LG Electronics USA JS750 Cellular/PCS GSM/WCDMA/EDGE Phone with WLAN and Bluetooth User Manual Layout 1
LG Electronics USA Cellular/PCS GSM/WCDMA/EDGE Phone with WLAN and Bluetooth Layout 1
Users Manual

14 JS750
Technical Details
FCC RF Exposure Information
WARNING! Read this information
before operating the phone.
In August 1996, the Federal
Communications Commission (FCC)
of the United States, with its action
in Report and Order FCC 96-326,
adopted an updated safety standard
for human exposure to Radio
Frequency (RF) electromagnetic
energy emitted by FCC regulated
transmitters. Those guidelines are
consistent with the safety standard
previously set by both U.S. and
international standards bodies. The
design of this phone complies with
the FCC guidelines and these
international standards.
Bodily Contact During Operation
This device was tested for typical
use with the back of the phone
kept 0.79 inches (2.0 cm) from
the body. To comply with FCC RF
exposure requirements, a minimum
separation distance of 0.79 inches
(2.0 cm) must be maintained
between the user’sbodyand the
back of the phone, including the
antenna. Third-party belt-clips,
holsters, and similar accessories
containing metallic components
should not be used. Avoid the use
of accessories that cannot maintain
0.79 inches (2.0 cm) distance
between the user’s body and the
back of the phone and have not
been tested for compliance with
FCC RF exposure limits.
Vehicle-Mounted External Antenna
(Optional, if available.)
To satisfy FCC RF exposure
requirements, keep 8 inches (20
cm) between the user / bystander
and vehicle-mounted external
antenna. For more information
about RF exposure, visit the FCC
website atwww.fcc.gov.
FCC Notice and Cautions
This device and its accessories
complywith part 15 of FCC rules.
Operation is subject to the
following twoconditions: (1) This
device and its accessories may not
cause harmful interference, and (2)
this device and itsaccessories must
accept any interference received,
including interference that causes
undesired operation.
Any changes or modifications not
expressly approved in this user
guide could void your warranty for
this equipment. Use onlythe

JS750 15
supplied antenna. Use of
unauthorized antennas (or
modifications to the antenna)
could impair call quality, damage
the phone, void your warranty
and/or violate FCC regulations.
Don't use the phone with a
damaged antenna. A damaged
antenna could cause a minor skin
burn. Contact your local dealer for
areplacement antenna.
Part 15.21 statement
Changes or modifications that are
not expresslyapproved by the
manufacturer could void the user's
authority to operate the
equipment.
Part 15.19 statement
This device and its accessories
comply with part15 of FCC rules.
Operation is subject to the
following two conditions:
(1) This device & itsaccessories
may not cause harmful
interference.
(2) This device & its accessories
must accept any interference
received, including interference
that may cause undesired
operation.
Part 15.105 statement
This equipment has been tested
and found to comply with the limits
for a class B digital device, pursuant
to Part 15 of the FCC Rules. These
limits are designed to provide
reasonable protection against
harmful interference in a residential
installation. This equipment
generates, uses, and can radiate
radio frequency energy and, if not
installed and used in accordance
with the instructions, may cause
harmful interference to radio
communications. However, there is
no guarantee that interference will
notoccur in a particular installation.
if this equipment does cause
harmful interference or television
reception, which can be determined
byturning the equipment off and
on, the user is encouraged to try to
correct the interference by one or
more of the following measures:
-Reorient or relocate the receiving
antenna.
-Increase the separation between
the equipment and receiver.
-Connect the equipment into an
outlet on a circuit different from
that towhich the receiver is
connected.
-Consult the dealer or an experienced
radio/TV technician for help.

1.1 About Your Phone
Your JS750 phone allows you to keep in touch with friends and family back
home when traveling to another country or outside your network carrier
service area.
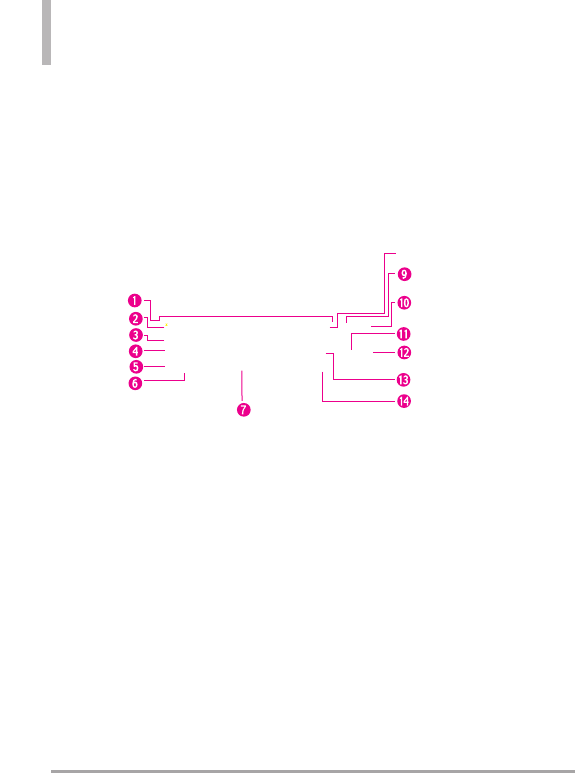
1.2 Getting to Know Your Touch Phone
16 JS750
Chapter 1
Getting Started
1. Notification LED LED lights blue when there are pending
notifications, lights red when charging, and lights green when fully
charged.
2. Earpiece Allows you to hear the caller.
3. Light and ProximitySensor Sensesthe ambient light and adjuststhe
screen backlight accordingly. Will also lock the screen during a call, so
thatkeys are not accidentally pressed.
4. LCD Screen Allows you to view incoming calls, messages and icon
indicators as well as a wide varietyof content you select for viewing.
5. End Key Use to end a call. Also returns to the Today Screen.
6. Start Key Press to open the Start menu.
7. SEND Key Use to make and answer calls. Press and hold to activate
voice commands.
Front panel

JS750 17
12. Headset Jack Allows you to plug in an optional 3.5mm headset for
convenient, hands-free conversations.
13 . Volume Keys Use to adjust the Master Volume in standby mode
and the Earpiece Volume during a call.
14 . Accessory/Charger Port Cover
15 . Reset Key Resets your phone (will end all applications currently
running).
1
6 . Accessory/ Charger Port Connects the phone to the battery
charger, or other compatible accessories.
17 . microSD™Slot Accommodates an optional microSD™card.
18 . Task Manager Key Allows you to view all programs currently
running on the device and corresponding memory usage. Also
allows you toend or go tothose tasks.
19. Camera/Video Key Press for quick access to the Camera function.
Press and hold this key to record a video.
Left panel Right panel
Back panel
9. Speaker Lets you hear the caller's voice in speakerphone mode. Also
lets you hear music and video sounds.
10. Camera Lens Use to take pictures and record video. Keep it clean
for optimal image quality.
11. Stylus Use to activate the Touch screen commands with ease. The
slot allows for convenient storage so your stylus is always at hand.
Top panel
8. Power/Lock(Unlock) Key Press and hold to turn the power on/off.
Press to lock and unlock the phone.
18 JS750
Getting Started
1. QWERTY Keypad Use to enter numbers and characters and select menu items.
2. Email Tab Key Use toaccess E-mail account(s) tosend/receiveemail messages.
3. Sym Key Use toinsertsymbols when entering text. Press the key, then touch the symbol on screen or press the
Qwerty key that corresponds with the onscreen symbol. Press the Sym Key again to exit from symbol mode.
4. Caps/ Shift Key Use to change letter case when typing.
5. Fn Key Use to insert symbols (at the top of each Qwerty key) into text or change input function from abc to
XT9.
6. Vibrate Key Use to turn Vibrate mode on/off (From the Today Screen, press and hold for about 3 seconds).
7. Space/Voice Command Key Use to enter a space while entering text. From the Today Screen, press to access
the call history or hold down for 3 seconds to access Voice Commands.
8. International Dial Key Press and hold the International Dial Key to display the + symbol. The symbol
automatically inserts the exit code for the country from which you are calling.
9. Speakerphone Key Use to activate Speakerphone during a call.
1
0. Back Key Press to return to back out of menus.
11. OK Key Use to activate a selected screen item.
1
2. Directional Key Use for quick, convenient navigation. In menus use to scroll to choices and settings.
1
3. Clear Key Press to delete a single space or character, or press and hold to delete a specific word plus its space.
14. Return Key Moves cursor to the next line.
1.3 Qwerty Keyboard
The Qwerty keyboard allows you to quickly and easily enter any kind of
data, whether it's a message (Text, Picture or Video), an Office file (Word,
Excel, Powerpoint or OneNote), or when using the Internet.
JS750 19
pictur
picture
es
s
m
music
usic
phone
phone
fa
fav
vorit
oritecont
econtact
acts
s
v
voicemail
oicemail
clock
clock
ge
get
tting st
ting star
art
ted
ed
me
message
ssage
e-mail
e-mail
calendar
calendar
fa
fav
vorit
orite
es
s
Inicio
Inicio
T
Teléfono
eléfono
T
Te
ext
xto
o
E-mail
E-mail
C
Cont
ontact
actos
os
V
Visual V
isual Voice Mail
oice Mail
Mobile Email
Mobile Email
Mobile IM
Mobile IM
Cit
CityID
yID
Int
Interne
ernetExplor
tExplorer
er
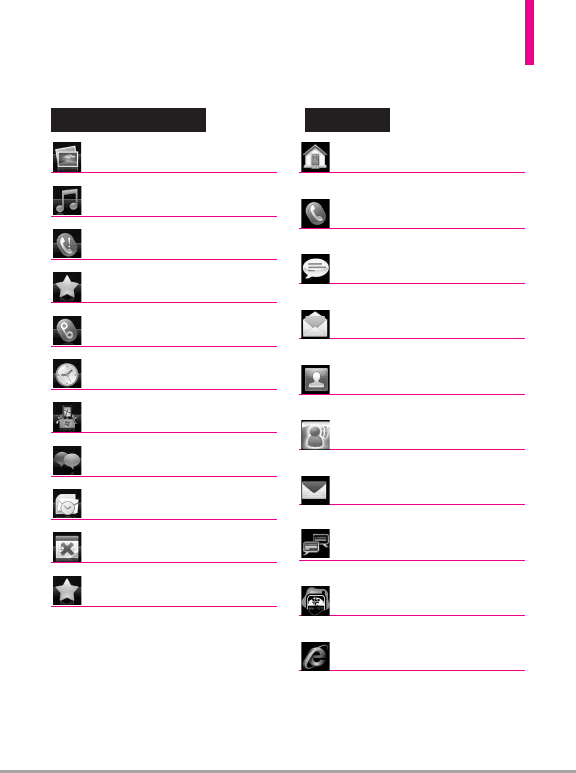
Today Screen Menu Start Menu
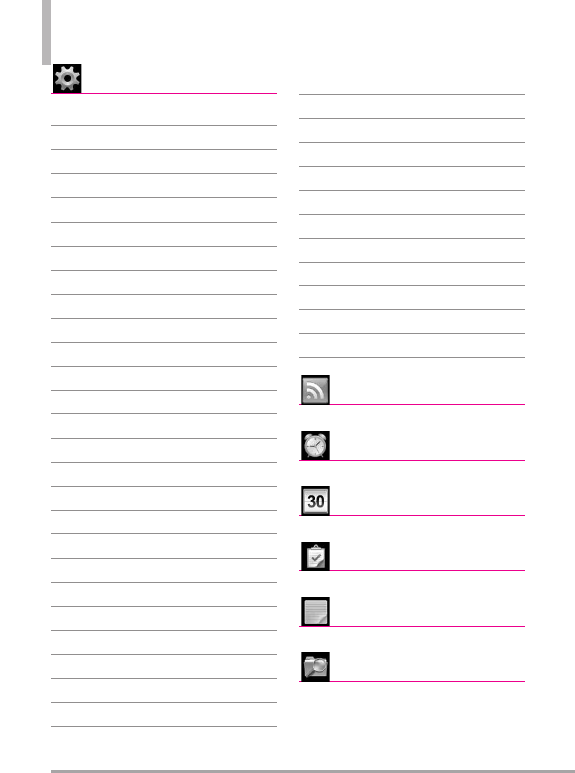
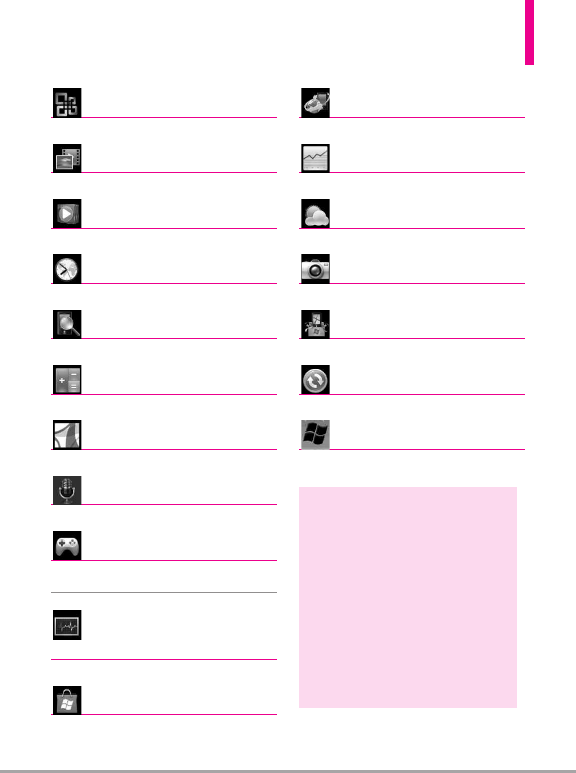
1.4 Menus and Applications Overview
20 JS750
Getting Started
C
Configur
onfiguración
ación
Reloj y alarmas
Inicio
Bloquear
Sonidos y notificaciones
Conexiones
Administrador de conexiones ina
Cambiar USB
Conexiones
Conexión del navegador
Configuración GPRS
Insctipción en dominio
USB a PC
WI-Fi
Personal
Cotones
Datos propietario
Teléfono
Voice Commands
Sistema
Acerca de
Administrador de tareas
Cerrificados
Cifrado
Comentarios del cliente
Configuración regional
Energía
GPS externo
Información del sisterma
Informe de errores
Limpiar Almacen.
Luz de fondo
Memoria
Pantalla
Programas administrados
Qualcomm Control Panel
Quitar programas Sensor
Microsoft My Phone
Bluetooth
Bloquear tecla
R
RSSV
SSVie
iew
wer
er
Alarma
Alarmas
s
Calendario
Calendario
T
Tar
area
eas
s
No
Not
ta
as
s
Explor
Explorador de ar
ador de archiv
chivos
os
JS750 21
Office Mobile
Office Mobile
Imágene
Imágenesyvídeos
syvídeos
W
Windo
indow
wsMedia
sMedia
W
World Clock
orld Clock
Buscar T
Buscar Teléfono
eléfono
Calculador
Calculadora
a
A
Adobe R
dobe Reader LE
eader LE
V
Voice C
oice Commands
ommands
Juegos
Juegos
Solitario
A
Administr
dministrador de
ador de
t
tar
area
eas
s
Mark
Marke
etplace
tplace
Micr
Microsoft My Phone
osoft My Phone
MSN Mone
MSN Money
y
MSN El T
MSN El Tiempo
iempo
Cámer
Cámera
a
Intr
Introducción
oducción
A
Activ
ctive S
e Sync
ync
W
Windo
indow
wsLiv
sLive
e
NOTES
:
●
All screen shotsin this guide are
simulated. Actual displaysmayvary.
●
Instructions to perform tasks in this
guide may change depending on the
software version of your phone.
●
Unless specified otherwise, all
instructions to perform tasks in this
guide assume that you are starting
from the Today screen.

22 JS750
Getting Started
1.5 Installing the Battery
and Storage Card
The Battery
NOTE
It is important to fully charge the
battery before initial use of the phone.
The phone comes with a
rechargeable battery. Keep the
battery charged while not in use in
order to maximize talk and standby
time. The battery charge level is
shown at the top of the LCD screen.
Installing the Battery
To install the battery, insert the top
edge (aligning the battery
terminals) of the battery into the
opening on the back of the phone.
Push the battery down until it clicks
into place. Place the top edge of
battery cover with the tabs and
slots aligned, then apply steady
upward pressure until it clicks into
place.
Removing the Battery
Turn power off. Apply steady
downward pressure to the center of
the battery cover release it. Remove
the cover, then use the fingertip
cutout to lift the bottom edge of
the battery out.
Installing the microSD
1. Remove the microSD card slot
cover.
2. Push the microSD cardinto the
slot with its gold contacts facing
down until it clicks into place
and then replace the slotcover.

JS750 23
1.6 Charging the Battery
Your JS750 phone device comes
with a cableless wall adapter and a
USB data cable which connect
together to charge your phone. To
charge your phone:
NOTICE
Please use only an approved charging
accessory to charge your LG phone.
Improper handling of the charging port, as
well as the use of an incompatible charger,
may cause damage to your phone and
void the warranty.
Battery Charge Level
You can find the battery charge
level at the top right of the LCD
screen. When the charge level
becomes low, the phone blinks the
battery icon, and displays a warning
message. As the charge level
approaches empty, the phone will
turn off. Unsaved items may be lost.
NOTICE
Please make sure that the side with the
USB symbol faces up before inserting a
charger or data cable into the charger
port of your phone.

24 JS750
Getting Started
Charging with USB
You can use your computer to
charge your phone. Connect one
end of the USB cable to the
charging accessory port on your
phone and the other end to a
highpower USB port on your PC
(commonly located on the front
panel of the computer). It is best to
use the rear USB port when
connecting to a desktop PC. A USB
Hub should be powered by an
external power source (see Note
below).
NOTES
●
Low-power USB ports are not
supported, such as the USB
porton your keyboard or bus-
powered USB hub.
●
When the device needs to
charge from USB port of the
computer, the necessary USB
driver should be first installed
on the computer.
-When the device is in, LG
USB Modem Driver should be
installed in advance for USB
charging.
-When the device is in
ActiveSync mode as a default
setting, the computer needs
ActiveSync program including
USB driver to be installed for
USB charging.
-On the other hand, you do not
need to install the specific
driver for USB charging when
the device is in USB Mass
Storage, because OS like
Windows has the driver.
●
Another way for USB charging
with ActiveSync mode
1Press the Start Key , tap
Settings , tap Connections
,and then tap USB to PC.
2. Unchecked "Enable advanced
network functionality.
1.7 Starting Up
Turning the power on and off
Turning the Phone On
1. Press and hold the Power/Lock
Key for a couple of
seconds.
NOTE
When you turn on your phone
for the first time, followthe
instructions on the screen to
activate your device.
Turning the Phone Off
1. Press and hold the Power/Lock
Key for a few seconds.
2. Tap
Yes
to confirm that you want
to shut down the device.

JS750 25
1.8 Today Screen
The Today Screen provides quick access to various frequently used device
programs and applications. It also displays the Notification and Status Icon
taskbar and the Options taskbar for additional quick and easy access options.
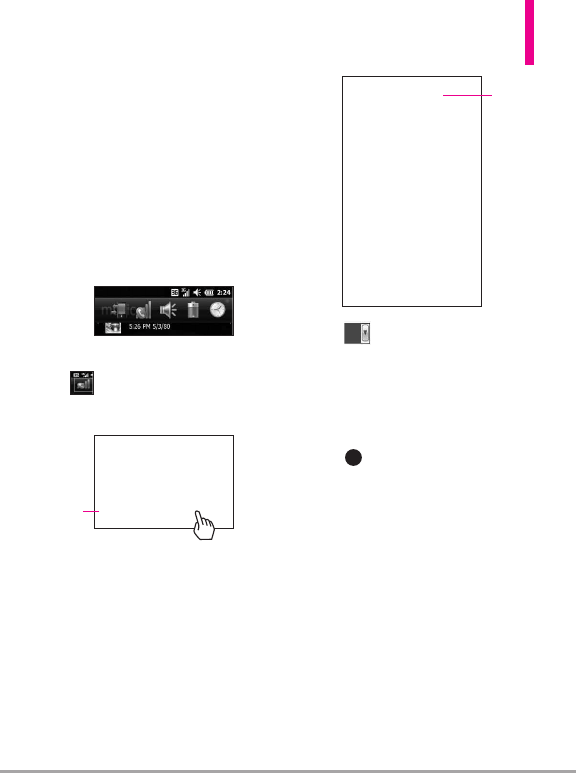
1.9 Notification and Status Icon Taskbar
The Icon taskbar displays a variety of icons to let you know device status
and notification of events. Status icons can include connectivity, network,
signal strength, volume, battery and time. Notifications can include missed
calls, new SMS/MMS messages, and more. The following is an example of
the icons you may see on the Icon taskbar.
Notification and Status
Icon taskbar
See "Notification and Status
Icon T
askbar" below for details.
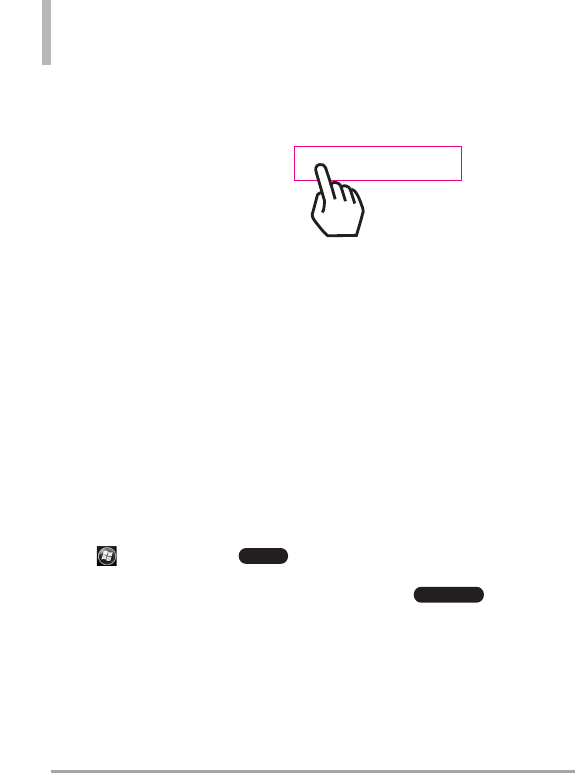
Current selection
Options Icon
Options will depend on the selected menus.
Options taskbar
See "Options Taskbar" on page
28 for details.
Contacts Icon
Tap to open Contacts panel.
Start icon
T
ap to open the
Start menu.
Today Screen
See "Today Screen"
on page 50 for
details.
26 JS750
Getting Started
Tap the Icon taskbar to display a drop-down menu that allows you to zoom,
access the wireless manager for network connection status, change volume,
see remaining battery power, set the Clock/Alarm, and more.
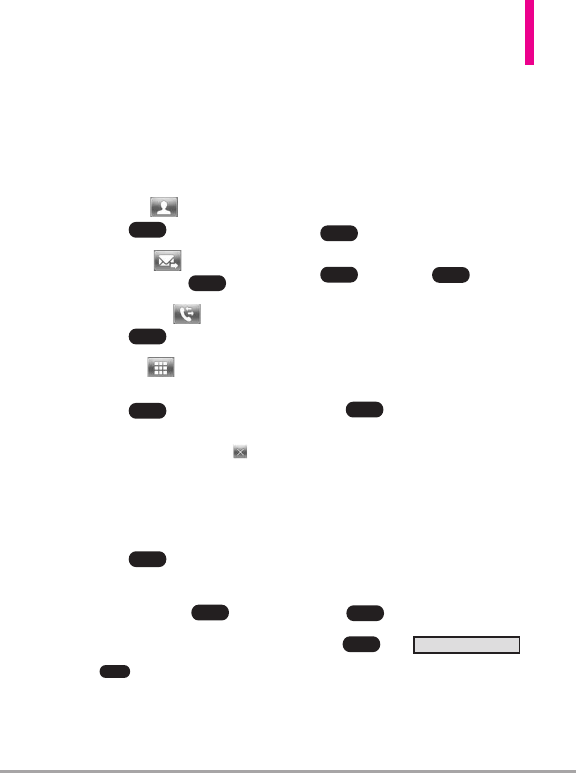
1.10Options Taskbar
The Options Taskbar displays options that are dependent on the current
menuor function.
Today Screen Options Taskbar
The TodayScreen Options taskbar includesaccess icons for the Start
screen , and Contacts list .
NOTE
If you havenew notifications waiting, the Notifications icon will be
displayed instead.
Notifications
Contacts
Notification and Status
Icon taskbar
Drop-down taskbar
JS750 27
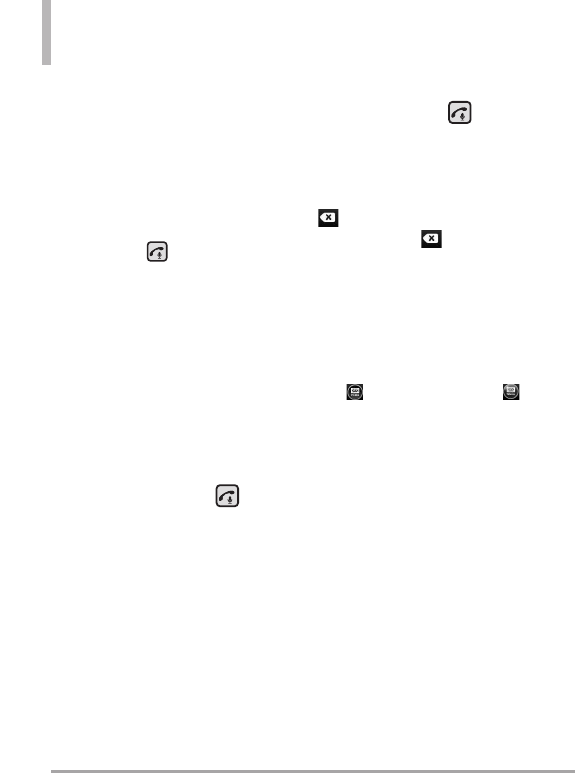
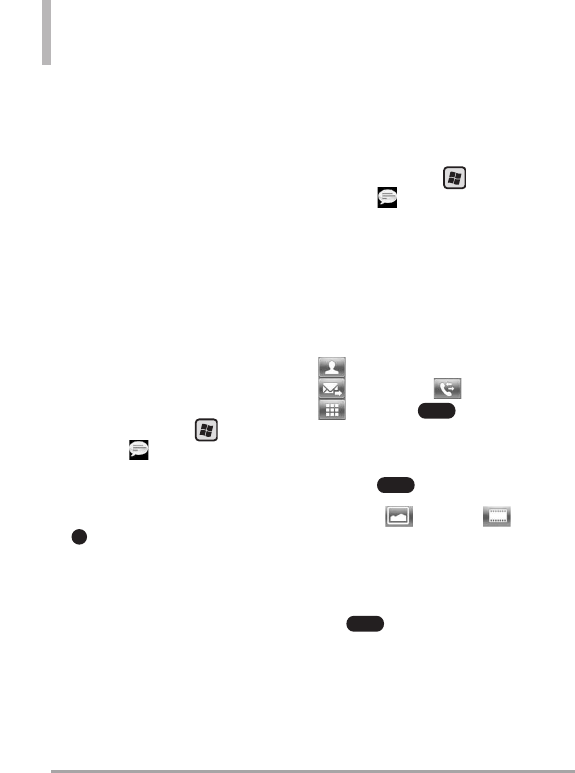
1.11 Start Menu
The Start menu is home to all the programs, applications and settings of
your Windows Phone-powered device, giving you complete access at the tip
of your finger.
To open the Start screen press the
Start
Key at the bottom center of
the phone or tap the Start icon in the Options taskbar on the lower left
corner of the LCD.
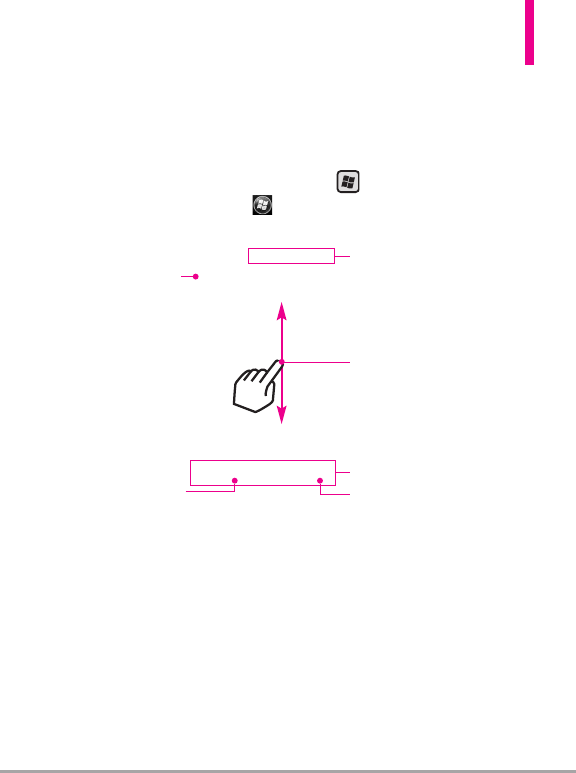
To launch a program application or open a panel, simply tap the
program icon.
Tap to return to the
Today Screen.
Flick up or down to scroll the screen.
Tap an icon to launch it.
Lock icon
Tap to temporarily lock.
See page 30for details.
Close icon
Tap toclose the Start menu.
Notification and Status
Icon taskbar
Options taskbar
1.12 Lock
Locking the Phone
You can lock your phone to guard
against accidental or intentional
use. Press the Power/Lock Key
to lock your phone.
Unlocking the Phone
To unlock your phone, press the
Power/Lock Key to turn the
screen on. Then, touch and slide
the Lock icon to either left or
right. If you wish, you can set the
phone to require a password before
it is unlocked. Tosetup a password
requirement, go tothe Lock menu
(Start > Settings > Lock ).
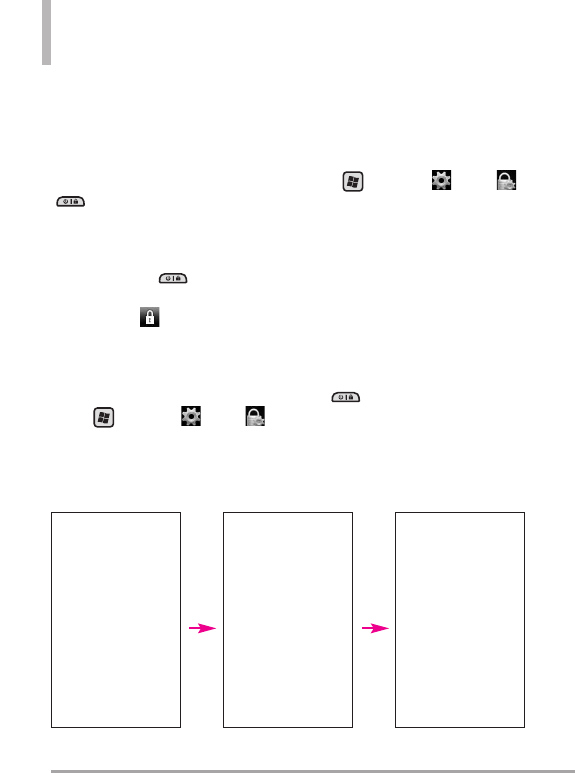
Unlocking with Gestures
Another option to unlock your
phone is available that allows you to
go to a specific function. Gestures
allows you to perform the gesture
on the lock screen. For Gestures
information, go to the Gesture
Unlock page on the Lock menu
(Start > Settings > Lock >
scroll to Gesture Unlock page).
To go to the Calendar from the
Lock screen, follow the images
below:
Sleep Mode
Sleep mode automatically locks the
phone against accidental actions
and conserves battery power. While
in Sleep mode, only the Power/Lock
Key at the top edge of the
phone will wake up your phone.
The phone automaticallyenters
Sleep mode after a period of
inactivity.
28 JS750
Getting Started
Locked Screen Gesture Entered on
Locked Screen
Activated Gesture
JS750 29
NOTE
If a phone password is required to
unlock, you will be prompted for
the password when you unlock
the phone.
Unlocking the Phone
The steps and instructions in this
guide begin with the screen already
unlocked. If your phone screen is in
sleep mode, press the Power/Lock
button on the top side of the
phone. Then, slide the Unlock icon
to the left, or right, to unlock the
screen.
Notifications on the Lock
panel
Your phone still alerts you to
incoming calls and alarms even if the
screen is locked. The device only
responds to a deliberate touch and
slide action, not to simple taps which
could be accidental. To unlock the
screen, touch and slide a displayed
icon. For instance, to answer an
incoming call, touch and slide the
Answer icon to the right.
Tracking notifications on the Lock
panel
Your phone keeps track of
notifications not responded to on
the lock screen. When the screen is
locked, the Lock icon shows the
number of pending notifications,
including missed calls, new
messages and upcoming
appointments.
To view notifications on the Lock
panel
1. On the Lock screen, tap the Lock
icon ( ). Notification icons
representing each type of
notification arethen displayed
below the Lock icon.
2. Slide a notification icon right or
left to view the respective
information. For instance, slide
the Missed Call icon toview your
list of missed calls.

30 JS750
Getting Started
1.13 Adjusting the Volume
Asingle Volume Control panel
adjusts both the system volume
(notifications and audio/video
playback volume) and the phone
ring volume of your phone.
Accessing the Volume Control panel
To open the Volume Control panel:
●Press the Volume Keys on the
left side of the phone.
●Tap the Volume Control icon in
the Status Icon taskbar.
NOTE
The Volume Control panel
automatically closes after a few
seconds if accessed by pressing
the Volume Keys. If accessed from
the Status Icon taskbar, tap
to close the panel.
To change volume settings using
the Volume Keys
1. Press the side volume keys .
2. Tap the volume bar you want to
adjust, then press the Volume
Up/ Down Key to adjust the
volume level. You can also:
●Tap
Vibrate
to switch to vibrate
mode.
●Tap
Off
to mute the volume.
NOTE
If you press the Volume Down Key
repeatedly, both volumes are
silenced.
Tochange volume settings using
the volume bars
1. Open the Volume Control panel.
2. Tap or drag your finger up/down
either of the volume bars. You
can also:
●Tap
Vibrate
toswitch to vibrate
mode.
●Tap
Off
to mute the volume.
NOTE
Use the Volume Up / Down Key
on the left side of your phone
toadjust the conversation phone
volume during an ongoing call.
OK
JS750 31
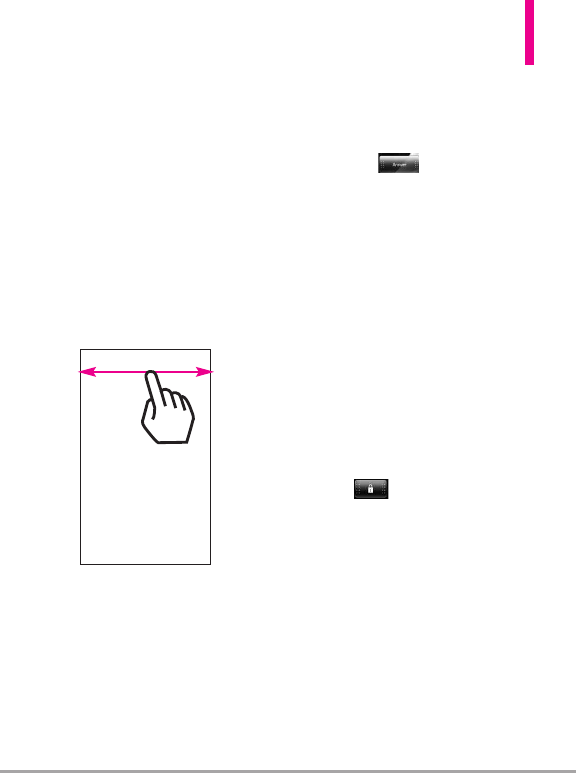
1.14 Finger Movement
Gestures
The touch screen is sensitive to
fingertip movements allowing you to
scroll and pan with ease.
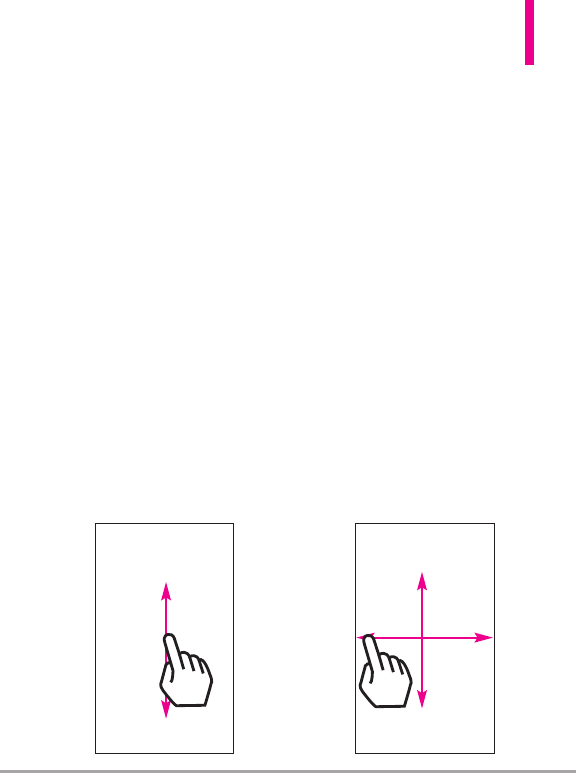
Finger scrolling
Finger scrolling is available in all
directions (up and down or left and
right) and can be used to move
through web pages, documents, and
lists (like the Contacts, file,
message, calendar, and
appointmentslists).
Toscroll up and down
●To scroll down, drag your finger
upward on the touch screen.
●To scroll up, drag your finger
downward on the touch screen.
●To auto-scroll, flick your finger
upward or downward on the
touch screen. Tap the screen to
stop scrolling.
To scroll left and right
●To scroll towards the right, drag
your finger to the left.
●To scroll towards the left, drag
your finger to the right.
●Toauto-scroll, flick your finger
left or right. Tap the screen to
stop scrolling.
When finger
scrolling, drag or
flick your finger
on the touch
screen.
32 JS750
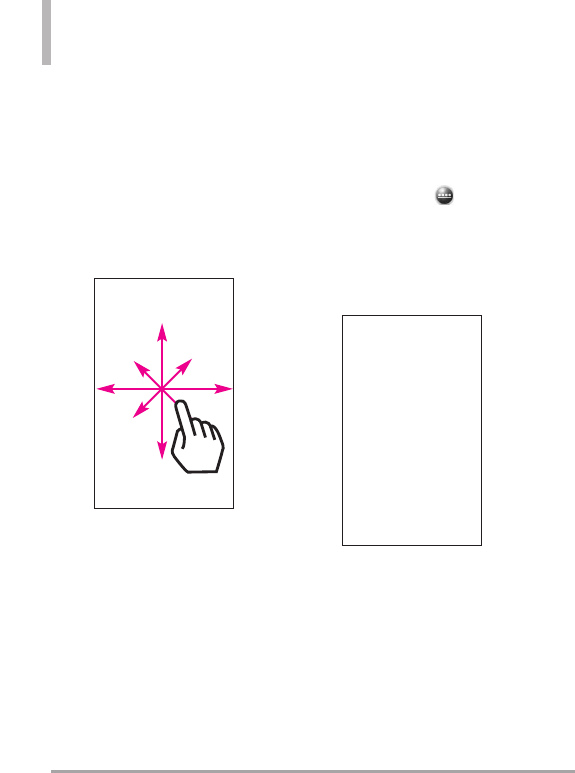
Finger panning
Finger panning doesn't limit you to
opposite 90 degree directions. You
can use finger panning to move to
and view other parts of a zoomed-in
photo, web page, document, or an
email. To pan, touch and keep your
finger on the touch screen, then
drag your finger in any direction.
1.15 Using the Zoom Bar
Your JS750 phone has a handy and
unique zoom control tool right on
the touch screen. When viewing a
Web page in the Web browser,
touch the Menu icon to display
the Zoom bar. Simply slide your
finger across the Zoom bar to easily
set the zoom to the level that's best
for you.
JS750 33
Changing Networks with Your
JS750
You can change network modes
manually in phone settings.
To change networks manually
1. From the Today Screen, tap the
Notification and Status Icon
taskbar.
2. Tap the connections indicator
to access the following
menu.
3. Tap
Settings
.
4. Scroll horizontally (at the top of
the screen) tothe
Network
tab.
5. Tap under Mode of
operation, then tap the network
you want to set.
●
GSM/UMTS Mode:
access GSM
networks only.
6. Tap tosavesettings.
OK
Network
tab
Settings
34 JS750
Chapter 2
Using Phone Features
2.1 Making Calls with the
Phone Dialpad
The phone's dialpad allows you to
manually dial a number, or select a
number stored in the phone's
memory.
To open the phone's dialpad, press
the SEND Key .
Smart Dial
Your JS750 phone has a Smart Dial
feature that makes it quick and easy
to call any number stored in your
phone's memory. As you start
entering either numbers or letters
on the Phone panel, Smart Dial
automaticallysearches for matches
in Contacts and call history and lists
them. Just tap an entry on the list,
then press the SEND Key to
call it.
To call a phone number or contact
1. Press the SEND Key , then
begin entering the first few
numbers or characters by tapping
the keys. If you tap a wrong
number or character, tap Delete
to erase each mistake. Touch
and hold Delete to erase the
entire entry.
NOTE
By default, a numeric touch
keypad is displayed for you to
enter numbers. If you want to
enter letters instead, in the
Options taskbar, tap Hide Keypad
,then tap Show Keyboard .

2. The list of matching entries is
displayed above the touch keys.
Tap Hide to view the list
only. Slide (or flick) your finger
up or down to scroll through the
list.
3. To call from the list, tap the
desired entry, then tap the
phone number to call.
TIPS
●
Depending on the information
saved on each contact, Smart
Dial will make it easy to place a
call, send a text or email to that
contact.
Making a call from a text
message
While you are viewing a text
message, you can directly call the
sender of the message.
1. While viewing the text message,
press the SEND Key .
2. A verification message appears
with the phone number from the
text message. To call the
displayed number, press the
SEND Key .
Tapping a phone number thatis
displayed in the body of the text
message also allows you to call that
number.
JS750 35

36 JS750
Using Phone Features
Making a call from an email
message
While viewing a received email
message, you can directly place a
call to the sender of the message.
Tap a phone number that is
displayed in the body of the email
message to call that number.
Making a call from a meeting
request or reminder
When you receive a calendar
reminder or meeting request email
thatcontains a phone number, you
can tap the number to directly
place the call.
For example, if you are traveling and
need to join a conference bridge
call back in the home office, rest
assured that you can join the call
without delay. Appointment
reminders you receive on your
phone will convenientlydisplay the
phone number and PIN, ready for
you to dial.
If you made a call from a meeting
request email, you can view the
meeting details in the email directly
on the Phone panel while the call is
in progress. An email indicator is
shown on the Keypad key. Tap this
icon toview the meeting details.
Making an emergency call
Even if the phone is locked, slide
the slider to unlock the screen, then
tap 911(where you would enter
your lock code). Then press the
SEND Key to place the call.
Making an international call
To make an international call, you
need to press and hold the
International Dial Key to replace
the international prefix of the
country that you are calling. After
the plus sign, enter the full phone
number which includes the country
code, area code (without the leading
zero, if any), and phone number.
1. Press the SEND Key , then
tap and hold the number 0 key
on the dialpad until the plus (+)
sign appears.
2. Enter the full phone number you
want to dial, then press the
SEND Key on your phone.
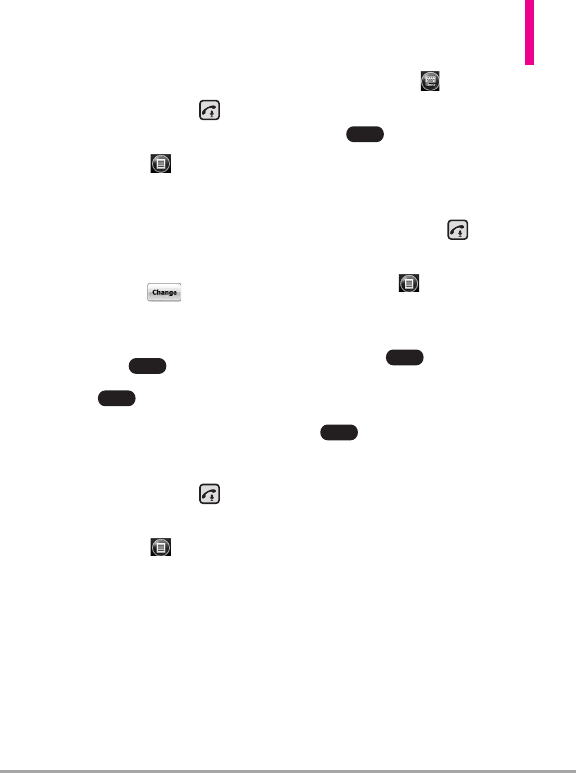
Assisted Dialing
Assisted Dialing allows you to easily
dial international calls while roaming
in another country.When enabled,
Assisted Dialing On
appearsin the
Phone panel.
JS750 37
To turn Assisted Dialing on
1. Press the SEND Key to
display the Phone panel.
2. Tap Options in the Options
taskbar, then tap
Assisted
Dialing
.
3. Tap the check box next to
Enable
Assisted Dialing
.
4. Tap Change next to
Reference Country / Region
.
5. Tap the country you want to call,
then tap .
6. Tap .
To edit a country’s international
call settings
1. Press the SEND Key to
display the Phone panel.
2. T
ap Options in the Options
taskbar, then tap
Assisted
Dialing
.
3. Tap any of the call settings,
including Country code, IDD
Prefix (International Direct Dial),
NDD Prefix (National Direct
Dial), Area/City Code and
National Number Length (length
of phone number).
4. Use the Keypad to make the
changes you want.
5. Tap .
To reset Assisted Dialing to the
default
1. Press the SEND Key to
display the Phone panel.
2. Tap Options in the Options
taskbar, then tap
Assisted
Dialing
.
3. Tap Menu in the Options
taskbar.
4. Tap
Restore Default
,then tap
.
Calling voice mail
Speed Dial Number 1
is generally
reserved for your voice mail. Touch
and hold this key on the phone's
dialpad to call voice mail and
retrieve your voice mail messages.
You can also double-tap
(visual*)
voicemail
from the Today Screen.
*After subscribing to Visual
Voicemail, the option name on the
TodayScreen will change to Visual
Voicemail.
Done
Menu
Done
Done
Save
38 JS750
Using Phone Features
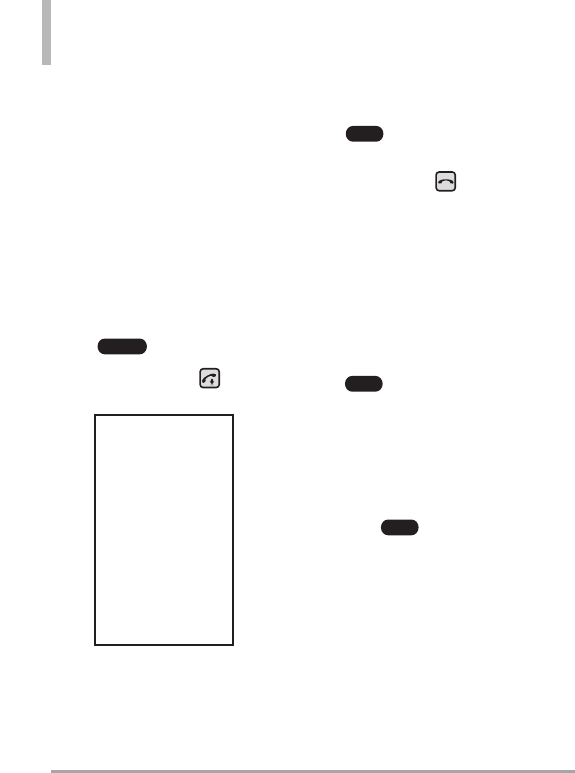
2.2 Answering and Ending
Calls
When you receive a phone call, the
Incoming message will appear,
allowing you to either answer or
ignore the call.
Accepting or rejecting an
incoming voice call
To answer a call
Do either of the following:
●Tap .
●Press the SEND Key .
To reject a call
Do either of the following:
●Tap in the Options
taskbar, then tap
Ignore
.
●Press the End Key .
To reject a call and send a text
message
If you can't take a call, you can
reject it and automatically reply to
the caller with a text message
instead. When the phone alerts you
to a call:
1. Tap in the Options
taskbar, then tap
Respond with
text message
.
2. Tap the text message you want
to respond with, such as
I'm in a
meeting; I'll call you later
.
3. Tap Send in the Options
taskbar.
To accept a phone call when the
phone is locked
You can receive an incoming call
when the phone is locked. When
the phone is locked, the following
screen is shown when you accept
the call:
Send
Menu
Menu
Answer
JS750 39
Touch and slide the onscreen touch
key (
Answer
or
Ignore
).
Using the call functions
When a call is in progress, use the call
function buttons to put a call on
hold, dial another contact for a three-
way phone, enter notes about the
conversation, and more.
Call Waiting
Your phone notifies you when you
have another incoming call, and
gives you the option of rejecting or
accepting the call. If you are already
on a call and accept the new call,
you can choose to start a three-way
call for all participants.
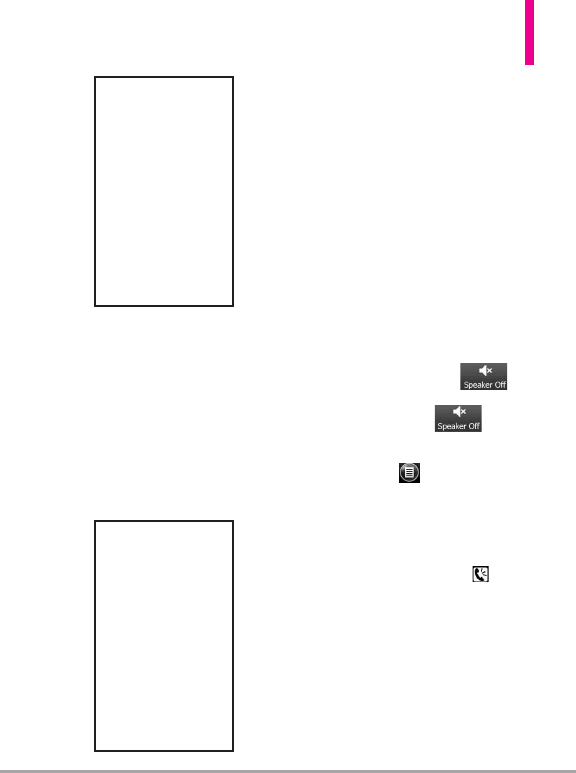
To use the speakerphone
During a call, do one of the
following to turn the speakerphone
on or off:
●Tap Speakerphone On
toturn the speakerphone on. Tap
Speakerphone Off to
turn the speakerphone off.
●Tap Options in the Options
taskbar, then tap
Turn
Speakerphone On
or
Turn
Speakerphone Off
.
NOTE
The speakerphone icon
appears in the Notifications and
Status Icon taskbar when the
speakerphone is on.
WARNING!
Toavoid damage to your
hearing, do nothold the
phone against your ear when
the speakerphone is on.
40 JS750
Using Phone Features
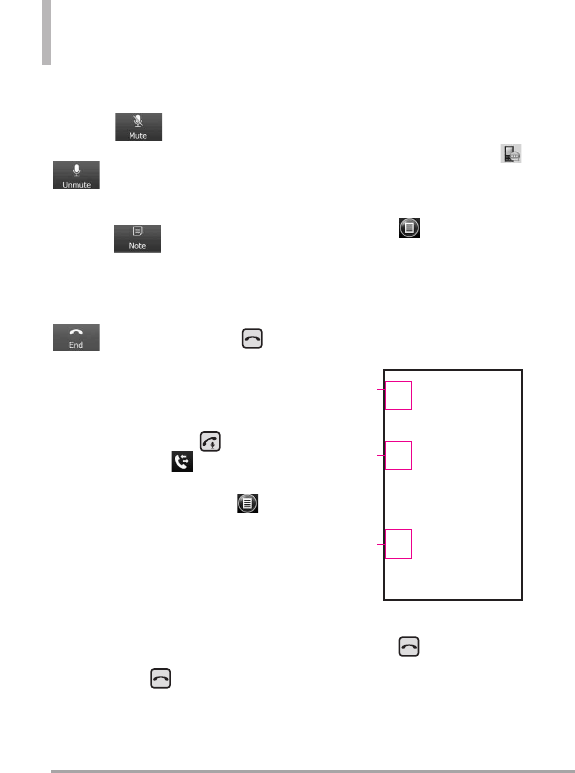
To mute the microphone during a
call
Tap Mute to turn the
microphone off and tap Unmute
to turn on.
To create Notes while in a call
Tap Note .
To end a call
When a call is in progress, tap End
or press the End Key .
2.3 Using Call History
Viewcall history in the Phone panel.
1. Press the SEND Key , then
tap Call History .
NOTE
You can also tap Options
in the Options taskbar, tap View,
then tap All Calls toview your
recent call history.
2. Swipe or flick toscroll through
the list, then tap an entry toview
call details.
3. Tap the entry to call it, or press
the End Keyto exit.
View Call history from the
Notifications and Status Icon taskbar
1. Tap the Notifications taskbar,
then tap the missed call icon
in the drop-down taskbar to
display all missed calls.
2. Tap Options in the Options
taskbar, then tap
Filter
.
3. Tap
All Calls
.
4. Swipe or flick to scroll through
the list, then tap an entry to view
call details.
5. Tap the entry to call it, or press
the End Key to exit.
Received call
Dialed call
Missed call

JS750 41
2.4 Speed Dial
Use Speed Dial to call frequently-
used numbers with a single touch.
For example, if you assign a contact
to location 2 in Speed Dial, you can
touch and hold the number 2 key
on the Phone panel keypad to dial
the contact’s number.
To create a Speed Dial entry
1. Open your Contacts list.
2. Find and tap the desired Contact.
3. Tap Options in the Options
taskbar, then tap
Add to Speed
Dial
.
4. Tap the Location field and tap
the Speed Dial location.
5. Tosave, tap .
Todelete a Speed Dial
1. Open your Contacts list.
2. Find and tap the desired Contact.
3. Tap Options in the Options
taskbar, then tap
Edit Speed
Dial
.
4. Tap Trash and tap Yes.
NOTES
•Number “0” and “1” keys are
reserved and cannot be
assigned as speed dial keys. The
number “1” key is reserved for
voicemail. You can set any
number between “2” and “99”
as a speed dial key.
•If you attempt to assign a speed
dial that is already assigned, you
will be asked if you want to
replace the existing one.
To make a call using Speed Dial
To call any assigned speed dial key,
press the SEND Key to display
the Phone panel, then
●Touch and hold the assigned key,
toautomaticallydial a single-
digit speed dial number.
●To dial a two-digit Speed Dial,
tap the first number key, then
touch and hold the second
number key.
2.5 Making Three-way
Calls
To set up a three-way call, directly
dial the participantsand add each
connected call tothe three-way call.
OK
42 JS750
Using Phone Features
Starting a three-way call
1. Press the SEND Key to
open the Phone panel.
2. Make the call to the first person.
3. After the first call is connected,
tap Dialpad , dial the other
number and press the SEND Key
.
Ending the three-way call
Tap End or press the End
Key .
2.6
Using the JS750 as a
GSM Phone
Your wireless phone is set to Global
Mode by default enabling you to
roam internationally on GSM
networks.
You can manually change the phone
to GSM/UMTS Mode.
GSM international roaming
Your phone can operate in a
number of countries on GSM
(Global Systems for Mobile)
networks. Use your phone in
GSM/UMTS Mode or Global Mode
while in countries serviced by GSM
networks.

JS750 43
Using the GSM SIM card
Your wireless phone comes with a
SIM card preinstalled which, along
with a Global feature on your
account, enables you to make calls
and access email in GSM networks
while traveling overseas. Should
your SIM card be lost or damaged,
please follow these instructions for
the installation of your new SIM.
To remove the SIM card
1. Remove the back cover and the
battery if it is installed. See
Chapter 1 for details.
2. Locate the SIM card slot.
3. Slide the SIM card out from the
slot with your finger.
To install the SIM card
1. Removethe back cover and the
battery if it is installed. See
Chapter 1 for details.
2. Locate the SIM card slot, then
insert the SIM card with its gold
contacts facing down and its
angled corner facing out the card
slot.
3. Slide the SIM card completely
into the slot.
TIP
Any contacts on the SIM card are
automatically added to Contacts.

44 JS750
2.7 GSM settings
To protect your SIM card with a
PIN code
The preinstalled SIM cardmaybe
locked with a PIN. If you choose to
protect your SIM card with a PIN
code, the PIN will be required each
time the phone is powered on.
When prompted, enter the PIN,
then tap
Enter
.
If you do not want to enter the PIN
to turn on the phone, you can
disable it.
1. Press the
Start
Key , then
tap
Settings
.
2. Tap
Personal
,then tap
Phone
.
3. In the banner at the top of the
screen, flick horizontally to
display the
Security
tab.
NOTE
You must be in GSM/UMTS
Mode to access GSM/UMTS
services.
4. Tap the checkbox
Require PIN
when phone is used
toclear it.
TIPS
•To change the PIN, tap Change
PIN,then enter the PIN you
want to use. Tap Change PIN 2,
then re-enter your PIN to verify
it.
•Emergency calls can be placed
at any time, without requiring a
PIN.
JS750 45
2.8 Turning the Phone
Function On and Off
In many countries, you are required
by law to turn off the phone while
on board an aircraft, or in areas
sensitive to RF transmissions.
To enable or disable the phone
function
1. Press the
Start
Key , then
tap
Settings
.
2. Tap
Connections
,then tap
Wireless Manager
.
3. Tap the item(s) to enable or
disable.
●Tap All to
disable all wireless functions.
●Tap
Wi-Fi, Bluetooth
,or
Phone
to disable individually.

46 JS750
Chapter 3
Using the Today Screen
3.1 What’s on the Today
Screen
The Today Screen of your phone
allows quick access to your most
frequently used information and
functions you want to keep at hand.
The Today Screen is organized into
three sections: Notifications and
Status Icons taskbar, Today Screen,
and Options taskbar.
3.2 Today Screen
The Today Screen portion of the
screen is organized as panels of
information and programs. It
provides you with current
information, easy swipe viewing, and
quick tap access. Some of the
panels provide at-a-glance
notification by displaying indicators
toalert you to pending information
(e.g.,
message2
alerts you that two
new messages are pending).
Default Today Screen
The default for TodayScreen
includes: pictures, music, phone,
favoritecontacts, (visual*)voicemail,
clock, getting started, message, e-
mail, calendar and favorites. You can
disable the Windows Default setting
and choose from selected panels to
display instead.
*After subscribing to Visual
Voicemail, the option name on the
Today Screen will change to Visual
Voicemail.
Notifications and Status Icons taskbar
(see page 27 for details)
Options taskbar
(see page 28for details)
Today
Screen
JS750 47
Using the Today Screen
Tap a Today Screen panel to select
it. The select bar surrounds it and
displays current detail information.
For panels with multiple items (e.g.,
multiple calendar events), swipe
horizontally to scroll through them,
then tap again to open the item.
TIP
Double-tap a Today Screen panel
to open it directly.
Changing the Today Screen
Panel items from the Today Screen
are set by default, but you can
choose todisplay other selected
items instead, then set their order
and set customized options.
1. Press the
Start
Key , then
tap
Settings
.
2. Tap
Home
,then tap
Items
in
the Home Settings tabs at the
top of the screen.
3. Tap the checkbox next to the
item(s) you want as your Today
Screen (all Windows Default
items will be deactivated).
Changing Screen background
Set the Today Screen and Start
screen background to suit your
personality.
1. Press the
Start
Key , then
tap
Settings
.
2. Tap
Home
.
3. In the
Appearance
tab, choose
the background:
●
Tap a theme from the list, or
●
Tap the
Use this picture as
the background
checkbox,
then tap to set a
Background image from your
Pictures.
Browse
48 JS750
Using the Today Screen
3.3 Teléfono
Your JS750 phone has many calling
capabilities, including Speed Dialing,
emergency calls, international calls
(see page 38), and Smart Dial (see
page 36) as well as many ways to
access the phone's dialpad,
including:
●
Press the SEND Key .
●
Double-tap
phone
from the
Today Screen.
●
Press the
Start
Key , then
tap
Phone
.
3.4 Texto
The Message panel contains your
messages (text, picture and video)
all in one place.
To access the Message panel:
●
Double-tap
message
from the
Today Screen.
OR
●
Press the
Start
Key , then
tap
Message
.
Changing the message
account settings
Message Settings
To access Settings for Messaging,
press the
Start
Key , tap
Message
,then tap
Settings
.
There are four message settings
tabs: General Settings, MMS
Settings, SMS Settings and About.
Text Messages
Send text messages (SMS) to other
mobile phones. If your message is
morethan 160characters, it will be
sent as two or more separate
messagesand will be billed
accordingly.
Composing and sending text
messages
To compose and send a text
message
1. Double-tap
message
from the
Today Screen, then tap .
NOTE
If you have unread messages, tap
text,swipe horizontally past
pending messages (No New
Messages is displayed), then tap
the Message panel again.
New
JS750 49
2. Tap
Text message
.
3. Tap the
To
:box to enter the
mobile phone number of one or
more recipients. There are
additional ways to add contacts:
●
Tap Contact , tap a contact,
then tap .
●
Tap Message , tap a
message, then tap .
●
Tap Call History , tap a call,
then tap .
●
Tap Dialpad tap keys to
manuallyenter a destination,
then tap .
TIP
Todeletearecipient, tap to
the right of the entry.
4. Tap the text area to compose
your message. Begin tapping the
displayed keys to enter your text,
then tap to exit text
entry.
5. When finished, tap .
TIP
To cancel the text message, tap
,then tap Cancel
Message.
Managing text messages
To reply to a text message
1. In the Message Inbox, tap a
message to open it.
2. At the bottom of the screen, tap
, tap the text area to
enter your message, then tap
,and then .
To delete a message
1. In the Message Inbox, scroll up
or down and touch a message
that you want to delete.
2. Tap , then tap
Delete
.
To reply to a text message with an
MMS message
You are able to easily reply to a text
message with an MMS message.
1. In the Message Inbox, tap a
message toopen it.
2. Tap .
3. Tap , tap .
Send via Picture Message
Menu
Reply
Menu
Send
Done
Reply
Menu
Send
Done
Done
Done
Done
Done
50 JS750
Using the Today Screen
MMS
Creating and sending MMS
(Multimedia Message Service)
messages to your friends and family
is fun and easy.
NOTES
Your phone is already
preconfigured with your wireless
service provider's MMS settings.
MMS is a charged service and
must be provisioned with your
mobile phone plan. Contact your
wireless service provider to have
MMS provisioned as part of your
call plan.
To configure MMS settings
1. Press the
Start
Key,
Message
,then tap
Settings
.
2. Tap
MMS Settings
.
3. Configure as necessary and tap
to save.
Creating and sending MMS
messages
You can compose MMS messages
with various slides, where each slide
can consist of a photo, audio,
and/or video files.
NOTE
Make sure the size of the MMS is
within the limits of the wireless
service provider while sending it
to another mobile phone user or
to an e-mail address.
1. Press the
Start
Key , tap
Message
and tap
New
Message
.
2. Tap
Picture Message
or
Video
Message
.
3. Tap the
To
:field to enter the
recipient's phone number or e-
mail address (or use Contact
,Sent Message History
,Call History or the
)then tap .
4. Tap
Subject
box, tap keys to
enter a subject for your message,
then tap ,
5. Tap Photo (or Video ),
then tap the photo (or video
clip) you want to send.
OR
Tap , tap
Insert
,tap
Picture
(or
Video
), then tap the
desired item type.
Menu
Done
Done
OK

NOTE
To take a new photo, tap (or
tap , tap
Capture,tap
Image). To record a new video,
tap (or tap , tap
Capture,tap Video).
You can also insert an audio clip
into a picture message. To insert
an existing clip, tap , tap
Insert,tap Audio,then tap the
clip you want. To record a new
clip instead, tap Microphone
,tap Record , say the
recording, then tap Stop .
6. Tap the text message area to
enter text. To insert My Text
phrases, tap , then tap the
one you want. To insert
Emoticons, tap , then tap
the one you want.
7. Tap .
8. Tap .
NOTES
•To designate recipient(s) as
addressee, copied addressee, or
blindcopy addressee, tap the
To :box, the To :box again
then tap To ,Cc or Bcc as
needed.
•To remove a photo, text, or
audio, tap next to the item
to remove.
•Additional slides are added
automatically if you insert
multiple photos into the
message.
Viewing and replying to MMS
messages
To view an MMS message
In the Message Inbox, MMS
messages are identified by the MMS
icon .
To reply to an MMS message
1. In the Message inbox, find the
message you want to reply to.
2. While still in the Inbox, touch and
hold the message.
3. Once the popup menu appears,
tap , then tap the type of
message.
4. Complete the message as
necessary.
3.5 E-mail
Setting Up E-mail Accounts
Before you can send and receive e-
mail, you need to set up your e-mail
account on your phone. You can set
up the following types of e-mail
accounts on your phone:
●
Outlook e-mail that you sync
with your computer or the
Exchange Server.
Reply
Send
Done
Menu
Menu
Menu
JS750 51

52 JS750
Using the Today Screen
●
E-mail account that you have
from an Internet Service Provider
(ISP) or other e-mail provider.
●
Web-based e-mail accounts such
as Yahoo!
®
Mail Plus or AOL
®
.
●
Custom domain e-mail accounts.
The e-mail domain name is
hosted by a different e-mail
provider.
●
Work account that you access
using a VPN connection.
Synchronizing Outlook e-mail
with your computer
If you've installed the
synchronization softwareon your
PC and created a partnership with
your phone, then your phone is
ready to send and receive Outlook
e-mail. If you have not yet installed
the synchronization software or
created a partnership, follow the
procedures in page 121.
TIP
Tosetup your company e-mail
account so that you can access
Outlook e-mail messages
wirelessly, you must set up your
phone tosynchronize via an over-
the-air connection with your
company’s Exchange Server. For
moreinformation about
synchronizing with your company
e-mail server, see Chapter 7.
Setting up an Internet e-mail
account
Set up a POP3 or IMAP4 e-mail
account on your phone if you have
an e-mail account from an Internet
service provider (ISP), or a Web-
based account such as Yahoo! Mail
Plus, etc. You can also add a work
account that you access using a
VPN server connection as a
POP3/IMAP4 account.
1. Press the
Start
Key , tap
E-
mail
,then tap
Setup E-mail
.
2. Enter the E-mail address and
Password for the e-mail account
and tap the checkbox
Save
password
then tap
Next
.
3. Tap
Next
.
NOTE
E-mail Setup searches your phone
for preloaded e-mail configuration
settings. If the phone cannot find
the server settings for the
specified e-mail account, your
phone needs to connect to the
Internet and try to download the
settings. If it cannot find the
settings online, you need to enter
the settings manually.

JS750 53
4. Enter your name and the
Account display name, then tap
Next
.
5. If prompted, choose how often
you want e-mail messages to be
automatically sent and
downloaded on your phone.
NOTE
Tap Review all download settings
to select download options, set
the e-mail format as HTML or
plain text, and more. For more
information, see “To customize
download and formatsettings.“
6. Tap
Finish
.
Tospecify e-mail server settings
If Auto Setup is unsuccessful,
contact your ISP or e-mail provider
for the incoming mail server and
outgoing mail server settings so you
can enter them on your phone.
Other options that you can select
include the following:
●
Select the checkbox
Outgoing
server requires authentication
if
required by your provider.
●
If the outgoing e-mail server
requires a different user name
and password for sending e-mail,
clear the checkbox
Use the same
user name and password for
sending e-mail
.You will then be
prompted to enter this
information.
●
Tap
Advanced Server Settings
,
then select the checkbox
Require
SSL
if your e-mail provider uses
an SSL connection for more
secured e-mail.
●
From the Network connection
list, select the data connection
that you use for connecting to
the Internet.
To customize download and
formatsettings
Before you tap
Finish
when setting
up your Internete-mail account,
you can tap
Review all download
settings
tochoose download
options, message format, and other
settings. Tap
Advanced Settings
for
further options.
54 JS750
Using the Today Screen
Setting up a custom domain
e-mail
When you are using an e-mail
domain name that is hosted by a
different e-mail provider (for
example, your e-mail address may
be johndoe@work.com but E-
mail.com hosts the e-mail account
and provides e-mail services), select
the Custom Domain option in the
E-mail Setup wizard to set up your
e-mail account on your phone.
1. Press the
Start
Key , tap
E-mail
,then tap
Setup
E-mail
.
2. Enter your E-mail address and
the Password for your e-mail
account and select the checkbox
Save password
.Tap
Next
.
3. Clear the checkbox
Try togete-
mail settings automatically from
the Internet
,then tap
Next
.
4. In your e-mail provider, select
Custom domain
then tap
Next
.
5. Enter the domain of your e-mail
provider,then tap
Next
.
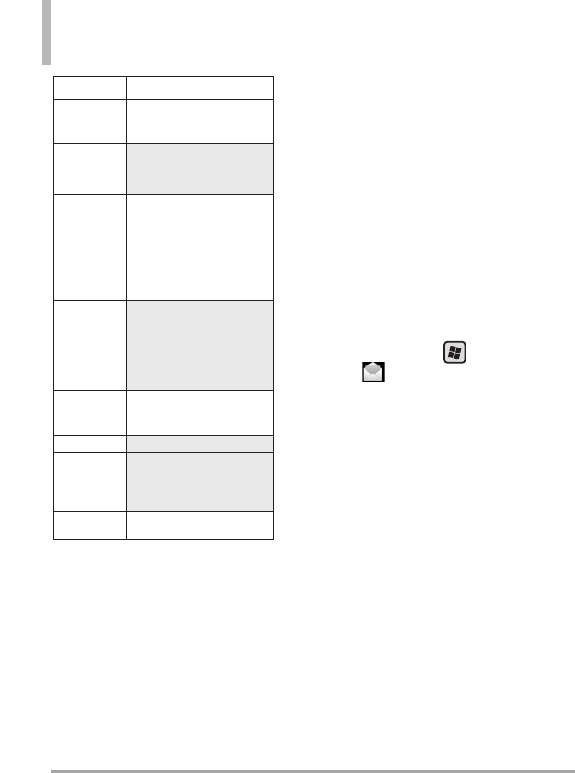
Options Description
Automatic
Send/Receive
Y
ou can select a time interval for
connecting to the Internet
automatically to send and receive
messages.
Download
messages
Set the number of days of messages
that you want to be downloaded to
your phone.
Send/receive
when I click
Send
By default, messages are
immediately delivered when you tap
Send.If you prefer to save outgoing
messages to the Outbox folder first,
clear the check box. (In this case,
you will need to manually send
messages by tapping Menu, then
tap Send/Receive).
Use automatic
send/receive
schedule when
roaming
This allows your phone to data roam
when there is a set time interval for
connecting to the Internet
automatically. Since this may result
in higher connection costs, you may
want to leave the check box cleared.
When deleting
messages
Choose whether to delete messages
from the mail server when you delete
them on your phone.
Message format Select HTML or Plain Text.
Message
download limit
Select the e-mail download size. If
you have large volumes of e-mail,
use a lower size or select to
download headers only.
Download
attachments
Set your preference when there is an
e-mail attachment

JS750 55
6. The E-mail Setup wizard then
tries to find the e-mail provider
settings on your phone or from
the Internet. If the settings are
found, it shows a successful
message. Tap
Next
.
7. Enter your name and the
Account display name, then tap
Next
.
NOTE
If the E-mail Setup wizard was
unsuccessful in finding the
settings, you will be prompted to
enter e-mail server settings on the
succeeding screens. See “To
specify e-mail server settings” for
details.
8. In the Automatic Send/Receive
list, choose howoften you want
e-mail messages to be
automatically sent and
downloaded on your phone.
NOTE
Tap Review all download settings
toselect download options, set
the e-mail formatas HTML or
plain text, and more. For more
information, see “To customize
download and format settings."
9. Tap
Finish
.
Creating and sending e-mail
messages
After setting up e-mail accounts on
your phone, you can start sending
and receiving e-mail messages.
To compose and send an e-mail
1. Double-tap
e-mail
from the
Today Screen, then tap the email
account touse.
2. Tap , then tap
New
.
3. Enter the e-mail address(es) (put
semicolon between addresses).
To copy address(es) from your
phone's memory,with the cursor
in the
To
:box, tap , tap
Add recipient
,then tap the
contact.
4. Enter a subject and compose
your message. Toquicklyadd
common phrases, tap , tap
My Text
,then tap the phrase to
insert.
5. Tap .
TIPS
•To change message options, tap
,then tap Message
Options to set priority, security,
permission, and language.
Menu
Send
Menu
Menu
Menu

56 JS750
Using the Today Screen
•If you are working offline, e-mail
messages are moved to the
Outbox folder and will be sent
the next time you connect.
To add an attachment to an e-mail
1. In the message that you are
composing, tap , tap
Insert
,then tap the items to
attach:
Picture
,
Voice Note
,or
File
.
2. Tap the file you want to attach,
or recordavoice note, then
complete the message as
necessary.
Searching e-mail messages
Tosearch the Inboxmessage list
Filter the e-mail messages in your
Inbox to only display the e-mail
messages that contain the sender
or e-mail subject you are searching
for. Use touch keys or keyboard to
enter the characters or numbers for
your filter search. As you enter, the
list narrows down to the conditions
you set.
For example, tap (or press) “J” then
"A" to narrow the list to only the e-
mail messages that contain sender
names and e-mail subjects that start
with “JA.”
To download a complete e-mail
By default, each e-mail in the inbox
on your phone contains only the
first few kilobytes of the message.
When you open an e-mail, it
displays only the headers and part
of the message. You must download
the whole e-mail toviewthe
completecontent.
To download a complete e-mail
message, open the e-mail and then
do one of the following:
●
Scroll down to the end of the
message and tap
Getthe rest of
this message
.
●
Tap , then tap
Download
Message
.
Menu
Menu

JS750 57
NOTE
The Fetch Mail feature, which is
available for POP3 and IMAP4
Internet e-mail accounts,
downloads an entire e-mail
without the need for you to
perform a full synchronization.
This limits the download to just
the e-mail message(s) that you
want and helps save data costs.
Fetch Mail is also available for
Outlook E-mail. See “Instant
download through Fetch Mail” in
page 137.
Touse shortcuts
When in an e-mail account, press
and then touch and hold to open a
shortcut list of often-used
commands. Touch and hold the
shortcut key to execute the
command.
To download an attachment
In an open message with an
attachment todownload, tap the
attachment. If there is more than
one attachment, tap the other
attachments todownload them. You
can directly open the file in the
associated program after download
by tapping the attachment again.
To reply to or forward an e-mail
1. Open the message, tap ,
tap
Reply/Forward
,then tap
Reply
,
Reply All
,or
Forward
.
2. Enter your response (also enter
the address(es) if you are
forwarding the message), then
tap .
NOTE
You can receive and view HTML
e-mail messages from any type of
e-mail account. The HTML format
is retained, without layout shifting
or resizing. HTML e-mail support
in Outlook Mobile is available
onlyif you are synchronizing your
phone with a Microsoft Exchange
Server.
Synchronizing e-mail
messages
Synchronizing e-mail messages
ensures that new e-mail messages
are downloaded to the phone Inbox
folder,e-mail messages in the
Outbox folder are sent, and e-mail
messages deleted from the server
are removed from your phone. The
manner in which you synchronize
e-mail messages depends on your
e-mail account type.
Send
Menu

58 JS750
Using the Today Screen
To automatically synchronize an
Outlook e-mail account
1. Connect your phone to your
computer through USB or
Bluetooth. Otherwise, connect
through Wi-Fi or a data
connection if you are
synchronizing Outlook e-mail
with the Exchange Server. For
more information, see Chapter 7.
2. Synchronization automatically
begins, and your phone send.s
and receives Outlook e-mail.
To manually synchronize your
Outlook or Internete-mail
account
1. Double-tap
e-mail
from the
Today Screen, then select your e-
mail account.
2. Tap , then tap
Send/Receive
.
Customizing e-mail settings
To change the download size and
format for Outlook e-mail
1. Disconnect your phone from the
computer.
2. Press the
Start
Key , scroll
the screen up, then tap
ActiveSync
.
3. Tap , tap
Options
, tap
E-mail
,then tap
Settings
.
4. On the E-mail Sync Settings
screen, set the
Download size
limit
and
Message format
.
5. Tap .
Tochange the download size and
formatfor POP3/IMAP4 e-mail
1. While viewing POP3/IMAP4 e-
mail Account, tap
,
tap
Options,tap the account to
modify, then tap Download size
settings.
2. On the E-mail Setup, setthe
Message format,Message
download limit and Download
attachments,
3. Tap .
Done
Menu
OK
Menu
Menu
JS750 59
3.6 Contactos
Contacts is your address book and
information storage for the people
and businesses you communicate
with. If you use Outlook on your
PC, you can synchronize contacts
between your phone and PC.
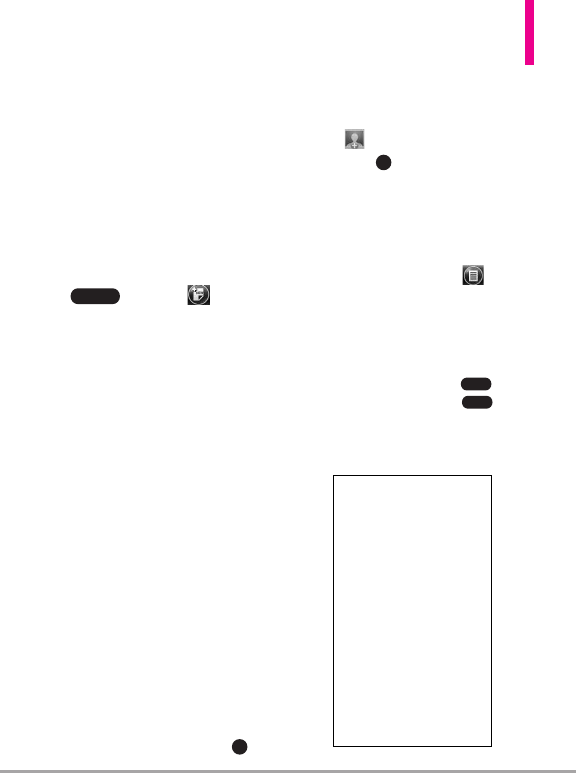
Creating a contact
1. From the Today Screen, tap
, tap New , then tap
Outlook Contact
.
NOTE
Tocreate a newcontact on your
SIM card (if one is installed), tap
SIM Contact.You can also use
SIM Manager toadd contacts to
your SIM card. For more
information about SIM Manager,
see “SIM Manager” in this chapter.
2. Tap a field to select it, then enter
contact details as necessary.
Contact information is contained
in three tabs. Communicate, Info,
and Notes. Tap these tabs to
complete the entry as necessary.
3. To easily identify the caller, you
can assign a custom ring tone to
each Outlook contact. To assign
acustom ring tone, tap the
Info
tab at the top of the screen, tap
Set Ringtone
,tap the ringtone
you want to set, then tap .
4. To assign a picture to a contact,
tap the
Communicate
tab at the
top of the screen, tap the Picture
box , tap the picture to set,
then tap .
TIPS
•If someone calls who is not in
your list of contacts, you can
quickly add it to Contacts from
the phone's call history. Tap the
call entry, tap Option , tap
Save to Contacts,tap New
Contact,then enter the
necessary remaining information.
•If someone who is not in your list
of contactssends you a message,
tap the message, tap , tap
Contact Details,tap , tap
Save As New Contact,then enter
the necessary remaining
information.
Menu
Menu
OK
OK
Contacts

60 JS750
Using the Today Screen
Editing and calling a contact
To view and edit a contact
information
1. From the Today Screen, tap
.
2. Tap the contact whose
information you want to view or
edit.
3. Tap the name field.
4. Tap the field(s) you want to edit.
5. Make changes as needed, then
tap .
Tocall a contact from the
Contactspanel
1. From the Today Screen, tap
.
2. Tap the contact to call and press
the SEND Key . The
contact’s default phone number
is dialed.
TIP
To call a phone number other
than the default, tap the contact,
tap the number you want to dial,
and press the SEND Key .
Finding a contact
To find a contact
1. From the Today Screen, tap
.
2. Do one of the following:
●Begin entering a name or phone
number of the contact until the
contact is displayed. As soon as
you enter a character, contacts
that begin with that character are
displayed (e.g., entering
V
could
display
V
et,
V
ictor Smith, or Joe
V
ick). The next character entry
continues tonarrowthe search.
●If you have assigned categories
(e.g., Business) to your Outlook
contacts, you can filter the
Contacts list by category. In the
Contacts list, tap Options ,
tap
Filter
,then tap a category.To
show all contacts again, tap
All
Contacts
.
Contacts
Contacts
OK
Contacts

JS750 61
●If you have entered information
under Company for your
Outlook contacts on your phone,
you can quickly locate the
contacts that work for a specific
company. In the Contacts list, tap
Options , tap
View By
,then
tap
Company
.Tap the company
to see the contacts who work
there.
NOTE
To return to the previous view, tap
Options , tap
View By,then
tap Name.
Sharing contact information
To beam contact information to
another device via Bluetooth
1. Turn on the Bluetooth
functionality (Start > Settings >
Bluetooth).
2. From the Today Screen, tap
.
3. Touch and hold the contact until
the popup menu appears.
4. Tap
Send via Bluetooth
.
5. Tap the device you want to beam
the contact details to and follow
the instructions, as necessary.
NOTE
For more information, see
“Bluetooth” in Chapter 8.
To send contact information via a
text message
1. From the Today Screen, tap
.
2. Touch and hold the contact, tap
Send Contact
and tap
Messages
.Select the contact
information that you want to
send and tap .
3. In the new text message, enter
the mobile phone number of the
person you want to send the
contact information to and tap
.
3.7 Visual Voice Mail
Visual Voice Mail allows the
management of voice mail directly
from the device rather than
accessing voice mail via traditional
method(s). Visual Voice Mail
displaysalist of messagesand
allows the user to choose which
message to listen to or delete,
without having todial intotheir
mailbox, listen to voice instructions,
or prior messages.
Send
Done
Contacts
Contacts
62 JS750
Using the Today Screen
1. Press the
Start
Key , then
tap
Visual Voice Mail
.
2. Follow the instructions to sign in.
3.8 Mobile Email
Mobile Email is an application
already downloaded on your device.
Don't miss an important email.
Thanks to Mobile Email, you can get
your emails on your phone, while
you're on the go. Mobile Email
works with many providers,
including Yahoo!, AOL, and others.
Get alerts from your
JS750 smart phone when new email
hasarrived.
Additional fees may apply.
1. Press the
Start
Key , then
tap
Mobile Email
.
3.9 Mobile IM
Mobile IM provides you with access
to popular instant messaging (IM)
communities, including AOL
®
Instant
Messenger (AIM
®
), WindowsLive™
Messenger, and Yahoo!
®
Messenger.
Instant Messaging enables you to
sign in to multiple communities at
the same time.
1. Press the
Start
Key , then
tap
Mobile IM
.
2. Read the disclaimer and tap
Accept
.
3. Tap the Mobile IM provider, enter
the required sign-in information
for the selected community, such
as user name or password, then
tap
Sign In
.
NOTE
The information required to sign
in will vary depending on the
instant messaging community you
are accessing.
The instant messaging screen for
your selected community will then
be displayed, and you can start
chatting online with your friends or
family.
For more information on using
Mobile IM, tap
Help
.
NOTE
Separate charges apply to
send/receive instant messages.
JS750 63
3.11 Internet Explorer
Internet Explorer Mobile is a full-
featured Internet browser, optimized
for use on your phone.
Browsing the Web
1. Press the
Start
Key , then
tap
Internet Explorer
.
2. Tap the web address bar, enter
the URL/address, then tap .
While browsing the Web, tap Menu
,then tap Browser menu to
access the browser's options.
Navigating web pages
Viewing and navigating web pages is
easy, even on large sites.
1. Go to the web page that you
want to view.
2. Use your fingertip or stylus which
is attached on the back side of
the device to easily drag page
contents into view anywhere on
the web page.
3. Tap Menu to display the
zoom bar at the right side of the
LCD and full menubar along the
bottom.
4. Touch and slide the zoom indicator
up or down the zoom bar, or tap
any of the menu bar icons.
Copying web page text
Copy text from a web page and
then paste it on a text message or
e-mail.
Tocopy text on a web page
1. On the web page, tap Menu ,
tap Browser menu , then tap
Copy/Paste
.
64 JS750
Using the Today Screen
2. Tap
Make
Selection, then use
your fingertip, or stylus which is
attached on the back side of the
device, to touch and drag over
the text you wish to copy.
3. Tap .
3.12 Configuración
Enjoy the freedom of customizing
your JS750 to operate according to
your own preferences using the
Settings menus. Within Settings on
the Start screen, there are several
Settings menus. The submenus and
options in some of the Settings
menus are organized into tabs. Tabs
are displayed at the top of the
screen allowing you to easily tap to
view and change settings as needed.
Access Settings
1. Press the
Start
Key, tap
Settings
,then tap the
Settings menu you want to view.
TIP Settings options are often
organized into separate tabs. Use
the Tab Bar (as shown in the
following image) to access all
options.
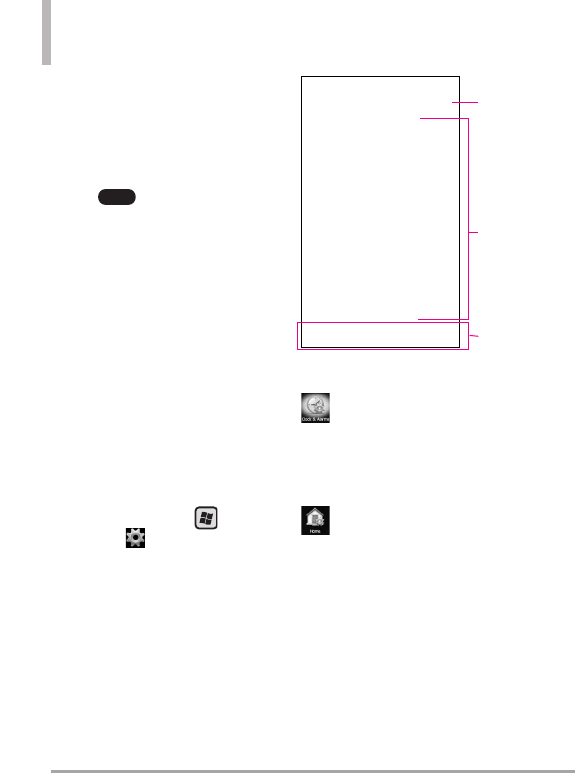
Settings Menus and Tabs Overview
Clock & Alarms
Menufor
setting time and alarms.
Alarms
tab: Viewor setalarms.
Time
tab: Viewor change time
and date settings.
Home
Sets Today Screen
display.
Appearance
tab: Sets
background theme for LCD.
Items
tab: Sets items
displayed on Today Screen.
Copy
Tab Bar
Settings and
choices
Options
taskbar
JS750 65
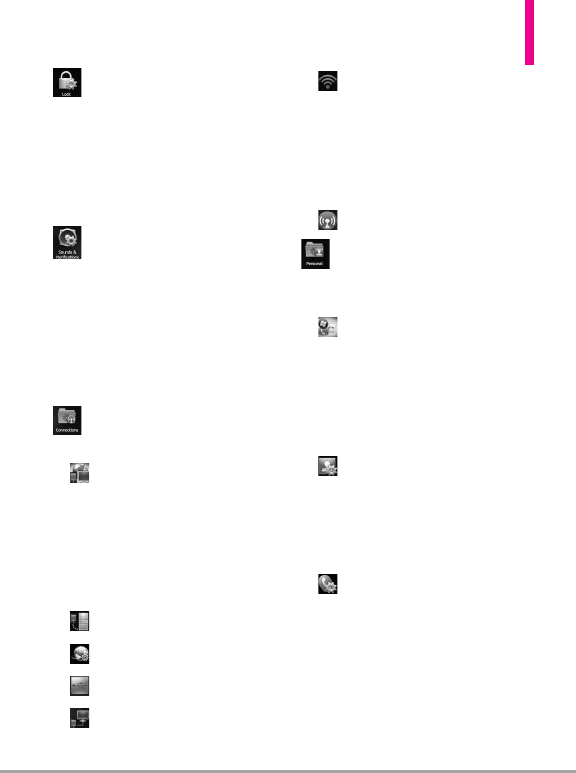
Lock
Use to secure your
phone.
Password
tab: Sets your
password.
Gesture Unlock
tab: Allows
you to use gestures to unlock
screen and launch program.
Sounds and Notifications
Sets your alerts.
Sounds
tab: Enables sounds.
Notifications
tab: Sets ring
type and ring tone for
selected events.
Vibrations
tab: Sets screen
vibration.
Connections
settings Use for
connection(s) setup.
Connections
Tasks
tab: Sets modem, VPN
server and proxyserver.
Advanced
tab: Sets network
selection, dialing rules and
exceptions.
Domain Enroll
GPRS Setting
Switch USB
USB to PC
Wi-Fi
Wireless
tab: Use to select or
add a Wi-Fi connection.
Network Adapters
tab: Sets
network connection adapters.
Wireless Manager
Personal
settings Use to set
your phone functionality
preferences.
Buttons
Program Buttons
tab: Changes
functions for selected keys.
Up Down Control
tab: Sets
Volume Key sensitivity.
Owner Information
Identification
tab: Your
identifying information.
Notes
tab: Free-form text area.
Phone
Sounds
tab: Setsdefault ring
type and tone, keypad tone,
voicemail access, and voice
privacy alert.
Security
tab: Sets PIN security
(password required to power up).
66 JS750
Using the Today Screen
GSM Services
tab: Sets provider
services such as Call Barring,
Caller ID, Call Forwarding, Call
Waiting, Voicemail and Text
Messages, and more.
Network
tab: Let's you select the
network and mode of operation.
Voice Commands
System
settings
Use for system configuration.
About
Version
tab: View device version
information.
Device ID
tab: Enter your device
identification (used to identify it
to other devices).
Copyrights
tab: Viewcopyright
text.
Backlight
Battery power
tab: Sets
backlight duration when running
on battery power.
External power
tab: Sets
backlight duration when fed from
external power.
Button
tab: Setsbacklight
duration for the keybacklights
presses.
Brightness
tab: Lets you set the
brightness or enable the
Luminous sensor.
Certificates
Personal
tab: Select and view
personal authority certificates.
Intermediate
tab: Select and
view intermediate authority
certificates.
Root
tab: Select and view root
authority certificates.
Customer Feedback
Encryption
Error Reporting
External GPS
Programs
tab: Lets you set the
port for GPS data.
Hardware
tab: Lets you set the
hardware port and baud rate.
Access
tab: Lets you enable the
GPS access management.
Managed Programs
Memory
Main
tab: View storage and

JS750 67
program memory (used and free
space).
Storage Card
tab: View card
memory.
Clear Storage
tab: Allows you to
erase all data and resets to the
factory defaults.
Power
Battery
tab: View battery type
and status.
Advanced
tab: Lets you set the
timeout for sleep mode on
battery or external power.
Regional Settings
Region
tab: Letsyou set region
and displays regional information.
Number
tab: Lets you set
number formats.
Currency
tab: Lets you set
currency formats.
Time
tab: Lets you set time
formats.
Date
tab: Lets you set date
formats.
Remove Programs
Screen
Alignment
tab: Lets you calibrate
the screen.
Clear Type
tab: Lets you set
clearer fonts.
Text Size
tab: Lets you set text
size.
Sensor
Accelerometer
tab: Lets you set
automatic screen rotation (left
and right handed).
Luminous
tab: Enables the
luminosity sensor.
Proximity
tab: Enables the sensor
tolock the touch screen when
the device is held to your ear.
System Information
Version
tab: View OS, ROM date,
hardware, software, PRL, and ERI.
68 JS750
Using the Today Screen
Product
tab: View product,
manufacturer, language, model ID
and processor.
Owner
tab: View owner
information.
Phone Info
tab: View, MDN, IMEI,
MCCID MNCID, warranty code
date, SIM ICCID
Task Manager
Microsoft My Phone
Bluetooth
Lock Key
3.12.1 Reloj y alarmas
You can set up to three alarms.
1. Press the
Start
Key , tap
Settings
,then tap
Clock &
Alarms
toopen the Clock &
Alarms.
SHORTCUT
Tap from the Today
Screen for quick access to
Clock & Alarms.
NOTE
Your alarms will not be audible if
your phone is set to silent or
vibrate.
2. On the Alarms tab, tap any of
the alarms to display Alarm
Settings for that alarm.
3. Tap the time, then tap arrows
to set the alarm time.
4. Tap the description box, then
enter a description for the alarm.
5. Tap the day(s) of the week for
the alarm to sound.
TIP
You are able to select any days of
the week for your alarm.
6. Tap Arrow in the Sound box,
then tap the sound to be played
at the alarm time.
7. Tap Arrow in the notification
type box, then tap how to play
the alarm alert.
Play once/ Repeat/ Repeat and
Vibrate/ Vibrate only
8. Tap when settings are
completed.
OK
JS750 69
[Alarm Settings]
To activate and deactivate
alarm(s)
If you want to disable an alarm,
simply turn it off by tapping the
checkboxnext to it. The X is
removed, but the settings remain
allowing you to simply tap the
checkbox to reactivate later.
Dismissing an alarm
When an alarm goes off, you can
choose to Snooze or Dismiss the
alarm. When you select
Snooze
the alarm will sound again
after fiveminutes.
To set time
Tap
Time
in the tab bar at the top
of the screen to move to the Time
tab, then adjust the settings for
time zone, date or time.
Touch to save settings.
[Time]
OK

70 JS750
Using the Today Screen
3.12.2 Incio
Home settings allow you to set the
appearance of your Today Screen.
1. Press the
Start
Key , tap
Settings
,then tap
Home
.
2. On the
Appearance
tab, tap the
theme to set as the background
screen.
3. Tap the
Items
tab to select items
displayed from the Today Screen
and set the timeout for the
Today Screen.
4. Tap .
3.12.3 Blouear
Protect your phone from
unauthorized use byassigning
password(s) to gain access.
To Protect your Phone
Protect your phone from
unauthorized use by assigning a
type of password or a PIN (personal
identification number).
1. Press the
Start
Key , tap
Settings
, tap
Lock
.
2. On the Password tab, tap the
checkbox
Prompt if device
unused for
,then tap Arrow
and tap the amount of time
before a password is required.
3. Tap the arrow in the
Password type
box, then tap
Simple PIN
or
Strong
alphanumeric
.
4. Enter the PIN or alphanumeric
password and then enter it again
toconfirm.
TIP
If your device is configured to
connect to a network, use a
strong password to help protect
network security.
4. Tap .The next time you unlock
your device, you will be prompted
to enter your password.
ToChange your Password
1. Press the
Start
Key,tap
Settings
,then tap
Lock
.
You will be prompted to enter
your current password, then re-
enter it in the Confirm box.
2. Tap the Password box, enter your
new password.
4. Tap .
OK
OK
OK
JS750 71
3.12.4 Sonidos y notificaciones
To Set Sounds & Notifications of
Actions
1. Press the
Start
Key , tap
Settings
, then tap
Sounds &
Notifications
.
2. On the
Sounds
tab, tap the
checkbox(es) to enable sounds
as you want.
3. Tap the
Notifications
tab, to
select notification event(s) and
corresponding ring type and tone
to alert you. Tap next to
Event
and tap an event, tap
next to
Ring type
and tap the
type you want, then tap next
toRing tone and tap the tone
you want.
4. Tap the Vibrations tab, tap the
checkbox to enable vibrations for
screen taps, then tap the
vibration type.
5. Tap when finished.
3.12.5 Conexiones
The Connections Settings menu has
additional sub-menus which provide
you with control over how your
phone uniquely connects to
network(s) and other devices.
1. Press the
Start
Key , tap
Settings
,then tap
Connections
.
2. Tap a Connections sub-menu.
Connections
Tap to set up
network server connections. It has a
Tasks
tab and
Advanced
tab.
●The
Tasks
tab has (settings
cannot be modified) and
My
Work Network
connections. Tap
Add a new modem connection
,
Add a new VPN server
connection
or
Set up my proxy
server
and enter information as
necessary.
●The
Advanced
tab allows you to
set which networks are
automatically used (tap
Select
Networks
)as well as create rules
(tap
Dialing Rules
)and URL
exceptions for intranet (tap
Exceptions
).
OK
72 JS750
Using the Today Screen
Domain Enroll
Tap to connect
your phone with company
resources. Tap
Enroll
and enter
information as necessary.
GPRS Setting
Tap to select the
GPRS authentication method. Tap
None, PAP Authentication or CHAP
Authentication.
Switch USB
Tap to select USB
access during a USB connection.
Tap
ActiveSync
,
VZAccess
Manager
,or
USB Mass Storage
.
The JS750can connect with and
charge through your PC with
ActiveSync, VZAccess Manager, or
USB Mass Storage.
●When set toActiveSync, the
phone will automatically sync
with your PC via ActiveSync.
ActiveSync must be installed on
your PC before using this
connection mode.
●VZAccess Manager configures
your PC touse your wireless
phone as a modem. VZAccess
Manager must be installed on
your PC beforeusing this
connection mode.
●USB Mass Storage allows your
PC to use your phone as an
external drive.
To set your USB default connection
preference, press the
Start
Key
>Settings > Connections
>Switch USB .
Be sure to press to save
your preferences.
USB to PC
Tap to change the
advanced network functionality. Tap
the checkbox to enable or disable.
Wi-Fi
Tap to select or add Wi-
Fi connection. It has a
Wireless
tab
and
Network Adapters
tab.
●The
Wireless
tab allows you to
select or add a router.
●The
Network Adapters
tab
allowsyou set and enter network
connection adapters.
Wireless Manager
Tap to
manage your RF transmissions. You
can disable (and enable) all RF
functionality by tapping All
,or disable/
enable selectively by tapping
Wi-Fi
,
Bluetooth
,or
Phone
.
Save
JS750 73
3.12.6 Personal
The Personal Settings menu has four
additional sub-menus which provide
you with control over how your
phone alerts you, usage, services,
and identification to other devices.
1. Press the Start Key , tap
Settings ,then tap Personal
.
2. Tap a Personal sub-menu.
Buttons
Tap to set
functionality for specific hardware
keys. It has a
Program Buttons
tab
and
Up/Down Control
tab.
The
Program Buttons
tab has a
box to select the button and a
box to select the program it will
access. Tap available selections in
the boxes to set to your
preferences.
●
The
Up/Down Control
tab allows
you to customize the Volume Keys
reaction. Touch and drag across
the slide bar for
Delay before
first repeat
between Short and
Long, and for
Repeat rate
between Slow and Fast.
Owner Information
Tap to enter
your infomation and notes. It has an
Identification
tab and
Notes
tab.
●The
Identification
tab has boxes
to enter name, company, address
telephone, and email.
●The
Notes
tab is a free-form text
area.
Phone
Tap to customize
settings to define how you use your
phone. It has a
Sounds
tab,
Security
tab,
GSM Services
tab,
Network
tab,
and
Band
tab.
●The
Sounds
tab displays your
phone number, sound settings
and voicemail access number.
Ring type
Tap how you want to be notified
of incoming calls.
Ring / Increasing ring / Ring
once / Vibrate / Vibrate and ring
/Vibrate then ring / None
Ring tone
Tap a ringtone in the list.
Keypad
Tap the tone length heard when
touch keys are tapped.
Long tones / Short tones / Off

74 JS750
Using the Today Screen
●The
Security
tab activates PIN
security features.
●The
GSM Services
tab displays
available access services. Tap a
service in the list from your
service provider, then tap
Get
Settings
.
Call Barring
(emergency calls
excluded)
Block incoming calls: Off / All
calls / When roaming
Block outgoing calls:
Off / All calls / International /
International except to home
country
NOTE
Call Barring is a network
subscription service. Upon
subscription, your service
provider will give you the
password to edit these
settings.
Caller ID
Everyone: Displaysyour caller ID
No one: Hides your caller ID
Only to contacts: Displays your
caller ID for Contactscalls only
Call Forwarding
Forwards calls to another number.
Call Waiting
Notify me: Alerts you to waiting
calls.
Voice Mail and Text Messages
The SIM card in your phone
automatically sets your voice mail
and SMS servers by default.
Open to view settings.
NOTE
You can also view your voice
mail number on the Speed
Dial screen and in the Phone
settings Sounds tab.
Fixed Dialing
Select Fixed Dial numbers to turn
on and compile a list of numbers
that can be called from your
phone. When activated, only
numbers included in the fixed dial
list can be called from your
phone.
●The
Network
tab displays the
current network, mode of
operation, GSM Network
selection, and preferred
networks.
NOTE
The abilityto choose between
available networks can be
beneficial when traveling.
JS750 75
Current network
Tap to find other
available networks.
Mode of operation
GSM/UMTS Mode / Global
Mode
GSM network selection
Manual / Automatic
TIP
Manual setting can be useful when
you know that one network is less
expensive than another or that it
provides faster data transmission.
Preferred networks
Tap (retrieving
settings maytake a few minutes).
Tap a network to select it, then
tap MoveUp or MoveDown to
reprioritize the order for network
usage.
Answer Options
Any Key / Auto Answer with
handsfree
TTY
Full / Talk / Hear / Off
Alerts
ERI Banner: On / Off
ERI Sound: On / Off
Emergency Tone
Alert / Vibrate / Off
GPS
Location On / 911Only
Voice Privacy
On / Off
Assisted Dialing
Enables assisted dialing for
international calls. See page 38
for details.
The
Band
tab displaysfrequency
channels used to access service.
GSM/UMTS Settings
GSM Only/ UMTS Only/
GMS/ UMTS Dual
Voice Command
Tap to set
voice command functionality. Tap a
voice command setting in the list,
then tap the setting you want.
Confirmation
Automatic / Always Confirm /
Never Confirm
Set Networks
Find Network

76 JS750
Using the Today Screen
Sensitivity
Most Sensitive / Recommended /
Least Sensitive
Adaptation
Adapt voice to your speech
patterns.
Prompts
Mode: Prompts/ Readout +
Menu / Readout/ Tones Only
Timeout: 5 seconds/ 10 seconds
About
3.12.7 Sistema
The System Settings has additional
sub-menus which allow you to set
up the phone management
environment.
1. Press the
Start
Key , tap
Settings
,then tap
System
.
2. Tap a System sub-menu.
About
Tap to view device
information on three tabs.
●The
Version
tab displays
Windows Mobile Professional
information.
●The
Device ID
tab enter device
name and description to identify
your device to other devices.
●The
Copyrights
tab displays
copyright text.
Backlight
Tap to set
illumination settings on four tabs.
●The
Battery power
tab sets the
backlight duration when battery
powered.
●The
External power
tab setsthe
backlight duration when powered
from an external source.
●The
Button
tab setsthe
backlight duration when any
hardware key is pressed.
●The
Brightness
tab setsthe
screen brightness manually or
activates the Luminous Sensor.
Certificates
Tap to manage
certification authority on three tabs.
●The
Personal
tab displays
personal certificatesfor positive
identification.
JS750 77
●The
Intermediate
tab displays
intermediate certification
authorities.
●The
Root
tab displays positive
root certification authorities.
Customer Feedback
Tap to
elect to participate in customer
feedback to Microsoft.
Encryption
Tap to encrypt files
placed on a storage card for
increased security.
Error Reporting
Tap to set the
device to report software operation
errors to Microsoft to diagnose
problems.
External GPS
Tap to set GPS
information on three tabs.
●The
Programs
tab sets the GPS
program port.
●The
Hardware
tab sets the GPS
hardware port.
●The
Access
tab setsthe device
to manage GPS automatically.
Managed Programs
Tap to
viewlist of installed managed
programs.
Memory
Tap to view and
manage memory usage on two tabs.
●The
Main
tab displays memory
used for storage and programs.
●The
Storage Card
tab displays
memory used and memory free.
●The
Clear Storage
tab sets the
phone to reset to factory default
or your custom configuration.
Power
Tap to view and manage
power settings on two tabs.
●The
Battery
tab displays the
battery status.
●The
Advanced
tab setspower
conserving settings.
Regional Settings
Tab to set
regional information on five tabs.
The
Region
tab set region from
the drop-down list.
The
Number
tab sets your data
numbers format.
The
Currency
tab sets your data
currency format.
The
Time
tab sets time format.
The
Date
tab sets date format.

78 JS750
Using the Today Screen
Remove Programs
Tap to
select program(s) to remove from
device memory.
Screen
Tap to set screen
responsiveness and font settings on
three tabs.
The
Alignment
tab calibrates the
screen to your touch.
The
ClearType
tab sets
ClearType to smooth font edges.
The
Text Size
tab sets text size.
Sensor
Tap to set sensors on
three tabs.
The
Accelerometer
tab sets
device to automatically rotate
screen contents.
The
Luminous
tab setslight
sensor.
The
Proximity
tab sets proximity
sensor.
System Information
Tap to
viewsystem information on four
tabs.
The
Version
tab displays OS,
ROM date, hardware, software,
PRL, and ERI.
The
Product
tab displays name,
manufacturer, language, model
ID, and processor.
The
Owner
tab displays owner
information.
The Phone Info tab displays
MDN, IMEI, MCCID MNCID,
Warranty date code, and SIM
ICCID.
Task Manager
Tap to manage
your device tasks. Tap an
application, then tap to
end the task. You can also tap Menu
to switch applications, end
all tasks, change view, change sort,
refresh, or exit Task Manager.
Wireless LAN
Tap tomanage
your wireless LAN on two tabs.
The
Main
tab displays wireless
LAN information.
The
Station
tab sets status,
mode, SSID, BSSID, channel,
speed, and signal quality.
Menu
End Task

JS750 79
3.12.8 Bluetooth
Bluetooth enables compatible
mobile devices, peripherals, and
computers that are in close
proximity to communicate directly
with each other wirelessly. This
handset has built-in Bluetooth
connectivity, which makes it
possible to connect it with
compatible Bluetooth headsets,
computer applications, and so on.
Bluetooth QD ID B016063
NOTE
●If you use PC Sync via
Bluetooth,you can exchange
data with your PC.
●When you receive data from
another Bluetooth device, the
phone requests confirmation.
●Bluetooth must be turned on to
use these features.
1. Press the
Start
Key , tap
Settings
,then tap
Bluetooth
.
2. If Bluetooth power is set to off,
you will be prompted to turn
power on. Tap
Yes
toturn on
Bluetooth.
3. There are three tabs for
Bluetooth: My Devices,
Accessories any Settings.
●
Settings
tab
Add a device
:
Allows you to set up a new
Bluetooth device.
Disable Bluetooth
:
Turns off Bluetooth.
Advanced
:
Allows you to set up additional
options.
●
My Devices
tab
Allows you to see the information
and properties of the paired
devices.
●
Accessories
tab
Print Images
:Allows you to lay
out and print pictures from your
handset.
PC Remote Control
:Allows you
to remotely control a PC with
your device.
Business Card Exchange
:Allows
you tosend and receive business
cards.
BT Send Object
:Allows you to
send objects such as
Outlook E-
mail
,
Contacts, Tasks, Notes,
Calendar Items, Audio, Ring
Tones, Images
,and
Videos
to a
another Bluetooth device.
To make your phone Bluetooth
visible
1. Press the
Start
Key , tap
Settings ,then tap Bluetooth
.
NOTE
If Bluetooth power is off, you will
be prompted to turn power on.
Tap toturn on Bluetooth.
2. Tap
Settings
in the tab bar atthe
top of the screen, then tap
Not
Discoverable
(which is the
default setting).
3. Tap , then tap the setting you
want.
Always Visible/ Visible for
180 seconds/ Never Visible
4. Tap .
NOTE
To turn off Bluetooth capabilites
on your phone, tap Disable
Bluetooth on the Bluetooth
Settings tab.
TIP
Enter a Bluetooth phone name for
your phone. This will be the
phone name that will be shown on
another Bluetooth-enabled device
when it searches and detects your
phone. To enter a name, on the
Bluetooth screen, tap Security
and enter a device name.
Bluetooth pairing
Pairing is a Bluetooth partnership
relationship that you create
between your phone and another
Bluetooth-enabled device in order
to exchange information in a secure
manner.
TocreateaBluetooth pairing
1. Press the
Start
Key,tap
Settings ,then tap Bluetooth
.
2. Tap toturn Bluetooth On,
if it is Off.
Yes
Done
Yes
80 JS750
Using the Today Screen

JS750 81
3. Tap
Add
.Your phone searches
for other Bluetooth-enabled
devices and lists them.
4. Select the desired device name in
the list.
5. The handset may automatically
send a passcode to try and
autopair. Once complete, Tap
.If the handset does not
autopair, continue on to the next
step.
6. Enter, or confirm, a passcode
(typically “0000”) to establish a
secure connection, then tap .
7.Wait for the paired device to
acceptthe partnership. The
receiving partyneeds toenter
the same passcode that you
specified.
8. After the receiving party enters
the passcode, tap to
confirm the partnership.
NOTE
Creating a Bluetooth pairing
between two devices is a one-time
process. Once a pairing
partnership is created, the devices
can recognize each other and
exchange information without
entering a passcode again.
To accept a Bluetooth pairing
1. Ensure that Bluetooth is turned
on and in visible mode.
2. Tap Yes when prompted to
establish a partnership with the
other device.
3. Enter a passcode (the same
passcode that is entered on the
device requesting pairing) to
establish a secure connection
and tap .
NOTE
Tap Advanced tab tochange the
paired device name and tosetthe
services you want touse for the
paired device.
4. Tap .
To change the display name of a
Bluetooth device
1. Press the
Start
Key , tap
Settings ,then tap Bluetooth
.
2. Tap a Bluetooth device.
3. Tap .
4. Enter a new display name for the
Bluetooth device in the Nickname
field, then tap .
Done
Properties
Done
Next
Done
OK
Done

82 JS750
Using the Today Screen
To delete a Bluetooth pairing
1. Press the
Start
Key , tap
Settings ,then tap Bluetooth
.
2. Tap a Bluetooth device.
3. Tap , tap
Delete, and then
tap in the confirmation
screen.
Connecting a Bluetooth
hands-free or stereo headset
For hands-free phone conversations
or to listen to music, you can use a
Bluetooth hands-free or stereo
headset.
Toconnect a Bluetooth hands-free
or stereo headset
1. Make sure that both your phone
and the Bluetooth headset are
turned on and that the headset
is in visible mode. Refer to the
manufacturer’s documentation to
find out how to set the headset
in visible mode.
2. Press the
Start
Key , tap
Settings then, tap
Bluetooth .
3. On My Devices tab, tap
Add
.
4. Tap the name of the Bluetooth
headset, then tap . The
phone will automatically pair with
the Bluetooth headset.
Windows Mobile will automatically
try one of the preconfigured
passcodes (0000, 1111, 8888,
1234) to pair the Bluetooth headset
with the phone. If this fails, you have
tomanuallyenter the passcode
delivered with your headset.
NOTE
If the Bluetooth stereo headset
becomes disconnected, turn the
headset on and repeat steps 1 to
3above, then select the stereo
headset. Tap , then tap
Set as Wireless Stereo.
Menu
Next
Yes
Menu
JS750 83
3.12.9 Microsoft My Phone
Microsoft My Phone allows you to
synchronize your phone's contacts,
calendar, tasks, text messages, music,
photos, videos and other documents
with your My Phone account at
http://myphone.microsoft.com. You
can configure this service on your
phone using the Settings tab of
Microsoft My Phone.
1. Press the
Start
Key , scroll
the screen up, then tap
Microsoft My Phone
.
or
Press the
Start
Key,tap
Settings
,then tap
Microsoft
My Phone
.
2. Tap .
3. Tap the Privacy Statement and
Service Agreement links, review
these documents, then tap
.
4. Tap the sign in boxand enter
your Windows Live ID.
5. Tap the password box and enter
your password in the password
box, then tap .
3.14 RSSViewer
RSS Viewer is an RSS reader that
keeps you up-to-date with the
latest news from the Internet. It
monitors Internet news channels
and downloads the most current
news updates and podcasts so you
are instantly informed of breaking
news and events. For more
information and tips on using RSS
Viewer, see Help on your phone.
NOTE
Make sure you have an active
Internet connection (such as Wi-
Fi or a data connection) before
using RSS Viewer.
Sign In
Accept
Next
84 JS750
Using the Today Screen
Subscribing to and organizing
news channels
You must subscribe to news
channels before you can receive
RSS feeds.
To subscribe to news channels
1. Press the
Start
Key , then
tap
RSS Viewer .
2. Tap Channels and a
list of RSS channels is displayed.
3. Tap the channels you want to
subscribe to, then tap New
in the task bar.
4. Select the check boxesof the
RSS channels you want to
subscribe to, then tap Done
.
TIP
Channels are grouped by
categories. If you want to select
all channels in a category, tap the
category check box.
5. The channel list appears. Tap
Refresh
to update the channels.
3.15 Alarmas
You can set up to three alarms that
activate or deactivate with a simple
tap. See page 73 for details.
SHORTCUTS
There are two shortcuts to the
Clock and Alarms panel. Tap Set
in the Options taskbar
from the Today Screen, or tap the
Clock standby panel from the
Today Screen.
1. Press the
Start
Key , then
tap
Alarms
.
2. Tap an alarm todisplaythe Alarm
Settings, then tap fields and
enter information asnecessary.
Toactivate and deactivate
alarm(s)
If your schedule changes temporarily,
disable a set alarm simply by tapping
the checkbox next to it. The X is
removed, but the settings remain
allowing you to simply tap the
checkbox to reactivate later.
When an alarm sounds
When an alarm goesoff, you can
choose toSnooze or Dismiss the
alarm. When you touch and drag
Snooze
the alarm will sound
again after fiveminutes.
Set
Done

JS750 85
3.16 Calendario
Use Calendar to schedule
appointments, including meetings
and other events. If you use
Outlook on your PC, you can
synchronize appointments between
your phone and PC.
SHORTCUT
Double-tap calendar from the
Today Screen.
Creating an appointment
1. Press the
Start
Key , scroll
the screen up, then tap
Calendar
.
2. Tap the current date at the top
of the screen todisplaythe
current month.
TIP
Tap the arrow icons to move to
the next/previous dates or tap
Today to return to the
current date.
3. Tap Options , then tap
New
Appointment
.
4. Enter appointment information.
Subject
:Manually enter using
the keyboard or tap Arrow ,
then tap one of the listed
subjects.
Location
:Manually enter using
the keyboard or tap Arrow ,
then tap one of the listed
locations (based on previous
entered locations).
Starts
:Manually enter the
appointment time or tap Arrow
and tap the time to set.
Ends
:Manually enter the time or
tap Arrow and tap the time
to set.
All Day
:Tap
Yes
or
No
.
Occurs
:Tap the appointment
recurrance.
Reminder
:Tap
None
or
Remind
me
.If Remind me is selected,
enter when toremind you.
Categories
:Tap checkbox
(
Business
/
Holiday
/
Personal
/
Seasonal
), then tap .
Attendees
:Ta p
or
then add
attendees as necessary.
Status
:Ta p
Free, Tentative,
Busy,
or
Out of Office
.
OK
86 JS750
Using the Today Screen
Sensitivity
:Tap
Normal
,
Personal
,
Private
or
Confidential
.
5. When the appointment settings
are complete, tap .
NOTE
All-day events do not occupy
blocks of time in Calendar;
instead, they appear in banners at
the top when viewing the day's
agenda.
Viewing your appointments
View your schedule in Day, Agenda,
Week, Month, or Year view.
1. Press the
Start
Key, scroll
the screen up, then tap
Calendar
.
2. Tap in the Options task bar,
and your day's appointments are
listed. Tap tochange tothe next
appointment view (each tap
changes tothe next view).
Sending meeting requests and
appointments
You can send meeting requestsvia
e-mail to persons that use Outlook
or Outlook Mobile. You can also
send a calendar appointment to
another phone using MMS.
To send a meeting request
1. Press the
Start
Key , scroll the
screen up, then tap
Calendar
.
OK
JS750 87
2. Schedule a new appointment (or
open an existing appointment)
scroll down to Attendees tap
No
Attendees
.Ta p
or
.
3. Tap the contact(s) you want to
send the meeting request to and
tap .
NOTE
Only contacts that contain email
addresses can be selected as
attendees.
4. On the New Appointment screen,
tap . The meeting request is
sent out.
NOTES
•
You can only specify if an
attendee is required or optional
if your phone is connected to a
Microsoft Exchange Server 2007
or later. Otherwise, all attendees
are designated as required. For
moreinformation, see Chapter 7.
•To removean attendee from the
list, select the attendee and tap
Options ,then tap Remove
Attendee.
•When attendees accept your
meeting request, the meeting is
automaticallyadded totheir
schedules. When their response
is sent back to you, your
calendar is updated aswell.
3.17 Tareas
Use Tasks to keep track of things
you need to do.
To create a task
1. Press the
Start
Key , scroll
the screen up, then tap
Tasks
.
2. Tap
Menu
,then tap
New
Task
.
3. Enter task details including
Priority, Status, Starts, Due,
Occurs, Reminder, Categories,
and Sensitivity.
4. When finished, tap .
NOTES
•You can synchronize information
on your phone with your PC to
keep your task list up to date in
both locations.
•If you create a new task with a
reminder on your PC and then
synchronize tasks with your
phone, the reminder will play at
the time thatwas set on your
PC.
To manage your Tasks list
1. Press the
Start
Key , scroll
the screen up, then tap
Tasks
.
OK
OK
OK
88 JS750
Using the Today Screen
2. Tap Options to access task
management options.
New Task
:Starts a new task
entry.
Delete Task
:Deletes the selected
task.
Edit
:Allows edits.
Options
:Enables reminders and
shows dates and Task entry bar
on the Tasks panel.
Sort By
:Sorts by Status, Priority,
Subject, Start Date, or Due Date.
Filter
:Filters list view to include
either activeor completed tasks
plus shows All Tasks or selected
task categories.
Send via Bluetooth
:Allows you
to send a task via Bluetooth
®
.
Send asvCalendar
:Starts
message (video or picture) with
task attached.
To mark a task as completed
1. Press the
Start
Key , scroll
the screen up, then tap
Tasks
.
2. Tap the checkbox next to the
task to mark it as completed (tap
again to unmark).
3.18 Notas
Notes helps you to quickly capture
thoughts, questions, reminders, to-
do lists, and meeting notes. You can
create handwritten and typed notes,
record voice notes, convert
handwritten notes to text for easy
readability, and send notes to others.
1. Press the
Start
Key , scroll
the screen up, then tap
Notes
.
JS750 89
Entering Information in Notes
You can enter typed text by using
the on-screen keyboard or
handwriting recognition software.
You can also use the stylus which is
attached on the back side of the
device to write or draw directly on
the screen. Tap Options in the
Options taskbar, then tap
View
Recording Toolbar
to record sound
directly on your note.
1. Press the
Start
Key, scroll
the screen up, then tap
Notes
.
2. Tap
New Note
to write a
new note.
3.
Tap Keyboard , type the note,
then tap .
Managing Note entries
1. Access Notepad and tap an entry.
2. Tap Options .
●Erase a note
Tap
Tools
, tap
Delete
,then tap
Yes
.
●Rename or move a note
Tap
Tools
, tap
Rename/Move
,
then enter changes as necessary.
●Send a note
Tap
Tools
, tap
Send
,then
complete message fields as
necessary and tap .
Note file storage
You can file your Notes into specific
file folders for easy organization and
retrieval. To select a file folder to
view, tap
All Folders
in the upper-
left corner of the screen, then tap
the file folder to open.
To change how your Notes are
sorted, tap
Name
in the upper-
right corner of the screen, then tap
how you want to sort your notes.
3.19 Explorador de archivos
The File Explorer application allows
you to open an explorer window
similar to a desktop Windows based
system. The explorer window allows
you tonavigatethrough your phone
to locate and manage desired
foldersand files.
The file structure starts with
location (phone memory or storage
card memory), then lists category
folders. Within the category folders
are sub-folders and/or documents.
Send
OK
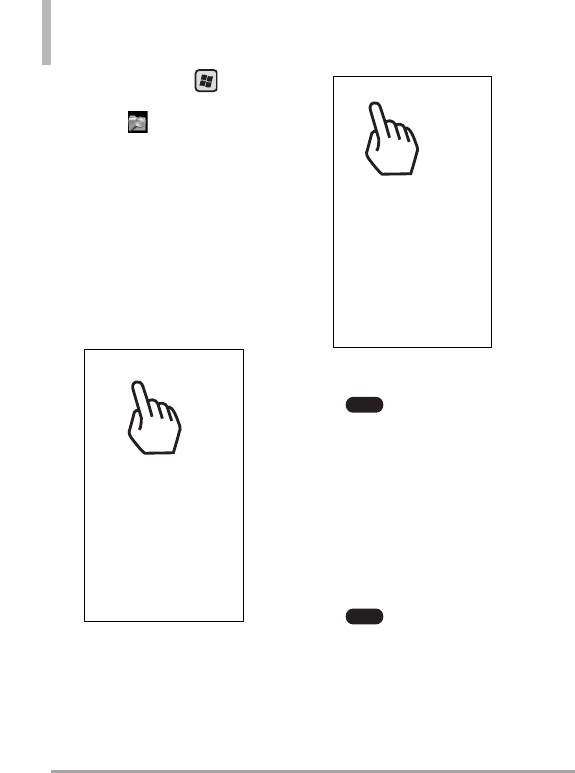
90 JS750
Using the Today Screen
1. Press the
Start
Key , scroll
the screen up, then tap
File
Explorer
.
2. Tap a file folder from those listed,
then tap the folders (or file) you
want.
To change the current location
Tap the current folder in the
upper left corner of the LCD,
then tap a folder from the drop-
down menu.
To manage your files
Tap , then tap
New Folder
tocreate a newfolder, tap
Rename
tochange the name of
the highlighted item, folder, tap
Delete
to delete the highlighted
item, folder, or tap
Edit
to edit
(cut, paste, and more) the
highlighted item.
To manage the file list
Tap , then tap
Refresh
to
refresh the list, tap
SortBy
to
change how the list is sorted.
Menu
Menu

JS750 91
To open a file on a network
Tap , tap
Go To
,tap
Open Path
, tap
New Path
,enter
the new path, then tap .
TIP
Tap and hold a file to bring up a
pop-up menu with options to cut,
copy, rename, delete, send, or set
as Home background.
3.20 Office Mobile
Microsoft
®
Office Mobile consists of
four applications that let you create,
view, and edit Microsoft documents.
These four applications are:
●Microsoft
®
Office Word Mobile:
viewand edit Microsoft Word
documentsand text files.
●Microsoft
®
Office Excel
®
Mobile:
use Microsoft Excel worksheets.
●Microsoft
®
Office PowerPoint
®
Mobile: view Microsoft
PowerPoint slides.
●Microsoft
®
Office OneNote
®
Mobile: lets you easily create
noteswith audio and images.
To use Microsoft Office Mobile
1. Press the
Start
Key , scroll
the screen up, then tap
Office
Mobile
.
2. Tap the Office Mobile application
that you want to use.
NOTE
Word Mobile and Excel Mobile do
not fully support some features of
Microsoft®Office Word and
Microsoft®Office Excel®.
Microsoft Mobile document
formats
By default, Word Mobile saves
documents in .docx format, while
Excel Mobile saves workbooks in
.xlsx format. If you want to open
these file types on a computer that
usesMicrosoft Office 2000, Office
XP, or Office 2003, you may need
todownload and install the File
Format Converter in your computer.
You can find this converter at
http://www.microsoft.com/downloa
ds/details.aspx?FamilyId=941B3470
-3AE9-4AEE-8F43-
C6BB74CD1466&displaylang=en.
OK
Menu

92 JS750
Using the Today Screen
Changing document format on
your device
To save a Word Mobile file in a
different format, tap , tap
Tools
, tap
Options
,tap Default
template arrow , tap
Word 97-
2003 Document (.doc)
,then tap
.
NOTE
If no document is opened, tap
,then tap Options to
access the Default template
settings.
To save Excel Mobile workbooks in
the .xls format, start Excel Mobile,
but do notopen a workbook. Tap
, tap
Options
, tap
Template
for new workbook
, tap
Blank
97-2003 Workbook
,then tap .
3.21 Imágenes y Vídeos
Pictures & Videos allows you to
view and manage media files on
your phone.
SHORTCUT
Double-tap pictures from the
Today Screen to view picture files.
To view media files
1. Press the
Start
Key , scroll
the screen up, then tap
Pictures
&Videos
.
2. Tap a media file to view or play
back the file.
TIP
You can make minor touch ups to
the picture such as rotate, crop,
and auto correct. View a file, tap
,then tap Edit.To rotate,
tap . To crop or auto
correct, tap again, then
tap Crop or Auto Correct.
NOTE
If you cannot find the media file
in the default My Pictures folder,
tap My Pictures at the top left
side of the screen, tap My
Device,then browse the folders.
Pictureand Video files
There are a number of things you
can do with your picture and video
filesbeyond simple viewing. You can
send the selected file, beam it to
another device, or play a slide show.
1. Press the
Start
Key , scroll
the screen up, then tap
Pictures
&Videos
.
2. Highlight a media file, then tap
.
Menu
Menu
Rotate
Menu
OK
Menu
Menu
OK
Menu

JS750 93
NOTE
The available menu options
depend on the selected media
file.
Send the media file
Tap
Send
,tap the account to use,
then complete the fields as
necessary to send the message or
email.
Manage your media file(s)
●Tap
Delete
,then tap
Yes
.
●Tap
Edit
,then tap
Cut
or
Copy
.
●Tap
Go To
to jump to another
file area, such as My Device.
Using Pictures
●Tap
Save to Contact
,then tap
the contact you want to set with
with the picture.
●Tap
PlaySlide Show
. Todisplay
control buttons to rotate, play,
pause, rewind, fast-forward, or
exit, tap the screen.
●Tap
Setas Home Background
,
tap the percent of transparency,
then tap [ok graphic].
File tools
●Tap
Tools
,then tap
Properties
to view the detail properties of
the selected file.
●Tap
Tools
,then tap
Sort By
to
change the sort to Name, Date
or Size.
●Tap
Tools
,then tap
Options
to
customize picture settings and
slideshow playback preferences.
TIP
Tap and hold a file to display a
pop-up menufor that file tocut,
copy, delete, send, or set as
Home Background.
Tocopy a picture or video clip to
your phone
You can copy pictures and video
files from your PC to the My
Pictures folder on your phone, and
then viewthem on your phone. For
more information about copying
files from your PC to your phone,
see Windows Mobile Device Center
or ActiveSync Help on your PC.

94 JS750
Using the Today Screen
NOTE
You can also copy pictures and
video files from your PC to your
phone using a storage card. Install
the storage card to your phone,
and then copy them from your PC
to the folder you created on the
storage card.
3.22 Windows Media
You can use Microsoft Windows
Media Player 10 Mobile for Pocket
PC to play digital audio and video
files that are stored on your device
or on a network, such as on a Web
site.
Using Windows Media Player, you
can play both audio and video files.
The following file formats are
supported by this version of
WindowsMedia Player: WAV,WMA,
WMV, MP3, MIDI, AAC, MP4 and
more.
1. Press the
Start
Key , scroll
the screen up, then tap
Windows
Media
.
Playback Screen
The Playback screen displays the
playback controls (such as Play,
Pause, Next, Previous, and Volume),
album art window, and video
window. You can change the
appearance of the default Playback
screen by choosing a different skin.
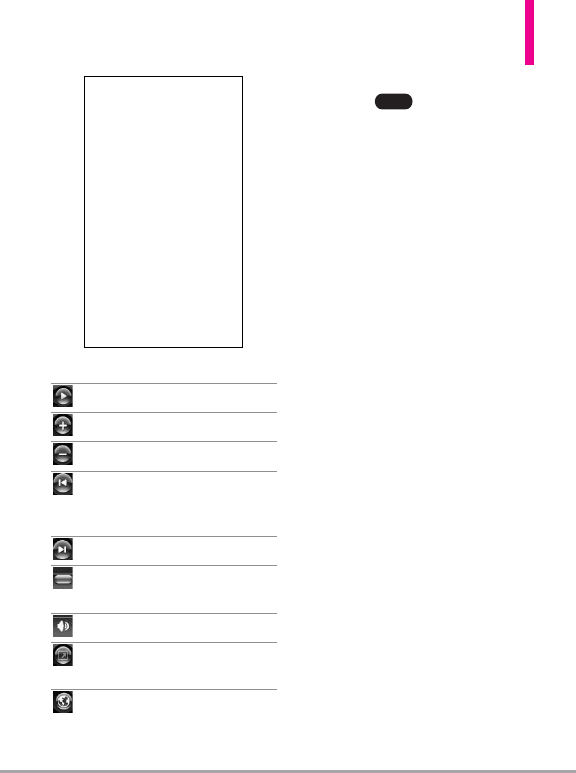
JS750 95
Icon Description
Plays/Pauses a file.
Increases volume level.
Decreases volume level.
Returns to the beginning of
the current file or skips to
the previous file.
Skips to the next file.
Adjusts the playback
progress of a selected file.
Turns the sound on or off.
Displays a video byusing the
entirescreen (full screen).
Displays a Web site where
you can find music and
videos to play.
When you are viewing the Playback
screen, tap to access the
following commands.
●
Library
:Displays the Library screen
so you can choose a file to play.
●
Play/Pause
:Starts or pauses
playback.
●
Stop
:Stops playback.
●
Shuffle /Repeat
:Plays the items
in the Now Playing playlist
randomly/ repeatedly.
●
Full Screen
:When a video is
playing, uses the entire screen to
play it.
●
Options
: Lets you adjust various
WindowsMedia Player options,
including Playback, Video,
Network, Library, Skins, and
hardware Button options.
●
Properties
:Displaysinformation
about the file currentlyplaying.
●
About
:Displays information
about Windows Media Player,
such as the version number and
copyright notification.
Menu
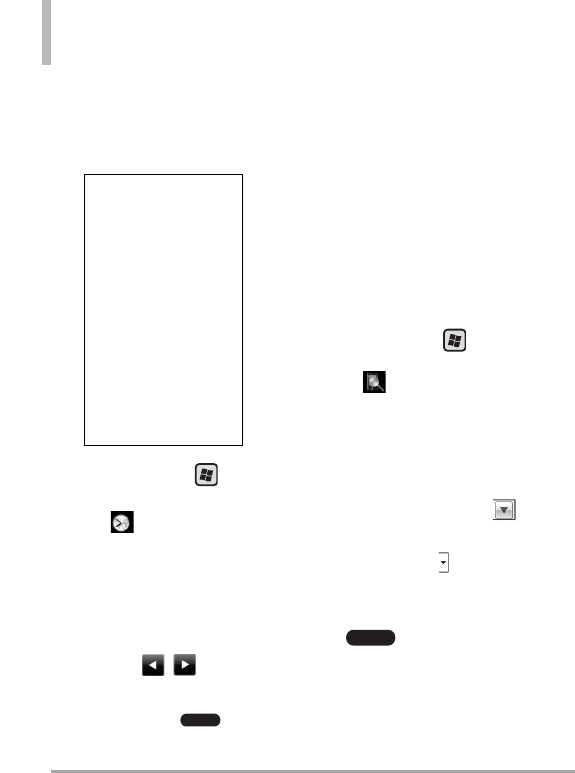
96 JS750
Using the Today Screen
3.23 World Clock
Allows you to view current date and
time in another time zone or
country.
1. Press the
Start
Key , scroll
the screen up, then tap
World
Clock
.
2. Tap the area to zoom in to view.
Date and time of the selected
location displays at the bottom
of the screen.
3. Tap Arrows to move
through World Clock locations.
NOTE
Tap Zoom Out to return
to the global view.
3.24 Buscar Teléfono
You can search for files and other
items stored on your device in the
My Documents folder or on a
storage card. You can search by file
name or by words located in the
item. For example, you can search in
e-mail messages, notes,
appointments, contacts, and tasks,
aswell as in online Help.
To search for a file or an item
1. Press the
Start
Key , scroll
the screen up, then tap
Search
Phone
.
2. In
Search for
box, enter the file
name, word, or other information
you want tosearch for.
3. If you have looked for this item
recently, tap drop-down list
in then tap the item from the list.
4. Tap drop-down list in the
Type
box, then tap a data type
tohelp narrowyour search.
5. Tap in the Options
taskbar.
The
My Documents
folder and
subfolders are searched.
Search
Zoom Out

JS750 97
6. In the
Results
list, tap the item
you want to open.
3.25 Calculadora
Allows you to perform simple
mathematical calculations.
1. Press the
Start
Key , scroll
the screen up, then tap
Calculator
.
2. Tap available keys to enter data
and perform calculation.
●
Tap the keypad that pops up
to enter numbers.
●
Tap to enter decimals.
●
Tap to delete the whole
digit entered.
●
Tap to delete the last digit
entered.
●
Tap the corresponding Touch
Keys toenter functions (C, R,
+).
●
Tap the corresponding Touch
Keys to use memory keys (M,
MC, MR, M+).
●
Tap tocomplete
equation.
3.26 Adobe Reader LE
Adobe
®
Reader
®
LE lets you view
Portable Document Format (PDF)
files.
When you open a password-
protected PDF file, you will be
prompted to enter the password
beforethe file can be opened.
To open a PDF file on your phone
1. Press the
Start
Key , scroll
the screen up, then tap
Adobe
Reader LE
.
2. Browse the folders to find and
open a PDF document:
●Tap it in the displayed list of
recently opened documents.
●Tap
My Device
, tap foldersto
open and view contents as
necessary, then tap the PDF
document to open.
NOTE
To open another PDF file, tap
,tap Open,tap Browse
,then find and tap the
PDF file. You can also open a PDF
file from File Explorer by tapping
it.
Browse
Menu
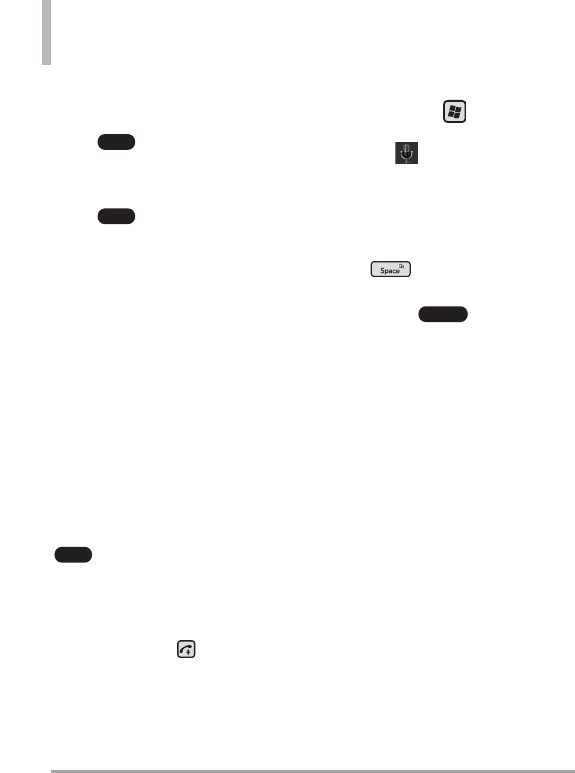
98 JS750
Using the Today Screen
To navigate through a PDF file
You can do any of the following:
●Tap , then tap
Go To
and
tap an option to go to a specific
page in the PDF file.
●Tap , then tap
Zoom
to
then tap a zoom option (in, out,
%, fit to screen, or fit to width).
●When using the internal LCD,
press the Navigation Keys up and
down toscroll through the
pages.
3.27Voice Commands
This feature provides you with the
following options equipped with
AVR (Advanced Voice Recognition)
technology. Each option has its
detailed information on the phone
and you can check it out by tapping
.
SHORTCUT
Toquickly access Voice
Commands, simplypress and hold
the SEND Key .
Access and Options
1. Press the
Start
Key , scroll
the screen up, then tap
Voice
Commands
.
NOTE
You can access Voice Commands
using the internal keypad as well.
Open the slide, then press and
hold the Space/Voice Commands
Key .
2. Tocustomize your voice
commands, tap .
Confirmation
Automatic/ Always
confirm/Never confirm
Sensitivity
Most Sensitive /
Recommended/ Least Sensitive
Adaptation
If the phone asks
you to repeat your voice
command too often, train the
phone to recognize your voice
patterns.
Prompt Mode Mode/ Timeout
For Mode, setPrompts/ Readout
+Menu/ Readout/ TonesOnly.
For Timeout, set 5 seconds or 10
seconds.
Settings
Info
Tools
Tools

JS750 99
Call <Name or Number>
Say ‘Call’ then call someone simply
by saying the phone number or
name. Please speak clearly and
exactly as in your Contacts list.
When you have more than one
contact number, you can state the
name and number type of the
contact (for example, 'Call John
Work').
Send <MSG Type>
Say 'Send Message' and the voice
command will prompt you for the
type of message. After choosing the
message type, system will ask you
for the contact name, number or
group. It will automatically start a
message. If you say a full-sentence
command, such as 'Send Message
to Bob', it would automatically start
a text message without asking for
the message type. When using
'Send Message' command, speak
clearlyand saythe number, group
name, or name exactly asit is
entered in your Contacts list.
Go to <Menu>
The 'Go to' command allows you to
access a menu within the phone (for
example, 'Go to Calendar').
If no menu option is stated, a list of
options will be provided.
Check <Item>
The ‘Check’ command allows you to
check out a wide range of items
from the battery level, service mode,
signal strength, GPS location,
network status, volume, number of
missed calls, voicemail, messages, to
time and date.
Contact <Name>
You can look up namesin your
Contacts(for example, 'Lookup
John'):
Call/ Read out/ Create New/
Modify/ Erase
Redial
Allows you to automatically redial
the last number called.
Play <Playlist>
Allows you to play songs saved in
the phone.
Help
Provides a general guideline to using
Voice Commands.
100 JS750
Using the Today Screen
3.28 Juegos
Allows you to access your
downloaded games. The game
Solitaire is pre-installed on your
device.
1. Press the
Start
Key , scroll
the screen up, then tap
Games
.
2. To play, tap the game that you
want to play.
3.29 Administrador de
tareas
In most cases, programs
automatically close to free needed
memory, however, you can close
programs manually, if you prefer.
SHORTCUT
Press the Task Manager Key
on the right side of the phone.
1. Press the
Start
Key , scroll
the screen up, then tap
Ta s k
Manager
.
2. Check the list of running
programs under the Application
column, along with
corresponding Memory usage
and CPU information.
Tochange howyou view the list,
tap .
●
Tap
View
,then tap
Applications
or
Processes
.
●
Tap
SortBy
,then tap
Memory
,
CPU
,or
Name
.
●Tap
Refresh
.
3. Manage your tasks as detailed
below:
Menu
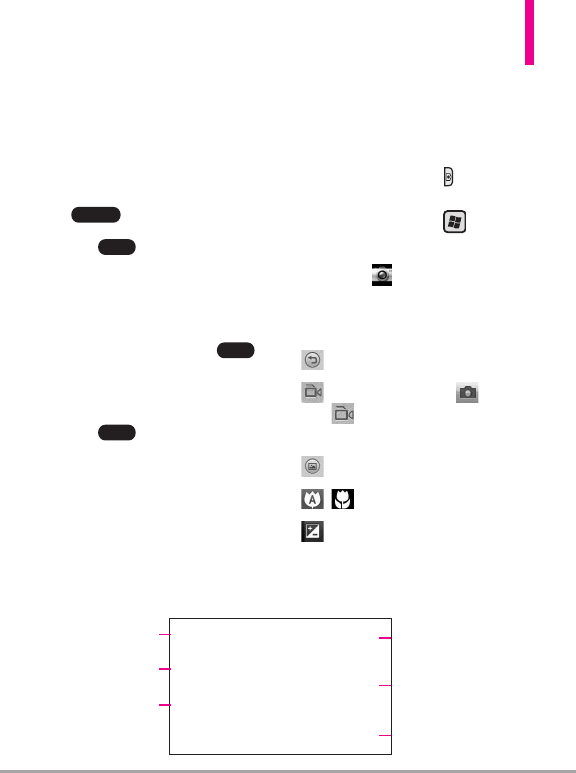
JS750 101
To open a list item
●Double-tap the item in the list.
To stop a running application
program
●Tap an application, then tap
to stop individual tasks.
●Tap , tap
End All Tasks
,
then tap
Yes
to confirm to end all
tasks at once.
To switch tasks
●Tap an application, tap ,
then tap
Switch To
.
To exit
●Tap , then tap
Exit
.
3.30 Cámara
3.30.1 Camera
SHORTCUT
Press Camera Key on the right
side of the phone.
1. Press the
Start
Key .
2. Scroll the screen up, then tap
Camera
.
3. Use the following options to
customize your settings:
Back
Record Video Drag into
to change from Camera
mode to Video mode.
My Images
Auto/ Macro
Brightness
Menu
Menu
Menu
End Task
Brightness
Settings Back
My Images
Capture Mode
Macro
102 JS750
Using the Today Screen
NOTE
Zoom is adjustable with Side
Volume Keys (not available at
the highest resolution).
Settings
Access the settings below by
tapping the settings icon, then
using your fingertip to turn the
settings wheel and tapping the
setting you want.
Image Size
2048X1536/
1600X1200/1024X768/
640X480/320X240
*Zoom is not available in 2048X1536
resolution.
Scene Mode Auto/ Portrait/
Landscape/ Sports/ Night
Color Effect Off/ Sepia/ Mono/
Negative/ Solarize
White Balance Auto/
Incandescent/ Sunny/ Fluorescent/
Cloudy
Timer Off/ 3 Sec/ 5 Sec/ 10 Sec
Shot mode Normal/ Continuous
Shot/ Panorama Shot
PreviewStyle Full Screen/ Full
Image
ISO Auto/ 100/ 200/ 400/ 800
Image Quality Super Fine/ Fine/
Normal
Memory In Use Handset Memory/
External Memory
Hide Icon Auto/ Manual
Shutter Sound Off/ Shutter 1/
Shutter 2/ Shutter 3/ Shutter 4
Grid View Off/ Simple Cross/
Trisection
Reset Settings Reset All
4. Take a picture by pressing the
Camera Key or tap
Ta k e
Photo
.
3.30.2 Video
SHORTCUT
Press and hold Camera Key for
2seconds on the right side of
the phone.
1. Press the
Start
Key .
2. Scroll the screen up, then tap
Camera , then drag to
video icon .
3. Use the following options to
customize your settings:
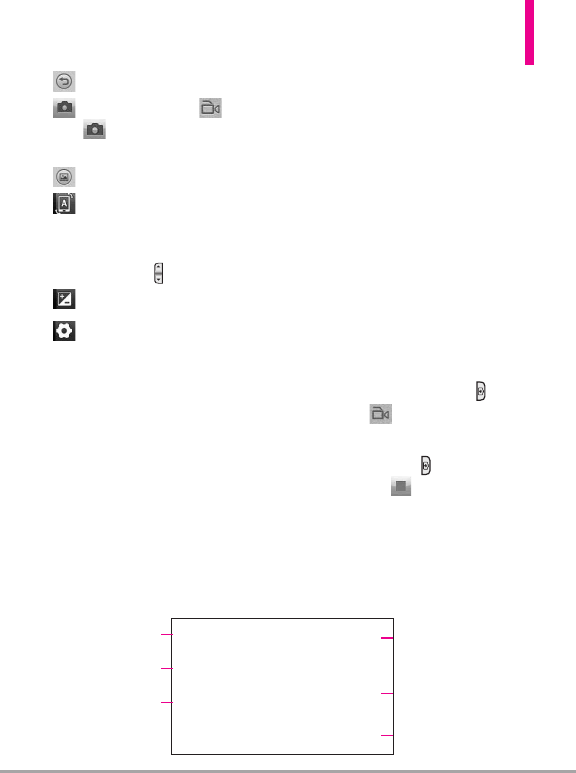
JS750 103
Back
Take Picture Drag into
to change from Video
mode to Camera mode.
My Videos
Scene Mode Auto/ Portrait/
Landscape/ Sports
Zoom is adjustable with Side
Volume Keys .
Brightness
Settings
Access the settings below by
tapping the Settings icon, using
your fingertip toturn the settings
wheel and tapping the setting you
want.
Video Size 640X480/ 320X240/
176X144
Scene Mode Auto/ Portrait/
Landscape/ Sports
Color Effect Off/ Sepia/ Mono/
Negative/ Solarize
White Balance Auto/
Incandescent/ Sunny/ Fluorescent/
Cloudy
Video Quality Super Fine/ Fine/
Normal
Duration Normal/ MMS
Memory In Use Handset Memory/
External Memory
Voice Mute/ Unmute
Hide Icons Auto/ Manual
Reset Settings Reset All
4. Start a video recording by
pressing the Camera Key or
tapping Take Video.
5. Stop video recording by pressing
the Camera Key or tapping
Stop Video .
Brightness
Settings
Scene Mode
Back
My Videos
Record Mode
104 JS750
Using the Today Screen
3.31 Introducción
The Getting Started menu steps you
through the information you need
to get you and your phone up and
running. Some of the items tell you
how to use them, others tell you
how to set them up. When you're
through, you can delete the panel
from the Today Screen though the
Add/remove Getting Started
option.
1. Press the
Start
Key , scroll
the screen up, then tap
Getting
Started
.
●
Make a call
●
Setdateand time
●
Setup Visual Voice Mail
●
Setup e-mail
●
Set up Exchange Server
●
Set up a device password
●
Set up Wi-Fi
●
Set up Bluetooth
●
Setgesture recognition
●
Set orientation
●
Setup PC Synchronization
●
Set background
●
Set ring tone
●
Transfer Music
●
Online help & how-to
●
Add/remove Getting Started

JS750 105
3.32 ActiveSync
ActiveSync synchronizes information
on your device with information on
your PC, such asOutlook content.
ActiveSync can also synchronize
over a cellular network with
Microsoft Exchange Server, if your
company or service provider is
running Microsoft Exchange Server
with Exchange ActiveSync. When
you synchronize, ActiveSync
compares the information on your
device with the information on your
PC and/or Exchange Server and
updates all locations with the most
recent information.
NOTE
You can download ActiveSync or
Windows Mobile Device Center from
www.windowsmobile.com/getstarted
.
With ActiveSync, you can:
●
Synchronize information, such as
Outlook E-mail, Contacts,
Calendar, or Tasks information on
your device with your PC, as well
as pictures, video, and music.
●
Synchronize Outlook E-mail,
Contacts, Calendar
appointments, and Tasks on your
device directly with Exchange
Server so that you can stay up to
date even when your PC is
turned off.
●
Exchange filesbetween your
device and your PC without
synchronizing.
●
Select which typesof information
are synchronized and specify how
much information is
synchronized. For example, you
can choose how many weeks of
past Calendar appointments to
synchronize.
Before you can synchronize
information with a PC, first, install
ActiveSync on your PC, then create
asynchronization pairing between
your device and the PC. You can
download ActiveSync from
www.windowsmobile.com/getstarted.

106 JS750
Using the Today Screen
Once you have installed ActiveSync
and set up a synchronization
relationship, ActiveSync on the PC
recognizes your device when you
connect it, and automatically
transfers the synchronization
settings you specified on your
device.
You may be able to synchronize
your device with Exchange Server
through your company or wireless
service provider. If you plan to do
so, obtain e-mail address, Exchange
Server address, user name,
password, and domain name from
your administrator before starting
the Sync Setup Wizard.
3.33 EnableDUN
While traveling, you can use your
Windows Mobile powered phone as
amodem for your notebook. Use
either VZAccess Manager or the
Modem Link program to use your
phone as a USB or Bluetooth
modem.
Before you proceed
●
Make sure your phone has a data
or dial-up modem connection.
For more information about
setting up these connections, see
“Wireless data connection” and
“Dial-up” in this chapter.
●
To connect your device to a
computer via USB, you must first
install Windows Mobile Device
Center or Microsoft ActiveSync
version 4.5 or later on the
computer.
●
To use a Bluetooth connection,
make sure your computer has
built-in Bluetooth capability. If
your computer does not have
Bluetooth, you can connect and
use a Bluetooth dongle.

JS750 107
Setting up your phone as a
USB modem in Windows
Vista™,Windows 7 or Windows
XP
To set up the phone as a USB
modem, you must first install the
modem driver on your computer
and then activate your phone as a
USB modem.
To install the wireless modem
driver on the computer
1. Download ActiveSync from
www.windowsmobile.com/getstar
ted. Select your language, click
Additional Tools
,and then click
Wireless Modem Driver
Installation
.
2. Follow the on-screen instructions
toinstall the USB modem driver.
When installation completes, click
Exit
to close the installation
program.
To activate your phone as a USB
modem
Connect your phone to your
notebook using the USB cable, then
follow the steps below to activate
your phone as a USB modem.
NOTE
When you activate Wireless
Modem, ActiveSync and Windows
Mobile Device Center will be
disabled automatically.
1. Press the
Start
Key , tap
Settings
,tap
Connections
, tap
Switch USB
,then
tap
VZAccess Manager
.
2. Tap , tap , then the
handset will restart.
Next, create a modem dial-up
connection. The procedures for
creating a modem dial-up connection
aredifferent for Windows Vista™,
Windows 7 or Windows XP. Refer to
“Creating a modem dial-up
connection” later in this chapter for
details.
OK
Save

108 JS750
Using the Today Screen
Setting up your phone as a
Bluetooth modem in Windows
Vista™or Windows 7
You can connect your phone to a
notebook or desktop computer
through Bluetooth and use the
phone as a modem for the
computer. To connect your phone
to the computer through Bluetooth,
your computer must be Bluetooth
enabled or you must have a USB
Bluetooth dongle.
Tosetup a Bluetooth connection
between your phone and Windows
Vista™or Windows 7 computer
1. On your phone, turn on
Bluetooth and set it to Visible
mode.
2. Connect a Bluetooth radio
adapter on your computer. (Refer
to the manufacturer’s
documentation for details on
how to install).
After a Bluetooth radio adapter is
installed on your computer, the
Control Panel and System Tray
will have the Bluetooth Devices
icon. Right-click this icon then
click
Open Bluetooth Settings
.
3. In the Bluetooth Devices window,
click
Add
.
4. The Add Bluetooth Device
Wizard opens. Select the
checkbox
My device is set up
and ready to be found
then click
Next
.
5. The wizard then detects your
device and displays its name in
the dialog box. Select the phone
name then click
Next
.
6. Select
Let me choose my own
passkey
then enter a passcode
(up to 16digits) that will serve
as an identification number for
establishing a secure connection
between your phone and the
computer. Click
Next
.
7. Aconfirmation message then
appears on your phone. Tap
Yes
toaccept the connection, enter
the same passcode, then tap
Next
.
8. On the computer, click
Finish
to
exit the wizard.
9. On your phone tap .
Done
JS750 109
To add your phone as a Bluetooth
modem to your Windows Vista™or
Windows 7 computer
After you have finished creating a
Bluetooth connection between your
phone and computer, Windows
Vista
™
or Windows 7 automatically
detects your device and then
installs it to your computer as a
Bluetooth modem.
3.34 Domain Enroll
Enroll your phone in your
company’s domain to let System
Center Mobile Device Manager
manage the phone. Ask your
network administrator for more
details.
1. Press the
Start
Key , tap
Settings
,tap
Connections
,then tap
Domain Enroll
.
2. Follow the on-screen instructions
toenroll domain.
110 JS750
Chapter 4
Entering Text
4.1 On-screen Input Methods
When you start a program or select a field that requires text or numbers,
the Input Panel icon is displayed on the Options taskbar.
Tap the Input Selector arrow (next to the Input Panel icon) to open a menu
where you can select a text input method and customize input options.
After selecting a text input method, the corresponding Input Panel is
displayed, which you can use to enter text.
abc/123
Mode
Tapping
[abc/123 icon]
Show/Hide Input Panel

JS750 111
4.2 Using the QWERTY Keyboard
The QWERTY Keyboard is a full on-screen QWERTY keyboard layout similar
to a computer keyboard.
To enter text using the QWERTY Keyboard
1. Start a program that accepts text input, such as Word Mobile.
2. Tap Show Keyboard if the keyboard isn't already displayed.
3. Start tapping keys on the keyboard to enter your text.
As you tap the keys, the activated character displays on top of the key.
To learn how to enter text using predictive XT9 mode, see “Using XT9
Mode” in the following page.

112 JS750
Entering Text
4.3 Using XT9 Mode
XT9 is a predictive text input mode
which displays a word candidate list
as you enter characters so you just
tap the word in the list that you want.
To enter text using Predictive
mode
1. While the cursor is in a text entry
field and the keyboard is
displayed, tap XT9 Input to
enter XT9 input mode.
2. Start entering the first few letters
of a word. As you enter each
letter, predicted words appear in
the wordcandidatebar.
3. Tap the desired word to enter. If
the wordis highlighted in the
word candidate bar, you can also
tap the Space bar or Enter key to
enter it.
NOTE
If there are several words to
choose from, tap the left or right
directional arrow keysbelowthe
input panel tonavigate through
the wordcandidate list.
To add a word to the XT9
dictionary
If the word that you have entered is
not found in the dictionary, you can
add it to the dictionary.
1. While in XT9 mode, type a letter
and then tap until you get to
the
Add Word?
option.
2. Tap
Add Word?
then type the
word you want to add, and then
tap .
Done
JS750 113
4.4 Using Numeric and
Symbol Mode
Switch to Numeric and Symbol
mode to easily enter numbers and
common symbols such as
parentheses, braces, currency signs,
punctuation marks, and special
characters.
To switch to Numeric and Symbol
mode
1. While using QWERTY Keyboard
tap 123 .
2. Locate and tap the desired
number or symbol toenter it.
abc mode
123 mode

114 JS750
Chapter 5
Synchronizing Information
5.1 About
Synchronization
You can take information wherever
you go by synchronizing it to your
phone. There are different ways you
can sync your phone:
●
Sync information from your
computer to your phone.
The following types of
information can be synchronized:
Microsoft
®
Office Outlook
®
information
-Office Outlook
email, contacts, calendar, tasks,
and notes.
Notes created using Microsoft
®
Office OneNote
®
2007
Media
-Pictures, music, and
video.
Favorites
- Website addresses
you save as Favorites in Internet
Explorer on your phone or in the
Mobile Favoritesfolder of Internet
Explorer on your computer.
Files
-Documentsand other files.
●
Sync your phone with your
Outlook work account on the
Exchange Server.
For more information about
setting up your phone to sync
with the Exchange Server, see
Chapter 7.
●
Sync your phone with Microsoft
My Phone.
If you have a Microsoft My
Phone account, you can sync and
restore the contacts, calendar
appointments, photos, and other
information that you stored on
your account to your current
Windows phone.
5.2 Before Synchronizing
with Your Computer
Before you can sync your phone,
you must first install and set up the
synchronization software on your
computer. For more information, see
“Setting Up Windows Mobile Device
Center on Windows 7 or Windows
Vista
®
”and “Setting Up ActiveSync
®
on Windows
®
XP” in this chapter.

JS750 115
After installing the synchronization
software on your computer, connect
the phone to your computer using
the USB sync cable. When the
Connect to PC screen appears on
your phone, tap
ActiveSync
,and
then tap .
You can also sync information with
your computer using Bluetooth. See
“Synchronizing via Bluetooth” later
in this chapter.
NOTES
•ActiveSync or Windows Mobile
Device Center only syncs data
on your computer and phone. If
you have installed a storage
card and you want to back up
files from the storage card, use
Windows Explorer on your
computer to copy files from the
storage card to your computer.
•If you are sending your phone
for repair or performing a hard
reset, data from your phone will
be lost. It is recommended that
you sync your phone to your
computer to back up your files.
To back up files from the
storage card to your computer,
use Windows Explorer to copy
files from the storage card to
the computer.
5.3 Setting Up Windows
Mobile®Device Center
on Windows 7 or
Windows Vista™
Microsoft Windows Mobile®
Device Center
is the replacement
for Microsoft
®
ActiveSync
®
on
Windows 7 or Windows Vista
®
.
Some versions of Windows Vista
®
come with Windows Mobile Device
Center already installed. If Windows
Mobile Device Center is not
available on your Windows Vista
®
,
you can go to the following website
for information on downloading and
installing Windows Mobile Device
Center to your computer:
http://www.windowsmobile.com/get
started.
Setting up synchronization in
Windows Mobile Device
Center
When you connect your phone to
your computer and start Windows
Mobile Device Center for the first
time, you are asked to create a
Windows Mobile partnership with
your phone. To create a partnership:
1. Connect your phone to your
computer using a USB cable.
Done

116 JS750
Synchronizing Information
Windows Mobile Device Center
configures itself, then opens.
2. On the license agreement screen,
click
Accept
.
3. On the Windows Mobile Device
Center’s screen, click
Set up your
device
.
NOTE
Choose Connect without setting
up your device if you only want
to transfer media files, check for
updates, and explore your phone
but not sync Outlook information.
4. Select the items you want to
sync, then click
Next
.
5. Enter a name for your phone,
then click
SetUp
.
When you finish the setup wizard,
WindowsMobile Device Center
syncs your phone automatically.
Outlook email messagesand other
information appear on your phone
after synchronization.
Using Windows Mobile Device
Center
To open Windows Mobile Device
Center, click
Start > All
Programs > WindowsMobile
Device Center
on your Windows
Vista
™
or Windows7computer.
On Windows Mobile Device Center,
you can do the following:
●
Tap
Mobile Device Settings
to
change synchronization settings.
●
When you tap
Pictures, Music
and
Video
,then tap
New
pictures/video clips are
available for import
,awizard
guides you to tag and transfer
photos from your phone to the
Photo Gallery on your computer.
●
Tap
Pictures, Music and Video
,
then tap
Add media to your
device from Windows Media
Player
to sync music and video
files using Windows Media
®
Player. For more information, see
“Using Windows Media
®
Player
Mobile” in Chapter 11.
●
Tap
File Management
,then tap
Browse the contentsof your
device
to view documents and
fileson your phone.
NOTE
See Windows Mobile Device
Center Help for moreinformation.

JS750 117
5.4 Setting Up
ActiveSync®on
Windows®XP
On a Windows
®
XP computer, you
need to use Microsoft ActiveSync
®
4.5 or later. If you do not have this
software on your computer, you can
go tothe following website for
information on downloading and
installing Windows Mobile Device
Center to your computer:
http://www.windowsmobile.com/get
started.
Setting up synchronization in
ActiveSync
1. Connect your phone to your
computer. The Synchronization
Setup Wizard automatically starts
and guides you to create a
synchronization partnership.
2. Followthe steps tosetup the
partnership between your phone
and your PC.
3. Click
Finish
.
When you finish the wizard,
ActiveSync syncs your phone
automatically.
5.5 Synchronizing With
Your Computer
Connect and sync your phone with
your computer using the USB cable
or Bluetooth connection.
Starting and stopping
synchronization
You can manually sync either from
your phone or computer.
From your phone
●
Press the
Start
Key , scroll
the screen up, tap
ActiveSync
then tap
Sync
. Toend
synchronization before it
completes, tap
Stop
.
TIP
Todelete a partnership with one
computer completely, disconnect
your phone from that computer
first. In ActiveSync on your
phone, tap Menu , tap
Options,tap the computer name,
then tap Delete.
Menu

118 JS750
Synchronizing Information
From ActiveSync on your
computer
When you connect your phone to
your computer, ActiveSync
automatically opens on your
computer and syncs.
●
To manually start
synchronization, click
Sync
.
●
To end synchronization before it
completes, press .
Selecting information to sync
You can select information type(s)
and amount of information to sync
on either your phone or computer.
Follow the steps below to change
synchronization settings on your
phone.
NOTE
Before changing synchronization
settings on your phone,
disconnect it from your computer.
1. In ActiveSync on your phone, tap
,then tap
Options
.
2. Select the check box next to the
item(s) you want to sync. If you
cannot select a check box, you
might have to clear the check box
for the same information type
elsewhere in the list.
3. To change synchronization
settings for an information type,
for instance, E-mail, select it and
tap
Settings
. You can then set
the download size limit, specify
the time period of information to
download, and more.
NOTES
•Some information types such as
Favorites, Files and Media
cannot be selected in
ActiveSync Options on your
phone. You can only select or
clear these items from your
computer’s Windows Mobile
Device Center or ActiveSync.
•Acomputer can have sync
partnerships with many different
Windows Mobile powered
devices, but a device can have
sync partnerships with two
computers at most. To ensure
that your phone syncs properly
with both computers, set up the
second computer using the
same synchronization settings
you used on the first computer.
Menu
JS750 119
•Outlook email can be
synchronized with only one
computer.
Troubleshooting sync
connection problem
In some cases, when the computer
connects to the Internet or a local
network, it may disconnect the
connection with your phone in favor
of the Internet or network
connection.
If this happens, press the
Start
Key
, tap
Settings
tap
Connections
, tap
USB to PC
,then clear the checkbox
Enable
advanced network functionality
.
This makes your computer utilize a
serial USB connection with your
phone.
5.6 Synchronizing via
Bluetooth
You can connect and sync your
phone with the computer using
Bluetooth.
If this is the first time you have
connected to this computer via
Bluetooth, you must first set up a
Bluetooth pairing between your
phone and the computer.
NOTE
To connect and sync your phone
with a computer via Bluetooth,
your computer must have built-in
Bluetooth or Bluetooth adapter
(or dongle) installed.
To sync with a computer via
Bluetooth
1. Install Windows Mobile Device
Center or ActiveSync on your
computer to sync through
Bluetooth. Use the program’s
Help section for instructions.
2. Make sure that Bluetooth on
your phone and the computer
are both turned on and set to
Visible mode.
3. On your phone, press the
Start
Key , then tap
ActiveSync
.
4. Tap , then tap
Connect
via Bluetooth
.
Menu

120 JS750
Synchronizing Information
5.7 Synchronizing Music
and Video
If you want to carry your music or
other digital media along with you
while you travel, set up Windows
Media
®
Player on your computer to
sync music and video with your
phone.
Other than selecting the Media
information type to be
synchronized, all media
synchronization settings must be set
in Windows Media
®
Player. Before
media can be synchronized, you
must do the following:
1. Install Windows Media
®
Player
Version 11 on your computer.
(Windows Media
®
Player 11
works onlyin Windows XP or
later versions).
2. Connect your phone to the
computer with a USB cable. If
your phone is currently
connected using Bluetooth, you
must end thatconnection before
media can be synchronized.
3. Set up a sync partnership
between your phone and your
computer’s Windows Media
®
Player.
4. Add files from your Library to the
Sync List
and Click
Start Sync
to
sync with your phone.
5.8 Synchronizing with
Microsoft®My Phone
Microsoft
®
My Phone syncs
information between your phone
and Microsoft's password-protected
web site. You can back up and
restore your contacts, calendar
appointments, photos, and other
information.
NOTE
You can sync contacts, calendar,
and tasks with My Phone onlyif
your phone doesnothave a sync
partnership with an Exchange
Server.
You can also use a web browser on
your computer to:
●
Add, edit, and delete contacts
and calendar appointments.
These changesarethen
synchronized with your phone.
●
View your photos and videos,
and save them to your computer.
JS750 121
NOTE
If the information you select for
synchronization exceeds the
available storage space on your My
Phone account, My Phone stops
transferring files. For more
information on using My Phone,
see: http://myphone.microsoft.com
Setting up your My Phone
account
Whether you are setting up a new
account or synchronizing to an
existing account, the first step is to
set up My Phone on your phone.
1. Press the
Start
Key , scroll
the screen up, then tap
Microsoft My Phone
.
or
Press the
Start
Key , tap
Settings
,then tap
Microsoft
My Phone
.
2. Follow the instructions in the
wizard toset up your My Phone
account.
During setup:
●
Sign in using your Hotmail or
Windows Live address and
password.
●
Set the sync method to
Automatic or Manual, depending
on your preference.
Changing sync settings
To change sync settings such as the
sync schedule and items to
synchronize, you need to access the
settings from the menu.
To change which items to sync
1. Press the
Start
Key , scroll
the screen up, then tap
Microsoft My Phone
.
or
Press the
Start
Key, tap
Settings
,then tap
Microsoft
My Phone
.
2. Tap , then tap
Sync
Options
.
3. Select the items you want to
include or exclude during
synchronization.
4. Tap .
Done
Menu
122 JS750
Synchronizing Information
To adjust sync schedule and
roaming settings
1. Press the
Start
Key , scroll
the screen up, then tap
Microsoft My Phone
.
or
Press the
Start
Key , tap
Settings
,then tap
Microsoft
My Phone .
2. Tap , then tap
Sync
Schedule
.
3. Select from the available
schedule options.
4. To enable automatic sync while
roaming (when you are out of
range of your home network),
select the check box
Use these
settings when roaming
.
5. Tap .
Stopping the sync partnership
with your My Phone account
You can stop synchronizing with
your My Phone Web account on
your phone. This does not delete
the data already synchronized to
your phone and the data stored on
your My Phone Web account.
1. Press the
Start
Key , scroll
the screen up, then tap
Microsoft My Phone
.
or
Press the
Start
Key,tap
Settings
,then tap
Microsoft
My Phone .
2. Tap , then tap
Account
.
3. Tap
Stop Service
,then tap
Yes
.
Menu
Done
Menu

JS750 123
Managing your My Phone
Web account from your
computer
You can use a Web browser on your
computer to access your My Phone
Web account and:
●
Add, edit, or delete contacts,
calendar appointments, and
other types of information.
Changes will be synchronized
with your phone.
●
View photos and videos that are
stored on your My Phone
account, delete them, save them
to your computer, and more.
To access your My Phone Web
account from your computer, go to
http://myphone.microsoft.com, and
sign in using your Hotmail or
Windows Live address and
password.

124 JS750
Chapter 6
Exchanging Messages
6.1 Text Messages
Send short text messages (SMS) to
other mobile phones. If your
message is more than 160
characters, it will be sent as two or
more separate messages and you
will be billed accordingly.
Creating
and sending a new
text message
1. Double-tap
message
from the
Today Screen, then tap on
the Options taskbar at the
bottom of the screen.
NOTE
If you have unread messages, tap
text,swipe horizontally past
pending messages (No New
Messages is displayed), then tap
the Message panel again.
2. Tap
Text message
.
3. Tap the
To
:text field to enter the
mobile phone number or to
select from the following options:
●
Tap Contact , tap a contact,
then tap .
●
Tap Message History , tap a
message, then tap .
●
Tap Call History , tap a call,
then tap .
●
Tap Dialpad , tap keys to
manually enter a destination,
then tap .
TIP
Todelete a recipient, tap to
the right of the entry.
4. Tap the text area and enter your
message, then tap .
TIPS
•Tochoose from preset
messages, tap , tap
InsertMy Text and tap a
desired message.
5. When finished, tap then
.
Managing text messages
Deleting and copying messagesin
your Inbox is easy.
Send
Done
Menu
Done
Done
Done
Done
Done
New

JS750 125
To copy a text message to the SIM
card
1. Press the
Start
Key , then
tap
Message
.
2. Tap a message to open it, then
tap to close it.
3. With the message now
highlighted, tap , then tap
Copy to SIM
.
NOTES
•You cannot copy sent messages
to the SIM card.
•Copying text messages from your
phone to the SIM card results in
duplicate messages in the Inbox
when your SIM card is in use.
To delete one or more text
messages
1. Open the Messaging Inbox.
2. Tap , tap
Delete
,then tap
the checkmarks tothe left of
each message.
3. Tap to delete the
selected messages.
Making calls directly from text
messages
While you are viewing a text
message from the Today Screen
Messages panel or in your Inbox,
you can directly call the sender of
the message, if the sender’s phone
number is stored in your contacts.
1. Open the text message, press the
SEND Key .
2. Verify that the correct number is
about to be dialed, if it is, press
the SEND Keyagain.
NOTE
Tapping a phone number that is
contained in a text message also
allows you to call that number.
6.2 Multimedia Messages
Sending multimedia messages
(MMS) to your friends and family is
fun and easy. You can include
pictures, audio clips and videos,
along with text.
Done
Menu
Menu
OK

126 JS750
Exchanging Messages
To configure MMS message
settings
1. Press the
Start
Key , then
tap
Message
.
2. Tap
Settings
.
3. Tap the MMS Settings Tab.
4. Set your preferences.
5. Tap .
Creating and sending MMS
messages
You can compose MMS messages in
acombination of slides, where each
slide can consist of a photo, video
or audio clip, and/or text.
To compose an MMS message
1. Press the
Start
Key and tap
Message
.
2. Tap
New Message
.
3. Tap
Picture Message
or
Video
Message
.
4. Tap the
To
:field to enter the
recipient's phone number or e-
mail address (use Contact ,
Message , Call History ,
Dialpad , or Blog ) then
tap .
TIP
Todesignate as Cc or Bcc, tap
Arrow next to the addressee
and tap the designation you want
to set for it.
4. Tap again when finished
adding recipients.
5. Depending on the type of
message you selected (Video or
Picture), the attachment options
will vary. Choose from the
following options:
Done
Done
OK
JS750 127
●
Tap Picture , then tap the
picture to insert.
●
Tap Video , then tap the
video clip to insert.
●
Tap to take a photo and
insert it into the Picture message.
●
Tap to record MMS video
and insert it into the Video
message.
●
Tap Mic to record an audio
clip and insert it into the Picture
message.
●
Tap Audio , then tap the
audio file to attach. For more
information, see page 132.
●
Tap to add other
attachments, then tap Vcard
toinsert vCard from your
Contacts, tap Vcal to insert
vCal from your Calendar, or tap
File to insert a data file
stored on your phone.
6. Enter the subject and message
text.
7. Slides areadded automatically
each time you add more of the
same types of attachments.
NOTE
To add slides manually, tap
,tap Slides,tap Insert
Slide.
8. Tap to send the MMS
message.
TIP
You can also send an MMS
message from Camera, Album or
Pictures & Videos.
Adding attachments to a Text
Message
Once you start an SMS message,
tap the text area to bring up the
text entry box Insert text here.
Simply begin tapping the screen
keyboard to enter your text. You
can insert additional items into your
text including:
●
Tap Emoticon to insert face
graphics.
●
Tap Favorites to insert
favorite websites.
●
Tap My Text to insert My
Text phrases.
●
Tap to insert a Contact.
●
Tap to insert information
about a Calendar event.
Send
Menu

128 JS750
Exchanging Messages
To add an audio clip to a Picture
Message
You can add one audio clip per slide
in your Picture message.
1. Start a Picture message, then tap
Audio , By default, the My
Sounds folder is shown.
NOTE
Tap Up in the Options
taskbar to move up one level in
the folder hierarchy (e.g., from My
Sounds to My Documents. This
is helpful if you need to navigate
to a different path/folder that
contains audio files.
2. Select an audio file. When
highlighted, you can:
●
Tap to play the audio clip, or
tap to pause.
●
Tap the file to insert it in the
MMS message.
●
Tap to quit selection and
return to your MMS message.
NOTE
To record a new audio clip and
add it to your MMS message, tap
. The Record pop-up window
opens. Tap Record to start
recording, and Stop to end
the recording. Tap Play to
listen to the recorded audio clip,
then tap Record . The new
audio clip is then inserted to the
MMS message.
Viewing MMS messages
It is easy to view a received
multimedia message.
1. From the Today Screen, tap
message
.
2. Tap the received MMS message.
3. Tap todownload the
message, if it hasn't already been
downloaded.
Download
Select
II
Up

JS750 129
Synchronizing Outlook email
with your computer
If you have installed the
synchronization software on your
computer and created a partnership
with your phone, then your phone
is ready to send and receive
Outlook email.
If you have not yet installed the
synchronization software nor created
apartnership, do so by following the
procedures in Chapter 5.
TIP
To set up your company email
account so that you can access
Outlook email messages
wirelessly, you must set up your
phone to synchronize via an over-
the-air connection with your
company’s Exchange Server. For
moreinformation about
synchronizing with your company
email server, see Chapter 7.

130 JS750
Chapter 7
Working With Company Email and
Meeting Appointments
7.1 Synchronizing with the
Exchange Server
To keep up-to-date with your
company email messages and
meeting schedules while you’re out
of the office, you can connect your
phone to the Internet through Wi-Fi
or a data connection and
synchronize with your company’s
Exchange Server.
Setting up an Exchange
Server connection
Before you can synchronize or
access information on the Exchange
Server, you need to set up an
Exchange Server connection on
your phone. You need to get the
Exchange Server name (must be
Outlook Web Access server name),
domain name, user name, and the
password that you use at work from
your network administrator and
enter them on your phone.
NOTE
You can set up an Outlook email
account that synchronizes with
the Exchange Server on the Today
Screen e-mail panel using Mail
Setup. See “Email” in Chapter 3
for details.
If you have not synchronized your
phone with your computer, follow
these steps to set up an Exchange
Server connection.
1. Press the
Start
Key , tap
Email
,then tap
Setup E-
mail
.
2. Enter the E-mail address and
Password for the email account
and select the Save password
option. Tap .
3. Clear the checkbox
Try to get e-
mail settings automatically from
the Internet
and tap .
4. In
Select e-mail provider
box,
tap Drop-down , then tap
Exchange server and tap .
5. Tap again.
6. Select the checkbox
Attempt to
detect Exchange Server Settings
automatically
and tap .
7. Enter the Domain name and tap
.
8. In Server address, enter the
Exchange Server address and tap
.
Next
Next
Next
Next
Next
Next
Next

JS750 131
9. Select the items that you want to
sync with the Exchange Server.
TIPS
•To change synchronization
settings of an information item,
for example, E-mail, select the
item, then tap Settings.
•To change the rules for
resolving synchronization
conflicts, tap , then tap
Advanced.
10. Tap
Finish
.
NOTES
•If you synchronized email
messages with your computer
before, open ActiveSync on
your phone, then tap ,
then tap Add Server Source to
set up an Exchange Server
connection. When prompted to
select information types for
synchronization, you must first
clear the E-mail check boxunder
the Windows PC item before
you can select E-mail under
Exchange Server.
•Tochange Exchange Server
settings, open ActiveSync on
your phone, and then tap
,then tap Configure
Server.
Starting synchronization
Before you start synchronizing with
the Exchange Server, make sure your
phone has been set up with a Wi-Fi
or data connection to the Internet
so that you can synchronize over-
the-air. For more information about
connections, see Chapter 8.
After you finish setting up an
Exchange Server connection, your
phone automatically starts
synchronization.
To manually start synchronization,
press the
Start
Key , scroll the
screen up, tap
ActiveSync
,then
tap
Sync
.
NOTE
If you connect your phone to
your office computer via a USB or
Bluetooth connection, you can
use this connection tothe
computer to “pass through” to
the network and download
Outlook email messages and
other information to your phone.
Menu
Menu
Menu
132 JS750
Working With Company Email and Meeting Appointments
7.2 Working With
Company Email
Messages
Your phone gives you instant access
to your company email messages
and lets you manage your messages
easier. Direct Push, Fetch Mail,
Remote email search, and email flags
arejust some of the tools you can
use to manage your email messages.
NOTE
Some messaging features depend
on the Microsoft Exchange Server
version used in your company.
Check with your network
administrator for the availability of
these features.
Automatic synchronization
through Direct Push
Direct Push technology (push email
feature) enables you to receive new
email messages on your phone as
soon as they arrive in your Inbox on
the Exchange Server. Items such as
contacts, calendar and tasks are
also immediately updated onto your
phone when these items have been
changed or new entries have been
added on the Exchange Server. To
make Direct Push work, you need to
have a Wi-Fi or data connection on
your phone.
You need to perform a full
synchronization between your
phone and the Exchange Server
before Direct Push can be enabled.
REQUIREMENT
The Direct Push feature works for
your phone only if your company
is using Microsoft Exchange
Server 2003 Service Pack 2
(SP2) with Exchange ActiveSync
or later.
To turn on Direct Push in
ActiveSync
1. Press the
Start
Key , scroll
the screen up, tap
ActiveSync
,tap , then tap
Schedule
.
2. Select As items arrive in the
Peak
times
and
Off-peak times
boxes.
Menu

JS750 133
NOTE
When Direct Push is off, you need
to manually retrieve your email
messages.
Scheduled synchronization
If you do not want to use Direct
Push, you can set a regular schedule
for synchronizing Outlook email and
information.
1. In ActiveSync on your phone, tap
,then tap
Schedule
.
2. Select from the available options
to set the synchronization
schedule.
TIP
You can select a shorter interval
in the Peak times box and a
longer interval in the Off-peak
times box, so that your email
messages are synchronized more
frequently when you are working.
To set the days and hours that
make up your peak and off-peak
times, tap the peak times link at
the bottom of the screen.
Instant download through
Fetch Mail
The Fetch Mail feature downloads
an entire email immediately without
the need for you to perform a full
Send/ Receive action. This limits the
download to just the email
message(s) that you want and helps
save data cost.
REQUIREMENT
Fetch Mail works for your phone
onlyif your company is using
Microsoft Exchange Server 2007
or later.
1. Press the
Start
Key , tap
Email
,then tap
Outlook E-
mail
.
2. Open an email message.
3. By default, only the first few
words of the message are shown.
To download the whole email,
fingerscroll to the end of the
message, then tap
Getthe rest
of this message
.
4. Wait for the remainder of the
message body todownload.
Menu

134 JS750
Working With Company Email and Meeting Appointments
NOTES
•For information about changing
email sync options such as
setting the download size for
email, see "Customizing email
settings" in Chapter 6.
•When you receive an email that
contains a link to a document
such as a PDF or Microsoft
Office document located on
SharePoint or an internal file
server, you can tap the link to
view the document on your
phone. You can view the
document only if you have a
Microsoft Outlook account that
synchronizes with Microsoft
Exchange Server 2007 or later.
Exchange Server must also be
setup toallow access to
SharePoint document libraries
or internal file servers.
Searching for email messages
on the Exchange Server
You can access email messages that
are not available on your phone by
searching your Microsoft Exchange
Server mailbox. The search results
aredownloaded and displayed in a
Search Results folder.
REQUIREMENT
Your company must be using
Microsoft Exchange Server 2007
or later.
1. Press the
Start
Key , tap
Email
,then tap
Outlook E-
mail
.
2. Tap , tap
Tools
,then tap
Search Server...
.
3. In the
Look for
text box, enter
the search keyword.
4. Choose the date range of
messages to search from.
5. In the
Look in
list, specify
whether to search in the Inbox,
Sent Items, or All Folders, and
then tap .
TIP
Toclear the search results and
return to the message list, tap
,then tap Clear Results.
Search

JS750 135
Flagging your messages
Flags serve as a reminder for you to
follow-up on important issues or
requests contained in email
messages.
Flagging messages, which has been
auseful feature on desktop Outlook
E-mail, can also be done in Outlook
Mobile on your phone. You can flag
received email messages on your
phone.
REQUIREMENT
Flags areenabled only if email
messagesare synchronized with
Microsoft Exchange Server 2007
or later.Flags aredisabled or
hidden if email messagesare
synchronized with earlier versions
of Microsoft Exchange Server.
Toflag or unflag a message
1. Press the
Start
Key , tap
Email
,then tap
Outlook E-
mail
.
2. Select a message.
3. Tap ,then tap
FollowUp
and
select one of the following
options:
●
Set Flag
Marks the message with
ared flag to remind you to follow
up.
●
Complete Flag
Marks the
message with a check mark to
indicate that the issue or request
in the email is already completed.
●
Clear Flag
Removes the flag to
unmark the message.
NOTE
Email message reminders are
displayed on your phone if the
messages are flagged with
reminders and synchronized from
the Exchange Server.
7.3 Managing Meeting
Requests
When you schedule and send
meeting requests from your phone,
you can invite attendees to your
meeting and check their availability.
When you receive a meeting
request, you can reply by accepting
or declining the request. The
meeting request also clearly
indicates whether or not there are
conflicting or adjacent meetings.
REQUIREMENT
Your company must be using
Microsoft Exchange Server 2007
or later.

136 JS750
Working With Company Email and Meeting Appointments
To reply to a meeting request
1. When you receive a meeting
request email, a notification is
displayed on your phone. Open
the email.
2. Tap to reply and accept the
meeting request, or tap , then
tap
Decline
if you cannot attend
the meeting.
TIPS
•Before responding, you can
check your availability during
the time of the requested
meeting by tapping View your
calendar.
•If the time of the meeting
conflicts with your other
appointments, a “Scheduling
Conflict” status appears on top
of the email.
3. Choose whether or not to edit
your response email before
sending, then tap .
If you accept the meeting
request, it is automatically added
as an appointment in Calendar
on your phone.
7.4 Finding Contacts in the
Company Directory
In addition to having contacts on
your phone, you can access contact
information from your organization’s
Company Directory. By having over-
the-air access to the Company
Directory, you can easily send email
messages and meeting requests to
anyone in your company.
REQUIREMENT
Access to the Company Directory
is available only if your
organization is running Microsoft
Exchange Server 2003 SP2 or
newer, and you have completed
your first synchronization with the
Exchange Server.
OK

JS750 137
When browsing Contacts,
composing email, or creating a
meeting request
1. Synchronize with the Exchange
Server.
2. Do any of the following:
●
While browsing through your
contacts on the Contacts or
Phone panel, tap , then tap
Company Directory.
●
In a new email message, tap the
To
box (or tap , then tap
Add
Recipient
), and then tap
Company Directory
on the top
of the list.
●
When creating a meeting request
and selecting required and
optional attendees in Calendar,
tap
Company Directory
.
3. Enter a partial or full contact
name and tap . In the
search results list, tap a contact
toselect it.
4. You can save a contact from the
Company Directory to your
phone by selecting the contact,
and then tapping , then tap
Save to Contacts
.
NOTE
You can search for the following
information as long as that
information is included in the
Company Directory: First name,
Last name, E-mail name, Display
name, E-mail address, or Office
location.
When viewing a received
Outlook email message
1. Open a received Outlook email
message.
2. If a Search button
appears to the right of the
sender name in the email
message, tap this button to
search for the sender in the
CompanyDirectory.
3. If the sender is found, the
contact details will be displayed.
You can then choose tosavethe
sender to your contacts, call the
sender,and more.
Search
Search

138 JS750
Chapter 8
Programs
8.1 Managing Programs
Installing a program
You can install or uninstall
additional programs. Your phone
does not allow you to uninstall most
of the preinstalled programs.
NOTE
Before you purchase additional
programs, make sure that they are
compatible with your phone.
Before you launch the program
installer, check first whether the
installer can directly run on
Windows Mobile or needs to be run
on a computer.
To install a program directly on
your phone
1. If the installer is a .cab file,
directly download or copy it to
your phone.
2. On your phone, open File
Explorer and navigate to the
installer file.
3. Tap the file to launch the installer.
4. Choose whether to install the
program into the main memory
or your storage card, if you have
the storage card inserted on your
phone.
5. Wait for the installation to
complete.
NOTE
You may be prompted to restart
your phone after installation is
completed.

JS750 139
To install a program from your
computer
1. If the installer is an .exe file such
as Setup.exe, most likely, the
installer needs to be run on a
computer.
Download or copy it to your
computer.
2. Connect your phone to your
computer using the USB cable,
and then double-click the
installer file on your computer to
launch the installer.
3. Follow the on-screen instructions
on your computer and your
phone to complete the
installation.
To uninstall a program
1. Press the
Start
Key , tap
Settings
.
2. Tap
System
,then tap
Remove Programs
.
3. From the list, select the program
you want to remove, and then
tap .
Remove

140 JS750
Chapter 9
Managing Your Phone
9.1 Copying and
Managing Files
Copy files between your phone and
computer, or copy files to a storage
card installed on your phone. You
can also efficiently manage your
files and folders using File Explorer.
Tocopy files using Windows
Mobile Device Center or
ActiveSync
1. Connect your phone to the
computer.
2. Click
File Management
,then tap
Browse the contents of your
device
in Windows Mobile Device
Center on your computer, or click
Explore
in ActiveSync on your
computer. This displays the
content of your phone in
Windows Explorer on your
computer.
3. To copy a file from your phone to
your computer:
a. Browse the contents of your
phone, right-click the file you
want to copy, and then click
Copy
.
b. Right-click a folder on your
computer, and then click
Paste
.
4. To copy a file from your
computer to your phone:
a. Browse the folders on your
computer, right-click the file
you want to copy, and then
click
Copy
.
b. Right-click a folder on your
phone, and then click
Paste
.
Tomanage fileson your phone
using File Explorer
File Explorer lets you browse and
manage the contents of your
phone. The rootfolder on the
phone is named My Device, and
contains the following folders: My
Documents, Program Files, Windows,
and more.
1. Press the
Start
Key , scroll
the screen up, then tap
File
Explorer
.
2. Tap a folder or file to open it.
3. To return toan upper level folder,
tap .
Up
JS750 141
4. To quickly delete, rename, or
copy a file, tap and hold the file,
and then tap the desired
operation on the shortcut menu.
To copy or delete multiple files,
tap and drag over the desired
files, tap and hold the selection,
and then tap an option from the
menu.
Tocopy files to a storage card
1. Make sure that the storage card
is properlyinstalled on your
phone.
2. Connect the phone to your
computer using the USB cable.
3. On your computer, navigate to
the removable disk drive, and
then start copying files, as you
would on a PC, tothe storage
card.
4. When finished, disconnect the
phone from your computer.
9.2 Settings on your
Phone
You can adjust the phone settings
to suit your preferences. Use the
Settings tab to adjust basic phone
settings. See “Settings” in Chapter 3
for details.
To see all available settings, press
the
Start
Key , then tap
Settings
.Settings are organized
into the Personal, Connections, and
System folders.
9.3 Changing Basic
Settings
Display settings
To manually adjust the screen
brightness
By default, your phone
automatically adjusts the screen
brightness according to the ambient
lighting.
1. Press the
Start
Key , tap
Settings
,tap
System
,
then tap
Backlight
.
2. Tap the
Brightness
tab.

142 JS750
Managing Your Phone
3. Clear the checkbox
Enable
Luminous Sensor
.
4. Adjust the brightness by
dragging the slider under
On
battery power
and
On external
power
.
5. Tap .
Toautomatically turn off the
screen backlight when the phone
is not in use
1. Press the
Start
Key , tap
Settings
,tap
System
,
then tap
Power
.
2. Tap the
Advanced
tab.
3. Tap the checkbox next to the
power source (battery or external),
then specify the time before the
screen backlight turns off.
4. Tap .
Toincrease or decrease the size of
text on the screen
1. Press the
Start
Key , tap
Settings
, tap
System
,
scroll the screen up, then tap
Screen
.
2. Tap the
Text Size
tab.
3. Move the slider to increase or
decrease the text size.
4. Tap .
To re-calibrate the touch screen
The phone touch screen is calibrated
before shipment. Re-calibrate the
touch screen if it does not accurately
respond to screen taps.
1. Press the
Start
Key , tap
Settings
,tap
System
,
scroll the screen up, then tap
Screen
.
2. Tap the
Align Screen
tab.
3. Followthe on screen instructions.
Phone name
The phone name is used to identify
your phone when synchronizing
with a computer, connecting to a
network, or restoring information
from a backup.
NOTE
If you sync multiple devices with
the same computer, each device
must have a unique name.
OK
OK
OK
To change the phone name
1. Press the
Start
Key , tap
Settings
,tap
System
,
then tap
About
.
2. Tap the
Device ID
tab.
3. Enter the Device name.
4. Tap .
NOTES
•The phone name must begin
with a letter, consist of letters
from A to Z, numbers from 0 to
9, and cannot contain spaces.
Use the underscore character to
separate words.
•If you enroll your phone to your
company’s domain, the phone
name will be changed tobe the
same as the one used to enroll
the phone.
Ringer settings
Tochange the ring type and
ringtone
1. Press the
Start
Key, tap
Settings
,then tap
Sounds &
Notifications
.
2. Tap the
Notifications
tab.
3. Tap the drop-down menu in
the Event box, then tap
phone:
incoming call
.
4. Tap the drop-down menu in
the Ring type box, then tap the
ring type you want to set.
5. Tap the drop-down menu in
the Ring tone box, then tap the
ringtone you want to use.
6. Tap .
TIPS
•You can use *.wav, *.mid, *.mp3,
*.wma, or other types of sound
files that you downloaded from
the Internet or copied from
your computer. For a complete
list of supported audio file
formats, see “Specifications” in
the Appendix.
•Touse your sound files as
ringtones, copy them first to the
/My Documents/My Ringtones
folder on your phone, and then
select the sound from the Ring
tone list of your phone.
OK
OK
JS750 143
144 JS750
Managing Your Phone
To choose how to be notified
about events or actions
1. Press the
Start
Key , tap
Settings
,then tap
Sounds &
Notifications
.
2. Tap the
Notifications
tab.
3. Tap the
Sounds
tab, choose how
you want to be notified by
selecting the appropriate check
boxes.
4. Tap the
Notifications
tab, tap
the drop-down menu in the
Event box, then tap a ring type
and ringtone for that event or
action from the lists below.
5. Tap .
TIP
Turning off sound notifications
helps conservebattery power.
9.4 Using Wireless
Manager
Wireless Manager lets you easily
turn on and off the communication
features of your phone such as the
phone, Bluetooth, Wi-Fi, and data
connection.
1. Press the
Start
Key , tap
Settings
,tap
Connections
,then tap
Wireless Manager
.
2. Tap wireless functions to turn on
or off as needed.
9.5 Using Task Manager
The Task Manager allows you to
view all currently running programs
and to stop them one by one, or all
atonce.
Toopen Task Manager
Press the Task Manager Key on
the right side of the phone. You can
also access the Task Manager
through the Start Menu. Press the
Start Key >
Settings
>
System
>
Task Manager
.
NOTE
Not all programs close completely
when you exit out of them. To
make sure that they are closed,
use the Task Manager.
OK

JS750 145
9.6 Protecting Your Phone
Protecting your phone with a
password
You can help keep your data more
secure by requiring a password
every time the phone is turned on,
or after a timeout that you set.
To set a phone password
1. Press the
Start
Key , tap
Settings
,then tap
Lock
.
2. Tap the checkbox
Promptif
phone unused for
,and then
specify the idle time beforethe
phone requires a password. If you
choose 0 Minutes, you will need
to input the password every time
you wake the phone up from
Sleep mode. For more
information, see “Switching to
Sleep mode” in Chapter 1.
3. In the Password type box, select
the type of password you would
like to use.
TIP
If your phone is configured to
connect toanetwork, use a
strong alphanumeric password for
increased security.
4. Enter the password in both the
Password and Confirm boxes.
5. Tap .
If the phone is idle for the timeout
period that you set, you will need
to enter your password to unlock
your phone. If you used a simple
PIN password, the Lock screen will
be displayed before you enter your
password.
For information, see “Using the Lock
Screen” in Chapter 1.
NOTES
•To ensure that you can always
make emergency calls, do not
begin your password with the
digits of your local emergency
number.
•If you entered a hint, the hint
will be displayed after the wrong
password is entered five times.
•If you forget your password, you
can hard reset or clear the
phone memory. For more
information about hard resetting
the phone and clearing the
memory, see “Resetting Your
Phone”.
OK
146 JS750
Managing Your Phone
Encrypting files on your
storage card
You can set your phone to encrypt
files as they are saved on the
storage card.
1. Press the
Start
Key , tap
Settings
, tap
System
,
then tap
Encryption
.
2. Tap the checkbox
Encrypt files
when placed on a storage card
.
NOTES
•Encrypted files can only be read
on the device thatencrypted
them.
•Encrypted files are opened just
likeother files, provided you are
using the device that encrypted
them. Thereis no separate step
for you to take to read these
files.
IMPORTANT
If Encrypt files when placed on
astorage card is enabled, backup
all files from the storage card
before using Clear Storage, hard
reset, or updating the operating
system. Otherwise you will no
longer be able to access the
encrypted files on the storage
card. To backup the files, use
ActiveSync or Windows Mobile
Device Center to transfer files
between your storage card and
computer.
9.7 Resetting Your Phone
Performing a soft reset
Perform a soft (normal) reset to
clear all active program memory and
shut down all active programs. This
is useful when your phone is
running slower than normal, or a
program is not performing properly.
If a soft reset is performed when
programs are running, unsaved work
is lost.
To perform a soft reset
JS750 147
Performing a hard reset
If a soft reset does not solve a
system problem, you can perform a
hard reset. After a hard reset, the
phone is restored to its default
settings—the way it was when you
first purchased it and turned it on.
You will lose the programs you
installed, data you entered, and
settings you customized on your
phone, and only Windows Mobile
®
software and other pre-installed
programs will remain.
Toperform a factory reset, press
Start
>
Settings
>
System
>
Memory
> Tap
Clear
Storage
and select Factory Default
from the Clear Type drop-down
menu. Then, tap .
WARNING!
Your phone will be setback
tofactory default settings.
Makesurethatany
additional installed programs
and/or user datahavebeen
backed up before you
perform a factory reset.
Clear