LG Electronics USA L01C PCS GSM Phone User Manual L 03B E Cover 100126
LG Electronics USA PCS GSM Phone L 03B E Cover 100126
Contents
- 1. User manual 1
- 2. User manual
User manual 1

INSTRUCTION MANUAL
’10.XX
L-01C

Part 15.21 statement
" Change or Modifications that are not expressly approved by the manufacturer could void
the user's authority to operate the equipment. “
Part 15.105 statement
This equipment has been tested and found to comply with the limits for a class B digital
device, pursuant to Part 15 of the FCC Rules.
These limits are designed to provide reasonable protection against harmful interference in
a residential installation. This equipment generates uses and can radiate radio frequency
energy and, if not installed and used in accordance with the instructions, may cause harmful
interference to radio communications. However, there is no guarantee that interference will
not occur in a particular installation. If this equipment does cause harmful interference or
television reception, which can be determined by turning the equipment off and on, the user
is encouraged to try to correct the interference by one or more of the following measures:
- Reorient or relocate the receiving antenna.
- Increase the separation between the equipment and receiver.
- Connect the equipment into an outlet on a circuit different from that to
which the receiver is connected.
- Consult the dealer or an experienced radio/TV technician for help.
This device is not intended for sale in the USA.

Part 15 Class B Compliance
This device and its accessories comply with part15 of FCC rules.
Operation is subject to the following two conditions:
(1) This device & its accessories may not cause harmful interference.
(2) This device & its accessories must accept any interference received,
including interference that may cause undesired operation.
Body-worn Operation
This device has been tested for typical body-worn operations
with the distance of 0.79inches (2.0cm) from the user’s body.
To comply with FCC RF exposure requirements, a minimum separation distance
of 0.79inches(2.0cm) must be maintained from the user's body.
Additionally, Belt clips, holsters & other body-worn accessories may not contain
metallic components.
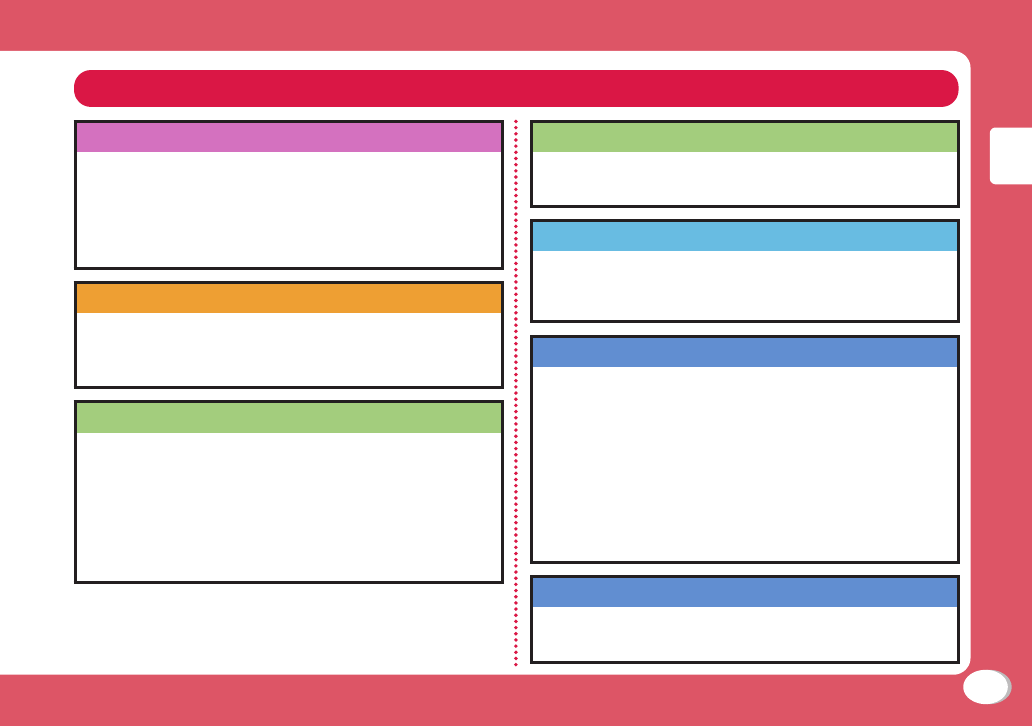
Introduction
P2
FOMA Terminal What You Can Do with L-01C Part Names and Functions Precautions
Handling Precautions
Basic Operation
P18
Before Using Screen Explanation Character Entry Sound/Screen Setting
Lock/Security
Connect
P36 Call Telephone Mail Phonebook
Search
P50 i-mode/Full Browser i-Channel
Enjoy
P54 Camera Music i-αppli i-motion
More Convenient
P62 Osaifu-Keitai Convenient Tools Data Management
Others
P70 Support Appendix Index
Contents
1

2
Introduction
•
The FOMA terminal uses radio waves, therefore, it may
not function in locations where radio waves cannot
reach, such as in tunnels, underground, or in buildings;
outside the building where radio waves are weak or out
of FOMA service area. Even when you are in an upper
fl oor of a tall building and nothing blocks your view
outside, your FOMA terminal may not be able to receive
or transmit signals. Also, even when radio waves are
strong with three antenna bars displayed, and you are
not moving, communication may still be interrupted.
•
Be considerate of other people around you in public or
where it is especially crowded or quiet.
•
The FOMA terminal uses radio waves to communicate,
therefore, there is a possibility that calls may be
intercepted by third parties. The W-CDMA and GSM/
GPRS systems automatically encode signals for all
calls so even if third parties should intercept calls with
the receiver, they will hear only noise.
•
The FOMA terminal sends and receives voice
communication as encoded digital data. When you are
operating the FOMA terminal while moving, sometimes
you may encounter weaker radio waves and the
transmitted digital data may not be correctly decoded
resulting in sound distortions.
•
It is recommended that you save important data on a
microSD card. If you use a PC, use DOCOMO keitai
datalink to send and save data such as Phonebook
entries, mail messages, Schedule events, etc. to the
PC.
•
When you use SSL for a secure connection, you
agree that you are responsible for any actions you
take. DOCOMO and the certifi ers listed below do
not guarantee the safety of SSL for any activities of
customers while using SSL, and are not liable for any
damages incurred through using SSL.
Certifi ers: VeriSign Japan K.K.,
Cybertrust Japan Co., Ltd.,
GlobalSign K.K.,
RSA Security Japan Ltd.,
SECOM Trust Systems Co., Ltd.
•
The FOMA terminal supports FOMA Plus-Area and
FOMA HIGH-SPEED Area.
•
The FOMA terminal can be used only via the FOMA
network provided by DOCOMO and DOCOMO's
roaming area.
•
It is recommended that you make a backup of user-
defi ned data (Phonebook entries, Schedule events,
text memos, Record messages, voice memos, or
moving picture memos) saved in the FOMA terminal
by keeping the separate record or note of those data,
etc. and storing them at a separate location. DOCOMO
is not responsible for lost data due to failure, repair, or
replacement of the model of your FOMA terminal.
FOMA Terminal
3
Introduction
Guide (Japanese only)
→
P21
Guide pre-installed in the FOMA terminal allows you
to look for operating instructions of a desired
function. When you cannot refer to this manual, you
can search functions with Guide quickly.
Stand-by display X 7(for over 1 second)
International roaming
→
P41
Your FOMA terminal, phone number, and mail
address that are used in Japan are available
overseas (supporting 3G and GSM areas).
i-Channel (Japanese only)
→
P53
You can receive graphic information such as news or
weather forecasts.
Also, you can obtain rich content created with Flash
by selecting your favorite channels from the Channel
list.
*
This service is a fee-based service that requires
subscription.
Full browser
→
P51
You can browse web pages incompatible with i-mode
on the FOMA terminal in the same way as on a PC.
Camera functions
→
P54
You can capture still images (with auto focus) and
moving pictures using the camera with approx. 3.1 Mega
effective pixels (approx. 3.1 Mega recorded pixels).
Osaifu-Keitai
→
P62
You can download i-αppli that supports Osaifu-
Keitai to deposit electronic money to the IC card
on the FOMA terminal, check your balance or view
usage history using communication. DOCOMO
credit service, "DCMX" application, is pre-installed.
"iC transfer service" is also available, which allows
transfer of data on the IC card when you replace
your FOMA terminal.
* This FOMA terminal does not support
"iC communication".
Bar code reader
→
P63
By scanning a bar code or QR code with the camera,
you can access to the corresponding site or send a mail.
What You Can Do with L-01C

4
Introduction
Part Names and Functions
•
The microSD card insertion position is underneath the battery pack inside the back cover.
→
P65
●Front ●Rear ●Left side ●Right side
5
Introduction
a Infrared port
b Earpiece
c Display
d MMenu key
Display the main menu.
e Navigation Left key
Display the received call list screen.
f gMail key
Display the mail menu.
g Navigation Down key
Display the Phonebook list screen.
h AStart key
Make/receive a call.
i Dial keys
Enter a phone number or character.
j *
Public mode (Drive mode)
key
k Mouthpiece
l Charging light/Illumination
m CSet key
n Navigation Up key
Display a schedule.
o
Ii-mode/i-αppli key
Display the i-mode menu.
p Navigation Right key
Display the redial list screen.
q GCamera key
Display the still image shooting
screen.
r PPower/Exit key
End a call or exit a function.
s QClear/i-Channel key
Display the channel list screen.
t #Manner mode key
u Camera
v mark
w Back cover
Do not remove the sticker on the
back side of the back cover. If
removing it, the IC card contents
may not be read or written.
x Photo light
y Speaker
z FOMA antenna
The FOMA antenna is
inside the FOMA terminal.
To communicate in better
condition, avoid covering the
antenna part with your hands.
A Strap hole
B Charging terminals
C External connector terminal
D lLock key
Press for over 1 second to set/
cancel the key lock.
Using earphones
Connect optional earphones compatible with
the external connector terminal.
If you use the incompatible earphones,
connect the optional conversion plug
adapter to the earphones.
Earphone terminal
(Flat type)
Flat plug for the
Flat-plug Earphone/
Microphone with Switch
Plug
Ex.: Connecting the Flat-plug Earphone/
Microphone with Switch (optional)
18
Basic Operation
Before Using
Attaching UIM (FOMA Card)/Battery Pack
The UIM is an IC card that contains subscription
information such as your phone number.
•
Turn the FOMA terminal power off and hold it with both
hands.
1Press and slide
the back cover in
the direction a,
and hold it up in
the direction b
and remove it
Back cover
2With the gold IC
side down, insert
the UIM under
the guide in the
direction of the
arrow
Notch
Notch
IC (Gold)
Guide
3
With the "
B
" side
of the battery
pack up, align the
metal contacts of
the battery pack
and the FOMA
terminal, attach
Tabs
the battery pack in the direction a, and
then push it down in the direction b
•
When attaching, align the tabs and depressions of
the FOMA terminal and the battery pack.
4Align the back
cover to the ditch
of the FOMA
terminal with
approx. 3mm gap
kept between the
back cover and (Approx. 3mm)
FOMA terminal. Then, slide it in the
direction a and insert it until it clicks
• If trying to attach the battery pack forcibly while UIM
is not inserted properly, UIM may be damaged.
• If trying to attach the battery pack forcibly, the
contacts of the FOMA terminal may be damaged.
Information
19
Basic Operation
Charging
Charging with desktop holder
While holding the desktop holder (optional), insert
the AC adapter connector, with the inscribed
arrow side up, straight into the external connector
terminal of the desktop holder.
Connect the AC adapter plug to an electric outlet.
While holding the desktop holder, align the charging
terminals of the FOMA terminal with the holder (a),
and fi t it in the direction of the allow b.
•
The charging light turns on and charging starts. When
charging completes, the charging light turns off.
After charging completes, pull the FOMA terminal
out while holding the desktop holder.
•
Be careful not to pinch the strap, etc.
•
Pull out the AC adapter connector straight while pressing
the release buttons on both sides of the connector.
Release buttons
Charging light
Inscription
Power
plug
100V AC
outlet
Desktop
holder
Connector
Charging with AC adapter
Open the external connector terminal cover of
the FOMA terminal (a) and fl ip it over (b). With
the inscribed arrow side up, insert the AC adapter
connector straight into the external connector
terminal of the FOMA terminal.
Connect the AC adapter plug to an electric outlet.
•
The charging light turns on and charging starts. When
charging completes, the charging light turns off.
After charging completes, pull the AC adapter connector
straight out while pressing the release buttons.
Charging light
Connector
Inscription
Release buttons
External
connector
terminal
cover
•
Make sure to insert/pull out the AC adapter connector
straight with the correct side up. Forcibly trying to pull
it out may cause damage.
Information
20
Basic Operation
Turning Power ON
Turning power ON
1With the power turned OFF, P (for over
2 seconds)
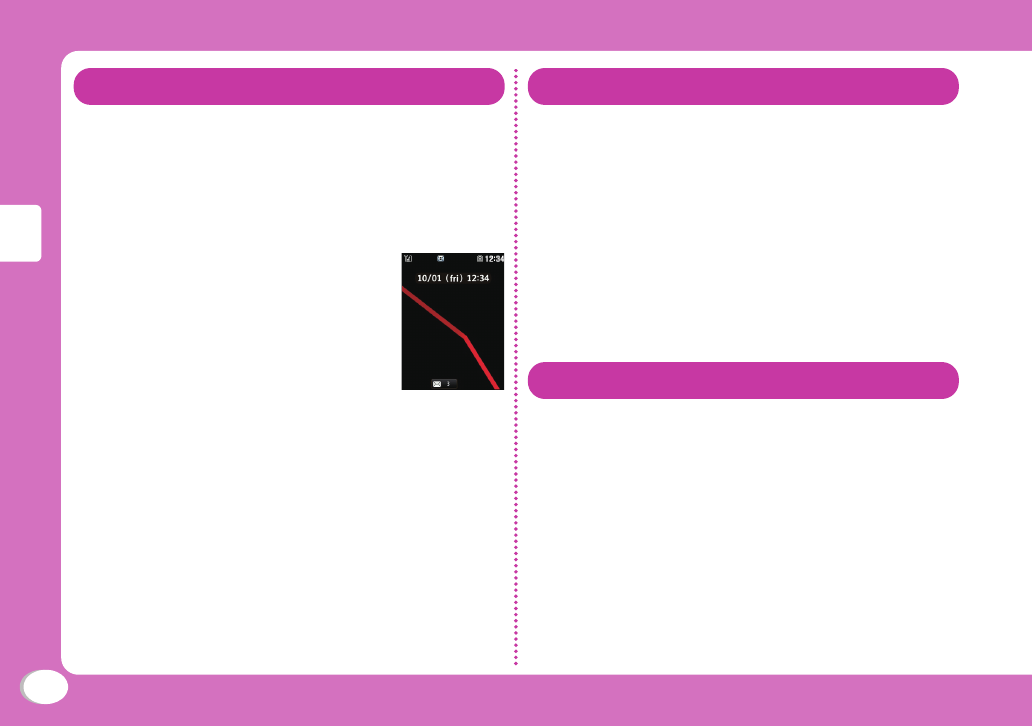
After the Wake-up screen is displayed, the Stand-by
display appears.
Turning power OFF
1With the power turned ON, P (for over
2 seconds) in Stand-by
The Exit screen appears and the power is turned OFF.
Confi guring Default Setting
After turning the power ON for the fi rst time, set
"Set Date&Time", "Change security code", and
"KeyPad Sound(ON/OFF)" as default settings.
1Turn the power ON X "Yes"
2Set the date and time
3Set the Terminal security code
4
Set the keypad tone (select "ON" or "OFF")
Checking Your Own Phone Number
View your phone number (own number) saved on
the UIM.
•
For procedures on checking/changing your mail
address, see "Mobile Phone User's Guide [i-mode]
FOMA version".
1Stand-by display X M X "Own Number"
21
Basic Operation
Editing your own number
1Stand-by display X M X "Own Number"
X C[Detail] X Enter the Terminal security
code
2M[Menu] X "Edit"
3Edit each item X I[Done]
Searching for Key Operations
Search and refer to the function you want to
know or use. Depending on the function, you can
execute the searched function after searching.
•
This function is provided in Japanese only.
1
Stand-by display X 7(for over 1 second)
2"Menu search"/"Useful guide"
When selecting "Menu search", enter menu item
names or keywords to search for your desired
function. Press I[Chara] to switch input modes.
When selecting "Useful guide", select and check the
target function from the list.
•
If C[Start] appears on the search result screen,
press C[Start] to execute the function.
Information
Preventing Key Misoperations
When you put the FOMA terminal in your bag, it
is recommended to set the key lock in order to
prevent key misoperation.
Setting key lock
1l(for over 1 second)
Canceling key lock
1While the display turns on, l(for over 1
second)
•
When the display turns off, press l to turn it on,
and then perform the operation.
•
When the key lock is set, appears on the screen.
•
When a call arrives while setting the key lock, an
incoming screen, etc. appears on the display. Some
operations are temporarily available depending on
the key.
Information
22
Basic Operation
Screen Explanation
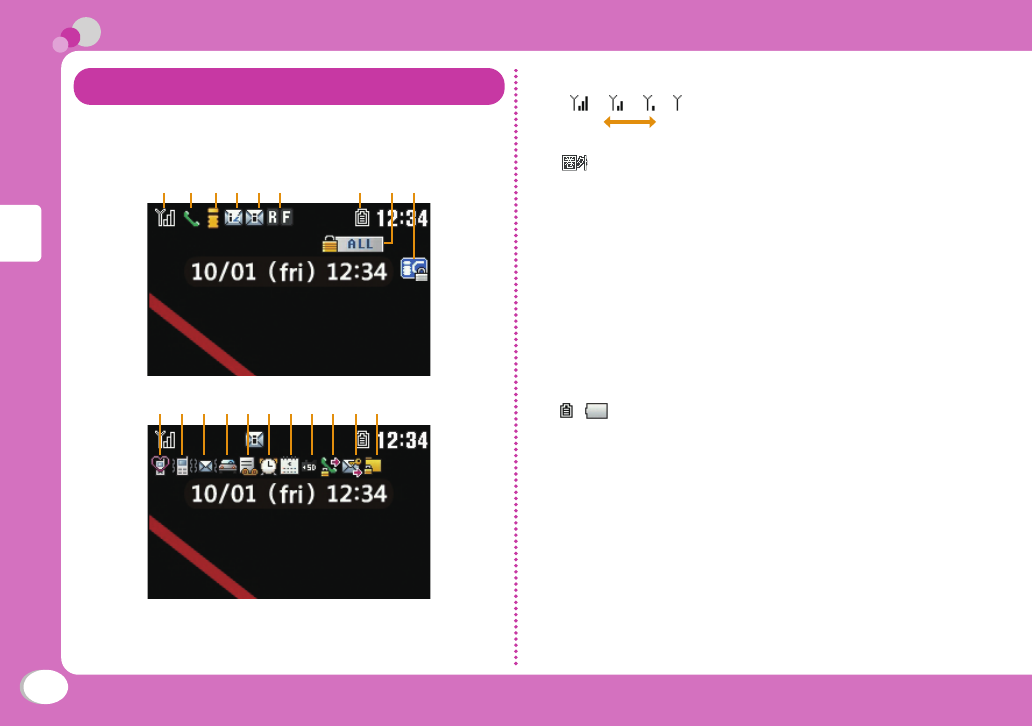
Viewing Display/Icon
The meanings of icons displayed at the top of the
screen are as follows.
abcdef g hi
jklmn ropqst
aSignal strength
Strong Weak
Out of service area or no signal reception
bVoice call in progress
ci-mode connection in progress while blinking
di-mode mail stored at the i-mode center
eUnread i-mode mail
fUnread MessageR
Unread MessageF
gBattery level
~
hLock all set
iIC card lock set
jManner mode set
kA ring tone for voice/videophone call inactive
and vibration active
lA ring tone for mail/MessageR/F inactive and
vibration active
mPublic mode (Drive mode) set
23
Basic Operation
nRecord message set
oAlarm set
pToday's schedule or To do set
qmicroSD card inserted
rOutgoing voice/videophone calls restricted
sOutgoing mails restricted
tData access lock set
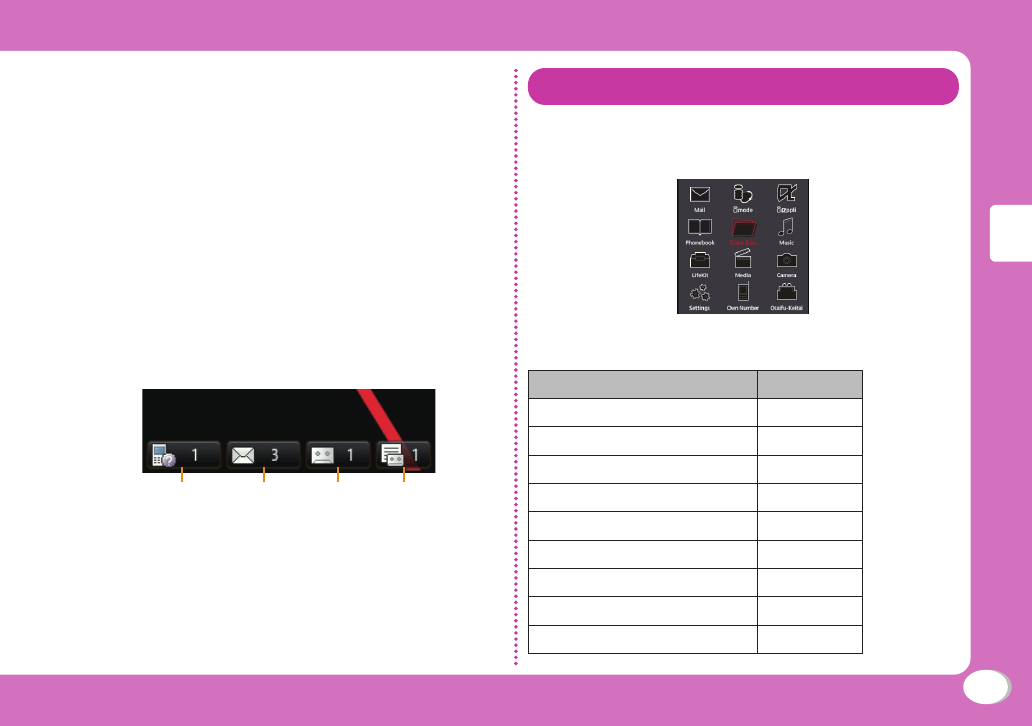
Notifi cation icon
A number displayed on each icon indicates the
number of entries.
uvwx
uMissed call
vUnread mail
wVoice mail message
xRecord message
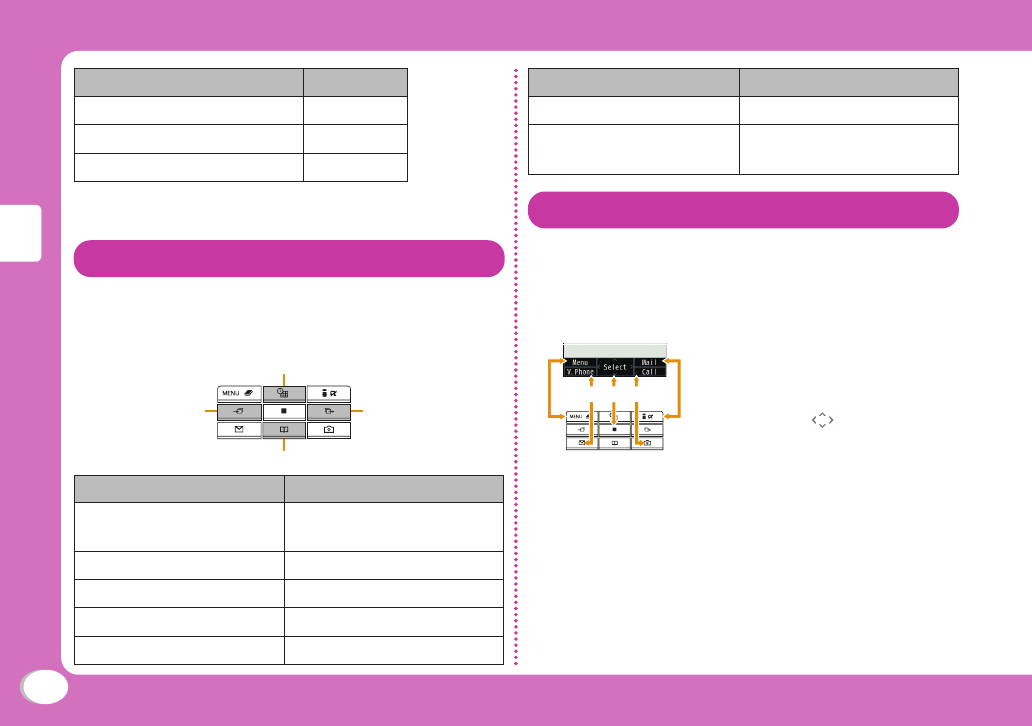
Viewing Main Menu
On the FOMA terminal, execute functions, set
items, or save entries or data from menus such as
main menu or sub menu.
● Function displayed on the main menu and
corresponding key operation
Function Operation
Mail 1
i-mode 2
i-αppli 3
Phonebook 4
Data Box 5
Music (MUSIC) 6
LifeKit 7
Media 8
Camera 9
24
Basic Operation
Function Operation
Own Number 0
Settings *
Osaifu-Keitai #
*
Depending on the main menu design, the description
of menu name may differ.
Navigation Key Operation
In this manual, operations such as moving the
cursor up, down, to left or to right, or scrolling on
the screen are described as below.
Navigation Up key
Navigation Down key
Navigation Right keyNavigation Left key
Description Operation
Navigation key Press Navigation Up,
Down, Left, or Right key.
Navigation Up key Press Navigation Up key.
Navigation Left key Press Navigation Left key.
Navigation Right key
Press Navigation Right key.
Navigation Down key
Press Navigation Down key.
Description Operation
Navigation Up/Down key
Navigation Up or Down key.
Navigation Left/Right key Press Navigation Left or
Right key.
Soft Key Operation
Available operations on the currently opened
screen are displayed as Soft keys at the bottom of
a screen.
ea bcd
a Operation to be performed with
M appears.
b Operation to be performed with
g appears.
c Operation to be performed with
C appears.
• The mark ( ) also appears to
indicate the possible direction for
scrolling or selecting an item.
d Operation to be performed with
G appears.
e Operation to be performed with
I appears.
25
Basic Operation
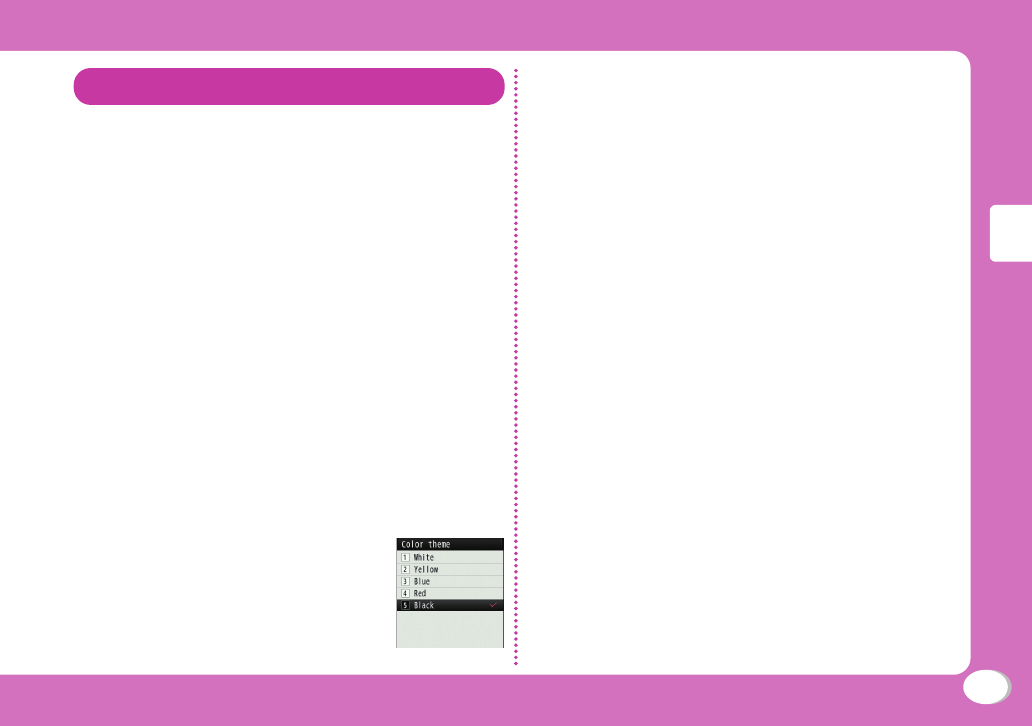
Menu Operation
This section explains operations for accessing
the main menu from the Stand-by display and
displaying the setting screen for "Color theme" in
the following two ways.
When using Navigation key
1In Stand-by, press M
to display the Main
menu
2
Use Navigation key to move the cursor to
"Settings" and press C[Select]
to display
the Settings screen
3Use
Navigation Up/Down key
to move the
cursor to "Display" and press C[Select]
to display the Display screen
4
Use Navigation Up/Down key to move the
cursor to "Color theme" and press
C[Select]
When using Dial keys
1In Stand-by, press M
to display the Main
menu
2Press * corresponding to "Settings" to
display the Settings screen
3Press 2 corresponding to "Display" to
display the Display screen
4Press 3 corresponding to "Color
theme"
26
Basic Operation
Character Entry
Entering Characters
Character entry is required in various situations
such as when saving entries to Phonebook or
creating mail. Learn how to enter characters
beforehand to make use of the FOMA terminal.
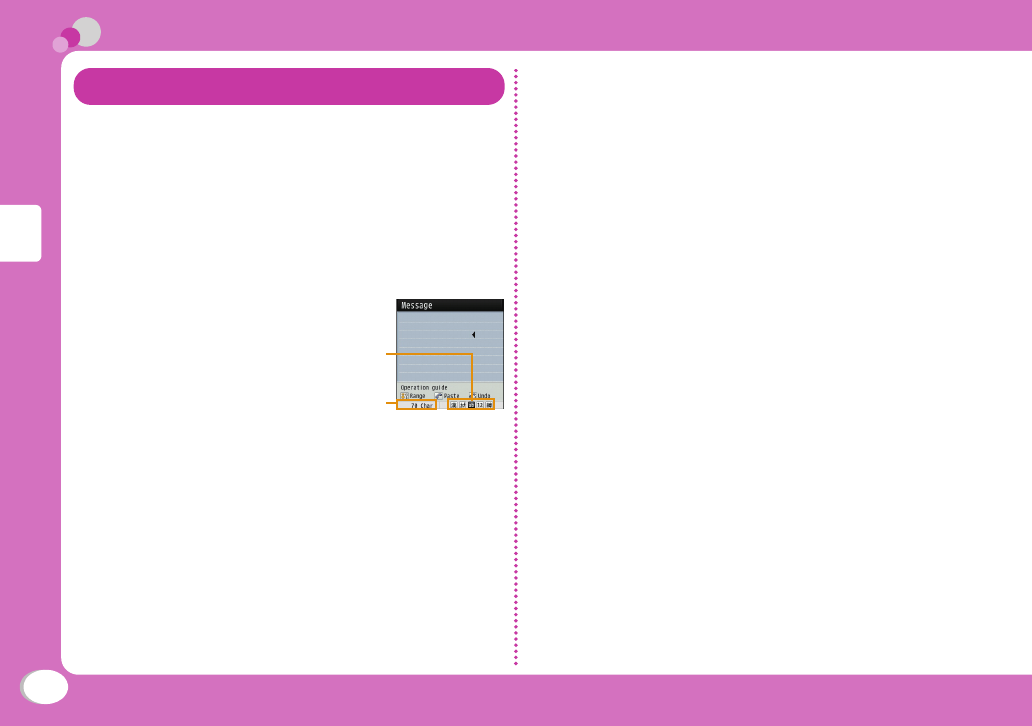
Character entry screen
On the Character entry screen, the current input
mode and operation guide are displayed.
Input mode
Available number of characters
or bytes to be input Character
entry screen
Switching input mode
Switch the input mode according to the character
type to be input. In some input modes, switching
between full-pitch and half-pitch characters is
available.
1Character entry screen XI[Mode]
2I[Change]
•
Each time you press I[Change], input modes
are switched.
When you press g[To full/To
half], full-pitch and half-pitch modes are switched
(except for Hiragana and Kanji input mode and
Korean input mode).
漢
カナ
(カ)
: Hiragana and Kanji input mode
: Katakana input mode
ab/AB*1 (a/A*1)
: Alphabetical input mode
12
(1) : Numeric input mode
韓*2: Korean input mode
*1 Press M[Upper/Lower] to switch between
upper and lower cases.
*2 Appears when SMS input character is set to
"JP/KR(70Chara)".
3C[Select]
The input mode is set.
27
Basic Operation
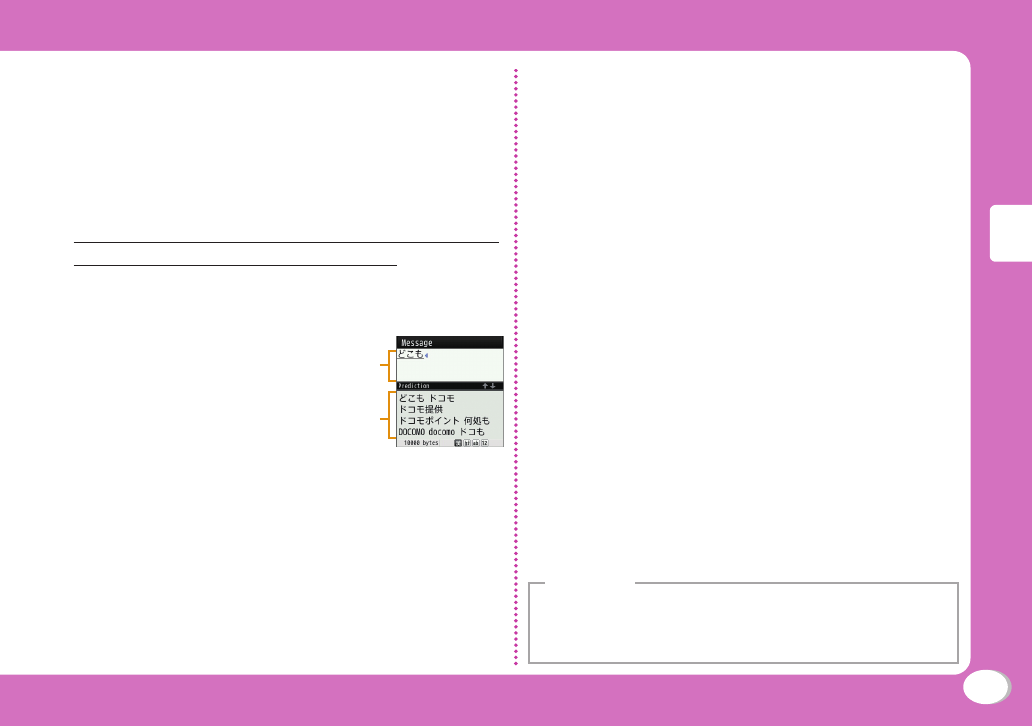
Character entry method
In Hiragana and Kanji input mode, enter
characters using the following two prediction
functions. Prediction input function: predicts
conversion options. Next phrase prediction
function: predicts the next phrase from the
characters being entered.
Example: Entering characters "ドコモ太郎 (DOCOMO
Taro)" in Hiragana and Kanji input mode
1On the Character entry screen, enter "どこ
も (DOCOMO)"
"
ど
": 4 fi ve times X
* once
"
こ
": 2 fi ve times
"
も
": 7 fi ve times
Character
input fi eld
Prediction
option fi eld
Conversion (Prediction) options predicted by the
Prediction input function appear.
2Use
Navigation Up/Down key
to move the
cursor to the Prediction option fi eld
3Move the cursor to "ドコモ (DOCOMO)" X
C[Set]
4Enter "たろう (Taro)"
"た": 4 once
"ろ": 9 fi ve times
"う": 1 three times
5Use
Navigation Up/Down key
to move the
cursor to the Prediction option fi eld
6Move the cursor to "太郎 (Taro)" X
C[Set]
Entering pictograms/symbols/emoticons
Pictograms, symbols, and emoticons pre-installed
in the FOMA terminal can be used when entering
characters.
1Character entry screen X G[Pict/Sym]
2Use I[Change] to select an input mode
3Use
M
to switch types
4Select a pictogram/symbol/emoticon to
enter
• Depending on the entry screen, pictograms, symbols, or
emoticons may not be entered, or input mode/type may
not be switched.
Information

28
Basic Operation
Sound/Screen Setting
Changing Ring Tone
1Stand-by display X M X "Settings" X
"Sounds & Vibration" X "Select ring tone"
2Select an item and select a fi le
3I[Done]
Adjusting Volume
1Stand-by display X M X "Settings" X
"Sounds & Vibration" X "Volume"
2Select an item and adjust volume
3I[Done]
Setting Vibrator
1Stand-by display X M X "Settings" X
"Sounds & Vibration" X "Vibrator"
2Move the cursor to the item to set X
C[ON/OFF]
3I[Done]
Using Manner Mode
1
Stand-by display X #(for over 1 second)
When the Manner mode is set, appears at the top
of the screen.
• Even while the manner mode is set, the camera shutter
tone, shooting start tone and end tone sound.
b To cancel the Manner mode
In Stand-by, press #(for over 1 second).
Setting Keypad Sound OFF
1Stand-by display X M X "Settings" X
"Sounds & Vibration" X "Volume" X
Move the cursor to "Keypad tone"
2Use
Navigation Left key
to set (Mute)
3I[Done]
29
Basic Operation
Changing Screen Settings
Changing Stand-by display
1Stand-by display X M X "Settings" X
"Display" X "Stand-by display"
2Set each item
3I[Done]
Changing display brightness
Set the backlight duration and brightness of the
display.
1Stand-by display X M X "Settings" X
"Display" X "Backlight"
2Set each item
3
I[Done]
Changing main menu design
Set the menu design displayed when M is
pressed in Stand-by.
1
Stand-by display
X
M
X
M[Menu]
X
"Menu priority"
X
"Custom menu"/"Basic
menu"
X
"Yes"
• To switch the menu temporarily, press G[Basic]/
g[Custom] while the menu is displayed.
Information
Setting Kisekae Tool
Set ring tones, stand-by display or menu icons,
etc. at a time.
1Stand-by display X M X "Data Box" X
"Kisekae Tool"
2Move the cursor to "i-mode"/"Preinstalled"
X C[Open]
3Move the cursor to a Kisekae Tool X
I[Set all] X "Yes"