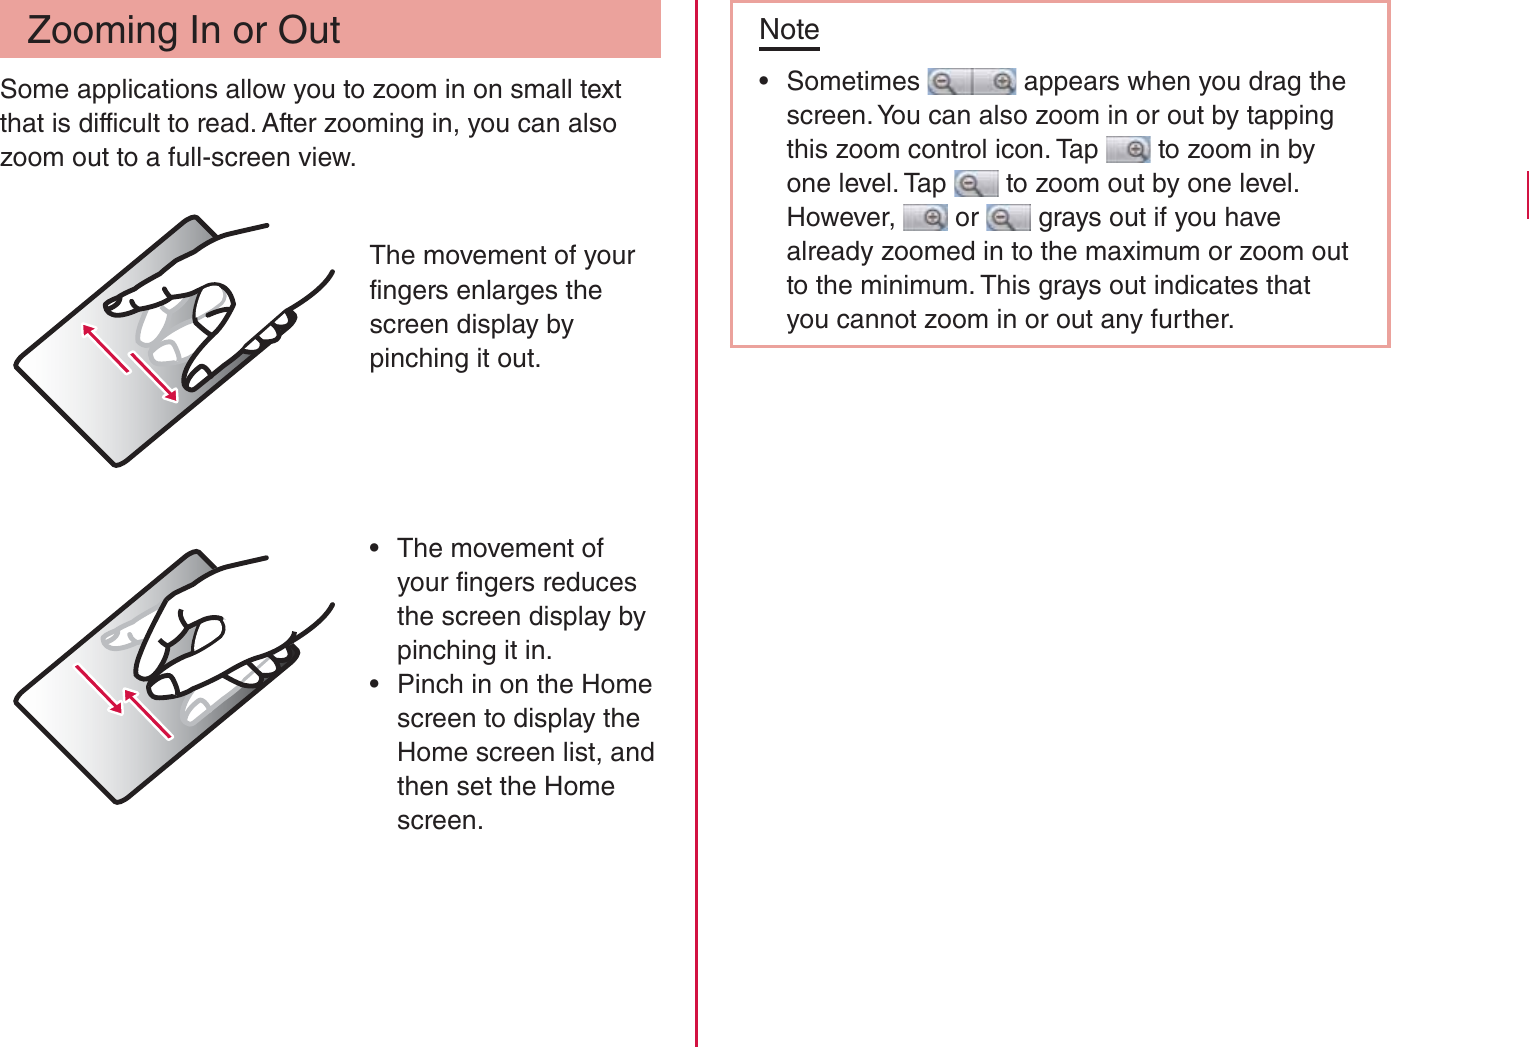
LG Electronics USA L06D PCS GSM Phone with WLAN, Bluetooth and RFID User Manual
LG Electronics MobileComm USA, Inc. PCS GSM Phone with WLAN, Bluetooth and RFID
UserManual.wiki
>
LG Electronics USA
>
L06D User Manual
Users Manual
Navigation menu
Upload a User Manual
Namespaces
Wiki Guide
HTML
PDF
Info
Views
User Manual
Discussion / Help
Navigation
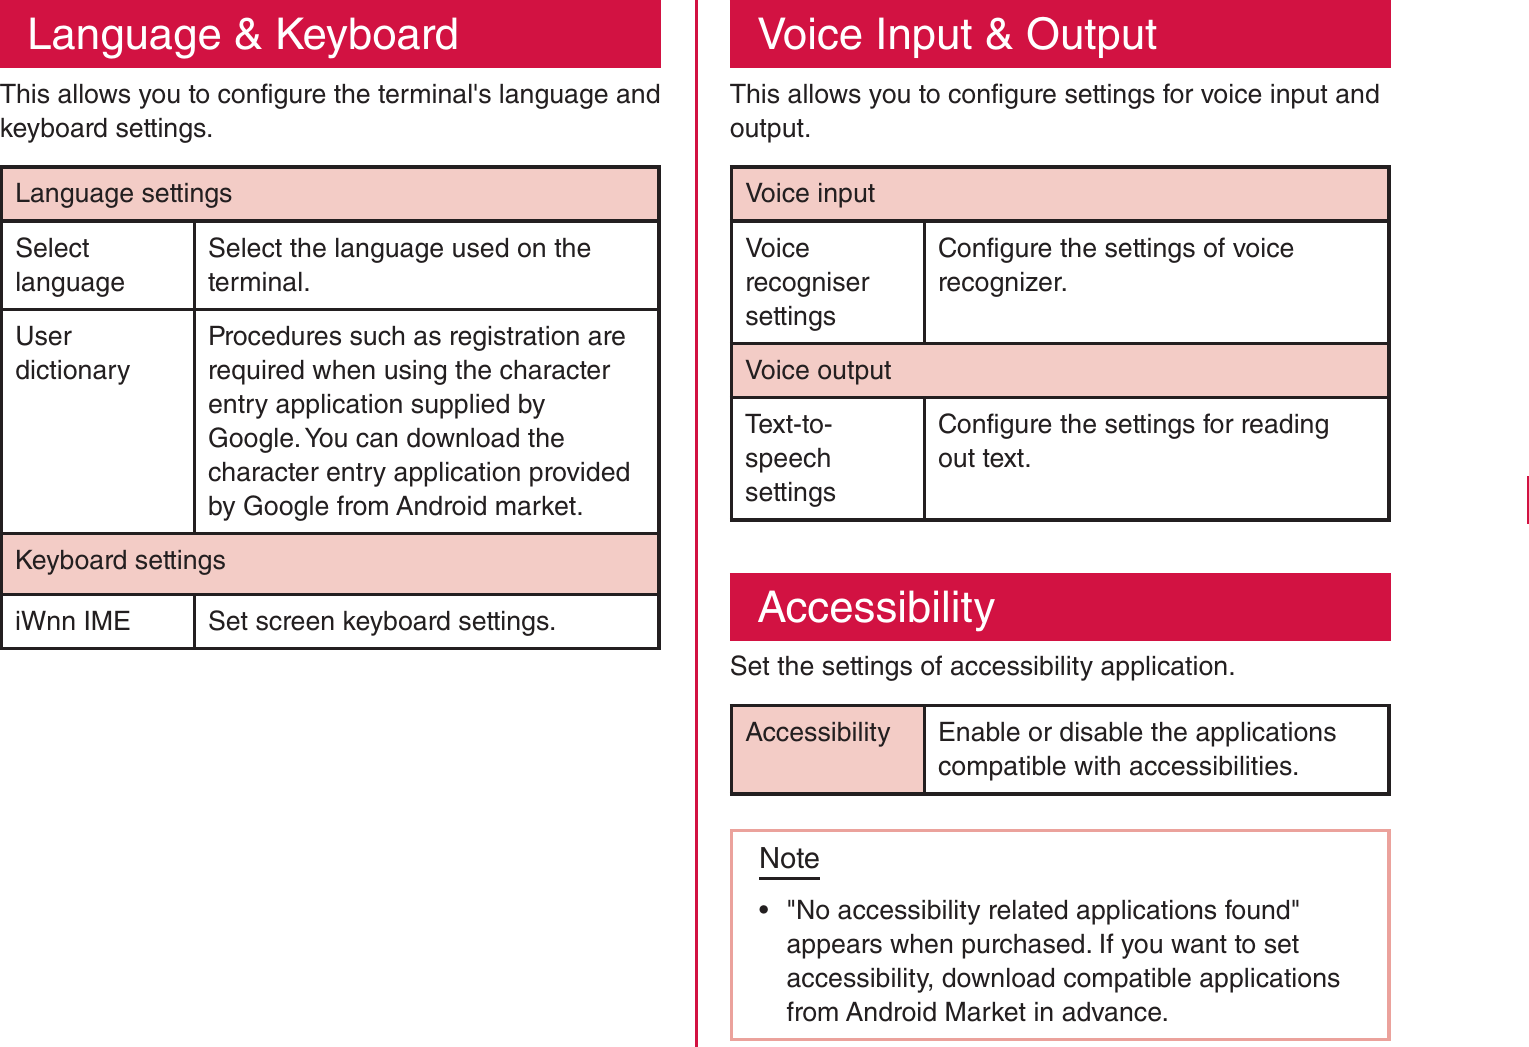
![2CTVUVCVGOGPV&KDQJHRU0RGLILFDWLRQVWKDWDUHQRWH[SUHVVO\DSSURYHGE\WKHPDQXIDFWXUHUFRXOGYRLGWKHXVHUVDXWKRULW\WRRSHUDWHWKHHTXLSPHQW2CTVUVCVGOGPV7KLVHTXLSPHQWKDVEHHQWHVWHGDQGIRXQGWRFRPSO\ZLWKWKHOLPLWVIRUDFODVV%GLJLWDOGHYLFHSXUVXDQWWR3DUWRIWKH)&&5XOHV7KHVHOLPLWVDUHGHVLJQHGWRSURYLGHUHDVRQDEOHSURWHFWLRQDJDLQVWKDUPIXOLQWHUIHUHQFHLQDUHVLGHQWLDOLQVWDOODWLRQ7KLVHTXLSPHQWJHQHUDWHVXVHVDQGFDQUDGLDWHUDGLRIUHTXHQF\HQHUJ\DQGLIQRWLQVWDOOHGDQGXVHGLQDFFRUGDQFHZLWKWKHLQVWUXFWLRQVPD\FDXVHKDUPIXOLQWHUIHUHQFHWRUDGLRFRPPXQLFDWLRQV+RZHYHUWKHUHLVQRJXDUDQWHHWKDWLQWHUIHUHQFHZLOOQRWRFFXULQDSDUWLFXODULQVWDOODWLRQ,IWKLVHTXLSPHQWGRHVFDXVHKDUPIXOLQWHUIHUHQFHRUWHOHYLVLRQUHFHSWLRQZKLFKFDQEHGHWHUPLQHGE\WXUQLQJWKHHTXLSPHQWRIIDQGRQWKHXVHULVHQFRXUDJHGWRWU\WRFRUUHFWWKHLQWHUIHUHQFHE\RQHRUPRUHRIWKHIROORZLQJPHDVXUHV5HRULHQWRUUHORFDWHWKHUHFHLYLQJDQWHQQD,QFUHDVHWKHVHSDUDWLRQEHWZHHQWKHHTXLSPHQWDQGUHFHLYHU&RQQHFWWKHHTXLSPHQWLQWRDQRXWOHWRQDFLUFXLWGLIIHUHQWIURPWKDWWRZKLFKWKHUHFHLYHULVFRQQHFWHG&RQVXOWWKHGHDOHURUDQH[SHULHQFHGUDGLR79WHFKQLFLDQIRUKHOS(%%2CTV%NCUU$%QORNKCPEG7KLVGHYLFHDQGLWVDFFHVVRULHVFRPSO\ZLWKSDUWRI)&&UXOHVDQG,&(6&ODVV%GLJLWDODSSDUDWXVUHTXLUHPHQWVIRU,QGXVWU\&DQDGD2SHUDWLRQLVVXEMHFWWRWKHIROORZLQJWZRFRQGLWLRQV7KLVGHYLFHDQGLWVDFFHVVRULHVPD\QRWFDXVHKDUPIXOLQWHUIHUHQFHDQGWKLVGHYLFHDQGLWVDFFHVVRULHVPXVWDFFHSWDQ\LQWHUIHUHQFHUHFHLYHGLQFOXGLQJLQWHUIHUHQFHWKDWPD\FDXVHXQGHVLUHGRSHUDWLRQ$QF[YQTP1RGTCVKQP7KLVGHYLFHKDVEHHQWHVWHGIRUERG\ZRUQRSHUDWLRQVZLWKWKHGLVWDQFHRIFPLQFKHVEHWZHHQWKHXVHUĜVERG\DQGWKHSKRQH7RFRPSO\ZLWK)&&5)H[SRVXUHUHTXLUHPHQWVDPLQLPXPVHSDUDWLRQGLVWDQFHRIFPLQFKHVPXVWEHPDLQWDLQHGIURPWKHXVHUVERG\7KLUGSDUW\EHOWFOLSVKROVWHUVDQGVLPLODUDFFHVVRULHVFRQWDLQLQJPHWDOOLFFRPSRQHQWVPD\QRWEHXVHG%RG\ZRUQDFFHVVRULHVWKDWFDQQRWPDLQWDLQFPLQFKHVVHSDUDWLRQGLVWDQFHEHWZHHQWKHXVHUVERG\DQGWKHSKRQHDQGKDYHQRWEHHQWHVWHGIRUW\SLFDOERG\ZRUQRSHUDWLRQVPD\QRWFRPSO\ZLWK)&&5)H[SRVXUHOLPLWVDQGVKRXOGEHDYRLGHG9+(+%CWVKQP7KLVGHYLFHLVFDSDEOHRIRSHUDWLQJLQDQPRGH)RUDQGHYLFHVRSHUDWLQJLQWKHIUHTXHQF\UDQJHRI *+]WKH\DUHUHVWULFWHGIRULQGRRURSHUDWLRQVWRUHGXFHDQ\SRWHQWLDOKDUPIXOLQWHUIHUHQFHIRU0RELOH6DWHOOLWH6HUYLFHV066LQWKH86:,),$FFHVV3RLQWVWKDWDUHFDSDEOHRIDOORZLQJ\RXUGHYLFHWRRSHUDWHLQDQPRGH *+]EDQGDUHRSWLPL]HGIRULQGRRUXVHRQO\,I\RXU:,),QHWZRUNLVFDSDEOHRIRSHUDWLQJLQWKLVPRGHSOHDVHUHVWULFW\RXU:,),XVHLQGRRUVWRQRWYLRODWHIHGHUDOUHJXODWLRQVWRSURWHFW0RELOH6DWHOOLWH6HUYLFHV7KLV GHYLFHLVQRWLQWHQGHGIRUVDOHLQWKH86$](https://usermanual.wiki/LG-Electronics-USA/L06D/User-Guide-1729887-Page-2.png)


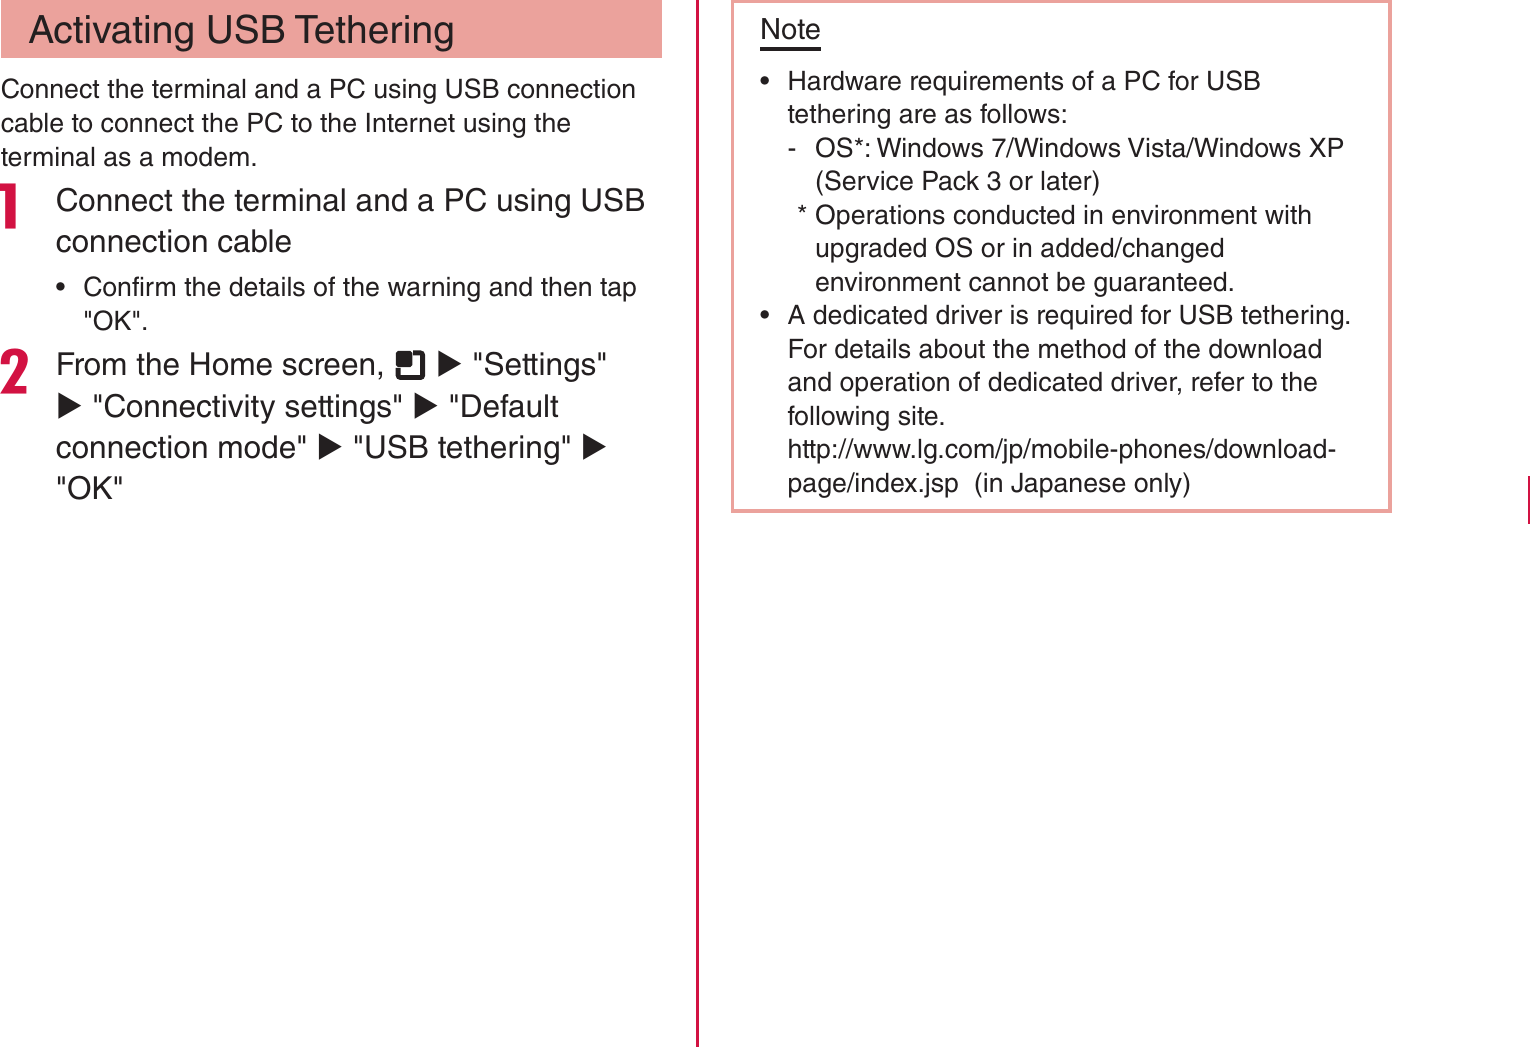
![Setting the Call Forwarding guidance on/off From the Home screen, "Phone"X "Dial" rThe "Dial" tab appears."1" X "4" X "2" X "9" X rVoice guidance is played. Follow the guidance to configure the settings. For details, refer to "Mobile Phone User's Guide [Network Services]".Caller ID Notification ServiceWhen making a call, your phone number can be shown in the display of the other party's phone.Note rThe Caller ID Notification Service is not available when (out of service area) is displayed. rThe service is only available when the other party's phone can display the caller ID. rIf an announcement requesting caller ID is heard when making a call, activate Caller ID Notification or add the "186" prefix to the phone number and call again. From the Home screen, X "Settings" X "Call settings" X "Network service" X "Caller ID notification" rThe "Caller ID notification" screen appears.Settings Set whether the other party is notified of your caller ID. Tap "Notify" to enable notification, and "Not notify" to disable notification.Settings confirmationThe current Caller ID Notification settings are displayed.98Calling / Network Services](https://usermanual.wiki/LG-Electronics-USA/L06D/User-Guide-1729887-Page-59.png)

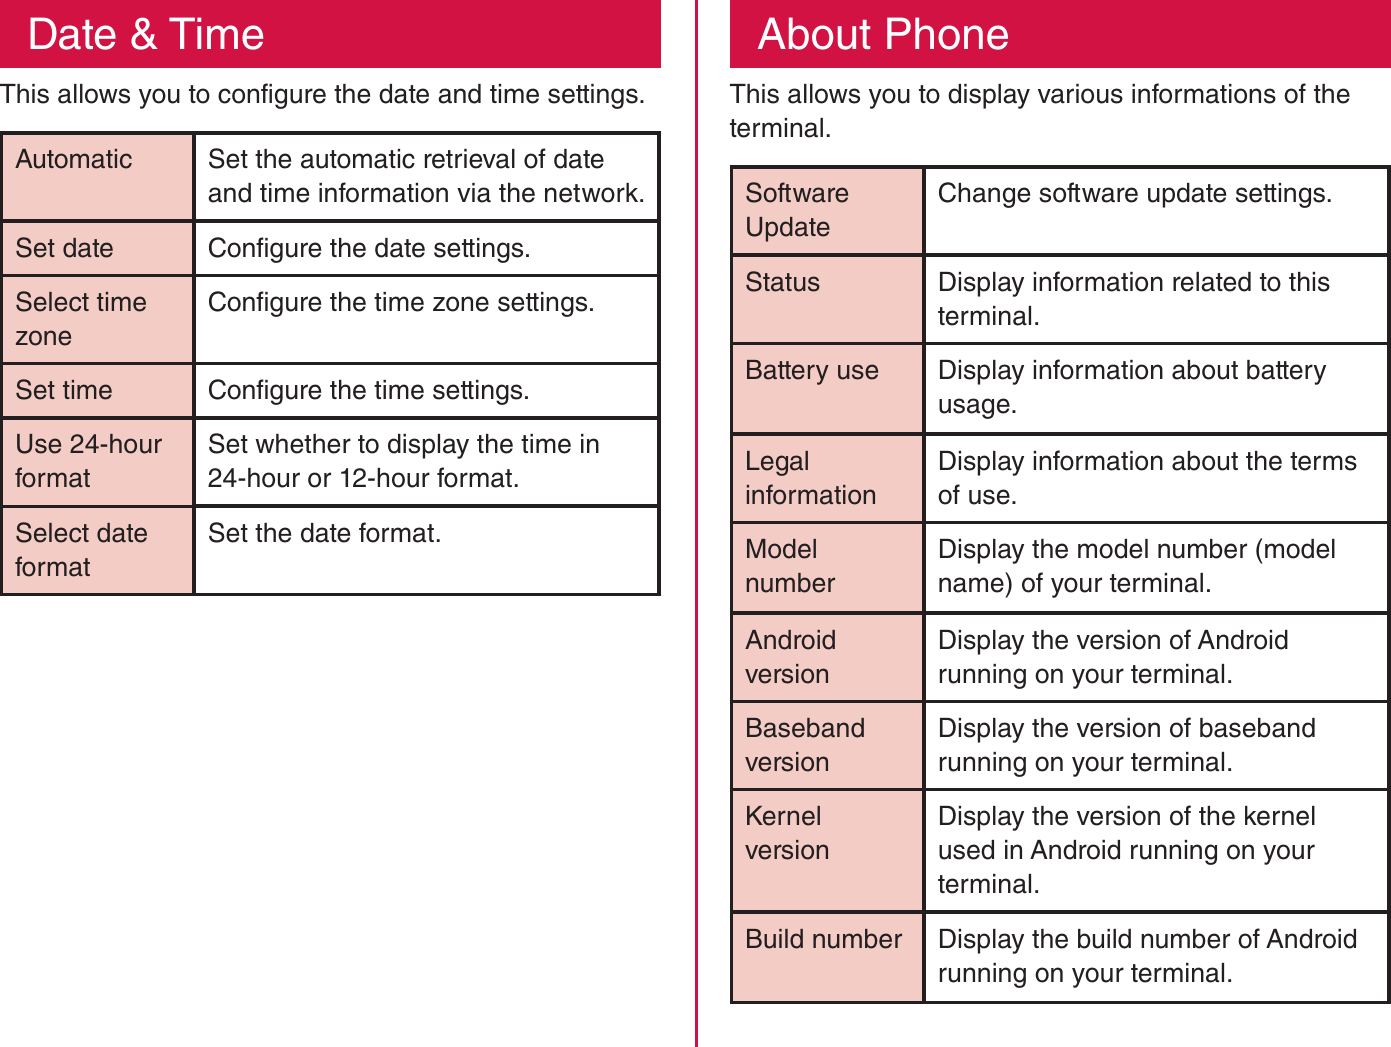
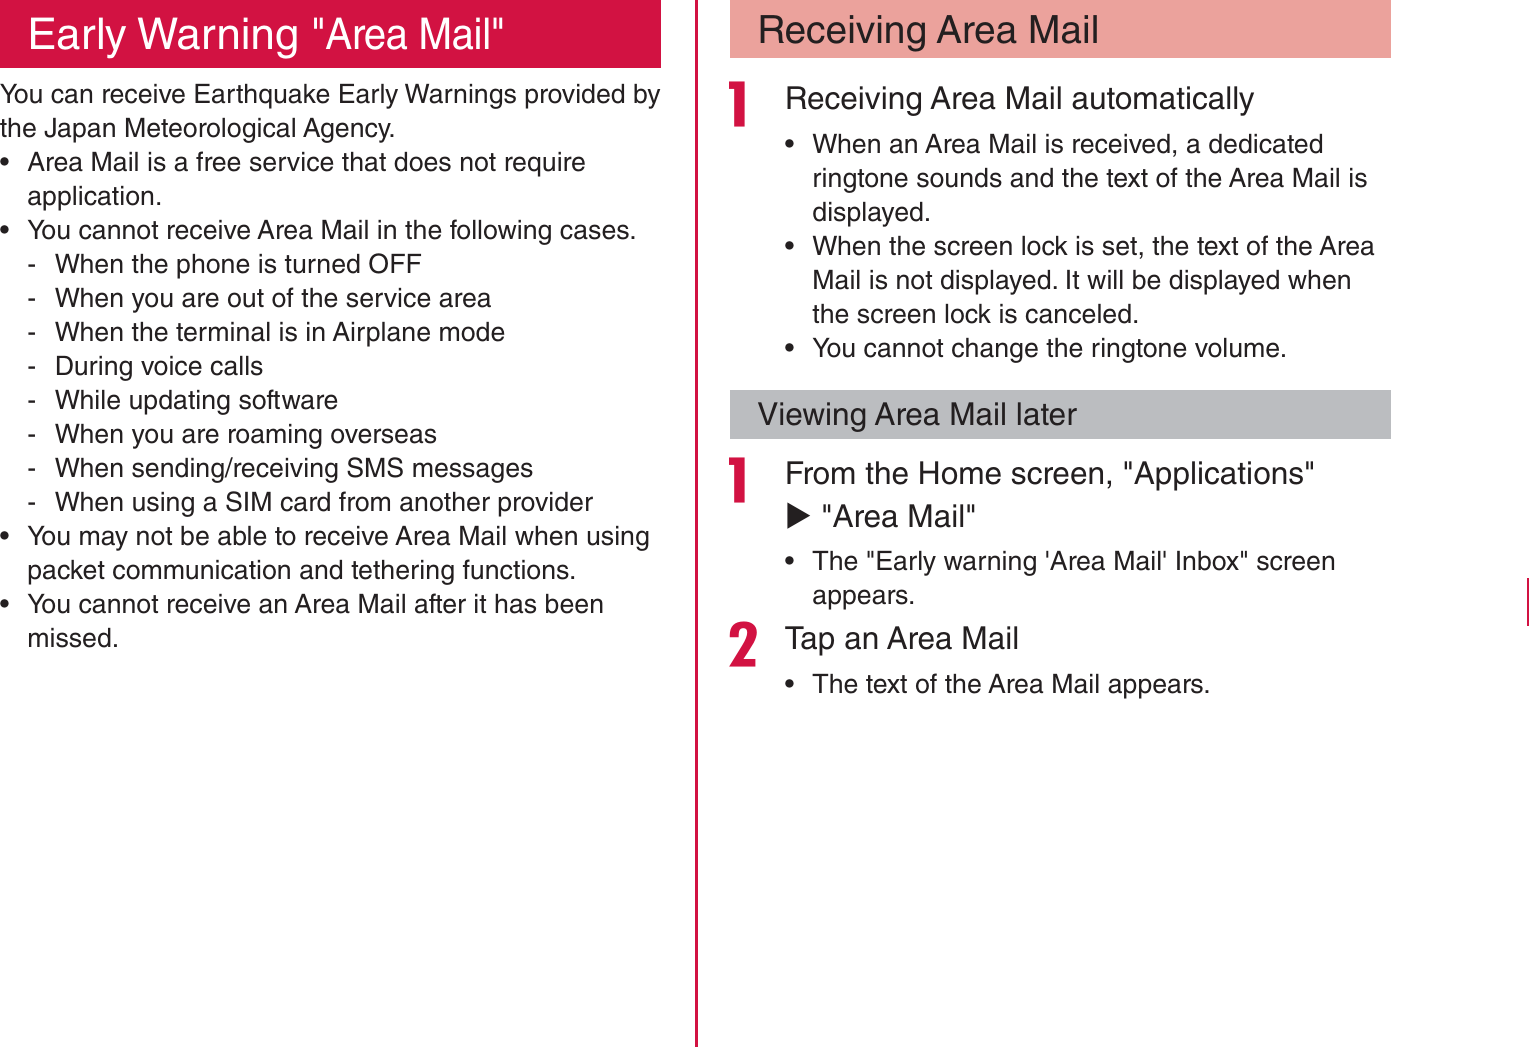
![Note rTap X "Insert smiley" while entering a message to insert a pictogram. Although an emoticon appears on your "Enter Message" box, the pictogram is displayed if the message is received on an Android compatible phone. rTo receive notification that the SMS message is received, tap X "Settings" on the "Messaging" screen, and check the "Delivery reports" checkbox. rYou can also send/receive SMS messages to/from users of overseas network operators. For available countries/compatible overseas network operators, refer to "Mobile Phone User's Guide [International Services]" or the DOCOMO "International Services website". rTo send SMS messages to users of overseas network operators, enter "+" X "Country code" X "Recipient's mobile phone number". Omit "0" if the recipient phone number starts with "0".You can also send an SMS message by entering "010", "Country code" and "the recipient mobile phone number". (To reply to an SMS message sent from overseas, enter "010".)Receiving/Viewing an SMS Message From the Home screen, "Applications" X "Messaging" rThe "Messaging" screen appears.Tap one of the threads rThe message appears.Note rWhen you receive an SMS message, appears in the status bar. To read the message, drag or swipe the status bar downwards to open the Notification panel, and tap a new message.123Mail / Internet](https://usermanual.wiki/LG-Electronics-USA/L06D/User-Guide-1729887-Page-80.png)


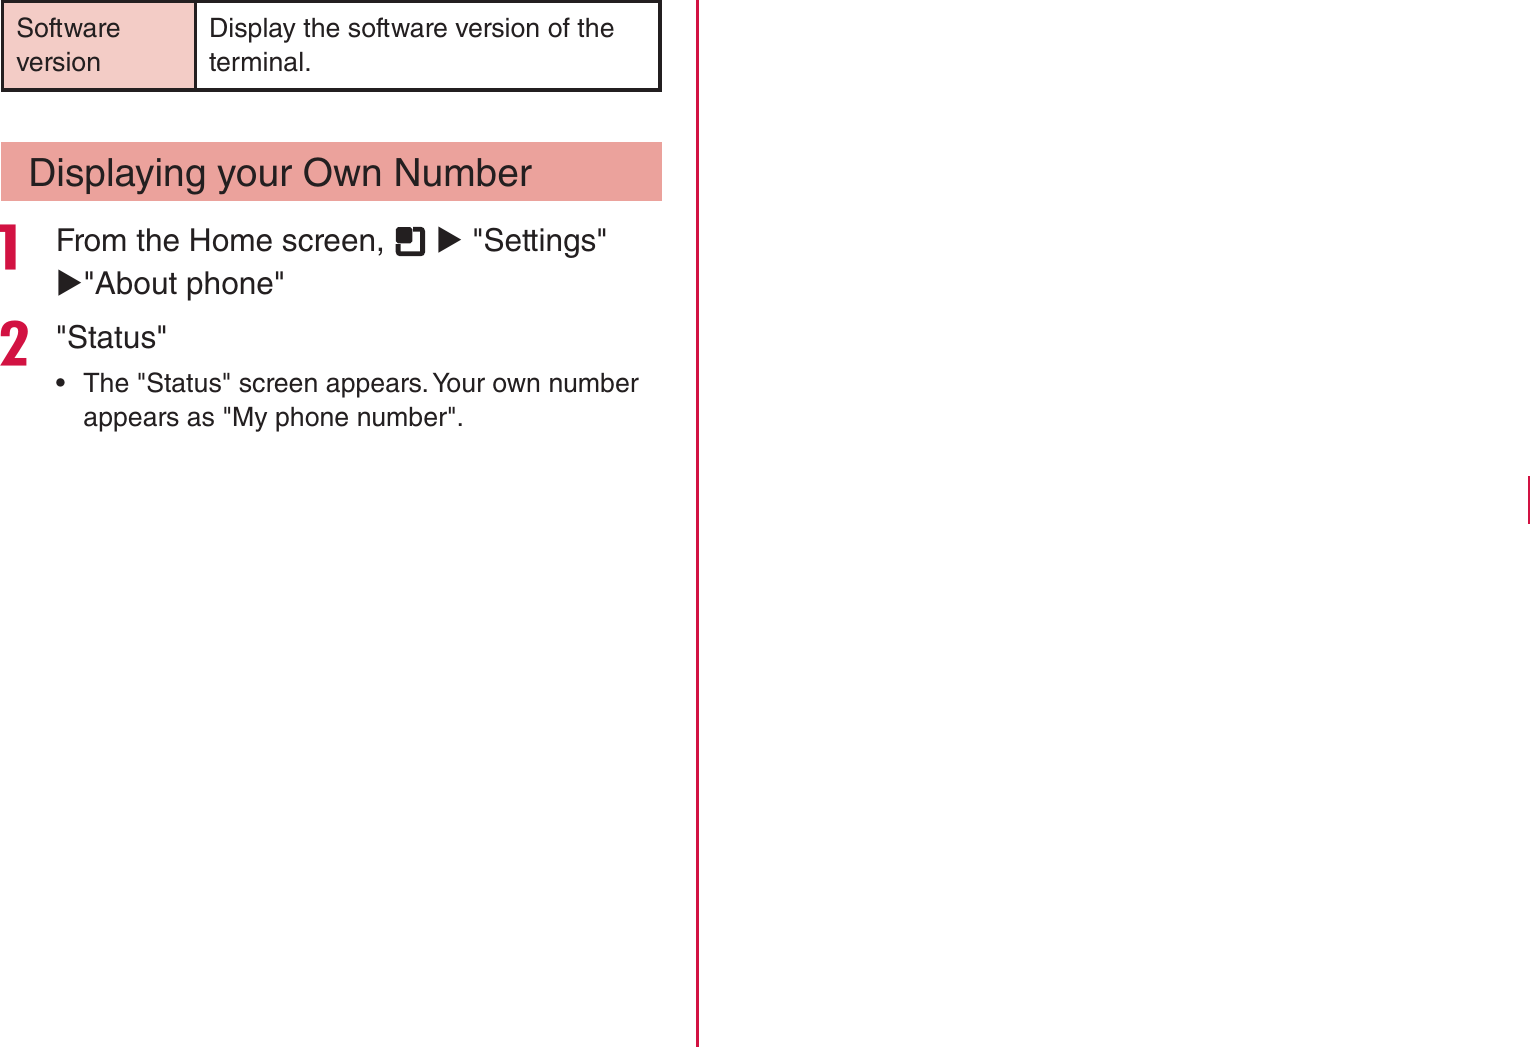
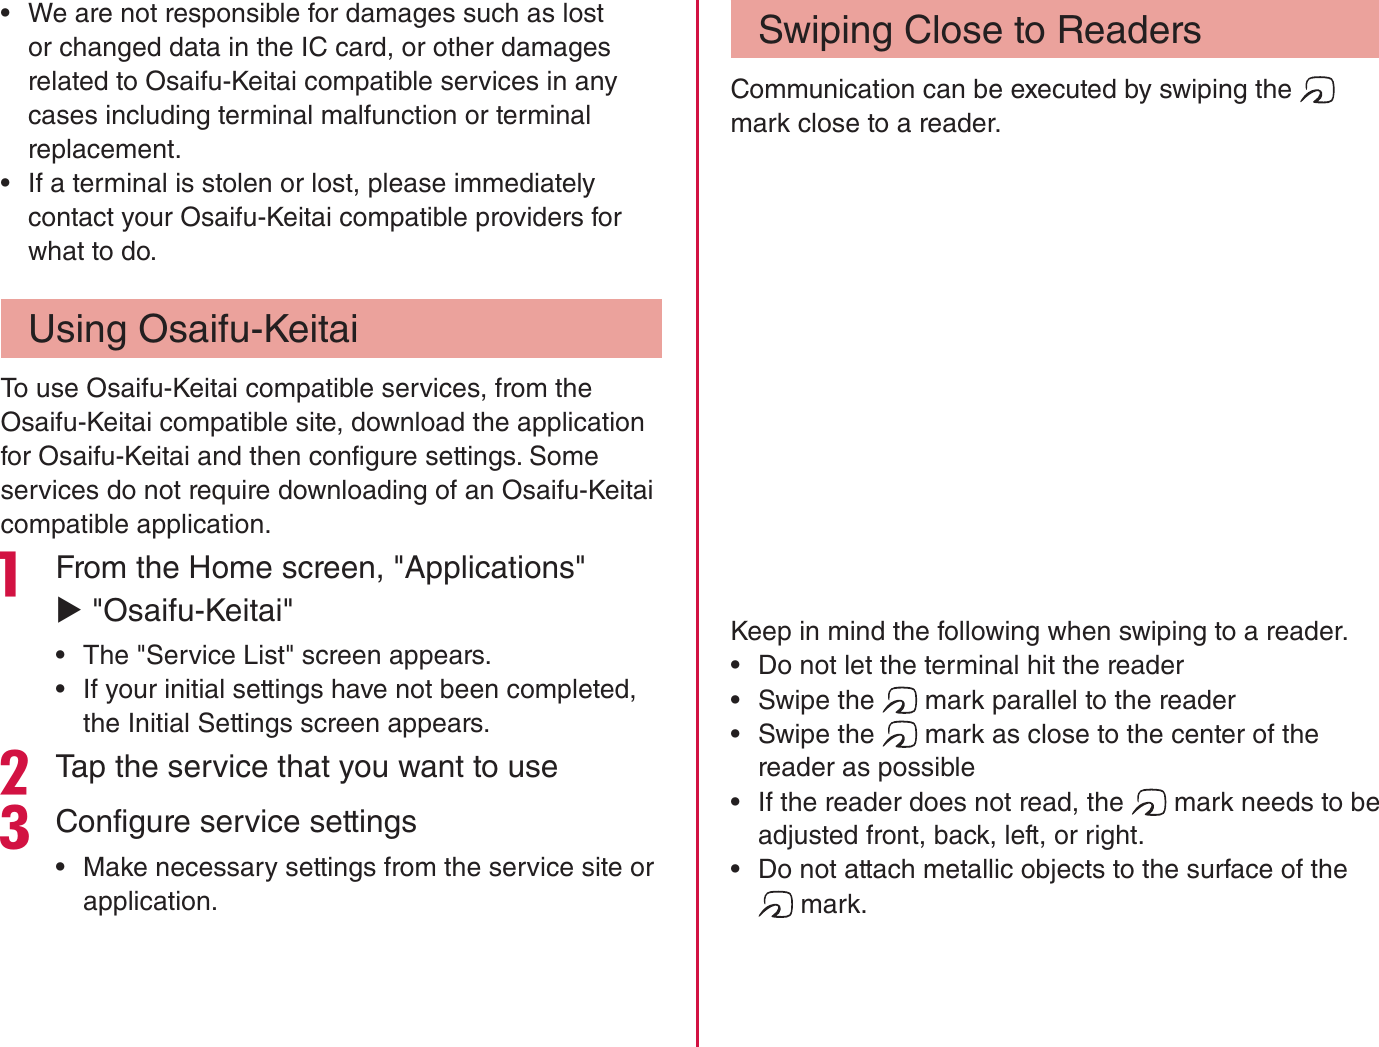
![Creating a channel list From the 1Seg viewing screen, X "Settings" X "Channel setting" X "Channel list edit" rThe "Channel list edit" screen appears.Touch "Untitled" for over 1 second"Create" rThe "Creating channel list" screen appears. The following operations are available to you.Manual settingSelect the viewing area from the area list, and create a channel list.Auto settingScan broadcast stations that can be received at the current location and create a channel list.Osaifu-KeitaiOsaifu-Keitai is equipped with an IC card, so by waving the terminal close to a reader at a shop, it is possible to make payments or use coupons or participate in stamp rallies. By waving the terminal close to a reader, it is also possible to access sites and home pages, acquire the latest coupons using communication, and deposit money and confirm usage status for e-money. As a countermeasure for loss, an Osaifu-Keitai lock function is available so that you can use it without worry. rFor details about Osaifu-Keitai, refer to "Mobile Phone User's Guide [sp-mode]" or dmarket. rTo use Osaifu-Keitai compatible services, it is necessary to make settings through sites or applications. rIf the terminal has a problem, data in the IC card (including e-money and points) may be lost or changed (if the terminal needs repair, terminals with data cannot be accepted, so principally the user needs to delete the data). For more information about reissuing and restoring data, and support for saving and transferring data, contact the Osaifu-Keitai service provider. Please use Osaifu-Keitai compatible services that provide backup services to save you important data.177Application](https://usermanual.wiki/LG-Electronics-USA/L06D/User-Guide-1729887-Page-131.png)
![To r u CaToruCa is an electronic card that can be loaded to your mobile. It can be acquired from readers and websites as the shop information or coupons. The acquired ToruCa will be saved in "ToruCa" application. Use "ToruCa" application to display, search or update. rFor details of ToruCa, refer to "Mobile Phone User's Guide [sp-mode]" or dmarket. From the Home screen, "Applications" X "ToruCa" Note rPacket communication fee may incur when acquiring, displaying or updating ToruCa. rYou may not be able to acquire, display or update the ToruCa provided for i-mode terminal. rThe functions below may not be available depending on the IP (Information Provider) setting. - Acquiring from readers - Update - ToruCa sharing - Viewing maps rIt is not possible to acquire ToruCa from readers while Osaifu-Keitai is locked. rDepending on IP setting, ToruCa that can be displayed on the map from ToruCa (details) may not be able to be displayed on the map from ToruCa list. rWhen sending ToruCa using email, it is sent with the status before acquiring ToruCa (details). rThe received ToruCa by email may not be saved depending on the email application you use. rToruCa may not be acquired depending on the browser you use. rToruCa may not be acquired from readers when Osaifu-Keitai is not initialized.180Application](https://usermanual.wiki/LG-Electronics-USA/L06D/User-Guide-1729887-Page-134.png)