LG Electronics USA L06D PCS GSM Phone with WLAN, Bluetooth and RFID User Manual
LG Electronics MobileComm USA, Inc. PCS GSM Phone with WLAN, Bluetooth and RFID
Users Manual

L-06D
INSTRUCTION MANUAL

2CTVUVCVGOGPV
&KDQJHRU0RGLILFDWLRQVWKDWDUHQRWH[SUHVVO\DSSURYHGE\WKHPDQXIDFWXUHUFRXOGYRLG
WKHXVHUVDXWKRULW\WRRSHUDWHWKHHTXLSPHQW
2CTVUVCVGOGPV
7KLVHTXLSPHQWKDVEHHQWHVWHGDQGIRXQGWRFRPSO\ZLWKWKHOLPLWVIRUDFODVV%GLJLWDO
GHYLFHSXUVXDQWWR3DUWRIWKH)&&5XOHV7KHVHOLPLWVDUHGHVLJQHGWRSURYLGH
UHDVRQDEOHSURWHFWLRQDJDLQVWKDUPIXOLQWHUIHUHQFHLQDUHVLGHQWLDOLQVWDOODWLRQ7KLV
HTXLSPHQWJHQHUDWHVXVHVDQGFDQUDGLDWHUDGLRIUHTXHQF\HQHUJ\DQGLIQRWLQVWDOOHGDQG
XVHGLQDFFRUGDQFHZLWKWKHLQVWUXFWLRQVPD\FDXVHKDUPIXOLQWHUIHUHQFHWRUDGLR
FRPPXQLFDWLRQV+RZHYHUWKHUHLVQRJXDUDQWHHWKDWLQWHUIHUHQFHZLOOQRWRFFXULQD
SDUWLFXODULQVWDOODWLRQ,IWKLVHTXLSPHQWGRHVFDXVHKDUPIXOLQWHUIHUHQFHRUWHOHYLVLRQ
UHFHSWLRQZKLFKFDQEHGHWHUPLQHGE\WXUQLQJWKHHTXLSPHQWRIIDQGRQWKHXVHULV
HQFRXUDJHGWRWU\WRFRUUHFWWKHLQWHUIHUHQFHE\RQHRUPRUHRIWKHIROORZLQJPHDVXUHV
5HRULHQWRUUHORFDWHWKHUHFHLYLQJDQWHQQD,QFUHDVHWKHVHSDUDWLRQEHWZHHQWKH
HTXLSPHQWDQGUHFHLYHU
&RQQHFWWKHHTXLSPHQWLQWRDQRXWOHWRQDFLUFXLWGLIIHUHQWIURPWKDWWRZKLFKWKH
UHFHLYHULVFRQQHFWHG
&RQVXOWWKHGHDOHURUDQH[SHULHQFHGUDGLR79WHFKQLFLDQIRUKHOS
(%%2CTV%NCUU$%QORNKCPEG
7KLVGHYLFHDQGLWVDFFHVVRULHVFRPSO\ZLWKSDUWRI)&&UXOHVDQG,&(6&ODVV%
GLJLWDODSSDUDWXVUHTXLUHPHQWVIRU,QGXVWU\&DQDGD2SHUDWLRQLVVXEMHFWWRWKHIROORZLQJ
WZRFRQGLWLRQV7KLVGHYLFHDQGLWVDFFHVVRULHVPD\QRWFDXVHKDUPIXOLQWHUIHUHQFHDQG
WKLVGHYLFHDQGLWVDFFHVVRULHVPXVWDFFHSWDQ\LQWHUIHUHQFHUHFHLYHGLQFOXGLQJ
LQWHUIHUHQFHWKDWPD\FDXVHXQGHVLUHGRSHUDWLRQ
$QF[YQTP1RGTCVKQP
7KLVGHYLFHKDVEHHQWHVWHGIRUERG\ZRUQRSHUDWLRQVZLWKWKHGLVWDQFHRIFP
LQFKHVEHWZHHQWKHXVHUĜVERG\DQGWKHSKRQH7RFRPSO\ZLWK)&&5)H[SRVXUH
UHTXLUHPHQWVDPLQLPXPVHSDUDWLRQGLVWDQFHRIFPLQFKHVPXVWEHPDLQWDLQHG
IURPWKHXVHUVERG\7KLUGSDUW\EHOWFOLSVKROVWHUVDQGVLPLODUDFFHVVRULHVFRQWDLQLQJ
PHWDOOLFFRPSRQHQWVPD\QRWEHXVHG%RG\ZRUQDFFHVVRULHVWKDWFDQQRWPDLQWDLQFP
LQFKHVVHSDUDWLRQGLVWDQFHEHWZHHQWKHXVHUVERG\DQGWKHSKRQHDQGKDYHQRW
EHHQWHVWHGIRUW\SLFDOERG\ZRUQRSHUDWLRQVPD\QRWFRPSO\ZLWK)&&5)H[SRVXUHOLPLWV
DQGVKRXOGEHDYRLGHG
9+(+%CWVKQP
7KLVGHYLFHLVFDSDEOHRIRSHUDWLQJLQDQPRGH)RUDQGHYLFHVRSHUDWLQJ
LQWKHIUHTXHQF\UDQJHRI *+]WKH\DUHUHVWULFWHGIRULQGRRURSHUDWLRQVWR
UHGXFHDQ\SRWHQWLDOKDUPIXOLQWHUIHUHQFHIRU0RELOH6DWHOOLWH6HUYLFHV066LQWKH86
:,),$FFHVV3RLQWVWKDWDUHFDSDEOHRIDOORZLQJ\RXUGHYLFHWRRSHUDWHLQDQ
PRGH *+]EDQGDUHRSWLPL]HGIRULQGRRUXVHRQO\
,I\RXU:,),QHWZRUNLVFDSDEOHRIRSHUDWLQJLQWKLVPRGHSOHDVHUHVWULFW\RXU:,),XVH
LQGRRUVWRQRWYLRODWHIHGHUDOUHJXODWLRQVWRSURWHFW0RELOH6DWHOOLWH6HUYLFHV
7KLV GHYLFHLVQRWLQWHQGHGIRUVDOHLQWKH86$

Confirmation and Settings before Using
29
Confirmation and Settings before Using
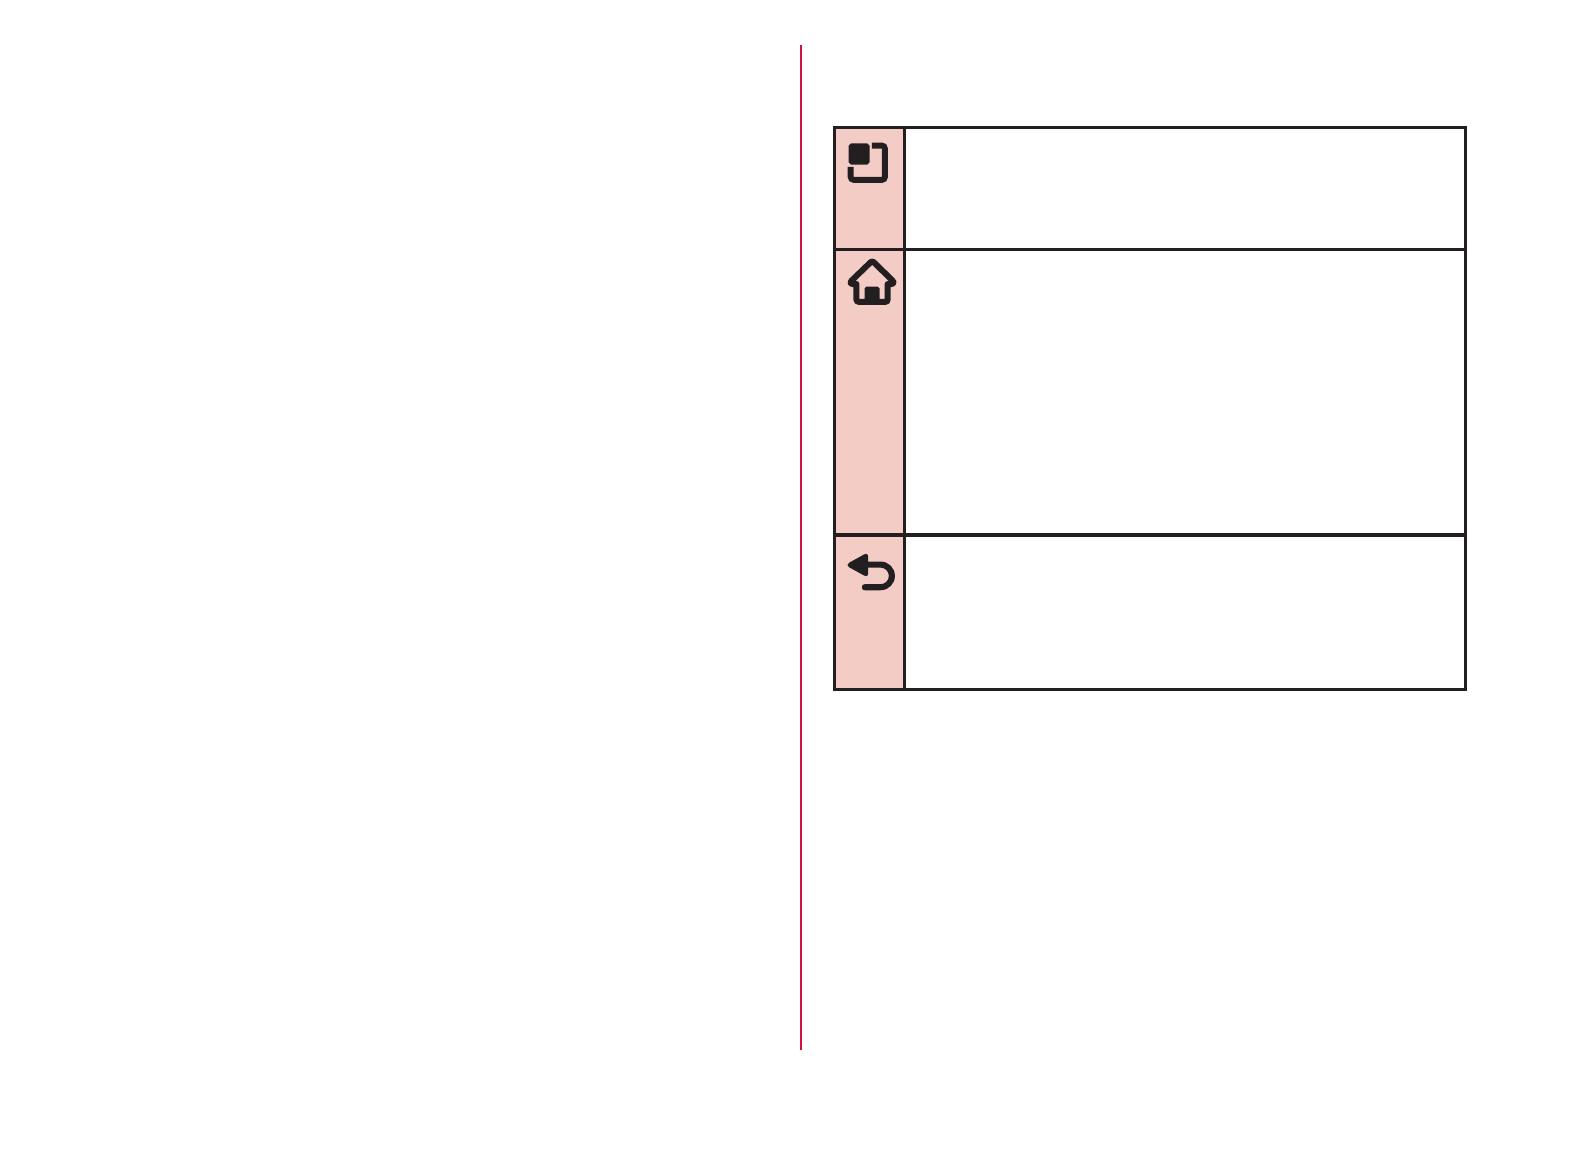
There are three keys on the front of the terminal. The
roles of these keys are shown below.
Menu key
Tap this key to display the options menu for
the current screen or application.
Home key
rIf you tap this key, you will return to the
Home screen, regardless of the application
being used or the screen being displayed.
rIf you touch this key for over 1 second, the
icons of the most recently used applications
appear. Tap an icon to open the application.
(It may be displayed as horizontal screen.)
Back key
Tap this key to return to the previous screen. It
also closes a dialog box, an options menu, the
Notification panel, or the on-screen keyboard.
30
Confirmation and Settings before Using

UIM
UIM is an IC card that stores informations of each
customer.
You cannot use some of the terminal functions if the
UIM is not inserted. Before inserting or removing
the UIM, you must always turn OFF the power and
disconnect the AC adapter cable.
This terminal uses only the UIM. Bring your miniUIM/
FOMA card to a docomo Shop to exchange it.
UIM security codes
The UIM can set security code named PIN code. This
code is set to "0000" at the time of subscription, but you
may subsequently change it. For details about changing
this security code, refer to "Security Code and UIM
Protection" (P111).
Inserting the UIM
Insert a fingernail into the groove in the
back cover, and pull up in the direction
of the arrow (a) while pressing

Remove the battery pack (P35), and
insert the UIM into the slot with the gold-
colored IC side facing down
Removing the UIM
Remove the back cover and the battery
pack. Gently press the UIM with your
fingertip and slide it out
32
Confirmation and Settings before Using

Battery Pack
Attaching the Battery Pack
Remove the back cover (P31)
Insert the battery pack in the direction of
the arrow (a) with the "CE" mark facing
up. Ensure that the tabs on the terminal
and the battery pack are aligned with
each other
Check the direction of the back cover
and attach it to the terminal (b). Press
portion to close it firmly (c)
rMake sure there is no gap between the terminal
and the back cover.
34
Confirmation and Settings before Using
Removing the Battery Pack
Remove the back cover (P31)
Put your fingernail into the groove, and
lift out the battery pack in the direction
of the arrow (b), pushing it to the
direction of the arrow (a)
Note
rTurn the power OFF before attaching/removing
the battery pack.
Charging
Battery Pack Life
rThe battery pack is a consumable accessory. The
usage time of the battery per one charge decreases
gradually each time the battery is recharged.
rWhen the usage time from one charge becomes
about half of a new battery pack, the life of the
battery pack is assumed to be almost over. We
recommend that you replace the battery ahead of
time. Refer to "Repairs" on the back of the manual
or consult a specified DOCOMO repair center for
battery exchanging information.
35
Confirmation and Settings before Using
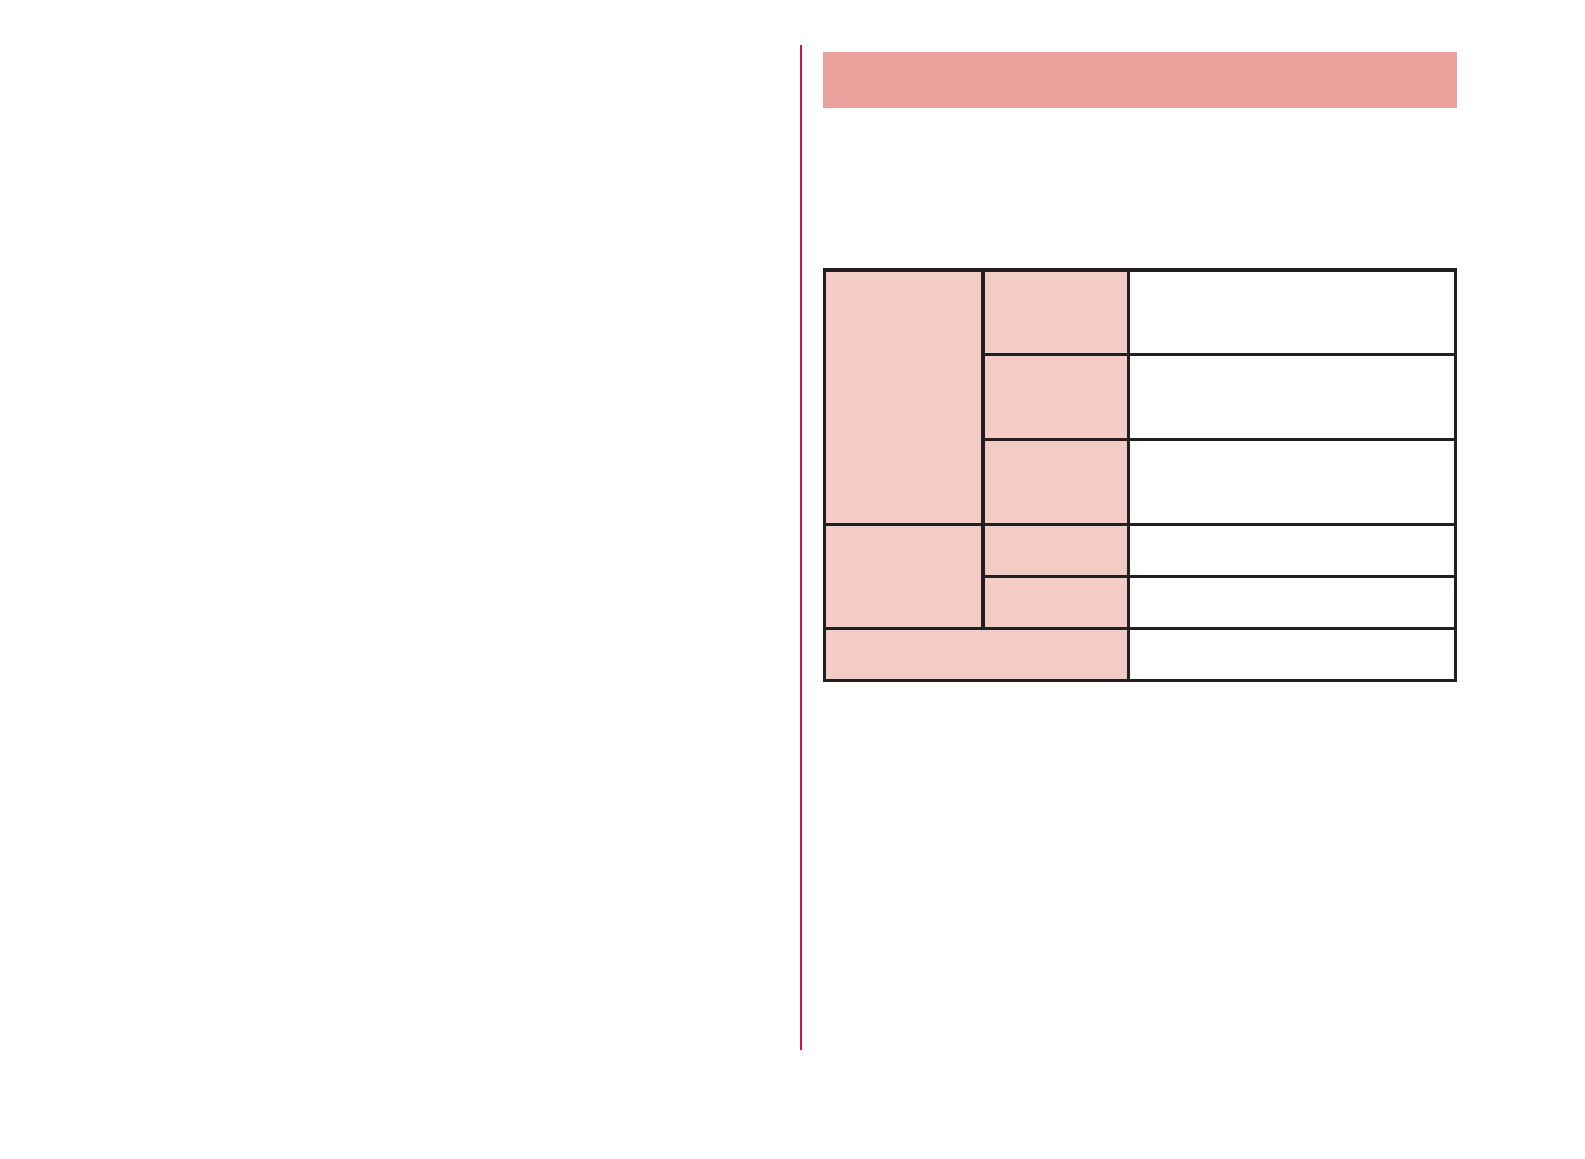
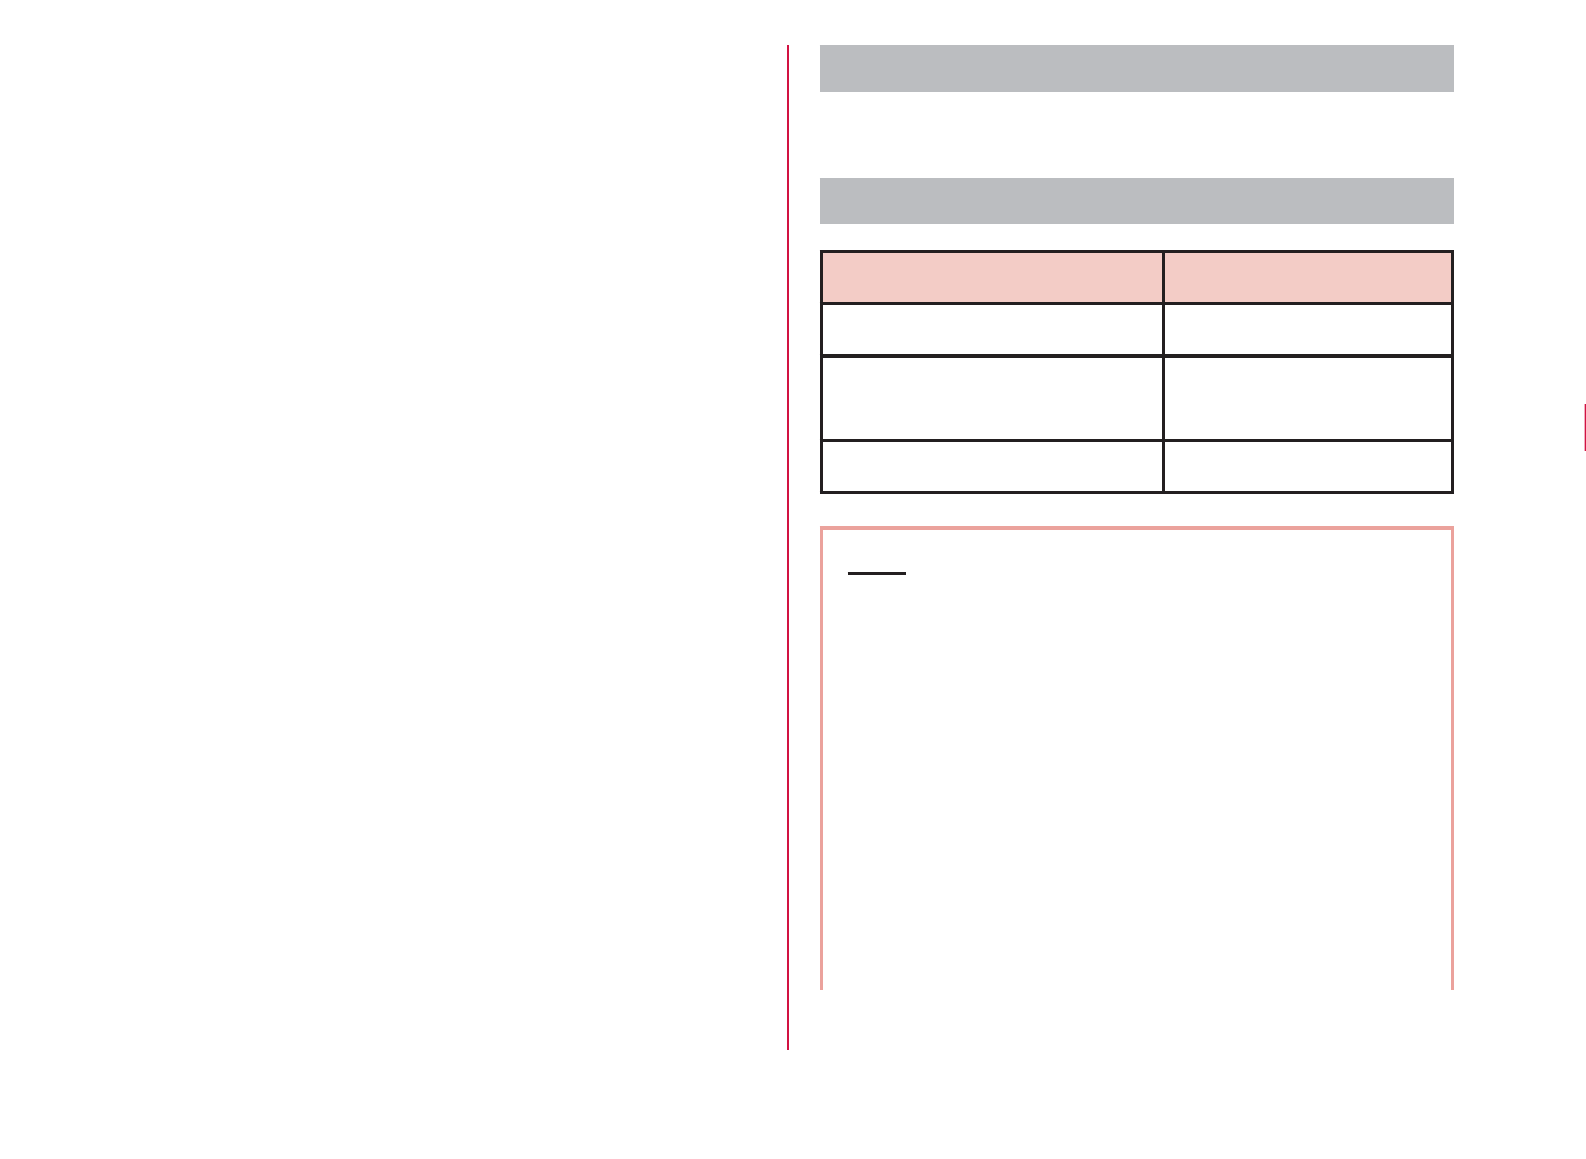
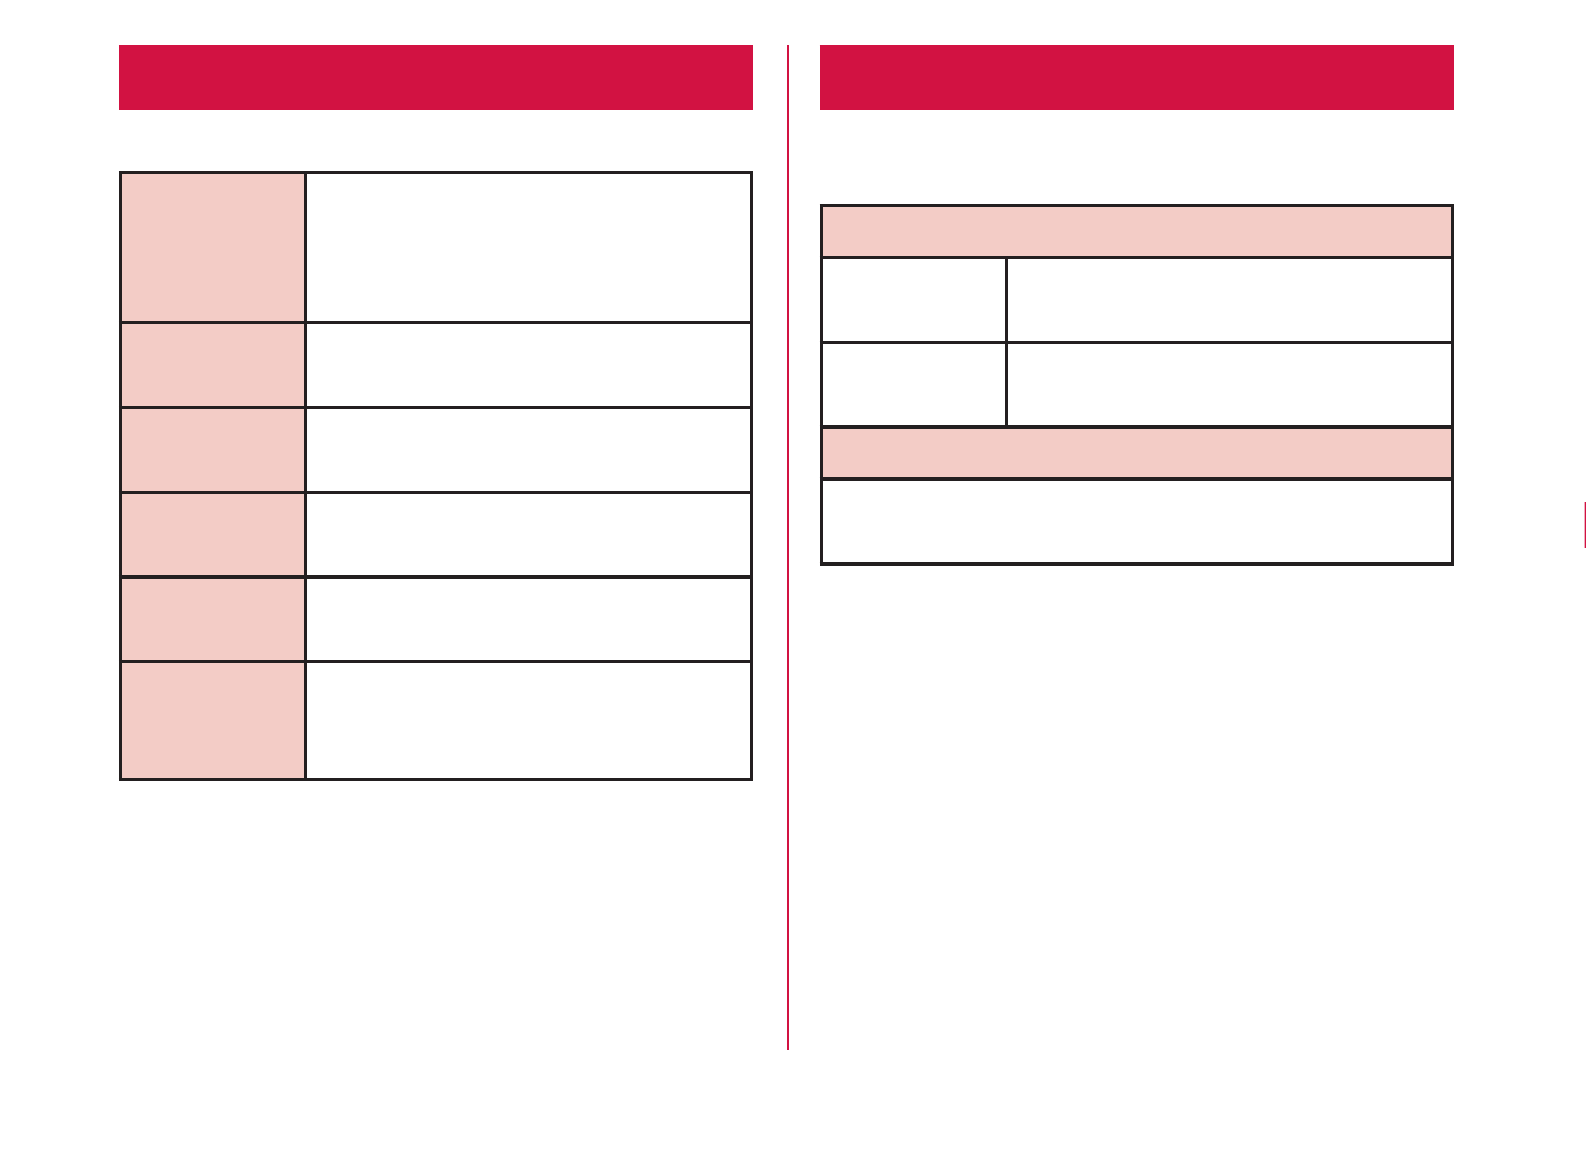
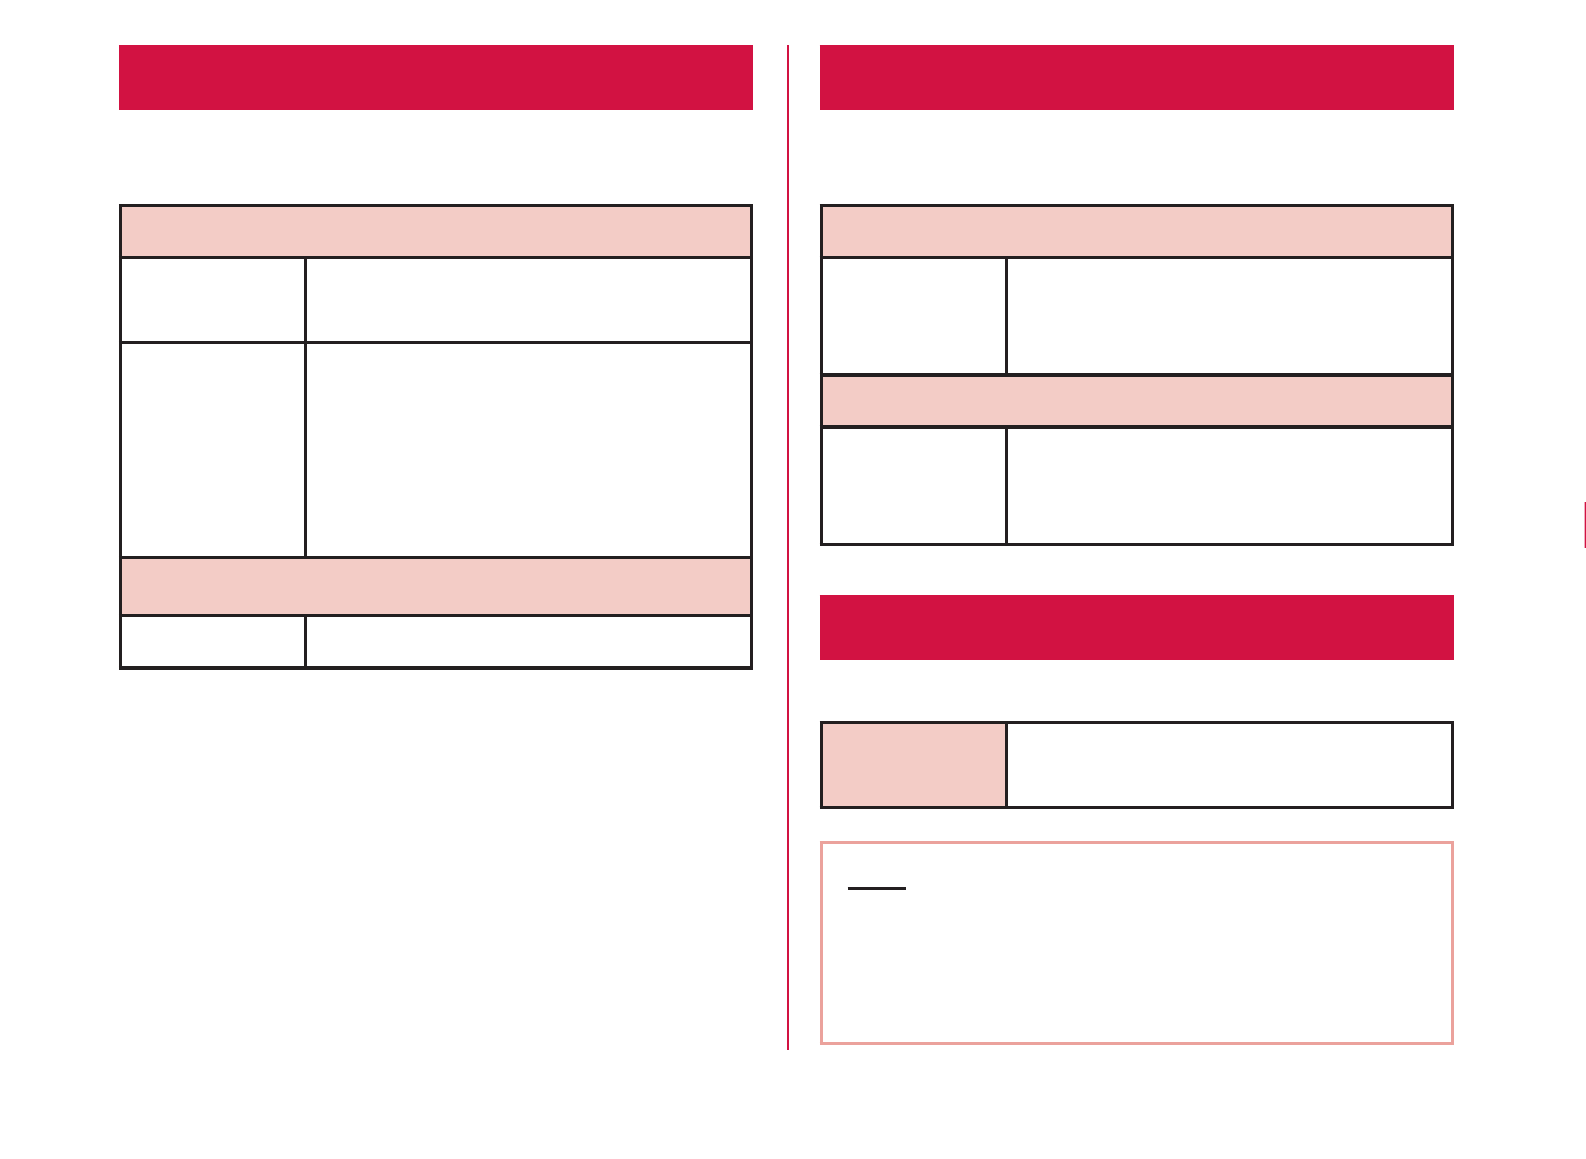
Usage Time (estimate)
A list of the charging time (estimate) of a fully charged
battery is shown below. The usage time varies depending
on the usage conditions and the battery pack condition.
For details, refer to "Main Specifications" (P225).
Continuous
standby
time
Xi/LTE Stationary (Automatic):
Approx. 240 hours
FOMA/3G Stationary (Automatic):
Approx. 300 hours
GSM Stationary (Automatic):
Approx. 240 hours
Continuous
call time
FOMA/3G Approx. 340 minutes
GSM Approx. 240 minutes
1Seg watching time Approx. 240 minutes
36
Confirmation and Settings before Using
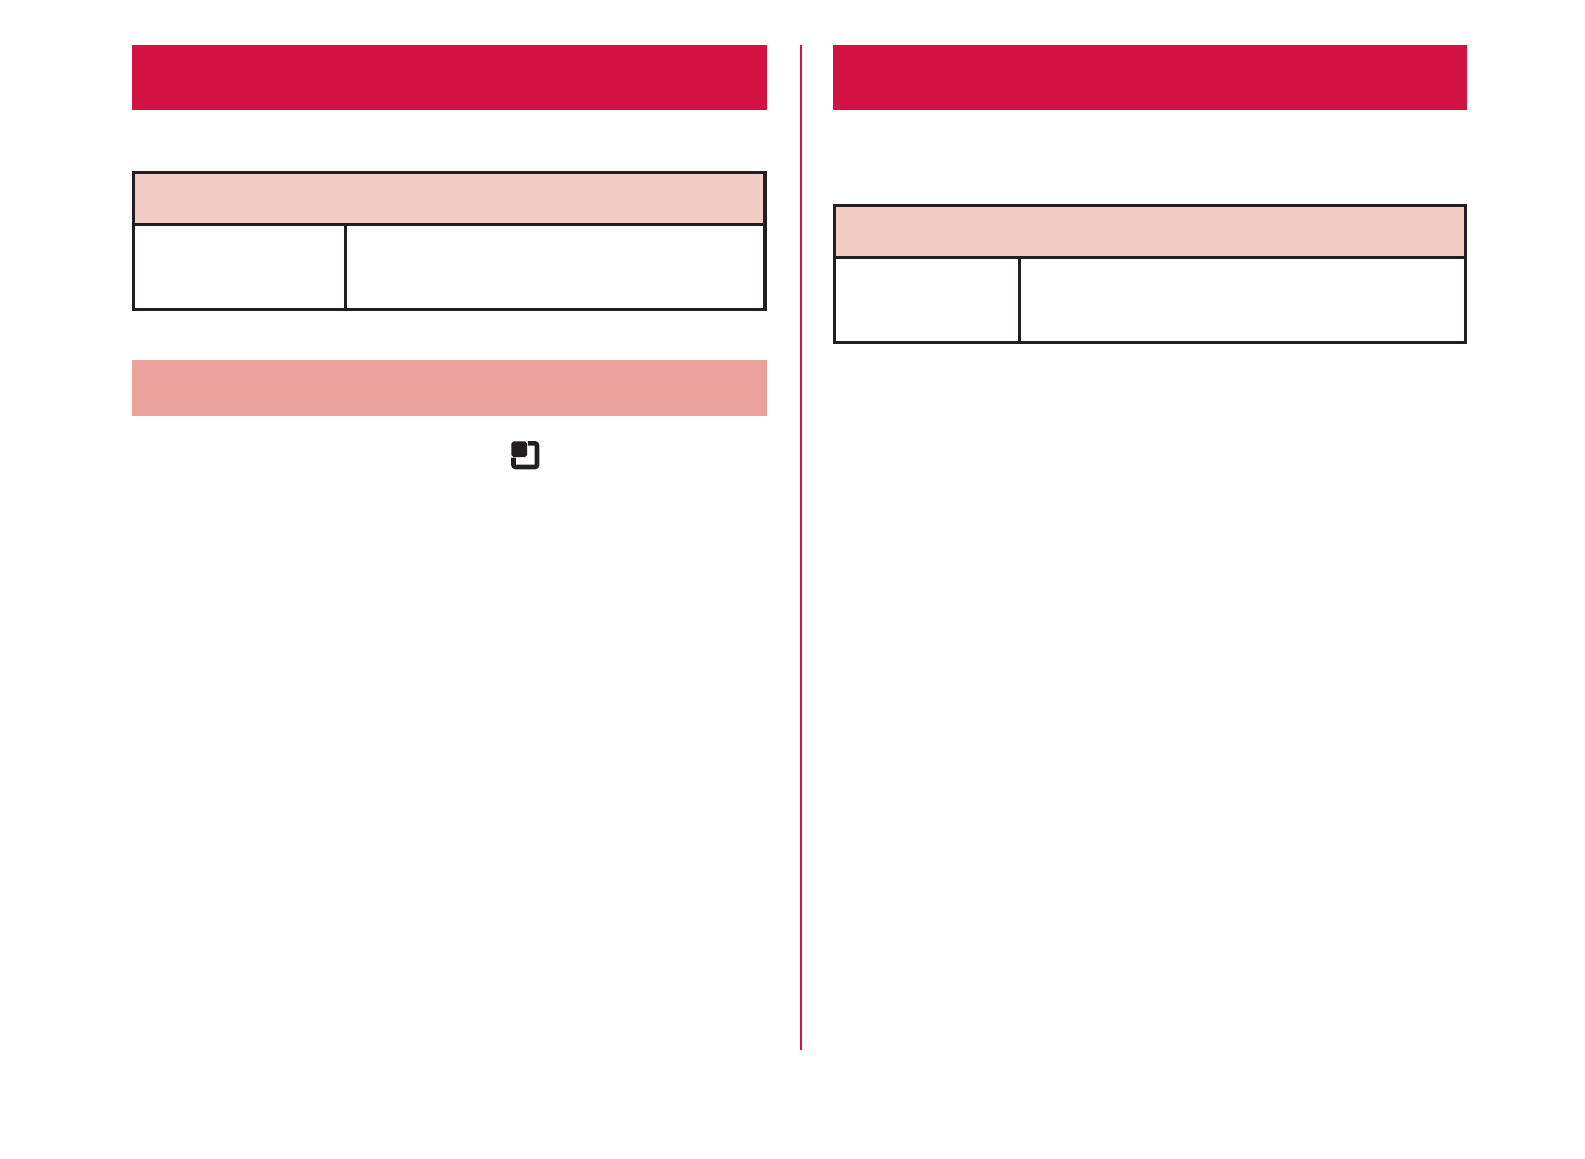
Turning ON/OFF the Power
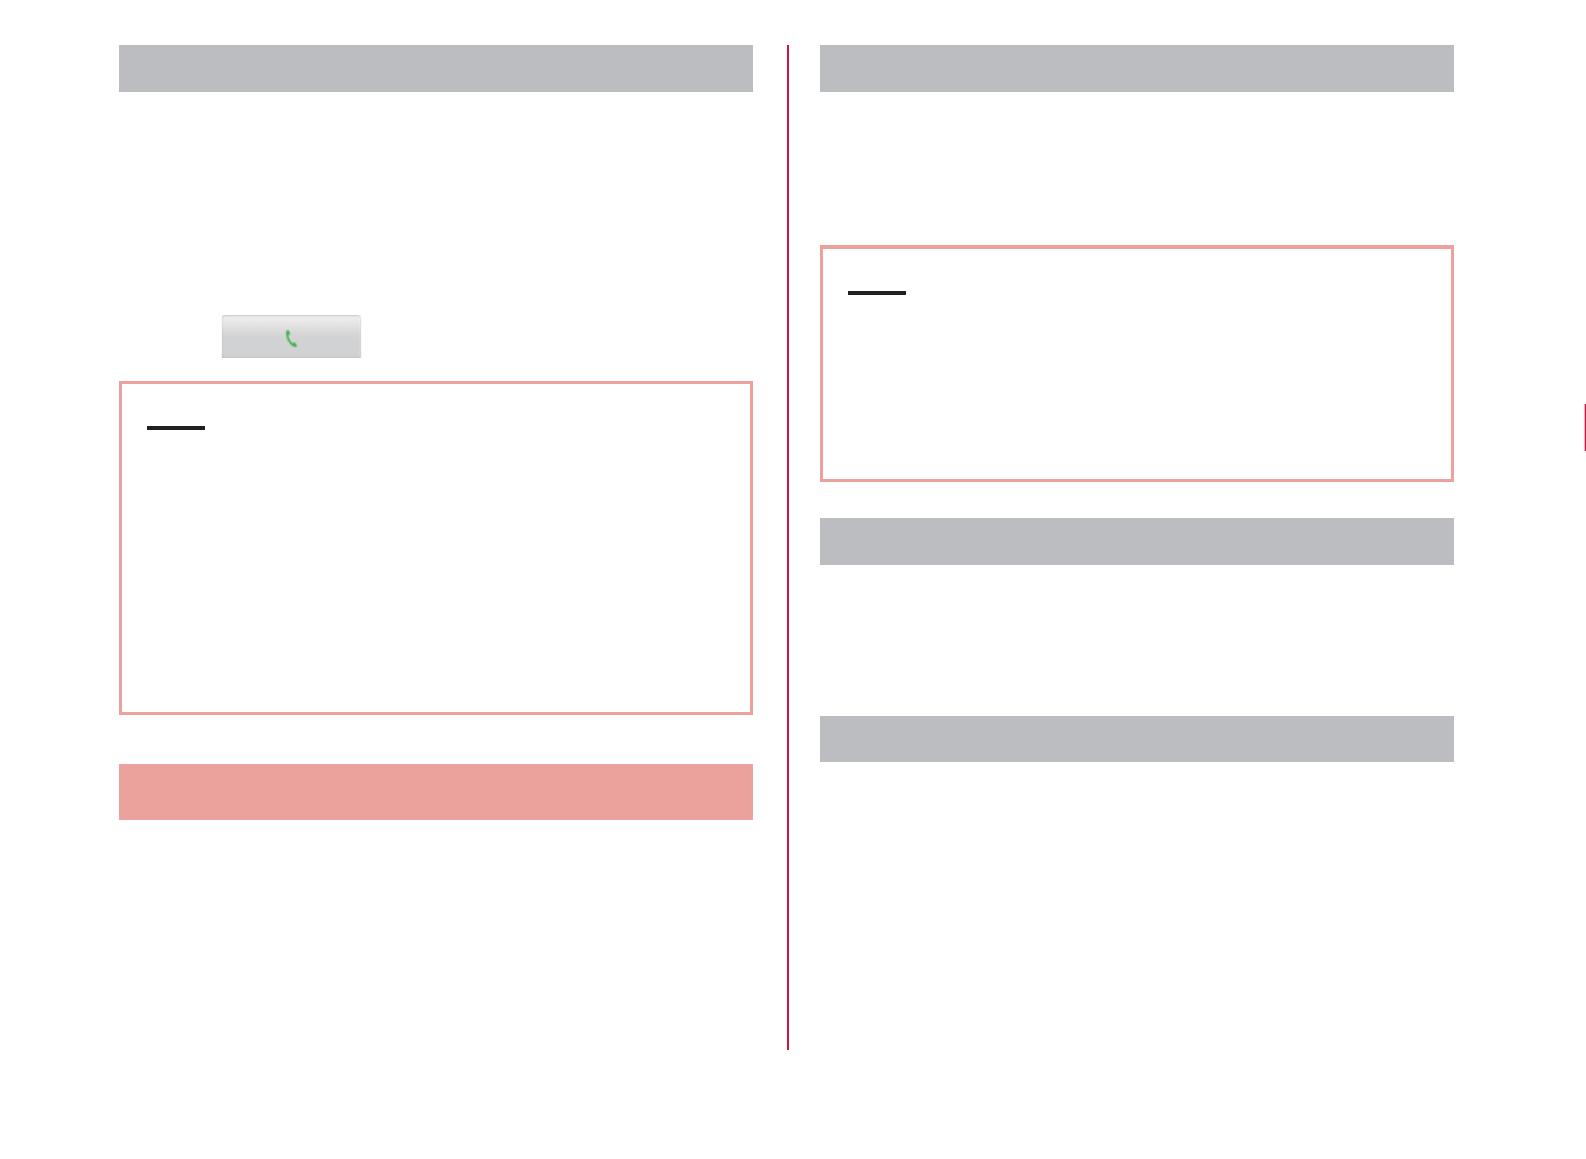
Turning ON the Power
Press and hold the power key for over 1
second
Tap to release the screen lock.
Note
rThe "Locked" screen appears when the power is
turned ON or when the backlight is turned on.
rIf the screen lock has been set using a screen
unlock pattern, the "Draw pattern to unlock"
screen appears when the power is turned ON.
rIf the screen lock has been set using a PIN code
or password, the "Locked" screen appears
when the power is turned ON. After releasing
the screen lock by following Step 2, enter the
PIN code or password and tap "OK". To correct
the typing error, tap .
Turning OFF the Power
Press and hold the power key for over 1
second
"Power off"
"OK"
40
Confirmation and Settings before Using
Turning on Backlight
To prevent unintended operation and to save power,
the backlight turns off after a set period. If you then turn
on the backlight to release the screen lock, the screen
that was displayed before the backlight was turned off
appears again.
Press the power key
rThe "Locked" screen appears. The backlight
automatically lights up when you receive a call
or when alarm is ringing.
Note
rScreen gets locked if pressing the power key
while the backlight is on.
rYou can set the length of time before the
backlight turns off. For details, refer to "Display"
(P109).
rIf a screen unlock pattern has been set, you will
be prompted to enter the pattern when pressing
the power key. For more details about setting a
screen unlock pattern and releasing the screen
lock, refer to "Location & Security" (P110).
Basic Operations (Touch
Screen Operations)
The display of the terminal has a touch screen that
allows you to perform various operations by touching it.
Precautions on Using Touch Screen
The touch screen has been designed for finger touching
slightly. Do not press it with sharp objects (fingernail,
ballpoint pen, pin etc.) or press it hard with your finger.
The following user actions may cause the touch screen
not to work properly. They may also cause malfunction.
rTouching the screen with gloved hands
rTouching the screen with the tip of a fingernail
rPlacing a foreign object on the screen
rSticking a protective sheet or seal on the screen
41
Confirmation and Settings before Using
Touch Screen Operations
You can perform the following actions on the touch
screen.
rTap: Touch the screen lightly
rDouble-tap: Touch the screen lightly twice
successively
rTouch for over 1 second: Touch and hold down the
screen
rSwipe: Lightly flick the screen
rDrag: Touch and hold down to flick the screen, and
then release your finger
rPinch-out: Touch the screen with 2 fingers and then
move them apart
rPinch-in: Touch the screen with 2 fingers apart and
then move them together, as if pinching
Opening Items
Tap an item
Checking or Unchecking Options
Tap an item that has a checkbox
rIf the checkbox was unmarked, a check mark
now appears in it.
rIf the checkbox was marked, the check mark
now disappears from it.
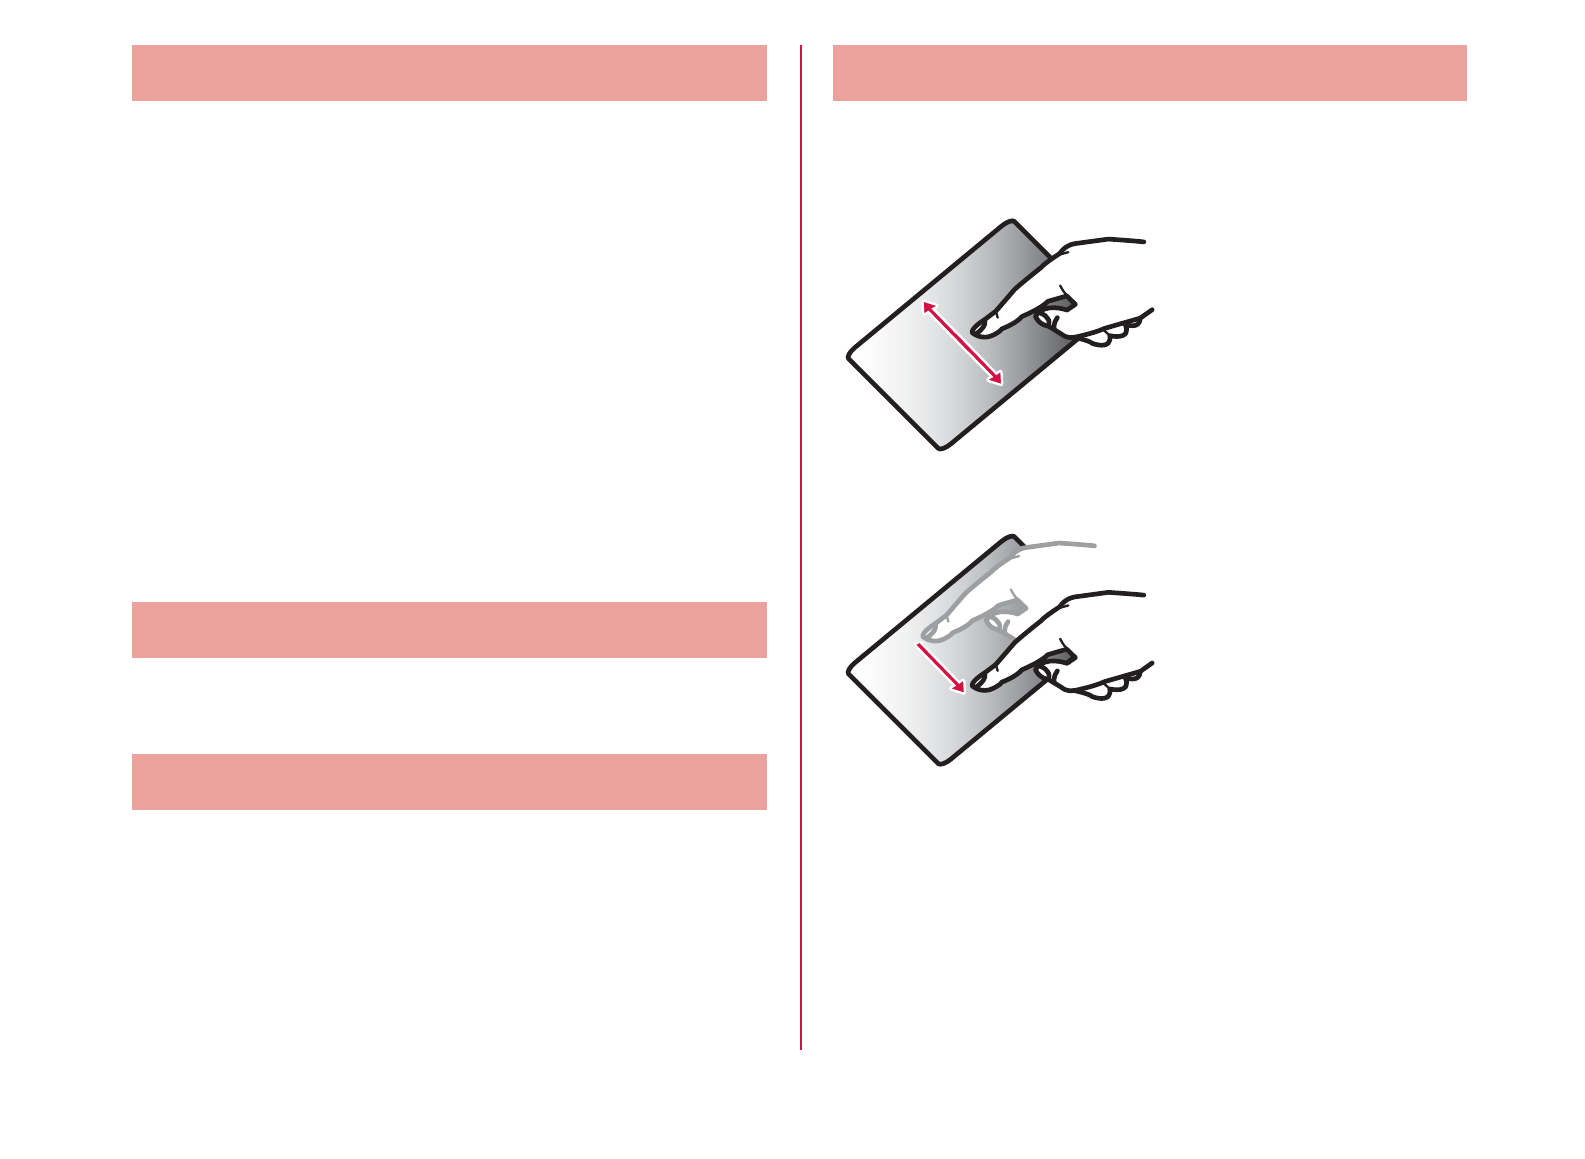
Scrolling Screen
You can scroll the screen up or down. On some web
pages, you can also scroll side to side.
Drag up or down to
scroll.
Swipe to scroll quickly.
To stop scrolling, touch
the screen.
42
Confirmation and Settings before Using
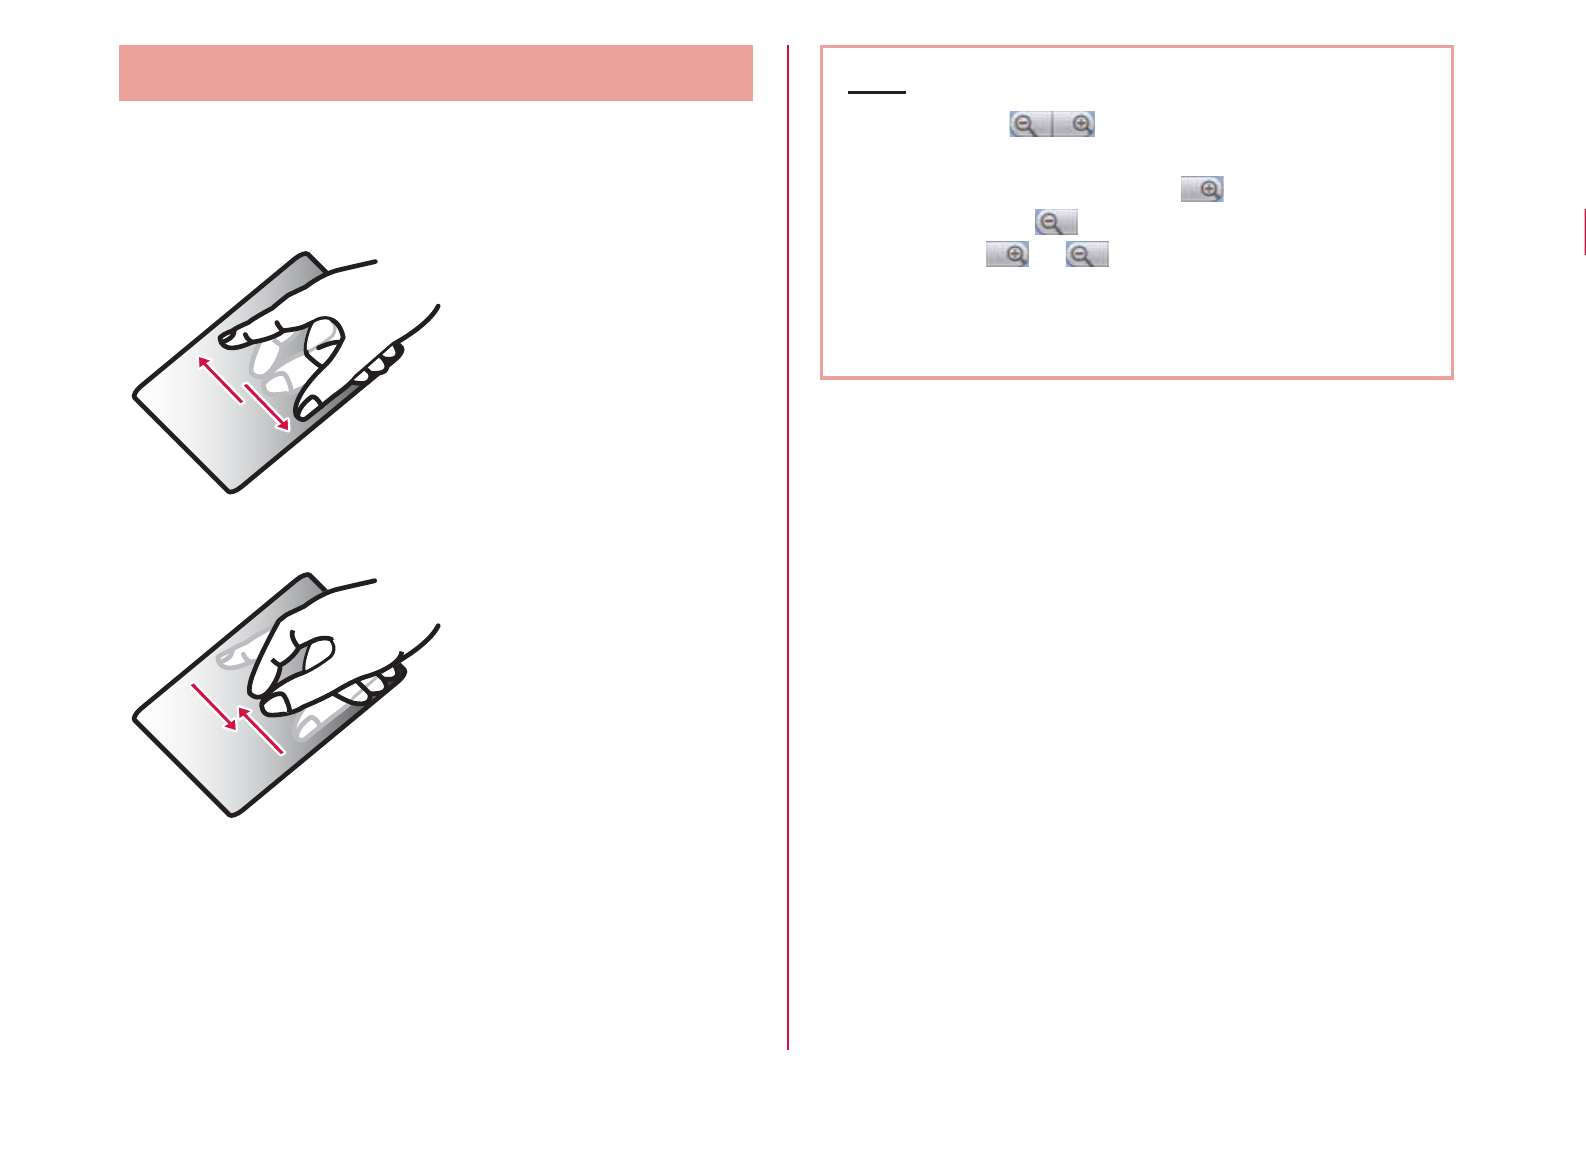
Zooming In or Out
Some applications allow you to zoom in on small text
that is difficult to read. After zooming in, you can also
zoom out to a full-screen view.
The movement of your
fingers enlarges the
screen display by
pinching it out.
rThe movement of
your fingers reduces
the screen display by
pinching it in.
rPinch in on the Home
screen to display the
Home screen list, and
then set the Home
screen.
Note
rSometimes appears when you drag the
screen. You can also zoom in or out by tapping
this zoom control icon. Tap to zoom in by
one level. Tap to zoom out by one level.
However, or grays out if you have
already zoomed in to the maximum or zoom out
to the minimum. This grays out indicates that
you cannot zoom in or out any further.
43
Confirmation and Settings before Using
Using Motion Gesture
Various functions can be operated simply by moving the
terminal.
rTo use motion gestures, tap X "Settings" X
"Gesture" from the Home screen, and place a check
mark in each item.
Using motion gesture on alarm
Stopping alarm
Flip the terminal while alarm is ringing
rAlarm stops.
Using motion gesture while an incoming
call arrives
Muting ringtone
When an incoming call arrives, flip the
terminal
rThe ringtone is muted.
44
Confirmation and Settings before Using

Using motion gesture in gallery
Viewing previous/next image
While an image in gallery is being
displayed, tap the left or right side of the
terminal
rThe left or right image is displayed.
Changing Screen Orientation
The terminal screen automatically rotates to horizontal
(landscape) or vertical (portrait) views, depending on
the direction in which it is turned.
Note
rScreen orientation may not change in some
applications.
rYou can disable screen rotation by tapping X
"Settings" X "Display" on the Home screen, and
unmarking the "Auto-rotate screen" checkbox on
the "Display settings" screen.
45
Confirmation and Settings before Using
Initial Settings
First-time Settings
When the power is first turned ON, you need to set the
language and date for the terminal. Once you set those
settings, there is no need to set them the next time the
power is turned ON. You can also change these settings
later.
rProcedures differ depending on the connection with
network and settings. Here, an explanation is given
for the docomo Palette UI.
Press and hold the power key for over 1
second
Tap to cancel the screen lock
On the "

Configuring Wi-Fi Settings
The terminal connects to the Internet via access points
for Wi-Fi networks or public wireless LAN services.
To connect, you must configure the access point
connection settings on the terminal.
Reception interference caused by Bluetooth devices
rAs the terminal's wireless LAN devices and
Bluetooth device use the same frequency
(2.4 GHz), reception interference may occur or the
communications speed may lower. Also, you may
hear noise or have a connection problem. In these
cases, do the following:
- Keep the wireless LAN device over 10 m away
from the Bluetooth device.
- Within 10 m, turn off either the wireless LAN
device or the Bluetooth device.
Wi-Fi network status
When the terminal is connected to a Wi-Fi network,
appears in the status bar. An open network with
no security protection is detected when Wi-Fi network
notification is set to ON, always appears in the status
bar.
47
Confirmation and Settings before Using

Connecting to a Wi-Fi network
From the Home screen, X "Settings"
X "Wireless & networks"
rThe "Wireless & network settings" screen
appears.
Place a check mark on "Wi-Fi"
"Wi-Fi settings"
rThe "Wi-Fi settings" screen appears.
Tap the Wi-Fi network that you want to
connect to
rIf you try to connect to a protected Wi-Fi
network, you will be prompted to enter the
security key for that Wi-Fi network. Tap the
"Password" box, enter the network password
and tap "Connect".
rUsually, when you enter a password, the last
character entered is displayed and as many
"

Connecting to a Wi-Fi network by
specifying a static IP address
From the Home screen, X "Settings"
X "Wireless & networks" X "Wi-Fi
settings"
rThe "Wi-Fi settings" screen appears.
X "Advanced"
Place a check mark on "Use static IP"
Tap in the order of "IP address",
"Gateway", "Netmask", "DNS 1", and
"DNS 2" to set
rA menu appears for each item. Set the
appropriate value for each item. Make sure
to enter value on "IP address", "Gateway",
"Netmask", and "DNS 1".
Notifying when Wi-Fi network with no
security protection is detected
From the Home screen, X "Settings"
X "Wireless & networks" X "Wi-Fi
settings"
rThe "Wi-Fi settings" screen appears.
Place a check mark on "Wi-Fi"
Place a check mark on "Network
notification"
rYou will be automatically notified when an open
network with no security protection is detected.
49
Confirmation and Settings before Using
Adding a Wi-Fi network
From the Home screen, X "Settings"
X "Wireless & networks" X "Wi-Fi
settings"
rThe "Wi-Fi settings" screen appears.
Place a check mark on "Wi-Fi"
"Add Wi-Fi network"
rThe "Add Wi-Fi network" menu appears.
Enter the network SSID in the "Network
SSID" box
"Security"
r"Security" menu appears. Select the appropriate
type from "Open", "WEP", "WPA/WPA2 PSK", and
"802.1x EAP".
rThe setting method differs depending on the
security settings.
"Save"
rThe Wi-Fi network is added.
Changing the Wi-Fi network password
From the Home screen, X "Settings"
X "Wireless & networks" X "Wi-Fi
settings"
rThe "Wi-Fi settings" screen appears.
Touch the Wi-Fi network name for over 1
second
rA menu appears.
"Modify network"
rThe network settings are displayed. Tap the
"Password" box and enter the new password.
Disconnecting from a Wi-Fi network
From the Home screen, X "Settings"
X "Wireless & networks" X "Wi-Fi
settings"
rThe "Wi-Fi settings" screen appears.
Touch the name of Wi-Fi network that
you want to disconnect from for over 1
second
rA menu appears.
"Forget network"
rYou are disconnected from the Wi-Fi network.
50
Confirmation and Settings before Using
Setting Wi-Fi to sleep mode
Set Wi-Fi to sleep mode and specify the timing of
switching the terminal to data communications.
From the Home screen, X "Settings"
X "Wireless & networks" X "Wi-Fi
settings"
rThe "Wi-Fi settings" screen appears.
X "Advanced"
"Wi-Fi sleep policy"
r"Wi-Fi sleep policy" menu appears. Choose from
"When screen turns off", "Never when plugged
in" and "Never".
Setting Online Service Accounts
You can update your status on Google and other online
services once you have set up your online service
account on the terminal. You can also configure the
terminal to automatically sync updates from the online
service.
You can also delete unnecessary accounts.
Adding an online service account
From the Home screen, X "Settings"
X "Accounts & sync"
rThe "Accounts & sync settings" screen appears.
"Add account"
rThe "Add an account" screen appears.
Tap the online service that you want to set
an account
rFollow the screen instructions and enter your
login details.
rWhen you have finished adding the account, the
added online service appears in the "Manage
accounts" group.
51
Confirmation and Settings before Using
Note
rIf you mark the "Background data" checkbox,
all installed applications on the terminal
will automatically communicate with their
respective services. If you mark the "Auto-
sync" checkbox, the applications will also
automatically synchronize data with their
respective services. These operations may incur
packet communication charges. Marking these
checkboxes also runs down the battery.
Manually synchronizing online service
data
From the Home screen, X "Settings"
X "Accounts & sync"
rThe "Accounts & sync settings" screen appears.
Tap the account that you want to
synchronize with
rA list of online service's synchronized data
appears.
rThe data with a check mark is synchronized.
Place a check mark on synchronized
data
rThe data with a check mark is synchronized.
Deleting an online service account
From the Home screen, X "Settings"
X "Accounts & sync"
rThe "Accounts & sync settings" screen appears.
Tap the account that you want to delete
rThe "Data & synchronization" screen appears.
"Remove account"
rThe "Remove account" screen appears.
"Remove account"
rThe selected account is deleted.
Note
rThe Google account that you set for the first
time cannot be deleted with the operation
above. To delete it, initialization of the terminal
is required from the Home screen, tap X
"Settings" X "Privacy" X "Factory data reset".
rdocomo account cannot be deleted.
52
Confirmation and Settings before Using
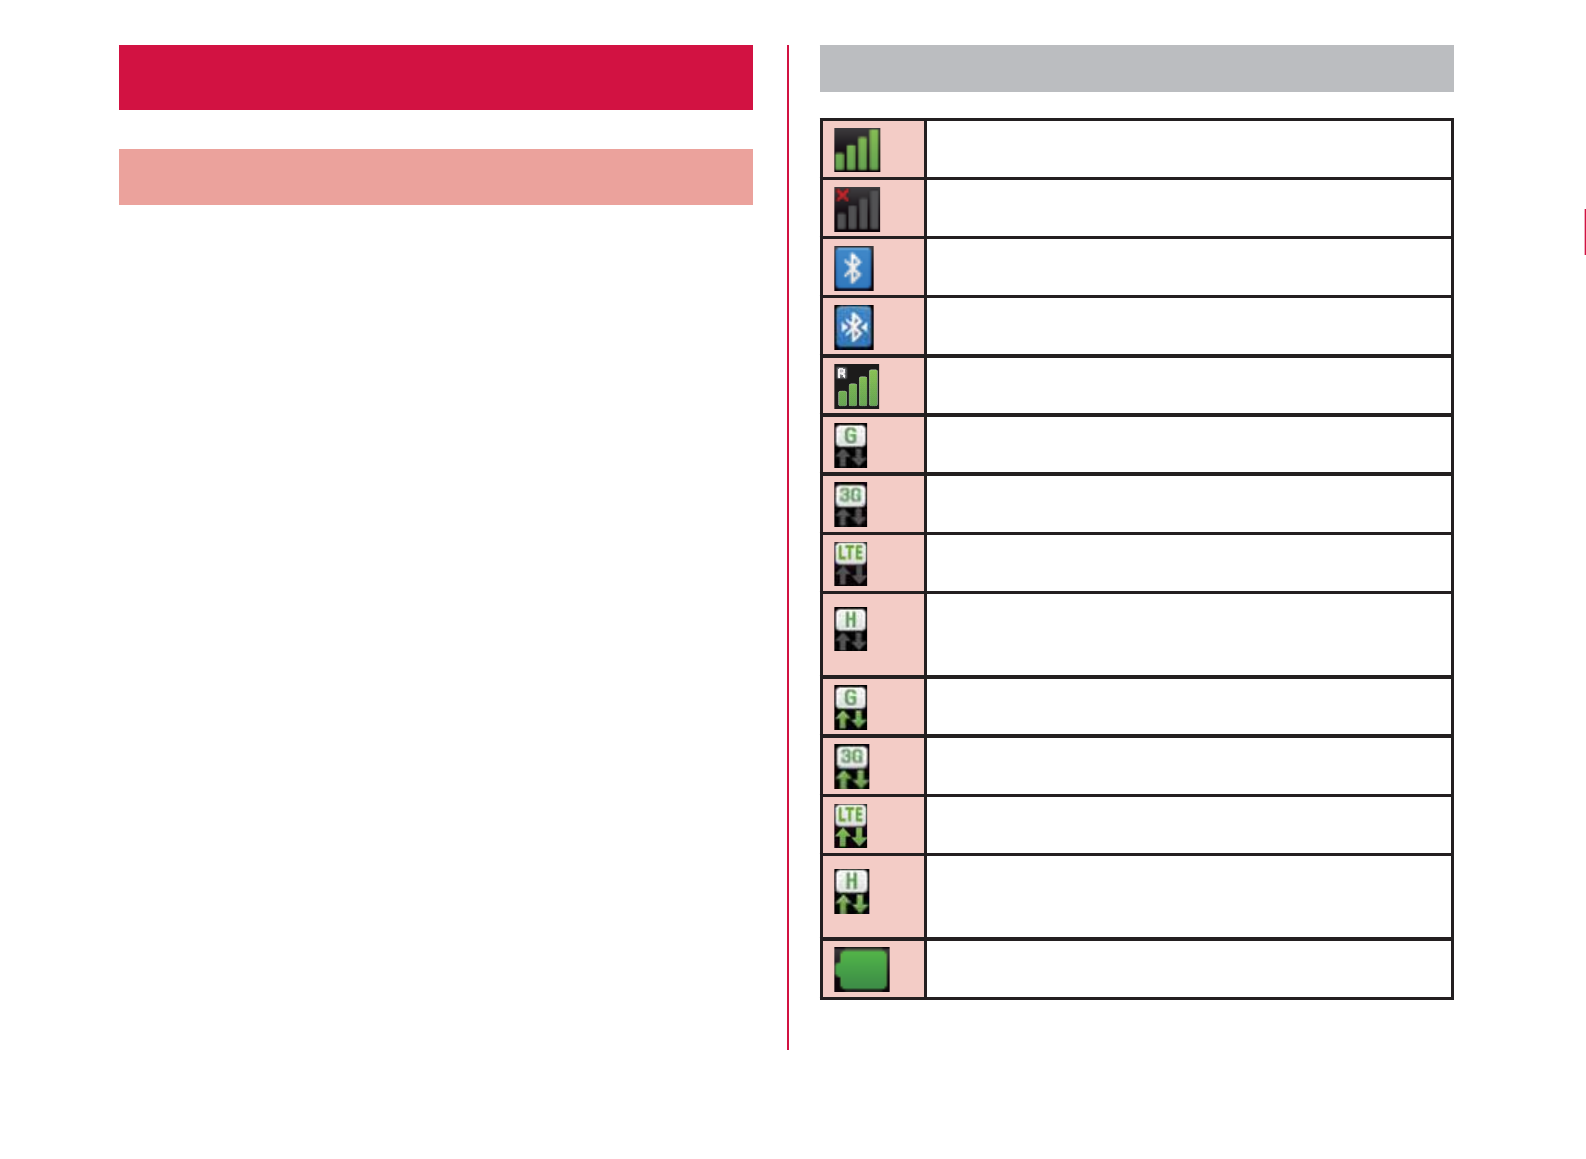
Screen Display/Icons
Status Bar
The status bar is displayed at the top of the screen. The
terminal status and notifications are displayed in the
status bar. Notification icons are displayed on the left
side, and the terminal status icons are displayed on the
right side.
Main status icons
Signal strength
Out of service area
Bluetooth ON
Connected to Bluetooth device
When you are roaming overseas
GPRS available
3G available
LTE available
FOMA high speed/HSDPA network
available
Communicating by GPRS
Communicating by 3G
Communicating by LTE
Communicating by FOMA high speed/
HSDPA network
Battery level
53
Confirmation and Settings before Using
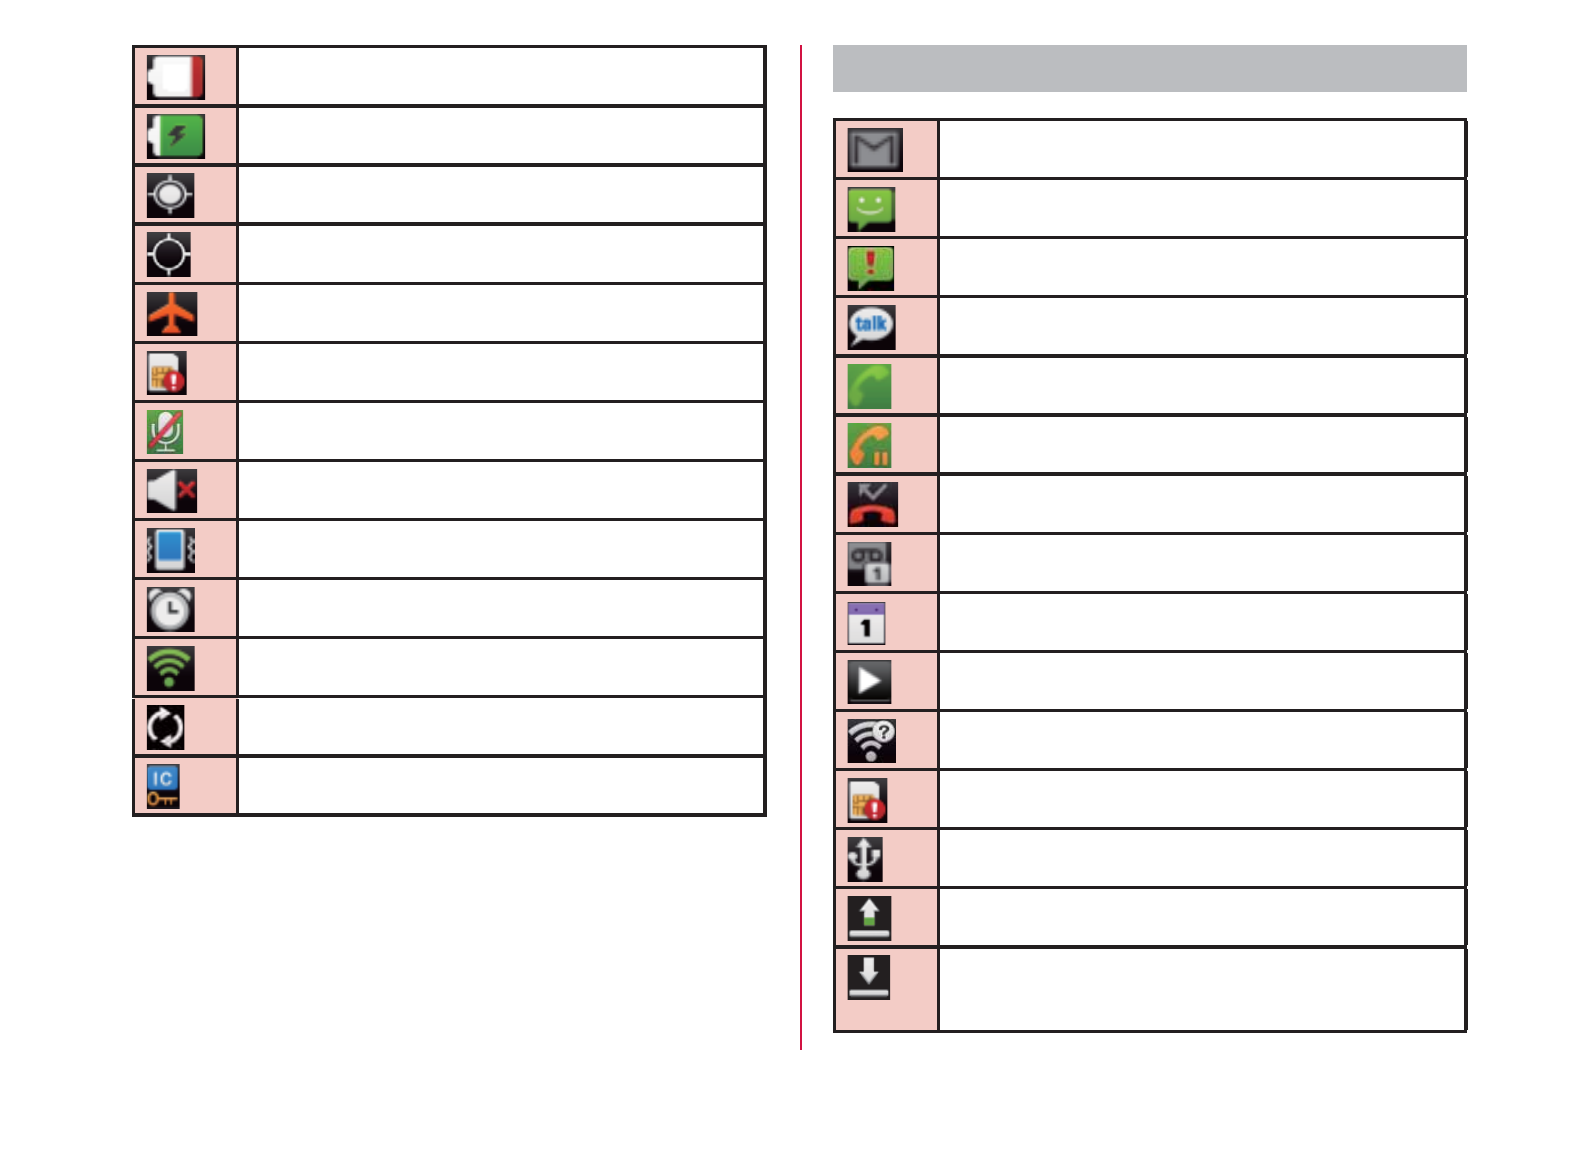
The battery needs to be charged
The battery is charging
GPS enabled
GPS is positioning
Airplane mode activated
UIM locked or UIM not inserted
Phone microphone is muted
Silent mode is set (no vibration)
Silent mode is set (vibration)
Alarm is set
Connected to Wi-Fi
Synchronizing data
Osaifu-Keitai lock activated
Main notification icons
New Gmail
New SMS message
Problem with an SMS message
New Google Talk message
Making a call or during a call
Call on hold
Missed call
New voicemail message
Upcoming calendar event
Music is playing
Discovered Open Network (Wi-Fi)
UIM is not inserted
USB is connected
Uploading data
Downloading data/Data download
completed
54
Confirmation and Settings before Using
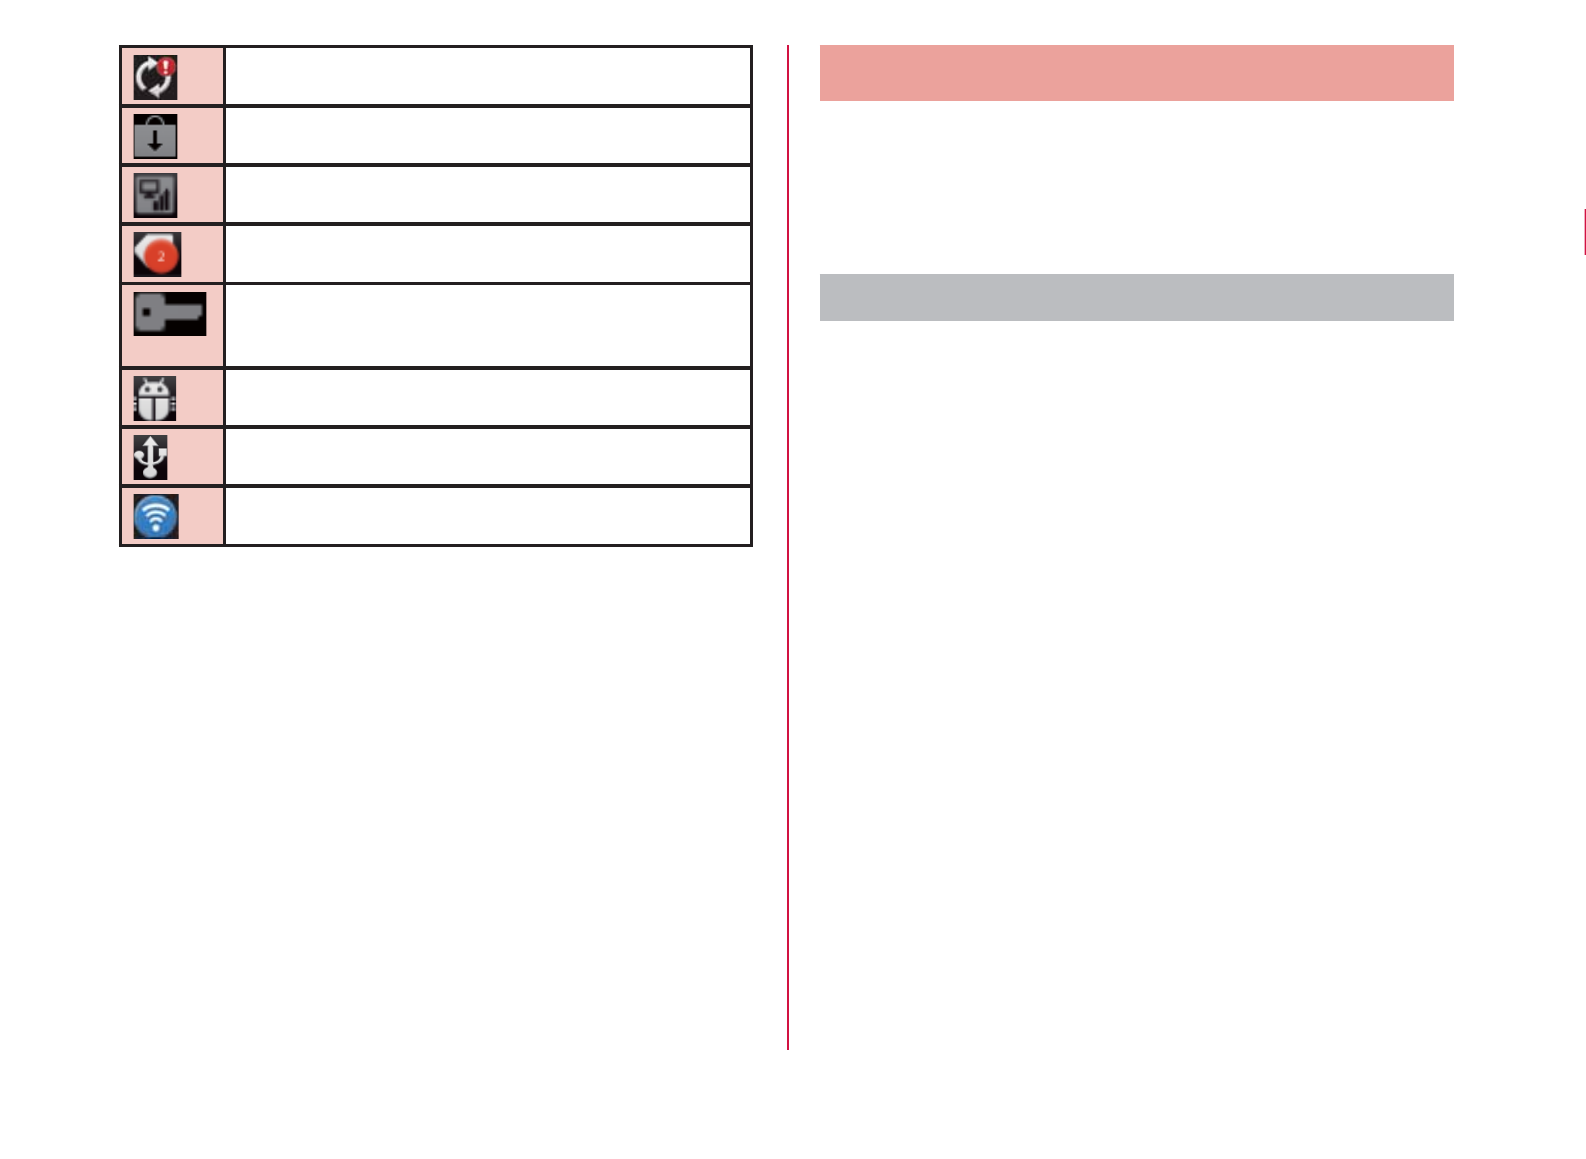
Problem with login or synchronization
Update of installed application available
Viewing 1Seg
More notifications
Connected to a VPN/Not connected to a
VPN
USB debug mode is connected
USB tethering available
Wi-Fi tethering available
Notification Panel
Notification icons are displayed in the Notification
panel. You can open notifications, such as messages,
reminders, or event notifications, directly from the
Notification panel.
Opening the Notification panel
Drag or swipe the status bar downwards
rThe Notification panel appears. Icons are
displayed at the top of the Notification panel.
Icons are blue when they are on, and gray when
they are off.
55
Confirmation and Settings before Using
a Silent mode
Switch between on and off. Touch for over 1 second
to display the "Sound settings" screen.
b Wi-Fi
Switch between on and off. Touch for over 1 second
to display the "Wi-Fi settings" screen.
c Bluetooth
Switch between on and off. Touch for over 1 second
to display the "Bluetooth settings" screen.
d GPS
Switch between on and off. Touch for over 1 second
to display the "Location & security settings" screen.
e Mobile network settings
When Wi-Fi is not available, set if access to mobile
network. Touch for over 1 second to display "Mobile
network settings" screen.
f Clear
Delete notification information and icons.
g Notification information
Display details of notification information.
Viewing notification details
Tap the notification message on the
Notification panel
rThe notification details are displayed in the
appropriate application.
Clearing notification informations
Tap "Clear" on the Notification panel
Note
rSome notifications cannot be cleared,
depending on their content.
Closing the Notification panel
Drag or swipe the bottom of the
Notification panel upwards
Note
rYou can also close the Notification panel by
tapping .
56
Confirmation and Settings before Using

Character Entry
The terminal has an on-screen keyboard that is
displayed in the touch screen for character entry.
Character Entry Using the On-
screen Keyboard
If you tap a text box on the screen, the on-screen
keyboard appears in the touch panel. The terminal
provides two types of on-screen keyboards: an on-
screen 10-key keyboard and an on-screen QWERTY
keyboard.
Tap key icon to switch the entry operation such as
character mode change.
On-screen 10-key keyboard
Use this for entering Japanese in "Kana character
input".
On-screen QWERTY keyboard
Use this for entering Japanese in "Roman letter
input".
a Reverse order key/Undo key
Displays the previous character (reverse
sequence). When "Undo" is displayed, this undoes
the last operation.
b Left cursor key
The highlight moves to the left. Touch this for over 1
second to move it continuously. It can also narrow
the conversion range.
c Symbol key
Displays a list of pictograms, symbols and
emoticons.
d Switch character mode key/Setting key
Switch the character mode. Touch for over 1 second
to display "iWnn IME Menu".
57
Confirmation and Settings before Using
e Deletion key
Deletes the character to the left of the cursor. Touch
this for over 1 second to delete the characters
continuously.
f Right cursor key
The highlight moves to the right. Touch this for over
1 second to move it continuously. It can also widen
the conversion range. Also, if you tap this icon when
the highlight is at the right end of an unconfirmed
character string, the number of characters
applicable to predictive conversion increases.
g Space key/Conversion key
Enter a space. Execute consecutive segment
conversions.
h Execution key/Enter key
Confirms the entered characters or converted
characters. If the entered characters or converted
characters have already been confirmed, this
executes the function of the text box in which the
characters were entered.
i Shift key
Switch between upper case letter and lower case
letter.
Tap once: Only the first letter is capitalized
Tap twice: All letters are capitalized
Tap three times: Lowercase
Note
rThe key display varies depending on the entry
screen or character mode.
rFor information on switching the type of on-
screen keyboard, refer to "Switching the
keyboard" (P58).
rWhen you no longer need the keyboard, you
can close it by tapping . To display it again,
tap the text box on the screen.
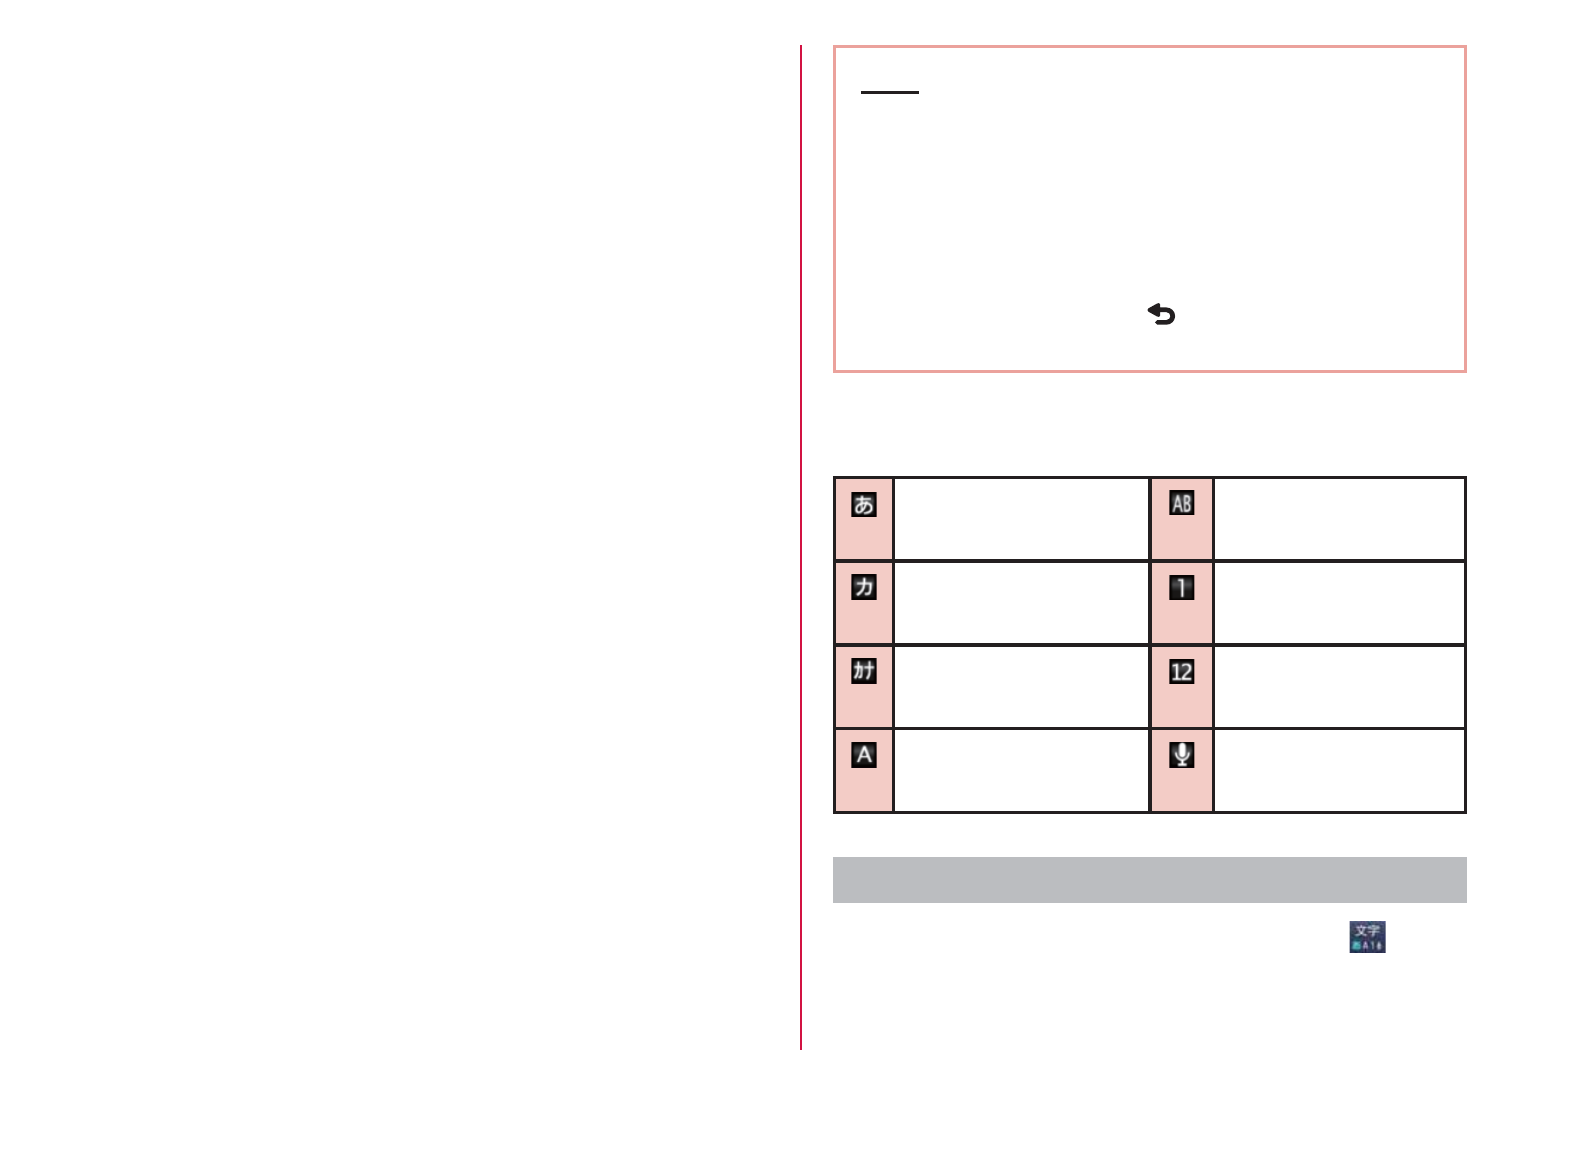
There are 8 character input modes. The current mode is
indicated by the following icons in the status bar.
Hiragana and Kanji
input
Half-width alphabet
input
Full-width Katakana
input
Full-width number
input
Half-width Katakana
input
Half-width number
input
Full-width alphabet
input
Voice Input
Switching the keyboard
On the on-screen keyboard, touch for
over 1 second
r"iWnn IME Menu" appears.
58
Confirmation and Settings before Using

"10-key

Keyboard
Type
This allows you to set the type of
keyboard to use on each screen
view (horizontal/vertical) or for each
input mode.
Voice Input Mark the checkbox to enable voice
input, and add it to the character
entry modes.
10-key Keyboard
Flick Input Mark this checkbox to change the
input method on the on-screen 10-
key keyboard to flick input. Unmark
this checkbox to change it back to
toggle input.
Flick
Sensitivity
If you tap this when the "Flick
Input" checkbox is marked, the
"Flick Sensitivity(Low

Home Screen Management
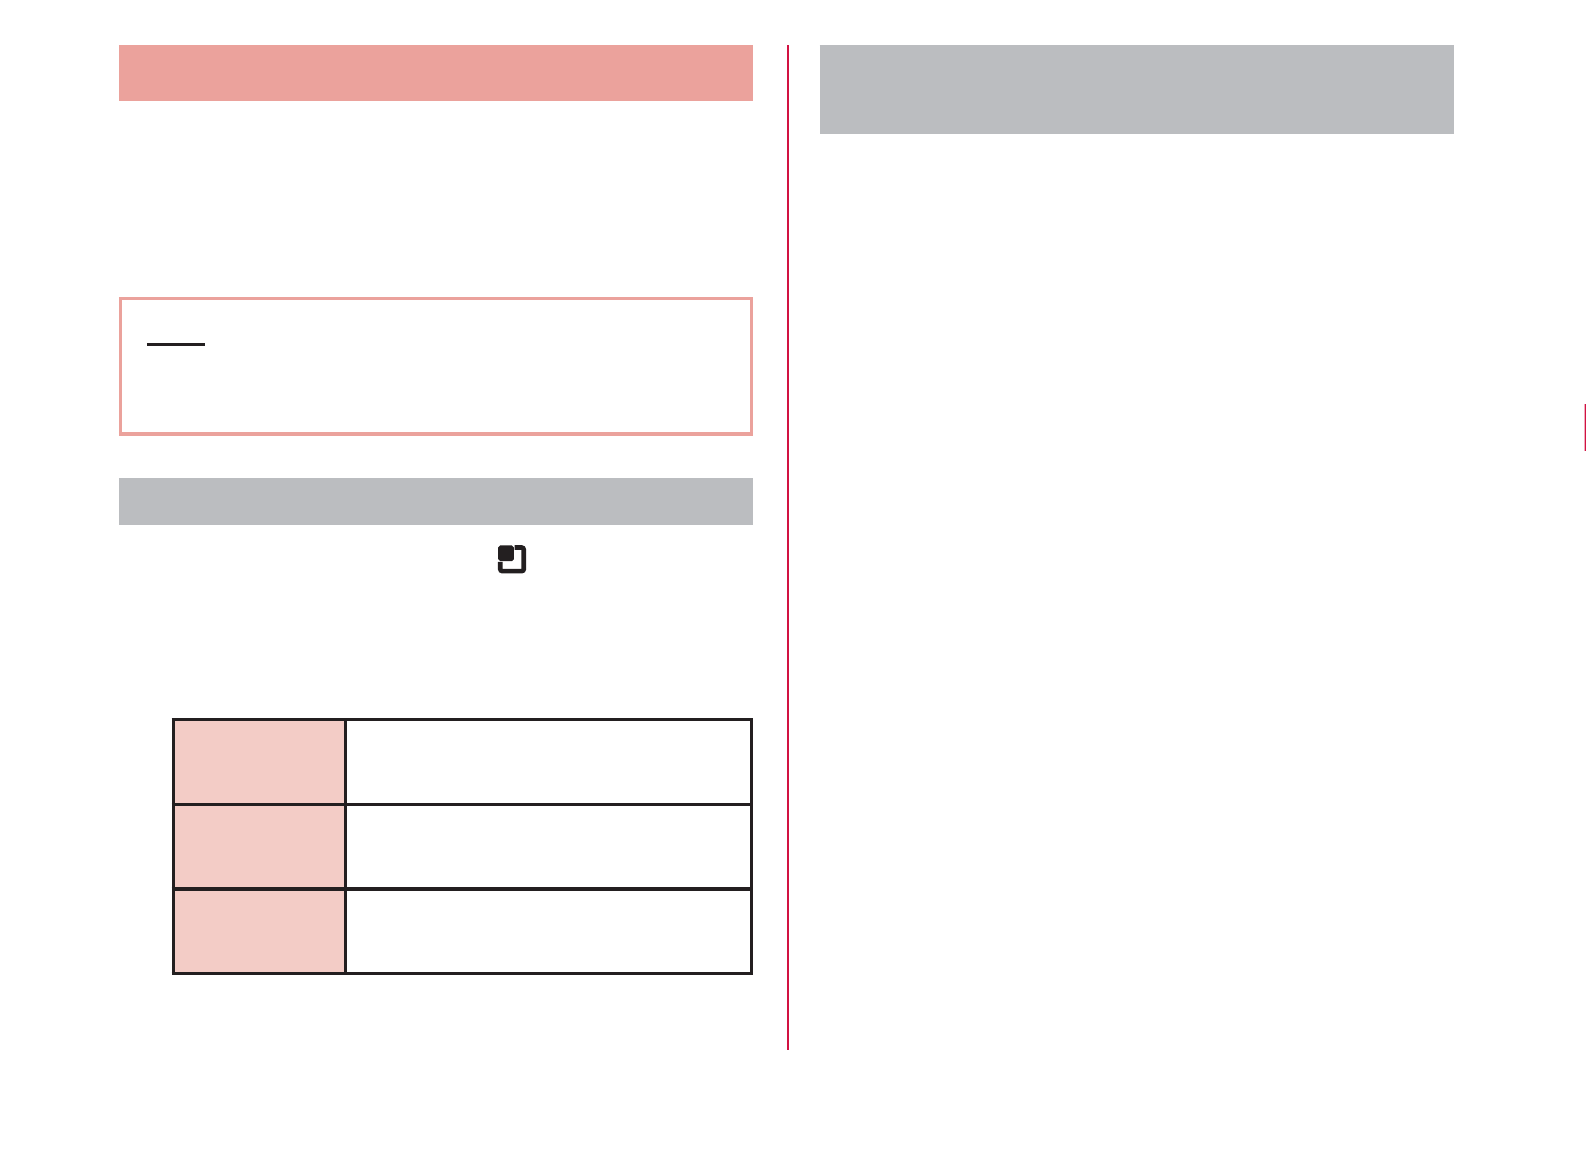
What You can Add to the Home
Screen
You can customize the Home screen.
Touch the Home screen for over 1 second
r The "Add to home screen" list screen appears.
Shortcut You can create shortcuts.
Widget You can layout Widgets.
Folder You can create folders.
Kisekae You can select the background
and icon design.
Wallpaper You can choose the wallpaper
for the Home screen.
Group You can select from groups.
Tap the item you want to add/set.
r It is added/set to the Home screen.
Moving Shortcuts, etc.
From the Home screen, touch the icon you
want to move for over 1 second
Drag the icon and release your nger
r The icon is moved.
Note
r You can also drag the icon to one of the Home
screen's extended screens to the left or right.
Deleting Shortcuts, etc. from the
Home Screen
From the Home screen, touch a shortcut
icon or widget for over 1 second
Drag it to and release your nger
r The icon is deleted from the Home screen.
Note
r It is also possible to delete by tapping “Delete"
displayed in the balloon of Step 1.
63
docomo Palette UI
Uninstalling Applications and
Widgets
From the Home screen, "Applications"
Touch the application you want to delete for
over 1 second X "Uninstall"
"OK"
r The application is deleted.
Note
r Applications installed in the terminal when
purchasing cannot be uninstalled.
Changing Folder Names
From the Home screen, tap a folder you
want to change name
r The folder window opens.
Touch the title bar for over 1 second
r The "Edit name" menu appears.
Enter a new name of the folder and tap
"OK"
r The name of the folder is changed.
Changing Kisekae
Change the wallpaper and icon of the Home screen to
change the image.
Touch the Home screen for over 1 second
r The "Add to home screen" list screen appears.
Tap "Kisekae", select a design, and tap
"Set"
r It is possible to select and set designs that you
like from a website.
r It is also possible to set from the Home screen
by X "Kisekae/Wallp" X "Kisekae".
64
docomo Palette UI

Changing Wallpaper
Touch the Home screen for over 1 second
"Wallpaper"
"Gallery" / "Live wallpapers" / "Wallpaper
gallery"
r If you have tapped "Gallery", tap an image that
you want to use as wallpaper. Drag the square
displayed on the screen to select the section
that you want to use as wallpaper, and then tap
"Save".
r Live wallpaper list appears when tapping
"Live wallpapers". Tap to select one of the live
wallpaper, then tap "Set wallpaper". Depending
on the type of wallpaper, you can set the live
wallpaper settings by tapping "Settings...".
Adding Home Screens
You can add Home screens.
From the Home screen, X "Home
screens"
r The "Home screens" screen appears.
r You can create up to 12 Home screens.
Tap one of the thumbnails with a "+" mark
r The "+" appears for screens that can be added.
Sorting Home Screens
You can sort the scroll order for Home screens.
From the Home screen, X "Home
screens"
r The "Home screens" screen appears.
Touch the thumbnail for over 1 second, and
drag it to the location where you want to
move it
65
docomo Palette UI
Deleting Home Screens
From the Home screen, tap X "Home
screens"
r The "Home screens" screen appears.
Touch the thumbnail for over 1 second,
drag it over to and release your nger
Note
r It is also possible to delete by tapping "Delete"
displayed in the balloon of Step 2.
66
docomo Palette UI
Note
r This is a list of the applications that have been
installed in this terminal at the time of purchase.
r If the software is updated, application content
and icon positions may change.
r The names of some applications may not be
fully displayed below their respective icons.
Manage Applications
Adding Shortcuts to the Home
Screen
From the Home screen, "Applications"
Touch the application icon for which you
want to create a shortcut for over 1 second,
and tap "Add"
The shortcut icon is added to the Home screen.
Uninstalling an Application
From the Home screen, "Applications"
Touch the application icon you want
to uninstall for over 1 second, and tap
"Uninstall"
The conrmation screen appears,
then tap "OK"
73
docomo Palette UI
Moving Applications
From the Home screen, "Applications"
Touch the application you want to move for
over 1 second
Drag the application and release your
nger
r The application is moved.
Group Management
Manage groups on the application screen and sort
icons.
Adding Groups
From the Home screen, "Applications"
X "Add group"
Enter a group name and tap "OK"
r The group is added on the application screen.
Sorting Groups
From the Home screen, "Applications"
Touch the group name for over 1 second,
and drag it
r The group location is moved.
74
docomo Palette UI

Editing Group Names
From the Home screen, "Applications"
Touch the group name for over 1 second,
and tap "Edit name"
Enter a new group name and tap "OK"
r The group name is changed.
Changing Group Colors
From the Home screen, "Applications"
Touch the group name for over 1 second,
and tap "Edit label"
r Select a color and tap.
Adding Groups to the Home
Screen
From the Home screen, "Applications"
Touch the group name for over 1 second,
and tap "Add"
r The group shortcut icon is added to the Home
screen.
Deleting Groups
From the Home screen, "Applications"
Touch the group name for over 1 second,
and tap "Delete"
"OK"
r The group is deleted.
75
docomo Palette UI
Searching Applications
From the Home screen, "Applications"
X "Search"
r The Search widget starts. Enter a keyword or
use Voice Input to search.
Switching Application
Screen Display
Select the display for the Application screen as Tile or
List.
From the Home screen, "Applications"
X "List format" / "Tile format"
Home Application Information
You can view the operation guide for the docomo Palette
UI.
From the Home screen, X "More" X
"Help"
r An explanation for the docomo palette UI
operation is displayed.
Version Information
From the Home screen, X "More" X
"Application info"
r The application name, provider, and version are
displayed.
76
docomo Palette UI
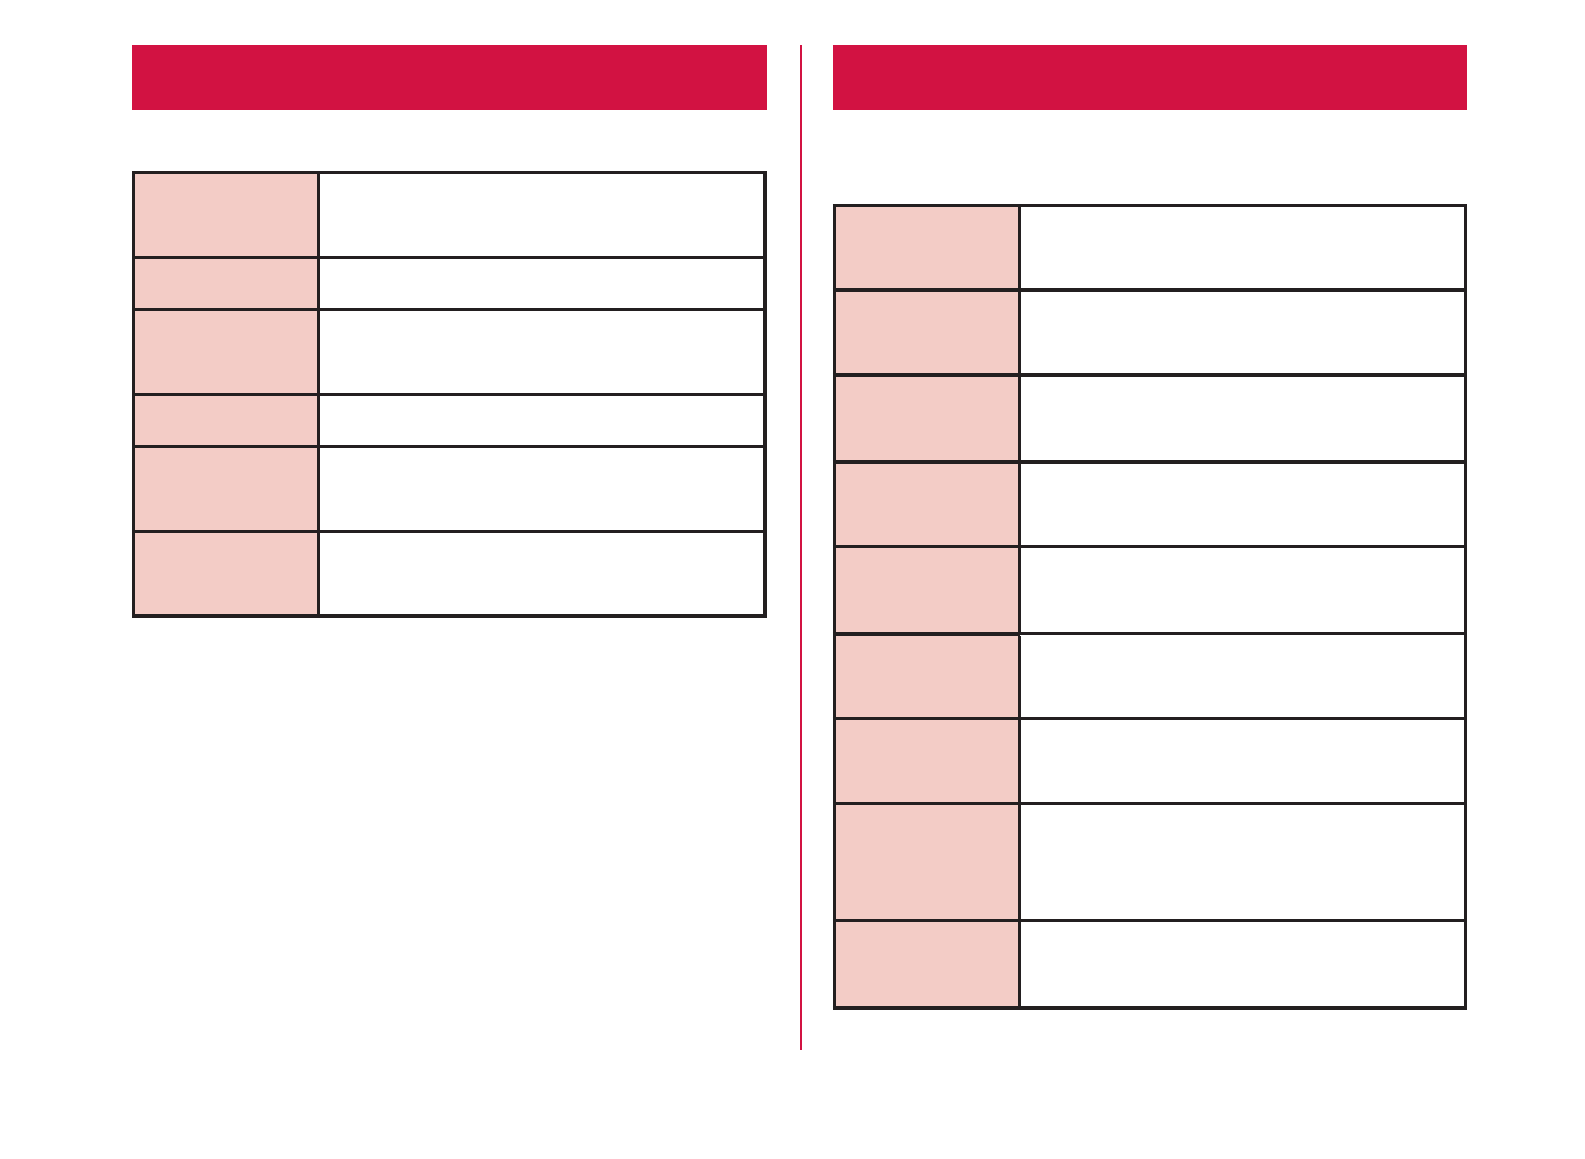
Home Application Settings
From the Home screen, X "More" X
"Home settings"
r "Home settings" screen appears.
Personal area Personal area is displayed.
Wallpaper loop The wallpaper display is
looped.
Sync function Auto communication is
executed when personal area
information is updated.
International
roaming
Auto communication is
executed during international
roaming.
77
docomo Palette UI
Calling / Network Services
Making/Receiving Calls
Making a Call
You can use the terminal to make international calls
and emergency calls, as well as standard calls. You can
also enter a pause when using phone services, such as
reserving tickets or checking your bank balance.
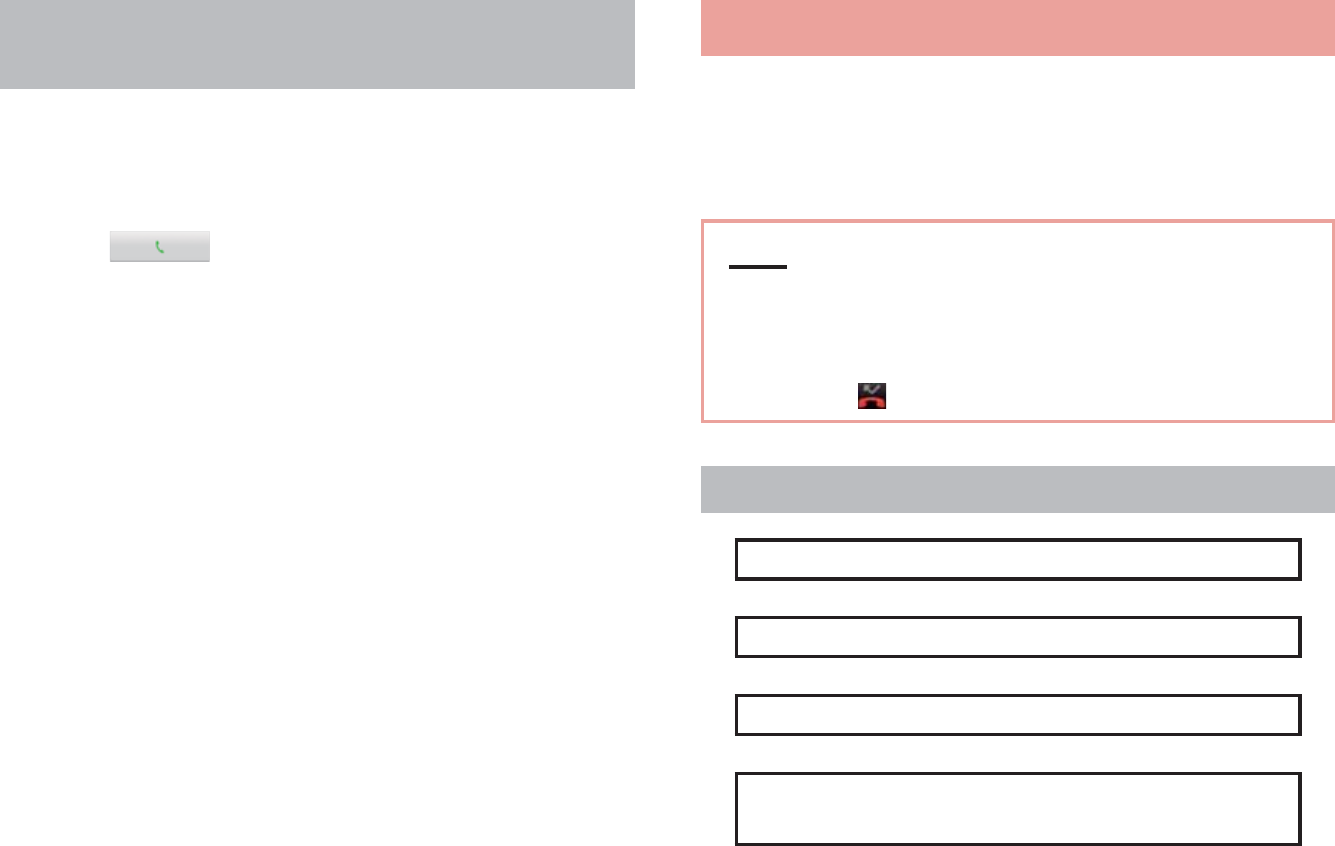
Making a call
From the Home screen, "Phone" X
"Dial"
rThe "Dial" tab appears.
Enter the phone number X Tap
rIf you enter a wrong number, tap to
delete the number.
78
Calling / Network Services
Ending a call
During a call, "End"
Emergency call
Emergency call Phone number
Police 110
Fire department or
ambulance service
119
Japan Coast Guard 118
Note
rWhen you are making an emergency call (110,
119, and 118) from your terminal, be sure
to notify that you are calling from a mobile
phone and give your mobile phone number
and present location clearly, as the police/fire
department may call you back for confirmation.
During an emergency call, be sure to stay where
you are so that your call will not be interrupted.
After making an emergency call, do not turn
off your mobile phone immediately. Keep it on
for about 10 minutes so that it can receive an
incoming call.
79
Calling / Network Services

rDepending on the location from which you make
an emergency call, connection may be made
to the fire department or the police of another
jurisdiction.
rIn Japan, the 110, 119, and 118 emergency
numbers cannot be dialed when UIM is not
inserted, from the PIN code input screen or from
the PIN unblocking key input screen. For details
on PIN code, refer to "Security Code and UIM
Protection" (P111).
80
Calling / Network Services
Calls to mobile phone
From the Home screen, "Phone" X
"Dial"
rThe "Dial" tab appears.
Enter "010" X Country code X
Recipient's mobile phone number, and
tap
Note
rIf a recipient's mobile phone number or an area
code begins with "0", omit "0". However, "0" may
be required when calling some countries or
areas, such as Italy.
r"+" (touch "0" for over 1 second to input "+") or
"009130-010" can also be used instead of "010".
rFor details on WORLD CALL, refer to DOCOMO
"International Services website".
Receiving a Call
The terminal plays a ringtone when there is an incoming
call. In Silent mode, the ringtone does not sound. If the
terminal has been set to vibrate, it vibrates when there
is an incoming call.
Receiving a call
When an incoming call arrives, tap
"Activate" X "Accept"
rYou can talk to the caller.
Note
rIf the caller has been saved in Contacts
(Phonebook), the caller's name and phone
number are displayed. If the caller is not saved
in Contacts (Phonebook), only the phone
number is displayed.
Declining a call
When an incoming call arrives, tap
"Activate" X "Reject"
rThe incoming call is declined.
Muting ringtone
Press the Volume key (upper)/Volume
key (lower) while an incoming call
ringing
rThe ringtone is muted.
81
Calling / Network Services
Operations during a Call
During a call, you can adjust the volume, turn the
speaker ON/OFF, mute the microphone, and put the call
on hold, depending on the usage conditions.
Adjusting Call Volume
During a call, you can adjust the reception volume.
Press Volume key (upper)/Volume key
(lower)
rThe call volume changes accordingly.
Using Call Options
During a call, you can put the caller onto speaker or
temporarily mute the microphone.
Turning the speaker ON/OFF
During a call, "Speaker"
rYou can hear the caller's voice through the
speaker.
With the speaker ON, "Speaker"
rYou can no longer hear the caller's voice
through the speaker.
Note
rDo not hold the terminal against your ear with
the speaker ON.
rSpeak into the terminal from a distance of no
more than 50 cm. If you find it difficult to hear
what is being said, turn off the speaker.
Muting the microphone
During a call, "Mute"
rThe caller can no longer hear what you are
saying.
With the microphone OFF, "Mute"
rThe caller can hear what you are saying again.
Putting the call on hold
During a call, "Hold"
rThe call is put on hold.
In the hold state, "Unhold"
rHold is canceled, and you can resume the call.
82
Calling / Network Services
Call Log
This automatically records a history of your incoming
and outgoing calls. You can also use the call log to call a
phone number or add it to Phonebook.
a The names of the recipient and caller are displayed.
b A call is made.
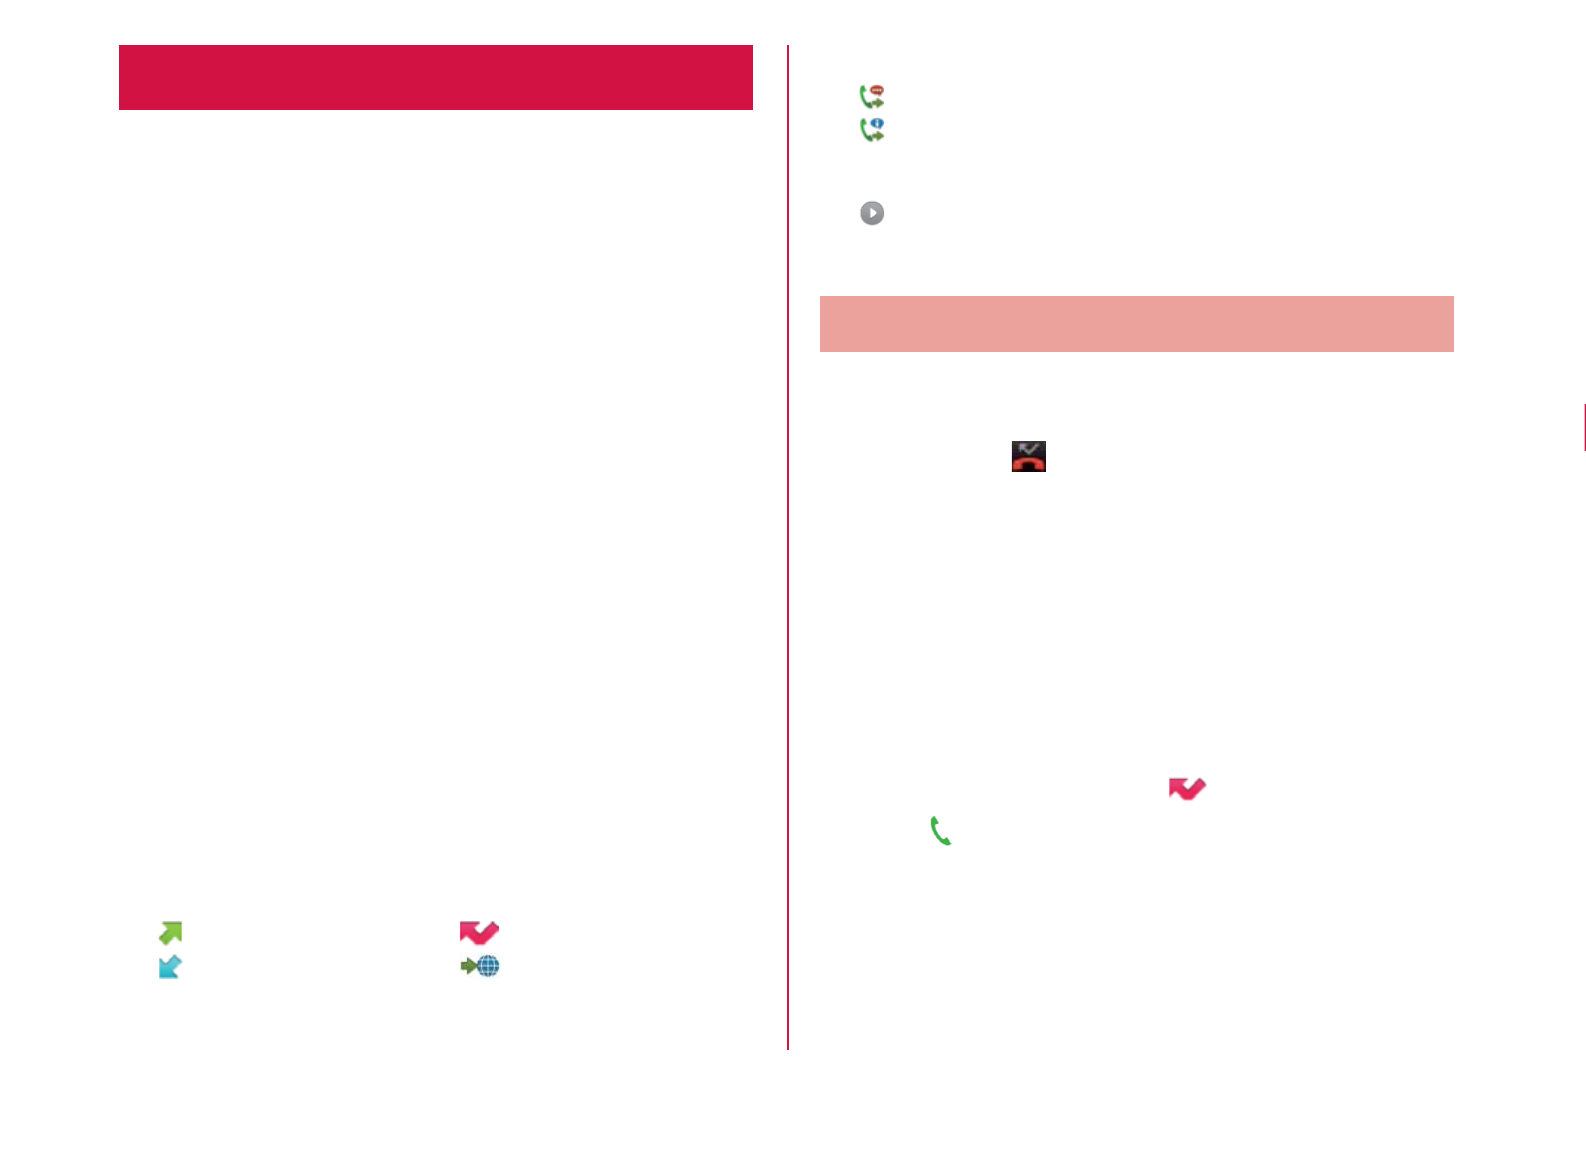
c Log icons are displayed.
: Dialed calls log
: Received calls log
: Missed calls log
: International call log
d Call icon
: Call icon without caller ID notification
: Call icon other than without caller ID notification
e Logs with the same person are displayed together as
. The number in parentheses shows the number of
logs.
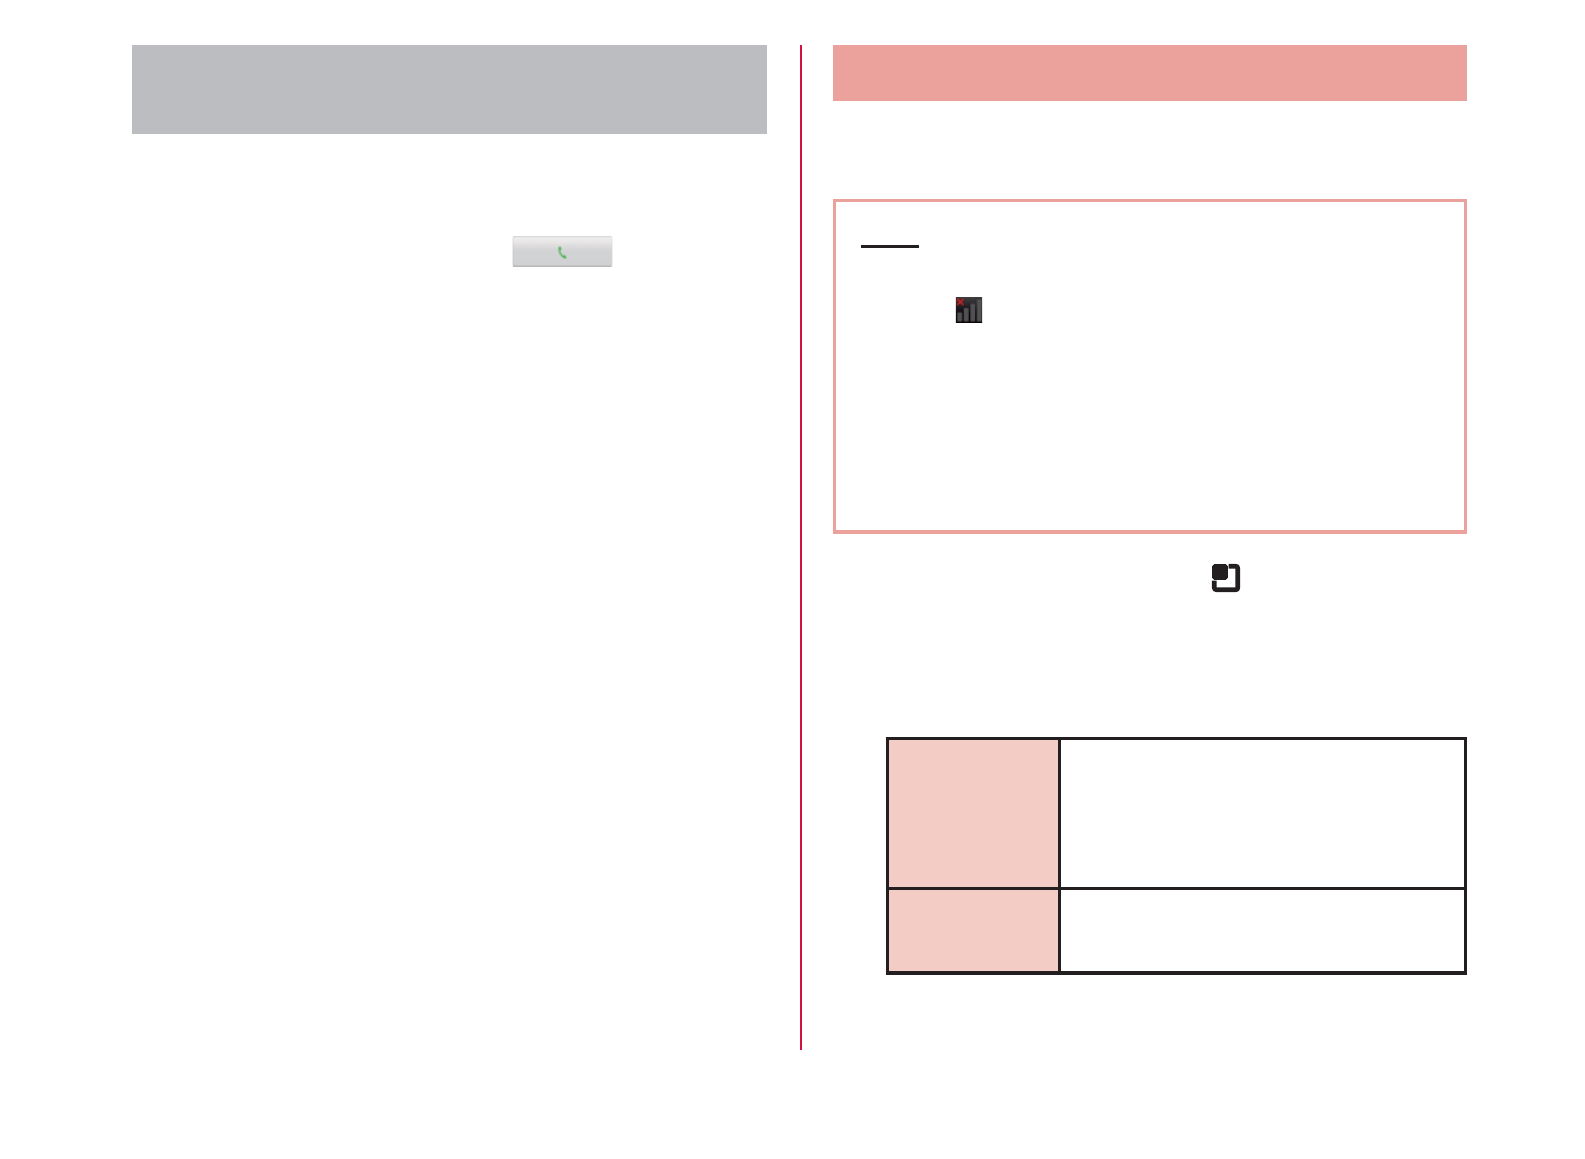
Calling to Answer a Missed Call
When you have missed calls, a missed call notification
appears in the status bar.
If you see in the status bar, drag or
swipe the status bar downwards
rThe missed call notification appears in the
Notification panel. The missed call notification
displays the caller's phone number or the
caller's name that is saved in Phonebook, and
the time or date of the missed call.
Tap the missed call notification
rThe "Incoming history" tab appears.
rFor the missed call log, is displayed.
Tap on the right of the missed call log
rThe call is made.
83
Calling / Network Services
Calling a Number from the Call Log
You can make calls to the phone numbers stored in the
call log.
From the Home screen, "Phone" X
"Recent calls" tab
r"Incoming history" and "Outgoing history"
appear.
Tap on the right of the other party's
name or phone number
rThe call is made.
Note
rYou can make a call by tapping the name or
phone number on the "Recent calls" tab and
then "Call".
rYou can also make a call by touching the name
or phone number on the "Recent calls" tab for
over 1 second and then tapping "Call ×××-×××-
×××××" in the menu that appears.
Registering Phone Numbers from
the Call Log to the Phonebook
You can register unregistered items from the call log to
the Phonebook.
On the "Recent calls" tab, tap a phone
number
"Add to phonebook"
rThe "Register/Update phonebook" screen
appears.
"Register new"
rWhen multiple accounts have been registered,
select the account for which you want to create
a phonebook.
Enter information, and tap "Save"
rIt is registered as a Phonebook.
Note
rIt is also possible to register to the Phonebook
by touching the phone number that you want
to register for over 1 second on the "Recent
calls" tab and tapping "Add to phonebook" X
"Register new".
84
Calling / Network Services
Deleting the Call Log
The call log is automatically added. However, you can
delete a call log or all call logs.
Deleting a desired call log
On the "Recent calls" tab, touch a phone
number for over 1 second
rA menu appears.
"Remove from call log" X "OK"
rThe call log is deleted.
Deleting the entire call log
On the "Recent calls" tab, "Incoming
history" / "Outgoing history" X X
"Delete all" X "OK"
rThe entire "Incoming history"/"Outgoing history"
call log is deleted.
Phonebook
In Phonebook, you can enter information about your
personal contacts, such as their phone numbers, email
addresses and web service accounts.
Displaying the Phonebook
You can view all the information that is saved in
Phonebook.
From the Home screen, "Phone" X
"Phonebook" tab
rThe Phonebook appears.
85
Calling / Network Services
a The Phonebook (profile) is displayed.
b Call log is displayed. You can also confirm the sent/
received details for sp-mode mail and SMS.
c Your profile (My profile) is displayed.
d Tap the icon that is displayed by selecting the image
to make a call, create an email, or use various
services on the internet.
e Phonebook belonging to the selected group are
displayed.
f A new phonebook is registered.
g Enter a keyword and search Phonebook.
Note
rWhen you open Phonebook for the first
time, descriptions for adding Phonebook are
displayed. Tap X "Others" X "Import/Export"
to import or export contacts from your UIM.
Registering Phonebook
You can register a new phonebook.
On the "Phonebook" tab, "Register"
rWhen multiple accounts are registered, select
the account for which you want to create a
phonebook.
Enter information, and tap "Save"
rThe entered information is added to Phonebook.
Editing Phonebook
You can edit a phonebook that has already been
registered.
On the "Phonebook" tab, tap a
phonebook that you want to edit
rThe Profile screen appears.
"Edit"
rThe "Edit profile" screen containing previously
entered information appears.
Add, delete or edit the information, and
tap "Save"
rThe Phonebook is updated.
86
Calling / Network Services
Searching the Phonebook
You can search for a phonebook on the "Phonebook"
tab by dragging in the tab or by text entry.
On the "Phonebook" tab, "Search"
Enter the word(s) that you are looking
for
rSearch candidates and search results in the
terminal are displayed.
Tap a phonebook
rThe Phonebook menu appears.
Making Calls/Sending Emails/
Chatting via Phonebook
You can make a call directly from Phonebook. If you
have added an email address or chat account to the
phonebook entry, you can also send an email or launch
a chat application.
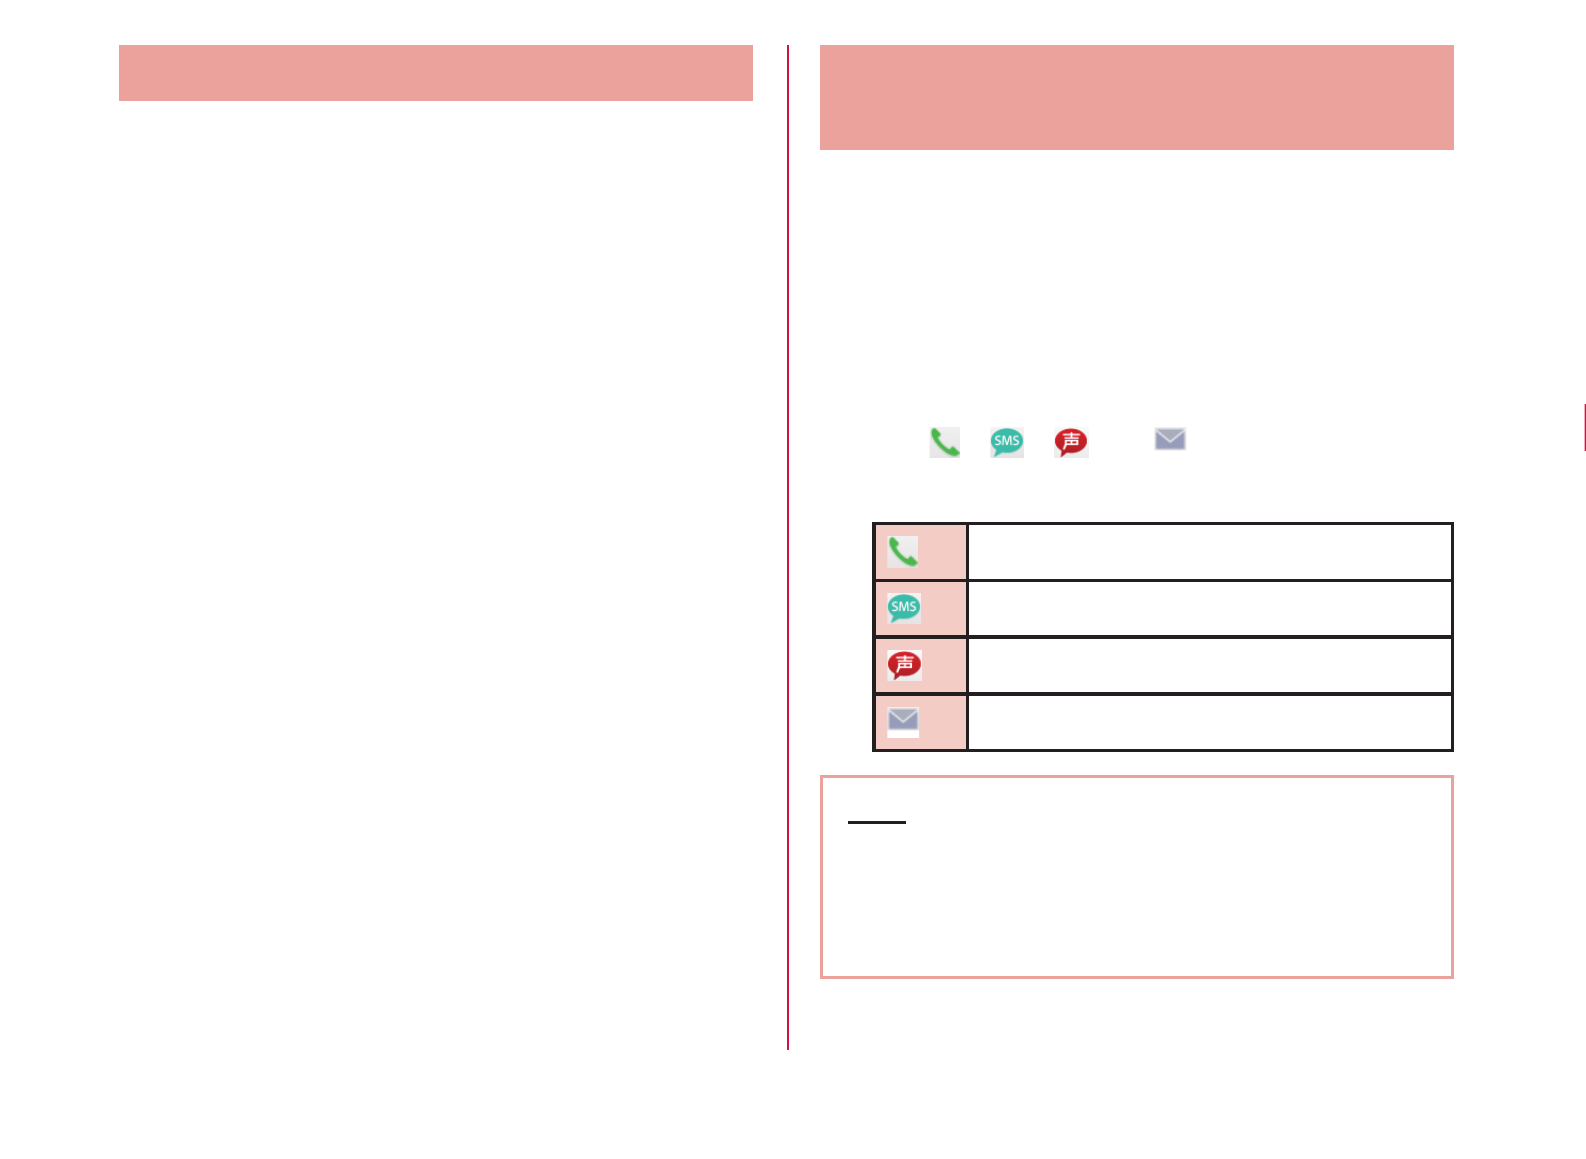
On the "Phonebook" tab, tap one of the
Phonebook contacts
rThe Profile information is displayed.
Tap , , , or
rYou can now make a call, send an email or chat.
Make a call.
Send an SMS message.
Record Koe-no-Takuhaibin
Send an email.
Note
rTouch the Phonebook for over 1 second to
display the option menu. You can now make a
call if you tap "Phone", or send an SMS message
if you tap "SMS".
87
Calling / Network Services

Viewing the Map of a Contact's
Address
If the address has been added to the Phonebook, you
can view its location in a map.
On the "Phonebook" tab, tap one of the
Phonebook contacts
rThe phonebook information appears.
On the "Profile" tab, touch the address
for over 1 second X "Display map"
rWhen selecting "Maps" or "
Adding a Phonebook to Favorites
When you add a phonebook to Favorites, it appears on
the "Favorites" tab. The "Favorites" tab allows you to
quickly display a specific Phonebook.
On the "Phonebook" tab, tap the
phonebook that you want to add to
Favorites
rThe Profile screen appears.
Tap
rThe phonebook is added to the "Favorites" tab.
Note
rWhen you display a phonebook that has been
added to Favorites, the star icon in the top right-
hand corner of the screen turns yellow.
rIf you tap the yellow star icon, it turns gray.
- If the phonebook has a call log, the
phonebook is displayed in the "Favorites" tab.
- If the phonebook has no call log, the
phonebook is undisplayed in the "Favorites"
tab.
rIf you tap a gray star icon, it turns yellow and
the phonebook is displayed in "Favorites".
89
Calling / Network Services

Message recording
From the Home screen, "Phone" X "Dial"
Enter the phone number X Tap
"Koe-no-Takuhaibin"
rThe terminal is connected to the Koe
Voice Mail Service
If you are in a location with no radio reception, the
terminal is powered off, or you are unable to take the
call within the preset ring time, the Voice Mail Service
answers a call with a voice mail greeting and records
the caller's message.
Note
rThe message can be recorded up to 3 minutes
per 1 message, up to 20 messages, and stored
up to 72 hours.
rIf you do not answer an incoming call when the
Voice Mail Service is set to "Activate", the call
is saved in "Incoming history" as a missed call,
and appears in the status bar.
rThis terminal does not record voice messages
on internal memory. Use the Voice Mail Service.
92
Calling / Network Services
Basic flow of the Voice Mail Service
Start the Voice Mail Service.
Checking
messages
Check whether there is a new
Voice Mail message. After
checking, the completion
message appears.
Message
notification
settings
Configure the setting for whether
to notify when new messages
arrive.
Note
rIf you have messages at the Voice Mail Service
Center, appears in the status bar. Once
all messages have been cleared or stored,
following the guidance, will disappear.
Playing a voice message
Drag or swipe the status bar downwards
rThe Notification panel appears.
"Voice mail" X "OK"
rThe terminal is connected to the Voice Mail
Service Center. Follow the guidance to play
messages.
94
Calling / Network Services
Call Waiting Service
When there is another incoming call while you are on a
call, the in-call ringtone notifies you of the second call.
You can answer the second call by putting the first call
on hold. You can also put your current call on hold and
make a call to another party.
Note
rEven when the call is on hold, the caller is
charged for a call fee.
Setting the Call Waiting Service
From the Home screen, X "Settings"
X "Call settings" X "Network service" X
"Call waiting"
rThe "Call waiting" screen appears.
Activate
service
Tap "OK" to start the Call Waiting
Service.
Deactivate
service
Tap "OK" to deactivate the Call
Waiting Service.
Settings
confirmation
The current settings are
displayed.
Putting the current call on hold and
answering an incoming call
If you hear a beep during a call,
"Activate" X "Accept"
rThe first call is automatically put on hold and the
incoming call is answered.
Switch to the first call
rTo end the second call, tap "End". The second
call is terminated and you return to the first call.
rTo put the second call on hold, tap "Swap". The
second call is put on hold and you return to the
first call. Tapping "Swap" switches to the other
party.
95
Calling / Network Services
Putting the current call on hold and
making a call to another party
During a call, "Add call"
rThe "Dial" tab appears.
Enter the other party's phone number
X
Tap
rThe first call is automatically put on hold and
you are put through to the new call. You can
also search for a phonebook if you tap the
"Phonebook" tab or "Recent calls" tab.
Switch to the first call
rTo terminate the new call, tap "End". The new
call is terminated and you return to the first call.
rTo put the new call on hold, tap "Swap". The new
call is put on hold and you return to the first call.
Tapping "Swap" switches to the other party.
Call Forwarding Service
The Call Forwarding Service forwards a call to a preset
forwarding number if you do not answer the call within
the preset ring time, or are outside of the service area
or if the terminal is powered off.
Note
rIf you do not answer an incoming call when the
Call Forwarding Service is set to "Activate", the
call is saved in "Incoming history" as a missed
call, and appears in the status bar.
Basic flow of the Call Forwarding Service
Register the forwarding number.
Call charge for the Call Forwarding
Service
Caller
Setting the Call Forwarding guidance
on/off
From the Home screen, "Phone"X "Dial"
rThe "Dial" tab appears.
"1" X "4" X "2" X "9" X
rVoice guidance is played. Follow the guidance
to configure the settings. For details, refer to
"Mobile Phone User's Guide [Network Services]".
Caller ID Notification Service
When making a call, your phone number can be shown
in the display of the other party's phone.
Note
rThe Caller ID Notification Service is not available
when (out of service area) is displayed.
rThe service is only available when the other
party's phone can display the caller ID.
rIf an announcement requesting caller ID is
heard when making a call, activate Caller ID
Notification or add the "186" prefix to the phone
number and call again.
From the Home screen, X "Settings"
X "Call settings" X "Network service" X
"Caller ID notification"
rThe "Caller ID notification" screen appears.
Settings Set whether the other party is
notified of your caller ID. Tap
"Notify" to enable notification, and
"Not notify" to disable notification.
Settings
confirmation
The current Caller ID Notification
settings are displayed.
98
Calling / Network Services
Public Mode (Power OFF)
When you receive at a public location where you want to
refrain from using or while driving, guidance is provided
to callers. Public mode (Power OFF) guidance is also
played when you are outside of the service area or
when there is no signal.
Public mode (Power OFF) settings
From the Home screen, X "Settings"
X "Call settings" X "Network service" X
"Public mode (power OFF) settings"
rThe "Public mode (power OFF) settings" screen
appears.
Activate
service
Tap "OK" to activate Public mode
(Power OFF).
Deactivate
service
When Public mode (Power OFF)
is set, tap "OK" to deactivate the
service.
Settings
confirmation
The current settings are
displayed.
99
Calling / Network Services
Wi-Fi Tethering Settings
Connect wireless LAN compatible device up to eight
devices to the Internet simultaneously using the terminal
as a Wi-Fi hotspot.
Note
rWi-Fi tethering and USB tethering cannot both
be used at the same time.
Activating Wi-Fi tethering
From the Home screen, X "Settings"
X "Wireless & networks" X "Portable
hotspot"
"Portable Wi-Fi hotspot"
rConfirm the details of the warning and then tap
"OK".
rWhen activating for the first time, a dialog for
entering a new password appears. Enter a new
password, and then tap "Save".
Setting Wi-Fi access point
From the Home screen, X "Settings"
X "Wireless & networks" X "Portable
hotspot"
"Portable Wi-Fi hotspot settings"
"Configure Wi-Fi hotspot"
r
"Configure Wi-Fi hotspot" menu appears.
Enter network SSID in the "Network
SSID" box
"Security"
r"S
ecurity" menu appears. Select appropriate one
from "Open" and "WPA2 PSK".
r
The password entry is necessary if "Se
curity" is set
to "WPA2 PSK".
"Save"
Note
rNetwork SSID is set to "AndroidAP", and security
is set to "WPA2 PSK" by default. Set Security as
needed.
102
Settings
Connecting to VPN (Virtual
Private Network)
VPN (Virtual Private Network) is a technique to access
to the information protected in local network from other
networks. VPN is generally equipped in companies,
schools or other facilities. Users can access the local
network and view information outside the premise.
To set VPN access from the terminal, security
information from network administrator is required.
Adding a VPN
From the Home screen, X "Settings"
X "Wireless & networks" X "VPN
settings"
"Add VPN"
Tap a VPN type to add
rPPTP is unavailable when ISP is set to sp-mode.
Tap "VPN name" X Enter a VPN name X
Tap "OK"
Tap "Set VPN server" X Enter the
settings of VPN server X Tap "OK"
Enter other necessary items
X "Save"
Connecting to a VPN
In VPN list, tap a VPN name to connect
rA menu appears.
Tap "Username" X Enter a user name
Tap "Password" X Enter a password
"Connect"
rYou can also connect to a VPN by touching a
VPN name to connect for over 1 second and
tapping "Connect to network".
Editing a VPN
In VPN list, touch a VPN name to edit for
over 1 second
rA menu appears.
"Edit network"
rThe detailed setting screen is displayed with the
registered information entered.
Add, delete or edit the information, and
tap X "Save"
rThe settings are updated.
103
Settings
Deleting a VPN
In VPN list, touch a VPN name to delete
for over 1 second
rA menu appears.
"Delete network" X "OK"
Setting the Access Point
The access points (sp-mode, mopera U) required for
connecting to the Internet are preset. You may add or
change them if necessary.
The sp-mode is set as the default access point.
Checking the access point being used
From the Home screen, X "Settings"
X "Wireless & networks" X "Mobile
networks" X "Access Point Names"
Setting an additional access point <New
APN>
From the Home screen, X "Settings"
X "Wireless & networks" X "Mobile
networks" X "Access Point Names" X
X "New APN"
Tap "Name" X Enter the network profile
name you want to create X Tap "OK"
Tap "APN" X Enter the access point
name X Tap "OK"
Enter any other items requested by your
network operator
X "Save"
Note
rDo not change MCC to anything other than
440, or change MNC to anything other than 10.
Doing this will result in not being shown on the
screen.
rIf the MCC and MNC disappear from the screen
after changing the settings, you can either
restore default settings or manually set the
access points again.
104
Settings

Initializing an Access Point
When you initialize an access point, it returns to its
default settings.
From the Home screen, X "Settings"
X "Wireless & networks" X "Mobile
networks" X "Access Point Names"
X "Reset to default"
sp-mode
sp-mode is an ISP for NTT DOCOMO smartphones. In
addition to Internet connection, this also provides an
email service that uses the same email addresses as
i-mode (@docomo.ne.jp). The sp-mode is a paid service
that requires subscription. For details about sp-mode,
refer to the NTT DOCOMO website.
mopera U
mopera U is an NTT DOCOMO ISP. If you have
subscribed to mopera U, you can use the Internet after
making the simple settings. mopera U is a paid service
that requires subscription.
Setting mopera U
From the Home screen, X "Settings"
X "Wireless & networks" X "Mobile
networks" X "Access Point Names"
Tap to select the "mopera U" or "mopera
U
Remote
operation
settings
Set to remotely control the
terminal from a docomo mobile
phone, land-line phone, NTT
public phone, etc.
Public mode
(power OFF)
settings
"Public Mode (Power OFF)
Settings" (P99)
107
Settings
Sound
This allows you to configure various sound settings,
such as the type and volume of ringtones, Silent mode
and Vibrate.
General
Silent mode Enable/disable Silent mode. When
in Silent mode, all sounds apart from
music/video and alarms are muted.
Vibrate Set when to use the vibrator.
Volume Set the volume of the ringtone,
music/video and alarms. Sound
volume of notification also can be
adjusted.
Incoming calls
Phone
ringtone
Set the sound used as the ringtone.
Notifications
Notification
ringtone
Set the sound used for notifications.
Feedback
Audible touch
tones
Set whether to play a sound when a
phone number is entered.
Audible
selection
Set whether to play a sound when a
menu item is selected.
Screen lock
sounds
Set whether to play a sound when
the screen is locked/unlocked.
Haptic
feedback
Set whether to vibrate the terminal
during specific operations, such as
, , and .
108
Settings

Display
This allows you to configure display settings, such as
screen brightness and animation.
Brightness Set the screen brightness.
Auto-rotate
screen
Set whether to automatically change
the screen display when the terminal
is rotated.
Animation Configure the animation settings.
Screen
timeout
Set how long to keep the backlight
on after the last time you use the
terminal.
Screen
optimization
Adjust the display of downloaded
applications according to resolution.
Sensor settings
Motion
sensor
calibration
Adjust the calibration of the motion
sensor.
Gesture
This allows you to enable or disable each motion
gesture.
Home screen
Rearrange
items
You can change item locations by
tilting the phone to the left and right
while an item is selected.
rThis is only available when the
Home setting is "Home". It does
not work when "docomo Palette
UI" is used.
Incoming call
Mute When the phone is flipped while
ringing, the ringtone will stop.
Alarm
Snooze
(turn off)
When the phone is flipped while
ringing, the alarm will stop.
Gallery
Previous/next
picture
Tap the sides to view the previous/
next image.
109
Settings
Location & Security
This allows you to configure settings such as GPS,
screen lock and passwords.
My location
Use wireless
networks
Display the current location in an
application using a wireless network.
Use GPS
satellites
Set whether to use GPS.
Screen unlock
Set up screen
lock
Set whether to use the screen lock
and configure its settings.
SIM/RUIM card lock
Set up SIM/
RUIM card
lock
Set whether to lock the SIM card
(UIM) and configure its settings.
Passwords
Visible
passwords
Set whether to display the
characters entered for the
password.
Device administration
Select device
administrators
Add or delete the administrator of
this terminal.
Credential storage
Use secure
credentials
Set whether to allow the application
to access the secure certification
and other certification information.
Set password Set/change the credential
information storage password.
Clear storage Delete all content of credential
information storage and reset the
password.
110
Settings

Note
<On-Screen Unlock>
rIf you enter incorrect screen-unlock patterns
5 times, a message prompting you for reentry
will appear after 30 seconds. If you forget the
screen-unlock pattern, tap "Forgot pattern?" on
the reentry screen then log in with your Google
account that has been set on your terminal. In
this way, you can enter a new pattern.
rNote that you cannot unlock the screen if you
forget the PIN or screen-lock password and
have not set a Google account.
Security Code and UIM Protection
For convenient and secure use of the terminal, you can
set codes to lock the terminal and network security
codes to be used with network services. You can make
better use of the terminal by using different codes
depending on the purposes.
Note
rAvoid setting security codes using your
birthday, part of your phone number, your
address or room number, "1111" or "1234",
which can be easily guessed by others. Be sure
to write down the security codes and store them
in a safe location.
rDo not reveal your security codes to others.
DOCOMO is not responsible for damage
caused by misuse of your security codes by
others.
rIf you forget your security codes, you need to
bring your identification document (driver's
license, etc.), the terminal and the UIM to a
docomo Shop. For details, contact "General
Inquiries" provided on the last page of this
manual.
111
Settings
rYour PIN unblocking key is written in the
application form (copy for subscriber) given at
the time of contract. If you have subscribed at
a place other than a docomo Shop, bring your
identification document (driver's license, etc.)
and the UIM to a docomo Shop, or contact
"General Inquiries" provided on the last page of
this manual.
Network security code
The network security code is a 4-digit number
necessary for using the docomo Network Services or
identification at reception of your request in docomo
Shop or at docomo Information Center. It can be set to
any number at the subscription and also changed later
by yourself. You can change your network security code
to the new one through PC if you have a "docomo ID/
Password" on General support site for PC "My docomo".
PIN code
The UIM can set security code named PIN code. This
code is set to "0000" at the time of subscription, but you
can subsequently change it.
PIN code is a 4- to 8-digit number that is entered to
check the user when the UIM is inserted in the terminal
or the terminal power is turned on. It is intended to
prevent unauthorized use of the terminal by a third party.
You can use the terminal by entering PIN code.
Note
rIf you use a UIM that has been currently used
when you buy a new terminal, use the same PIN
code that had been set on the current terminal.
The code is "0000" if the default setting has not
been changed.
rIf you enter incorrect PIN code three times in
a row, the code will be locked. In that case,
unlock with "PUK code".
112
Settings
PIN unblocking key (PUK)
The PIN unblocking key (PUK) is an 8-digit number
used to unblock the PIN code. You cannot change it by
yourself.
rIf you enter the PUK code incorrectly ten times in a
row, the UIM will be locked. If this happens, please
contact a docomo Shop.
Enabling UIM's PIN code
From the Home screen, X "Settings"
X "Location & security"
"Set up SIM/RUIM card lock"
rThe "SIM/RUIM card lock settings" screen
appears.
"Lock SIM/RUIM card"
rSet the PIN code on the "Lock SIM/RUIM card"
screen.
Enter PIN code and tap "OK"
rYou are asked to enter the PIN code when the
terminal is powered on.
Changing PIN code
From the Home screen, X "Settings"
X "Location & security"
"Set up SIM/RUIM card lock"
rThe "SIM/RUIM card lock settings" screen
appears.
"Change SIM/RUIM PIN"
rThe "SIM/RUIM PIN" screen appears, and you
are prompted to enter the PIN code.
Enter the current PIN code, and tap
"OK"
rYou are prompted to enter the PIN code in the
"SIM/RUIM PIN" screen.
Enter a new PIN code and tap "OK"
rYou are prompted to enter the PIN code again in
the "SIM/RUIM PIN" screen.
Enter the same PIN code that you
entered in step 5 and tap "OK"
rThe PIN code is changed.
113
Settings
Enter PIN code
This the following operations if you are asked to enter
the PIN code when the terminal is powered on.
Enter the PIN code of the UIM, and tap
"OK"
Unblocking the PUK locked UIM
Follow the procedures below to unlock PIN when you
enter PIN code 3 times incorrectly in a row.
Enter PUK on PIN unblocking code
screen and tap "OK"
Enter a new PIN code and tap "OK"
Enter the same PIN code that you
entered in step 2 and tap "OK"
Device management
Configure device management settings to use Omakase
Lock.
From the Home screen, X "Settings"
X "Location & security"
"Select device administrators" X
Select a device administrator X Place a
checkmark
rAt the time of purchase, the Omakase Lock is
set to be enabled.
Note
rTo use the Omakase Lock, it is necessary to
enable "Omakase Lock". As of November 2011,
Omakase Lock cannot be used.
114
Settings
Applications
This allows you to configure applications' settings.
Unknown
sources
Configure whether to allow the
installation of the applications that
are supplied by other than Android
market.
Manage
applications
List/delete installed applications.
Running
services
List/stop the active services.
Storage use Display storage status used for
application.
Battery use Display applications which are using
battery and battery usage.
Development Configure the various settings
required for application
development.
Accounts & Sync
This allows you to configure the settings of accounts
and their synchronization.
General sync settings
Background
data
Set whether the applications always
synchronize and send/receive data.
Auto-sync Set whether the applications
automatically synchronize data.
Manage accounts
Add or delete an account used in this terminal, such
as Google account.
115
Settings
Privacy
This allows you to initialize data.
Personal data
Factory data
reset
Delete all data from the terminal.
Initializing Terminal
From the Home screen, X "Settings"
X "Privacy"
"Factory data reset" X "Reset phone" X
"Erase everything"
Storage
This allows you to display the free space in internal
memory.
Internal storage
Available
space
Display free space of internal
storage.
116
Settings
Language & Keyboard
This allows you to configure the terminal's language and
keyboard settings.
Language settings
Select
language
Select the language used on the
terminal.
User
dictionary
Procedures such as registration are
required when using the character
entry application supplied by
Google. You can download the
character entry application provided
by Google from Android market.
Keyboard settings
iWnn IME Set screen keyboard settings.
Voice Input & Output
This allows you to configure settings for voice input and
output.
Voice input
Voice
recogniser
settings
Configure the settings of voice
recognizer.
Voice output
Text-to-
speech
settings
Configure the settings for reading
out text.
Accessibility
Set the settings of accessibility application.
Accessibility Enable or disable the applications
compatible with accessibilities.
Note
r"No accessibility related applications found"
appears when purchased. If you want to set
accessibility, download compatible applications
from Android Market in advance.
117
Settings
Activating USB Tethering
Connect the terminal and a PC using USB connection
cable to connect the PC to the Internet using the
terminal as a modem.
Connect the terminal and a PC using USB
connection cable
rConfirm the details of the warning and then tap
"OK".
From the Home screen, X "Settings"
X "Connectivity settings" X "Default
connection mode" X "USB tethering" X
"OK"
Note
rHardware requirements of a PC for USB
tethering are as follows:
- OS*: Windows 7/Windows Vista/Windows XP
(Service Pack 3 or later)
* Operations conducted in environment with
upgraded OS or in added/changed
environment cannot be guaranteed.
rA dedicated driver is required for USB tethering.
For details about the method of the download
and operation of dedicated driver, refer to the
following site.
http://www.lg.com/jp/mobile-phones/download-
page/index.jsp (in Japanese only)
119
Settings
Date & Time
This allows you to configure the date and time settings.
Automatic Set the automatic retrieval of date
and time information via the network.
Set date Configure the date settings.
Select time
zone
Configure the time zone settings.
Set time Configure the time settings.
Use 24-hour
format
Set whether to display the time in
24-hour or 12-hour format.
Select date
format
Set the date format.
About Phone
This allows you to display various informations of the
terminal.
Software
Update
Change software update settings.
Status Display information related to this
terminal.
Battery use Display information about battery
usage.
Legal
information
Display information about the terms
of use.
Model
number
Display the model number (model
name) of your terminal.
Android
version
Display the version of Android
running on your terminal.
Baseband
version
Display the version of baseband
running on your terminal.
Kernel
version
Display the version of the kernel
used in Android running on your
terminal.
Build number Display the build number of Android
running on your terminal.
120
Settings
Software
version
Display the software version of the
terminal.
Displaying your Own Number
From the Home screen, X "Settings"
X"About phone"
"Status"
rThe "Status" screen appears. Your own number
appears as "My phone number".
121
Settings

Mail / Internet
sp-mode Mail
This allows you to send and receive emails using an
i-mode mail address (@docomo.ne.jp).
It allows you to use pictograms and Deco-mail, and also
supports auto receive.
For details about sp-mode, refer to "Mobile Phone
User's Guide (sp-mode)".
From the Home screen, "sp-mode mail"
rFollow the instruction on the screen.
SMS
You can send and receive text messages containing
up to 70 double-byte characters (or 160 single-byte
alphanumeric characters) to other terminals.
Sending an SMS Message
From the Home screen, "Applications"
X "Messaging"
rThe "Messaging" screen appears.
"New Message"
Tap the "To" box X Enter recipient's
phone number
rA list of contacts beginning with the entered
number or name appears.
Tap the "Enter Message" box X Enter a
message
"Send"
rThe message is sent.
122
Mail / Internet
Note
rTap X "Insert smiley" while entering a
message to insert a pictogram. Although an
emoticon appears on your "Enter Message" box,
the pictogram is displayed if the message is
received on an Android compatible phone.
rTo receive notification that the SMS message is
received, tap X "Settings" on the "Messaging"
screen, and check the "Delivery reports"
checkbox.
rYou can also send/receive SMS messages to/
from users of overseas network operators.
For available countries/compatible overseas
network operators, refer to "Mobile Phone User's
Guide [International Services]" or the DOCOMO
"International Services website".
rTo send SMS messages to users of overseas
network operators, enter "+" X "Country code"
X "Recipient's mobile phone number". Omit "0"
if the recipient phone number starts with "0".
You can also send an SMS message by entering
"010", "Country code" and "the recipient mobile
phone number". (To reply to an SMS message
sent from overseas, enter "010".)
Receiving/Viewing an SMS
Message
From the Home screen, "Applications"
X "Messaging"
rThe "Messaging" screen appears.
Tap one of the threads
rThe message appears.
Note
rWhen you receive an SMS message, appears
in the status bar. To read the message, drag or
swipe the status bar downwards to open the
Notification panel, and tap a new message.
123
Mail / Internet
Gmail
If you have a Google account, you can send and
receive emails using Gmail. If you do not have a Google
account, you must open an account before using Gmail.
Opening Gmail
From the Home screen, "Applications"
X "Gmail"
rGmail opens, and the "Inbox" screen appears.
Note
rIf your Google account settings have not been
completed, the "Add a Google Account" screen
appears. Follow the displayed instructions. If
you do not have a Google account, create one
here.
rFor details about Gmail, tap X "More" X
"Help" on the "Inbox" screen.
Creating and Sending an Gmail
From the "Inbox" screen, X
"Compose"
rThe "Compose" screen appears.
Enter email address in the "To" box
Enter a subject in the "Subject" box
Enter a message in the "Compose Mail"
box
rYou can also send an email by tapping X
"Send" on the "Compose" screen.
124
Mail / Internet

Early Warning
"Area Mail"
You can receive Earthquake Early Warnings provided by
the Japan Meteorological Agency.
rArea Mail is a free service that does not require
application.
rYou cannot receive Area Mail in the following cases.
- When the phone is turned OFF
- When you are out of the service area
- When the terminal is in Airplane mode
- During voice calls
- While updating software
- When you are roaming overseas
- When sending/receiving SMS messages
- When using a SIM card from another provider
rYou may not be able to receive Area Mail when using
packet communication and tethering functions.
rYou cannot receive an Area Mail after it has been
missed.
Receiving Area Mail
Receiving Area Mail automatically
rWhen an Area Mail is received, a dedicated
ringtone sounds and the text of the Area Mail is
displayed.
rWhen the screen lock is set, the text of the Area
Mail is not displayed. It will be displayed when
the screen lock is canceled.
rYou cannot change the ringtone volume.
Viewing Area Mail later
From the Home screen, "Applications"
X "Area Mail"
rThe "Early warning 'Area Mail' Inbox" screen
appears.
Tap an Area Mail
rThe text of the Area Mail appears.
125
Mail / Internet
Setting Area Mail
From the Home screen, "Applications"
X "Area Mail"
rThe "Early warning 'Area Mail' Inbox" screen
appears.
X "Settings"
rThe "Settings" menu appears.
Change the settings if required
Receive
setting
Check to receive Area Mail.
Beep tone Configure the beep time settings and
operations during Silent mode.
Check
screen
image and
beep tone
You can confirm operations for
receiving earthquake early warnings
and disaster/evacuation information.
Other
settings
To receive Area Mail other than
earthquake early warnings and
disaster/evacuation information,
you can register Area Mail names
and message IDs that you want to
receive.
Browser
Browser allows you to view web pages in the same way
that you can from a PC.
Opening Browser
From the Home screen, "Browser"
rBrowser opens, displaying the last web page
that you viewed. The home page appears if you
have not used the Browser recently.
rPinch out on the web page to zoom in the
display, and pinch in to zoom out.
126
Mail / Internet

a Search box
Enter the text you want to search or URL to
display a list of web page candidates and search
candidates that match the entered characters.
Tap one of the listed candidates or finish entering
the URL, and tap to display the web page.
If the search box is not displayed on the browser
screen, tap .
b Bookmark button
The "Bookmarks" tab appears.
c Previous web page
The previous page is displayed.
d Next web page
The next page is displayed.
e Zoom
Tilt the terminal toward you while touching to zoom
in the web page. Tilt it away from you to zoom out.
f Switching windows
You can switch to the selected window when
accessing web pages via multiple windows. You
can close the window by tapping .
g New window
A list of frequently used web pages is displayed,
and you can tap to access in a new window.
127
Mail / Internet

Searching for a web page by voice entry
Tap the search box
Tap
r"Speak now" appears.
Clearly speak the search word(s) into
the microphone
rCandidates for the search word are displayed.
Tap a candidate word and it will be entered
in the search box. Also, a list of web pages
including the search word appears.
Tap one of the listed web pages
rThe selected web page opens.
Using Bookmark and History
Bookmarking a web page allows you to quickly access
that web page.
You can also view previously visited web pages by
displaying your browsing history.
Adding a bookmark
View the page that you want to
bookmark
Tap
rA thumbnail of the bookmarked page appears
on the "Bookmarks" tab.
"
Changing Browser Settings
From the Browser screen, X "More"
X "Settings"
rA menu appears.
Change the settings if required
Page
content
settings
Set whether to use the default scaling
on web pages, whether to display
popup windows, whether to import
images, the home page and other
items.
Privacy
settings
Clear the browser cache, the browsing
history, cookies, form data, and
location information. Configure the
settings about whether to accept
cookies, to save form data and to allow
location information.
Security
settings
Set whether to save passwords and
whether to display security warnings.
You can also clear saved passwords.
Advanced
settings
Return website settings and browser
settings to default setting.
Talk
Google Talk is a Google instant messaging program. It
allows you to chat (text chatting) with friends who have
Google accounts. To use Google Talk, you must set up
your own Google account. For details, refer to "Setting
Online Service Accounts" (P51).
Before Using Google Talk
To use Google Talk, it is required to log in and add a
new friend. If you already have a Google account, you
don't have to sign in to start using Google Talk.
Logging in to Google Talk
From the Home screen, "Applications"
X "Talk"
r
The set Google account appears.
Note
rIf your Google account settings have not been
completed, the "Add a Google Account" screen
appears. Follow the displayed instructions. If
you do not have a Google account, create one
here.
129
Mail / Internet

Chatting
Tap a friend's account on the "Talk"
screen
rThe Chat screen appears.
Tap the "Type to compose" box X Enter
your message and tap "Send"
rThe text that you entered in the "Type to
compose" box is sent.
rFor details about Google Talk, from the Google
Talk screen, tap X "Settings" X "Terms &
privacy" X "Help Center" (Talk Help is displayed
in English).
130
Mail / Internet
File Management
File Operation
You can synchronize music with "Windows Media
Player" on your PC by connecting the terminal with the
PC via the supplied USB connection cable, and transfer
the data between the PC and the terminal by dragging
and dropping. Sharing some data may not be permitted
due to copyright.
rIn order for your PC to recognize this terminal, a
dedicated driver and Windows Media Player 11 or
later are required.
- For details about the method of the download
and operation of dedicated driver, refer to the
homepage below.
http://www.lg.com/jp/mobile-phones/download-
page/index.jsp (in Japanese only)
- You can download the latest Windows Media
Player on Microsoft website.
http://www.microsoft.com/windows/windowsmedia/
download (in Japanese only)
rSome functions such as shooting and playing video
may not work while connecting the terminal with PC.
Note
rOperating environment of a PC for file operation
is as follows:
- OS*: Windows 7/Windows Vista/Windows XP
(Service Pack 3 or later)
- Windows Media Player: Windows Media
Player 11 or later
* Operations conducted in environment
with upgraded OS or in added/changed
environment cannot be guaranteed.
rOther than the terminal or PC, the following
devices and software are necessary to perform
file operation on a PC.
- Dedicated driver
131
File Management
Folder and File Operations
Note
rDo not turn off the terminal while reading or
writing data.
rDo not unplug USB connection cable while
reading or writing data. It results in loss of data.
Synchronizing Data with
Windows Media Player
This allows you to synchronize music and videos with
Windows Media Player library on PC. In this way,
music and videos with copyright protection can be
synchronized as well as the copyright information.
Connect the terminal with a PC via the
USB connection cable (P139)
Set USB connection mode to "Mass
storage" (P139)
Activate Windows Media Player on PC
and synchronize
Note
rFor details about Windows Media Player, refer to
Windows Media Player help.
133
File Management

Disconnecting the terminal from a PC
Stop and remove the removable disk
safely from PC
rFor example, for Windows® 7/Windows Vista®/
Windows® XP, execute operation according to
the "
Turning ON Bluetooth Function to
Make the Terminal Discoverable
From the Home screen, X "Settings"
X "Wireless & networks" X "Bluetooth
settings"
Place a check mark on "Bluetooth"
rBluetooth function turns ON.
Tap "Device name" and enter the
terminal name X Tap "OK"
Place a check mark on "Discoverable"
rThe terminal can be detected by another
Bluetooth device for approx. 120 seconds.
Note
rWhen you do not use Bluetooth function, turn it
OFF to save the battery.
rThe setting of the Bluetooth ON/OFF is not
changed even when the power is turned off.
Pairing/Connecting with Other
Bluetooth Device
To transfer data by Bluetooth connection, perform
pairing (pairing setting) with the device in advance and
register it to the terminal.
rDepending on Bluetooth device, only pairing is
performed or pairing and connecting is performed
successively.
From the Home screen, X "Settings"
X "Wireless & networks" X "Bluetooth
settings" X "Scan for devices"
rDetected Bluetooth devices list appears.
Tap a device that you want to connect
with X Tap "Pair"
rIf pass code (PIN) is set on Bluetooth devices,
enter pass code (PIN) and tap "OK".
rFor some Bluetooth devices, after completion
of pairing, connection may be established
successively by tapping a device.
136
File Management
Note
rEven for device requiring entry of pass code
(PIN) when pairing, once pairing is performed,
entering pass code (PIN) is not necessary for
next connection.
rPairing can be set even if a device is unable
to connect such as non-profile-compliant.
However, it cannot be connected even if you tap
the device.
rTouch a device that has already been paired
for over 1 second, tap "Connection access" and
then select "Automatic" to connect or "Always
ask".
rDevices that are not compatible with SCMS-T
cannot play any audio related data such as
music.
When the other device requests for
pairing
When a screen asking for pairing for Bluetooth
connection appears, tap "Pair & connect" or enter pass
code (PIN) if required and tap "OK".
Disconnecting
Tap the connected device on "Bluetooth
devices" list X "OK"
rTouch the connected device for over 1 second
and tap "Disconnect" to disconnect.
Canceling the pairing
Touch a device to unpair for over 1
second on "Bluetooth devices" list X
Tap "Disconnect & unpair"
rIf you want to unpair with a device being only
paired, touch the device for over 1 second and
tap "Unpair".
137
File Management
Sending/Receiving Data via
Bluetooth Function
rSet the Bluetooth function to ON beforehand to be
discoverable.
Sending data via Bluetooth
You can send data of Phonebook (name card data in
vcf format), files such as photos or videos, etc. to a
Bluetooth device (PC etc.).
rFor sending, perform the operation from the menu
such as "Share"/"Send" of each application.
Receiving data via Bluetooth
Set the terminal to discoverable
Tap "Accept" when Bluetooth
Authorization Request screen appears
r is displayed in the status bar, and data
reception starts.
rYou can confirm data reception on the
Notification panel.
rMessage screen appears at the bottom screen
after receiving data.
External Device Connection
Connecting the Terminal with a PC
Make sure that Windows Media Player 11 or later and
dedicated driver are installed on PC. If Windows Media
Player 11 or later and dedicated driver are not installed,
the terminal may not be recognized by PC correctly.
For details about operating environment, refer to "File
Operation" (P131).
138
File Management

Connect the microUSB connector of
USB connection cable to the microUSB
connection terminal of the terminal
rInsert the microUSB connector horizontally with
the surface with the USB mark facing up.
Connect the USB connector of USB
connection cable to the USB port of PC
rThe terminal is recognized automatically by PC.
rRequest for installation of the device driver may
appear on your PC. If it appears, cancel it.
r is displayed in the status bar.
rThe "USB connection mode" screen appears on
the terminal.
If the "USB connection mode" screen does not
appear, drag or swipe the status bar down
to open the Notification panel, and then tap
"Charge only", "Mass storage", "PC sync", or
"USB tethering".
"Charge only" / "Mass storage" / "PC
sync" / "USB tethering" X "OK"
139
File Management

Note
rWhile connecting to a PC, drag or swipe the
status bar down to open the Notification panel,
and then tap "Charge only", "Mass storage", "PC
sync", or "USB tethering" to display the "USB
connection mode" screen, and then you can
change the USB connection mode.
rTo change the default USB connection mode for
connecting with a PC, from the Home screen,
tap X "Settings" X "Connectivity settings" X
"Default connection mode".
rDo not turn off the terminal while reading or
writing data
rDo not unplug USB connection cable while
reading or writing data. It results in loss of data.
rFor details about Windows Media Player, refer to
Windows Media Player help.
140
File Management

Application
Camera
The terminal has a built-in camera that can shoot
photos and videos.
Before Shooting
Copyrights and portrait rights
Avoid copyright infringements when copying or
editing photos and videos that have been shot on the
terminal. You should also avoid infringing the portrait
rights of other people by using or modifying their
portraits without their consent. Note that the shooting or
recording of stage performances, shows or exhibitions
may be prohibited, even for personal use.
Please be considerate of the privacy of
individuals around you when shooting and
sending photos using camera-equipped mobile
phones.
Notes for capturing images
rThe Camera employs high precision technology, but
some pixels or lines may seem brighter or darker
than others. Also, when you shoot photos in places
with insufficient lighting, noises seen as white line
increase. This is normal.
rClean the lens with a soft cloth before shooting. If the
lens is stained with fingerprints or oil, the shot photo
may appear out of focus or blurred.
rDo not leave the terminal in a warm place or under a
direct sunlight for a long period of time. The quality
of shot photos or video may deteriorate.
rIf you shoot under a fluorescent light, mercury lamp
or sodium lamp flickering at high speed, flickering
such as stripes may appear. The color tone of photos
or videos may vary depending on the shooting
timing.
rDo not expose the lens to direct sunlight for a long
period of time and do not point at the sun or a bright
light directly. The image may become discolored or
the camera may fail to operate properly.
rDo not cover the lens with your fingers or hair when
shooting.
141
Application

rShooting a fast moving object may result in an image
slightly distorted from the image displayed on the
screen at the time of shooting, or the image may be
blurred.
rWhen the battery level is low, you may not be able to
save shot photos or videos. Check the battery level
before using the camera.
rShot photos or videos may differ from the actual
subjects in brightness or color tone.
rYou can hear shutter sound even when the terminal
is set to Silent mode.
Shooting a Photo
You can shoot photos with both horizontal and vertical
screen.
Viewing shooting screen
The meanings of marks (icons and others) on the photo
shooting screen are as follows:
a Switching cameras
Switch between the front and main cameras.
b Zoom
Adjust zoom.
c Brightness
Adjust brightness.
142
Application
d Flash
Set flash mode to Auto, Off or On.
e Settings (while shooting photos)
Set Focus/Image size/Scene mode/ISO/White
balance/Color effect/Timer/Shot mode/Auto review/
Tag location (horizontal screen).
f Auto focus frame
Touch the screen on the area where you want to
focus.
It is shown in green when auto focus is successfully
done. It turns to red if auto focus is failed.
g Focus mode
Adjust the focus to a specified position (Auto/Face
tracking).
h Possible number of shooting images
i Switch button
Switch between photo mode and video mode.
j Shutter
k Thumbnail
Tap to display the preview screen and confirm the
shot photo. Also you can edit the photos.
Shooting a photo
From the Home screen, "Applications"
X "Camera"
rThe photo shooting screen is displayed.
rMenus appear on the screen to allow you to
configure various settings to suit the scene and
conditions for shooting.
rIf you tap a menu icon, and appear.
Tap to return all settings to the initial settings.
Tap to confirm the details of each function.
Point the camera at the subject
Tap
rThe shutter sound plays and the photo is shot.
rAfter shooting, a preview of the photo is
displayed.
rThe shot data is saved in "Gallery".
143
Application
Note
rMenus are displayed on the preview screen
after shooting a photo. The following operations
are available.
<Left part (Top part for vertical screen)>
- "Share": Send via Bluetooth, Gmail, Picasa,
etc.
- "Set as": Set to wallpaper or phonebook icon.
- "Rename": Edit the name of the shot photo.
<Right part (Bottom part for vertical screen)>
- : Delete the displayed photo.
- : Shoot a new photo.
- : Confirm and edit the shot photo.
Shooting Videos
You can shoot videos by switching modes. Videos are
shot horizontally.
Viewing shooting screen
The meanings of marks (icons and others) on the video
shooting screen are as follows:
a Switching cameras
Switch between the front and main cameras.
b Zoom
Adjust zoom.
c Brightness
Adjust brightness.
144
Application
d Flash
Set flash mode to ON or OFF.
e Settings (when shooting video)
Set the video size/white balance/color effects/audio
recording/auto review.
f Sound (On/Off)
g Switch button
Switch between photo mode and video mode.
h Recording button
i Thumbnail
Tap to display the preview screen and confirm the
shot videos.
j Shooting duration
Shooting videos
Drag on the photo shooting screen.
rThe screen switches to the video shooting
screen.
rMenus appear on the screen to allow you to
configure various settings to suit the scene and
conditions for shooting.
rIf you tap a menu icon, and appear.
Tap to return all settings to the initial settings.
Tap to confirm the details of each function.
Point the camera at the subject
Tap
rThe recording start sound plays and Camera
starts shooting.
rWhile you are recording, "REC" appears and a
red circle blinks.
Tap
rThe recording stop sound plays and recording
stops. Then, the screen displayed at the start of
recording appears.
rThe shot data is saved in "Gallery".
145
Application
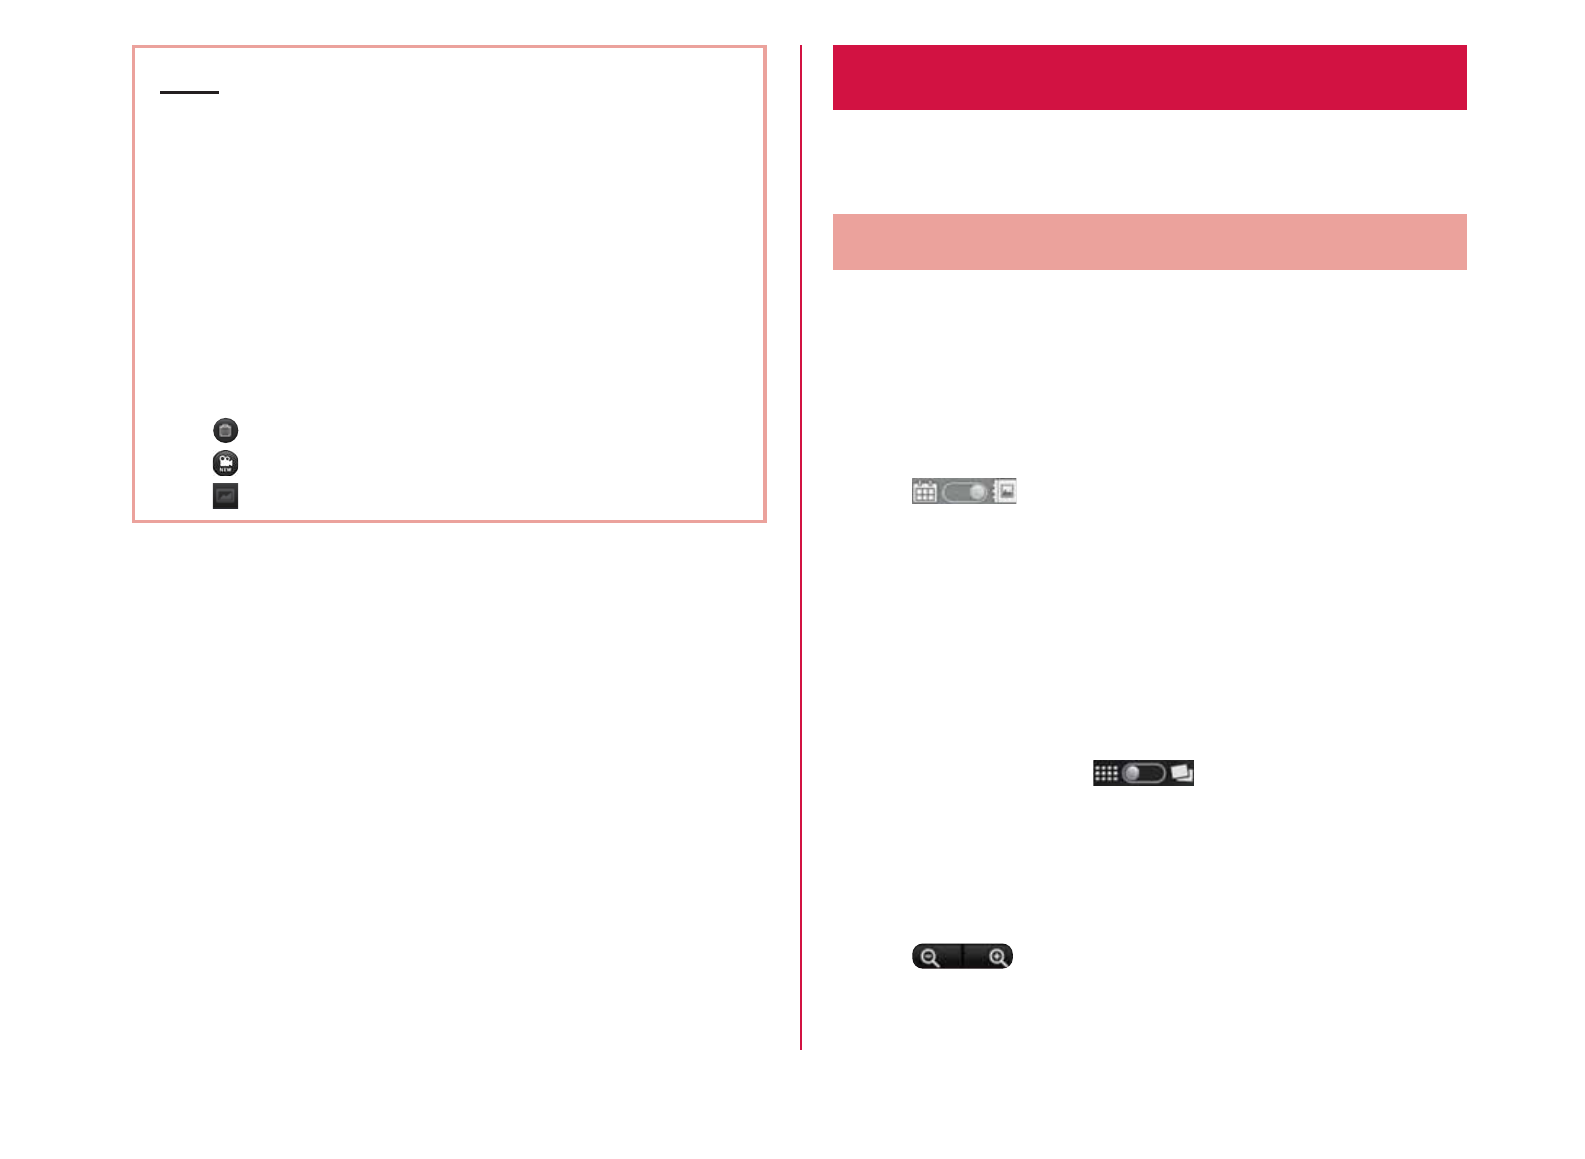
Note
rMenus are displayed on the preview screen
after shooting a video. The following operations
are available.
<Left part>
- "Play": Play the shot video.
- "Share": Send via Bluetooth, Gmail, YouTube,
etc.
- "Rename": Edit the name of the shot video.
<Right part>
- : Delete the displayed video.
- : Shoot a new video.
- : Confirm the shot video.
Gallery
Gallery allows you to view photos/videos in a slide show.
Photos can be trimmed.
Viewing Photos and Videos
From the Home screen, "Applications"
X "Gallery"
rThe Gallery screen appears.
rGallery contains both photos and videos shot
with camera and those downloaded.
r : Tap to switch between the Calendar
screen and Gallery screen. Tap a date on the
Calendar screen to display photos and videos
shot on that day by thumbnail.
Tap a folder
rBoth photos and videos are displayed by
thumbnail.
rPhotos and videos are categorized by shooting
date by tapping .
rTo view photos or videos shot by this terminal,
tap "Camera".
Tap one of the thumbnails
rPhoto can be zoomed in or out by tapping
or pinching out or in on the touch
screen.
rThe video is played if you tap a video thumbnail.
146
Application

Note
rA screen appears to enable/disable thumbnail
selection if you tap on the Gallery screen,
or touch one thumbnail for over 1 second. The
following operations are available.
<Top part>
- "Select all": Select all the thumbnails.
- "xx items": Show the number of the selected
thumbnails.
- "Deselect all": Cancel all the selected
thumbnails.
<Bottom part>
- "Share": Send the selected photos via Picasa,
Gmail, or Bluetooth, and the selected videos
via YouTube, Gmail, or Bluetooth.
- "Delete": Delete the selected photos or
videos.
- "More": Confirm the detailed information
of photos and videos, configure the photo
settings, trim the photos, etc.
rThe following operations are available from the
photo display screen.
- "Slide show": Display the photos and videos
saved in terminal in slide show order.
- "Menu": Share or delete photos.
- : Zoom in or out the image.
- : Activate Camera to shoot photos or
videos.
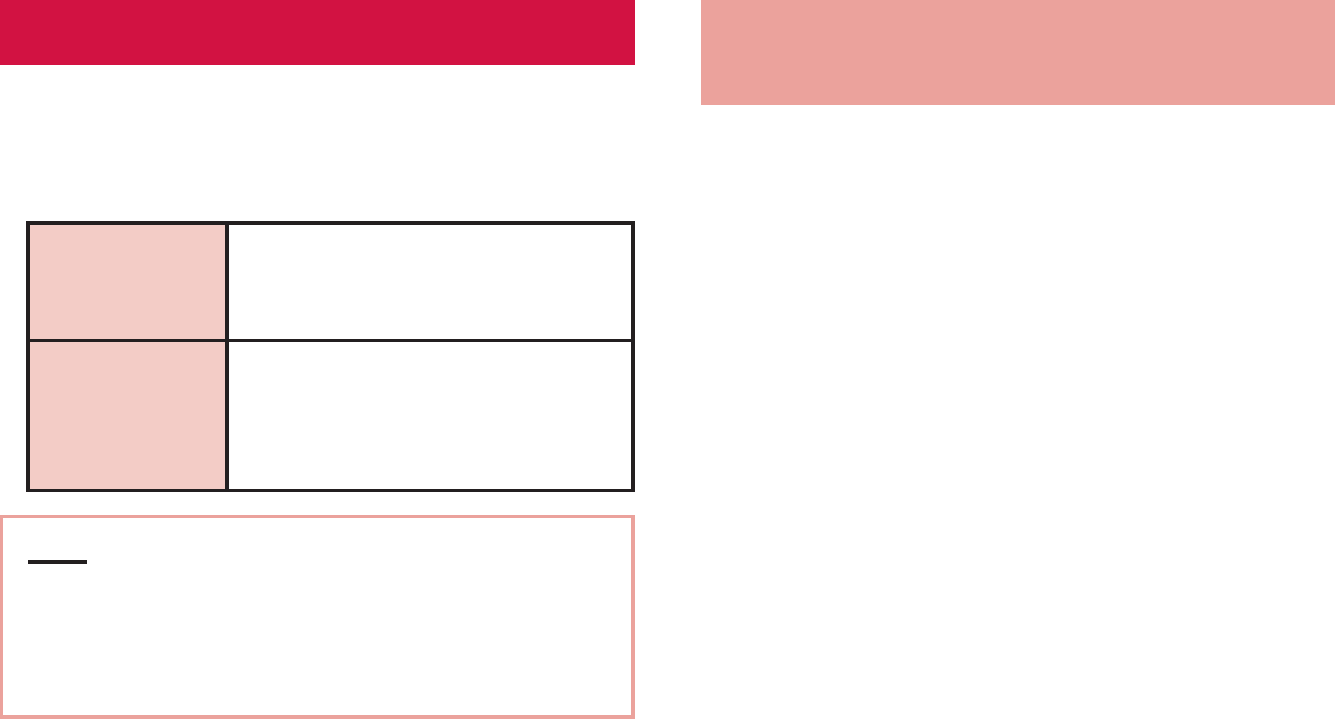
Media Player
The "Media Player" application plays music files and
video files saved on the storage. Media Player supports
the following file formats.
Available file formats
Music files MP3, 3GP, 3GA, AMR, WMA,
AAC, MID, WAV, OGG, ISMA,
M4A, FLAC, AWB
Video files MP4, AVI, 3GP, WMV, ASF, MKV,
MOV, WebM, TS, ISMV, FLV,
OGM, DivX (Only for Non-DRM
contents)
Note
rSome files may not be played even with the
supported file format.
rSome files are protected by copyright and may
not be played.
Copying Music Files and Videos
to the Terminal
From Media Player, you can play music files and video
files of your own after copying them to a storage.
Connect the terminal with a PC via the
supplied USB connection cable (P138)
Set USB connection mode to "Mass
storage" (P139)
Open "

Note
rThis terminal can be connected to most devices
supporting the USB mass storage interface and
the following operating systems (OS).
- Windows® 7 (32-bit/64-bit version)
- Windows Vista® (32-bit/64-bit version)
- Windows® XP (32-bit/64-bit version)
Opening the Media Player
From the Home screen, "Applications"
X "Media Player"
rThe "Media Player" screen appears.
rTap the icon at the bottom of the screen to
switch between lists for "Songs", "Artists",
"Albums", and "Movie".
149
Application
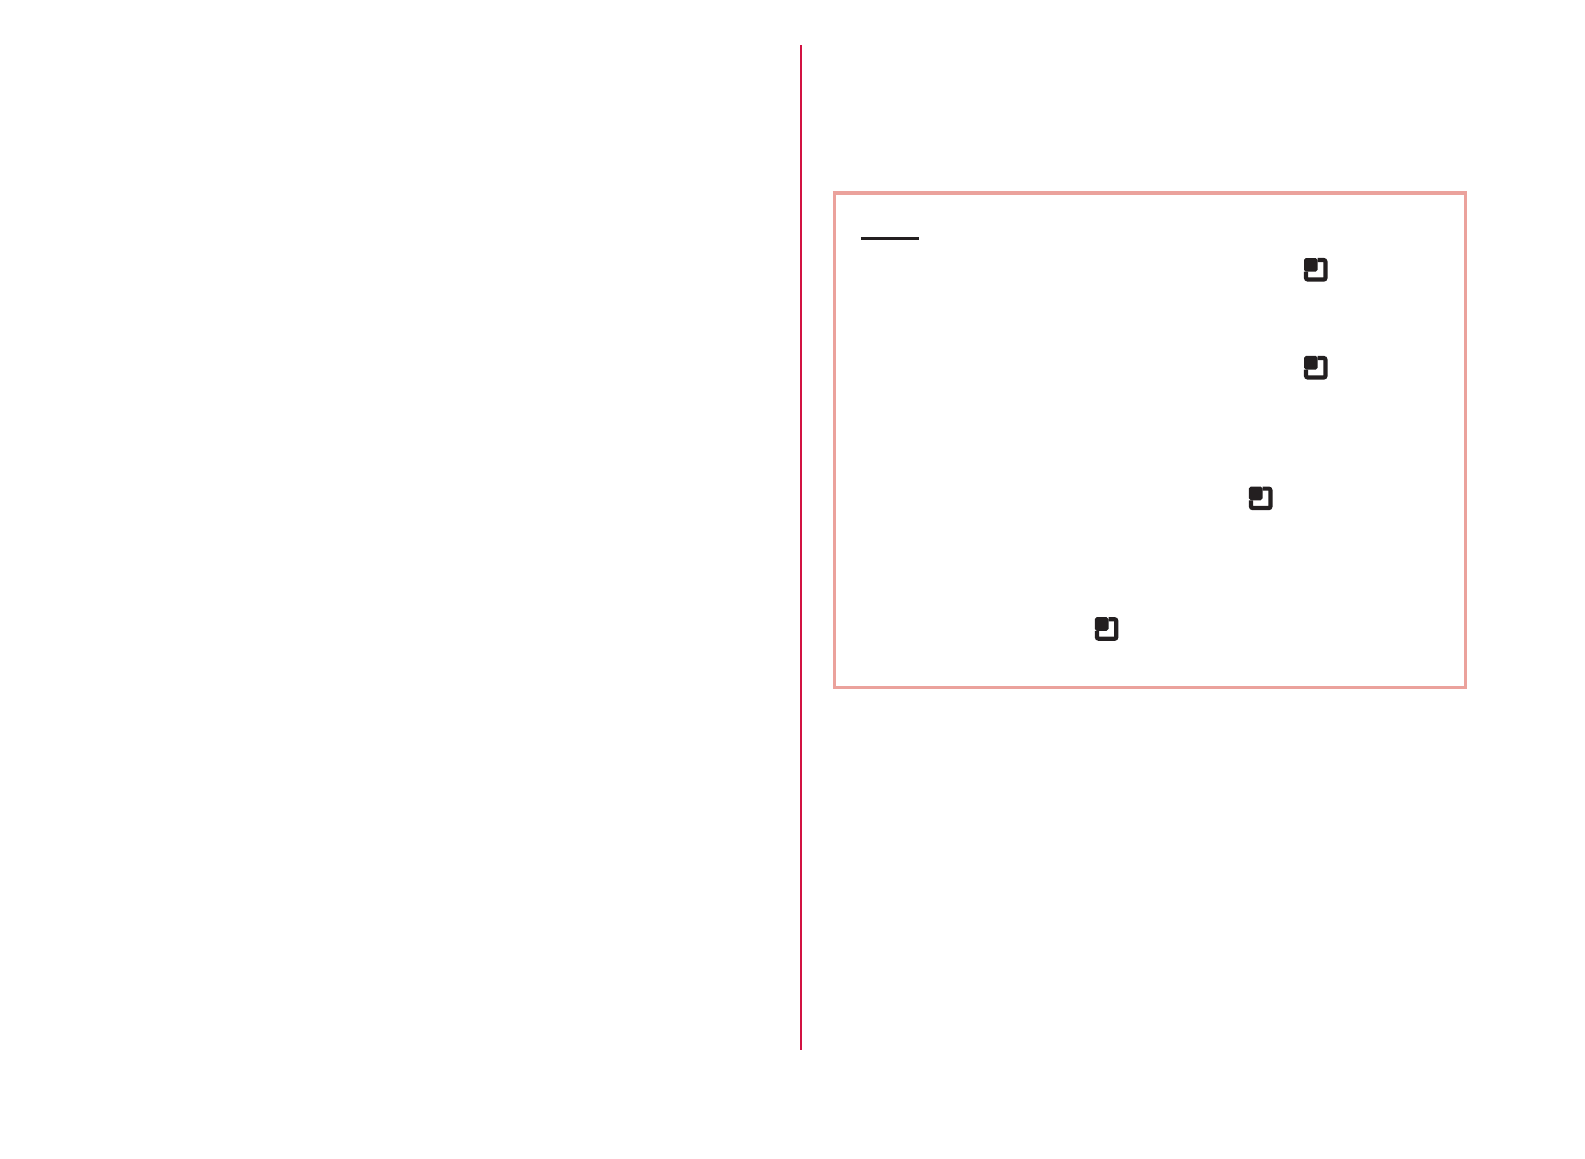
a Quick play bar
This is displayed when there is music playing/
paused.
Tap this to display the Music screen.
b Play/Pause icon
This is displayed for the music playing/paused.
c Title
d Artist name
e Index
A list of songs starting with the tapped letter are
displayed.
f Bottom bar
You can change the icons that are displayed on the
bottom bar. For more details, refer to "Setting the
Media Player" (P155).
rSongs: Display a list of playable songs saved on
the storage.
Tap a song to display the Music screen.
rArtists: Display a list of artists.
Tap an artist name to display a list of albums by
the artist. Tap an album title to display a list of
songs on the album.
rAlbums: Display a list of albums.
Tap an album title to display a list of songs
included on the album.
rMovie: Display a list of playable videos saved on
the storage.
rMUSIC Store: Access the dmarket Music Store.
While a list of videos is displayed, the "VIDEO
Store" icon appears. Tap this to access the
dmarket VIDEO Store.
Note
rFrom the "Media Player" screen, tap X "Sort"
to switch the list display between ascending
and descending order.
rFrom the "Media Player" screen, tap X
"Search" to access dmarket for purchasing
songs.
rFrom the "Media Player" screen, while a list of
albums/videos is displayed, tap X "Switch
display" to switch the list display format between
thumbnail display and list display.
rFrom the "Media Player" screen/Music screen/
Video screen, tap X "Exit" to close the Media
Player.
150
Application

Playing Music
In the song list, tap a song you want to
play
rThe Music screen appears and the song is
played.
a Elapsed time
b Play progress bar
Drag or tap to play a song from a desired point
within the song.
c Cover flow
Tap to switch between display/not display elapsed
time, play progress bar, and song length.
Flick left or right to scroll through the thumbnails on
horizontal screen.
d Contents information
Title/artist name/album title are displayed.
e Return to list
Return to the song list.
f Back button
Start playing from the beginning of the current song.
Double-tap to start playing from the beginning of
the previous song.
g Play/Pause button
h Song length
i Repeat/1 Repeat button
Switch between Repeat all/1 repeat/Repeat OFF.
j Shuffle button
Turn shuffle play on/off.
k Forward button
l Volume bar
Drag or tap to adjust the volume.
151
Application
Note
rWhile a song is playing, is displayed in the
status bar.
rFrom the Music screen, tap X "Settings"
X "This song : Ringtone settings" to set the
displayed song as a ringtone for voice calls,
email, or sp-mode mail.
Playing Videos
From the "Media Player" screen, tap
rA list of playable videos saved on the storage
appears.
Tap a video you want to play
rThe Video screen appears and the video is
played.
152
Application

a Elapsed time
b Play progress bar
Drag or tap to play a video from a desired point
within the video.
c Video information
Displays titles/artist names.
d Video list button
Return to the video list.
e Back button
Start playing from the beginning of the current
video. Double-tap to start playing from the
beginning of the previous video.
f Play/Pause button
g Video length
h Rotation lock button
Lock not to change the orientation of the screen
even when the orientation of the terminal changes.
i Forward button
j Volume bar
Drag or tap to adjust the volume.
Note
rTilt the terminal to the side while displaying
the Video screen to switch to horizontal screen
display so that videos can be displayed on the
whole screen. Tap the screen to switch between
button display/not display.
Using Playlists
Playlists allow you to play your favorite songs in a
desired order.
Set to view playlists
With the initial setting, the bottom bar of the "Media
Player" screen does not display the "Play list" icon. The
following operation will allow you to display it.
From the "Media Player" screen, X
"Settings" X "Arrange icons"
rThe "Arrange icons" screen appears.
Drag the "Play list" icon and drop it on
the bottom bar
rYou cannot change the "Movie", "MUSIC Store",
and "VIDEO Store" icons.
"Apply"
153
Application
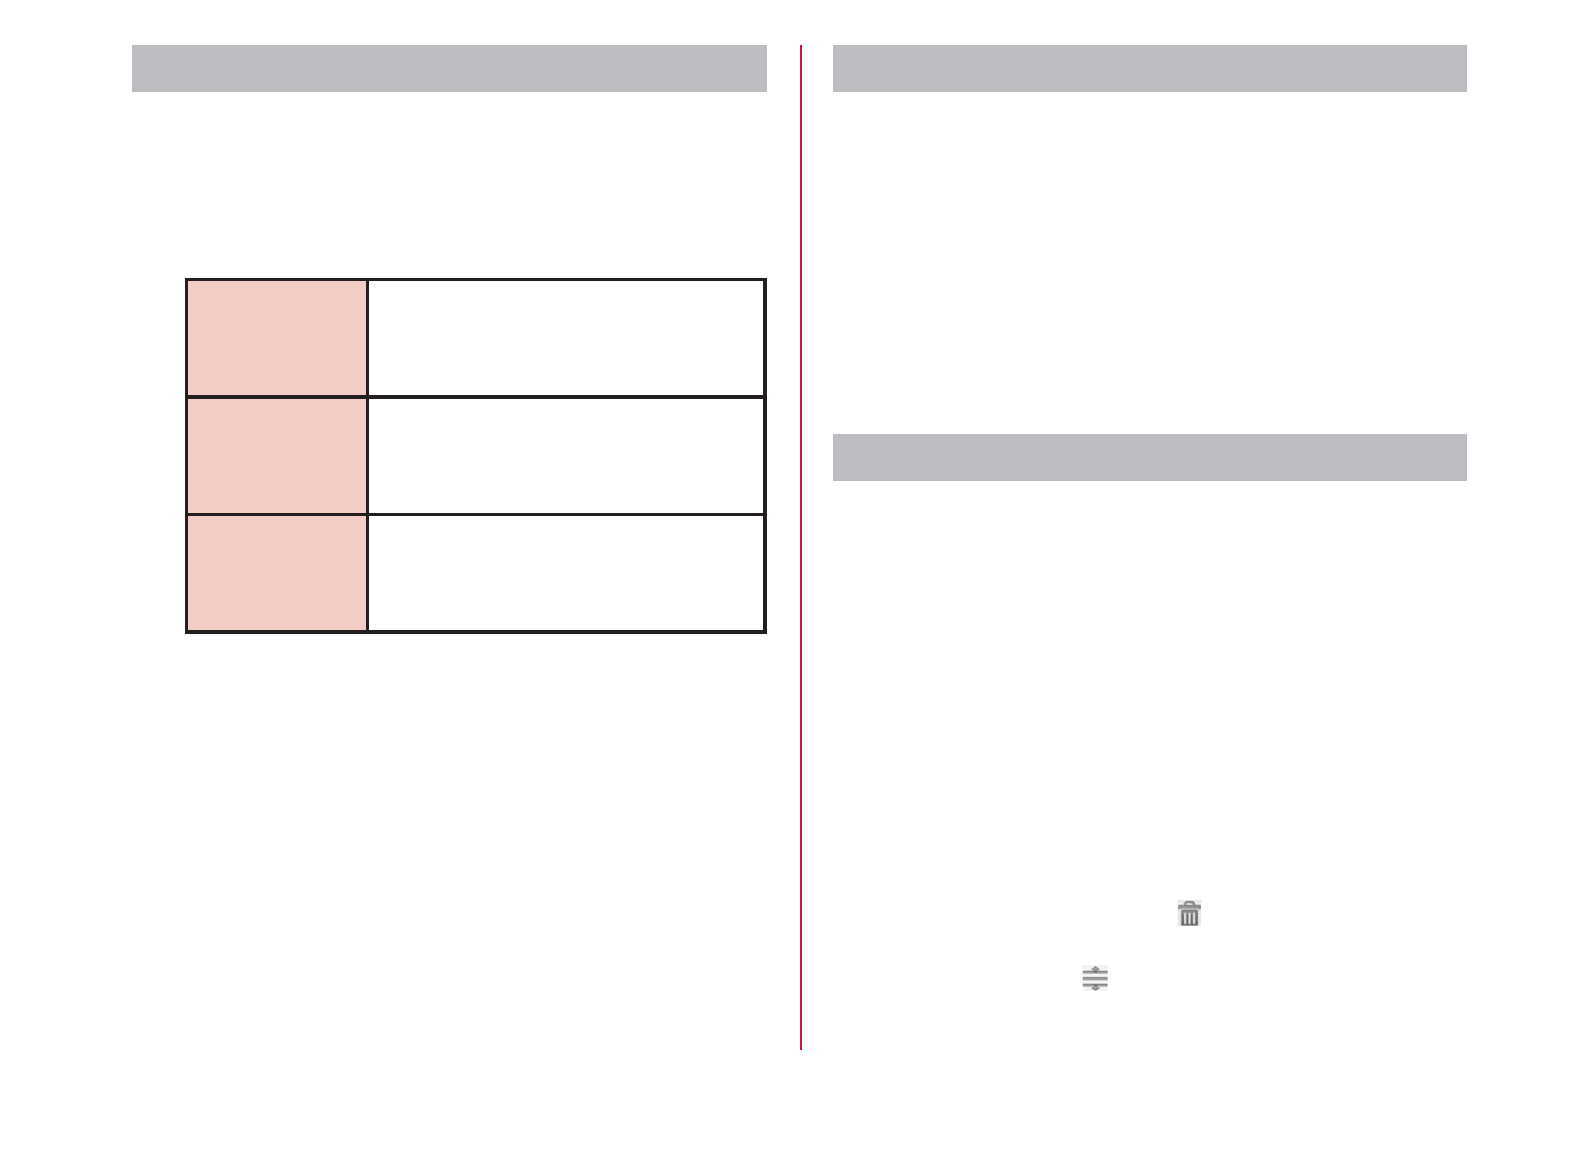
Displaying playlists
From the "Media Player" screen, tap
"Play list"
rCurrent playlists are displayed.
rThe following quick playlists are available.
Recently
added songs
Display songs that were added
in the last two weeks in the
order you add them.
Recently
played songs
Display songs that were played
in the last two weeks with the
most recent date on top.
Most played
songs
Display songs that were played
with the most frequently played
song on top.
Tap a playlist/quick playlist
rThe songs contained in the playlist are
displayed.
rTap a song from the playlist/quick playlist to
play.
Creating a playlist
In the Playlists, tap "New"
"Add songs to playlist"
rTap the "All songs", "Artists", and "Albums" tabs
to switch the display list.
Tap the song you want to add
rTap "Add all songs" to add all songs in the list.
"Apply" X "Save" X "OK"
Editing playlists
In the list of Playlists, tap the playlist
that you want to edit
rThe songs contained in the playlist are
displayed.
"Edit"
rTap the title of the playlist to edit the title.
rTap "Add songs to playlist" to add a song to the
playlist.
rTap "Delete all songs" to delete all songs.
Deleting all songs from a playlist will also delete
the playlist itself.
rTap on a song to make turn red and become
a deletion target.
rDrag and drop to change the order of the
song.
154
Application
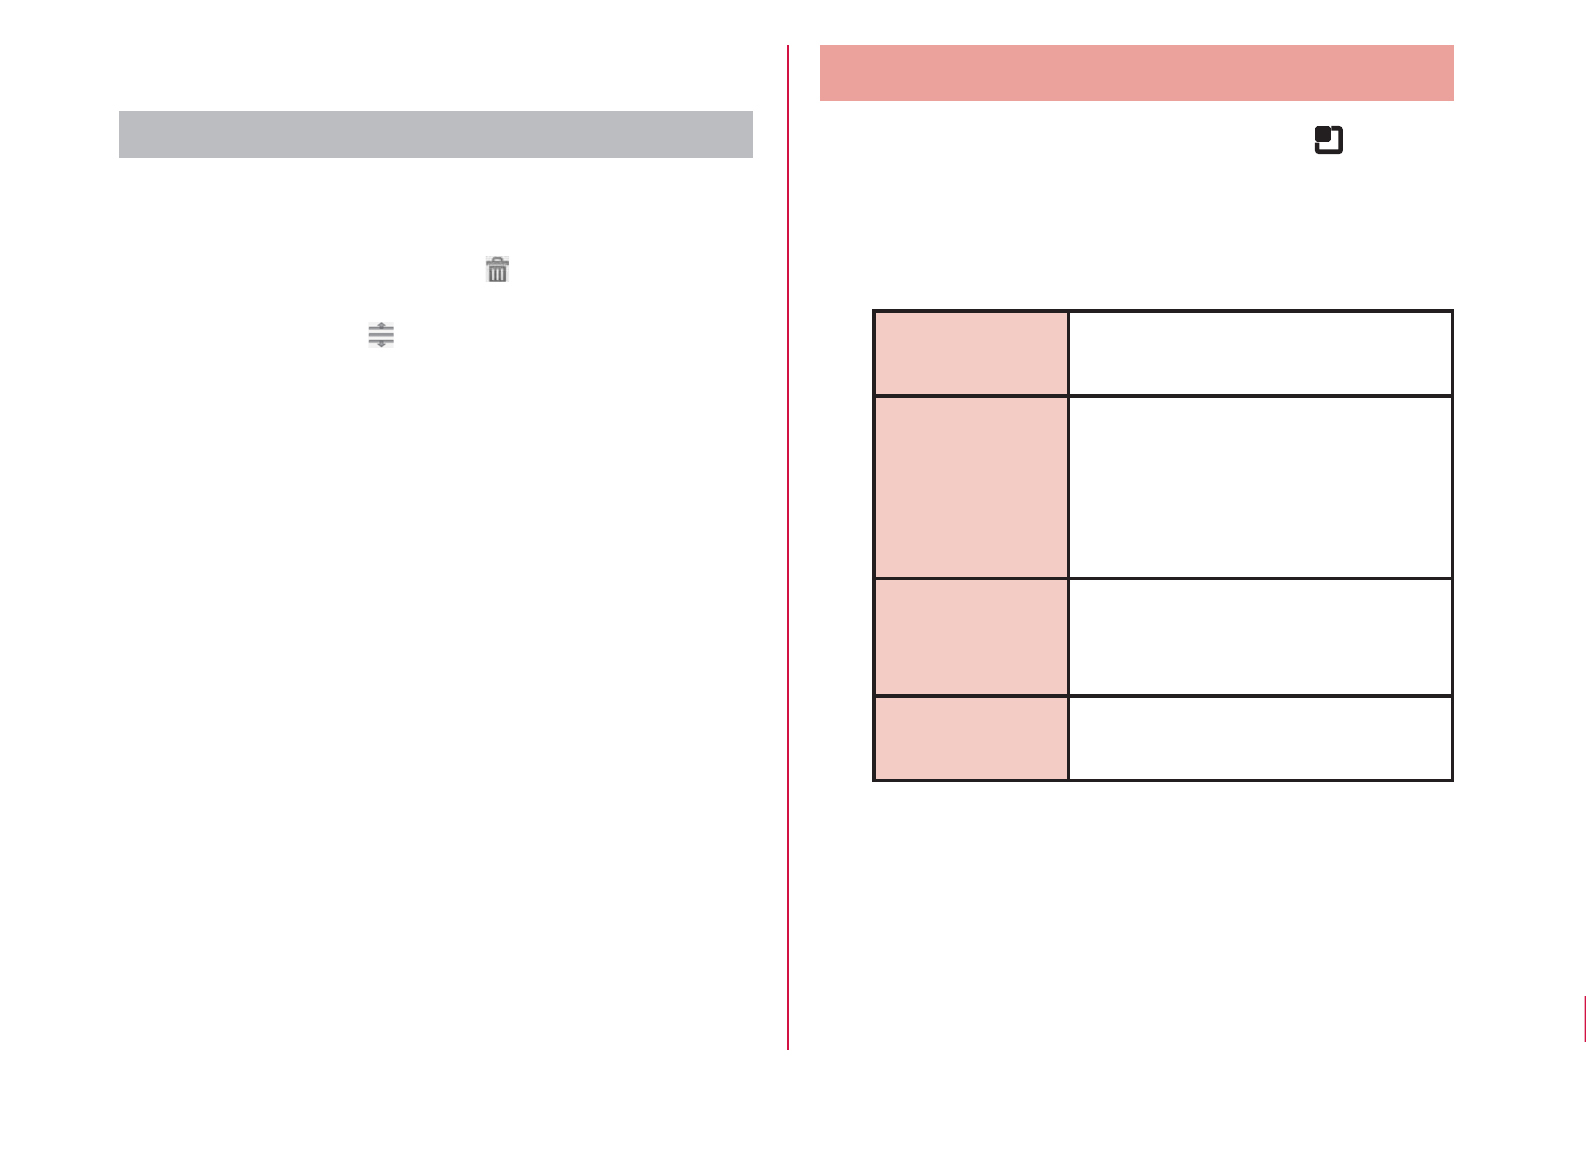
After you finish editing, tap "Save"
Deleting/sorting a playlist
In the Playlists, tap "Edit"
rTap "Delete all playlists" to delete all playlists.
rTap on a playlist to make turn red and
become a deletion target.
rDrag and drop to change the order of the
playlist/quick playlist.
After you finish editing, tap "Save"
Setting the Media Player
From the "Media Player" screen, X
"Settings"
rThe "Settings" menu appears.
Change the settings if required
Audio effect
settings
Set effects for when playing
music.
Ringtone
settings
Set a song as a ringtone for
voice calls, emails, and sp-
mode mail.
rSome songs cannot be set
as ringtones.
Movie sort
settings
Select the order of the video
list from "Saved date and time"
and "Title".
Delete
contents
Delete all/selected displayed
music files/video files.
155
Application
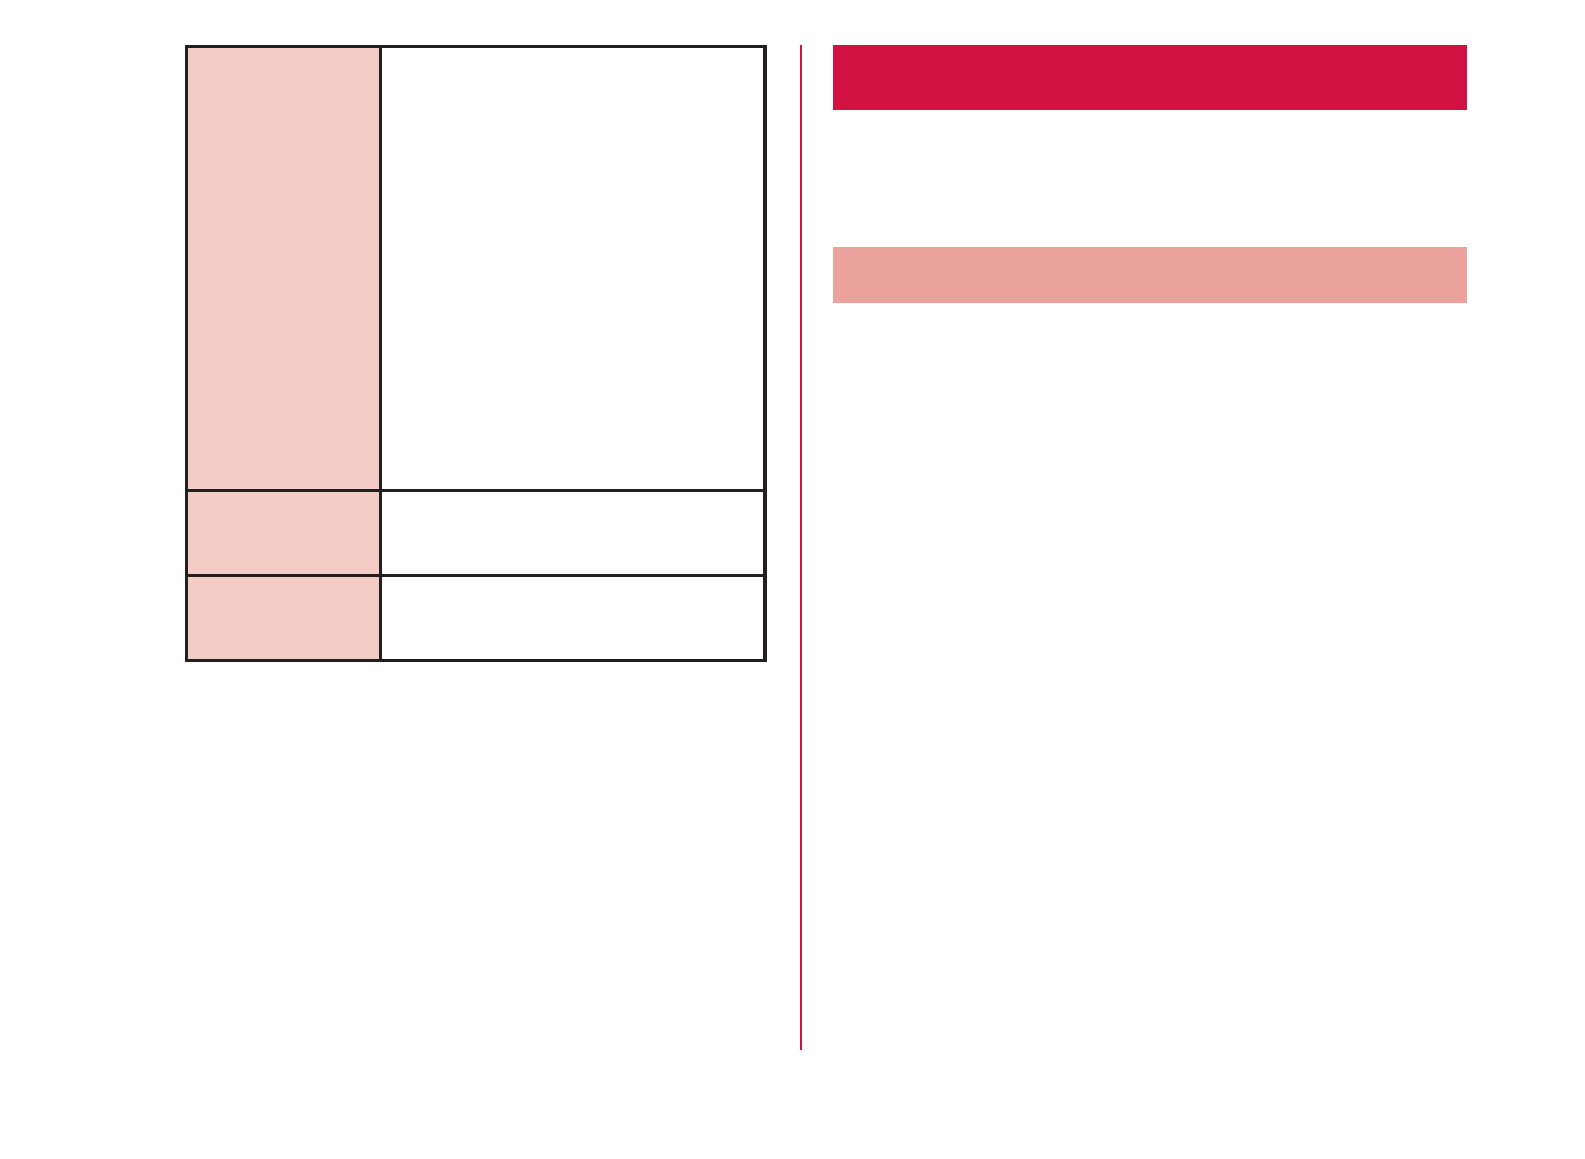
Arrange icons Drag and drop to change the
icons displayed on the bottom
bar of the "Media Player"
screen.
rIf you change the icons
to "Play list", "Genre", or
"Age", you can display lists
according to Playlists/Genre/
Age on the "Media Player"
screen.
rYou cannot change the
"Movie", "MUSIC Store", and
"VIDEO Store" icons.
Update
database
Update the Media Player
database.
Reset settings Return the Media Player to its
initial settings.
Market
Android Market enables you to access applications and
games you like and download them to install into the
terminal.
Opening Android Market
From the Home screen, "Applications"
X "Market"
rWhen the application is activated for the first
time, the terms of Android Market use appears.
It only appears for the first time open.
"Accept"
rAndroid Market opens.
156
Application
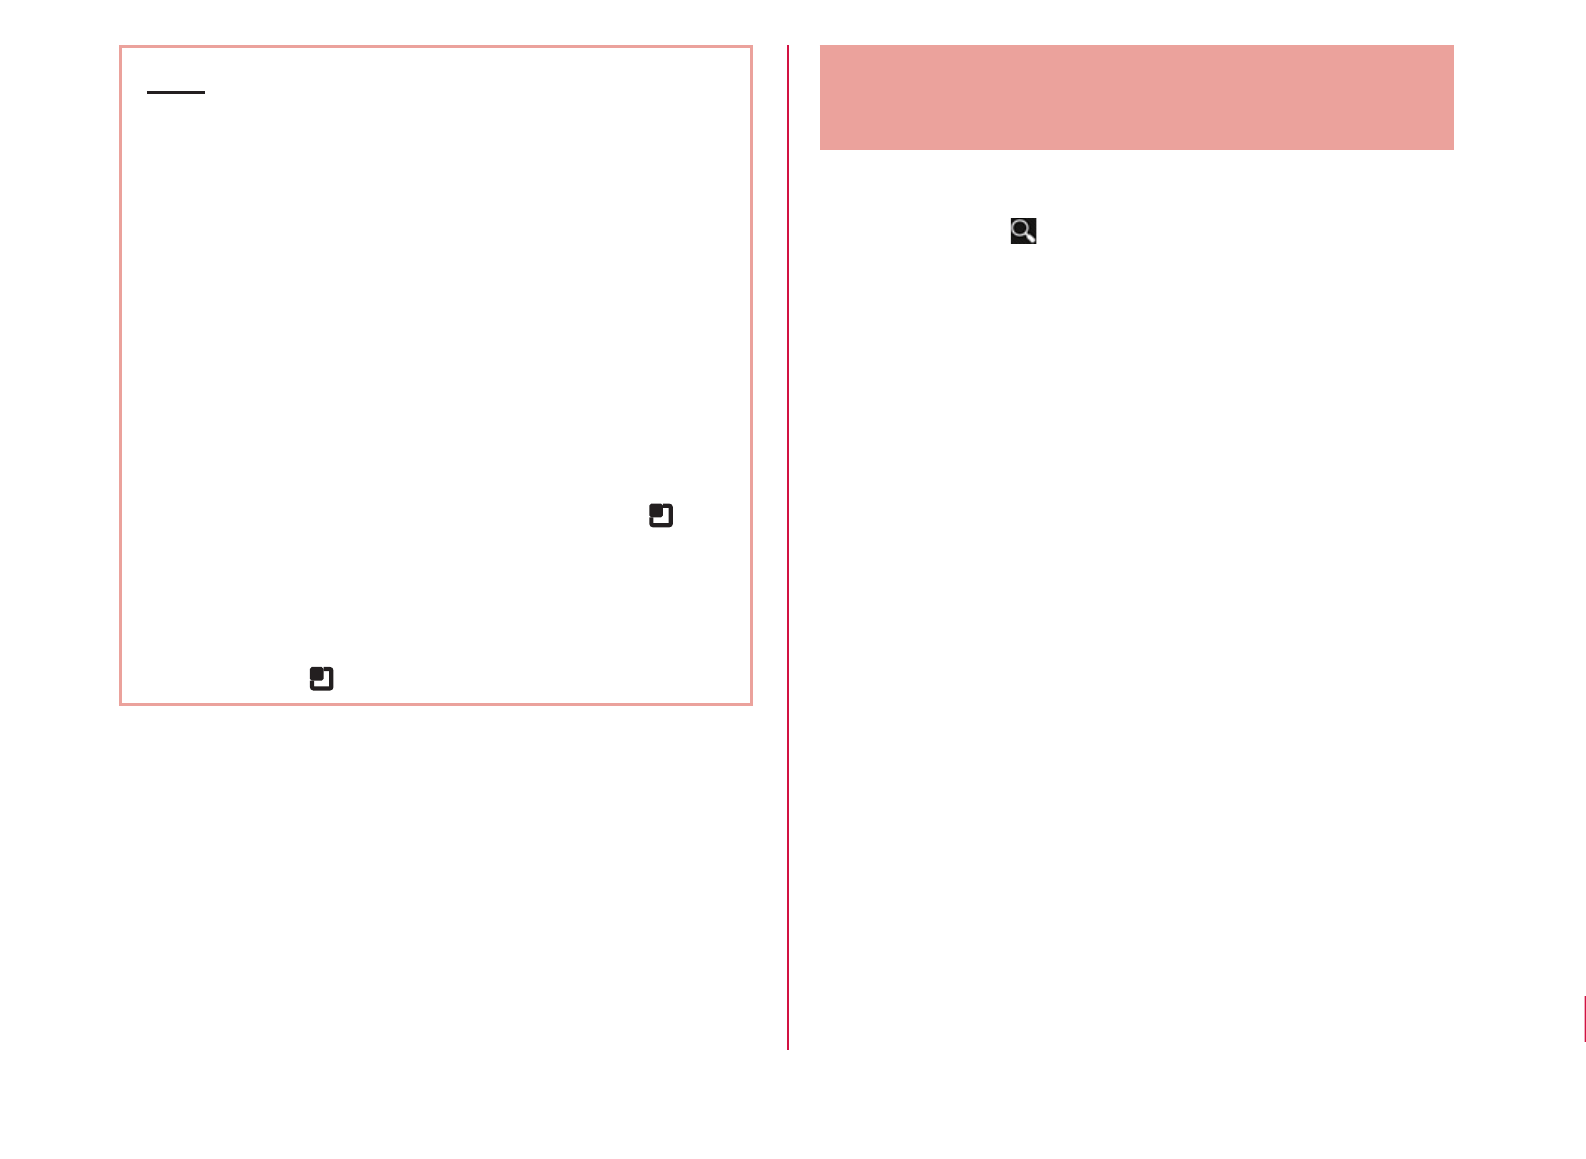
Note
rBe sure to check the security of application,
and then install it at your own risk. The terminal
may be infected with a virus and the data may
be damaged.
rNTT DOCOMO is not liable for malfunctions, if
any, caused by the application you installed.
rNTT DOCOMO is not liable for any
disadvantage brought to you or any third party
due to an application you installed.
rSome applications automatically perform packet
communications. Packet communication is kept
active unless you disconnect or it is timed out.
To disconnect packet communication, tap
X "Settings" X "Wireless & networks" X "Mobile
networks" on the Home screen, and uncheck
the "Data enabled" checkbox.
rIf you need more information about Android
Market, tap X "Help" when Market is open.
Searching or Installing an
Application
Search for the desired application
rIf you tap and enter a key word on the
"Market" screen, you can search for an
application by its name.
Tap the application name
rThe application details are displayed. Users'
comments and their evaluations are displayed
on the screen.
To continue installing operation,
tap "Download" / "Install" (for free
application) or Price button (if paid
application)
rThe displayed content differs depending on the
application.
rIf the application needs to access data and
functions on the terminal, the functions used by
the application are displayed.
"Accept & download" / "Accept & buy"
rIt is download and installed automatically. When
installation is complete, the notification icon
appears in the status bar.
157
Application
Note
rRead the application details carefully. Once you
install the application, you accept liability for its
use.
rYou are required to purchase those paid
applications. For purchasing an application, refer
to "Purchasing an Application" (P159).
rIf it takes a long time to download, you can tap
"My Apps" to check the progress status on-
screen.
rMost applications can be installed in a few
seconds, but, if the download does not end
after a long time, you can stop it by tapping
X "My Apps" X "u Stop 1" displayed in the
application to abort downloading.
rIf download or installation is finished normally,
the notification icon will be displayed in the
status bar. Display the Notification panel and tap
the application name. The installed application
opens.
Updating an Application
If an installed application is updated, the notification
icon appears on the status bar. You can also check the
update information on the "My Apps" screen. Once you
have confirmed the availability of an update, you can
update the application.
Tap the application which shows
"Update" on the "My Apps" screen
"Update" X "Accept & download"
rYou can update the application by following the
same procedures used for installation.
Note
rYou can also display the "My Apps" screen by
tapping X "My Apps" on the "Market" screen.
"Update" appears beside updated applications.
Tap the application to update it by following the
same procedures used for installation.
158
Application
Uninstalling an Application
You can uninstall applications whenever you want.
Tap any of application on the "My Apps"
screen
rThe application details are displayed.
"Uninstall"
rA message appears.
"OK"
Purchasing an Application
Before downloading a paid application, you must first
purchase it. Try it for free within a certain period. If you
do not ask for a refund within a certain period after
purchasing, your credit card will be charged.
Note
rYou pay for the application only once. You are
not charged for uninstalling an application or for
downloading it again.
rIf you have multiple Android devices that use
the same Google account, you may download
the purchased application to all of them at no
additional cost.
159
Application
Purchasing an application
Tap an application that you want to
purchase
rThe application's functions and other users'
comments and evaluations appear.
Price button X "Accept & buy"
rIf the application needs to access data and
functions on the terminal, the functions used by
the application are displayed.
rPurchase procedure screen is displayed.
rWhen purchasing for the first time, tap "Add
payment method" X "Add card" to proceed.
Requesting a refund and deleting an
application
In the "Market" screen, X "My Apps"
rThe "My Apps" screen appears.
Tap the application that you want to
uninstall
"Refund"
rA menu asking why you want to delete the
application appears. If this menu does not
appear, the trial period has expired.
Tap the answer that best matches your
reason, and then "OK"
Maps
"Maps" enables you to show your current location,
search for other locations and routes. Open Google
Maps to show your approximate location according to
information received from the nearest base station. Your
current location will be updated more accurately if your
current position is determined by GPS.
160
Application

Location Information Services
Mobile networks, Wi-Fi and GPS methods are available
to obtain current locations. With Wi-Fi current locations
can be speedily determined, but accuracy is lacking.
If GPS is used, it takes more time, but accurate
positioning can be obtained. When determining current
locations, activate both Wi-Fi and GPS to utilize both of
161
Application
Note
rThis terminal is equipped with a GPS receiver
that uses satellite signals to calculate current
locations. Some GPS functions use the Internet.
Transferring data may incur charges.
rTo use a function which requires a GPS receiver
for positioning of your current location, check
for an unimpeded view of the sky. Move to
another location if your current location is not
determined after a few minutes.
rIn order to calculate the current location faster,
do not move or cover GPS antenna with other
objects.
rIt may take up to ten minutes to determine
current locations when the GPS functions are
used for the first time.
Activating GPS functions
From the Home screen, X "Settings"
X "Location & security"
Place a check mark on "Use GPS
satellites"
rThe "Notice" menu appears.
"Agree"
rThe GPS function is enabled.
Enabling location search by Wi-Fi
From the Home screen, X "Settings"
X "Location & security"
Place a check mark on "Use wireless
networks"
rThe "Location consent" menu appears.
"Agree"
rYou can search for your location with an
application that uses Wi-Fi.
Note
rLocation information that is collected by Wi-
Fi does not identify individual users. Location
information can also be collected even when
the application is not running.
162
Application
Open Maps
From the Home screen, "Applications"
X "Maps"
rGoogle Maps opens.
rRefer to the following to zoom in or zoom out a
map.
Pinch out/
pinch in
Pinch your fingers apart to zoom
in, or together to zoom out.
Double-tap Double-tap to zoom in.
Tap with 2
fingers
Tap with two fingers to zoom out.
Identifying your Current Location
In the "Maps" screen, tap
rYour current location is displayed on the map by
a blinking blue circle.
Viewing Street View
You can switch to the Street View of your current
location.
From the Maps screen, touch the section
that you want to view in Street View for
over 1 second
rA balloon appears.
Tap the balloon X Tap
rStreet View appears.
Note
rStreet View is not available in some areas.
is light gray for areas where Street View is not
available. is dark gray for areas where Street
View is available.
rYou can change direction by dragging the
"Street View" screen. You can also zoom in/out
by pinching out/in on the screen. Drag to the
place that you want to view.
rIf you tap X "Compass mode" when viewing
Street View, the terminal's magnetic compass
directions is linked to the directions displayed in
Street View.
163
Application
Searching for a Specific Location
From the Maps screen, tap the "Search
Maps" box and enter the location that
you are looking for
rIn addition to the address, you can specify city
names or facility names in your search (e.g.,
"Tokyo" and "museum").
rWhen you tap "Search Maps" box, a list of
previously searched or viewed locations
appears. You can also display a location by
tapping the list.
Tap
rAn icon appears at the location on the map.
Tap the location icon
rBalloons with names of locations and facilities
appear.
Tap the balloon
rDetailed information appears.
: Return to the Maps screen.
: Start navigation to the displayed location,
or search for routes.
: Make a call.
: Display other options.
rThe displayed information and available options
vary depending on the location.
Note
rYou can also search by voice entry. For details,
refer to "Searching for a web page by voice
entry" (P128).
Changing Layer
The map can display multiple layers of different
information.
Adding a layer
Tap in the "Maps" screen
rThe "Layers" menu appears. The following
information is displayed in the layers.
Traffic View traffic information. This is
only available in some areas.
Satellite View satellite photos.
Terrain View topography.
Transit
Lines
View train information. This is only
available in some areas.
Latitude Join Latitude. For details, refer to
"Joining Latitude" (P167).
164
Application

My Maps View My Maps you created on
your PC. You can only view My
Maps on the terminal. You cannot
create My Maps on the terminal.
Wikipedia Display .
Tap to view a Wikipedia article
about the location.
Clear Map Clear all displayed layers, route
search results, etc.
Deleting a layer
Tap in the "Maps" screen
rThe "Layers" menu appears.
Tap the checked layer
rThe layer is unchecked and deleted.
Searching for a Route
You can view a detailed route to your destination.
From the "Maps" screen, tap X
"Directions"
Enter your departure point in "Start
point:*1" box X Enter your destination in
"End point:" box
rYou can also select your Start point and End
point by tapping to the right of their respective
boxes to display a menu and then choosing
from "My current location*2", "Contacts", "Point on
map" and "My Places*3" on the menu.
*1 "My current location" is entered in "Start point:"
box.
*2 If "My current location" is entered in "Start point:"
box or "End point:" box, it will not be displayed
even if you tap .
*3 Only the location with star mark can be displayed.
165
Application
Select / / as your mode of
transportation
"Get directions"
rA list of routes to your destination appears.
Tap one of the routes
rThe selected route appears.
Note
rIf the routes are searched by car, on foot, or on
bicycle, the routes are displayed on the map.
rTap the icon on the top left of the screen to
choose the mode of transportation, "Driving",
"Transit", "Walking" or "Bicycling".
rWhen appears, if you tap , Google maps
navigation is activated, and route guidance all
the way up to the destination is started.
rTap to change "Start point:"/"End point:".
rWhen routes are searched via Public
transportation agencies, route choices are
displayed under "End point:". Tap any one of the
routes and details concerning travel times and
transfer for trains, station names and fares are
displayed.
rTap to search for routes according to
“Departure time", "Arrival time" and "Last
available time".
rTap "Show earlier trips" or "Show later trips", to
search for routes at earlier or later times.
rWhen routes are searched via Car, On foot,
Bicycle, if the items displayed under "End point:"
are tapped, the changes in directions for the
points on the routes are displayed on the maps.
166
Application
Clearing a Map
You can clear all displayed layers and route search
results.
Tap in the "Maps" screen
rThe "Layers" menu appears.
"Clear Map"
rThe displayed layers and route search results
are cleared.
Note
rIf there is nothing that can be cleared, "Clear
Map" is grayed out and cannot be tapped.
rYou can also clear a specific layer by tapping
on the Maps screen and tapping checked
layers to uncheck them.
rYou can also clear displayed layers and route
search results by tapping X "Clear Map" in
the Maps screen.
Latitude
Google Latitude enables you and your friends to check
each other's locations on maps and share status
messages with each other. It also enables you to send
emails, make calls and search for routes to friend's
locations.
Location information is not shared automatically. You
must first join Latitude and then invite friends to provide
their locations, or accept invitations from friends to
share your location.
Joining Latitude
From the Home screen, "Applications"
X "Latitude"
rThe first time that you join Latitude, you are
prompted to accept or reject the Google privacy
policy.
Tap the link for "Google Privacy Policy"
X After reading, tap
X "Join Latitude" X "Allow and
Share"
rLatitude opens and a list of members with
Google accounts appears.
167
Application
Opening Latitude
From the Home screen, "Applications"
X "Latitude"
rLatitude opens and a list of members with
Google accounts appears.
Note
rYou can also open Latitude by tapping X
"Latitude" on the Maps screen.
rFor more details, tap X "See map" X X
"More" X "Help" X "Latitude" in the Latitude
screen, to refer to Mobile Help.
Navigation
Google Maps Navigation (beta) is route guidance
software with voice guidance.
From the Home screen, "Applications"
X "Navigation"
rService terms are displayed. Check "Show this
message next time", and from the next time
onward the same message is displayed.
"Accept"
rOpens Google Maps navigation and displays
menu.
Tap one of the items
Enter or select your destination to start route
guidance.
r"Speak Destination": Search for destination via
voice.
r"Type Destination": Enter the characters of your
destination.
r"Contacts": Search for an address registered in
your contacts.
r"Starred Places": Search for a location with a star
added in Google Maps.
r (Route options): Set whether to use the
expressway and toll roads.
r : Display a map.
r / : Select by car or on foot
Note
rAny operation during driving should be
performed by a passenger.
168
Application

Places
You can use Places to easily search for nearby
restaurants, cafes, bars, travel spot, ATMs, gas stations,
and other places of interest.
From the Home screen, "Applications"
X "Places"
rPlaces opens.
Tap one from "Restaurants" / "Coffee" /
"Bars" / "Attractions" / "ATMs" / "Gas
Stations" / "Explore Nearby"
rA list of search results appears. Tap a search
result to view details.
Note
rYou can also open Places by tapping on the
Maps screen.
rTo add the search condition, tap "Add", enter a
category to search, and tap "Add".
1Seg
1Seg is a digital terrestrial TV broadcasting service for
mobile devices that allows you to receive data programs
along with video and audio. It is also possible to acquire
detailed program information, participate in quiz shows,
and enjoy TV shopping.
For details on "1Seg" service, refer to the following
homepage.
Association for Promotion of Digital Broadcasting
http://www.dpa.or.jp/english/

1Seg Viewing
From the Home screen, "Applications"
X "TV"
rThe 1Seg viewing screen appears.
rWhen activating it for the first time, it is
necessary to accept the terms of service and to
select your viewing area.
171
Application

Viewing the 1Seg viewing screen
Vertical screen display shows the data broadcast.
a TV broadcast area
Flick left or right to switch channels.
Tap to display the TV operation screen.
b Data broadcast area
Tapping directly on the content of the data
broadcast may allow you to operate.
c Data broadcast operation button
d Subtitle display area
Tap to display the TV operation screen.
172
Application

Viewing the TV operation screen
Tap the TV broadcast area/subtitle display area on
the 1Seg viewing screen to temporarily display the TV
operation screen.
a Channel, Broadcast station, Program name
b "Channels" tab
Tap to display the channel list. Tap on a channel to
switch channels.
c Volume bar
Swipe left and right to adjust the volume.
It is also possible to adjust the volume using the
volume key (up)/volume key (down).
d Channel switch button
Tap to switch to the previous/next broadcast station
registered in the channel list. Touch for over 1
second to start a channel search and switch to the
first received broadcast station regardless of the
channel list order.
e "Programs" tab
Tap to display the program schedule of the channel
you are watching. Tap on a program to display the
details.
173
Application

Fixing the screen orientation
You can fix the screen orientation that is currently
displayed.
From the 1Seg viewing screen, X "Fix
screen direction"
Note
rTo cancel fixed screen orientation, from the
1Seg viewing screen, tap X "Unfix screen
direction".
Using the Program Schedule
You can view a TV guide of both terrestrial TV programs
and BS digital broadcast programs. You can search
programs using key words or by genre, and make
reservations for viewing.
From the 1Seg viewing screen, X
"Programs"
rThe program schedule appears.
rWhen activating it for the first time, it is
necessary to accept the terms of service and to
select your viewing area.
Tap on a program
rProgram information is displayed.
rTap "
Note
rThe start of a program cannot be notified if the
terminal power is OFF at the reservation time.
Confirming, editing, or deleting
reservation contents
From the "TV timer list" screen, touch a
viewing reservation for over 1 second
rA menu appears. The following operations are
available to you.
Detail Display the viewing reservation
details.
Edit Edit the viewing reservation.
Delete Delete the viewing reservation.
Using TV Link
Some data broadcasts may show link information
(TV link) to related sites. By registering a TV link, it is
possible to connect to related sites later.
rTo register a TV link, tap the item that can be
registered for the TV link that is displayed in the data
broadcast area.
From the 1Seg viewing screen, X
"TVlink"
rThe "TVlink" list screen appears.
Tap the TV link
rConnect to the registered site.
Note
rFrom the "TVlink" list screen, touch the TV link
for over 1 second, and tap "Delete" X "Yes" to
delete.
rFrom the "TVlink" list screen, tap X "Delete
All" X "Yes" to delete all TV links.
175
Application
1Seg Settings
From the 1Seg viewing screen, X
"Settings"
rThe "Settings" menu appears.
Change the settings if required
Subtitle
settings
Subtitle
display
Put a mark in the
checkbox to display
subtitles.
Subtitle
language
If the program provides
multiple subtitles, select
the subtitle you want to
display.
Audio
setting
Main/Sub
switch
If a sub audio channel
is available for a
program, you can
switch between the
main and sub audio
channels.
Audio
switch
If multiple sounds are
available for a program,
you can select the
sound you want to hear.
Other
settings
Channel
setting
Create and edit channel
lists, switch channel
lists, and initialize
channel lists.
Alarm
setting
Configure the settings
for the viewing
reservation alarm.
Reset
broadcast
memory
Delete the information
and TV links that are
registered on the data
broadcast
176
Application
Creating a channel list
From the 1Seg viewing screen, X
"Settings" X "Channel setting" X
"Channel list edit"
rThe "Channel list edit" screen appears.
Touch "Untitled" for over 1 second
"Create"
rThe "Creating channel list" screen appears. The
following operations are available to you.
Manual
setting
Select the viewing area from the
area list, and create a channel list.
Auto
setting
Scan broadcast stations that can
be received at the current location
and create a channel list.
Osaifu-Keitai
Osaifu-Keitai is equipped with an IC card, so by waving
the terminal close to a reader at a shop, it is possible to
make payments or use coupons or participate in stamp
rallies. By waving the terminal close to a reader, it is
also possible to access sites and home pages, acquire
the latest coupons using communication, and deposit
money and confirm usage status for e-money. As a
countermeasure for loss, an Osaifu-Keitai lock function
is available so that you can use it without worry.
rFor details about Osaifu-Keitai, refer to "Mobile
Phone User's Guide [sp-mode]" or dmarket.
rTo use Osaifu-Keitai compatible services, it is
necessary to make settings through sites or
applications.
rIf the terminal has a problem, data in the IC card
(including e-money and points) may be lost or
changed (if the terminal needs repair, terminals with
data cannot be accepted, so principally the user
needs to delete the data). For more information
about reissuing and restoring data, and support for
saving and transferring data, contact the Osaifu-
Keitai service provider. Please use Osaifu-Keitai
compatible services that provide backup services to
save you important data.
177
Application
rWe are not responsible for damages such as lost
or changed data in the IC card, or other damages
related to Osaifu-Keitai compatible services in any
cases including terminal malfunction or terminal
replacement.
rIf a terminal is stolen or lost, please immediately
contact your Osaifu-Keitai compatible providers for
what to do.
Using Osaifu-Keitai
To use Osaifu-Keitai compatible services, from the
Osaifu-Keitai compatible site, download the application
for Osaifu-Keitai and then configure settings. Some
services do not require downloading of an Osaifu-Keitai
compatible application.
From the Home screen, "Applications"
X "Osaifu-Keitai"
rThe "Service List" screen appears.
rIf your initial settings have not been completed,
the Initial Settings screen appears.
Tap the service that you want to use
Configure service settings
rMake necessary settings from the service site or
application.
Swiping Close to Readers
Communication can be executed by swiping the
mark close to a reader.
Keep in mind the following when swiping to a reader.
rDo not let the terminal hit the reader
rSwipe the mark parallel to the reader
rSwipe the mark as close to the center of the
reader as possible
rIf the reader does not read, the mark needs to be
adjusted front, back, left, or right.
rDo not attach metallic objects to the surface of the
mark.
178
Application
Locking Osaifu-Keitai
Lock the Osaifu-Keitai service from being used. After
locking, data cannot be acquired from the reader.
From the Home screen, "Applications"
X "Osaifu-Keitai"
rThe "Service List" screen appears.
X "Osaifu-Keitai Lock Setting"
Tap the "Password:" box and enter
password
Tap the "Confirm Password:" box and
enter the same password entered in
Step 3
"OK"
Note
rThe lock is not canceled even if the power is
turned off.
Canceling the lock
From the Home screen, "Applications"
X "Osaifu-Keitai"
rThe "Service List" screen appears.
X "Osaifu-Keitai Lock Setting"
Tap the "Password:" box and enter the
same password entered for locking
"OK"
179
Application

To r u Ca
ToruCa is an electronic card that can be loaded to your
mobile. It can be acquired from readers and websites as
the shop information or coupons. The acquired ToruCa
will be saved in "ToruCa" application. Use "ToruCa"
application to display, search or update.
rFor details of ToruCa, refer to "Mobile Phone User's
Guide [sp-mode]" or dmarket.
From the Home screen, "Applications"
X "ToruCa"
Note
rPacket communication fee may incur when
acquiring, displaying or updating ToruCa.
rYou may not be able to acquire, display or
update the ToruCa provided for i-mode terminal.
rThe functions below may not be available
depending on the IP (Information Provider)
setting.
- Acquiring from readers
- Update
- ToruCa sharing
- Viewing maps
rIt is not possible to acquire ToruCa from readers
while Osaifu-Keitai is locked.
rDepending on IP setting, ToruCa that can be
displayed on the map from ToruCa (details) may
not be able to be displayed on the map from
ToruCa list.
rWhen sending ToruCa using email, it is sent with
the status before acquiring ToruCa (details).
rThe received ToruCa by email may not be saved
depending on the email application you use.
rToruCa may not be acquired depending on the
browser you use.
rToruCa may not be acquired from readers when
Osaifu-Keitai is not initialized.
180
Application

Alarm Clock
From the Home screen, "Applications"
X "Alarm Clock"
rThe following functions are available by
switching tabs.
: Alarm
: Timer
: World Clock
: Stopwatch
Setting Alarm
Tap on the Alarm Clock screen
rThe "Alarm" screen appears.
"New alarm"
rThe "Set alarm" screen is displayed, and the
following settings are available.
Hour/
Minute
Change the time setting.
Repeat Set the alarm to repeat on certain
days of the week at the same
time.
Snooze
duration
Set the snooze time.
Vibration Check to enable both alarm
sound and vibrator.
Alarm tone Set the alarm sound.
Puzzle lock Check to enable or uncheck to
disable the puzzle setteing.
Memo Add memos to alarms that are
set.
181
Application
Set alarm details and tap "Save"
rThe "Alarm" screen is displayed. The set alarm
is added to the list. Set the alarm ON or OFF by
tapping / .
rTap the list to display the "Set alarm" screen and
change the content.
Tap "Save" to overwrite the changes, and return
to the "Alarm" screen.
Note
rThe alarm functions at the time set for the alarm.
Tap "Stop" to stop the alarm. Tap "Snooze" to
make the alarm function again according to the
time interval set in the alarm setting for "Snooze
duration".
Setting the Timer
Tap on the Alarm Clock screen
rThe Timer screen is displayed, and the following
settings are available.
Hour/Minute/
Second
Set the timer.
Vibration Check to enable both alarm
sound and vibrator.
Alert tone Set the alarm sound.
"Start"
rThe timer starts.
Setting the World Clock
You can confirm the date and time for registered cities in
a list.
Tap on the Alarm Clock screen
"New city"
rCity names are displayed. Tap to display the
current time and name of the selected city on
the list screen. Tap to add/delete cities.
182
Application
Setting the Stopwatch
Tap on the Alarm Clock screen
"Start"
rThe stopwatch starts. Tap "Lap" to count lap
times.
rTo stop the stopwatch, tap "Stop".
rTap "Resume" to restart the stopwatch, and tap
"Reset" to reset it.
Calendar
Calendar
The terminal has a calendar for managing your
schedule. It can synchronize with scheduler built by
Microsoft Exchange Server or with Google Calendar if
you have a Google account.
Opening Calendar
From the Home screen, "Applications"
X "Calendar"
rThe Calendar screen appears.
183
Application

Changing Calendar Display/
Displaying Schedule
Changing to Day/Week/Month view
Tap "Day" / "Week" / "Month" in the
change display box
rTap "Agenda" in the change display box to
display a list of events. Tap each list to display
the content.
Note
rIf you swipe left or right in Day, Week, or Month
view, the previous or next day, week, or month
is shown.
rIf you tap "Today" in the Calendar screen
when in Week or Month view, today's date is
highlighted according to the system date.
Setting calendar type to display
From the Calendar screen, X
"Calendars"
rThe registered calendar types are displayed.
Tap of the calendar you want to
display
rIf appears, update is automatically running. If
appears, the calendar is displayed. If both of
them are grayed out, functions are not available.
"OK"
rThe Calendar screen appears and information
based on the settings you set is displayed.
Note
rThis application cannot create calendar type. To
create calendar type, access Google calendar
web page from browser and tap "
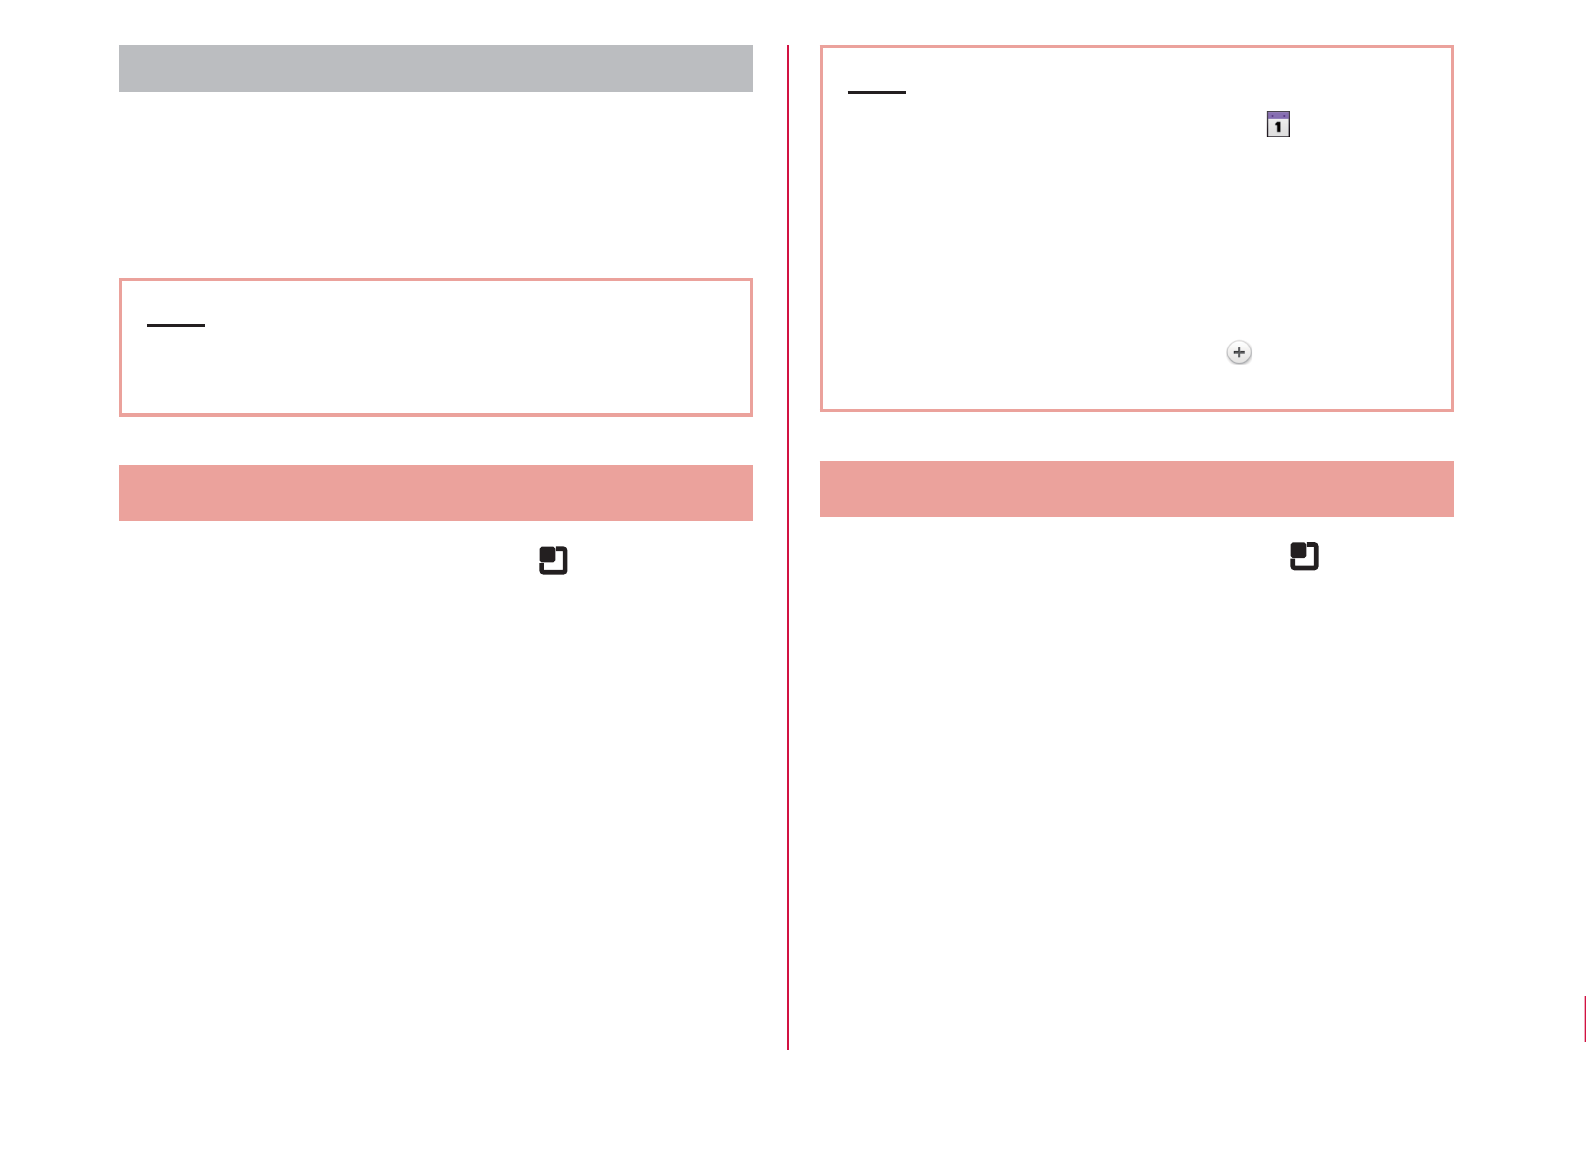
Viewing your schedule
From the Calendar screen, tap the
schedule that you want to view
rThe "Agenda" screen appears, and a list of your
schedules is displayed.
Note
rTap "Agenda" in the change display box to
display the "Agenda" screen.
Creating a Schedule
From the Calendar screen, X "New
event"
rThe "New event" screen appears. Follow the on-
screen instructions to fill out each item and tap
"Save".
Note
rAs the schedule time approaches, appears
in the status bar. Drag or swipe the status bar
downwards to open the Notification panel then
tap the calendar notification, the "Calendar
notifications" screen is displayed. Tap "Dismiss
all" to delete the notification or tap "Snooze all"
to repeat the notification 5 minutes later.
rFrom the Calendar screen, tap to display the
"New event" screen.
Changing Calendar Settings
From the Calendar screen, tap X
"Settings"
rThe "Settings" screen appears.
Change the settings if required
rSet how to notify an event, also set ringtone,
vibrator and default notification time.
185
Application
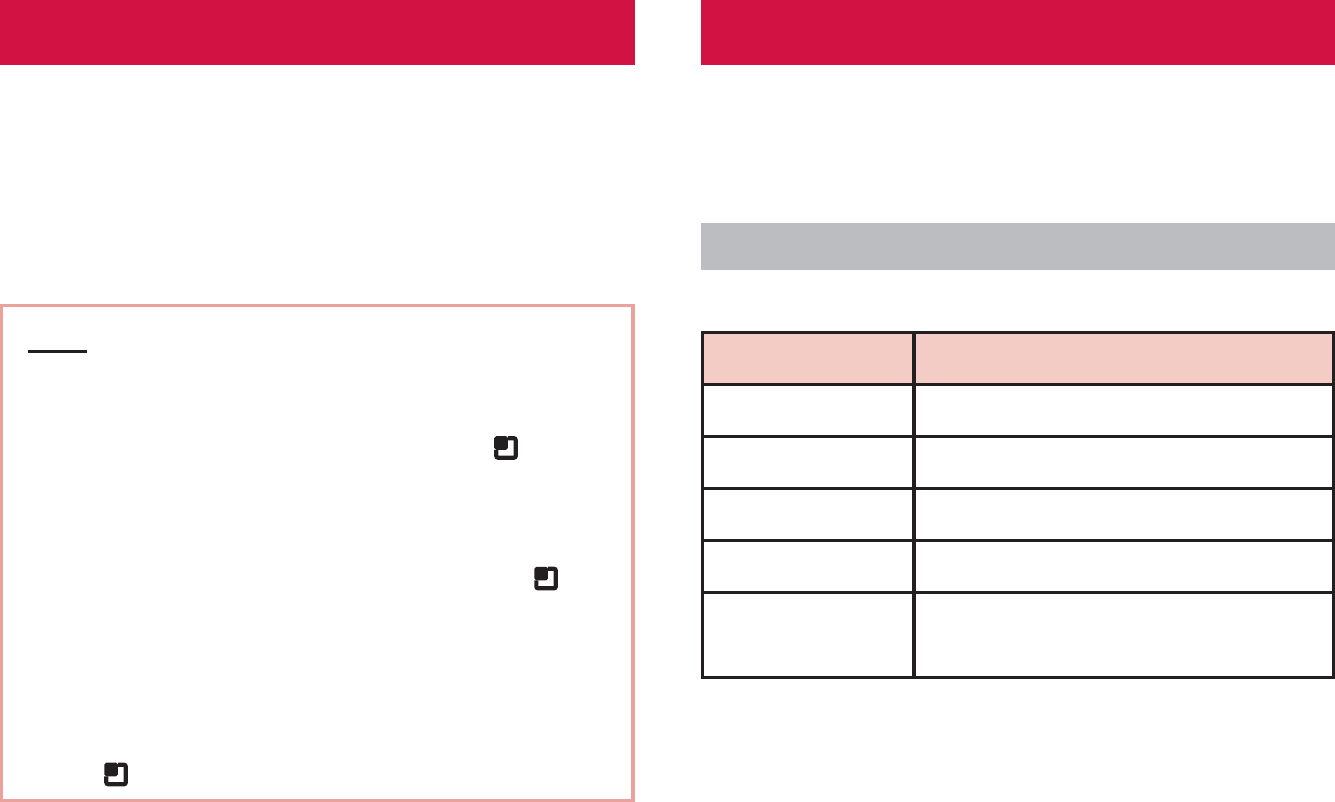
Calculator
From the Home screen, "Applications"
X "Calculator"
rThe Calculator screen appears.
Calculate
rThe results are displayed.
Note
rYou can display the Functions screen by
dragging or swiping the keypad area to the left
on the Calculator screen or by tapping X
"Advanced panel".
You can return to the Calculator screen by
dragging or swiping the keypad area to the
right on the Function screen or by tapping X
"Basic panel".
rTap "CLEAR" to delete the most recently
entered number or arithmetic operator. Touch
"CLEAR" for over 1 second to delete all entered
information.
rTap X "Clear History" to clear the history.
SmartWorld
From the Home screen, "Applications"
X "SmartWorld"
rThe “SmartWorld" screen appears.
SmartWorld menu
For SmartWorld, the following menu is displayed.
Item Description
Hot & New Hot & New screen is displayed.
Apps Apps screen is displayed.
YouTube
You can play YouTube videos or upload the videos you
have shot to YouTube.
rFirst-time users are required to accept "mobile terms
of service".
From the Home screen, "Applications"
X "YouTube"
rThe “YouTube" screen appears.
: Enter a keyword and then search for a
video
: Shoot a video with the camera of the
terminal and then upload the video to
YouTube
rYou need to log in to your YouTube account to
upload a video.
Tap a video you want to play
rThe video is played.
: Switch between high quality (HQ)
playback and low quality playback.
rTap screen to pause a video, or to show the
playback bar to change the playback position.
Polaris Office
From the Home screen, "Applications"
X "Polaris Office"
rThe "Polaris Office" screen appears.
Note
rIf you have not registered as a user, the user
registration screen appears when activating
"Polaris Office".
rFiles with password may not be usable.
rFiles created on PC may be displayed differently
or may not be displayed.
187
Application