LG Electronics USA L30LP 30-inch LCD TV/ Monitor User Manual EMISSION TEST REPORT
LG Electronics USA 30-inch LCD TV/ Monitor EMISSION TEST REPORT
Contents
- 1. Users Manual 1
- 2. Users Manual 2
Users Manual 2
K22
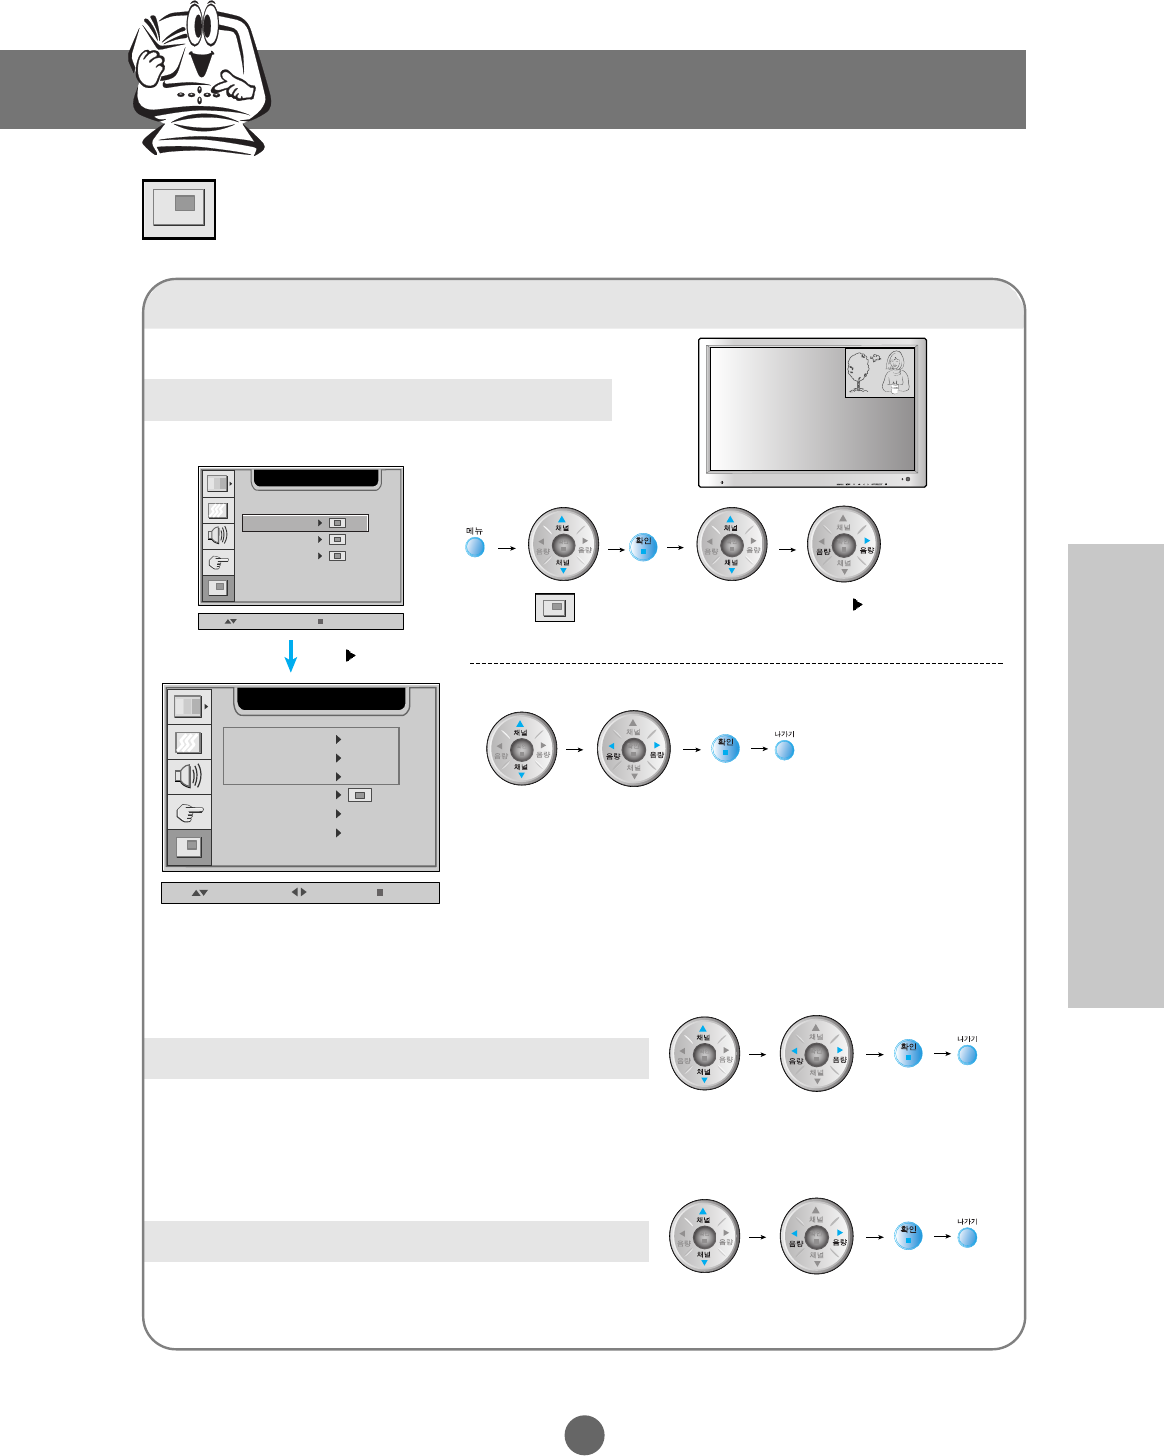
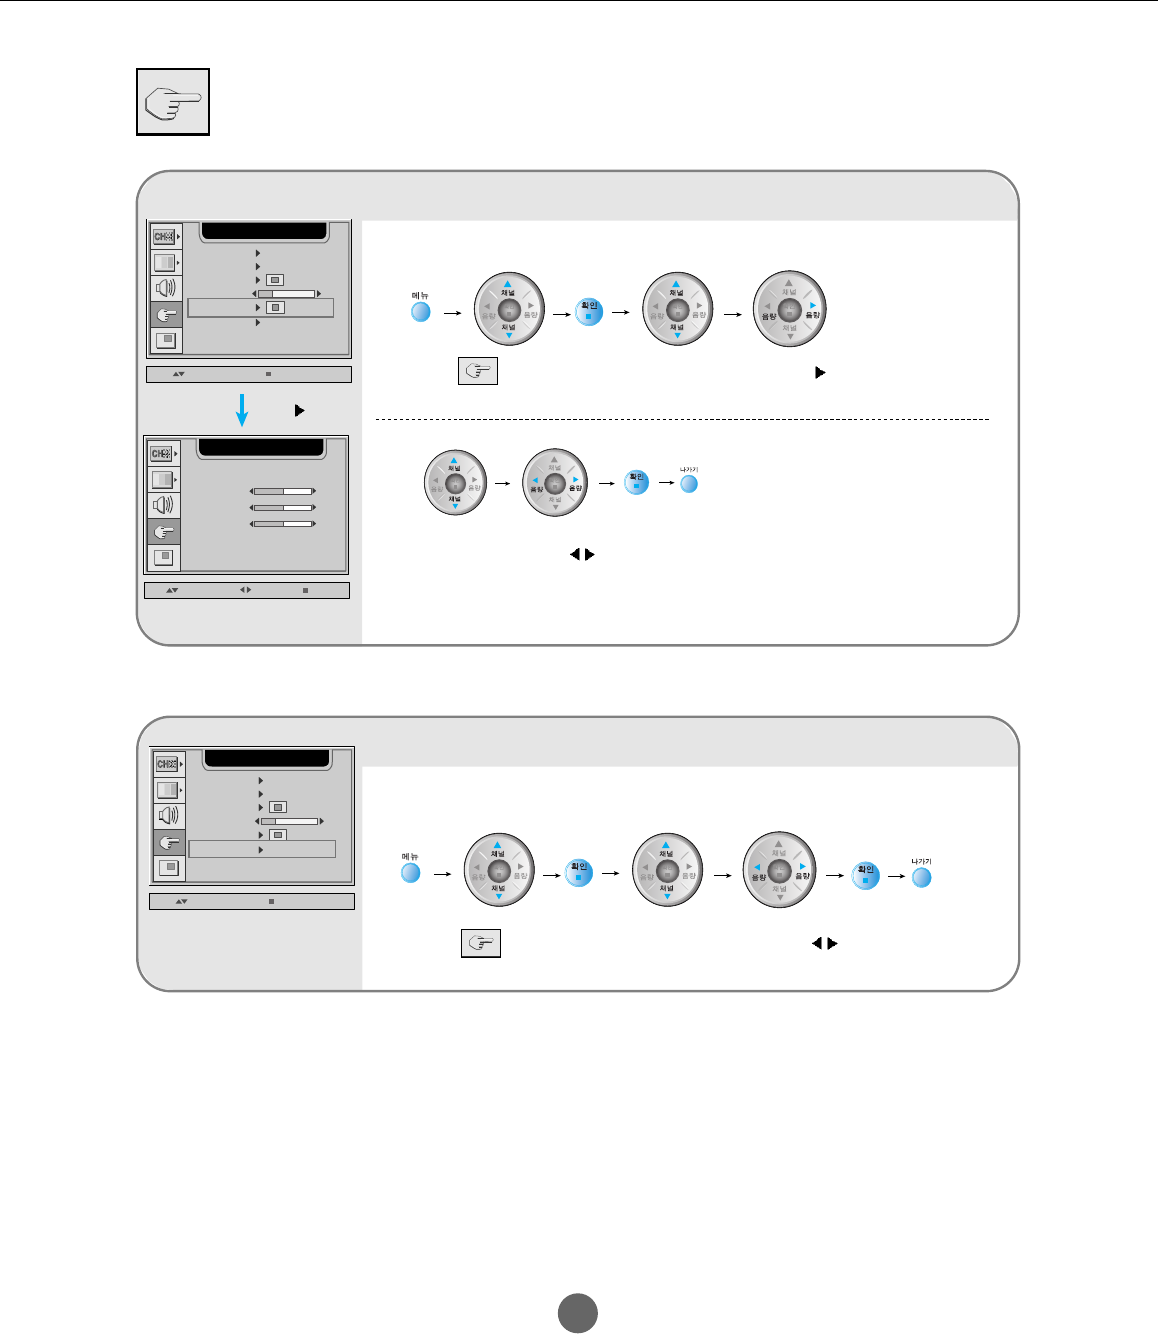
Input Selection and Tracking
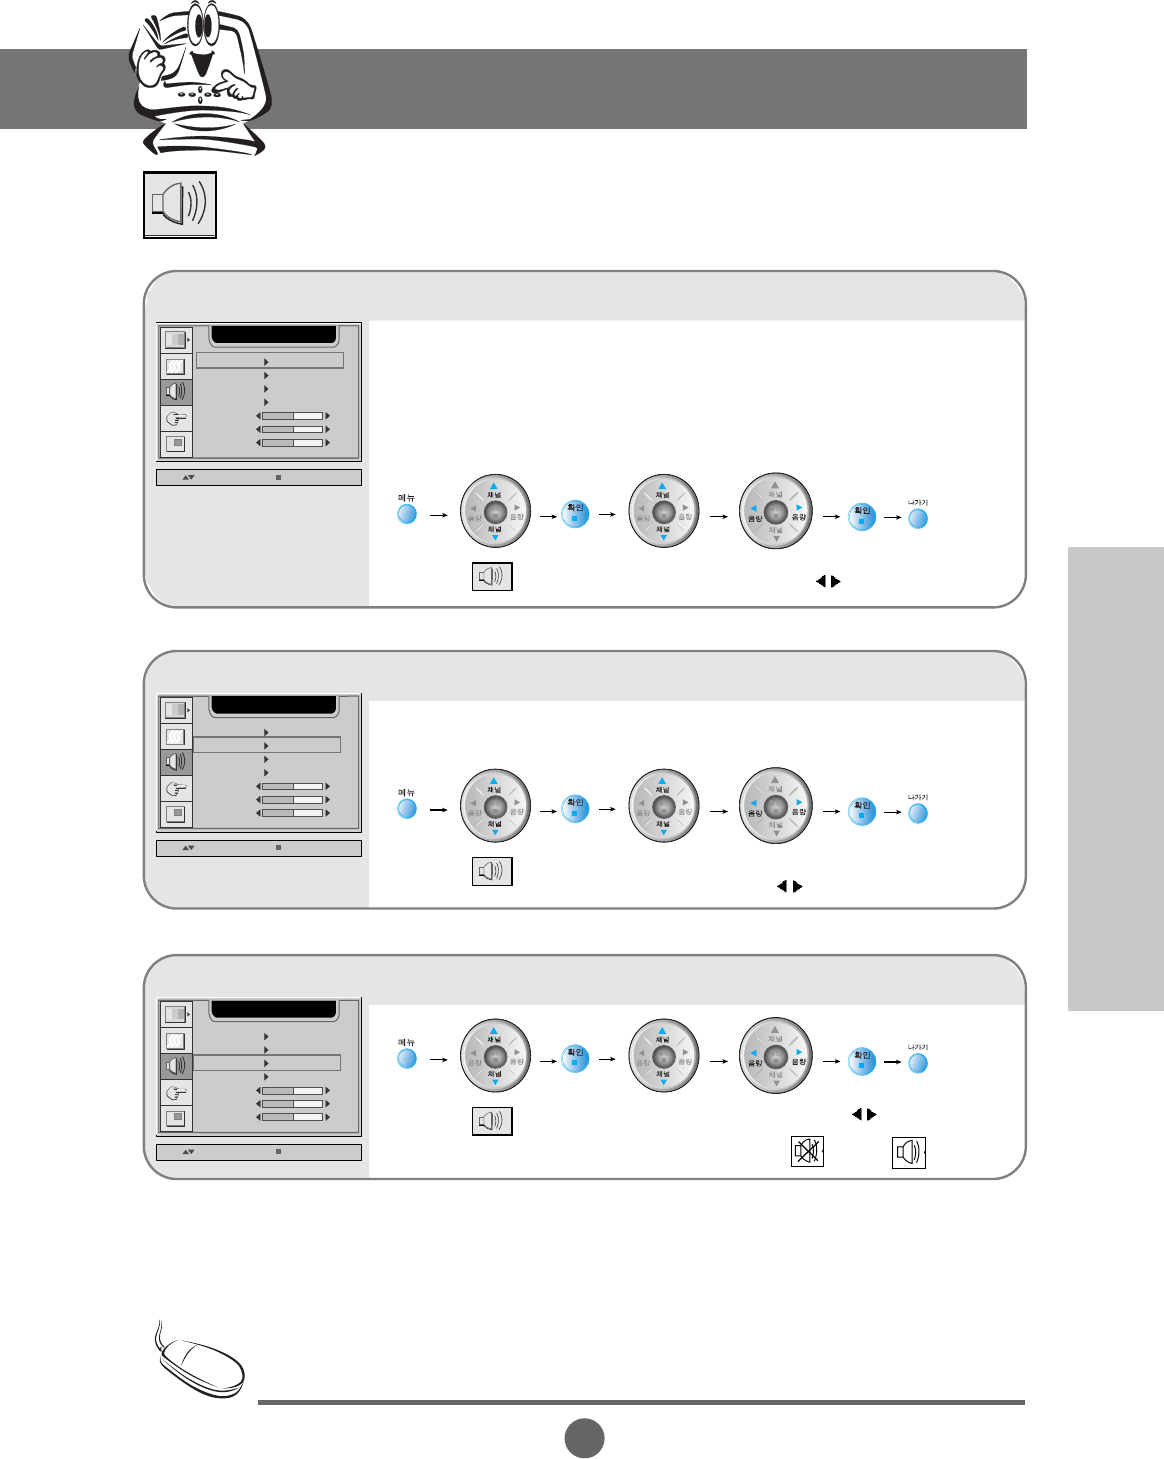
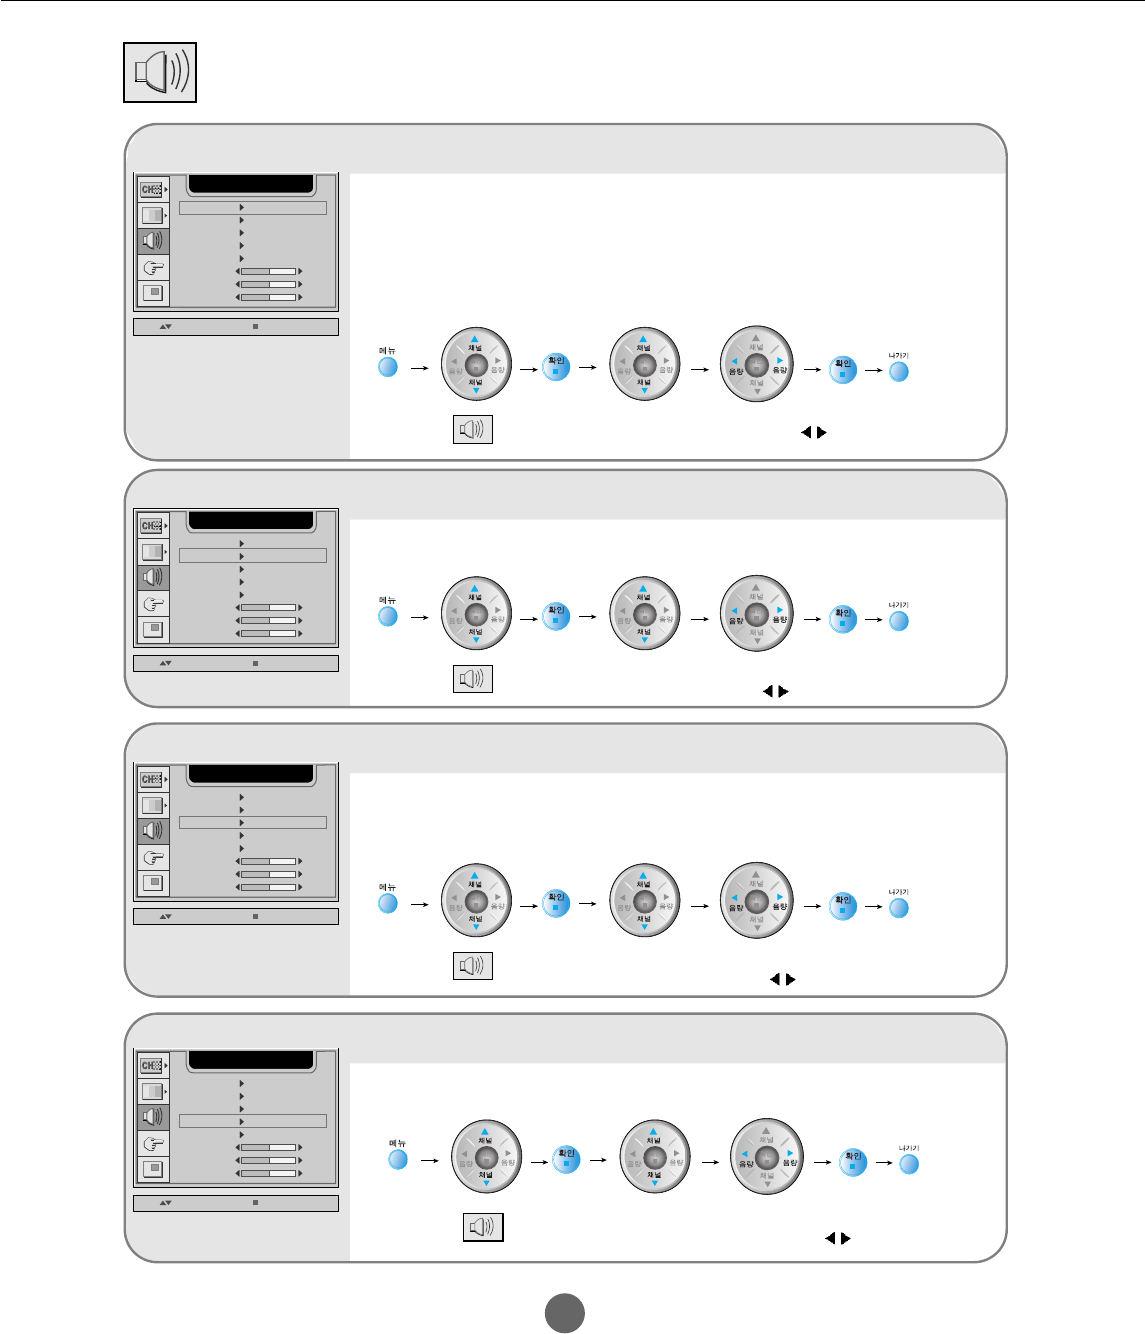
Adjusting the audio function
Adjusting the audio automatically.
Move to SSM Select using
SSM USER
UP / DOWN SELECT
AUDIO
AVL OFF
MUTE OFF
SRS WOW OFF
BALANCE
BASS
TREBLE
0
50
50
The audio will be automatically calibrated according to the type of the playback video.
• User: Select this option to use the user-defined audio settings.
• Flat: The most commanding and natural audio.
• Movie: Select this option to watch a movie.
• Music: Select this option to listen to music.
• Sport: Select this option to watch sports broadcasting.
Adjusting the volume automatically
Move to
AVL Select On
using
SSM USER
UP / DOWN SELECT
AUDIO
AVL OFF
MUTE OFF
SRS WOW OFF
BALANCE
BASS
TREBLE
0
50
50
Use this function to automatically adjust volume that is uneven for each channel or signal
so that the most appropriate level can be selected.
Muting the sound temporarily
Move to
Mute
Select On or Off using
On : Off :
SSM USER
UP / DOWN SELECT
AUDIO
AVL OFF
MUTE OFF
SRS WOW OFF
BALANCE
BASS
TREBLE
0
50
50
When connected to your computer and the SSM setting in the audio menu is one of Flat, Movie,
Music or Sport, the available menus are VAL, Mute, SRS WOW and Balance.
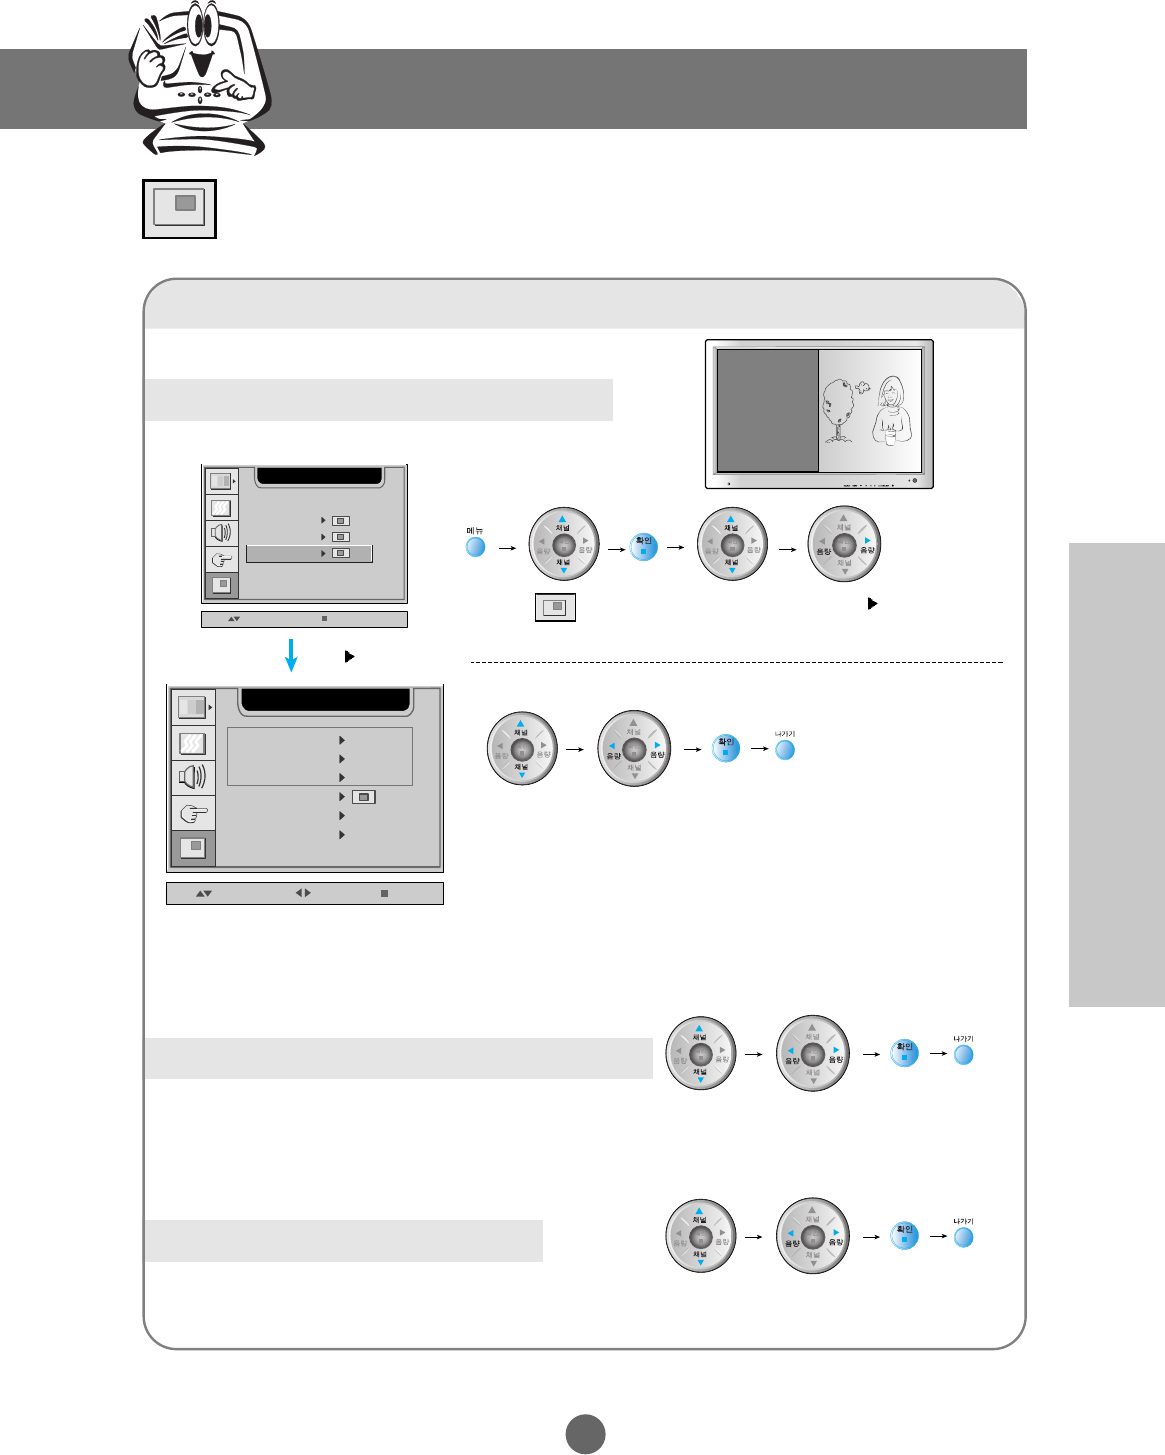
Selecting and Adjusting the Screen
Use to move
Use to move
Use to move
Note
K23
Adjusting the audio function
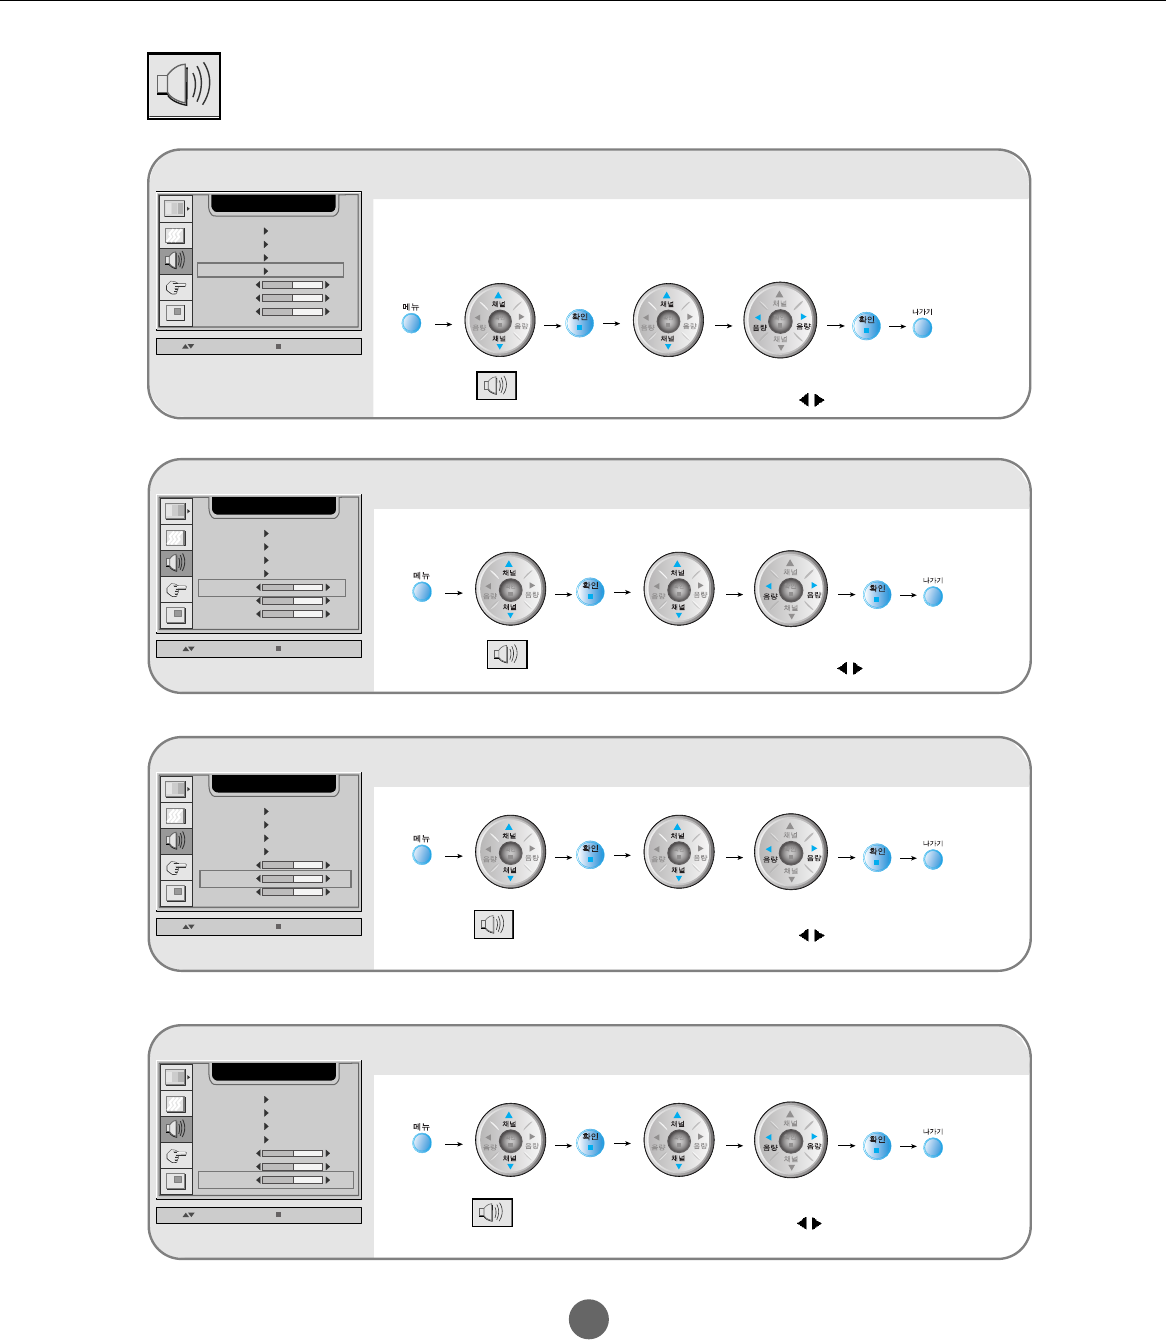
Selecting rich surround sound
Move to SRS
WOW Select On or Off
using
SSM USER
UP / DOWN SELECT
AUDIO
AVL OFF
MUTE OFF
SRS WOW OFF
BALANCE
BASS
TREBLE
0
50
50
Set the SRS WOW menu on to give a surround sound effect in mono/stereo sound or
2-channel speakers.
Adjusting sound balance
Move to
Balance Adjust sound
balance using
SSM USER
UP / DOWN SELECT
AUDIO
AVL OFF
MUTE OFF
SRS WOW OFF
BALANCE
BASS
TREBLE
0
50
50
Use this function to balance sound from the left and right speakers.
Adjusting audio bass
Move to Bass Select bass
using
SSM USER
UP / DOWN SELECT
AUDIO
AVL OFF
MUTE OFF
SRS WOW OFF
BALANCE
BASS
TREBLE
0
50
50
Adjusting audio treble
Move to Treble Select treble
using
SSM USER
UP / DOWN SELECT
AUDIO
AVL OFF
MUTE OFF
SRS WOW OFF
BALANCE
BASS
TREBLE
0
50
50
Use to move
Use to move
Use to move
Use to move
K24
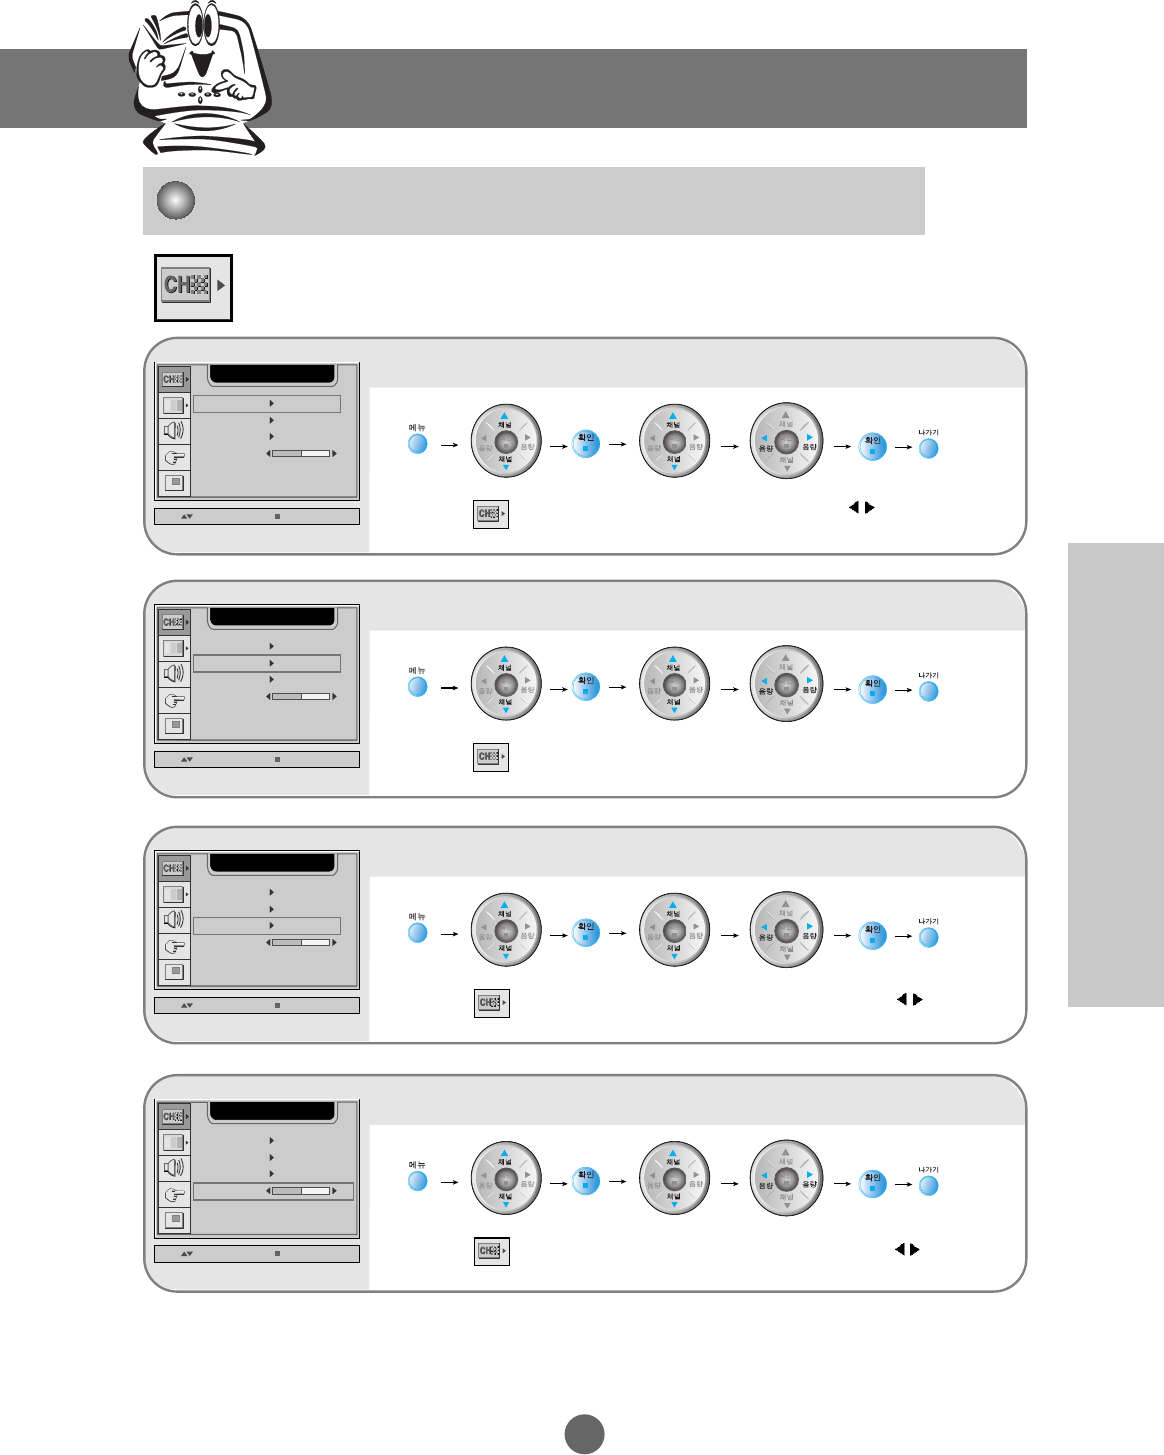
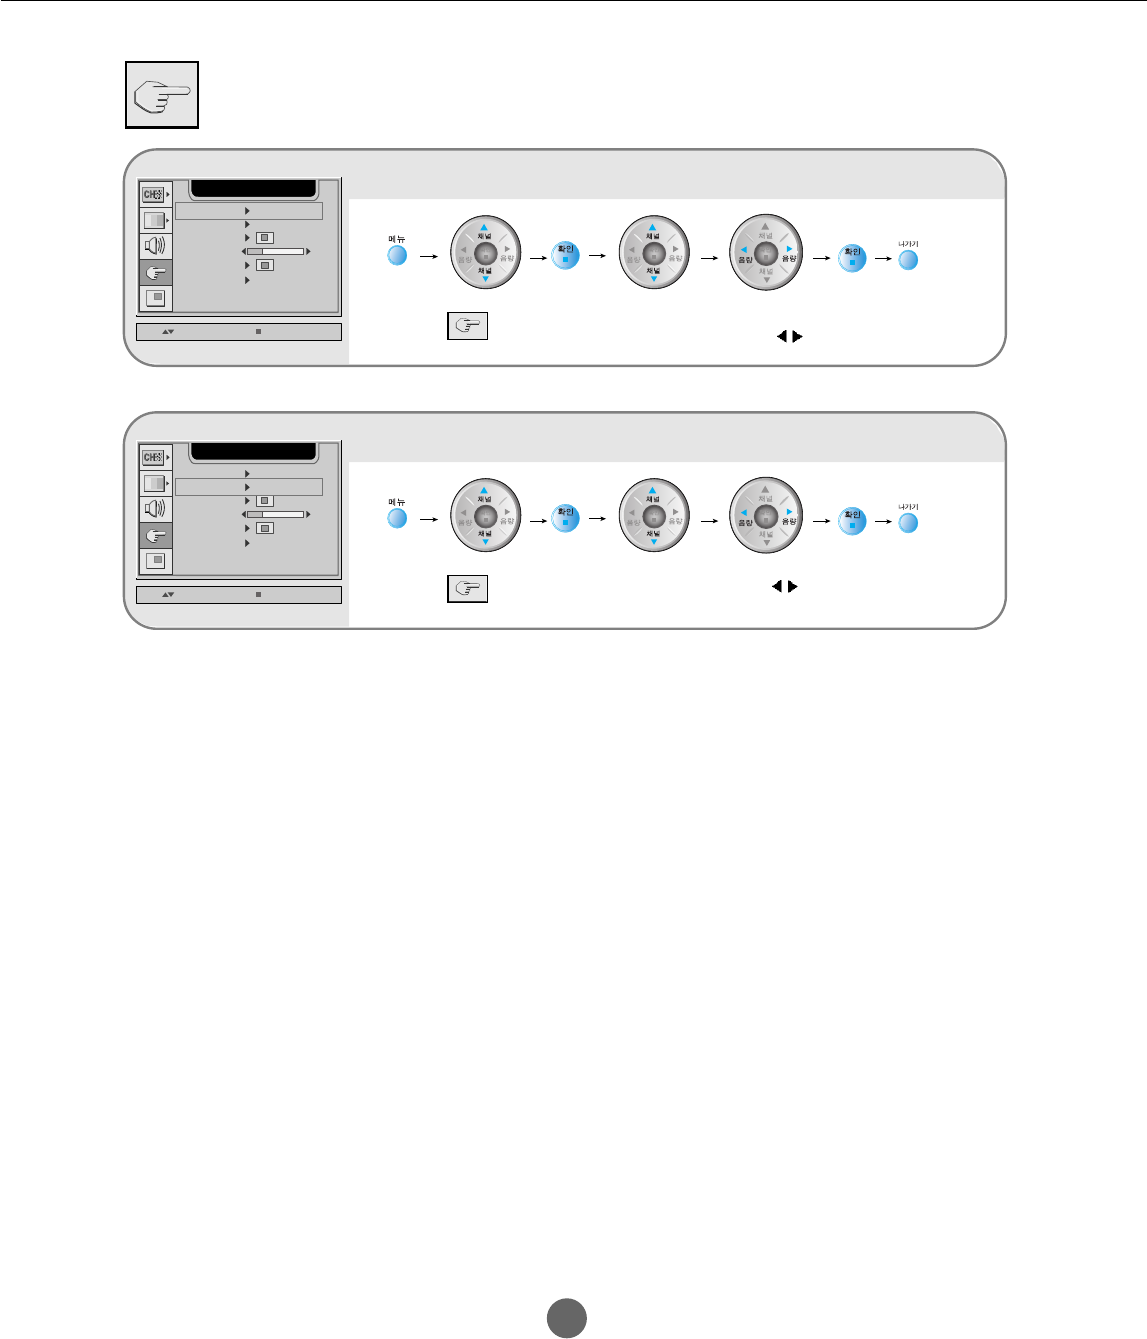
Input Selection and Tracking
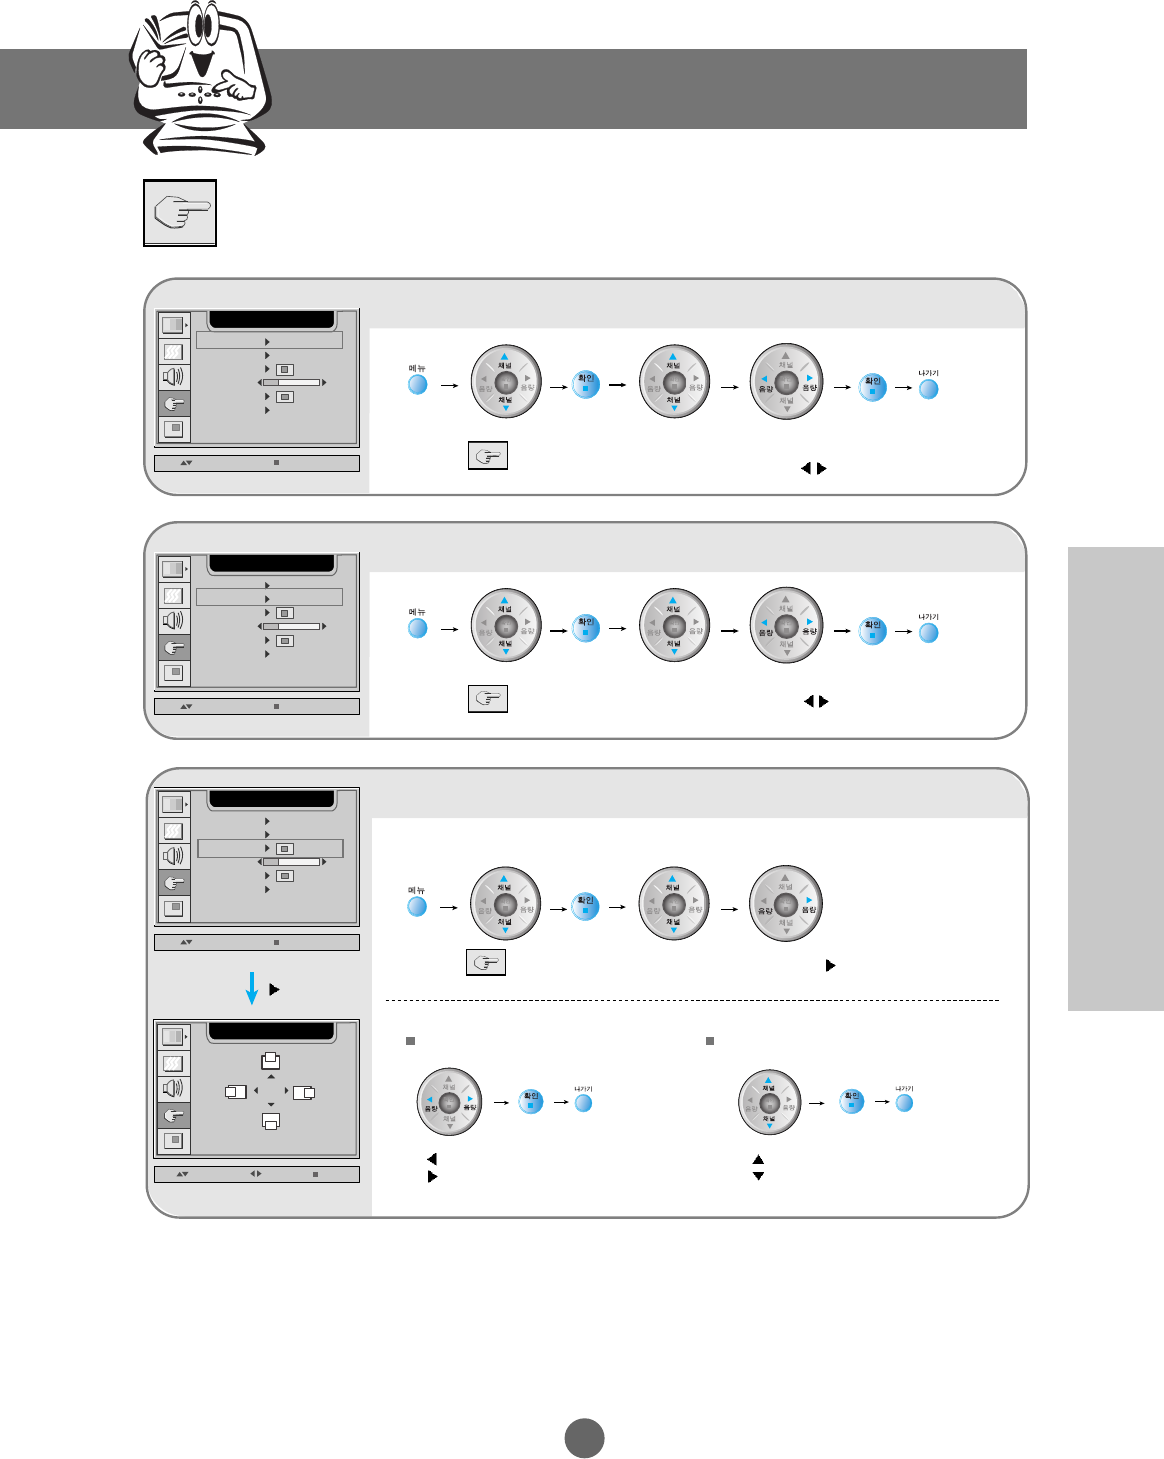
Selecting the options
Displaying the menu with a different language
Move to
Language
Select a language
using
LANGUAGE ENGLISH
UP / DOWN SELECT
SETUP
IMAGE SIZE FULL
OFF
OSD POSITION
1280x1024@60Hz
TRABSOAREBCT
ZOOM
RESET
20
Selecting screen size
Move to Image
Size
Select screen size
using
(Full or 1:1)
LANGUAGE ENGLISH
UP / DOWN SELECT
SETUP
IMAGE SIZE FULL
OFF
OSD POSITION
1280x1024@60Hz
TRABSOAREBCT
ZOOM
RESET
20
Moving the menu screen
Select
Move to
OSD Position Select using
LANGUAGE ENGLISH
UP / DOWN SELECT
SETUP
IMAGE SIZE FULL
OFF
OSD POSITION
1280x1024@60Hz
TRABSOAREBCT
ZOOM
RESET
20
UP / DOWN SELECT EXIT
SETUP
50
50
Change the position of the OSD screen on the monitor.
Left
Right
Up
Down
Moving the OSD screen position horizontally Moving the OSD screen position vertically
Selecting and Adjusting the Screen
Use to move
Use to move
Use to move
K25
Selecting the options
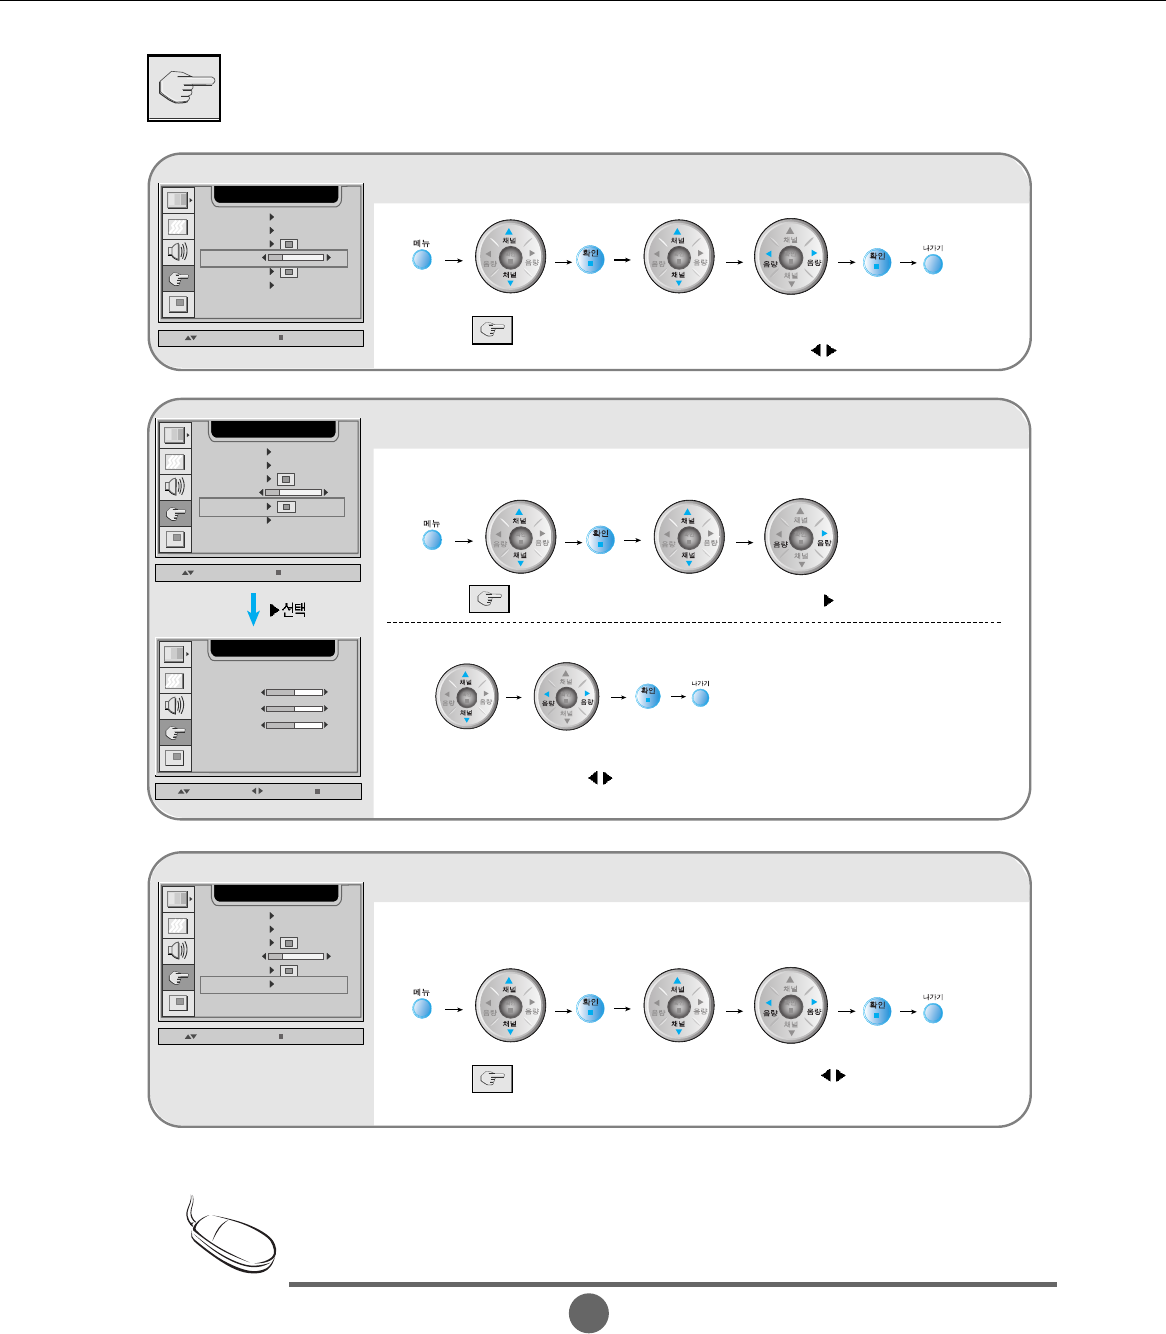
Adjusting transparency of the menu screen
Move to
Transparency Adjust transparency
using
LANGUAGE ENGLISH
UP / DOWN SELECT
SETUP
IMAGE SIZE FULL
OFF
OSD POSITION
1280x1024@60Hz
TRABSOAREBCT
ZOOM
RESET
20
Initializing to the factory default
Move to Reset Select using
- On: Return to the factory default.
LANGUAGE ENGLISH
UP / DOWN SELECT
SETUP
IMAGE SIZE FULL
OFF
OSD POSITION
1280x1024@60Hz
TRABSOAREBCT
ZOOM
RESET
20
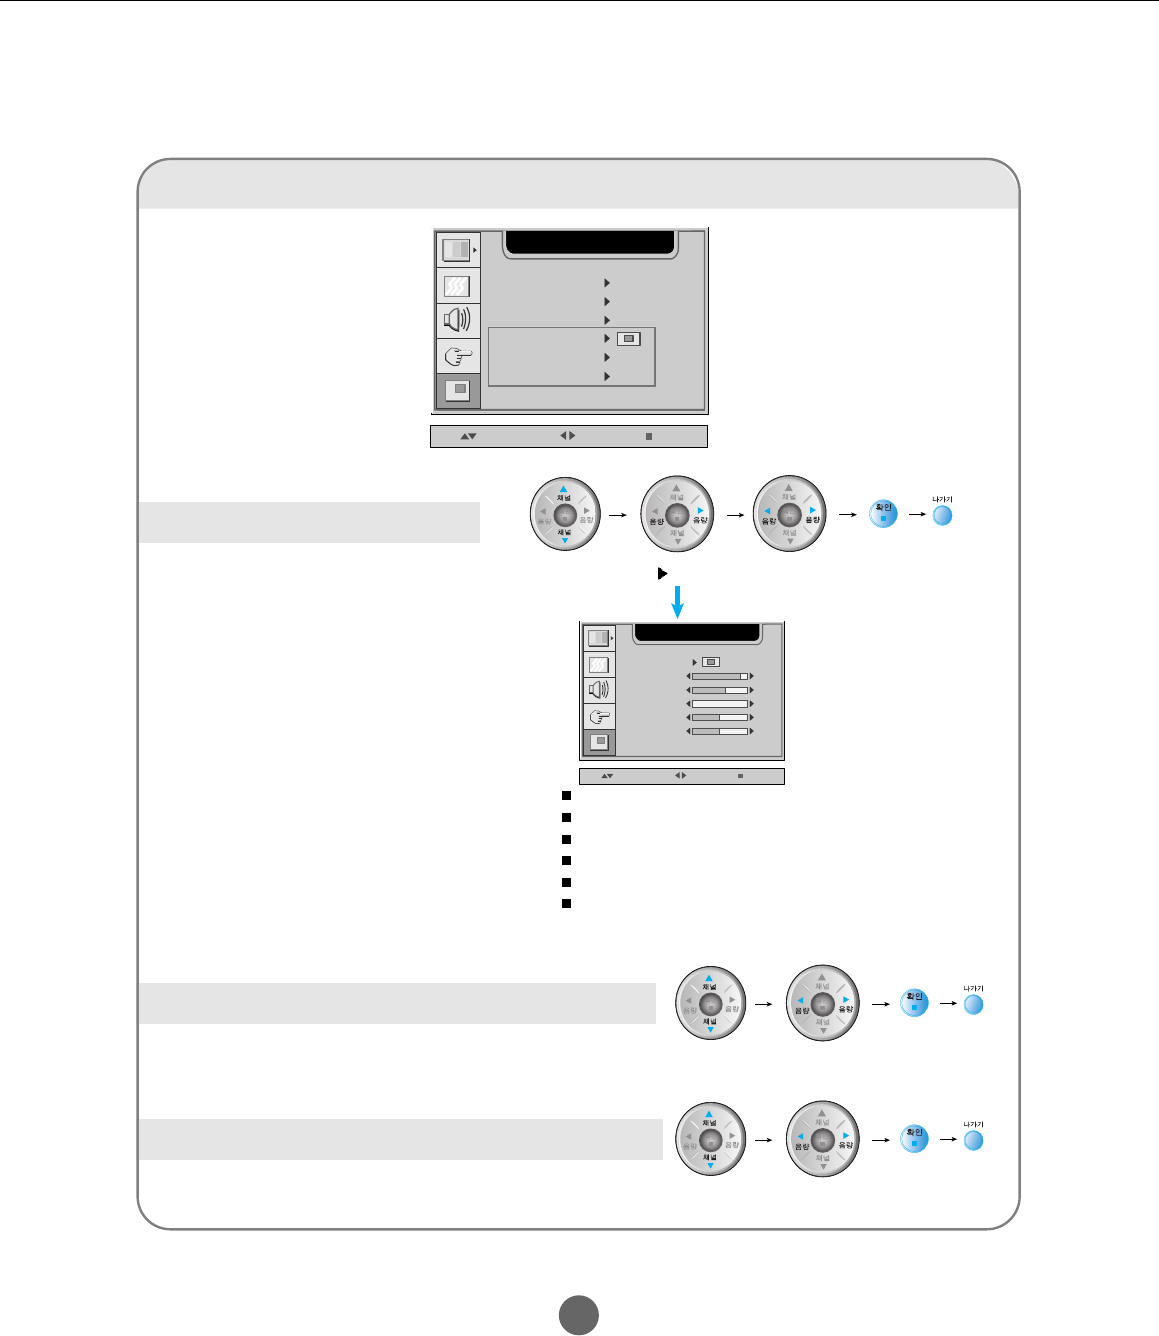
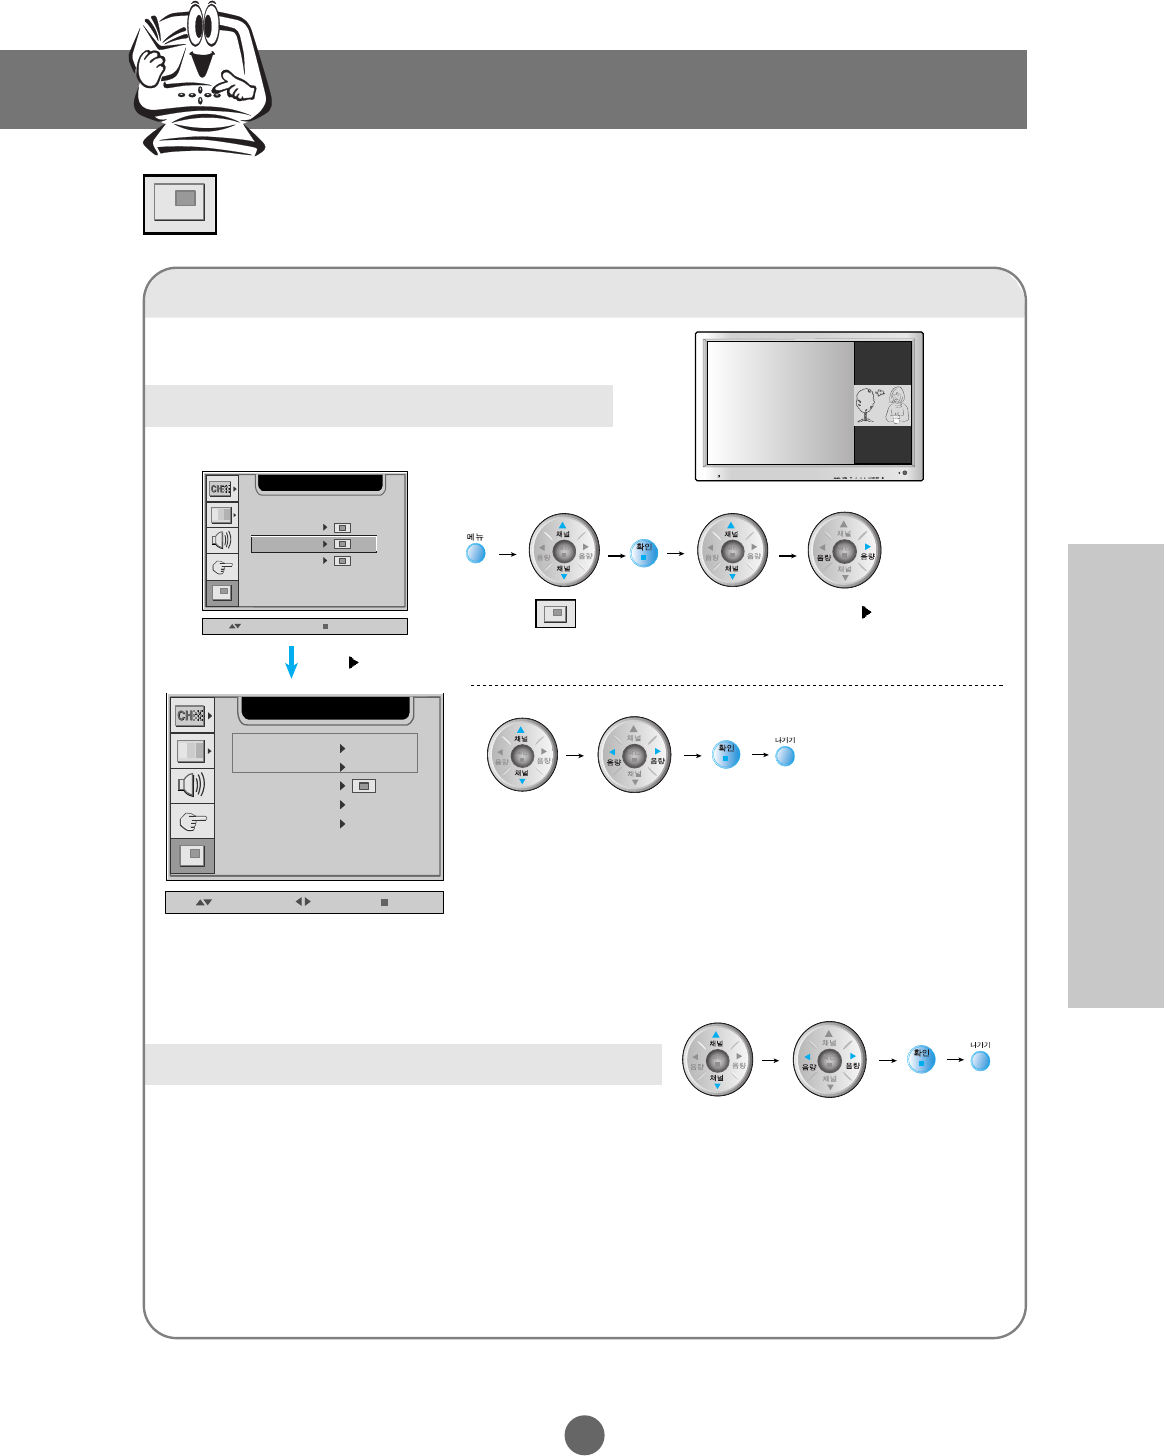
Zooming the screen
Move to Zoom Select
LANGUAGE ENGLISH
UP / DOWN SELECT
SETUP
IMAGE SIZE FULL
OFF
OSD POSITION
1280x1024@60Hz
TRABSOAREBCT
ZOOM
RESET
20
UP / DOWN SELECT EXIT
SETUP
ZOOM 50
50
50
H POSITION
V POSITION
Use this function to zoom in the screen. When you turn the monitor off and on again,
the default screen size will be restored.
Use this function to reset the monitor to the factory default. However, language
selection will not be initialized.
Select Zoom, H Position
or V Position.
Adjust the value
using
Use to move
Use to move
Use to move
When connected to your computer, the Zoom menu will be disabled if the screen size is 1:1 or
PIP/POP/PBP is in use.
Note
K26
Input Selection and Tracking
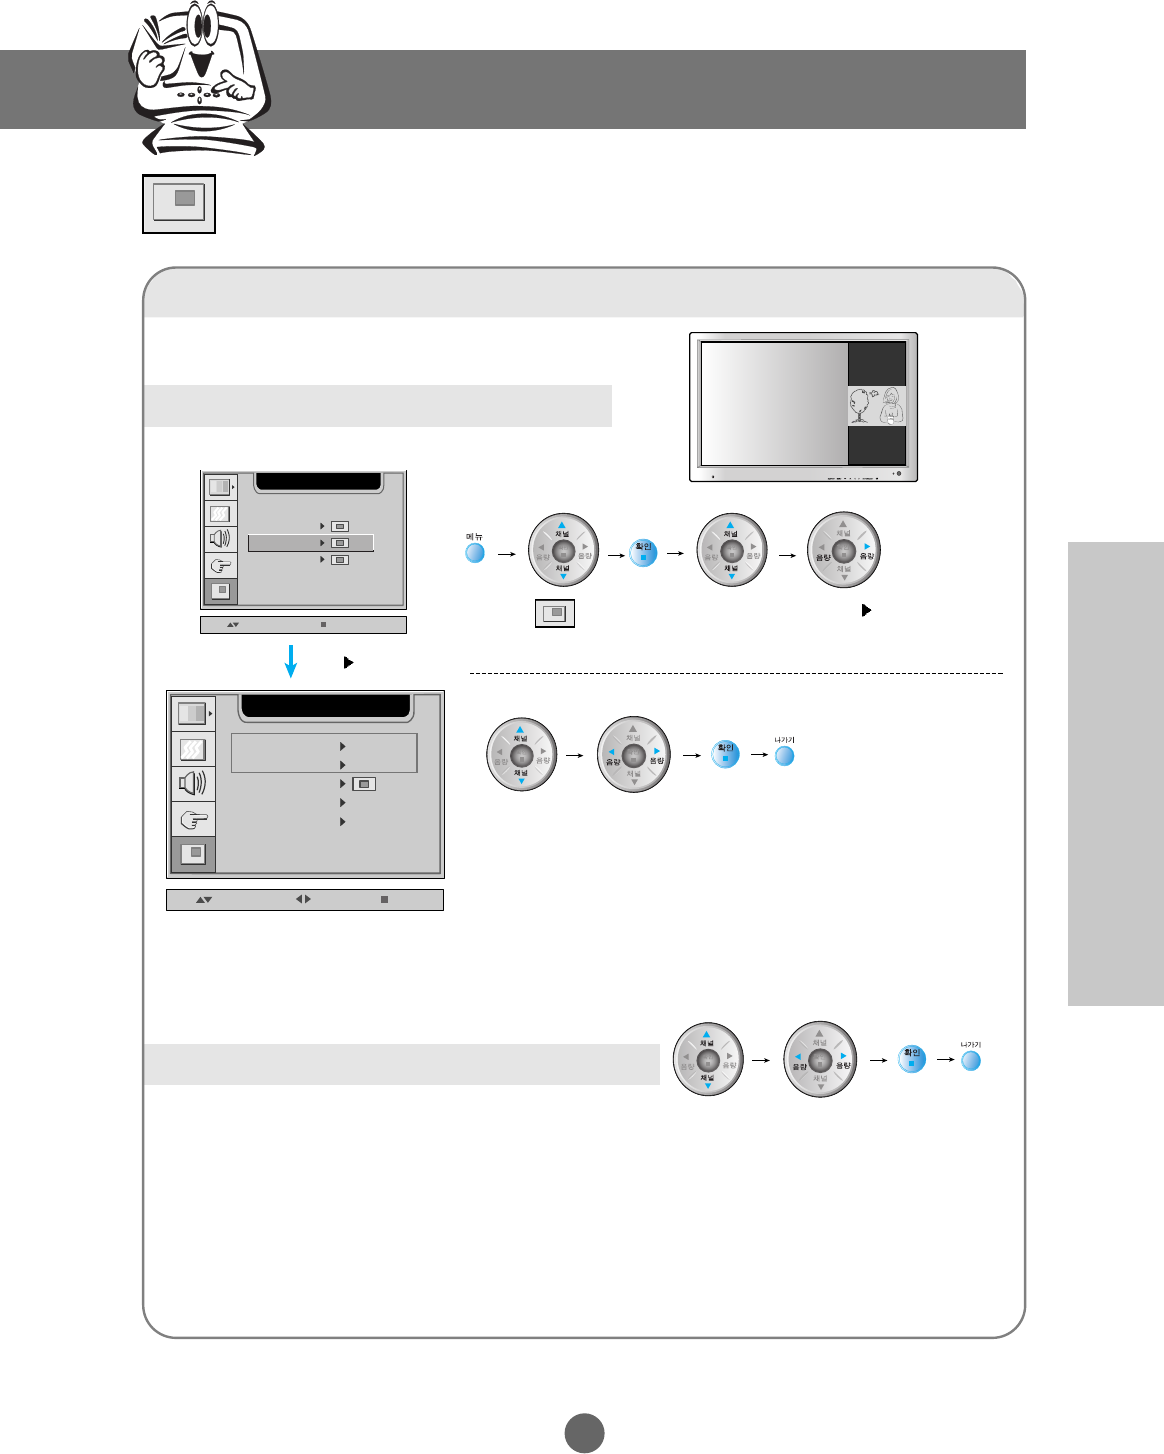
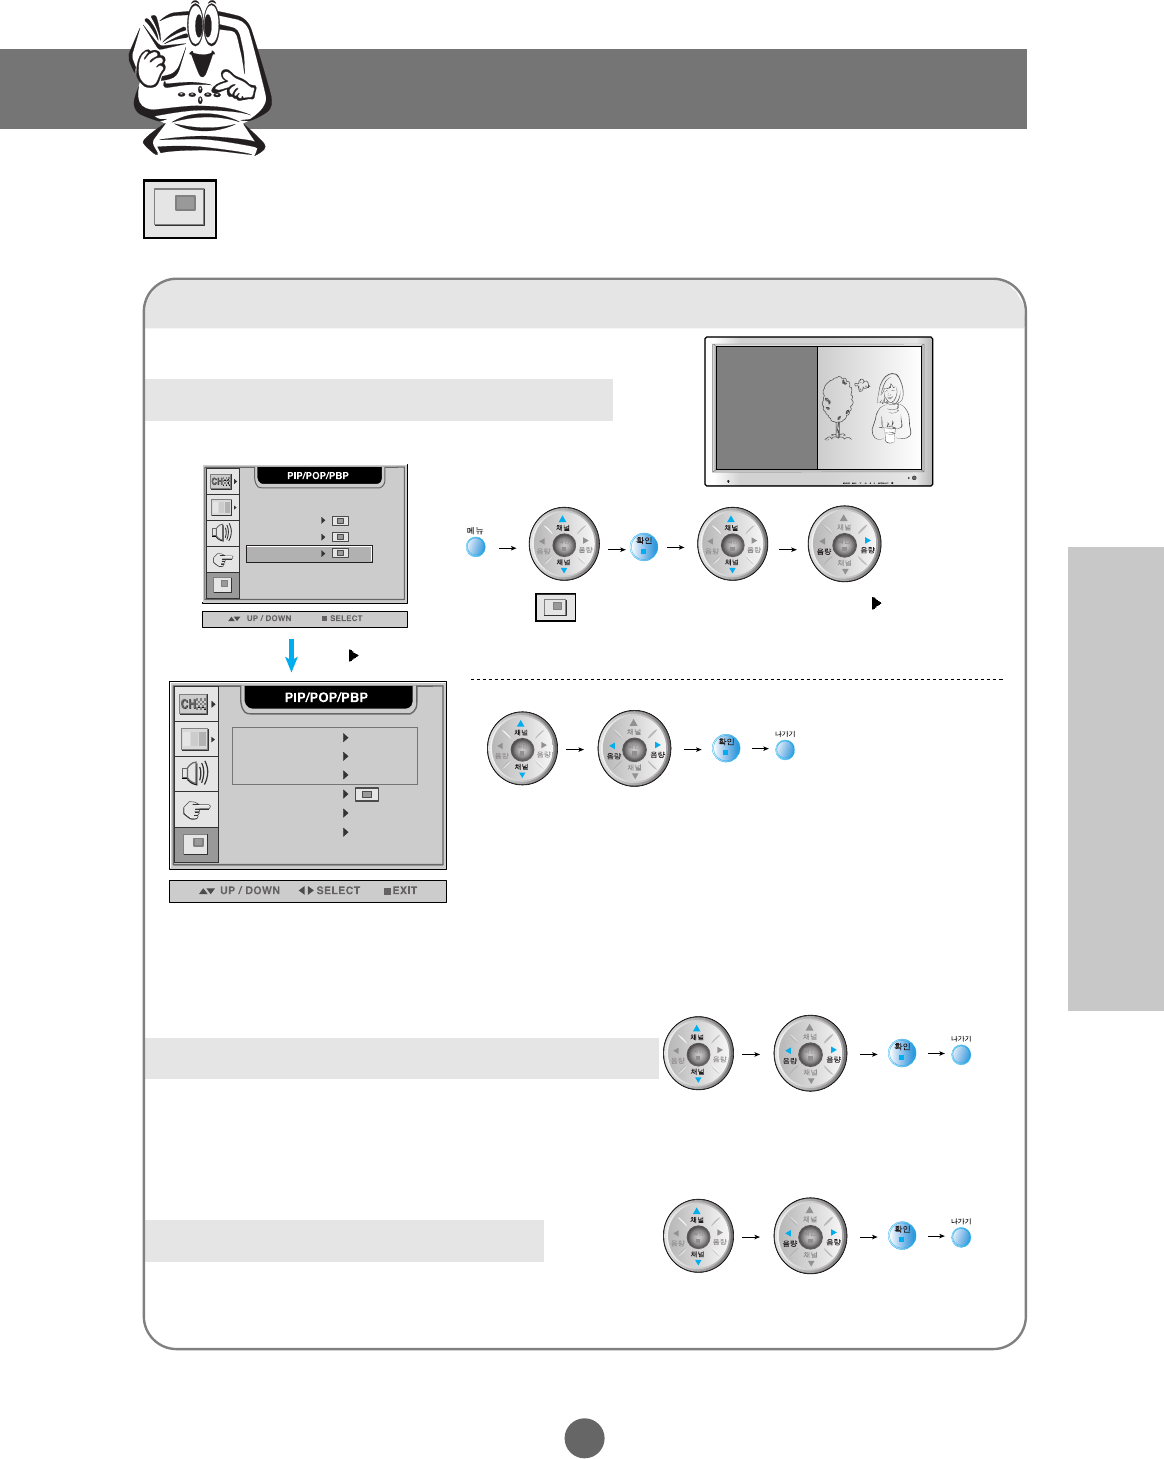
Adjusting PIP/POP/PBP Mode (Multiple Screen) Functions
PIP/POP/PBP Mode Functions
Showing/Hiding PIP Screen
Selecting the input signal for the PIP screen.
Move to PIP
Mode
Select
Move to PIP
On/Off
Select On or Off
Move to PIP Input Select
Selecting the PIP screen size
Move to PIP
Size
Select Large
or Small.
UP / DOWN SELECT
PIP/POP/PBP
PBP MODE
POP MODE
PIP MODE
UP / DOWN SELECT EXIT
PIP/POP/PBP
PIP ON/OFF OFF
PIP SOURCE DVI
PIP SIZE LARGE
PIP IMAGE
PIP SOUND
PIP SWAP
OFF
OFF
* If you select PIP On, you can adjust the following menus.
Select
Selecting and Adjusting the Screen
Use to move
K27
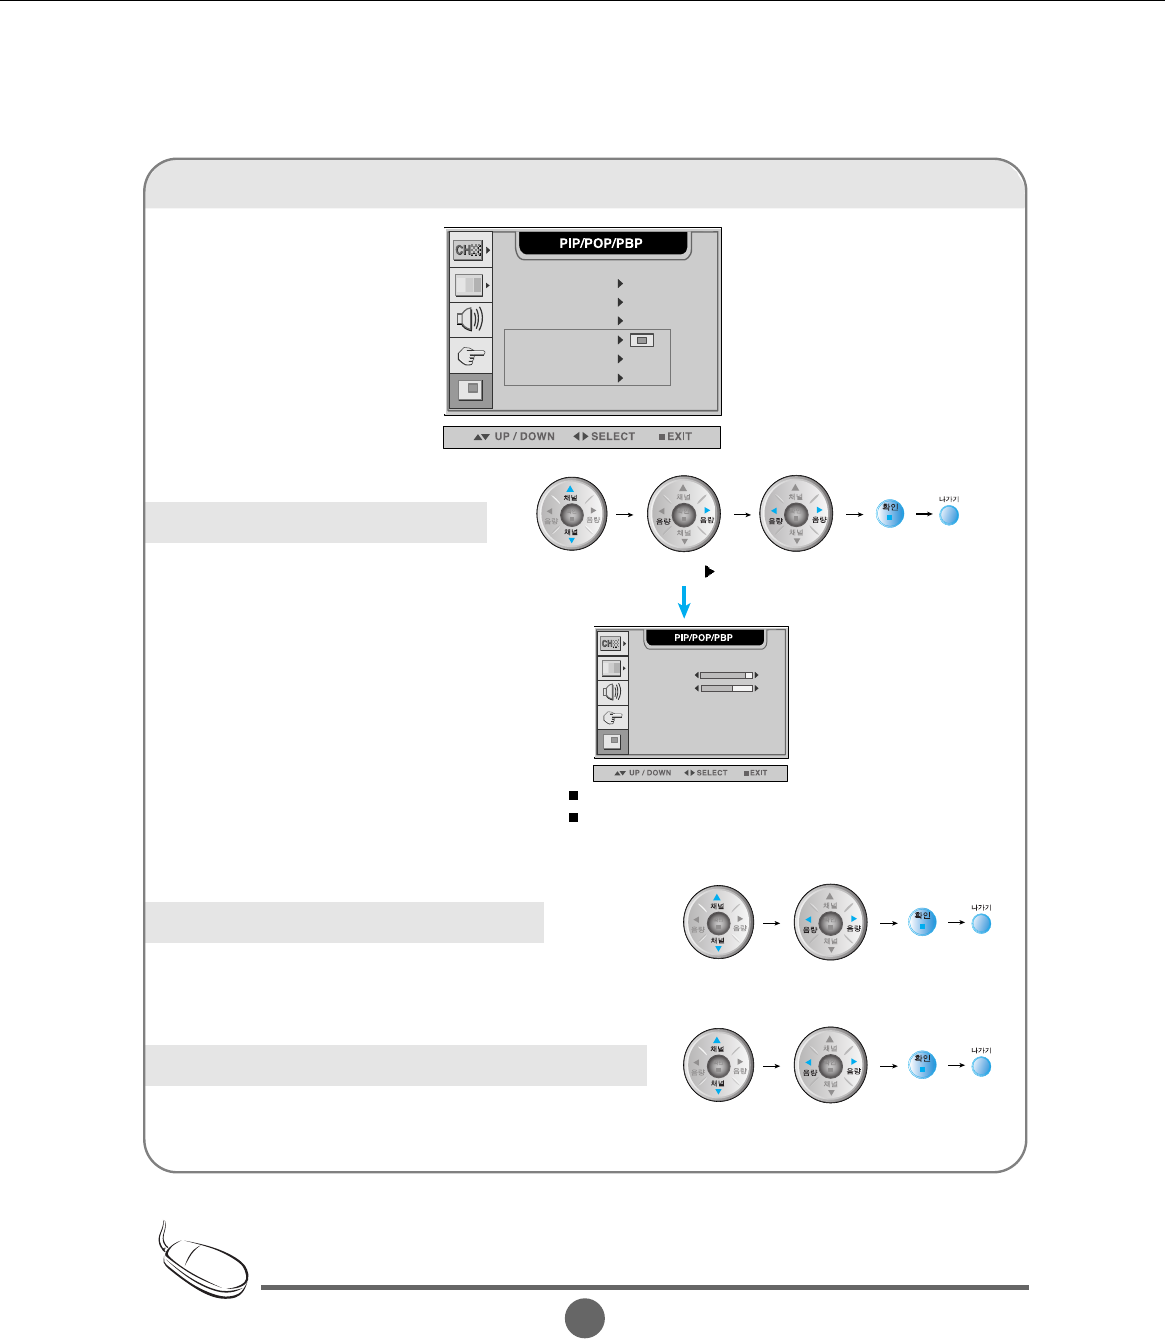
PIP (Picture In Picture) Mode Functions
Adjusting PIP Screen Image
Move to PIP
Screen
Select Select and adjust
Adjusting PIP screen sound
Move to PIP
sound
Select On or Off
Swapping the main screen and the sub-screen
Move to PIP
Swap
Select On or Off
UP / DOWN SELECT EXIT
PIP/POP/PBP
PIP ON/OFF OFF
PIP SOURCE DVI
PIP SIZE LARGE
PIP IMAGE
PIP SOUND
PIP SWAP
OFF
OFF
UP / DOWN SELECT EXIT
PIP/POP/PBP
PIP SOURCE
PIP CONTRAST
PIP BRIGHTNESS
PIP SHARPNESS
PIP TINT
PIP COLOR
63
0
50
50
92
PIP Position Adjust the PIP screen position.
PIP Contrast Adjust PIP screen contrast.
PIP Brightness Adjust PIP screen brightness.
PIP Sharpness Adjust PIP screen sharpness.
PIP Color Adjust the PIP screen color.
PIP Tint Adjust the PIP screen tint.
* The sub-menu can differ according to the type of the input
signal.
K28
Input Selection and Tracking
POP (Picture Out Picture) Mode Functions
Showing/Hiding POP Screen
Selecting the input signal for the POP screen.
UP / DOWN SELECT
PIP/POP/PBP
PIP MODE
PBP MODE
POP MODE
UP / DOWN SELECT EXIT
PIP/POP/PBP
POP ON/OFF OFF
POP SOURCE TV
POP IMAGE
POP SOUND
POP SWAP
OFF
OFF
Select
Adjusting PIP/POP/PBP Mode (Multiple Screen) Functions
Selecting and Adjusting the Screen
Move to POP
Mode
Select
Move to POP
On/Off
Select On or Off
Move to POP
Input
Select
* If you select POP On, you can adjust the following menus.
Use to move
K29
POP (Picture Out Picture) Mode Functions
Adjusting POP Screen Image
Adjusting POP screen sound
Swapping the main screen and the sub-screen
UP / DOWN SELECT EXIT
PIP/POP/PBP
POP ON/OFF OFF
POP SOURCE TV
POP IMAGE
POP SOUND
POP SWAP
OFF
OFF
The POP screen menu will be disabled if the POP screen input is a PC signal (DVI).
Move to POP
Screen
Select Select and adjust
Move to POP
sound
Select On or Off
'POP 'Select On or Off
UP / DOWN SELECT EXIT
PIP/POP/PBP
POP CONTRAST
POP BRIGHTNESS
POP SHARPNESS
POP TINT
POP COLOR
63
0
50
50
92
POP Contrast Adjust POP screen contrast.
POP Brightness Adjust POP screen brightness.
POP Sharpness Adjust POP screen sharpness.
POP Color Adjust the POP screen color.
POP Tint Adjust the POP screen tint.
* The sub-menu can differ according to the type of the input signal.
Note
K30
Input Selection and Tracking
Adjusting PIP/POP/PBP Mode (Multiple Screen) Functions
PBP (Picture By Picture) Mode Functions
Showing/Hiding PBP Screen
Selecting the input signal for the PBP screen
Move to PBP
Input
Selecting the PBP screen size
Move to PBP
Size
Select Full or 4:3
UP / DOWN SELECT
PIP/POP/PBP
PIP MODE
POP MODE
PBP MODE
UP / DOWN SELECT EXIT
PIP/POP/PBP
TV
PBP ON/OFF OFF
PBP SOURCE
PBP SIZE FULL
PBP IMAGE
PBP SOUND
PBP SWAP
OFF
OFF
Select
Selecting and Adjusting the Screen
Move to PBP
Mode
Select
Move to PBP
On/Off
Select On or Off
Select
* If you select PBP On, you can adjust the following menus.
Use to move

K31
PBP (Picture By Picture) Mode Functions
Adjusting PBP Screen Image
Move to PBP
Screen
Select Select and adjust
Adjusting PBP screen sound
Move to PBP
sound
Select On or Off
Swapping the main screen and the sub-screen
Move to PBP
Swap
Select On or Off
UP / DOWN SELECT EXIT
PIP/POP/PBP
TV
PBP ON/OFF OFF
PBP SOURCE
PBP SIZE FULL
PBP IMAGE
PBP SOUND
PBP SWAP
OFF
OFF
UP / DOWN SELECT EXIT
PIP/POP/PBP
63
0
50
50
92
PBP CONTRAST
PBP BRIGHTNESS
PBP SHARPNESS
PBP TINT
PBP COLOR
PBP Contrast Adjust PBP screen contrast.
PBP Brightness Adjust PBP screen brightness.
PBP Sharpness Adjust PBP screen sharpness.
PBP Color Adjust the PBP screen color.
PBP Tint Adjust the PBP screen tint.
* The sub-menu can differ according to the type of the input signal.
The PBP screen menu will be disabled if the PBP screen input is a PC signal.
Note
K32
Input Selection and Tracking
OSD Menu – When Watching Video/DVD/HDTV/TV
Setting up the channel - Available only when watching TV.
AUTO CHANNEL
CHANNEL
ADD/DEL CH
OFF
123
ADD
FINE TUNE
UP / DOWN SELECT
CHANNEL SETUP
50
Setting up the channel manually
Move to Channel
AUTO CHANNEL
CHANNEL
ADD/DEL CH
OFF
123
ADD
FINE TUNE
UP / DOWN SELECT
CHANNEL SETUP
50
Adding/Deleting a channel you have selected
Move to Add/Del
Channel
AUTO CHANNEL
CHANNEL
ADD/DEL CH
OFF
123
ADD
FINE TUNE
UP / DOWN SELECT
CHANNEL SETUP
50
Fine tuning the screen resolution
Move to Fine Tune
AUTO CHANNEL
CHANNEL
ADD/DEL CH
OFF
123
ADD
FINE TUNE
UP / DOWN SELECT
CHANNEL SETUP
50
Selecting and Adjusting the Screen
Setting up the channels automatically
Select On using to start
automatic channel setup.
Select a channel
Select Add or Del using
Adjust the screen using
until you can see a sharp screen.
Use to move
Use to move
Use to move
Use to move
Move to Auto
Channel
K33
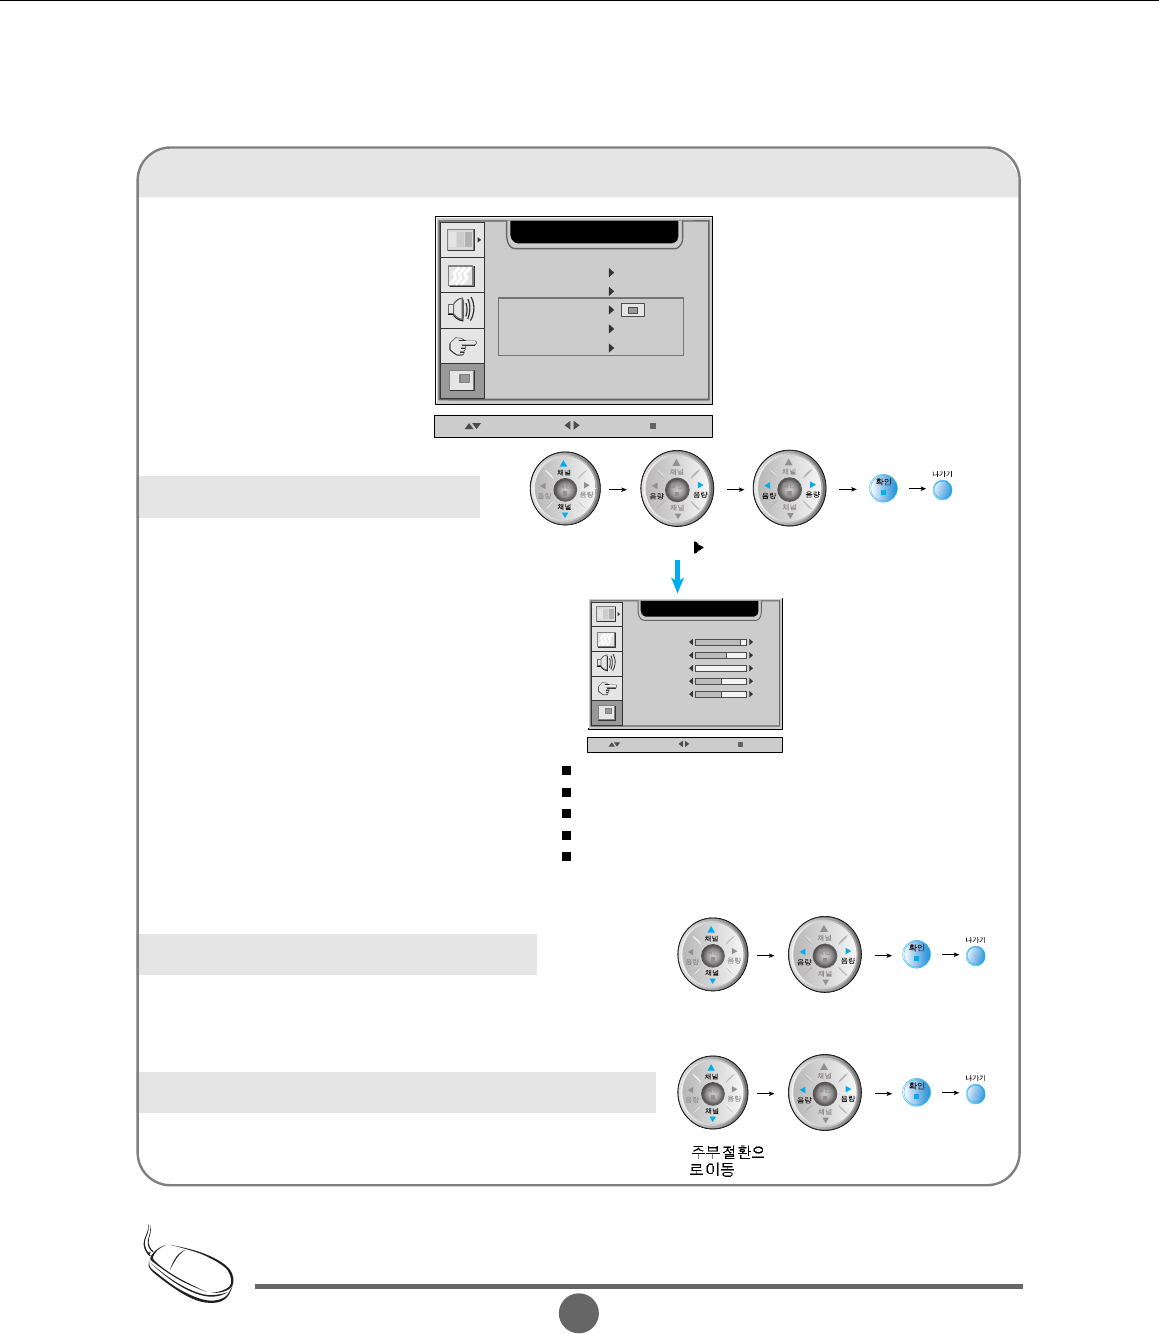
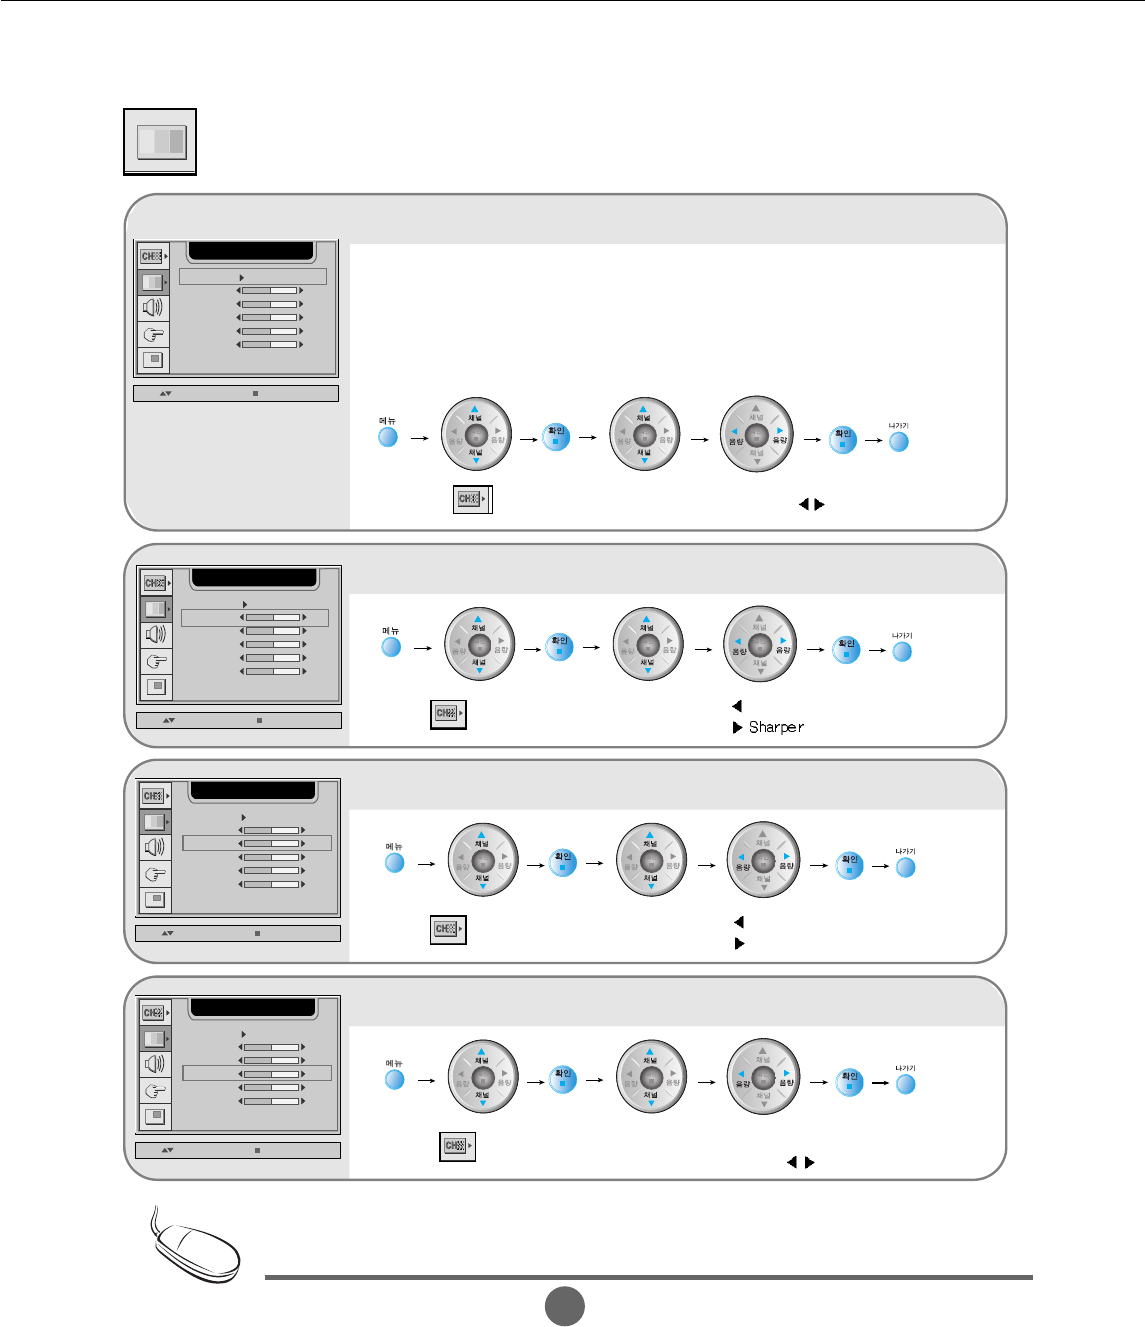
Adjusting Screen Image
Adjusting the screen automatically
Move to PSM Select using
PSM USER
UP / DOWN SELECT
CONTRAST
BRIGHTNESS
SHARPNESS
COLOR
TINT
50
50
50
50
50
VIDEO
Use this function to automatically set the optimal screen
• User: Select this option to use the user-defined settings.
• Game: Select this option when you play a game.
• Standard: The most general and natural screen display status.
• Dynamic: Select this option to display with a sharp image.
• Mild: Select this option to display with a mild image.
Adjusting screen contrast
Dimmer
Move to Contrast.
PSM USER
UP / DOWN SELECT
CONTRAST
BRIGHTNESS
SHARPNESS
COLOR
TINT
50
50
50
50
50
VIDEO
Adjusting screen brightness
Brighter
Darker
Move to
Brightness
PSM USER
UP / DOWN SELECT
CONTRAST
BRIGHTNESS
SHARPNESS
COLOR
TINT
50
50
50
50
50
VIDEO
Adjusting screen sharpness
Adjust the outline
using
Move to
Sharpness
PSM USER
UP / DOWN SELECT
CONTRAST
BRIGHTNESS
SHARPNESS
COLOR
TINT
50
50
50
50
50
VIDEO
If the PSM setting in the Video menu is set to Standard, Dynamic, Mild or Game, the
subsequent menus will be automatically set.
Use to move
Use to move
Use to move
Use to move
Note
K34
Input Selection and Tracking
Adjusting screen color
Adjust screen color
using
Move to Color
PSM USER
UP / DOWN SELECT
CONTRAST
BRIGHTNESS
SHARPNESS
COLOR
TINT
50
50
50
50
50
VIDEO
Adjusting screen tint
Adjust screen tint
using
Move to Tint
PSM USER
UP / DOWN SELECT
CONTRAST
BRIGHTNESS
SHARPNESS
COLOR
TINT
50
50
50
50
50
VIDEO
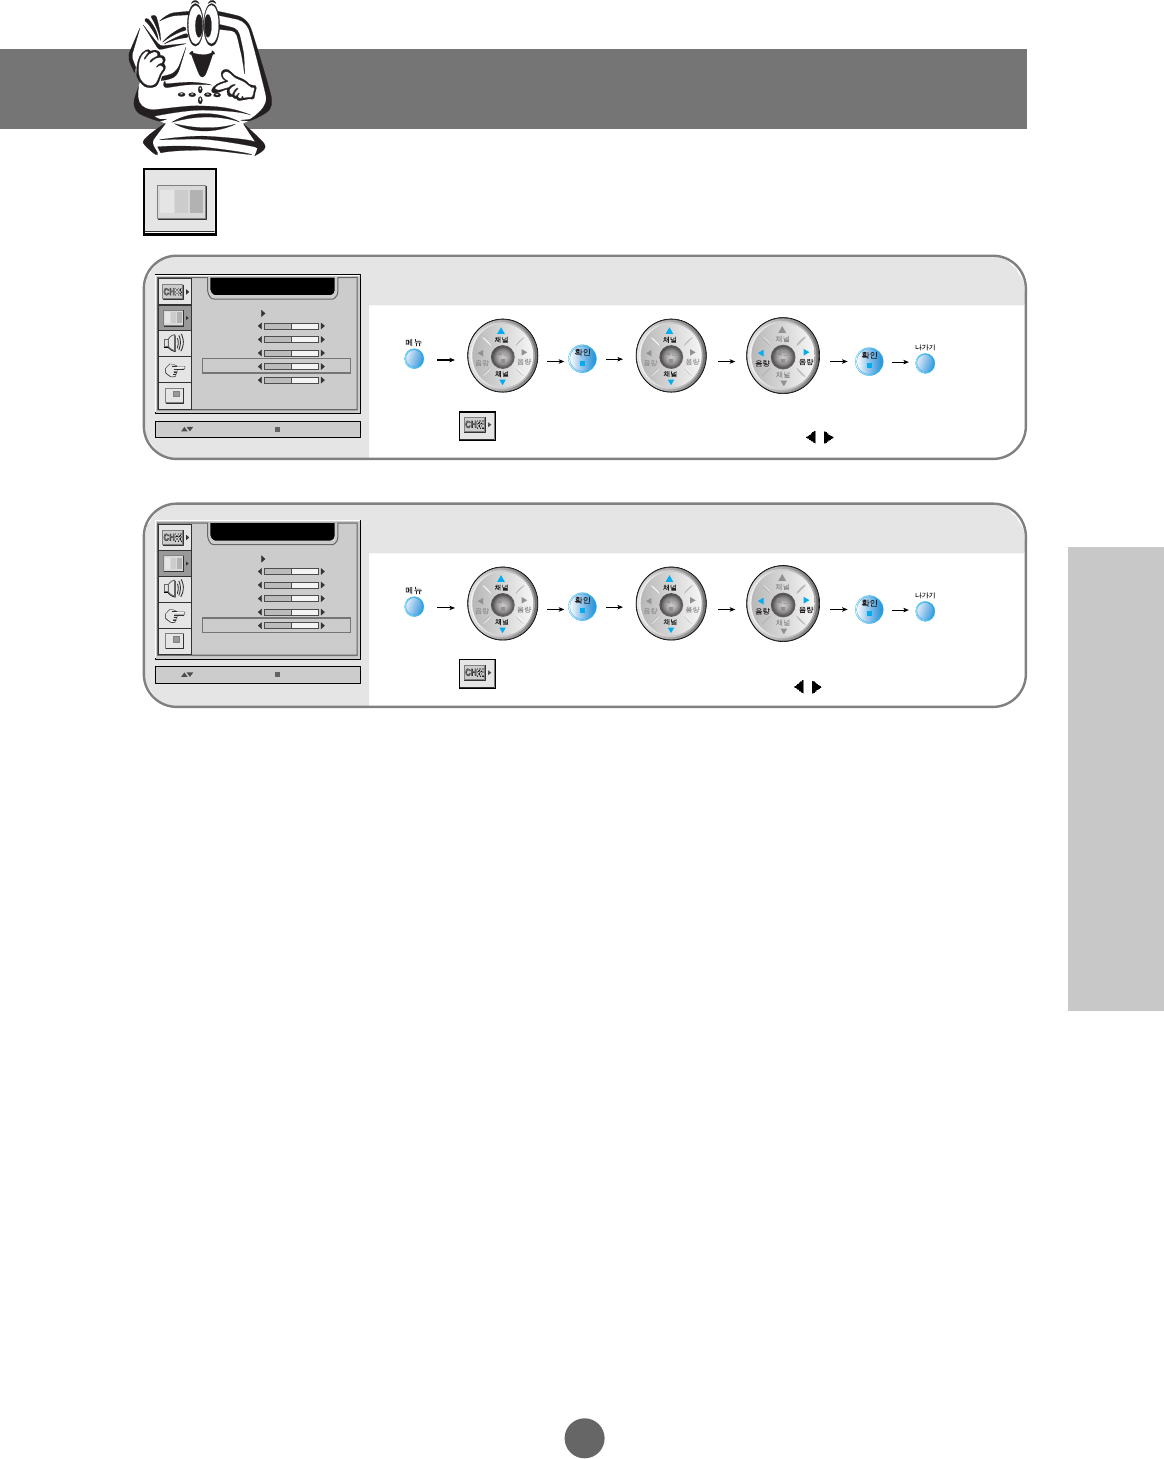
Adjusting the screen image
Selecting and Adjusting the Screen
Use to move
Use to move
K35
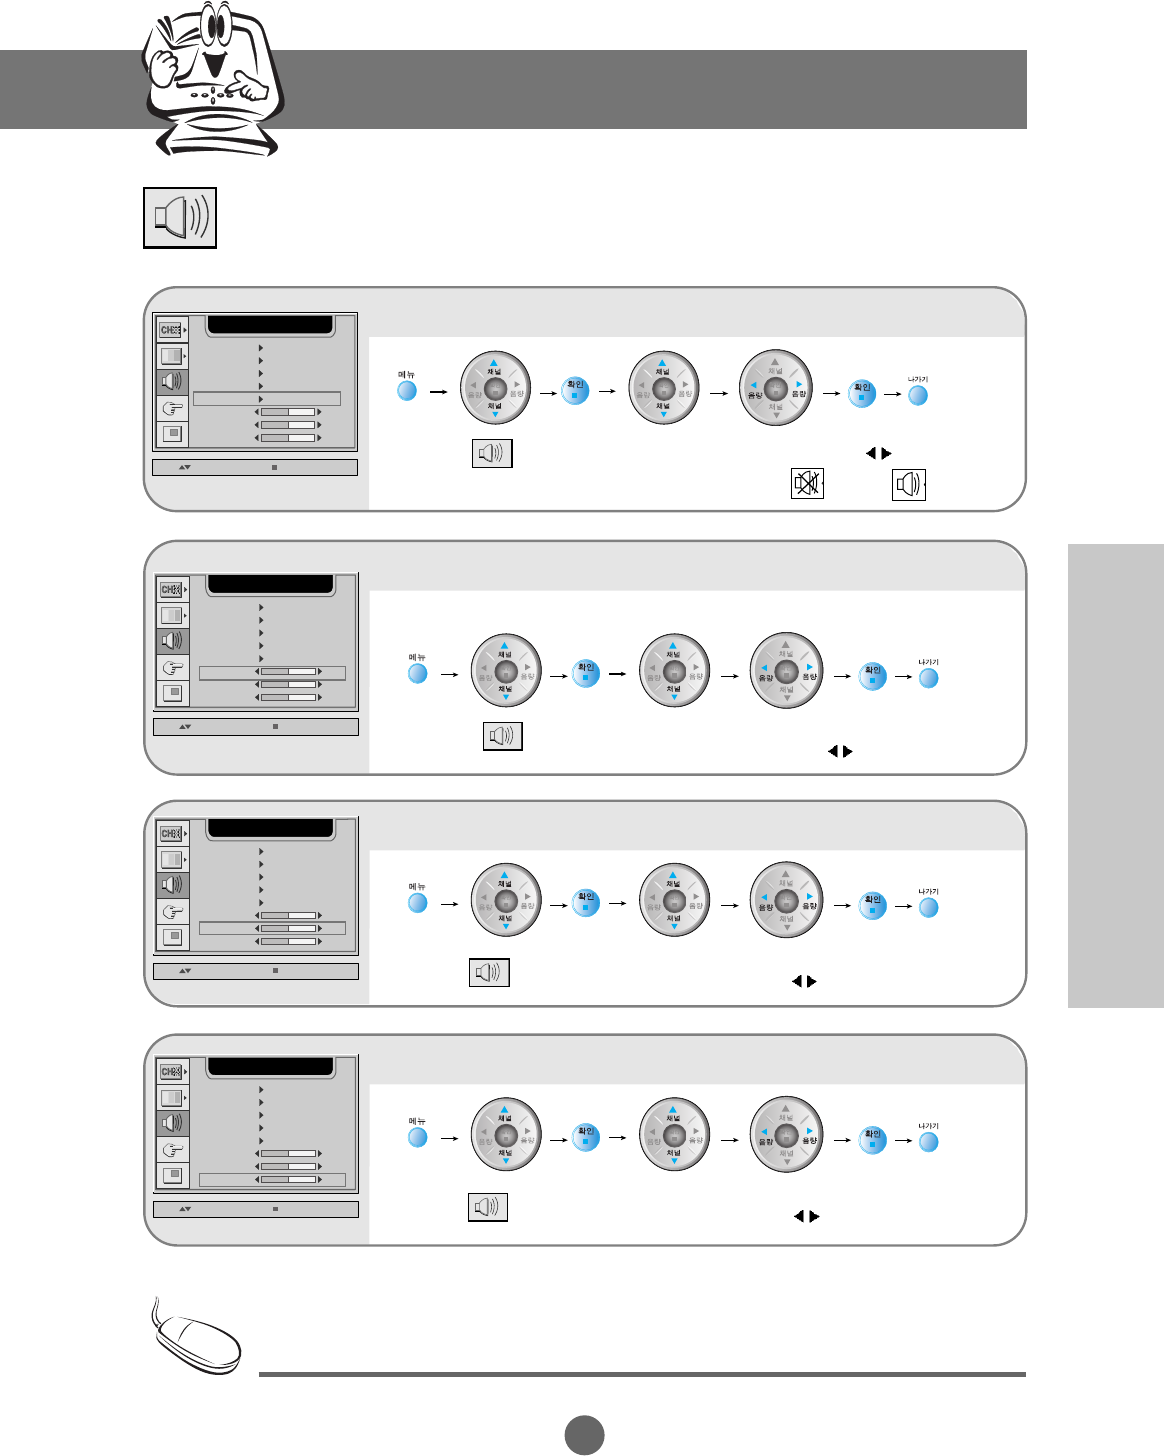
Adjusting the audio function
Selecting the audio.
Move to SSM Select using
SSM USER
UP / DOWN SELECT
AUDIO
AVL OFF
SRS WOW OFF
SOUND MONO
OFF
MUTE
BALANCE
BASS
50
50
TREBLE
50
The audio will be automatically calibrated according to the type of the playback video.
• User: Select this option to use the user-defined audio settings.
• Flat: The most commanding and natural audio.
• Movie: Select this option to watch a movie.
• Music: Select this option to listen to music.
• Sport: Select this option to watch sports broadcasting.
Adjusting the volume automatically
Move to
AVL
Select On
using
SSM USER
UP / DOWN SELECT
AUDIO
AVL OFF
SRS WOW OFF
SOUND MONO
OFF
MUTE
BALANCE
BASS
50
50
TREBLE
50
Use this function to automatically adjust volume that is uneven on each channel or signal
so that the most appropriate level can be selected.
Selecting rich surround sound
Move to SRS
WOW Select On/Off
using
SSM USER
UP / DOWN SELECT
AUDIO
AVL OFF
SRS WOW OFF
SOUND MONO
OFF
MUTE
BALANCE
BASS
50
50
TREBLE
50
Set the SRS WOW menu to On.
Enjoy surround sound effects from mono/stereo sound or the two-channel speaker.
Selecting the sound mode
Move to Sound Select Mono/Stereo/
Language using
SSM USER
UP / DOWN SELECT
AUDIO
AVL OFF
SRS WOW OFF
SOUND MONO
OFF
MUTE
BALANCE
BASS
50
50
TREBLE
50
The Language menu will be disabled when the input signal is video or DVD.
This menu will be enabled only when the bilingual signal is entered.
Use to move
Use to move
Use to move
Use to move
K36
Input Selection and Tracking
Adjusting sound balance
Move to
Balance Adjust sound
balance using
SSM USER
UP / DOWN SELECT
AUDIO
AVL OFF
SRS WOW OFF
SOUND MONO
OFF
MUTE
BALANCE
BASS
50
50
TREBLE
50
Use this function to balance sound from the left and right speakers.
Adjusting audio bass
Move to Bass Select bass
using
SSM USER
UP / DOWN SELECT
AUDIO
AVL OFF
SRS WOW OFF
SOUND MONO
OFF
MUTE
BALANCE
BASS
50
50
TREBLE
50
Adjusting audio treble
Move to Treble Select treble
using
SSM USER
UP / DOWN SELECT
AUDIO
AVL OFF
SRS WOW OFF
SOUND MONO
OFF
MUTE
BALANCE
BASS
50
50
TREBLE
50
Adjusting the audio function
Muting the sound temporarily
Move to
Mute Select On or Off using
On: Off:
SSM USER
UP / DOWN SELECT
AUDIO
AVL OFF
SRS WOW OFF
SOUND MONO
OFF
MUTE
BALANCE
BASS
50
50
TREBLE
50
If the SSM setting in the audio menu is one of Flat, Movie, Music or Sport, the available menus
are VAL, Mute, SRS WOW and Balance. Other menu items will be automatically adjusted.
Selecting and Adjusting the Screen
Use to move
Use to move
Use to move
Use to move
Note
K37
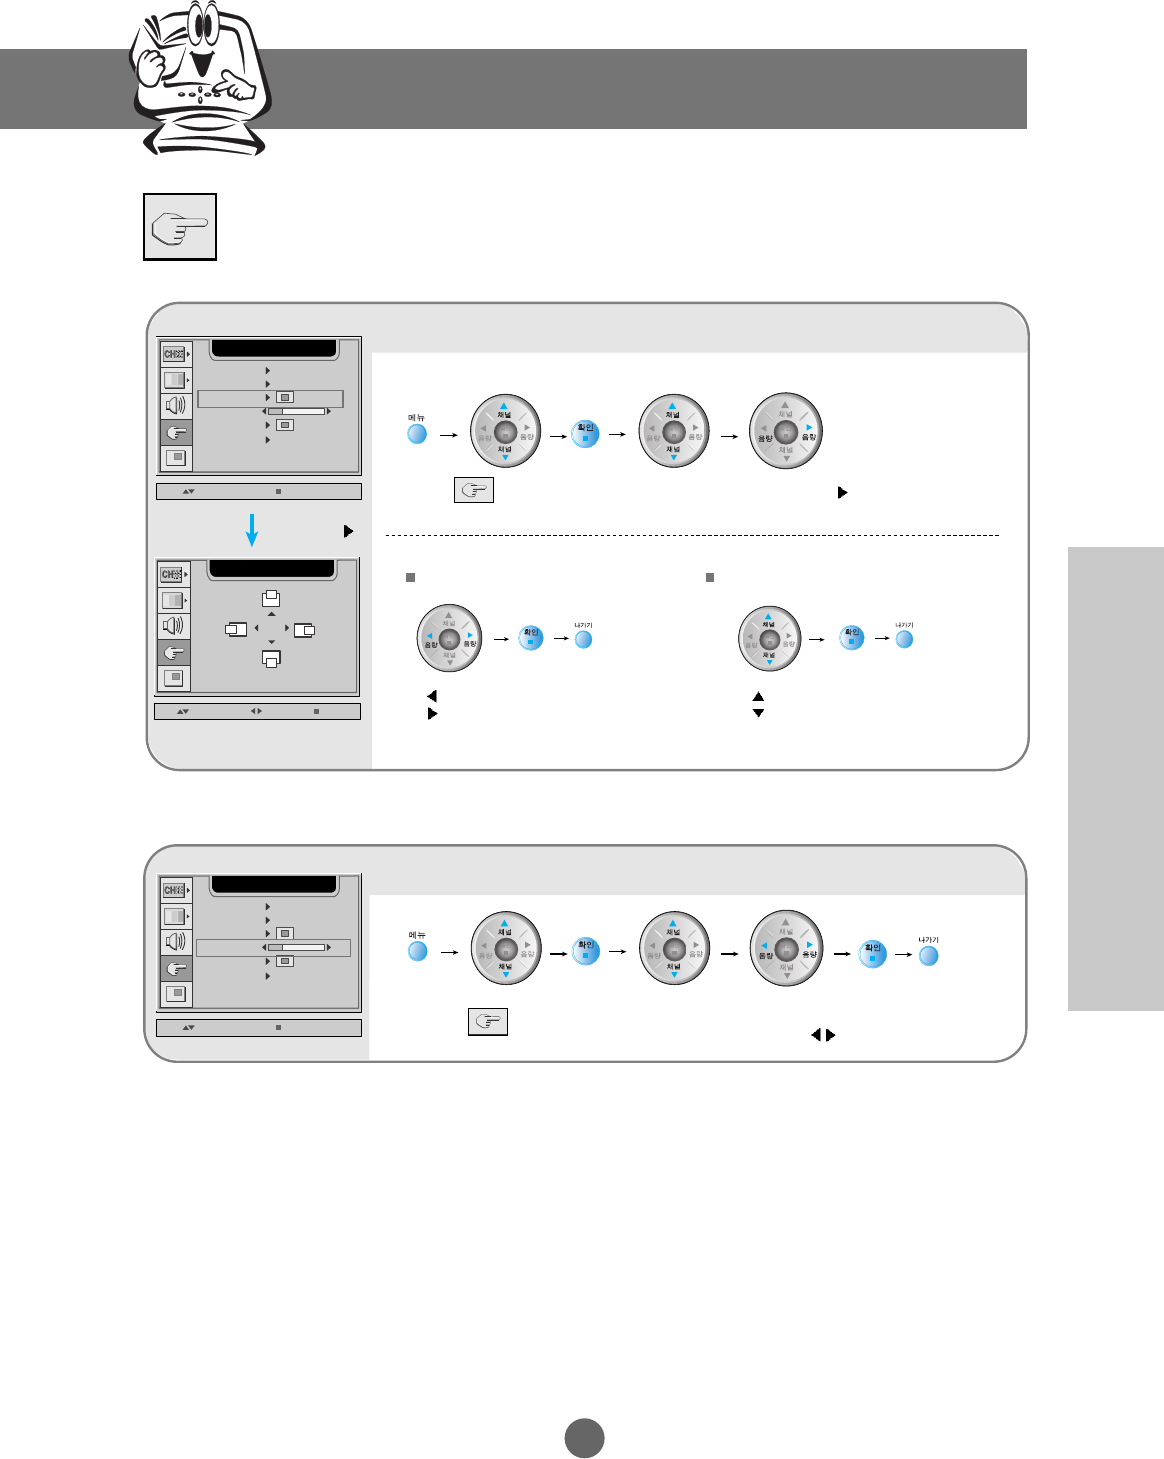
Selecting the options
Displaying the menu with a different language
Move to
Language
Select a language
using
LANGUAGE ENGLISH
UP / DOWN SELECT
SETUP
IMAGE SIZE FULL
OSD POSITION
TRABSOAREBCT
ZOOM
OFF
RESET
20
Selecting screen size
Move to Image
Size
Select screen size
using (Full, 4:3,
Spectacle or 1:1)
LANGUAGE ENGLISH
UP / DOWN SELECT
SETUP
IMAGE SIZE FULL
OSD POSITION
TRABSOAREBCT
ZOOM
OFF
RESET
20
Use to move
Use to move
K38
Input Selection and Tracking
Selecting the options
Adjusting transparency of the menu screen
Move to
Transparency
Adjust transparency
using
LANGUAGE ENGLISH
UP / DOWN SELECT
SETUP
IMAGE SIZE FULL
OSD POSITION
TRABSOAREBCT
ZOOM
OFF
RESET
20
Moving the menu screen
Select using
Move to OSD
Position
Select using
LANGUAGE ENGLISH
UP / DOWN SELECT
SETUP
IMAGE SIZE FULL
OSD POSITION
TRABSOAREBCT
ZOOM
OFF
RESET
20
UP / DOWN SELECT EXIT
SETUP
50
50
Use this function to move the OSD screen position in the monitor.
Left
Right
Up
Down
Moving the OSD screen position horizontally Moving the OSD screen position vertically
Selecting and Adjusting the Screen
Use to move
Use to move
K39
Zooming in on the screen
Select
Move to Zoom Select
LANGUAGE ENGLISH
UP / DOWN SELECT
SETUP
IMAGE SIZE FULL
OSD POSITION
TRABSOAREBCT
ZOOM
OFF
RESET
20
UP / DOWN SELECT EXIT
SETUP
ZOOM 50
50
50
H POSITION
V POSITION
Use this function to zoom in on the screen. When you turn the monitor off and on
again, the default screen size will be restored.
Initializing to the factory default
Move to Reset Select using
- On: Return to the factory default.
LANGUAGE ENGLISH
UP / DOWN SELECT
SETUP
IMAGE SIZE FULL
OSD POSITION
TRABSOAREBCT
ZOOM
OFF
RESET
20
Use this function to reset the monitor to the factory default. However, language
selection will not be initialized.
Select Zoom, H
Position or V Position.
Adjust the value
using
Selecting the options
Use to move
Use to move

K40
Input Selection and Tracking
Adjusting PIP/POP/PBP Mode (Multiple Screen) Functions
PIP/POP/PBP Mode Functions
Showing/Hiding PIP Screen
Selecting the input signal for the PIP screen.
Move to PIP
Mode
Select
Move to PIP
On/Off
Select On or Off
Move to PIP Input Select
Selecting the PIP screen size
Move to PIP
Size
Select Large
or Small.
UP / DOWN SELECT
PIP/POP/PBP
PBP MODE
POP MODE
PIP MODE
UP / DOWN SELECT EXIT
PIP/POP/PBP
PIP ON/OFF OFF
PIP SOURCE DVI
PIP SIZE LARGE
PIP IMAGE
PIP SOUND
PIP SWAP
OFF
OFF
* If you select PIP On, you can adjust the following menus.
Select
Selecting and Adjusting the Screen
Use to move

K41
PIP (Picture In Picture) Mode Functions
Adjusting PIP Screen Image
Move to PIP
Screen
Select Select and adjust
Adjusting PIP screen sound
Move to PIP
sound
Select On or Off
Swapping the main screen and the sub-screen
Move to PIP
Swap
Select On or Off
UP / DOWN SELECT EXIT
PIP/POP/PBP
PIP ON/OFF OFF
PIP SOURCE DVI
PIP SIZE LARGE
PIP IMAGE
PIP SOUND
PIP SWAP
OFF
OFF
UP / DOWN SELECT EXIT
PIP/POP/PBP
PIP ON/OFF OFF
PIP SOURCE DVI
PIP SIZE LARGE
PIP IMAGE
PIP SOUND
PIP SWAP
OFF
OFF
PIP Position Adjust the PIP screen position.
PIP Contrast Adjust PIP screen contrast.
PIP Brightness Adjust PIP screen brightness.
* The sub-menu can differ according to the type of the input signal.
K42
Input Selection and Tracking
POP (Picture Out Picture) Mode Functions
Showing/Hiding POP Screen
Selecting the input signal for the POP screen.
Move to POP
Mode
Move to POP
On/Off
Select On or Off
Move to POP
Input
Select
UP / DOWN SELECT
PIP/POP/PBP
PIP MODE
PBP MODE
POP MODE
UP / DOWN SELECT EXIT
PIP/POP/PBP
POP ON/OFF OFF
POP SOURCE TV
POP IMAGE
POP SOUND
POP SWAP
OFF
OFF
* If you select POP On, you can adjust the following menus.
Select
Adjusting PIP/POP/PBP Mode (Multiple Screen) Functions
Selecting and Adjusting the Screen
Select
Use to move

K43
POP (Picture Out Picture) Mode Functions
Adjusting POP Screen Image
Adjusting POP screen sound
Swapping the main screen and the sub-screen
UP / DOWN SELECT EXIT
PIP/POP/PBP
POP ON/OFF OFF
POP SOURCE TV
POP IMAGE
POP SOUND
POP SWAP
OFF
OFF
The POP screen menu will be disabled if the POP screen input is video.
Move to POP
Screen
Select Select and adjust
Move to POP
sound
Select On or Off
Move to POP
Swap
Select On or Off
UP / DOWN SELECT EXIT
PIP/POP/PBP
POP ON/OFF OFF
POP SOURCE TV
POP IMAGE
POP SOUND
POP SWAP
OFF
OFF
POP Contrast Adjust POP screen contrast.
POP Brightness Adjust POP screen brightness.
* The sub-menu can differ according to the type of input signal.
Note
K44
Input Selection and Tracking
Adjusting PIP/POP/PBP Mode (Multiple Screen) Functions
PBP (Picture By Picture) Mode Functions
Showing/Hiding PBP Screen
Selecting the input signal for the PBP screen.
Move to PBP
Mode
Select
Move to PBP
On/Off
Select On or Off
Move to PBP
Input
Select
Selecting the PBP screen size
Move to PBP
Size
Select Full or 1:1
PIP MODE
POP MODE
PBP MODE
TV
PBP ON/OFF OFF
PBP SOURCE
PBP SIZE FULL
PBP IMAGE
PBP SOUND
PBP SWAP
OFF
OFF
* If you select PBP On, you can adjust the following menus.
Select
Selecting and Adjusting the Screen
Use to move
K45
PBP (Picture By Picture) Mode Functions
Adjusting PBP Screen Image
Move to PBP
Screen
Select Select and adjust
Adjusting PBP screen sound
Move to PBP
sound
Select On or Off
Swapping the main screen and the sub-screen
Move to PBP
Swap
Select On or Off
TV
PBP ON/OFF OFF
PBP SOURCE
PBP SIZE FULL
PBP IMAGE
PBP SOUND
PBP SWAP
OFF
OFF
63
92
PBP CONTRAST
PBP BRIGHTNESS
PBP Contrast Adjust PBP screen contrast.
PBP Brightness Adjust PBP screen brightness.
* The sub-menu can differ according to the type of input signal.
The PBP screen menu will be disabled if the PBP screen input is video of HDTV.
Note

K46
Miscellaneous
Vertical frequency: To enable the user to watch the monitor display, screen image should be changed tens of
times every second like a fluorescent lamp. The vertical frequency or refresh rate is the
times of image display per second. The unit is Hz.
Horizontal frequency: The horizontal interval is the time to display one vertical line. When the horizontal
interval is divided by 1, the number of horizontal lines displayed every second can be
tabulated as the horizontal frequency. The unit is kHz.
• See if the power cord is properly connected to the
outlet.
• See if the power switch is turned on.
• Adjust brightness ( ) and contrast ( ) again.
• If the monitor is in power saving mode, move the
mouse or press any key.
• The signal from the PC (video card) is out of the
vertical or horizontal frequency range of the
monitor. Adjust the frequency range by referring
to the Specifications in this manual.
* Maximum resolution
D-Sub : 1280x1024 @60Hz
DVI-D : 1280x1024 @60Hz
• See if the set top box HDTV resolution is set to
480i. If it is, change to 720p/1080i or plug the jack
into the DVD input terminal.
• The signal cable between PC and monitor is not
connected. Check the signal cable.
• Press the “Input Select” menu in the remote
controller to check the input signal.
Is the monitor power cord
connected?
Does the power LED is turned on?
Power is on, power LED is green but
the screen appears extremely dark.
Does the power LED look yellow?
Does the “Out of Range” message
appear?
The input signal of the main screen
is set to HDTV but the “Out of
Range” message appears.
'Does the “Check Signal Cable”
message appear?
Troubleshooting
No image is displayed
Note
K47
• Install the monitor driver, which is provided with
the monitor, or download it from the web site.
(http://www.lge.co.kr)
• See if the plug&play function is supported by
referring to the video card user manual.
Did you install the driver?
• D-Sub analog signal – Press the “Auto Channel”
button in the remote controller to automatically
select the optimal screen status that fits into the
current mode. If adjustment is not satisfactory, use
the Position OSD menu.
• See if the video card resolution and frequency are
supported by the monitor. If the frequency is out of
range, set to the recommended resolution in the
Control Panel – Display – Setting menu.
• D-Sub analog signal – Press the “Auto Channel”
button in the remote controller to automatically
select an optimal screen status that fits into the
current mode. If adjustment is not satisfactory, use
the Clock OSD menu.
• D-Sub analog signal – Press the “Auto Channel”
button in the remote controller to automatically
select an optimal screen status that fits into the
current mode. If adjustment is not satisfactory, use
the Phase OSD menu.
• See if the Zoom value is set to 0. If it is, you
cannot adjust the H/V Position value.
• If the screen size is not full when connected to the
PC, execute the POP to change to full screen
mode.
• See if the TV sound is set to mono. If it is, the
sound will not be displayed.
• You cannot adjust brightness and tint in the
PIP/POP/PBP Screen menu for the sub-screen
among PIP/POP/PBP menus. Therefore,
brightness can be different for the sub-screen.
Is the screen position wrong?
Do thin lines appear on the
background screen?
Horizontal noise appears or the
characters look blurred.
Unable to adjust the
horizontal/vertical position in the
Zoom menu.
Screen size is automatically adjusted
when connected to the PC.
No sound appears in the TV channel
display window.
Brightness differs in the main and
sub screen when connected to the
PC.
The screen image looks abnormal.
“Unknown Monitor” message appears when the monitor is connected.
K48
Input Selection and Tracking
• See if the audio cable is connected properly.
• Adjust the volume.
• See if the sound is set properly.
• See if the Sound is set to On in the PIP/POP/PBP
menu.
• Select the appropriate treble sound.
• Select the appropriate bass sound.
• Adjust the volume.
No sound?
No sound is available when the
PIP/POP/PBP mode is engaged.
Sound is too dull.
Sound is too low.
Troubleshooting
The audio function does not work.
• See if you have selected the proper channel
mode.
• Use the automatic channel setup function.
• See if the TV antenna is properly connected.
The TV signal is not being received.
The TV function does not work.
• See if the POP function is in use. If the POP
function is in use, the screen size function may not
work.
The screen size function in the OSD
menu does not work.
The screen size function in the OSD menu does not work.
K49
• Set the number of colors to more than 24 bits (true
color)
Select Control Panel – Display – Settings – Color
Table menu in Windows.
• Check the connection status of the signal cable.
Or, re-insert the PC video card.
• Several pixels (red, green, white or black color)
may appear on the screen, which can be
attributable to the unique characteristics of the
LCD panel. It is not a malfunction of the LCD.
Screen has poor color resolution (16
colors).
Screen color is unstable or mono-
colored.
Do black spots appear on the
screen?
Screen color is abnormal.
• If you use a fixed image for a long time, the pixels
may be damaged quickly. Use the screensaver
function.
After-image appears when the
monitor is turned off.
After-image appears on the monitor.
• The control locking function prevents unintentional
OSD setting change due to careless usage. To
unlock the controls, simultaneously press the
Menu button and > button for 5 seconds. (You
cannot set this function using the remote controller
buttons. You can set this function in the monitor
only.)
The “Controls locked” message
appears when pressing the Menu
button.
“Controls Locked” message appears.
K50
Miscellaneous
Screen Type 30 Type (75.0062cm) TFT (Thin Film Transistor)
LCD (Liquid Crystal Display) Panel
Visible diagonal size: 75.0062cm
Pixel Pitch 0.5025mm
Max. Resolution D-SUB : 1280x1024 @60Hz
DVI-D : 1280x1024 @60Hz
Recommended Resolution
D-SUB : WXGA 1280x768 @60Hz
DVI-D : SXGA 1280x768 @60Hz
Horizontal Frequency D-SUB : 31~66 kHz
DVI-D : 31~66 kHz
Vertical Frequency 56 - 85 Hz
Synchronization Type Separate/Composite/SOG (Sync On Green)/Digital
15-pin D-Sub type, DVI-D (digital), S-Video,
composite video, HDTV, DVD, TV
Rated Voltage AC 100-240V~ 50/60Hz 1.8A
Power Consumption Normal operation: 165W
Power saving preparation state: ≤5W
Power saving state: ≤5W
Power switch on: ≤5W
Power cut-off, switch off: ≤1W
Size (WxLxH) 733.8mm x 538.0 mm x 107.0mm
Weight (excl. package) 16.4 kg
Operational Condition Temperature: 10˚C ~ 35˚C , Humidity: 10% ~ 80%
Storage Condition Temperature: -20˚C ~ 60˚C , Humidity: 5% ~ 95%
The product specifications can change without prior notice for product improvement.
LCD Panel
Video Signal
Input Connector
Power
Dimension/Weight
Environmental Conditions
Specifications
K51
Preset mode
Horizontal
Frequency
(kHz)
Vertical
Frequency
(kHz)
PC Mode – Preset Mode
HDV Mode
Composite Video Input YPbPr
Preset mode
Horizontal
Frequency
(kHz)
Vertical
Frequency
(kHz)
1
2
3
4
5
6
7
640 x 350
720 x 400
640 x 480
640 x 480
640 x 480
800 x 600
800 x 600
31.469
31.468
31.469
37.500
43.269
37.879
46.875
70
70
60
75
85
60
75
VGA
VGA
VGA
VESA
VESA
VESA
VESA
8
9
10
11
12
13
800 x 600
832 x 624
1024 x 768
1024 x 768
1280 x 1024
1280 x 768
53.674
49.725
48.363
60.123
63.981
47.7
VESA
MAC
VESA
VESA
VESA
VESA
85
75
60
75
60
60
Preset mode
Horizontal
Frequency
(kHz)
Vertical
Frequency
(kHz)
1
2
3
4
5
720 x 483
1280x 720
1280x 720
1920x 1080
1920x 1080
31.50
45.00
44.96
33.75
33.72
59.94
60.00
59.94
60.00
59.94
Power LED
Mode Monitor
Normal Operation
Pre-power Saving State
Power Saving State
Power Switch Off
Power Cut-off Switch Off
Green
Yellow
Yellow
-
-
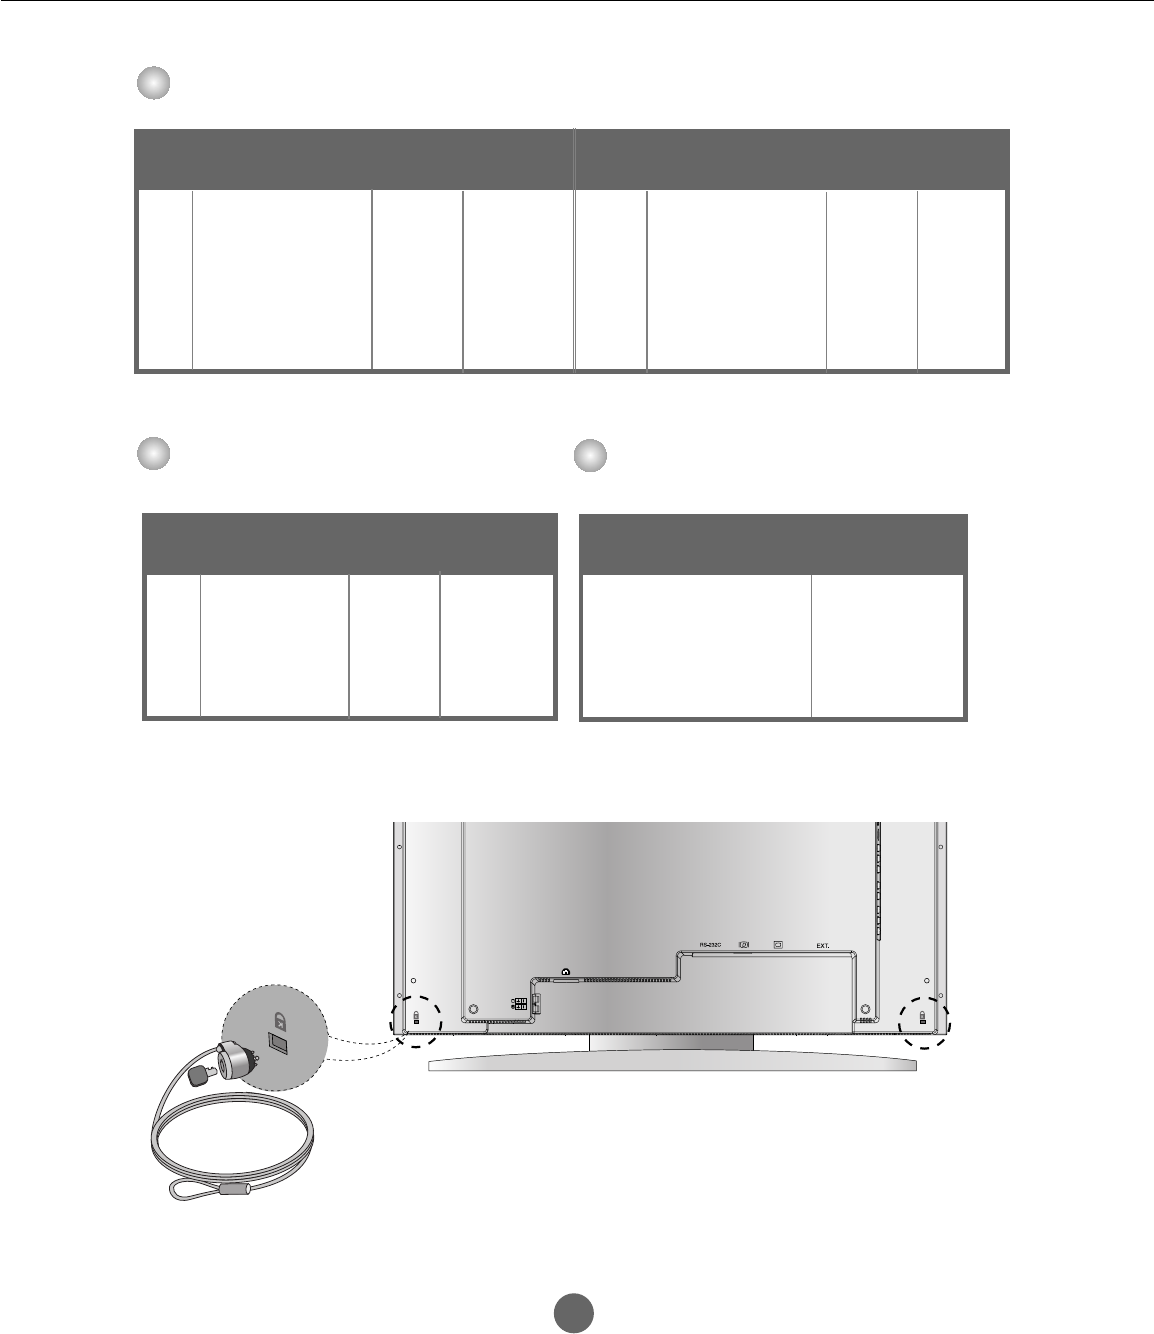
Locking Device
Use this locking cable (optional) to
prevent theft.
K52
Miscellaneous
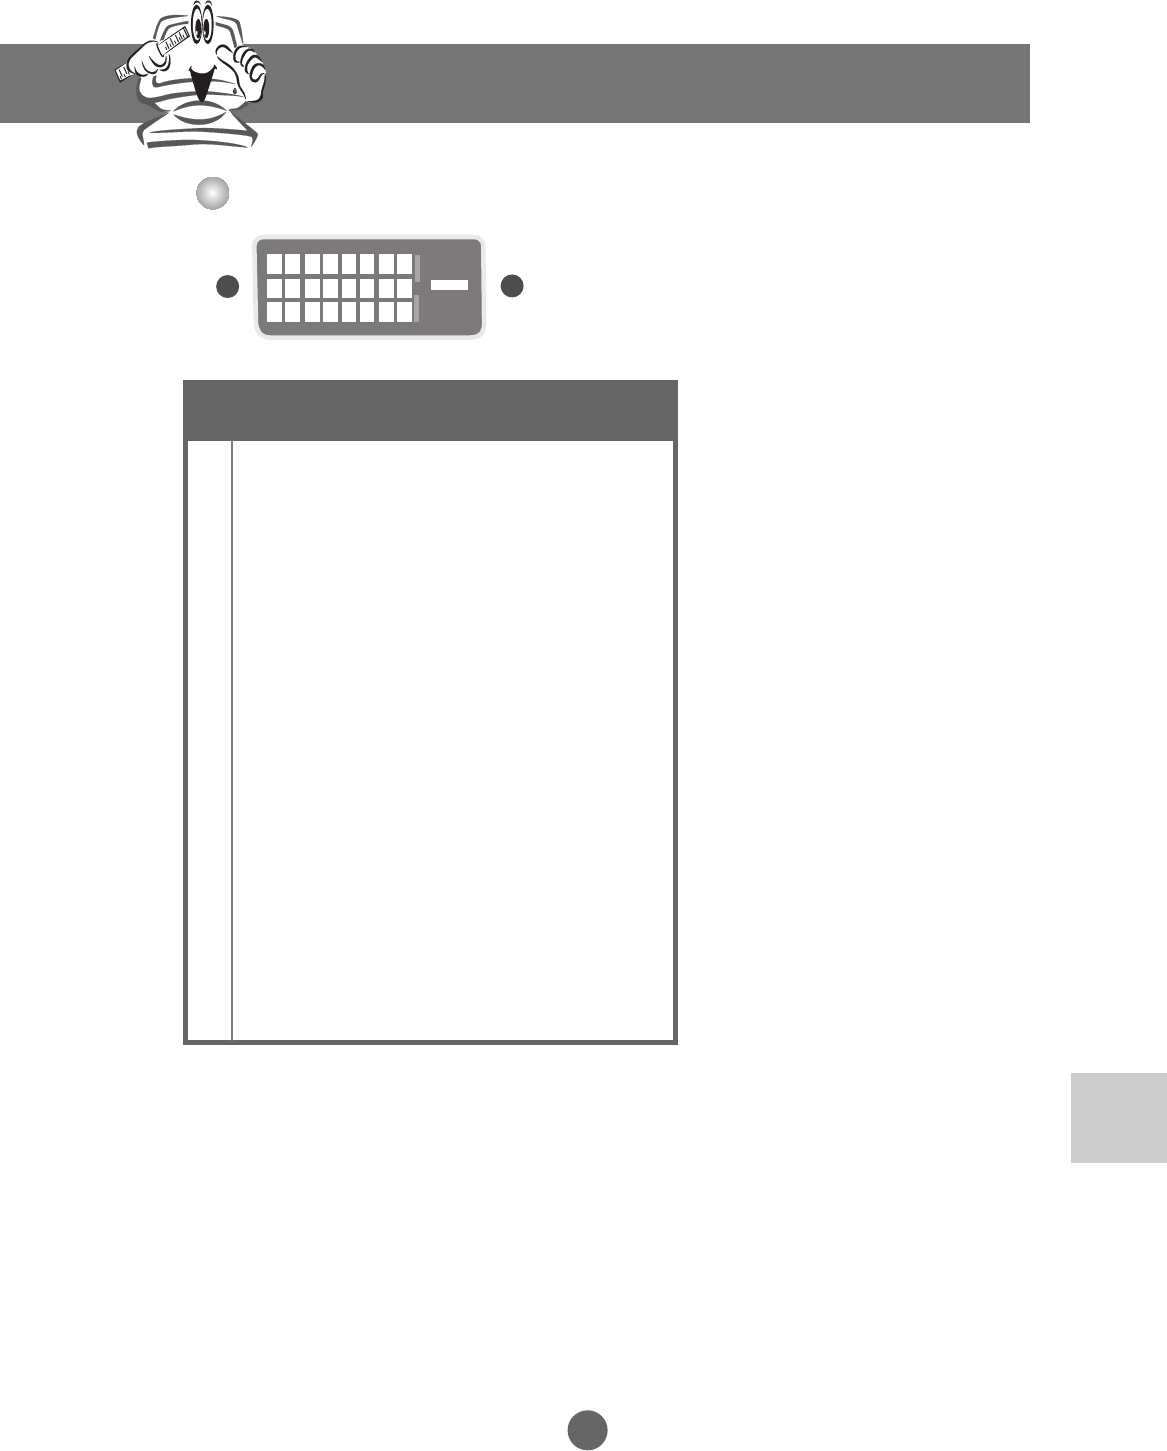
DVI-D
18
9
17 24
16
T.M.D.S. (Transition Minimized Differential Signaling)
C1~C5: DVI-I only
No. Signal
1
2
3
4
5
6
7
8
9
10
11
12
13
14
15
16
17
18
19
20
21
22
23
24
T. M. D. S. Data 2-
T. M. D. S. Data 2+
T. M. D. S. Data 2/4 Shield
T. M. D. S. Data 4-
T. M. D. S. Data 4+
DDC Clock
DDC Data
Analog Vertical Synchronization
T. M. D. S. Data 1-
T. M. D. S. Data 1+
T. M. D. S. Data 1/3 Shield
T. M. D. S. Data 3-
T. M. D. S. Data 3+
+5V Power
Grounding (return for +5V, horizontal sync and vertical sync)
Hot Plug Detect
T. M. D. S. Data 0-
T. M. D. S. Data 0+
T. M. D. S. Data 0/5 Shield
T. M. D. S. Data 5-
T. M. D. S. Data 5+
T. M. D. S. Clock Shield
T. M. D. S. Clock+
T. M. D. S. Clock
Product Specifications
K7
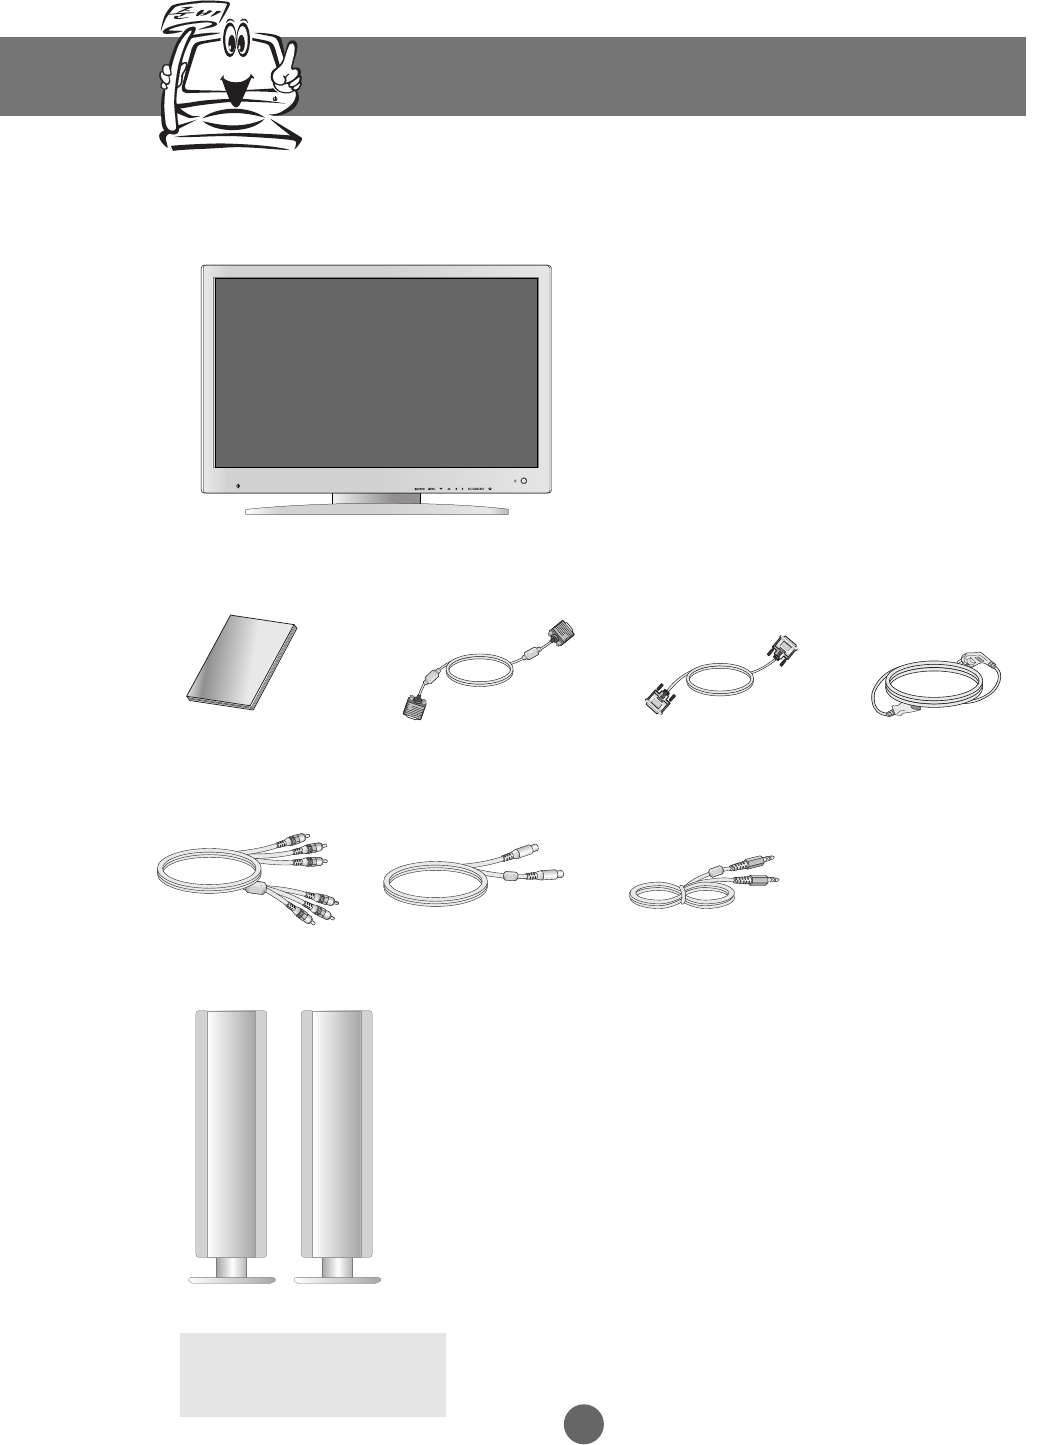
Speaker
Refer to the manual in the
speaker box for more details
on speaker accessories.
User’s Manual Power Cord
RCA Cable S-Video Cable Audio Cable (PC)
Monitor
Please check the accessories in the product package.
* The monitor and the accessories can be different from the figures shown here.
15-pin D-Sub Signal
Cable
DVI-D Signal Cable
Accessories