LG Electronics USA L602I PCS GSM Phone User Manual L601i E 047 056
LG Electronics USA PCS GSM Phone L601i E 047 056
Contents
- 1. Users Manual 1
- 2. Users Manual 2
Users Manual 1
Part 15.21 statement
" Change or Modifications that are not expressly approved by the manufacturer could void
the user's authority to operate the equipment. "
Part 15.105 statement
This equipment has been tested and found to comply with the limits for a class B digital device,
pursuant to Part 15 of the FCC Rules.
These limits are designed to provide reasonable protection against harmful interference in a
residential installation.
This equipment generates uses and can radiate radio frequency energy and, if not installed and used
in accordance with the instructions, may cause harmful interference to radio communications.
However, there is no guarantee that interference will not occur in a particular installation. if this
equipment does cause harmful interference or television reception, which can be determined by
turning the equipment off and on, the user is encouraged to try to correct the interference by one or
more of the following measures:
- Reorient or relocate the receiving antenna.
- Increase the separation between the equipment and receiver.
- Connect the equipment into an outlet on a circuit different from that to
which the receiver is connected
- Consult the dealer or an experienced radio/TV technician for help.
LIMITED WARRANTY STATEMENT
1. WHAT THIS WARRANTY COVERS:
LG offers you a limited warranty that the enclosed subscriber unit and its enclosed accessories will be
free from defects in material and workmanship, according to the following terms and conditions:
(1) The limited warranty for the product extends for ONE (1) year beginning on the data of purchase
of the product.
(2) The limited warranty extends on to the original purchaser of the product and is not assignable or
transferable to any subsequent purchaser/end user.
(3) This warranty is good only to the original purchaser of the product during the warranty period as
long as it is in the U.S., including Alaska, Hawaii, U.S. Territories and Canada.
(4) The external housing and cosmetic parts shall not be covered under these limited warranty terms.
(5) Upon request from LG, the consumer must provide information to reasonably prove the date of
purchase.
(6) The customer shall bear the cost of shipping the product to the Customer Service Department of
LG. LG shall bear the cost of shipping the product back to the consumer after the completion of
service under this limited warranty.
2. WHAT THIS WARRANTY DOES NOT COVER:
(1) Defects or damages resulting from use of the product in other than its normal and customary
manner.
(2) Defects or damages from abnormal use, abnormal conditions, improper storage, exposure to
moisture or dampness, unauthorized modifications, unauthorized connections, unauthorized repair,
misuse, neglect, abuse, accident, alteration, improper installation, or other acts which are not the
fault of LG, including damage caused by shipping blown fuses spills of food or liquid.
(3) Breakage or damage to antennas unless caused directly by defects in material or workmanship.
(4) That the Customer Service Department at LG was net notified by consumer of the alleged defect
or malfunction of the product during the applicable limited warranty period.
(5) Products which have had the serial number removed or made illegible.
(6) The limited warranty is in lieu of all other warranties, express or implied either in fact or by
operations law, statutory or otherwise, including, but limited to any implied warranty of
marketability or fitness for a particular use.
(7) Damage resulting from use of non-LG approved accessories.
(8) All plastic surfaces and all other externally exposed parts that are scratched or damaged due to
normal customer use.
(9) Products operated outside published maximum ratings.
3
(10) Products used or obtained in a rental program.
(11) Consumables (such as fuses).
3. STATE LAW RIGHTS:
No other express warranty is applicable to this product. THE DURATION OF ANY IMPLIED
WARRANTIES, INCLUDING THE IMPLIED WARRANTY OF MARKETABILITY, IS LIMITED
TO THE DURATION OF THE EXPRESS WARRANTY HEREIN. LG INFOCOMM INC. SHALL
NOT BE LIABLE FOR THE LOSS OF THE USE OF THE PRODUCT, INCONVENIENCE, LOSS
OR ANY OTHER DAMAGES, DIRECT OR CONSEQUENTIAL, RISING OUT OF THE USE OF,
OR INABILITY TO USE, THIS PRODUCT OR FOR ANY BREACH OF ANY EXPRESS OR
IMPLIED WARRANTY, INCLUDING THE IMPLIED WARRANTY OF MARKETABILITY
APPLICABLE TO THIS PRODUCT. Some states do not allow the exclusive of imitation of incidental
or consequential damages or limitations on how long an implied warranty lasts; so these limitations or
exclusions may not apply to you. This warranty gives you specific legal rights and you may also have
other rights which vary from state to state.
4. HOW TO GET WARRANTY SERVICE:
To obtain warranty service, please call the following web address:
www.lgeservice.com

8
For Your Safety
Important Information
This user guide contains important information on the use and
operation of this phone. Please read all the information
carefully for optimal performance and to prevent any damage
to or misuse of the phone. Any changes or modifications not
expressly approved in this user guide could void your warranty
for this equipment.
Before You Start
Safety Instructions
WARNING! To reduce the possibility of electric shock, do not
expose your phone to high humidity areas, such as the
bathroom, swimming pool, etc.
Always store your phone away from heat. Never store your
phone in settings that may expose it to temperatures less than
32°F or greater than 104°F, such as outside during extreme
weather conditions or in your car on a hot day. Exposure to
excessive cold or heat will result in malfunction, damage
and/or catastrophic failure.
Be careful when using your phone near other electronic
devices. RF emissions from your mobile phone may affect
nearby in adequately shielded electronic equipment. You
should consult with manufacturers of any personal medical
devices such as pacemakers and hearing aides to determine if
they are susceptible to interference from your mobile phone.
Turn off your phone in a medical facility or at a gas station.
Never place your phone in a microwave oven as this will
cause the battery to explode.
IMPORTANT! Please read the TIA SAFETY INFORMATION on
page 78 before using your phone.
Safety Information
Read these simple guidelines. Breaking the rules may be
dangerous or illegal. Further detailed information is given in this
user guide.
]Never use an unapproved battery since this could damage
the phone and/or battery and could cause the battery to
explode.
]Never place your phone in a microwave oven as it will
cause the battery to explode.
]Do not dispose of your battery by fire or with hazardous or
flammable materials.
]Make sure that no sharp-edged items come into contact
with the battery. There is a risk of this causing a fire.
]Store the battery in a place out of reach of children.
]Be careful that children do not swallow any parts such as
rubber plugs (earphone, connection parts of the phone,
etc.). This could cause asphyxiation or suffocation.

9
For Your Safety
]Unplug the power cord and charger during lightning storms
to avoid electric shock or fire.
]When riding in a car, do not leave your phone or set up the
hands-free kit near to the air bag. If wireless equipment is
improperly installed and the air bag is activated, you may be
seriously injured.
]Do not use a hand-held phone while driving.
]Do not use the phone in areas where its use is prohibited.
(For example: aircraft).
]Do not expose the battery charger or adapter to direct
sunlight or use it in places with high humidity, such as a
bathroom.
]Never store your phone in temperatures less than- 4°F or
greater than 122°F.
]Do not use harsh chemicals (such as alcohol, benzene,
thinners, etc.) or detergents to clean your phone. There is a
risk of this causing a fire.
]Do not drop, strike, or shake your phone severely. Such
actions may harm the internal circuit boards of the phone.
]Do not use your phone in high explosive areas as the phone
may generate sparks.
]Do not damage the power cord by bending, twisting, pulling,
or heating. Do not use the plug if it is loose as it may cause
a fire or electric shock.
]Do not place any heavy items on the power cord. Do not
allow the power cord to be crimped as it may cause fire or
electric shock.
]Do not handle the phone with wet hands while it is being
charged. It may cause an electric shock or seriously
damage your phone.
]Do not disassemble the phone.
]Do not place or answer calls while charging the phone as it
may short-circuit the phone and/or cause electric shock or
fire.
]Only use the batteries, antennas, and chargers provided by
LG. The warranty will not be applied to products provided by
other suppliers.
]Only authorized personnel should service the phone and its
accessories. Faulty installation or service may result in
accidents and consequently invalidate the warranty.
]Do not hold or let the antenna come in contact with your
body during a call.
]An emergency call can be made only within a service area.
For an emergency call, make sure that you are within a
service area and that the phone is turned on.

10
For Your Safety
FCC RF Exposure Information
WARNING! Read this information before operating the phone.
In August 1996, the Federal Communications (FCC) of he United
States, with its action in Report and Order FCC 96-326, adopted
an updated safety standard for human exposure to radio
frequency (RF) electromagnetic energy emitted by FCC
regulated transmitters. Those guidelines are consistent with
the safety standard previously set by both U.S. and
international standards bodies.
The design of this phone complies with the FCC guidelines and
these international standards.
CAUTION
Use only the supplied and approved antenna. Use of
unauthorized antennas or modifications could impair call
quality, damage the phone, void your warranty and/or result in
violation of FCC regulations. Do not use the phone with a
damaged antenna. If a damaged antenna comes into contact
with skin, a minor burn may result. Contact your local dealer
for a replacement antenna.
Body-worn Operation
This device was tested for typical body-worn operations with
the back of the phone kept 0.6 inches (1.5cm) between the
user’s body and the back of the phone. To comply with FCC RF
exposure requirements, a minimum separation distance of 0.6
inches(1.5cm) must be maintained between the user's body
and the back of the phone. Third-party belt-clips, holsters, and
similar accessories containing metallic components should not
be used. Body-worn accessories that cannot maintain 0.6
inches(1.5cm) separation distance between the user's body
and the back of the phone, and have not been tested for typical
body-worn operations may not comply with FCC RF exposure
limits and should be avoided.

11
For Your Safety
Vehicle Mounted External Antenna
(optional, if available)
A minimum separation distance of 8 inches (20cm) must be
maintained between the user/bystander and the vehicle
mounted external antenna to satisfy FCC RF exposure
requirements. For more information about RF exposure, visit
the FCC website at www.fcc.gov
FCC Part 15 Class B Compliance
This device and its accessories comply with part 15 of FCC
rules. Operation is subject to the following two conditions:
(1) This device and its accessories may not cause harmful
interference, and (2) this device and its accessories must
accept any interference received, including interference that
may cause undesired operation.
Cautions for Battery
]Do not disassemble.
]Do not short-circuit.
]Do not expose to high temperature: 60°C (140°F).]
]Do not incinerate.
Battery Disposal
]Please dispose of your battery properly or bring to your
local wireless carrier for recycling.
]Do not dispose in fire or with hazardous or flammable
materials.
Adapter (Charger) Cautions
]Using the wrong battery charger could damage your phone
and void your warranty.
]The adapter or battery charger is intended for indoor use
only.
Do not expose the adapter or battery charger to direct sunlight
or use it in places with high humidity, such as the bathroom.

DoCoMo W-CDMA, GSM/GPRS system
Thank you for purchasing the “FOMA L602i”.
Before or during use of the FOMA L602i, make sure that you read this manual and the separate manuals such as for the battery pack
thoroughly so that you can use the FOMA L602i correctly. If you feel any inconvenience in reading the manual, contact the DoCoMo
Information Center listed on the back of this manual.
The FOMA L602i is designed to be your close partner. Treat it carefully at all times to ensure long-term performance.
Before using your FOMA phone
Because the FOMA phones use radio waves, they cannot be used in places where radio waves do not reach, such as inside tunnels,
underground, or in buildings; or the outside where radio waves are weak or out of the FOMA service area. They may not be used in the
high-rise buildings even when the antennas are unobstructed. You may also experience interruption of calls even when using without
moving while the radio waves are strong enough for the 3 antennas to appear on the display.
Use the FOMA phone carefully to avoid disturbing other people when in public, or in crowded or quiet places.
Since the FOMA phones use radio waves as the medium of telecommunication, calls may be tapped by the third party. However, the W-
CDMA and GSM/GPRS systems automatically support tapping prevention, so your conversation will be incomprehensible to the third party.
The FOMA phones change your voice into digital signals and send them to the other party. In places where the radio waves are weak, the
digital signals may not be converted correctly, and in such a case, the voice heard may sound differently from the original voice.
It is recommended that you make separate notes of the information stored in the FOMA phone and keep such notes in a safe place.
DoCoMo assumes no responsibility for the loss of data stored in the phone.
The user hereby agrees that the user shall be solely responsible for the result of the use of SSL. Neither DoCoMo nor the certifier listed
herein makes any representation and warranty as for the security in the use of SSL. In the event that the user shall sustain damage or loss
due to the use of SSL, neither DoCoMo nor the certifier assumes any responsibility for any such damage or loss.
Certifier: VeriSign Japan K.K. Betrusted Japan Co., Ltd. GeoTrust Japan, inc, RAS Security Inc., and SECOM Trust Systems Co., Ltd.
This FOMA phone can be used only via the FOMA network or Roaming service area of DoCoMo.
For those who use the FOMA phone for the first time
If this is the first time for you to use the FOMA phone, read this manual in the order as described below. Then you will get acquainted with the
outline of preparing and operating procedures for using your FOMA phone.
1. Attach and then charge the battery pack. >P39, P40
2. Turn the power to the FOMA phone ON, initialize, and confirm your phone number. >P44, P45
3. Confirm the buttons on the FOMA phone for their roles. >P28
4. Confirm the meanings of icons that appear on the display. >P31
5. Confirm how to operate the menus. >P35
6. Confirm how to make and receive calls. >P48, P58
You can download the latest version of this manual from DoCoMo Web page.
• “Manual (PDF file)” download
(http://www.nttdocomo.co.jp/support/manual/download/index.html)
The instructions contained of this manual and URL may be changed without notice.
1
How to Read/Refer to This Manual
The search methods and page structure of this manual are described here. Screen displays and illustrations described in this
manual are for reference. The actual ones may differ.
How to Refer to This Manual
By the following search methods, you can find pages where your desired functions and explanations are described:
Tabs on Cover ]Cover
Search from the tabs printed on the cover.
]See the next page for more details.
Index ]P322
Search from keywords when you know the names of functions or services.
Contents ]P4
Search from the contents that categorize functions.
Features ]P6
Search from features when you want to use specific functions of FOMA L602i such as new functions or useful functions.
Menu List ]P234
Search from list for menus of FOMA L602i.
Quick Manual ]P332
Quick Manual gives you a clear, brief explanation about fundamental functions. You can take it with you when you go out.
Note that “FOMA L602i” is referred to as “FOMA phone” in this manual.
It is prohibited to copy all or part of this manual without permission.
The instructions contained in this manual may be changed without notice.
How to Read/Refer to This Manual
aSee “Overseas use” (P223) for how to use your FOMA phone outside Japan.
2
How to Read/Refer to This Manual
aFrom the Tabs on the Front Cover
Search for the functions and explanations in the order of the Front Cover >First page of Chapter >Description page.
aFrom the Index
Search from the index when you know the names of functions or services.
Contents / Precautions
Confirming before use
Making Calls /
Receiving Calls
Making /
ceiving videophone calls
Phonebook
Sound / Display
Settings
Safety settings
Multimedia
(Camera)
i-mode
Mail
i-appli
Data box
Adjusting the Ring Volume ....................76
Adjusting the Effect Tone Volume .........76
Setting a Ring Tone................................76
Setting an Effect Tone ...........................77
Setting a Vibrator ...................................78
Activating the Manner Mode .................78
Setting Ringing Operations for
Incoming Mail ........................................80
Setting Ringing Time..............................80
Setting Main Screen...............................80
Setting Sub Display................................82
Setting Fonts of Dial Characters ...........83
Setting Menu Style .................................83
Setting Backlight ....................................83
Setting color Scheme 83
Sound/
Display
1 Ring volume
2 Effect tone volume
3 Select ringtone
4 Select effect tone
5 Vibration settings
6 Manner settings
7 Mail ring duration
Select
Sound
On the Stand-by display, C[Menu] ]
(Sound) or “Sound”
To display the Sound menu
1 Main display
2 Sub display
3 Font
4 Menu style
5 Backlight
6 Color scheme
7 Lighting LED
Select
Display
On the Standby display, C[Menu] ]
(Display) or “Display”
To display the Display menu
2
.....91
calls
.....80
.....82
...115
...109
.....36
.....63
...141
.....68
6, 148
...153
Folder list (Melody) .................177
Folder list (Moving/i-motion) ...168
Mail list (Received)..................141
Mail list (Sent).........................146
Mail list (Unsent).....................148
Software list...........................161
Sound .........................................76
Effect tone volume ...................76
Mail ring ON/OFF .....................79
Manner mode ..........................78
Ring volume.............................76
Ringing time.............................80
Setting an Effect Tone..............77
Setting a ring tone....................76
2
3
How to Read/Refer to This Manual
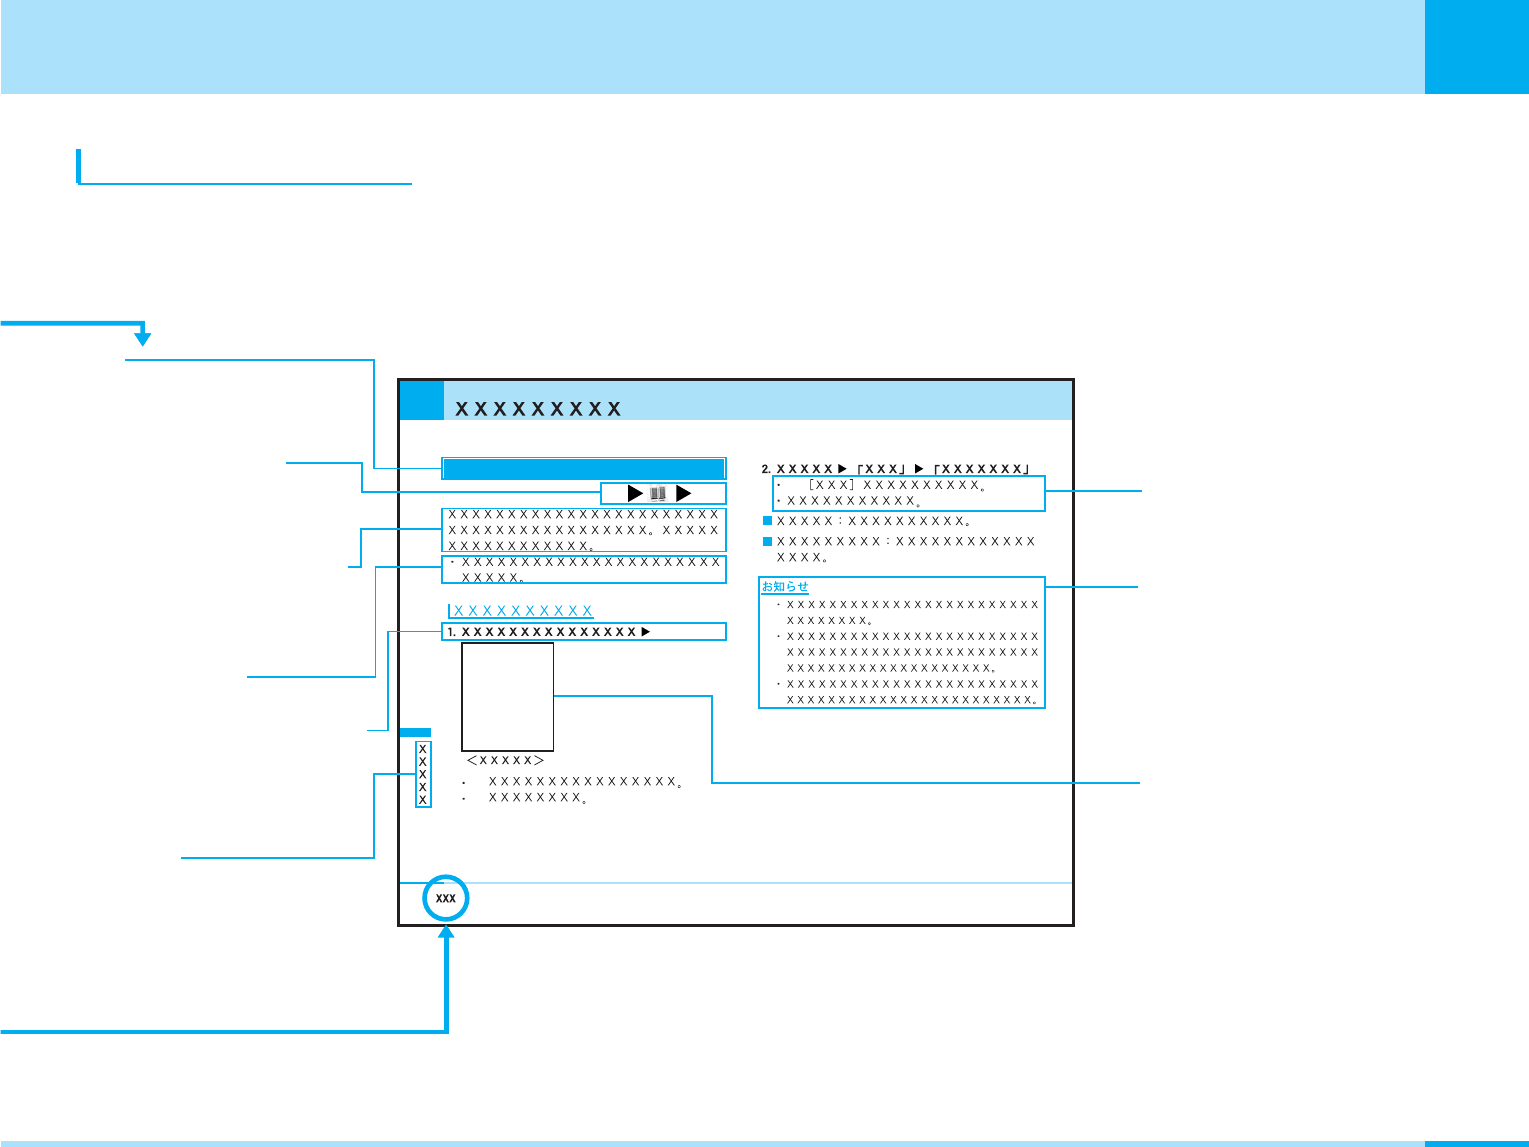
How to use this manual
In this manual, operations of your FOMA phone are explained in the structure as shown below:
• Screen displays and illustrations described in this manual are for reference. The actual ones may differ.
C
I
I
M
C1
Title
Shows the title
Description of operations
Provides the operation
number and operation
method. > P35
Supplementary
description of operation
Shortcut operation
Shows button operation
from the Stand-by display.
Description of functions
Provides detailed
explanation of each
function.
Supplementary
description of functions
Index tab
Shows the chapter title.
These titles are in the
tabs on the cover.
Screen
Shows the screen
displayed during/
after an operation.
Information
Gives necessary
information, notes,
and supplementary
explanation.
✽ The above page is a sample.
How to enter the menu
4
Contents/Precautions
Contents/Precautions
Contents
Before using your FOMA phone....................... Rear side of Front Cover
For those who use the FOMA phone
for the first time ........................................... Rear Side of Front Cover
How to Read/Refer to This Manual...................................................... 1
Contents ............................................................................................. 4
Features of FOMA L602i...................................................................... 6
Making Full Use of FOMA L602i!.......................................................... 8
Safety Precautions (Always follow the safety precautions.)................. 10
Notes on Handling............................................................................. 20
Intellectual Property Rights ................................................................ 23
Accessories and Main Options .......................................................... 25
Confirming before use......................................... 27
• Phone Parts and Functions • Display • Menu Operations
• Soft Key Operations • Side Button Main Operations
• Using the UIM (FOMA Card) • Attaching/Removing the Battery Pack
• Charging the FOMA Phone • Turning Power ON
• Turning Power OFF • Date/Time
• Using Caller ID Notification Service • Own Number
Making calls/Receiving calls............................... 47
• Making calls • Receiving calls • Using Public mode (drive mode)
• Using Public mode (power off)
Making/Receiving Video-phone calls ................. 57
• About Video-phone • Making Video-phone Calls
• Receiving Video-phone Calls
• Changing Settings for Video-phone Calls
Phonebook........................................................... 63
• Adding to Phonebook • Searching for Phonebook Entries
• Checking the Number of Saved Phonebook Entries
• Setting Phonebook • Setting Groups • Displaying Own Number
Sound/Display ..................................................... 75
• Adjusting the Ring Volume • Adjusting the Effect Tone Volume
• Setting a Ring Tone • Setting an Effect Tone
• Setting a Vibrator • Activating the Manner Mode
• Setting Ringing Operations for Incoming Mail
• Setting Ringing Time • Setting Main Screen
• Setting Sub Display • Setting Fonts of Dial Characters
• Setting Menu Style • Setting Backlight
• Setting color Scheme • Setting LED
Settings ................................................................ 85
• Call/Answer • Call Feature • Video Phone • Date & Time
• Network (for overseas use) • Changing a Host from i-mode
• Security • • Others Settings
Safety settings ................................................... 103
• Passwords
• Preventing the Phone from Activating the Operation of Function
• Other Safety Settings
Multimedia (Camera) ......................................... 107
• Notes for when using the camera • Using the Camera
• Shooting Still Images • Shooting Moving Images
• Setting Camera
i-mode ................................................................ 119
• i-mode Menu • What is i-mode? • Displaying the iMenu display
• Displaying Sites from Bookmark • Displaying Screen memo
• Displaying Last URL • Displaying Internet Web Pages
• Displaying MessageR/F
• Checking Whether Center Holds MessageR/F
• Setting Functions of i-mode • Displaying Sites
• How to See/Use Sites • Using My Menu
• Changing i-mode Password

5
Contents/Precautions
Contents/Precautions
Mail..................................................................... 137
• Mail Menu • i-mode Mail • Displaying Mail in Inbox
• Displaying Mail in Outbox • Displaying Mail in Unsent message
• Composing Mail • Checking New i-mode mail and Message
• Receiving Selected Mail • Checking whether Center Holds SMS
• Changing Mail Setting
i-appli ................................................................. 159
• What is i-appli • Downloading i-appli from Sites • Starting i-appli
Data box............................................................. 165
• Introduction of Data box • Displaying/Managing/Editing Images
• Playing back/Managing/Moving Images/i-motion
• Playing back/Managing/Melody
Tools................................................................... 179
• Using Alarm • Setting the Custom Menu
• Using the Infrared Communication Function • Using Calculator
• Using Unit Converter • Using World Time • Using Stop Watch
Stationery........................................................... 189
• Using Schedule • Using Memo
• Using Date Search • Using Date Counter
Network Service ................................................ 197
• Available Network Services • Using Voice Mail
• Using Call Waiting Service • Using Call Forwarding Service
• Using Nuisance Call Barring Service
• Using Caller ID Notification Service
• Using Caller ID Request Service • Using Set Arrival Act
• Selecting Arrival Call Act • Setting Remote Control
• International Roaming Service • Registering Additional Services
• Registering Additional Guidance • Using English Guidance
• Using Service Dialing Number • Using Call Barring
Data Transmission............................................. 209
• Data Transmission Available from the FOMA phone • Before Use
• Glossary of Data Transmission Terms
• Preparation Flow for Data Transmission • AT command
Entering Characters........................................... 215
• Entering Characters • List of Character Assignment of Dial Buttons
Overseas Use..................................................... 223
• International Roaming Service • Setting the Network Mode
• Confirming Before Using Overseas
• Using the FOMA Phone Overseas
Appendix............................................................ 233
• Menu list • Pre-installed data • Symbol/Special Character List
• Pictograph and Emoticon List • Common Phrase List
• Kuten Code List • List of city in World time
• Multiaccess Combination Patterns
• Multitask Combination Patterns
• Service Available with FOMA Phones • Introduction of Data Link
• Troubleshooting • Error Messages
• Introduction of Options and Related Equipment
• Warranty and Maintenance Services
• Specific Absorption Rate of the Mobile Phone
• Export/Re-export regulations of Japan and USA
Index/Quick Manual .......................................... 321
• Index • Quick Manual
6
Contents/Precautions
Contents/Precautions
Features of FOMA L602i
FOMA is the name of the DoCoMo's service based on the W-CDMA format, authorized as one of the world’s
standards for third-generation mobile telecommunication systems (IMT-2000).
Main Futures
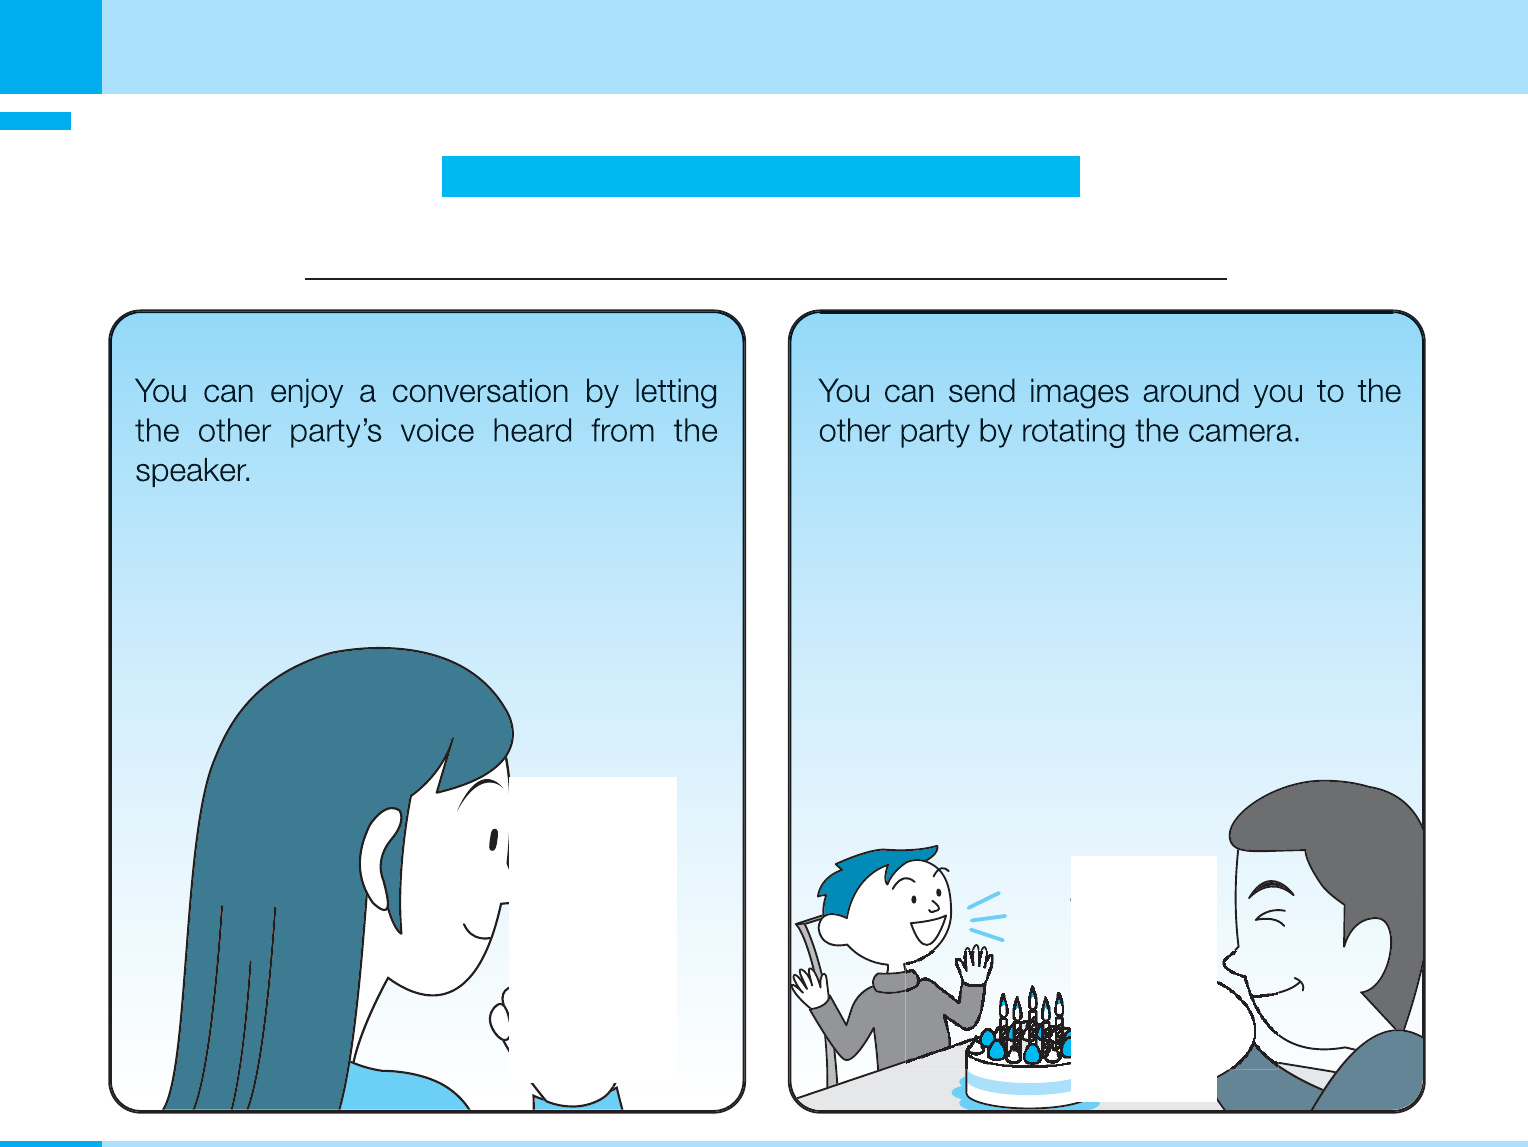
Video-phone >P58
You can have a conversation with the other party seeing
each other's face. You can also let the other party’s
voice heard from the speaker or the other party see the
landscape around you by rotating the camera.
i-mode Function
i-appli >P160
You can download and use a variety of i-appli software
programs from sites.
For example, you can download and enjoy a variety of
games.
Whole Range of Network Services
Voice Mail (Charged) >P198
Call Forwarding Service (Free) >P201
Call Waiting Service (Charged) >P200
SMS (Short Messages) (Free) >P152
Nuisance Call Barring Service (Free) >P202
Caller ID Display Request (Free) >P202
i-mode Function
Viewing sites >P130
This is on-line service to view the information via connecting
the site or homepage by simply operating the button.
i-mode mail
>
P149
You can compose and send i-mode mails. Also, you can
attach images, moving images and melodies to be sent.
i-motion >P135
You can obtain images and music from sites or Internet
web pages.
Chaku-motion/Chaku-Uta®>P76
You can download i-motion from i-mode site and set it as a
ring alert and/or reception image.
• “Chaku-Uta” is a registered trademark of Sony Music
Entertainment Inc.
i-motion Mail >P149, P150
You can attach moving images shot by the camera or i-
motion movies obtained from sites or Internet web pages to
i-mode mail to be sent.
7
Contents/Precautions
Contents/Precautions
International Roaming >P224
You can make/receive voice/video-phone calls, perform
i-mode communication, exchange i-mode mail and SMS
messages and perform data transmission with a
personal computer connected to your FOMA phone
overseas with the same phone number. Moreover,
subscribers of the Voice Mail or Call Forwarding Service
can use the network services.
Useful Functions for Overseas Use
Unit converter >P185
You can convert a value of currency, surface, length,
weight, temperature, capacity or velocity from one unit
to another. You can use Unit converter in confirming a
price converted into yen when you shop overseas.
World time
>
P187
You can check the date and time of 58 cities in the
world. Also, a world map is displayed so that you can
confirm the locations of cities and the national flags. You
can use Global Clock in confirming the date and time
and the location of your next destination on a trip.
Dual clock display
>
P81
You can display the time of two cities on the Stand-by
display at the same time. For example, you can view the
time difference by setting the city of a stay place.
Using the Infrared Communication
>
P182
You can exchange the data with FOMA handset via
Infrared.
To display a character in phonebook
>
P64
In a phonebook, you can set the image and the character
for each entry. You can make your own character by
changing “Face”, “Hair”, “Tops”, “Bottoms”, “Accessory”
and “Scenery”.
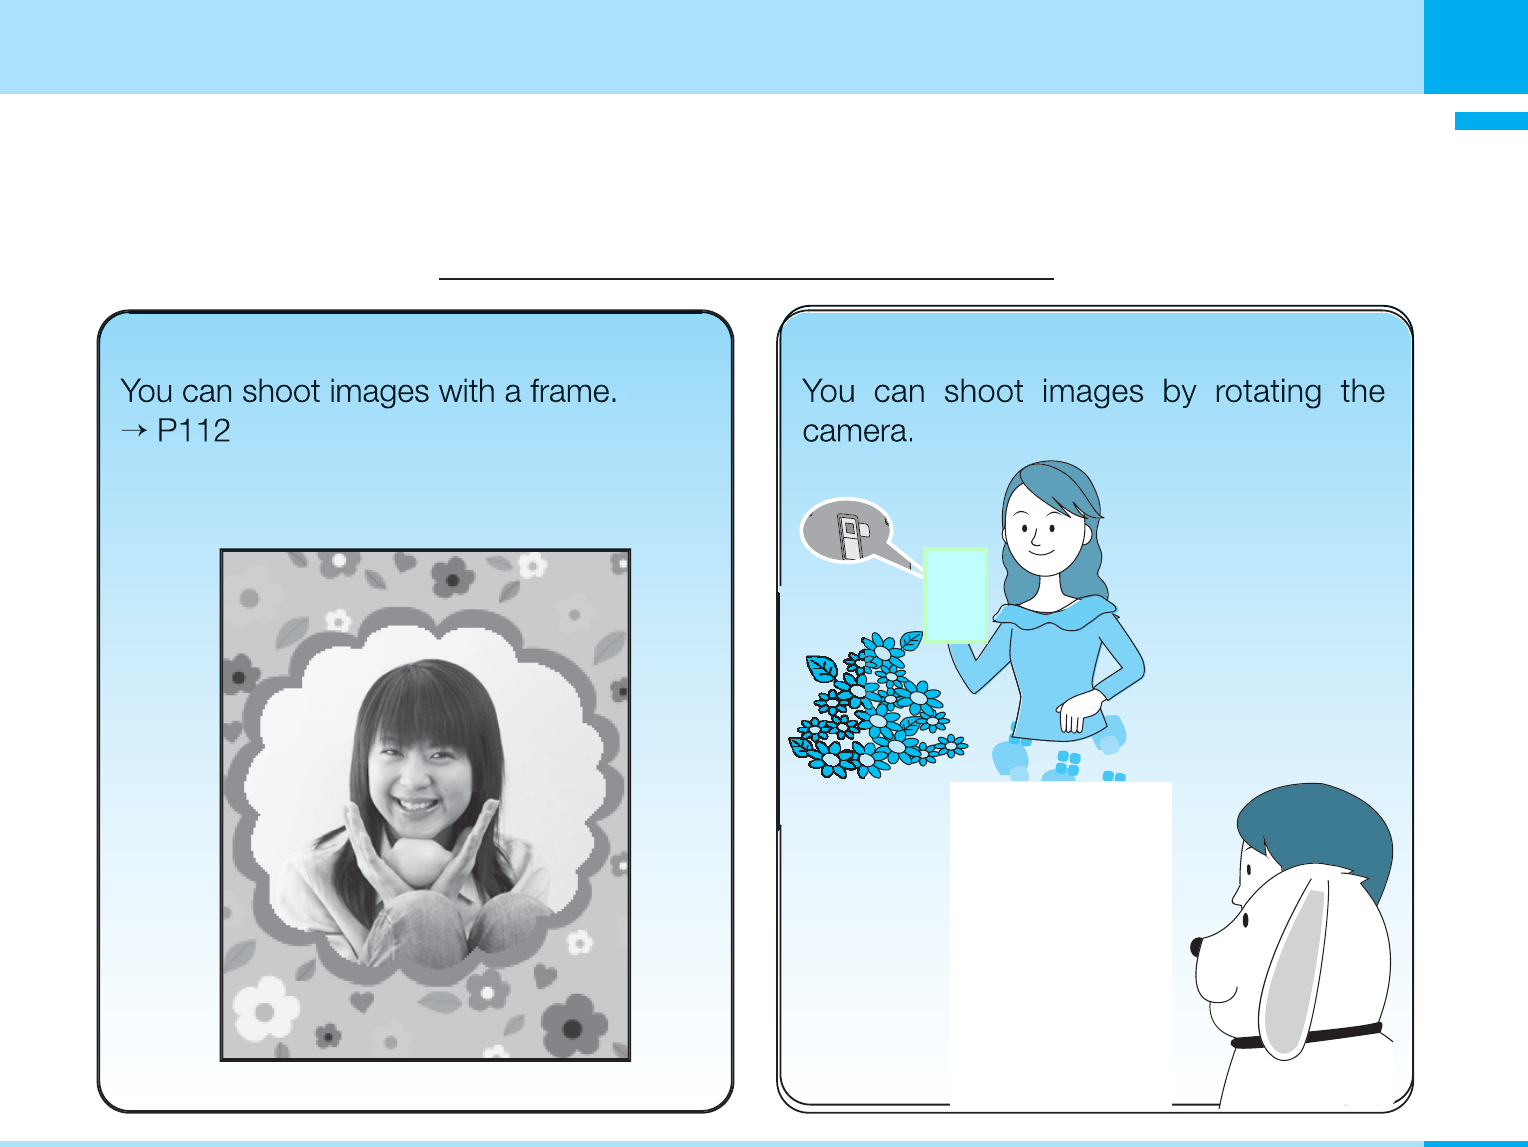
Camera Functions >P109, P115
You can shoot still images and moving images using the
rotatable camera (1,300,000 effective pixels and 1,300,000
recording pixels). You can shoot not only a person or
landscape but also yourself by rotating the camera.
You can use various functions such as adjusting images,
zooming images, special effects when you shoot images.
8
Contents/Precautions
Contents/Precautions
Making Full Use of FOMA L602i!
"Video-phone", communication seein
g
each other's face.
>
P
58
9
Contents/Precautions
Contents/Precautions
Sim
p
le and Eas
y
Camera Function
>
P1
08
10
Contents/Precautions
Contents/Precautions
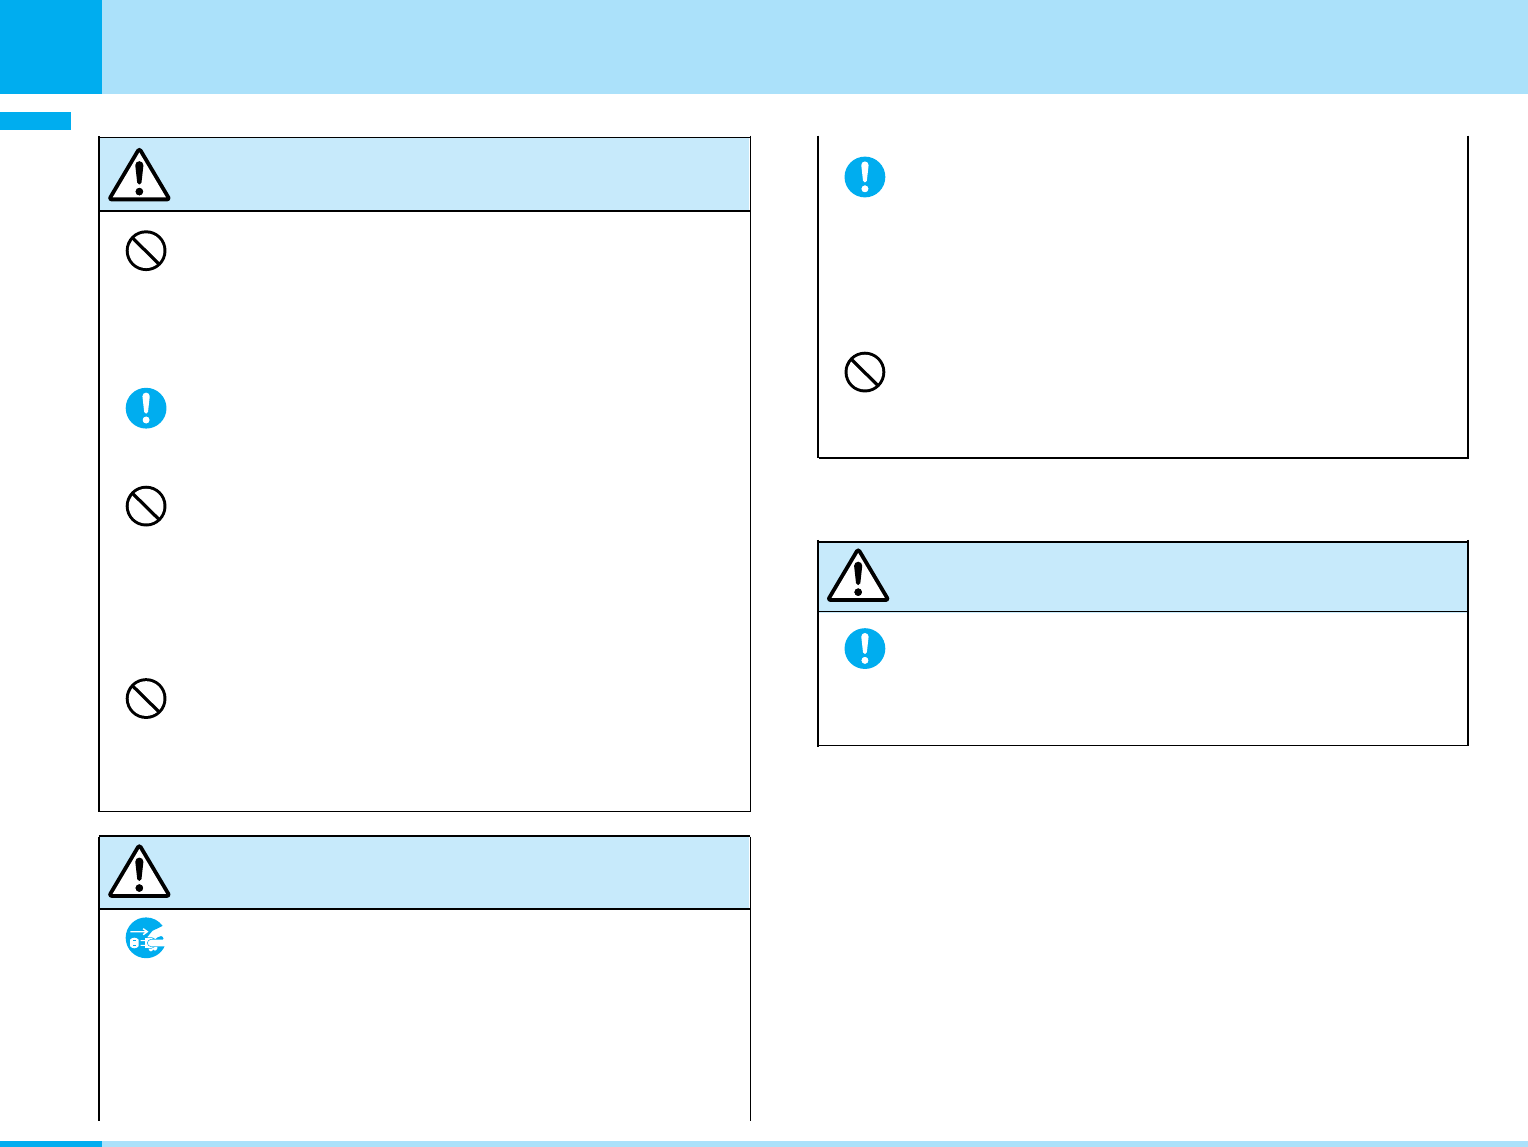
Safety Precautions
(Always follow the safety precautions.)
aBefore using the FOMA phone, read these
safety precautions carefully so that you can use
it correctly. After reading the precautions, keep
them in a safe place for future reference.
aBe sure to observe these safety precautions
because they are designed to protect you or
persons around you from causing injury and to
avoid damages to the property.
aThe symbols below indicate the levels of danger
or damage that can be caused if the particular
precautions are not observed.
aThe following symbols show specific directions:
a“Safety Precautions” are divided into the
following 6 sections:
General precautions for FOMA phone, batteries,
adapters/chargers and UIM ................................ P11
Precautions for FOMA phone ............................. P13
Precautions for batteries ..................................... P15
Precautions for adapters/chargers ...................... P17
Precautions for UIM ............................................ P18
Notes on using near electronic
medical equipment.............................................. P19
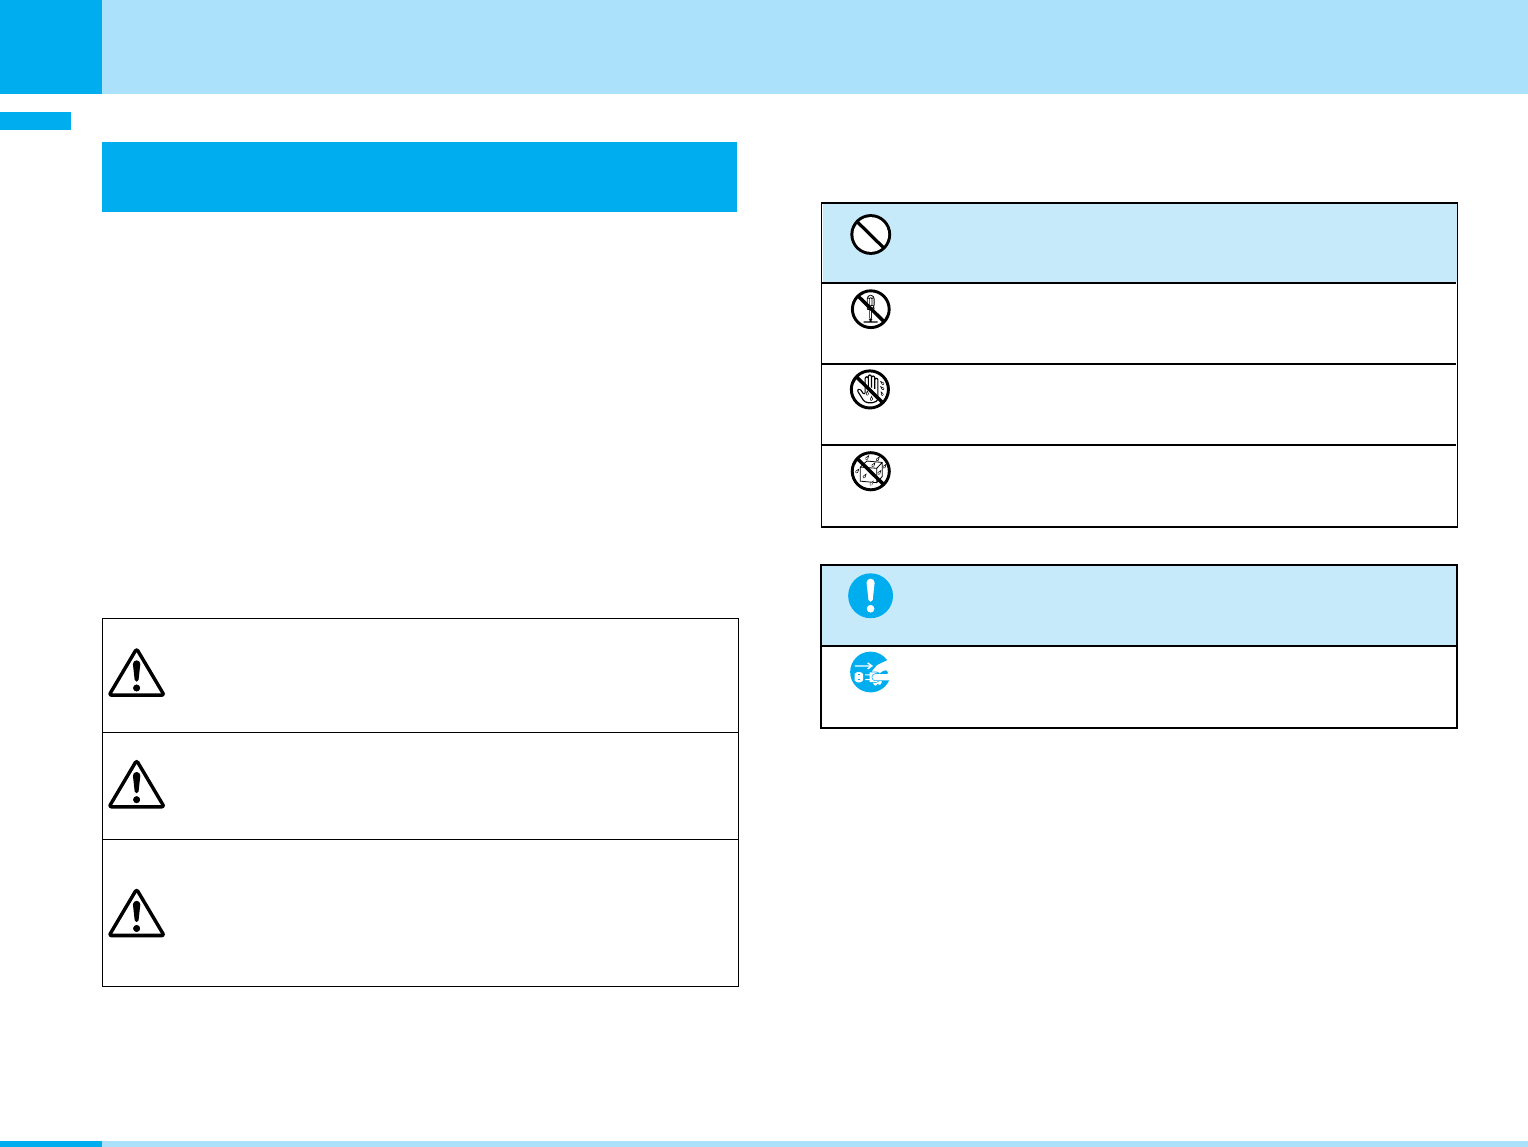
This symbol indicates that incorrect
handling will almost certainly cause
death or serious injury.
This symbol indicates that incorrect
handling poses a risk of causing
death or serious injury.
This symbol indicates that incorrect
handling poses a risk of causing
injury or damage to the product or
property.
Danger
Warning
Caution
Denotes things not to do (Prohibition).
Don’t
Denotes not to disassemble.
Denotes not to touch with wet hands.
Denotes not to use where it could get wet.
Do not
disassemble
No wet
hands
Avoid
water
Denotes mandatory instructions (matters that
must be complied with).
Denotes to pull the power from the outlet.
Pull the power
plug out
Do
11
Contents/Precautions
Contents/Precautions
Next Page
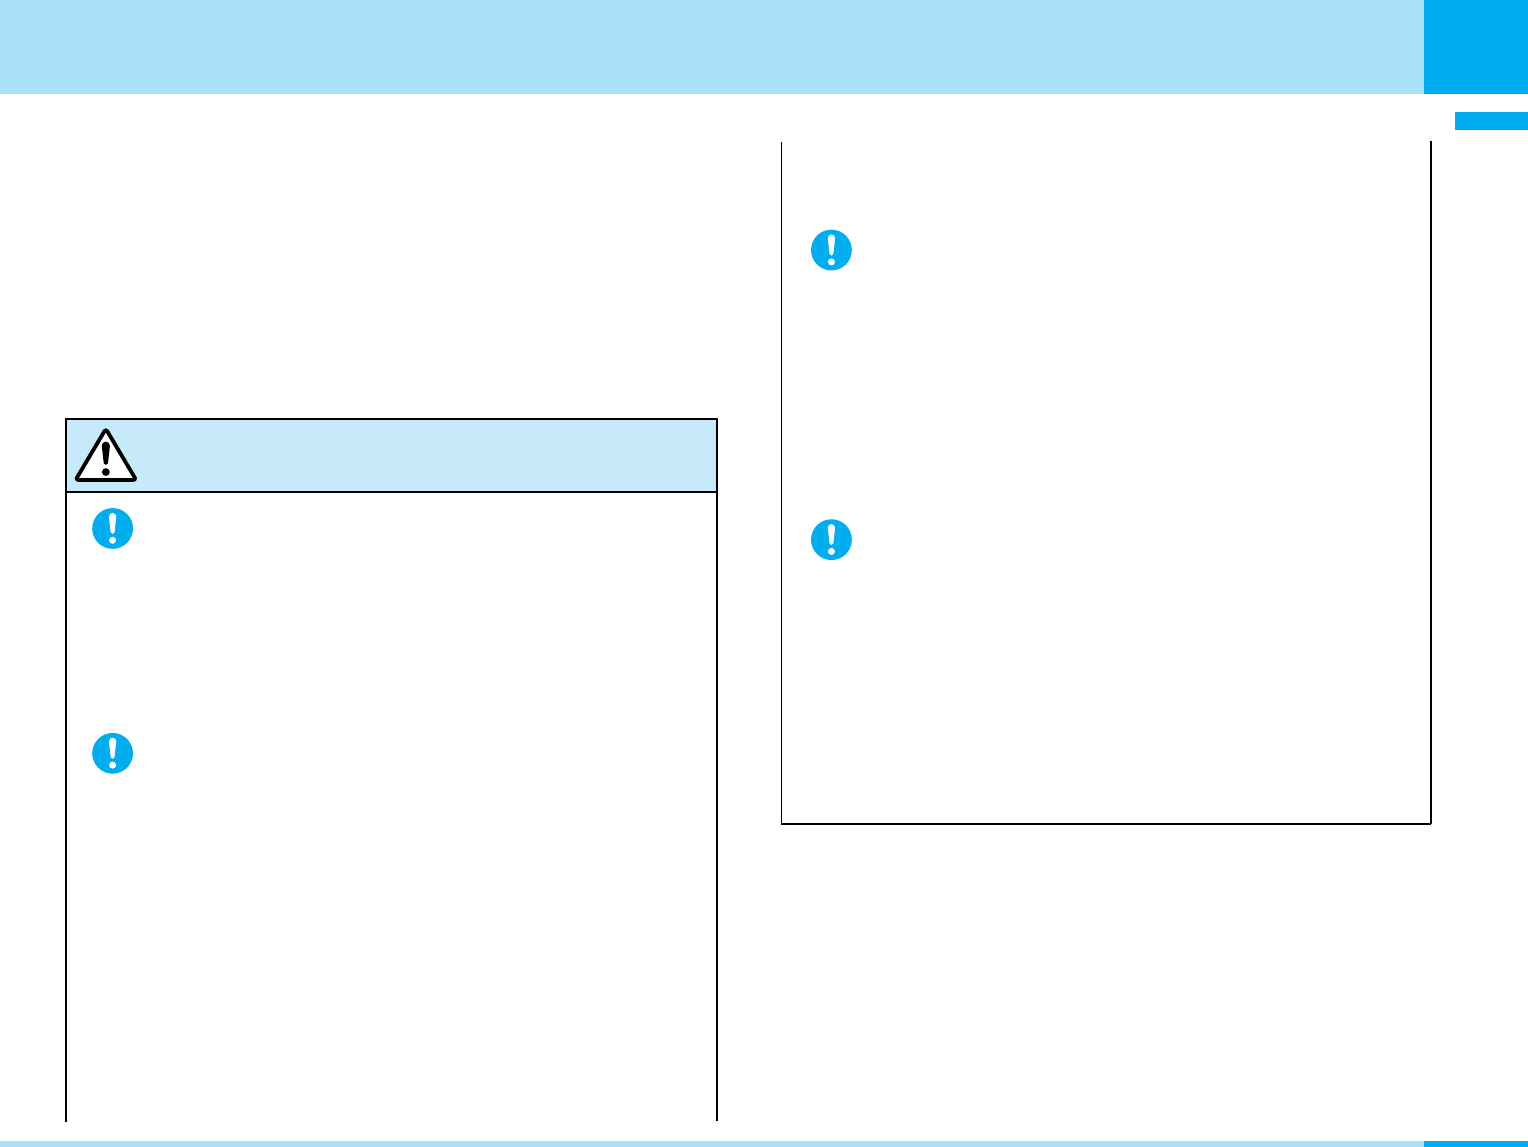
General precautions for FOMA
phone, batteries, adapters/chargers,
and UIM
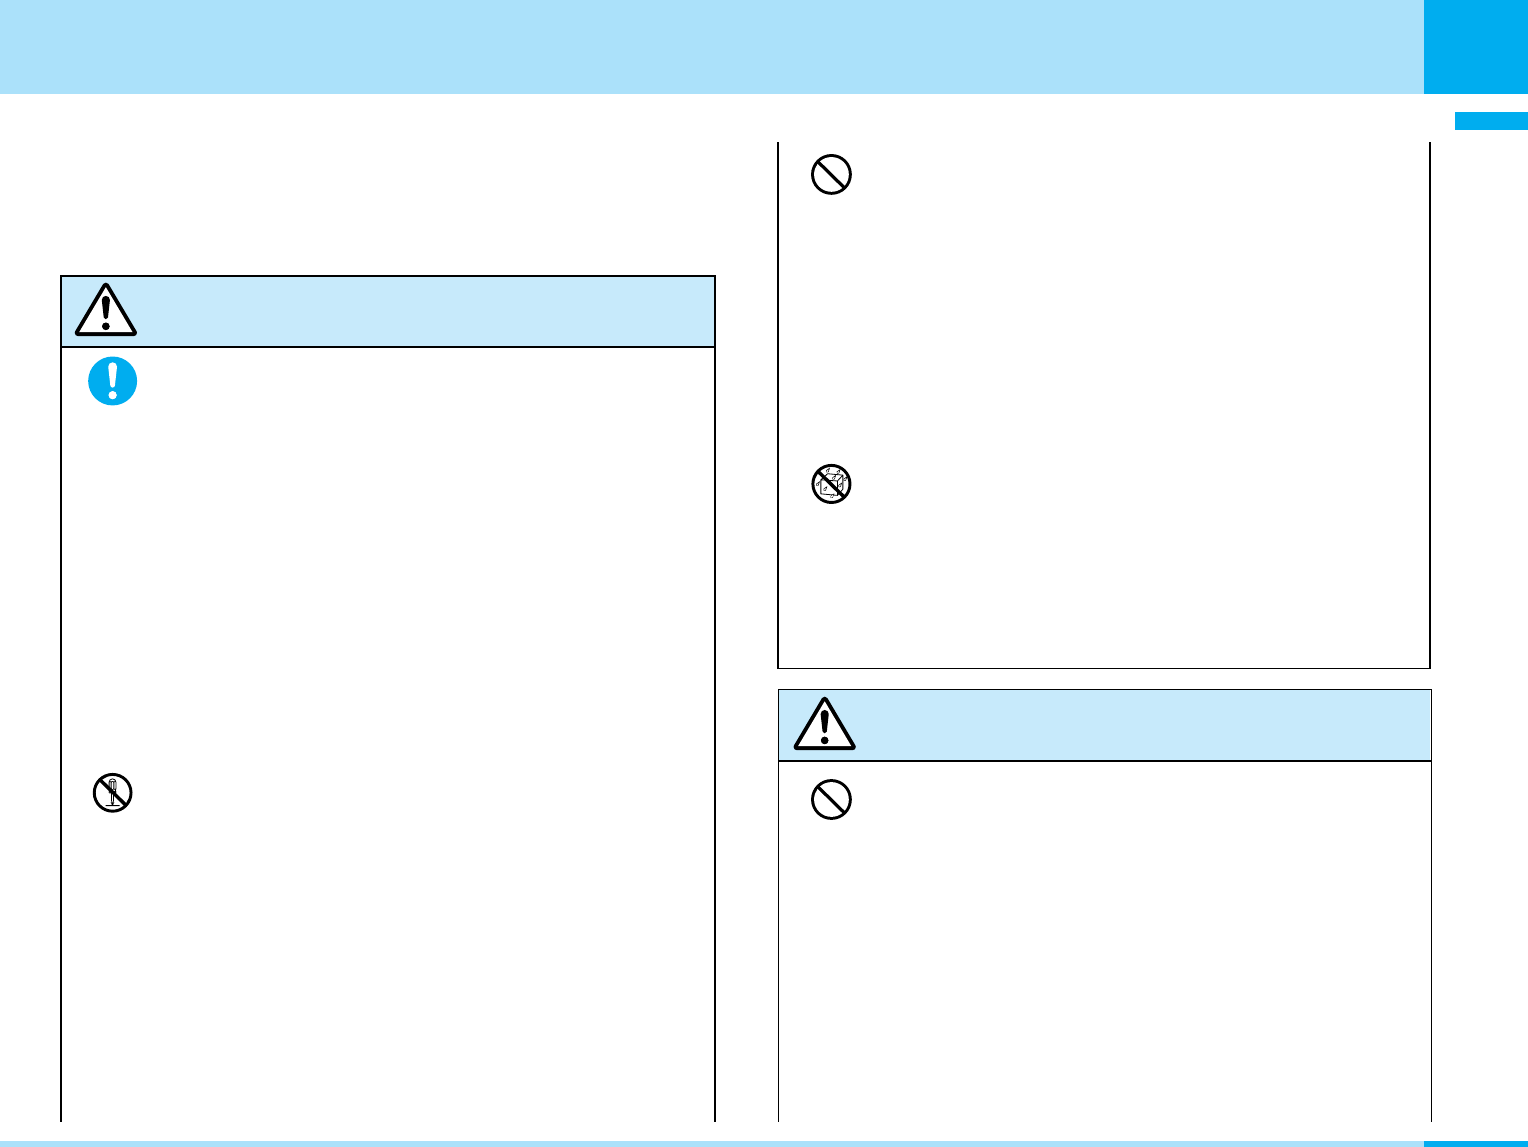
Danger
Use only the batteries and adapters /
chargers approved by DoCoMo for the
FOMA phone.
If you use any type of battery, adapter or charger
other than the specified one, the FOMA phone,
battery or other devices may leak, overheat, burst,
catch fire, or get damaged.
Battery Pack L02 FOMA AC Adapter 01
FOMA AC Adapter 01 for both overseas and
domestic usage FOMA DC Adapter 01
• For other specified products, contact a handling
counter such as a DoCoMo shop.
Do not disassemble, modify or solder the
FOMA phone or accessories.
Accidents such as fire, injury, electric shock, or
malfunction may result. The battery fluid may leak,
overheat, bust or catch fire.
Do not use or leave the FOMA phone or
accessories in places where it is exposed
to direct sunlight, or in extremely high
temperatures such as inside a car in the
summer heat.
Otherwise, the devices may deform or malfunction,
battery fluid may leak, overheat, burst, or catch fire, or
performance and longevity may deteriorate. Also, part
of the case may be heated, causing bare skin burns.
Do not let the FOMA phone or accessories
get wet.
If liquids such as water or pet urine get onto them,
overheating, electric shock, fire, malfunction, injuries
or others may result. Pay attention to the place of use
of the way of handling.
Warning
Do not use the FOMA phone near places
such as gas stations where there is danger
of fire or explosion.
If used in dusty places or where there are flammable
gases such as propane or gasoline, explosions or fire
may result.
Don’t
Avoid
water
Don’t
Do not
disassemble
Do
12
Contents/Precautions
Contents/Precautions
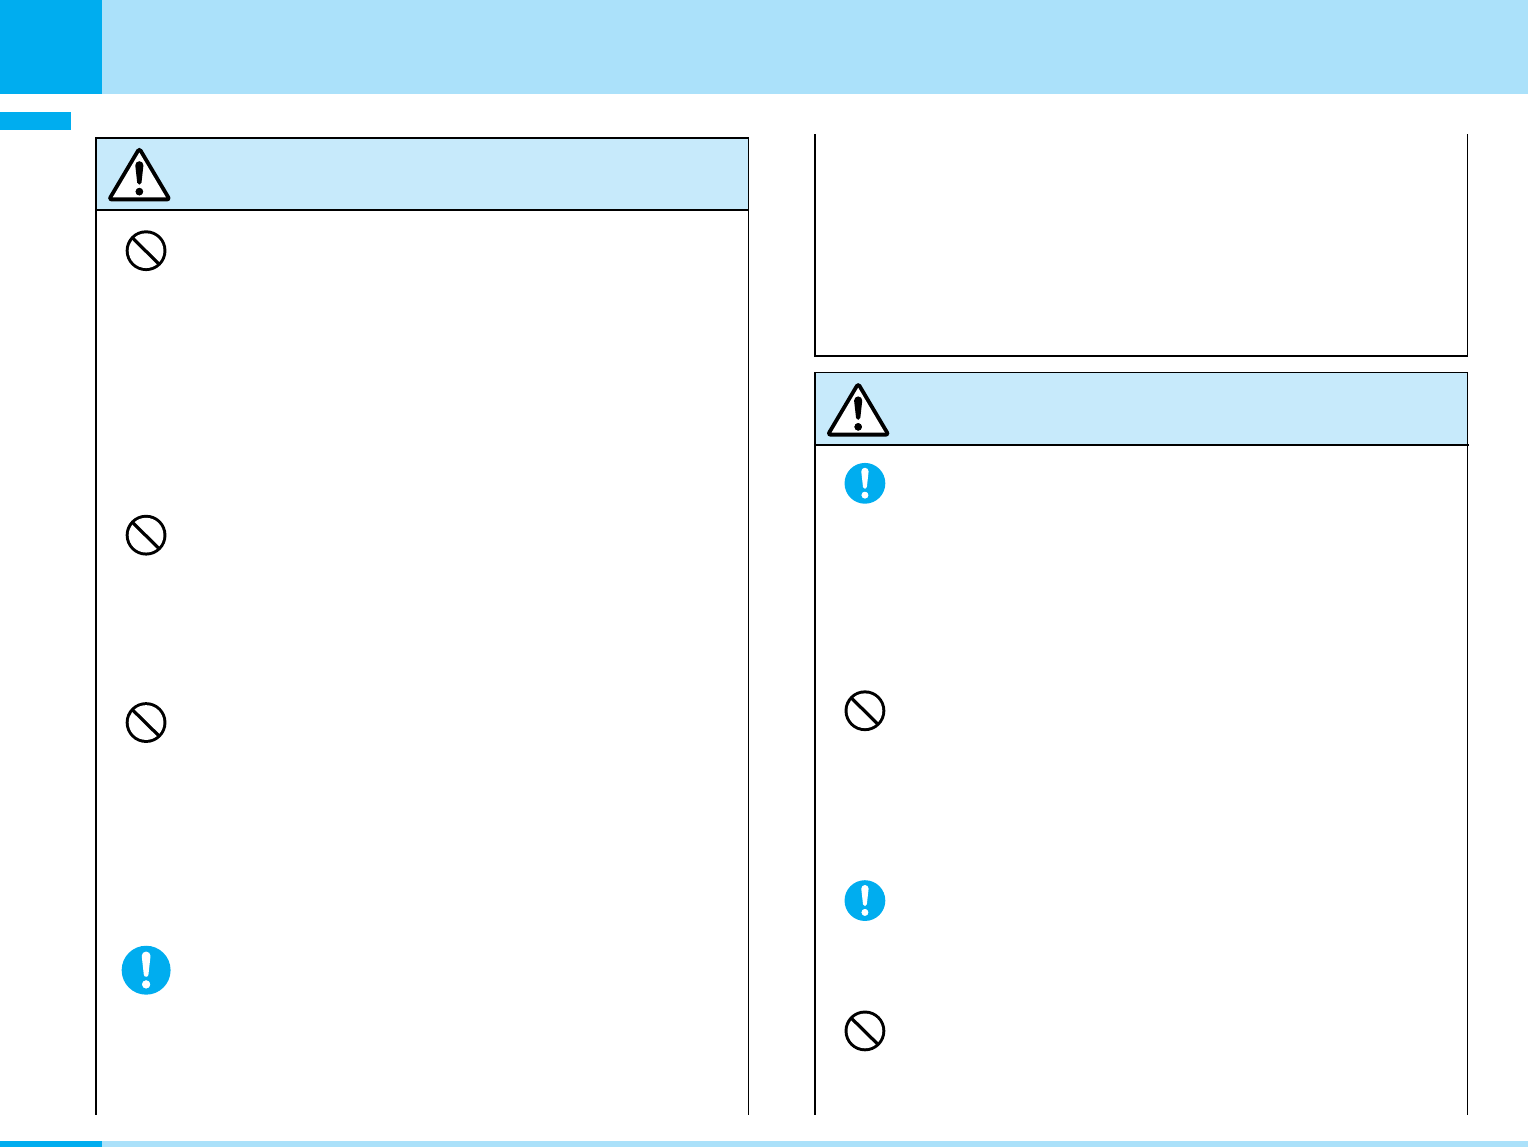
Warning
Do not place the batteries, the FOMA
phone, adapters/chargers, or UIM in
microwave ovens or high-pressure
containers.
The battery may leak, overheat, burst, or catch fire.
The FOMA phone or the adapter/charger may
overheat, smoke, or catch fire, or its circuit parts may
burst.
Do not throw the FOMA phone or
accessories, or subject them to severe
shocks.
The battery may leak, overheat, burst, catch fire, or
cause damage to the equipment.
Be careful not to let electroconductive
materials (metal pieces, pencil leads, etc.)
contact with the charging terminal or
connector terminals. Also, make sure not
to let them inside the FOMA phone.
Short-circuit could cause catching fire or malfunction
of the FOMA phone.
If the FOMA phone or accessories begins
to emit an odor, overheat, discolor, deform,
etc., while being used, charged, or stored,
take the countermeasures as follows;
1. Pull the power plug off the outlet or socket.
2. Turn off the FOMA phone.
3. Remove the battery pack from the FOMA phone.
If you use the devices with these symptoms not
handled, they may overheat, burst, or catch fire, or
the battery fluid may leak.
Caution
If children use the FOMA phone or
accessories, a guardian should explain the
safety precautions and correct operations to
them. The guardian should also make sure
that the instructions are followed during use.
Otherwise, injury may result.
Do not place the FOMA phone or
accessories on unstable locations such as
wobbly tables or slanted locations.
The FOMA phone or accessories may fall, resulting in
injury or malfunction.
Keep out of the reach of babies and
infants.
Accidental swallowing or injury may result.
Do not store in humid or dusty places, or in
high temperature environments.
Malfunction may result.
Don’t
Do
Don’t
Do
Do
Don’t
Don’t
Don’t
13
Contents/Precautions
Contents/Precautions
Next Page
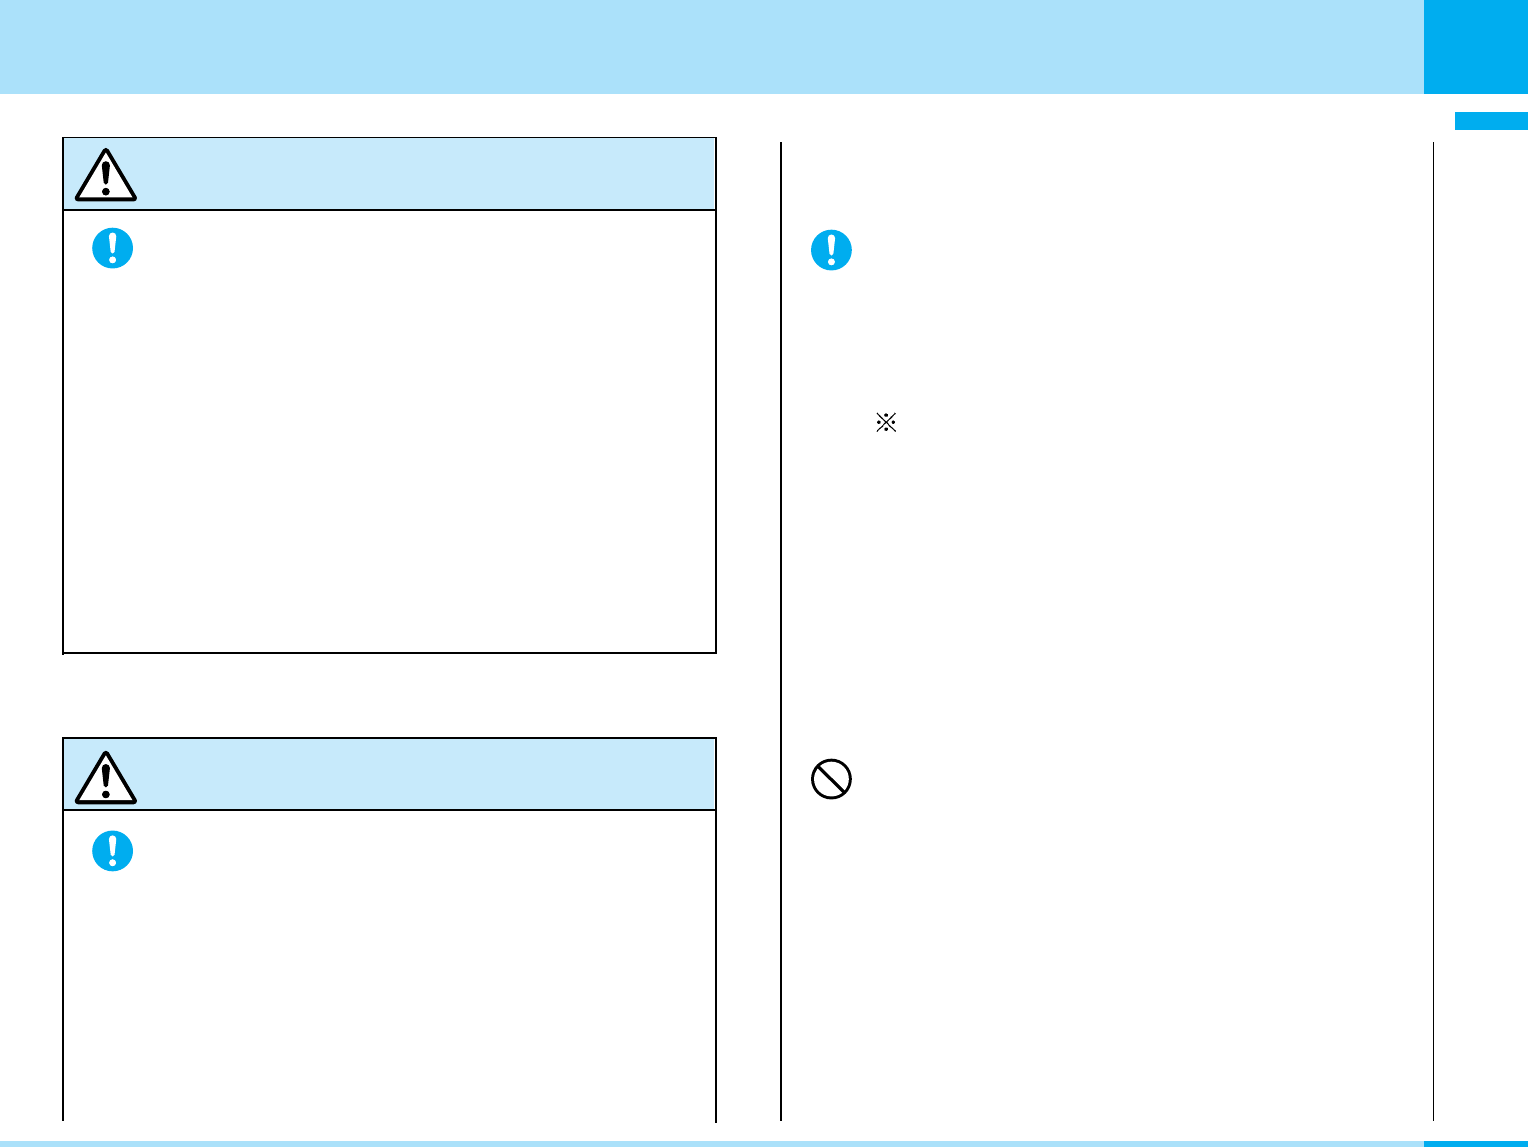
Caution
Temperature of the FOMA phone, battery
pack or adapter/charger may rise while
charging the battery, shooting moving
images, playing back or using the video
phone, i-mode or i-appli repeatedly or
continuously for a long time.
Prolonged direct contact with a high temperature
part may cause redness, itching, rash, etc. on skin
depending on your physical conditions or
predisposition.
Be careful especially when using the FOMA phone
connected to the adapter / charger continuously for a
long time.
Precautions for FOMA phone
Warning
Turn off the FOMA phone in places where
use is prohibited as in airplanes or
hospitals.
Otherwise, electronic devices and electronic medical
appliances may be adversely affected. If the Auto
Power ON function is set, deactivate the setting, then
turn the power off.
For use inside medical facilities, make sure that you
comply with their regulations.
You may be punished for using the FOMA
phone in airplanes, which is prohibited by law.
Turn off the FOMA phone near high-
precision electronic devices or devices
using weak electronic signals.
The FOMA phone may possibly cause these devices
to malfunction.
Electronic devices that may be affected:
Hearing aids, implanted cardiac pacemakers,
implanted defibrillators, other medical electronic
devices, fire alarms, automatic doors and other
automatically controlled devices.
If you are using an implanted cardiac pacemaker,
implanted defibrillator or any other electronic
medical device, consult the manufacturer or
retailer of the device for advice regarding possible
effects from the radio waves.
If you have any implanted electronic
medical equipment, do not place your
FOMA phone in a chest pocket or inner
pocket.
If the FOMA phone is close to electronic medical
equipment, it may cause that equipment to
malfunction.
Don’t
Do
Do
Do
14
Contents/Precautions
Contents/Precautions
Warning
For those with weak heart conditions, the
vibrator and ring volume must be adjusted
carefully.
Those functions may cause an effect on the heart.
Do not operate the FOMA phone while
driving a vehicle.
Operating a mobile phone while driving has been
prohibited since November 1, 2004. During driving,
activate Public mode or Voice Mail.
Do not directly point the infrared data port
at someone’s eyes during transmission.
His/Her eyes may possibly be affected. Other
infrared devices may operate erroneously if the
infrared data port is pointed at them during
transmission.
When talking on the speaker phone, be
sure to keep the FOMA phone away from
your ear.
Otherwise, your hearing could be impaired.
Do not put the FOMA phone in the place
where it could be affected by an expanded
airbag, etc., on the dashboard.
If the airbag expands, the FOMA phone could hit you
and others, causing accidents such as injury and the
FOMA phone could become damaged.
If thunder starts to rumble while you are
using the FOMA phone outdoors, turn the
power off, and move to a safe place.
Otherwise, you could be struck by lightning or suffer
an electric shock.
Caution
Do not swing the FOMA phone by its strap.
The FOMA phone may hit you or persons around you,
and accident such as injury or malfunction may result.
Itching, rash or eczema may be caused
depending on your physical conditions or
predisposition. If an abnormality occurs,
stop using the FOMA phone immediately,
and seek medical attention.
Metals are used for the following parts:
Do
Don’t
Do
Don’t
Do
Don’t
Don’t
Do
15
Contents/Precautions
Contents/Precautions
Next Page
Caution
Do not allow liquids such as water, or
foreign materials such as metal pieces or
flammable materials to get into the UIM
insertion slit of the FOMA phone.
Fire, electric shock or malfunction may result.
Electronic devices in some types of cars
can be affected by use of the FOMA phone.
For safety’s sake, do not use the FOMA phone inside
such cars.
Do not place magnetic cards or similar
objects near the FOMA phone or between
phone parts.
Information on magnetic cards such as cash cards,
credit cards, telephone cards and floppy disks may
be deleted.
Be careful not to let your finger or the strap
get caught when you open and close the
FOMA phone.
Accidents such as injury or malfunction may result.
Precautions for batteries
aCheck the description on the label of the
battery pack for the type of battery.
Danger
If the battery fluid gets into your eyes, do not
rub them. Flush your eyes with clean water
and get medical attention immediately.
Otherwise, the loss of eyesight may result.
Do not throw the battery into fire.
The battery may leak, overheat, burst or catch fire.
Do not let any metal such as a wire contact
the terminal. Also, do not carry or store the
battery together with a metal necklace.
The battery may leak, overheat, burst or catch fire.
Don’t
Don’t
Do
Do
Don’t
Do
Don’t
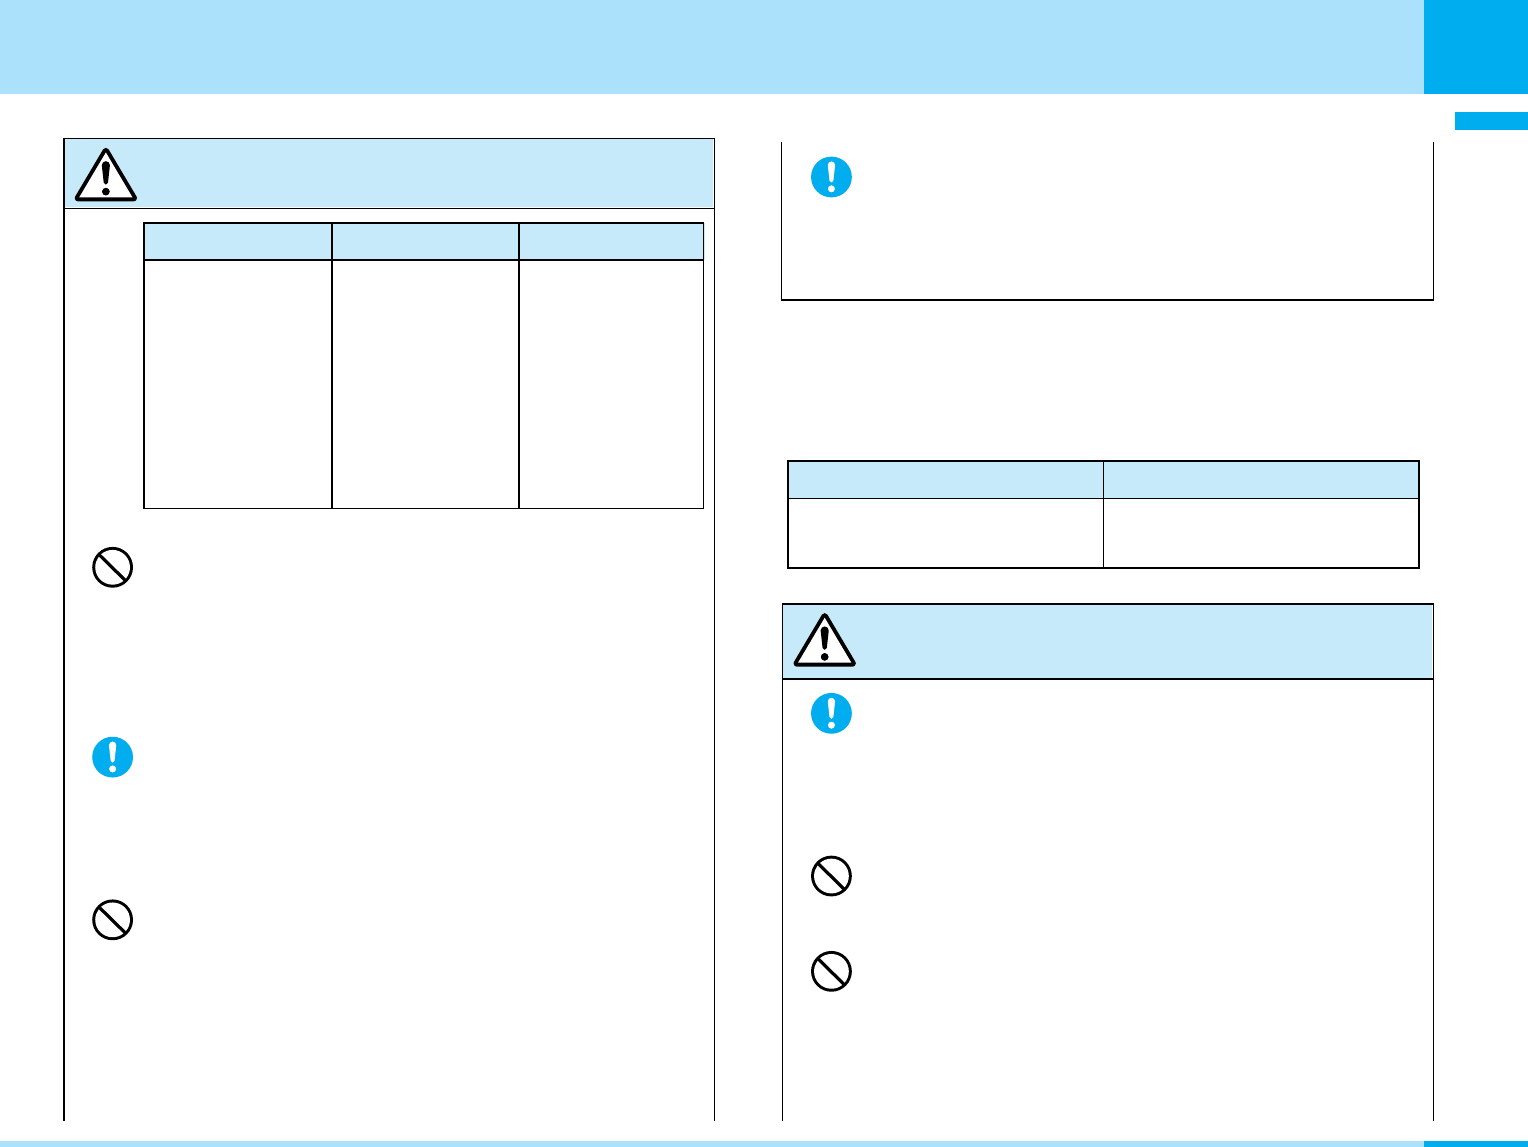
Description Type
Li-ion Lithium-ion battery
(Li-polymer) (Lithium-polymer battery)
Portion Material Finishing
Earpiece/Speaker
Sub display frame
Surrounding part
of Navigation
button, Menu/
Select button
Aluminium
Stainless
ABS
Oxidation
treatment
Chromium plating
Chromium plating
finishing over
nickel plating
16
Contents/Precautions
Contents/Precautions
Danger
Do not pierce the battery pack with nails,
hit it with a hammer, or step on it.
The battery may leak, overheat, burst or catch fire.
Do not use excessive force to attach the
battery to the FOMA phone when you
cannot attach it successfully. Also, check
that the battery is the right way round
when you attach it.
The battery may leak, overheat, burst or catch fire.
Warning
If the battery fluid comes in contact with
skin or clothes, immediately stop using the
battery and wash affected areas
thoroughly with clean water.
The battery fluid is harmful to skin.
If charging is not completed at the end of
the specified charging time, stop charging.
Otherwise, the battery may leak, overheat, burst or
catch fire.
If the battery fluid leaks or emits an odor,
immediately stop using the battery and
keep it away from fire.
The battery fluid, being flammable, may catch fire and
cause an explosion.
Caution
An exhausted battery should not be
disposed of with ordinary waste.
The battery may catch fire or destroy the environment.
After insulating the battery terminals with tape, bring
them to a handling counter such as a DoCoMo shop
or dispose of them in accordance with local waste
disposal regulations.
Don’t
Do
Do
Do
Don’t
Don’t
17
Contents/Precautions
Contents/Precautions
Next Page
Precautions for adapters/chargers
Warning
Never short-circuit the charging terminals
when the adapter is plugged into the
power outlet or cigarette lighter socket.
Also, never touch the charging terminals
with fingers or other bare skin.
Fire, malfunction, electric shock or injury may result.
Do not touch the power cord of the
adapter/charger, or power outlet with wet
hands.
Electric shock or injury may result.
Do not use the AC adapter in moist places
such as a bathroom.
Electric shock may occur.
When the adapter/charger is not to be
used for a long period of time, unplug the
power cord from the outlet.
Otherwise, electric shock, fire, or malfunction may
result.
Do not use a damaged adapter/charger
cord or power cord.
Electric shock, overheating or fire may result.
If liquids such as water get in the charger,
unplug the power cord immediately from
the outlet or cigarette lighter socket.
Liquid inside the charger may cause electric shock,
smoke, or fire.
When plugging the AC adapter into the
power outlet, firmly plug it in, taking care
not to contact with metal straps or the like.
Electric shock, short-circuit or fire may result.
Use the adapter/charger at the specified
VAC.
Fire or malfunction may result. When using the
FOMA phones overseas, use FOMA AC Adapter 01
for both overseas and domestic usage.
AC adapter: 100 VAC
FOMA AC Adapter for both overseas and domestic
usage: 100 to 240 VAC
(Connect only to home AC outlet)
DC adapter: 12/24 VDC
(For negative (-) grounded vehicles only)
If a fuse of the DC adapter has blown,
replace it with a specified fuse.
Otherwise, catching fire or malfunction may result.
For the specified fuse, see the user’s manual.
Do
Do
Do
Pull the power
plug out
Don’t
Pull the power
plug out
Don’t
No wet
hands
Don’t
18
Contents/Precautions
Contents/Precautions
Warning
The DC adapter is for use only in a negative
(-) grounded vehicle. Do not use them in a
positive (+) grounded vehicle.
Fire may result.
Wipe the dust off the power plugs.
Fire may result.
Place the charger on a stable location
during charging. Do not cover or wrap the
charger in cloth or bedding.
The FOMA phone may become separated, or the
charger may overheat, leading to fire or malfunction.
If it starts to thunder, do not touch the
FOMA phone and adapter/charger.
You may be struck by lighting or suffer an electric
shock.
Caution
Before cleaning, pull the plug from the
power outlet or cigarette lighter socket.
Electric shock may result.
Always hold the plug when pulling the
adapter/charger out of the power outlet or
cigarette lighter socket.
If you pull the plug out by the cord, the cord may be
damaged, which could result in electric shock or fire.
Do not place heavy objects on the
adapter/charger cord and power cord.
Electric shock or fire may result.
Precautions for UIM
Caution
Be careful when removing the UIM (IC
portion).
Your hand or finger may be injured.
Do
Don’t
Do
Pull the power
plug out
Don’t
Don’t
Do
Don’t
19
Contents/Precautions
Contents/Precautions
Notes on using near electronic medical
equipment
aThe description below meets “Guidelines on the
Use of Radio-communication Equipment such as
Cellular Telephones – Safeguards for Electronic
Medical Equipment” by the Electromagnetic
Compatibility Conference Japan.
Warning
Turn off the phone in crowded areas such as
inside trains during rush hour, as someone
with an implanted cardiac pacemaker or
implanted defibrillator may be near you.
Operation of an implanted cardiac pacemaker or
implanted defibrillator can be affected by radio waves.
Comply with the following in hospitals or
health care facilities:
• Do not carry the FOMA phone into operating
rooms, intensive care units (ICU) or coronary care
units (CCU).
• Turn off the FOMA phone in hospital wards.
• If there is any electronic medical equipment near
you, turn off the FOMA phone even when in a
location such as a lobby.
• Comply with any regulations of hospital and health
care facilities instructing you not to use or carry in a
mobile phone.
• If the Auto Power On function is set, deactivate the
setting, then turn the power off.
If you use an implanted cardiac pacemaker
or implanted defibrillator, use the mobile
phone 22cm or more away from an
implanted cardiac pacemaker or implanted
defibrillator.
Operation of an implanted cardiac pacemaker or
implanted defibrillator may be affected by radio
waves.
Patients using electronic medical equipment
other than implanted cardiac pacemakers
or implanted defibrillators (outside medical
establishments for treatment at home, etc.)
should check the influence of radio waves
upon the equipment by consulting its
manufacturer.
Operation of electronic medical equipment may be
affected by radio waves.
Do
Do
Do
Do

20
Contents/Precautions
Contents/Precautions
Notes on Handling
General Notes
aDo not let the equipment get wet.
The FOMA phone, battery and adapter/charger or UIM
(FOMA card) are not waterproofed. Do not use them in which
are high in humidity such as in bathrooms, and do not allow
them to get wet from rain. Furthermore, if carrying them with
your body, the internal parts may become corroded if
exposed to body perspiration.
If the parts are found to have been damaged due to
exposure to the liquids, any repairs will not be covered by
warranty, or repairs may not be possible.
This may be repaired at your cost even if repairs are
possible.
aUse a dry soft cloth (lens cleaning cloth) to
clean the equipment.
• The screen of the FOMA phone sometimes has a
special coating so that it is easier to see. If you rub it
roughly with a dry cloth, it may be scratched. Take care
of the way of handling, and use only a dry, soft cloth
such as used for cleaning glasses.
When the FOMA phone is left with water drops or stains
on the display, smear may be generated or its coating
may be peeled off.
• Do not use alcohol, thinner, benzene, detergent or other
solvents for cleaning, otherwise the printing may be
removed or discoloration may result.
aOccasionally clean the connector terminals of
the equipment using a dry cotton swab.
If the connector terminal becomes soiled, the connection
may deteriorate so that the power goes off or the battery
does not charge fully. Wipe the connector terminal with a
dry cloth or cotton swab.
aDo not place the FOMA phone near an air
conditioner outlet.
Condensation may form due to rapid changes in
temperature, and this may corrode internal parts and
cause malfunction.
aDo not place the FOMA phone in places where
it may be subjected to excessive force.
Do not place the FOMA phone in a bag along with many
other articles or in a trouser pocket, because this can
damage the LCD display and internal circuitry.
Malfunctions caused by such damage are not covered by
the warranty.
aDo carefully read each instruction manual
attached to the battery pack or
adapter/charger.
Notes on handling the FOMA phone
aAvoid using in extremely high or low
temperatures.
The FOMA phone should be used within a temperature
range from 5 °C to 35°C and a humidity from 45% to
85%.

21
Contents/Precautions
Contents/Precautions
Next Page
aThe FOMA phone, if operated near ordinary
phones, televisions or radios that are in use,
may affect them. You should operate your
FOMA phone as far away from such equipment
as possible.
aIt is recommended that you make separate
notes of the information stored in the FOMA
phone and keep such notes in a safe place.
DoCoMo assumes no responsibility for any loss of the
stored data items.
aDo not sit with the FOMA phone in your
trousers or skirts pocket. Do not place the
FOMA phone under heavy objects in a bag.
Malfunction may result.
aMake sure that nothing, such as a strap, gets
caught between the parts of the FOMA phone
when you close it.
Malfunction or breakage may result.
aThe FOMA phone becomes warm while using
or charging, but this is not an abnormality. Use
the FOMA phone as it is.
aDo not leave the FOMA phone with a camera
pointing direct to the sunlight.
Pixels may be discolored or burns may result.
Notes on handling batteries
aBatteries have a limited life.
If the usable time of your FOMA phone is extremely short
even if the battery is fully charged, replace the battery.
Make sure that you only buy the specified battery.
aCharge the battery in a place with an ambient
temperature from 5°C to 35°C.
aMake sure that the battery is charged when
you use the FOMA phone for the first time.
aWhen the FOMA phone has been left unused
for a long period of time, charge the battery
pack before using, or the battery may be easily
exhausted.
aThe usable time of the battery varies depending
on the usage environment or its remaining life.
aThough the battery pack may swell a little as it
comes closer to the end of its service life under
some conditions, it is not a problem.
aStore the batteries in a well ventilated place out
of direct sunlight.
When the battery is not to be used for a long period of
time, unplug the power cord from the FOMA phone or
adapter (including charger) with the battery power
completely drained, and store it in the plastic bag
wrapping the battery pack.

22
Contents/Precautions
Contents/Precautions
Notes on handling chargers and adapters
aCharge the battery in a place with an ambient
temperature from 5°C to 35°C.
aCharge the battery where:
• There is excessive humidity, vibration, and dust.
• There are no ordinary phones, television sets or radios
nearby.
aDuring charging, the adapter or charger may
become warm. This is not an abnormality, so
continue charging.
aDo not use the DC Adapter for charging the
battery when the car engine is not running.
The car battery could go flat.
aWhen using the power outlet having the
disengaging prevention mechanism, observe
the instructions given in that instruction manual.
aDo not give a strong shock. Also, do not
deform the charging terminal.
Malfunction may result.
Notes on handling the UIM
aDo not apply more than necessary force when
detaching the UIM.
aDo not apply more than necessary force when
inserting it into the phone.
aThe UIM may become warm during use, but
this is not a sign of a malfunction. Continue
using it as it is.
aThe warranty does not cover damage caused
by inserting the UIM into some other of IC card
reader/writer.
aAlways keep the IC portion clean.
aUse a dry soft cloth to clean the equipment.
aIt is recommended that you make separate
notes of the information stored on the UIM and
keep such notes in a safe place.
DoCoMo assumes no responsibility for any loss of the
stored data items.
aFor the environmental protection, bring any
unneeded UIMs to a handling counter such as
a DoCoMo shop.
aAvoid using in extremely high or low
temperatures.
aDo not damage, carelessly touch, or short-
circuit the IC.
Data may be lost or damage to the IC may result.
aDo not drop the UIM or subject it to strong
impacts.
Malfunction may result.
aDo not bend the UIM or place heavy objects on
it.
Malfunction may result.
23
Contents/Precautions
Contents/Precautions
Notes on handling the Camera
You may be imposed punishment according to the
law and rule (such as nuisance prevention ordinance)
if you use the FOMA phone to give a remarkable
nuisance and misdeed to the public.
Intellectual Property Rights
Copyrights and Rights of Portrait
You have no right to copy, modify, or distribute the contents
of which a third party holds the copyright such as text,
images, music, or software downloaded from web pages on
the Internet, or images shot by the cameras of this product
without permission from the copyright holder except for when
the copy or quote is for personal use that is allowed by the
Copyright Law.
Note that it may be prohibited to shoot or record live
performances or exhibitions even for personal use. Make sure
that you refrain from taking portraits of other persons and
distributing such portraits over the Internet without consent,
as this violates portrait rights.
Trademarks
• “FOMA”, “mova”, “i-mode”, “i-appli”, “i-motion”, “i-motion
Mail”, “MessageF”, “i-melody”, “mopera”, “mopera U”,
“WORLD CALL”, “WORLD WING”, “Deco-mail” “Public
mode”, “My DoCoMo” and the logos of “FOMA”, “i-mode”,
and “i-appli” are trademarks or registered trademarks of
NTT DoCoMo, Inc.
• The “Free Dial Service” name and its logo are trademarks of
NTT Communications.
• “Multitask” is a trademark of the NEC Corporation.
• “Catch phone” (Call Waiting Service) is a registered
trademark of Nippon Telegraph and Telephone
Corporation.
• Java and Java related trademarks and logos are
trademarks or registered trademarks of Sun Microsystems,
Inc. in the United States and other countries.
• “Chaku-Uta” is a registered trademark of Sony Music
Entertainment Inc.
• NetFront and are trademarks or
registered trademarks of ACCESS Co.,Ltd. In Japan and
other countries.
• Microsoft, MS, and Windows are registered trademarks or
trademarks of Microsoft Corporation in the United States
and other countries.
• Windows XP is abbreviation of Microsoft
®
Windows
®
XP
Professional operating system or Microsoft
®
Windows
®
XP
Home Edition operating system.
• Windows 2000 is Microsoft
®
Windows
®
2000 Professional
operating system.
Please respect the privacy of individuals around you when
taking and sending photos using camera-equipped mobile
phones.

24
Contents/Precautions
Contents/Precautions
• Sometimes transcribed like Windows XP or 2000.
• Other company names and product names described in
the text are trademarks or registered trademarks of those
companies.
Others
• This product contains NetFront for FOMA Internet browser
software of ACCESS Co., Ltd.
NetFront is registered trademarks of ACCESS Co., Ltd. in
Japan other countries.
Copyright© 1996-2006 ACCESS CO., LTD.
(With Instruction Manual)
• Some part of the software in this product contains modules
developed by Independent JPEG Group.
• Adobe and Acrobat Reader are trademarks or registered
trademarks of Adobe systems Incorporated in the US and
other countries.
• This product is licensed under the MPEG-4 patent portfolio
license for the personal and non-commercial use of a
consumer to
– encode video in compliance with the MPEG-4 Visual
Standard (“MPEG-4 Video”) and/or
– decode MPEG-4 Video that was encoded by a consumer
engaged in a personal and non-commercial activity
and/or was obtained from a licensed video provider. No
license is granted or implied for any other use.
Additional information may be obtained from MPEG LA,
LLC.
• Licensed by QUALCOMM Incorporated under one or more
of the following United States Patents and/or their
counterparts in other nations:
4,901,307 5,490,165 5,056,109 5,504,773 5,101,501
5,506,865 5,109,390 5,511,073 5,228,054 5,535,239
5,267,261 5,544,196 5,267,262 5,568,483 5,337,338
5,600,754 5,414,796 5,657,420 5,416,797 5,659,569
5,710,784 5,778,338
25
Contents/Precautions
Contents/Precautions
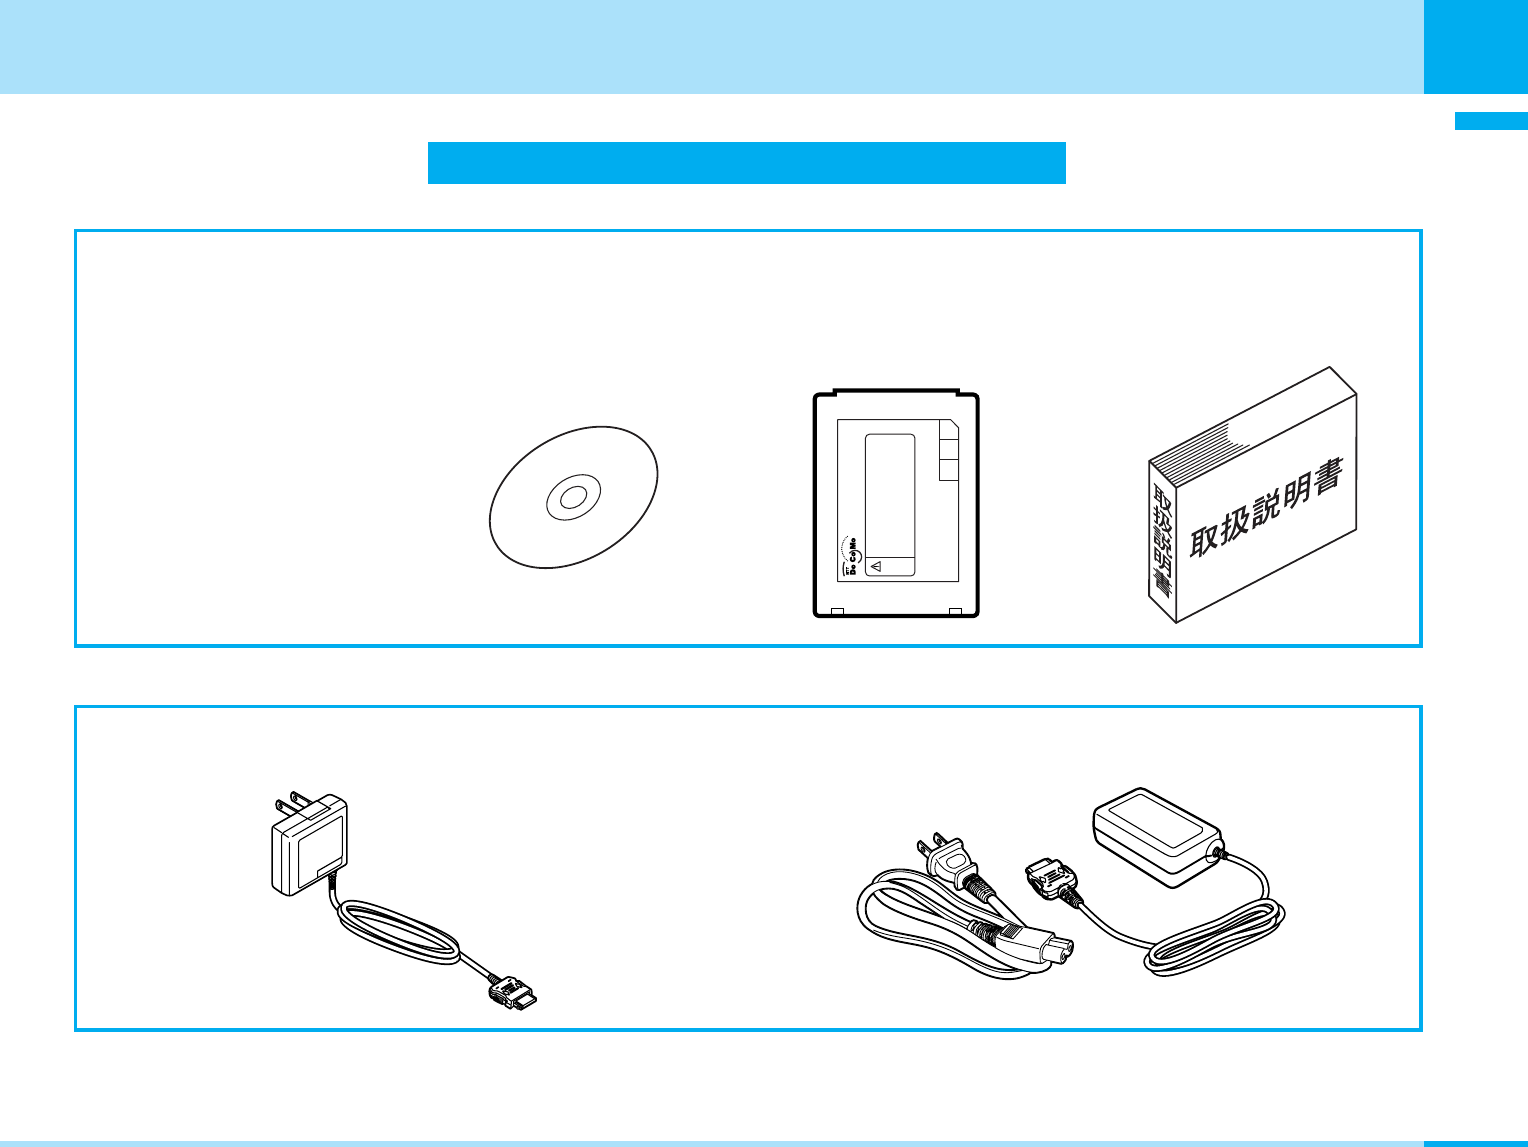
Accessories and Main Options
<Accessories>
• Instruction manual
•Quick Manual
included (P332)
• L602i Handset
(including Warranty
and Rear Cover L02)
• CD-ROM for L602i
(“Manual for Data
Communication” (PDF
file) is included.)
<Main Options>
• FOMA AC Adapter 01
(With Warranty card and Instruction Manual)
• FOMA AC Adapter for Abroad 01
(With Warranty card and Instruction Manual)
Other Options >P308
• Battery Pack L02
(With Instruction
Manual)


27
Confirming before use
Phone Parts and Functions .................. 28
Display ................................................... 31
Menu Operations................................... 35
Soft Key Operations.............................. 35
Side Button Main Operations ............... 36
Using the UIM (FOMA Card) ................. 37
Attaching/Removing the
Battery Pack .......................................... 39
Charging the FOMA Phone................... 40
Turning Power ON................................. 44
Turning Power OFF ............................... 44
Date/Time .............................................. 45
Using Caller ID Notification Service ..... 45
Own Number.......................................... 45

28
Confirming before use
Ç)égópëOÇÃämîF
Confirming before use
Phone Parts and Functions
The Name and function of each part of the FOMA phone are as follows.
• This manual describes operation of each button using an illustration of the button.
Dimensions (H x W x D):
Approx. 94 x 50 x 18 mm
The height and thickness are
the values of folded FOMA
phone.
Weight:
Approx. 93g
With battery attached
• Antenna is embedded in the handset.

29
Confirming before use
Confirming before use
Next Page
1Earpiece/Speaker
While talking over a call (using a speaker phone), the
other party’s voice is heard from here.
While not talking, ring alerts and alarms are emitted
from here.
: Do not put your ears close to the speaker phone being
active, because it may emit loud sound.
2Main display >P31
3Camera
For shooting still images and moving images, and for
sending images on a video-phone call. Rotate the
camera to take a shot.
>P58, P109, P115
4Earphone/Microphone terminal
For connecting a Flat-plug Earphone/Microphone Set
with Switch (option), etc. Do not forcibly pull the
earphone/microphone cover .
: You can rotate it forward or backward when it is open.
5MMail button
Press from the Stand-by display to bring up the Mail
menu. >P138
Press from the Stand-by display for 2 or more
seconds to check new message. >P127, P154
6KNavigation button
For selecting an item and scrolling the display.
The following operations can be performed from the
Stand-by display:
UUp button : The phonebook list screen appears.
>P67
DDown button : The custom menu screen appears.
>P182
LLeft button : Received call screen appears.
>P86
Press for 1 or more seconds to
display the received mail list. >P88
RRight button : Redialed call screen appears.
>P87
Press for 1 or more seconds to
display the sent mail list. >P88
7TVideo-phone button
Press to make/receive video-phone calls. >P58, P60
Press on the Stand-by display to view the other party that
you made the latest call.
Press to switch modes, etc. in entering mode
(Pictograph/Symbol/Emoticon). >P217
Press to rotate the image when you start the camera.
8CMenu/Select button
Press on the Stand-by display to bring up the Main
menu.
>
P35
An operation displayed in the soft key area can be
performed.
>
P35

30
Confirming before use
Ç)égópëOÇÃämîF
Confirming before use
9AStart button
Press to make/receive voice calls. >P48, P50
Press on the Stand-by display to view the other party
that you made the latest call. Press for 1 or more
seconds to display all received/sent mail history.
Press while characters are entered to switch between
full-pitch and half-pitch. >P216
!Dial button
"*(asterisk) button
Press to enter “ ” and to switch between upper case
and lower case while characters are entered. >P218
On the stand-by display, press this key for 1 or more
seconds to set or cancel Public mode (drive mode).
>P51
#Microphone
For speaking to the other party.
For recording sound when shooting moving images by
the camera.
$Ii-mode button
Press from the Stand-by display to bring up the i-
mode menu. >P120
Press for 2 or more seconds from the Stand-by
display to bring up software list screen of i-appli.
>P161
Press from the entering character mode to switch the
mode (Hiragana/Katakana/English/ Number)
An operation displayed in the soft key area can be
performed. >P35
%NMultitask button
Press to bring up the Task Manager.
Press for 1 or more seconds to bring up the New Task
screen.
>P280
&QClear button
Press to return to the previous operation.
Press to cancel the operation depending on the function
such as sending mails or downloading data.
Also, press to delete entered text.
Note that the operation may not be canceled
depending on the timing of canceling.
(PPower/End button
Press for 1 or more seconds to turn the power on.
Press for 1 or more seconds to turn the power off.
>P44
Press to end calls and end functions.
)#(Sharp)/ Manner Mode button
Press for 1 or more seconds from the Stand-by
display to activate/deactivate the Manner Mode.
>P78
Also, press to enter “#” and to start a new line while
characters are entered.
~Connector terminal
For connecting adapters and cables.
+Sub display >P33
,LED
You can set LED to go ON when making/receiving a
call, playing music or doing other operations. >P84
31
Confirming before use
Confirming before use
Next Page
-Strap hole
.Rear cover
/Infrared data port
Point this port to the other device for infrared
communication. >P182
:FEVolume buttons
1. For adjusting the keypad volume in idle mode >
P36
2. For adjusting the volume during a call >P36
;GCamera button
Press from the Stand-by display to start up a camera.
>P109
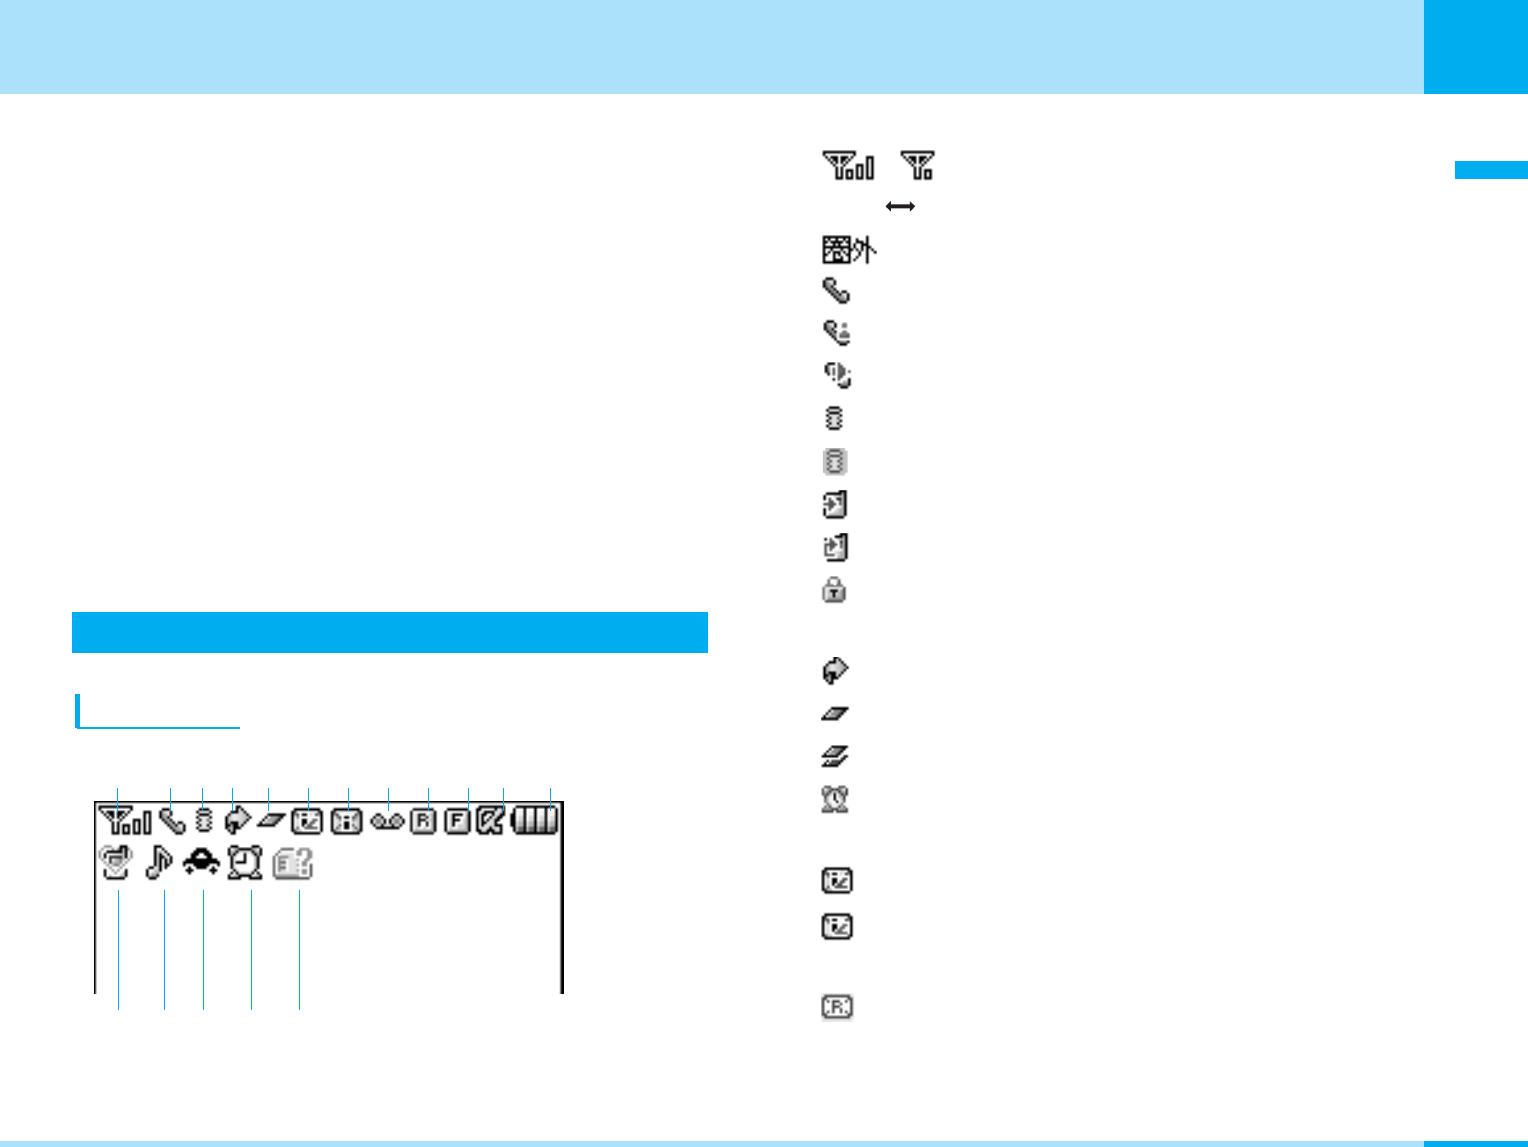
Display
Main Display
1~ : Shows the level of the received radio waves.
Strong Weak
: Out of the service area.
2: Displayed during a voice call.
: Displayed during a video-phone call.
: Displayed during a voice call using the speaker phone.
3(Blinks): while i-mode is activated.
(Blinks): during i-mode communication.
: Displayed during trying dialup connection.
: Displayed during dialup connection.
: Displayed while an SSL-enabled page is displayed or
obtained.
4: Displayed while “All Call Rejection” is activated.
5: Displayed while a function (Task) is activated.
: Performing multiple functions (Task).
(Blinking): Alarm starts while talking, activating camera
or setting public mode (drive mode).
6(White): Displayed when the i-mode Center holds a mail.
(Pink): Displayed when the box for i-mode mail at the
i-mode Center is full.
(White): Displayed when the i-mode Center holds a
MessageR.
1 23456 789!" #
$%&()
32
Confirming before use
Ç)égópëOÇÃämîF
Confirming before use
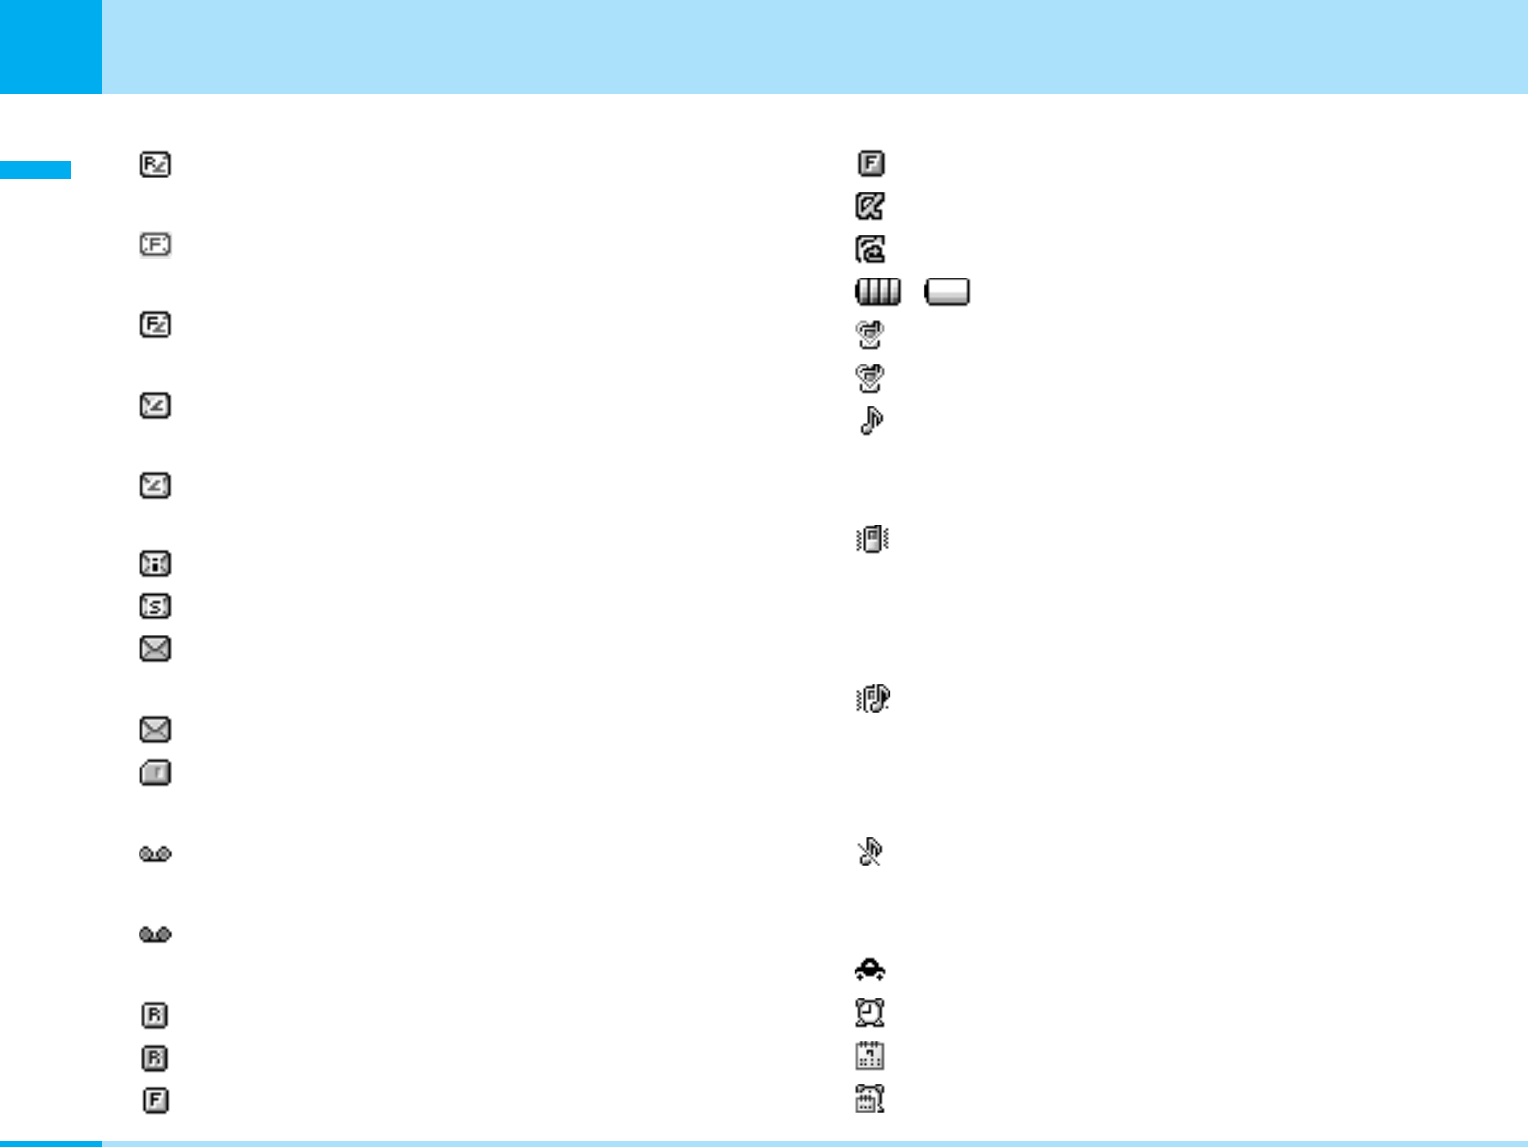
(Pink): Displayed when the box for MessageR at the
i-mode Center is full.
(White): Displayed when the i-mode center holds a
MessageF.
(Pink): Displayed when the box for MessageF at the
i-mode Center is full.
(White): Displayed when the i-mode Center holds mail,
a messageR and a messageF.
(Pink): Displayed when the boxes for i-mode mail,
MessageR and MessageF at the i-mode Center are full.
7(White): Displayed when an unread mail exists.
(White): Displayed when an unread SMS message exists.
(White): Displayed when an unread mail and SMS
message exist.
(Pink): Displayed when the inbox is full.
: Displayed when the area for SMS messages in the
UIM is full.
8(Yellowish green): Displayed when a Voice Mail
message exists.
(Orange): Displayed when the box for Voice Mail
messages is full.
9(White): Displayed when an unread MessageR exists.
(Pink): Displayed when the box for MessageR is full.
!: Displayed when an unread MessageF exists.
(Pink): Displayed when the box for MessageF is full.
": Displayed when i-appli is being started.
: Displayed when i-appli auto start failed.
#~ : Shows the battery level.
$(Pink): Displayed during Manner mode.
(Blue): Displayed during Original manner mode.
%: Displayed when the ringtone for incoming voice
call or video-phone call sounds, not operating a
vibration.
: Displayed when the vibration for incoming call is
activated to “Pattern 1” or “Pattern 2” when the
alarm for incoming voice call or video-call is muted,
and the vibration operate linked with a melody.
: Displayed when a vibration and a ringtone for
incoming voice call and video-phone call sounds
at the same time and the vibration is set to
operate linked with a melody.
: Displayed when a vibration and a ringtone from
incoming voice call or video-phone call do not
operate.
&: Public mode (Drive mode) active.
(: Displayed while an alarm is set.
: Displayed when today’s schedule exists.
: Displayed when an alarm is set and today’s
33
Confirming before use
Confirming before use
schedule exists.
):Displayed when UIM is not inserted or an error
occurs on the UIM.
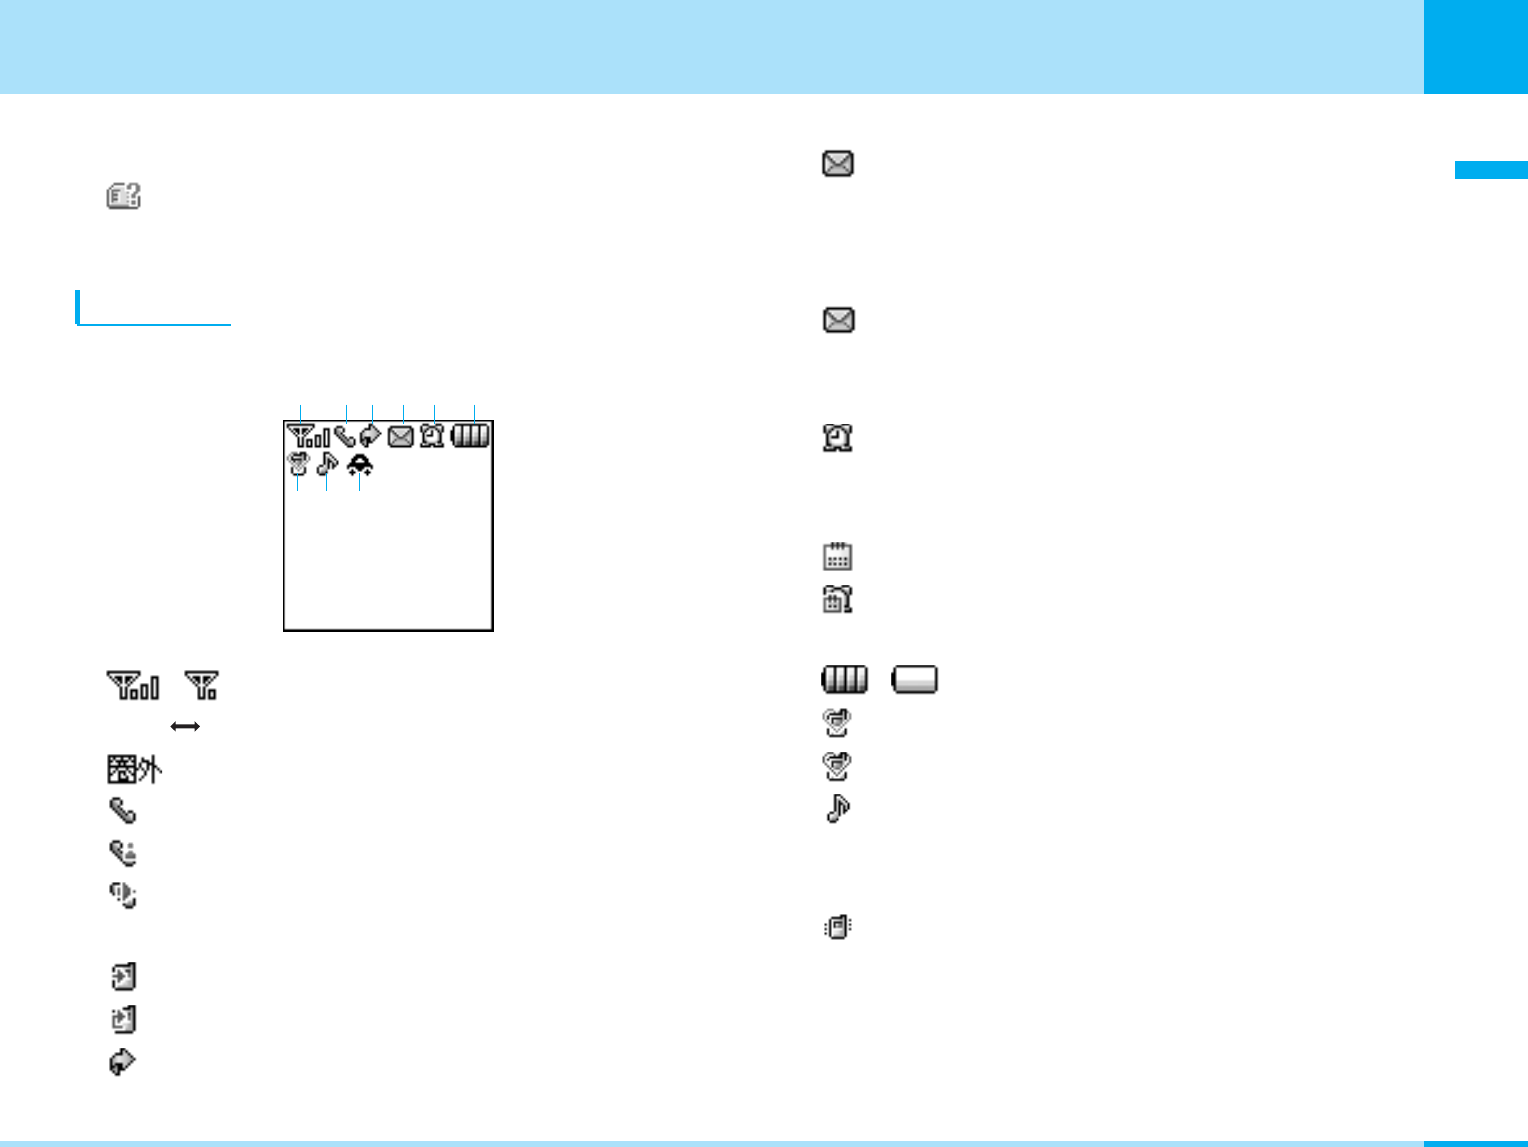
Sub Display
1
~
: Shows the level of the received radio waves.
Strong Weak
: Out of the service area.
2: Displayed during a voice call.
: Displayed during a video-phone call.
: Displayed during a voice call using the speaker
phone.
: Displayed during trying dialup connection.
: Displayed during dialup connection.
3: Displayed while “All Call Rejection” is activated.
4(White): Displayed when the i-mode Center holds a
mail, MessageR/F, an unread mail, SMS,
MessageR/F, or the message in answering machine
exists.
(Pink): Displayed when the box for mail, MessageR/F
at the i-mode Center Mail, SMS, MessageR/F, or the
message in answering machine is full in inbox or UIM.
5: Displayed when an alarm is set, and blinks when
an alarm starts while public mode (drive mode) is
set.
: Displayed when today’s schedule exists.
: Displayed when an alarm is set and today’s
schedule exists.
6~ : Show the battery level.
7(Pink): Manner mode active.
(Blue): Original manner mode active.
8
: In this mode, a ring alert sounds and an incoming
vibrator does not operate for voice and video-
phone calls.
: In this mode, an incoming vibrator operates in
“Pattern 1 (Vibration only)” or “Pattern 2 (Vibration
only)” or no ring alert sounds and an incoming
vibrator operates in “Melody + vibration” for
incoming voice/video-phone calls.
123456
789
34
Confirming before use
Ç)égópëOÇÃämîF
Confirming before use
: In this mode, a ring alert sounds and an incoming
vibrator operates in “Melody + vibration” for
incoming voice/video-phone calls.
: In this mode no ring alert sounds and no incoming
vibrator operates for incoming voice/video-phone
calls.
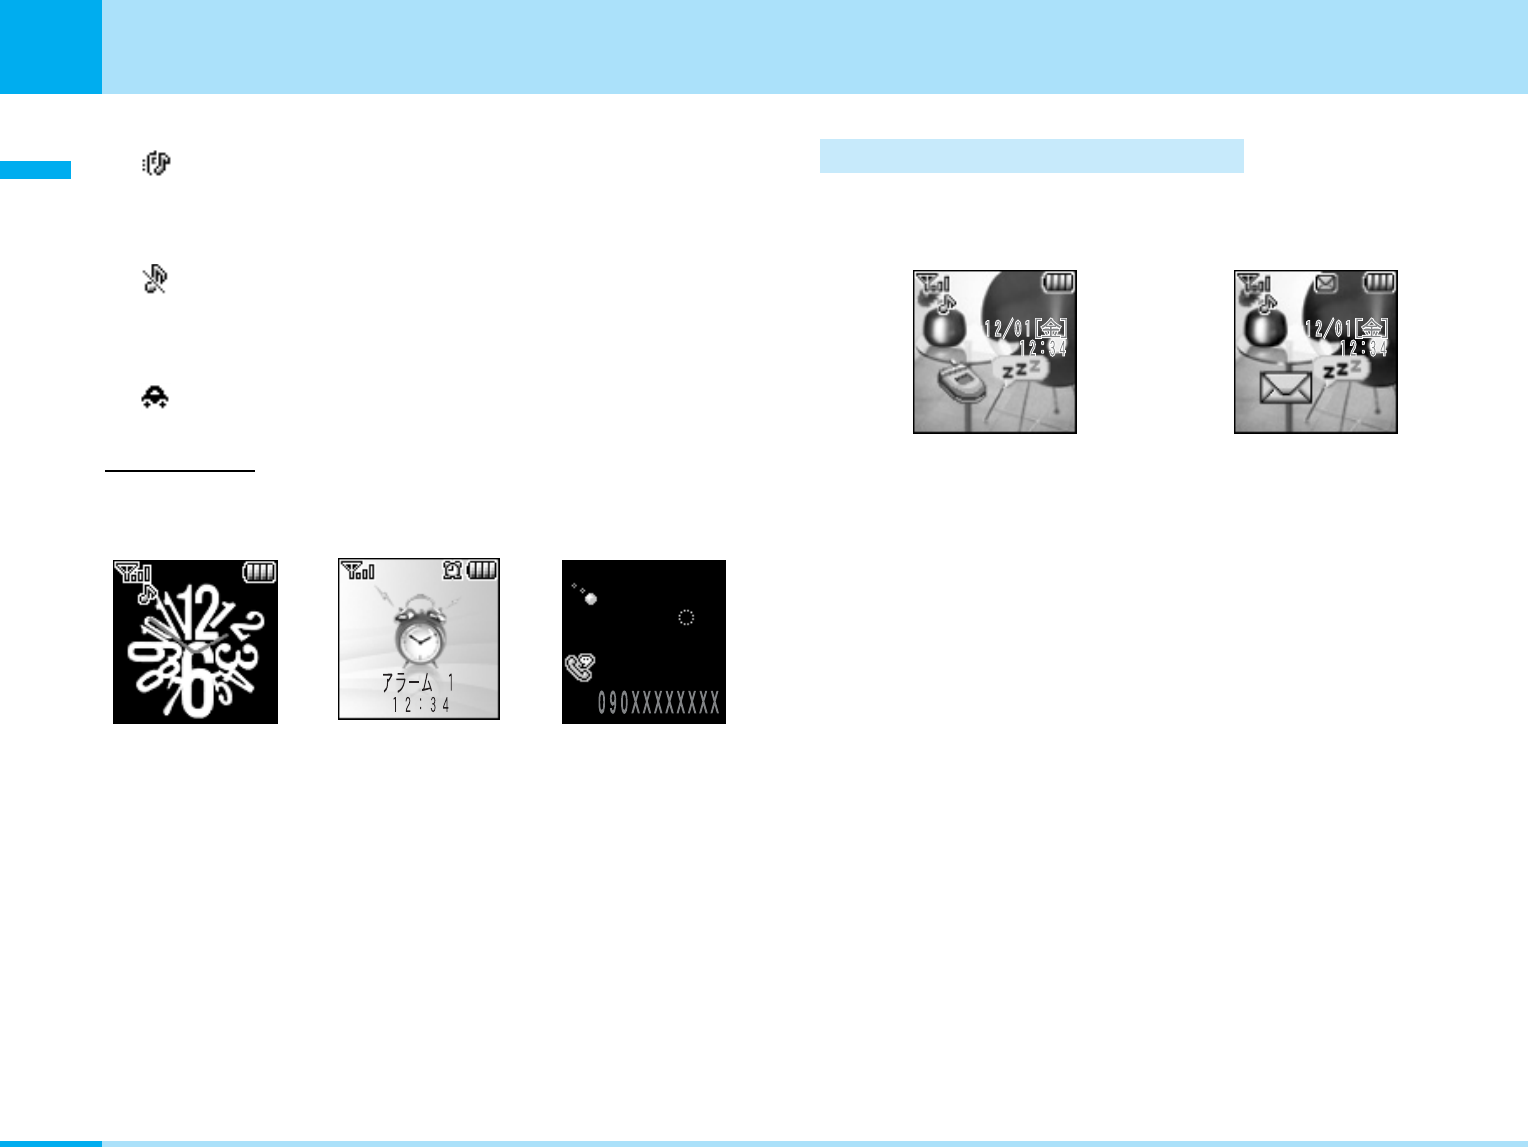
9
: Public mode (Drive mode) active.
Subdisplay
The various information such as clock or icons is
displayed as follows.
<Clock> <Alarm> <Incoming call>
Missed call/ New received E-mail
When closing the FOMA phone, following messages are
displayed on the Sub display.
<Missed call> <New message>
• When you open the FOMA phone on displaying “X
Missed call”, you can view the time or phone number in
main display. You can view the call history by pressing
C. If you press I[Close], “X Missed call” will not be
displayed anymore.
• When you open the FOMA phone on displaying “X
Message”, the pop up message on the Sub display will
disappear after confirming the screen.
1 Message
1 Missed call
DoCoMo Taro

Menu Operations
Example: How to set the “Stand-by display” of the “Main
display”.
aSelecting a function using K
1. On the Stand-by display, C[Menu] ]Enlarge
using K]C]Highlight “Main display” using
H]Move the cursor to “Stand-by display” using
H]C
aSelecting a function by pressing the key
corresponding to the menu number
1. On the Stand-by display, C[Menu] ]Enlarge
using K]C]1]1
Soft Key Operations
To perform an operation displayed in the soft key area on
the Main display, press the corresponding button as
below.
Information
• (Navigation icon) that indicates the directions in which you
can scroll and select items using Kis also displayed in the
soft key area.
• Items displayed in the soft key area vary depending on the
display.
KC 1 1
1 Main display
Display
Select
1 Stand-by display
2 Incoming call
3 Outgoing call
Select
Main display
Select
Display
2 Sub display
3 Font
4 Menu style
5 Backlight
6 Color scheme
7 Lighting LED
KC HC HC
1 Main display
Display
Select
1 Stand-by display
2 Incoming call
3 Outgoing call
Select
Main display
Select
Display
2 Sub display
3 Font
4 Menu style
5 Backlight
6 Color scheme
7 Lighting LED
35
Confirming before use
Confirming before use
Soft key area
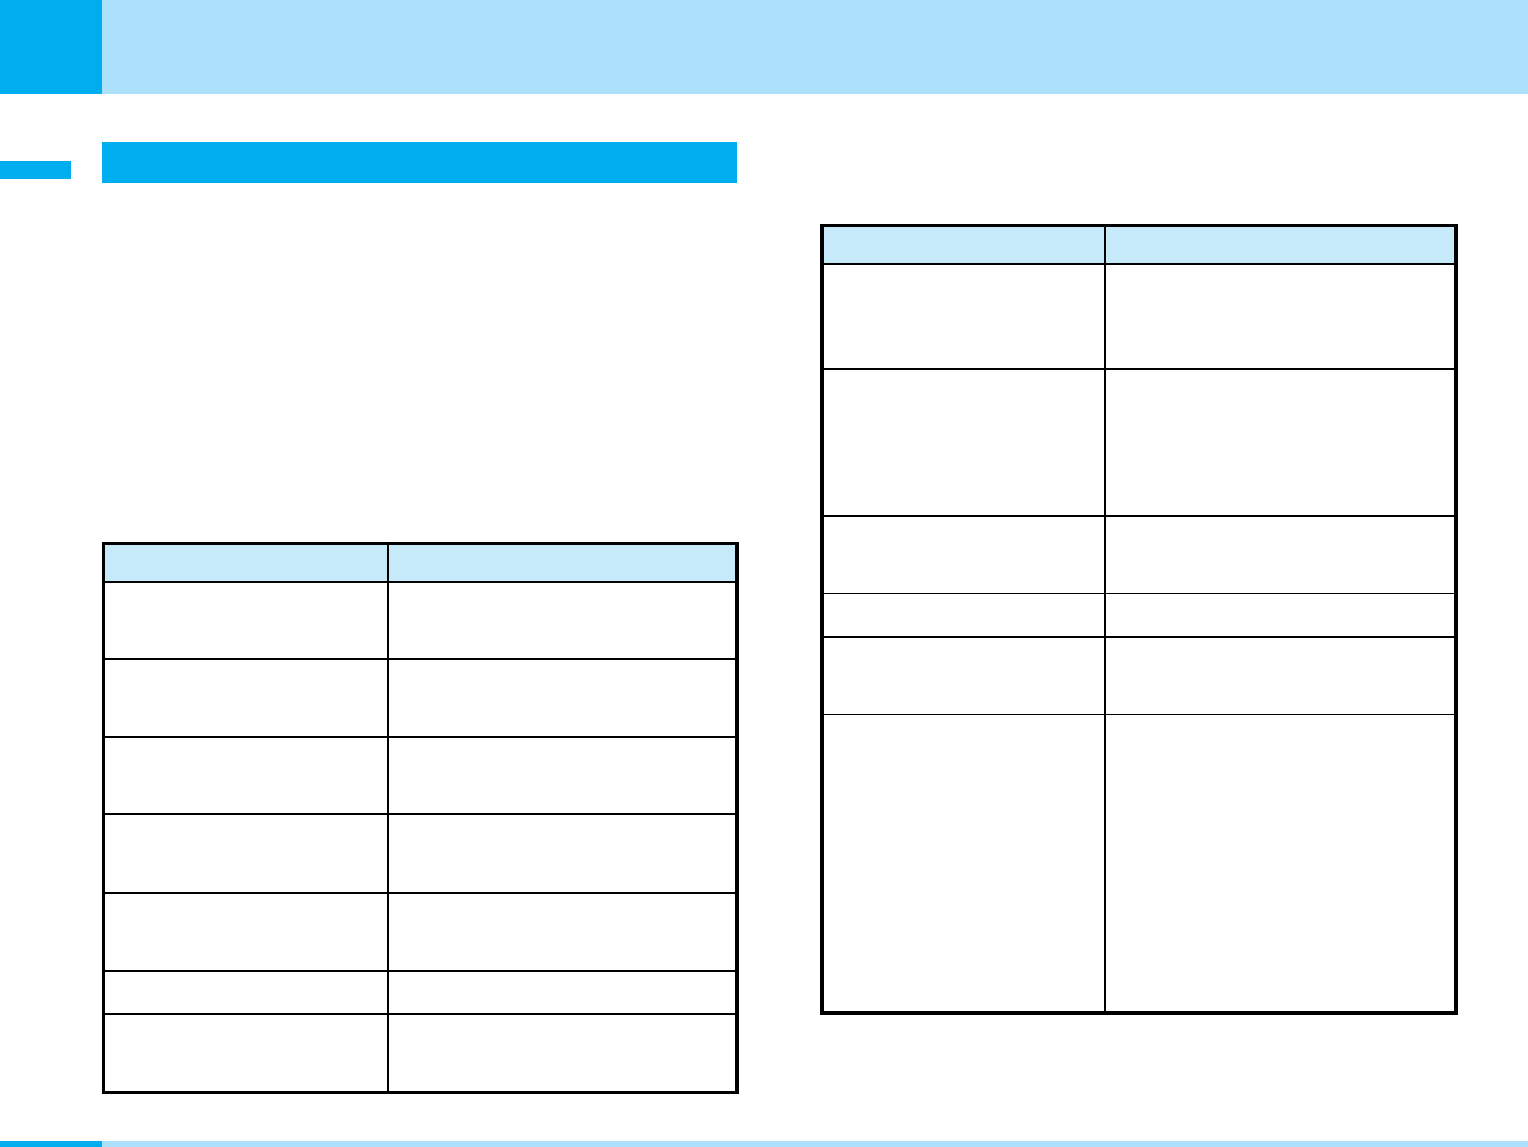
36
Confirming before use
Ç)égópëOÇÃämîF
Confirming before use
Side Button Main Operations
aMajor operations that can be performed by pressing
FE/Gwith the FOMA phone closed
aMain operations that can be performed by pressing
FE/Gwith the FOMA phone opened
Play back/pause moving
images/a melody
Start the camera
Adjust the volume when playing
back a moving image/melody
While playing a moving
image/melody ]FE
When moving images/a melody is
paused ]G(Play back)
While moving images/a melody is
played back ]G(Pause)
In Stand-by ]Press G
FOMA phone operation How to operate
Adjust the volume for
moving image/melody
playback
Scroll the List display by
page
Switch the Monthly
Schedule displays by month
While moving images/a melody is
played back ]FE
While each List display is
displayed ]FE
• The cursor is moved on some
displays.
While the Monthly Schedule
display is displayed ]FE
Zoom While the Still or Moving imaged
Finder screen is displayed ]FE
Incoming call ]Press Gfor 1
second
While an alarm / schedule alarm is
sounding ]Press E
Stop the alarm
Reject an incoming call
In Stand-by (Switch ON/OFF) ]
F
E
/G
Switch the display light of
the sub display to ON
FOMA phone operation How to operate
Adjust the volume of a ring
tone for incoming call Incoming call ]FE
Adjust the volume of a ring
tone for incoming call Incoming call ]FE
In Stand-by ]FE
Adjust the volume of key tone
During a voice call/video-phone
call ]FE
Adjust the volume

37
Confirming before use
Confirming before use
Using the UIM (FOMA Card)
Your phone number and contracted contents for the
service, etc. are recorded in the UIM. You need to insert it
into the FOMA phone to make/receive calls or perform
communication.
Refer to the UIM manual for details of how to use it.
Inserting/Removing UIM (FOMA Card)
Insert/remove the UIM after you turn off the power of the
FOMA phone and remove the rear cover and battery pack
beforehand (P39).
• Remove the AC adapter and options beforehand.
Inserting
1. Insert the UIM with its IC-side facing downwards
in the direction of the arrow underneath the guide.
Removing
1. Slide the UIM in the direction of the arrow to
remove it.
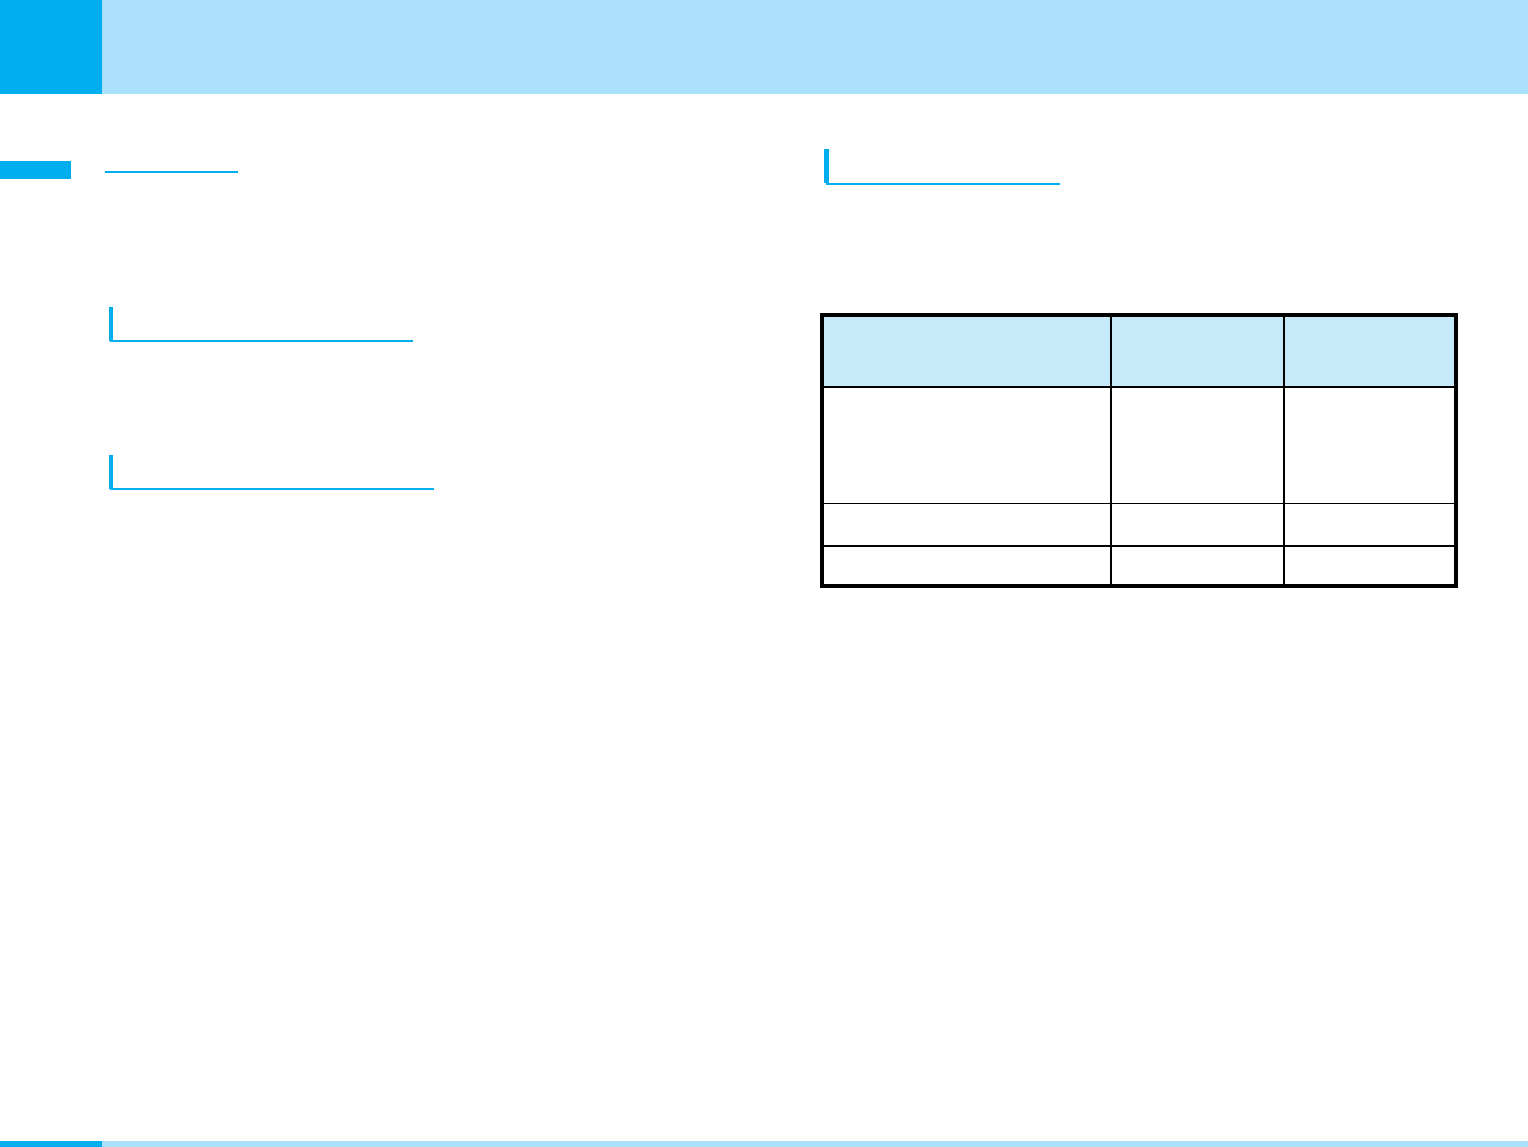
38
Confirming before use
Ç)égópëOÇÃämîF
Confirming before use
Information
• When inserting / removing the UIM, close the flip, and then put
it on your hand. Take care not to accidentally torch or scratch
the IC.
About Password of UIM
You can set 2 passwords, PIN1 and PIN2, for a UIM.
>P105
UIM Restriction Functions
The UIM has a restriction function to protect your data and
files.
If you obtain the following types of data and files with a
UIM inserted, restrictions are automatically imposed to
disable them when the UIM is not inserted or when
another UIM is inserted.
• Images/melodies/i-motion/i-appli obtained from sites
and Internet web pages
• Files attached to i-mode mail messages and
MessagesR/F
Differences of UIM
There are 2 types of UIM, the green, white and blue UIM and
the blue UIM. There are differences in specifications of the
following functions between those UIMs:
aAbout WORLD WING
WORLD WING is DoCoMo’s international roaming
service that allows you to use the same mobile pone
number for making and receiving calls after inserting
your UIM (Green) in a FOMA phone applicable to the
service or mobile phone available for overseas use
(WCDMA or GSM).
WORLD WING is available without subscription.
• If you subscribed to FOMA services before August
31, 2005 and have not subscribed to WORLD WING,
a separate subscription is required for WORLD WING.
• Some billing plans may not be applied to WORLD
WING.
UIM
(Green)
Function UIM (Blue)
Number of digits of the phone
number that can be stored in
the UIM phonebook
Up to 26 digits Up to 20 digits
WORLD WING Available Not available
Service dialing Available Not available

39
Confirming before use
Confirming before use
Next Page
• If the UIM (Green) is lost or stolen overseas, contact
DoCoMo immediately to suspend the service. For a
contact, see General Inquiries on the back cover of
this manual. Please be aware that call and
transmission charges made after loss or theft will be
charged to you.
Attaching/Removing the Battery Pack
Make sure that you attach the dedicated battery pack L02
for FOMA L602i to use it.
Attaching
1. Press the rear cover in the direction of the arrow 1
to slide it in the direction of the arrow 2, then lift it
up in the direction of the arrow 3to remove.
2. Insert the battery in the direction of the arrow 1
with the label facing downwards, then push it in
the direction of the arrow 2.
3. Adjust the rear cover to the ditch of the FOMA
phone holding the cover approx. 3mm off, then
press it in the direction of the arrow 1to slide it in
the direction of the arrow 2, then push it until it
clicks.

40
Confirming before use
Ç)égópëOÇÃämîF
Confirming before use
Removing
1. Press the rear cover in the direction of the arrow 1
to slide it in the direction of the arrow 2, then lift it
up in the direction of the arrow 3to remove.
2. Take the projection of the battery pack to lift it up
in the direction of the arrow.
Information
• Attach/remove the battery pack with the FOMA phone closed
and held in your hand after you turn off the power. In addition,
If you attach/remove the battery pack forcibly, it may damage
the charging connector of battery.
• Take care not to attach/remove the rear cover. Note that if the
rear cover is forcibly depressed, the slot of the rear cover may
be damaged.
• For details about the battery, see the manual for Battery Pack L02.
Charging the FOMA Phone
Charging
Connect specified AC Adapter (option) to charge the
battery after attaching the battery pack to the FOMA
phone (P39). You need FOMA AC Adapter 01 for both
overseas and domestic usage (option) separately when
using the FOMA phone overseas.
1. Open the cover of the external connector terminal
of the FOMA phone.
: You can rotate it forward or backward when it is open.
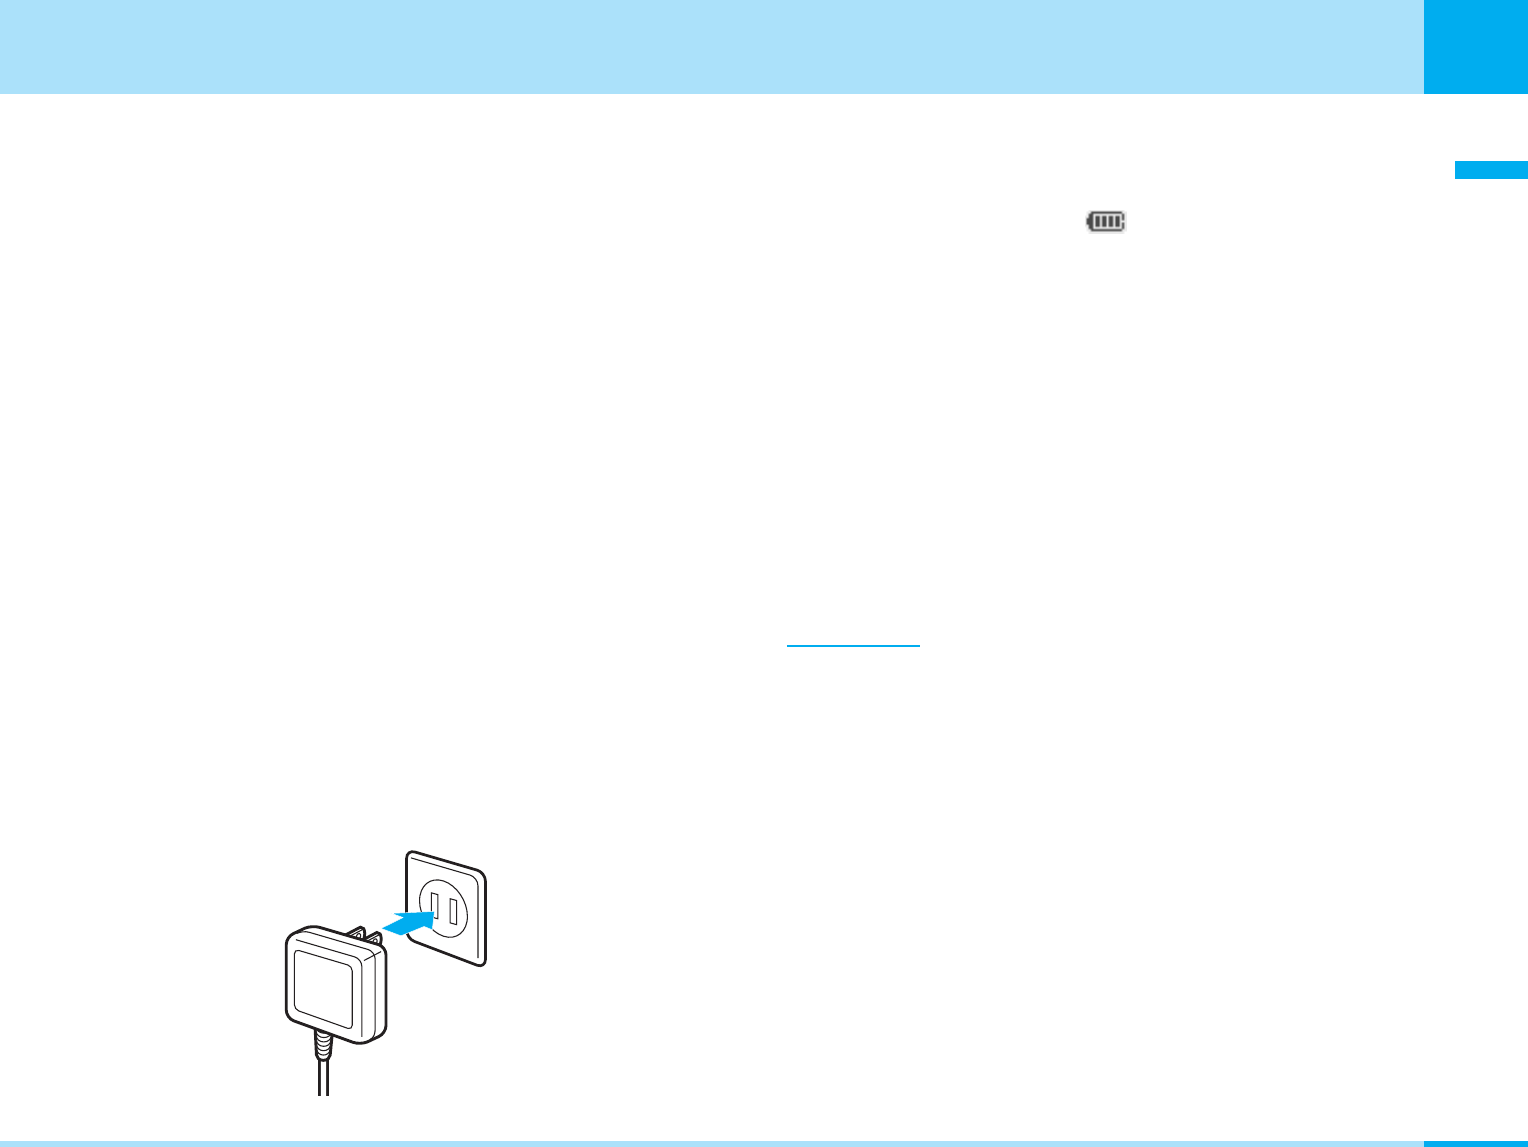
41
Confirming before use
Confirming before use
Next Page
2. While pressing the release buttons on both sides
of the connector of the AC adapter, connect it
horizontally to the FOMA phone with the arrows-
engraved side facing upwards in the direction of
the arrow.
3. Insert the AC adapter’s plug into a power socket.
• If you start to charge the battery, the charging start
tone will sound.
The battery level icon ( ) flashes on and off in turn
and it is red. After charging, the alarm tone for ending
the charging will ring and then the flashing disappears
and the LED turns off.
• If you charge the FOMA phone with the power off, the
animation for the battery level is displayed as follows,
depending on the battery level.
- In case the battery level is low: “Please wait” >
“Charging” >“Battery charged”
- In case the battery is empty: “Please wait” >“Low
battery Please wait” >“Charging” >“Battery
charged”
Information
• When you use the FOMA phone for the first time, the battery
pack is not fully charged. Fully charge the battery before using it.
• When you attach the AC adapter to the FOMA phone, do not
use unnecessary force. The FOMA phone and the connector
may be damaged.
• Do not remove the battery pack and the UIM during charging.
• If the battery cannot be charged correctly, turn off the power
once, remove the battery pack, and then reattach it to charge
the battery again.
• If the battery level becomes very low during a video-phone call,
connecting the AC adapter may not charge the battery fully,
and the power may go off.
• When charging the battery pack overseas, confirm the voltage
used in the country or the area of stay, and use FOMA
Overseas/Domestic AC Adapter 01 (option) (A conversion plug
AC100V
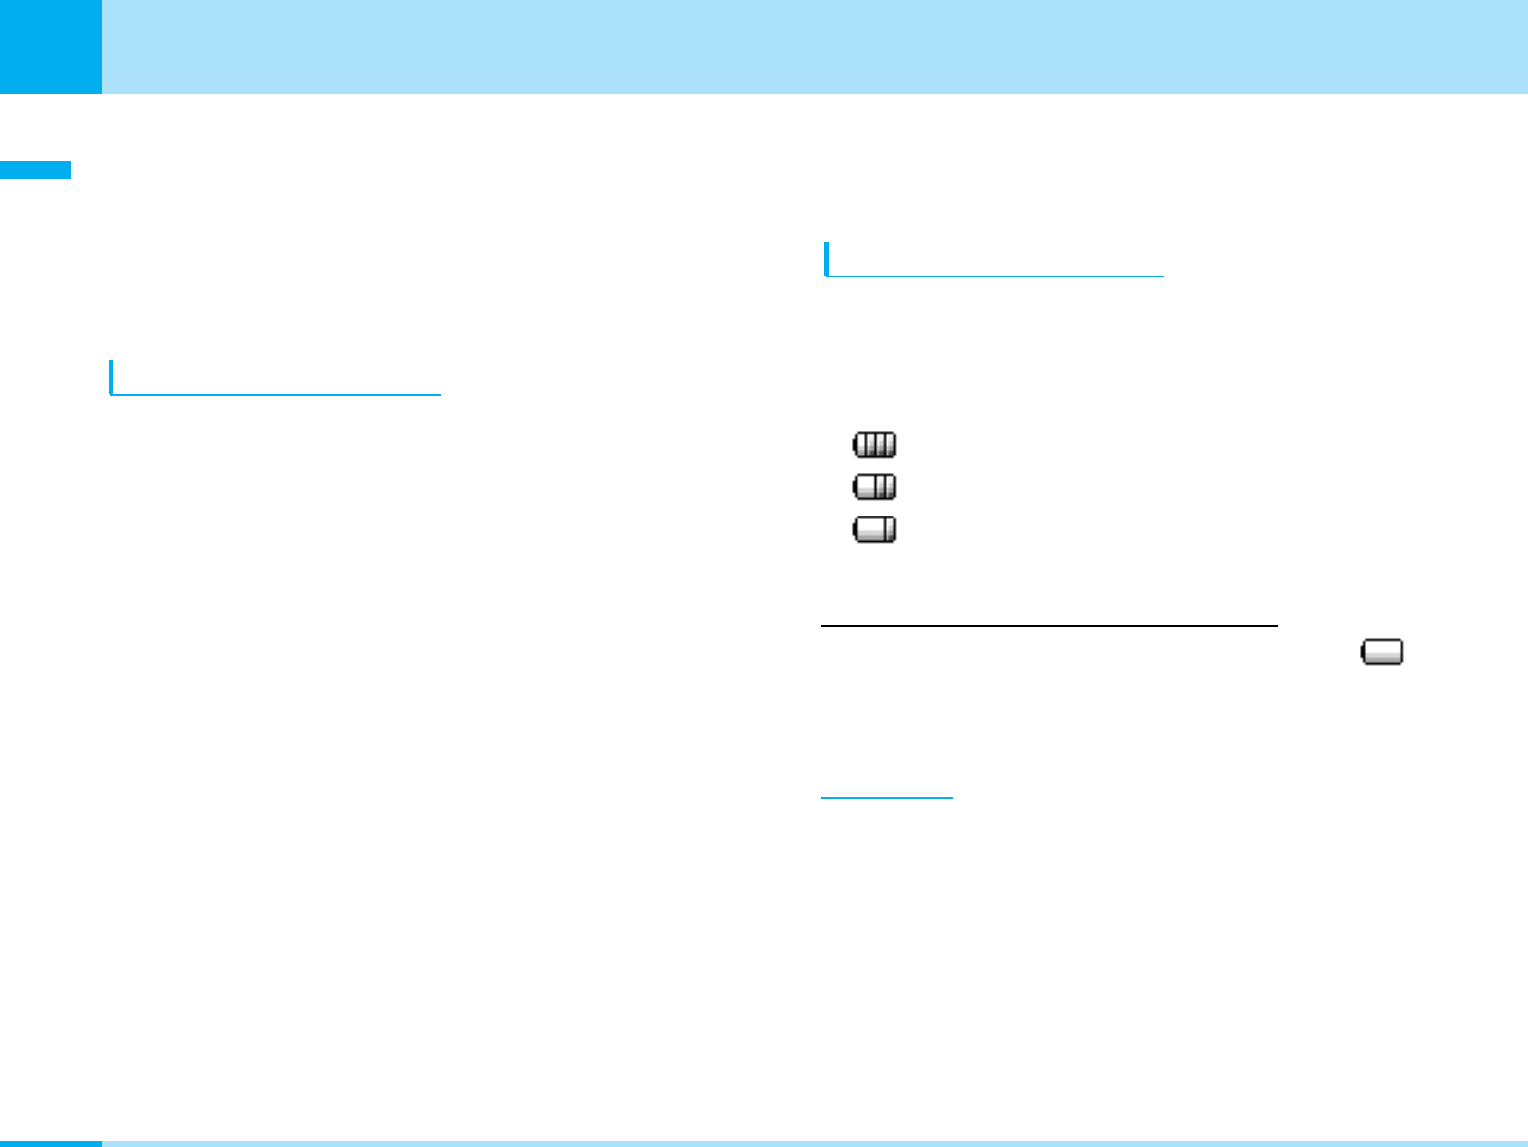
42
Confirming before use
Ç)égópëOÇÃämîF
Confirming before use
adapter for overseas travel applying to the country or area of
stay is required). Also, do not charge the battery pack using an
electric transformer for overseas travel.
• Refer to the instruction manuals for FOMA AC Adapter 01
(option) and FOMA AC Adapter 01 for both overseas and
domestic usage (option) for details.
Removing the AC Adapter
After charging completes, disconnect the AC adapter from
the FOMA phone.
1. Disconnect the connector of the AC adapter from
the power socket.
2. While pressing the release buttons on both sides
of the connector, remove it horizontally from the
FOMA phone in the direction of the arrow.
• Do not pull the connector forcibly. Malfunction may
result.
3. Close the cover of the external connector terminal
of the FOMA phone.
Checking the Battery Level
When turning the power on, the battery level (estimate)
icon is appeared.
• The Battery Level display indicates just an estimate of
the battery level.
: Almost full
: Getting low
: Almost empty. Charge the battery immediately.
When You Need to Charge the Battery
If the battery is completely flat, a message appears,
flickers, and the battery alarm sounds. If you press
C
, the
message disappears and the battery alarm stops.
Information
•
If you set “Manner mode” or “Original manner mode” and set
battery alarm to OFF, the alert tone does not ring.
43
Confirming before use
Confirming before use
Precautions on the Battery Pack
Be sure to use the battery pack dedicated to the FOMA
phone.
aBattery life
• Batteries are consumables. The usage time of all
chargeable batteries shortens slightly each time they
are charged. The battery’s life is considered to be
exhausted when the usage time of the battery after
charging is about half the time it was at purchase.
(The life of the battery is about 1 year. However, it
may be shorter if used very frequently.)
aDo not charge for long periods of time (several days)
with the FOMA phone turned on.
• Do not leave the FOMA phone power on for long
periods of time while charging. Otherwise, when
charging finishes, the FOMA phone will attempt to
receive power from the battery so that when you
actually use the FOMA phone, you will be able to do
so for just a short amount of time before the battery
alarm sounds. If this happens, charge the battery
correctly. When charging the battery again, first
disconnect the FOMA phone from the AC adapter
and then set it again.
aEstimated usage time for battery
The usable time of the battery varies depending on the
usage environment or its remaining life.
• Continuous talk time is the estimated time when radio
waves can be sent and received normally.
• Continuous stand-by time is the estimated time you
can use the FOMA phone in motion when it is closed
and can receive radio waves normally. The standby
time could be about half of this estimate depending
on the battery level, function settings, other ambient
conditions such as temperature, the status of radio
waves in the area (weak or no radio waves, for
instance) and the status of the network of the country
in which you stay. The continuous standby time will
be shorter if you don't insert the UIM. When you use
i-mode communications, the talk/transmission time
and standby time will be shorter. Further, even if you
do not make calls or perform i-mode communication,
the talk/communication time and standby time will be
shorter if you compose i-mode mail, start up a
downloaded i-appli.
Stand-by time
Network Continuous talk time
FOMA / 3G Static : about 380 hrs
Dynamic : about 250 hrs
Voice call : about 140 min
Video call : about 90 min
GSM/GPRS Static : about 260 hrs Voice call: about 200 minutes
For environmental protection, bring the exhausted
battery to an NTT DoCoMo, dealer, or recycle shop.
44
Confirming before use
Ç)égópëOÇÃämîF
Confirming before use
• The continuous standby time for standstill is the
average number of hours you can use the FOMA
phone in standstill status when it is closed and can
receive radio waves normally.
• The continuous standby time for in motion is the
average number of hours you can use the FOMA
phone in the combined status of ”standstill”, “moving”
and “out of the service area” when it is closed, in an
area where it can receive radio waves normally.
• The talk/communication time and standby time will
also be shorter than the above-mentioned estimates
when you perform data transmission or multi-access
or when you use the camera.
aEstimated time for charging battery
• The estimated charging time is for when the FOMA
phone is off and the battery is being charged from
empty. The charging time will be longer if you charge
the battery with the power turned on.
aOther precautions
• Do not use any other adapter than the specified one.
It may shorten the life of the battery pack.
Turning Power ON
• Before you turn on the power, make sure that the UIM is
inserted and that the battery is fully charged.
1. Press Pfor 2 or more seconds
• After the Wake-up display is displayed, the Stand-by
display appears.
Information
•If “PIN code request” (P100) is set to “ON”, you need to enter
the PIN1 code.
•If “All lock” (P99) is set to “Power on”, you need to enter the
terminal security code.
Turning Power OFF
1. Press Pfor 2 or more seconds
• The Exit display appears and the power is turned off.
Information
•The time to turn off the FOMA phone may be long. Depending
on the status of network, the lead time may differ. During
switching off the power, do not repeat to power on/off.
FOMA AC Adapter 01 Approx. 180 minutes

45
Confirming before use
Confirming before use
Date/Time
You can set the date and time and daylight saving time.
See “Setting Date & Time” (P95) for details of how to set
them up.
Using Caller ID Notification Service
The Caller ID Notification Service enables you to notify the
other party of your phone number when you make a call.
See “Using Caller ID Notification Service” (P202) for details
of how to set it up.
Own Number
You can display your phone number recorded in the UIM.
1. On the Stand-by display, C]0
• See “Displaying Own Number” (P72) for details of
how to change the settings on the Own Number
display.


47
Making calls............................................48
Receiving calls .......................................51
Using Public mode (drive mode) ...........52
Using Public mode (power off) ..............54
Making calls/
Receiving calls
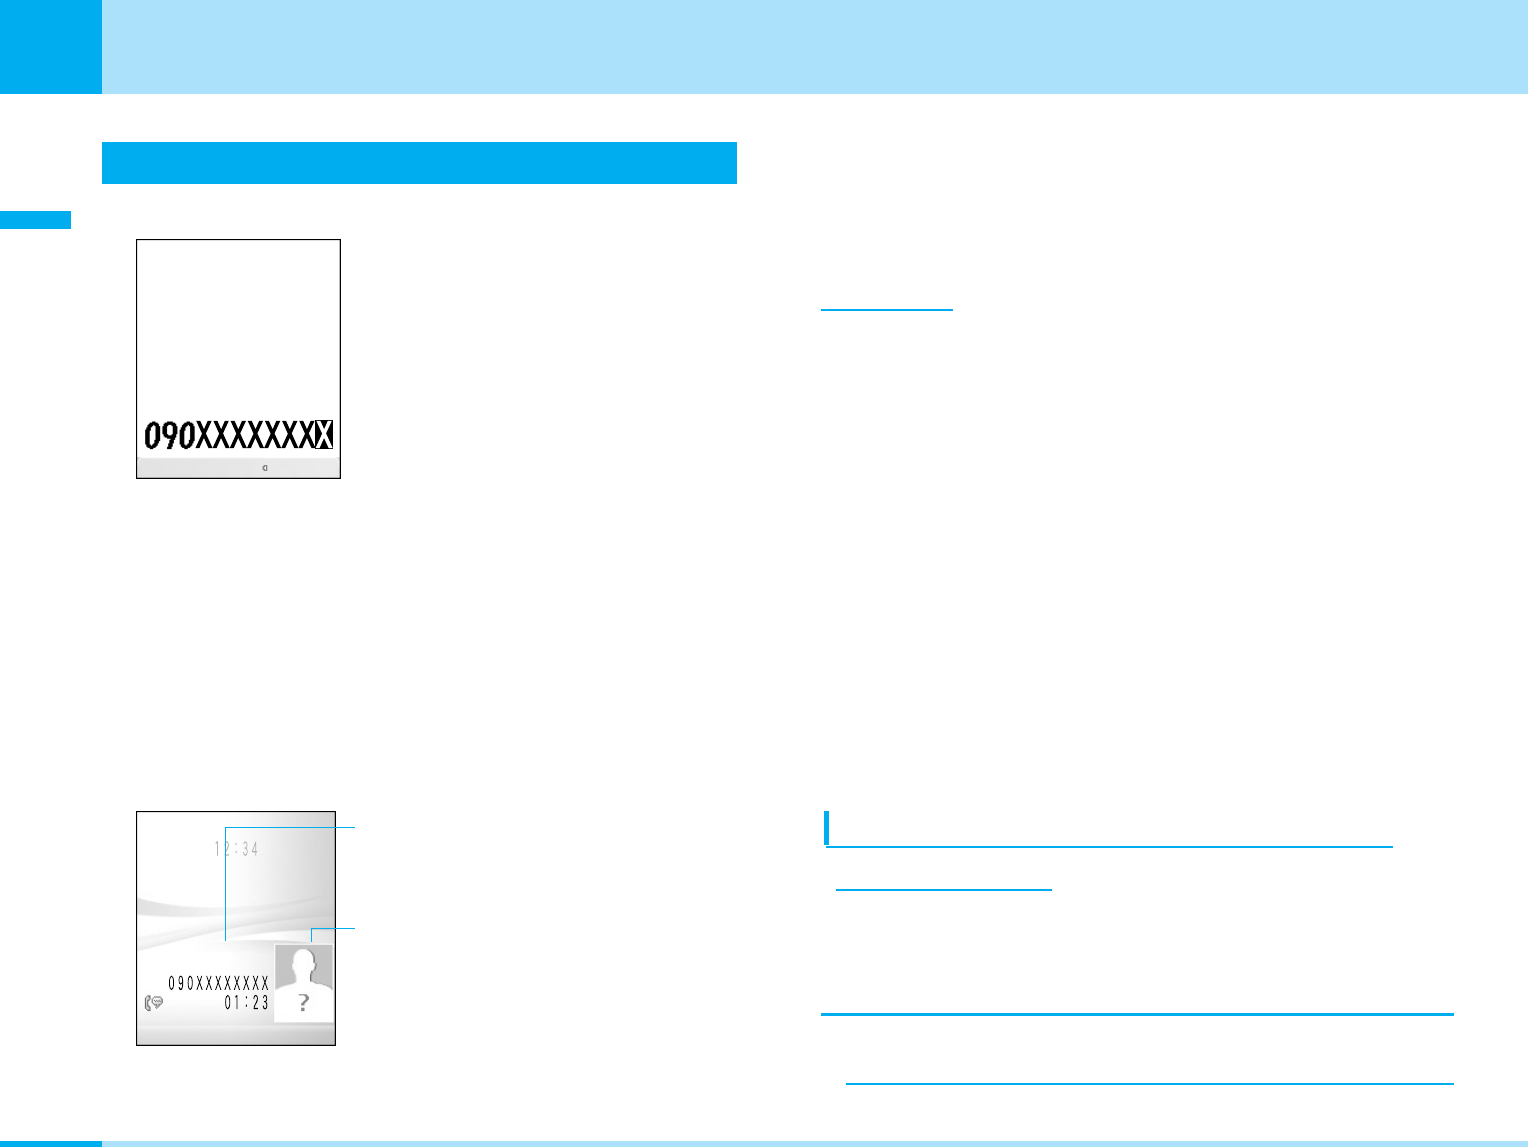
48
Making calls/Receiving calls
Making calls/Receiving calls
Making calls
1. Enter the other party’s phone number
<Enter Phone Number>
•Q:The last digit is cleared. To clear all digits,
press it for 1 or more seconds.
•C[Save]: You can register / add the entered phone
number to phonebook. Go to step 2 on page 64 of
“Adding to Phonebook”.
•I[Search]: You can search for the phone number in
phonebook. See the contents after step 3 on page 66.
2. A
]
Start talking when the other party answers
• Press Qfor 1 or more seconds: You can switch
ON/OFF the speaker phone.
3. Pto end the call after talking.
Information
• If you press Aafter entering the number from 0 to 9 in the
Enter Phone Number screen, you can make a call directly
matching the the number saved in memory.
• You can enter a phone number of up to 42 digits.
• If you enter a phone number exceeding 16 digits, dialing will be
made displaying the first 16 digits digits of the phone number.
• You can make a call after entering “184” (Not notify) or “186”
(Notify) in front of phone number.
• When the Flat-plug Earphone/Microphone Set with Switch
(option) is attached, you can only talk on the Earphone /
Microphone regardless that the speaker phone is ON/OFF.
• When the call is disconnected, the alert sound sounds from a
receiver.
• When dialing/receiving overseas, some name of the other
party may not be displayed even that name is registered in the
phonebook.
Using the Submenus of the Enter Phone
Number Display
1. From the Enter Phone Number screen (See left),
M[Menu]
]
Select from the following submenu
items
Notify caller ID
Set whether to notify your phone number per call.
The other party's name Ŧ1
The other party's phone number
Call duration
The other party's picture Ŧ2
Ŧ1 : In case of the other party you don't
register the information in phonebook,
“Unregistered” will be displayed when
receiving or making a call.
Ŧ2 : The picture will be displayed when you
register the picture in phonebook.
SaveMenu Search
<Talking>
49
Making calls/Receiving calls
Making calls/Receiving calls
Next page
–Not notify : “#31#” is added in front of the phone
number entered, but the phone number is not notified.
–Notify : “31#” is added in front of the phone
number entered, and the phone number is notified.
–Cancel : The added “#31#” or “ 31#” is deleted.
Select prefix
The number saved in “Setting Prefix Dial” (P92) is
added before the phone number is entered.
International call
The international access code saved in “International dial
setting” (P92) is added before the phone number is
entered.
Save
You can save the entered phone number entered into
the Phonebook. Go to step 2 on page 64 of “Adding
to Phonebook”.
Search phonebook
You can search for the phone number in phonebook. For
operations after searching, see 3 on page 66 of
“Searching for Phonebook Entries”.
Using the Submenus of the Talking screen
1. From the Talking screen (P48), M[Menu]
]
Select
from the following submenu items
New call 1
You can put the current call on make and hold a call
to another party.
End active call
You can disconnect the call.
Hold 1/Cancel held call 1
You can put/release the call on hold.
Mute 2/Unmute 2
You can mute/unmute the voice transmitted to the other
party.
1: Available only for Call Waiting Service subscribers.
To use this service, go to “Using Call Waiting Service” (P200).
2: Not displayed during call is held.
Making a Call From the Dialed/Received Call Record
1. From the Stand-by display, L/R/A/T
]
Select a record ]
A
Information
•See “Using the Submenu of the Received Calls display” (P86) for
submenus.
Making a Call from the Phonebook
1. Uin the Stand-by display, or search the
phonebook
]
Select the party you want to call
]
A
When multiple phone numbers are registered, press A
to display the Select call number screen, then select the
phone number and press C[Call].
Information
• To switch the phonebook list to display between the FOMA
phone and UIM, select M[Menu] >“View handset”/“View
UIM” on the phonebook list screen.

50
Making calls/Receiving calls
Making calls/Receiving calls
The name of DoCoMo's pocket bell has been changed to Quick Cast since January, 2001.
Using Pause Dial
You can use services such as sending messages to a
pocket bell, reserving tickets or checking the balance of
your bank account by sending push signal from the FOMA
handset.
1. Enter the phone number
2. Enter the dial data
• Press *3 times to enter pause “P”
• Only 0to 9,#,*and pause “P” can
be entered.
• Up to 42 digit can be entered.
• If you enter pause “P” before the phone number, you
can not dial.
3. A
• A call is made to the other party, and the dial data
from the beginning to the first pause “P” is displayed
while being connected.
4. Confirm that the other party accepted >Aor
C[Select]
• The dial data from the beginning to the first “P” is
sent, and the dial data to the next pause “P” is
displayed. Each time you press Aor C, the dial
data to the next “P” is sent. When you send the last
number, the calling screen appears.
Information
• The other party may not be able to receive the signal
depending on the type of the receiver's handset.
• When using video-phone call, you can not use pause dial.
International Calls
You can make an inteÎrnational call easily using the
DoCoMo international call service “WORLD CALL”.
When you have signed up for FOMA service, you have
contracted to use “WORLD CALL” (except those who
have applied not to use it).
• You can make calls to 240 countries and areas
worldwide.
aHow to make calls
009130 >010 >Country code >Area code >
Destination phone number >A
• This service is not available with some billing plans.
• Application/monthly fee for WORLD CALL is free of
charge.
• The WORLD CALL charges are added to your monthly
FOMA bill.
• Contact “DoCoMo Information Center” on the back of
this manual for inquiries about WORLD CALL.
• If the other party uses a specific 3G mobile phone
overseas, you can make an “International Video-phone
Call” by dialing out using Tafter following the dialing
method described above.

51
Making calls/Receiving calls
Making calls/Receiving calls
Next Page
– See the International Service web page of DoCoMo for
the information about connectable countries and
telecommunications carriers.
– Images sent from the other party may blur on your
FOMA phone or you may not be able to connect,
depending on the other party’s phone used for the
international video-phone.
• When the area code begins with “0”, leave this out
when dialing. However, include “0” when making a call
to some countries or regions such as Italy.
Making an International Call Easily
• Confirm that the “Setting Prefix Dial” (P92) is set to
“AUTO” and “009130010” (WORLD CALL) is set for
“IDD prefix code” in “IDD prefix setting”.
1. On the Stand-by display, press 0for 1 or more
seconds to enter “+”
2. Enter Country code >Area code >Destination
phone number
]
A(T)
3. “Yes”
Confirmation with the test machine required.
4. Pto end the call after talking
Adjusting the Volume
1. Press FE Hduring a call or press Hfor 1 or more
seconds.
Information
• The changed volume is held even after ending the call.
Receiving calls
1. When you receive a call, A
•I[Silent]: You can set to no sound for incoming call.
If you subsequently press I[Reject], incoming call
will be rejected.
•P: You can reject the incoming call.
• If you close the handset while a call is incoming, the
call will be rejected.
2. Pto end the call after talking
Information
• When dialing/receiving overseas, some name of the other
party may not be displayed even that name is registered in the
phonebook.
The other party's name Ŧ2
The other party's phone number
The other party's image Ŧ1
Ŧ1 : Displayed only when the other party's
image is registered in the phonebook.
Ŧ2 : In case the other party's information is
not registered in the phonebook,
“Unregistered” will be displayed.
<Ringing screen>
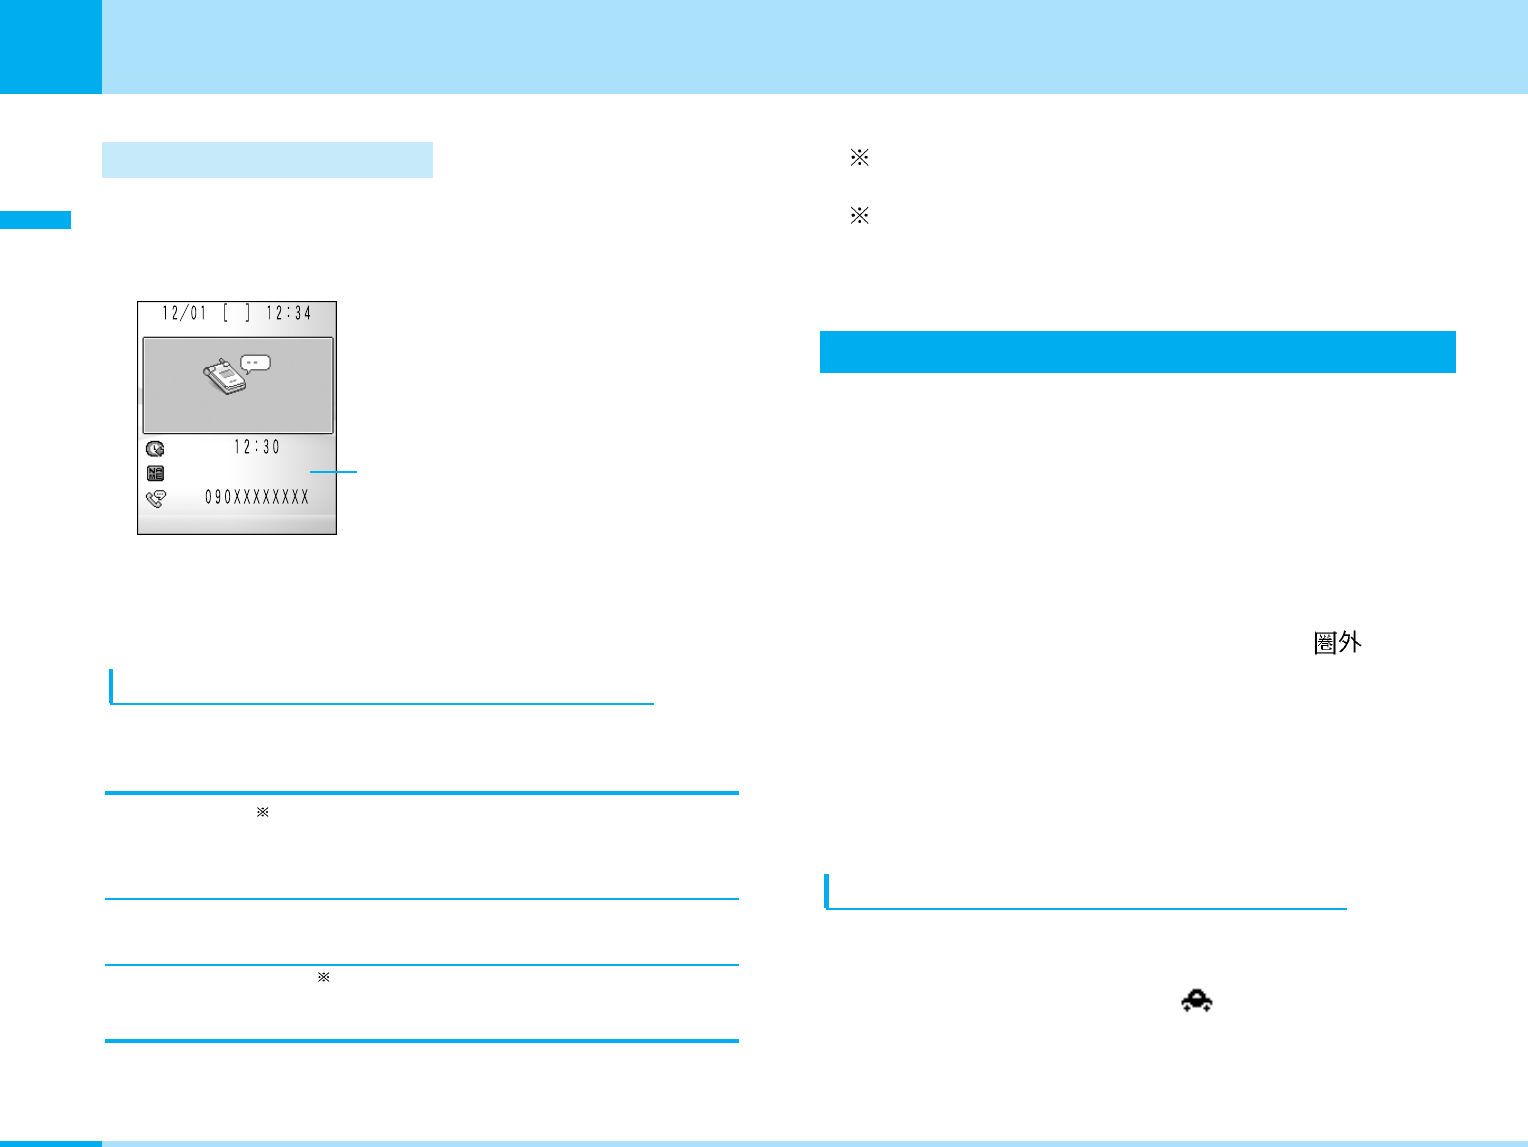
52
Making calls/Receiving calls
Making calls/Receiving calls
When you didn't get a call
When you could not answer the incoming voice call/video-
phone call, the following screen indicating a missed call
appears and the LED blinks for approx. 60 seconds.
•C[OK] : You can view the list of received calls.
•I[Close] : You can close the screen for missed calls.
Using the Submenu of the Ringing Display
1. From the Ringing screen (P51), M[Menu]
]
Select
from the following submenu items
Voice mail 1
The Call is connected to the Voice Mail Service
Center.
Call rejection
The call is disconnected without answering it.
Call forwarding 2
The call is forwarded to the registered phone number.
1: If you use voice mail menu, you should register this service
in operator. For details, see “Using voice mail” (P198).
2: If you use call forwarding menu, you should register this
service in operator. For details, please refer to the “Using
Call Forwarding Service” (P201).
Using Public mode (drive mode)
Public mode is an auto-answer service that puts stress on
manners in public spaces. When there is an incoming call
in Public mode, a guidance to the effect that you cannot
answer the call because you are driving a car or in a place
(train, bus, theater, etc.) that requires restraint from using a
phone is played for the caller and the call is disconnected.
• Public mode can be set/cancelled only from the stand-by
display (in addition, from a screen showing “ ”).
• You can make calls in Public mode.
• When there is an incoming call with “Deactivate caller ID
notification” set while caller ID request service is
“Activate”, a caller ID request guidance is played (no
Public mode guidance is played).
Setting the Public Mode (drive mode)
1. On the stand-by display ]Press *for 1 or more
seconds.
• The Public mode is set and is appeared.
The name not registered in
phonebook is not displayed.
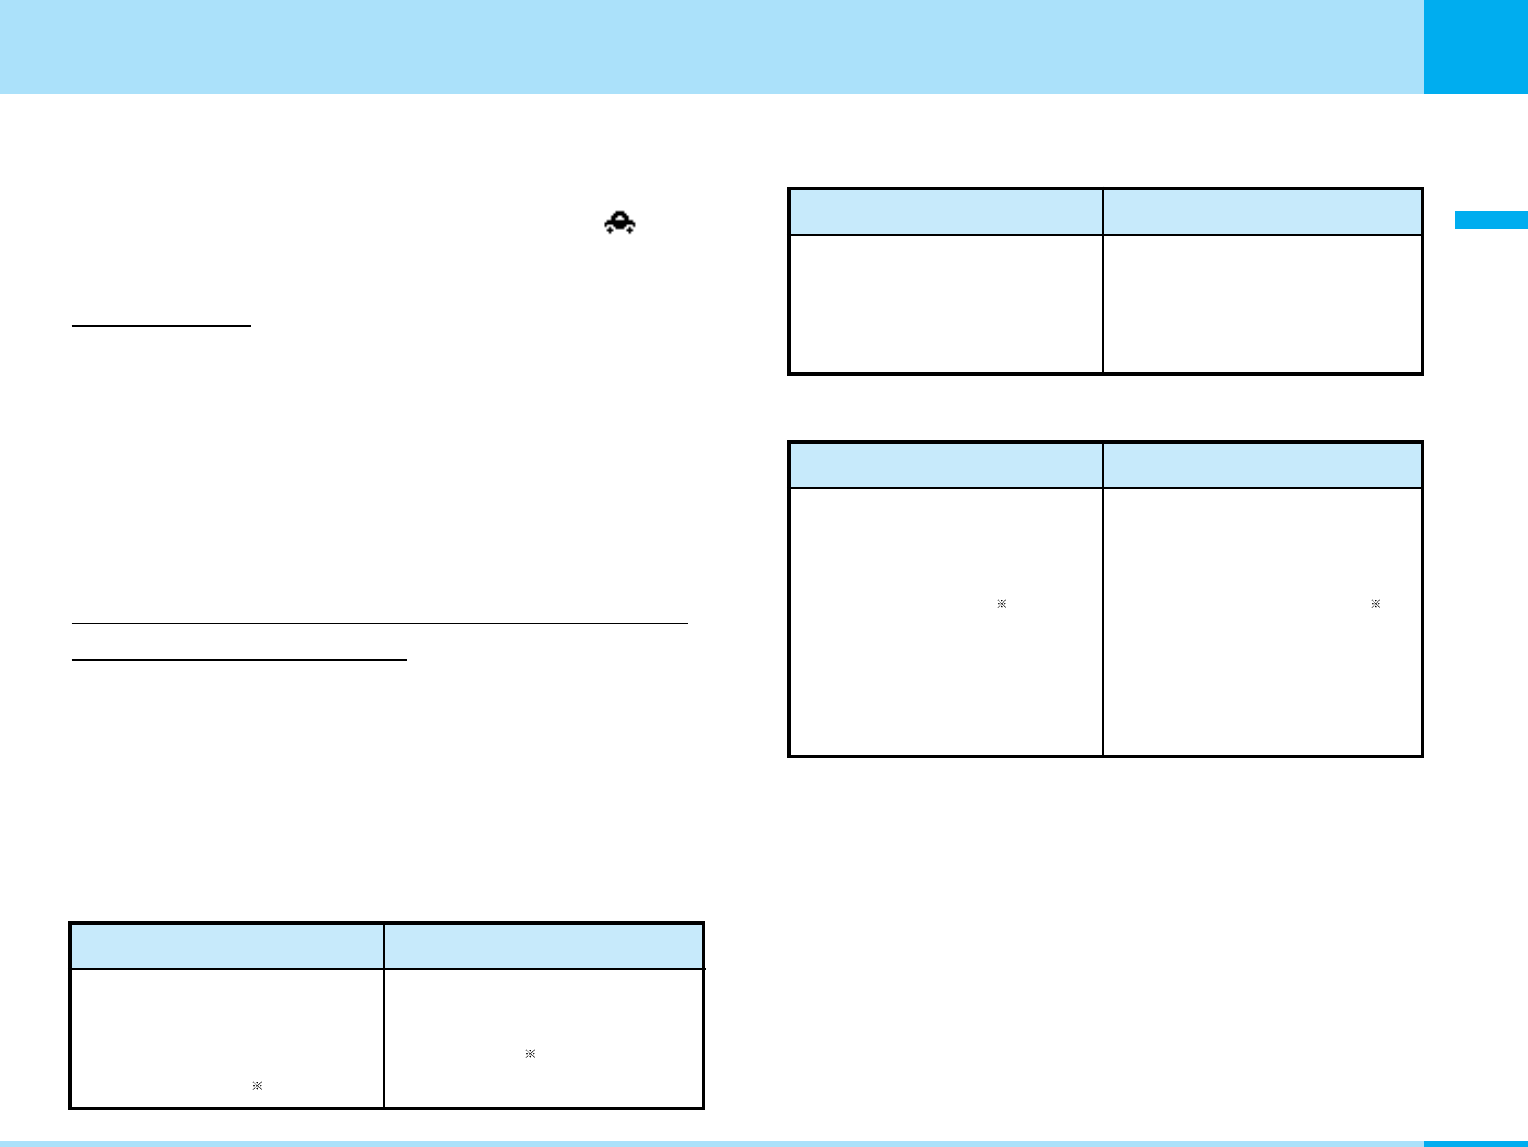
53
Making calls/Receiving calls
Making calls/Receiving calls
aReleasing the Public Mode
• On the stand-by display, press *for 1 or more
seconds. The Public mode is released, and is
disappeared.
In Public mode
No ring alert sounds when there is an incoming voice/video-
phone call. It is recorded as “Missed calls” in “Received calls”
and displayed as “X Missed call” on the stand-by display.
• A guidance to the effect that you cannot answer the call
because you are driving a car or in a place that requires
restraint from using a phone is played for the caller and
the call is disconnected.
Operations while Network Service and Public mode
(drive mode) are both active
While Public mode (drive mode) and Network Service are
both active at the same time, the FOMA phone operations
as listed below. Depending on the settings and/or steps for
making a call, Network Service may have precedence,
disabling Public mode (drive mode) operations or recording
or display of missed calls.
aVoice Mail
aCall Waiting
aCall Forwarding Service
When a video-phone call is received
When a voice call is received
A Public mode (drive mode)
guidance is played for the caller
and the call is connected to Voice
Mail Service Center.
1
The call is terminated without being
connected to the Voice Mail
Service Center.
2
When a video-phone call is received
When a voice call is received
A Public mode (drive mode)
guidance is played for the caller
and the call is disconnected.
In Public mode (drive mode), a
Public mode (drive mode) video
guidance is played for the caller
and the call is disconnected.
When a video-phone call is received
When a voice call is received
A Public mode (drive mode)
guidance is played for the caller
and the call is connected to the
forwarding destination. Whether
the guidance is played to the other
party or not depends on the
setting of the Call Forwarding
Service.
The call is connected to the
forwarding destination, with no
Public mode (drive mode) video
guidance played for the caller.
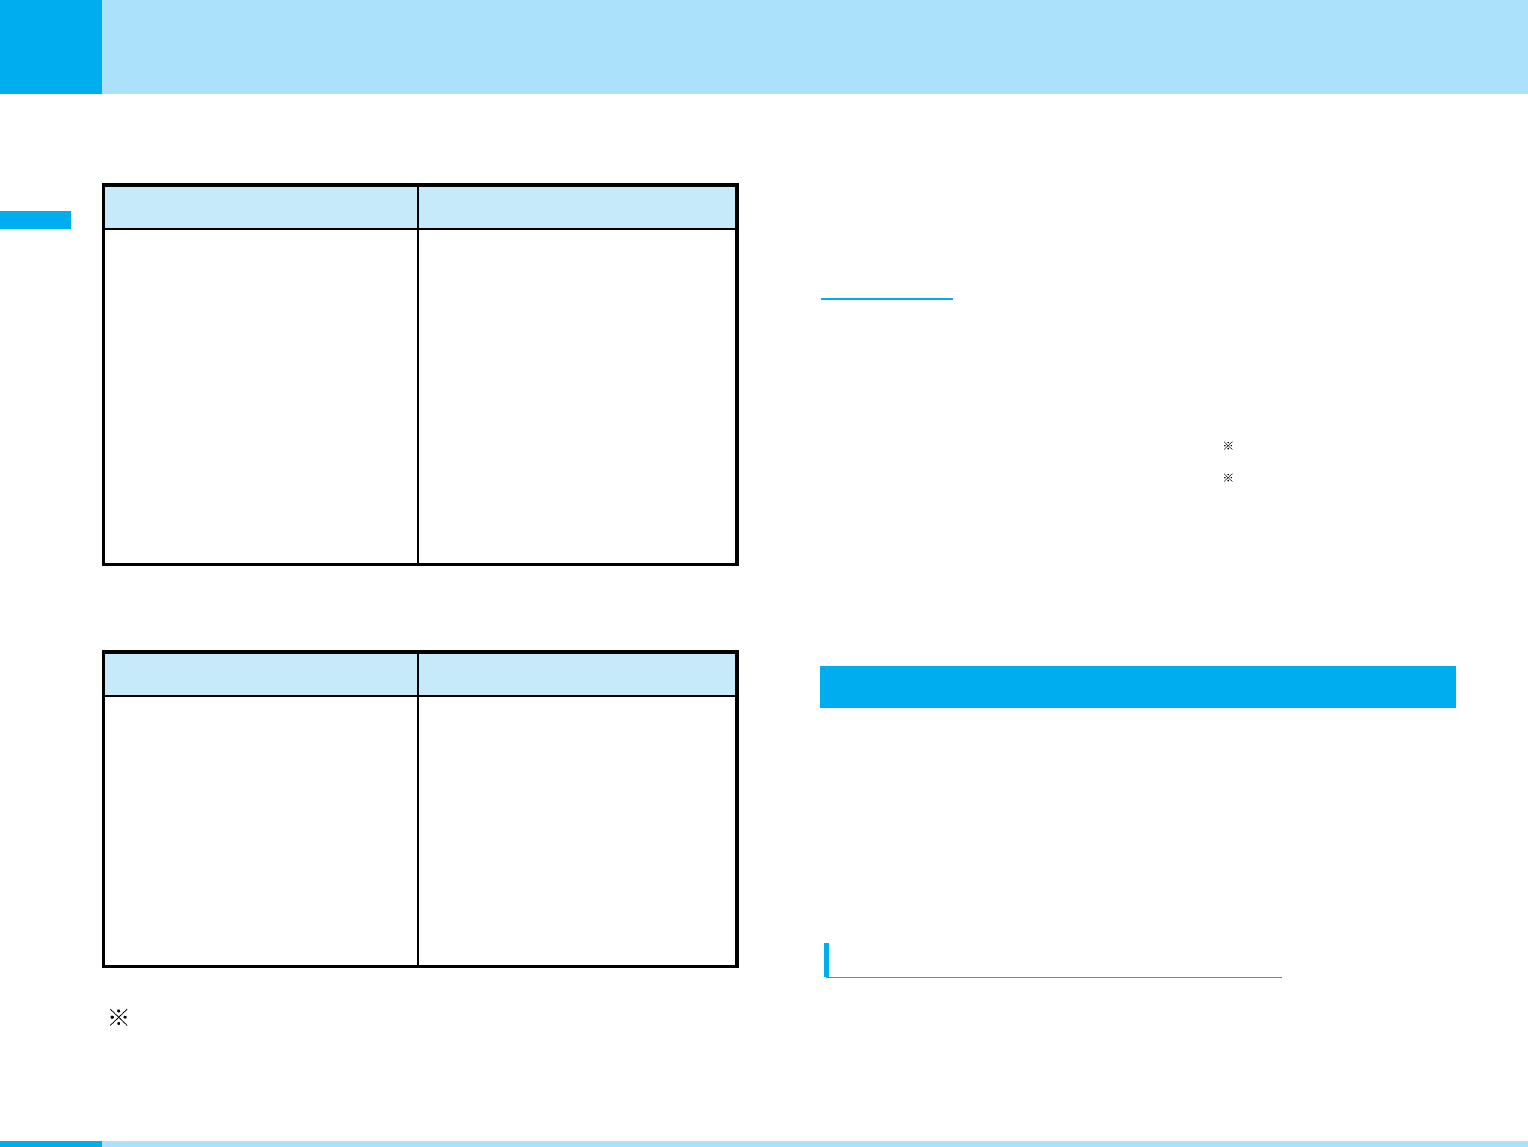
54
Making calls/Receiving calls
Making calls/Receiving calls
aNuisance Call Blocking Service
aCaller ID Request Service
: When voice mail or call forwarding ring time is “0 sec”, no Public
mode (drive mode) guidance is played and the call is not
recorded in Received calls.
• This handset is not applicable to Voice Mail (Video-phone
call). Make a voice call to “1412” (free) and set not to be
applicable to video-phone call.
Information
In Public mode, the following sounds are not generated:
• Ring alert for incoming voice/video-phone calls
• Ring alert for incoming mail
• Ring alert for incoming MessageR/F
• Wake-up alarm sound (the icon blinks)
• Schedule alarm sound (the icon blinks)
• Battery exhaustion alarm sound
• The sound of the i-appli started by the setting of auto-start.
• Battery charging confirmation sound
The alarm sounds after releasing the public mode (drive mode).
Using Public mode (power off)
Public mode is an auto-answer service that lays stress on
manners in public spaces. Once you activate Public mode
(power off), the guidance is played back telling that you
cannot take the call as you are currently in a place
(in hospital, airplane, or in around priority seat in a train)
where use is prohibited. Then the call is disconnected.
Activate Public mode (power off)
1. *25251
]
A
• Public mode (power off) is set. (Nothing is changed in
the Stand-by display.)
When a voice call is received
When a video-phone call is received
• For a call with no caller ID
notified, a caller ID request
guidance is played for the caller
and the call is disconnected.
• For a call with caller ID notified, a
Public mode (drive mode)
guidance is played for the caller
and the call is disconnected.
• For a call with no caller ID
notified, a caller ID request video
guidance is played for the caller
and the call is disconnected.
• For a call with caller ID notified, a
Public mode (drive mode) video
guidance is played for the caller
and the call is disconnected.
When a voice call is received
When a video-phone call is received
• For a call from a caller registered
for nuisance call blocking, a call
rejection guidance is played for
the caller and the call is
disconnected.
• For a call from a caller not
registered, a Public mode (drive
mode) guidance is played for the
caller and the call is
disconnected.
• For a call from a caller registered
for nuisance call blocking, a call
rejection video guidance is
played for the caller and the call
is disconnected.
• For a call from a caller not
registered, a Public mode (drive
mode) guidance is played for the
caller and the call is
disconnected.
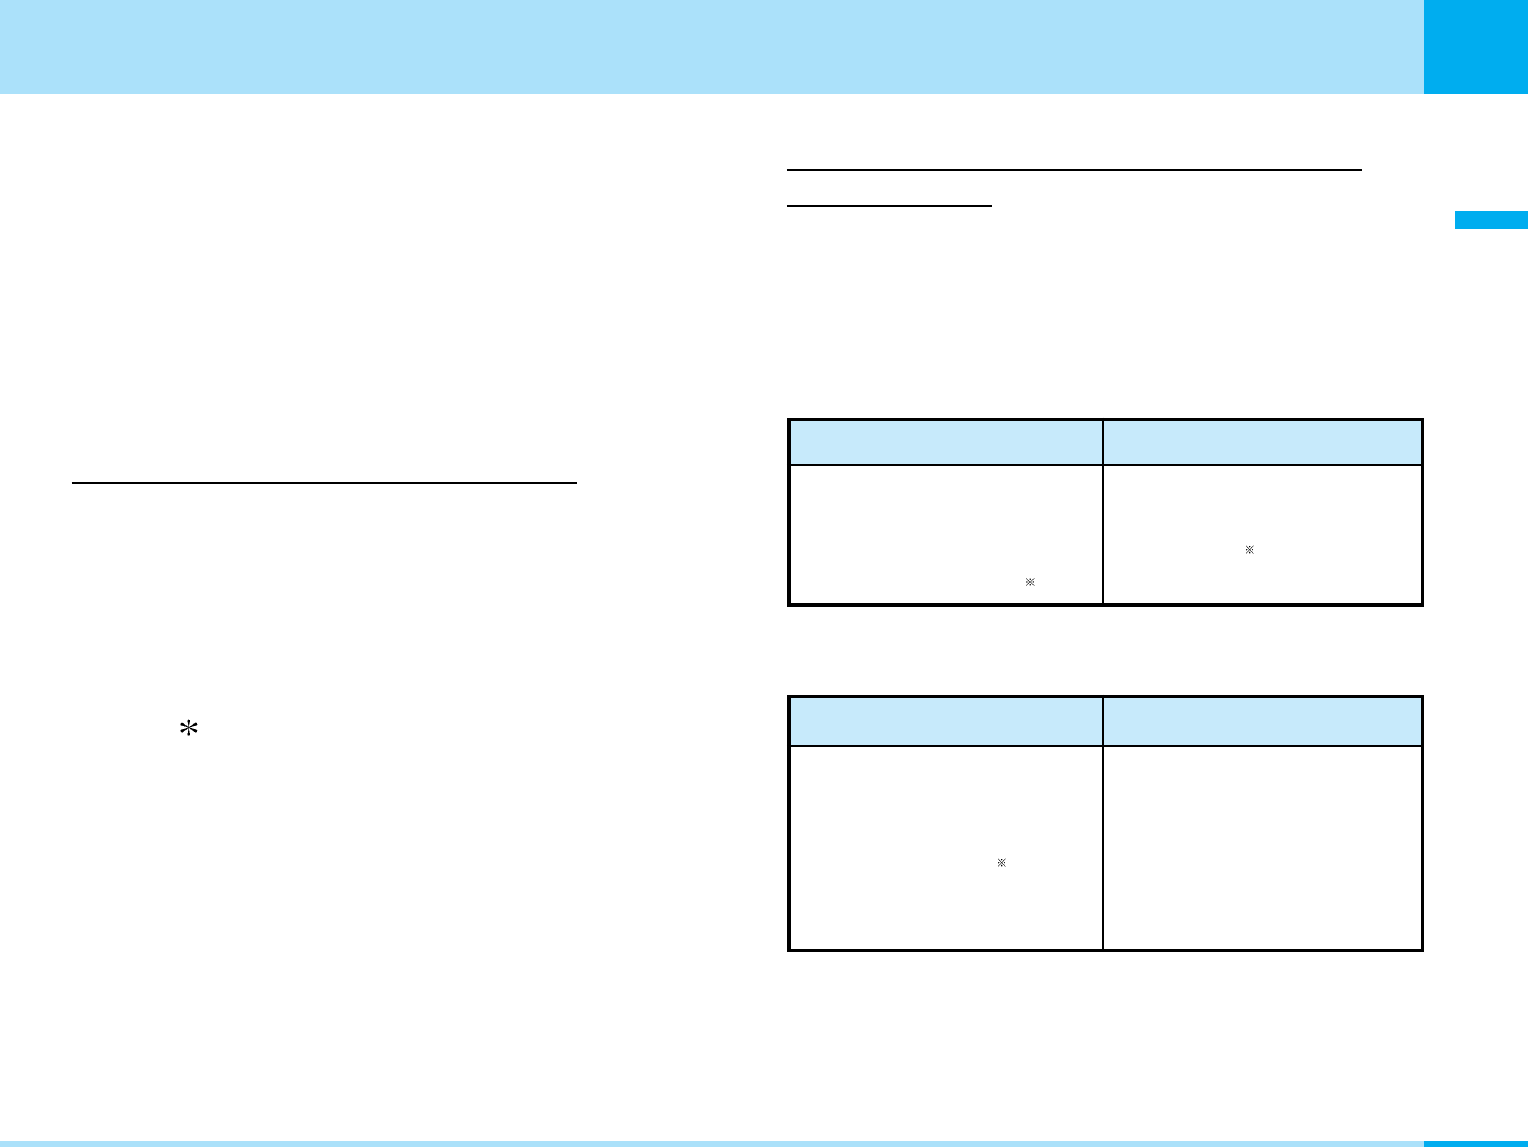
55
Making calls/Receiving calls
Making calls/Receiving calls
• After setting Public mode (power off) and turning off
the power, the guidance “The person you are calling
is currently in an area where use is prohibited. Please
try again later.” is played back for incoming calls.
aTo release Public mode (power off)
*25250 ]A
aTo check Public mode (power off) for the setting,
*25259 ]A
When Public mode (power off) is activated
When there is an incoming voice call, the guidance is
played back to the caller telling that you are currently in an
area where use is prohibited, and then the call is
disconnected. When there is an incoming video-phone
call, the video-guidance of the public mode is played back
to the caller, and then the call is disconnected.
• This setting is continued until you release the setting by
dialing “ 25250”. If you just switch on, this setting is not
released.
• The Public mode (power off) guidance is played back
even when you are out of the service area or radio
waves do not reach.
Activating between network services and Public
mode (power off)
If you use Public mode (power off) and Network service at
the same time, the operation will be activated as follow.
Depending on the setting or calling, the network service
can be preferred, so the activation of Public mode (power
off) or the record of missed call may not be displayed.
aVoice Mail
aCall Forwarding Service
Response to Incoming Video-phone calls
Response to Incoming Voice calls
Plays back the Public mode
(power off) guidance to caller, and
then the call is connected to the
Voice mail Service Center.
1
The call is terminated without being
connected to the Voice Mail
Service Center.
2
Response to Incoming Voice calls
Response to Incoming Video-phone calls
Plays back the Public mode
(power off) guidance to caller, and
then the call is forwarded to the
forwarding destination.
1
The
guidance depends on setting of
Call Forwarding Service.
Does not play back the video
guidance for Public mode, and the
call is forwarded to the forwarding
destination. If the destination does
not support video-phone call, the
call is disconnected.
56
Making calls/Receiving calls
Making calls/Receiving calls
aNuisance Call Blocking Service
aCaller ID Display Request
1: When voice mail or call forwarding ring time is set to
“0 sec”, no Public mode (power off) guidance is played.
2: This handset is not applicable to Voice Mail (Video-phone
call). Make a voice call to “1412” (free) and set not to be
applicable to video-phone call.
Response to Incoming Voice calls
Response to Incoming Video-phone calls
• When the caller is registered to
the Nuisance Call Blocking
Service, the guidance of the call
rejection is played to the caller
and the call is terminated.
• In other cases, the guidance of
the public mode (power off) is
played to the caller and the call
is terminated.
• When the caller is registered to
the Nuisance Call Blocking
Service, the image guidance of
the call rejection is played to the
caller and the call is terminated.
• In other cases, the guidance of
the public mode (power off) is
played to the caller and the call is
terminated.
Response to Incoming Voice calls
Response to Incoming Video-phone calls
• For the caller without a caller ID,
plays back the Caller ID Request
guidance, and then the call is
disconnected.
• For the caller with a caller ID,
plays back the Public mode
(power off) guidance, and then
the call is disconnected.
• For the caller without a caller ID,
plays back the video guidance
for Caller ID Request, and then
the call is disconnected.
• For the caller with a caller ID,
plays back the video guidance for
Public mode (power off), and
then the call is disconnected.

57
About Video-phone ................................58
Making Video-phone Calls.....................58
Receiving Video-phone Calls.................60
Changing Settings for
Video-phone Calls..................................61
Making/Receiving
Video-phone calls
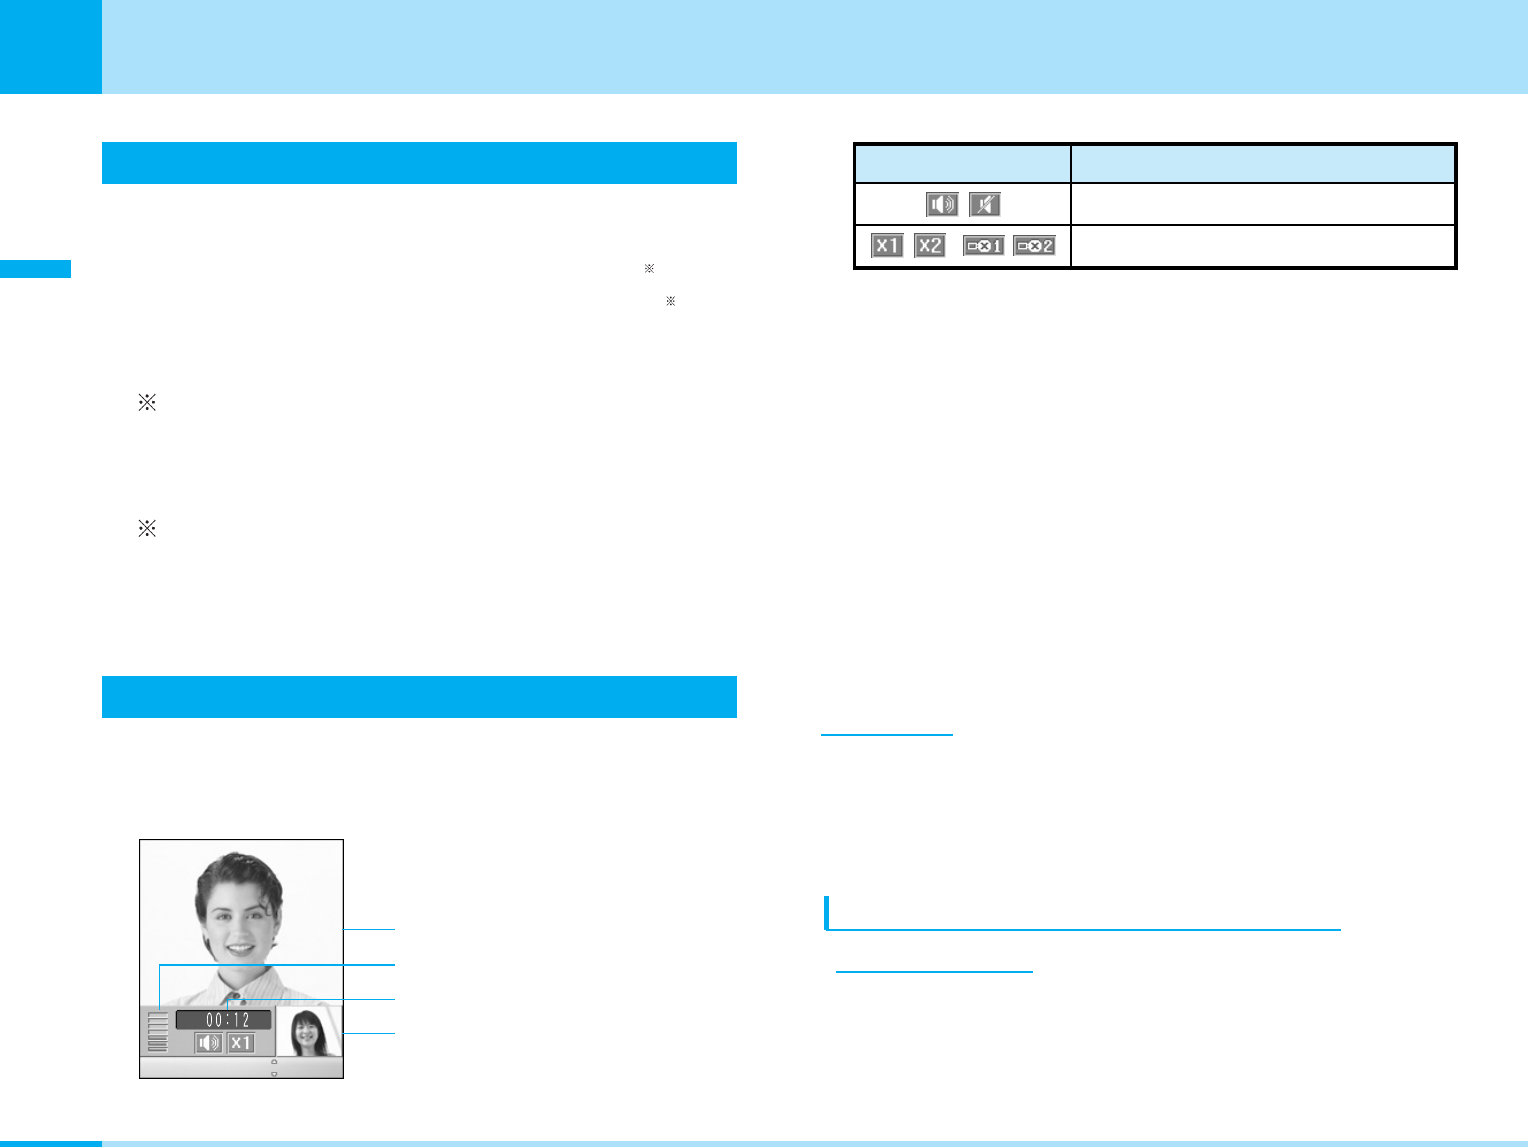
58
Making/Receiving Video-phone calls
Making/Receiving Video-phone calls
About Video-phone
When both you and the other party use DoCoMo's video-
phones, you can talk seeing each other's image.
• DoCoMo video-phones conform to 3G – 324M 2
standardized by the international standard 3GPP 1.
You cannot connect to the video-phone that uses a
different format.
1 : 3GPP (3rd Generation Partnership Project) is the regional
standards organization for developing common technical
specifications for third-generation mobile
telecommunications systems (IMT–2000).
2 : 3G–324M is the international standard for the third
generation of mobile video-phones.
• The video-phone call is activated at the speed of 64K
bytes.
Making Video-phone Calls
1. Enter the other party’s phone number
• The Enter Phone Number screen (P48) is displayed.
2. T]Start talking when the other party answers
<Talking Display>
• The voice of the other party is heard from the
speaker when the call starts.
• Press Qfor 1 or more second: You can switch
ON/OFF the speaker phone.
•C[Image]/[Camera]: You can switch between
Substitutive image and your photo image for sending
to the other party.
•I[Hold]/[Active]: You can put the call on hold or
release hold. While the call is put on hold, a
substitutive image is sent to the other party.
•T: Rotate an image.
3. Press Pto end the call after talking
Information
• See “International Calls” (P50) for how to make international calls.
• When the Flat-plug Earphone/Microphone Set with Switch (option)
is attached, you can only talk on the Earphone/ Microphone
regardless of whether the speaker phone is ON/OFF.
Using the Submenu of the Enter Phone
Number screen
See “Using the Submenus of the Enter Phone Number
screen” (P48) of voice calls for the submenus available.
The other party's image
The volume during a call
Call duration
Own image
Menu HoldImage
Description
Mark
/
Speaker phone ON/OFF
Zooming magnification
59
Making/Receiving Video-phone calls
Making/Receiving Video-phone calls
Using the Submenus of the Talking screen
Setting item/Setting at purchase >P253
1. From the Talking screen (P58), M[Menu] ]Select
from the following submenu items
End call
The call is disconnected.
Hold
You can put the call on hold. You can cancel the
function by pressing I[Active].
Substitutive image/Camera image
You can switch to the Substitutive image for sending
to the other party. >P94
Camera settings
You can set the camera of Video-phone call. You can
select the icon by pressing J. After setting, press I
[Close].
–Zoom : The camera image is zoomed. (x1/x2)
–Brightness : You can change the brightness of
photo images.
–Night mode : You can set it up when using the
camera in a dark place.
Video-phone settings
You can set the display of Video-phone call. After
setting, press I[Done]. >P93
–Display setting : You can set the display method
for the Talking screen.
• Both : The other party’s image and your image
are displayed.
• Other : Only the other party’s image is displayed.
• Me : Only your image is displayed.
–Sub screen : If you select “Both” of “video-phone
settings”, you can set the image which displayed
each screen.
• Me : Only your image is displayed.
• Other : Only the other party's image is displayed.
–Display light: You can set the lighting method of
the backlight on the Talking screen.
•Always on : Always lights during a call.
•Terminal setting : Follows the settings on the
“Main screen” of the “Backlight”. >P83
Sending image quality
You can set the quality of images to be sent to the
other party.
–Normal : Sends images in standard quality and
motion speed.
–Prefer motion quality : Sends images laying stress
on motion speed. Prefer motion quality is effective
for moving images.
–Prefer image quality : Sends images laying stress
on image quality. Prefer image quality is effective if
there is little motion.
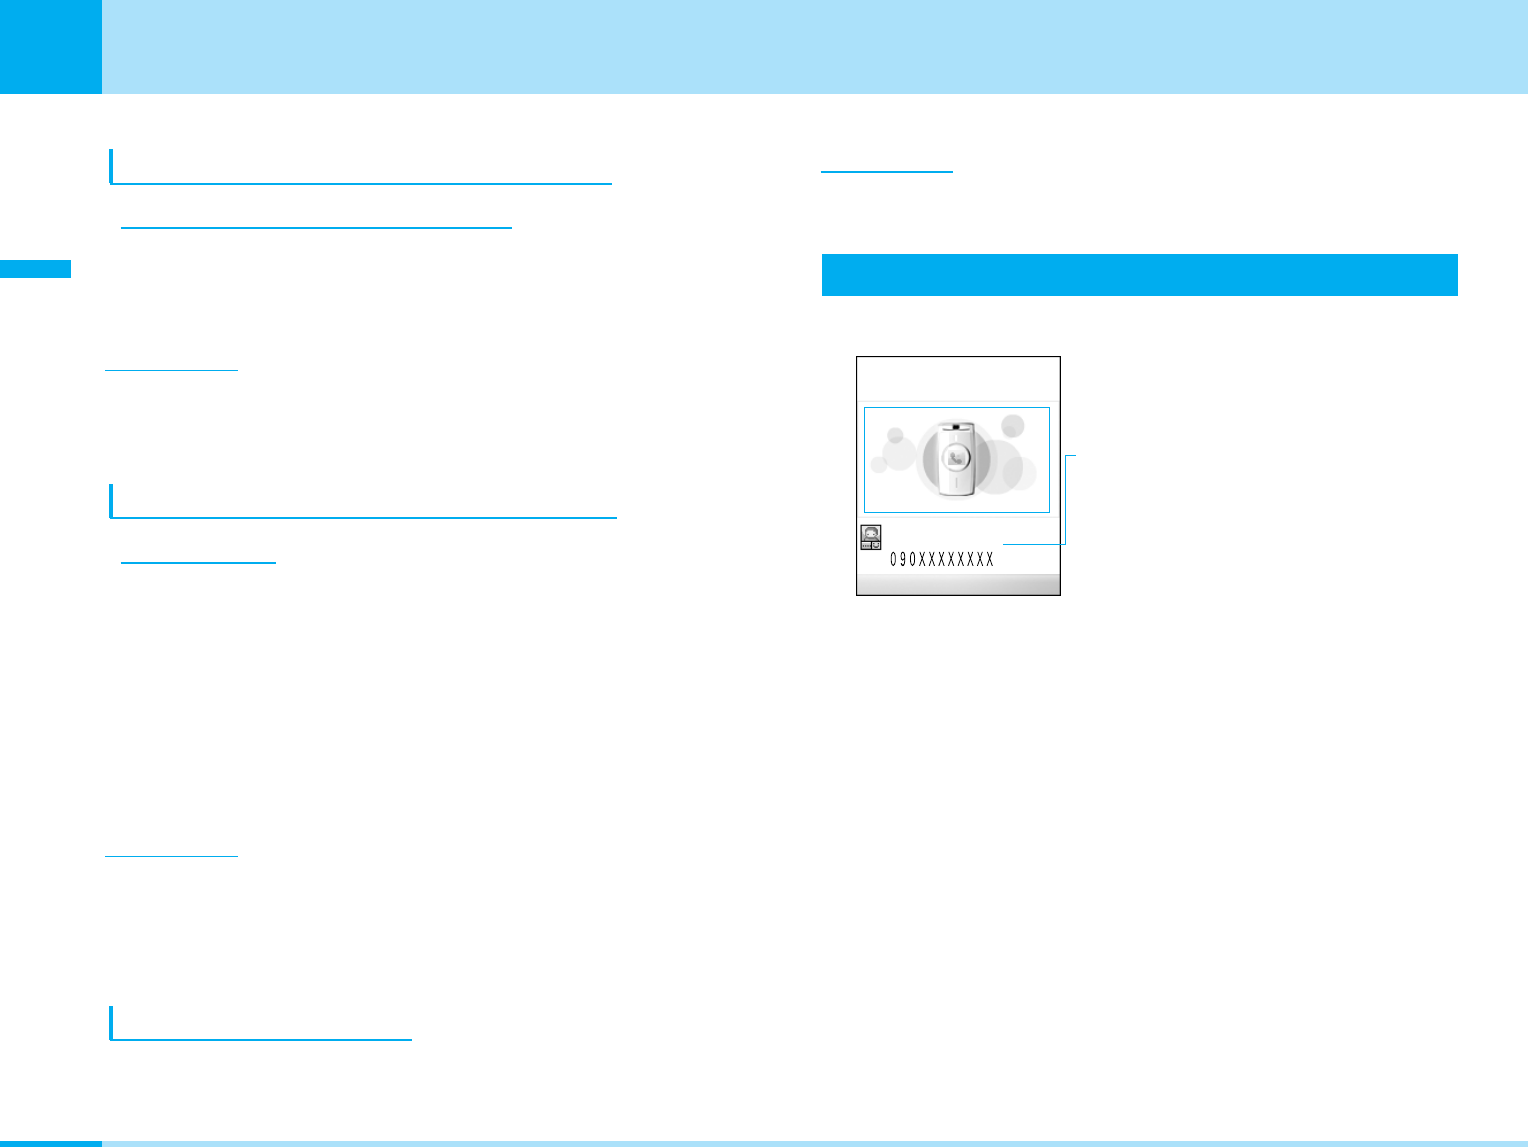
60
Making/Receiving Video-phone calls
Making/Receiving Video-phone calls
Making a Video-phone call from the
Dialed/Received Call Record
1. On the Stand-by display, L/R/A/T]Select
a history ]T
Information
• See “Using the Submenu of the Received Call Record Screen”
(P86) for the submenu.
Making a Video-phone Call from the
Phonebook
1. On the Stand-by display U, or Search for
phonebook entries (P66) ]Select a party to call ]
T
When multiple phone numbers are registered, press Tto
display the Select call number screen, then select the
phone number and press C[Call].
Information
• To switch the phonebook to display between the FOMA
phone and UIM, select M[Menu] >Select “View handset” /
“View UIM”.
Adjusting the Volume
1. Press H/FE during a call.
Information
• The changed volume is held even after ending the call.
Receiving Video-phone Calls
1. When you receive a call, T/A
•C[Image]: You can receive a call. The substitutive
image will be sent to the other party.
•P: You can put the call on hold. The holding
image will be sent to the other party. If you press C,
you can answer the call.
•T: Rotate an image.
• If you close the handset while a call is incoming, the
call will be rejected.
2. Pto end the call after talking
The other party's name Ŧ2
The other party's phone number
The other party's image Ŧ1
Ŧ1 : Displayed only when the other party's
image is registered in the phonebook.
Ŧ2 : In case the other party's information is
not registered in the phonebook,
“Unregistered” will be displayed.
<Ringing Display>
61
Making/Receiving Video-phone calls
Making/Receiving Video-phone calls
Information
• When inserting the switch of the Flat-plug Earphone/
Microphone set with Switch (option), you can connect a call
by earphone regardless of Speakerphone ON/OFF.
• If you answer a video-phone call by pressing the switch of the
Flat-plug Earphone/Microphone set with Switch (option) when
closing the flip, the substitutive image will be sent.
Using the Submenus of the Ringing screen
See “Using the Submenus of the Ringing screen” (P51) of
voice calls for the submenus available. Note that “Voice
mail” is not displayed for video-phone calls.
Changing Settings for Video-phone Calls
C](Settings) ]3
You can set the operation and display for video-phone
calls. See “Setting Operation and Display for video-phone
Calls” (P93) and “Selecting an Image for video-phone
Calls” (P94) for details of the settings.


63
Adding to Phonebook ............................64
Searching for Phonebook Entries..........66
Checking the Number of Saved
Phonebook Entries.................................70
Setting Phonebook.................................70
Setting Groups .......................................71
Displaying Own Number ........................72
Phonebook
On the Stand-by display, C[Menu] ]
(Phonebook) or “Phonebook”
To display the Phonebook menu
Select
Phonebook
1 Add to phonebook
2 Seach phonebook
3 No. of phonebook
4 Phonebook settings
5 Group settings
6 Own number
Select
Phonebook
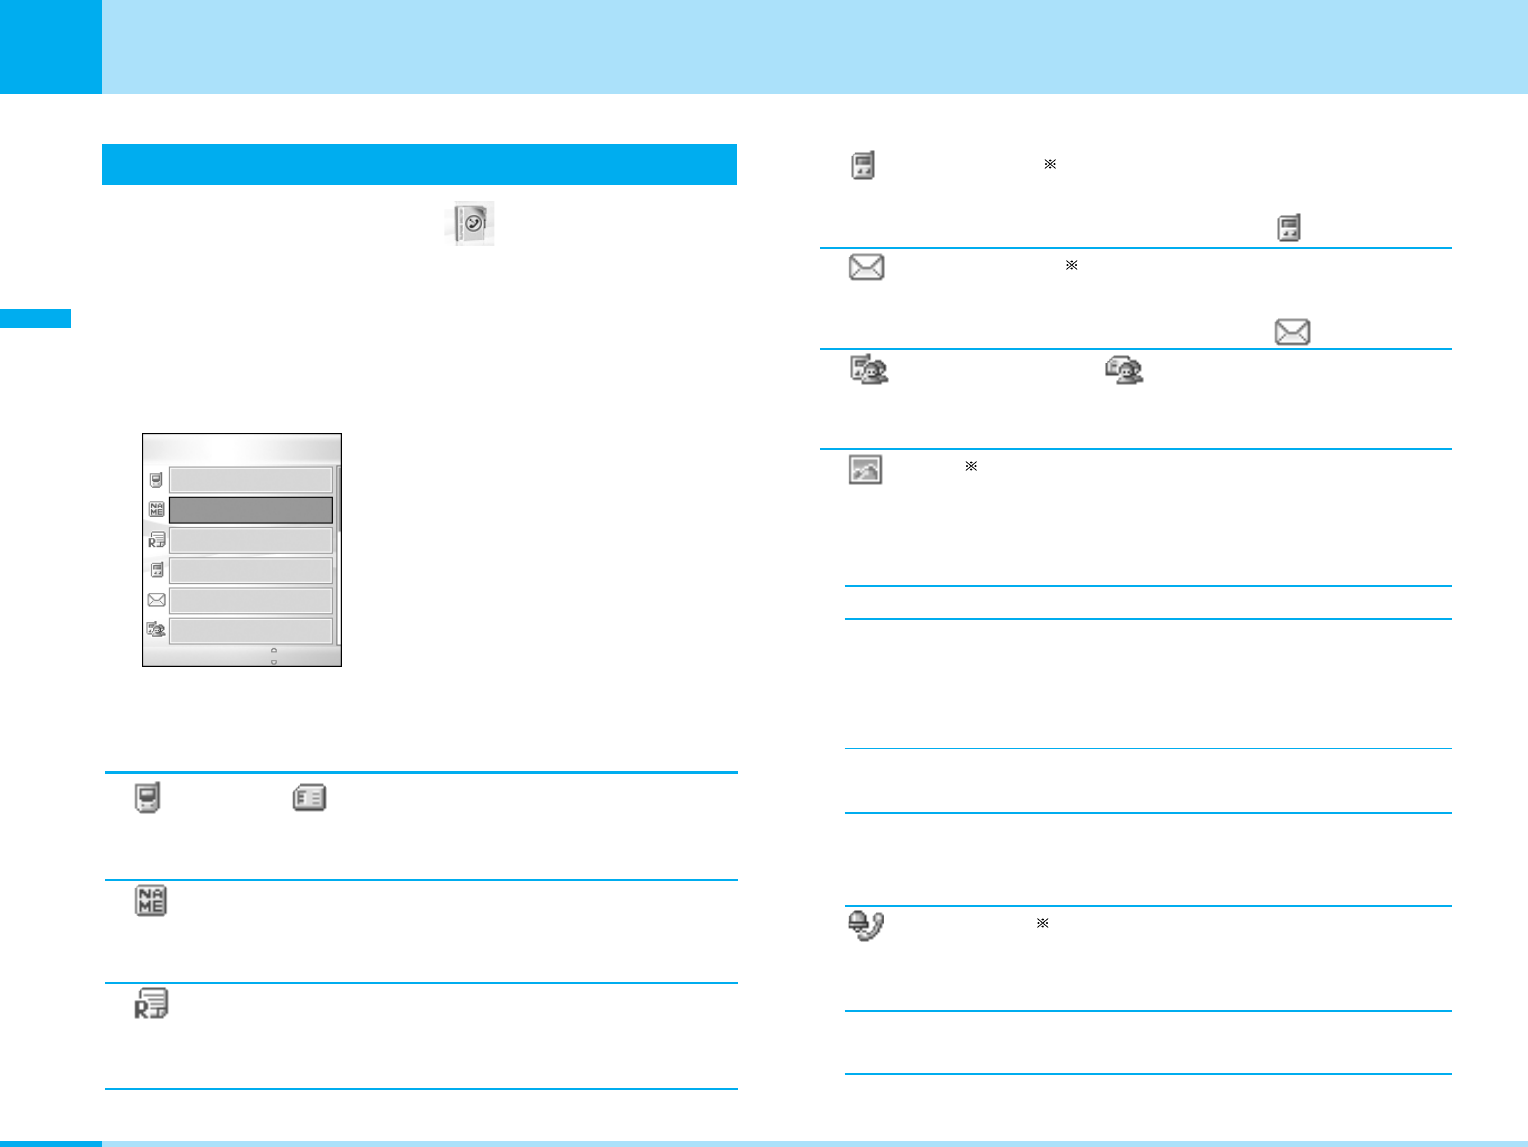
64
Phonebook
Adding to Phonebook
C](Phonebook) ]1
2 types of phonebooks are available, the phonebook
saved in the handset of the FOMA phone and the
phonebook saved in UIM.
1. From the Phonebook menu (P63), “Add to
phonebook”
<Saving Phonebook Entries>
2. Select an item to save
Handset / FOMA card (UIM)
Select a storage location of the Phonebook (Handset
/ UIM).
Name
Enter a name. Unless you enter a name, the
Phonebook entry cannot be saved.
Reading
Enter reading of the name. Automatically inserted if
you enter “Name”.
Number 1 ~ 5 1
Enter a phone number. If you press M[Icon] after
entering, you can set a mark other than .
Mail addr 1 – 3 1
Enter a mail address. If you press M[Icon] after
entering, you can set a mark other than .
Group (Handset)/ Group
FOMA card (UIM)
Select a group to save.
Image 2
Select an image to be displayed on dialing / receiving
calls screen, talking screen, phonebook list screen
and phonebook detail screen.
–No image : No image is set.
–Character: You can set the character. Select the
part (Face, Hair, Tops, Bottoms, Acc., Scenery) by
pressing H, and then select the item by pressing
J. After setting, press C.
–Select picture : You can select from images saved
in “My picture” of “Data box”. >P166
–Take picture: You can start a camera. Go to step 2
on page 109 of “Shooting Still Images”. The size of
image 80x96 cannot be changed.
Set ringtone 2
You can set a ring tone for when you receive a voice /
video-phone call from registered caller.
–Data box : You can select from melodies saved in
“Melody” of “Data box”. >P176
Name
Reading
Number1
Mail addr1
No group
Handset
Add to phonebook
SaveSelect
Phonebook

65
Phonebook
Phonebook
–Terminal setting : Go to the settings of “Select ring
tone”. >P76
Set mail ringtone 2
You can set a ring tone for when you receive mail
from registered party.
–Data box: You can select from melodies saved in
“Melody” of “Data box”. >P176
–Terminal setting: Follows the settings of
“ringtone”. >P76
URL 2
You can enter a URL.
Postal code 2
You can enter a postal code.
Home addr. 2
You can enter a home address.
Company name 2
You can enter a company name.
Job title 2
You can enter a job title.
Company addr. 2
You can enter a company address.
Memo 2
You can enter a memo.
Secret Code 3
Set to the secret code.
1 : Only 1 entry can be saved if the storage location for the
Phonebook is set to “FOMA card (UIM)”.
2 : Not displayed if the storage location for the Phonebook is set
to “FOMA card (UIM)”.
3 : For secret code, refer to “Mobile Phone User's Guide
[i-mode]”.
3. After storing, I[Save] ] Enter a memory number
(0-499) ]C
Saving in UIM
1. From the Saving Phonebook Entries screen (P64),
select the (Handset) field ]Select using J
2. Enter required items
• See (P64) of “Adding to Phonebook” for details of the
items.
3. I[Save]
Information
• For phone numbers of the Phonebook saved in Memory No
0 – 9 (1 saved in “Number1”), if you press 0~9and then
press A(T) from the Stand-by display, you can make a
voice (video-phone) call.
• 500 Phonebook entries can be saved in the FOMA phone and
50 Phonebook entries can be saved in the UIM. Note that the
number of savable entries may be smaller depending on the
saved contents. >P70
66
Phonebook
Phonebook
Searching for Phonebook Entries
C](Phonebook) ]2
You can display the Phonebook in the FOMA phone / UIM
specifying a search method.
1. From the Phonebook menu (P63), “Search
phonebook”
•I[UIM]/[Handset]: You can switch Phonebook
Search screens between the FOMA phone and the
UIM.
2. Select the following search method
Show all data
Press the buttons 1~0corresponding to the
50 Japanese syllables (corresponding to Columns) for
searching. If you press *, you can search for Other
item. You can switch tab of the 50 syllabary by
pressing J.
Group search
You can specify a group for searching. (Group 1~30
(FOMA Handset) / 1~10 (UIM)). After searching, you
can switch groups by pressing J.
Reading search
You can search by entering some of the characters
contained in the reading of the name.
Memory No. search
You can search by using a memory number (0-499).
You can switch tab of the memory number by pressing
J.
Phone No. search
You can search by entering part of the phone
number.
Domain search
You can search by specifying a domain. You can
switch domains using J.
• To create a domain to specify, see “Creating a
domain list” (P70).
: Not selectable on the Phonebook Search display of UIM.
3. The Phonebook List meeting the search method is
displayed.
<Phonebook List>
•A/T: You can make a voice call or video-phone
call to the selected phone number saved in
phonebook.
However, when multiple phone numbers are
registered, press A/Tto display the Select call
number screen, then select the phone number and
press C[Call].
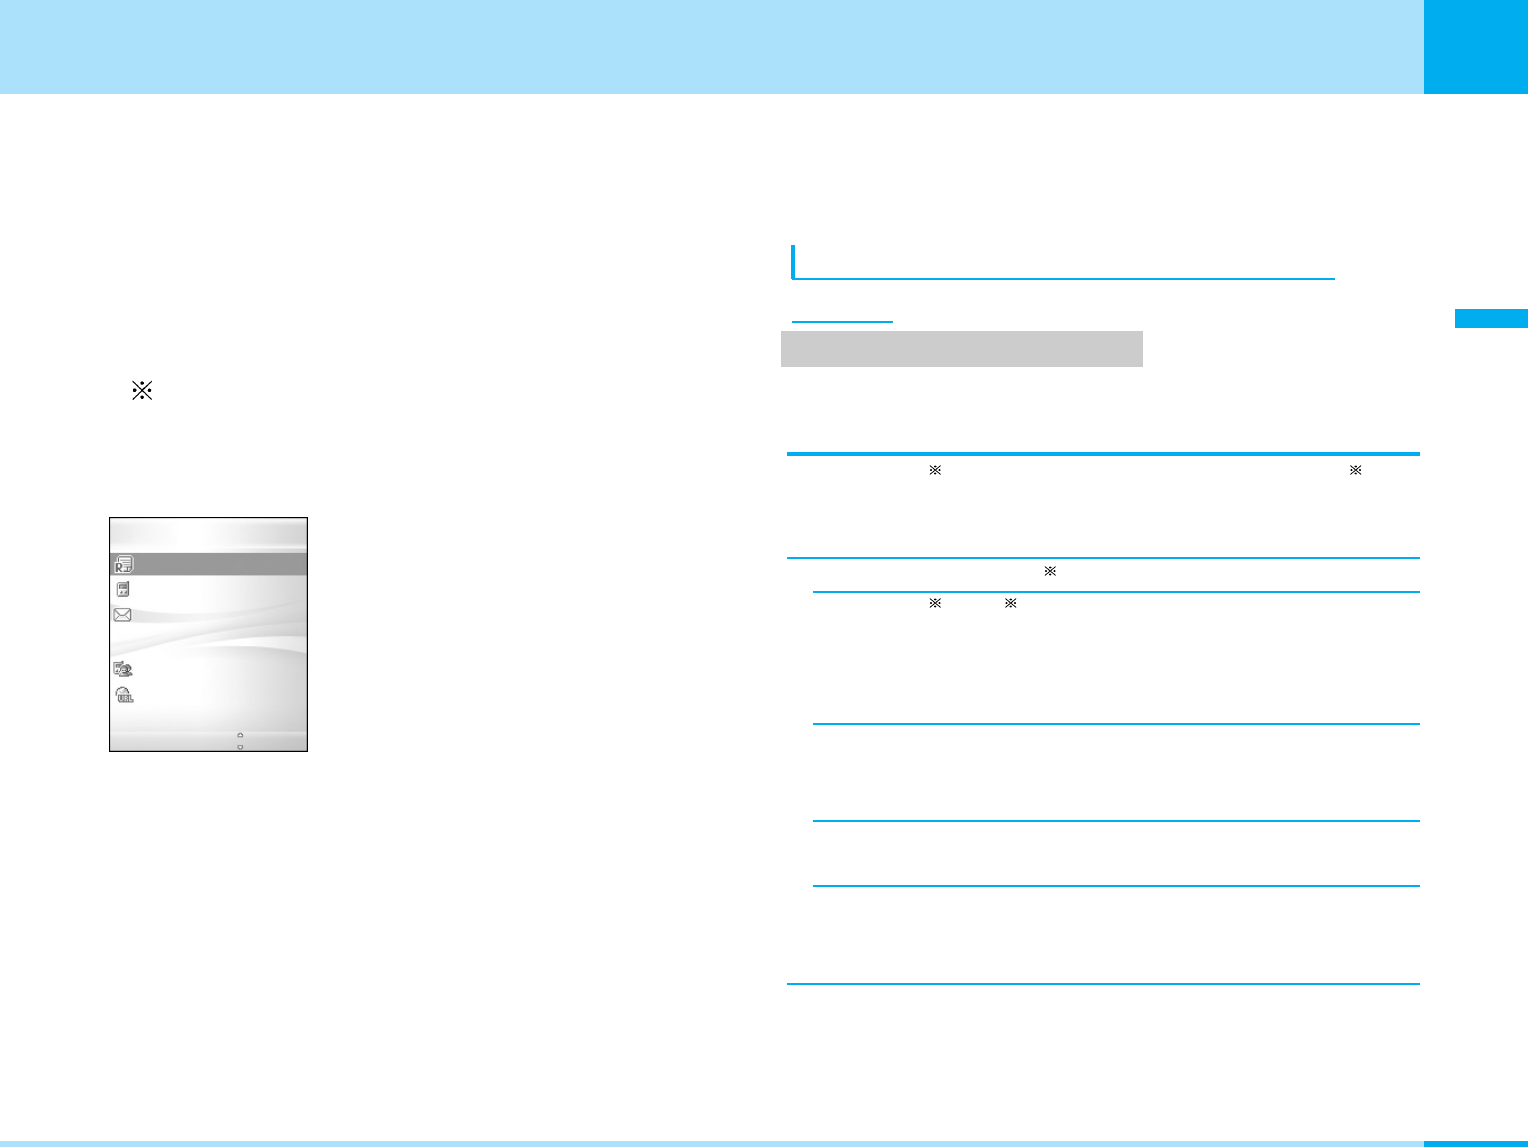
67
Phonebook
Phonebook
Next Page
•I[Mail] : You can compose i-mode mail to selected
mail address or phone number registered in the
selected phonebook. Go to step 3 on page 149 of
“Composing i-mode mail”. When multiple mail
addresses or phone numbers are registered in the
phonebook, press I[Mail] to display the destination
selection screen, then select the destination.
: If the mail address or phone number is not
registered in the phonebook, you cannot use this
function.
4. Select the desired Phonebook
]
C
<Detailed Phonebook>
•A/T: You can make a voice call or video-phone
call to the phone number saved in phonebook.
When multiple phone numbers are registered, the
Select call number screen is displayed, and select
the phone number and press C[Call].
•C[Call] : You can make a call to selected phone
number.
•C[Mail] : You can compose an i-mode mail to
selected mail address saved in phonebook. Go to
step 3 on page 149 of “Composing i-mode mail”.
•C[Connect] : You can connect the web page of
selected URL.
Using the Submenus of the Phone List
display
Setting item/Setting at purchase >P253
1.From the Phonebook List screen (P60), M[Menu]
]
Select from the following submenu items
View UIM 4/FOMA phone phonebook display 5
Switch between UIM phonebook and FOMA phone
phonebook displays.
Search ctgry menu 1
–
Handset
4
/UIM
5
Group settings :
After “Group
search”, you can set the each displayed group in the
phonebook list screen. Go to step 2 on page 71 of
“Using the Submenus of the Group Settings screen”.
–Input char chg: You can switch entry modes for
the Character Entry column displayed at the top of
the phonebook list screen after “Reading search”.
–Return to input: You can return without “Input
character change”.
–Create domain list: You can create a new domain
list from the Phone List display after “Domain search”.
Go to step 2 on page 70 of “Creating a Domain List”.
68
Phonebook
Phonebook
Mail/URL 2
–Compose mail: The mail address or phone number
saved in the selected Phonebook is entered into the
destination. Go to step 3 on page 149 of
“Composing i-mode mail message”.
–Compose SMS: The phone number saved in the
selected Phonebook is entered into the destination. Go
to step 3 on page 152 of “Creating SMS”.
–Connect to URL: Connected to the web page with
the URL saved in the selected Phonebook.
Add new
You can create a new phonebook. Go to step 2 on page
64 of “Adding to Phonebook” for items to be saved.
Edit
You can edit the selected Phonebook. Go to step 2 on
Page 64 of “Adding to Phonebook” for items to be saved.
Send Ir data 3
For Infrared Communication, see “Using the Infrared
Communication” (P182).
–Focused data: Send a selected phonebook entry via
infrared communication.
–All data: Send all phonebook entries via infrared
communication.
Search by
You can select another search method to display a
phonebook. For the searching method, Go to step 2 on
page 66 of “Searching for Phonebook Entries”.
Copy
–Copy to UIM 4:You can copy the Phonebook
selected to the UIM.
–Select copy to UIM 4:You can copy multiple
Phonebooks selected to the UIM. If you press M,
you can select “All data”. After selecting, press
I[Done].
–Copy to handset 5:You can copy the Phonebook
selected to the handset of the FOMA phone.
–Select copy to handset 5:You can copy multiple
Phonebooks selected to the handset of the FOMA
phone. If you press M, you can select “All data”. After
selecting, press I[Done].
Delete
–Delete: You can delete the selected Phonebook.
–Delete selected: You can delete the multiple
Phonebooks selected. If you press M, you can
select all data. After selecting, press I[Done].
–Delete all 6:You can delete all Phonebooks. To
delete all Phonebooks, your terminal security code is
required.
Display image 7
If an image is registered in phonebook list, you can
set whether to display the image or not. >P71
Int'l call (Japan) 8
Make a call to a phone number registered in the
selected phonebook. >P227
This submenu appears only while International
roaming service is active.

69
Phonebook
Phonebook
1: You can user phonebook list by Group search except for “No
group”, “Reading search”, “Phone No. search” and “Domain
search”. You may not be able to select it depending on the
search method or storage status of the selected Phonebook.
2: You cannot select it if no phone number/mail address/URL is
stored in the selected Phonebook.
3: Not selected in Phonebook for UIM.
4: Displayed on the Phonebook of the handset.
5: Displayed on the Phonebook of the UIM.
6: If you perform “Delete all” while checking new i-mode
mail/SMS or activating i-appli, active functions are terminated
and returns to Stand-by screen.
7: No image is displayed on the Phonebook of the UIM.
8: Does not appear within Japan.
Using the Submenus of the Detailed
Phonebook Display
1.
From the Detailed Phonebook screen (P67), M[Menu]
]Select from the following submenu items
Mail/URL 1
–Compose mail: The mail address or phone number
saved in the phonebook displayed is entered into
the Address. Go to step 3 (P149) of “Composing i-
mode mail message”.
–Compose SMS: The phone number saved in the
phonebook displayed is entered into the Address. Go
to step 3 (P152) of “Composing SMS”.
–Connect to URL: Connected to the homepage of
the URL saved in the Phonebook displayed.
Edit
You can edit the phonebook. Go to step 2 on page
64 of “Adding to Phonebook”.
Send Ir data 2
For details, please refer to “Using the Infrared
Communication Function” (P182).
Copy to UIM 3
You can copy the phonebook entry to the UIM.
Copy to handset 4
You can copy the phonebook entry to the FOMA handset.
Delete
You can delete the phonebook entry.
Int'l call (Japan) 5
Make a call to a phone number registered in the
selected phonebook. >P227
1: You cannot select it if no phone number/mail address/URL is
stored in the selected Phonebook.
2: Not selected in Phonebook for UIM.
3: Displayed during displaying the Phonebook of the handset of
the FOMA phone.
4: Displayed during displaying the Phonebook of the UIM.
5: Does not appear within Japan.
70
Phonebook
Phonebook
Checking the Number of Saved
Phonebook Entries
C](Phonebook) ]3
You can check the number of phonebook entries saved in
the handset of the FOMA phone and in the UIM as well as
the number of phonebook entries available.
1.
From the Phonebook menu (P63), “No. of phonebook”
Information
• Actual savable number of phonebook may be smaller
depending on the contents saved in Phonebook.
Setting Phonebook
Setting Display Data
C](Phonebook) ]41
You can set whether to display the phonebook of the
handset of the FOMA phone or the phonebook of the UIM
when displaying a phonebook.
Setting item/Setting at purchase >P241, P242
1. From the Phonebook menu (P63), “Phonebook
settings” ]“Display data” ]“Handset only”/“UIM
only”
Creating a Domain List
C](Phonebook) ]42
You can store domains to be used when doing “Domain
Search” (P66).
Setting item/Setting at purchase >P242
1. From the Phonebook menu (P63), “Phonebook
settings” ]“Create domain list”
•I[Disp.] 1: You can view all domain registered in a list.
•M[Delete] 2: You can delete the domain saved.
1: You cannot use this menu when you select no input screen.
2: You cannot use this menu when you select
“@docomo.ne.jp” or no input screen.
2. Select the domain list field
]
C
]Enter a domain
]
C
Selecting a Search Method
C(Phonebook) 43
You can set the search method for when you press Uon
the Stand-by display and bring up the phonebook search
display.
Setting item/Setting at purchase >P242
1. From the Phonebook menu (P63), “Phonebook
settings”
]
“Search by”
]
Select a search method
• Go to step 2 on page 66 of “Searching the
Phonebook Entries” for the search method.
71
Phonebook
Phonebook
Information
• If the “Display data” (See left) is set to “UIM only”, you cannot
select “Memory No. search”.
Displaying Images
C](Phonebook) ]44
You can set whether to display the image set when
selecting a phonebook with “ (image setting)” set (P64)
on the phonebook list screen.
Setting item/Setting at purchase >P242
1. From the Phonebook menu (P63), “Phonebook
settings”
]
“Display image”
]
“ON”/“OFF”
Setting Groups
C](Phonebook) ]5
You can save the group name for Group of the
phonebook. You can also set a ring tone for each group.
Setting item/Setting at purchase >P242
1. From the Phonebook menu (P63), “Group settings”
• Group settings display appears.
•I[UIM]/[Handset]: You can switch the Group settings
displays between the FOMA phone (handset) and the
UIM.
2. Select the group to set
]
C
]
Select the following
item to register
]
After setting, press I[Finish]
Group name
You can save the name of the group.
Ringtone
You can set a ring tone for when a call comes in.
–Data box: You can select from the melodies stored
in “Melodies” of “ Data box”. >P176
–Terminal setting: Follows the settings of
“ringtone”. >P76
Mail ringtone
You can set a ring tone for when mail comes in.
–Data box: You can select from the melodies saved
in “Melody” of “Data box”. >P176
–Terminal setting: Follows the settings of “Select
ringtone”. >P76
: Not displayed on the Group setting display of the UIM.
Information
• You cannot set to “No group”.
72
Phonebook
Phonebook
Using the Submenus of the Group Settings
Screen
1. From the Group Settings screen, M[Menu]
]
Select from the following submenu items
Reset 1
You can reset the settings of the group selected.
Move 2
You can change the order of the group selected.
Edit
You can edit the group selected. Go to step 2 (P71) of
“Setting Groups”.
Reset all 3
You can reset the settings and orders of all groups.
1: You cannot use this menu when the selected group is not edited.
2: You cannot use this menu in FOMA card group setting screen.
3: You cannot use this menu when not moving or editing any
group.
Displaying Own Number
C](Phonebook) ]6
You can display your phone number recorded in the UIM.
1. From the Phonebook menu (P63), “Own number”
• The Own number screen appears.
Information
•
You can also check your own number by pressing
C0
from
the Stand-by display.
Displaying Details of Own Number
1. From the Own number screen, C
[Detail]
]
Enter
your terminal security code
]
C
• The Detail screen appears.
•A/T: You can make a voice/ video-phone call
by the number registered in. (except own number)
When multiple phone numbers are registered, the
Select call number screen is displayed, and select
the phone number and press C[Call].
•C[Call] : You can make a voice call to the selected
phone number.
: You cannot use your own number.
•C[Mail]: You can compose i-mode mail to selected
mail address. Go to step 3 on page 149 of
“Composing i-mode Mail”.
•C[Connect]: You can connect the homepage of
selected URL.

73
Phonebook
Phonebook
Using the Submenu of the Detail Screen
1. From the Detail Screen, M
[Menu]
]
Select from
the following submenu items
Mail/URL 1
–Compose mail: The mail address registered in my
number will be entered to destination. Go to step 3
on page 149 of “Composing i-mode Mail”.
–Compose SMS
2
:The phone number registered in
my number will be entered to destination. Go to step
3 on page 152 of “Composing SMS message”.
–Connect to URL: You can connect the homepage
of URL registered in my number.
Edit
You can store your own information. For adding
method, go to step 2 on page 64 of “Adding to
Phonebook”. However, your number registered in
“ (Own number)” cannot be edited.
Send Ir data 3
You can send your own number through infrared
communication. For details related to infrared
communication, go to “Using the Infrared
Communication Function” on P182.
Reset 4
You can reset the edited own number information to
its default.
1: You cannot use this menu if the phone number/mail/URL are
not registered.
2: You cannot use the menu even if you operate the number
registered in own number.
3: You cannot use this menu during a call.
4: You cannot use this menu when the own number information is
not registered.

75
Adjusting the Ring Volume ....................76
Adjusting the Effect Tone Volume .........76
Setting a Ring Tone................................76
Setting an Effect Tone ...........................77
Setting a Vibrator ...................................78
Activating the Manner Mode .................78
Setting Ringing Operations for
Incoming Mail ........................................79
Setting Ringing Time..............................80
Setting Main Screen...............................80
Setting Sub Display................................82
Setting Fonts of Dial Characters ...........83
Setting Menu Style .................................83
Setting Backlight ....................................83
Setting color Scheme.............................84
Setting LED.............................................84
Sound/
Display
1 Ring volume
2 Effect tone volume
3 Select ringtone
4 Select effect tone
5 Vibration settings
6 Manner settings
7 Mail ring duration
Select
Sound
On the Stand-by display, C[Menu] ]
(Sound) or “Sound”
To display the Sound menu
1 Main display
2 Sub display
3 Font
4 Menu style
5 Backlight
6 Color scheme
7 Lighting LED
Select
Display
On the Standby display, C[Menu] ]
(Display) or “Display”
To display the Display menu
76
Sound/Display
Adjusting the Ring Volume
C](Sound) ]1
Setting items/Setting at purchase >P244
1. From the Sound menu (P75), “Ring volume” ]
Select from the following adjustment items ]
After setting,I[Done]
Voice call
You can adjust the ring tone volume for voice calls.
Video-phone
You can adjust the ring tone volume for video-phone
calls.
Mail tone
You can adjust the ring tone volume for mail.
MessageR tone
You can adjust the ring tone volume for MessageR.
MessageF tone
You can adjust the ring tone volume for MessageF.
SMS tone
You can adjust the ring tone volume for SMS.
Information
• When you receive mail, messageR/F or SMS on opening the
flip, the alarm sound will be fixed to level 1 regardless of each
setting of “Ring volume”. However, if you set level 0 of ring
tone, the alarm does not sound.
Adjusting the Effect Tone Volume
C](Sound) ]2
Setting items/Setting at purchase >P244
1. From the Sound menu (P75), “Effect tone volume”
]Select from the following adjustment items ]
After setting,I[Done]
Key tone
You can adjust the key pad sound volume.
Power ON/OFF
You can adjust the tone volume for when turning the
FOMA phone on/off.
Flip tone
You can adjust the tone volume for when opening or
closing the FOMA phone.
Feedback tone
You can adjust the tone volume for when a popup
appears.
Setting a Ring Tone
C](Sound) ]3
You can set the ring tone for voice call, video-phone call or
mail. In addition to ring alerts and melodies registered by
default, you can set melodies and/or i-motion downloaded
from i-mode sites and web pages as incoming ring alerts.
You can set the SMF, MFI or MP4 file as a ringtone.
Sound/Display
77
Sound/Display
Sound/Display
•
For the melody registered at purchase, see “List of
melody” (P251).
Setting items/Setting at purchase >P245
1. From the Sound menu (P75), “Select ringtone” ]
Select from the following adjustment items ]
After setting, I[Done]
• Select from the melodies stored in “Melody” or
“i-motion” in “Data box” respectively. >P176
• On a folder list screen, press Qto switch between
“Melody” and “i-motion”.
Voice call
You can select a ring tone for voice calls.
Video-phone
You can select a ring tone for video-phone calls.
Mail tone
You can select a ring tone for mail.
MessageR tone
You can select a ring tone for messageR.
MessageF tone
You can select a ring tone for messageF.
SMS tone
You can select a ring tone for SMS.
Information
• If you have set a ring tone depending on the voice call/ video
phone call/ Mail, the ring tone is preferred. The priority order is
as follows:
1Ringtone set in the FOMA phone’s phonebook >Set the
phonebook (P64)
2Ringtone set for a group of the FOMA phone’s phonebook
>Set group (P71)
3Ringtone volume/Video call ring tone/Mail, Message ring
tone >Select the ring tone (P76)
Setting an Effect Tone
C](Sound) ]4
Setting items/Setting at purchase >P245
1. From the Sound menu (P75), “Select effect tone” ]
Select from the following adjustment items ]After
setting, I[Done]
Key tone
You can set to emit an effect tone for when you touch
the buttons. The effect tone does not sound when
setting to “OFF”.
Power ON/OFF
You can set whether to emit an effect tone for when
you switch ON/OFF the FOMA phone.
Flip tone
You can set whether to emit an effect tone for when
you open/close the FOMA phone.
Feedback tone
You can set whether to emit an effect tone for when a
popup appears.
78
Sound/Display
Sound/Display
Setting a Vibrator
C](Sound) ]5
Setting items/Setting at purchase >P245
1. From the Sound menu (P75), Vibration settings ]
Select from the following setting items ]After
setting, I[Done]
Incoming call
You can select a vibration pattern for when a voice
call or a video-phone call comes in.
–melody+vibration: The vibration and the melody
for incoming call are activated at the same time.
–Pattern 1(Vibration only): This activates the
vibration to pattern 1. Regardless of ring tone, the
tone for incoming call does not sound.
–Pattern 2(Vibration only): This activates the
vibration to pattern 2. Regardless of ring tone, the
tone for incoming call does not sound.
–OFF: The vibration is not activated in FOMA phone.
Message
You can set a vibration pattern for when mail,
messageR/F or SMS comes in.
–melody+vibration: The vibration and the melody
for incoming call are activated at the same time.
–Pattern 1(Vibration only): This activates the
vibration to pattern 1. Regardless of ring tone, the
tone for incoming call does not sound.
–Pattern 2(Vibration only): This activates the
vibration to pattern 2. Regardless of ringtone, the
tone for incoming call does not sound.
–OFF: The vibration is not activated in FOMA phone.
Activating the Manner Mode
You can set whether to mute the ring tone, key pad sound
and any other sound from the speaker to avoid annoying
people around you. If the manner mode is activated, an
incoming call or alarm, etc. is notified with vibrator.
• You can change the activation on setting manner mode
to “Original manner mode”. >P79
1. From the Stand-by display, press #for 2 or
more seconds
•
The handset of the FOMA phone vibrates displaying
(blue/in the Original manner mode) or (pink/in
the Manner mode).
• You can cancel it by pressing #for 2 or more
seconds with the Manner mode activated.
Changing Manner Modes
C](Sound) ]6
You can change operations in the Manner mode.
Setting at purchase >P245, P246
1. From the Sound menu (P75), “Manner settings” ]
Select from the following setting items
79
Sound/Display
Sound/Display
Manner mode
You can set the Manner mode.
Original manner mode
You can customize operations in the Manner mode.
After setting, press I[Done].
–Incoming call sound: You can set whether to
make the ring tone sound when a voice call or
video-phone call comes in.
–Incoming call vib.: You can set whether to vibrate
the phone when a voice call or video-phone call
comes in.
–Message sound: You can set whether to make the
ring tone sound when mail, messageR/F or SMS
comes in.
–Message vibration: You can set whether to vibrate
the phone when mail, messageR/F or SMS comes
in.
–Key tone: You can set whether to make the key
operation sound when you do key operations.
–Flip tone: You can set whether to make an effect
tone sound when you open or close the FOMA
phone.
–Low battery tone: You can set whether to make a
battery alarm tone sound when the battery is flat.
Information
• The following sounds are emitted even when the manner
mode is activated.
– The shutter tone on shooting still and moving image. >P110
– The alert tone for disconnecting a call. >P48, P51
– The alert tone to reconnect >P91
– The alert tone for the quality of calling >P92
• If you try to play the melody, moving image or i-motion on
manner mode, the confirmation screen appears and you can
select whether to play with sounds.
Setting Ringing Operations for Incoming Mail
C](Sound) ]7
You can set whether to make the ring tone sound when
mail or SMS comes in. You can also set ringing duration
and cycle of rings.
Setting items/Setting at purchase >P246
1. From the Sound menu (P75), “Mail ring duration” ]
Select from the following setting items ]After
setting, I[Done]
Mail ring ON/OFF
You can set whether to make the ring tone sound
when mail comes in. If you select “ON”, you can set
the ringing duration or cycle of ringing.
Mail ring duration
You can set ringing time and number of rings for the
ringing tone.
–Time: After selecting Sec. section by pressing D,
you can enter the duration of ringing.
80
Sound/Display
Sound/Display
–Cycle: After selecting Cycle section by pressing D,
you can enter the number of cycle.
Setting Ringing Time
C](Sound) ]8
You can specify the mute time in seconds before ringing
starts when a voice call or video-phone call which is not
registered in phonebook comes in. This function is effective
as a countermeasure for nuisance calls such as 1 ring phone
scam.
Setting items/Setting at purchase >P246
1. From the Sound menu (P75), Select “Set mute
seconds” ]Enter ring time. ]I[Done]
Information
• If the voice call or video-phone call which are not registered in
phonebook disconnects within the setting ringing time, they are
not recorded in received call list.
Setting Main Screen
You can set the display for stand-by display or
Incoming/outgoing screen as Main display.
You can set the maximum of the image size of 1280 x
1024, the file size of JPEG file to 700K bytes and the file
size of GIF file to 500K bytes on the Stand-by display.
Depending on the image, some cannot be set properly.
• When the image saved in stand-by mode, making and
receiving a call at purchase, please refer to “Pre-installed
data” (P260)
Setting the Stand-by Display
C](Display) ]11
You can set wallpapers and clock displays for the Stand-
by display.
Setting items/Setting at purchase >P246
1. From the Display Menu (P75), “Main display” ]
“Stand-by display” ]Select from the following
setting items ]After setting, I[Done]
Wallpaper
–Select type field 1
• Select file ... Select an image saved in “My picture”
of “Data box” from “Select file/Clock theme field”.
• Clock theme ... Select a clock theme from “Select
file/Clock theme field”.
–Select file/Clock theme field 1:Select an image
(P166) or a clock theme saved in “My picture” of
“Data box”.
• The selectable items may differ depending on the
settings of “Select type field”.
81
Sound/Display
Sound/Display
Display items 2
–Select display type field 1
• Clock ... Display a digital clock on the stand-by
screen. You can select the type of the clock by
“Select clock/city field”.
• Dual clock ... Display 2 cities and times on the stand-
by screen. You can select the city of the second time
displayed lower by “Select clock/city field”. 3
• Calendar + Clock ... Display both calendar and
clock on the stand-by screen. You can select the
font color of the clock by “Clock font color”.
• Do not show ... Do not display the clock on the
stand-by screen.
–Select clock/city field 1 4:Select the type of the
digital clock or a city.
• The selectable items may differ depending on the
settings of “Select display type field”.
Clock font color 5
Set the font color of the clock display.
1: Actually, the name of the selected item is displayed.
2: Not displayed when you select “Clock theme” by “Select type
field”.
3: You can change the displayed city name also by “World time”
>P187
4: Not displayed when you select “Do not show”/“Calendar +
Clock” by “Select display type field”.
5: Displayed only when you select “Calendar + clock” or “Digital
4” of “Clock” by “Select display type field”.
Information
• If you press M[View], you can confirm the display set.
Setting the Display for Incoming Calls
C](Display) ]12
You can set the image displayed when you receive an
incoming call.
Setting items/Setting at purchase >P246
1. From the Display Menu (P75), “Main display” ]
“Incoming call”
•
Select from the images saved on “My picture” of “Data
box”.
>
P166
Setting Display for Outgoing Calls
C](Display) ]13
You can set the image displayed when you make a call.
Setting items/Setting at purchase >P246
1. From the Display Menu ]“Main display” ]
“Outgoing call” (P75)
•
Select from the images saved on “My picture” of “Data
box”.
>
P166
82
Sound/Display
Sound/Display
Setting Sub Display
You can set images of the stand-by display for Sub
display and displays for incoming and outgoing calls. You
can set the maximum of the image size of 1280 x 1024,
the file size of JPEG file to 700K bytes and the file size of
GIF file to 500K bytes on the stand-by display. Some
images cannot be set properly.
• When the image saved in stand-by mode, making and
receiving a call at purchase, see “Pre-installed data at
purchase” (P260)
Setting Stand-by Display
C](Display) ]21
You can set wallpapers and clock displays on the Stand-
by display.
Setting items/Setting at purchase >P246, P247
1. From the Display Menu (P75), “Sub display” ]
“Stand-by display” ]Select from the following
setting items ]After setting, I[Done]
Wallpaper
–Select type field 1
• Select file ... Select an image saved in “My picture”
of “Data box” from “Select file/Clock theme field”.
• Clock theme ... Select a clock theme from “Select
file/Clock theme field”.
–Select file/Clock theme field 1:Select an image
(P166) or a clock theme saved in “My picture” of
“Data box”.
• The selectable items may differ depending on the
settings of "Select type field".
Display items 2
You can set the display format for the clock.
1: Actually, the name of the selected item is displayed.
2: Does not appear when a wallpaper is set as stand-by theme.
Information
• You can view the screen after setting by pressing M[View].
Setting Display for Incoming Calls
C](Display) ]22
You can set the image to be displayed when you receive a
call.
Setting items/Setting at purchase >P247
1. From Display Menu (P75), “Sub display” ]
“Incoming call”
•
Select from the images saved on “My picture” of “Data
box”.
>
P166
83
Sound/Display
Sound/Display
Setting the Display for Outgoing Calls
C](Display) ]23
You can change the image to be displayed when you
make a call.
Setting items/Setting at purchase >P247
1. From Display Menu (P75), “Sub display” ]
“Outgoing call”
•
Select from the images saved on “My picture” of “Data
box”.
>
P166
Setting Fonts of Dial Characters
C](Display) ]3
You can set the sizes and colors of the dial fonts
displayed when you make a call, etc.
Setting items/Setting at purchase >P247
1. From the Display Menu (P75), “Font” ]Select from
the following setting items ]After setting,
I[Done].
Dial font size
Select a size of dial fonts.
Dial font color
Select a color of dial fonts.
Setting Menu Style
C](Display) ]4
You can set the style of the Menu Style that appears when
pressing C[Menu] on the Stand-by display.
Setting items/Setting at purchase >P247
1. From the Display Menu (P75), “Menu style” ]
“Grid”/“List” ]I[Done]
Setting Backlight
C](Display) ]5
You can set the lighting duration of the Main screen, Sub
display or buttons.
Setting items/Setting at purchase >P247
1. From the Display Menu (P75), “Backlight” ]Select
from the following setting items ]After setting,
I[Done].
Main display
Set the lighting duration and brightness of the Main
screen.
Sub display
Set the lighting duration and brightness of the Sub
display.
Keypad
Set the lighting duration of the buttons.
84
Sound/Display
Sound/Display
Setting color Scheme
C](Display) ]6
You can set the color scheme of the Main screen.
Setting items/Setting at purchase >P247
1. From the Display Menu (P75), “Color scheme” ]
Select the color scheme you want to set ]I
[Done].
Information
• If you press C[View], you can view the screen after setting.
Setting LED
C](Display) ]7
Set lighting for incoming voice calls, etc.
Setting items/Setting at purchase >P247, P248
1. From Display menu (P75), “Lighting LED” ]Select
next item to be set ]I[Done]
Lighting
Set whether to set lighting.
Incoming voice call
Set lighting pattern and color used for incoming voice
calls.
Incoming video call
Set lighting pattern and color used for incoming video-
phone calls.
Receiving mail
Set lighting pattern and color used for incoming mail.
Receiving message R
Set lighting pattern and color used for incoming
MessageR.
Receiving message F
Set lighting pattern and color used for incoming
MessageF.
Receiving SMS
Set lighting pattern and color used for incoming SMS.
Playing music
Set lighting pattern and color used when playing
music.
Alarm
Set lighting pattern and color used for alarm.
Schedule
Set lighting pattern and color used for scheduled
alarm.
During call
Set lighting pattern and color used during talking over
a call.
85
Call/Answer ............................................86
Call Feature ............................................91
Video-Phone...........................................93
Date & Time ............................................95
Network (for overseas use) ....................96
Changing a Host from i-mode ...............98
Security...................................................99
.........................................101
Others Settings.....................................101
Settings
On the Stand-by display, C[Menu] ]
(Settings) or “Settings”
To display the Settings menu
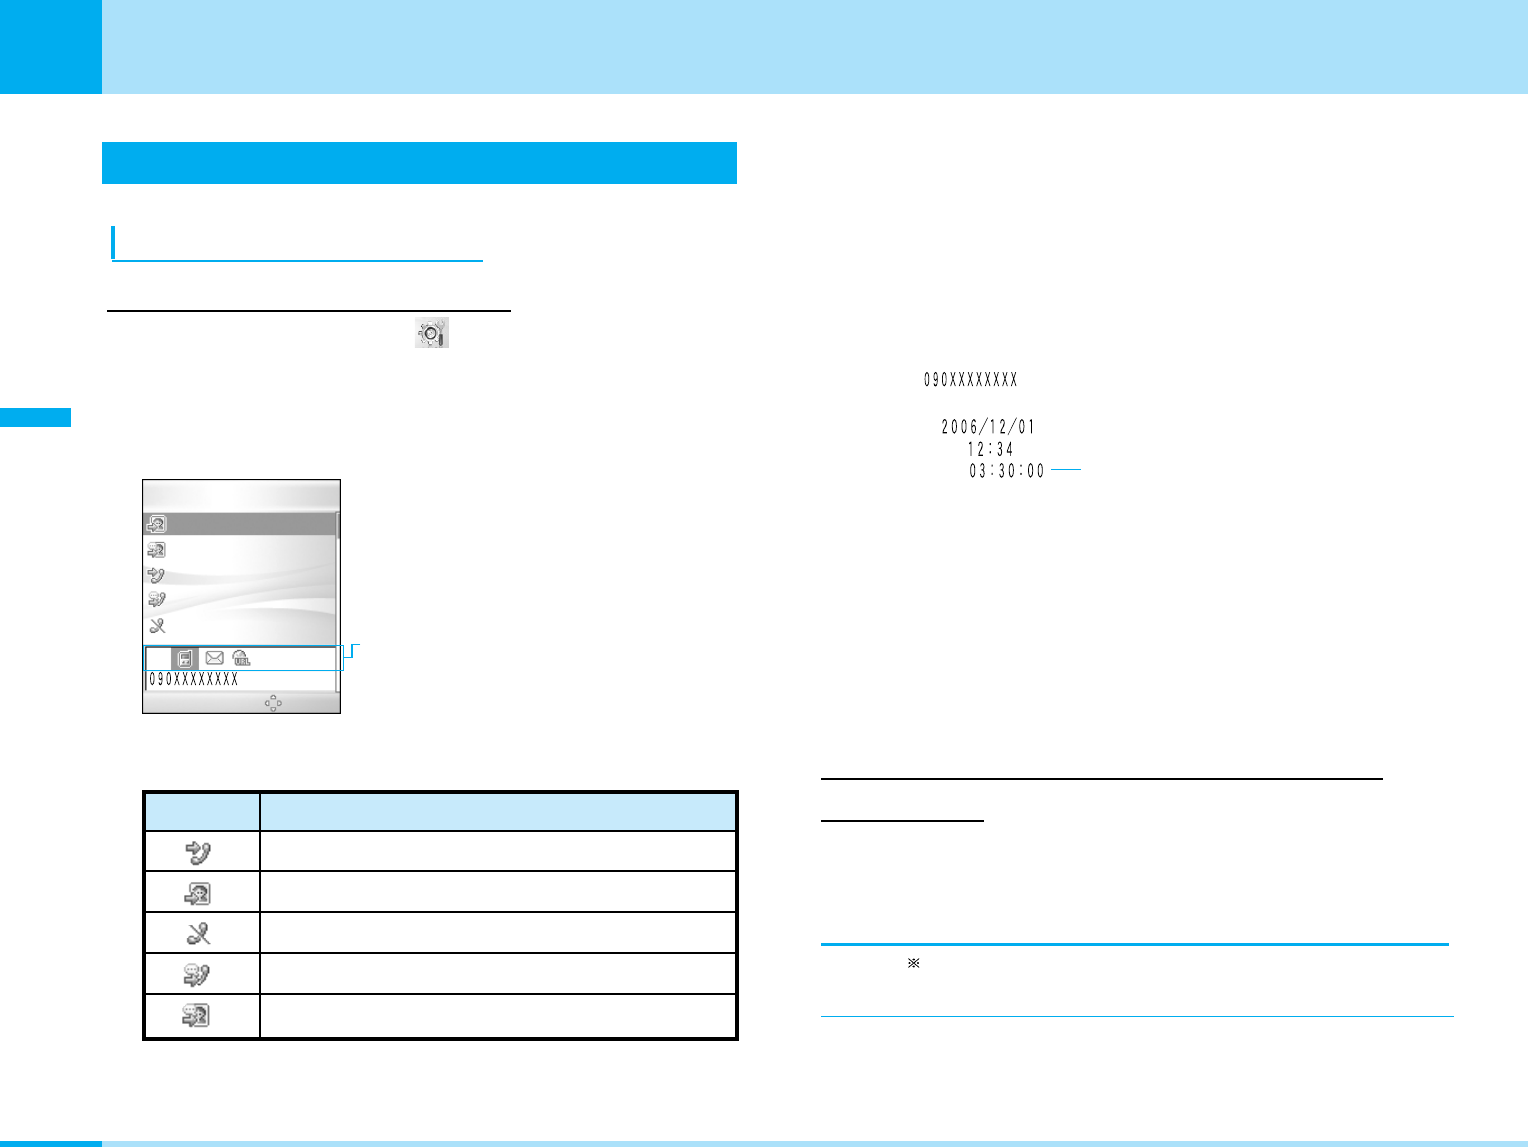
86
Settings
Call/Answer
Checking Call/Mail History
Displaying Received Call Records
C](Settings) ]111
You can view the record of received call.
1. From the Settings menu (P85), “Call/Answer” ]
“Call/Mail history” ] “Received calls”
•A/T: You can make a call to the other party of
the record being selected.
•I[Delete]: You can delete the record being selected.
2. Select a call record ]C
<Detail>
•A/T: You can make a call to the other party in a
list.
•I[Delete]: You can delete the list of call record.
•J: You can view the call record.
Using the Submenu of the Received Calls screen/
Details screen
1. From the Received Calls screen (See left)/Detail
screen (See above), M[Menu] ] Select from the
following submenu items
View 1
You can view details of the call record selected.
When you select “Missed call
history”, “Ringing time” is displayed.
This list will be displayed when the
phone number in a list are registered
in phonebook list. You can view the
list by pressing J.
Settings
Icon Description
Received voice calls
Received video-phone calls
Rejected calls
Missed calls (Voice calls)
Missed calls (Video-phone calls)
<Received Calls>
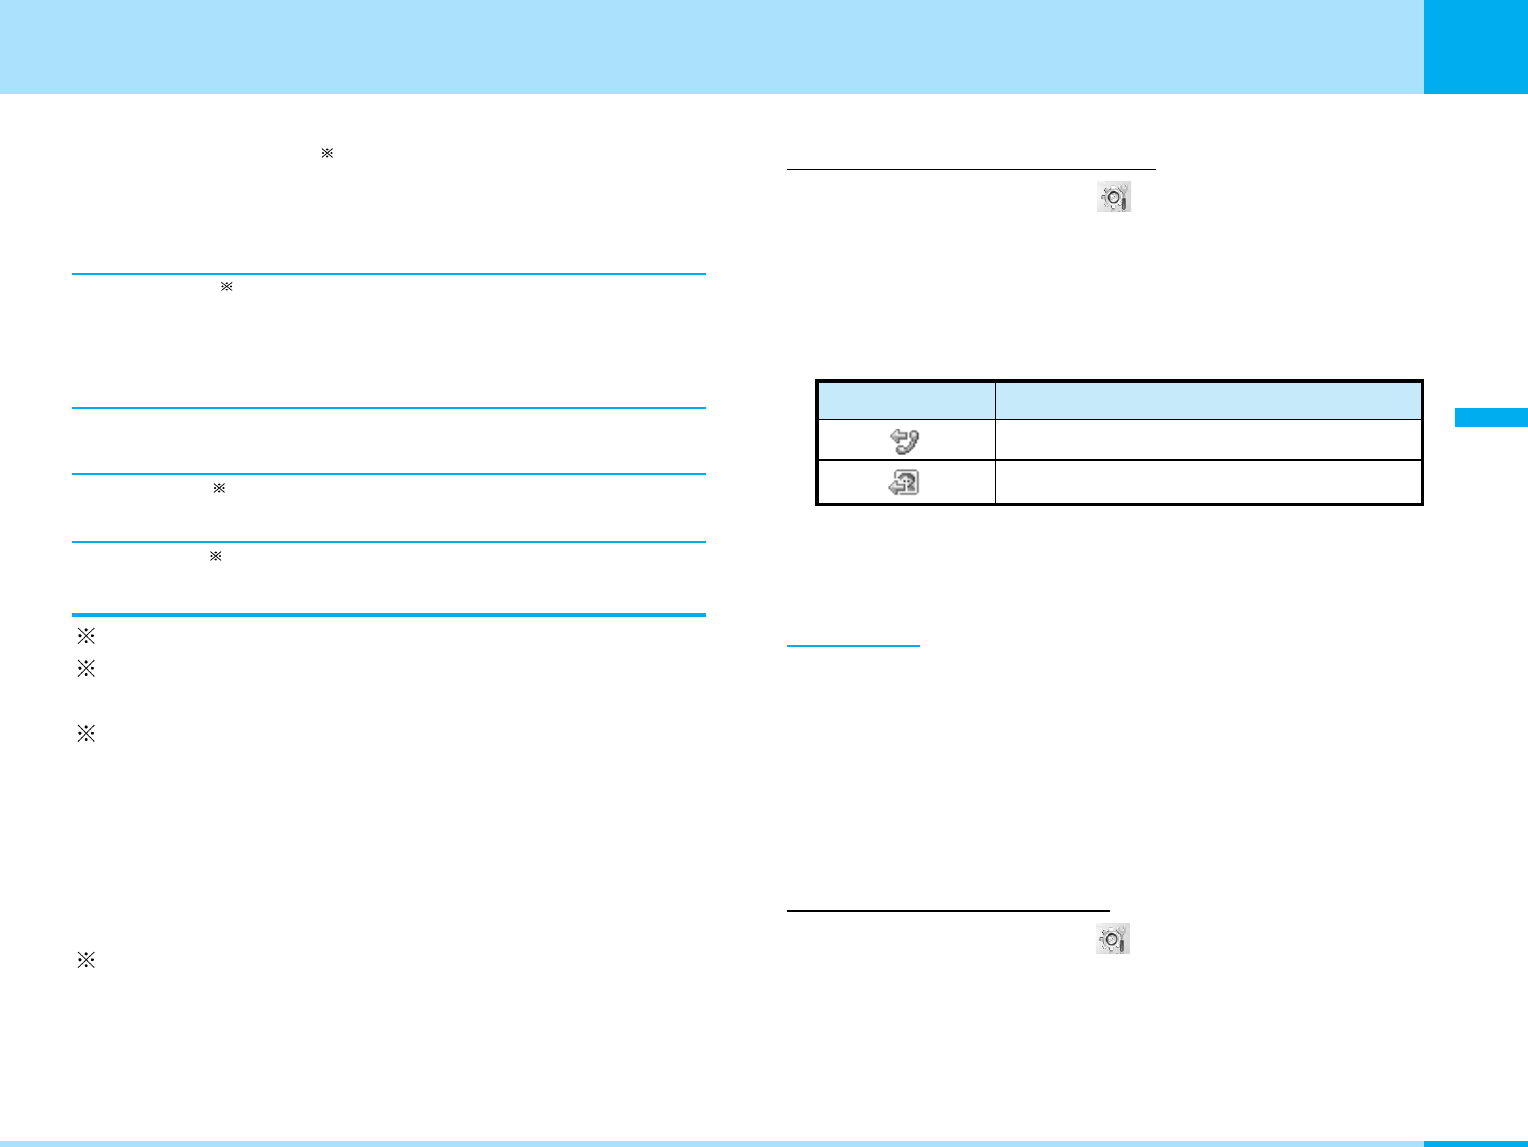
87
Settings
Settings
Add to phonebook 2
Register a selected/displayed phone number in the
history newly/additionally to a phonebook. Go to step
2 (P64) in ”Adding to phonebook”.
Send mail 3
Create i-mode mail with a destination set to a mail
address saved in phonebook. Go to step 3 (P149) of
“Composing i-mode mail message”.
Delete
You can delete the call record selected/displayed.
Delete all 1
You can delete all the call records.
Go to list 4
You can return to the screen of received call list (P86).
1: Not displayed in submenu of detail screen.
2: Not displayed if information on the caller of the call record
selected is stored in the phonebook.
3: When you compose a mail on the Received Calls screen, the
phone number or the mail address that the cursor is placed on
at the bottom of the screen will be entered as the destination.
When you compose a mail on the Detail screen, the mail
address which is saved in the phonebook will be entered as
the destination. However, when no mail address is registered,
phone number is entered as the destination.
4: Displayed in submenu of detail screen.
Displaying Dialed Call Records
C](Settings) ]112
You can view dialed call records.
1. From the Settings menu (P85), “Call/Answer” ]
“Call/Mail history” ] “Dialed calls”
• The Dialed Call Records appears.
2. Select a history ]C
• The Detail screen appears.
Information
• See “Using the Submenu of Received Calls Screen”/“Using
the Submenu of the Detailed Screen” (P86) for the display
operation method and the submenus available from the Dialed
call records/Detail screen.
• “Dialed calls” appears as the Redial screen when you press
Ron the stand-by screen.
Displaying All Call Records
C](Settings) ]113
Received and dialed call records are displayed together.
1. From the Settings menu (P85), “Call/Answer” ]
“Call/Mail history” ] “All calls”
• The All calls screen appears.
Mark Description
Dialed voice calls
Dialed video-phone calls
88
Settings
Settings
2. Select a history ]C
• The Detail screen appears.
Information
• See “Using the Submenu of Received Call Records
Screen” / “Using the Submenu of the Detailed Screen”
(P86) for the display operation method and the submenus
available from the All Calls screen / Detail screen.
Displaying received mail history
C](Settings) ]114
Display history of received mail.
1. From Settings menu (P85), select “Call/Answer” ]
“Call/Mail history” ] “Recv. mails”
• A history of the received mail appears.
2. Select a history ]C
• Detail screen appears.
Information
• See “Using the Submenu of Received mail history Screen”
/ “Using the Submenu of the Detailed Screen” (P86) for the
display operation method and the submenus available
from the All Calls screen / Detail screen.
Displaying sent mail history
C](Settings) ]115
Display history of sent mail.
1. From Settings menu (P85), select “Call/Answer” ]
“Call/Mail history” ] “Sent mails”
• A history of sent mail appears.
2. Select a history ]C
• Detail screen appears.
Information
• See “Using the Submenu of Received Call Records
Screen” / “Using the Submenu of the Detailed Screen”
(P86) for the display operation method and the submenus
available from the All Calls screen / Detail screen.
Displaying all mail history
C](Settings) ]116
Display history of all sent/received mail collectively.
1. From Settings menu (P85), select “Call/Answer” ]
“Call/Mail history” ] “All mails”
• A history of all mail appears.
2. Select a history ]C
• Detail screen appears.
Information
• See “Using the Submenu of Received mail history Screen”
/ “Using the Submenu of the Detailed Screen” (P86) for the
display operation method and the submenus available
from the All Calls screen / Detail screen.

89
Settings
Settings
Next Page
Displaying Call Time
C](Settings) ]12
You can confirm call duration for each call type. You can
confirm the following items:
• The displayed call duration is a standard. The real of call
duration may differ.
1. From the Settings menu (P85), “Call/Answer” ]
“Call duration”
• Call duration display appears.
Last call
You can confirm the last call duration.
Received calls
You can confirm the received call duration.
Dialed calls
You can confirm the dialed call duration.
All calls
You can confirm the total call duration.
Information
• If the display of call time exceeds “9999999:59:59”, the
setting will be reset to “000000:00:00”.
Resetting call duration
1. Select a call duration you want to clear on the Call
duration screen ]I[Reset] ]Enter your
terminal security code ]C]“Yes”
• To clear all the call durations ]M[Menu] ] “Reset
all”
Setting Earphone/Microphone Auto Answer
C](Settings) ]13
You can set how to answer an incoming call with the Flat-
plug Earphone/Microphone Set with Switch (option)
connected.
Setting item/Setting at purchase >P249
1. From the Settings menu (P85), “Call/Answer” ]
“Auto answer” ] Select from the following setting
items ]After setting, I[Done]
Auto answering
You can set the earphone/microphone auto answer to
ON/OFF.
Delayed time (SEC) (0-120)
You can set the time between receiving call and
answering a call automatically.
Information
• During a phone number display, you can make a call by
pressing the switch.
• While receiving a call, you can connect it by pressing the switch.
• During talking over a call, you can end the call by pressing the
switch for 1 or more seconds.
• If you press the switch for 1 or more seconds while receiving a
call, the call will be rejected.
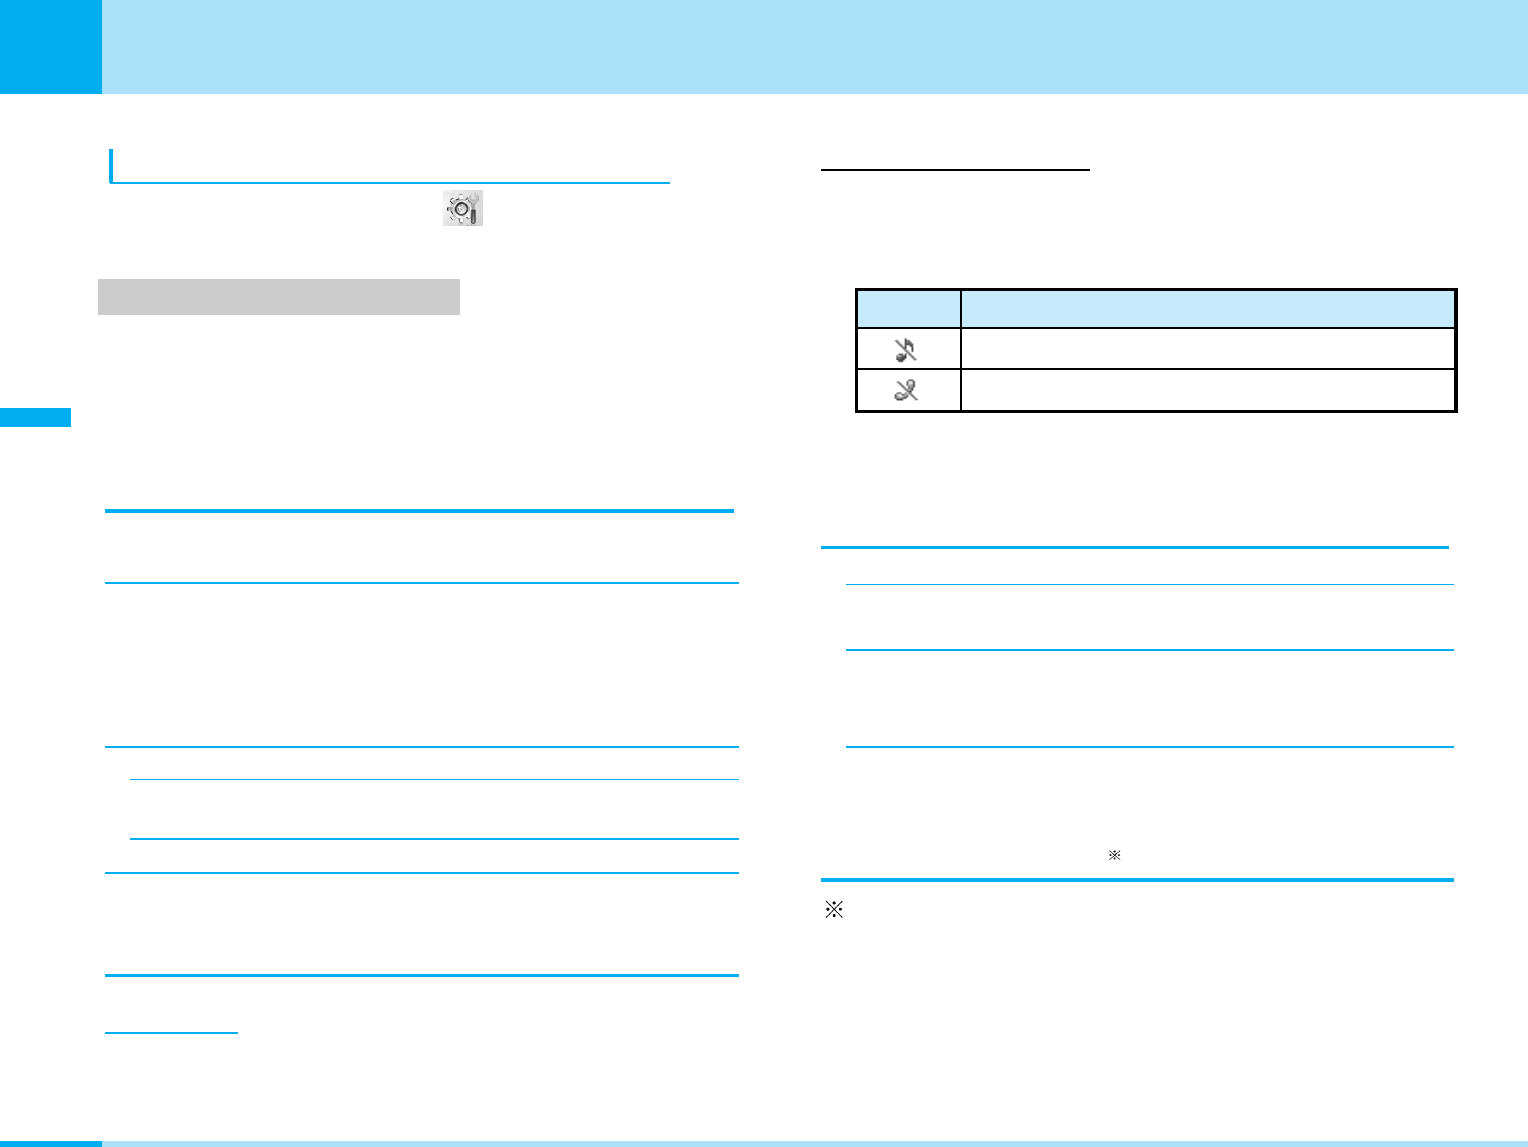
90
Settings
Settings
Setting to Reject/Accept Incoming Calls
C](Settings) ]14
You can set whether to reject incoming calls.
Setting item/Setting at purchase >P249
1. From the Settings menu (P85), “Call/Answer” ]
“Reject/Accept call” ] Enter your terminal
security code ]C
• The Reject/Accept call display appears.
2. Select from the following setting items
Accept
You can set whether to accept all incoming calls.
Reject on list
You can reject the incoming call from the specific
parties. You can set the rejecting action and the
party's phone number to reject a call by pressing I
[List] (See below).
Reject all calls
–Silent : You can disable the ringing tone for all
incoming calls.
–Disconnect call : You can reject all incoming calls.
Memory reject call
You can reject calls from parties not registered in
phonebook and those with no caller IDs.
Information
• Even when rejecting a call by “Reject on list”, “Reject all calls”,
or “Memory reject call”, the record will be remained.
Setting Reject call List
1. From the Reject/Accept call display (See left),
Select “Reject on list” ] I[List]
• The Reject on list will be displayed.
•M[Menu]: You can edit/delete the list set.
2. I[Add] ]Select from the following setting items
]After setting, I[Done]
Reject types
–Silent : Disables the ring tone when receiving the
call from the other party set to “Reject number”.
–Disconnect call : Rejects incoming calls when
receiving the call from the other party set to “Reject
number”.
Reject number
Enter the phone number of a caller you want to reject.
You can select a phone number from the phonebook
by pressing C[Search] .
: If you use M[Menu] >Edit from “Reject on list”, you cannot use
this function.
Mark Description
The type of reject call is set to “Silent”.
The type of reject call is set to “Disconnect call”.
91
Settings
Settings
Next Page
Setting an Answer Mode
C](Settings) ]15
You can set whether to answer a voice call by pressing a
button other thanA
Setting item/Setting at purchase >P249
1. From the Settings menu (P85), “Call/Answer” ]
”Answer mode” ]Select from the following
setting items
Press send key
You can answer a call by pressing Aonly.
Open flip
You can answer a call by opening the FOMA phone. If
the FOMA phone is already open, you can answer a
call by pressing A.
Press any key
You can answer a call by pressing any key except for
M,I,FE,G.
Information
• This setting is not available for video phone call.
Call Feature
Setting the Reconnect Control
C](Settings) ]21
You can set whether to make an alarm sound to inform
you when you are reconnected immediately after
disconnected owing to bad radio wave conditions.
Setting item/Setting at purchase >P249
1. From the Settings menu (P85), “Call feature” ]
”Reconnect alarm” ]Select from the following
setting items
High alarm
Set high alarm sounds.
Low alarm
Set Low alarm sounds.
No alarm
No sound.
Information
• The time to reconnect the network may differ depending on
the status of phone or radio (the maximum 10 seconds).
• The duration to reconnect the network can be chargeable.
• Depending on the status of phone or radio, the alarm may not
sound, and the call may be disconnected.
92
Settings
Settings
Setting Quality Alarm
C](Settings) ]22
You can set whether to make an alarm sound to inform
you when a call is liable to be disconnected midway
because of bad radio wave conditions.
Setting item/Setting at purchase >P250
1. From the Settings menu (P85), “Call feature” ]
“Quality alarm” ]Select from the following
setting items
High alarm
Set high alarm sounds.
Low alarm
Set low alarm sounds.
No alarm
No sounds.
Setting Minute Reminder
C](Settings) ]23
You can check the call duration by beep sound every
minute during a voice call (Not support this function for
Video-phone call).
Setting item/Setting at purchase >P249
1. From the Settings menu (P85), “Call feature” ]
“Minute reminder” ]“ON”/“OFF”
Information
• This setting is not available with a video-phone call.
Setting Prefix Dial
C](Settings) ]24
You can store prefix numbers such as international access
code or “184 / 186” and add it to the beginning of the
phone number to dial.
Setting item/Setting at purchase >P249
1. From the Settings menu (P85), “Call feature” ]
“Prefix dial”
• The Prefix Dial screen appears.
2. Select a PREFIX field to enter ]Enter a number ]
I[Done]
Setting International Dial
Setting Auto assist
C](Settings) ]251
You can set whether to automatically replace “+´” at the
beginning of a phone number with an international access
code such as “009130010” for making an international call.
Setting item/Setting at purchase >P249
1. From the Settings menu (P85), “Call feature” ]
“International dial” ]“Auto assist setting” ]
“Auto”/“OFF”
93
Settings
Settings
Next Page
Setting IDD prefix
C](Settings) ]252
You can set the international access code to be added to
the beginning of a phone number for making an
international call.
Setting item/Setting at purchase >P249
1. From the Settings menu (P85), “Call feature” ]
“International dial” ]“IDD prefix setting” ]Select
from the following setting items ]After setting,
I[Done]
IDD prefix name
Enter the name of an international call service.
IDD prefix code
Enter an international access code.
Setting Close setting
C](Settings) ]26
You can set how the FOMA phone works when it is
folded.
Setting item/Setting at purchase >P249
1. From the Settings menu (P85), “Call feature” ]
“Close setting” ]Select from the following setting
items
End the call
The call is disconnected.
Continue(Mute)
Put the call on mute without emitting Continue (Mute)
holding sound. In this case, your voice is not heard to
the other party.
Information
• During video-phone call, if you close the flip, the call will be
disconnected regardless of this setting.
Video-Phone
You can change settings for the video-phone operation
and display.
Changing the Video-Phone Settings
C](Settings) ]31
You can set how the FOMA phone works and screens
when making a video-phone call.
Setting item/Setting at purchase >P250
1. From the Settings menu (P85), “Video-phone” ]
“Video-phone settings” ]Select from the
following setting items ]After setting, I[Done]
VoiceCall AutoSwitch
Sets whether to redial by automatically switching to a
voice call if the other party is unable to answer a
video-phone call.
94
Settings
Settings
Display setting
You can set how to display the Talking screen.
–Both : Your image and the other party’s image are
displayed.
–Other : Only the other party’s image is displayed.
–Me : Only your image is displayed.
Sub screen
You can set an image to be displayed on the sub
screen when “Display setting for video phone call” is
set to “Both”.
–Me : Your image is displayed on sub screen and the
other party's image is displayed on main screen.
–Other : The other party’s image is displayed on sub
screen and your image is displayed on main screen.
Send camera image
You can set whether to send your image to the other
party. If set to “OFF”, a substitutive image is sent to
the other party.
Sending img. quality
–Prefer image quality : Sends images laying stress
on image quality. Prefer image quality is effective if
there is little motion.
–Normal : Sends images in standard quality and
motion speed.
–Prefer motion quality : Sends images laying stress
on motion speed. Prefer motion speed is effective if
there is much motion.
Display light
–Always on : Keeps the display lit during a call.
–Terminal setting : Follows the settings of the “Main
display” of the “Backlight”. >P83
Hands-free V.phone
Set whether to enable handsfree function during
video-phone calls.
Selecting a Video-phone Image
Changing Substitutive images
C](Settings) ]321
You can set a substitutive image to send in place of your
own image during a video-phone call.
Setting item/Setting at purchase >P250
1. From the Settings menu (P85), “Video-phone” ]
“Image settings” ]“Substitutive image” ]Select
from the following setting items ]After setting,
I[Done]
Image
–Default Image : The image by default.
–Selected image : You can select an image other
than the default image from the “Image list”.
Image list
You can select an image for when “Image” is set to
“Selected image”. Select from images stored in “My
picture” of “Data box”. >P166
95
Settings
Settings
Changing Response Hold Image
C](Settings) ]322
You can set an image to display when you put the call on
hold during ringing of a video-phone call.
Setting item/Setting at purchase >P250
1. From the Settings menu (P85), “Video-phone” ]
”Image settings” ]”Response hold image”
• See “Changing Substitutive image” (P94) for the
subsequent operations.
Changing On-hold Images
C](Settings) ]323
You can set an image to display when you put the call on
hold.
Setting item/Setting at purchase >P250
1. From the Settings menu (P85), “Video phone” ]
“Image settings” ]“On-hold image”
• See “Changing Substitutive image” (P94) for the
subsequent operations.
Date & Time
Setting Time
C](Settings) ]41
You can set the time of city which is already set “Home”
(the city at purchase: Tokyo) by “World time” (P187).
Setting item/Setting at purchase >P250
1. From the Settings menu (P85), Select “Date &
Time” ]“Set time” ]Select from the following
setting items ]After setting, I[Done]
Set time
Press Jto select an input item (hour, minute,
second, am/pm ). Use the numeric keys to enter
numbers. Press Cto switch between am/pm .
Time format
You can set whether to display time in the 12-hour
format or in the 24-hour format.
Hour indication
You can set whether the alarm will sound or not after
setting (00 min). You can select the ring tone as an
alarm. If you do not want this indication, set to “OFF”.
: Displayed if “Time format” is set to “12-hour”.
Setting Date
C](Settings) ]42
You can set the date.
Setting item/Setting at purchase >P250
96
Settings
Settings
1. From the Settings menu (P85) ]Select “Date &
Time” ]“Set date” ]Select from the following
setting items ]After setting, I[Done]
Set date
Press Jto select an input item (year, month, date).
Use the numeric keys to enter numbers.
Date format
You can change display formats of the date.
(DD/MM/YYYY, MM/DD/YYYY, YYYY/MM/DD)
: YYYY stands for Year, MM stands for Month, and DD stands for
Day.
Setting Daylight Saving
C](Settings) ]43
You can set daylight saving time.
Setting item/Setting at purchase >P251
1. From the Settings menu (P85), “Date & Time” ]
“Daylight saving” ]“ON”/“OFF”
Network (for overseas use)
Selecting the Network Connection Mode
Making settings for Network search
C](Settings) ]51
You can select a network setting method in case
destination networks (Communication carriers) change for
overseas use, etc.
Setting item/Setting at purchase >P251
1. From the Settings menu (P85), “Network” ]
“Network selection” ]Select from the following
setting items
Auto
Automatically searches for the network for setting.
Manual
The network search display appears, allowing you to
select a network from the list displayed after search.
Information
• It may take a few minutes to find the network.
• If you set “Auto”, you can search the network automatically in
the following situation.
– When you switch on – Out of the service area
• If you stop searching the network by “Manual”, the setting will
be changed to “Auto”.
97
Settings
Settings
Setting the Network Mode
C](Settings) ]52
You can set a type of network to search for when networks
are searched according to “Network selection”.
Setting item/Setting at purchase >P251
1. From the Settings menu (P85), “Network” ]
“Network mode” ]Select from the following
setting items
Auto
Searches all the networks connectable.
WCDMA only
Searches only networks supporting 3G.
GSM only
Searches only networks supporting GSM/GPRS.
Information
• You cannot exchange the data through packet service under
GSM network.
• When using the FOMA handset in Japan or in the service area
of 3G network, we recommend you change the setting of the
“Network mode” to “WCDMA only” to save battery power.
Registering a Network of Preferred list
C](Settings) ]53
Setting Networks
When you search the network automatically, you can add
a preferable network (communication carrier) to connect
to.
Setting item/Setting at purchase >P251
1. From the Settings menu (P85), “Network” ]
“Preferred lists”
• Networks registered in UIM are listed downward from
the one with the highest priority.
•I[Delete]: You can delete the network selected.
2. M[Menu] ]Select from the following setting
items
Add new
- Search network
You can select from the network list stored in the
FOMA phone for adding.
- Enter new network
You can enter the country code (MCC) and the
network code (MNC) for adding. After setting, press
I[Done].
Delete
You can delete the selected network.
98
Settings
Settings
Move up
You can move the selected network upward. The
network moved upward is more preferred.
Move down
You can move the selected network downward. The
network moved downward is less preferred.
: If you register multiple networks, you can use this menu.
Information
• If the network is not registered, [Menu], [Delete] of soft key
area on preferred list to register will not be displayed. To add
new network, press I[Add], select and register.
• The registered data is saved in UIM.
Displaying the Network Name
C](Settings) ]54
You can set whether to display the name of the network
currently set on the Stand-by display.
Setting item/Setting at purchase >P251
1. From the Settings menu (P85), “Network” ]
“Network name display” ]“Display on”/“Display
off”
Changing a Host from i-mode
Setting / Changing the Host
C](Settings) ]6
Normally, you do not need to change the setting.
You can set a host to use services of various providers
other than i-mode. If the host is changed, i-mode
becomes unavailable.
Setting item/Setting at purchase >P251
1. From the Settings menu (P85), “Host selection” ]
From the Host selection screen, I[Add] ]Enter
your terminal security code ]C]Set the
following items ]After setting, I[Done]
• The host set is displayed on the Host selection
screen with attached to it.
Host name
Enter the name displayed on the Host selection
screen.
Host address
Enter the address of the host.
Access point
Enter the Access point (URL, etc.).
99
Settings
Settings
Next Page
Information
• To switch the host back to “i-Mode” or to switch to another
host, select “i-Mode”/other hosts and press Con the Host
selection screen.
• If you press M[Menu] on the Host selection screen, you can
edit / delete / display the host set. Note that you cannot edit /
delete pre-installed “i-Mode”.
• In Access point menu, you should enter IP address in PDP
type.
Security
Setting All Lock
C](Settings) ]71
You can set whether to lock requiring to enter the terminal
security code to operate function. During All Lock, “All
lock” is displayed on the Stand-by display.
Setting item/Setting at purchase >P251
1. From the Settings menu (P85), “Security” ]“All
lock” ]Select from the following setting items
Power on
You can set whether to lock the FOMA phone when
you turn of the power. You need to enter your terminal
security code to set it.
Immediate
Sets All lock immediately. You need to enter your
terminal security code to set it.
none
You can release All lock. You need to enter your
terminal security code to release it.
Information
• While “All lock” is set, even though you receive an SMS, it is
only saved, and it is received after you release “All lock”.
• While “All lock” is set, you cannot perform packet transmission
connecting a personal computer.
• While “All lock” is set, answering operation is not performed
even though you receive a call, and only busy tone is played. It
is displayed as a missed call after you release “All lock”.
• While “All lock” is set, you can receive mails and messageR/F.
However, the screen of receiving messageR/F or receiving
result of the message will not appear, and only the icon
appears.
• While “All lock” is set, the alarm tone does not sound, and
only the icon appears. The alarm tone sounds after you
release “All lock”.
Releasing All Lock
1. Press one of 1~0]Enter your terminal
security code ]C
• Pressing I[Emergency Call] key on the “lock” screen:
Emergency calls (110/118/119) can be made.
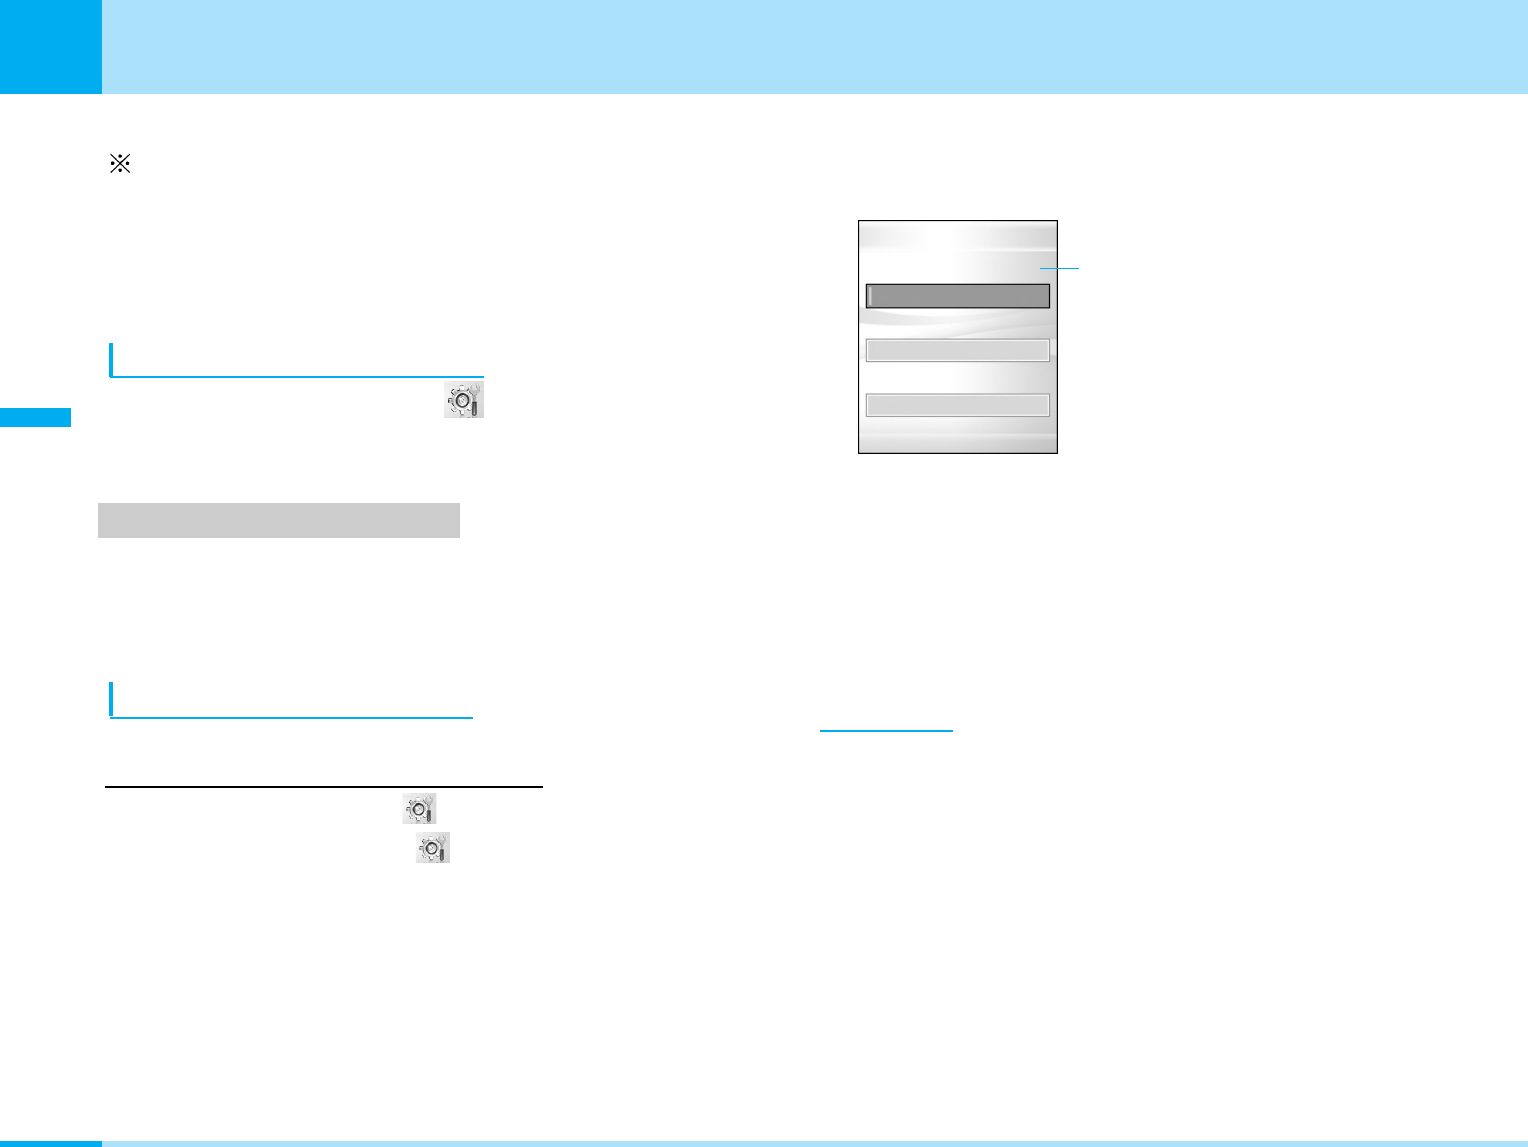
100
Settings
Settings
Display may differ depending on the used UIM.
• If you enter a wrong terminal security code 5 times in a
row, the handset turns off automatically. When you turn
on the power again, you can enter the terminal security
code.
Setting PIN Code Request
C](Settings) ]72
You can set to enter PIN1 code every time you turn on the
power to the FOMA phone.
Setting item/Setting at purchase >P251
1. From the Settings menu (P85), “Security” ]“PIN
code request” ]“ON”/“OFF” ]Enter PIN1 code ]
C
Changing Your Password
Changing the PIN1 code / PIN2 code
C](Settings) ]731 /
C](Settings) ]732
You can change the PIN1 code / PIN2 code. To change
the PIN1 code, you need to set “PIN code request” to
“ON” beforehand. The code is set to “0000” at purchase,
but you can change to any number as desired.
• In case you purchase a new FOMA phone and start
using it inserting the UIM you have been using, use the
PIN1 code / PIN2 code you have set.
1. From the Settings menu (P85), “Security” ]
“Change password” ]“PIN1 code”/“PIN2 code”
<Change PIN1 code>
2. Enter the current PIN1 code/PIN2 code ]C
3. Enter a new PIN1 code/PIN2 code ]C
4. Enter the same code that you did in Step 3 again ]
C
Information
• If you enter a wrong PIN code over 3 times, the PIN code will
be locked automatically. If you unlock the PIN code, see
“Releasing PIN lock code” (P105).
Current PIN1 code. R:3
New PIN1 code
Verify PIN1 code
Change PIN1 code
The remaining time to enter
PIN is available
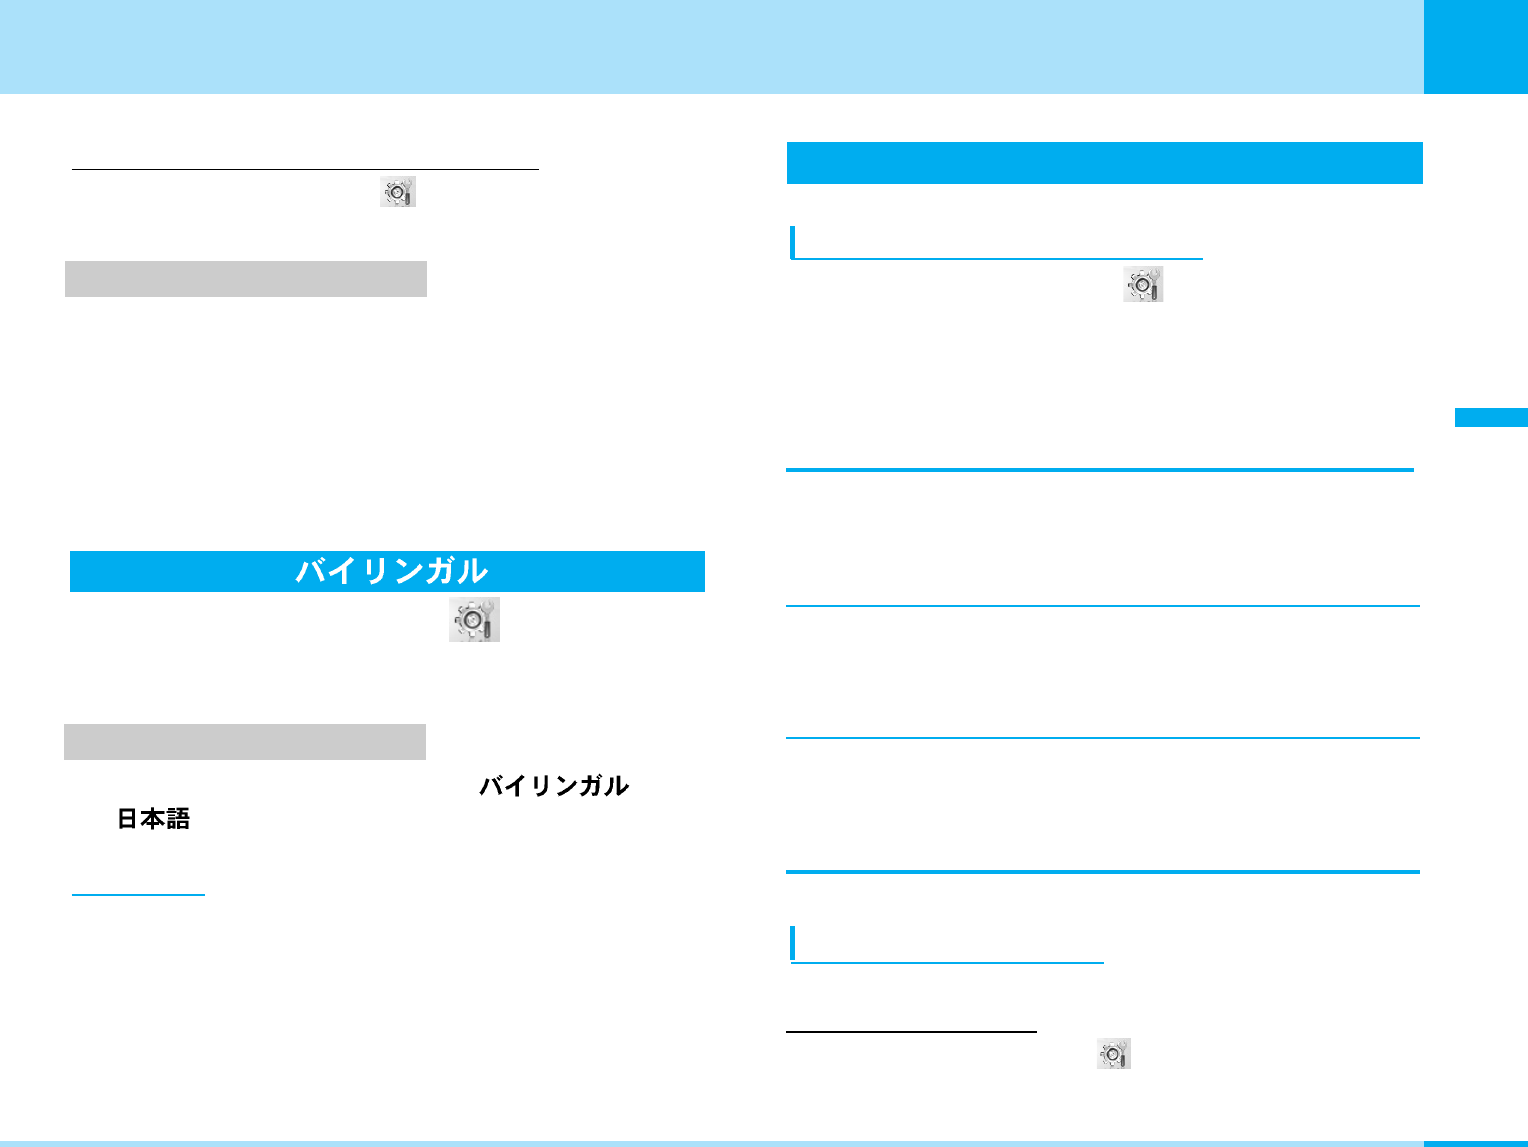
101
Settings
Settings
Changing Your Terminal Security Code
C](Settings) ]733
You can change your terminal security code.
Setting item/Setting at purchase >P251
1. From the Settings menu (P85), “Security” ]
“Change password” ]“Security code”
• For the subsequent steps, just like the steps to change
the PIN1 code / PIN2 code, enter your current terminal
security code, enter a new terminal security code and
then enter the same code again for confirmation.
C](Settings) ]8
You can switch the languages of the FOMA phone
between Japanese and English.
Setting item/Setting at purchase >P251
1. From the Settings menu (P85), “ ”]
“”/“English”
Information
• This setting is registered in FOMA phone and UIM which is
currently inserted. If you insert other UIM which registered
other settings, the settings of this UIM will be preferred.
Others Settings
Checking the Memory Status
C](Settings) ]91
You can check the usage status and available space of the
memories of the handset of the FOMA phone.
1. From the Settings menu (P85), “Others” ]“Memory
status” ]Select from the following items
Data box
You can check the empty or the reserved capacity
(Approximate) of the Data box for data such as My
picture, i-motion or Melody are stored.
Personal info.
You can check the empty or the reserved capacity
(Approximate) of the memory for Personal info. for data
such as Phonebook, Schedule, Memo or Date Counter.
UIM memory
You can check the empty or the reseved capacity
(Approximate) of the memory for data such as
“Phonebook” or “SMS”.
Resetting the Settings
Clearing the Memory
C](Settings) ]921
You can clear all the data recorded in the FOMA phone.

102
Settings
Settings
1. From the Settings menu (P85), “Others” ]“Reset
settings” ]“Clear memory” ]Select from the
following items
• You need to enter your terminal security code for
deleting.
Data box
Clears all the data saved in the Data box folder of the
FOMA phone.
Personal info.
Clears all the personal data saved in the FOMA phone
such as phonebooks, schedule, call history and so on.
Initializing the Default Settings
C](Settings) ]922
You can reset to all settings at purchase except for
“i-mode setting” and “Mail setting”.
1. From the Settings menu (P85), “Others” ]“Reset
settings” ]Default settings ]“Yes” ]Enter the
terminal security code ]Press C
Information
• When the date and time are reset, display or play of i-motion
and files with valid period and/or expiration date set may be
disabled.
Changing the Settings for the SMS Center
C](Settings) ]93
Normally, you do not need to change the settings.
You can change the SMS centers to use.
Setting item/Setting at purchase >P252
1. From the Settings menu (P85), “Others” ]“SMS
center” ]“Select from the following setting items
]After setting, I[Done]
SMSC
–DoCoMo : You can use the DoCoMo SMS center.
–Others : You can use another company’s SMS
center.
Address
If “SMSC” is set to “Others”, enter the address of the
SMS center.
Resetting the holiday
C](Settings) ]94
You can reset all settings of holiday of FOMA phone to
settings at purchase.
1. From the Settings menu (P85), “Others” ]“Reset
holiday” ]“Yes”

103
Passwords ............................................104
Preventing the Phone from
Activating the Operation of Function ..105
Other Safety Settings...........................106
Safety settings
Passwords
For some functions of the FOMA, you need to enter
your password. In addition to the Terminal security
Code for operating respective mobile phone functions,
the Network Security Code to use network services,
and i-mode password are available. These passwords
help you utilize your FOMA phone.
Information for Passwords
• Do not use easily-perceived figures such as “Birthday”,
“the part of phone number”, “Area code or Room
number”, “1111”, “1234” to prevent it from being
guessed by others. Note that you make a memo of the
password you set.
• Make sure that prevent the password from being
known by others. If the password is known by third
party, NTT DoCoMo will not have any other
responsibility concerning the mischief or the misuse of
handset.
• There is no requesting the client's password from NTT
DoCoMo.
• Note that if you do not remember password, you need
to bring an identification card such as a driver's
license, FOMA handset, UIM to a handling counter
such as a DoCoMo shop. For details, consult
“DoCoMo Information Center” described on the back
of this manual.
Terminal security code
The terminal security code is set “0000” at purchase. You
can change the terminal security code. To change the
code, see “Changing Your Terminal Security Code” (P100).
Network security code
The Network Security Code is a 4-digit number required for
using various network services and for various procedures at
the “ e” (DoCoMo e-site). The Network
Password is determined at the time of contract and can be
changed by the user.
The user who has an ID and a password of “My DoCoMo” ,
the integrated support site for PC, can change the network
security code through PC.
And, the user can change various procedures of DoCoMo e-
site in i-mode.
For “My DoCoMo”, “DoCoMo e-site”, see the back of this
manual.
i-mode Password
The i-mode password is a 4-digit password required for
registering, deleting My-menu, Messaging service, applying
for or canceling an i-mode service (charged) (The service
provider may supply its own password).
The default for i-mode password is “0000”, but you can
change it. If you change the password from i-mode, see
“Changing” (P136).
104
Safety settings
Safety settings

105
Safety settings
Safety settings
PIN1 code/PIN2 code
For the UIM, you can set the 2 security codes, namely the
PIN1 code / PIN2 code. The default for these security
codes are “0000”, but you can change these codes as
you like. To change the codes, see “Setting PIN Code
Request” (P100), “Changing the PIN1 code / PIN2 code”
(P100).
aPIN1 Code
The PIN1 code is the 4-to 8-digit code for checking the
user each time the UIM is inserted into the FOMA phone
or each time the FOMA phone is turned on so that you
can prevent the third party from using your UIM. If you
enter PIN1 code, you can receive or make a call or
activate the operation.
aPIN2 Code
The PIN2 code is the 4-to 8-digit code for using the user
certificate or applying for the issue of it and performing
reset All Calls.
This FOMA phone does not have this function.
Information
• If you purchase a new FOMA phone and use the existing UIM
with new FOMA phone, use PIN1 code and PIN2 code you
have set previously.
• If you enter a wrong PIN1 code / PIN2 code 3 times in a row
on the display requiring its entry, the PIN1 code / PIN2 code is
locked automatically. To unlock the code, you need to enter
PIN lock release code.
Releasing PIN lock code
PIN lock releasing code is a 8-digit password to release
locking PIN1 code / PIN2 code. You cannot change it.
Information
• If you enter a wrong “PIN unlock code” 10 times in a row, it is
automatically locked. In this case, you need to bring the FOMA
phone, UIM and an identification card such as a driver's license
to a handling counter such as a DoCoMo shop.
Preventing the Phone from Activating
the Operation of Function
To protect the information or data in FOMA phone, you
can activate the security function to prevent from
activating the operation or the function.
Setting All Lock
After locking FOMA phone, you need to enter terminal
password to activate the phone. To set this function, see
“Setting All Lock” (P99).
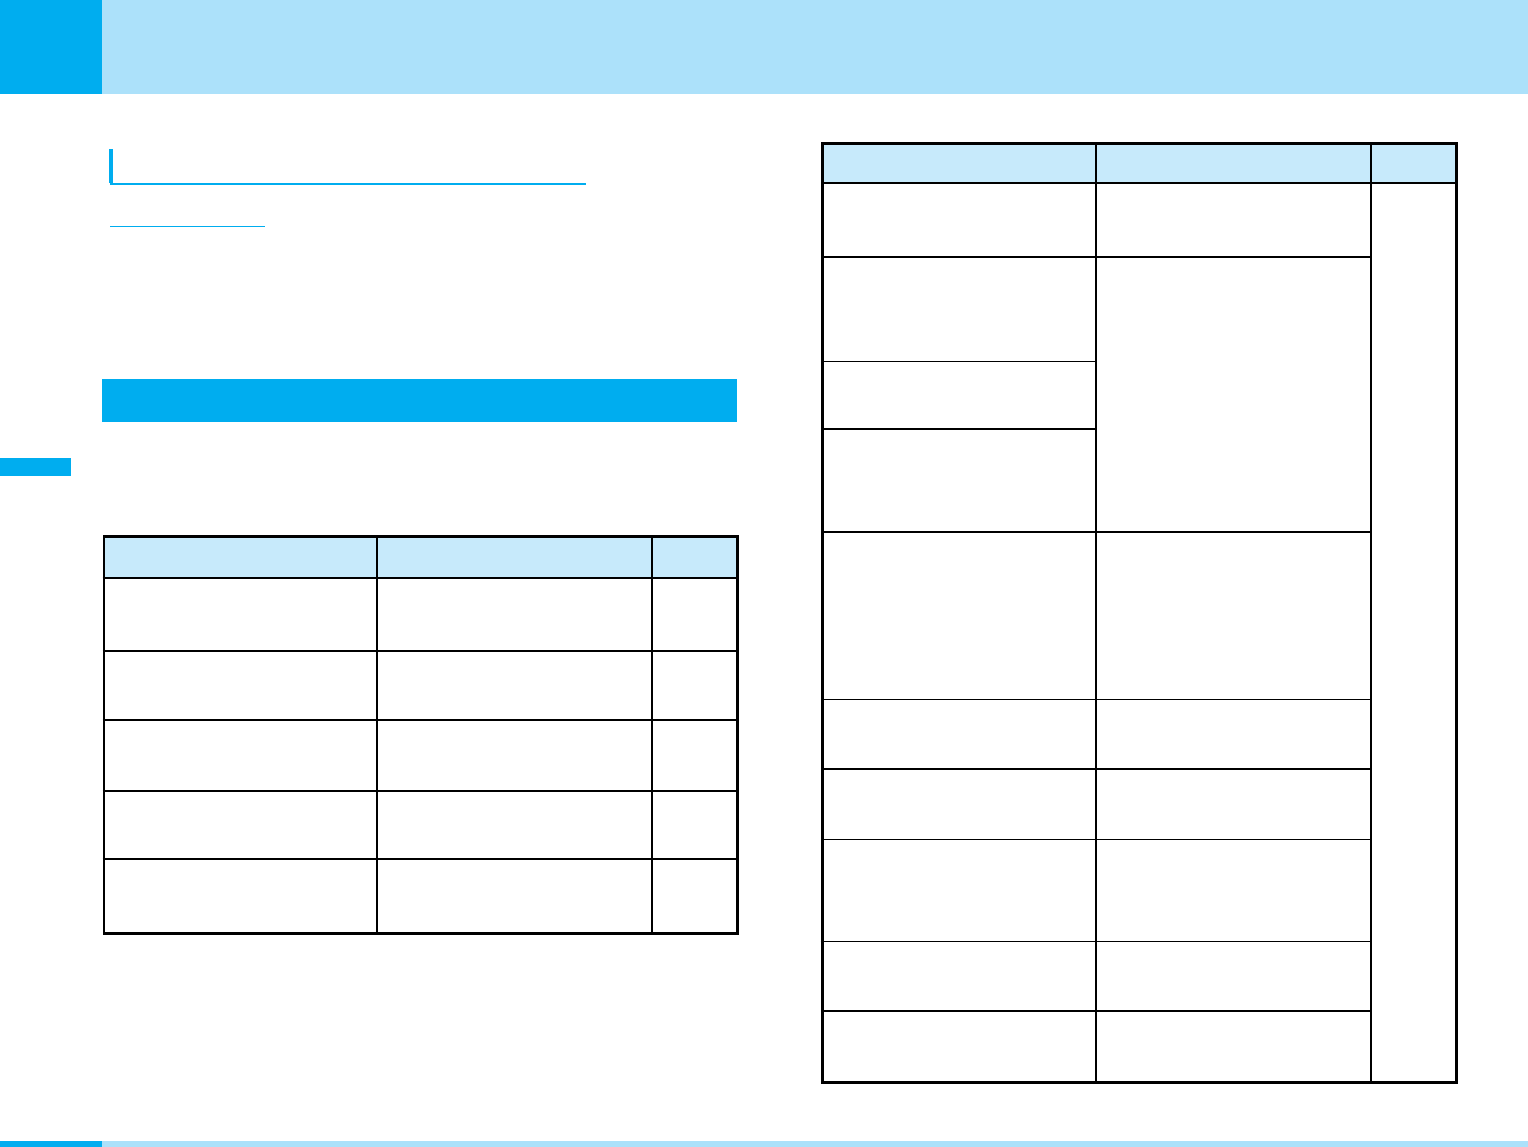
106
Safety settings
Setting not to display mail without
permission
You can set the security function for the Inbox, Outbox,
and Unsent of the Mail menu. For setting this function, see
“Display” of “Mail setting” (P156).
Other Safety Settings
The FOMA phone has the following safety settings in
addition to the “Security” function:
Safety settings
Purpose Function/Service
To change the mail
address
Receive/reject only mail
between i-mode
terminals
Receive/reject mail
from specified domains
Receive/reject mail
from specified
addresses
To reject 200th and
succeeding i-mode
messages sent from a
single i-mode phone on
the same day
To reject unsolicited Ad
mail
To reject SMS
reception
To store/check safety
information when a
disaster occurs
To stop the mail
function temporarily
To check the settings
for the mail function
Change mail address
Measures for nuisance
mail (reception/rejection
setting) Receive from
specified domain
Selected Mail Senders
Reject unsolicited Ad
mail/Reject mail
Set/Confirm SMS
Rejection Settings
i-mode Disaster
Message Board Service
Suspend Mail
Stop the mail function
Confirm Settings
Reference
Refer to
“Mobile
Phone
User's
Guide
[i-mode]”
Purpose Function/Service
To reject calls from
specified callers
To receive calls from callers
registered in the phonebook
Not to take nuisance
calls
Not to take calls from
callers not notifying caller ID
To receive necessary
mail only
Reject/Accept call
Memory reject call
Nuisance call barring
Caller ID request
Receive option
Reference
P90
P90
P202
P203
P154
107
Notes for using the camera .......................108
Using the Camera ......................................109
Shooting Still Images .................................109
Shooting Moving Images...........................115
Setting Camera...........................................118
Multimedia (Camera)
1 Camera-mode
2 Movie-mode
3 Camera settings
Select
Multimedia
On the Stand-by display, C[Menu] ]
(Multimedia) or “Multimedia”
To display the Multimedia menu
Select
Multimedia

108
Multimedia (Camera)
Notes for using the camera
• If the lens is stained with finger prints or something oily,
you cannot shoot clear images. Clean the lens with a
soft cloth before shooting images.
• If the lens is exposed to direct sunlight for a long time,
the color filter inside and images may be discolored.
• If shooting or saving images after leaving the FOMA
phone in a warm place for a long time, image quality
may deteriorate.
• Do not cover the lens with fingers, etc. when shooting
images.
• When the battery level is low, you may not be able to
activate camera and movie mode.
• When shooting a fast moving subject, it may be
recorded a little off the displayed position or the image
may be blurred.
• Be careful not to move your hands when taking a shot.
Hold the FOMA phone securely with your hands so that
it does not move, or place the FOMA phone in a stable
place and use the self timer when taking a shot.
• When moving your hands when shooting a moving
image or when shooting a rapidly moving image, the
image may be blurred.
• When trying to directly shoot a strong illuminant such
as the sun or a lamp, the image may become dim or
blurred.
• The camera has been made with highly precise
technologies, but there may be points or lines that
always look bright as well as pixels and lines that
always look dim. Also, be aware that when shooting an
image in a place where light intensity is small, it looks a
little rough or noises such as white lines increase.
• If the battery becomes low level before saving images,
you are not able to save still or moving shot images.
• Since the camera consumes electric power quickly, do
not operate the camera or leave it for a long time.
• It may take a long time until images are displayed on
the shooting display after starting the camera
depending on the settings.
• Images shot by the camera may differ from actual
subjects in color tone and brightness.
• To prevent from taking a picture without permission,
the shutter tone sound even on manner mode. Also,
even when the Flat-plug Earphone/Microphone Set
with Switch (option) is attached to the FOMA phone,
the shutter tone sound from the speaker.
Multimedia (Camera)
109
Multimedia (Camera)
Multimedia (Camera)
Next Page
Copyrights and Rights of Portrait
You have no right to copy, modify, or distribute the
contents of which a third party holds the copyright such
as text, images, music, or software downloaded from web
pages on the Internet, or images shot by the cameras of
this product without permission from the copyright holder
except for when the copy or quote is for personal use that
is allowed by the Copyright Law. Note that it may be
prohibited to shoot or record live performances or
exhibitions even for personal use. Make sure that you
refrain from taking portraits of other persons and
distributing such portraits over the Internet without
consent, as this violates portrait rights.
Using the Camera
You can adjust the angle of the camera on setting the
scene of a person, an landscape or a portrait.
Information
• If you shoot an image by adjusting the lens within the FOMA
phone as shown above, the image is saved as mirror image.
Shooting Still Images
C](Multimedia) ]1
Still images can be shot. The still images you take are
saved to “Camera” folder or its sub folders of “My picture”
in “Data box” of the FOMA phone. A saving folder can be
set from “Auto Saving” (P118).
Please respect the privacy of individuals around you when
taking and sending photos using camera-equipped
mobile phones.
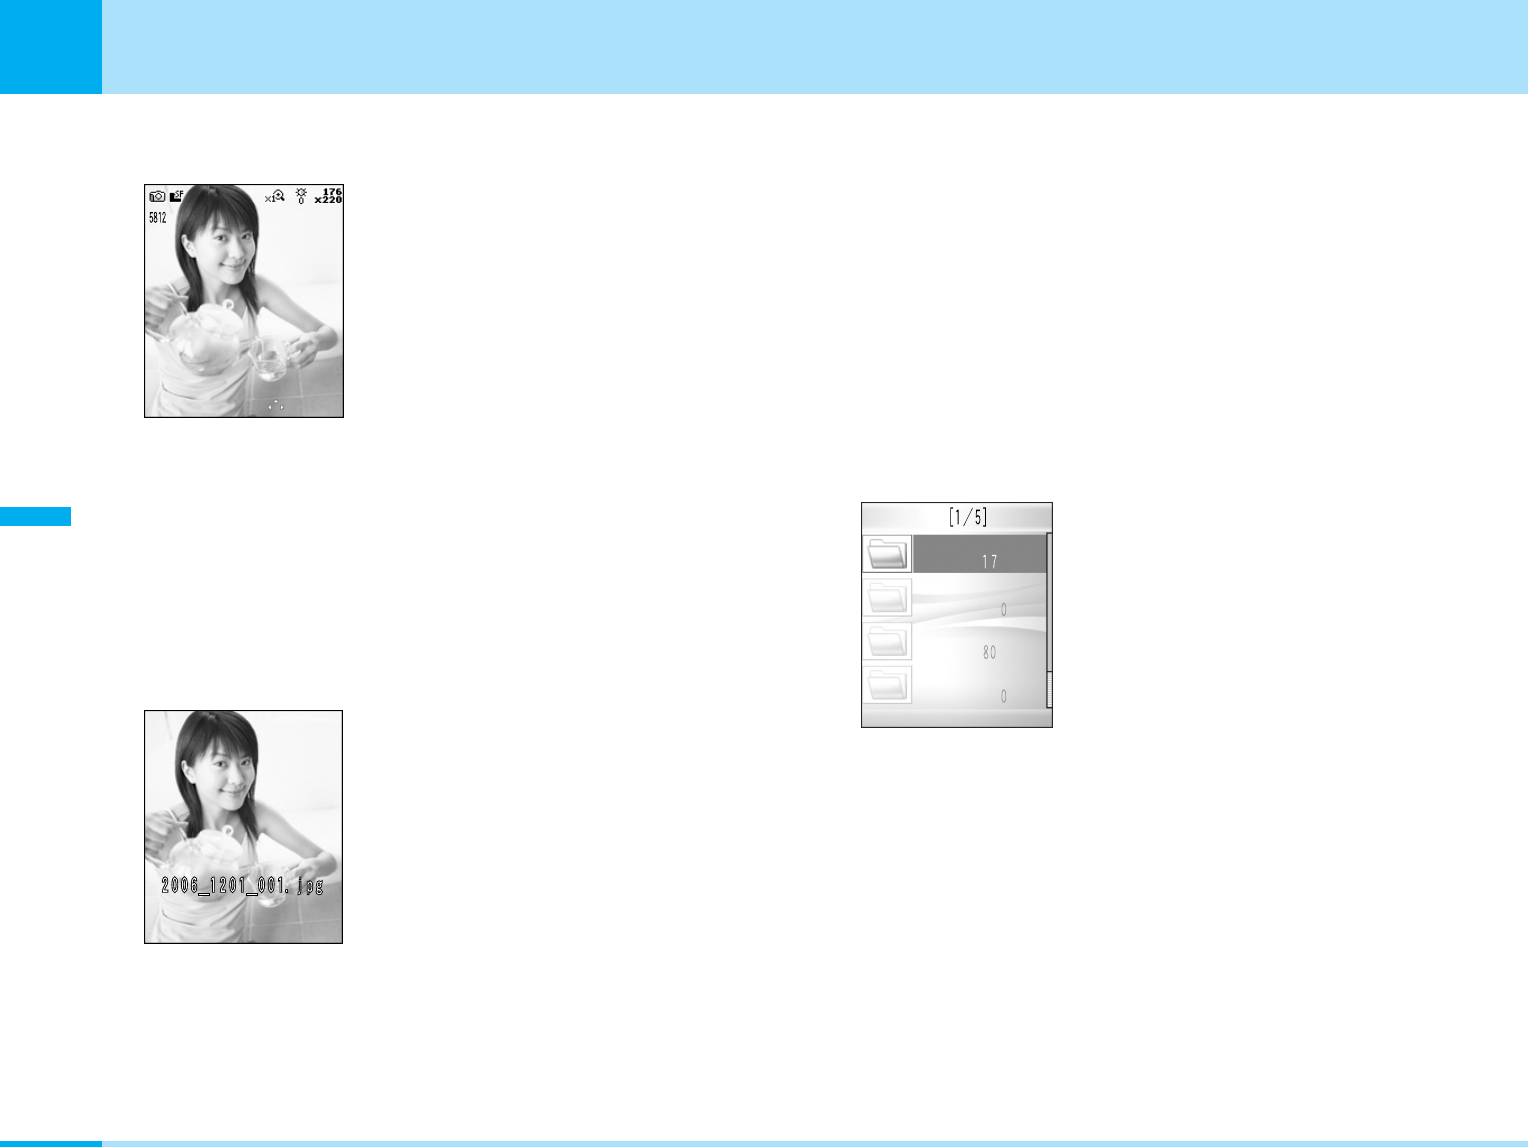
110
Multimedia (Camera)
Multimedia (Camera)
1. In Stand-by mode, press G
<Still Image Finder Stand-by>
•H/FE: You can set the magnification of the image.
•J: You can change the brightness of the image.
•I
[Album]: You can view the “Camera” folder of “My
picture”.
•T
: Flip the image vertically.
2. After confirming the subject, C
<Still Image Shooting End>
•I
[Mail]: You can compose the message with
attaching the image. Go to step 2 on page 149 of
“Composing i-mode mail”.
•C
[OK]: Return to the Still Image Finder Stand-by
screen.
•M
[Menu]: You can perform the operations such as
deleting the picture in submenu. >P113
•Q
: Return to Still Image Finder Stand-by screen
without saving the shot image.
aWhen ”Auto Saving” is set to OFF
Press C[Save] immediately after shooting an image
and go to the next step. When not saving the shot
image, press I[Cancel]. For “Auto Saving”
>
P118
<Still image saving screen>
•I[Save]: After deciding the folder to save the image,
the finishing screen of shooting still image is displayed.
•C[Open]: Opens a selected folder.
•M[Menu]: A submenu opens.
>
P114
Files
File
Files
File
Camera
Data transfer
Item
Pre-installed
My picture
Menu SwitchOpen
Menu MailOK
SavedSaved
Menu AlbumRec.
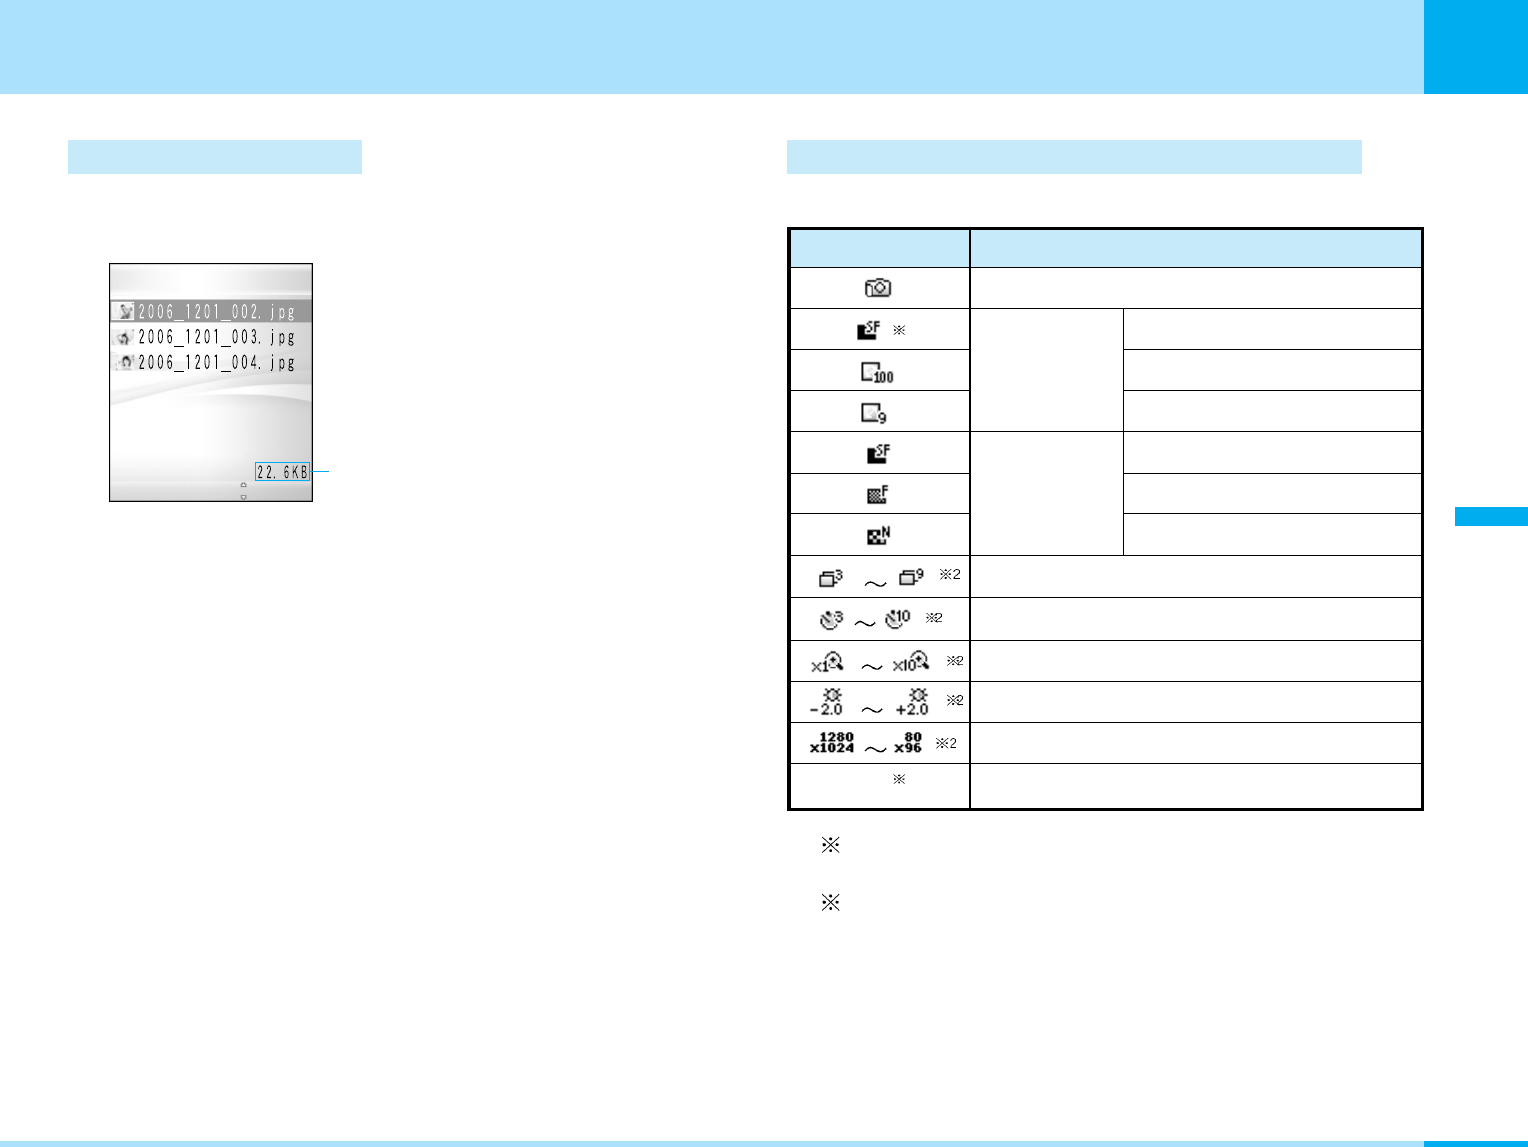
111
Multimedia (Camera)
Multimedia (Camera)
Next page
After taking a multishot
After setting a multishot (P112) and taking multiple images,
you can view the display as below.
<Screen multishot shooting End>
•C[View
]
: You can view the selected file using zooming.
•I
[Mail]: You can compose i-mode mail with attaching the
selected file. Go to step 2 on page 149 of “Composing
i-mode Mail”.
•Q: Returns to Still Image Finder Stand-by screen to
take a picture.
Icons on the Still Image Finder Stand-by Screen
• Indicates the status of the still image shot setting.
1: The remaining number of shots varies depending on the
settings of shooting.
2 : The selected value is displayed.
If “Size” is set to “128X96” and “Quality” is set to “Normal”,
the savable number of still images is approx. 8000.
Camera [1/3]
MailMenu View The file size of selected one
DescriptionIcon
Camera mode (Still image shot mode)
169 2Remaining number of shots
Auto timer
Size
Zoom
Brightness
Multishot
No restriction
100KB
File size
restriction
1
9KB
Super fine
Fine
Storage
image
quality
setup Normal
112
Multimedia (Camera)
Multimedia (Camera)
Using the Submenus of the Still Image
Finder Stand-by Screen
You can set up functions to shoot still images.
Setting item/Setting at purchase >P254
1. From the Still Image Finder Stand-by screen (P110),
M[Menu] ]Select from the following submenu
items using
J
]Select a setting item ]C]I
[Close]
Rotate
Set to rotate the view.
You can rotate the view also by pressing Ton Still
Image Finder Stand-by screen.
Size
You can set the photo size.
Quality
You can set the image quality to store shots of still
images.
Multishot
You can set the number of continuous shots of still
images to be taken by pushing the shutter.
Zoom
You can set the magnification of the image.
Brightness
You can set brightness (exposure) of the image.
White balance
You can revise the color tone for the image. This
setting is for a shot image with an unnatural color
tone.
Night mode
This setting is for when taking a shot in a dark place,
etc.
Frame shot
This setting is for when taking a shot with a frame
attached to the subject. Select “Choose Frame” and
select a frame using J>Press C.
Auto timer
You can set Auto timer. Select the number of seconds
between pressing the shutter and taking a shot.
Effect
This setting is for when taking a shot with special
effect applied to the image.
Size restriction
You can restrict the size of still images to store.
Information
• If taking a shot with the “size” set to “1280x1024”, you cannot
use the zoom.
• If “Multishot” is set, still images are automatically saved even if
“Auto Saving” is set to OFF.
• If “Multishot” is set, the “Size” automatically changes to
“320x240”. After setting Multishot, you cannot change the size.
113
Multimedia (Camera)
Multimedia (Camera)
• If the “Frame shot” is set, the “size” automatically changes to
“176x220”. After setting the Frame shot, you cannot change
the “size”.
• You cannot set “Multishot” and “Frame shot” at the same
time.
• If you are unable to store images in the size set in “File size
restriction”, automatically lower the resolution to store images.
• If you set “File size restriction” to “9KB”,
- You cannot set “Quality”.
- You can set “Size” only to “128 x 96” or “176 x 144”.
• If you set “File size restriction” to “100KB”,
- You cannot set “Quality”.
- You cannot set “Size” to “1280 x 1024”.
• For the frame image stored by default, see “Frame” (P250) in
“Data stored by default”.
Using the submenus of the Still Image
Shooting End Screen
Setting item/Setting at purchase >P255
1. From the Still Image Shooting End screen (P110) /
Multishot Shooting End Screen (P111), M[Menu]
]Select from the following submenu items
New picture
Returns to Still Image Shooting screen.
Mark/Unmark
You can delete the file shot by multishot. After selecting a
file, press M[Menu] >“Delete”.
–Mark : You can mark a file at a time.
–Mark all : You can mark all the files collectively.
–Unmark : You can unmark the file marked by
“Mark” or one of the files marked by “Mark all” at a
time.
–Unmark all : You can unmark the file marked by
“Mark” or all the files marked by “Mark all”.
Send via mail
You can attach shots of still images to i-mode mail for
sending. Go to step 2 (P149) of “Composing i-mode
mail message”.
Delete (Selected shot )
You can delete a shot of a still image.
Set as wallpaper
Set as wallpaper for “Main display” or “Sub display”.
114
Multimedia (Camera)
Multimedia (Camera)
Slide show
–Go : You can display still images shot in Multishot in
order.
–Settings : You can set up “View as” and “Time
interval (secs)” for slide show. After setting, press
I[Done].
Make animated GIF
You can select multiple files to create animation. After
selecting files, press I[Make].
Sort by
You can sort files.
View by
You can change file display methods.
File property
You can display the name, size and type of the file
being selected.
: Displayed only after taking images in Multishot.
Using submenu on still image saving screen
Setting items/Setting at purchase >P258
1. Press M[Menu] on still image saving screen
(P110) ]Select the next submenu item
Open
Open a selected folder.
Save to current folder
After deciding the current folder as the folder to save the
image, the finishing screen of shooting still image is
displayed.
New folder
Create a folder.
Delete
Delete a selected folder.
Sort by
Sort folders.
View by
Change the folder display method.
Memory info.
Display states, etc. of storage area in phone memory,
etc.
Folder property
Display the name, size, number of included files and
other information of a selected folder.
: Unavailable for folders set at purchase.
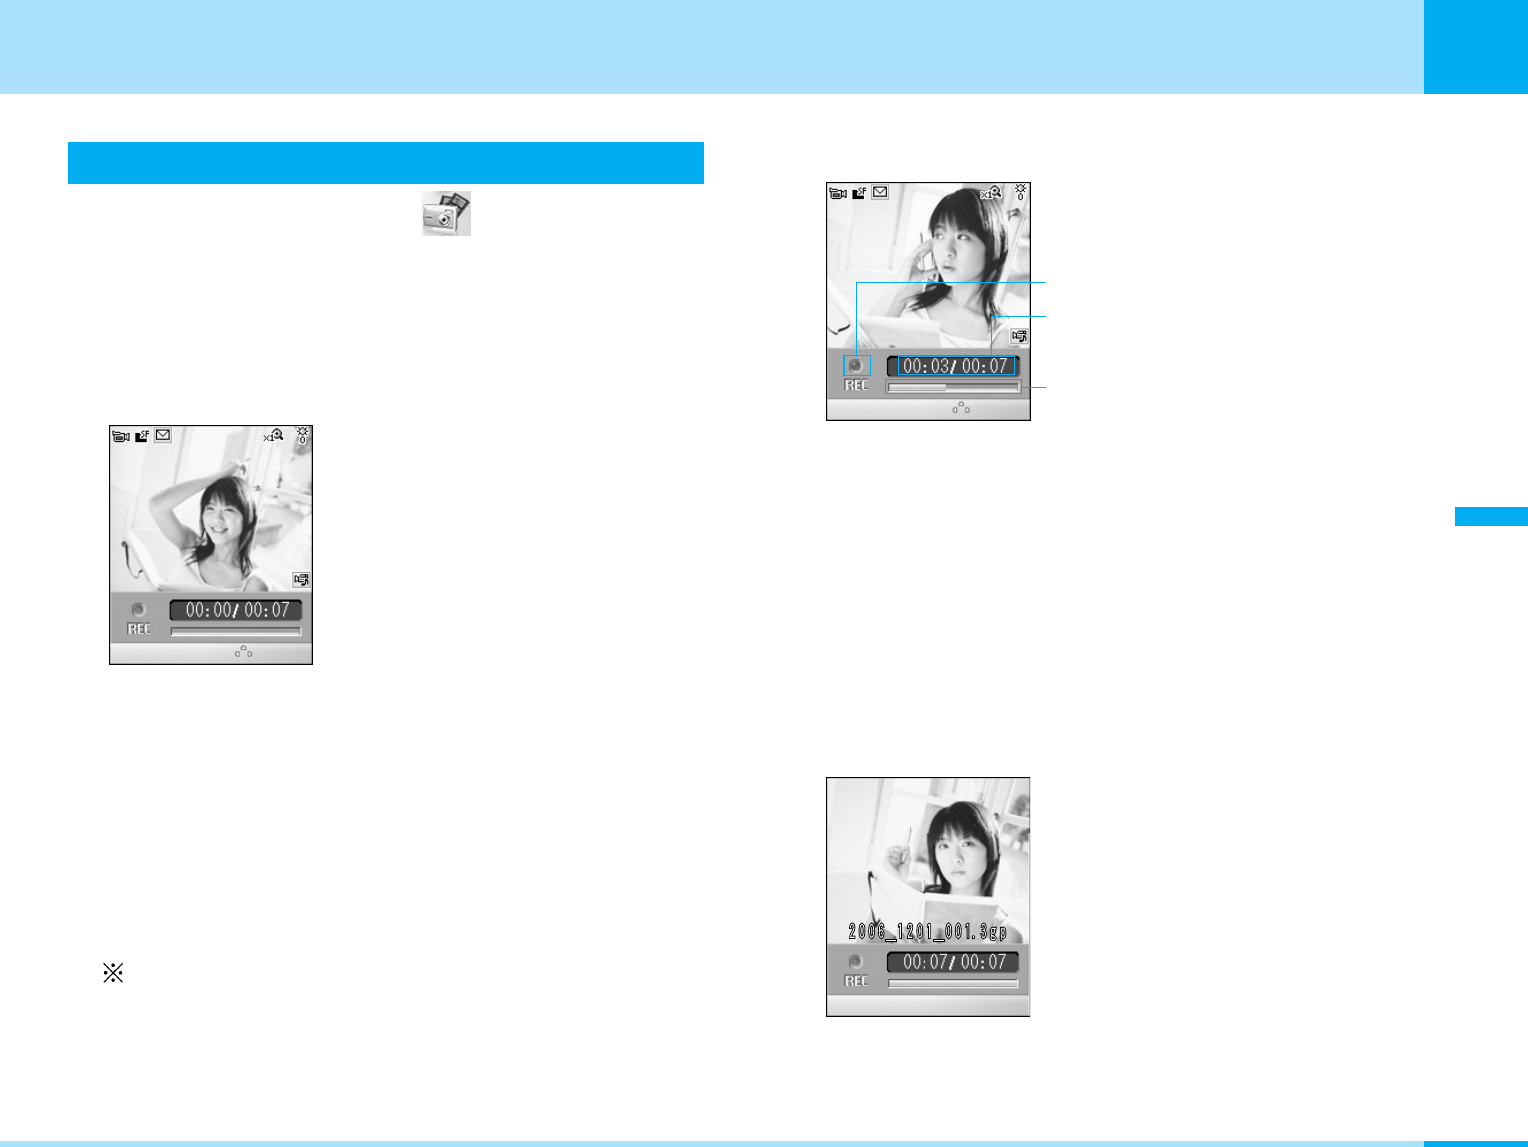
115
Multimedia (Camera)
Multimedia (Camera)
Next page
Shooting Moving Images
C](Multimedia) ]2
Moving images can be shot. Shot moving images are
saved to “Camera” folder or its sub folders of “i-motion” in
“Data box” of the FOMA phone. A saving folder can be set
from “Auto Saving”. (P110)
1. From the Multimedia menu (P107), “Movie-mode”
< Moving Image Finder Stand-by>
•H/FE: You can change the magnification of the
images.
•J: You can change the brightness of the images.
•I
[Album]: You can view the folder of “Camera” in
“i-motion”.
•T
: Flip the image vertically.
You cannot flip the image vertically while shooting
moving image.
2. After confirming the subject, C
<Moving Image Shooting>
•H/FE: You can change the magnification of an
image.
•Q: If you press this key on recording, the moving
image is not saved, and return to Stand-by mode to
take a picture.
•C[Stop]: Press this key to end the camera and
return to the screen of step 3.
3. The shooting is ended.
<Moving Image Shooting End>
OKMenu Mail
SavedSaved
Illuminates in red during shot.
Shot elapsed time/maximum shot time
Shot elapsed time is displayed with a bar.
Stop
Rec.Menu Album
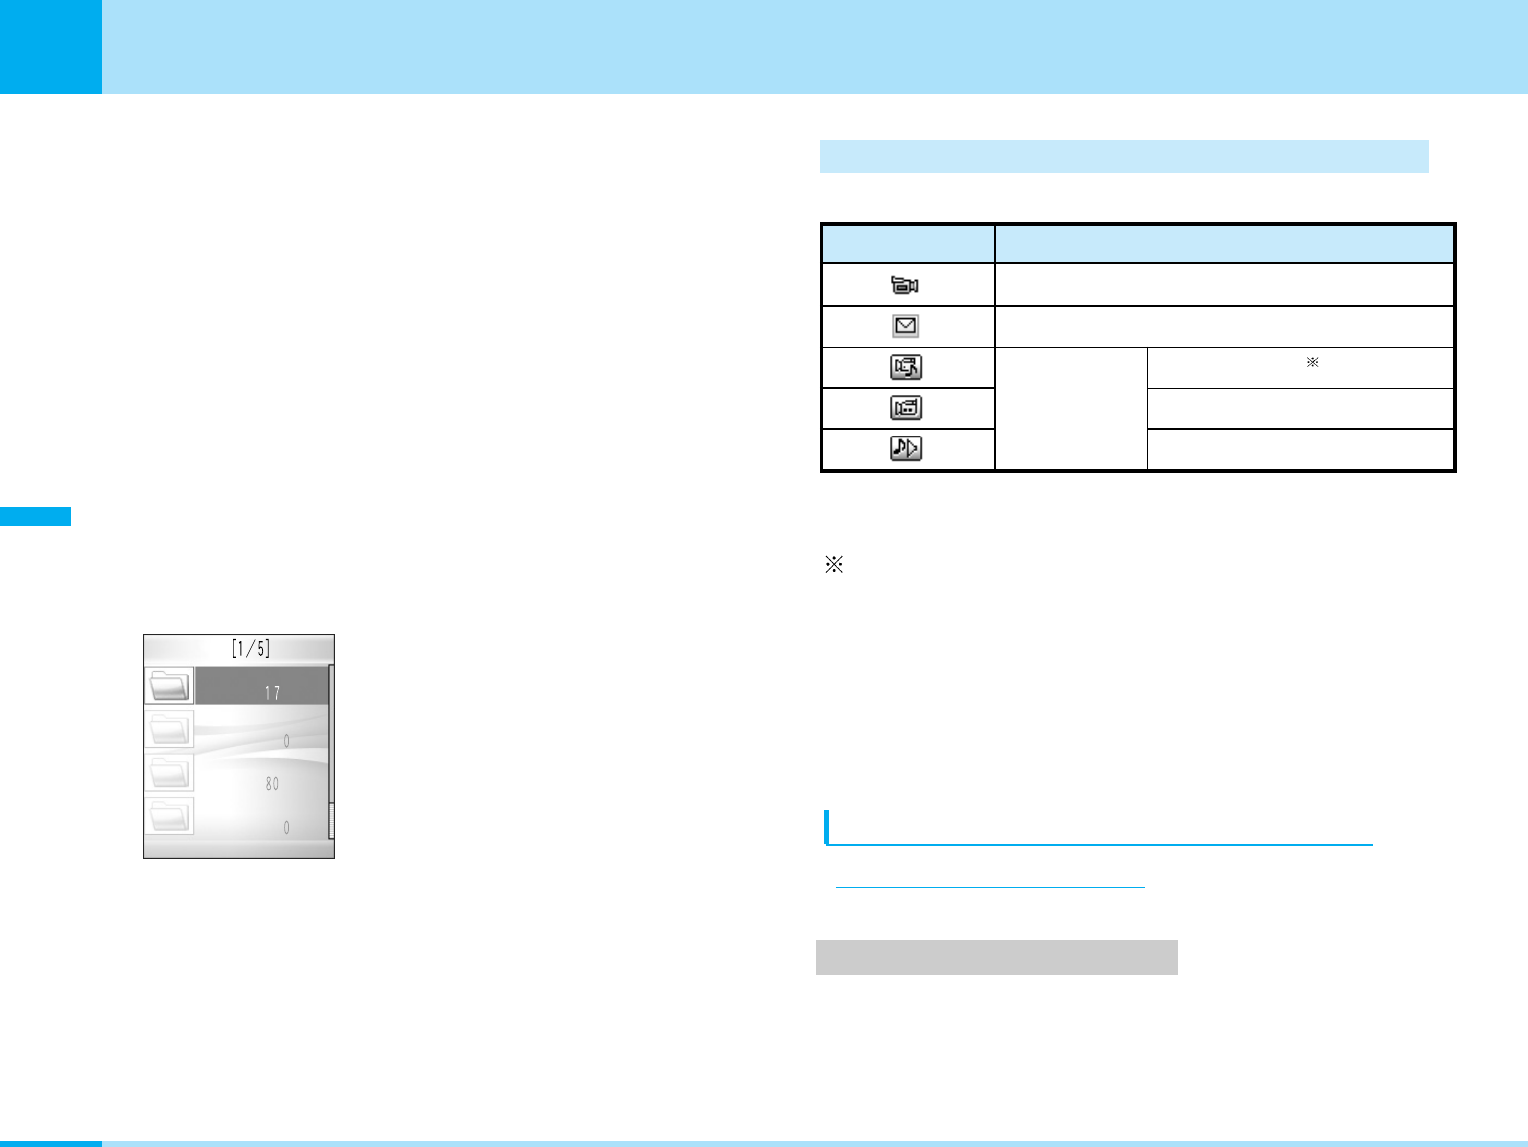
116
Multimedia (Camera)
Multimedia (Camera)
•I[Mail]: You can compose i-mode mail with
attaching the selected file. Go to step 2 on page 149
of “Composing i-mode mail”.
•C[OK]: Return to the Moving Image Finder Stand-by
screen.
•M[Menu]: You can delete the picture in submenu.
>P117
•Q: Return to Still Image Finder Stand-by screen
without saving the shot image.
aWhen “Auto Saving” is set to OFF
Press C[Save] immediately after shooting an image
and go to the next step. When not saving the shot
image, press I[Cancel]. For “Auto Saving”
>
P118
<Still image saving screen>
•I[Save]: After deciding the folder to save the image,
the finishing screen of shooting moving image is
displayed.
•C[Open]: Opens a selected folder.
•M[Menu]: A submenu opens.
>
P117
Icons on the Moving Image Finder Stand-by Screen
• Indicates the status of the moving image shot setting.
• See “Icons on the Still Image Finder Stand-by Screen”
(P111) for other icons.
: The recording time of a moving image can be set up to 30
minutes.
If “Quality” is set to “Super fine” and “Type” is set to
“Sound+Video", the preservation time of the recorded movie is
approx. 80 minutes.
The preservation time varies depending on the set shooting
condition.
Using the Submenu of the Moving Image
Finder Stand-by Screen
You can set up functions to shoot moving images.
Setting item/Setting at purchase >P255
1. From the Moving Image Finder Stand-by screen
(P115), M[Menu] ]Select from the following
submenu items using J]Select a setting item ]
C]I[Close]
Files
File
Files
File
Camera
Data transfer
Item
Pre-installed
My picture
Menu SaveOpen
Description
Icon
Recording time (for Mail)
Sound+Video
Video only
Sound only
Movie type
Movie mode (Taking a moving image)
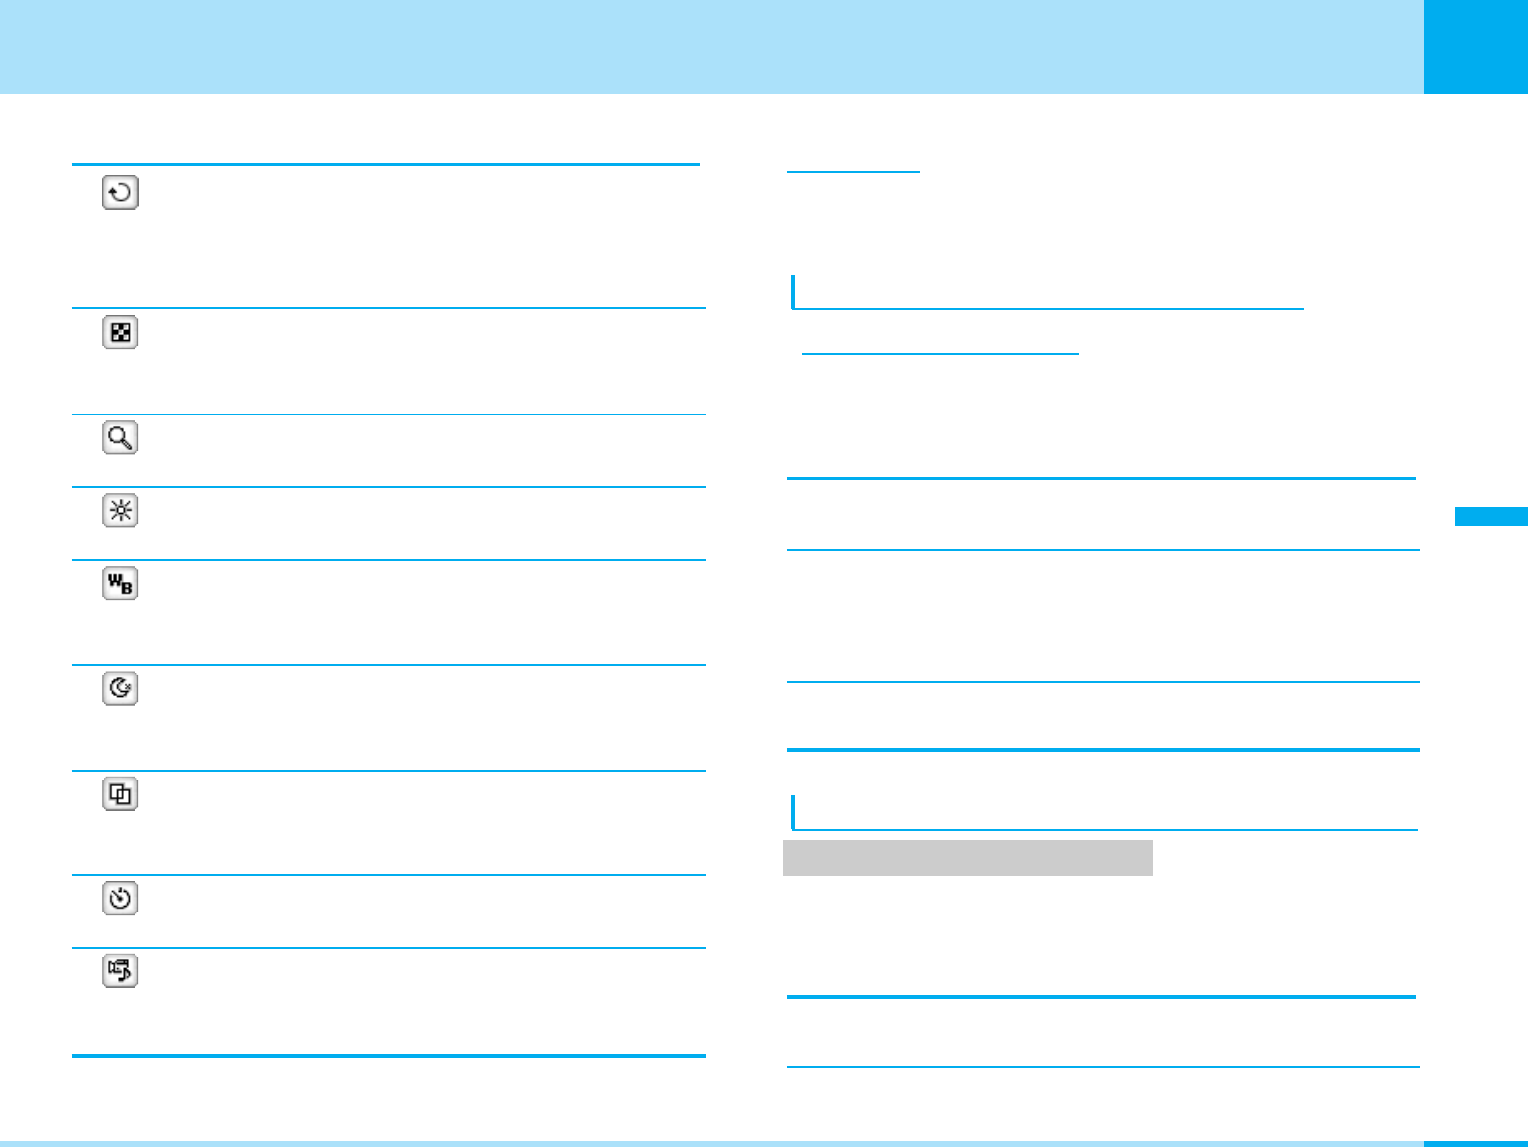
117
Multimedia (Camera)
Multimedia (Camera)
Rotate
Set to shoot a rotated image.
You can rotate the view also by pressing
T
on Still
Image Finder Stand-by screen.
Quality
You can set the image quality to store shots of moving
images.
Zoom
You can set up the magnification of the images.
Brightness
You can set up brightness (exposure) of the images.
White balance
You can revise the color tone for the images. This setting
is for shot images with an unnatural color tone.
Night mode
This setting is for when shooting a shot in a dark
place, etc.
Effect
This setting is for when shooting a shot with special
effect applied to the image.
Recording time
You can set the recording time for moving images.
Type
You can set whether or not images / sound are
recorded when shooting moving images.
Information
• If “Recording time” is set to “Mail attach”, the recording time
varies depending on the “Quality” setting.
Using the Submenus of Moving Image
Shooting End Screen
1. From the Moving Image Shooting End screen
(P115), M[Menu] ]Select from the following
submenu items
New movie
The Finder screen returns.
Send via mail
You can attach shot moving images to i-mode mail for
sending. Go to step 2 (P149) of “Composing i-mode
mail message”.
Delete
You can delete shot moving images.
Using submenu on moving image saving screen
Setting items/Setting at purchase >P259
1. Press M[Menu] on moving image saving screen
(P116) ]Select one of the submenu items given
below
Open
Open a selected folder.
118
Multimedia (Camera)
Multimedia (Camera)
Save to current folder
After deciding the current folder as the folder to save
the image, the finishing screen of shooting still image
is displayed.
New folder
Create a folder.
Delete
Delete a selected folder.
Sort by
Sort folders.
View by
Change the folder display method.
Memory info.
Display states, etc. of storage area in the phone
memory.
Folder property
Display the name, size, number of included files and
other information of a selected folder.
: Unavailable for folders set at purchase.
Setting Camera
C](Multimedia) ]3
Camera functions for shooting still and/or moving images
can be set.
1. Select “Camera settings” from Multimedia menu
(P107) ]Select one of the following items to be
set
Saving option
Set whether to automatically save shot still or moving
image. Use Jto set ON/OFF. When ON, set the
saving destination of still or moving image. After
setting, press I[Done].
Shutter sound
Set a sound to be emitted when the shutter is pressed.
• When an item is selected, a sample sound is emitted.
Flicker tuning
Set suppressing flickering of the screen.
Information
• Depending on the shooting environment and/or object tone,
flickering may not be completely suppressed by setting
“Flicker tuning”.

119
i-mode Menu ........................................120
What is i-mode? ...................................120
Displaying the iMenu display...............120
Displaying Sites from Bookmark .........121
Displaying Screen memo .....................122
Displaying Last URL.............................123
Displaying Internet Web Pages ...........123
Displaying MessageR/F .......................124
Checking Whether Center Holds
MessageR/F .........................................127
Setting Functions of i-mode ................127
Displaying Sites....................................130
How to See/Use Sites ..........................132
Using My Menu ....................................135
Changing i-mode Password ................136
i-mode
Menu
Select
On the Stand-by display, C[Menu] ]
(i-mode) or “i-mode”
To display the i-mode menu
Select
i-mode
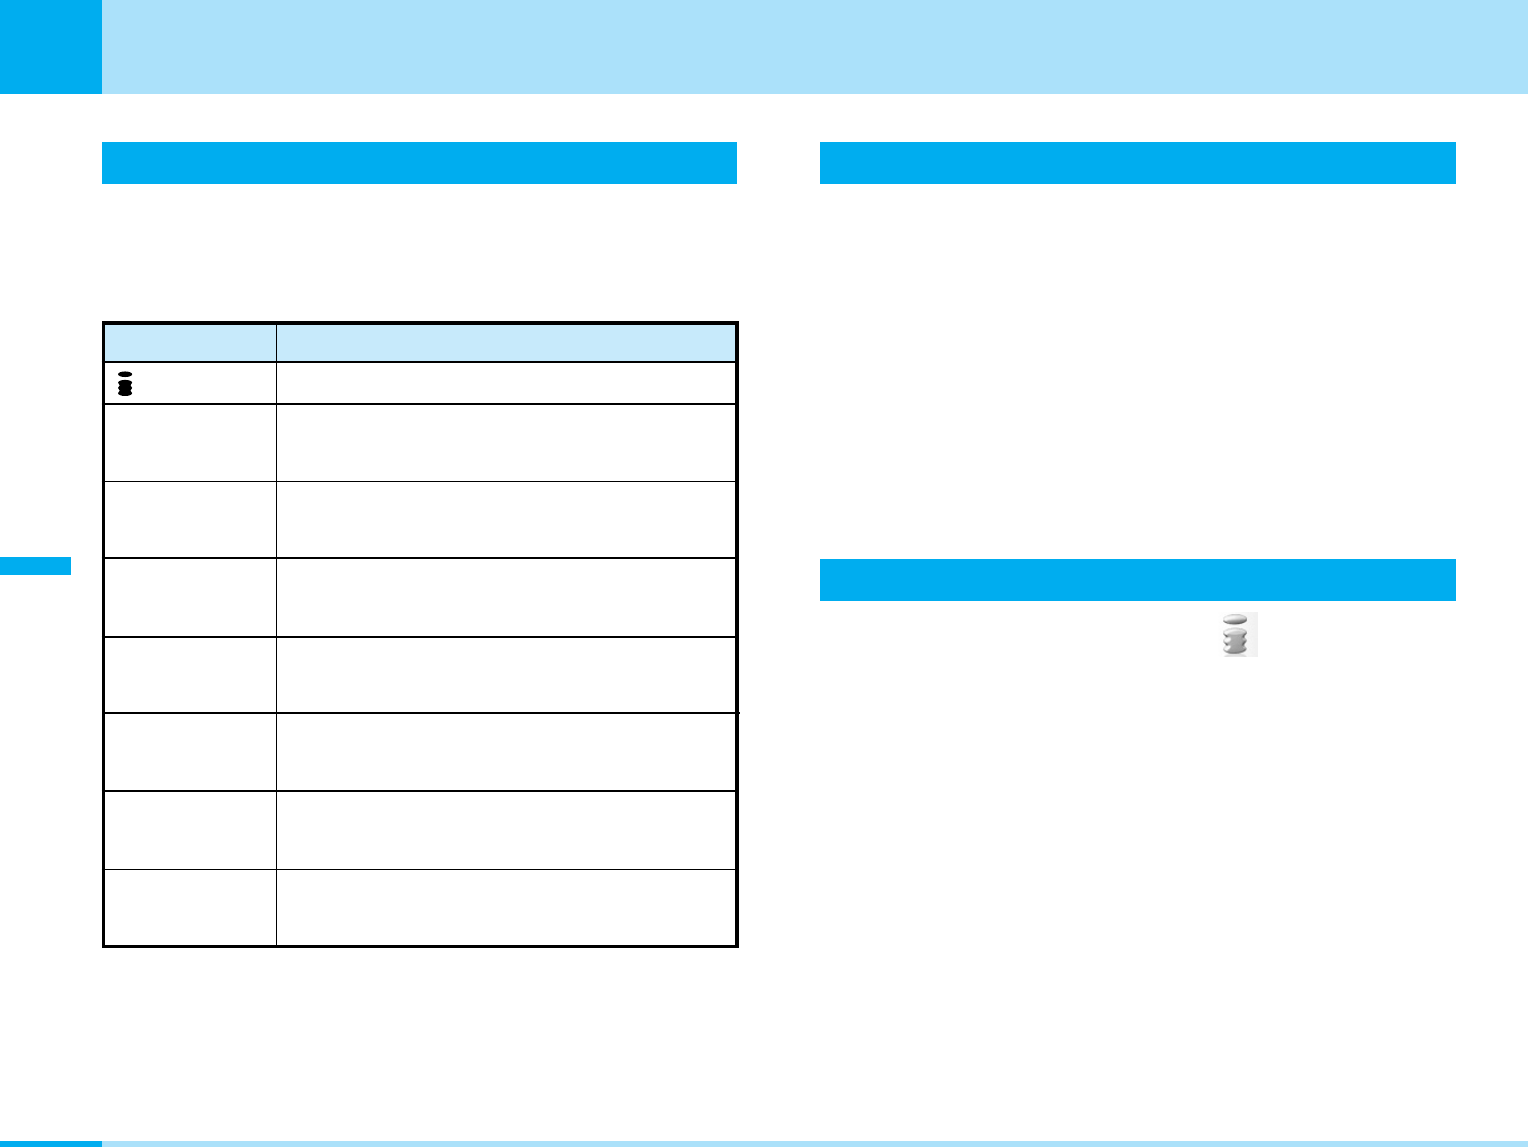
120
i-mode
i-mode
i-mode Menu
The i-mode menu is the basic display for viewing various
sites and Internet web pages. You can use each function of
i-mode from the i-mode menu.
What is i-mode?
i-mode is the online service that makes use of the display
of the i-mode phone to enable you to use convenient
information from i-mode sites (programs) and homepages
supporting i-mode and to exchange mail easily.
• Refer to “Mobile Phone User's Guide [i-mode]” for
details.
• Not all the services described in “Mobile Phone User's
Guide [i-mode]” are supported. Check the description
of the models supporting each service with “Mobile
Phone User's Guide [i-mode]”.
Displaying the iMenu display
C](i-mode) ]1
You can access each i-mode site from iMenu.
1. From the i-mode menu (P119), “iMenu”
•
Refer to “
Mobile Phone User's Guide [i-mode]
” for
items displayed on the iMenu display.
• See “Displaying Sites” (P130) for the subsequent
operations.
DescriptionMenu item
Connects to the i-mode Center
Displays your favorite sites and Internet
web pages.
Enter URL to connect to the internet.
Displays pages of sites, etc. saved in the
FOMA phone.
Displays the most recently accessed
site or Internet web page.
Bookmark
Last URL
Displays a list of the received
MessageR/F.
Message
You can set the FOMA functions related
to i-mode.
You can check whether the i-mode
Center holds mail and MessageR/F.
Check new
message
Go to
location
Menu
Screen memo
i-mode
setting
121
i-mode
i-mode
Displaying Sites from Bookmark
C](i-mode) ]2
You can directly access your favorite sites from Bookmark.
• For the registration method, see “Using the Submenus
of the Site Screen” (P130).
1. From the i-mode menu (P119), “Bookmark”
<Bookmark List>
2. Select a bookmark ]C
• Connected to the site.
Using the Submenus of the Bookmark List
Screen
1. From the Bookmark List screen (See above),
M
[Menu] ]Select from the following submenu
items
Connect
You can connect to the selected Bookmark site.
Edit bookmark
You can edit the title and URL of the selected
Bookmark. After editing, press I[Done].
Delete
You can delete the selected Bookmark.
Delete selected
You can select and delete multiple Bookmarks. After
selecting, M[Menu]>Select “Delete”
Delete all
You can delete all the registered Bookmarks. To delete
all, enter terminal security code >C[OK].
URL
You can display the URL of the selected Bookmark.
Copy URL
You can copy the URL of the selected Bookmark. For
the copy, see “Copying/Cutting/Pasting” (P219).
Compose message
You can paste the URL of the selected Bookmark to
the text of i-mode mail and send it. Go to step 2 of
“Composing i-mode mail” (P149).
Send
Send a selected bookmark via infrared communication.
Send all
Send all bookmarks via infrared communication.
: For infrared communication, see “Using infrared communication”
(P182).

122
i-mode
Displaying Screen memo
C](i-mode) ]3
You can display the web pages saved without connecting
to i-mode.
• For the registration method for the site screen, see
“Using the submenus for the Site screen” (P130).
1. From the i-mode menu (P119), “Screen memo”
<Screen Memo List>
2. Select a screen memo ]C
• The Screen Memo List screen appears.
Using the Submenus of the Screen Memo
Screen
1. From the Screen memo List screen (See above)
M
[Menu] ]Select from the following submenu
items
View
You can display the selected screen memo.
Edit title
You can edit the title of the selected screen memo.
Delete
You can delete the selected screen memo.
Delete selected
You can select and delete multiple screen memos.
After selecting,
M
[Menu]
>
Select “Delete”.
Delete all
You can delete all the screen memos. To delete all,
enter terminal security code >C[OK].
URL
You can display the URL of the selected screen
memo.
Protect ON/OFF
You can give or cancel protection for the selected
screen memo. You cannot delete protected screen
memos.
i-mode
DescriptionIcon
Protected Screen
memo
Unprotected Screen
memo
123
i-mode
Using the Submenus of the Screen Memo
Screen
1. From the Screen memo display See left M[Menu]
]Select from the following submenu items
Save graphics 1
You can select and save an image contained in a
screen memo. You can confirm the saved image by
“My picture” of “Data box”>”i-mode” folder. >P166
Show properties
–URL : You can display the URL of the displayed
screen memo.
–Page properties : You can check the title and URL
of the displayed screen memo.
–Certificates 2:You can display the certificate used
by the displayed screen memo.
Retry 3
A GIF animation is played back from the beginning.
Edit title
You can edit the title of the displayed screen memo.
Delete
You can delete the displayed screen memos.
Protect ON/OFF
You can activate or cancel protection for the displayed
the page. You cannot delete protected saved pages.
1: This menu is not selected in case the selected screen memo
does not include an image.
2: This menu is not selected in case the certificate is not used for
the displayed screen memo.
3: This menu is not selected in case the selected screen memo
does not include of GIF animation.
Displaying Last URL
C](i-mode) ]4
When you exit i-mode, the URL of the page displayed last is
stored as “Last URL”. Using “Last URL”, you can connect to
the site or Internet web page you visited last time.
1. From the i-mode menu (P119), “Last URL” ]I
[Done]
Information
• If you press Cin screen of URL, you can edit the latest URL
address.
Displaying Internet Web Pages
C](i-mode) ]5
You can display web pages supporting i-mode and
directly access sites from the history of the sites you
visited by entering their URLs.
i-mode
Next Page
124
i-mode
1. From the i-mode menu (P119), “Go to location” ]
Select from the following items
Input address
You can display Internet web pages supporting i-mode
by entering URLs. After entering, press I[Done] to
access.
URL history
You can directly access sites by selecting URLs you
visited from the URL history.
Information
• You can enter URL up to 256 half-pitch characters.
• You can view the list up to 50 address in URL history.
• Depending on the type of the accessed Internet site, the page
may not be displayed correctly.
• Web pages other than Internet web pages supporting i-mode
may not be displayed correctly.
Using the Submenus of the URL Screen
1. From URL history screen, press M[Menu] ]
Select from the following submenu items
Connect
You can connect the site in URL history.
Edit URL
You can connect URL in history after editing URL
address.
Delete
You can delete the history of URL.
Delete all
You can delete the history of all registered URL. To
delete all, enter terminal security code >C[OK].
Compose message
You can compose i-mode mail with attaching URL to
the text. Go to step 2 on page 149 of “Composing i-
mode mail”.
Displaying MessageR/F
C](i-mode) ]6
You can display received MessagesR/F.
• MessageR:
Your required information is delivered automatically
once you apply for the message service on the site
providing the service.
• MessageF:
Messages are delivered free of charge by performing
the Received settings in the option settings. Refer to
“Mobile Phone User's Guide [i-mode]” for how to set it
up.
: If you subscribed to the FOMA service after October 1, 2004,
the setting at purchase is “Receive”.
i-mode

125
Information
•You can save up to 100 MessageR and up to 50 MessageF.
Depending on the size of messages, the number of savable
messages may be smaller.
•If a message is attached to the received MessageR/F, the
melody will be played automatically when you display the
message.
Icons on the MessageR/F List Screen and the
Display MessageR/F Screen
i-mode
Next Page
DescriptionIcon
Unread MessageR/F
Read MessageR/F
Protected MessageR/F
Subject
An image is attached.
A file with the UIM operation restriction function
set up is attached.
MessageR/F with a file attached or pasted
A melody is attached.
A melody is pasted.
Received date and time
126
i-mode
Using the Submenus of the MessageR/F
List Screen
Setting item/Setting at purchase >P256
1. From the MessageR/F List (P125), M[Menu] ]
Select from the following submenu items
Delete
You can delete the selected MessageR/F.
Delete selected
You can select and delete multiple MessagesR/F. After
selecting, M[Menu] >Select “Delete”.
Delete all
You can delete all the MessagesR/F. To delete all,
enter terminal security code >C[OK].
Protect ON/OFF
You can give or cancel protection for the selected
MessageR/F. You cannot delete protected MessagesR/F.
Sort
You can sort MessagesR/F displayed on the List
screen.
Filter
You can change types of the MessageR/F displayed
on the List screen.
Using the Submenus of the Display
MessageR/F Screen
1. From the Display MessageR/F screen (P125),
M[Menu] ]Select from the following submenu
items
Delete
You can delete the displayed MessageR/F.
Protect ON/OFF
You can give or cancel protection for the displayed
MessageR/F. You cannot delete protected
MessagesR/F.
Add to phonebook 1
You can add phone number or mail address displayed
on the MessageR/F to phonebook. Go to step 2 on page
64 of “Adding to Phonebook”.
Save attach file 2
You can save the melody ( ) or image ( )
attached to the MessageR/F. You can view the saved
melody or the image in “Melody”/“My picture” of “Data
box”
>
“i-mode” folder.
>
P166, P176
1: Activate this menu after selecting the phone number or mail
address that can be registered. If no item exists, you cannot
activate this function.
2: You can activate this function after selecting the file saved in.
If the file to save does not exist, you cannot use this file.
i-mode
127
i-mode
Automatically Receiving MessageR/F
If you are in the FOMA service area, MessageR/F are sent
automatically.
1. Receive a MessageR or MessageF
•
(White) or (White) is displayed.
2. The reception results are displayed
• To confirm the received MessageR/F immediately,
select “MessageR”/“MessageF” and press C.
•Q: Returns to previous screen.
Checking Whether Center Holds
MessageR/F
C](i-mode) ]7
You can check whether the i-mode Center holds any i-
mode mail and/or MessageR/F that arrived while the
phone was out of the service area or turned off.
1. From the Stand-by screen, press M[Mail] for 2 or
more seconds
• The Check Result screen appears. To read the
received MessageR/F immediately, select
“MessageR”/“MessageF” and press C.
Information
•If the i-mode Center holds i-mode mail and/or a MessageR/F,
an icon (P31) is displayed. Note that the icon may not be
displayed if i-mode mail or a MessageR/F arrived at the
i-mode Center while the FOMA phone was turned off.
Setting Functions of i-mode
You can set functions of i-mode and MessageR/F.
i-mode
128
i-mode
Home
C](i-mode) ]81
You can set the URL of a web page displayed when “Home”
is selected and whether to enable/disable “Home” (P121).
Setting items/Setting at purchase >P234
1. From the i-mode menu (P119), “i-mode setting” ]
“Home”
2.“Enable” or “Disable”
3. Select the URL field ]C]Enter a URL ]C
• If “ [Done] Disable” is selected, you cannot enter a
URL.
4. I[Done]
View
C](i-mode) ]82
You can set functions related to displaying sites and
screen memos.
Setting at purchase >P234, 235
1. From the i-mode menu (P119), “i-mode setting” ]
“View” ]Select from the following setting items ]
After setting, I[Done]
Character size
You can change the character size for text of sites,
screen memos pages and MessagesR/F.
Image display
You can set whether to display images contained in
sites, or screen memos.
Scroll
You can set the number of lines scrolled when
pressing Hon a display displaying text of sites,
screen memos or MessagesR/F.
Message list disp.
You can set how to display MessageR/F list (the
number of lines).
: Images of MessageR/F are displayed regardless of this setting.
Certificates
C](i-mode) ]83
You can set a certificate used for displaying SSL-enabled
sites.
1. From the i-mode menu (P119), “i-mode setting” ]
“Certificates” ]M[Menu] ]Select from the
following setting items
Certificate info
You can view the selected certificate.
Valid/Invalid
You can set whether to validate or invalidate the
selected certificate.
• You can check the status of a certificate by the
following symbols. : Valid : Invalid
i-mode

129
i-mode
Information
• If “Valid/Invalid” is set to “Invalid”, you cannot display the sites
with that certificate.
Others
C](i-mode) ]84
You can set i-mode connection timeout and the type of
message to check. You can also check the i-mode
settings.
Setting items/Setting at purchase >P235
1. From i-mode menu (P119), “i-mode setting” ]
“Others” ]Select from the following setting items
Connection timeout
It may take time to download from some sites. You
can set the time to wait before canceling
downloading. After setting, press I[Done].
i-motion auto play
You can set whether to play back an i-motion movie
automatically when you download a standard (normal)
type of i-motion movie from a site. After setting, press
I[Done].
Check new message
You can set the contents to check by performing
“Check new message” from among i-mode mail,
MessageR or Message F. After setting, press
I[Done].
Check settings
You can check the individual “i-mode setting”.
Reset settings
You can reset each of the “i-mode setting” to their
defaults. To reset the settings, enter terminal security
code >C[OK].
Reset data
You can delete all data related to i-mode (Bookmark,
Screen memo, URL history) except for MessageR/F.
To reset the data, enter terminal security code >C
[OK].
Information
• Even when you have set “Connection Timeout” to “Unlimited”,
you may be disconnected depending on radio wave
conditions.
i-mode

130
i-mode
Displaying Sites
You can connect to sites by easy key operation, and use
various types of services offered by IPs (Information Service
Providers). (For some sites, you may be required to apply to
the IPs separately.)
1. From the i-mode menu (P119), “iMenu”
• blinks during i-mode communication.
2. Select an item (link) ]C
<Site>
•FE: You can scroll the menu.
•P: You can end i-mode.
Information
• If there is a number in front of the item showing the link, you
can connect to that link directly by pressing the same number
on the keypad. Note that some sites cannot be connected.
• Depending on the site, images may not be displayed.
• Depending on the site connected, the confirmation screen
may appear stating that mobile phone information is sent.
Your mobile phone information (the model and the serial
number of your mobile phone) is sent to the IP (Information
Service Provider) over the Internet, so could be perceived by
third parties. The phone number, address or age are not sent
to IP (Information Service provider).
Using the Submenus of the Site Screen
1. From the Site screen (See left), M[Menu] ]Select
from the following submenu items
Add bookmark
You can add the displayed URL of the Site to Bookmark.
The bookmark screen is displayed, and you can register
the site by pressing I[Done]. You can access directly
to the site from the registered bookmark. >P121
Add screen memo
You can save a displayed web page as a screen
memo. You can display saved screen memos without
connecting to i-mode. >P122
Save graphics 1
You can select and save an image contained in a web
page.
>
P134
Show properties
–URL : You can check the URL of the displayed site.
–Page properties : You can check information on
the displayed web page.
i-mode

131
i-mode
i-mode
–Certificates 2:You can check the certificate used
in the displayed site.
Bookmark list
You can view a list of bookmarks registered by “Add
bookmark”. If you select a bookmark, you can directly
access the site.
Go to location
–Input address : You can access web pages
supporting i-mode by entering URL. After entering it,
press I[Done] to connect to the site.
–URL history : You can select the URL history of a
displayed site to directly access the web page.
Screen memo list
You can view a list of pages saved as “Screen Memo”.
You can display the saved page by selecting it.
Menu
You can bring up the iMenu display.
Home
You can display the web page registered as “Home”
(P128).
Reload
You can reload data of a site. The contents of the site
will change to the latest information each time you
reload if the site has been updated.
Compose message
You can send the URL of site being displayed or the
URL for link with them attaching to the message text.
Go to step 2 on page 149 of “Composing message”.
Change char. code
When characters are not displayed correctly, you can
convert them to the correct ones.
Add to phonebook 3
You can add the phone number and mail address
displayed on the web page to the phonebook. Go to
step 2 on page 64 of “Adding to phonebook”.
Retry 4
You can play back a GIF animation from the beginning.
1: You cannot activate this menu in case the image that can be
saved is not included in a site or “Image” is set not to display.
(P128)
2: If no certificate is used in the site, you cannot use this menu.
3: Activate this menu after selecting the phone number or mail
address to register. Otherwise, you cannot activate this menu.
4: You cannot activate this menu when GIF animation is not
included in displayed site.

132
i-mode
Information
• Some sites may not be saved as bookmarks.
• When characters are not displayed correctly even after
“Change char. code”, repeat the operation. However, even if
you repeat this operation, the correct characters may not
come up. The original characters are displayed if you repeat
the operation 4 times.
• If you perform “Change char. code” when the correct
characters are displayed, wrong characters may come up
instead.
SSL Pages
SSL pages use data encryption for data transmission to
prevent hacking and source-file overwriting so that you
can more safely exchange personal information.
• If you try to display an SSL-enabled page, the SSL
communication starting message appears. When an
SSL page is displayed, appears.
• When moving from an SSL page to an ordinary page,
the confirmation display appears. After “Yes” is
selected, a regular page is displayed and
disappears.
How to See/Use Sites
Entering/Selecting Information on Sites
When you use a site, you may enter characters (text box) or
select an item from multiple options (radio button, checkbox,
pull down menu).
i-mode
Used for item selection.
You can select only 1 item.
Radio button
Used for item selection.
You can select multiple
items.
Checkbox
Display
Example Description
Name
You can enter characters.Text box
Used for item selection. If
you select a pull down
menu, a list of selectable
items is displayed.
Pull down
menu
ID
Password
Tokyo
Saitama
Kanagawa
:
Unselected
:
Selected
:
Unselected
:
Selected

133
i-mode
Returning to Obtained Previous Page/Going
to Obtained Next Page
The FOMA phone stores the last few screens displayed.
1. To display the previous page, L
To display the next page, R
Operations from Highlighted Information
You can easily make calls, send mails, and display Internet
web pages using highlighted information (phone numbers,
mail addresses, URLs, and so on) displayed on sites and in
mail and MessageR/F.
Phone To function/AV Phone To function
You can make a call by selecting displayed information
such as a phone number.
• You may not be able to use the Phone To/AV Phone To
function depending on the site.
1. Select information such as a phone number ]C
2. “Voice call”/“Video-phone call”
• You can make a call after setting the Caller ID
notification according to the screen.
Information
• You can add phone number information displayed on a web
page to the phonebook using the submenu of the site screen.
Mail To function
You can send mails by selecting displayed information
such as a mail address.
• You may not be able to use the Mail To function
depending on the site.
1. Select information such as a mail address ]C
• Go to step 2 of “Composing i-mode mail” (P149).
Information
• You can add mail address information displayed on a web
page to the phonebook using the submenu of the site screen.
Web To function
You can access a web page by selecting displayed
information such as a URL.
• You may not be able to use the Web To function
depending on the site.
1. Select information such as URL ]Press C
• If the confirmation screen to connect appears, press
I[Yes].
i-mode
Next page

134
i-mode
i-appli To function
You can start i-appli by selecting the displayed URL (link).
1. Select i-appli information ]C]I[Yes]
Information
• If “i-appli To” (P162) is set to “OFF”, you cannot start i-appli by
this operation.
Downloading Images from Sites
You can set images saved from the displayed web page
or screen memos. You can check the saved images in
“My picture” of “Data box” >“i-mode” folder. >P166
1. Displaying Site / Saved Page screen ]
M
[Menu]
]“Save graphics” ]
C
]Select an image ]
C
]“Yes”
Information
• Some images may not be saved.
• You cannot select “Save graphics” if the image that can be
saved is not included or “Image” (P128) is set not to be saved.
Downloading i-melody from Sites
You can download a melody from a site and set it.
Download a melody from a site. A saved melody can be
checked by “Melody” of “Data box” >“i-mode” folder
(P176).
1. Display a site that supports downloading of
melodies ]Select a melody ]C
• After the download is completed, the confirmation
screen appears.
2. Video content menu
• “Play”: You can play the downloaded melody.
• “File Protection”: You can view the information of
i-motion downloaded from network.
• “Back”: You can return to the site without saving the
melody.
Information
• Depending on the site, you may not be able to download
melodies.
• Some downloaded melodies may not be played back
successfully.
i-mode

135
i-mode
Obtaining i-motion Movies from Sites
The i-motion movie is a moving image file containing
images and sound. Acquired i-motion can be checked by
“i-motion” of “Data box” >“i-mode” folder (P173).
• See “Mobile Phone User's Guide [i-mode]” for details.
1. Select an i-motion movie on a site that supports
downloading of i-motion movies ]C
• When downloading is done, the confirmation screen
appears.
2. Video content menu
• “Play”: You can play i-motion downloaded from
network.
• “File property”: You can view the information of
i-motion downloaded from network.
• “Back”: You can return to the site without saving
i-motion.
Information
• You can change the playback methods for while downloading
i-motion movies. >P129
• Some downloaded i-motion movies might not be played back
correctly.
• You cannot download i-motion movies of the streaming type
and the ASF format.
Using My Menu
If you register frequently-used sites in My Menu, you can
access them easily.
Registering Sites in My Menu
1.
Bring up the page of the site to be registered
]
Select
“Register My Menu”
]C
2. Select the i-mode password text box ]C]Enter
the i-mode password ]C]“Select”
• For i-mode password, see “Changing i-mode
Password”.
Information
• Some sites may not be registered in My Menu.
• If you subscribe to Menu/Search in a pay site, it will be
registered in My Menu automatically.
Displaying Sites from My Menu
1. From the Stand-by display, I[i-mode] ]“iMenu”
]“My Menu” ]Select a site to access ]C
i-mode

136
i-mode
i-mode
Changing i-mode Password
The “i-mode password” (4 digits) is required to subscribe to
and unsubscribe from message services and i-mode pay
sites, and to perform i-mode mail settings. At purchase, this
password is set to “0000” (4 zeros), so you need to change
it to your own i-mode password. Be sure not to let others
know your i-mode password.
1.On the Stand-by display, I[i-mode] ]“iMenu” ]
“English” ]“Options” ]“Change i-mode
Password”
2. Select the “Current Password” text box ]C]
Enter your i-mode password (4 digits) ]C
• At purchase, the setting is “0000”, so enter “0000”
for the first time.
3. Select the “New Password” text box ]C]Enter
a new i-mode password (4 digits) ]C
4. Select the “New Password (Confirmation)” text box
]C]Enter a new i-mode password (4 digits) ]
C]“Select”
• Enter the same number as you entered in step 3.
Information
• If you forget your i-mode password, you can have it reset to
“0000” at a handling counter such as a DoCoMo shop. You
will be required to show your official identification (driver’s
license, etc.).
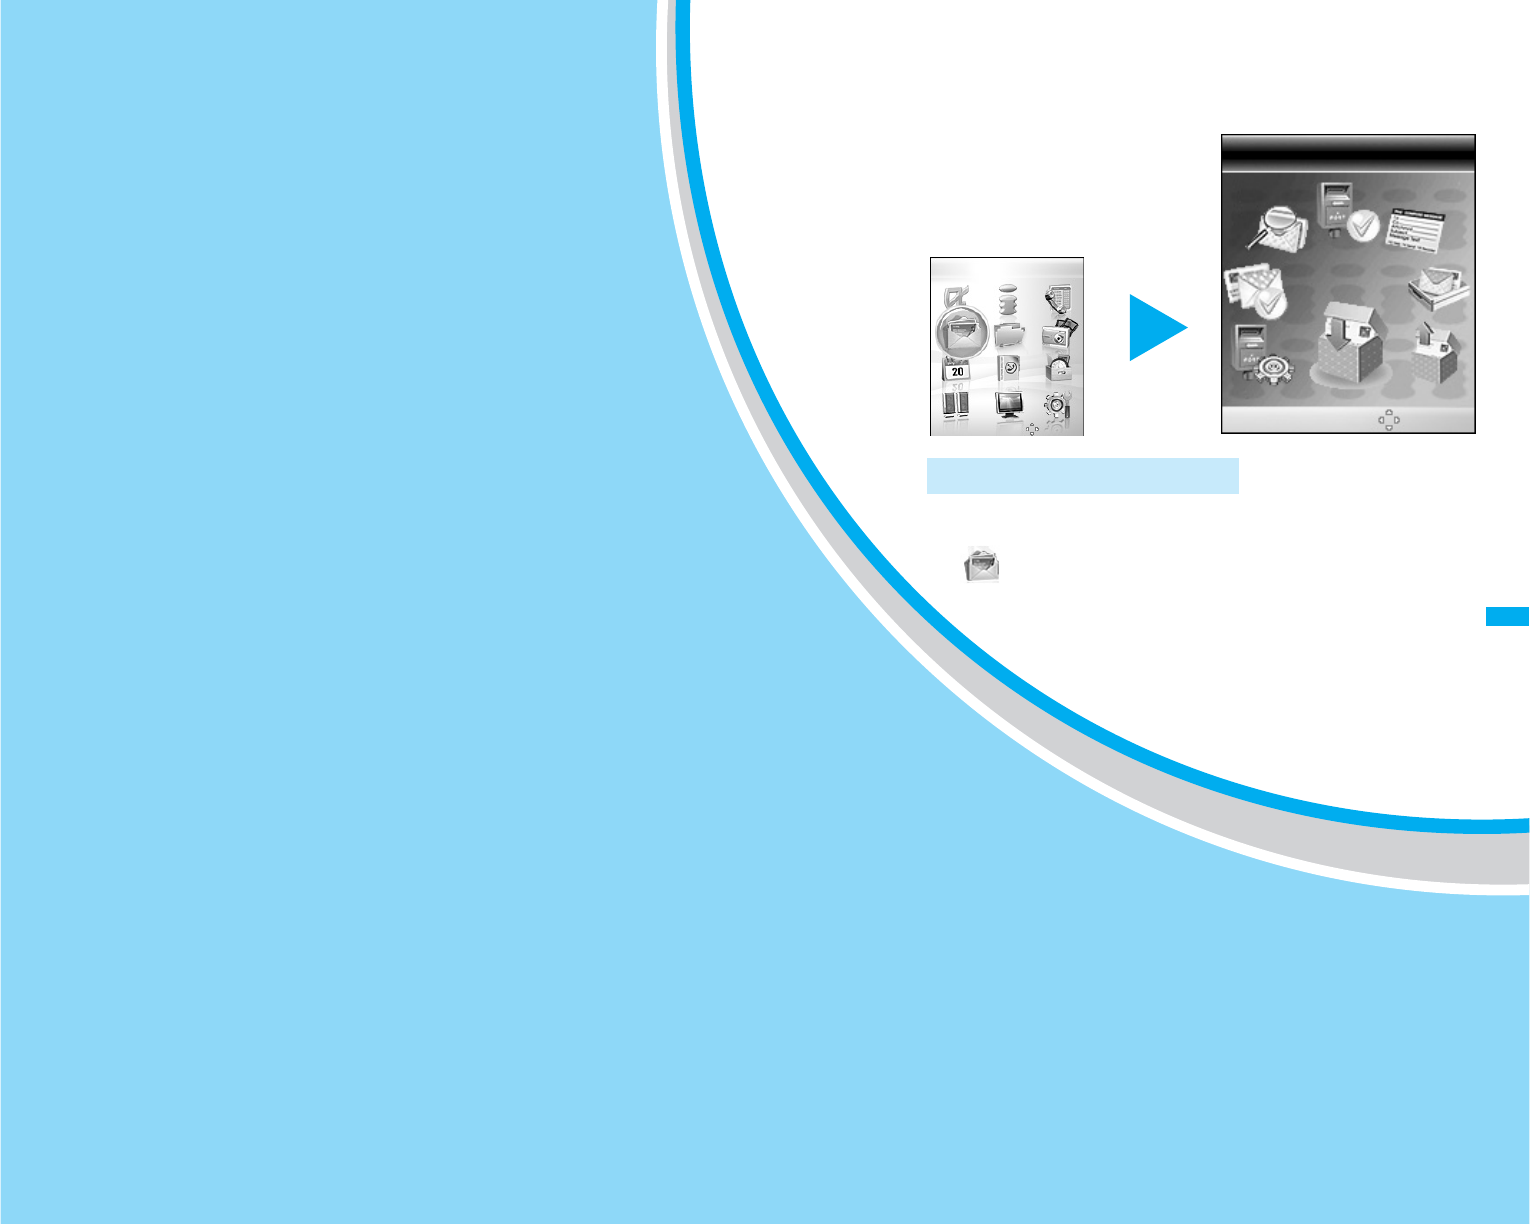
137
Mail Menu .............................................138
i-mode Mail...........................................138
Displaying Mail in Inbox.......................139
Displaying Mail in Outbox....................144
Displaying Mail in Unsent message ....147
Composing Mail ...................................149
Checking New i-mode mail and
Message ...............................................154
Receiving Selected Mail ......................154
Checking whether Center Holds SMS....155
Changing Mail Setting..........................155
Mail
Select
Inbox
On the Stand-by display, C[Menu] ]
(Mail) or “Mail”
To display the Mail menu
Select
Mail
Mail Menu
On the mail menu, the mail functions offered by the FOMA
phone are displayed.
i-mode Mail
The i-mode phone has the mail functions for exchanging e-
mail (electronic mail) via the Internet. You need to subscribe
to “i-mode” to use i-mode mail.
• See “Mobile Phone User's Guide [i-mode]” for more
details.
• This model does not support all the services described
in “Mobile Phone User's Guide [i-mode].” Check which
models support which services in “Mobile Phone User's
Guide [i-mode]”.
SMS messages (short messages)
You can send and receive SMS messages between
FOMA phones without subscribing to i-mode.
Sending and receiving SMS messages with subscribers to
overseas carriers in addition to DoCoMo are also
available. For information on the countries and overseas
carriers with which SMS messages can be exchanged,
see the International Service web page of DoCoMo.
• Refer to “Network Services User’s Guide” for more details.
138
Mail
Mail
DescriptionMenu item
Inbox You can check the records and contents of
received i-mode mails and SMS messages.
You can check the records and contents of
sent i-mode mails and SMS messages.
You can check the contents of temporarily
saved i-mode mails and SMS messages.
You can bring up the display to compose
i-mode mails and SMS messages.
You can receive i-mode mails held at the i-
mode Center.
You can receive SMS messages by checking
the SMS Center.
Outbox
Unsent
message
Compose mail
Check new
message
Receive option You can check the subjects of i-mode mail held
at the i-mode Center and select mail to receive,
or delete mail at the Center before receiving it.
Check new
SMS
Mail setting You can change the settings of each mail
function of the FOMA phone.
Displaying Mail in Inbox
C](Mail) ]1
The inbox folder list is displayed. You can sort mails by
folder. You can check the records and contents of
received i-mode mails and SMS messages.
1. From the Mail menu (P137), “Inbox”
<Received Mail Folder List>
2. Select a folder ]C
•J/FE: You can view previous or after pages for
multiple pages.
3. Select mail ]C
<Received Mail Display>
•I
[Reply]: You can reply the receiver. Go to step 3 on
page 149 of “Composing i-mode mail” / step 3 of page
152 “Composing SMS”.
•J: You can view previous or next mail.
•FE: You can scroll the screen.
Information
• To delete all displayed the contents in box setting “Security”
(P156), enter terminal security code >C[OK].
• The deco mail via FOMA phone includes of text and URL.
If you select the URL, you can read deco mail. >P144
• You can save up to 400 received mails/SMS. Depending on
the size of mails/SMS messages, the number of mails/SMS
messages to save may be fewer.
SubjectŦ3
The time to receive the mailŦ1 SenderŦ2
The mail you receive is displayed on a
time basis that day. From the next
day on, each message is displayed by
the date when you received it.
The name is displayed when the
entry is saved in phonebook.
SMS is displayed as “SMS”
Ŧ1:
Ŧ2:
Ŧ3:
The number of unread mails
SelectMenu
Folder
Inbox (1)
1/1
139
Mail
Mail
Next Page
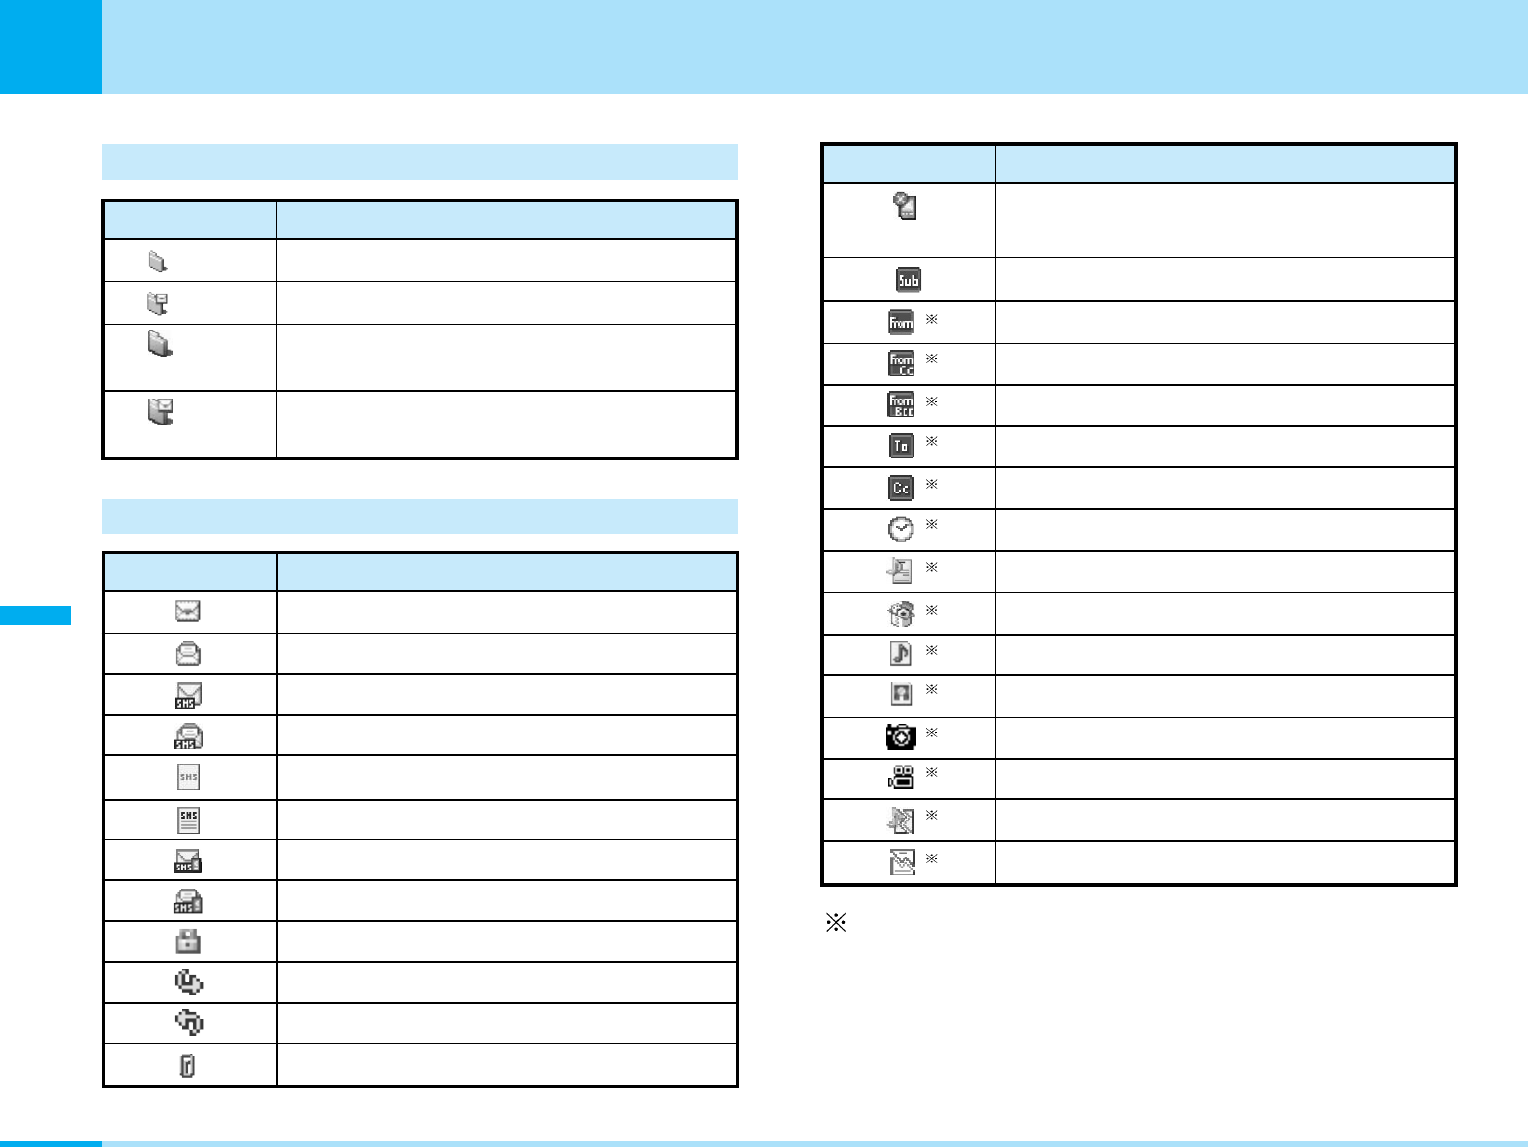
Icons on the Received Mail Folder List Screen
Received Mail List and Marks on Display Screen
: Appears only on the Received Mail Display Screen.
140
Mail
Mail
DescriptionIcon
DescriptionIcon
Unread mail messages
Read mail messages
Unread SMS messages
Read SMS messages
Unread SMS reports
Folder with unread mails/SMS messages
Created folder without unread mails/SMS
messages
Created folder with unread mails/SMS
messages
(gray)
(blue)
(blue)
DescriptionIcon
(gray) Folder without unread mails/SMS messages
Mail received as To-type
Mail received as Cc-type
Mail received as Bcc-type
Cc-type broadcast mail address
A melody is attached.
A melody is pasted.
Received date and time
i-appli launch information is pasted.
A URL or i-motion file is attached.
To-type broadcast mail address
An image of up to 10,000 bytes is attached.
A URL of i-shot is attached.
An attached file is damaged.
A pasted melody is damaged.
Read SMS reports
Unread SMS messages in the UIM
Read SMS messages in the UIM
Protected mails
Forwarded mails
Replied mails/SMS messages
Subject
Mail with a file to which the UIM
restrictions are set attached
Mail with a file attached or pasted

141
Mail
Using the Submenu of the Received Mail Folder
List Display
1. On the Received Mail Folder List screen (P139), M
[Menu] ]Select from the following submenu items
Create folder
You can add a folder.
Rename folder
You can edit the name of the selected folder.
Delete folder
You can delete the selected folder. You cannot delete
a folder if a mail is saved.
Auto sort
You can set sort conditions to the selected folder. Go
to step 2 of “Distributing the received mail to the
folder automatically” (P143).
: These operations are not available when you select Inbox.
Using the Submenu of the Received Mail
List Screen
Setting item/Setting at purchase >P256
1.
On the Received Mail List screen (P139), M[Menu] ]
Select from the following submenu items
Move to folder 1
You can move the selected mails and messages to
other added folders.
Delete
You can delete the selected mails and messages.
Delete selected
You can select and delete multiple mails and messages.
After selecting mail messages, M[Menu] >Select
“Delete”.
Delete all
You can delete all mail messages in the folder. To delete
all, enter terminal security code >C[OK].
Protect ON/OFF 1
You can set or cancel the protection of the selected
mails and messages. Protected mail cannot be
moved/deleted.
Sort
You can sort the mails and messages displayed on
the List display.
Filter
You can change the type of the mails and messages
displayed on the List display.
UIM 2
You can move and copy the selected SMS messages
in the FOMA phone to the UIM, and move and copy
the SMS messages in the UIM to the FOMA phone.
1: You cannot use this menu for SMS in the UIM.
2: You cannot use this menu for protected SMS or SMS delivery
report.
Mail
Next Page
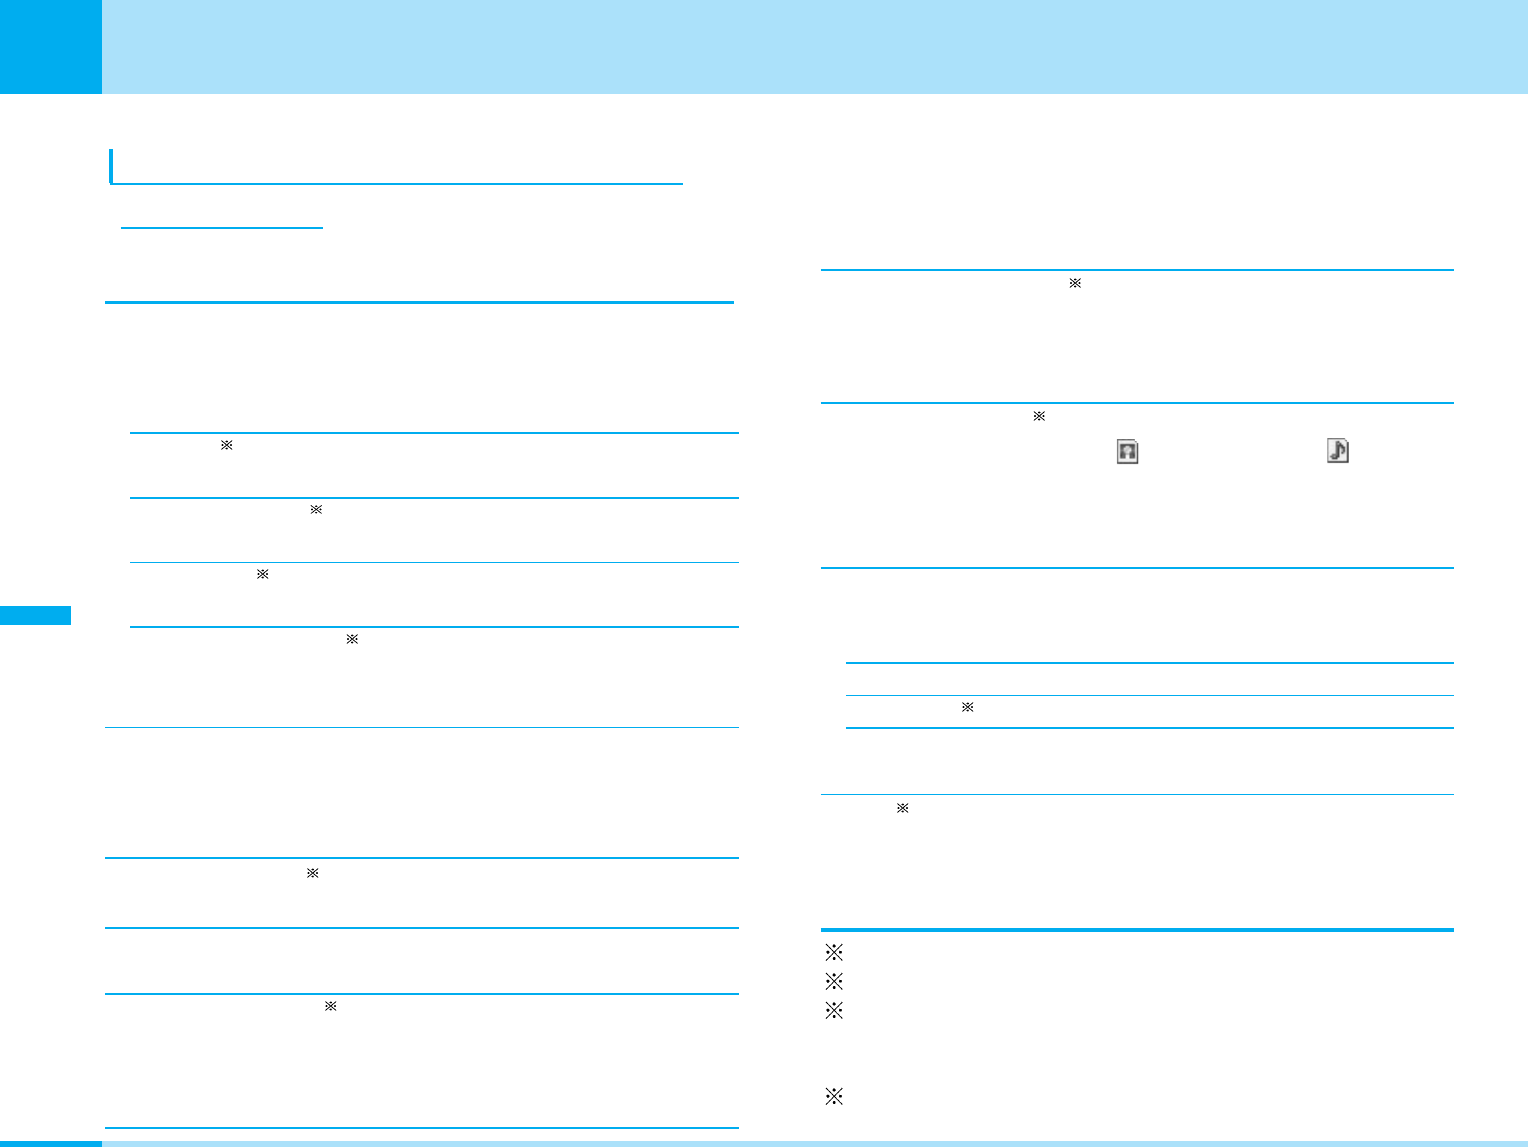
142
Mail
Using the Submenu of the Received Mail
Display Screen
1. On the Received Mail List screen (P139), M[Menu]
]Select from the following submenu items
Reply
You can reply after selecting the method to reply. Go to
step 3 on page 149 of “Composing i-mode mail”/ step 3
on page 152 of “Composing SMS”.
– Reply 1:You can reply to the sender of i-mode mail
from the detailed received mail list.
– Reply quoted 1:You can send the reply quoting the
original text in your received i-mode mail.
– Reply all 1:You can reply all receivers and senders
at the same time.
– Reply quoted all 1:You can reply all receivers and
senders with quoting the original text in your
received i-mode mail.
Forward
You can forward the displayed mail to other party. Go
to step 2 (P149) of “Composing i-mode mail” or step
2 (P152) of “Composing SMS messages.
Move to folder 2
You can move the displayed mail to other added folders.
Delete
You can delete the displayed mail.
Protect ON/OFF 2
You can set or cancel the protection to the displayed
mail. The protected mail messages cannot be
moved/deleted.
Store Address
You can register mail address / phone number of
receiver on displaying the mail. Go to step 2 on page
64 of “Adding to Phonebook”.
Add to phonebook 3
You can add the mail address / phone number written
on the displayed mail text to the phonebook. Go to
step 2 of “Adding to Phonebook” (P64).
Save attach file 4
You can save an image ( ) and a melody ( ) of up
to 10,000 bytes attached to the displayed mail. You
can check the saved images by selecting “Data box”.
>“My picture”. >“i-mode” folder. >P166, P176
Copy
• For copying after selecting the following items, see
“Copying/Cutting/Pasting” (P219).
– Body: You can copy the text.
– Subject 1:You can copy the title.
–
Sender: You can copy e-mail address / phone number
of the sender.
UIM 5
You can move / copy the displayed SMS message in
the FOMA phone to the UIM, and move / copy the
SMS messages in the UIM to the FOMA phone.
1: This menu is not displayed for SMS.
2: You cannot use this menu for SMS of UIM.
3: Activate this menu after selecting mail address / phone number
to register. If nothing to be registered is included, you cannot
activate this function.
4: Activate this menu after selecting the file to save. If the file to
register does not exist, you cannot activate this function.
Mail
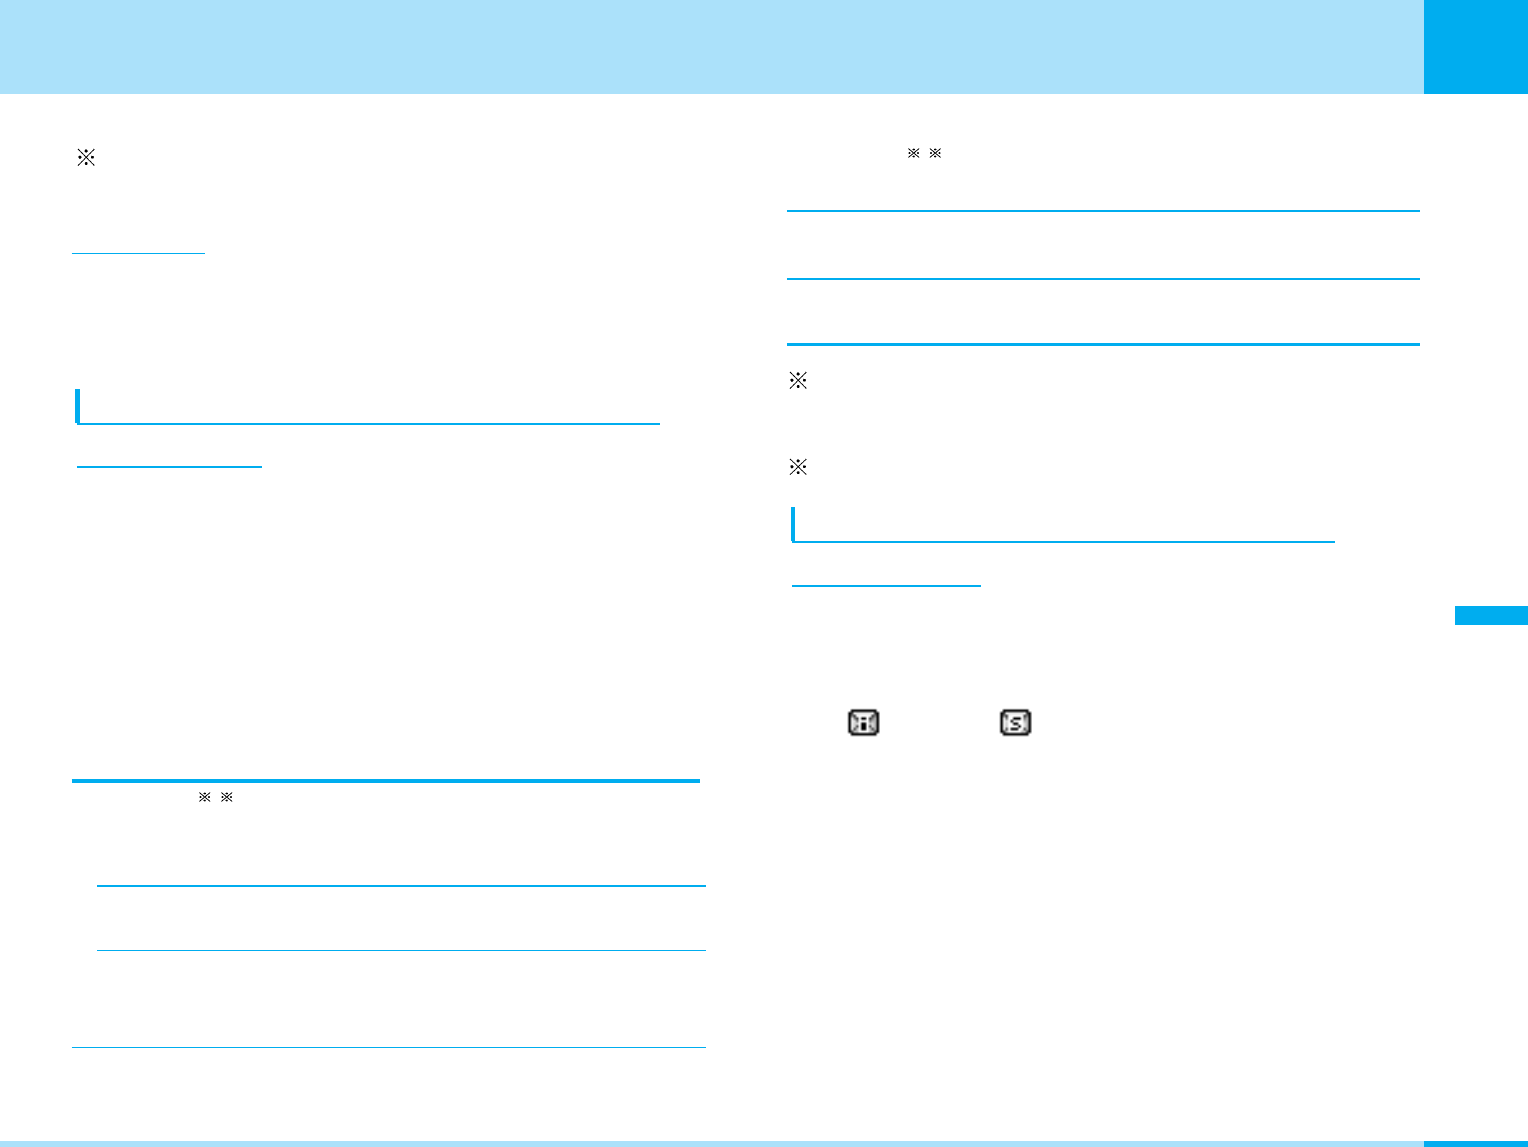
143
Mail
5: You cannot activate this function for i-mode mail or protected
SMS.
Information
• The Submenu items for the SMS report / voice mail incoming
notification display screen are “Move to folder”, “Delete,” and
“Protect ON/OFF” only.
Distributing the received mail to the folder
automatically
The mails / SMS messages is applicable for the condition
can be saved to the folder automatically. You can set this
only to additional folder.
1. On the Received Mail Folder List screen (P139),
select a folder to specify conditions ]M[Menu]
]Auto Sort
• The screen for automatic sort is displayed.
2. M[Menu] ]Select submenu.
Address 1 2
You can enter e-mail address or phone number to
distribute each folder.
– Open phonebook: You can enter the phone
number searching from phonebook.
– Input address: You can directly enter the address.
When you enter e-mail address, you input correctly
to a domain (the part of after @ mark).
Subject 1 2
You can input the subject of mail to distribute a folder.
Release
You can cancel one of conditions of distribution of folder.
Release all
You can cancel all distribution conditions of folders.
1 : When a received mail contains multiple conditions, it is
distributed to the top folder of the folder list that corresponding
condition is set.
2 : You cannot set the multiple conditions in the same folder.
Receiving i-mode Mail/SMS Messages
Automatically
When the FOMA phone is in the service area, it
automatically receives i-mode mail/ SMS messages.
1. A mail or an SMS message is received
• (White) or (White) is displayed.
2. The result of the reception is displayed
• If you want to check the received i-mode mail
message immediately, select “i-mode mail”, and
press C.
•If you want to check the received SMS message
immediately, press C
•Q: Go to previous screen.
Mail

144
Mail
Saving Images over 10,000 bytes
A JPEG image over 10,000 bytes is not downloaded
properly to the FOMA handset. Therefore, you can save it
after extracting the data from URL for image view in mail
text, and connecting i-shot center.
1. On the Received Mail Folder List screen (P139),
select “URL” ]C]“Yes”
• For the method of saving images, see “Obtaining
Images from Sites” (P134).
Information
• You can view the contents of received Deco-mails in this way.
Downloading i-motion Movies from i-motion Mail
Data of i-motion mail is not downloaded to the FOMA phone
even when it is received. You need to access the i-motion
mail Center from its URL given to the mail text to see an i-
motion movie to download and save the data. The saved i-
motion can be checked in “i-motion” of “Data box” >
“i-mode” folder (P173).
1. From the Received Mail Folder List screen (P139),
select the URL ]C]I“Yes”
• Downloading of i-motion starts.
• The i-motion is played while being downloaded in the case
it is possible.
2. After downloading, press Q
• “Play”: You can play downloaded i-motion.
• “File property”: You can view information of
downloaded i-motion from a site.
• “Back”: The site will be returned, not saving i-motion.
Displaying Mail in Outbox
C](Mail) ]2
The Sent Mail List is displayed. You can check the records
and contents of sent i-mode mail and SMS messages.
1. From the Mail menu (P137), select “Outbox”.
•K/FE: Display the previous or next page for multiple
pages.
SubjectŦ3
The time to send the mailŦ1 ReceiverŦ2
The mail you receive is displayed
on a time basis that day. From
the next day on, each message is
displayed by the date when you
received it.
The name is displayed when the
entry is saved in phonebook.
SMS is displayed as SMS
Ŧ1:
Ŧ2:
Ŧ3:
Mail
<Outbox>
2. Select a mail ]C
<Sent Mail Display>
•J: Display the previous or next page.
•FE: Scroll by screen.
Information
• To display the box which is set “Security” (P156), enter
terminal security code >C[OK].
• You can save up to 400 mails / SMS. Depending on the size
of mails / SMS messages, the number of mails / SMS
messages that can be saved may be smaller.
Icons on the Sent Mail List display and the Sent Mail
display screen
: Appears only on the Sent Mail Display Screen.
SubjectŦ
The time to send the mailŦ
ReceiverŦ
145
Mail
Mail
Description
Icon
Mail successfully sent
Mail failed to be sent
Description
Icon
An image of up to 10,000 bytes is attached.
An image (JPEG) of over 10,000 bytes is attached.
Moving images are attached.
A corrupted melody file is attached.
A corrupted file is attached.
Sent SMS messages in the UIM
Protected mail / SMS messages
Mail with a file attached
Mail with an attached file to which UIM
restrictions are set
Mail address failed to be sent as To-type mail
Mail address successfully sent as Cc-type mail
Mail address failed to be sent as Cc-type mail
Mail address successfully sent as Bcc-type mail
Mail address failed to be sent as Bcc-type mail
A pasted melody file is attached.
An i-appli activation information file is attached.
A melody is attached.
Subject
Mail address successfully sent as To-type mail
Sent date and time
SMS message successfully sent
SMS message failed to be sent

146
Mail
Using the Submenu of the Sent Mail List
Screen
Setting item/Setting at purchase >P256
1. From the Sent Mail Folder List screen (P144), M
[Menu] ]Select from the following Submenu items
Edit
You can edit the selected mail again. See “Composing
i-mode mail” (P149) / “Composing SMS messages”
(P152).
Delete
You can delete the selected mail.
Delete selected
You can select and delete multiple mail messages. After
selecting mail messages, M[Menu] >Select “Delete”.
Delete all
You can delete all mail messages in the Sent box.
To delete all, enter terminal security code >C[OK].
Protect ON/OFF 1
You can set or cancel the protection to the selected
mail. Protected mail cannot be deleted.
Sort
You can sort the mail messages displayed in the list
screen.
Filter
You can change the type of the mail messages
displayed in the list screen.
UIM 2
You can move and copy the selected SMS message
in the FOMA phone to the UIM, and move and copy
the SMS messages in the UIM to the FOMA phone.
1 : You cannot use this menu for SMS in the UIM.
2 : You cannot use this menu for i-mode mail or SMS delivery
report.
Using the Submenu of the Sent Mail Display
Screen
1. From the Sent Mail Display screen (P145), M
[Menu] ]Select from the following Submenu items
Edit
You can edit the displayed mail again. Go to step 2 in
“Composing i-mode mail” (P149) /“Composing SMS
messages” (P152).
Delete
You can delete the displayed mail.
Protect ON/OFF 1
You can set or cancel the protection to the displayed
mail. The protected mail messages cannot be deleted.
Store address
You can register mail address/phone number of
receiver on displaying the mail. Go to step 2 on page
64 of “Adding to Phonebook”.
Mail
147
Mail
Add to phonebook 2
You can add the mail address and phone number of
the sender of the displayed mail to the phonebook.
Go to step 2 (P64) of “Adding to Phone Book”.
Copy 3
• For copying after selecting the item, see “Copying /
Cutting / Pasting” (P219).
– Body: You can copy the text.
– Subject: You can copy the subject.
UIM 4
You can move and copy the displayed SMS message
to the UIM, and move and copy the SMS messages in
the UIM to the FOMA phone.
1: This function is not available in SMS of UIM.
2: After selecting the mail address / phone number, you can
activate the function. If nothing that can be registered is
included, you cannot activate the menu properly.
3: This function is not available for SMS.
Information
• To display the box which is set “Security” (P156), enter
terminal security code >C[OK].
• You can save up to 400 mails / SMS. Depending on the size
of mail/ SMS, the number of mails / SMS messages that can
be saved may be smaller.
Subject
Ŧ3
The time to save
Ŧ1
Receiver
Ŧ2
The mail you save is displayed on
a time basis that day. From the
next day on, each message is
displayed by the date when you
saved it.
The name is displayed when the
entry is saved in phonebook.
SMS is displayed as “SMS”
Ŧ1:
Ŧ2:
Ŧ3:
Mail
<Unsent message List>
148
Mail
Icons on the Unsent Mail List display and the Unsent
Mail display screen
: Only appears on the Unsent Mail display screen.
Using the Submenu of the Unsent Message
List Screen
Setting item/Setting at purchase >P257
1. From the Unsent Message List screen (P147),
M
[Menu] ]Select from the following submenu
items
Send
You can send the selected mails and messages.
Delete
You can delete the selected mails and messages.
Delete selected
You can select and delete multiple mail mails and
messages. After selecting mail messages, M[Menu]
>Select “Delete”.
Delete all
You can delete all mail messages in the folder. To
delete all, enter terminal security code >C[OK].
Sort
You can sort the mail messages displayed in the list
display.
Filter
You can change the type of the mail messages
displayed on the list display.
Mail
DescriptionIcon
Unsent mail
Unsent SMS message
Mail with a file attached
A damaged file is attached.
Subject
Address of To-type
Address of Cc-type
Mail with an attached file to which UIM
restrictions are set
Attached file
A pasted melody file is attached.
i-appli launch information is attached.
A melody file is attached.
An image file of up to 10,000 bytes is attached.
An image (JPEG) of over 10,000 bytes is attached.
A moving image file is attached.
A damaged melody file is attached.
Text
Address of Bcc-type
149
Mail
Using the Submenu of the Unsent Mail
Display Screen
From the Unsent Mail display screen (P147), press
M
[Menu] and select a submenu item. See “Using the
Submenu of the Compose mail display” (P150) / “Using
the Submenu of the Compose SMS Screen” (P153) for
the available submenu items.
Composing Mail
Composing i-mode Mail
C](Mail) ]41
You can create and send new i-mode mail.
1. From the Mail menu (P137), select “Compose mail”
]“Compose message”
<Compose message Display>
2. Select the Address field ]
C
]“Enter
Address” ]Enter the address ]“Enter Address”
]
C
• For a menu displayed for destinations, see “Address
menu” (P150) of “Using the Submenu of the
Compose Mail Display”.
3. Select the Subject field ]
C
]Enter the
subject ]
C
• In case of not attaching the file, go to step 5.
4. Select (Attach file) field ]
C
]Add attached
file
• Select the file saved in “My picture” / “i-motion”
(P166) / “Melody” (P173) of Data box” (P176) /
“Melody”.
• For a menu displayed for attachment files, see
“Attach file menu” (P150) of “Using the Submenu of
the Compose Mail Display”.
• If a file is attached, it can be displayed/played by
pressing I.
5. Select the Message field ]
C
]Enter
message ]
C
6.
I
[Send]
Mail
Next Page

150
Mail
Information
• Depending on the radio wave conditions, the characters may
not be sent successfully to the destination.
• Half-pitch katakana or pictographs may not be displayed
properly when exchanging mails between i-mode phones.
• When you enter the destination of the phonebook that a
secret code is set, the secret code is automatically added.
However, the secret code does not remain on the destination
of the sent mail.
Using the Submenu of the Compose Mail
Display
1. From the Compose Mail display (P149),
M
[Menu] ]
Select from the following Submenu items
Send
You can send the i-mode mail that you are
composing or editing.
Save
You can save the i-mode mail that you are composing
or editing in unsent message.
Add address
You can add addresses. When you add addresses,
you can send same i-mode mail to multiple recipients
at the same time. You can send same mail to up to 5
addresses at a time.
– Open phonebook: You can add the address by
searching the phonebook.
– Input address: You can enter the address directly.
– Received list: Set an address selected from
received mail history.
– Sent list: Set an address selected from sent mail
history.
Address menu 1
– Open phonebook: You can add the address by
searching the phonebook.
– Input address: You can enter the address directly.
– Change to To: You can change the setting of
receiver to “To type”.
– Change to Cc: You can change the setting of
receiver to “Cc type”.
– Change to Bcc: You can change the setting of
receiver to “Bcc type”.
– Delete address: You can delete the address.
– Received list: Set an address selected from
received mail history.
– Sent list: Set an address selected from sent mail
history.
Attach file menu
– Attach file: You can select the file in “My picture”
(P166) / “i-motion” (P173) / “Melody” (P176) of “Data
box”.
– Take a picture 3:A Still Image Finder Stand-by
screen appears. >P110
Press C[Attach] on Still Image Shooting End display
to add to the attachment file.
Mail
151
Mail
– Take a movie 4:A Moving Image Finder Stand-by
screen appears. >P115
Press C[OK] on Moving Image Shooting End display
to add to the attachment file.
– Delete att. file 2:You can delete the attachment file.
– Play/ Display file 2:You can play or view the file.
Add signature
You can insert a signature at the end of the text of mail.
• You need to register the signature beforehand.
>p156
Delete body
You can delete the the text of mail that you are
composing or editing.
Delete mail
You can delete the mail under composing or editing.
1 : After selecting / / , you can operate the menu.
2 : After selecting , you can operate the menu.
3 : Unavailable when a shot still image exceeding 5,000 bytes is
already attached to an attachment file.
4 : Unavailable when a moving image/i-motion or JPEG image
exceeding 10,000 bytes is already attached to an attachment
file.
Information
• The type or receiver
– To: Ordinary receiver
– Cc: To inform the contents in addition to the receiver.
– Bcc: To inform the contents if you do not want other
receivers to know except for direct receiver.
• About attachable files
1 : Up to 10 files when the total size of a data file including
melodies, images and the text is equivalent to 5,000 full-
pitch characters (i.e., 10,000 bytes).
2 : You can attach either an image or moving image/
i-motion movie of up to 100K bytes. You can attach the
file separately from melody files and images of 10,000
bytes or less.
• You cannot attach files that are prohibited from being
attached to mail or output from the FOMA phone to other
devices.
• When a JPEG image or an i-motion movie in excess of 10,000
bytes is attached, the number of characters you can enter in
the text field decreases by the equivalent of 100 full-pitch (200
half-pitch) characters.
• The i-mode phone of the mova service cannot receive GIF
images and melodies.
• Some attached files may be deleted at the i-mode Center or
not be received, displayed, or played properly by the
recipients.
Mail
Maximum number of filesType of file
Melody
Up to 10 files 1
1 file 2
Image of 10,000 bytes
or less (JPEG, GIF)
Moving image/ i-motion movie
Image over 10,000
bytes (JPEG)
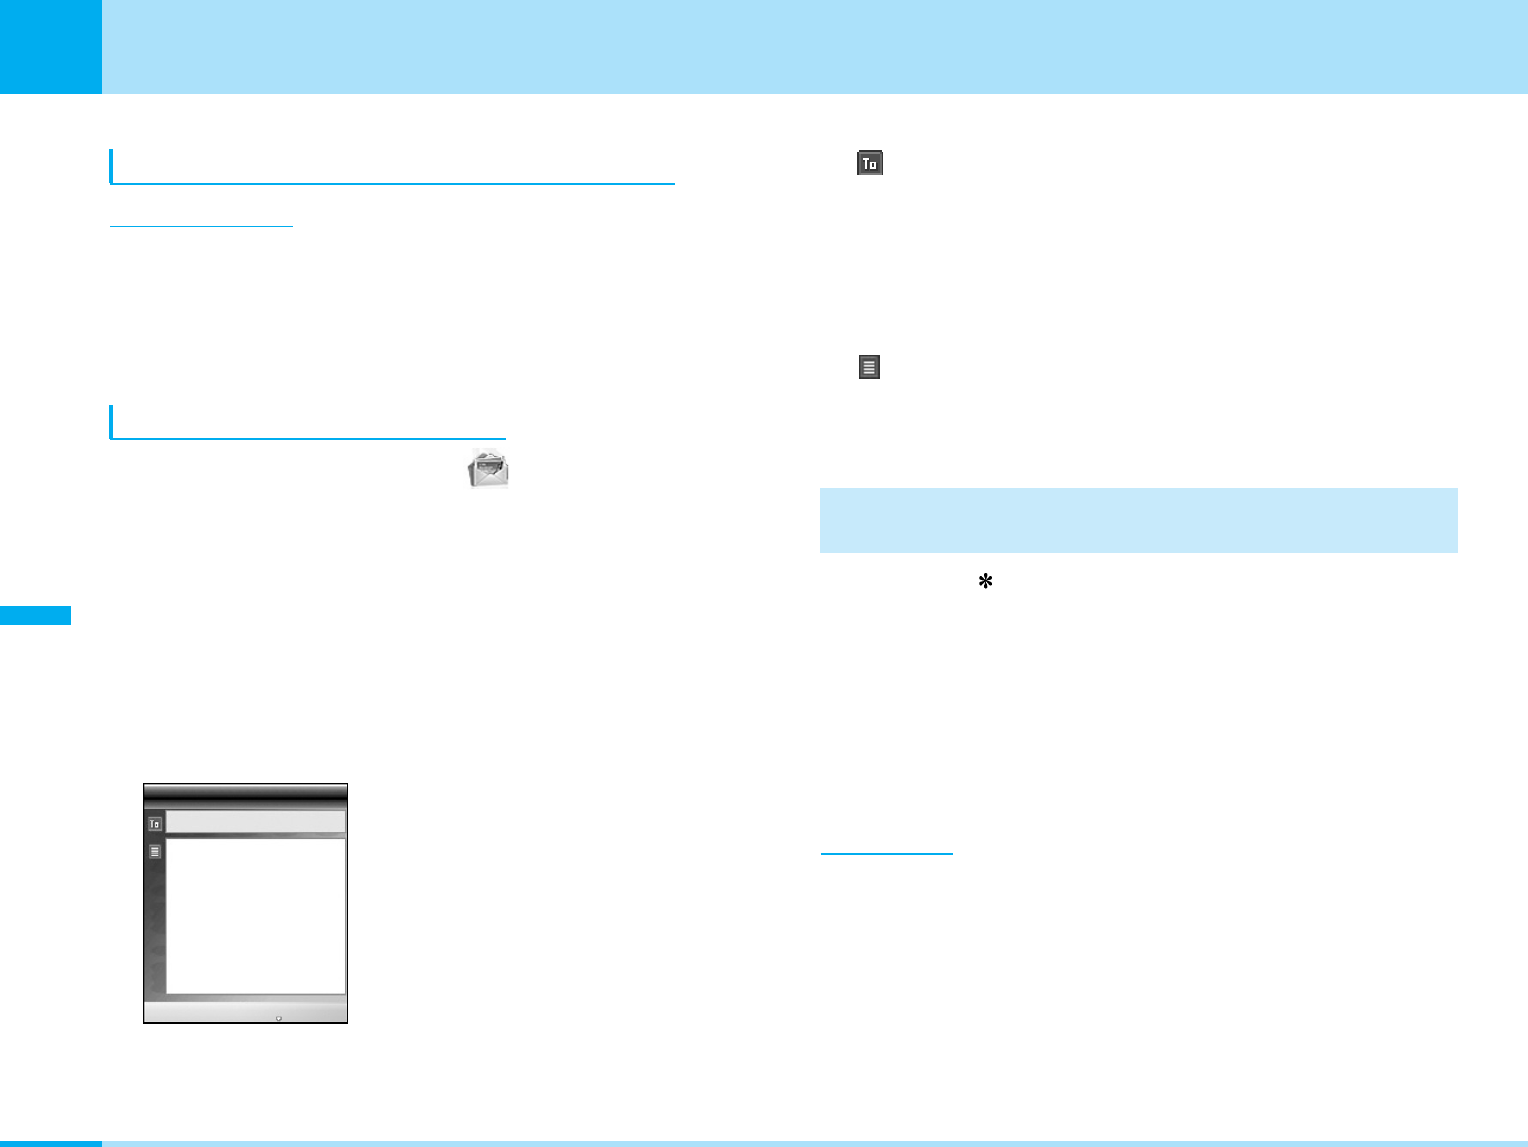
152
Mail
Using the Submenu of the Creating next
Entry Screen
From creating next Entry screen, press M[Menu] and
select a Submenu item. See “Using the Submenu of
Character Entry display” (P218) for the available Submenu
items.
Composing SMS messages
C](Mail) ]42
You can create and send SMS messages. You can send
and receive SMS messages to and from the subscribers
to overseas carriers in addition to DoCoMo. For
information on the countries and overseas carriers with
which SMS messages can be exchanged, see the
International Service web page of DoCoMo.
1. From the Mail menu (P137), select “Compose mail”
]“Compose SMS”
<Compose SMS Display>
2. Select the Address field ]
C
]“Enter
Address” ]Enter the recipient’s phone number ]
C
• For a menu displayed for destinations, see “Address
menu” (P153) of “Using the Submenu” of the
Compose SMS Display.
3. Select the Message field ]
C
]Enter the
message ]
C
4. I[Send]
If the recipient is a subscriber to an overseas carrier
other than DoCoMo:
“+” (Press key 2 times) ]“Country code” ]
“Mobile phone number of the recipient”
or
“010” ]“Country code” ]“Mobile phone number
of the recipient”
• If the mobile phone number starts with 0, enter the
number by omitting “0”.
Information
• Depending on the radio wave conditions, the characters may
not be sent successfully to the destination.
• When you send an SMS message to a subscriber to an
overseas carrier, if characters that the other party does not
support are included in its text, they may not be displayed
correctly.
• If the receiver has an i-mode phone of mova service, it may
receive SMS from FOMA phone as i-mode mail.
Select SendMenu
Compose SMS
Mail

153
Mail
• If the sender does not notify caller ID (including public
phone/Unknown ID), you cannot answer to the SMS
message.
Using the Submenu of the Compose SMS
Display
1. From the Compose SMS display (P152),
M
[Menu]
]Select from the following Submenu items
Send
You can send an SMS message that you are
composing or editing.
Save
You can save an SMS message that you are
composing or editing in Draft box.
Address menu
– Open phonebook: You can add the address by
searching the phonebook.
– Input address: You can enter the address directly.
– Received list: Set an address selected from
received mail history.
– Sent list: Set an address selected from sent mail
history.
SMS report request
You can set whether to request a report for the SMS
message that you are composing. An SMS report is
an SMS message to notify you when your SMS
message reaches the recipient.
SMS validity term
You can set the period during which the SMS Center
holds the SMS message that you are composing or
editing when the recipient cannot receive it
immediately.
Delete body
You can delete whole sentences entered in the text.
The phone number of receiver will not be deleted.
Delete SMS
You can delete the SMS message that you are
composing or editing.
Using the Submenu of of the Character
Entering Display while Composing SMS
From the Compose SMS display, press M[Menu] and
select a submenu item. See “Using the Submenu of the
Character Entry display” (P218) for the available
Submenu items.
Mail

154
Mail
Checking New i-mode mail and Message
C](Mail) ]5
When your FOMA phone has been turned off or out of the
service area, you can check whether or not the i-mode
Center holds i-mode mail and messageR/F.
1. From the Stand-by screen, press Mfor 2 or more
seconds
• The Check results display appears. To read the
received i-mode mail immediately, select “Mail” and
press C.
Information
• When the i-mode Center holds i-mode mail and messageR/F,
the relevant icon (P31) is displayed. When mail or messages
arrive at the Center when, for instance, your FOMA phone is
turned off, the icon may not be displayed.
• When “Receive option” is set to “ON,” you will receive all mail
held at the Center if you use “Check new message.” If you do
not want to receive all mail, unmark “Mail” from the “Check
new message” (P155) beforehand.
Receiving Selected Mail
C](Mail) ]6
You can check the subject of i-mode mail held at the
i-mode Center and select mails to receive, or delete mails
at the Center before receiving them.
To use this function, you need to set “Receive option”
(P155) to “ON” beforehand. Note that, when this is “ON”,
i-mode mail cannot be received automatically.
1. From the Mail menu (P137), “Receive option”
• The phone is connected to the Center, and the
display for selecting mail to receive is displayed.
2. Select the pull-down menu for each mail ]C]
Select “Receive”, “Delete” or “Hold” ]C
3. Select “Receive/Delete” ]C
• The confirmation screen appears.
4. Select “OK” ]C
• In step 2, the mail for which “Receive” was selected
are received immediately.
Mail
155
Mail
Checking whether Center Holds SMS
C](Mail) ]7
When your FOMA phone has been turned off or out of the
service area, you can check whether or not the SMS Center
holds SMS messages.
1. From the Mail menu (P137), “Check new SMS”
• The Check results display appears. To read the
received SMS messages immediately, press C.
Changing Mail Setting
Communication
C](Mail) ]81
You can make settings related to communication of mail
and SMS messages.
Setting items/Setting at purchase >P239
1. From the Mail menu (P137), “Mail setting” ]
“Communication” ]Select from the following
setting items ]After setting,
I
[Done]
Receive opt. setting
You can set whether to select i-mode mail to receive.
If this function is set to “ON,” you cannot receive
i-mode mail automatically.
Receive attach file
You can set whether to receive images or melodies
attached to i-mode mail.
Check new message
When you receive messages by performing “Check
New Message,” you can select an item to check from
i-mode mail, messageR/F.
SMS report request
You can set whether to request a report for the SMS
message that you are composing. An SMS report is
an SMS message to notify you when your SMS
message reaches the recipient.
SMS validity term
You can set the period during which the SMS Center
keeps the SMS message that you are composing or
editing when the recipient cannot receive it
immediately.
Information
• The attachment file set to by “Receive attach file” cannot
be received as the file is deleted at i-mode center.
• You can receive the melody of MFi format attached to the
body of mail even if you set the “Melody” to by “Receive
attach file”.
Mail
156
Mail
Mail
Edit
C](Mail) ]82
You can make settings related to a signature to be
attached to the mail text and quotation mark for when
replying to mail.
Setting items/Setting at purchase >P239
1. From the Mail menu (P137), “Mail setting” ]“Edit”
]Select from the following setting items ]After
setting, I[Done]
Edit signature
You can set whether to automatically attach your
name and address (signature) at the end of the text
and can set the contents of the signature.
Edit quotation
You can set symbols or sentences to be attached to
the head of the original text (quotation mark) for
“Reply quoted”.
View
C](Mail) ]83
You can make the settings related to the display of mail
and SMS messages.
Setting items/Setting at purchase >P239
1. From the Mail menu (P137), “Mail setting” ]
“View” ]Select from the following setting items ]
After setting, I[Done]
Character size
You can set the character size of the text on the Mail
display screen.
Scroll
You can set the number of lines to scroll when
pressing
H
on the Mail display screen.
Mail list display
You can set the display method (the number of
lines/the contents displayed) on the mail list display.
Folder security
You can set security to Inbox, Outbox, and Unsent
messages in the Mail menu. To display the messages
in the box with security set, enter terminal security
code >C[OK].
Melody auto play
You can set whether to automatically play a melody
attached or pasted on the mail display screen.
157
Mail
Mail
Others
C](Mail) ]84
You can check the settings made in “Mail setting” and
reset the settings to the default.
1. From the Mail menu (P137), “Mail setting” ]
“Others” ]Select from the following setting items.
Check settings
You can check the settings made in the “Mail
settings”.
Reset settings
You can reset the settings made in the “Mail settings”
to the default. To reset settings, enter terminal security
code >C[OK].
Reset data
You can delete all mail messages and MessageR/F
stored in the FOMA phone. To reset the datal, enter
terminal security code >C[OK].

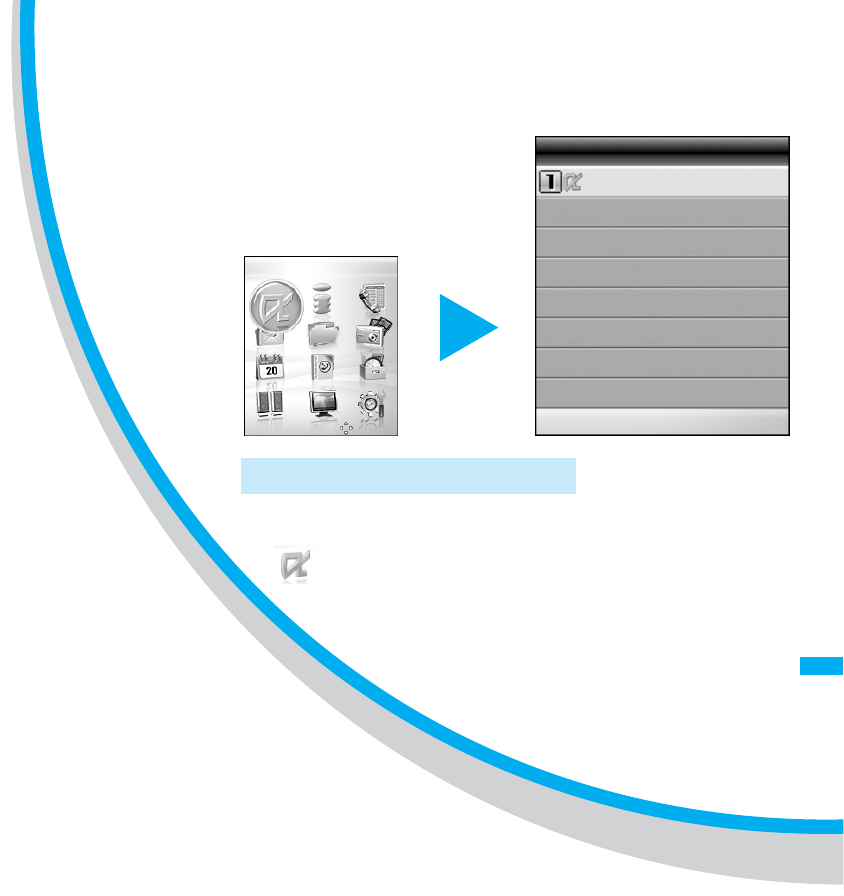
159
What is i-appli.......................................160
Downloading i-appli from Sites ...........160
Starting i-appli......................................161
i-appli
On the Stand-by display, C[Menu] ]
(i-appli) or “i-appli”
To display the Software List
SelectMenu
Software list 1/1
Select
i-appli

160
i-appli
i-appli
What is i-appli
By downloading various software programs from sites and
saving them into the FOMA phone, you can automatically
update the stock prices, weather information, etc. and
enjoy games even without connecting to the network.
• Refer to “Mobile Phone User's Guide [i-mode]” for
details.
• This model does not support all the services described
in “Mobile Phone User's Guide [i-mode]”. Check which
models support which services described in “Mobile
Phone User's Guide [i-mode]”.
Downloading i-appli from Sites
Download software from sites and start the FOMA phone.
1. Display a site that supports downloading of i-appli
]Select an item that enables you to download the
software ]C
2. After the download is finished, C
• After the download is finished, the communication
setup display may appear. After setting, press I
[Done].
• Some software may start immediately after it is
downloaded. In this case, the software may not have
been saved. When ending the software, the
confirmation display may appear asking whether to
save it. Select “Yes” to save it.
3. “Yes”/“No”
• “Yes”: Activates i-appli.
• “No”: Returns to the Site display.
Information
• Downloading is not available at some accessed sites.
• At downloading software, the confirmation display may appear
asking whether to use the “serial number of your mobile
phone/UIM”. Select “Yes” to start downloading. In this case,
the “serial number of your mobile phone/UIM” is sent to the IP
(Information Service Provider) over the Internet, so could be
perceived by third parties. However, your phone number,
address, age and gender are not notified to the IP (Information
Service Provider) or others by this operation.
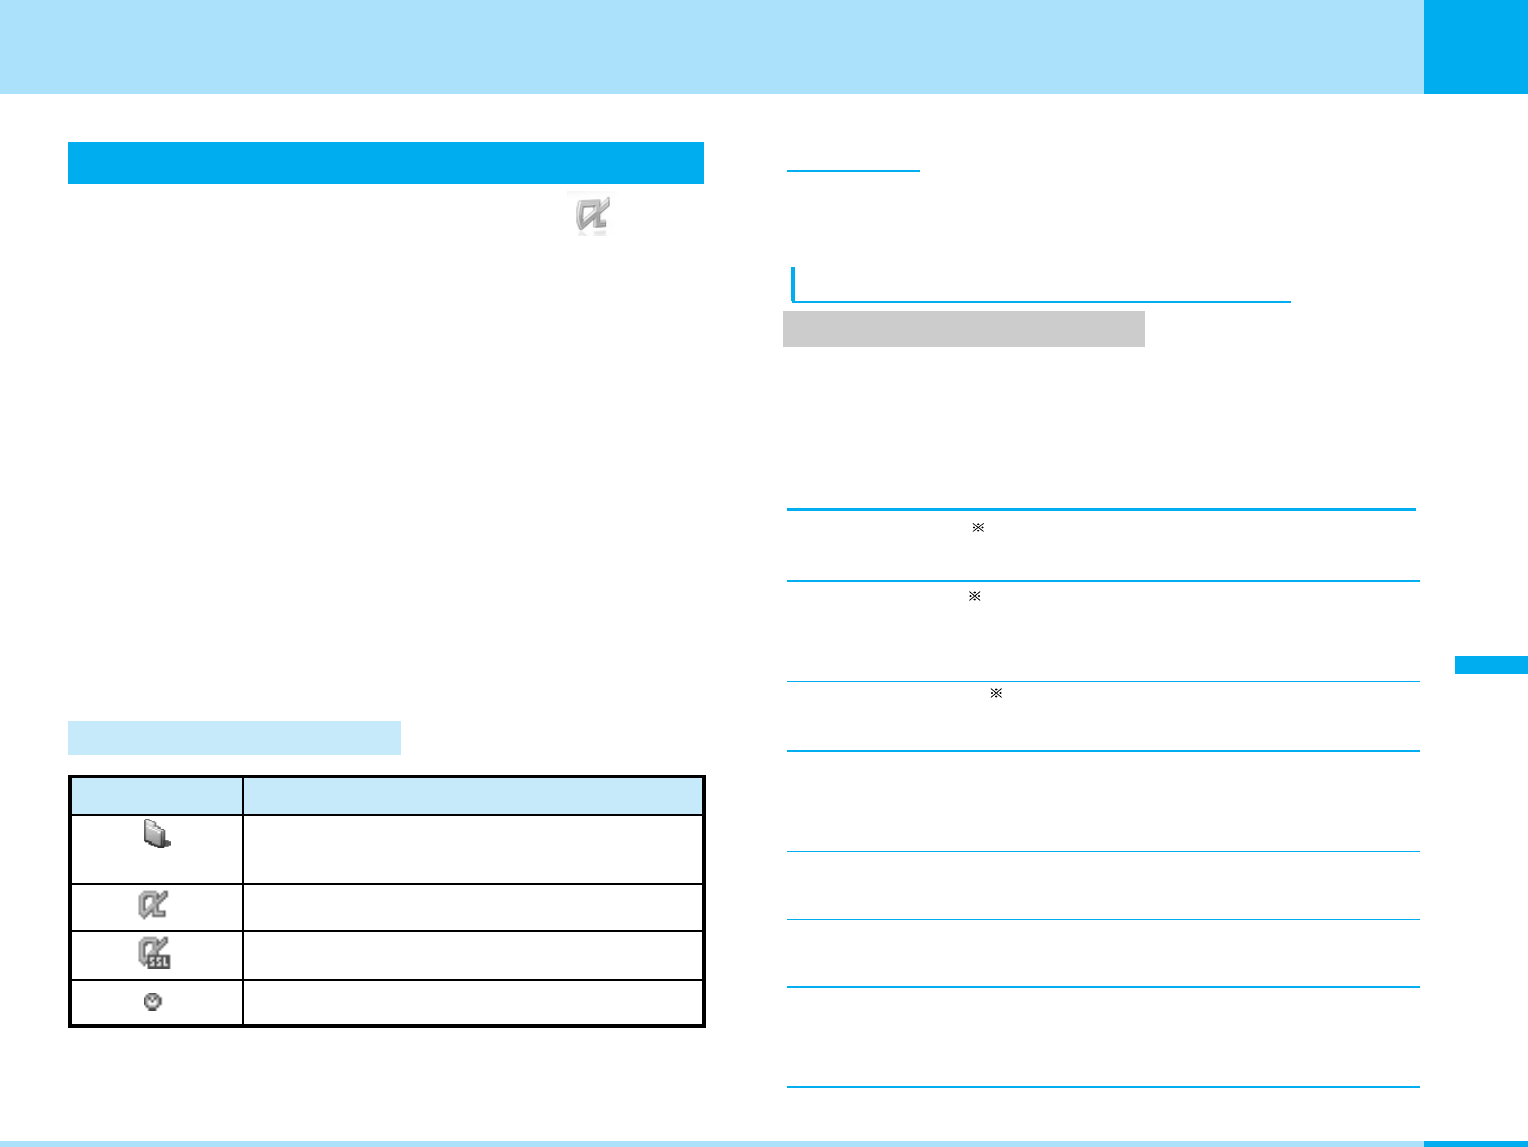
161
i-appli
i-appli
Next Page
Starting i-appli
C](i-appli)
1. Press I[i-mode] for 1 or more seconds from on
Stand-by display.
<Software List>
2. Select the software to be launched ]C
•P: End the activation of i-appli.
Icons on the Software List
• Each icon will be displayed thinly when downloading by other UIM
or upgraded of i-appli (Restriction on UIM).
Information
• Some software continues communication after downloaded.
You can let it not communicate by “Communication” setting.
Using the Submenu of the Software List
Setting item/Setting at purchase >P257
• Some submenus are not available depending on the
software.
1. From the Software List (See left), M[Menu] ]
Select from the following Submenu items
Create folder
You can create a folder.
Delete folder
You can delete a selected holder. You cannot delete a
folder in which software is saved.
Rename folder
You can edit the name of the selected holder.
Move to folder
You can move a selected software to another folder
you created.
Upgrade
You can upgrade the version of the selected software.
Delete
You can delete the selected software.
Delete selected
You can select and delete multiple software. After
selecting, M[Menu] >Select “Delete”.
DescriptionIcon
i-appli that Auto start is set
i-appli downloaded from SSL site
Normal i-appli
The folder you created
(Blue)
162
i-appli
i-appli
Delete all
You can delete all softwares in i-appli. To delete all,
C>Enter terminal security code >C[Done].
Sort
You can sort software.
Properties
You can check the name, size, etc. of the selected
software.
Certificate
You can check the owner, issuer, expiration date, etc.
of the certificate used for the selected software.
Network setting
You can set whether to communicate while the
selected software is being started. After setting, press
I[Done].
i-appli To
You can set whether to start the software selected
from a site or mail. After setting, press I[Done].
Icon info setting
You can set whether icon information for i-mode mail,
SMS, messageR/F, battery level, Manner Mode, radio
wave strength and being out of area is to be used by
the software selected. After setting, press I[Done].
Autostart setting
You can set to activate the selected software
automatically. If you set to “Set”, select “Edit” and
enter the method for activation and the time. After
setting, press I[Done].
Show desc setting
You can set whether to display software information
at i-appli downloading. After setting, press I[Done].
Autostart failure
You can check information when i-appli fails to start
automatically.
Trace info
You can check information when i-appli supporting the
trace function has been terminated due to an error.
System info
You can check system information such as memory
usage status of i-appli.
: You cannot use the folder you created.
163
i-appli
i-appli
Next page
Information
• Note that you may not be able to receive timely information if
you have set “Network Setting” to “OFF”.
• When you perform “Upgrade” of the software, the
confirmation display may appear asking whether to use the
“serial number of your FOMA phone / UIM”. If you select
“Yes”, version upgrade starts. In this case, your “mobile phone
number / serial number of UIM” is sent to the IP (Information
Service Provider) over the Internet, so could be perceived by
third parties. However, your phone number, address, age, and
gender are not notified to the IP (Information Service Provider)
or others by this operation.
• Since the version up of pre-installed i-appli is free of charge,
the confirmation screen asking whether to use the “serial
number of your FOMA phone / UIM” does not appear.
• If “Icon Info set” is set to “Use”, icon information for i-mode
mail, SMS, messageR/F, battery level, Manner mode, radio
wave strength and being out of area may be sent to the IP
(Information Service Provider) over the Internet just like your
“mobile phone number / serial number of UIM”, so could be
perceived by third parties. However, your phone number,
address, age, and gender are not notified to the IP
(Information Provider) or others by this operation.
Pre-installed i-appli
This game is to remove the blocks when putting the block
has a same result after multiplying the serial number.
(Brain teaser by multiplication matrix)
1. From the screen of software list (P161), select
“”]C]Select the following menu
•I[Quit]: You can end a game.
Start 1
Starts the game.
Stage 1
You can select the stage (01~10) by pressing J
Continue 2
You can resume the game on pause.
Key info
You can view the information on each button. After
displaying, press I[Menu] to return to the menu.
Help
You can view the information to remove the block.
After displaying, when you press J, you can change
the screen. Press I[Menu] to return to the menu.
Rank
You can view the status of score rank. After displaying,
you can return to the menu by pressing I[Menu].
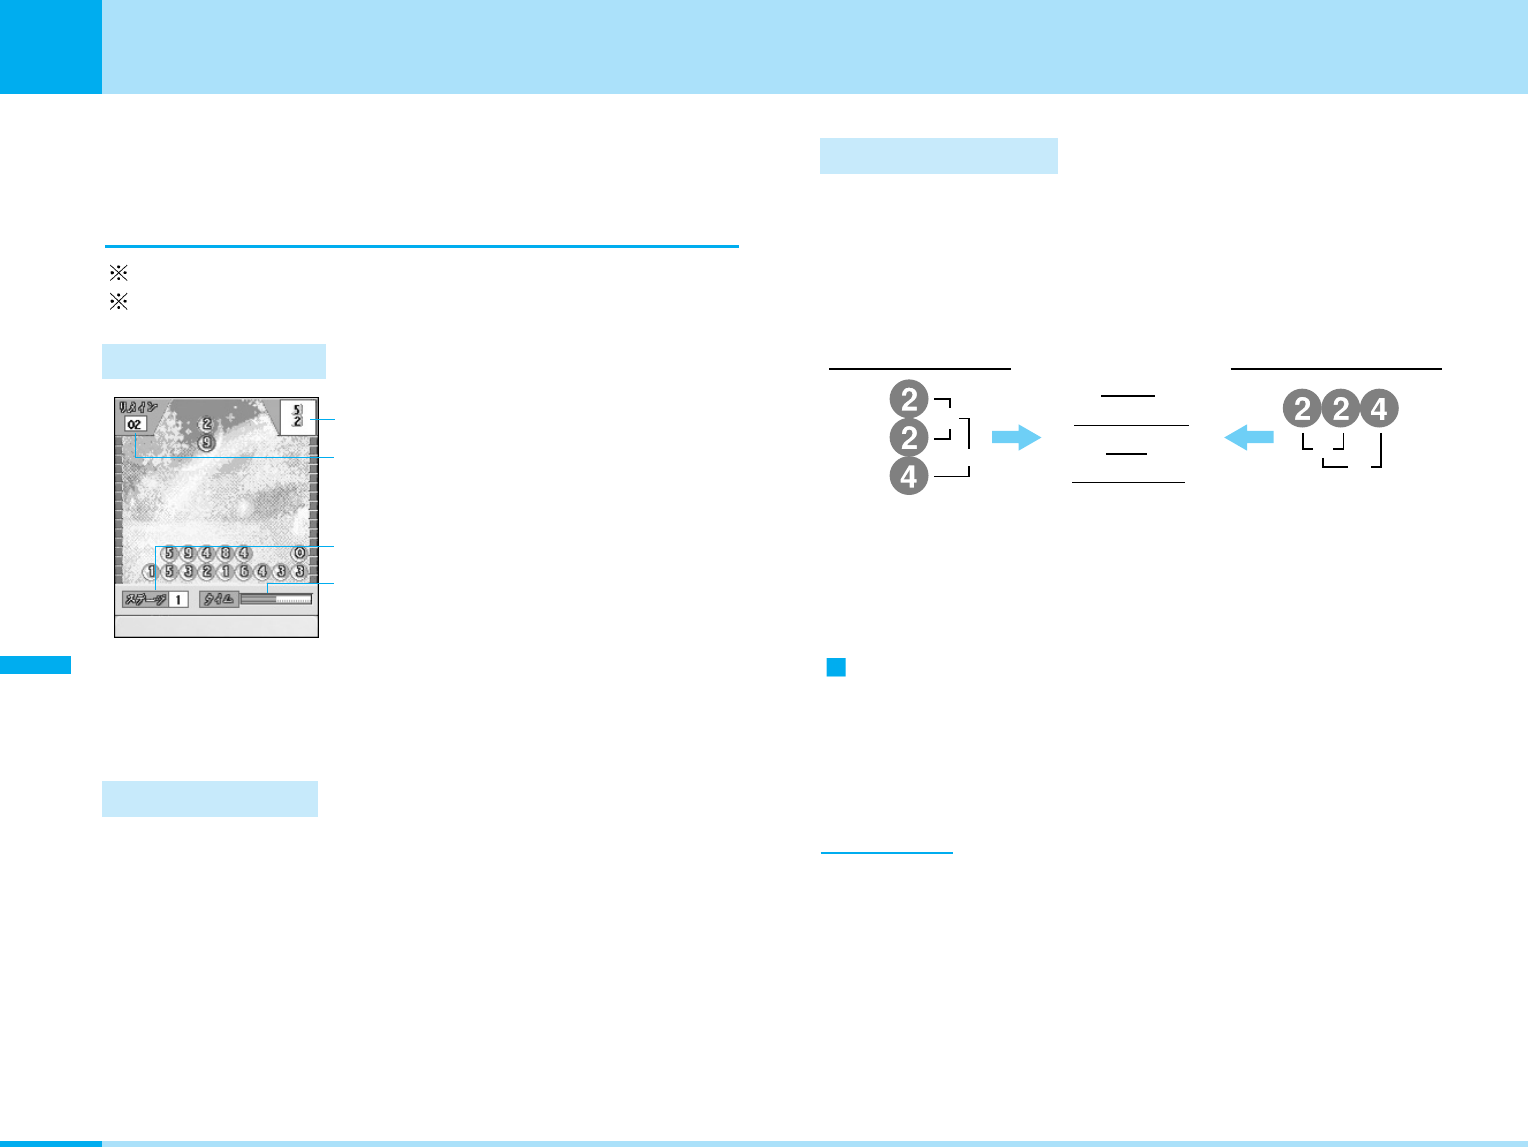
164
i-appli
i-appli
Sound
You can set the sound of game. Each time you press
C, you can turn on or off sound.
1 : You cannot see these menus on games on pause.
2 : You can see these menus only on games on pause.
Screen on game
•M[Pause]/[Resume]: You can pause the game. If you
press it again, you can resume it.
•I[Menu]: Terminate the game and display the menu.
Button on game
See Key info (P163) of menu for details.
Deleting the block
You can delete the falling blocks if you meet the following
condition. When the blocks are full from 4th line to 7th line
from the left, the game is over.
• In case the result after multiplying is 2 digits a, you can
paste the block beside same to the last number.
• See “Help” (P163), for the block except for number.
Game over
The screen of game over is displayed. If you press C,
you can view the score by displaying rank screen. If you
press I[Menu], you can return to the menu.
Information
• When you close the FOMA phone during the game, the game
is continued. The game is paused when a call comes in.
Vertical direction Horizontal direction
<Example: Combining the block of number 224>
All 3
blocks will
be
removed.
Ŀ
ŁĿ
Ł
Pause Menu
If you remove the block, the number
will be reduced. If the number is 0,
the stage will be clear.
Indicates next block.
Indicates the current stage.
If the rest of blocks are cleared, the
block will be dropped beside 1 line.
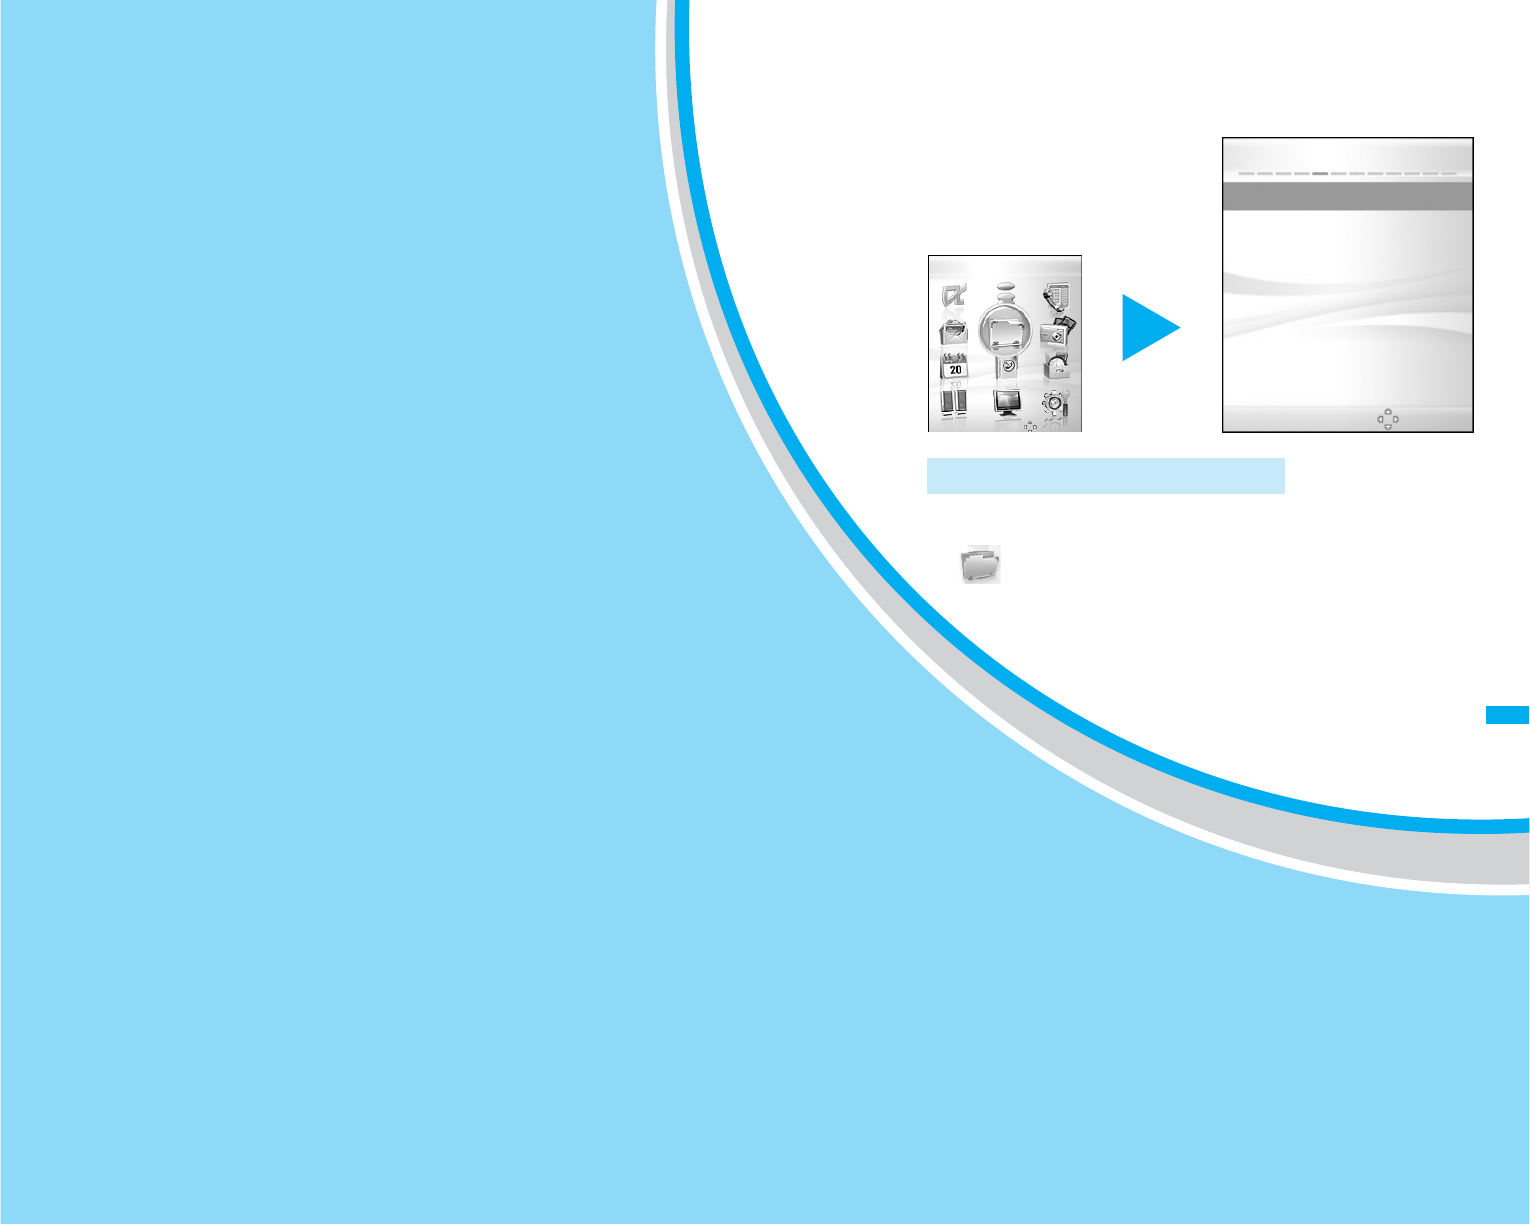
165
Introduction of Data box......................166
Displaying/Managing/
Editing Images......................................166
Playing back/Managing/
Moving Images/i-motion......................173
Playing back/Managing/Melody..........176
Data box
On the Stand-by display, C[Menu] ]
(Data box) or “Data box”
To display the Data box menu
1 My picture
2 i-motion
3 Melody
Select
Data box
Select
Data box

166
Data box
Introduction of Data box
Data box has the following items and folders:
: Folders added by the user are not included.
Displaying/Managing/Editing Images
C](Data box) ]1
You can display the shot still images, or still images
obtained from sites or i-mode mails.
The File Format To Display
• This FOMA phone supports to display file format as follows.
: Some files cannot be played depending on the file format.
Data box
Menu item ContentsFolder
My picture
i-motion
Still images etc. shot
camera.
Pre-installed still
images
Still images obtained
from sites, etc.
Pre-installed moving
images
i-motion obtained from
sites, etc.
Camera
Pre-installed
i-mode
Camera
Pre-installed
i-mode
Menu item ContentsFolder
Melody
Pre-installed
Melodies obtained from
sites, etc.
Pre-installed melodies
i-mode
Data transfer
Still images obtained
through data
transmission, etc.
Data transfer
Melodies obtained
through data
transmission, etc.
Data transfer
Moving images obtained
through data
transmission, etc.
Item
Still images usable for
frames and elements
Moving images shot by
video camera etc. File format JPEG, GIF
Pixel/File size
Up to 1280 x 1024 dots
File size
Extension name
JPEG file : Up to 700K bytes,
GIF file : Up to 500K bytes
jpg, gif

167
Data box
Data box
Displaying Images
1. From Data box menu (P165), “My picture”
<Folder List>
2. Select a folder ]
C
<Image File List>
3. Select a file ]
C
The mark on the image file list
: Output from the FOMA phone is inhibited or file editing is
restricted.
FullMenu Mail
File name
<Image>
•CĮFullį :
The image will be displayed
in full screen.
•IĮMailį :
You can send i-mode mail
with attaching the selected file.
Go to step 2 on page 149 of “Composing
i-mode mail”.
•J :
Displays the previous or next file.
Hp!up!Nz!qjduvsf
Camera [1/5]
OpenMenu Switch
The name and size of selected file
•I
[Mail] : You can compose i-mode
mail with attaching the selected file.
Go to step 2 on page 149 “Composing
i-mode mail”.
OpenMenu Switch
My picture [1/5]
Camera
Data transfer
0 File
4 file
Item 80 Files
Pre-installed
0 File •I [View by] : You can select
the type of listing the folder.
The number of files in the
selected folder
DescriptionMark
Previous list
The file set the restriction
Unrecognized file
168
Data box
Data box
Using the Submenu of the Folder List
Setting item/Setting at purchase >P258
1. From the Folder List (P167), M[Menu] ]Select
from the following Submenu items
Open
You can open the selected folder.
New folder
You can create a folder.
Delete
You can delete the selected folder.
Sort by
You can sort the folders.
Sorting the created folders are applied to only by the
“Name”.
View by
You can change folder display methods.
Memory info.
You can check status of the storage area on the
FOMA phone, etc.
Folder property
You can check the name, size and the number of the
files in the folder of the selected folder.
: You cannot use this menu in pre-installed folder.
Information
• If you delete a folder which includes an image set as a
wallpaper in stand-by mode, phonebook or the video-phone
call, or if you delete a folder which includes a melody set to
ringtone, alarm or schedule, each one can be returned to the
setting at purchase.
Using the Submenu of the Image File List Display
Setting item/Setting at purchase >P258
1. From the Image File List screen (P167), select a file
]M[Menu] ]Select from the following Submenu
items
New folder 1
You can create a folder.
Files 1
–View : You can display the selected file.
–Edit 2 4 :You can edit the selected file. >P171
–Move 3:You can move the selected file to other
folder. Select the folder
C>I
[Paste].
–Copy 3:You can copy the selected file to other
folder. Select the folder
C>I
[Paste].
–Delete : You can delete the selected file.
–Delete all : You can delete all the files in the folder.
You need to enter your terminal security code for
deleting.
–Rename : You can change the name of the
selected file.
169
Data box
Data box
Mark/Unmark 1
You can move, copy, and delete after selecting
multiple files. After selecting, press M[Menu] >“File”
>Select “Move”/“Copy”/“Delete”
–Mark : You can select a file at a time.
–Mark all : You can select all the files collectively.
–Unmark : You can deselect the file selected by
“Mark” or one of the files selected by “Unmark all” at
a time.
–Unmark all : You can deselect the file selected by
“Mark” or all the files selected by “Unmark all”.
Send via mail 1 4
You can attach a file to i-mode mail for sending. Go to
step 2 (P149) of “Compose i-mode mail ”.
Set as wallpaper
Select the “Main display” or “Sub display” and set as
wallpaper for the Stand-by display, etc.
Slide show
–Go : Files in the folder are displayed in order.
–Settings : You can set the “view as” and “Time
interval (secs)”. After setting, press I[Done].
Make animated GIF 1 4
You can select up to 10 files to create animation. After
selecting the files, press I[Make].
Sort by
You can sort files.
View by
You can change file display methods.
Memory info.
You can check status of the storage area on the
FOMA phone, etc.
File property
You can check the name, size and type, created time,
resolution, file restriction of the selected file.
1: You cannot use this menu in “Item” or “Pre-installed” folder.
2: You can use only JPEG file (Except for unrestricted file).
3: You cannot move and copy this menu to “Item” or “Pre-
installed” folder.
4: You cannot use this menu for restricted file.
Information
• If you delete the image set in stand-by mode, phonebook, or
video-phone, each image returns to the setting at purchase.
170
Data box
Data box
Using the Submenu of the Image Display
Setting items/Setting at purchase >P258
1. From the Image display (P167), M[Menu] ]Select
from the following Submenu itemsM
Files 1
–Delete : You can delete the displayed file.
–Rename : You can change the name of the
displayed file.
–Edit 2:You can edit the displayed file. >P171
Send via mail 1 3
You can attach a file to i-mode mail for sending. Go to
step 2 of “Compose i-mode mail” (P149).
Full
You can bring up an image on the full display hiding the
soft keys and display information.
•J: The previous image/next image is displayed.
•Q: The full display is cancelled.
Zoom
Displays an image in a large size.
•M[+]: Each time you press M, the displayed
image is enlarged.
•I[–]: The image is displayed in the previous size.
•K: You can move the display position of the
expanded image.
•Q: The zoom is cancelled.
Set as wallpaper
Select the “Main display” or “Sub display” to set as
wallpaper for the Stand-by display.
Slide show
–Go : Files in the folder are displayed in order.
–Settings : You can set the “View as” and “Time
interval (secs)” for the slide show. After the setting,
press I[Done].
Go to list
You can return to the list screen. (P167)
File property
You can check the name, size, type , created time,
resolution and file restriction of the selected file.
1: You cannot use this menu in “Item” or “Pre-installed” folder.
2: You can use only JPEG file (Except unrestricted file).
3: You cannot use this menu in restricted file.
Information
• If you delete each image which set as a wallpaper in stand-by
mode, phonebook, or video-phone call, each one can be
returned to the setting at purchase.

171
Data box
Data box
Next Page
Editing Still Images
You can edit a still image. You can edit only a JPEG file.
There are some cases that you may not be able to edit. The
edited still image is saved into the folder containing the
original still image.
Setting items/Setting at purchase >P258
1. From the Image File List (P167) Display (P167),
select a file, on the Image Display screen, press
M[Menu] ]“Files” ]“Edit”
• The screen to edit the image appears.
2. From the Edit display, M[Menu] ]Select from the
following editing methods ]After setting,
C[Save] ]New file/Original file ]C
• After editing in screen, you can operate the function
as follow.
–M[Menu]: Displays the edit menu.
–I[Undo]: Undoes the edited file.
Save
You can save the edited still image.
Rotate
You can rotate a still image 90 degrees to the left or
to the right.
1) Left / Right
•M[Rotate]: You can rotate a still image 90 degrees
to the left or to the right.
•I[Cancel]: You can cancel editing.
2) Press C
Resizing
You can change the size of a still image.
Insert
–Text : You can paste a text to a still image.
• If you press M[Menu], you can change the
settings of “Font size” and “Font color”.
1) Select a text box ]C
2) Enter text ]C
•M[Text]: You can change the text box.
•I[Cancel]: Returns to previous menu.
3) C]Select a position of the text using K]
C

172
Data box
Data box
–Frame : A frame is added to a still image.
Select a frame to add.
1) Select a frame ]C
•M[Rotate]: You can rotate a still image 180
degrees to the left or to the right.
•I[Cancel]: Returns to previous menu.
2) Press C
–Element : An element is pasted to a still image.
• If you press M[Menu] on element selection screen,
you can select a size of the element.
1) Select an element ]C
2) Select a position to paste the element by K]
C
• If you continue to add same element, repeat step
2.
•M[More]: You can change to another element.
3) I[Done]
Clipping
1) Select the size for trimming ]C
• The range for trimming is marked in red line.
2) Select the position for trimming by pressing K
]C
• If you select “User defined size”, move the red
cursor by pressing K, and set the starting and
ending point for trimming by pressing C.
Effect
–Black & White : Makes the color tone black and
white.
–Sepia : Makes the color tone sepia.
–Negative : Reverses the color tone.
–Black & White negative : Makes the color tone
black and white and reverses the color tone.
–Color balance : After selecting “Red”, “Green” or
“Blue”, adjust the shading by pressing
J
.
–Contrast : Emphasizes or weakens contrast.
–Sharpness : Emphasizes the contour.
–Softness : Gradates the contour.
–Mosaic Blur : Applies the mosaic. Select “Square”
/ “Round” and move to red line by pressing K, and
then set the starting and ending point to apply the
mosaic by pressing C.
Mirror
Reverse the image horizontally.
Undo
Undoes the edited file.
You cannot use this menu for the file before editing.
Information
• You can perform “Resizing” only to make it smaller than the
original still image. You may not be able to change the size
depending on the display size of the original image.
• If a screen proportion of the size selected by “Resize” is
different from the original size of still image, it may be saved by
different size from selected one.
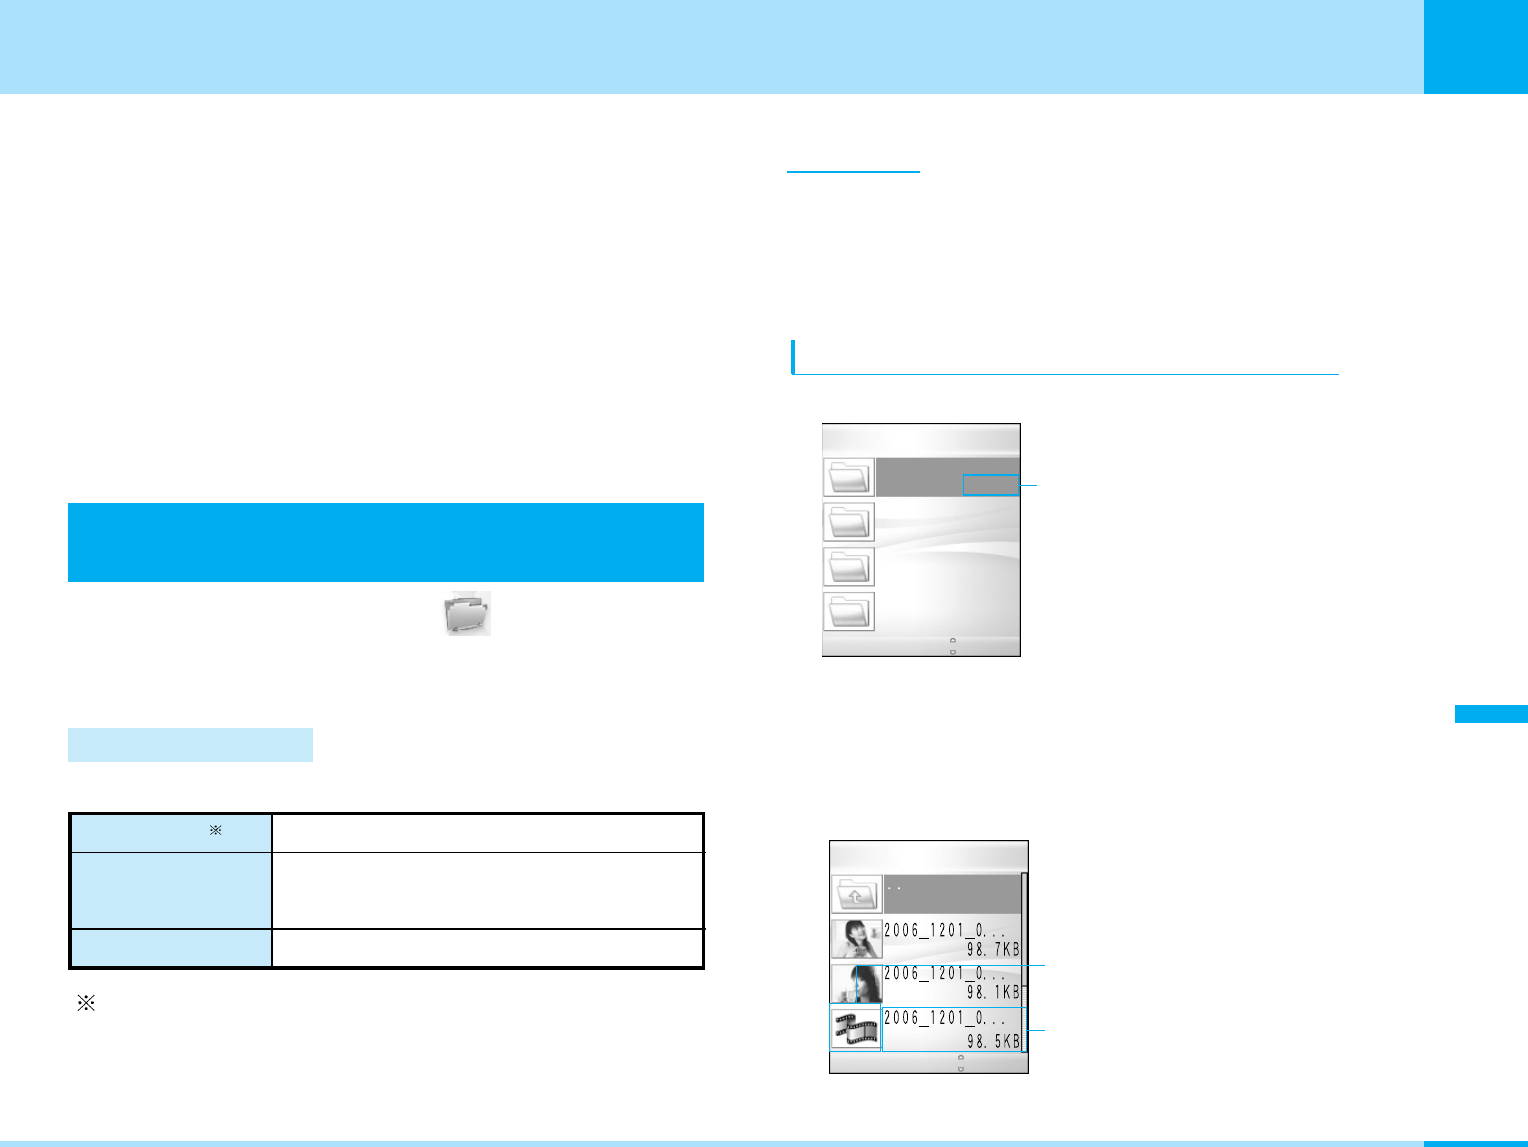
173
Data box
Data box
Next Page
• In the size of still image is “1280 x 1024”, you cannot set
“Insert” or “Effect”.
• Image sizes that allow “Frame” setting are “352X288”,
“320X240”, “176X220”, “176X144” and “128X96”.
“Frame” cannot be set for frames of other sizes.
• You cannot specify a display size larger than the original still
image to “Clipping”.
• For the Text box, Frame image or Element at purchase, see
“Text” (P263), “Frame” (P262) and “Element” (P263) of “Pre-
installed”.
Playing back/Managing/
Moving Images/i-motion
C](Data box) ]2
You can play back moving images shot by the camera, or
moving images obtained from sites or i-mode mail.
Playable file format
FOMA handset can play the file as follow.
You may not be able to play some files depending on file format
even if it is compatible with a phone.
Information
• When more than 3,000 files are stored in one folder, if you try
to play a movie stored in this folder, it may not be played
properly because of lack of memory. In this case, move the file
to another folder and play.
Playing back Moving Images / i-motion
1. From the Data box menu (P165), “i-motion”
<Folder List>
•I[Switch] : You can change the type of display of
folder.
2. Select a folder ]C
<Moving image File List>
Hp!up!j.npujpo
Camera [1/6]
OpenMenu Switch
• See step 2 Display screen (P167)
for the mark on display screen
Voice file
The name and size of selected file
OpenMenu Switch
i-motion [1/5]
Camera
Data transfer
0 File
5 file
Pre-installed
1 Files
i-mode 0 File
The number of the files in the
selected folder
Codec system
File format
Extension name
MP4
MP4 file (Image: MPEG4, H.263,
Voice: AAC, AMR)
3gp

174
Data box
Data box
•I[Mail] : You can send i-mode mail attaching the
selected file. Go to step 2 on page 149 of
“Composing message”.
3. Select a file ]C
<Moving Image Playback>
•C[Plays back]/G[Pauses]:Plays back / Pauses
•I[Stop]: Stops
•J: Plays back the previous file / next file
•J(Press and hold): The images are fast forwarded
/ fast rewound while it is pressed
•H/FE: Adjusts volume
Using the Submenu of the Folder List
See “Using the Submenu of the Folder List” of images (P168)
for the submenus available.
Using the Submenu of the Moving Image
File List
Setting item/Setting at purchase >P259
1. From the Moving Image File List (P173), select a
file ]M[Menu] ]Select from the following
Submenu items
Play
Plays back the selected file.
New folder 1
You can create a folder.
Files 1
–Move 2:You can move the selected file to another
folder. Select a folder to move >C>I[Paste].
–Copy 2:You can copy the selected file to another
folder. Select a folder to move >C>I[Paste].
–Delete : You can delete the selected file.
–Delete all : You can delete all files in the folder. If
you delete all files, you need to enter your terminal
security code.
–Rename : You can change the name of the
selected file.
Mark/Unmark 1
You can move, copy or delete multiple files. After
selecting , M[Menu] >“File” >Select “Move”/“Copy”/
“Delete”.
–Mark 2:You can select a file at a time.
–Mark all : You can select all the files collectively.
Volume
Playback bar
Playback elapsed time /
maximum playback time
Stereo / monaural
Pause StopMenu
175
Data box
Data box
–Unmark : You can deselect the file selected by
“Mark” or one of the files selected by “Mark all” at a
time.
–Unmark all : You can deselect the file selected by
“Mark” or all the files selected by “Mark all”.
Send via mail 1 3
You can attach a file to i-mode mail for sending. Go to
step 2 (P149) of “Compose i-mode mail”.
Ringtones
Set a ring alert for incoming voice and video-phone
calls.
–Voice call : Set a selected file as a ring alert for
incoming voice calls.
–Video-phone : Set a selected file as a ring alert for
incoming video-phone calls.
Sort by
You can sort files.
View by
You can change file display methods.
Memory info.
You can check the status of the storage area on the
FOMA phone, etc.
File property
You can check the name, size, type, created time,
resolution or file restriction of the selected file.
1: You cannot use the file in “Pre-installed” folder.
2: You cannot move or copy the file in “Pre-installed” folder.
3: You cannot use this menu in restricted file.
Using the Submenu of the Moving Image
Playback Screen
For MP4 file with only voice without image, see “Using the
Submenu of the Melody Playback” (P177).
Setting item/Setting at purchase >P259
1. From the Moving Image Playback display (P174),
M[Menu] ]Select from the following Submenu
items
Pause 3(Play 5)
You can pause the moving images being played
back.
Send via mail 1 2
You can compose an i-mode mail attaching a file to it for
sending. Go to step 2 (P149) of “Composing i-mode
message”.
Expand 3
You can view the whole moving image without displaying
the indication of soft key or player.
•
Q
: cancel this function.
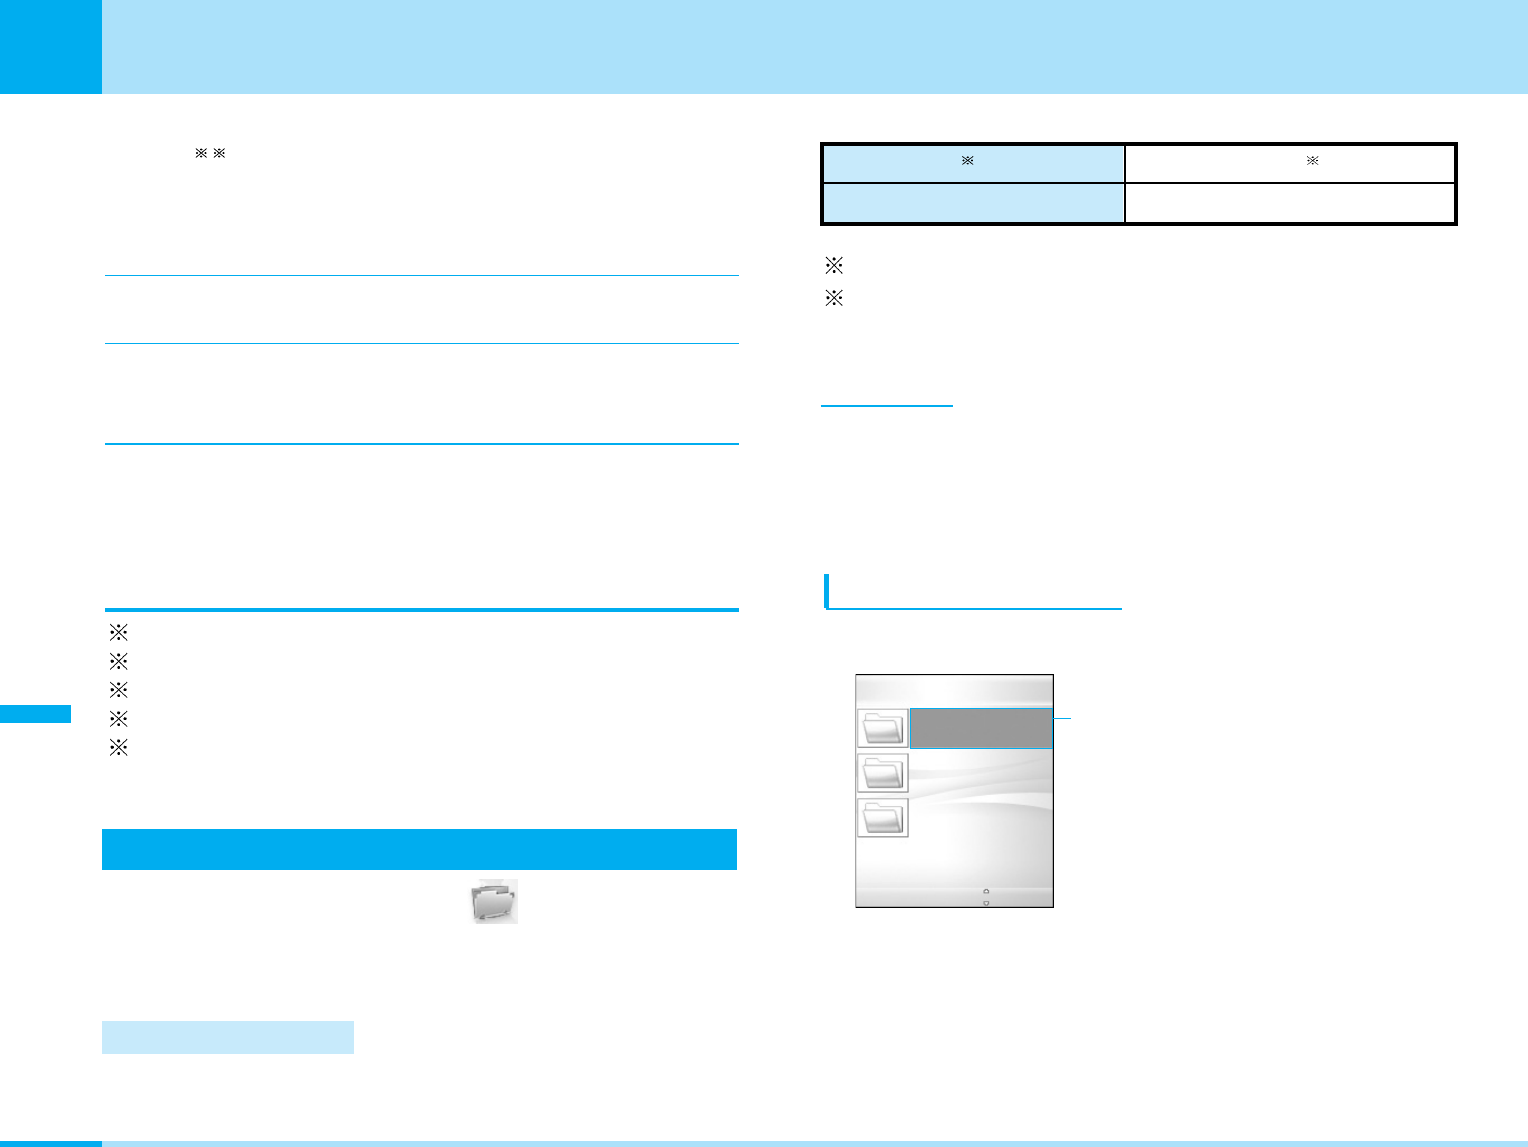
176
Data box
Data box
Snap 2 4
You can save paused moving images as still images.
Snapped images are saved into the “Camera” folder
of “My picture”.
Mute (Unmute)
You can play back moving images muting the sound.
Player settings
You can change settings of the visual effect and the
color tone of the player.
File property
Displays the name, size, type, created time, play
duration, restriction states, track state, availability as a
ring alert, title, creator, copyright and description of a
moving image file being played.
1: You cannot use this menu in “Pre-installed” menu.
2: You cannot use this menu for restricted file.
3: You can use this menu only on playing the file.
4: You can use this menu only on pause.
5: You can use this menu while pausing or after ending to play
back the file.
Playing back/Managing/Melody
C](Data box) ]3
You can play back pre-installed melodies, and melodies
obtained from sites, etc.
Playable file format
• This FOMA phone supports to display file format as follow.
1: Some files may not be played even if its format is supported.
2: The voice format of AAC or AMR is saved as 3gp file in “i-
motion” folder.
Information
• When more than 3,000 files are stored in one folder, if you try
to play a melody stored in this folder, it may not be played
properly because of lack of memory. In this case, move the file
to another folder and play.
Playing Back Melody
1. From the Data box menu (P165), “Melody”
<Folder List>
•I[Switch] : You can change the display type of
folder.
Open SwitchMenu
Melody [1/3]
Data transfer 0 File
i-mode 0 File
Pre-installed
47 Files
Folder name
The number of files in the folder.
File format 1
Extension name
SMF, MFi, MP4 2
mid, mld
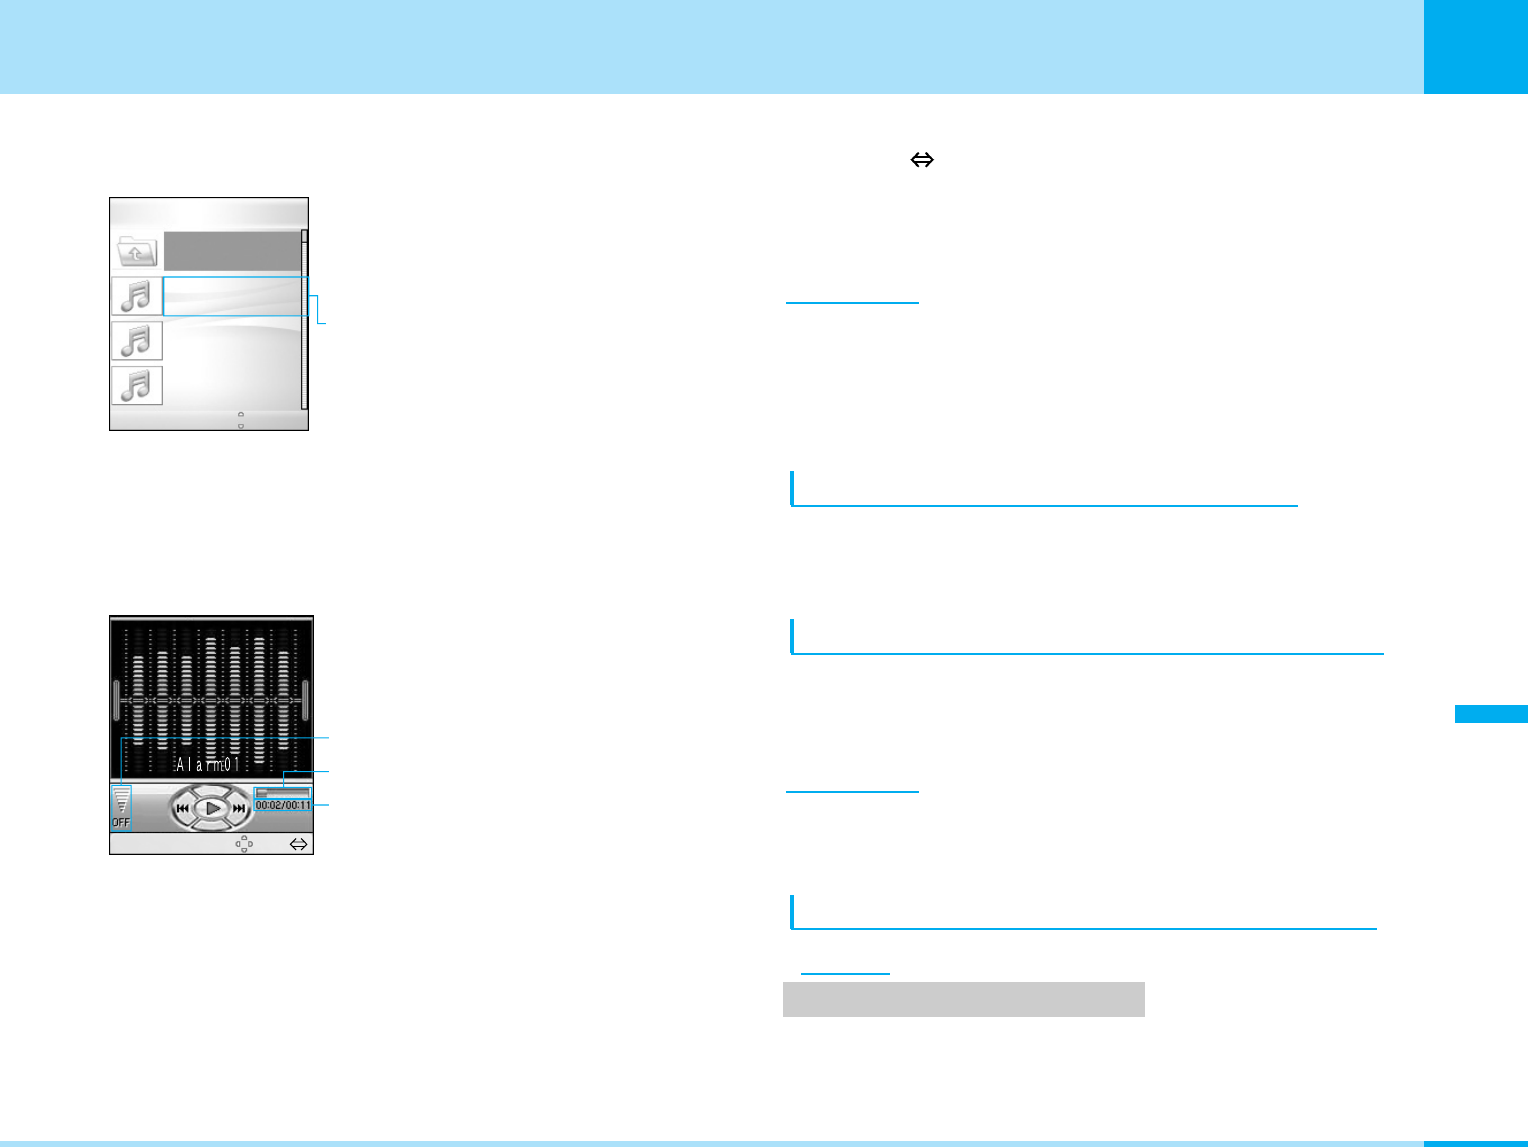
177
Data box
Data box
2. Select a folder ]C
<Melody File List>
•I[Mail] : You can attach the file to i-mode mail.
Go to step 2 on page 149 of “Composing i-mode mail”.
3. Select a file ]C
<Melody Playback>
–C,G: Plays back / pauses
–J: Plays pack the previous file / next file
–J(Press and hold): Melodies are fast forwarded /
fast rewound while pressing it.
–H/FE: Adjusts the sound volume
–I[]: Sets the repeat area (Starting point/
Ending point) If you press after setting, you can
release it.
Information
• When you play an MFI file that auto-repeat is set. you cannot
pause (stop temporarily) while playing the file after second
play back. To pause the file, select “Pause” from the sub
menu. >P178
Using the Submenu on the Folder List
For the submenu items available see “Using the Submenu of
the Folder List” of Images (P168).
Using the Submenu of the Melody File List
See “Using the Submenu of the i-motion File List” (P174)
for the Submenus available.
Information
• If you delete the melody set as the tone for incoming call, alarm
or schedule, each melody returns to setting at purchase.
Using the Submenu of the Melody Playback
Screen
Setting item/Setting at purchase >P259
1. From the Melody Playback display (P177), M[Menu]
]Select from the following Submenu items
Playback bar
Playback elapsed time /
maximum playback time
Volume
PauseMenu
OpenMenu Switch
Pre-installed [1/46]
..
Go to Melody
Alarm02.mid
1.8KB
Alarm01.mid
2.3KB
Alarm03.mid
2.0KB
• See step 2 “Display screen” for the
mark on display screen.
File name/File size
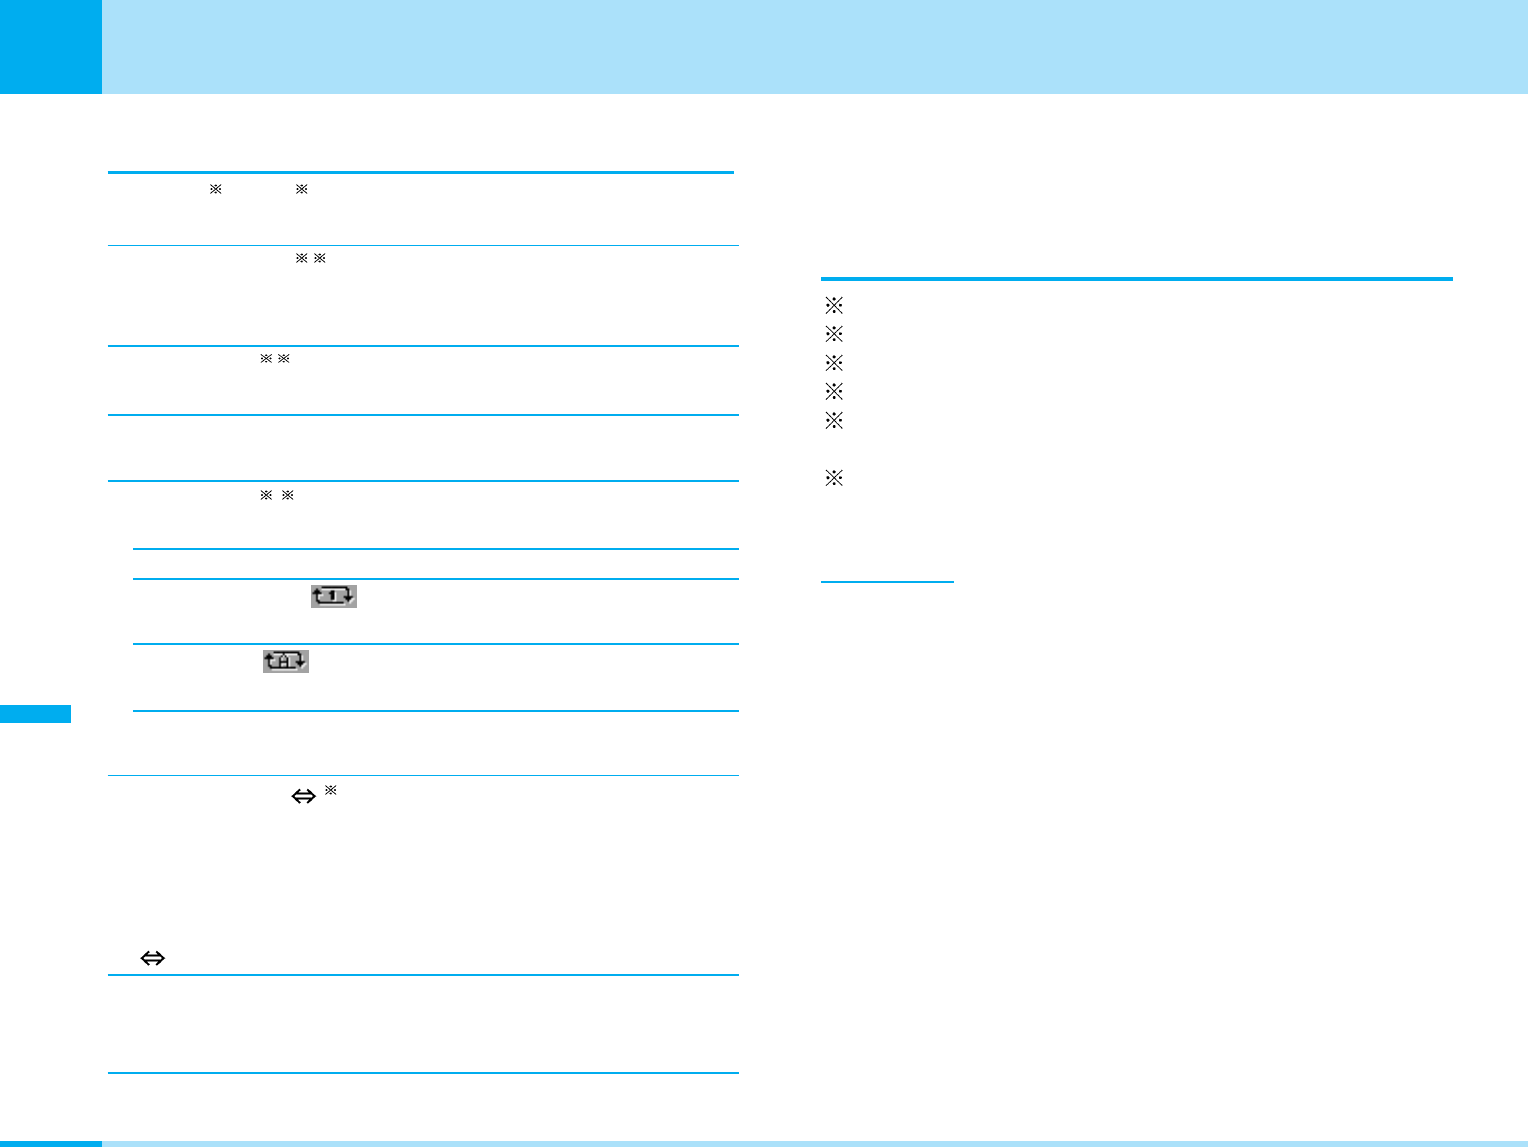
178
Data box
Data box
Pause 4(Play 5)
You can pause the melody being played back.
Send via mail 1 2
You can attach melody files to i-mode mail for sending.
Go to step 2 (P149) of “Composing i-mode mail”.
Ringtones 2 3
You can set a ring tone for voice or video phone calls.
Mute (Unmute)
You can mute the tone for playing back melodies.
Set repeat 3 4
You can select a repeat method of melody.
–None : You can cancel repeat setting.
–Current file ( ) : You can repeatedly play back
the current melody.
–All files ( ) : You can repeatedly play back all
the melodies in the folder.
–Shuffle : You can shuffle and play back all the
melodies in the folder.
Area repeat ( )5
You can specify a playback area for playing back
melodies. You can set the starting point by
performing this operation. You can set the ending
point by repeating the same operation or pressing I
[].
Player settings
You can change settings of the visual effect and the
color tone of the player.
File property
You can display the name, size, type, created time,
duration, ringtone and file restriction of the selected
file.
1: You cannot use the menu in pre-installed folder.
2: You cannot use this menu for restricted file.
3: You cannot use this menu in MP4 file, if image is not recorded.
4: You can use this menu only on playing.
5: You can use this menu only on pause or after ending to play
back.
6: You cannot use this menu on pause or after ending to play
back.
Information
• You can also change settings of the ring tone from the
Melody File List Screen. From the Melody File List screen
(P177), press M[Menu] select a “Ringtone”.

179
Using Alarm ..........................................180
Setting the Custom Menu ....................181
Using the Infrared Communication
Function................................................182
Using Calculator...................................184
Using Unit Converter............................185
Using World Time.................................187
Using Stop Watch ................................188
Tools
On the Stand-by display, C[Menu] ]
(Tools) or “Tools”
To display the Tools menu
1 Alarm
2 Custom menu
3 Receive Ir data
4 Calculator
5 Unit converter
6 World time
7 Stop watch
Select
Tools
Select
Tools
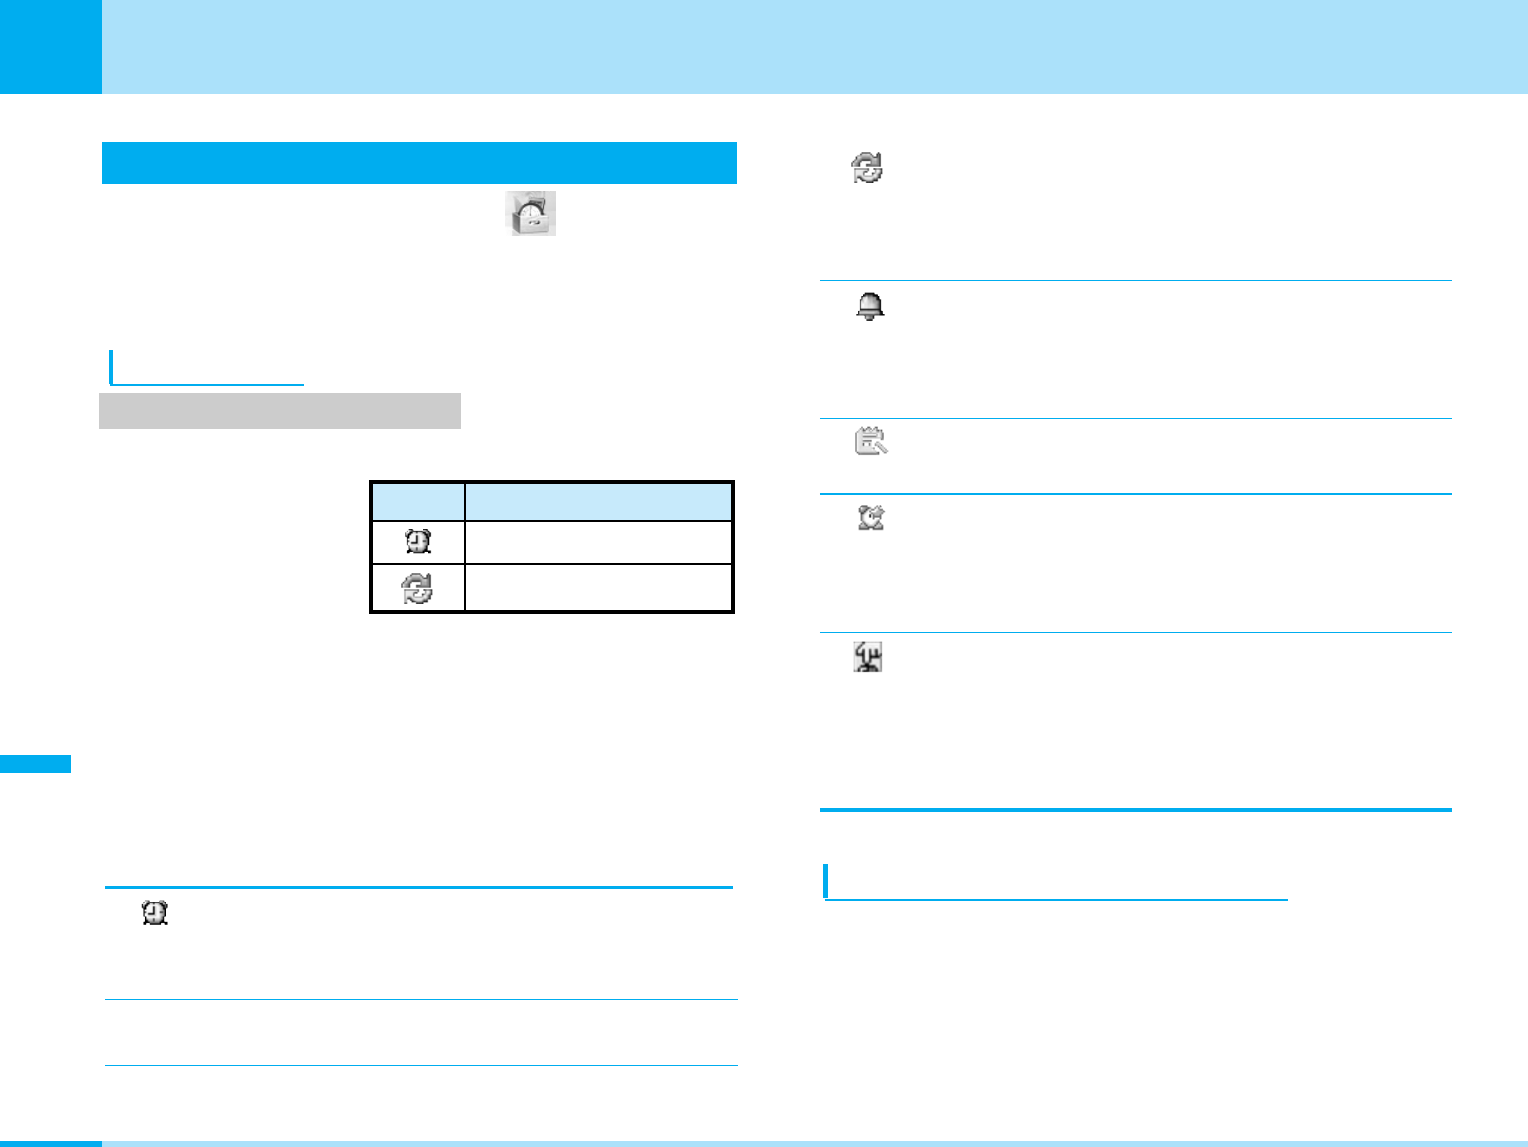
180
Tools
Using Alarm
C](Tools) ]1
You can set Alarm to alert you at the specified time. You
can also set Snooze or an alarm tone.
Setting Alarm
Setting item/Setting at purchase >P242
1. From the Tools menu (P179), “Alarm”
<Alarm List>
•I[ON]/[OFF] : You can set the alarm ON or OFF.
2. Select the alarm to edit ]C]Select the item to
edit ]C]After editing, I[Done].
(Setting ON/OFF)
You can select “ON” or “OFF”. To set Alarm, select
“ON”.
Time setting
You can set the time for making the Alarm sound.
(Setting repeat)
You can select the type of repeat.
• If you set “Except holiday”, the alarm does not alert
on Sunday or holiday (P192).
(Melody)
You can select an alarm tone.
• Select from alarm tone stored in “Melody” in “Data
box”. >P176
(Memo)
You can enter an alarm name.
Turbo Alarm
Set an alarm to sound at the maximum volume and
the vibration to operate at the maximum level. Select
“OFF” when not setting the turbo alarm.
Snooze
Select the time intervals of Snooze. If you do not want
to use Snooze, select “OFF”.
If “Snooze” is set to “ON”, the alarm repeats up to 12
times.
When the Specified Time Comes
When the specified time comes, the display informing of
Alarm appears and the Alarm sounds. To stop Alarm,
perform the following operations:
•C[OFF]: Alarm stops. When Snooze is set to “ON”, it is
canceled.
•I[Snooze]: Alarm stops. The set Snooze continues.
Tools
DescriptionIcon
Alarm is set to “ON”
Alarm is set to repeat
181
Tools
Tools
Next Page
aDuring a Voice/Video-phone Call
An alarm does not sound at the specified time during a
call because the icon is not displayed on upper side. After
ending the call, the alarm will be alerted on time.
• After ending to play a file/to take image, the alarm will
be sounded with displaying alarm screen.
• If you receive a voice call or video-phone call during
Alarm notification, Alarm is temporarily stopped, and
the Alarm is resumed after terminating the call.
aDuring playing back moving image, melody/
activating camera, video camera
An alarm does not sound at the specified time during a
call but the icon is displayed on upper side. After
ending the call/shooting, the alarm screen is displayed
and alarm sounds.
Information
• If the FOMA phone is not turned on, the alarm does not
sound.
• If the alarm cannot be sounded during activating i-appli, the
alarm icon blinks on upper part of the screen instead of
alarm sound to notify that the set time has come.
• The alarm sounds after i-appli is finished.
Using the Submenu of the Alarm List Screen
1. From the Alarm List screen (P180),
M[Menu]
]
Select from the following Submenu items
Edit
You can edit the selected alarm. Go to step 2 on page
180 of “Setting alarm”.
ON/(OFF)
You can activate/deactivate the selected alarm.
Mark/Unmark
Select and set 1 or more of edited alarms “ON” or
“OFF”. After selecting alarm(s), select M[Menu] >
“ON”/“OFF”.
–Mark: You can mark 1 alarm at a time.
–Mark all: You can mark all alarms at once.
–Unmark:
You can unmark 1 alarm at a time, which
you selected by “Mark” or “Mark all”.
–Unmark all: You can collectively unmark all alarms
you selected by “Mark” or “Mark all”.
Setting the Custom Menu
C](Tools) ]2
You can specify functions to store in the Custom menu. If
you store functions frequently used in the Custom menu,
you can quickly start the functions simply by pressing
Don the Stand-by display.
Setting item/Setting at purchase >P242
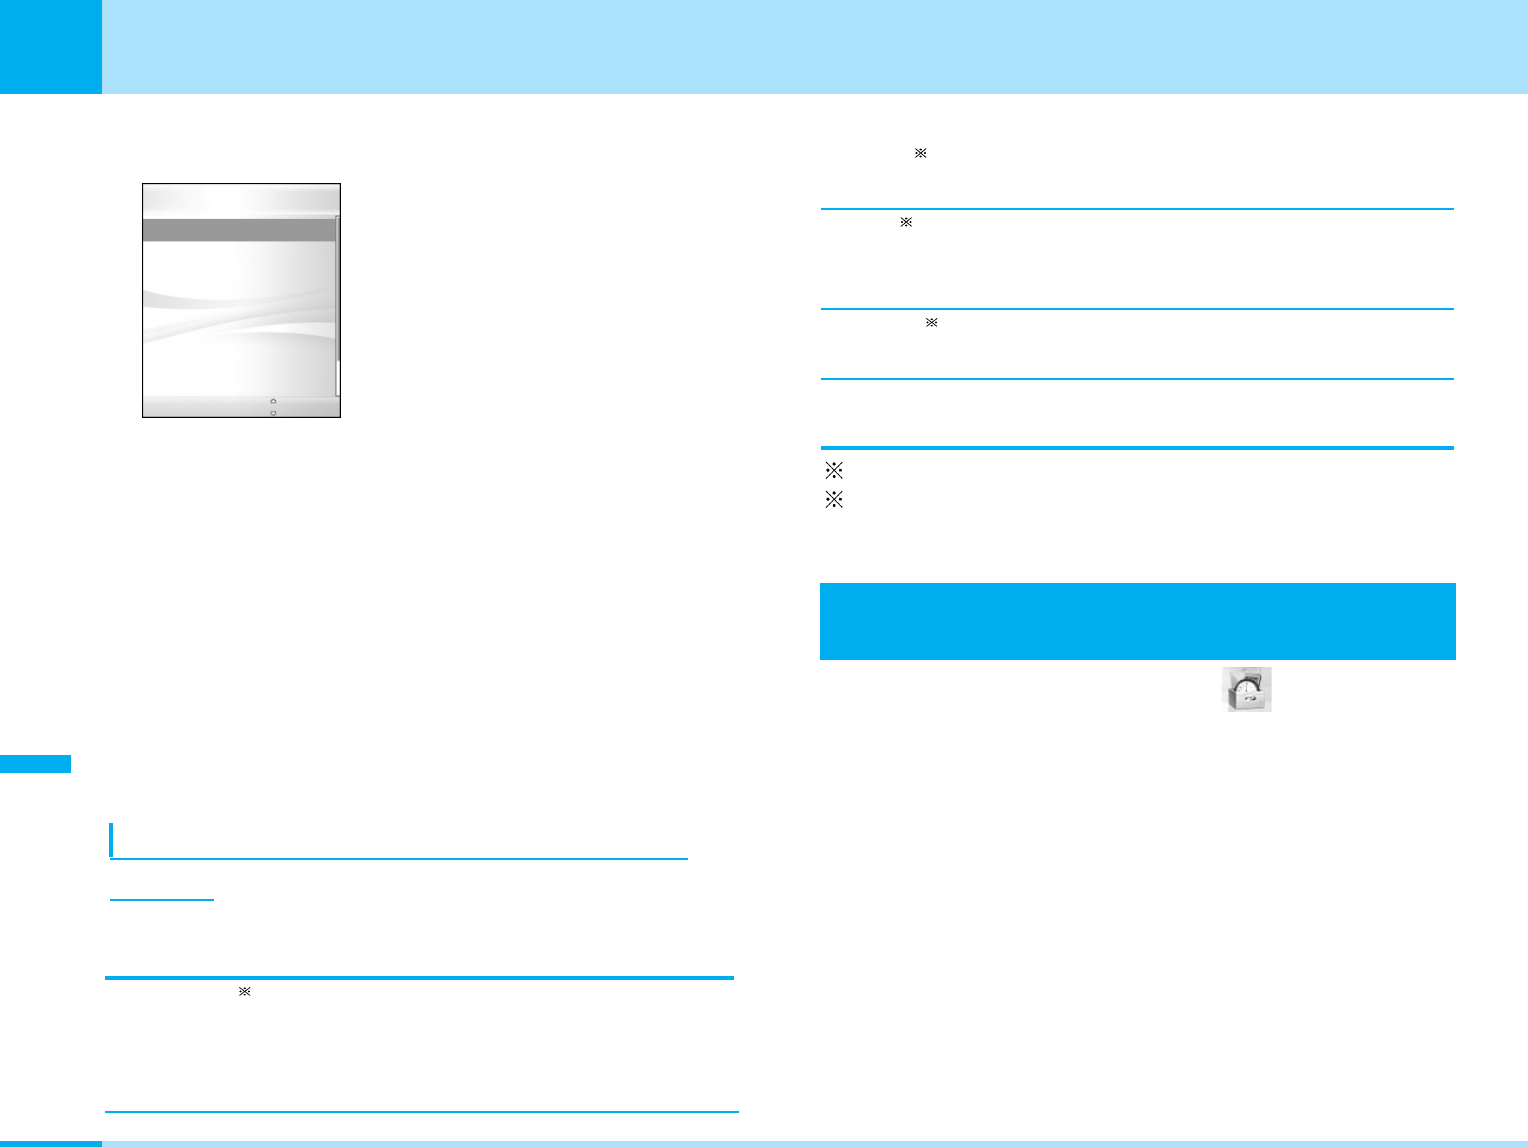
182
Tools
Tools
1.
From the Tools menu (P179), “Custom menu”
<Custom Menu>
•C[Select]: You can activate the selected menu.
•I[Edit]: You can change the menu saved as
Custom.
2. Select a blank line ]I[Add]
• The list of functions that can be stored in the Custom
menu appears.
3. Select a function ]C
• You cannot select the menu which is already
registered.
Using the Submenu of the Custom Menu
Display
1.
From the Custom menu display (See above), M[Menu]
]
Select from the following Submenu items
Add new 1
You can add a function to be registered from the
function list. Go to step 3 of “Setting the Custom
Menu” (See above).
Open 2
You can start the function selected.
Edit 2
You can change the functions registered. Go to step
3 of “Setting the Custom Menu” (See above).
Delete 2
You can delete a function registered at a time.
Delete all
You can delete all the registered functions collectively.
1: This Submenu item is displayed when a blank line is selected.
2: This Submenu item is displayed when a registered function is
selected.
Using the Infrared Communication
Function
C](Tools) ]3
You can send and receive data such as Phonebook and
Bookmark using the infrared communication to and from
other FOMA phones and personal computers supporting the
infrared communication function.
1 Search phonebook
2 Mail
3 i-mode
4 Camera-mode
5 Alarm
6 Select ringtone
7 [Menu7]
SelectMenu Edit
Custom menu
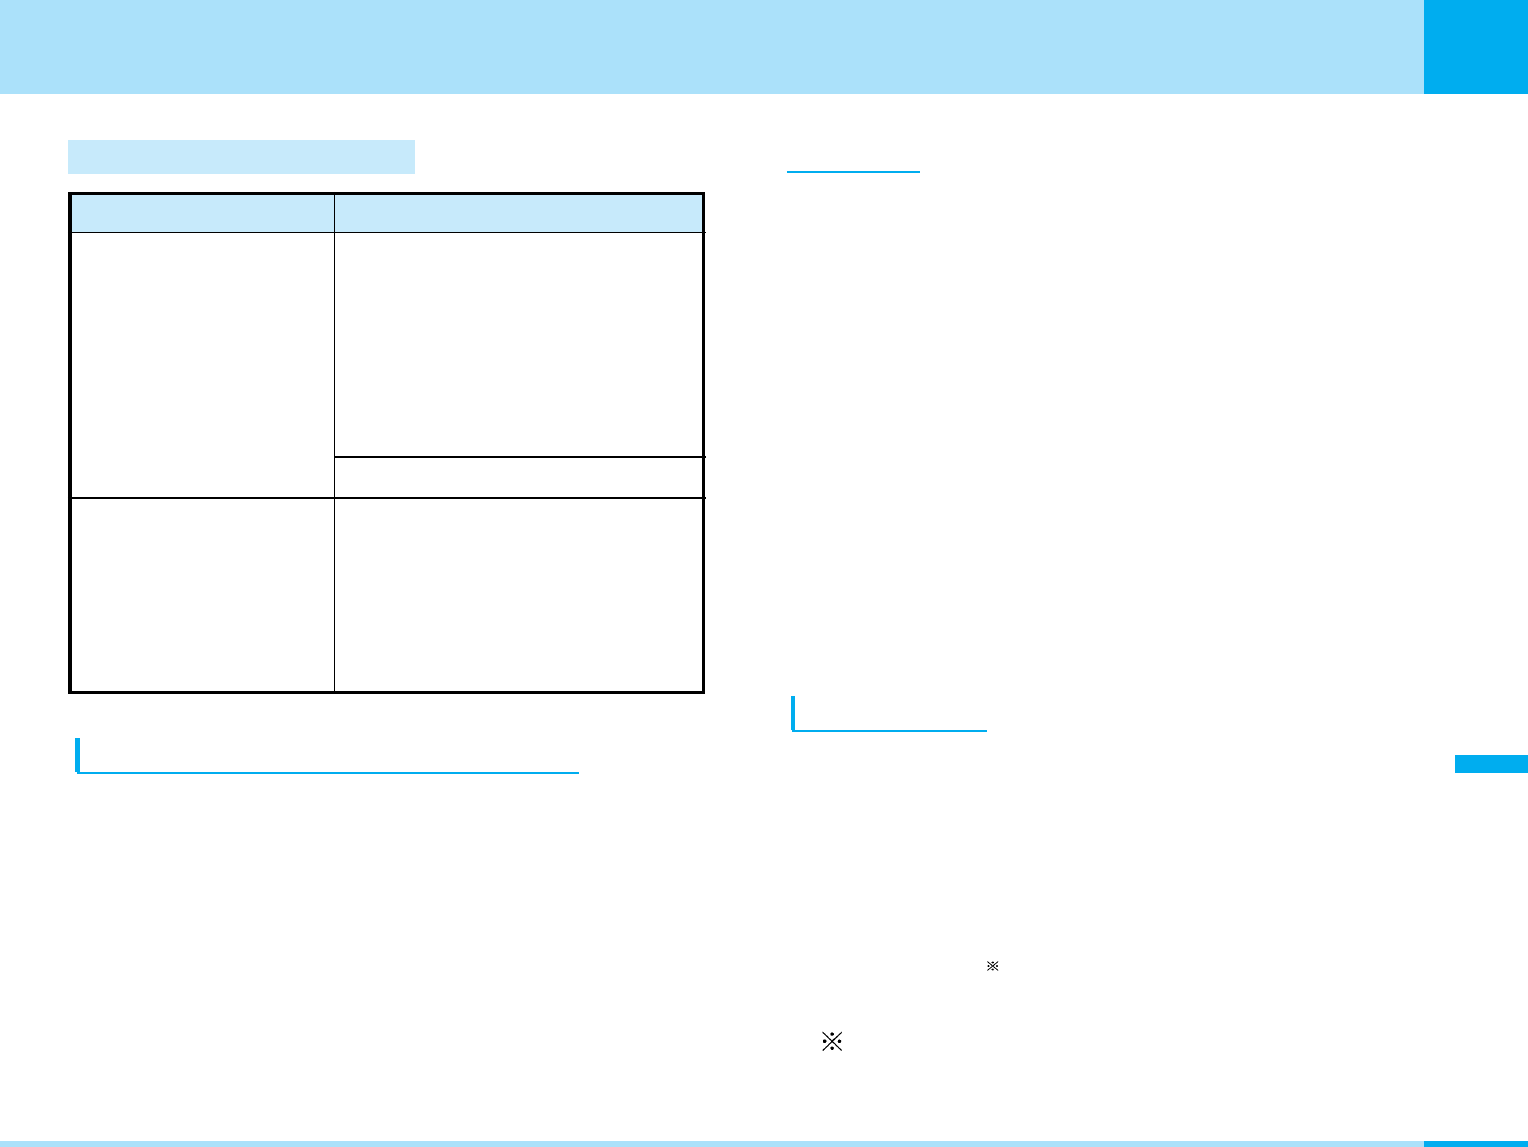
183
Tools
Tools
The data to send by infrared
Performing Infrared Communication
Place the FOMA phone parallel to another device so that the
infrared data ports of these devices face each other.
• The infrared data port is located on the right side of the
FOMA phone. >P28
• Place the FOMA phone on a stable location such as a
table and do not move it during communication.
• The distance for infrared communication should be
within 20 cm.
• Use Infrared communication within ±15 degrees from
the center line.
Information
• During infrared communication, do not remove the battery. If
you remove the battery during communication the data via
infrared, this operation will be stopped.
• If the battery level is low, you cannot exchange the data via
infrared. Before activating this menu, check the battery level.
• The amount of data that can be received varies depending on
the capacity of the memory. If you cannot receive data, delete
unnecessary data, and then activate infrared menu again.
• Before activating the infrared between the other phone, check
the infrared compatibility of each equipment.
• You may not be able to exchange data via infrared even if the
other party supports infrared communication function.
• While performing infrared communication, call, i-mode or data
transmission cannot be performed as the FOMA phone
becomes the same status as out of of the service area.
Sending Data
Make the receiving end ready for receiving the data and
then start sending data within 30 seconds following the
steps below.
<Example: When you want to send/receive a phonebook
via infrared communication>
1. Display of the data to be sent
]
M[Menu]
]
“Send Ir data”
]
“Focusd data”/“All data”
]
“Yes”
: Not displayed when sending a bookmark.
Data Contents
Sending / Receiving 1 or multiple
data (Phonebook of FOMA
phone) Data that can be sent /
received is name / phone number
/ mail address / note / web page.
(vCard items)
Sending / Receiving 1 or multiple
data (Bookmark of FOMA phone)
Data available in infrared
communication is title / URL.
(vBookmark items)
Own number
Phonebook
Bookmark
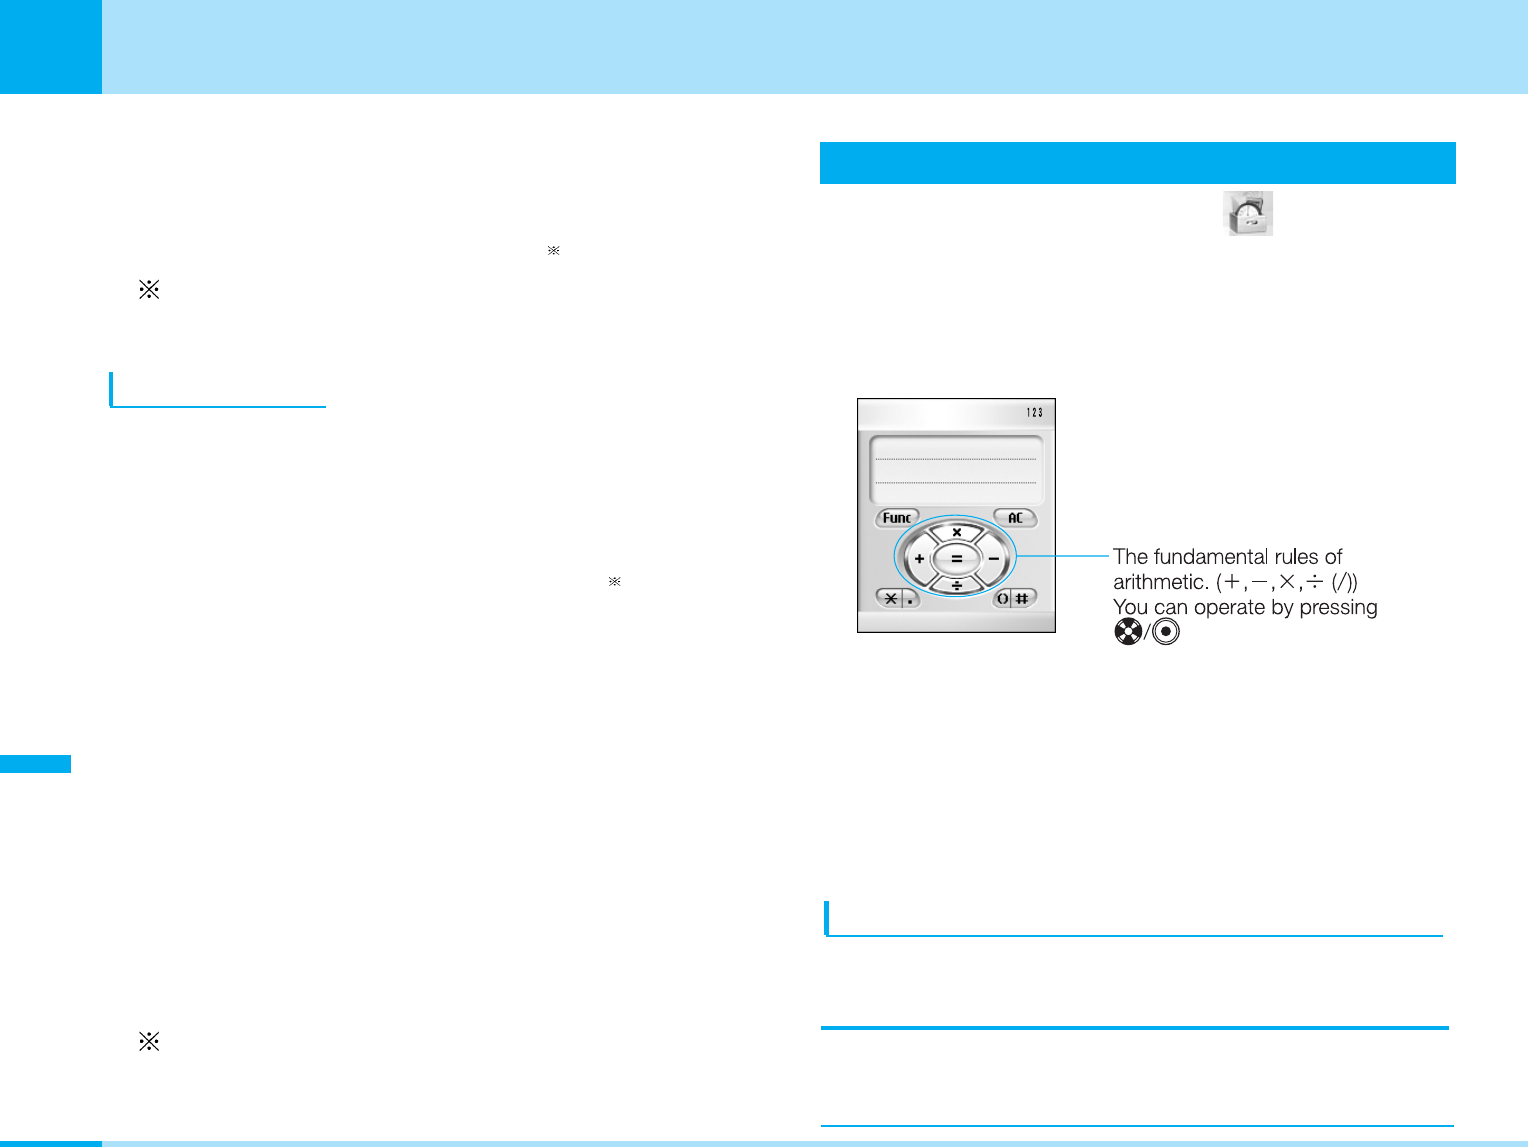
184
Tools
Tools
2. Make sure that the receiving end is ready for
receiving the data
]
“Yes”
• When sending all items, enter a terminal security code
(P104) and authentication password .
: Enter the same password as that entered from the
receiver's terminal.
Receiving Data
1. Select “Receive Ir data” from Tools menu (P179)
2. Perform sending operation on sender's terminal
3. “Receive”/“Receive all”
]
“OK”
• When receiving all items, enter a terminal security
code (P104) and authentication password .
• When receiving 1 bookmark, confirm a bookmark
registration screen displayed and press I[Done].
• The Phonebook will be registered to the available
smallest memory number.
• The bookmark will be registered at the top of the
bookmark list.
• You can view a received phonebook by “Search
phonebook” (P66) and bookmark by “Bookmark”
(P121).
• If you remove the battery pack or turn off the handset
while receiving a bookmark via infrared communication
and receiving is interrupted, the bookmark received
before the interruption will not be saved.
: Enter the same password as that entered from the
sender's terminal.
Using Calculator
C](Tools) ]4
You can perform calculation such as addition, subtraction,
multiplication and division. Use the numeric buttons to
enter numbers.
1.
From the Tools menu (P179), Select “Calculator”
< Calculator screen >
•*: Used to enter decimal point.
•#: Used to enter the parenthesis.
•Q: Used to delete the number to backward from
the end.
•I[AC]: You can reset all the number and calculation.
Using the Function Menu of the Calculator Display
1.
From the Calculator display (
See above
), M[func]
]Select from the following function menu items
+/-
Switches between positive and negative numbers.
(period) Does not go to step 2.
=
func. AC
Calculator
185
Tools
Tools
sin
Used for calculation of trigonometric functions.
cos
Used for calculation of trigonometric functions.
tan
Used for calculation of trigonometric functions.
log
Used for calculation of logarithmic functions.
ln
Used for calculation of natural logarithms (the
logarithm assuming e as the base) of the specified
positive number.
exp
Used for calculation of exponential functions.
sqrt
Used for calculation of square roots (root).
deg
Specifies the unit of angle to “degree”.
rad
Specifies the unit of angle to “radian”.
Radian expresses the angle in constant number n (n
radian equals to 180 degree). 1 radian (360
degree/2/) equals to approx. 57.29578 degree, 1
degree (2//360 degree) equals to approx. 0.01745
radian (/=3.141592653).
(Step)
2.
Enter the number ]M[=]
Using Unit Converter
This is a useful function to convert currency, surface,
length, weight, temperature, volume, and velocity.
Converting Unit of Currency
C](Tools) ]51
This is a useful function for converting the yen on hand to
the dollar, etc.
Setting at purchase >P242, P243
1. From the Tools menu (P179), “Unit converter” ]
“Currency”
• The screen for converting a currency is displayed.
(P186)
2. Select the currency ]I[Rate]
<Currency Unit Conversion>
Currency unit filed
Value entry field
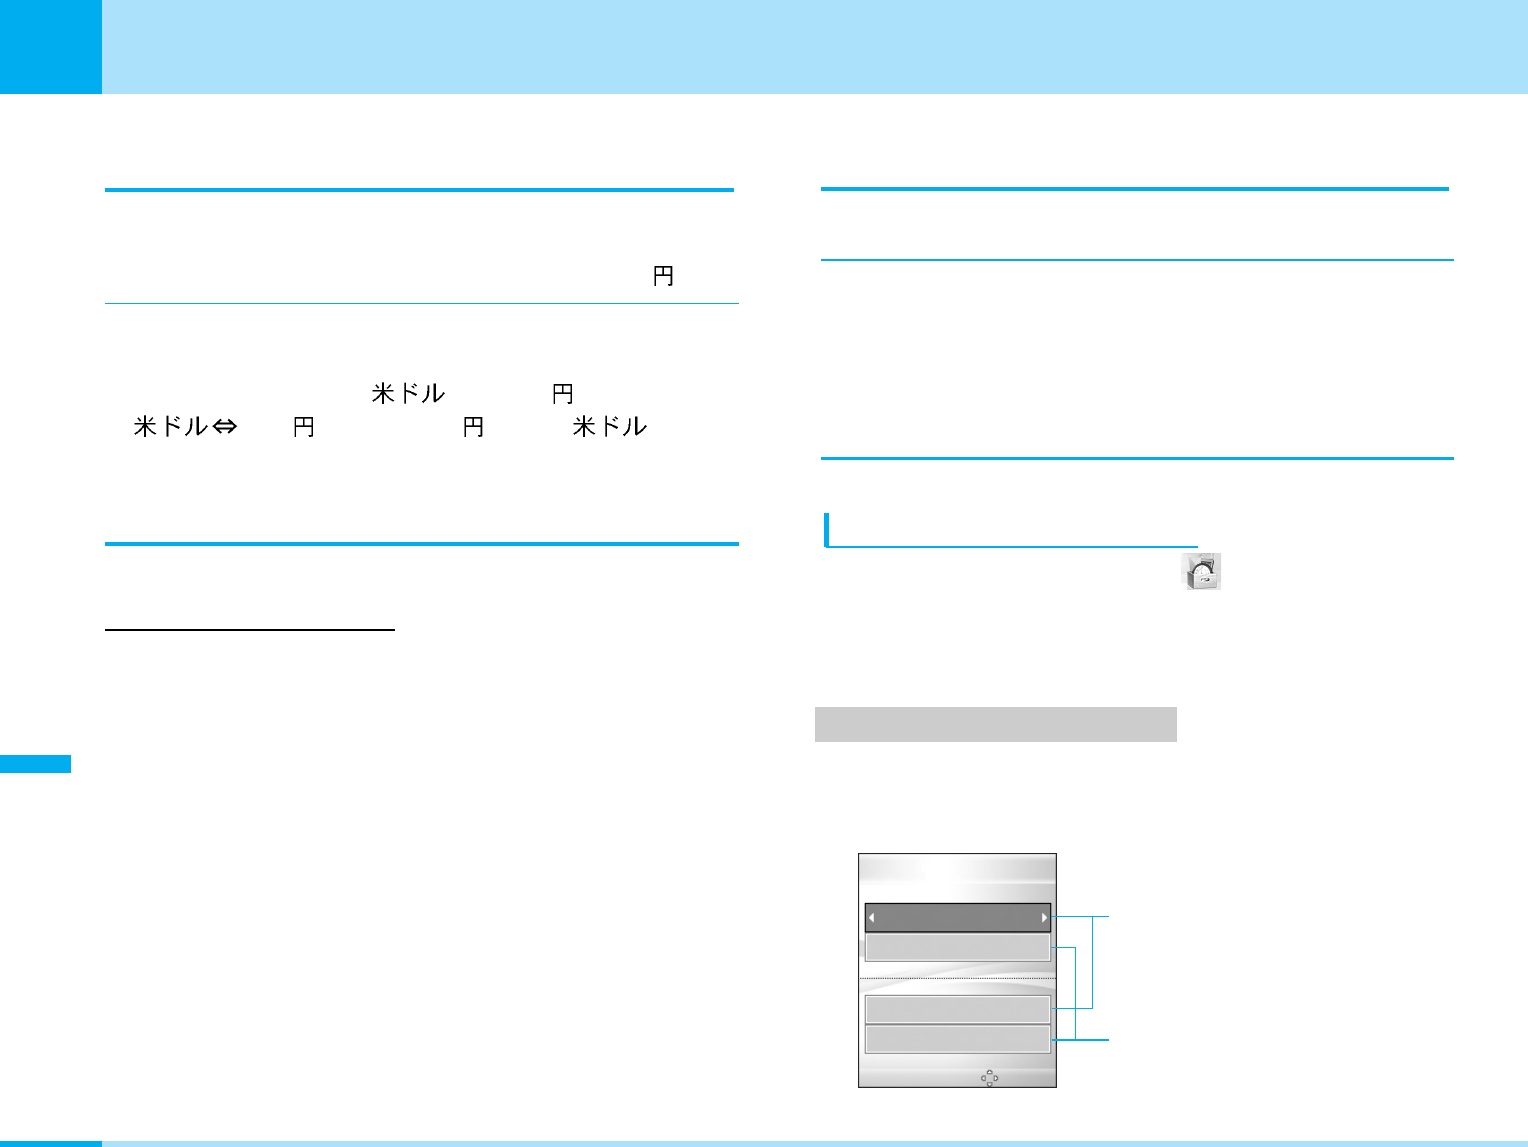
186
Tools
Tools
3. Select next item ]After setting, press I[Done].
Currency unit field
Select the unit of the currency. If you press C, you can
edit the currency. However, you cannot change “ ”.
Value entry field
You can set the currency exchange rate. For example, in
case you convert from (Dollar) to (Yen) (Ex. 1
120 ), you can set to 120, to 1.
•#: Enters the decimal point.
•Q: Deletes the number you entered from the
end.
Converting the currency
Converts a currency that exchange rate is set to another
currency. You can enter the currency whichever field to
convert. The value after conversion is displayed in the
other field.
1. “Unit converter” from “Tool”(P179) ]“Currency”
<Currency conversion display>
2. Select next item.
Currency unit field
You can select the unit before / after conversion.
Exchange rate entry field
Enter the amount of the currency to convert. The amount
after the conversion is displayed in the other field.
•#: You can enter decimal point.
•Q: Deletes the character you entered from the end.
•I[Reset]: You can reset all the number you entered.
Converting Unit of Surface
C](Tools) ]52
You can change the unit of surface. You can enter the
unit in up / down field to enter. The number after the
conversion is displayed in the other field.
Setting item/Setting at purchase >P243
1. From the Tools menu (P179), “Unit converter” ]
“Surface”
• The Surface Unit Conversion display appears
<Surface Unit Conversion>
Surface unit field
Value entry field
List
Surface
Acre
Hectare
0
0
187
Tools
Tools
Surface unit field
You can select the unit of surface before/after
conversion.
Value entry field
Enter a numerical value of the surface to be converted.
The number after the conversion is displayed in the
other field.
•#: Enters the decimal point.
•Q: Deletes the number which you already
entered from the end.
•I: [Reset]: The numerical value is reset.
• The maximum input value is an integer of 10 digits
and 8 digits after the decimal point. However, when
you input an actual number, the maximum input
value is 10 digits including the decimal point.
• The maximum output value is an integer of 10 digits
and 6 digits after the decimal point. However, it will
be the value rounded off to six decimal places.
Converting Unit of Length/Weight/
Temperature/Volume/Velocity
C](Tools) ]53~7
Setting item/Setting at purchase >P243,P244
1. From the Tools menu (P179), “Unit converter”
]“Length”/“Weight”/“Temperature”/“Volume”/“Ve
locity”
• For the subsequent operations, perform the same
operations as “Converting Unit of Surface” (P186).
Using World Time
C](Tools) ]6
You can check the date and time of major cities in the
world.
The time of city “Home” is set to the time of “Setting
date/time” (P95).
1.
From the Tools menu (P179), “World time”
<World Time>
•C[List]: You can select a city by displaying the city
list.
2. Use Jto select a city to be checked
•I[Set]: The selected city is set as Home.
The city name and time
which are checked
188
Tools
Tools
Using the Submenu of the World Time Display
Setting item/Setting at purchase >P244
1. From the World time display (P187),
M[Menu]
]
Select from the following Submenu items
Choose city
You can choose a city. After choosing, press C.
Set time zone
Sets the selected city to home.
: This menu is not displayed if you select the city as a home.
Using Stop Watch
C](Tools) ]7
You can use the FOMA phone as a stop watch.
1. From the Tools menu (P179), Select “Stop watch”
•C[Go]/[Stop]: You can start or stop measuring.
•I[Reset]: You can reset the result of measuring.
• During measuring, you can do the following
operations.
–I[Lap]: The lap time is recorded and displayed at
the bottom of the display.
–M[Detail]: You can view the list of the lap records.
189
Using Schedule....................................190
Using Memo.........................................193
Using Date Search...............................194
Using Date Counter .............................195
Stationery
On the Stand-by display, C[Menu] ]
(Stationery) or “Stationery”
To display the Stationery menu
1 Scheduler
2 Memo
3 Date search
4 Date counter
Select
Stationery
Select
Stationery
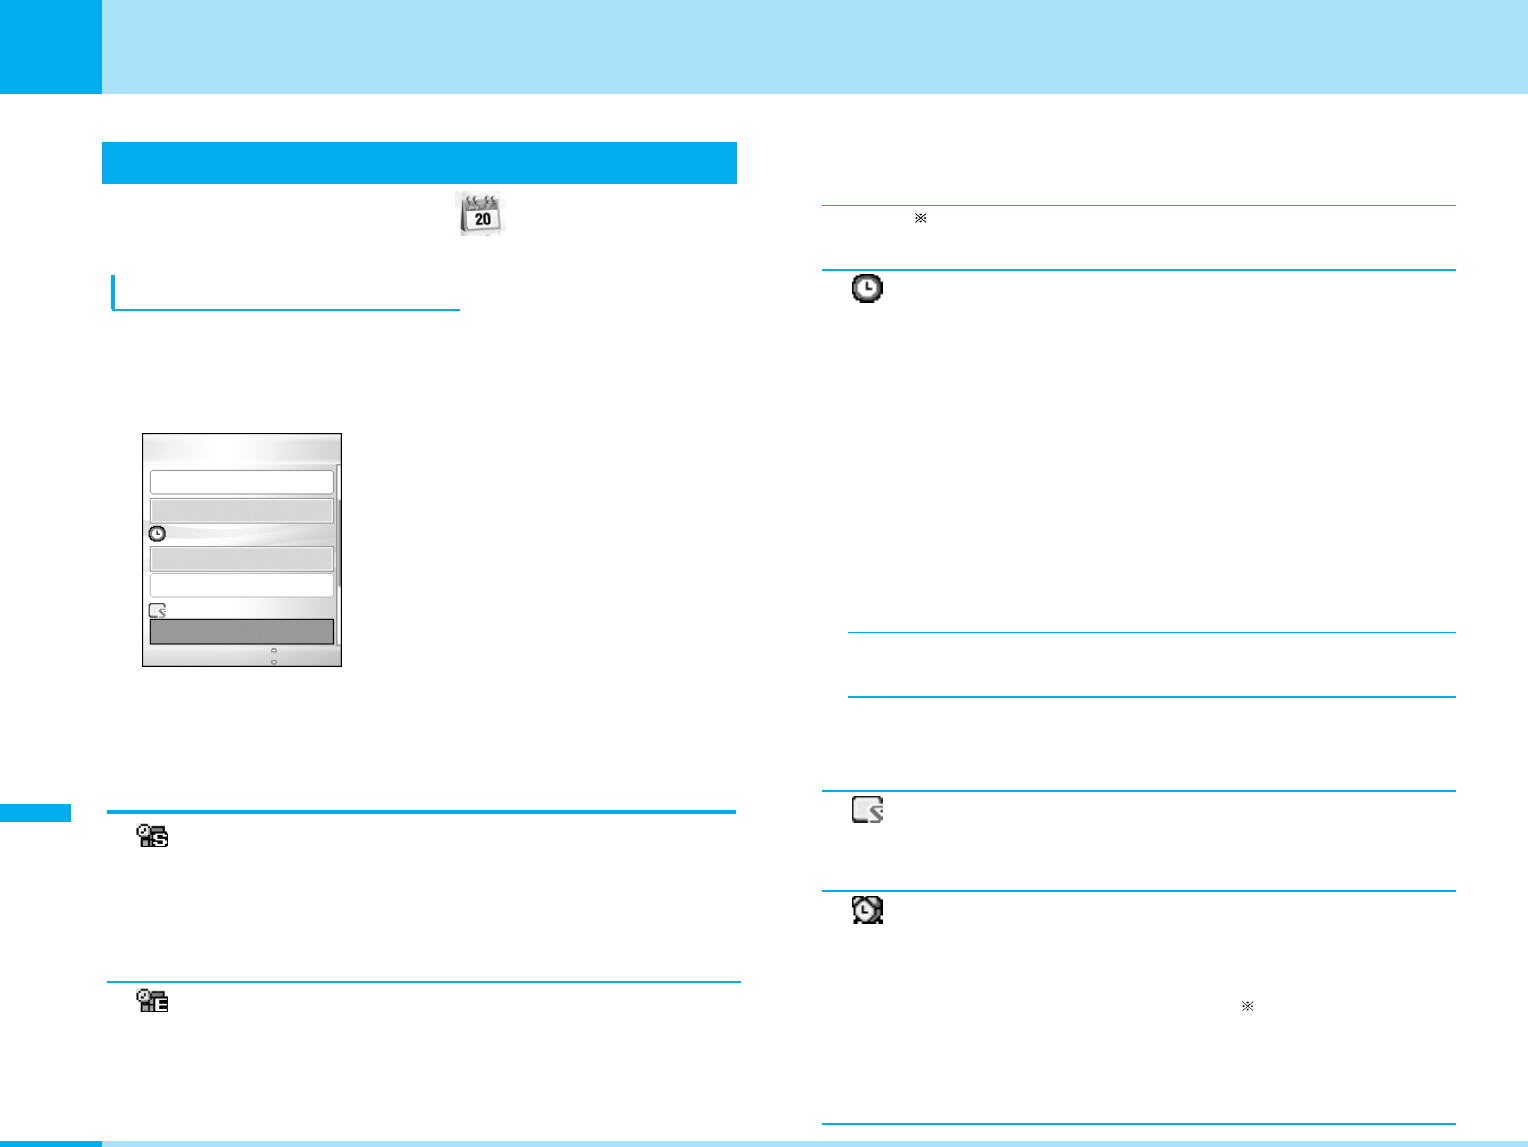
190
Stationery
Using Schedule
C](Stationery) ]1
Storing Schedule Events
1. From the Stationery menu (P189), “Scheduler”
• The monthly display (P191) appears.
2. Select a date to store a schedule event. ]I[Add]
<Add new schedule display>
3. Select from the following items to store ]After
storing, I[Done]
Start date
You can set a date to start the schedule event. You
can enter a date by pressing Rand dial buttons. You
can select a date from the calendar display by
pressing C.
End date
You can set a date to end the schedule event. You can
enter a date by pressing Jand dial buttons. You can
select a date from the calendar display by pressing C.
When the “Start date” and the “End date” are different,
set the “End date” later than the “Start date”.
None 1(Schedule type)
You can set a type of the schedule event.
Time
You can set time to start and end the schedule event.
• You cannot set the starting time and the ending time of
one event on different days. For example, if you want to
set the starting time to 22:00 of the starting day and set
the ending time to 9:00 of the following day, you should
set two events, 22:00 to 23:59 on the starting day and
00:00 to 9:00 on the following day.
• Regardless of the number the days till the ending, the
ending time cannot be set earlier than the starting time
of the starting day.
–All day: The schedule event is stored as an all-day
event.
–Set time: You can set time to start and end the
event by selecting the time field. You can enter the
time using Jand dial buttons.
Subject
You can set a subject of the schedule event. You
cannot store the event without entering a subject.
Alarm
You can set whether or not to be notified by an alarm
when the date and time specified in “Start date” and
“Time” come. You can select a melody 1when the alarm
function is set to other than “No alarm”.
• You can select the menu from “Melody” of “Data box”.
>P176
Edit
Add new
2006/12/01 (Fri)
None
Time
Subject
All day
00:00 ~ 23:59
Done
Stationery

191
Stationery
Next Page
Stationery
Repeat 2
You can set the repeat setting for the schedule event.
If you do not want to repeat it, select “Once”
1: The content you have set is displayed.
2: If “Start date” and “End date” are different, you can use only
“Once”.
Information
• You can save up to 200 schedules and up to 100 holidays.
• When the specified time of a schedule event setting by alarm
comes, the display to notify it appears.
–C[OK]: After stopping the alarm, you can view the time and
the subject of schedule. If you press Cagain, the alarm will
be released.
–I[Snooze]: You can set the snooze.
• As for the operation of alarm setting during a call or taking a
photo, see “When the Specified Time Comes” (P180).
Checking Schedule Events
1.
From the Stationery menu (P189), “Scheduler”
<Monthly Display>
•13: You can move the year of date.
•79/FE: You can move the month of date.
•5: You can move the cursor to the current date .
•I[Add]: You can add your own schedule.
Go to step 3
on page 190 of “Storing Schedule Events”.
2. Select a date in which a schedule event is stored
]C
<Daily Display>
•I[Add]: You can add your own schedule.
Go to step 3
on page 190 of “Storing Schedule Events”.
•J
: Displays the schedule of previous and next day.
3. Select a schedule event ] C
<Display>
Edit Delete
View (20/23)
10 : 00am ~ 11 : 00am
Alarm01.mid
2006/06/01 (Thu)
None
Umbrella
No alarm
Once
The number of schedule events stored
in the date on which the cursor is placed.
The date registered the schedule
is underlined.
Select AddMenu
Tu We Th Fr Sa SuMo
3
2006 June
DescriptionIcon
Sets the alarm setting
Sets the repeat setting
DescriptionIcon
Start date of schedule
End date of schedule
The type of schedule
Holiday
Alarm

192
Stationery
Stationery
• For other icons, see page 190.
•C[Edit]: You can edit the selected schedule. Go to
step 3 on page 190 of “Storing Schedule Events”.
•I[Delete]: You can delete the selected schedule.
•J: Displays the previous and next schedule.
Using the Submenus of the Monthly Display
1.
From the monthly display (P191),
M
[Menu] ]Select
from the following submenu items.
Add new
You can add a new schedule event. See step 2
(P190) of “Storing Schedule Events”.
Open
You can see the details of the schedule events of the
selected date (Daily display).
Set holiday
You can set the selected date to holiday. After
entering the holiday name, press I[Done]. The
setting date is marked in red color on Monthly view.
–On the day: Enter the holiday name and set the
selected date as a holiday.
–Weekly: Enter the holiday name and set the selected
day of the week as a holiday for every week.
–Monthly: Enter the holiday name and set the
selected date as a holiday for every month.
–Annually: Enter the holiday name and set the
selected date as a holiday for every year.
–Duration (2~31): Enter the holiday name and set
the holiday period.
Go to date
The cursor is moved to the specified date. You can
enter a date by pressing Jand dial buttons.
Delete
–Holiday: All the schedule events set as holidays are
deleted.
–Old schedules: All the schedule events stored for
up to the preceding day of the selected date are
deleted.
–Current day schedules: The schedule events of
the selected date are deleted.
–Current week schedules: All the schedule events
of the selected week are deleted.
–Current month schedules: All the schedule events
of the selected month are deleted.
–All schedules: All the schedule events are deleted.
Calendar Type
–Sunday first: Display a calendar with weeks
beginning with Sunday.
–Monday first: Display a calendar with weeks
beginning with Monday.
: You cannot the menu if select the date which you've already set
“Set holiday”.
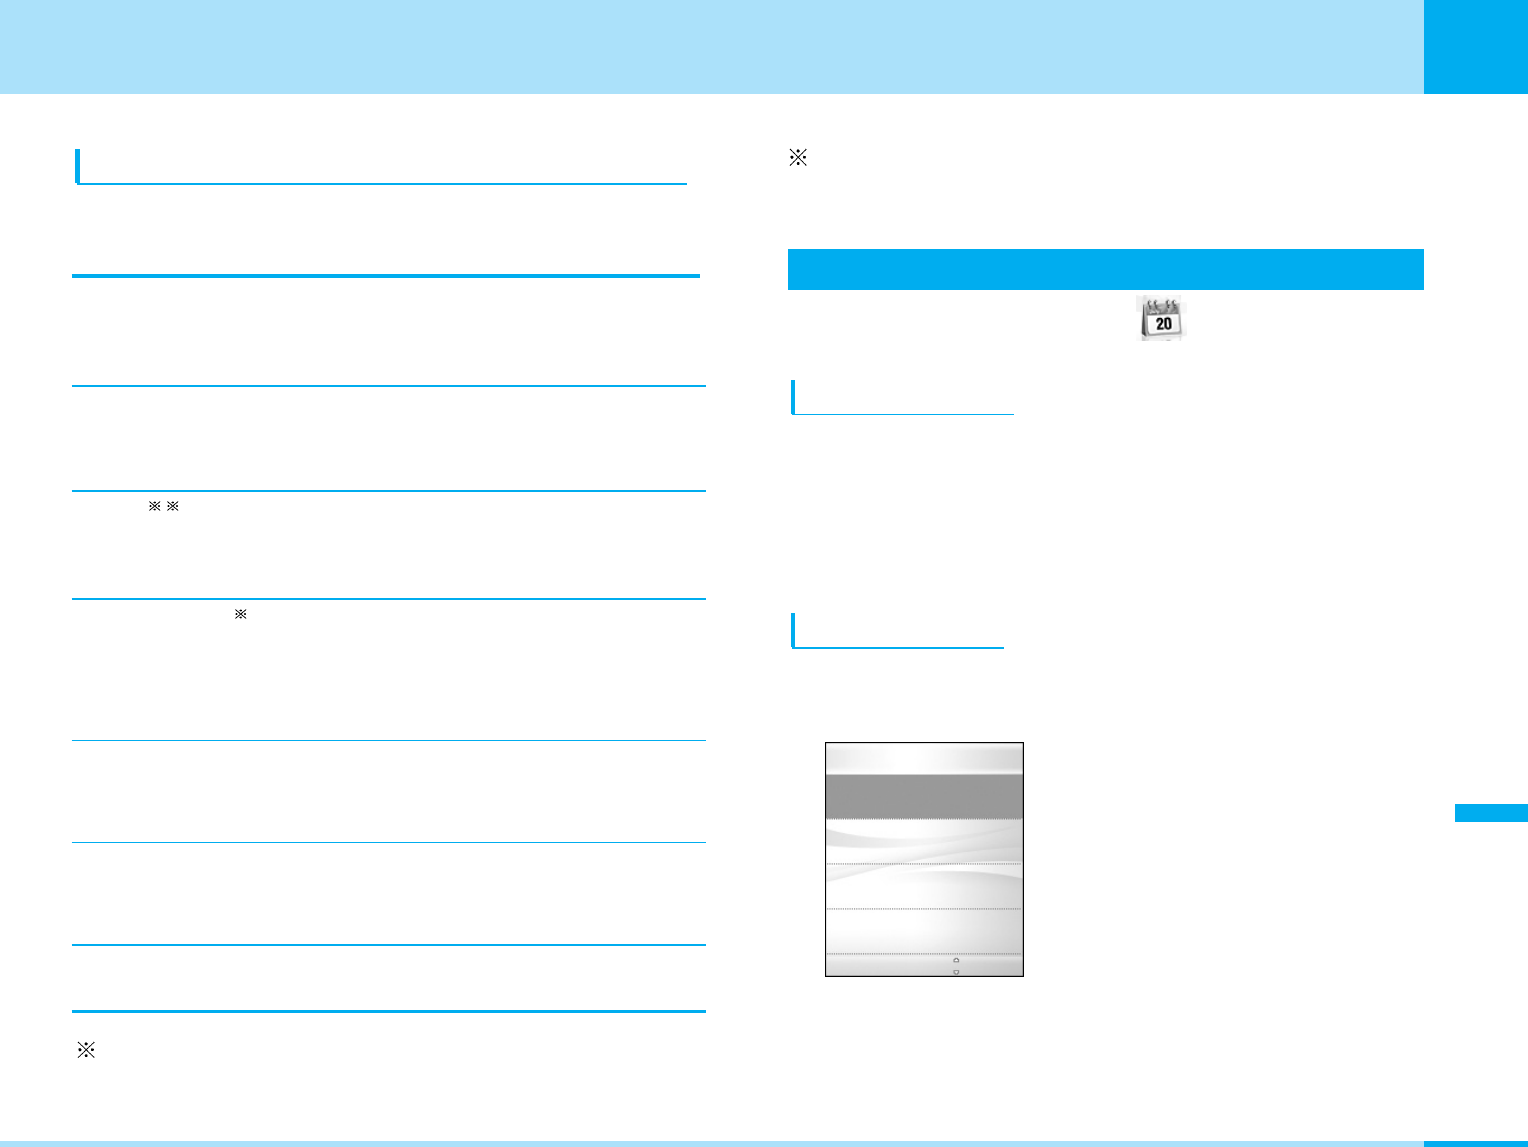
193
Stationery
Stationery
Using the Submenus of the Daily Display Screen
1. From the Daily display screen (P191), M[Menu] ]
Select from the following Submenu items
Add new
You can add a new schedule event. See Step 3
(P190) of “Storing Schedule Events”.
Open
The details of the selected schedule event (Display
screen) are displayed.
Edit 1 2
You can edit the selected schedule event. See Step 3
on page 190 of “Storing Schedule Events”.
Set holiday 2
You can set the selected date as a holiday. See
“Holiday settings” of “Using the Submenus of the
Monthly Display Screen” (P192) for the setting items.
Mark/Unmark
You can delete after selecting multiple schedules.
After selecting, press I[Delete].
Go to Date
Displays the schedule you set. You can enter a date
by pressing Jand dial buttons.
Delete
You can delete schedule events.
1: You cannot use this menu when you select the date which is
already set as the holiday by “Set holiday”.
2: You cannot use this menu when you select the daily display of
the date which is already set as the holiday.
Using Memo
C](Stationery) ]2
Creating Memo
You can create and save a memo.
1. From the Stationery menu (P189), “Memo”
• The memo display (See right) appears.
2. I[Add] ]Enter a memo ]C
Viewing Memo
You can view the memo that you created.
1. From the Stationery menu (P189), “Memo”
<Memo>
2. Select a memo to view ]C
•
The screen will be displayed.
Select Add
Memo (1/2)
2006/06/01 (Thu)
Meeting June 1
2006/06/01 (Thu)
Video-phone call
Menu
194
Stationery
Stationery
•C[Edit]: You can edit the displayed memo.
•I[Delete]: You can delete the displayed memo.
•J
: Displays the previous and next memo.
Using the Submenus of the Memo Display/
Display Screen
1. From the Memo display (P193)/Display screen, M
[Menu] ]Select from the following submenu items
Add new
You can create a memo.
Open
You can display the screen of the selected memo.
Edit
You can edit the selected/displayed memo.
Mark/Unmark
You can select and delete multiple memos. After
selecting, press I[Delete].
Delete
You can delete the memo selected or displayed
memo.
: This menu is not displayed in submenus of the displayed screen.
Using Date Search
C](Stationery) ]3
You can search for the number of days (target date) after a
specified period from a specified date. For instance, you can
search for the date after 90 days from the current date for
convenience.
1.
From the Stationery menu (P189), “Date search”
]
Select from the following setting items
•I[Reset]: You can reset all setting values.
From
You can enter a date to start the search. Enter the
date using Jand the dial buttons.
After
You can enter the number of days. Use the dial
buttons to enter the number of days. For instance, if
you want to know the date after 90 days from the
“Start date”, enter 90.
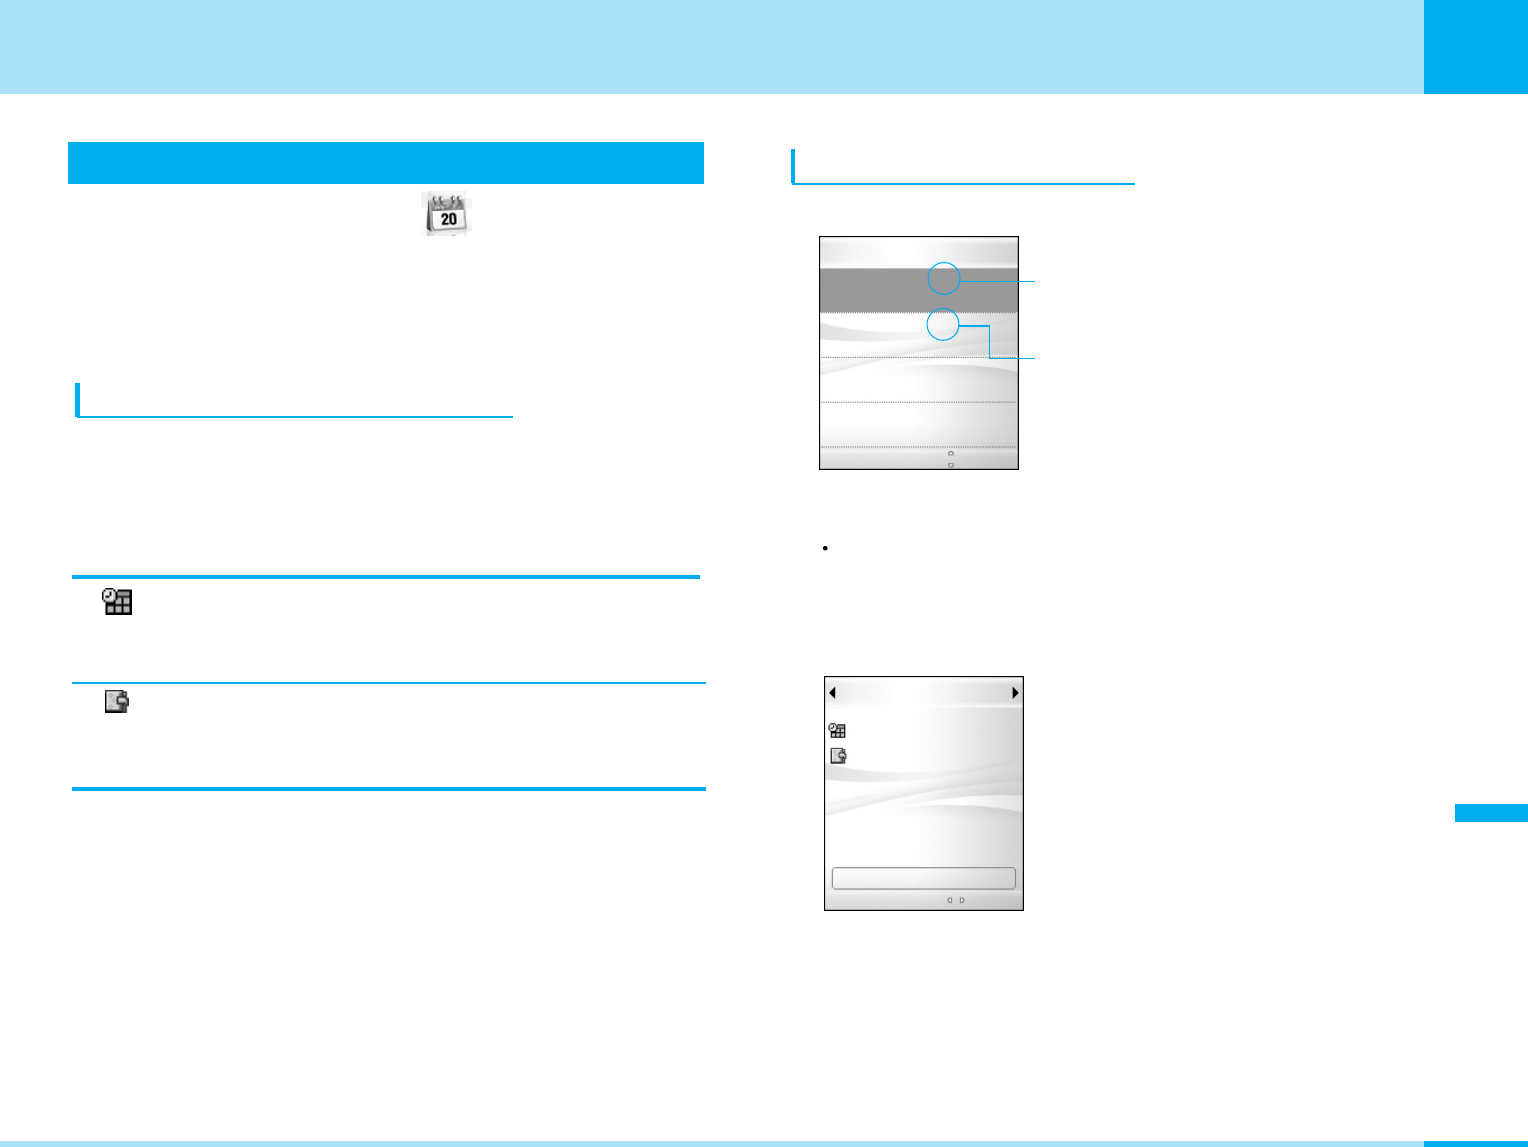
195
Stationery
Next Page
Stationery
Using Date Counter
C](Stationery) ]4
If you store the name and date of an event such as a
birthday, you can check how many days remain before
the event or how many days have passed after the event.
Storing Events in Date Counter
1. From the Stationery menu (P189), “Date counter”
• The Date counter display (P187) appears.
2. I[Add] ]Select from the following setting items
]After setting, I[Done]
(Date)
You can set the date of an event. Enter the date using
Jand the dial buttons.
(Memo)
You can enter a memo. You cannot set without
entering.
Displaying Date Counter
1. From the Stationery menu (P189), “Date counter”
<Date Counter>
I[Add]: You can compose the date counter.
Go to step 2 (See above) of “Storing Events in Date
Counter”.
2. Select a date counter ]C
<Display Screen>
•C[Edit]: You can edit the selected date counter.
Go to step 2 (P195) of “Storing Events in Date
Counter”.
•I[Delete]: You can delete the selected daily counter.
Edit Delete
View (1/2)
2006/05/31 (Wed)
D-day : -1
Meeting
Menu
Select
Menu Add
Date counter (1/2)
Meeting
- 1
2006/05/31
Destination
+16
2006/06/17
– before a number: The number of days
before the specified date
+ before a number: The number of days
after the specified date

196
Stationery
Stationery
•J: Displays the date counter of previous and next
day.
Using the Submenu of the Date Counter
Display/Display Screen
1. From the Date counter display (P195)/display
screen (P195), M[Menu] ]Select from the
following submenu items
Add new
You can store an event to the date counter. See
Step2 (P195) of “Storing Events in Date Counter”.
Open
You can view the selected date counter.
Edit
You can edit the selected or displayed date counter.
See Step2 of “Storing Events in Date Counter”.
Mark/Unmark
This function is used when you select and delete
multiple date counters. After selecting, press I
[Delete].
Delete
You can delete the selected or displayed date
counter.
: This menu is not displayed in submenus of screen.
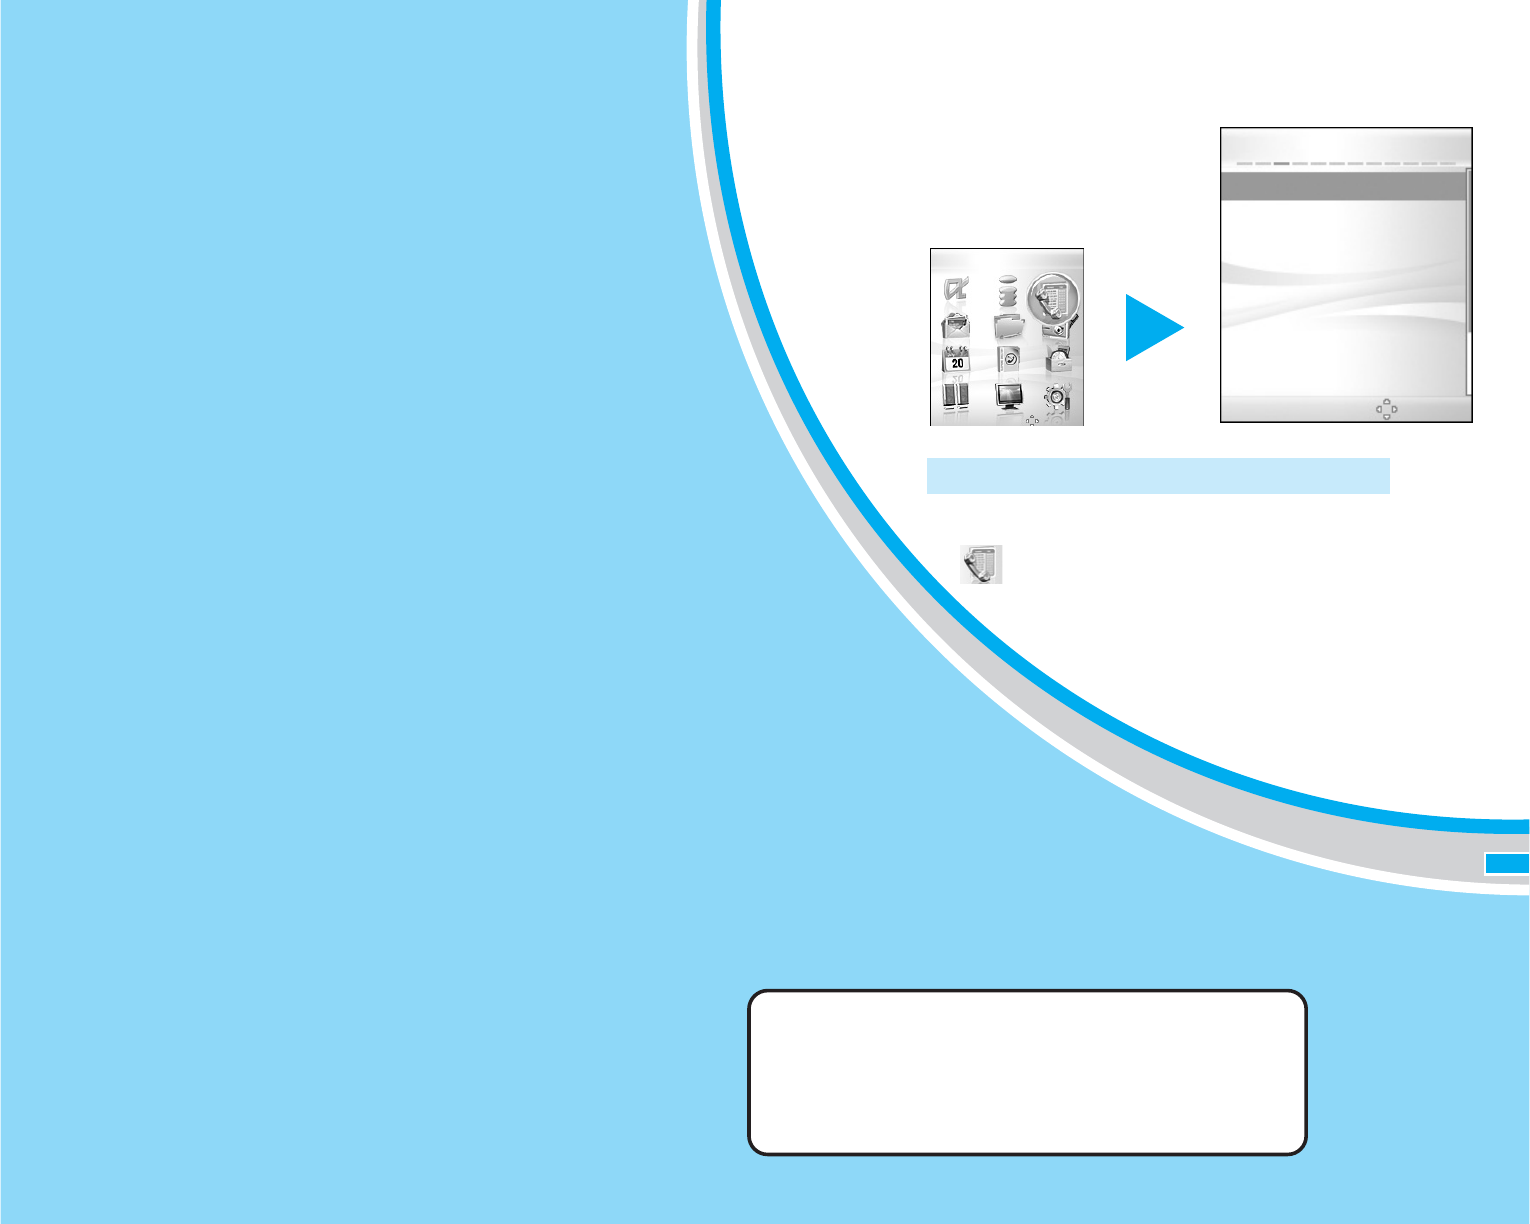
197
Available Network Services .................198
Using Voice Mail ...................................198
Using Call Waiting Service...................200
Using Call Forwarding Service.............201
Using Nuisance Call Barring Service...202
Using Caller ID Notification Service ....202
Using Caller ID Request Service..........203
Using Set Arrival Act ............................203
Selecting Arrival Call Act......................203
Setting Remote Control........................204
International Roaming Service.............204
Registering Additional Services...........205
Registering Additional Guidance .........206
Using English Guidance .......................206
Using Service Dialing Number .............207
Using Call Barring.................................207
Network Service
On the Stand-by display, C[Menu] ]
(NW service) or “NW service”
To display the Network service menu
Select
NW service
1 Voice mail
2 Call waiting
3 Call forwarding
4 Nuisance call barring
5 Caller ID notification
6 Caller ID request
7 Set arrival act
Select
NW service
In this manual, the outline of the network service is
explained by the method of using the FOMA
handset menu. For details, refer to “Network
Services User's Guide”.
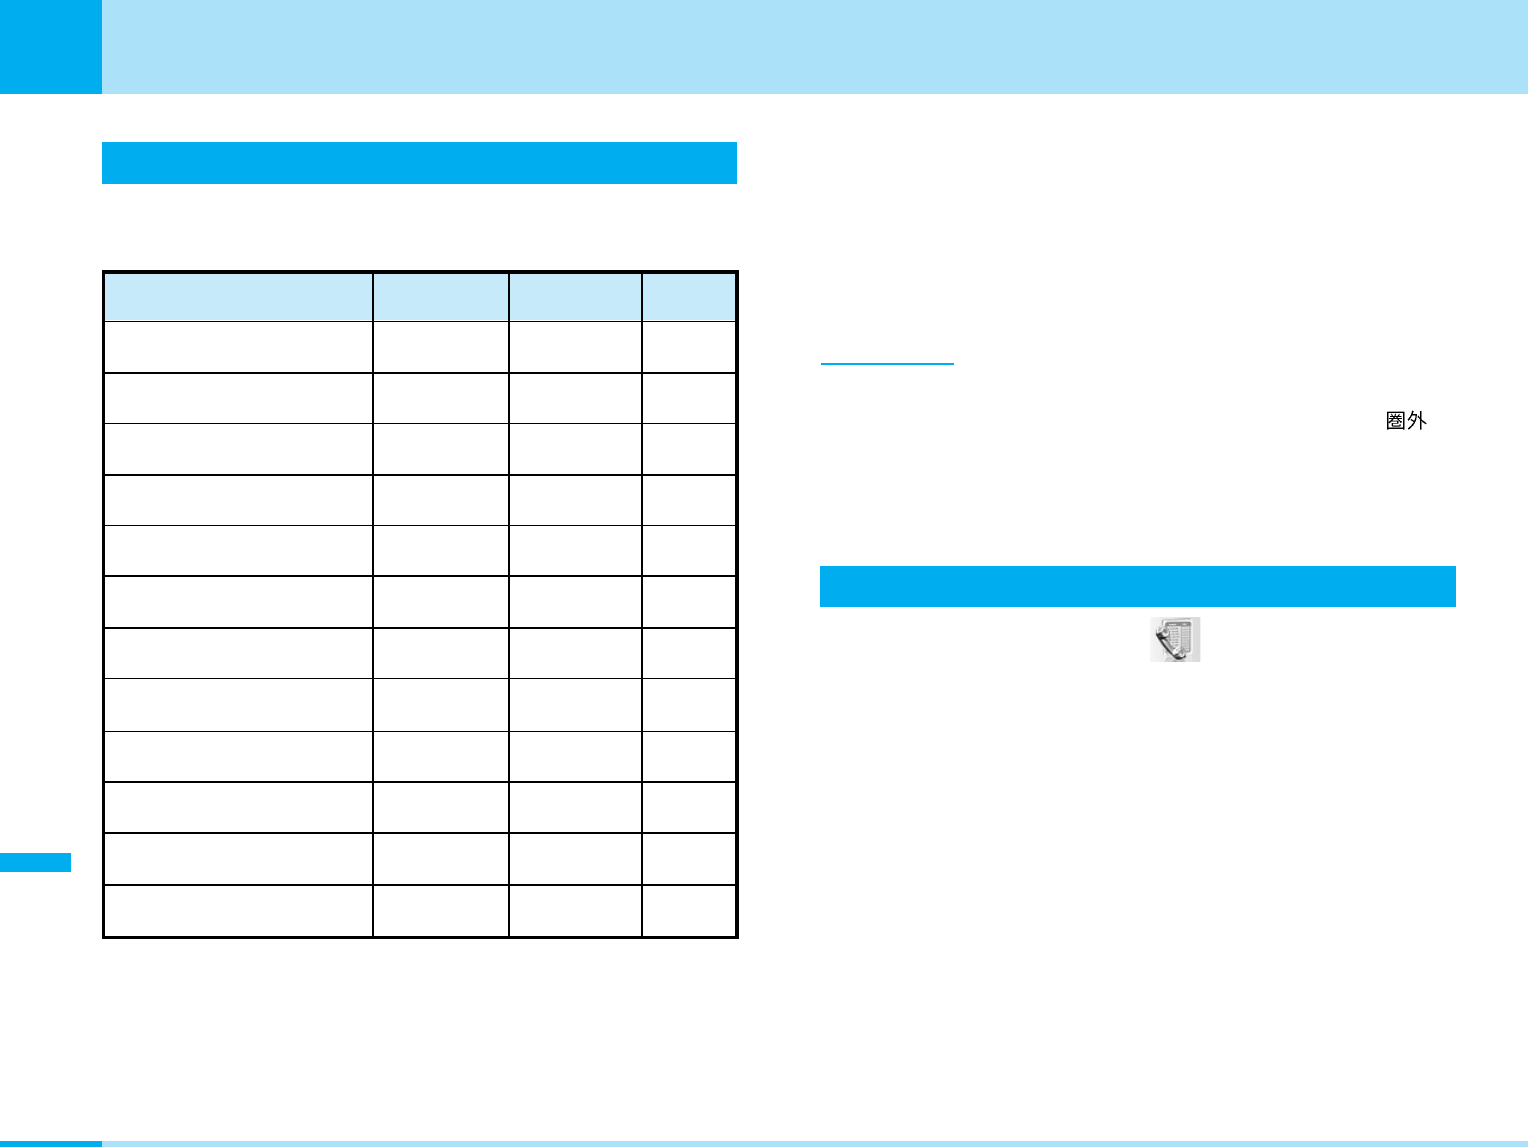
Available Network Services
With FOMA phone, following DoCoMo Network Services are
available.
• In this manual, the summaries each network service are
explained in the ways using the menu of the FOMA
phone. For detail, see “Mobile Phone User's Guide
[Network services]”.
• This FOMA phone is not applicable to all the services
described in “Mobile Phone User's Guide [Network
services]”.
• Contact “DoCoMo Information Center” on the back of
this manual for application or inquiry.
Information
• The Network Services that are operated by connecting to the
Network Service Center are not available when When “ ” is
displayed on your handset.
• You can register newly provided network services when
additionally provided by DoCoMo. >P205
Using Voice Mail
C](NW Service) ]1
When you are in an area where radio waves do not reach,
when you turn off the FOMA phone or when you cannot
answer the call, this service answers to the party who
made a voice/video-phone call to you, and the Voice Mail
Center holds voice mail messages for you.
•
When you did not answer a voice call or video-phone call
that came in while Voice Mail is activated, it is recorded to
the received call history as a missed call and a screen
notifying a missed call appears.
•
This handset is not applicable to Voice Mail (Video-phone
call). Make a voice call to “1412” (free) and set not to be
applicable to video-phone call.
198
Network Service
Network Service
Service
Reference
Monthly feeApplication
Voice Mail
See right
ChargedRequired
Call Waiting Service P200ChargedRequired
Call Forwarding Service
P201FreeRequired
Nuisance Call Barring Service
P202FreeRequired
P203Free
Not required
Caller ID Notification Service
P202Free
Not required
Remote control
Not required
Free P204
International roaming service Not required
Free P204
English Guidance
Not required
Free P206
Service Dialing Number
Not required
Free P207
Caller ID Request Service
Public mode (power off)
Not required
Free P54
Public mode (drive mode)
Not required
Free P51
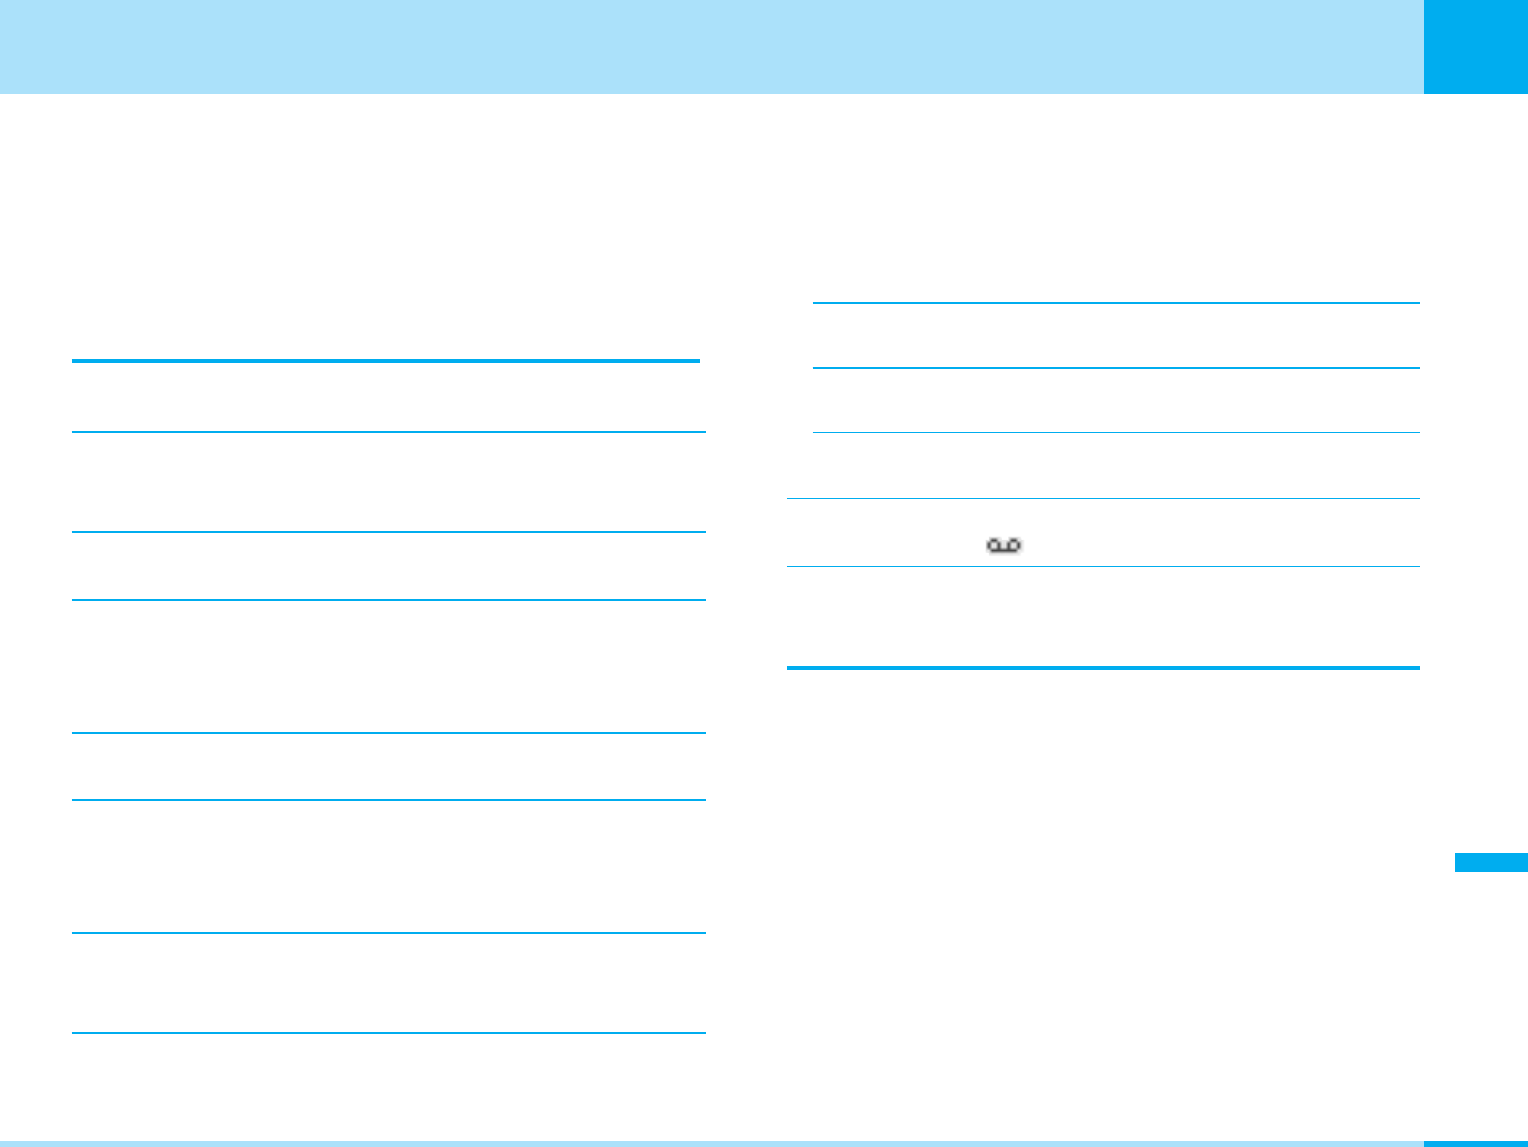
199
Network Service
Network Service
•
If a call comes in from a caller not notifying caller ID with
“Caller ID request” activated, the Caller ID Request
guidance is played back and the center will not hold
voice mail messages.
1. From the Network Service menu (P197), “Voice
mail” ]Select from the following setting items
Activate voice mail
You can start using Voice Mail.
Set ringing time
You can set the time from the first ring until the call is
connected to the Voice Mail Service Center. (period)
Deactivate voice mail
You can stop using Voice Mail.
Voice mail status request
You can check the current settings of Voice Mail
Service. If you press M[Menu], you can start/stop the
service of voice mail or set the length of ringing time.
Play messages
You can play back recorded Voice Mail messages.
Voice mail setting
You can connect to the Voice Mail Service Center to
change the settings of Voice Mail by following the
voice guidance.
Check messages
You can check whether or not new messages are
recorded.
Notify missed call
If the FOMA phone is turned off or out of the service
area, you are informed by SMS (Short Message Service)
of missed calls when the FOMA phone is turned on or in
the service area again.
–Activate missed call notification: You can start
using Missed Call Notice Service.
–Deactivate missed call notification: You can
stop using Missed Call Notice Service.
–Missed call notification status request: You can
check the settings of the Missed Call Notice Service.
Delete voice mail icon
You can delete displayed in the icon view area.
Set message alert ringer
You can set the ring tone to sound when a new
message is recorded.
200
Network Service
Network Service
Using Call Waiting Service
C](NW Service) ]2
When you receive another voice call during a call, you will
be notified of it by busy ring tone, and you can put the
current call on hold to answer the new call. You can also
newly make a call to another party by putting the current
call on hold.
• To use Call Waiting Service, set “Arrival Call Act” (P203)
to “Answer” beforehand. If this is set to another setting,
you cannot answer the incoming voice call while you are
performing a voice call even if you start Call Waiting
Service.
• When using Call Waiting, set “Arrival call act” to
“Answer”. >P203
•
If a call comes in from a caller not notifying caller ID while
Caller ID Request Service is set to “Activate caller ID
Request”, the Caller ID Request guidance is played back
and Call Waiting is not available.
• When a video-phone call comes in during a voice call, or
a voice call comes in during a video-phone call, Call
Waiting does not work. The second call is recorded as a
missed call in Received Calls.
1. From the Network Service menu (P197), “Call
waiting” ]Select from the following setting items
Activate call waiting
You can start using Call Waiting.
Deactivate call waiting
You can stop using Call Waiting.
Call waiting status request
You can check whether the Call Waiting is activated
or deactivated.
Submenus on using Call Waiting Service
• Press to view the submenu.
aWhen a new call comes in during a call
Voice mail 1
When a new call comes in, the caller can connect the
voice mail center.
Call rejection
You can reject a call without receiving.
Call forwarding 2
You can forward the incoming call to the forwarding
destination you have registered beforehand.
End active call
You can answer a new call after disconnecting the
current call.
Mute/Unmute
The voice to send to the other party is set to mute or
unmute.
1: You can use the voice mail when you have signed up this
service. See “Using Voice Mail” (P198) for details.
2: You can use the call forwarding service only when you have
signed up this service. See “Using Call Forwarding Service” on
the next page.
201
Network Service
Network Service
aWhen you are talking with a party while a call to
another party is put on hold (Multi call).
Switch
Put the current call on hold to enable talking with
another party on hold.
End
–End active call: After ending a call, you can take
the new call on hold.
–End held call: You can end a call on hold.
–End all calls: You can end both calls.
Mute/Unmute
The voice to send to the other party is set to mute or
unmute.
Using Call Forwarding Service
C](NW Service) ]3
This is a service to forward a voice call/video-phone call
when you are in an area where radio waves do not reach,
you turn off the handset or you did not answer within the
set ring time.
•
When you did not answer a voice call or video-phone
call that came in while Call Forwarding Service is
activated, it is recorded to the received call history as a
missed call and a screen notifying a missed call appears.
•
If a call comes in from a caller not notifying caller ID while
Caller ID Request Service is set to “Activate caller ID
Request”, the Caller ID Request guidance is played back
and the call is not forwarded.
• Call Forwarding Service will be automatically deactivated
if “Voice Mail” is set to “Activate Voice mail”.
• This service is not available with some billing plans.
1. From the Network Service menu (P197), “Call
forwarding” ]Select from the following setting
items
Activate call forwarding
You can start using Call forwarding Service.
–Register fwd number: You can register the phone
number of the forwarding destination. If you press
M[Search], you can search for phonebook.
–Set ringing time: You can set the time from the
first ring until the call is forwarded.
Deactivate call forwarding
You can stop using Call forwarding Service.
Register the forwarding number
You can change the phone number of the forwarding
destination. If you press M[Search], you can search
for phonebook.
Setting at forwarded party busy
You can set an incoming call to be connected to the
Voice Mail Service Center if the forwarded destination
is busy.
Call forwarding status request
You can check the current setting status of Call
Forwarding Service.
202
Network Service
Network Service
Setting to enable or disable call forwarding guidance
Press 1429A.
• Make settings following the voice guidance.
• For details, see “Mobile Phone User's [Network
services]”.
Using Nuisance Call Barring Service
C](NW Service) ]4
This is a service to reject "Nuisance calls" such as prank
calls. If you register a caller to reject, calls from the caller
will be automatically rejected and the caller will be
answered by the guidance.
• Even if a call from a caller who is registered to be
rejected, the ring tone will not sound, and the call will not
be recorded in the received call history.
1. From the Network Service menu (P197),
“Nuisance call barring” ]Select from the
following setting items
Register nuisance caller
You can register the phone number of the call that
you answered the last for rejection.
Delete all entries
All the phone numbers registered for rejection are
deleted.
Delete most recent entry
You can delete the phone number registered last for
rejection.
Using Caller ID Notification Service
C](NW Service) ]5
You can notify your phone number to the other party
when making a call. When the other party's phone is the
digital terminal that supports caller ID, your phone number
appears on the other party’s phone.
• Your caller ID is important information, so take great
care to notify it.
1. From the Network Service menu (P197), “Caller ID
notification” ]Select from the following setting
items
Activate/Deactivate caller ID notification
You can display your phone number on the other
party's phone (display) when making a call. To use
this service, enter the Network Security Code.
Caller ID notification status request
You can check the current setting status of Caller ID
Notification.
203
Network Service
Network Service
Using Caller ID Request Service
C](NW Service) ]6
This is a service to request for the Caller ID notification by
guidance to the call from the party who does not notify
Caller ID, and terminate the call.
• A call that was not answered by Caller ID Request
Service will not be recorded in the received call history,
and the screen notifying of the missed call does not
appear.
1. From the Network Service menu (P197), Caller ID
request” ]Select from the following setting items
Activate caller ID request
You can start using Caller ID Request Service.
Deactivate caller ID request
You can stop using Caller ID Request Service.
Caller ID request status request
You can check the current settings of Caller ID
Request Service.
Using Set Arrival Act
C](NW Service) ]7
You can activate or cancel the arrival call act set by
“Selecting Arrival Call Act” (See right). You can view the
current settings.
1. From the Network Service menu (P197), “Set arrival
act” ]Select from the following setting items
Activate arrival act
You can start using the response you set in “Arrival
Call Act”.
Deactivate arrival act
You can stop using the response you set in “Arrival
Call Act”.
Arrival act status request
You can check the current settings of Set Arrival Act.
Selecting Arrival Call Act
C](NW Service) ]8
You can set how to react to a voice call/video-phone call
that comes to a customer who has subscribed to “Voice
Mail”, “Call Forwarding Service” or “Call Waiting Service”
while performing a call.
• If you have not subscribed to “Voice Mail”, “Call
Forwarding Service” or “Call Waiting Service”, you
cannot answer a call while performing a call.
• To use arrival act, set “Set arrival act” to “Activate arrival
act”.
Setting item/Setting at purchase >P237
204
Network Service
Network Service
1. From the Network Service menu (P197), “Arrival
call act” ]Select from the following setting items
Answer
The phone rings. If Voice Mail, Call Waiting Service, or
Call Forwarding Service is activated, the phone
follows each setting.
Voice mail
Connects incoming calls to Voice Mail. Even if Call
Waiting Service is activated, the calls are connected
to Voice Mail.
Call forwarding
Forwards incoming calls to the forwarding phone
number registered. Even if Call Waiting Service or
Voice Mail is activated, the calls are forwarded.
Call rejection
Rejects incoming calls.
Setting Remote Control
C](NW Service) ]9
This service allows you to operate “Voice Mail” or “Call
Forwarding Service” from touch-tone phones, public
phones or DoCoMo's cellular phones.
• To use “Voice Mail” or “Call Forwarding Service”
overseas, you need to set “Remote control” to “Activate
remote control” beforehand.
1. Select “Remote control” from Network Service
menu (P197) ]Select one of the following items to
be set
Activate remote control
Start remote control.
Deactivate remote control
Stop remote control.
Remote control status request
Check settings for remote control.
International Roaming Service
C](NW Service) ]0
This service allows you to use functions such as Voice
Mail and Call Forwarding Service while you stay overseas.
1. Select “International service” from NW service
menu (P197) ]Select one of the following items to
be set
Voice mail (Int.)
- Activate voice mail: Start Voice Mail.
- Deactivate voice mail: Stop Voice Mail.
- Play messages: Play recorded voice message.
- Voice mail setting: Check current settings of Voice
Mail.
205
Network Service
Next page
Network Service
Call forwarding (Int.)
- Activate call forwarding: Start Call Forwarding
Service.
- Deactivate call forwarding: Stop Call Forwarding
Service.
Roaming guidance (Int.)
Set roaming guidance.
Registering Additional Services
C](NW Service) ]*1
When a new network service is added by DoCoMo, you
can register the service to the menu and use.
1. From the Network Service menu (P197), “Others”
]“Additional service”
• The additional service list will be displayed.
2. I[Edit] ]After editing, press C[Select]
USSD code
Enter the service code (USSD) supplied by DoCoMo.
Service name
Enter any service name. Press I[Edit] to edit.
Using the Submenu of the Additional Service
List Screen
1. From the Additional Service List screen,
M[Menu] ]Select from the following submenu
items
Edit
Edit a service.
Select
The selected service is performed.
Delete 1 item
The selected service is deleted.
Delete all
All the registered services are deleted.
: Not displayed if an unregistered service is selected.
Using Registered Services
1. From the Additional Service List screen, select a
registered service ]C
206
Network Service
Network Service
Registering Additional Guidance
C](NW Service) ]*2
When you perform services added by “Additional Service”,
you can register reply messages that correspond to the
codes (USSD) returned from the Service Center. The reply
message is displayed when the registered code is
returned as a reply.
1. From the Network Service menu (P197), “Others”
]“Additional guidance”
• The reply message list will be displayed.
2. I[Edit] ]After setting, press C[OK]
USSD code
Enter the service code (USSD) supplied by DoCoMo.
Reply message
Enter a reply message name. Press I[Edit] to edit.
Using the Submenu of the Reply Message
List Screen
1. From the Reply Message List screen, M[Menu]
]Select from the following Submenu items
Edit
You can set a reply message.
Delete 1 item
The selected reply message is deleted.
Delete all
The all registered reply messages are deleted.
: Not displayed if an unregistered service is selected.
Using English Guidance
C](NW Service) ]*3
You can set the guidance of setting network services such
as “Voice Mail” or voice guidance such as “out of the
service area” to English.
Available Languages
LanguageSetting
Japanese
Plays back the guidance in Japanese.
Plays back the guidance in English.
First plays back the guidance in
Japanese and then in English.
First plays back the guidance in
English and then in Japanese.
English
Japanese +
English
English +
Japanese
207
Network Service
Network Service
1. From the Network Service menu (P197), “Others”
]“English guidance” ]Select from the following
setting items
Guidance setting
–Outgoing + Incoming call: You can set languages
of the guidance for outgoing and incoming calls.
Select “Yes” and then select a language.
–Outgoing call: You can set a language of the
guidance only for outgoing calls. Select “Yes” and
then select a language.
–Incoming call: You can set a language of the
guidance only for incoming calls. Select “Yes” and
then select a language.
Guidance status request
You can check the current settings of the guidance.
Using Service Dialing Number
C](NW Service) ]*4
You can make a call to DoCoMo Information Center or
DoCoMo repair counter.
• The displayed item may differ or some items may not be
displayed depending on the FOMA card.
1. From the Network Service menu (P197), “Others”
]“Service dialing number” ]Select from the
following items
(DoCoMo Malfunction
information)
Connect to the DoCoMo repair counter.
(General information)
Connect to the DoCoMo Information Center.
Using Call Barring
C](NW Service) ]*5
You can block all incoming calls while you are roaming
outside Japan with the FOMA phone.
1. From the Network Service menu (P197), “Others”
]“Call barring” ]Select from the following
setting items
Activate barring of incoming call - roam
–Barring all incoming calls: All incoming calls are
restricted. Enter your Network Security Code.
–Data calls barring: Only incoming video-phone
calls are restricted. Enter your Network Security
Code.
Deactivate barring of incoming call - roam
You can stop using Barring All Incoming When Roam.
Enter your Network Security Code.
Barring of incoming call - roam status request
You can check the settings of Barring All Incoming
When Roam.

209
Data Transmission Available from
the FOMA phone ..................................210
Before Use............................................211
Glossary of Data Transmission
Terms ....................................................212
Preparation Flow for Data
Transmission ........................................213
AT command ........................................213
Data Transmission
As for data transmissions, refer to Manual for data
transmission in CD-ROM for details. To read this
manual, it is recommended to set up Adobe Reader
(Over Ver 6.0). If this program is not installed in your
personal computer yet, install it from the attached
CD-ROM to read the manual. For details, see the
Help of Adobe Reader.

Data Transmission Available from the
FOMA phone
The data transmission services you can use by connecting
the FOMA phone to a personal computer are classified as
follows: packet transmission, and data transfer (OBEX).
• This FOMA handset does not support 64K data
transmission.
•
This FOMA handset is not applicable with Remote Wakeup.
•
This FOMA handset does not support FAX transmission.
•
This FOMA phone is applicable only to packet
transmission through IP connection (mopera U, etc.). It is
not applicable to packet transmission through PPP
connection.
Types of Available Transmission
Packet Transmission
This service charges a transmission fee according to the
amount of data you sent and received. The packet
transmission is suitable for sending and receiving data
only when data transmission is required, with a device
always connected to the network. This service is provided
by best effort that the communication speed varies
depending on the communication environment and traffic
of the network.
It uses an access point which supports FOMA packet
transmission such as “mopera U”, an Internet connection
service for FOMA, and allows data transmission at a
maximum rate of 384kbps in downloading and 64kbps in
uploading.
FOMA L602i allows data transmission overseas using an
access point compatible with W-CDMA or GPRS packet
transmission.
• Note that uploading and downloading a massive
amount of data results in a high amount of
communication fee.
Data Transfer (OBEX)
This service transfers data using infrared rays. This data
transfer service is not chargeable.
By infrared communication, you can exchange data with
another FOMA phone or a device having the infrared
communication function such as a personal computer.
Notes for Using Data Transmission
Charges of Internet service provider
To use the internet, you need to pay the charge for the
Internet service provider you use (referred to as “provider”
in this document).
Besides the FOMA service fee, you need to pay the
charge directly to the Internet service provider.
For details on the charges, contact the Internet service
provider.
You can use the DoCoMo Internet service, “mopera U”.
To use “mopera U”, subscription (charged) is required.
210
Data Transmission
Data Transmission
211
Data Transmission
Data Transmission
Next Page
Setting access point (Internet service provider, etc.)
To use the packet transmission, connect to an access
point for packet transmission.
• You cannot connect to the DoPa access point.
• You cannot connect to PHS 64K or 32K data
transmission access point such as PIAFS.
About user authentication for accessing network
User certification (ID and password) may be required at
connection to some access points. In this case, enter your ID
and password on the transmission software (dial-up
network). An ID and a password are given from a connecting
provider or a network administrator of the connecting access
point. Consult your Internet service provider or network
administrator for details of the ID and password.
Conditions for packet transmission
To perform the transmission using the FOMA phone by
connecting to a personal computer, the following
conditions are required. Even when these conditions are
satisfied, however, if the base station is congested or the
radio wave conditions are bad, you may not be able to
perform transmission.
• The personal computer to be used should support the
FOMA USB cable (option).
• Within FOMA service area.
• The access point supports IP access of packet
transmission (PDP type) of the FOMA.
Before Use
Operating Environments
The following operating environments are applicable to a
personal computer used for data transmission:
1: DoCoMo does not assure the operation from the OS upgrade.
2: Required memory and hard disk space depends on system
configuration of a PC.
Information
• Purchase the dedicated FOMA USB Cable (option). The USB
cable for personal computer cannot be used because the
shape of the connector differs.
Requirements
• PC-AT compatible PC with CD-
ROM drive.
• USB port (USB Specification
Rev1.1/2.0 compliant)
• Display resolution 800X600 dots,
High Color (65,536 colors) or higher
recommended.
Item
PC unit
Hard disk space
Required memory
Windows XP, Windows 2000,
(All Japanese editions)
• Windows XP: 128M bytes or more 2
• Windows 2000: 64M bytes or more 2
OS 1
Free space of 5M bytes or more 2

212
Data Transmission
Glossary of Data Transmission Terms
aAPN
An abbreviation for Access Point Name. Used to
identify an Internet service provider or Internet LAN
system you access for packet transmission.
For example, “mopera U” is expressed with character
string “mopera.net” in APN.
acid
An abbreviation for Context Identifier. A registration
number of the APN that is registered in the FOMA
phone beforehand for packet transmission.
In the FOMA phones, you can register up to 10 cid
numbers (1 to 10).
aDNS
An abbreviation for Domain Name System, which
converts a name easy-to-understand for human-being.
For example, a domain name “mopera.net” is
converted into an address indicated by a number easy-
to-manage for computer.
aPDP type
An abbreviation for Packet Data Protocol, which
indicates packet transmission. Usually, the type
provider indicates will be selected from PPP access
point and IP access point.This FOMA phone supports
IP access service. For PDP type, consult provider or
network service.
aQoS
An abbreviation for Quality of Service, which indicates
the quality of network service. For the QoS setting of
the FOMA phone, you can specify a communication
speed.
: Connection speed may vary depending on
communicating conditions, etc.
aW-TCP
A TCP parameter used to maximize the TCP/IP
transmission capability when performing the packet
transmission in the FOMA network. To maximize the
transmission performance of the FOMA phone, you
need to optimize the TCP parameter.
aPC Administrator right
Means the right with which the user can access all
functions of Windows XP and Windows 2000 systems.
A user without an administrator right
cannot install/uninstall transmission setup files (drivers)
and FOMA PC setup software, etc.
Data Transmission

213
Data Transmission
Preparation Flow for Data Transmission
The following outline shows a preparation flow for packet
transmission, and data transfer by connecting a FOMA
phone to a personal computer.
Transmission setup files and FOMA PC setup
software
Attached FOMA L602i CD-ROM contains the transmission
setup files (drivers) and FOMA PC setup software.
• The L602i transmission setup files are software (drivers)
required for packet transmission, and data transfer
using the FOMA USB Cable (option).
• The FOMA PC setup software can setup access points
(APN) for packet transmission and dial-up settings
easily.
AT command
AT commands are used to specify and modify the
functions of the FOMA phone on the personal computer.
FOMA phone is in conformity with AT commands.
For details, refer to “Data Transmission” in attached FOMA
L602i CD-ROM.
Data Transmission
Packet transmission
Data transfer (OBEX)
Infrared communication
Install L602i transfer setup file
onto a personal computer
Specify a connecting access point
Data transfer (OBEX)
Using FOMA PC
setup software
Not using FOMA PC
setup software
Using infrared
communication > P182
Establish connection


215
Entering Characters ............................ 216
List of Character Assignment of
Dial Buttons ......................................... 222
Entering Characters
216
Entering Characters
Entering Characters
Entering Characters
About Character Entry Display
FOMA phone has some functions to enter characters for
phonebook or mail.
On the Character Entry display, information on the current
input mode or operation guidance is displayed.
<Character Entry display>
1Remaining number of bytes: Remaining number of
characters you can enter is displayed in bytes.
2Operation guidance field: Full-pitch and half-pitch are
displayed.
3Input mode field: Input mode is displayed.
Setting the prediction conversion to enter
character
You can set ON/OFF to predict the conversion candidates
(P217) on entering Hiragana.
• This method is set to “ON” at purchase.
1. From the Character Entry display, M[Menu] ]
“Input setting” ]“Prediction ON/OFF”
2. ON/OFF
Switching Input Mode
1. Press I[i-mode] on the Character Entry display
(See left)
• Each time you press I[i-mode], the input mode
switches.
“” ... You can enter Kanji and Hiragana.
“” ... You can enter Katakana.
“”…You can enter Alphabets.
: Indicates that you can enter the capital letters.
“”…You can enter Numerals.
Switching Between Full-pitch/Half-pitch
• You may not be able to switch between full/half-pitch
depending on the display of character entry.
1. Press Aon the Full Entry display (See left)
217
Entering Characters
Entering Characters
Next page
• Each time you press A, the full-pitch and half-pitch
modes switch.
Switching Pictograph/Symbol/Emoticon Mode
• You cannot switch the mode depending on the display
of character entry.
1. Press Ton the Character Entry display (P216)
• Each time you press T, the input mode switches.
“” ... You can enter pictographs.
“” ... You can enter full-pitch Symbols.
“” ... You can enter half-pitch Symbols.
“” ... You can enter emoticons.
–I[Continue]: You can enter characters after
selecting multiple. After selecting them, press I
[Set].
–A: You can change the page. If you select “
”, the cursor will be jumped.
Entering Characters
You can enter characters by pressing dial buttons to
which desired characters are assigned.
•To allocate the character on each button, refer to “List of
Character Assignment of Dial Buttons” (P222).
Entering Characters in Prediction mode
• You can use this method on setting “ ” of Hiragana
mode.
1. Enter characters on the Character Entry display
(P216)
•M[KanaA1]: The entered characters are converted
to Katakana or Numerals.
•I[Conv]: The entered characters are converted to
Kanji or other characters.
•C: The entered characters are finalized.
2. Move the cursor to Prediction/Conversion area
using H.
3. Select a character to convert ]C
Entering Characters in Normal mode
When entering the characters in other than “Hiragana
mode ( )”, the conversion (after step 2) is not required.
1. On Character Entry display (P216), enter characters
•M[Katakana/ Numeral] : You can convert the
characters on inputting to Katakana or number.

218
Entering Characters
Entering Characters
•C[Set] : You can confirm the character on
inputting.
: In Hiragana mode
2. D/I[Convert]
3. Move the cursor by pressing Hto the area of
conversion candidates.
4. Select the character to convert. ]C
aSwitching Upper / Lower Character Mode
To switch upper / lower characters, press *several
times after entering characters. If the character is not
correspond with each one, you cannot convert it.
• You cannot convert the character in numeral mode
(“1(12)”).
aEntering Voiced / Semivoiced Marks
After entering the character, press Aseveral times.
However, you cannot enter a full-pitch character if it
does not correspond to a half-pitch character.
• You cannot enter it in alphabet (“a(ab/AB)”) or numeral
(“1(12)”) mode.
aEntering a Punctuation
Press *several times.
• You cannot enter it in alphabet (“a(ab/AB)”) or numeral
(“1(12)”) mode.
aEntering Line Feed
Press #/D
• Press Din numeral mode (“1(12)” a line feed).
aEntering a Space
M[Menu] >“Special input” >Select “Space”. In case
of being the cursor at the middle of sentence, press R
to enter a space.
aDeleting a Character
Move the cursor to the character to delete and press
Q. If the cursor is at the end of a character, press
Qonce to delete the character left of the cursor.
And, press Qfor more than 1 seconds to delete all
the characters.
Using the Submenu on the Character Entry
Display
• A few menus may not be activated depending on the
display of character entry.
1.
From the Character Entry display (P216), M[Menu]
]Select from the following Submenu items.
Common phrases
–Input common phrase: You can select and enter
the registered common phrases.
–Edit common phrase: You can create and register
common phrases and edit registered common
phrases. Go to step 2 in “Editing Common Phrases”
(P220).
Edit character
You can specify a range to copy/cut and paste
characters. Go to “Copying/Cutting/Pasting” (P219).

219
Entering Characters
Entering Characters
Next Page
Edit word
You can register words. Go to step 2 (P221) of
“Registering Words”.
Quote
–Phonebook: You can access a Phonebook entry
and quote the registered contents. Go to step 3 on
page 66 of “Searching Phonebook”.
–Own number: You can bring up your own number
and quote the registered contents.
Input setting
–Full/Half: You can switch between full-pitch and
half-pitch.
–Upper/Lower :You can switch between upper
case and lower case of Alphabets (a/A (ab/AB)).
–Prediction ON/OFF: You can activate/deactivate
the Prediction and Conversion function.
Special input
–Changing line: You can start a new line.
–Space: You can enter a space before the cursor.
–Kuten code: You can enter characters using the
Kuten code. Go to step 2 of “Entering Characters
Using Kuten Code” (See right).
: After converting the English mode “a(ab/AB)”, you can activate
the menu. You cannot use this menu in other modes.
Entering Characters Using Kuten Code
You can enter characters or symbols using the 4-digit
Kuten code.
• For details, see “Kuten code list” (P269).
1. From the Character Entry display (P216), M
[Menu] ]“Special input” ]“Kuten code”
2. Enter a Kuten code using the numeric buttons ]
C
• You can also select characters or symbols using K.
Copying/Cutting/Pasting
You can copy or cut a character string and paste it to
another display/position.
1. From the Character Entry display (P216), M
[Menu] ]“Edit character” ]“Copy”/“Cut”
2. Move the cursor to the start position using K]
C
3. Move the cursor to the end position using K]
C
4. Display the Character Entry display to which you
want to paste the copied/cut characters ]Move
the cursor to the desired position for pasting
using K.
5. M[Menu] ]“Edit character” ]“Paste” ]“Yes”
• Select M[Menu] ]“Edit character” ]“Undo” in
sequence to undo cut or pasted characters.
Information
• If the number of characters which are copied or cut from the
sentence exceeds the limit, you can paste them after deleting
the characters over the limit.
220
Entering Characters
Entering Characters
• To paste the character after copying or cutting, its type should
be same. For example, you cannot enter (half pitch of
Alphabet and numeral) Hiragana or Kanji in screen to input
mail address.
• If you paste character lines including a line feed in the entry
screen that line feeds cannot be entered, it is replaced by a
blank (half-pitch space).
Editing Common Phrases
You can edit registered common phrases or add new
common phrases.
1. From the Character Entry display (P216), M
[Menu] ]“Common phrases” ]“Edit common
phrase”
<Edit common phrase>
2. Select Category ]C
• The Select Common phrase display appears.
• If you press Cin common phrase list, you can view
all categories.
• If you register new phrase, select “Original”.
3. Select a common phrase to be changed ]I[Edit]
]Edit/input the common phrase ]C
Using the Submenus of the Edit Common
Phrase Display/ Select Common Phrase
Display / Input Common Phrase Display
1.
From the Edit Common Phrase display / Common
Phrase display,
M
[Menu]
]
Select from the following
Submenu items
Reset all 1
All common phrases are reset to their defaults.
Delete 1 item 2
A selected/displayed common phrase is deleted.
Reset 1 item 2
A selected/displayed common phrase is reset to its
default.
Category reset 2
All common phrases stored in the category are reset
to their defaults.
Cancel
You can cancel editing of common phrases.
1: Not displayed on the submenu of the common phrase display.
2: Not displayed on the submenu of the Edit common phrase
display.
SelectMenu
Edit common phrase
2 Greeting
3 Business
4 Private
5 Reply
6 Pictograph idiom
7 Original
1 Internet

221
Entering Characters
Entering Characters
Information
• If you activate the menu “Reset all”, the contents of “Original”
will be deleted.
Registering Words
For those words not displayed as the conversion
candidates or words with unusual readings, you can
register them with their readings. Once registered, the
words are displayed as conversion candidates when their
readings are entered.
1. From the Character Entry display (P216), M
[Menu] ]“Edit word”
• The registered Words List is displayed.
• Select a dictionary and press Cto confirm the
registered words.
2. I[New registration] ]Select the next item to
register ]After registering, I[Register]
following
Reading
You can set reading of “Word”.
Word
You can set a word that will be displayed as a
conversion candidate when you enter characters
registered as “Reading”.
Deleting Words
1. From the Registered Words list, M[Menu] ]
“Delete 1 item”/“Delete all” ]“Yes”
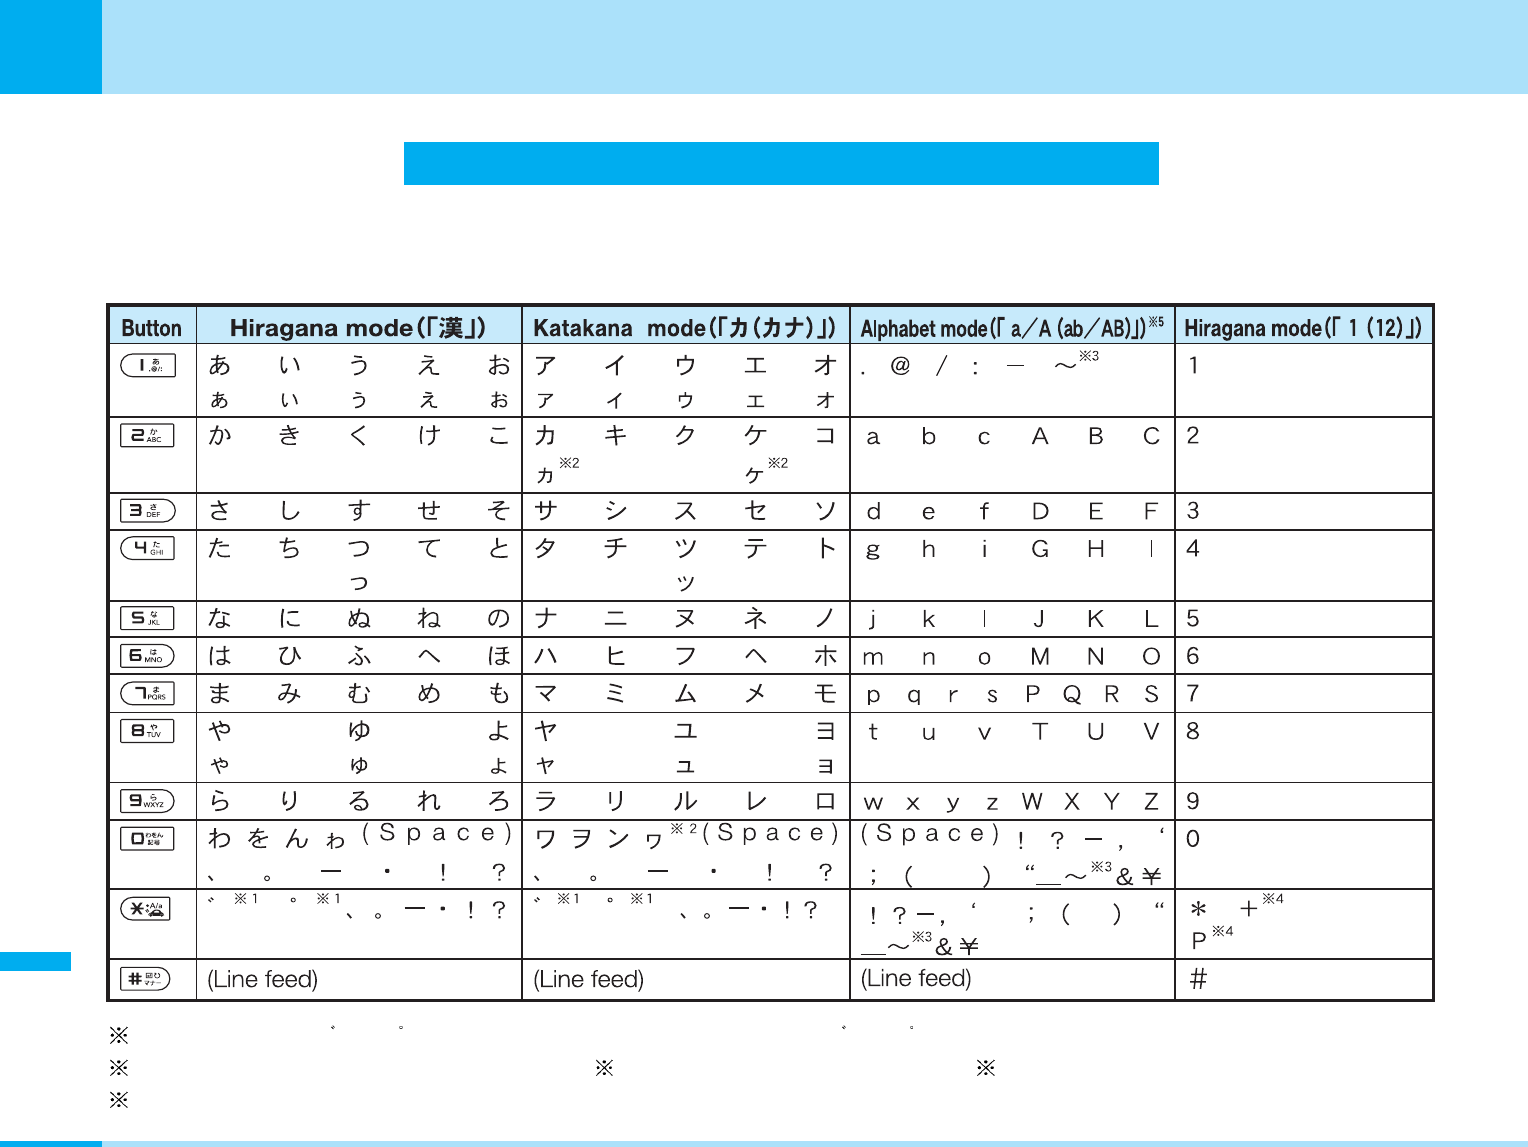
222
Entering Characters
Entering Characters
List of Character Assignment of Dial Buttons
You can enter a character by pressing dial button. On pressing each button, you can enter multiple characters as follow the
table below. Each time you press the button, the character will be changed. Each time you press #, the character will be
changed in reverse order.
1: In full-pitch mode, “ ” or “ ” is displayed only when the character to which “ ” or “ ” can be added is displayed.
2: You can enter a character only in full-pitch mode. 3: In half-pitch mode, “ ~ ” is displayed. 4: You can enter a character only in half-pitch mode.
5: If you set capital mode in “Switching Capital/Small letter mode” (P219), the capital letter will be displayed at first.

223
International Roaming Service ........... 224
Setting the Network Mode.................. 225
Confirming Before Using Overseas.... 225
Using the FOMA Phone Overseas...... 227
Overseas Use
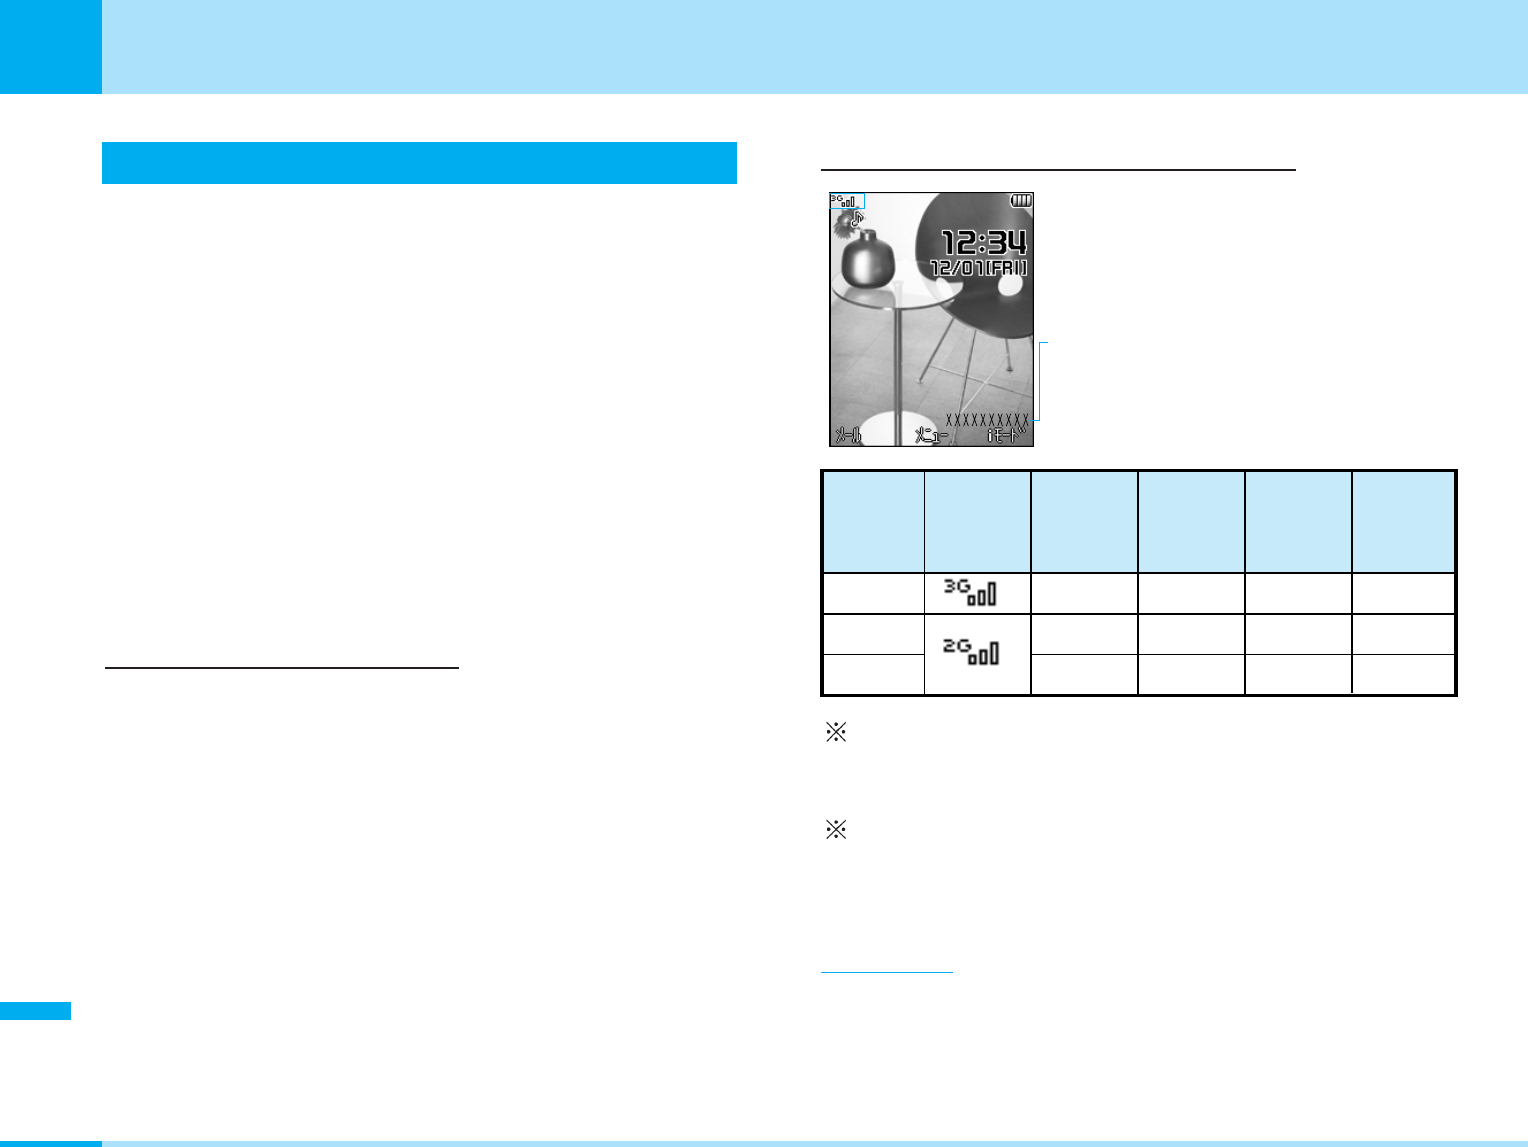
224
Overseas Use
International Roaming Service
International roaming service (WORLD WING) is a service
that allows you to make calls or communications overseas
using the same phone number as that used in Japan,
utilizing networks of affiliate telecommunications carriers
overseas. Refer to “Network Services User's Guide
(Chapter of International Service)” for details of the
communications services available while in international
roaming. The International Service web page of DoCoMo
offers the downloadable latest version of “Network
Services User's Guide (Chapter of International Service)”
as well as the latest information about WORLD SERVICE:
http://www.nttdocomo.co.jp/service/world/
Application for WORLD WING
• The customer who subscribed to the service on or after
September 1, 2005 is not required to apply to this
service. However, the customer who declined this
service at subscription to the FOMA service is required
to apply.
• The customer who subscribed to the FOMA service on
and before August 31, 2005 and has not applied to the
“WORLD WING” is required to apply to this service.
• This service is not available with some billing plans.
Overseas Networks and Services Available
Services marked with “O” in the table above may not
be available depending on the mobile phone carrier
being used or the place of stay.
See the International Service web page of DoCoMo for
details about services available in each country or region
http://www.nttdocomo.co.jp/service/world/
Information
• You can set to display Japan time together with the local time
on the stand-by display. >P81
See “Network Name” (P98)
to display the network
name on connecting and
to set it.
Overseas Use
Network
Icon
Voice
Packet
transmission
(i-mode,
mopera U, etc.)
SMS
Video-
phone
3G
GPRS
GSM
O
O
O
O
O
X
O
O
O
O
X
X
225
Overseas Use
Next Page
Overseas Use
Setting the Network Mode
C](Settings) ]52
Network mode of the FOMA phone is set to “Auto” at
purchase. If you know the network in your area, you can
select it directly.
Setting item/Setting at purchase >P251
1. From the Settings menu (P85), “Network” ]
“Network mode” ]Select from the following
setting items
Auto
Searches all the networks connectable.
WCDMA only
Searches only networks supporting 3G.
GSM only
Searches only networks supporting GSM/GPRS.
For the network search setting (changing of the
communication carriers), see P96.
Information
• You cannot exchange the data through packet service under
GSM network.
• When using the FOMA handset in Japan or in the service area
of 3G network, we recommend you change the setting of the
“Network mode” to “WCDMA only” to save battery power.
Confirming Before Using Overseas
Before Departure
Charging the Battery
Make sure of the voltage available in the country or area of
stay and use the FOMA Overseas/Domestic AC Adaptor 01
(option) for overseas and domestic usage (a conversion
plug adapter according to the place of stay will be required).
And, do not charge the FOMA phone using an electrical
transformer for overseas travel.
Using Voice Mail/Call Forwarding from Overseas
Use of the Voice Mail or Call Forwarding service from
overseas is part of “remote operation” and requires the
activation of Remote operation before your departure. For
details to set the remote operations, refer to “Remote
Opeartion Settings” (P204).
Before departure, make sure that you have the Network
Security Code, which may be required for remote-
accessing the Voice Mail etc. If you have forget your
Network Security Code, visit a DoCoMo Shop or
DoCoMo World Counter with an identification such as
the driver’s license to make necessary changes.
Using i-mode Overseas
To use i-mode overseas, you need to set “International
Settings” to “YES”.
aTo change settings in Japan
• No packet transmission fees apply.
“iMenu” ]“English” ]“Options” ]“International
Settings” ]“YES”
aTo change settings outside Japan
Packet transmission fees apply.
“iMenu” ]“International Settings” ]“YES”
•
If set to “NO”, you can send and receive i-mode mail
messages and view the i Menu only. The setting at
purchase is “NO”.
Some i-mode sites may not be available depending on
the information provider.
Packet transmission fees apply to all types of access
from overseas including transmissions that are free of
charge in Japan.
Japan time applies even if i-mode sites are accessed
from overseas. Be careful when registering entries to or
deleting entries from My Menu at the beginning or end
of a month.
Using FOMA phone overseas
Setting Mobile Phone Carrier
The network will be set after searching it automatically if
“Setting the Network Mode” (P97) is set to “Auto” in
international roaming.
• You can set up beforehand the type of network on
searching by “Setting the Network Mode” (P97).
• If you search the network automatically, you can set the
preferred network by “Registering a Network from the
list” (P97).
• You can select the network manually. Refer to “Selecting
the Network Connection Mode” (P96).
Information
• “Network mode” is set to “Auto” after you search with
“Network mode” set to “WCDMA only” or “GSM only” and
“Network selection” set to “Auto”, “Network mode” will be set
to “Auto” after searching.
• If you search with “Network mode” set to “Auto” and “Network
selection” set to “Auto”, the same mode (“WCDMA only” /
“GSM only”) of the network (communication carrier) you
selected after searching will be set.
226
Overseas Use
Overseas Use
Settings to be made after returning to Japan
After Coming Back to Japan
When network settings have been changed for use
overseas, “ ” may appear in Japan.
In that case, make settings given below.
• You have to set “Network selection” (P97) to
“Auto/WCDMA only”.
• You have to set “Network selection” (P96) to “Auto” or
“Manual” and select “JP DoCoMo-3G” on the network
selection screen displayed after searching.
Using the FOMA Phone Overseas
•
If the other party subscribes to a mobile phone carrier
supporting the FOMA video-phone, you can make a
video-phone call by pressing T.
Making Calls
aMaking a call to Japan from the country you stay
When entering the phone number directly
Press 0for 1 or more seconds to display “+”
]81(Country code for Japan) ]Other party’s
phone number excluding “0 (zero)” at the beginning
of the area code ]A(T)
Example: When the other party is in one of the 23
wards of Tokyo (area code: 03)
“+”>81> 3> XXXX – XXXX
Making a call to a number registered in phonebook
The phonebook list screen (P67) or M[Menu] on
phonebook detail screen (P67) ]“International call
(Japan)” ]C[Call] when recipient's phone number
appears
Example: When a phone number saved in phonebook
has area code “03” (in 23 ward of Tokyo)
+813XXXX - XXXX
• A recipient's phone number is generated,
automatically prefixed with Japan's Cuontry code
“+81” and “0” removed from area code.
aCalling another WORLD WING/WORLD WALKER user
Press 0for 1 or more seconds to display “+”
]81(Country code for Japan) ]Other
party’s phone number excluding “0 (zero)” at the
beginning of the area code ]A(T)
Example: When the other party has a mobile phone
number beginning with (090)
“+” > 81 > 90 >XXXX –
XXXX
aCalling a mobile phone or fixed-line phone within the
country of stay
Dial the other party’s phone number including the
area code
]
A(T)
227
Overseas Use
Overseas Use
228
Overseas Use
Overseas Use
a
Calling from the country of stay to a mobile phone or
fixed-line phone in another country (except for Japan)
• In some countries or areas such as Italy, “0” may be
required.
Press 0for 1 or more seconds to display “+”
]
Country code of the other party
]
Other party’s
phone number excluding “0 (zero)” at the beginning of
the area code
]
A(T)
Receiving calls
When a call comes in, A(T)
Having Others Call You
aReceiving a call from Japan
Have the other party call you at your mobile phone
number as usual.
090
>
XXXX – XXXX/
080
>
XXXX – XXXX
]
CALL
aReceiving a call from a country other than Japan
International access code of the country where you
make the call ]81 (Country code for Japan)
]Your phone number excluding “0 (zero)” at the
beginning ]CALL
Troubleshooting
Unable to Make or Receive Calls/Always Out of the
Service Area/Handset Does Not Turn ON
Possible causes for inability to make or receive calls,
reception level indication permanently being “Out of the
service area” or the handset not turning on are as follows:
• Weak radio waves being received or being out of the
service area
• Failure of the local switchboard or base station or
temporary line congestion
• Wrong operation of the handset
• Others
See the International Service web page of DoCoMo for the
latest information about service areas and network
interruption:
In addition, make sure of the operation and try the following:
• If you are indoors, confirm if the condition is the same
outdoors.
• Confirm if your monthly charges have not exceeded the
limit.
• Turn OFF the handset once and back ON.
• Manually select the mobile phone carrier to use.
If the problem persists after the above troubleshooting
procedures are taken, contact the Network Technical
Support and Operations Center (P229).
If i-mode is inaccessible
• If i-mode sites other than “iMenu” is unavailable, first
make “International Settings” (P225). Some sites may
not be available depending on the information provider.
• The i-mode services may not be available depending
on the operator being used.
• Select a mobile phone carrier compatible with packet
transmission.
• For the latest information about overseas carriers
compatible with packet transmission, see the
International Service web page of DoCoMo.
• “i-mode” services offered by overseas carriers are not
available.
Contact (While outside Japan)
If the handset is lost or stolen, etc.
<DoCoMo Information Center> (24-hour service)
aUniversal Number
International Call ID Number for the Universal Number
(See Table 1)
– 800-0120-0151
Domestic call charges of the country you stay apply if you
make a call from a mobile phone.
aIf the Universal Number (above) is not available
International access code for the country of stay
(See Table 2)
– 81-3-5366-3114
Dialing charges for calls to Japan will apply.
Please be aware that you are charged for call fee incurred
after the phone or UIM is lost or stolen. Contact the
Information Center immediately after the loss and follow
the procedures to cancel the service.
If the Handset is not Working Properly
<Network Technical Support and Operations Center>
(24-hour service)
aUniversal Number
International Call ID Number for the Universal Number
(See Table 1)
– 800-5931-8600
Domestic call charges of the country you stay apply if you
make a call from a mobile phone.
aIf the Universal Number above is not available
International access code for the country of stay
(See Table 2)
– 81-3-6718-1414
Dialing charges for calls to Japan will apply.
229
Overseas Use
Next Page
Overseas Use
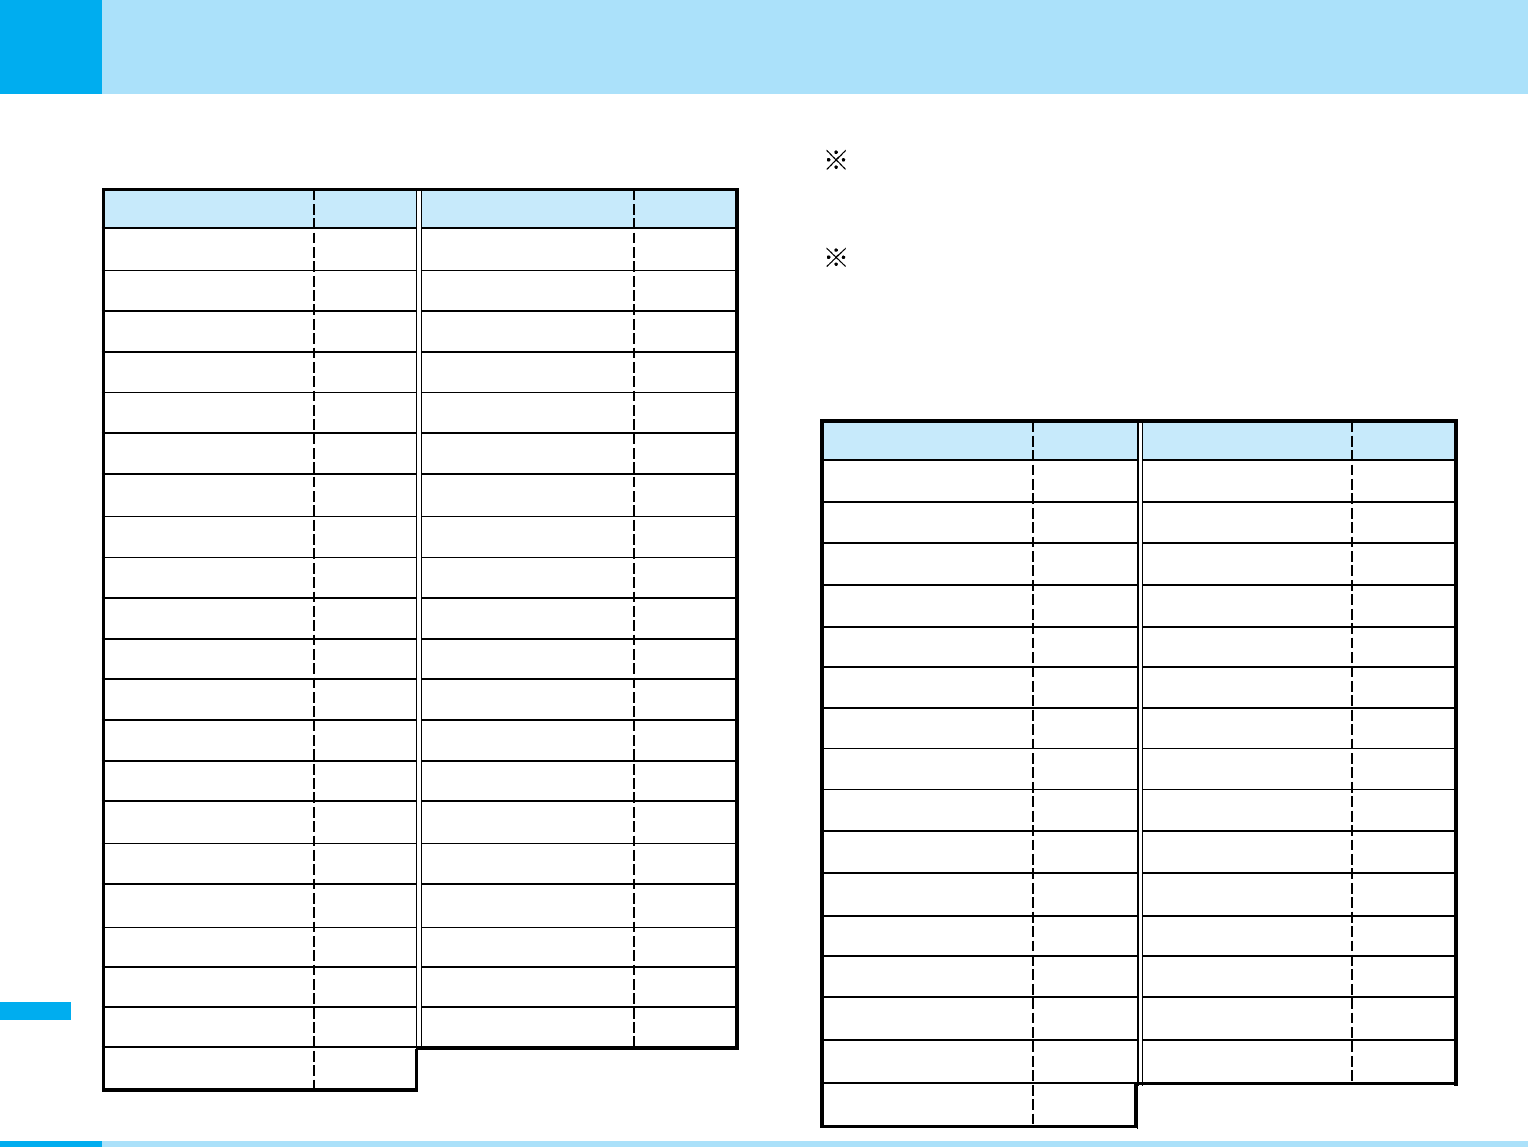
230
Overseas Use
Overseas Use
Major Country Codes The International Call ID Numbers for the Universal
Number in Table 1 and international access codes in
Table 2 are subject to change.
Be careful that the Universal Number may be often
unavailable when making calls from mobile phones,
public phones or hotel phones.
International Call ID Number for the Universal
Number (Table 1)
Australia 0011
Austria 00
Belgium 00
Brazil 0021
Canada 011
China 00
Columbia 009
Denmark 00
Finland 990
France 00
Germany
Hong Kong
00
001
Luxembourg 00
Malaysia 00
Netherlands
00
00
New Zealand
Norway
Philippines
00
00
Singapore 001
South Korea 001
Spain 00
Sweden
Switzerland
00
00
Taiwan 00
Country/Region
Code
Argentina 00
Ireland 00
Country/Region
Code
Israel 014
Italy 00
Thailand 001
UK 00
USA 01
Country/Region
Code
Australia 61
Austria 43
Belgium 32
Brazil 55
Canada 1
China 86
Czech 420
Country/Region
Code
Egypt 20
Fiji 679
Finland 358
France 33
Germany 49
Greece 30
Hong Kong 852
Indonesia
Italy
62
39
Maldives 960
Netherlands 31
687
New Zealand 64
Norway
Peru
47
51
Singapore 65
India 91
South Korea 82
Spain 34
Sweden 46
Switzerland 41
Tahiti 689
Taiwan 886
Japan 81 USA 1
Philippines
Russia
63
7
Hungary 36
New Caledonia
Macao 853 Vietnam 84
Malaysia 60
Thailand 66
Turkey 90
UK 44
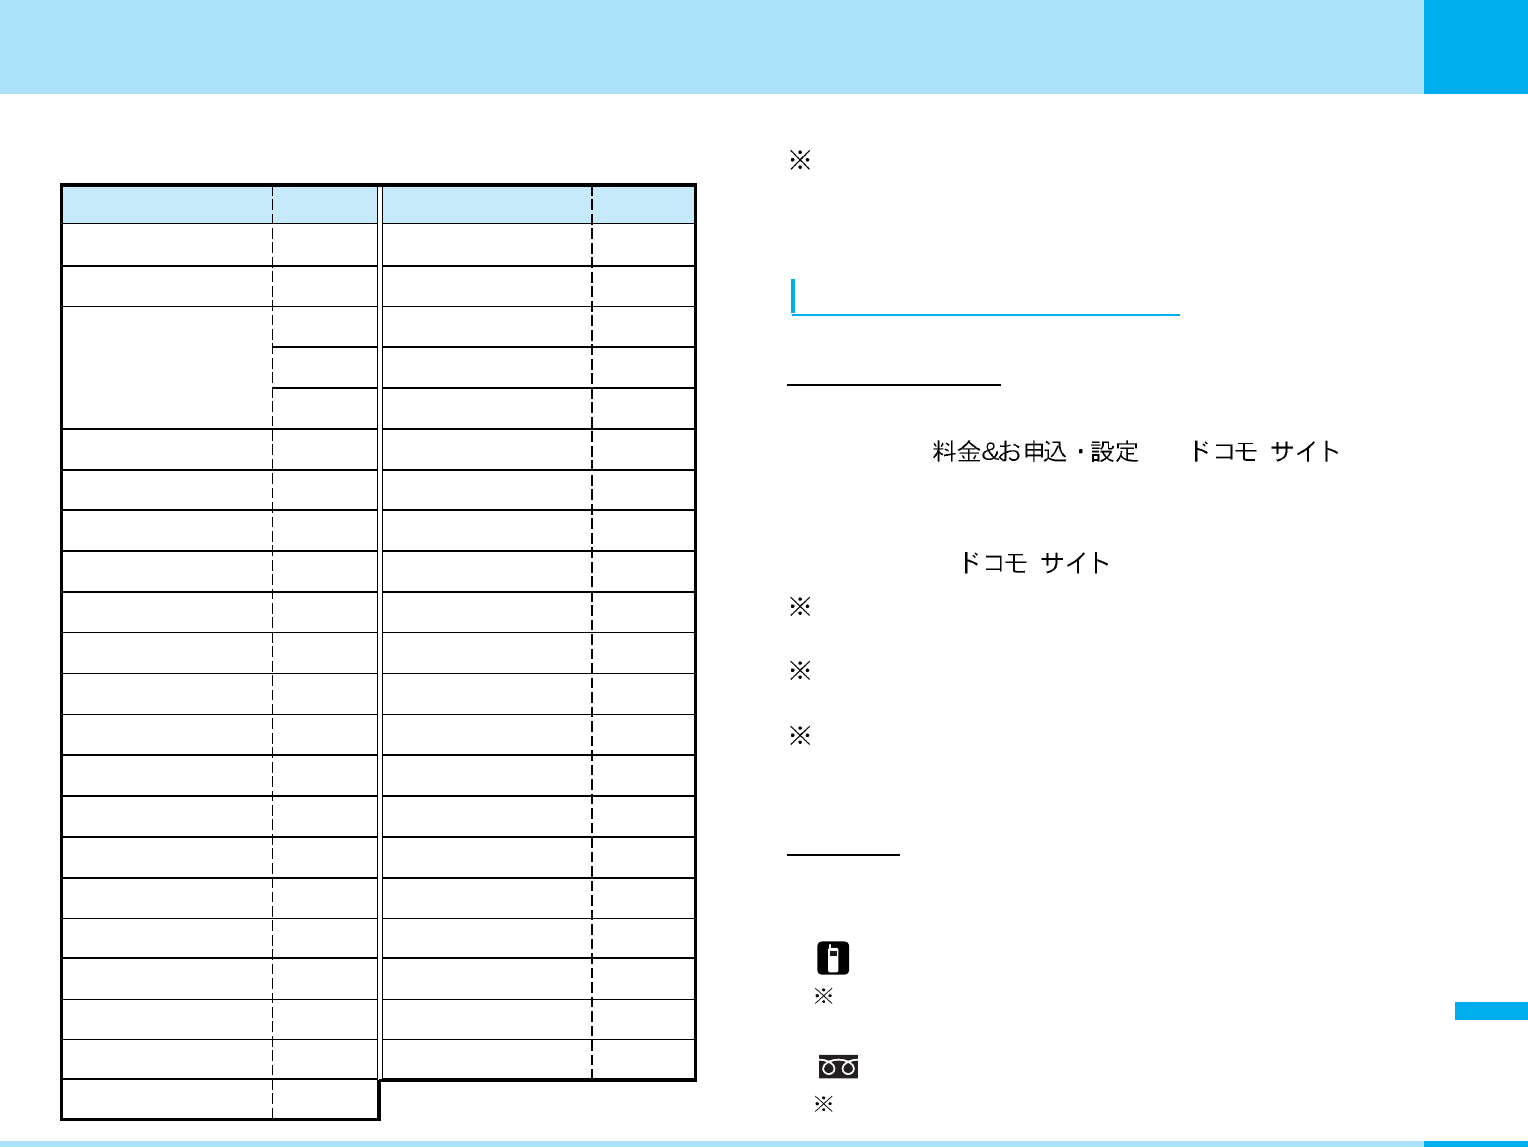
231
Overseas Use
Overseas Use
Major International Access Codes (Table 2) Be careful that the Universal Number may be often
unavailable when making calls from mobile phones,
public phones or hotel phones.
Applying for WORLD WING
At DoCoMo e-site
aBy i-mode
“iMenu” ]“ ” ]“ e ”
aFrom a personal computer
My DoCoMo (http://www.mydocomo.com/)
]
Procedures (
e
)
You need to enter your “Network Security Code” for
application by i-mode.
You need to enter your “DoCoMo ID/Password” for
application from a personal computer.
DoCoMo e-site may not be available for the application
depending on the contracted contents.
By phone
<DoCoMo Information Center>
aFrom DoCoMo mobile phone or PHS
151 (toll-free)
Not accessible from fixed-line phones, etc.
aFrom fixed-line phones, etc.
0120–800–000 (Japanese only)
Also accessible from a mobile phone or PHS.
Ireland 00
Australia 0011
India 00
Indonesia 001
Italy 00
Luxembourg 00
UAE 00
UK 00
USA 011
Country/Region
Code
Belgium 00
Brazil 0041
0021
0023
Country/Region
Code
Monaco 00
Netherlands 00
New Zealand 00
Norway
Philippines
Poland
00
Canada 011 00
China 00 00
Czech 00 Portugal 00
Denmark 00 Russia 810
00 Singapore 001
990 South Korea 001
France 00 Spain 00
Germany 00 Sweden 00
Greece 00 Switzerland 00
Hong Kong 001 Taiwan 002
Hungary
Malaysia
00
00
Thailand 001
Turkey 00
Macao 00
Vietnam 00
Philippine
Finland
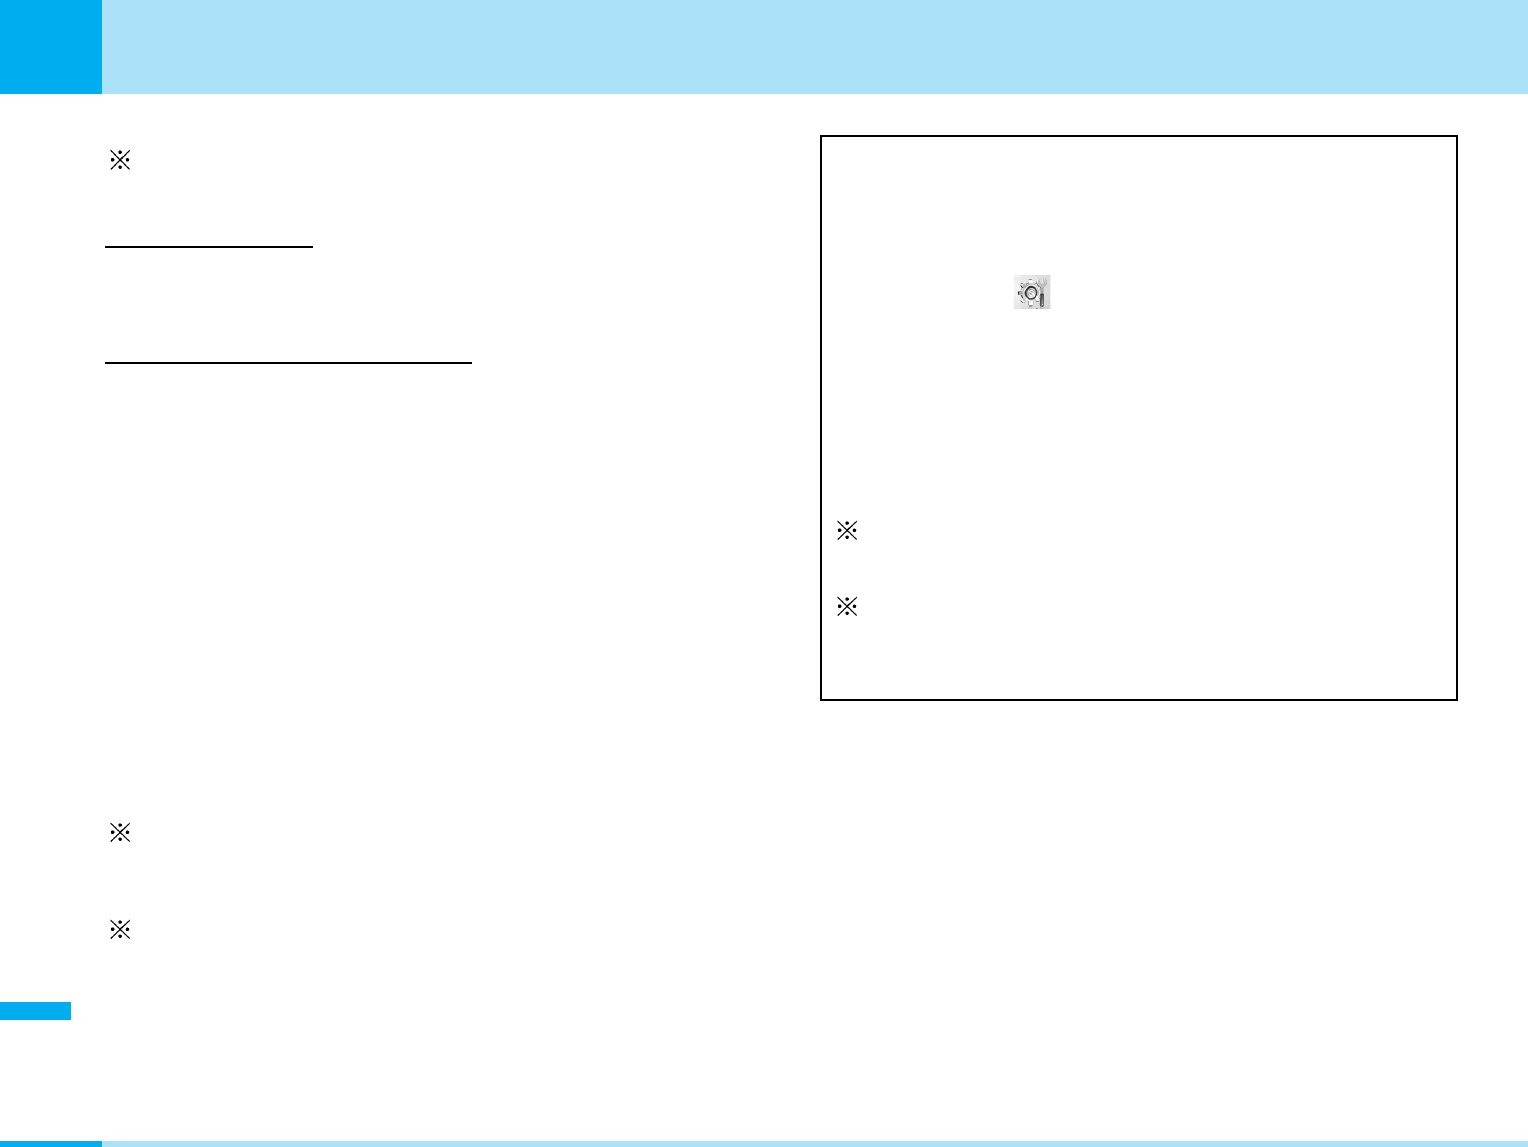
232
Overseas Use
Overseas Use
Make sure that you dial the correct number.
At DoCoMo Shop
Your local DoCoMo Shop accepts the application.
At the DoCoMo World Counter
Applications accepted even on the day of departure.
aDoCoMo World Counter Narita International Airport No.
1: 4F Central Building, Narita International Airport
Terminal 1
aDoCoMo World Counter Narita International Airport No.
2: B1F Main Building, Narita International Airport
Terminal 2
aDoCoMo World Counter Kansai International Airport: 4F
Kansai International Airport Terminal Building
aDoCoMo World Counter Central Japan International
Airport: Business Center P@tio, 3F Central Japan
International Airport Terminal Building
Processing the application may take time. Allow
sufficient time for application at the DoCoMo World
Counter.
For business hours, refer to “Network Services User's
Guide (Chapter of International Service)”.
How to Use WORLD CALL
aCheck the settings of “International Settings”
<How to activate WORLD CALL>
C[Menu] ]or “Settings” ]“Call feature” ]
“International dial” ]“IDD prefix setting”
• Set to use “009130010” for WORLD CALL.
aMaking
Display “+”
>
Country code
>
Area code
>
Other
party’s phone number
>
A
When you call a mobile phone, dial the mobile phone
number after the country code.
When the other party’s area code or mobile phone
number begins with 0, omit the zero when dialing
(This does not apply in some countries/regions).

233
Menu list ...............................................234
Pre-installed data .................................260
Symbol/Special Character List............264
Pictograph and Emoticon List .............265
Common Phrase List............................267
Kuten Code List....................................269
List of city in World time ......................278
Multiaccess Combination Patterns .....279
Multitask Combination Patterns..........280
Service Available with
FOMA Phones ......................................284
aConnecting with External Devices
Introduction of Data Link .....................285
aWhen You are in Trouble
Troubleshooting ...................................286
Error Messages ....................................288
Introduction of Options and Related
Equipment ............................................308
Warranty and Maintenance Services ..308
Specific Absorption Rate of the
Mobile Phone .......................................311
Export/Re-export regulations of
Japan and USA.....................................314
Appendix
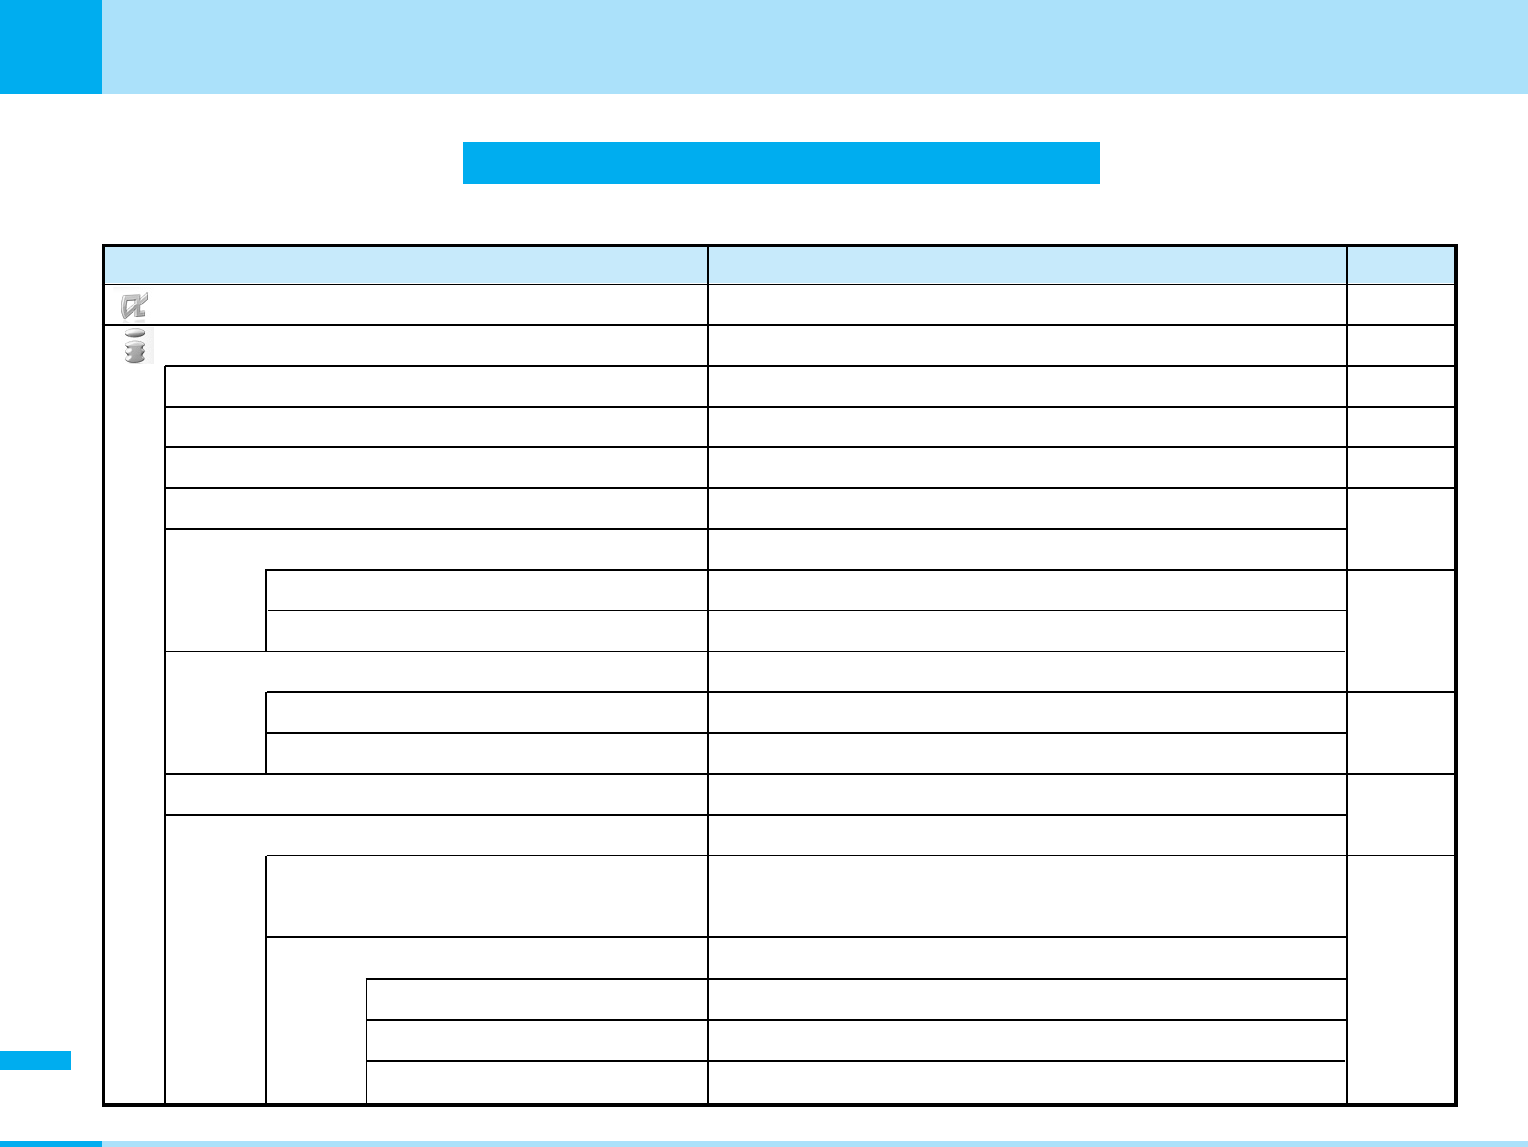
234
Appendix
Menu list
• You can select the function by pressing the button corresponding with the number in the table below.
Appendix
i-appli
2 Image display
1 Character size
Pre-installed i-appli only
–
P159
No bookmarks
No screen memos
–
http://
No URL history
No messages
No messages
–
Enable/Disable
URL Address: http://
Small/Stadard/Large
ON/OFF
P120
P121
P122
P123
P127
1 iMenu
2 Bookmark
3 Screen memo
4 Last URL
1 Input address
2 URL history
1 MessageR
2 MessageF
7 Check new message
8 i-mode setting
1 Home
2 View
5 Go to location
6 Message
P128
P124
P125
i-mode P119
3 Scroll 1 line/3 lines/5 lines
Menu Item Setting Item (Blue color: Setting at purchase)
Reference
235
Appendix
Next Page
Appendix
Menu Item Setting Item (Blue color: Setting at purchase)
Reference
4 Message list disp.
–
–
ON/OFF
60 seconds/90 seconds/Unlimited
Mail/MessageR/MessageF (All marked)
–
–
–
–
–
–
–
–
–
–
P129
–
–
P198
P197
P199
4 Others
3 Certificates
2 i-motion auto play
1 Connection timeout
3 Check new message
5 Reset settings
4 Check settings
6 Reset data
NW Service
1 Voice mail
2 Set ringing time
1 Activate voice mail
3 Deactivate voice mail
4 Voice mail status request
5 Play messages
6 Voice mail setting
7 Check messages
8 Notify missed call
1 line/2 lines P128
1
Activate missed call notification
2
Deactivate missed call notification
3 Missed call notification status request
–
236
Appendix
Appendix
Menu Item Setting Item (Blue color: Setting at purchase)
Reference
P202
P203
3 Call forwarding
1 Activate call forwarding
3 Call waiting status request
2 Deactivate call waiting
1 Activate call waiting
2 Call waiting
–
–
–
–
–
–
–
–
–
–
–
–
2 Deactivate call forwarding
3 Register the forwarding number
4 Setting at forwarded party busy
5 Call forwarding status request
4 Nuisance call barring
1 Register nuisance caller
2 Delete all entries
3 Delete most recent entry
5 Caller ID notification
1 Activate/Deactivate caller ID notification
2 Caller ID notification status request
6 Caller ID request
P201
–
–P200
–
–
9 Delete voice mail icon
0 Set message alert ringer P199
–
1 Register fwd number
2 Set ringing time
1 Activate caller ID request
237
Appendix
Next Page
Appendix
Menu Item Setting Item (Blue color: Setting at purchase)
Reference
Answer/Voice mail/Call forwarding/Call rejection
–
–
–
–
–
–
–
–
–
8 Arrival call act
–
–
–
3 Arrival act status request
2 Deactivate arrival act
1 Activate arrival act
9 Remote control
2 Deactivate remote control
3 Remote control status request
1 Voice mail (Int.)
2 Call forwarding (Int.)
3 Roaming guidance (Int.)
–
–3 Caller ID request status request
7 Set arrival act
P204
P204
P203
10 International service
2 Deactivate voice mail
1 Activate voice mail
3 Play messages
4 Voice mail setting
1 Activate call forwarding
2 Deactivate call forwarding
2 Deactivate caller ID request
1 Activate remote control
11 Others
238
Appendix
Appendix
No messages
3 Unsent message
Menu Item Setting Item (Blue color: Setting at purchase)
Reference
Not recorded
Not recorded
–
–
Mail
1 Inbox
2 Outbox
2 Additional guidance
3 English guidance
4 Service dialing number
5 Call barring
None
No messages
1 Activate barring of
incoming call - roam
1 Barring all incoming calls
2 Data calls barring
Inbox
Folder created by user
No messages
P139
P137
P144
P147
P207
P205
P206
Outgoing+Incoming call/ Outgoing call/ Incoming call1 Guidance setting
2 Guidance status request
1

239
Appendix
Next Page
Appendix
Menu Item Setting Item (Blue color: Setting at purchase)
Reference
None/1 day/2 days/3 days
Auto attach: Marked
Signature field: Not marked
>
Small/Standard/Large
1 line/3 lines/5 lines
ON/OFF
Image, Melody (All marked)
ON/OFF
Mail, MessageR, MessageF (All marked)
P156
5 SMS validity term
1 Edit signature
2 Edit quotation
1 Character size
2 Scroll
4 SMS report request
3 Check new message
2 Receive attach file
1 Receive opt. setting
1 Communication
2 Edit
3 View
P149
P154
P152
P155
4 Compose mail
–
–
–
–
–
1 Compose message
2 Compose SMS
5 Check new message
6 Receive option
7 Check new SMS
8 Mail setting
1 line subject/1 line address/1 line name/2 lines address/2 lines name
3 Mail list display
4 Folder security Inbox, Outbox, Unsent message (All unmarked)

240
Appendix
Appendix
Menu Item Setting Item (Blue color: Setting at purchase)
Reference
2 i-motion
3 Melody
Multimedia
1 Camera-mode
2 Movie-mode
ON/OFF
–
–
–
–
–
P156
P157
4 Others
1 Check settings
3 Reset data
2 Reset settings
5 Melody auto play
No data
No data
None
Only preinstalled file
Only preinstalled file
None
No data
Only preinstalled file
None
Camera, Data transfer, i-mode
Folder created by user
Item, Pre-installed
Camera, Data transfer, i-mode
Pre-installed
Folder created by user
Data transfer, i-mode
Pre-installed
Folder created by user
P176
P165
P107
P109
P115
P166
P173
1 My picture
Data box
P118
3 Camera settings
ON/OFF
Shutter 1/Shutter 2/Shutter 3
Auto/50Hz area/60Hz area
1 Saving option Auto saving
2 Shutter sound
3 Flicker tuning
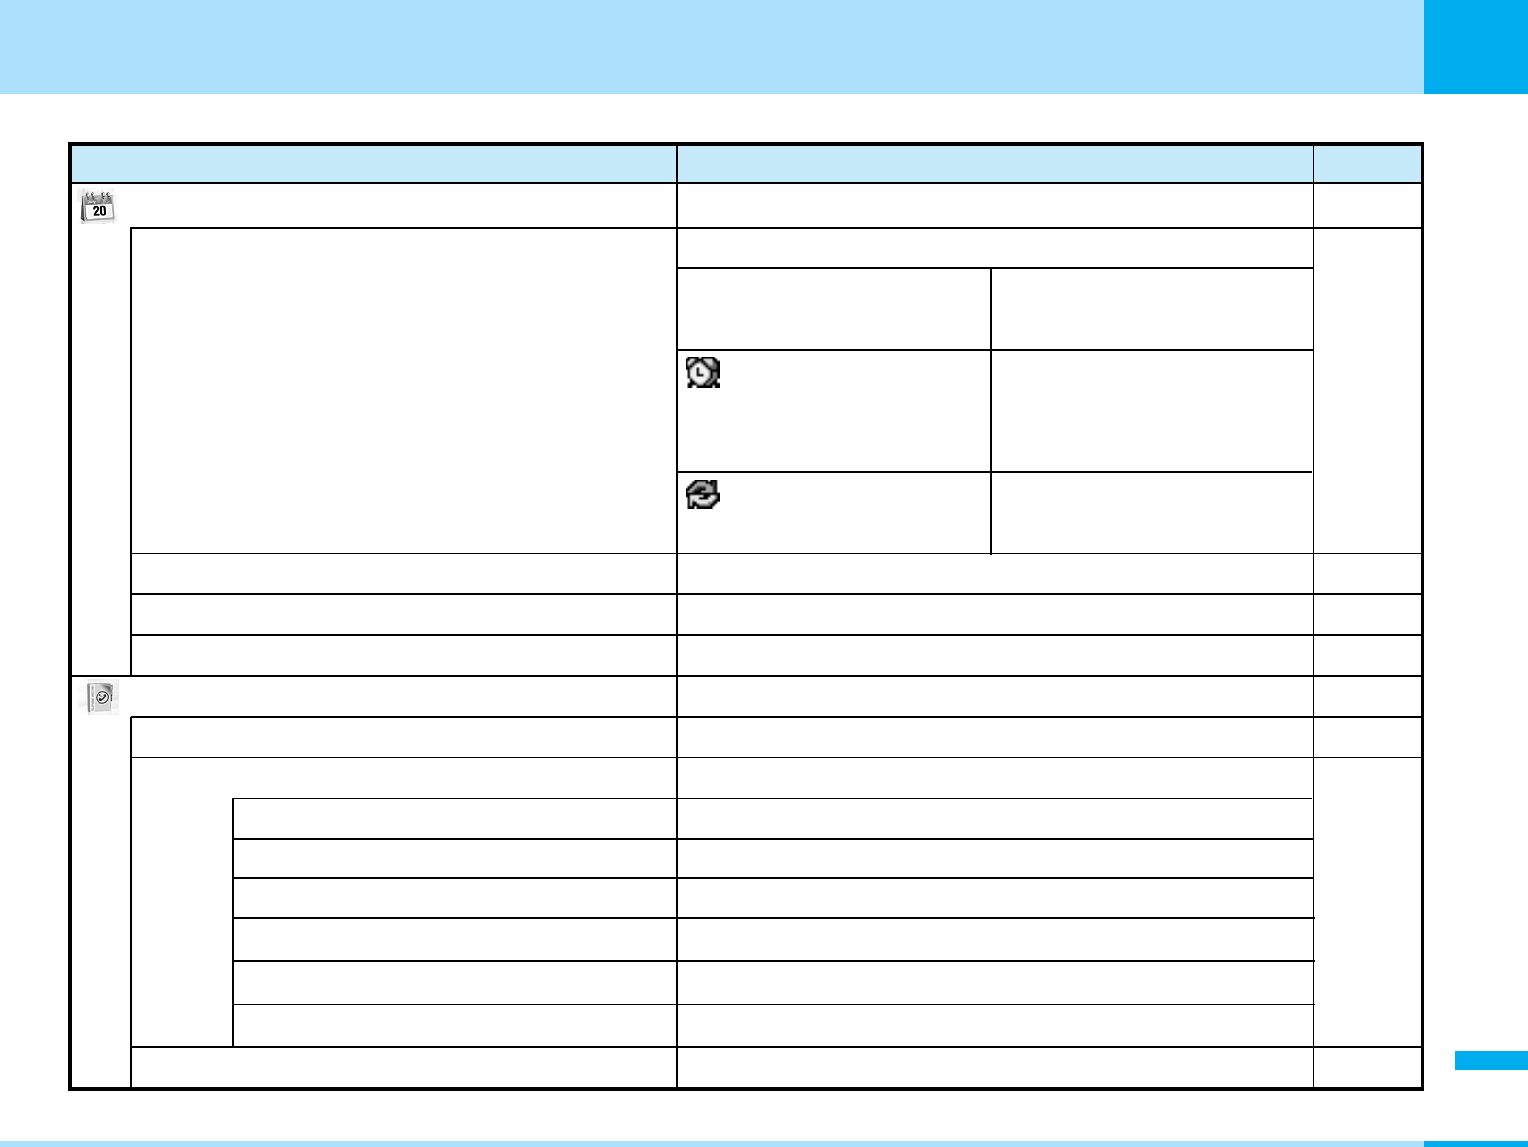
241
Appendix
Next Page
Appendix
Menu Item Setting Item (Blue color: Setting at purchase)
Reference
Phonebook
1 Add to phonebook
1 Show all data
2 Group search
3 Reading search
4 Memory No. search
Not registered
P191
Stationery
1 Scheduler
P189
P66
P64
P193
P194
P195
P63
Not registered
Not registered
–
–
–
–
–
–
Not registered
4 Date counter
3 Date search
2 Memo
Schedule type
No alarm/On time/Before 15
mins/Before 30 mins/Before 1
hour/Before 1 day/Before 3
days/ Before 1 week
Alarm
Repeat
None/Private/Anniversary/Trip/
Work/Meeting
2 Search phonebook
Once/Daily/Mon~Fri/Sat~Sun/
Weekly/Monthly/Yearly
–
5 Phone No. search
P70
–
–
6 Domain search
3 No. of phonebook
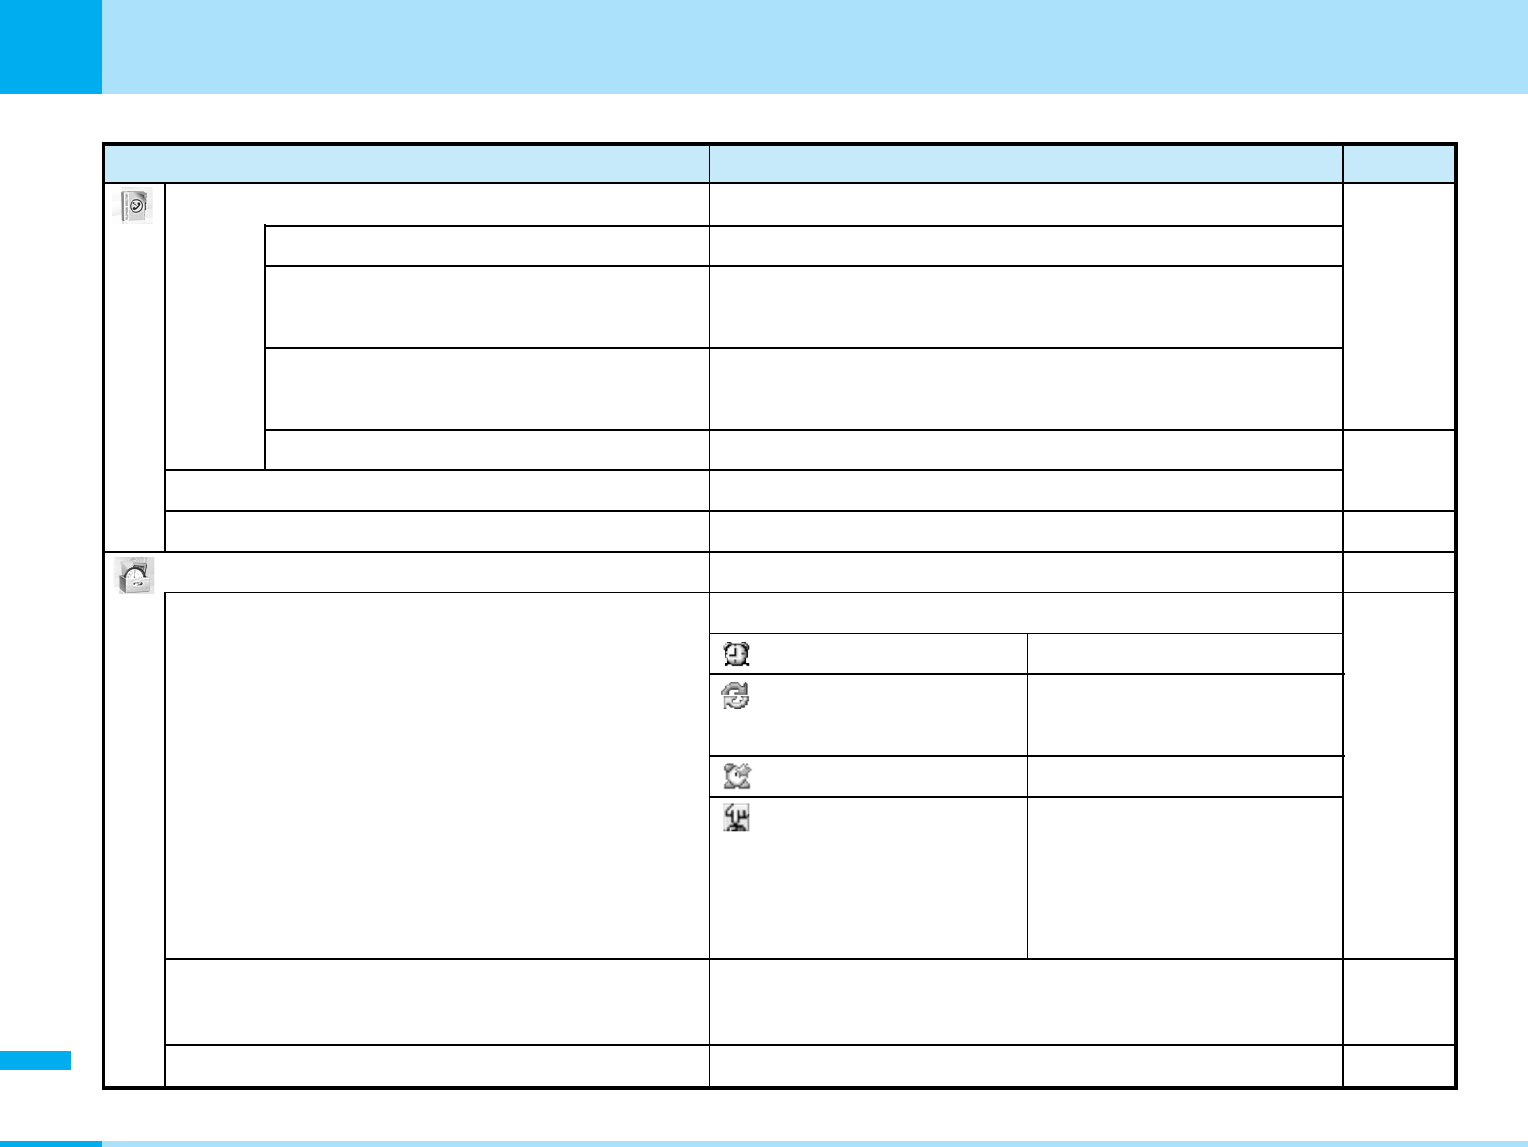
242
Appendix
Appendix
Menu Item Setting Item (Blue color: Setting at purchase)
Reference
1. @docomo.ne.jp
2~10. Not registered
Show all data/Group search/Reading search/
Memory No. search/Phone No. search/Domain search
ON/OFF P71
1 Display data Handset only/UIM only
2 Create domain list
3 Search by
4 Display image
4 Phonebook settings
5 Group settings Group name: Group 1 - Group 30 (Not setting)
P70
6 Own number –
Tools
P72
P179
Not setting
ON/OFF
OFF/ON (Max Ring&Vib)
OFF/In 5 mins/In 10 mins/
In 30 mins/In 1 hour/
In 2 hours/In 4 hours/
In 8 hours/In 1 day/In 1 week
Once/Daily/Mon~ Fri/
Sat~Sun/Except holiday
(Snooze setting)
(Turbo Alarm)
(ON/OFF setting)
(Repetition setting)
1 Alarm
3 Receive Ir data – P184
P181
P180
2 Custom menu 1 Search phonebook, 2Mail, 3i-mode, 4Camera-mode,
5Alarm, 6Select ringtone, 7~10 Not registered
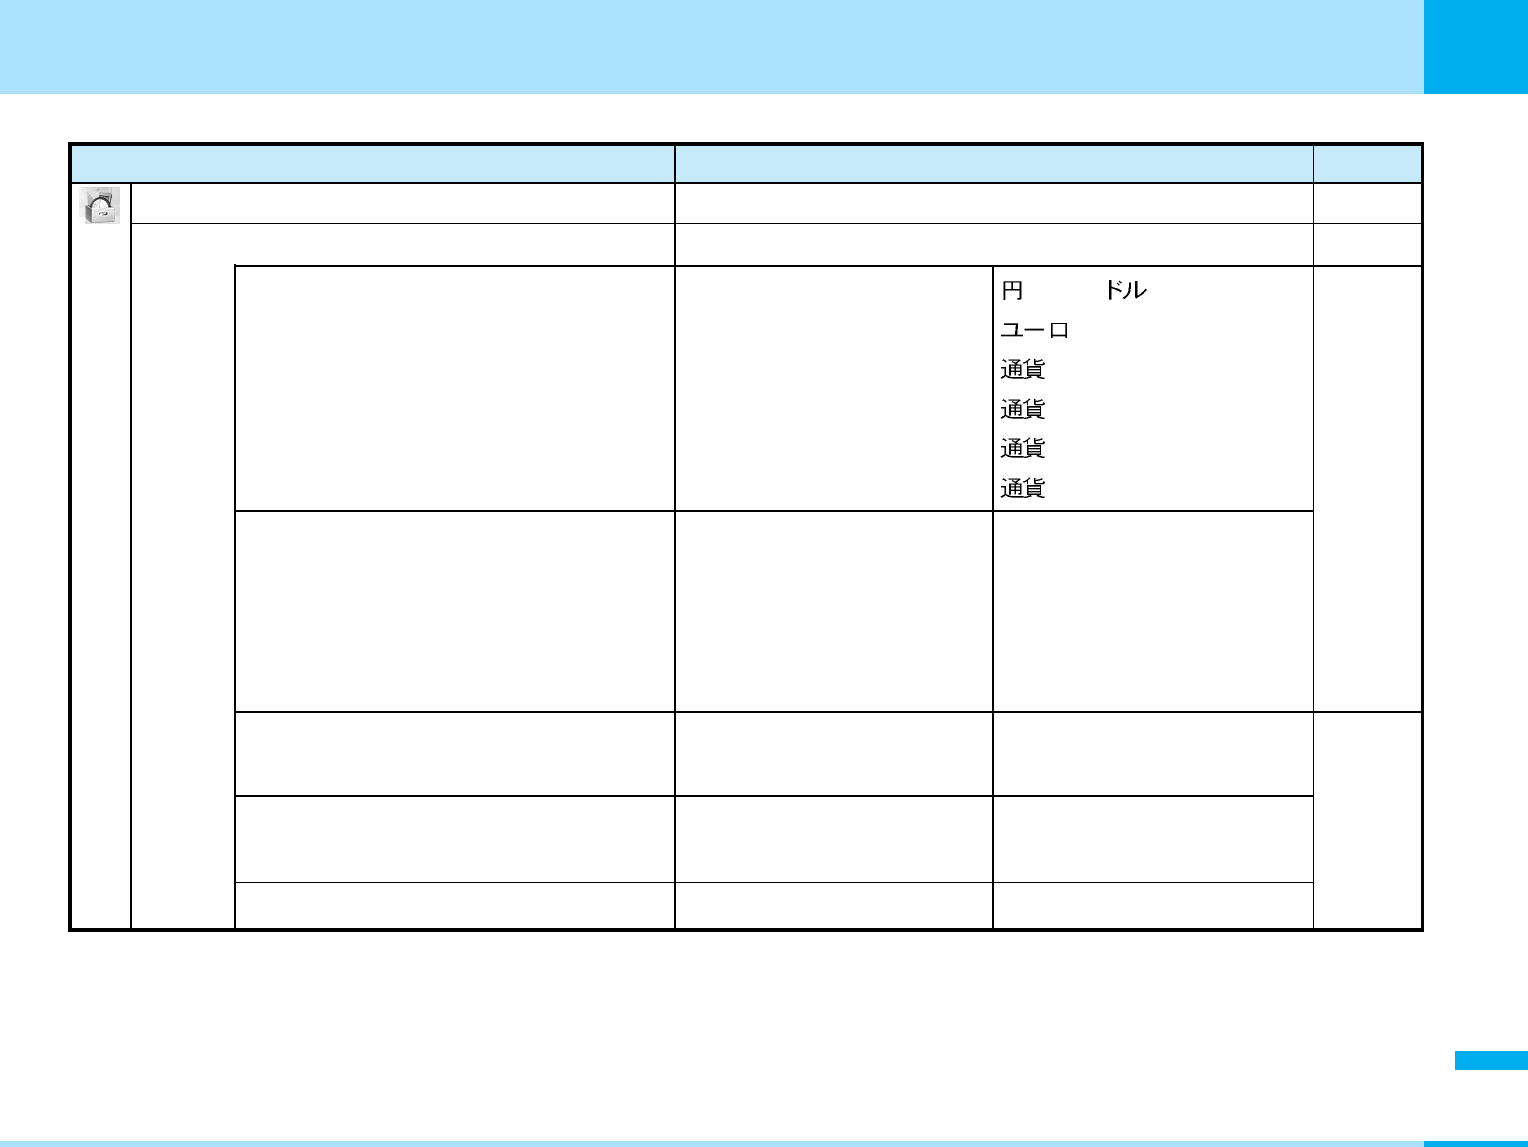
243
Appendix
Next Page
Appendix
Menu Item Setting Item (Blue color: Setting at purchase)
Reference
4 Calculator –
P185
5 Unit converter
P186
P187
1 Currency (Yen) / (Dollar) /
(Euro) /
1 (Currency 1) /
2 (Currency 2) /
3 (Currency 3) /
4 (Currency 4)
Acre/Hectare/Square in/
Square feet/Square yd/
Square miles/Square mm/
Square cm/Square m/
Square km
mm, cm, m, km, inch, feet,
yard, mile
2 Surface
3 Length
Currency unit
Surface unit
Length unit
P184
mg, g, kg, ton, ounce, pound,
stone
Celsius/Fahrenheit
4 Weight
5 Temperature
Weight unit
Temperature unit
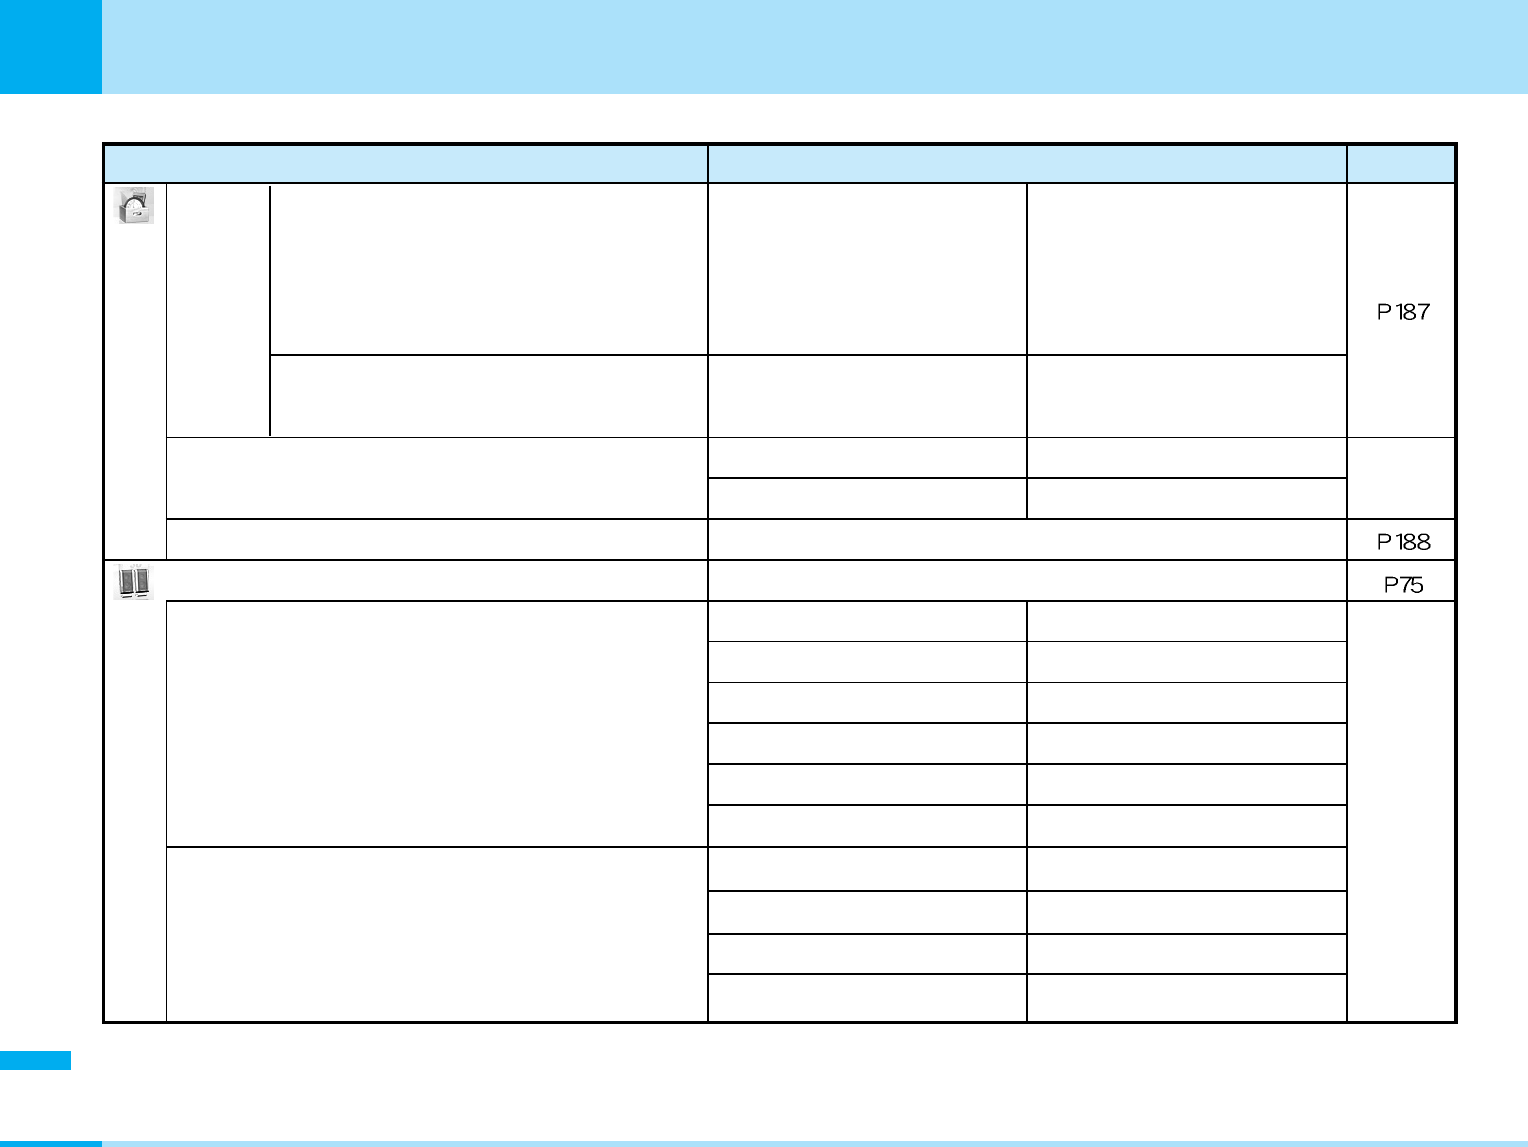
244
Appendix
Appendix
2 Effect tone volume
Menu Item Setting Item (Blue color: Setting at purchase)
Reference
P188, 278
P76
km/h, meter/sec, mile/h,
feet/sec
Tokyo
Level 0~7 (Level 3)
Level 0~7 (Level 3)
Level 0~7 (Level 3)
Level 0~7 (Level 3)
Level 0~7 (Level 3)
Level 0~7 (Level 3)
–
7 Velocity
6 World time
7 Stop watch
Sound
1 Ring volume
Velocity unit
Home setting
Voice call
Video-phone
Mail tone
MessageR tone
MessageF tone
SMS tone
–
Choose city
Key tone Level 0~7 (Level 3)
Power ON/OFF Level 0~7 (Level 3)
Level 0~7 (Level 3)Flip tone
Level 0~7 (Level 3)Feedback tone
Milliliter, Liter, Cubic mm,
Cubic cm, Cubic meter,
Cubic inch, Gallon, Liq.pt,
Liq.oz, Fluid oz, Barrel
6 Volume Volume unit
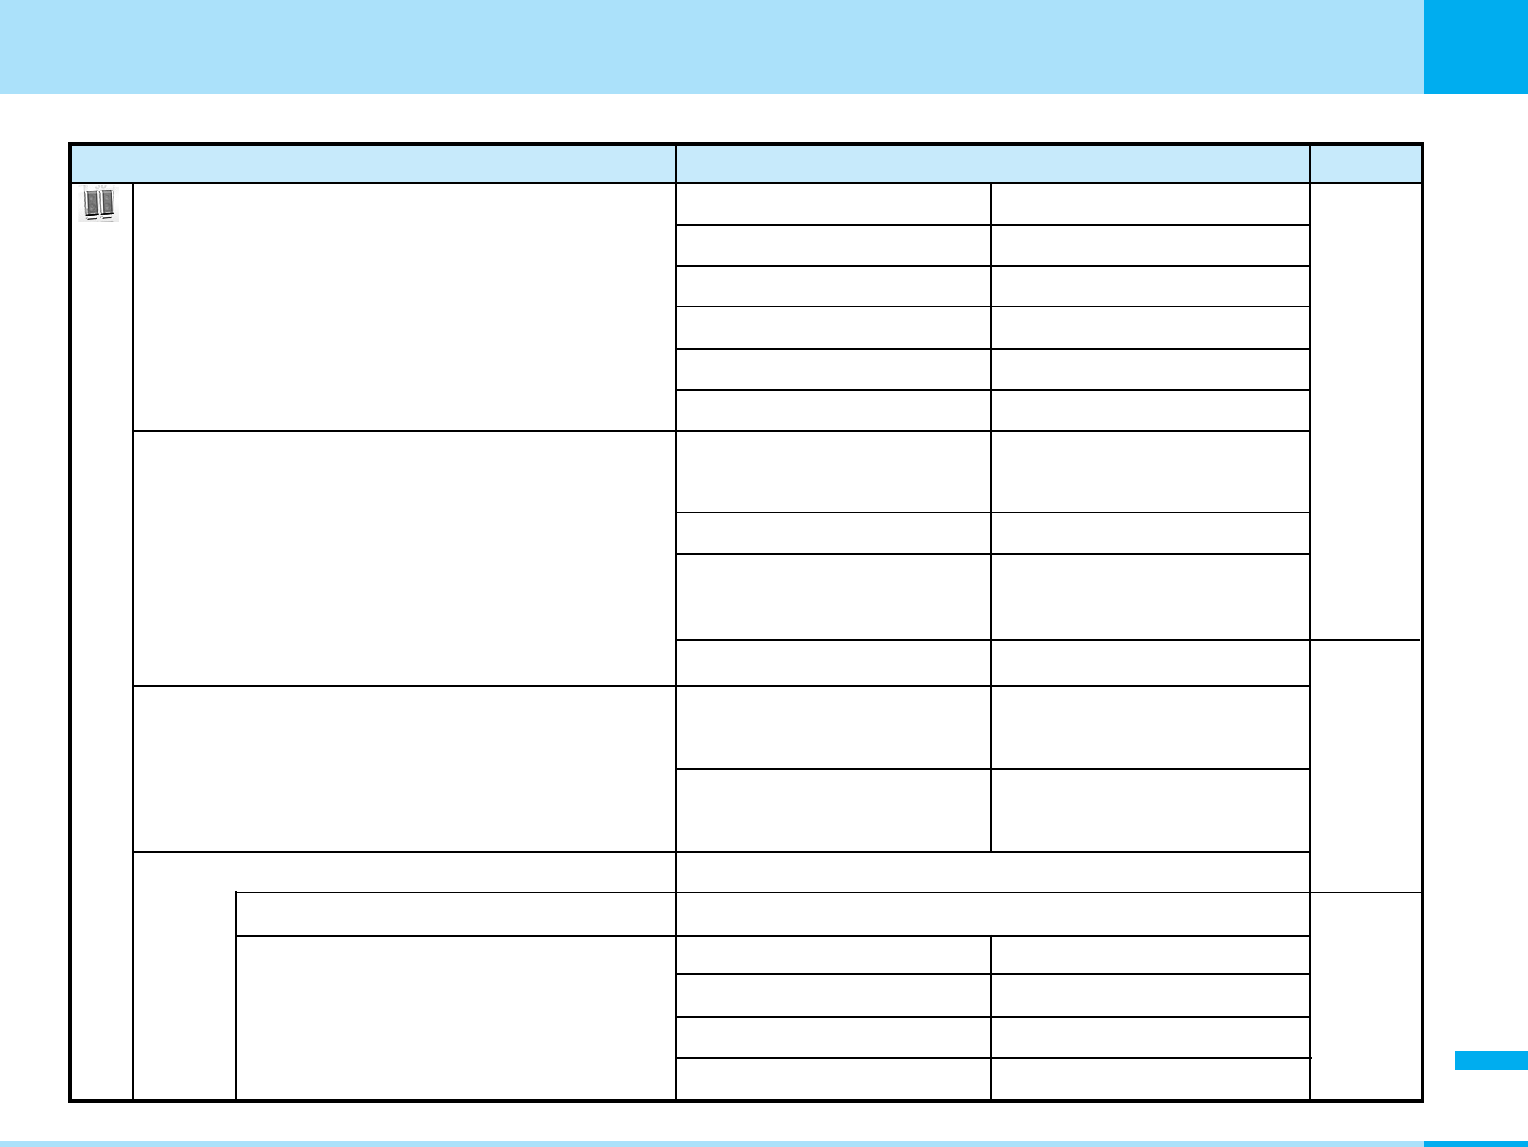
245
Appendix
Next Page
Appendix
Menu Item Setting Item (Blue color: Setting at purchase)
Reference
Feedback tone
Incoming call
melody + vibration/Pattern 1 (Vibration
only)/Pattern 2 (Vibration only)/OFF
ON/OFF
Message
melody + vibration/Pattern 1 (Vibration
only)/Pattern 2 (Vibration only)/OFF
5 Vibration settings
3 Select ringtone
MessageF tone
SMS tone
Key tone
Power ON/OFF
Flip tone
MessageR tone
Mail tone
Video-phone
Voice call
P78
ON/OFF
4 Select effect tone
Sound off/Sound1/Sound 2/
Sound3
P77
Ring01.mid
Ring02.mid
Message02.mid
Message03.mid
Message04.mid
Message05.mid
OFF/Digital Tone/Japanese/
English/Korean
6 Manner settings Manner mode/Original manner mode
P79
1 Manner mode –
2 Original manner mode Incoming call sound ON/OFF
ON/OFF
ON/OFF
Incoming call vib.
Message sound
Message vibration ON/OFF
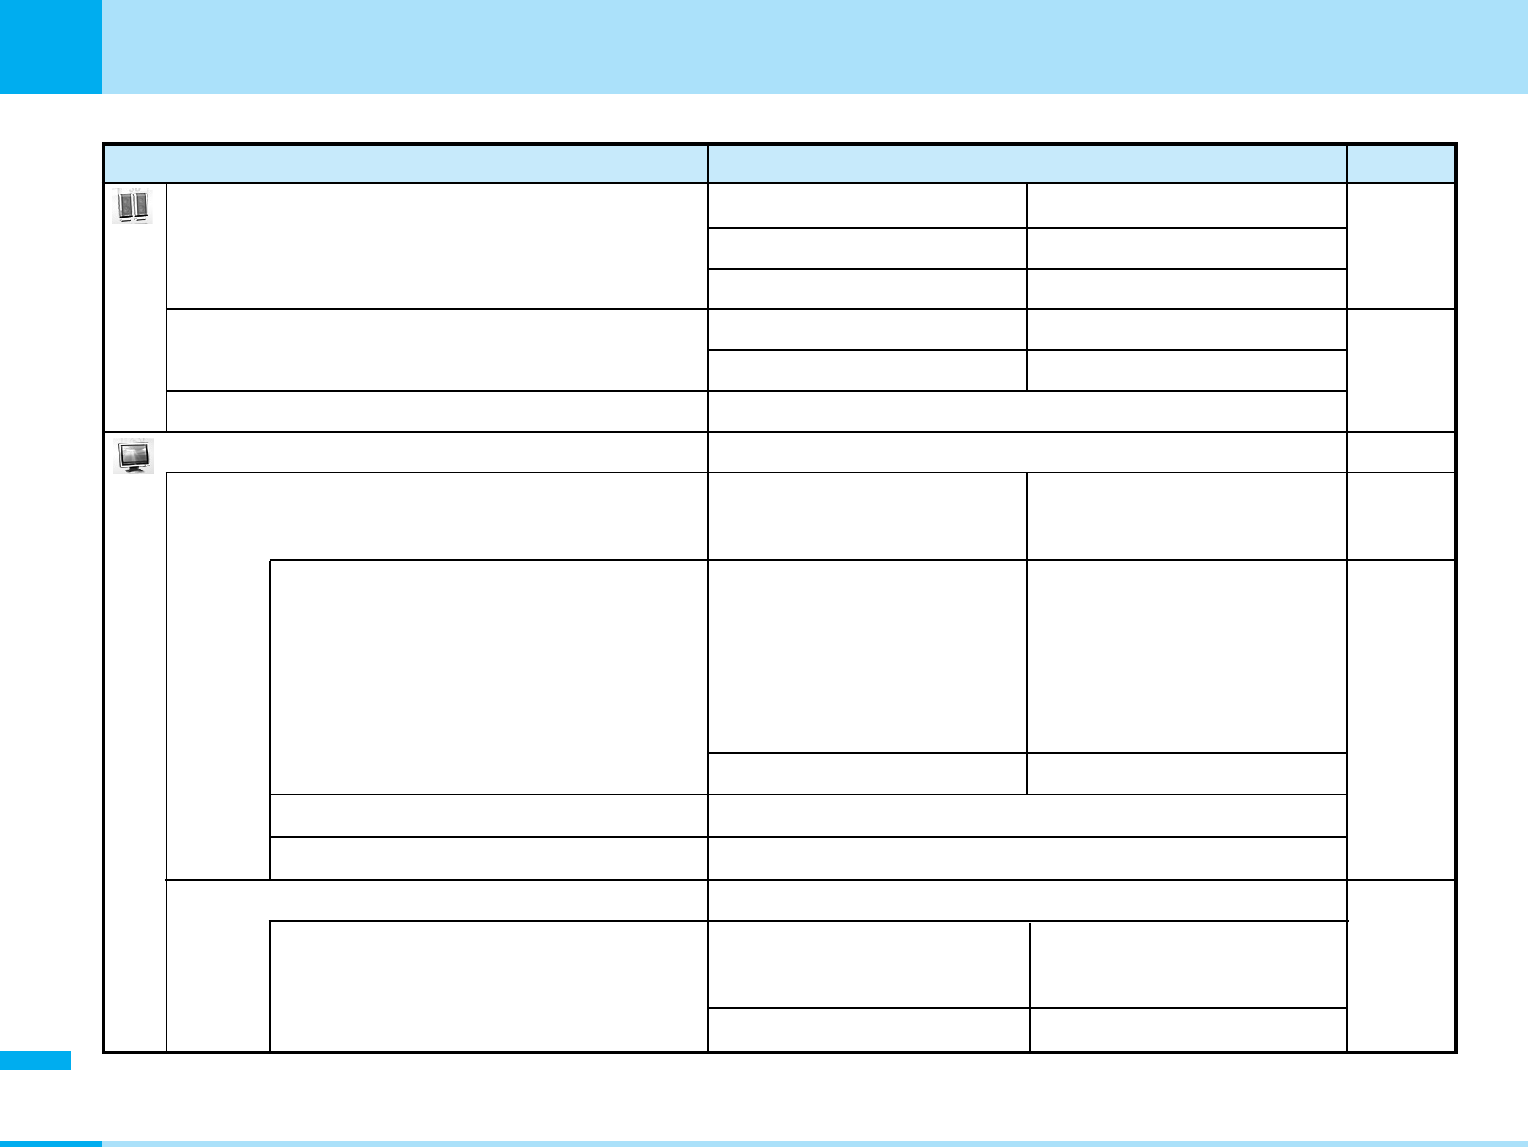
246
Appendix
Appendix
Menu Item Setting Item (Blue color: Setting at purchase)
Reference
8 Set mute seconds 0 Sec.
P81
Display
1 Main display
2 Incoming call
3 Outgoing call
P75
P80
Time 3 Sec./Duration 1 Cycle
Select file: Vivid red.gif
Clock theme: Willy Willy
Clock: Digital 1/Digital 2/
Digital 3/Digital 4
Dual clock
Calendar + Clock
Not display
16 colors in total (black)
Mail ring duraiton
Wallpaper
Display items
Clock font color
Incoming_call_clean.gif
Outgoing_call_clean.gif
P79
P80
P82
7 Mail ring duration
Flip tone
Low battery tone
ON/OFF
ON/OFF
ON/OFF
Mail ring ON/OFF
ON/OFF
Key tone
1 Stand-by display
1 Stand-by display
Wallpaper
Display items
Select file: Sub_vivid red.jpg
Clock theme: Tropical
Dual clock/Calendar+clock
2 Sub display

247
Appendix
Next Page
Appendix
Menu Item Setting Item (Blue color: Setting at purchase)
Reference
Dial font size
Dial font color
List
Main display
Sub display
Keypad
3 Dial Font
4 Menu style
5 Backlight
Small/Large
Total 16 colors (Orange)
List
Grid
10 seconds/30 seconds/60 seconds/
120 seconds/180 seconds
100%/80%/60%/40%
10 seconds/30 seconds/60 seconds/
120 seconds/180 seconds
100%/80%/60%/40%
10 seconds/30 seconds/60 seconds/
120 seconds/180 seconds
P83
2 Incoming call
3 Outgoing call
Sub_incoming.gif
Sub_outgoing.gif P82
P84
6 Color scheme Green tea black/Cherry pink/Water drop blue/Ceramic white
7 LED Settings Lighting
Incoming voice call
ON/OFF
Pattern 10
(red/pink/blue/aqua/green
/yellow)
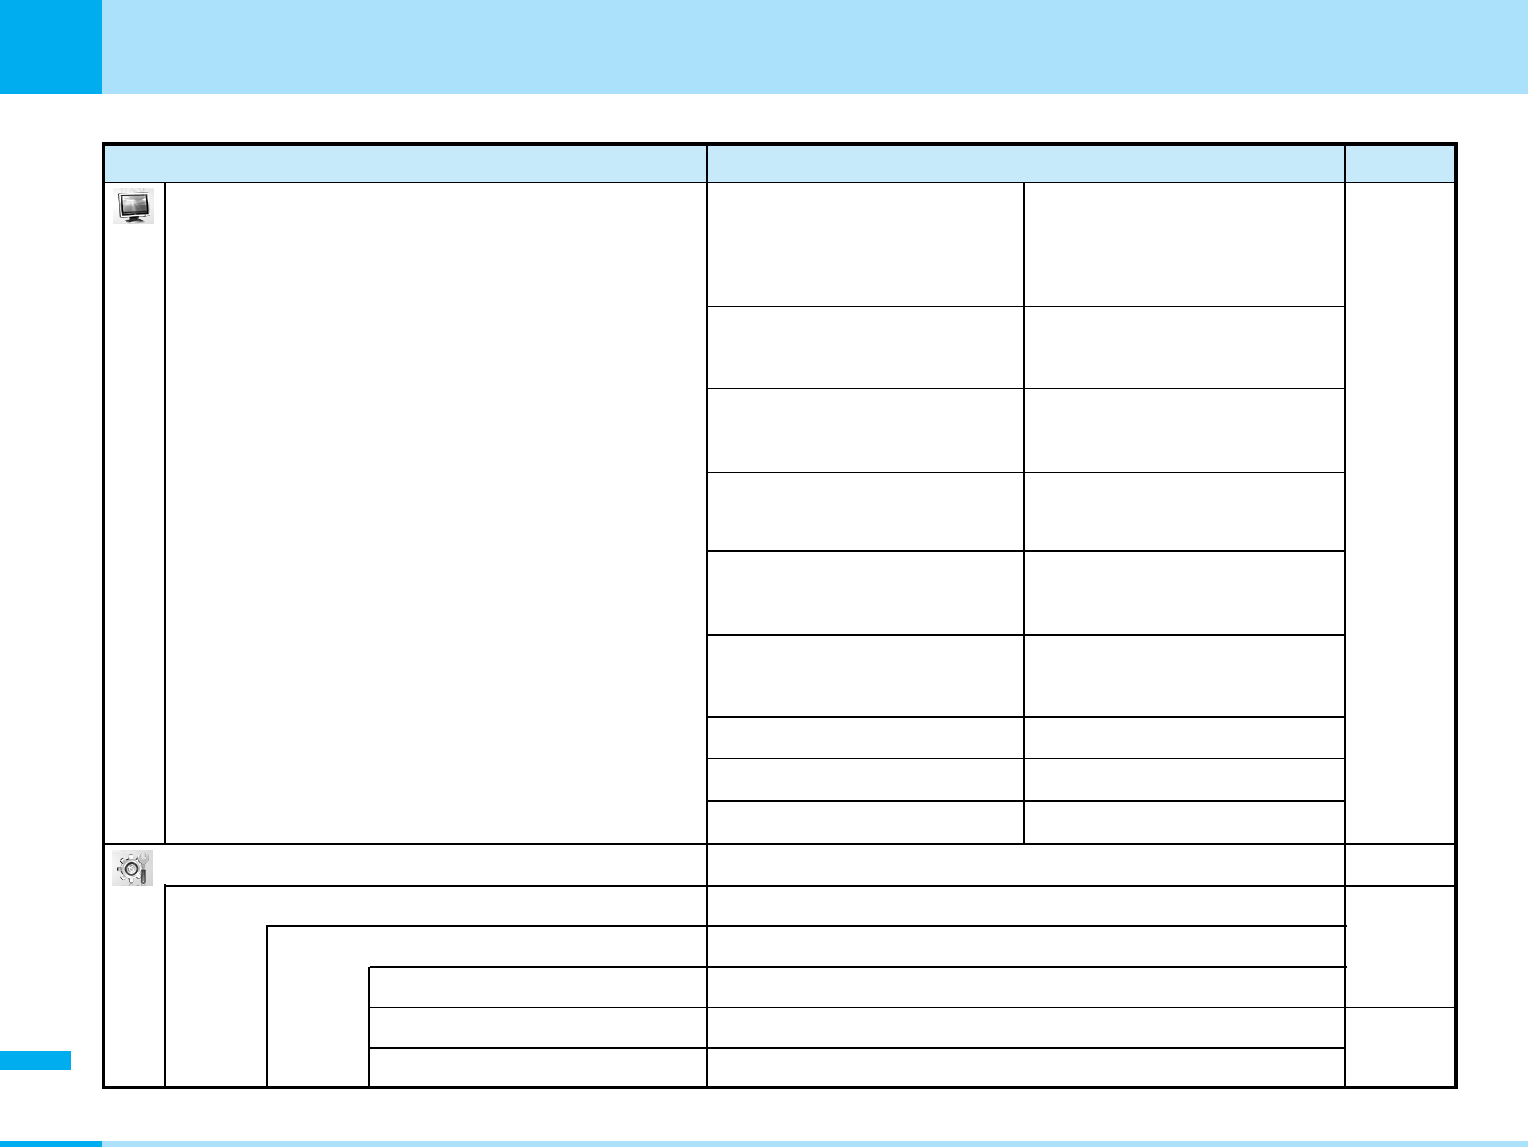
248
Appendix
Appendix
Menu Item Setting Item (Blue color: Setting at purchase)
Reference
P84
Incoming video call
Receiving mail
Receiving messageR
Receiving messageF
Receiving SMS
Playing music
Alarm
Pattern 10
(red/pink/blue/aqua/green
/yellow)
Pattern 9
(red/yellow/green)
Pattern 9
(yellow/pink/green)
Pattern 9
(green/yellow/blue)
Pattern 9
(blue/yellow/red)
Pattern 8
(aqua/white/pink)
Pattern 3 (aqua)
Pattern 4 (blue/red)
Schedule
Pattern 1 (aqua)
During a call
P86
P87
No record
No record
No record
1 Call/MAil history
1 Received calls
2 Dialed calls
3 All calls
Settings
1 Call/Answer
P85
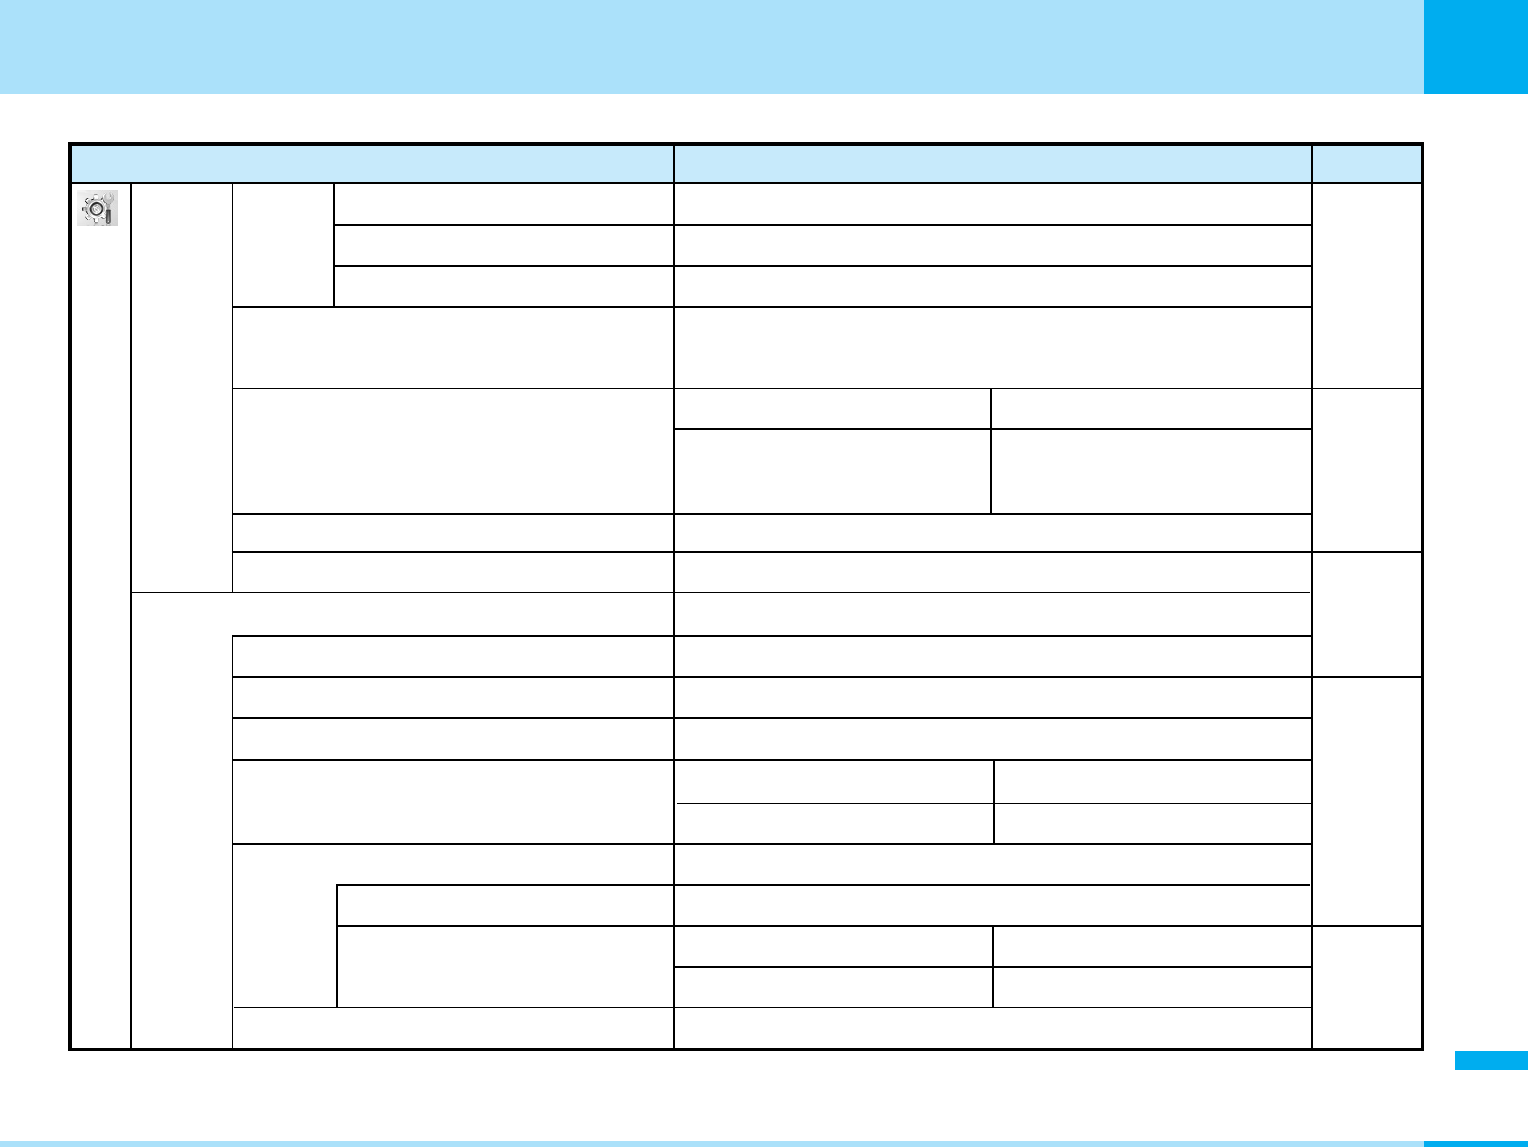
249
Appendix
Appendix
Menu Item Setting Item (Blue color: Setting at purchase)
Reference
5 Answer mode
2 Call feature
1 Reconnect alarm
2 Quality alarm
3 Minute reminder
Press send key/Open flip/Press any key
P91
P92
P88
No record
No record
No record
2 Call duration
4 Received mails
5 Sent mails
6 All mails
Accept/Reject/Reject all calls/Memory reject call
Last call, Received calls, Dialed calls, All calls (00:00:00)
3 Auto answer
4 Reject/Accept call
P89
Auto answering
Delayed time
(SEC) (0 - 120)
10
ON/OFF
High alarm/Low alarm/No alarm
High alarm/Low alarm/No alarm
ON/OFF
5 International dial
6 Close setting
2 IDD prefix setting
Auto/OFF
WORLDCALL
009130010
IDD prefix name
IDD prefix code
End the call/Continue (Mute)
1 Auto assist setting
4 Prefix dial
P93
Not registeredPREFIX 2~3
PREFIX 1 009130010
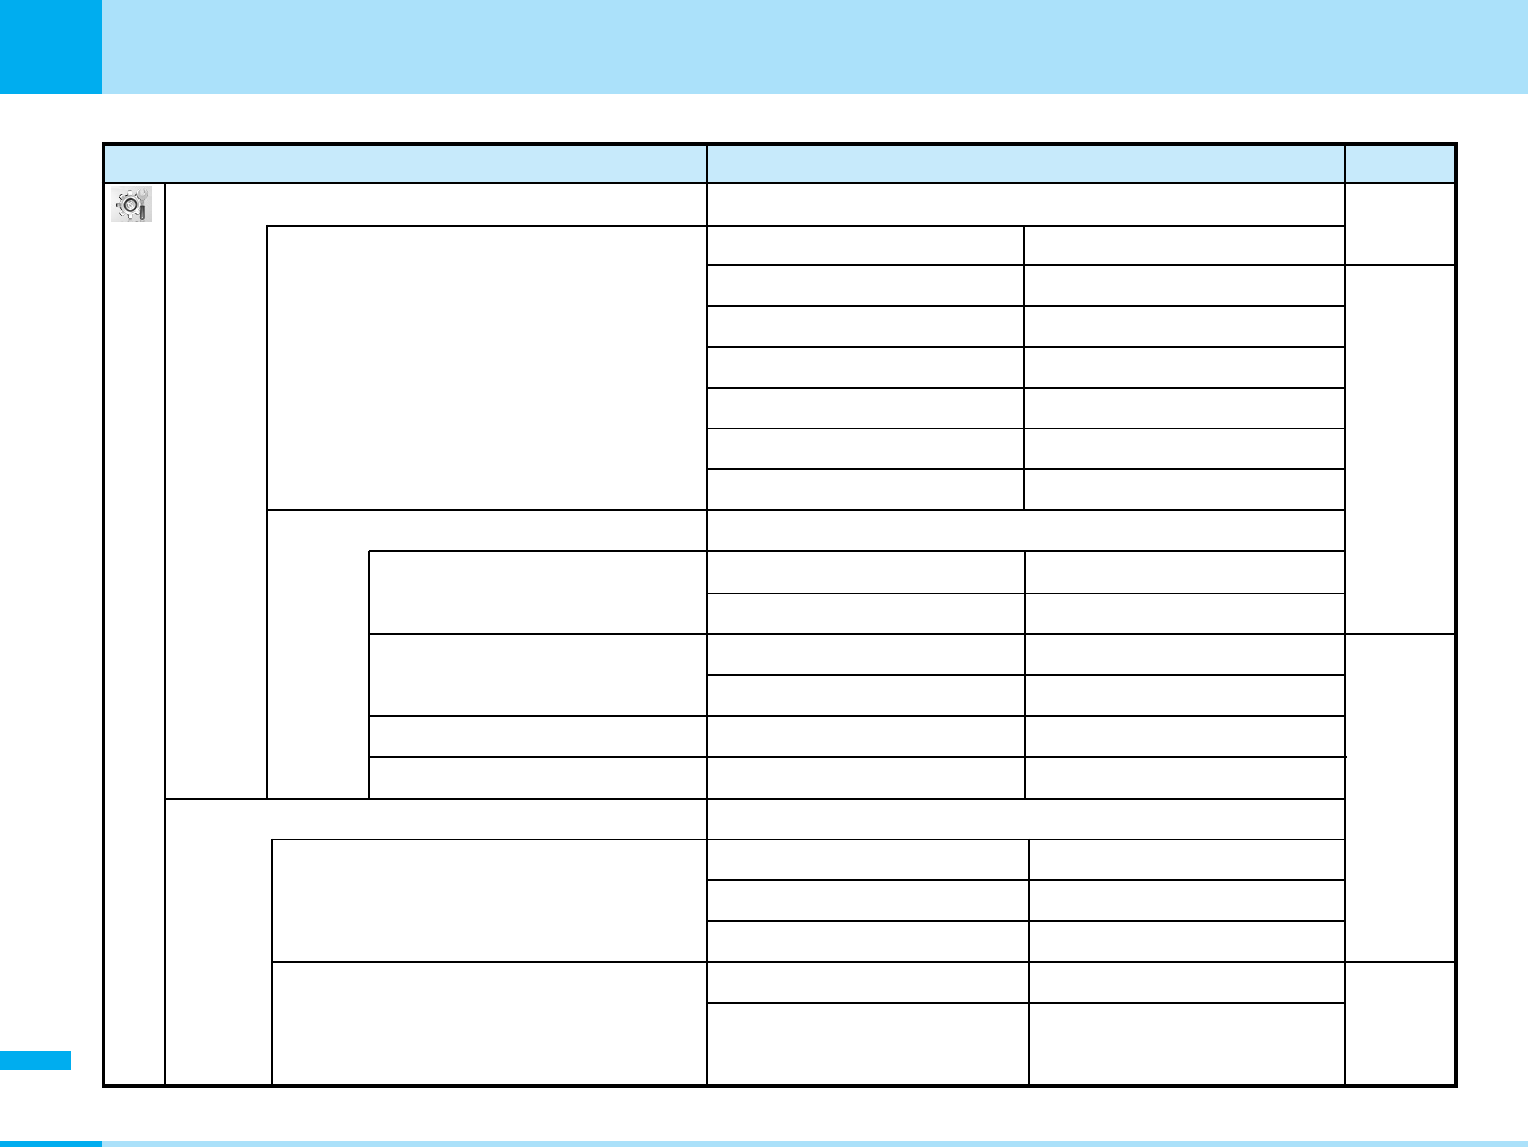
250
Appendix
Appendix
Menu Item Setting Item (Blue color: Setting at purchase)
Reference
P95
Image
Image
Image list
Image list
Image
Image list
Default image
/Selected image
Not setting
Default image
/Selected image
Not setting
Not setting
Default image
/Selected image
1 Substitutive image
2 Response hold image
3 On-hold image
3 Video-phone
1 Video-phone settings
2 Image settings
VoiceCall AutoSwitch
Display setting
Sub screen
Send camera image
Sending img. quality
ON/OFF
Both/Other/Me
Me/Other
ON/OFF
Prefer image quality/Normal/Prefer motion quality
Display light
Hands_free V.phone
Always on/Terminal setting
ON/OFF
P94
P93
Hour indication OFF
2006.01.01
DD/MM/YYYY / MM/DD/YYYY /
YYYY/MM/DD
Set date
Date format
2 Set date
P96
4 Date & Time
1 Set time 00 : 00 : 00
Set time
12-hour/24-hourTime format
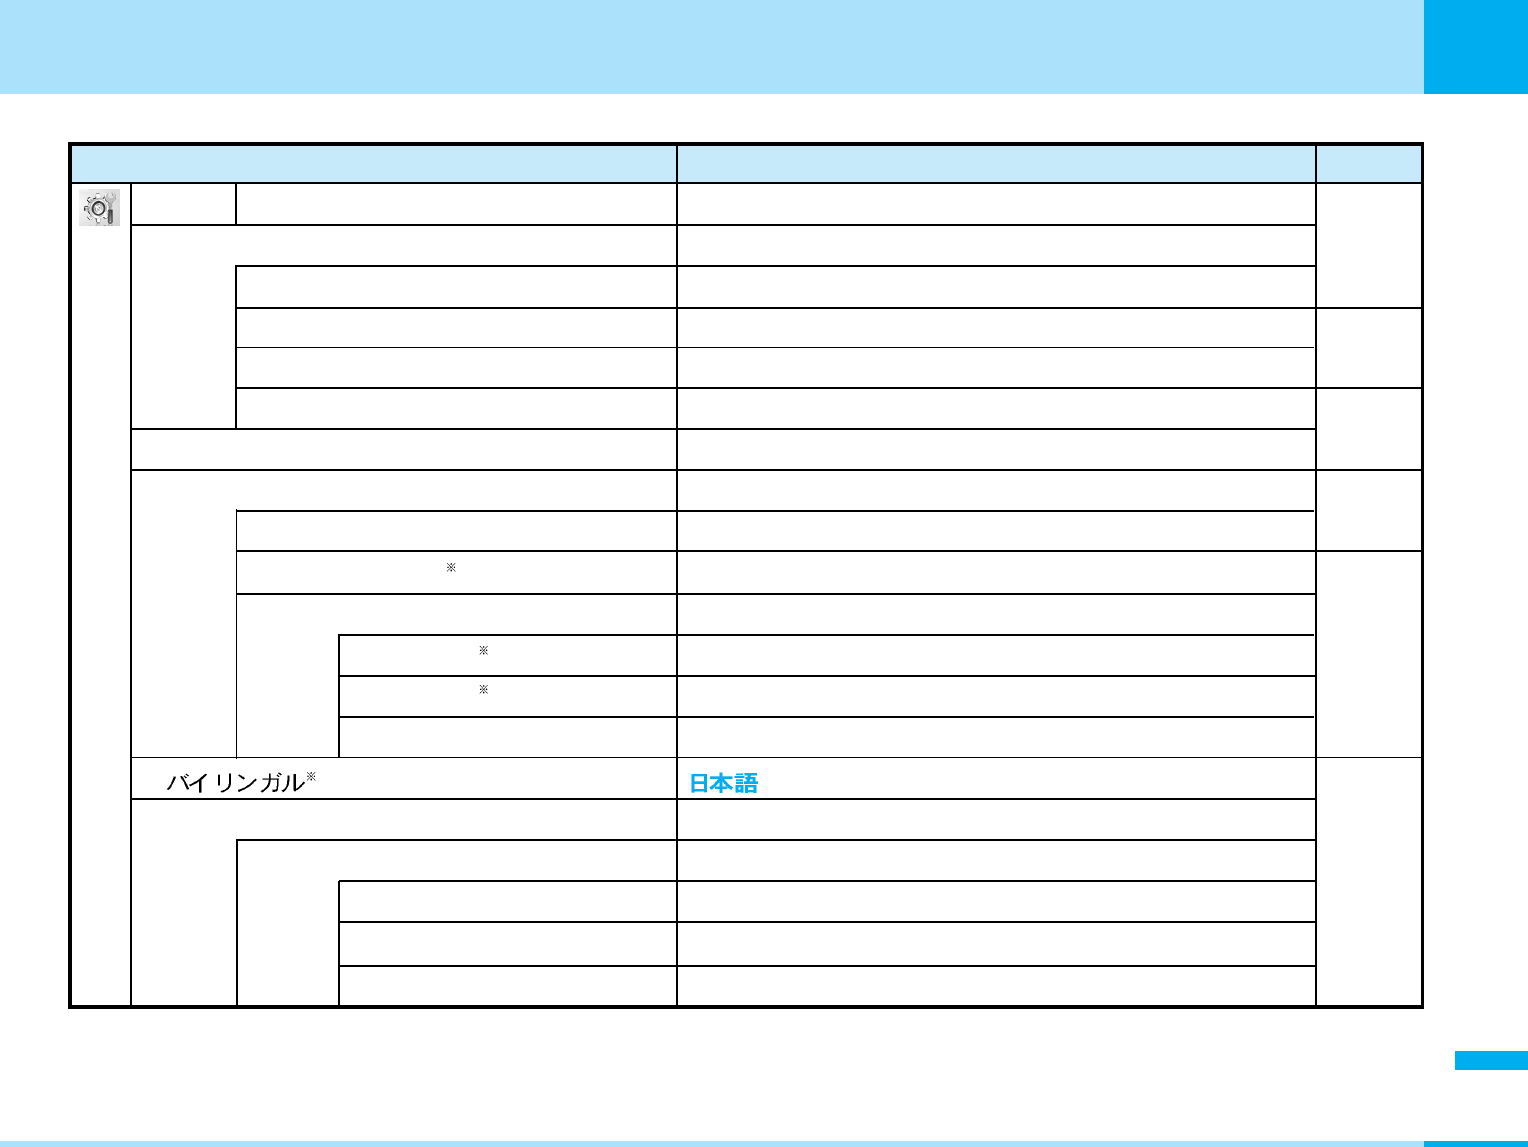
251
Appendix
Next Page
Appendix
Menu Item Setting Item (Blue color: Setting at purchase)
Reference
3 Security code
0000
ON/OFF
P100
3 Change password
2 PIN code request 1
2 PIN2 code 1
1 PIN1 code 1
0000
0000
/English
5 Network
6 Host selection
1 Network selection
2 Network mode
3 Preferred lists
4 Network name display
Auto/Manual
Auto/WCDMA only/GSM only
Depending on user's setting
Display on/Display off
i - mode
P97
P98
7 Security
82
Power on/Immediate/None P99
1 All lock
3 Daylight saving ON/OFF
P96
2 Personal info.
3 UIM memory
–
–
9 Others
1 Memory status
1 Data box – P101
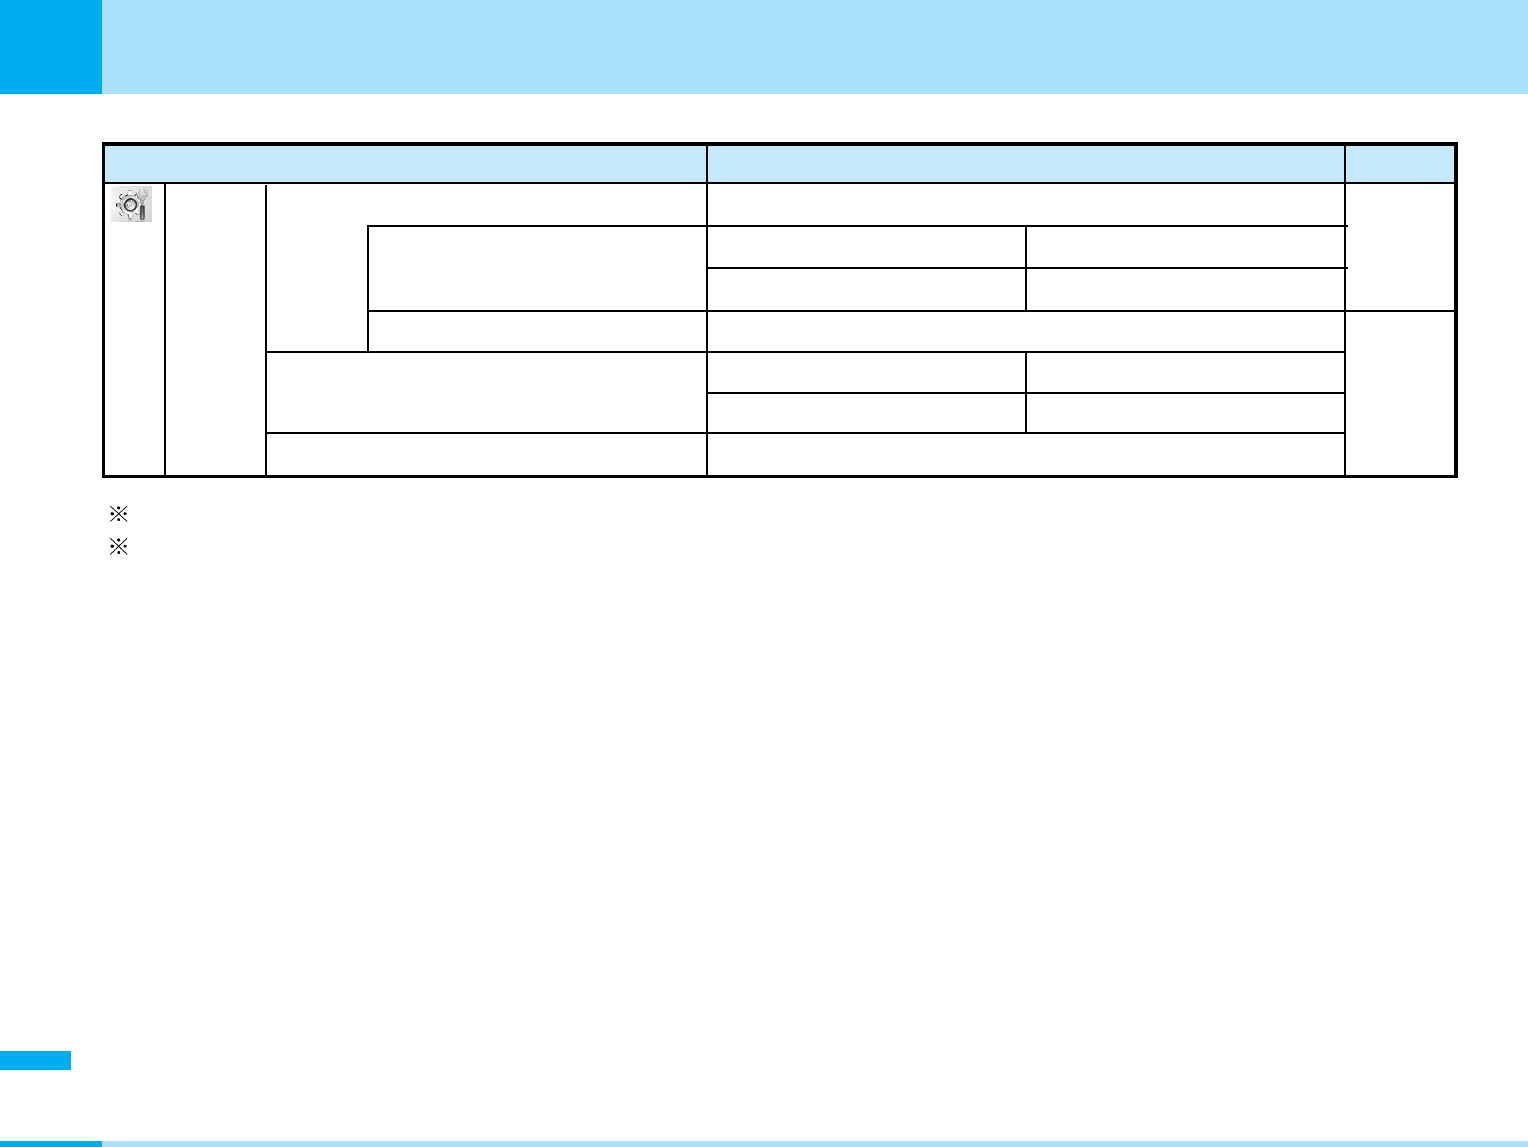
252
Appendix
Appendix
P102
2 Default settings
3 SMS center
4 Reset holiday
–
DoCoMo/Others
81903101652
SMSC
Address
–
2 Personal info.
Menu Item Setting Item (Blue color: Setting at purchase)
Reference
1: Settings of UIM takes precedence.
2: The setting is registered in FOMA phone and UIM, but if each setting is different, the setting of UIM takes precedence.
1 Clear memory
2 Reset settings
1 Data box
–
–P101
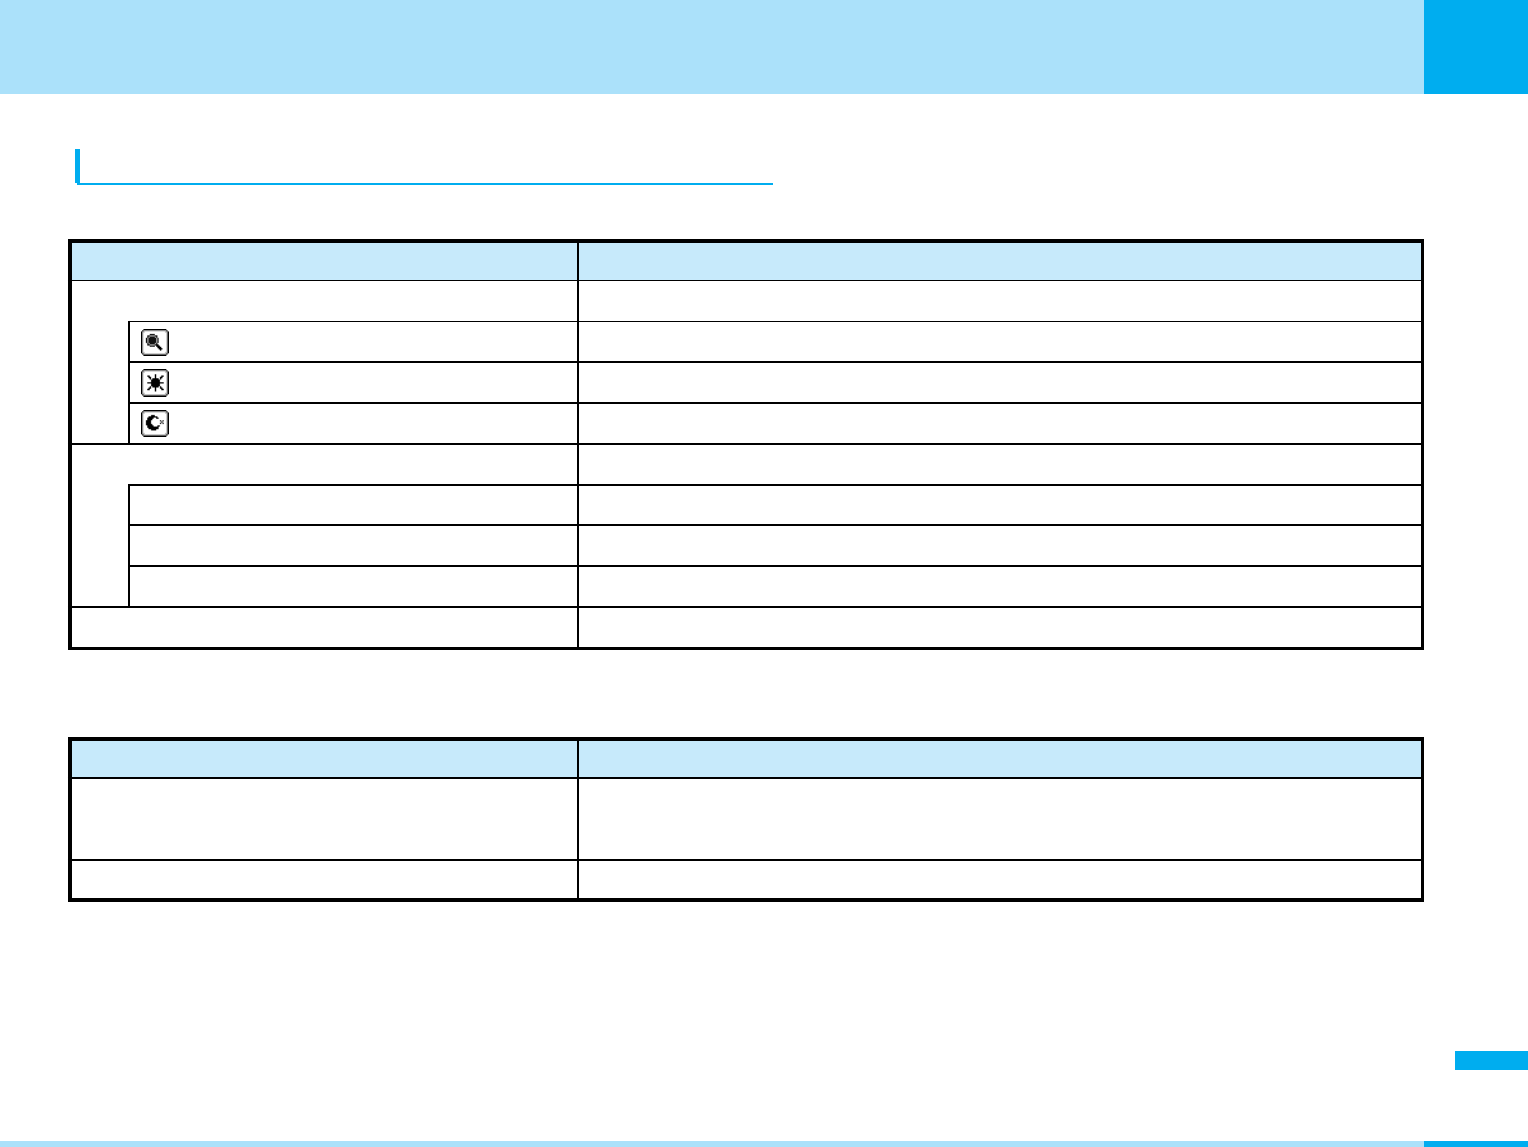
253
Appendix
Next page
Appendix
Default List of the Submenu/Function Menu Items
Video-phone talking screen >P59
Phonebook list screen >P67
Setting ItemsItems / Function Name
X1/X2
High/Medium/Low
ON/OFF
Both/Other/Me
Me/Other
Always on/Terminal setting
Normal/Prefer motion quality/Prefer image quality
Camera settings
(Zoom)
(Brightness)
(Night mode)
Video phone settings
Display setting
Sub screen
Display light
Sending img. Quality
Setting ItemsItems / Function Name
Show all data/Group search/Reading search/Memory No. search/Phone No.
search/Domain search
ON/OFF
Search phonebook
Display image
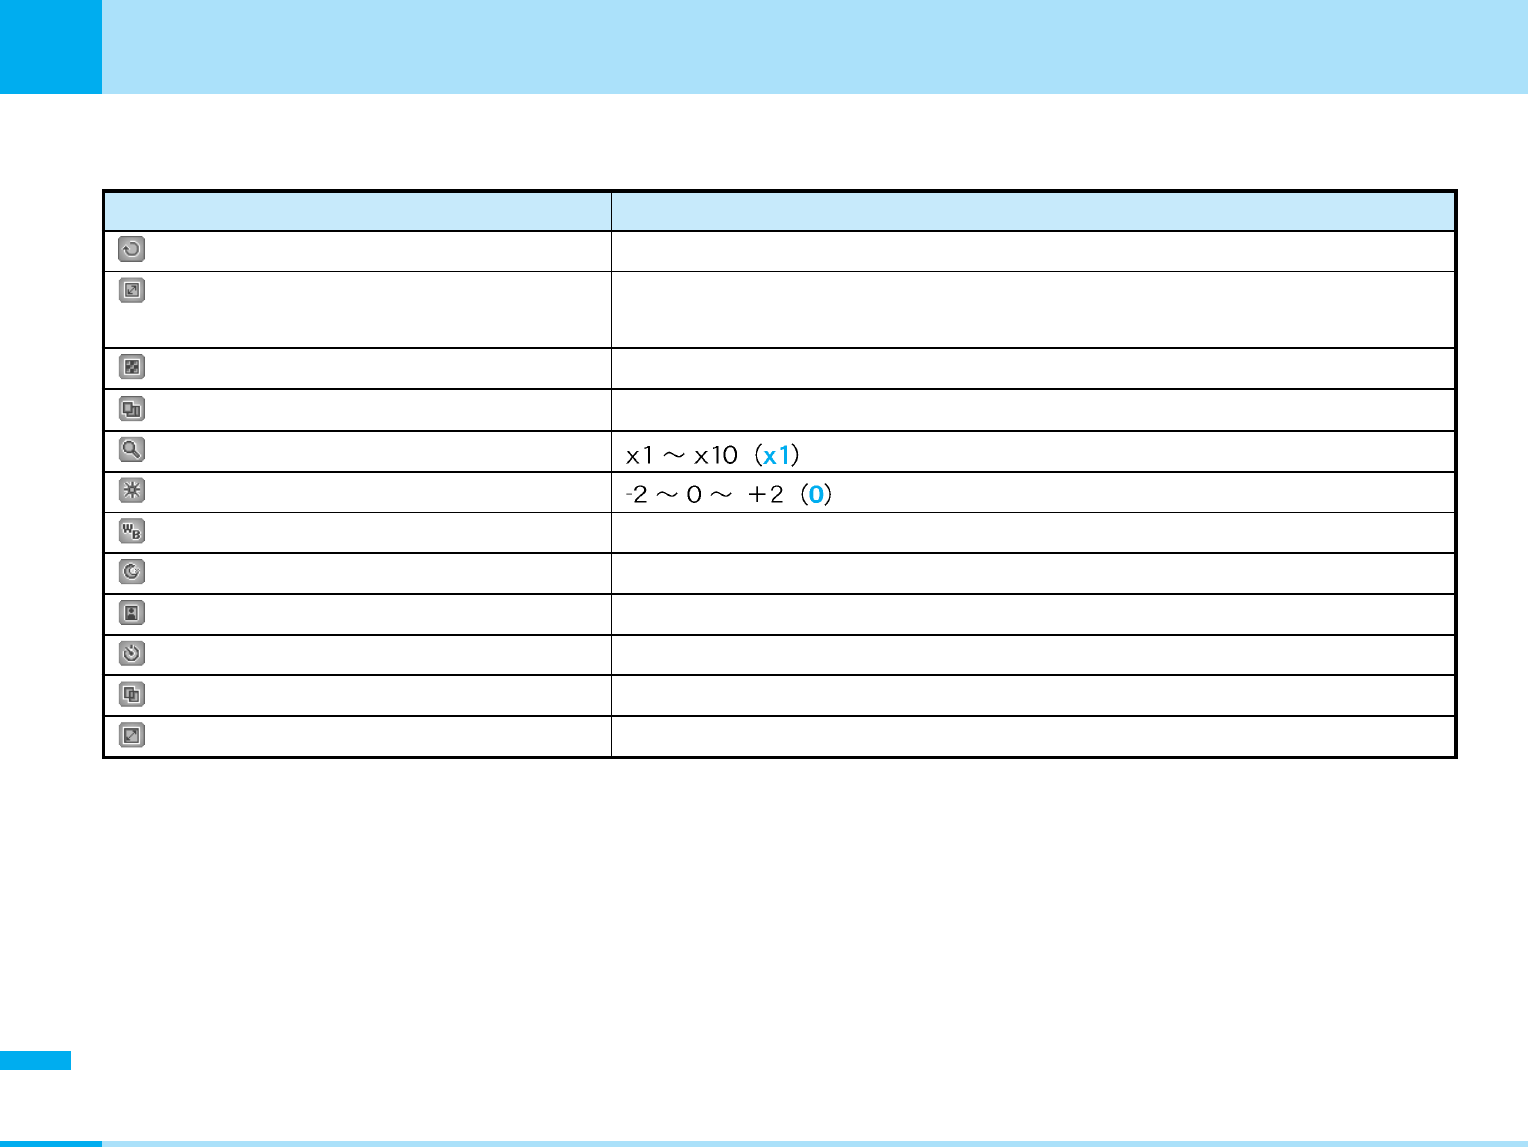
254
Appendix
Still Image Finder Stand-by display >P112
Setting Items
No restriction/100KB/9KB
(File size restriction)
Super fine/Fine/Normal
OFF/3/6/9
Auto/Daylight/Cloudy/Incandescent/Fluorescent
ON/OFF
Choose frame/No frame
None/3 sec./5 sec./10 sec.
None/Black & White/Sepia/Negative
(Size)
(Upside down)
(Quality)
(Multishot)
(Zoom)
(Brightness)
(White balance)
(Night mode)
(Frame shot)
(Auto timer)
(Effect)
1280X1024/640X480/352X288/320X240/176X220/176X144/128X96/
Phonebook
Upside down
Submenu Items
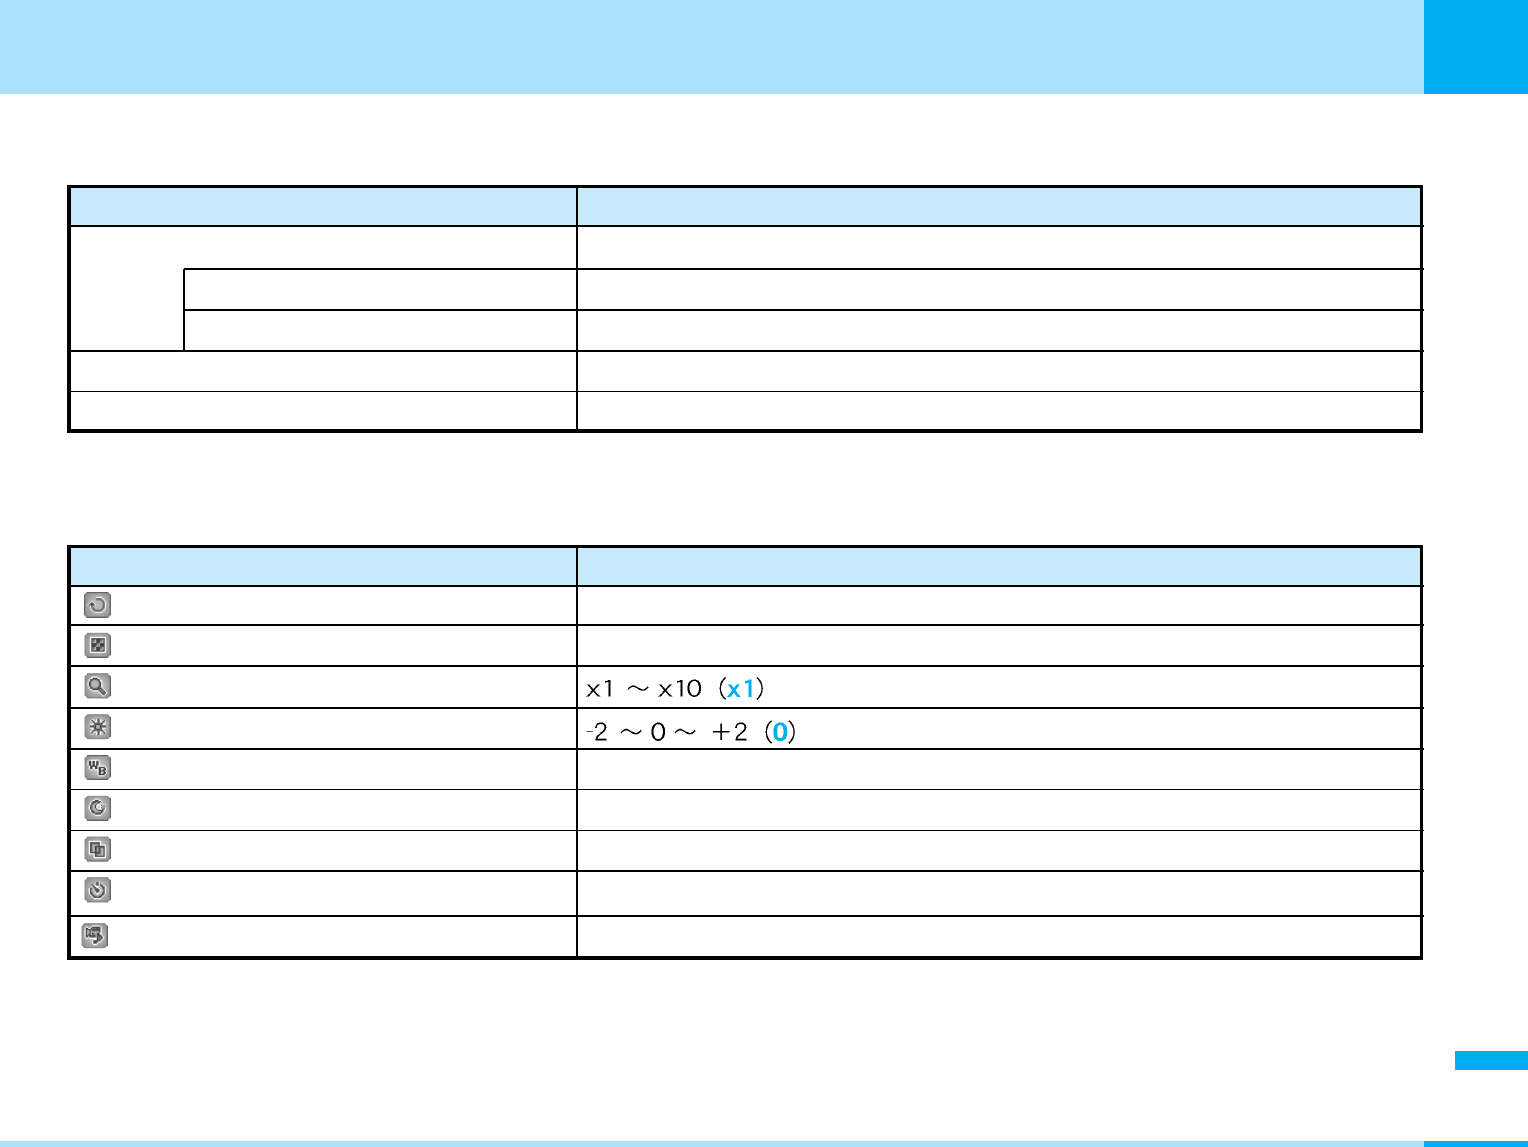
255
Appendix
Next page
Still Image Display (After taking a multishot) >P113
Moving Image Display >P116
Setting ItemsSubmenu Item
Normal screen/Full screen
1 ~ 9 sec (s) (1)
Slide show settings
View as
Time interval (secs)
Sort by
Setting ItemsSubmenu Item
Super fine/Fine/Normal
Upside down
Auto/Daylight/ Cloudy/Incandescent/Fluorescent
ON/OFF
None/Black & White/Negative/Sepia
30 secs/1 min/2 mins/5 mins/30 mins/Mail attach
(Quality)
(Upside down)
(Zoom)
(Brightness)
(White balance)
(Night mode)
(Effect)
(Recording time)
Sound+Video/Video only/Sound only
(Type)
View by
Name/Date/Type
Simple list/Detailed list/Grid
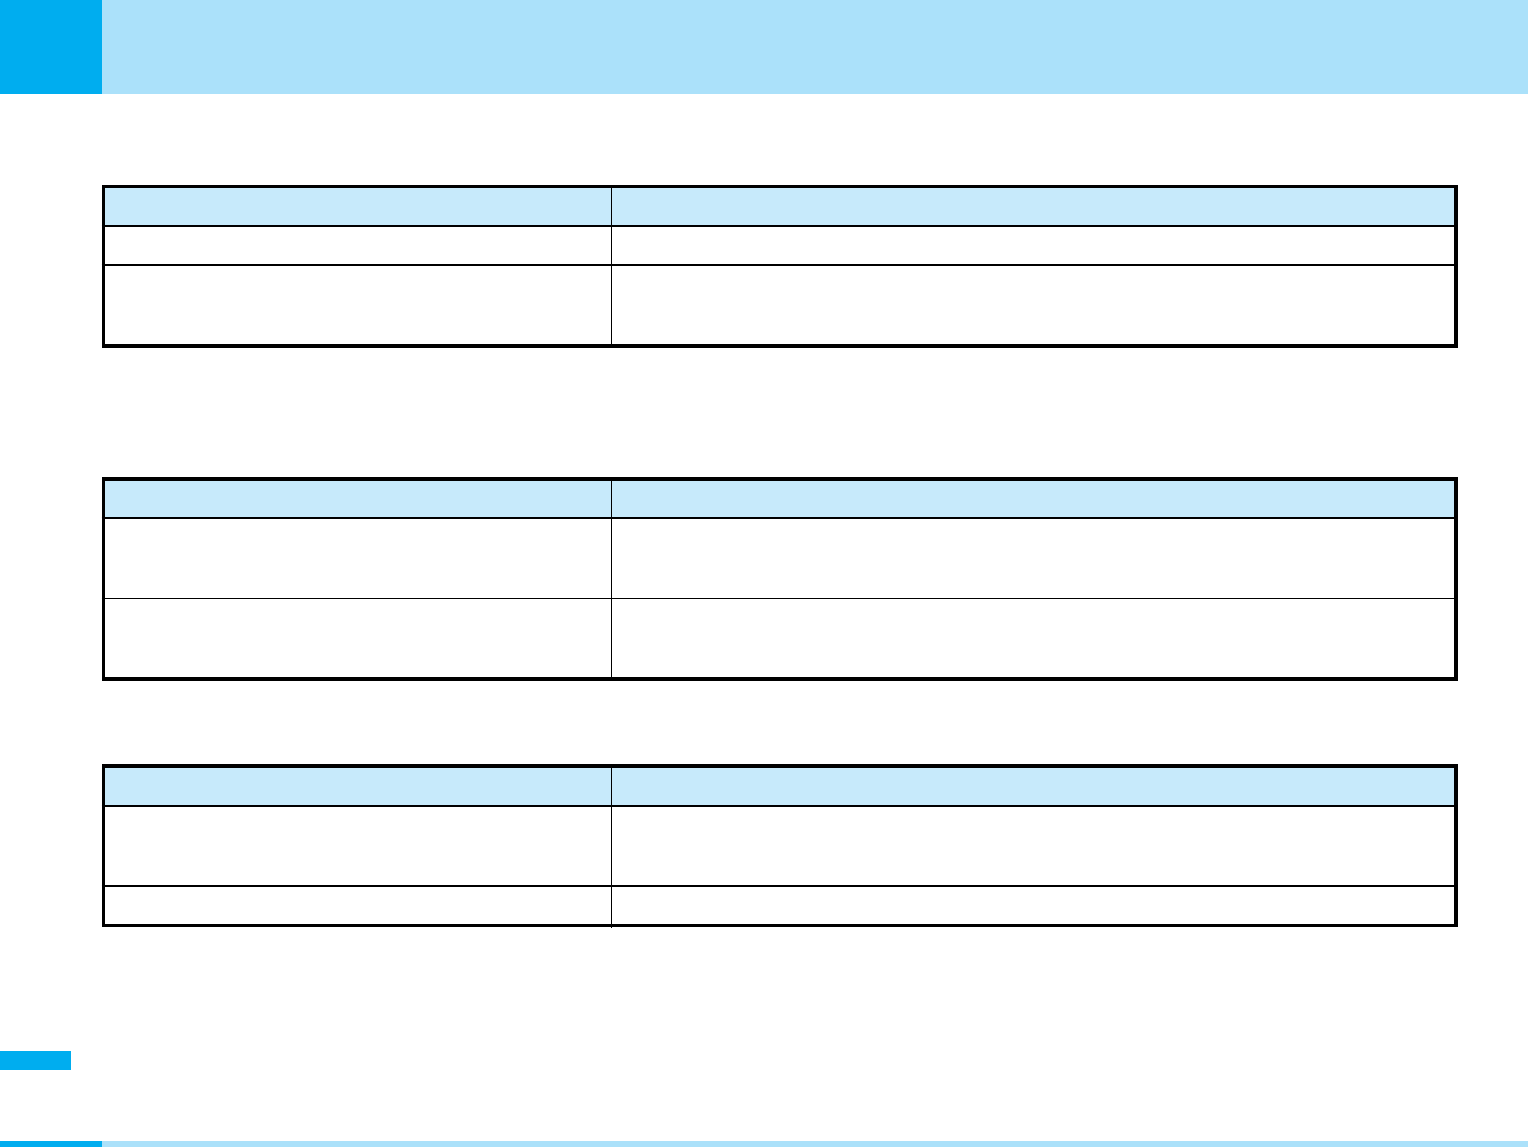
256
Appendix
Appendix
MessageR/F list screen >P126
Received mail list screen >P141
Sent mail list screen >P146
Setting ItemsItems / Function Name
Sort
Filter
Setting ItemsItems / Function Name
Sort
Filter
Setting ItemsItems / Function Name
Sort
Filter
Subject(asc.)/Subject(desc.)/Address(asc.)/Address(desc.)/Date(asc.)/
Date(desc.)
All/Unread/Read/Protected/Not protected/Pasted/Attached/i-mode mail/
SMS/SMS report
Subject(asc.)/Subject(desc.)/Address(asc.)/Address(desc.)/Date(asc.)/
Date(desc.)
All/Protected/Not protected/Attached/i-mode mail/SMS
Subject(asc.)/Subject(desc.)/Date(asc.)/Date(desc.)
All/Unread/Read/Protected/Not protected/Pasted/Attached
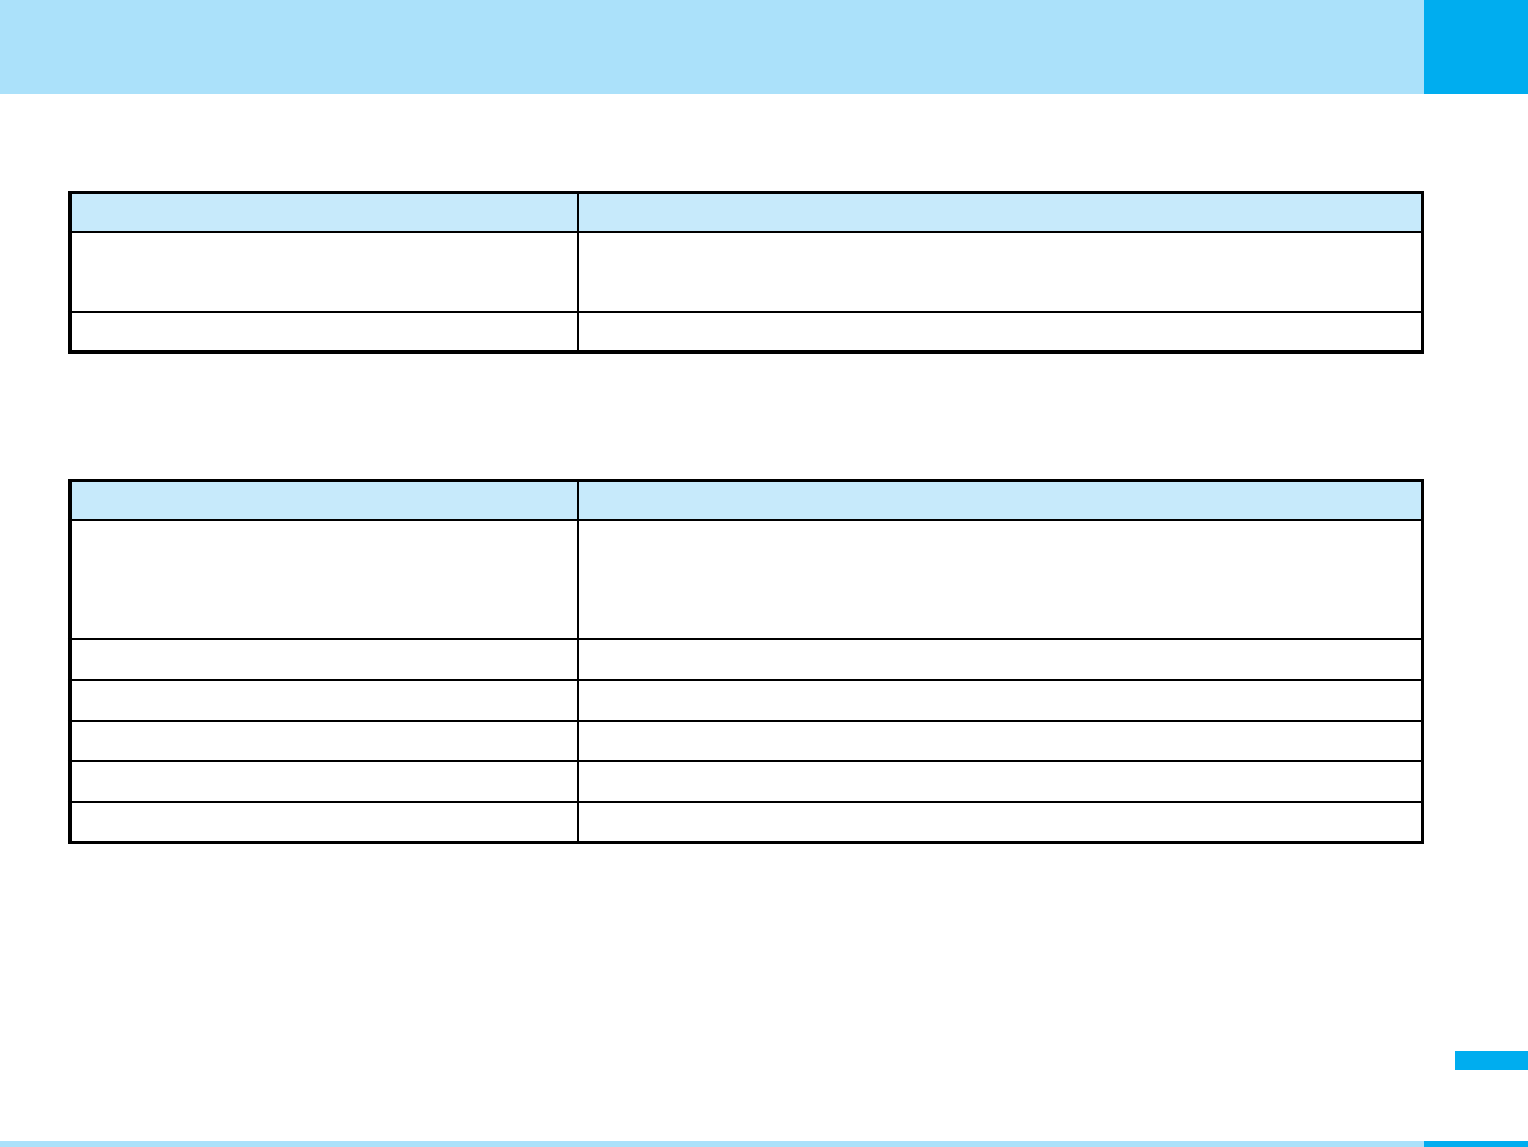
257
Appendix
Next page
Appendix
Unsent mail list screen >P148
Software list screen >P161
Setting ItemsSubmenu Item
Sort
Network setting
i-appli To
Icon info setting
Set/Not set
Show desc setting
Setting ItemsSubmenu Item
Sort
Filter
Subject (asc.)/Subject (desc.)/Address (asc.)/Address (desc.)/Date (asc.)/
Date (desc.)
Name (asc.)/Name (desc.)/Exec time (asc.)/Exec time (desc.)/
Create time (asc.)/Create time (desc.)/S/W size (asc.)/S/W size (desc.)/
Exec count (asc.)/Exec count (desc.)
Show/Don't show
All/Attached/i-mode mail/SMS
Autostart setting
Yes/No/Check every start
Yes/No
Yes/No
258
Appendix
Appendix
Still image saving screen >P114/moving image saving screen >P117/Image folder list screen >P168/Image file
list screen >P168/Image display screen >P170
Image edit screen >P171
Setting ItemsSubmenu Item
Slide show settings
Settings
Normal screen/Full screen
View as
1 sec ~ 9 secs (1 sec)
Time interval (secs)
Name/Date/Type
Simple list/Detailed list/GridView by
Sort by
Setting ItemsSubmenu Item
Resizing
Insert
Text
640x480/320x240/160x120/Wallpaper size/Phonebook size/Sub display size
Frame
Element
Clipping
>Text focus (P251)
>Frame (P250)
>Stamp (P251)
1280X960/640X480/320X240/160X120/Wallpaper size/Phonebook size
User-defined size
Effect Black & White/Sepia/Negative/Black & White negative/Color balance/Contrast/
Sharpness/Softness/Mosaic Blur
259
Appendix
Appendix
Moving image folder list screen >P174/i-motion file list screen >P174/Moving image playback screen >P175
Melody folder list screen >P177/Melody file list screen >P177/Melody playback screen >P177
Setting ItemsSubmenu Item
Player settings
Spectrum analy/Dancing notes
Visual effect
Pink/Blue/Violet
Volume
Setting ItemsSubmenu Item
Name/Date/Type
Sort by
None/Current file/All files/Shuffle
Set repeat
Player setting
Spectrum analy/Dancing notes
Visual effect
Pink/Blue/Violet
Player skin
Volume
Sort by
View by
Name/Date/Type
Simple list/Detailed list/Grid
View by Simple list/Detailed list/Grid
OFF~Level 7 (Level3)
Player skin (Color)
OFF~Level 7 (Level3)
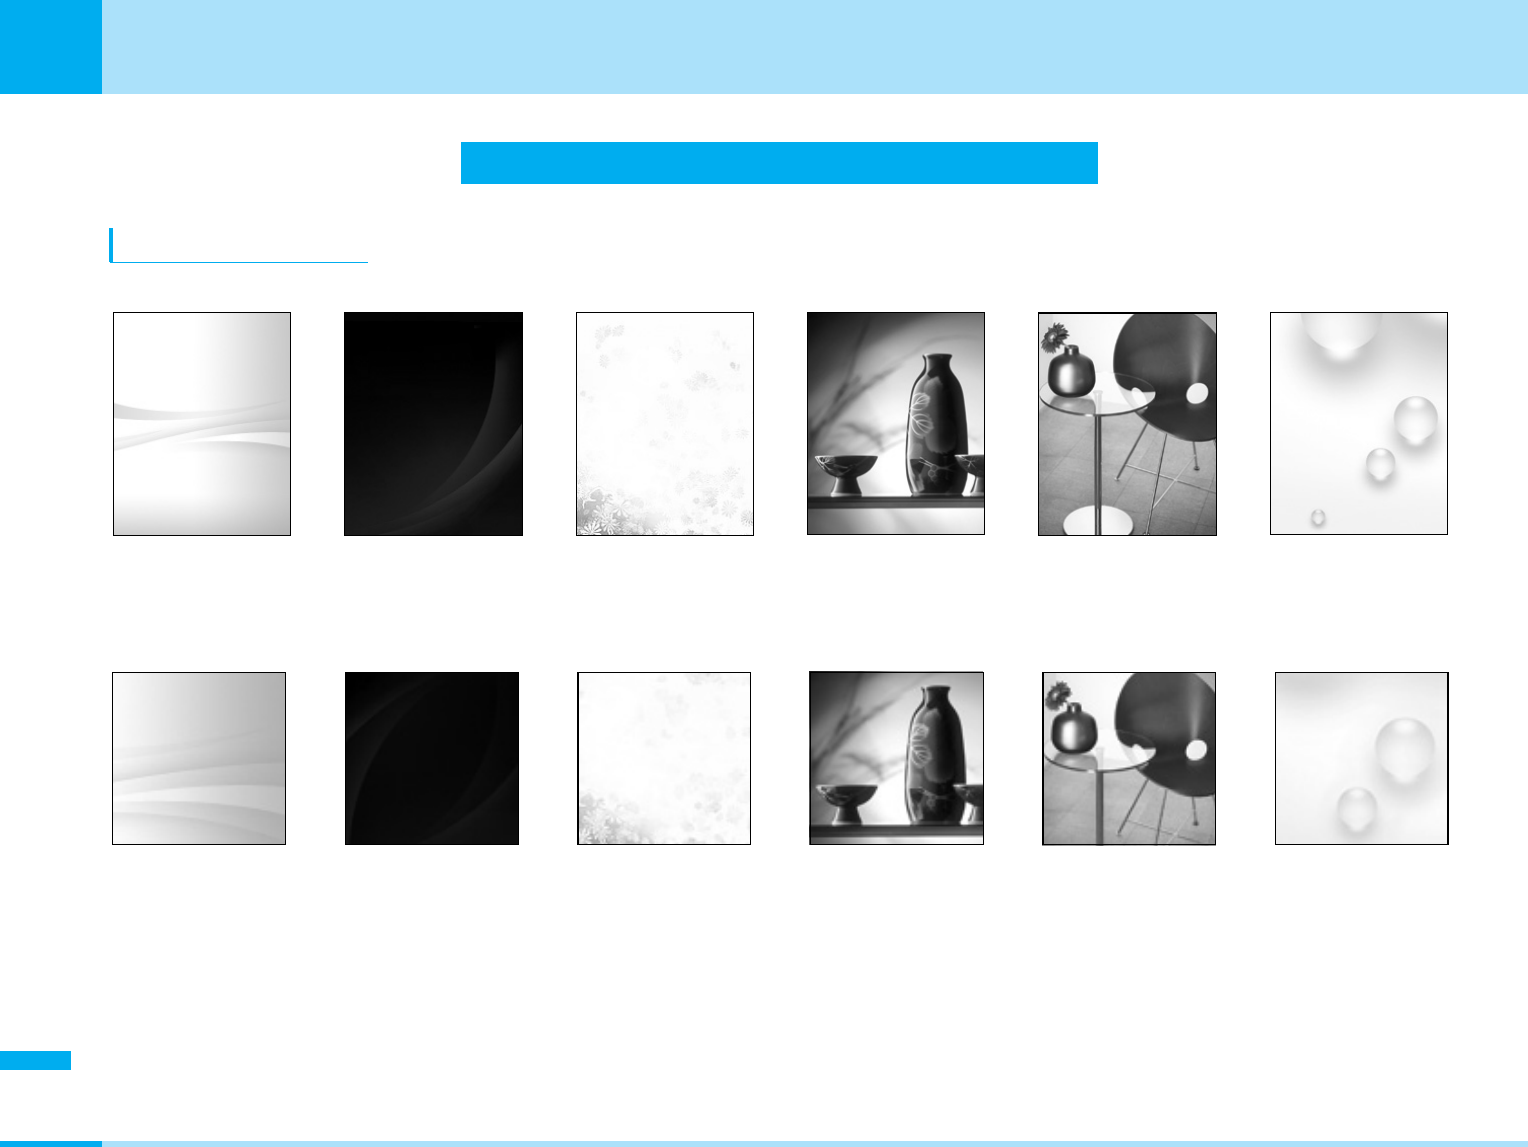
260
Appendix
Appendix
Pre-installed data
In Stand-by mode
aMain display
aSub-display
Ceramic.jpg Vivid blue.jpg Vivid red.jpgSakura.jpg Waterdrop.jpgGreen tea.jpg
Sub_ceramic.jpg Sub_green tea.jpg Sub_sakura.jpg Sub_vivid red.jpgSub_vivid blue.jpg Sub_waterdrop.jpg
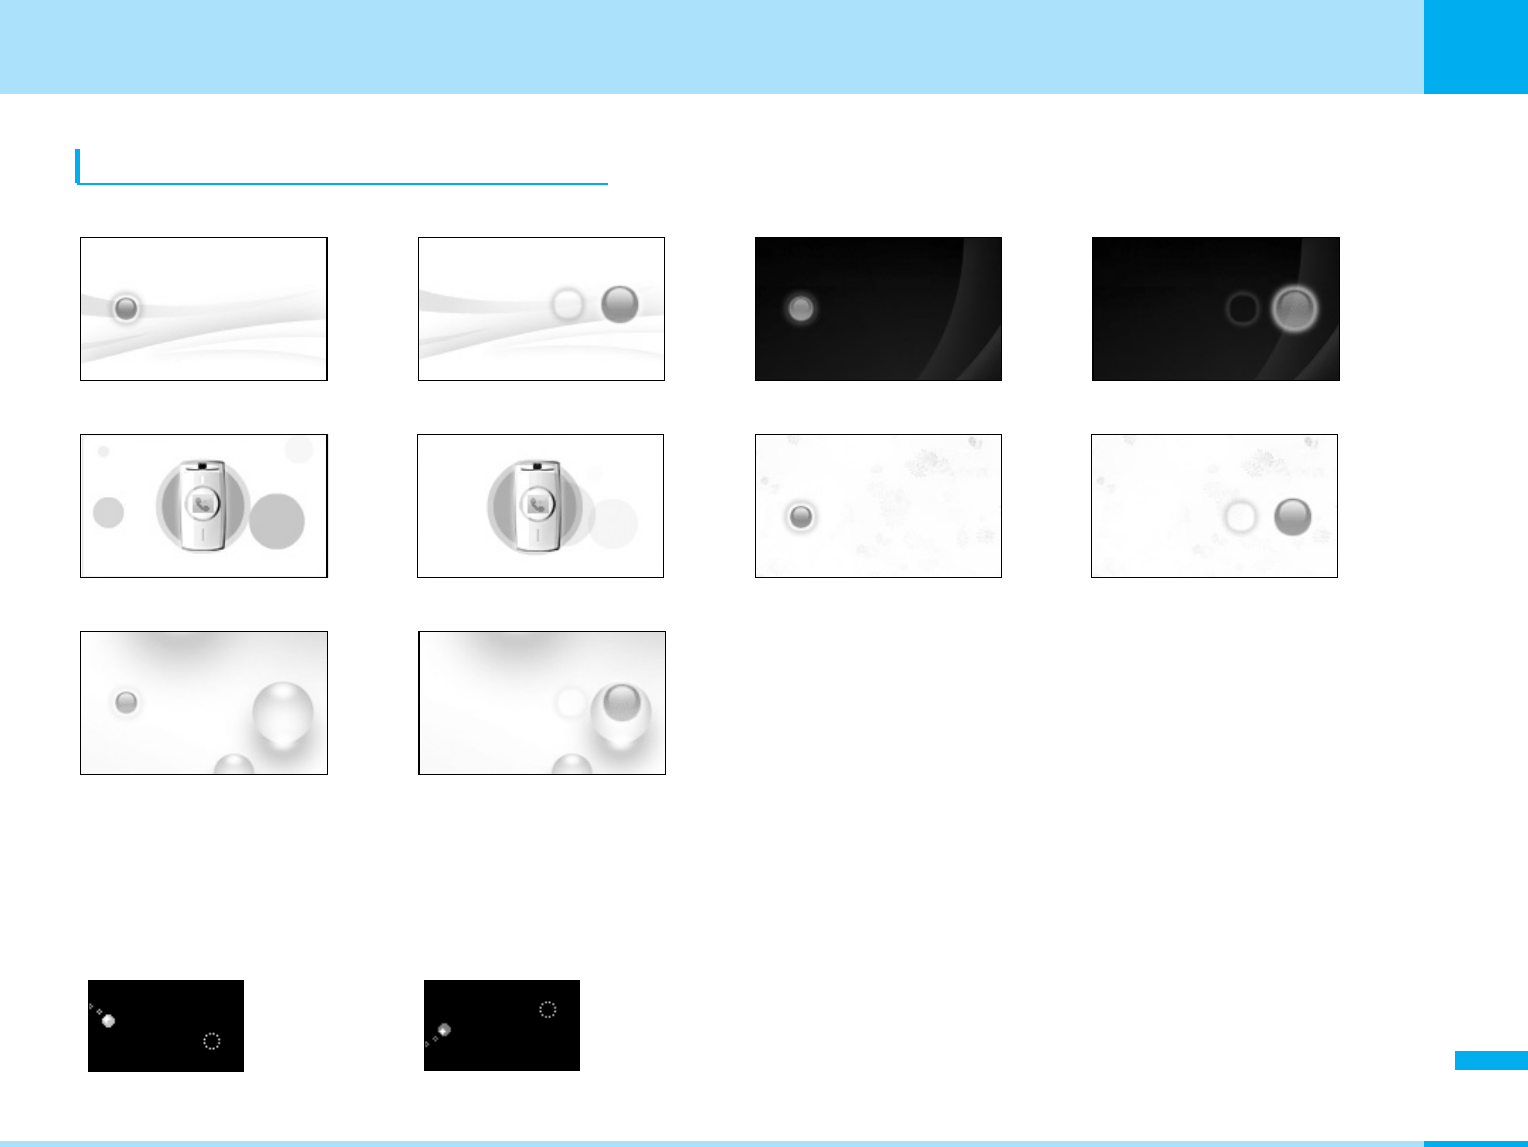
261
Appendix
Appendix
The screen for receiving/making a call
aMain display
aSub display
Sub_incoming.gif Sub_outgoing.gif
Ceramic_in_calling.gif
Incoming_call.gif Sakura_in_calling.gif
Ceramic_out_calling.gif
Sakura_out_calling.gif
Green_in_calling.gif
Outgoing_call.gif
Waterdrop_in_calling.gif
Green_out_calling.gif
Waterdrop_out_calling.gif

262
Appendix
Appendix
Frame
• The frame including of multiple file sizes can be different to view depending on file size.
• The frames enclosed in the lines below can be selected by “Frame Shot” in “Using the Submenus of the Still Image Finder
Stand-by Screen” (P112).
• The displayed frame differs depending on the size of the image to be edited.
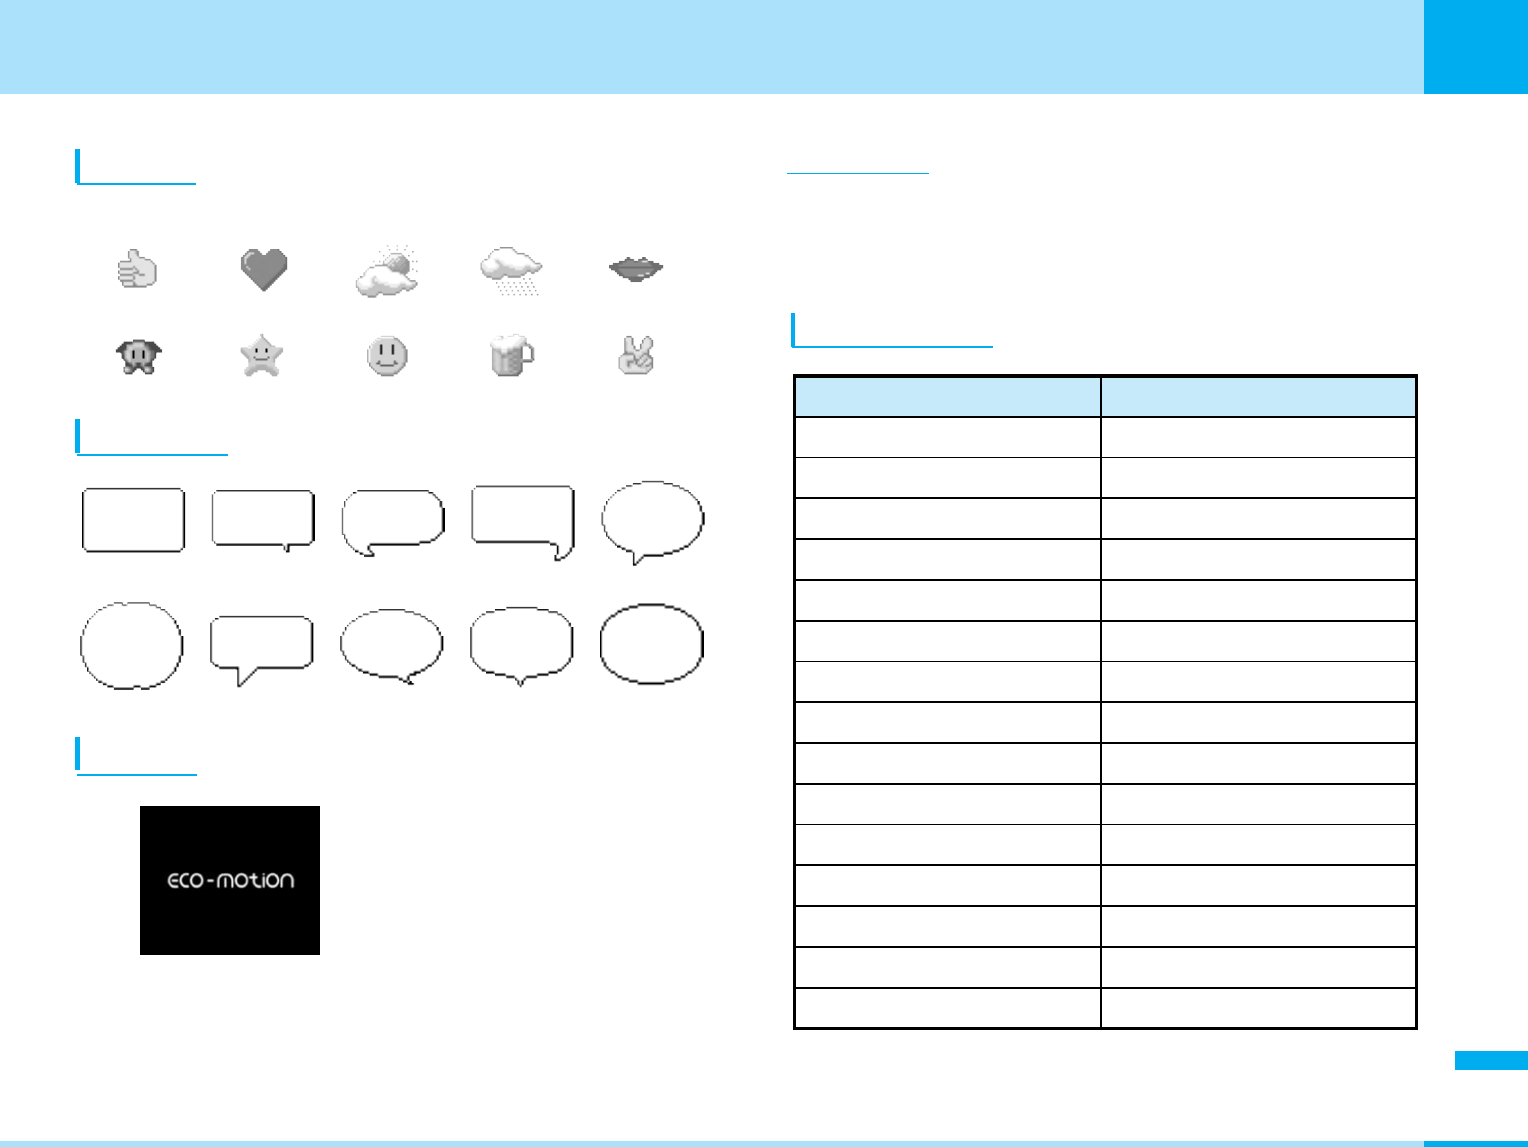
263
Appendix
Appendix
Element
• Appearances may differ depending on file size.
Text focus
i-motion
Information
• i-motions on the left are 3D-sound-supported i-motions,
but as this FOMA phone does not support 3D-sound,
they are not played with 3D-sound.
List of melody
• The copyright of each melody belongs to LG electronic
Japan, Inc.
Melody title Melody title
Air on The G String.mid
Alarm01
~
Alarm03.mid
An der schonen blauen donau.mid
Beautiful Life.mid
Blues Mania.mid
Brandenburg Concertos.mid
Cave No.31.mid
Czardas.mid
Dark Valley.mid
Driving Bayside.mid
Energetic Today.mid
Funny Funky.mid
Green Park.mid
Happy Birthday to you.mid
Hunter G.mid
If I Could.mid
Jasmine.mid
Jingle Bell.mid
Menueti.mid
Message01 ~ Message12.mid
Moonlight.mid
Musette.mid
Play Dominoes.mid
Ring01
~
Ring05.mid
Secrect Of Nature.mid
Swan Lake.mid
Touch Of Light.mid
Wedding Martch.mid
Welcome My Friend.mid
Winter.mid
DiMAGIC eco-motion.3gp

264
Appendix
Appendix
Symbol/Special Character List
aFull-pitch symbol
Special Characters
Information
• Special characters may not be correctly displayed if they are sent to mobile phones or personal computers that do not support
i-mode mail.
Full symbol (8/8)
Full symbol (7/8)
Full symbol (6/8)
Full symbol (5/8)
Full symbol (4/8)
Full symbol (3/8)
Full symbol (2/8)
Full symbol (1/8)
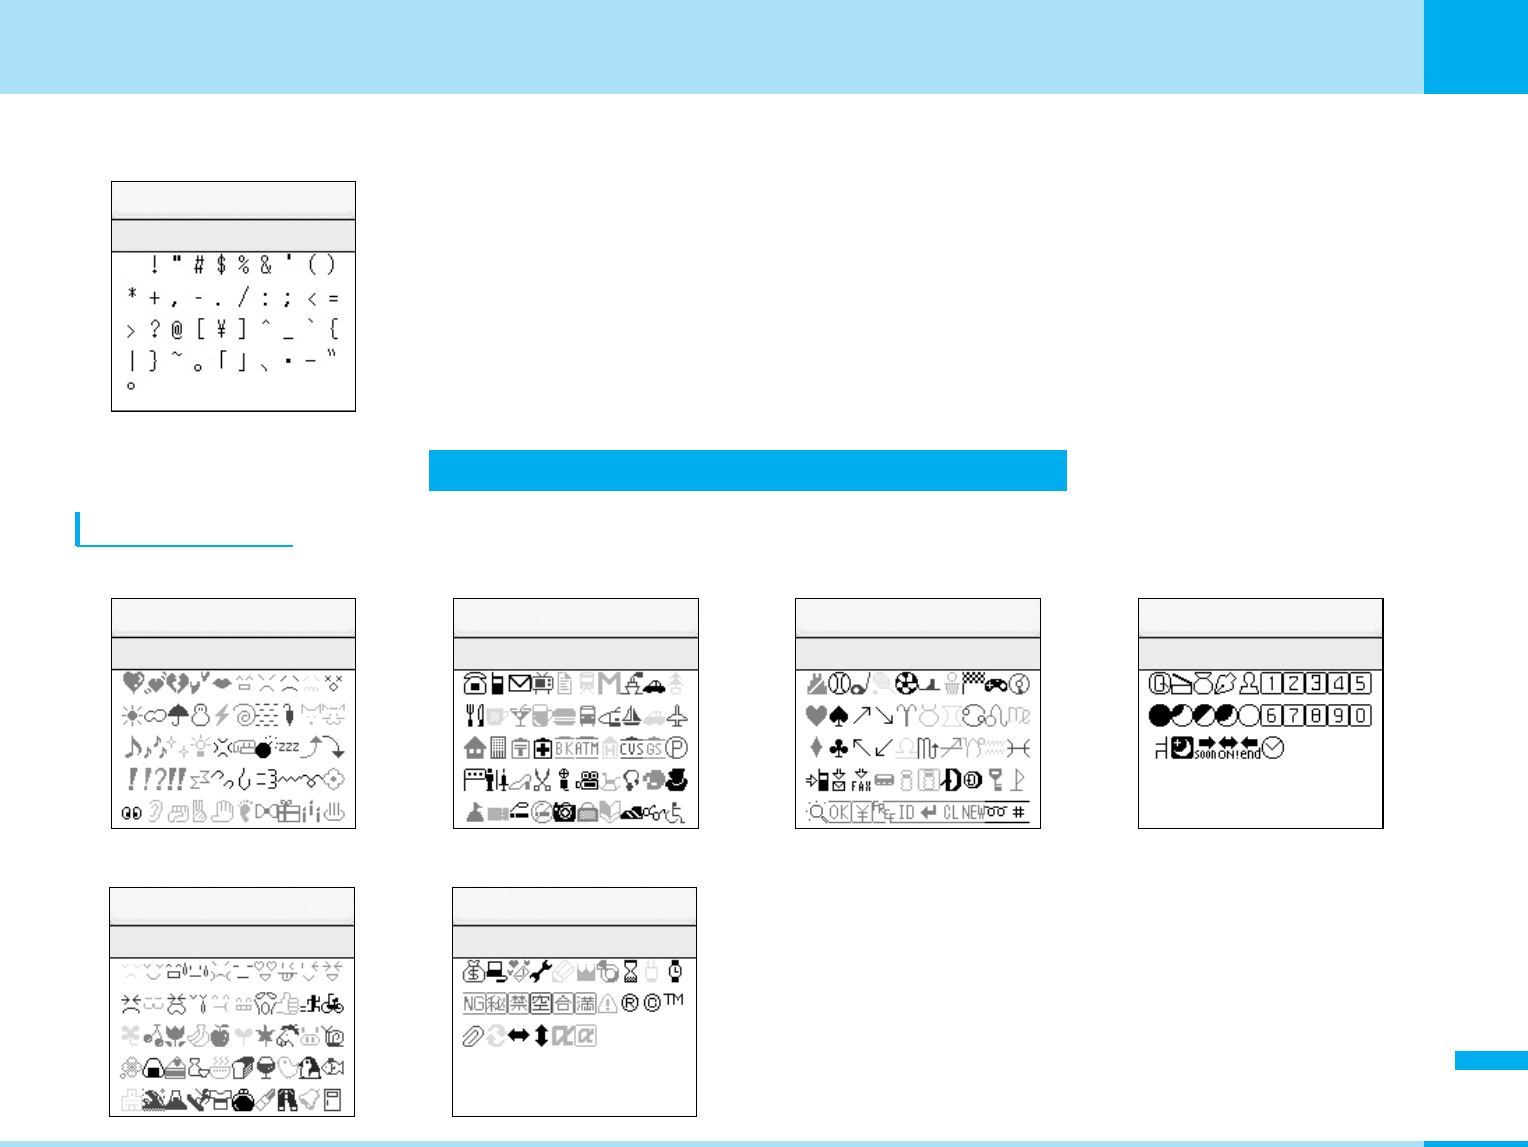
265
Appendix
Next page
Appendix
aHalf-pitch symbol
Pictograph and Emoticon List
Pictograph List
aPictograph1
aPictograph2
Pictograph1 (6/6)
Pictograph1 (5/6)
Pictograph1 (4/6)
Pictograph1 (3/6)
Pictograph1 (2/6)
Pictograph1 (1/6)
Half symbol
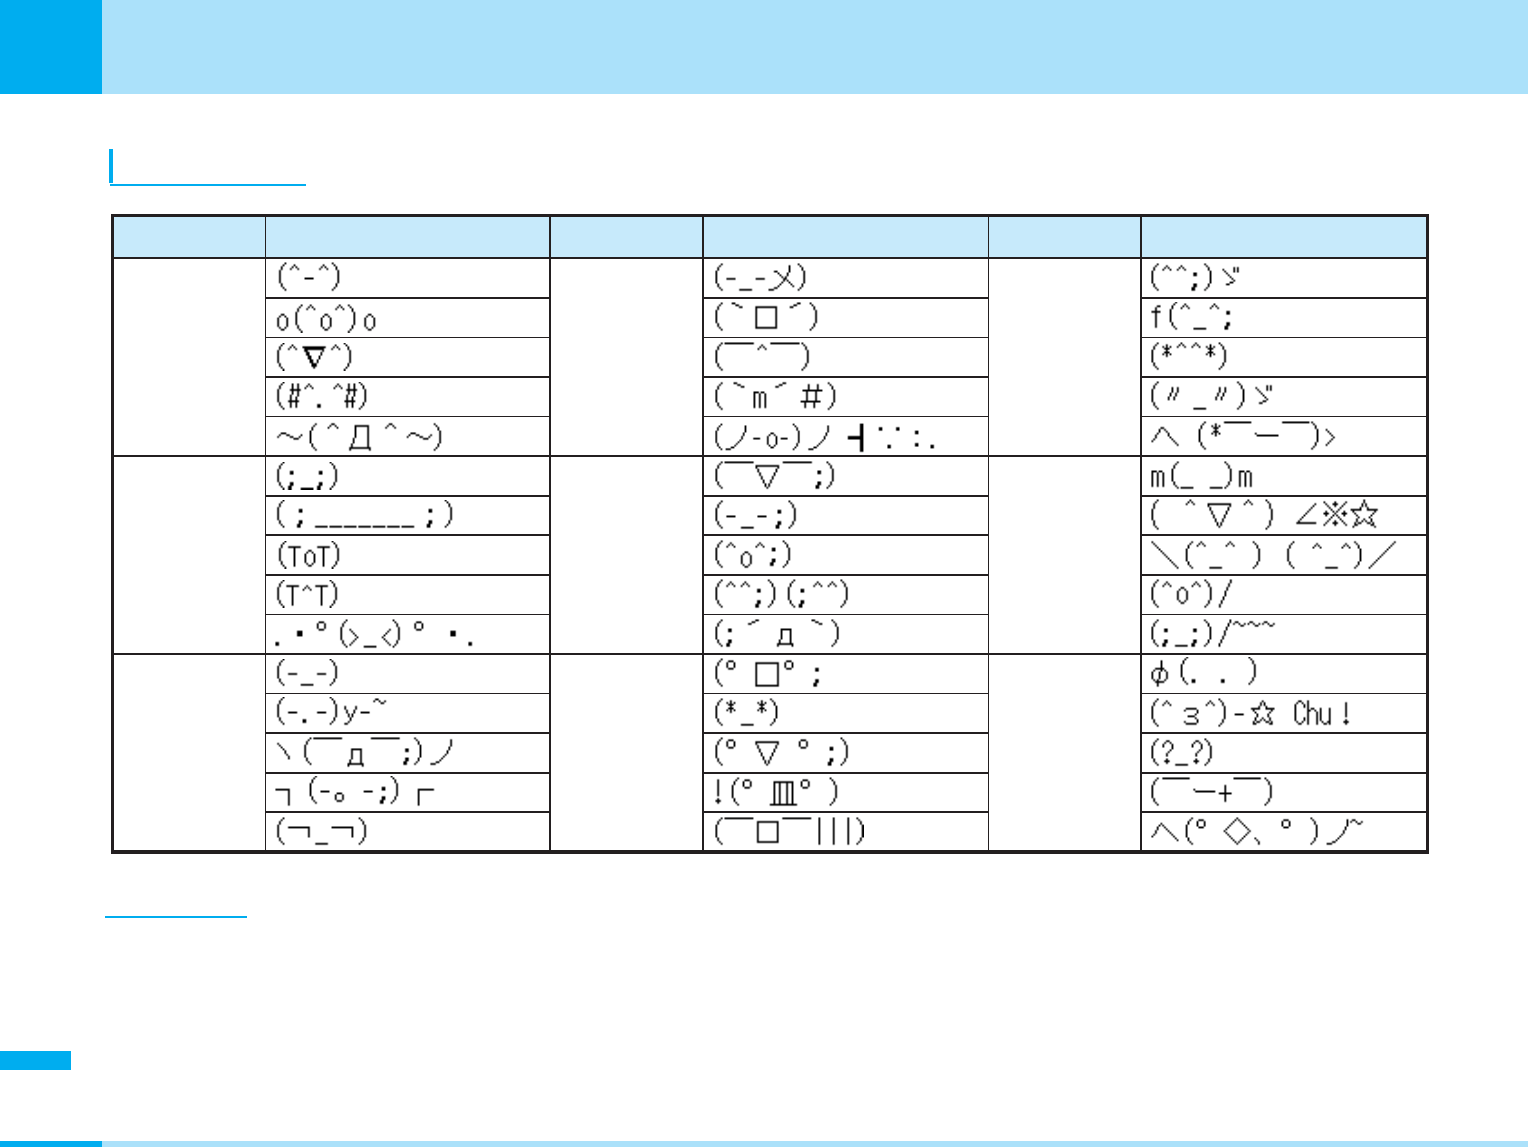
266
Appendix
Appendix
Emoticon List
Information
• For the method of entering pictographs and emoticons, see “Switching Pictograph/Symbol/Emoticon” (P217).
Category
Happy
Cry
Chill
Expressions Category
Angry
Sweat
Surprise
Expressions Category
Embarrass
Greeting
Other
Expressions
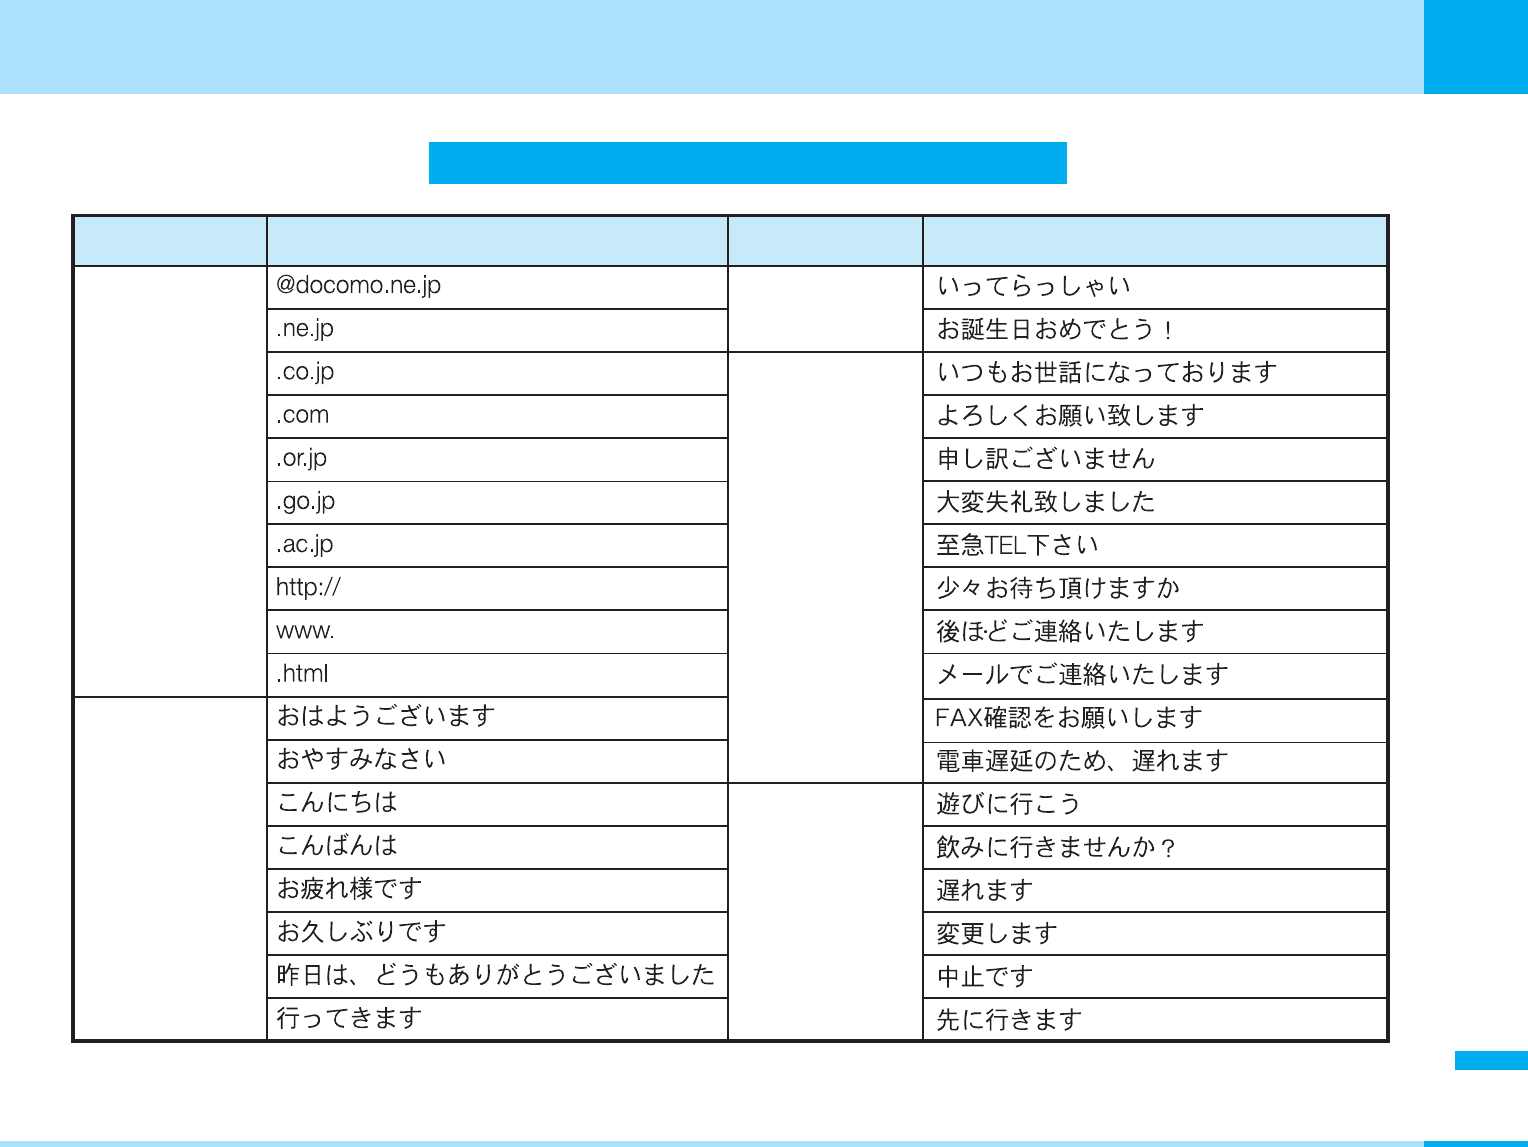
267
Appendix
Appendix
Common Phrase List
Category
Internet folder
Greeting folder
Phrase Category
Greeting folder
Business folder
Private folder
Phrase
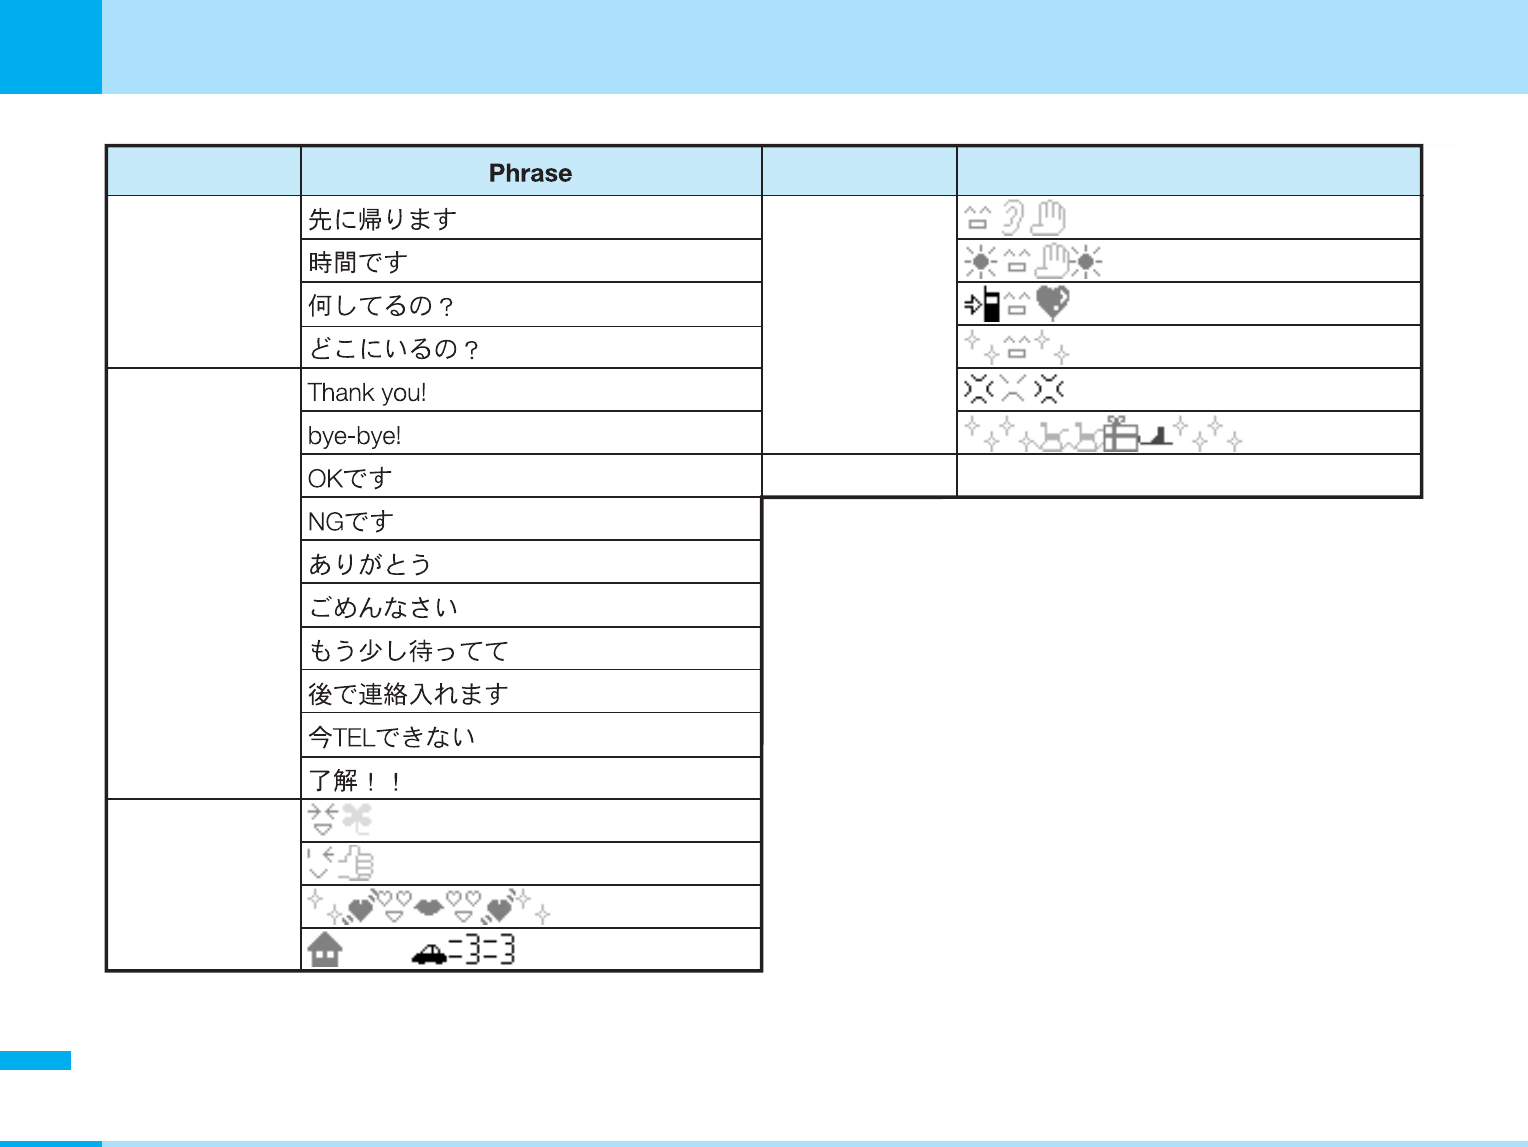
268
Appendix
Appendix
Category
Private folder
Reply folder
Pictograph
idiom folder
Category
Pictograph
idiom folder
Original folder
Phrase
You can enter your own phrase from 1 to 0.
(Glad)
(OK)
(Lovely)
(Hello)
(Waiting a call)
(Happy)
(Angry)
(Christmas)
(Return)
( ? )
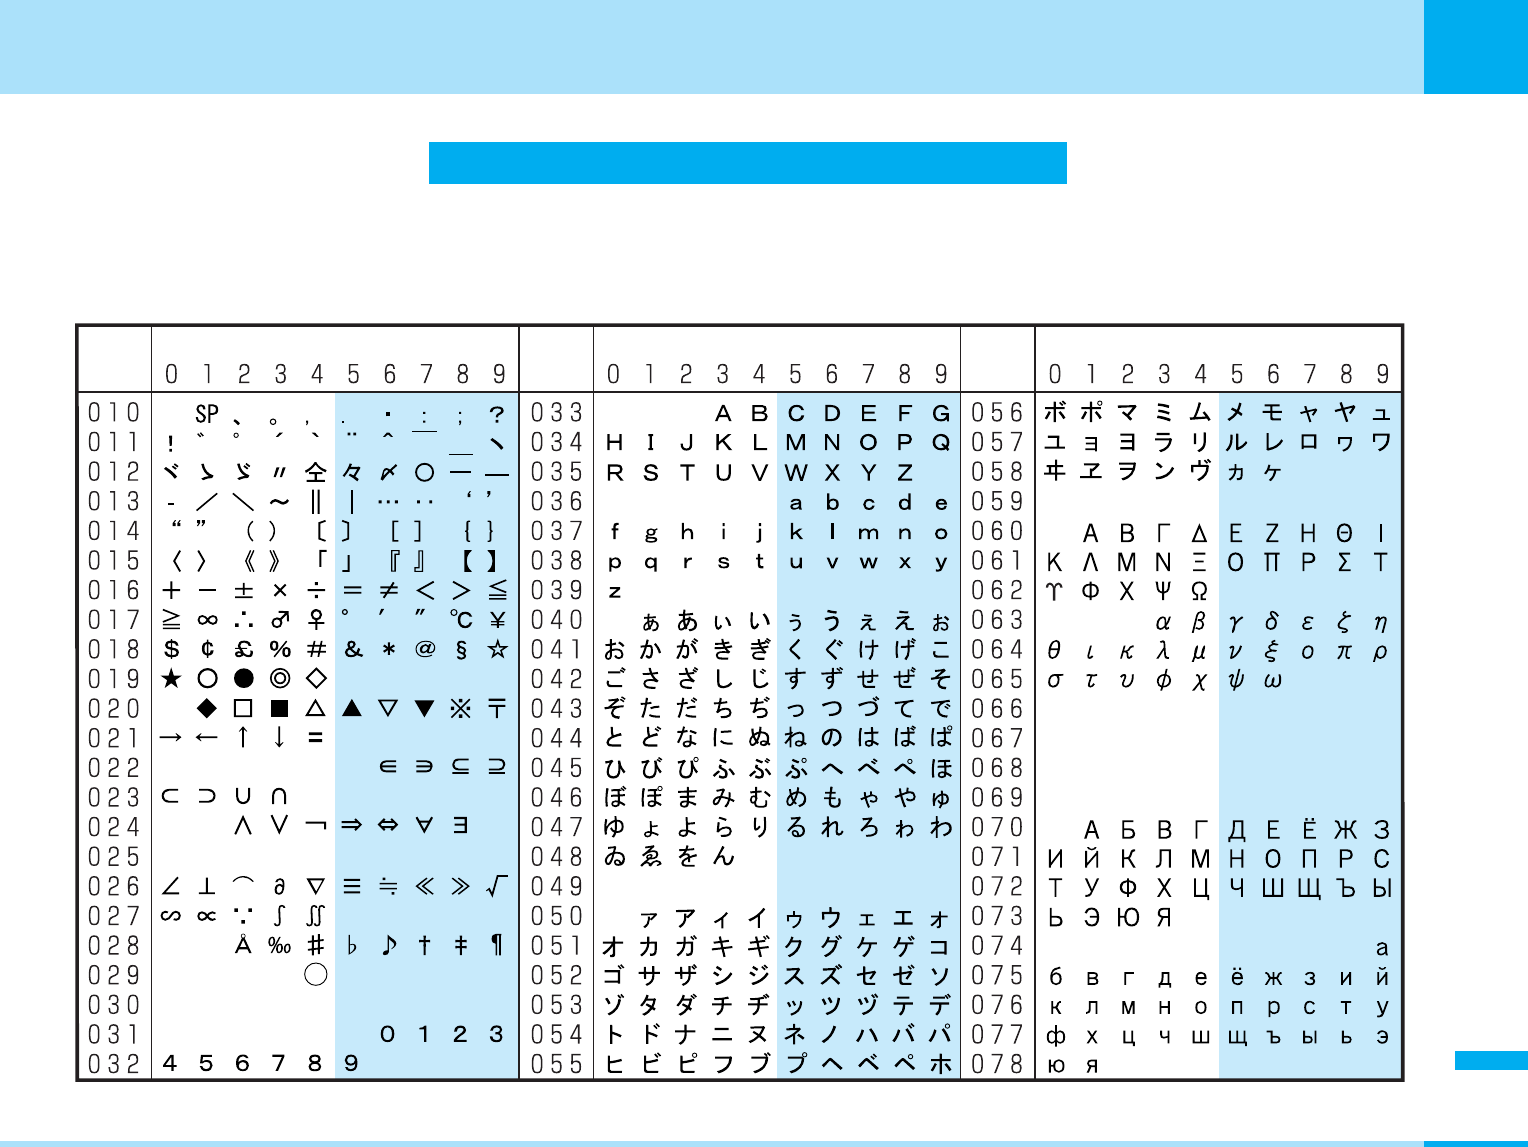
269
Appendix
Appendix
Kuten Code List
To enter a Kuten Code, first enter the 3-digit number for “Kuten digits 1 to 3” and enter the 1-digit number for
“Kuten digit 4”
• Some characters in Kuten Code List may appear different from those on the display.
Kuten
digit
1 to 3
Kuten digit 4 Kuten digit 4 Kuten digit 4
Kuten
digit
1 to 3
Kuten
digit
1 to 3
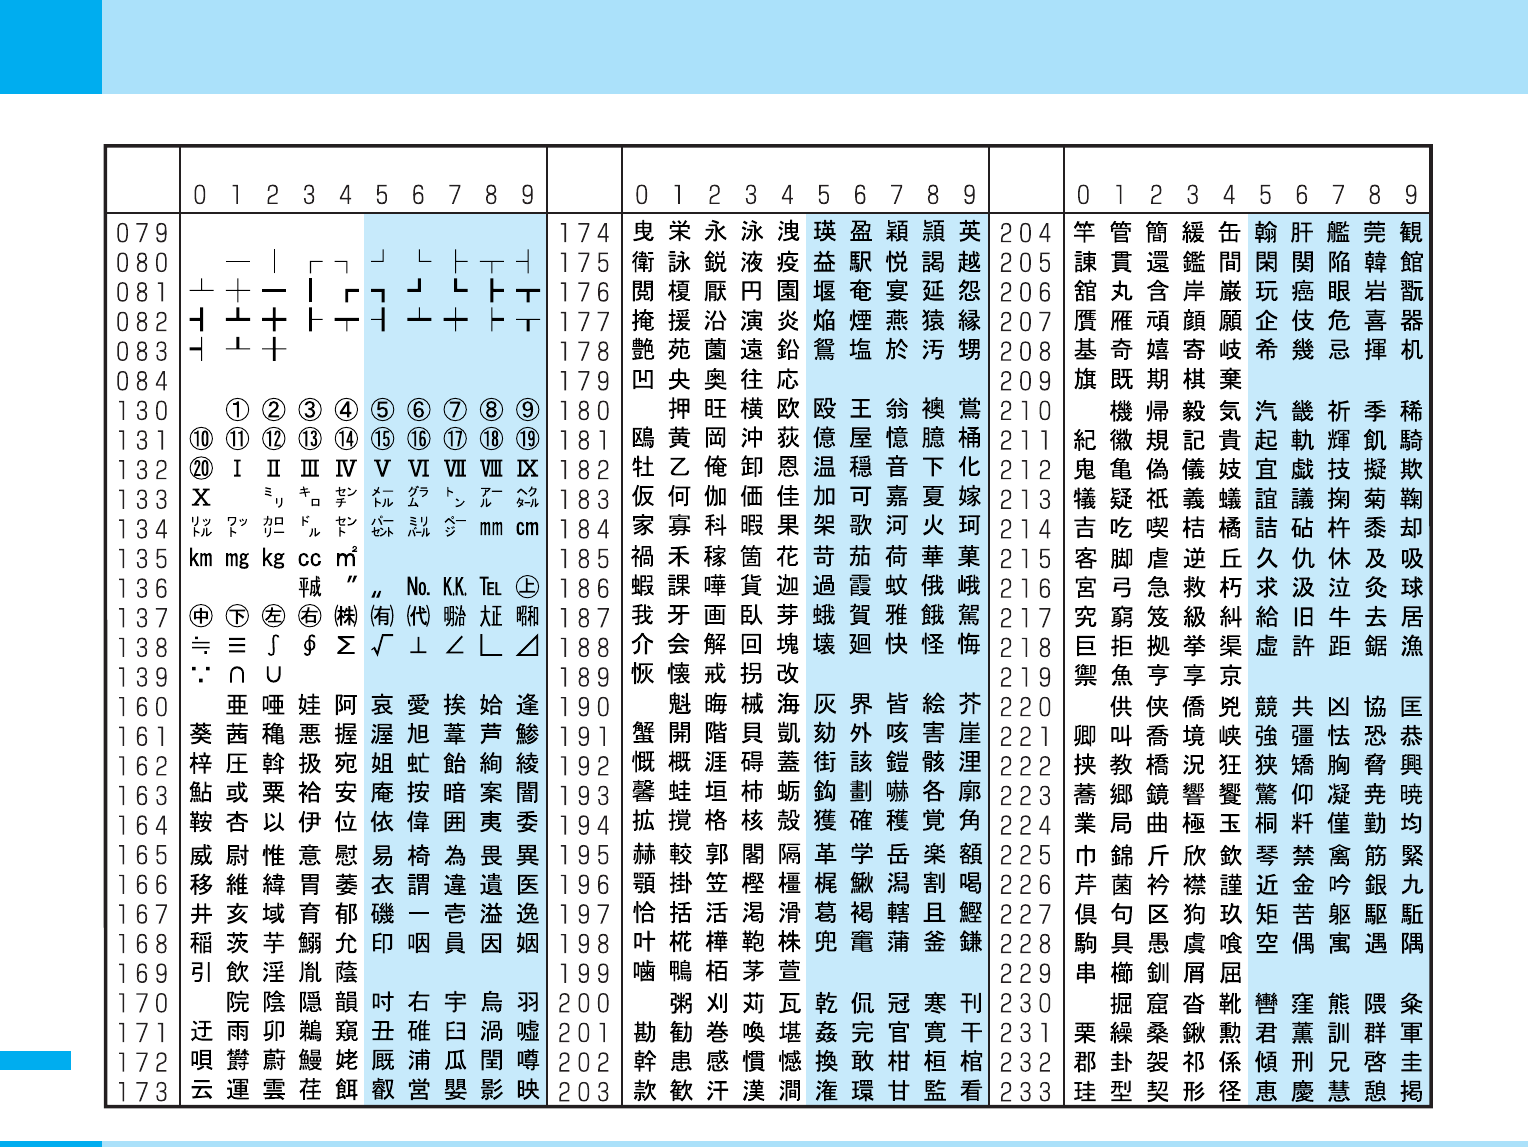
270
Appendix
Appendix
Kuten
digit
1 to 3
Kuten digit 4 Kuten digit 4 Kuten digit 4
Kuten
digit
1 to 3
Kuten
digit
1 to 3