LG Electronics USA L705I PCS GSM Phone User Manual
LG Electronics USA PCS GSM Phone
Contents
- 1. Users Manual 1
- 2. Users Manual 2
Users Manual 1
Part 15.21 statement
" Change or Modifications that are not expressly approved by the manufacturer could void
the user's authority to operate the equipment. "
Part 15.105 statement
This equipment has been tested and found to comply with the limits for a class B digital device,
pursuant to Part 15 of the FCC Rules.
These limits are designed to provide reasonable protection against harmful interference in a
residential installation.
This equipment generates uses and can radiate radio frequency energy and, if not installed and used
in accordance with the instructions, may cause harmful interference to radio communications.
However, there is no guarantee that interference will not occur in a particular installation. if this
equipment does cause harmful interference or television reception, which can be determined by
turning the equipment off and on, the user is encouraged to try to correct the interference by one or
more of the following measures:
- Reorient or relocate the receiving antenna.
- Increase the separation between the equipment and receiver.
- Connect the equipment into an outlet on a circuit different from that to
which the receiver is connected
- Consult the dealer or an experienced radio/TV technician for help.
LIMITED WARRANTY STATEMENT
1. WHAT THIS WARRANTY COVERS:
LG offers you a limited warranty that the enclosed subscriber unit and its enclosed accessories will be
free from defects in material and workmanship, according to the following terms and conditions:
(1) The limited warranty for the product extends for ONE (1) year beginning on the data of purchase
of the product.
(2) The limited warranty extends on to the original purchaser of the product and is not assignable or
transferable to any subsequent purchaser/end user.
(3) This warranty is good only to the original purchaser of the product during the warranty period as
long as it is in the U.S., including Alaska, Hawaii, U.S. Territories and Canada.
(4) The external housing and cosmetic parts shall not be covered under these limited warranty terms.
(5) Upon request from LG, the consumer must provide information to reasonably prove the date of
purchase.
(6) The customer shall bear the cost of shipping the product to the Customer Service Department of
LG. LG shall bear the cost of shipping the product back to the consumer after the completion of
service under this limited warranty.
2. WHAT THIS WARRANTY DOES NOT COVER:
(1) Defects or damages resulting from use of the product in other than its normal and customary
manner.
(2) Defects or damages from abnormal use, abnormal conditions, improper storage, exposure to
moisture or dampness, unauthorized modifications, unauthorized connections, unauthorized repair,
misuse, neglect, abuse, accident, alteration, improper installation, or other acts which are not the
fault of LG, including damage caused by shipping blown fuses spills of food or liquid.
(3) Breakage or damage to antennas unless caused directly by defects in material or workmanship.
(4) That the Customer Service Department at LG was net notified by consumer of the alleged defect
or malfunction of the product during the applicable limited warranty period.
(5) Products which have had the serial number removed or made illegible.
(6) The limited warranty is in lieu of all other warranties, express or implied either in fact or by
operations law, statutory or otherwise, including, but limited to any implied warranty of
marketability or fitness for a particular use.
(7) Damage resulting from use of non-LG approved accessories.
(8) All plastic surfaces and all other externally exposed parts that are scratched or damaged due to
normal customer use.
(9) Products operated outside published maximum ratings.
3
(10) Products used or obtained in a rental program.
(11) Consumables (such as fuses).
3. STATE LAW RIGHTS:
No other express warranty is applicable to this product. THE DURATION OF ANY IMPLIED
WARRANTIES, INCLUDING THE IMPLIED WARRANTY OF MARKETABILITY, IS LIMITED
TO THE DURATION OF THE EXPRESS WARRANTY HEREIN. LG INFOCOMM INC. SHALL
NOT BE LIABLE FOR THE LOSS OF THE USE OF THE PRODUCT, INCONVENIENCE, LOSS
OR ANY OTHER DAMAGES, DIRECT OR CONSEQUENTIAL, RISING OUT OF THE USE OF,
OR INABILITY TO USE, THIS PRODUCT OR FOR ANY BREACH OF ANY EXPRESS OR
IMPLIED WARRANTY, INCLUDING THE IMPLIED WARRANTY OF MARKETABILITY
APPLICABLE TO THIS PRODUCT. Some states do not allow the exclusive of imitation of incidental
or consequential damages or limitations on how long an implied warranty lasts; so these limitations or
exclusions may not apply to you. This warranty gives you specific legal rights and you may also have
other rights which vary from state to state.
4. HOW TO GET WARRANTY SERVICE:
To obtain warranty service, please call the following web address:
www.lgeservice.com

8
For Your Safety
Important Information
This user guide contains important information on the use and
operation of this phone. Please read all the information
carefully for optimal performance and to prevent any damage
to or misuse of the phone. Any changes or modifications not
expressly approved in this user guide could void your warranty
for this equipment.
Before You Start
Safety Instructions
WARNING! To reduce the possibility of electric shock, do not
expose your phone to high humidity areas, such as the
bathroom, swimming pool, etc.
Always store your phone away from heat. Never store your
phone in settings that may expose it to temperatures less than
32°F or greater than 104°F, such as outside during extreme
weather conditions or in your car on a hot day. Exposure to
excessive cold or heat will result in malfunction, damage
and/or catastrophic failure.
Be careful when using your phone near other electronic
devices. RF emissions from your mobile phone may affect
nearby in adequately shielded electronic equipment. You
should consult with manufacturers of any personal medical
devices such as pacemakers and hearing aides to determine if
they are susceptible to interference from your mobile phone.
Turn off your phone in a medical facility or at a gas station.
Never place your phone in a microwave oven as this will
cause the battery to explode.
IMPORTANT! Please read the TIA SAFETY INFORMATION on
page 78 before using your phone.
Safety Information
Read these simple guidelines. Breaking the rules may be
dangerous or illegal. Further detailed information is given in this
user guide.
]Never use an unapproved battery since this could damage
the phone and/or battery and could cause the battery to
explode.
]Never place your phone in a microwave oven as it will
cause the battery to explode.
]Do not dispose of your battery by fire or with hazardous or
flammable materials.
]Make sure that no sharp-edged items come into contact
with the battery. There is a risk of this causing a fire.
]Store the battery in a place out of reach of children.
]Be careful that children do not swallow any parts such as
rubber plugs (earphone, connection parts of the phone,
etc.). This could cause asphyxiation or suffocation.

9
For Your Safety
]Unplug the power cord and charger during lightning storms
to avoid electric shock or fire.
]When riding in a car, do not leave your phone or set up the
hands-free kit near to the air bag. If wireless equipment is
improperly installed and the air bag is activated, you may be
seriously injured.
]Do not use a hand-held phone while driving.
]Do not use the phone in areas where its use is prohibited.
(For example: aircraft).
]Do not expose the battery charger or adapter to direct
sunlight or use it in places with high humidity, such as a
bathroom.
]Never store your phone in temperatures less than- 4°F or
greater than 122°F.
]Do not use harsh chemicals (such as alcohol, benzene,
thinners, etc.) or detergents to clean your phone. There is a
risk of this causing a fire.
]Do not drop, strike, or shake your phone severely. Such
actions may harm the internal circuit boards of the phone.
]Do not use your phone in high explosive areas as the phone
may generate sparks.
]Do not damage the power cord by bending, twisting, pulling,
or heating. Do not use the plug if it is loose as it may cause
a fire or electric shock.
]Do not place any heavy items on the power cord. Do not
allow the power cord to be crimped as it may cause fire or
electric shock.
]Do not handle the phone with wet hands while it is being
charged. It may cause an electric shock or seriously
damage your phone.
]Do not disassemble the phone.
]Do not place or answer calls while charging the phone as it
may short-circuit the phone and/or cause electric shock or
fire.
]Only use the batteries, antennas, and chargers provided by
LG. The warranty will not be applied to products provided by
other suppliers.
]Only authorized personnel should service the phone and its
accessories. Faulty installation or service may result in
accidents and consequently invalidate the warranty.
]Do not hold or let the antenna come in contact with your
body during a call.
]An emergency call can be made only within a service area.
For an emergency call, make sure that you are within a
service area and that the phone is turned on.

10
For Your Safety
FCC RF Exposure Information
WARNING! Read this information before operating the phone.
In August 1996, the Federal Communications (FCC) of he United
States, with its action in Report and Order FCC 96-326, adopted
an updated safety standard for human exposure to radio
frequency (RF) electromagnetic energy emitted by FCC
regulated transmitters. Those guidelines are consistent with
the safety standard previously set by both U.S. and
international standards bodies.
The design of this phone complies with the FCC guidelines and
these international standards.
CAUTION
Use only the supplied and approved antenna. Use of
unauthorized antennas or modifications could impair call
quality, damage the phone, void your warranty and/or result in
violation of FCC regulations. Do not use the phone with a
damaged antenna. If a damaged antenna comes into contact
with skin, a minor burn may result. Contact your local dealer
for a replacement antenna.
Body-worn Operation
This device was tested for typical body-worn operations with
the back of the phone kept 0.79 inches (2cm) between the
user’s body and the back of the phone. To comply with FCC RF
exposure requirements, a minimum separation distance of 0.79
inches(2cm) must be maintained between the user's body
and the back of the phone. Third-party belt-clips, holsters, and
similar accessories containing metallic components should not
be used. Body-worn accessories that cannot maintain 0.79
inches(2cm) separation distance between the user's body
and the back of the phone, and have not been tested for typical
body-worn operations may not comply with FCC RF exposure
limits and should be avoided.

11
For Your Safety
Vehicle Mounted External Antenna
(optional, if available)
A minimum separation distance of 8 inches (20cm) must be
maintained between the user/bystander and the vehicle
mounted external antenna to satisfy FCC RF exposure
requirements. For more information about RF exposure, visit
the FCC website at www.fcc.gov
FCC Part 15 Class B Compliance
This device and its accessories comply with part 15 of FCC
rules. Operation is subject to the following two conditions:
(1) This device and its accessories may not cause harmful
interference, and (2) this device and its accessories must
accept any interference received, including interference that
may cause undesired operation.
Cautions for Battery
]Do not disassemble.
]Do not short-circuit.
]Do not expose to high temperature: 60°C (140°F).]
]Do not incinerate.
Battery Disposal
]Please dispose of your battery properly or bring to your
local wireless carrier for recycling.
]Do not dispose in fire or with hazardous or flammable
materials.
Adapter (Charger) Cautions
]Using the wrong battery charger could damage your phone
and void your warranty.
]The adapter or battery charger is intended for indoor use
only.
Do not expose the adapter or battery charger to direct sunlight
or use it in places with high humidity, such as the bathroom.
8
Easy Search/Contents/Precautions
Main Features of the FOMA L705i
FOMA is the name of the DoCoMo service based on W-CDMA technology, and one of the
world's standards for third-generation (3G) mobile telecommunications (under the IMT-2000
standard).
Incredible Services of i-mode
i-mode is an online service that enables you to get useful information from i-mode programs
or web sites that support i-mode using an i-mode-enabled handset. This service also enables
you to send and receive mail messages with great ease.
䂹Main Features of the FOMA L705i䂹
䂓i-mode mail/Deco-mail/
Deco-mail pictogram→P158
As well as sending text messages, you can
send binary attachments such as JPEG
images, up to 10 different files otherwise a
total size of 2MB at a time. Besides, FOMA
supports Deco-mail and Deco-mail
pictogram for rich and various way to
express you by editing body text color, text
size, or wallpapers.
䂓i-appli/i-appli DX→P184
You can download i-appli programs which
have different functions, ranging from being
fun games, to providing weather reports
and even giving the latest stock quotes.
Also, you can link i-appli DX software to the
information inside the i-mode handset such
as the Phonebook entries and mail
messages so that you can have further fun
with i-appli software.
䂓Chaku-Uta Full®→P220
Chaku-Uta-Full® is a service which you can
download entire songs from music
distribution sites. You can play them back
or set them as your ringtone after
downloading.
䂓International Roaming→P270
Voice calls, video calls, i-mode, i-mode
mail, SMS, and network services are
available with the same FOMA handset,
phone number and mail address used in
Japan even when overseas (in 3G, GSM/
GPRS areas).
䂹An Abundance of Network Services䂹→P256
䊶Voice Mail Services (Charged)䋪䊶Call Waiting (Charged)䋪
䊶Nuisance Call Blocking (Free)䋪䊶Call forwarding (Free)䋪
䊶Dual Network Service (Charged)䋪䊶Caller ID Request (Free)䋪
䊶Multi number (Charged)䋪䊶SMS (Short Message Service) (Free)
䋪 : These services require a separate subscription.

9
Easy Search/Contents/Precautions
䂹Your FOMA L705i's Various Functions䂹
䂓Beautiful Glossy Finish
Its glossy and beautiful finish gives it an
extraordinarily elegant feels.
䂓Vibrated Touchpad that
Responds to Graceful Contact
→P26, P29
Your handset's touchpad is designed to
respond to light, graceful touches. The
handset vibration shows that your key
touch worked.
䂓LED Keys
Keys in the Touchpad are illuminated in
bright red
䂓Motion dialing that allows you to
change the design of the Dialing
screen →P101
You can select from digital and painting
designs and also can change the color of
the entered digits.
䂓Dialing quick search allows you to
find a phone number with few
steps →89
You can find a saved phone number in the
Phonebook by entering the memory
number (within 2 digits) or a part of the
phone number (3 digits or more) from the
Stand-by screen.
䂓Camera Functions→P124
Still images (with auto focus) and videos
can be captured using either the Outer
camera or Inner camera. Outer camera has
an effective resolution of 1.94 Mega pixels
(and a recording resolution of 1.92 Mega
pixel) while Inner camera has an effective
resolution of 320 Kilo pixels (recording
resolution of 300 Kilo pixel).
䂓Multiaccess/Multitask→P230
Supports Multiaccess to make i-mode or
text messaging available during a voice
call.
Supports Multitask that enables you to use
several functions simultaneously.
䂓Infrared Communication/Infrared
Remote Control →P211
Besides data exchange through infrared
communication, appliances like the
television can be controlled through infrared
remote control.
䂓microSD Memory Card Support
→P206
Music and pictures can be stored in light
and compact microSD memory cards, thus
it allows data exchange with PC.
䂓World Clock →P240
Allows you to check the date and time in
Cities in each country as well as mean time.
You can check not only date and time but
also the location of the desired city/region
concurrently using the on-screen world
map. It is useful for checking the date, time,
and location there, on the way to the next
destination in your travel...etc.
䂓Barcode Reader →P134
By scanning barcodes or QR codes through
the camera, you can access or send mails
to the corresponding websites or email
addresses.
䂓Function to read out the entered
numbers with Dial keys →P96
The numbers of the Dial keys pressed for
making a call can be read.
The language to read can be selected from
Japanese, English or Korean.
䂓Animation →P200
You can create an animation concatenating
up to 20 still images saved on the FOMA
handset and display them in a slide show.
䂓Characters for Phonebook entries
→P77
In addition to a still image, video or i-motion
movie, you can set a character image, that
allows you to combine a face, hair style,
clothing, and background, to a Phonebook
entry.
10
Easy Search/Contents/Precautions
Making Full Use of the L705i
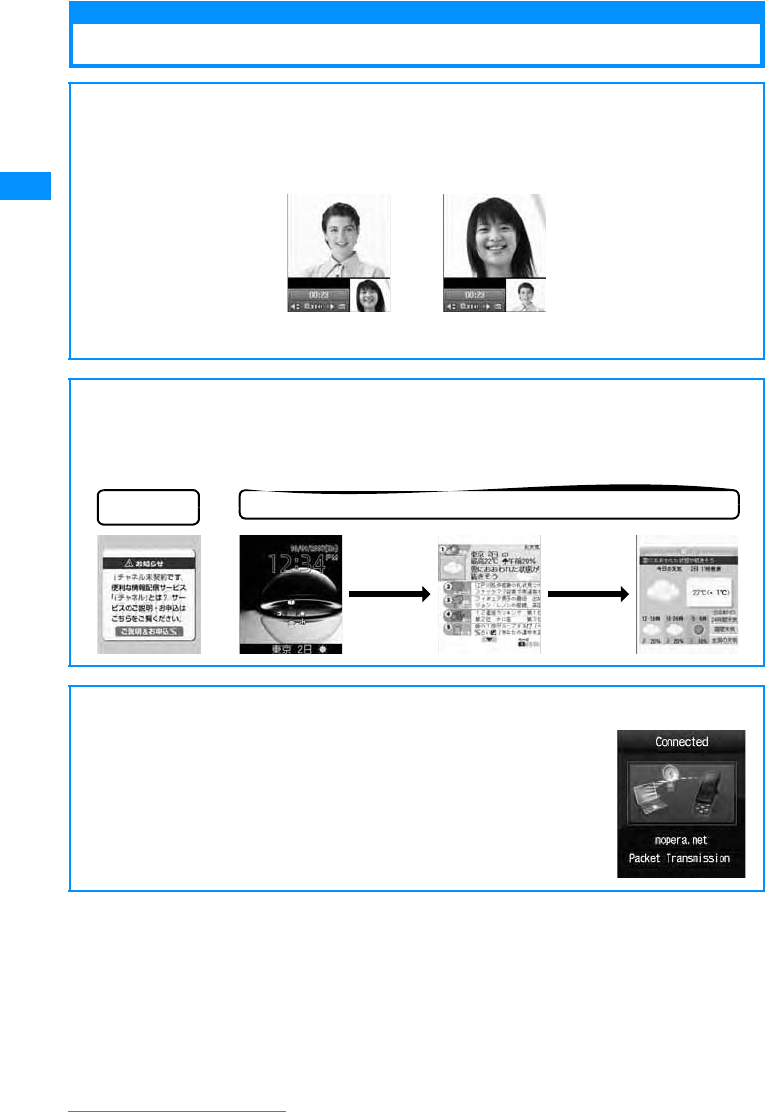
䂹Video Phone䂹→P50
You can have a face-to-face conversation with a partner, even if he/she is far away. By
default, the other party's voice can be heard from the speaker during video call. So you can
start it right away.
䂹i-Channel䂹→P154
䋪
This fee-based service requires a separate subscription.
Provides graphical view of information such as news or weather forecasts.
Also, you can obtain more rich-content generated in Flash(P197) by selecting your favorite
channel from the Channel List.
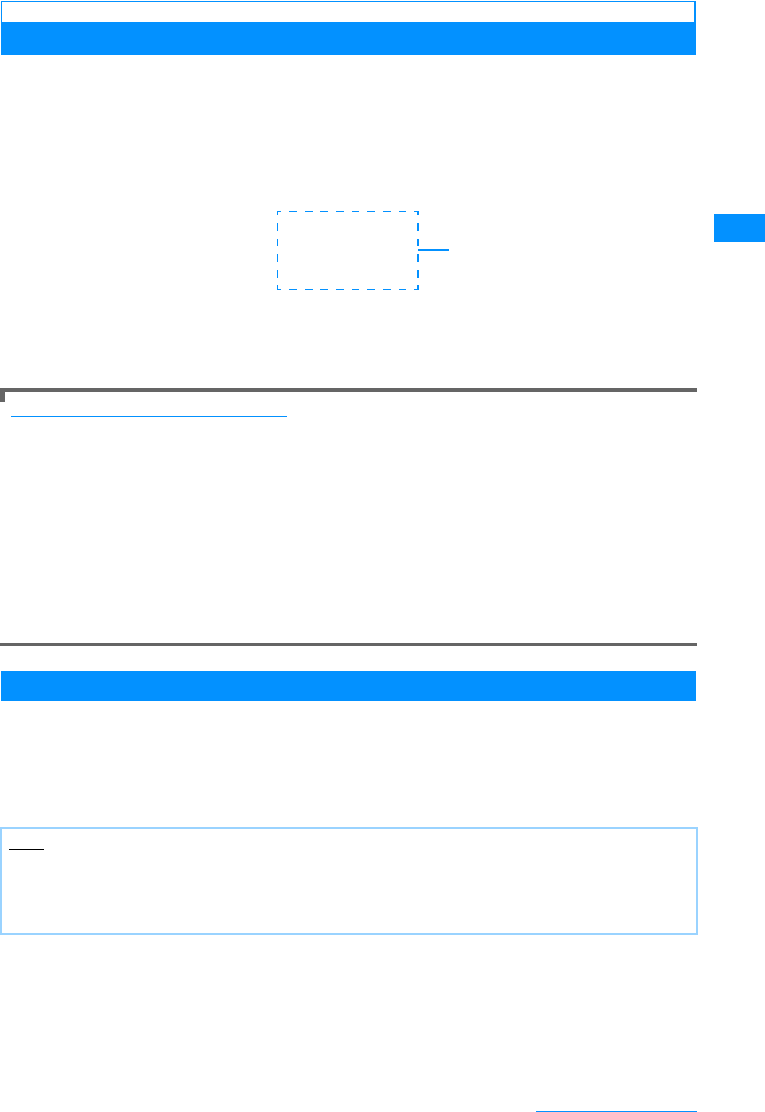
䂹FOMA High Speed䂹→P188
Supports high speed data transfer at the maximum rate of 3.6Mbps for
receiving and 384Kbps for sending within the FOMA High Speed Area.
You can check whether you are within a High Speed Area using "FOMA
ㅢାⅣႺ⏕䉝 䊒䊥 (FOMA connection environment check
application)".
The other
party’s display Your display
Before subscribing
to the service
After the service subscription procedures have been completed
(Connect)
Q
(One second
or longer)
11
Easy Search/Contents/Precautions
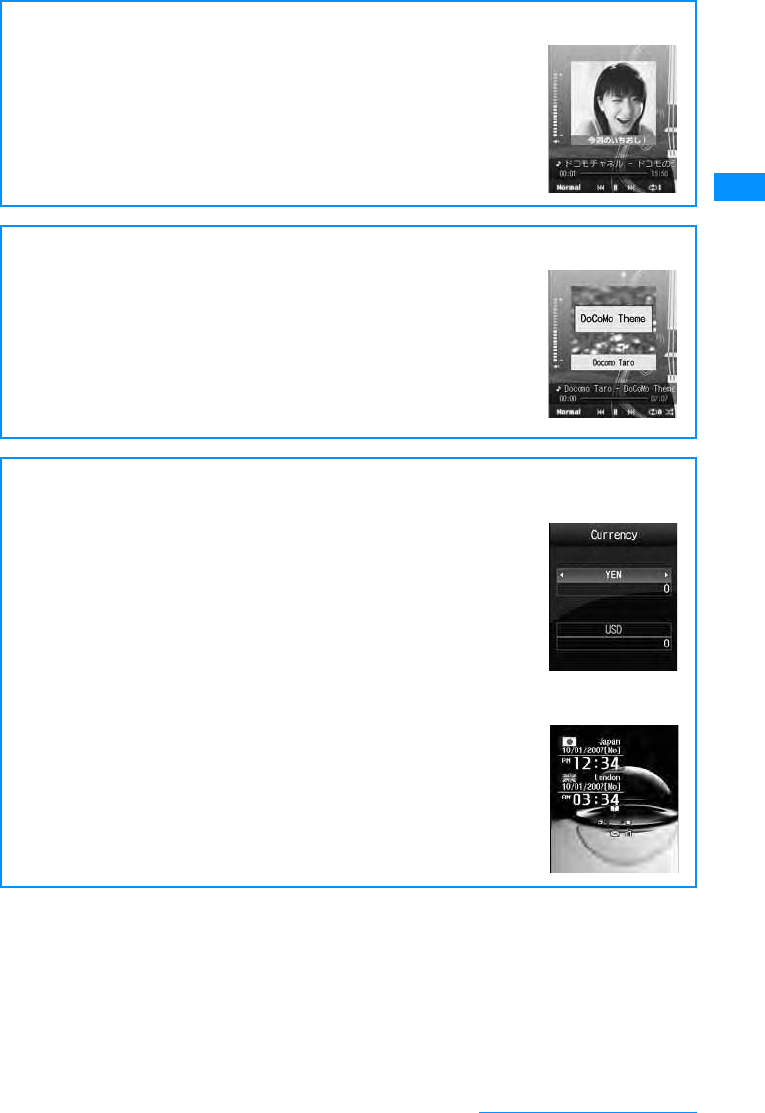
䂹Music Channel䂹→P216
䋪
This is a fee-based service requiring a separate subscription.
This service allows reserved music program delivery to be automatically
downloaded at night. Programs are periodically updated, and you can
enjoy the downloaded content for up to one hour whenever you want.
䂹Music Player䂹→P220
You can use a PC to save songs downloaded from a music download
service site or copied from a music CD to a microSD memory card, and
then play the songs on the FOMA handset. You can also download an
entire song compatible with Chaku-Uta-Full® from a download service
site and play it.
Also, the handset offers Music player skins of 5 screen designs for the
Playback screen, and Music life that allows you to set the sound quality,
sound volume and the playback duration in line with your usage.
Useful Functions when Using Abroad
䂓Unit Converter →P241
Units for currency, area, length, weight, temperature, volume, and speed
can all be quickly converted back and forth. For example, you can find
out how much the purchase you made abroad costs in Japanese Yen.
䂓Dual Clock Display →P100
On the Stand-by display, you can simultaneously show the time in two
different cities. For example, you can output the city you are traveling to,
and see the time difference.
12
Easy Search/Contents/Precautions
Safety Precautions (ALWAYS FOLLOW THESE
PRECAUTIONS)
䃂Before using your FOMA handset, read these "Safety Precautions" carefully so that you can use
it correctly. After reading the safety precautions, keep this manual in a safe place for later
reference.
䃂These precautions are intended to protect you and others around you. Read and follow them
carefully to avoid injury, damage to the product or damage to property.
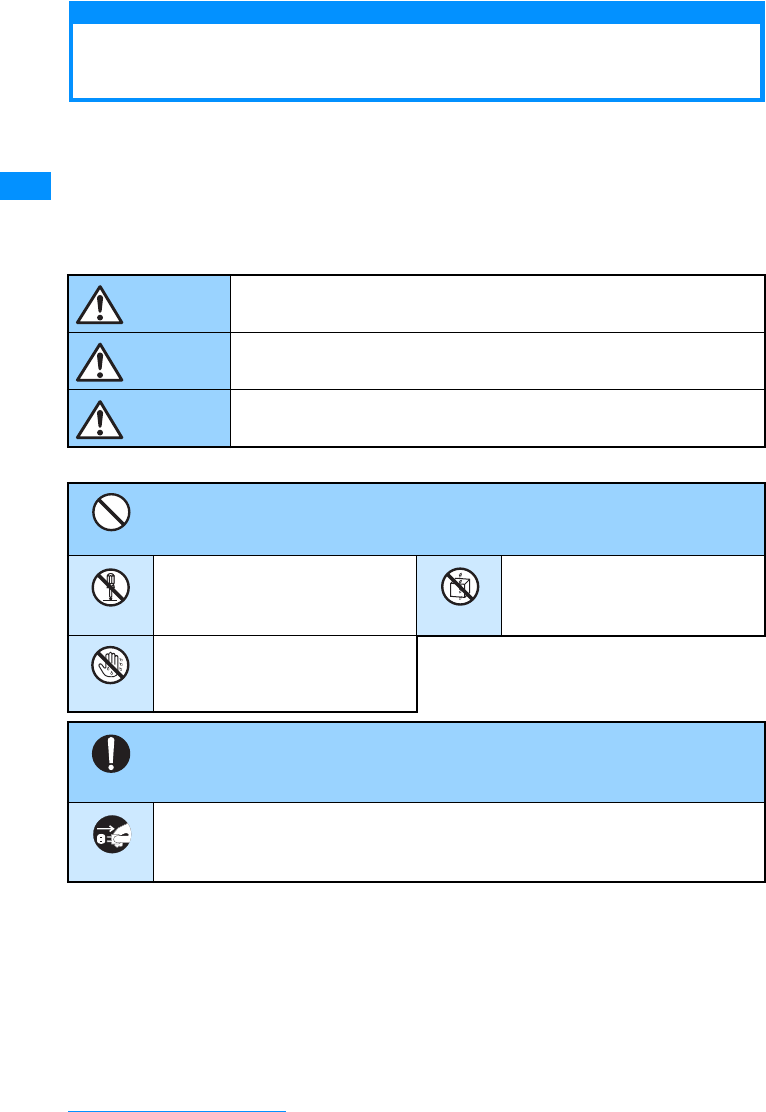
䂓The signs below indicate the levels of danger or damage that may occur if the particular
precautions are not observed.
䂓The following symbols show specific actions:
䂓"Safety Precautions" are explained in the following 6 sections:
General Precautions for FOMA Handset, Battery Packs, Adapters
(Including the Chargers) and UIM................................................................................................P13
Precautions for the FOMA Handset.............................................................................................P14
Precautions for Battery Packs......................................................................................................P16
Precautions for Adapters (Including the Chargers)......................................................................P17
Precautions for the UIM ...............................................................................................................P18
Notes on Using near Electronics Medical Equipment..................................................................P18
This sign indicates that incorrect handling has a high possibility of
causing death or serious injury.
This sign indicates that incorrect handling poses a risk of causing
death or serious injury.
This sign indicates that incorrect handling poses a risk of causing
injury or damage to the product or property.
DANGER
WARNING
CAUTION
Denotes things not to do (Prohibitions)
Denotes not to disassemble. Denotes not to use where it
could get wet.
Denotes not to touch with wet
hands.
Don't
No disassembly
No liquids
No wet hands
Denotes mandatory instructions (matters that must be complied with).
Denotes to unplug from the outlet.
Do
Unplug
13
Easy Search/Contents/Precautions
General Precautions for FOMA
Handset, Battery Packs, Adapters
(Including the Chargers) and UIM
DANGER
Do not use or leave the FOMA
handset or other devices in
locations subject to high
temperatures, such as near fire, in
direct sunlight or inside a car on a
hot day.
䃂Doing so may cause the battery
pack to leak, overheat, explode or
ignite, the devices to be deformed
or malfunction, lower the
performance or shorten the life.
Also, doing so may cause part of
the case to become hot and
possibly cause burns.
䃂Fire, injury, electric shock or
malfunction may result. The
battery pack may leak, overheat,
explode or catch fire.
Do not get the devices wet.
䃂Contact with the devices to liquids
such as water or pet urine may
cause overheating, electric shock,
fire, malfunction, injury, etc. Be
careful not to use the devices in
areas where they could get wet.
Use only the battery packs and
adapters (including the chargers)
approved by DoCoMo for the FOMA
handset.
䃂Using the devices other than those
specified by NTT DoCoMo may
cause the FOMA handset, battery
pack and other devices to leak,
overheat, explode, ignite or
malfunction.
Battery Pack L03
FOMA AC Adapter 01/02
FOMA Overseas/Domestic AC
Adapter 01
FOMA DC Adapter 01/02
FOMA Dry Cell Battery Adapter 01
Desk Adapter L01
FOMA Auxiliary Charger Adapter 01
FOMA Rechargeable USB cable 01
㶎For information on other compatible
products, contact the DoCoMo
service counter.
WARNING
Do not put the battery pack, FOMA
handset or adapter(including the
charger) in heating appliances such
as microwave ovens, or high
pressure containers.
䃂The battery pack may leak,
overheat, explode or ignite. Also,
the FOMA handset or adapter
(including the charger) may
overheat, smoke or ignite, or the
IC may damage.
Do not throw the FOMA handset or
devices, or subject them to severe
shocks.
䃂The battery pack may leak,
overheat, explode, or ignite. Also,
the devices may malfunction or
catch fire.
Keep conductive foreign objects
(metal, pencil lead, etc.) away from
the charge terminal or external
connector. Do not insert such
objects inside.
䃂Fire or malfunction may result from
a short circuit.
Make sure you have the power
switched off before you are near
flammable gas such as gasoline. Do
not charge near that places. Failure
to do so may catch fire.
If you notice any strange smells,
overheating, discoloration or
warping of the handset,
immediately take the following
actions:
1. Remove the power plug from the outlet
2. Turn the FOMA handset off
3. Remove the battery pack from the
FOMA handset
䃂If you continue to use the handset
or devices in the above mentioned
conditions, it may overheat,
rupture, or ignite; the battery pack
may leak.
Don't
No disassembly
No liquids
Do
Continue on the next page
14
Easy Search/Contents/Precautions
CAUTION
Do not place the FOMA handset or
accessories on unstable locations
such as wobbly tables or slanted
locations.
䃂The FOMA handset or accessories
may fall, resulting in injury or
malfunction.
Do not store the FOMA handset
accessories in humid or dusty
places, or in hot areas.
䃂Malfunction may result.
If children use the FOMA handset or
devices, a guardian should explain
the safety instructions and correct
operations. The guardian should
also make sure that the instructions
are followed during use.
䃂Injury may result.
Keep out of the reach of babies and
infants.
䃂Accidental swallowing or injury
may result.
Pay extra attention when you are
using the FOMA handset for an
extended period of time while it is
connected to the adapter(including
the charger).
The FOMA handset will become
moderately warm. In particular,
when the battery pack is being
charged, or when you are capturing
or playing videos, or making video
calls, or constantly using i-mode
functions, or i-appli functions, the
FOMA handset, and its components
including the adapter (including the
charger) can become warm.
䃂Some people who continuously or
repeatedly touch a hot FOMA
handset may develop rashes,
itching, or eczema depending on
their physical health or existing
medical conditions.
Precautions for the FOMA
Handset
WARNING
Do not use the FOMA handset while
driving a vehicle.
䃂Mobile phone usage during driving
is subject to punishment by law as
of November 1st, 2004. Use the
FOMA terminal after stopping the
vehicle to park in a safe place even
if you are using a hands-free kit.
While driving a vehicle, use the
Public mode or the Voice mail
service.
Do not directly point the Infrared
Port at someone's eyes while
exchanging data using infrared
communication.
䃂Doing so may affect your eyes.
Also, aiming it towards other
infrared devices may interfere with
the operation of these devices.
Do not put the FOMA handset in the
place where it could be affected by
an expanded airbag, e.g. on the
dashboard.
䃂If the airbag expands, the FOMA
handset could hit you and others,
causing accidents such as injury
and the FOMA handset could get
malfunction or damaged.
If you are wearing any imbedded
electronic medical devices, do not
place the FOMA handset in a
pocket close to the location of the
device.
䃂The FOMA handset may cause the
device to fail.
15
Easy Search/Contents/Precautions
Turn off the FOMA handset in
places where use is prohibited such
as in airplanes or hospitals.
䃂Electronic and electronic medical
appliances may be adversely
affected. If the function which
automatically turns on your FOMA
handset is set, cancel the setting
before turning it off.
If the medical facility has specific
zones where use or possession of
handsets is prohibited, follow
those regulations.
You may be punished for using the
FOMA handset in airplanes, which
is prohibited by law.
While using Handsfree, do not put
the FOMA handset speaker next to
your ear.
䃂Do not point the photo light directly
at someone's eyes at close range.
People who suffer from heart
ailments should be especially
careful about setting vibration and
ring volume levels.
䃂Being startled by alerts from an
incoming call could have effects on
the heart.
If it thunders while using the FOMA
handset outside, immediately turn it
off and move in a safe place.
䃂There is a risk that you may
receive an electrical shock or even
be struck by lighting.
Turn off your FOMA handset in
places near from high-precision
electronics devices or devices
using weak electronic signals.
䃂The FOMA handset may possibly
cause the following devices to
malfunction:
㶎Electronic devices that may be
affected: Hearing aids, implanted
cardiac pacemakers, implanted
defibrillators, other medical
electronic devices, fire alarms,
automatic doors and other
automatically controlled devices. If
you are using an implanted cardiac
pacemaker, implanted defibrillator
or any other electronic medical
device, consult the manufacturer or
retailer of the device for advice
regarding possible effects from
radio waves.
CAUTION
Do not swing the FOMA handset
around.
䃂If you swing the FOMA handset
around by its lanyard, someone
could get hurt or the device could
be damaged.
Do not place the magnetized items
near the FOMA handset.
䃂Information on magnetic media
such as cash cards, credit cards,
telephone cards or floppy disks
may be lost. Otherwise,
malfunction may result.
Electronic devices in some types of
cars can be affected by use of the
FOMA handset.
䃂For safety's sake, do not use the
FOMA handset in such cars.
Itching, rash or eczema may be
caused depending on your physical
conditions or predisposition. If an
abnormality occurs, stop using the
FOMA handset immediately, and
then seek medical attention.
䃂Metals are used for the following
parts:
Be careful not to catch anything
inside the fold of the FOMA handset
when you close it.
䃂You may be accidentally injured or
device may fail.
Do not put anything but a UIM in the
FOMA Card Slot and microSD
Memory Card Slot. Keep water,
foreign objects such as electrical
conductors, volatile liquids, etc.,
out of the FOMA handset.
䃂Otherwise, electrical shock, fire or
malfunction may result.
Part Material Surface
Treatment
Hinge plate on the
back side of the
handset
Stainless steel Coating
Around the Outer
camera Stainless steel Trivalent
chrome
plating
Charge terminal on
the back side Beryllium
copper Rhodium
plating
Continue on the next page
16
Easy Search/Contents/Precautions
Precautions for Battery Packs
䂓
You can check the type of battery pack in
your FOMA handset by reading the label
attached to the battery pack.
DANGER
Keep all electrical conductors away
from the battery terminal contacts.
Do not carry or keep the handset
together with accessories made of
metal.
䃂Battery packs may leak, overheat,
rupture or ignite.
Do not use excessive force to insert
the battery pack into the FOMA
handset even when you have
difficulty in inserting it. Also, check
that the battery pack is oriented
correctly when you insert it. Also,
check that the battery pack is
oriented correctly when you insert it.
䃂Battery packs may leak, overheat,
rupture or ignite.
Do not attempt to incinerate battery
packs.
䃂Battery packs may leak, overheat,
rupture or ignite.
Do not puncture the battery pack,
or strike it with a heavy blow.
䃂Battery packs may leak, overheat,
rupture or ignite.
If battery fluid somehow gets into
your eyes, immediately flush your
eyes with clean water and
immediately seek emergency
medical advice.
䃂Do not rub your eyes.
WARNING
If normal charging time has elapsed
but charging does not complete,
stop the charging anyhow.
䃂Battery packs may leak, overheat,
rupture or ignite.
If the battery fluid gets on your skin
or clothes, immediately stop using
the battery pack and rinse with
clean running water.
䃂Failure to do so may cause injury
on your skin.
If you see that battery pack is
leaking, or if it smells bad, stop
using it.
䃂Be sure to keep a leak battery
pack away from open flames since
the battery fluid is highly
inflammable and could ignite or
explode.
CAUTION
After its useful life, a battery pack
should be properly disposed of. Do
not dispose of exhaust batteries
with ordinary household waste.
䃂Battery packs which are not
disposed of properly may burn,
explode or cause environmental
damage. Cover the battery
terminals with a non-conductive
tape and take them to a service
counter such as DoCoMo shop or
dispose of them in accordance
with procedures for disposing of
battery packs set up by your local
authorities.
Description Type
Li-ion Lithium ion battery
Don't
Don't
Don't
Don't
Do
Do
Do
Do
Don't
17
Easy Search/Contents/Precautions
Precautions for Adapters
(Including the Chargers)
WARNING
Do not use a damaged adapter
(including the charger) or one with a
damaged power cord.
䃂Electric shock, overheating or
ignition may result.
Do not use the AC adapter or
Desktop Holder in places with a
very high level of humidity such as a
bath.
䃂You could suffer an electric shock.
Use the DC adapter only in a
negative (-) ground vehicle. It is not
designed for use in a positive (+)
ground vehicle.
䃂Otherwise, ignition may result.
If you hear thunder, do not touch
the FOMA handset or adapter
(including the charger).
䃂There is a risk that you may
receive an electrical shock or even
be struck by lighting.
Do not short-circuit the Charging
Terminal when the adapter is
plugged into the outlet or cigarette
lighter socket. Also, never touch the
Charging Terminal with fingers or
other bare skin.
䃂Doing so could cause fire,
equipment failure, electric shock or
other injury.
Place the charger or Desktop
Holder on a stable location during
charging. In addition, do not cover
or wrap the charger in cloth or
bedding.
䃂If cooling air is restricted by
wrapping the device, it may
overheat, ignite or fail.
Do not touch the power cord of the
adapter (including the charger), or
the outlet with wet hands.
䃂You could suffer an electric shock.
Use the adapter only with the
specified power source and
voltage.
䃂Failing to do so may result in fire or
malfunction. When you use the
FOMA handset overseas, use the
AC adapter appropriate for the
location.
AC adapter: AC 100V
DC adapter: DC 12V, 24V (only for a
negative ground car)
Available AC adapter overseas:
AC100-240V (plug into a home AC
outlet)
If you below the fuse of the DC
adapter, replace it with the
specified fuse.
䃂The use of an incorrect fuse may
cause fire or malfunction. See the
user's manual supplied with the
adapter for the specified fuse.
Keep the power plug dust-free.
䃂Otherwise, ignition may result.
When plugging the adapter
(including the charger) into an
outlet, plug it in firmly, being careful
not to let it contact with metal
lanyards or the like.
䃂Otherwise, electric shock, a short-
circuit or fire may result.
If you are not planning to use the
AC adapter for a long period of
time, unplug it from the outlet.
䃂Otherwise, electrical shock, fire or
malfunction may result.
If the Adapter gets wet, unplug it
immediately from the outlet or
cigarette lighter socket.
䃂A wet adapter can cause electric
shock, smoke or fire.
Don't
Don't
Don't
Don't
Don't
Don't
No wet hands
Do
Do
Do
Do
Unplug
Unplug
Continue on the next page
18
Easy Search/Contents/Precautions
CAUTION
Do not place heavy objects on the
adapter (including the charger) cord
and power cord.
䃂Electric shock or fire may result.
Always hold the adapter (including
the charger) firmly when pulling it
out of the outlet or cigarette lighter
socket.
䃂If you pull on the cord instead of
the adapter or plug, the cord could
come loose or be damaged
resulting in electric shock or fire.
Before cleaning, pull the plug out of
the outlet or cigarette lighter
socket.
䃂You could suffer an electric shock.
Precautions for the UIM
CAUTION
Be careful not to touch the edge of
UIM (IC portion) when removing it.
䃂Your hands or fingers may be
injured.
Notes on Using near Electronics
Medical Equipment
䂓
The description below meets "Guideline on
the Use of Radio-communication
Equipment such as Cellular Telephones -
Safeguards for Electronic Medical
Equipment" by the Electromagnetic
Compatibility Conference Japan.
WARNING
Be sure to adhere to the following
regulations inside medical facilities:
䃂Keep the FOMA handset out of
operating rooms (ORs), intensive
care units (ICUs) or coronary care
units (CCUs).
䃂Turn off the FOMA handset in
hospital wards.
䃂Turn off the FOMA handset in
hospital lobbies and corridors if
electrical medical devices could be
nearby.
䃂If the medical facility has specific
zones where use or possession of
handsets is prohibited, follow
those regulations.
䃂If the function which automatically
turns on your FOMA handset is
set, cancel the setting before
turning it off.
Turn off the FOMA handset in
crowded trains or other public
places where implanted cardiac
pacemaker or defibrillator wearers
could be nearby.
䃂Operation of an implanted cardiac
pacemaker or implanted
defibrillator may be affected by
radio waves.
If you use an implanted cardiac
pacemaker or implanted defibrillator,
use the FOMA handset 22cm or more
away from the implanted cardiac
pacemaker or implanted defibrillator.
䃂Operation of an implanted cardiac
pacemaker or implanted
defibrillator may be affected by
radio waves.
Don't
Do
Unplug
Do
Do
Do
Do

19
Easy Search/Contents/Precautions
Patients using electronic medical
equipment other than implanted
cardiac pacemakers or implanted
defibrillators (outside medical
facilities for treatment at home, etc.)
should check the influence of radio
waves upon the equipment by
consulting the manufacturer.
䃂Operation of electronic medical
equipment may be affected by
radio waves.
Do
Continue on the next page

20
Easy Search/Contents/Precautions
Handling and Care
General Usage Guidelines
䂓
Do not let the equipment get wet.
The FOMA handset, battery pack, adapter
(including the charger) and UIM are not
waterproof. Do not use them in places with
high humidity such as a bath or where rain
may get it wet. If you carry them close to your
body, moisture from sweat may corrode the
internal parts causing a malfunction. Note that
malfunctions deemed to be caused by water
are not covered by the warranty, and may be
impossible to repair. Since these malfunctions
are not under warranty, even when repair is
possible, it will be done at the user's expense.
䂓
Clean the FOMA handset with a dry, soft
cloth (Lens cleaning cloth).
• The Display of the FOMA handset
sometimes has a special coating so that it
is easier to see. If you rub the Display
roughly with a dry cloth, it may be
scratched. Take care of the way of
handling, and use only a dry, soft cloth such
as used for cleaning glasses. If the Display
is left with water drop or stain adhered,
smear may be generated or the coating
may peel off.
• Do not use alcohol, thinner, benzene,
detergent or other solvents for cleaning,
otherwise the printing may be removed or
discoloration may result.
䂓
Occasionally clean the connector terminal
with a dry cotton swab.
If the connector terminal becomes dirty, the
connection may become intermittent because
power disconnects or the battery is not fully
charged. Wipe the connector terminal with a
clean dry cloth or cotton swab.
䂓
Do not place the equipment near air
conditioner outlets.
Condensation may form due to rapid changes
in temperature, and this may corrode internal
parts and cause malfunction.
䂓
Do not use excessive force using the FOMA
handset or the battery pack
If the FOMA handset is inserted to a full bag,
or placed in a pocket and sat on, its LCD and/
or internal PCBs may be damaged or
malfunction. And if external devices are
inserted to the external connector terminal,
the connector may be damaged or
malfunction.
䂓
Do carefully read each manual attached to
the battery pack, adapter, or Desktop
Holder (including the charger).
Precautions for FOMA Handsets
䂓
Avoid extreme temperatures.
The FOMA handset should be used within a
temperature range from 5°C to 35°C and a
humidity range from 45% to 85%.
䂓
The FOMA handset may affect general
phones, televisions or radios, etc. in use
nearby. Use as far as possible from such
appliances.
䂓
Keep a separate record of any information
stored on the FOMA handset and store the
copies in a safe location.
DoCoMo assumes no responsibility for the
loss of any of your data.
䂓
Do not insert the the external devices to
Headphone/Microphone Jack or the
external connector terminal obliquely or do
not pull out with the connector is inserted.
it may cause damage or malfunction.
䂓
It is normal for the FOMA handset to
become warm during use or while charging.
You can continue to use it even if it is warm.
䂓
Do not leave the FOMA handset directly
under the sunlight.
Pixels may become discolored or burn out.
Precautions for Battery Packs
䂓
Battery packs are expendable.
Depending on the use condition, the battery
pack may be inflated as it comes to the end of
its life. This is not a malfunction. Purchase the
battery pack specified in this manual.
䂓
Charge the battery pack in a place with an
ambient temperature of 5
°
C to 35
°
C.
䂓
Be sure to charge the battery pack before
you first use the FOMA handset or after you
have not used it for a long time.
䂓
The actual time that a battery pack holds its
charge depends on how the FOMA handset
is used and how close the battery pack is to
the end of its useful life.
䂓
The battery pack may bulge towards the
end of its useful life. This is normal.
21
Easy Search/Contents/Precautions
䂓
When you are not using a battery pack,
keep it in a cool dry place away from direct
sunlight.
If you are not planning to use the FOMA
handset for a long time, remove the battery
pack from the FOMA handset after its power
has been completely drained. Keep the
battery pack in its original plastic bag.
䂓
If the battery packs are damaged or
deformed as by dropping the handset,
contact a repair counter.
Precautions for Adapters (Including the
Chargers)
䂓
Charge the battery pack in a place with an
ambient temperature of 5
°
C to 35
°
C.
䂓
Charge the battery pack where:
• There is very little humidity, vibration, and
dust.
• There are no general phones, television
sets or radios nearby.
䂓
It is normal for the adapters (including the
chargers) to become warm while using or
charging the FOMA handset. You can
continue to use it even if they become
warm.
䂓
Only use the DC adapter when the car
engine is running.
The car battery could be depleted.
䂓
When using a outlet with a latch
mechanism, observe the precautions that
came with the outlet.
䂓
Do not subject the adapters to sharp
impacts. Also, do not bend the Charging
Terminal and terminal guide.
Malfunction may result.
Precautions for UIMs
䂓
Do not use excessive force to insert/remove
the UIM.
䂓
It is normal for the UIM to become warm
during use. You can continue to use it even
if it becomes warm.
䂓
Note that NTT DoCoMo will not be liable for
malfunctions occurring as the result of
inserting and using a UIM with not
recommended IC card reader/writer.
䂓
Always keep the IC portion of the UIM clean.
䂓
Clean the UIM with a soft, dry cloth (Lens
cleaning cloth).
䂓
Keep a separate record of any information
stored on the UIM and store the copies in a
safe location.
DoCoMo assumes no responsibility for the
loss of any of your data.
䂓
To protect the environment, please bring
the old UIM to a service counter such as
DoCoMo shop.
䂓
Avoid extreme temperatures.
䂓
Do not scratch, touch carelessly or short
circuit the IC portion.
Data loss or malfunction may result.
䂓
Do not drop or give shock to the UIM.
Malfunction may result.
䂓
Do not bend the UIM or put heavy things on
the UIM.
Malfunction may result.
䂓
Do not insert the UIM with labels or stickers
attached.
Malfunction may result.
Camera Handling
If you seriously annoy others when using the
FOMA handset, you may be liable for
prosecution under applicable laws or
regulations (such as the Public Nuisance
Laws).
Cautions
䂓
Never use a modified FOMA handset. Using
a modified device violates the Radio Wave
Law.
The FOMA handset is given a certificate for
conformity of technical standards of specified
radio equipment based on the Radio Wave
Law. To confirm this, the rating sticker on the
FOMA handset has written.
If you modify the internal components of the
FOMA handset by removing screws, the
certificate for conformity of technical
standards becomes void.
Using the handset with the void certificate for
conformity of technical standards violates the
Radio Wave Law.
Please be considerate of other
people's privacy when capturing
and sending pictures using
camera-equipped mobile phones.

22
Easy Search/Contents/Precautions
Intellectual Property
Issues
Copyrights and Portrait Rights
You have no right to copy, modify, or
distribute the contents such as text, images,
music, or software downloaded from web sites
on the Internet, or images captured by the
cameras of this product without permission
from the copyright except for when the copy or
quote is for personal use that is allowed by the
Copyright Law. Note that it may be prohibited
to capture or record live performances or
exhibitions even for personal use.
Refrain from taking portraits of other persons
and uploading such portraits on websites
without consent, as this violates portrait rights.
Trademarks
䍃
"FOMA", "mova", "i-mode", "i-appli", "i-appli DX",
"WORLD CALL", "WORLD WING" "Public Mode",
"i-melody", "i-area", "i-motion", "i-motion mail",
"Chaku-motion", "Deco-mail", "Chara-den", "i-shot",
"mopera", "mopera U", "sigmarion", "musea", "Dual
Network", "Visualnet", "V-live", "i-Channel", "Short
Mail", "Security Scan", "Message F", "Multi Number",
"Music channel", "DoPa", "IMCS", "Pake-Houdai",
"My DoCoMo", "Family Wide Limit", and the logos of
"FOMA", "i-mode", "i-
㱍
ppli", "WORLD WING", and
"Music Channel" are trademarks or registered
trademarks of NTT DoCoMo, Inc.
䍃The name of the Free Dial Service and its logo
are registered trademarks of NTT
Communications Corporation.
䍃"Multitask" is a trademark of the NEC
Corporation.
䍃"Catch Phone (Call Waiting Service)" is a
registered trademark of the Nippon Telegraph
and Telephone Corp.
䍃McAfee®,䊙䉦䊐䉞 䊷® are registered trademarks
or trademarks of McAfee, Inc. and/or its affiliates
in the United States and/or other countries.
䍃Quick Time is a trademark of Apple Computer,
Inc. in the United States and/or other countries.
䍃Powered by JBlendTM Copyright
2002-2006 Aplix Corporation. All rights
reserved.
䍃QR code is a registered trademark of
DENSO WAVE Inc.
䍃G GAIDO, G-GUIDE, G GAIDO
MOBAIRU, G-GUIDE MOBILE, and
the G-GUIDE logos are registered
trademarks in Japan of Gemstar-TV
Guide International, Inc. of America or its
affiliates.䇭
䍃This product is preloaded with NetFront from
ACCESS Co., Ltd. as its Internet browser.
NetFront is a registered trademark or trademark
of ACCESS Co., Ltd in Japan and/or the other
countries.
Copyright© 1996-2007 ACCESS CO., LTD.
䍃
Contains Adobe
®
Reader
®
technology by Adobe
Systems Incorporated
Copyright
©
1995-2007 Adobe Macromedia Software
LLC. All rights reserved.
䍃
Adobe and Adobe Reader are either registered
trademarks or trademarks of Adobe Systems
Incorporated in the United States and/or other
countries.
䍃Microsoft, Windows, and Windows Vista are
trademarks or registered trademarks of U.S.
based Microsoft Corporation in the U.S.A. and
other countries.
䍃Other company names or product names
mentioned in this content are the trademarks or
registered trademarks of their respective owners.
Other
䍃Contains Flash® LiteTM‚ and Adobe® Reader®
technology by Adobe Systems Incorporated
Copyright© 1995-2007 Adobe Macromedia
Software LLC. All rights reserved. Adobe, Flash,
Flash Lite and Adobe Reader are either
registered trademarks or trademarks of Adobe
Systems Incorporated in the United States and/or
other countries.
䍃A module developed by Independent JPEG
Group is integrated into the software on this
product.
䍃This manual abbreviates operating systems
(Japanese version) as follows:
- Windows Vista is an abbreviation of Windows
Vista
(TM)
(Home Basic, Home Premium,
Business, Enterprise, and Ultimate) operating
system.
- Windows XP is an abbreviation of Microsoft
®
Windows
®
XP Professional operating system,
or Microsoft
®
Windows
®
XP Home Edition
operating system.

23
Easy Search/Contents/Precautions
- Windows 2000 is an abbreviation of Microsoft
®
Windows
®
2000 Professional operating system.
䍃This product is licensed based on the MPEG-4
Patent Portfolio License. If you use MPEG-4
videos for private purpose without any profits,
you are allowed to use them only when:
- Recording MPEG-4 videos that is compliant
with the standard of MPEG-4 Visual.
- Playing back MPEG-4 videos that the
consumers recorded for non-commercial
activities.
- Playing back MPEG-4 videos obtained from the
MPEG-LA licensees.
For details, contact MPEG LA,LLC.
䍃Licensed by QUALCOMM Incorporated under
one or more of the following US Patents and/or
their counterparts in other nations:
4,901,307 5,504,773 5,109,390
5,535,239 5,267,262 5,600,754
5,416,797 5,490,165 5,101,501
5,511,073 5,267,261 5,568,483
5,414,796 5,659,569 5,056,109
5,506,865 5,228,054 5,544,196
5,337,338 5,657,420 5,710,784
5,778,338
24
Easy Search/Contents/Precautions
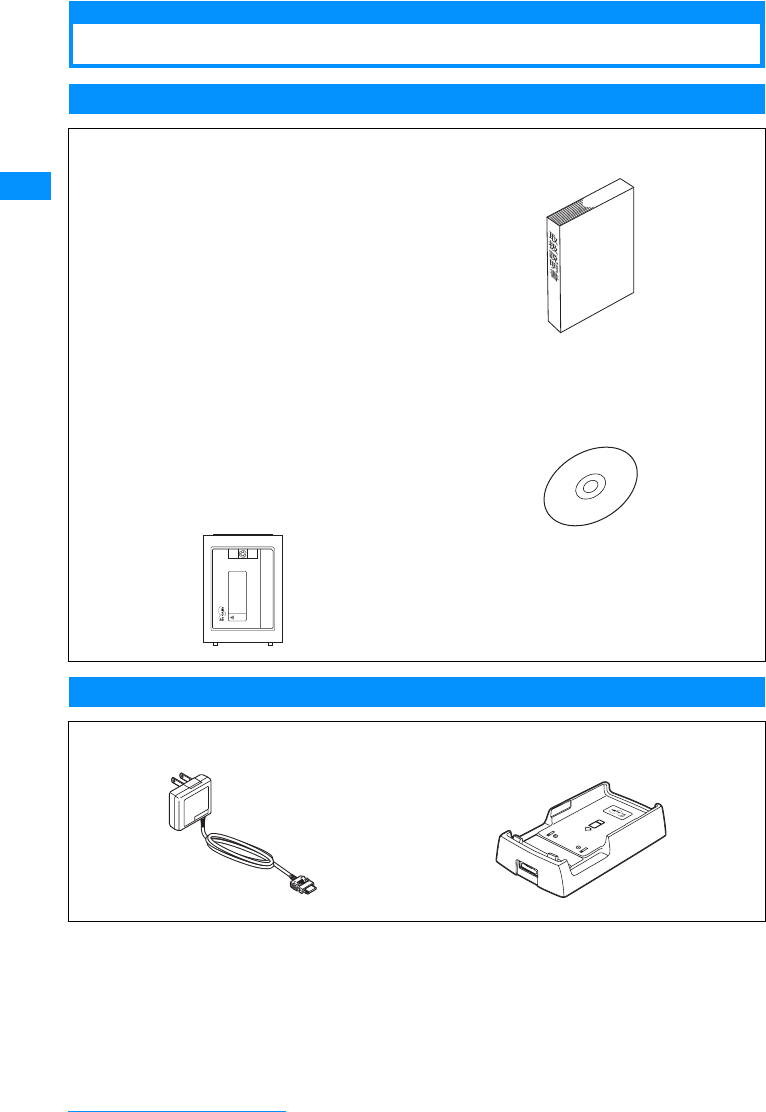
Accessories and Main Options
Accessories
Main Options
Other Options →P305
FOMA L705i
(With Warranty and Rear Cover L04)
Battery Pack L03
(With Instruction Manual)
Instruction Manual
㶎See Quick Manual on P343.
CD-ROM for FOMA L705i (accessory)
㶎"Manual for Data Communication" in PDF format
contained.
FOMA AC adapter 01/02
(With Warranty and Instruction Manual)
Desktop Holder L01
(With Instruction Manual)
ขᛒ⺑ᦠ

25
Before Using the Handset
Part Names and Functions............................................................................................... 26
Display Components ........................................................................................................ 32
Selecting Menu Items ....................................................................................................... 34
Using the UIM (FOMA Card) ............................................................................................. 38
Inserting/Removing the Battery Pack ............................................................................. 41
Charging the Mobile Handset .......................................................................................... 42
Checking the Battery Level ..................................................................... Battery Meter 45
Turn On/Turn Off ....................................................................................... Power On/Off 46
Setting the Date and Time ..................................................................... Set Date&Time 47
Sending Caller ID .........................................................................Caller ID Notification 48
Viewing Your Own Number .......................................................................Own Number 48

26
Before Using the Handset
Part Names and Functions
aInfrared Port
• When carrying out Infrared communications,
point this towards the other person.→P212
bInner Camera
• Capture your own still image or movie with
camera.→P129, P130
• Capture your own image during video calls.
cDisplay →P32
dTouchpad
Just slide over the illuminated buttons on the
touchpad to operate.→P29
eMMenu Button / Right Soft Key
• Press this in Stand-by to open the Main menu
(P34), and press for 1+ seconds to open the
Custom menu.
• Executes the program indicated for the right soft
key→P31
fKNavigation Button
This is used to move the cursor or scroll through
the screen.
U Up Button
• Move the cursor up.
• Press this in Stand-by to open the Phonebook
list screen (P82), and press for 1+ seconds to
open the Create contact screen (P77).
• Press this while the Music player, etc. is running
to increase the volume.
DDown Button
• Move the cursor down.
• Press this in Stand-by to open the Mail menu
screen (P160), and press for 1+ seconds to
perform the Check new message screen (P168,
P168).
• Press this while the Music player, etc. is running
to reduce the volume.
LLeft Button
• Move the cursor left. Also, return to the previous
screen.
• Press this in Stand-by to open the Received call
screen (P56), and press for 1+ seconds to open
the Received message screen (P178).
RRight Button
• Move the cursor right. Also, go to the next
screen.
• Press this in Stand-by to open the Redial screen
(P54), and press for 1+ seconds to open the
Sent message screen (P178).
gAStart Button
• You can use this to initiate a voice or video call.
→P50, P64
• Press this in the Stand-by display to open your
recent call history, and press this for 1+seconds
in the Stand-by display to open the recent sent/
received mail history.
• When typing, clicking this modify the types of
characters being input.→P248
䂓Front
䊶The antenna is inside the FOMA handset.
䂓Rear 䂓Left side 䂓Right side

27
Before Using the Handset
hDial Button
• Press to enter a phone number or character.→
P296
•If the "
0" button is pressed for more than
1 second at the Stand-by display, "+" is entered.
→P60
i*Public Mode (Driving Mode) Button
•Press ":" and "䋪".
• If you hold the button for one second at the
Stand-by display, Driving Mode is enabled or
disabled.→P68
jIllumination dot
Turning the backlight on and off during use or
while charging→P105
kEarpiece
The other party's voice comes from here.
lIiMode Button / Right Soft Key
• Press this in Stand-by to open the i-mode menu
screen (P138), and press for 1+ seconds to
open the i-appli list screen→P184
• Executes the program indicated for the right soft
key→P31
• When typing, clicking this modify the types of
characters being input (between Hiragana,
Katakana, Kanji and numeric characters).
→P296
mCConfirmation Button
• Execute the operation.
nQClear Button
• Restore the previous state.
• Press this in Stand-by for 1+ seconds to open
the i-channel list screen.→P155
o#Manner Mode Button
• "#" is entered.
• Press for 1+ seconds on the Stand-by display to
set/ cancel Manner Mode.→P97
pMouthpiece
• During a phone conversation, one's voice is
transmitted through this.
• During a video recording, it serves as a
microphone.
qOuter Camera
• Capture still images or movies of surroundings
with the camera.→P129
• Capture images of surroundings during video
calls.
rPhoto Light
• When taking still pictures or videos, turns on or
off a red light.
sCharging Terminal
tRear Cover
• Remove the rear cover when inserting/removing
the UIM or battery pack .→P38, P41
uSpeaker
• Ringtones, alarm tones, and melodies sound
from here.
• The other party's voice comes from here during
a handsfree call.
vLanyard Hole
wHeadphone/Microphone Jack
You can a connect flat-plug earphone/microphone
with switch (option) here. Please do not forcibly
pull the wire out from the jack.
xFEVolume Key
Use this key to adjust the volume, etc
• Press this in Stand-by or when a call is arriving
to adjust the ring tone volume.
• Press this during a call to adjust the Earpiece
volume.
• Press F for 1+ seconds in Stand-by to activate
or deactivate Manner mode. Press E for 1䋫
seconds to display Record message list screen.
• Press this twice to deactivate Keypad lock when
it is activated䋪(when the FOMA handset is
closed).
䋪 : When "Keypad lock" (P116) is set to "Allow
manual unlock"
• Press this on the Still image/Video capture
screen to switch between the Inner and Outer
cameras.
• Press this on the Playback screen of the Music
player to adjust the playback volume.
• Press this on the Menu screen or List screen to
move the cursor or scroll by screen to the next
screen.
yNMultitask Button
• The task list screen opens (P231).
• If you hold the button for more than a second,
the "New task " menu opens up.→P230
zExternal Connector Terminal
• AC adapter (optional), DC adapter (optional), or
FOMA USB Cable (optional).
APPower/Off Button
• Turn the power on/off.→P46
• Used to end a call, or to stop a function.
BGMusic Button
• The Music menu is displayed.→P221
• If you hold the button for more than a second,
the Music Player menu is displayed.
• This key works as an shutter when pressing on
the Still image/Video capture screen.→P129,
P130
CmicroSD Memory Card Slot
• A spot to insert the microSD memory card.
28
Before Using the Handset
Opening/Closing your FOMA Handset
When you want to open the FOMA handset, please slide up the display screen. When closing
the phone, please slide down the display screen.
• Closing the FOMA handset automatically activates the Keypad lock, and opening the handset deactivates it.
You can set how to deactivate in "Keypad lock".→P116
Note
• Be careful not to slide the phone roughly, or it could damage the handset.
29
Before Using the Handset
How to Use the Touchpad
Beneath the display is the touchpad that can be operated by touching it lightly with your
fingers. The FOMA handset vibrates when you use the touchpad. Touchpad keys are available
only while they are illuminated.
• You can set the handset to vibrate or not.→P30
If the touchpad turns off during an operation
When the touchpad is not illuminated, operations using the touchpad become unavailable. Illuminate the
touchpad by performing any of the following steps before performing operations:
When the FOMA handset is open
• Press any dial key or side key
When the FOMA handset is closed
• Open the FOMA handset
• Press the power key or volume key
To vibrate the FOMA handset when you use the touchpad
If you set "Vibration feedback" in "Touchpad settings" to "On", the handset vibrates to indicate the
proper operation.→P95
• The handset may not vibrate depending on the screens such as under the Photo-mode/Movie-mode capture
screen or the barcode reader scan screen, or operations such as using an i-appli.
Notes when Using the Touchpad
The touchpad does not function if:
• The touchpad is not illuminated
• You use an object other than your finger such as a ballpoint pen or pencil
• You wear gloves
• You place a foreign object on the touchpad
Note
• Do not apply any object, such as a label, on top of the operating part of the touch-pad or it may not function
properly.
• Do not use a sharp tipped metal object such as a pen tip because it may cause damage.
• Clean with a dry, soft cloth. If it is very dirty, wipe with a wet cloth. Dry sufficiently before using.
Touchpad
Touchpad illuminated
30
Before Using the Handset
Vibration feedback settings
Settig Touchpad Vibration
Set whether using the touchpad vibrates the FOMA handset or not.
aM[Menu]X(Settings)X"Others"X"Touchpad settings"X
Vibration feedbackXOn/Off
If this is set to "Off", the FOMA handset does not vibrate when you use the touchpad.
Touchpad sensitivity settings
Touchpad sensitivity settings
Set to adjust the touchpad sensitivity.
aM[Menu]X(Settings)X"Others"X"Touchpad settings"
X"Touchpad sensitivity"XSelect a sensitivity
High
䋺Increase the sensitivity of the touchpad.
Standard
䋺Set the sensitivity of the touchpad to normal.
Low
䋺Increase the sensitivity of the touchpad.
Default On
Default Standard

31
Before Using the Handset
Soft Keys
Available operations on the currently opened screen are displayed as Soft Keys at the bottom
of the screen. Press the following keys on the touchpad to perform functions corresponding to
Soft Keys.
• Different Soft Keys appear depending on the function or display status.
Notation of Soft Key Operations
This manual describes the Soft Key operations as follows.
aOperations performed using Mwill be displayed.
bOperations performed using Cwill be displayed.
• Indicates and displays where Scrolling / Item Selection
is possible.
cIOperations performed with will be displayed. 䉸䊐䊃 䉨䊷䉣䊥 䉝
䇭䇭
䇭
M[Menu]
䇭 The Button Soft Keys

32
Before Using the Handset
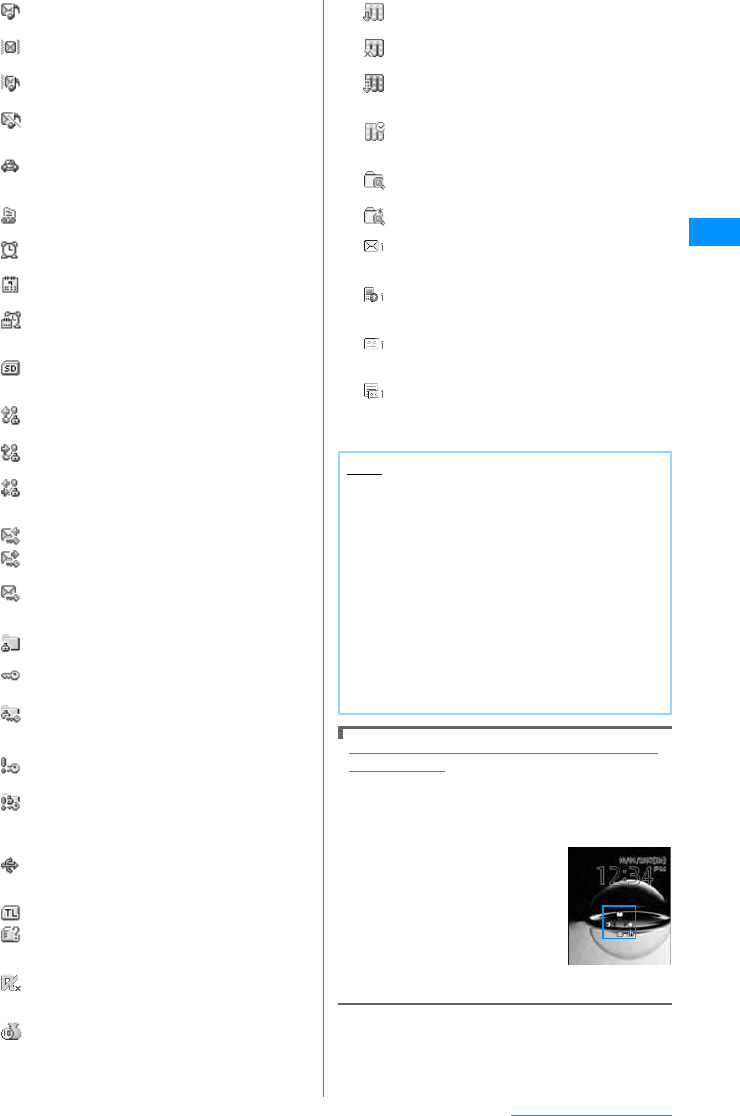
Display Components
The meanings of the icons appearing at the top of the Display or Sub-display are as follows:
a
Strong Weak
Radio wave reception level →P46
Self Mode is set →P115
Out of Service Area / No Reception
→P46
bVoice call in progress →P50
TV Call in progress →P50
"Reject all calls" is in progress.→
P119
cToggle
On/Off i-mode Connection engaged →P139
Toggle
On/Off Ongoing i-mode transmission /
i-channel message reception →P139
Toggle
On/Off Engage/Disengage Packet
connection
During Packet Communication
Sending/Receiving Packet Data
Sending packet data
Sending/Receiving pakcet data
d(White)
i-mode mail from i-mode center
→
P167
(Pink) i-mode center mailbox is full
(White) There is a MessageR at the i-mode
Center→P150
(Pink) MessageR at the i-mode Center is full
(White) There is a MessageF at the i-mode
Center→P150
(Pink) MessageF at the i-mode Center is full
a b c d e fg h i j k
l m n o pq r s t u v w x
FED G
CBAzy
(White) There is a i-mode mail and
MessageR/F at the i-mode Center
(Pink) i-mode Mail and Message R/F at
i-mode center is full
e(White) There is an unread i-mode mail at the
i-mode Center→P166
(White) There is an unread SMS→P182
(White) There is an unread i-mode mail and
SMS
(Pink) Handset Mailbox is full
UIM's SMS section is full
Handset Mailbox and UIM SMS
sections are full
f(White) There is an unread MessageR
→P150
(Pink) Handset MessageR section is full
(White) There is an unread MessageF→P150
(Pink) Handset MessageR section is full
gA SSL Page is open→P152
hAn i-appli is running →P185
An i-appli i-appliDX is running →P185
iA task is currently being executed
→P230
Several tasks are currently being
executed
A task is currently being restarted in
the background
Several tasks are currently being
restarted in the background
Alarm has executed while several
tasks are running.
j䌾Battery level →P45
kConfiguring Full-lock →P113
l
(Pink)
Manner Mode is activated →P97
(Blue)
Original Manner Mode is activated
→P98
mAudio ringer for voice/video call is
active, vibrator is inactive →P94, P95
Audio ringer for voice/video call is
inactive, vibrator is active →P94, P95
Audio Ringer for voice/video call is
active, vibrator is also active →P94,
P95
Audio ringer for voice/video call is
inactive, vibrator is inactive →P94,
P95
33
Before Using the Handset
Function mark assigned to the touchpad (Show
shortcut icons)
Icons indicating the function assigned to touchpad
navigation key and Q appear on the Stand-by
display by default. For the functions assigned, see
P26.
• You can set not to be displayed.→P99
nMail/message receipt ringer active,
vibrator is inactive→P94, P95
Mail/message receipt ringer inactive,
vibrator is active→P94, P95
Mail/message receipt ringer active,
vibrator is active→P94, P95
Mail/message receipt ringer inactive,
vibrator is inactive→P94, P95
oPublic Mode (Drive Mode) is set
→P68
pModifying Voicemail Settings →P71
qThere is a set alarm →P231
rThere are TO DO activities today
→P232
There are TO DO activities today with
their alarms activated→P231, P232
sInserting microSD Memory Card
→P206
tConfiguring voice/video calls usage
limit→P114
Configuring voice/video calls
reception limit→P114
Configuring voice/video calls usage
and reception limit→P114
uConfiguring Sent Mail limit→P114
Configuring Received Mail limit
→P114
Configuring Sent and Received Mail
limit→P114
vWhen you set "Call/Mail lock" to "On"
→P115
When you set "Secret mode" to "On"
→P117
When you set both "Call/Mail lock"
and "Secret mode" to "On" →P115,
P117
When you set "Secret data only
mode" to "On"→P117
When you set both "Call/Mail lock"
and "Secret data only mode" to "On"
→P115, P117
wConnecting to an external device via
USB cable→P210
xLinking to Terminal
UIM not inserted / UIM has produced
an error→P38
yi-appli automatic execution has failed
→P190
zCall costs have exceeded the limit
→P240
AMusic channel episode download
complete→P216
Music channel episode download
failed→P216
Downloading music channel episode
→P216
BBooking downloading music channel
program→P216
CPattern Data has been updated→
P328
You should update your pattern data
DSeveral Unread Mails (with number of
the mails)
ESeveral Missed Calls(with number of
the calls)
FThere are Voice mail messages(with
number of the calls)→P256
GNew Record message have been
recorded(with number of the
messages)
Note
• Some characters or symbols appearing on the
display may be partially deformed or
abbreviated.
• Icons appearing on the Display are based on
the default settings. Depending on changes to
your settings, the display of the FOMA handset
may appear differently from the illustrations in
the operation manual.
• The Display of the FOMA handset employs
high-precision production technology, however,
there may be instances where there are missing
dots or dots that remain on. This is not a
manufacturing defect.
34
Before Using the Handset
Selecting Menu Items
On your FOMA handset, you can configure execution settings, perform operations, or save
items through the main menu or sub menu.
Selecting Functions from Main Menu
You can choose a function from the menu by using the navigation buttons or the dial buttons.
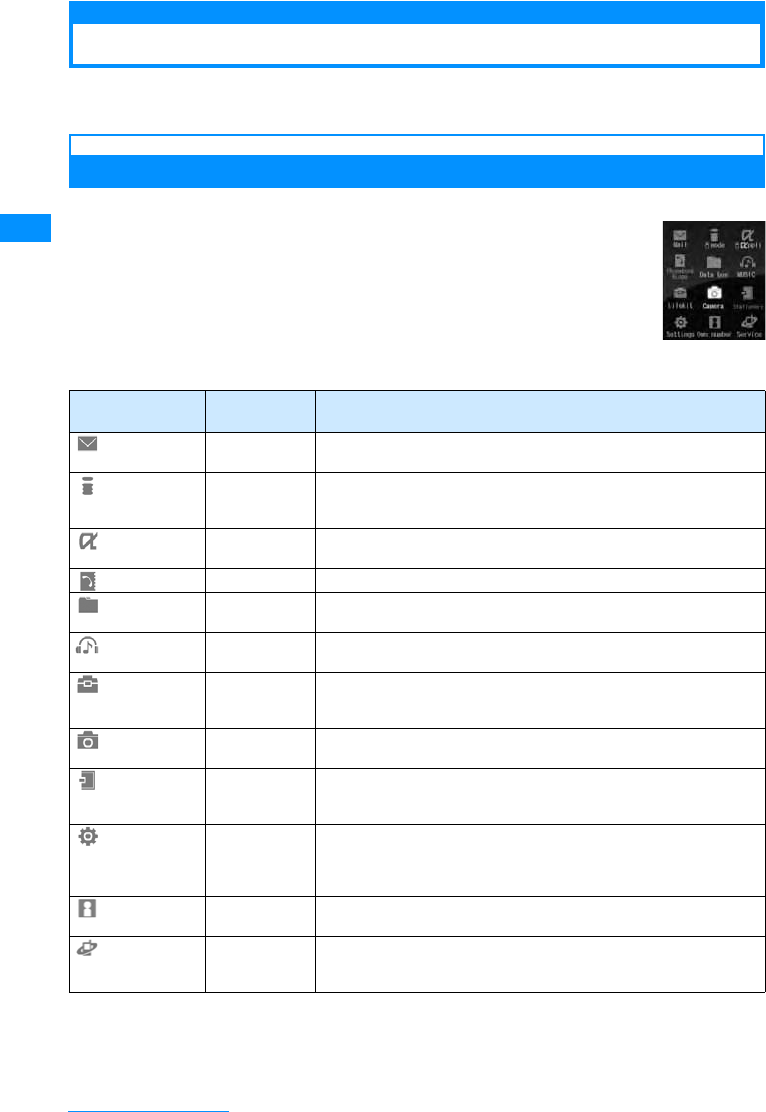
䂓Icons and buttons displayed on the Main menu
Menu Icons Corresponding
Dial Key Description
(Mail) 1Select for using i-mode mail and SMS. You can configure settings to use
i-mode mail and SMS.
(i-mode) 2
Select for using i-mode. You can also connecting to the i-menu,
displaying i-channels, confirm i-mode
settings, examine MessageR
(Request) and MessageF (Free) messages, et cetra.
i-appli 3Select for using i-appli. You can view pre-installed i-appli and i-appli
downloaded from sites.
(Phone Book) 4Select for using the Phonebook saved on the FOMA handset or UIM.
(Data box) 5
Select when using Music/Videos/iMotions/Ringtones/SD Audio Data that
has been saved to a microSD memory Card or to the FOMA Handset.
(MUSIC) 6Select when using the music player/SD audio player, or when viewing a
music channel.
(Lifekit) 7Select when using the barcode reader, Receive Ir Data, custom menu
configuration, the Record Message configuration, Stop watch, or other
similar small, useful functions.
(Camera) 8Select when taking pictures or video, or making configuration changes
to the camera.
(Stationary)
9
Select when using functions related to daily life, such as the schedule,
Alarm, memo, To Do
䊥䉴䊃
, World time, calculator, Unit converter and
Remembering dates.
(Settings) *Select when making configuration changes to your FOMA handset,
such as modifications to sound levels, displayed images (such as the
Stand-by display), time and date settings, international roaming settings
and security-related settings.
(Own number) 0Select this when you need to confirm your own phone number.
(Service) #
Select this when you need to use network changes, such as the
Answering Machine/Voice mail , Call waiting, Call forwarding, Nuisance
call blocking, Caller ID notification, Caller ID request services
Main Menu
35
Before Using the Handset
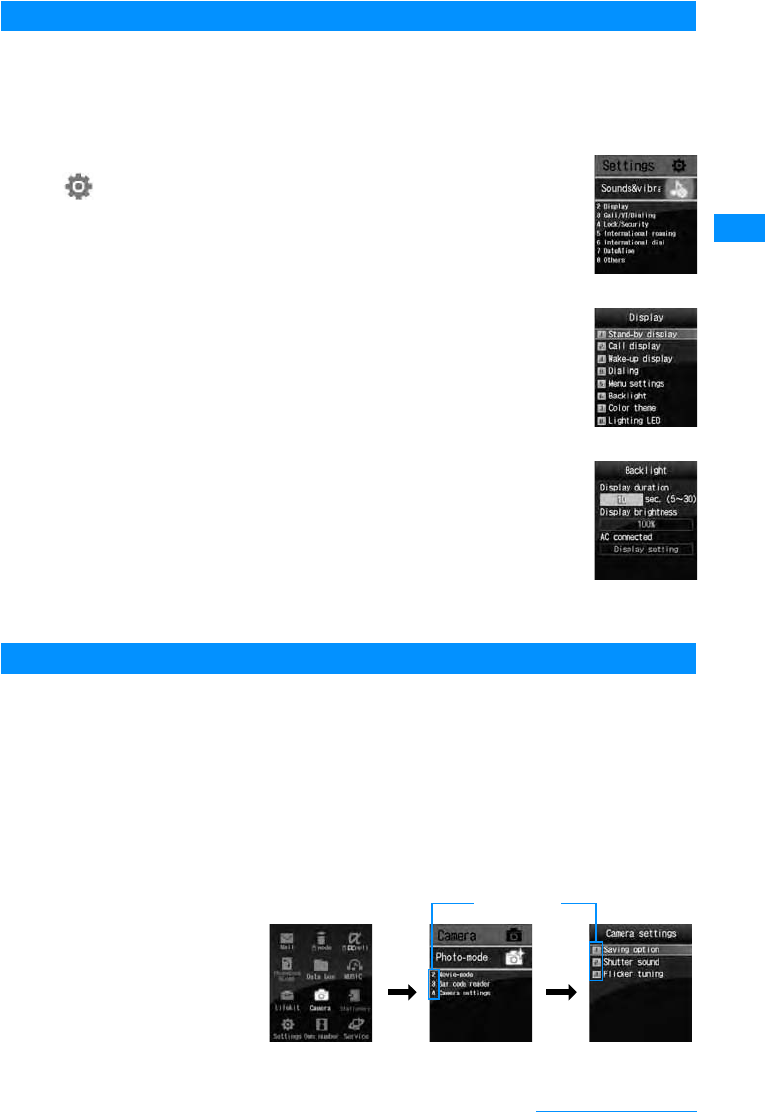
Selecting Menu Items
As an example, we explain how to modify "Light" from the Stand-by display.
• This manual explains how to select functions using the navigation buttons as follow:.
aPress the M[Menu] button on the Stand-by display.
Main menu appears.
bAt the main menu, press Kand move the cursor over
(Settings) and press C[Select]
cAt the Settings menu screen, press Hand move the
cursor over "Display" and press C[Select]
dAt the display menu, press Hand move the cursor
over "Light" and press C[Select]
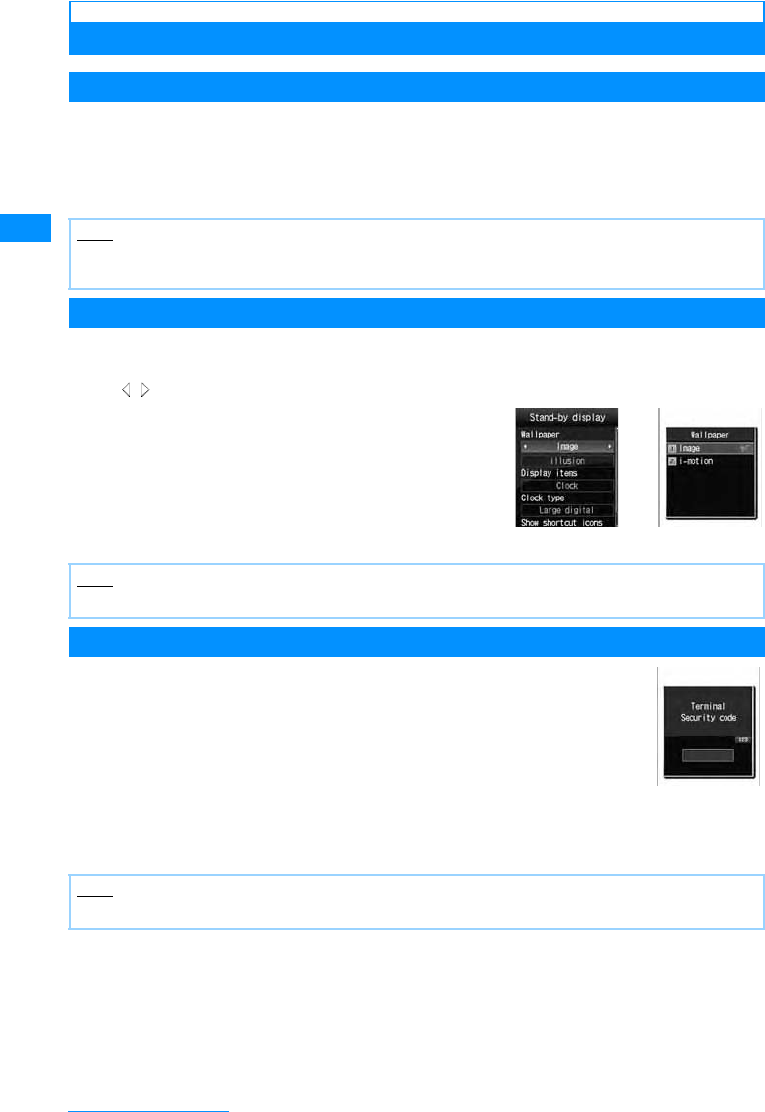
Making a Selection with the Dial Buttons
This section explains the steps for using dial key numbers to open the "Camera Settings"
screen from the main menu, as an example.
aPress the M[Menu] button on the Stand-by display.
bFrom the Main menu screen, press 8that corresponds to the
"Camera" menu.
cFrom the Camera screen, press 4that corresponds to the
"Camera settings".
Settings screen
display screen
Screen
Brightness
Settings
Camera Screen Camera Setting
Screen
48
Main Menu Screen
Menu number
Continue on the next page
36
Before Using the Handset
Basic Functions for Each Menu
Returning to the Previous Screen/the Stand-by Display
Press the following keys to return to the previous screen or pause/cancel the operation to
return to the Stand-by display.
•Q䋺Return to the previous menu
•P䋺Returns to the Stand-by display. If a confirmation screen to exit is displayed, press "Yes" to return to the
Stand-by display.
Selecting Setting Items
Option fields for a setting screen show the currently set options. To change a setting, select an
option field and select an item from a list that opens.
• When is displayed to the right and left of an option field, use J to switch items.
Authentication
For certain functions and services, it may be required for confirmation
purposes to enter a password(P110). If the entry screen appears, use the dial
buttons to enter the password and press C[OK]. If correctly entered, you
can complete the function, or continue to use the function.
• The entered password will appear as "䋪" (Asterisk) marks.
Note
• Depending on the operation on the FOMA handset, pressing P䋯Q may not return to the Stand-by
display/the previous screen.
Note
• The settings may not be switched depending on the items.
Note
• To cancel entering the security code and close the entry screen, press M[cancel]
HXCHXC
Password entry
screen (Example:
Security Code
entry screen)
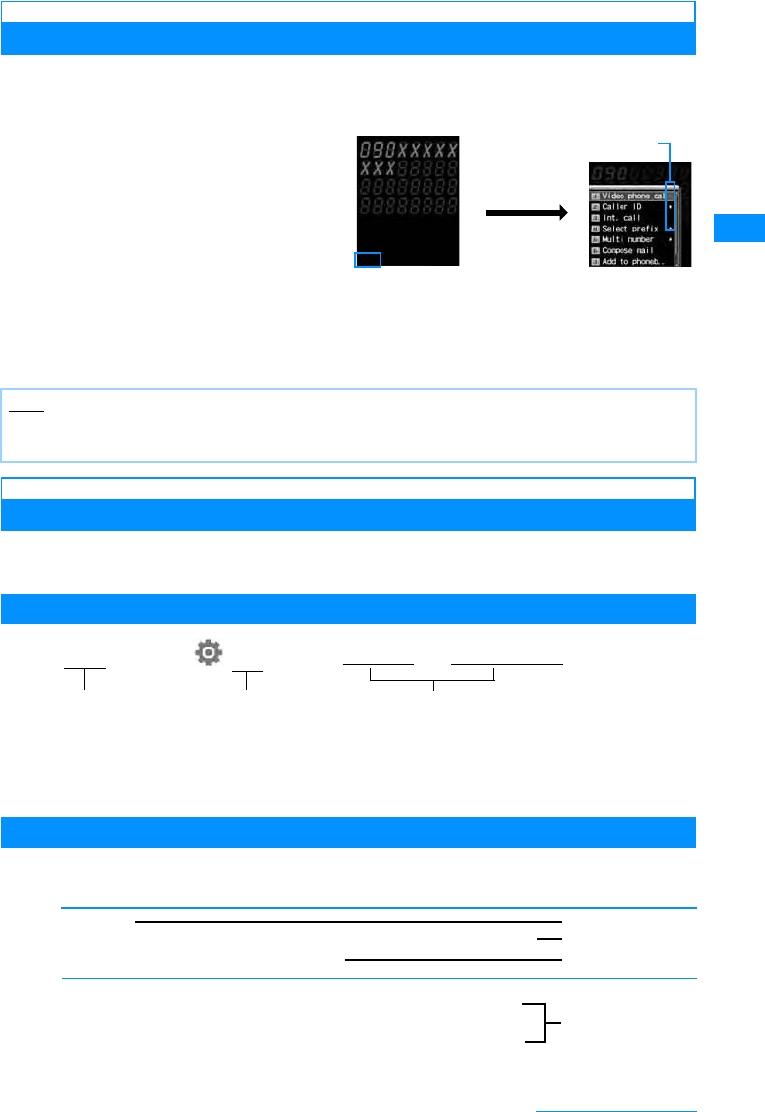
37
Before Using the Handset
Sub Menu
When "Menu" is displayed on the Soft Key, you can call up the sub menu to perform various
functions.
• The sub menu's display varies depending on the function or your FOMA headset's settings.
䂓About the sub menu on the List Screen
On the sub menu for a list screen, there are some items that apply only to the highlighted item such as "Delete"
and other items that apply all items on the list such as "Delete all" Move the cursor to the item before pressing
M[Menu] when executing an operation that applies to only one item.
Notation for Menu Operation
This manual makes explanations by using steps to be performed mainly from the Stand-by
display. Basically, descriptions of operations are simplified as follows:
Example of Operations
aAn icon to press to operate
b
An icon on the main menu Use
K
to move the cursor on the icon and press
C
[Select]
to select.
cMenu item names. There are situations where it may say "Perform the following operation" or
"select xxx". Press H to move the cursor onto the item and press C[Select] to select.
Sub Menu Example
Items displayed on the sub menu may vary depending on the settings or registration status of
the FOMA handset.
Note
• For items that have a sub menu, move the cursor and press C [Select]/R to view the sub menu.
• Press M[Close]/ Qto close the sub menu
Phone number
entry screen
M[Menu]
Items that have sub menus
Sub menu
aM[Menu]X(Settings)X"Display"X"Call display"
䇭䇭䇭䇭 a䇭䇭䇭䇭䇭䇭䇭䇭 b䇭䇭䇭䇭䇭䇭 䇭䇭䇭
䇭
c
[Sort]
According to certain situations, the files can be displayed in different fashion.
X"Display name"/"Date"/"Size"/"Source"
[Memory Info]
Handset
memory
External
䋺Display the status of storage space in the "Data box".
䋺Display the status of storage space on the microSD memory
card.
d
a
b
c
Continue on the next page
38
Before Using the Handset
aMenu item names. Press H to move the cursor onto the item and press C[Select] to select.
bFunctional description of items.
cOperational description of items. Operate aft er selecting a.
dItem names, function description of items, and operation description of items after the
selection of items.
Notation Rules
䂓Description of steps starting from other than the Stand-by display
At the beginning of the description, the status of the handset or the screen to open such as "Ringing " or "List
screen" is written.
䂓Omitting C[Select] in selection operation
As shown in c in "Example of Operations" (P37), to explain a step to select an icon or a function from a list,
operational steps such as pressing C[Select] are omitted.
Similarly, to explain steps to enter a password or fix entered characters, the operations for fixing such as
C[OK] are omitted.
䂓Omitting C when carrying out a function to make into
The instruction beginning with "Enable xxx checkbox" means that you have to enable the checkbox by
pressing C to turn to shown beside the desired item.
Using the UIM (FOMA Card)
The UIM is an IC card that contains subscription information, such as your phone number. You
can use communication functions including calls, mail, and i-mode communication by inserting
the UIM into the handset. Inserting the UIM into another FOMA handset allows you to operate
multiple FOMA handsets for various purposes.
For details on how to handle the UIM, refer to the UIM instruction manual.
Inserting/Removing the UIM
• After you turned off the handset following the steps described in "Turning the Power Off" (P46), turn the handset
upside down, then remove or insert the battery pack.→P42
• Turn off the FOMA handset and remove the battery pack before inserting or removing the UIM.→P46
Inserting
To insert the UIM, close the FOMA handset and hold it with both hands.
Note
• If multiple sub menus such as the redial list screen and the redial detail screen are collectively described,
some menu items that do not actually appear may be included (depending on the settings or screens).
aInsert the UIM in the direction of the arrow with the IC chip side down
Note
• Do not use excessive force inserting the UIM to avoid damaging it.
39
Before Using the Handset
Removing
To remove the UIM, close the FOMA handset and hold it with both hands.
Security Code for the UIM
You can assign the security code to the UIM, "PIN1 code" and "PIN2 code".→P111
Operations Restricted by the UIM
The UIM operation restriction function is embedded in the FOMA handset as a security
function the to protect your data and files.
• UIM restrictions will be set automatically to data or files if an i-appli is launched or if the data or files are obtained
in one of the following methods, with the UIM inserted in the FOMA handset:
- Images or melodies downloaded from sites or Web pages
- Site or Web pages saved as Screen memos
- i-mode mail received with attachments
- i-appli launched
• Data, files or applications with UIM restrictions set can be viewed, played, attached to i-mode mail, launched,
sent/received via infrared, or copied to a microSD memory card only when the UIM that was inserted when the
data, files or applications were obtained is inserted. If the UIM that was inserted is replaced with another UIM,
these data and files become unavailable.
• The following data/files are restricted:
- Files attached to i-mode mail
- Files (ringtones / pictures) that are attached to MessageR/Fs.
- Files contained in Screen Memos
- Images inserted in the main text of Deco-mail
- i-motion
-i-appli
- Images (including Flash animations)
- Chaku-Uta®Chaku-Uta-Furu (Downloaded Music)®
- Melody
- Motion-restricted data, including mail templates.
- Music Channel episodes
䋪
"Chaku-Uta" is a registered trademark of Sony Music Entertainment Inc.
aSlide the UIM in the direction of the arrow and remove it from the FOMA Card Slot
Note
• Do not misplace the removed UIM.
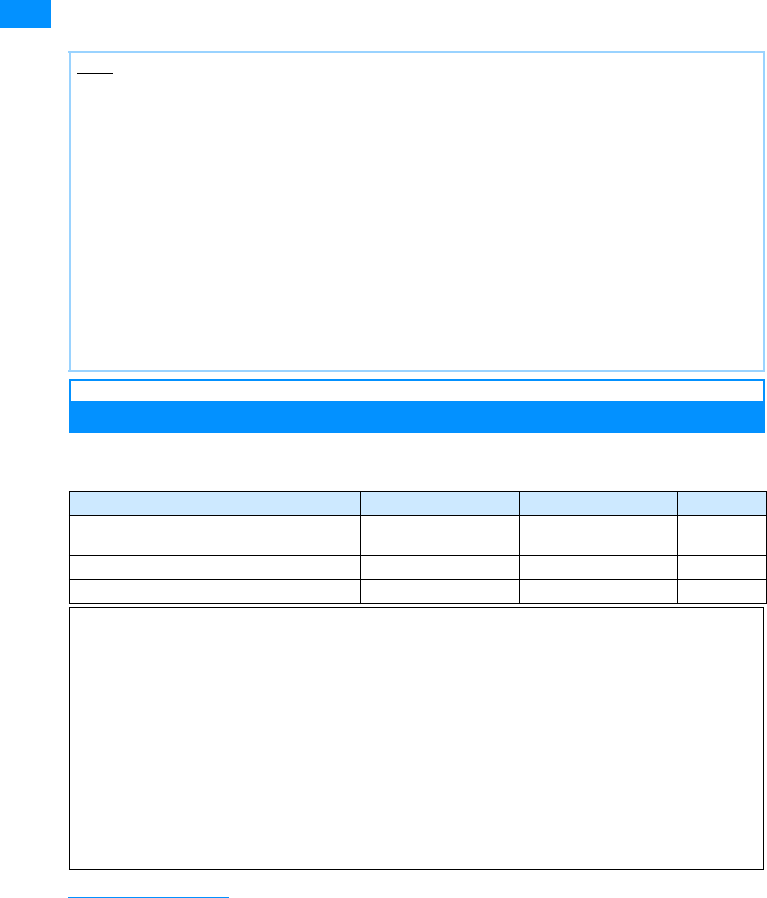
40
Before Using the Handset
䋪Hereafter, the UIM that was inserted when the data or files were obtained is called "your UIM" and any other
UIM is "another UIM".
UIM Types
Please be aware that using your UIM (Blue) will result in different functionalities than using UIM
(Green/White).
Note
• Even if you have set the data/files restricted with this function for the Stand-by display, the settings will revert
to their factory-default settings temporarily if another UIM is inserted (or if no FOMA card is inserted). When
you re-insert your UIM, it will restore the phone to your original settings.
• Pre-installed i-appli programs are not restricted. However, if you delete an i-appli and then download it, the
newly-downloaded i-appli program will be restricted.
• The following data/files are not restricted with this function:
- Data/files obtained by using Infrared communication, the microSD memory card, or data
communications
- Images captured/edited using your FOMA handset
• Even if a different UIM from the time when data/files were obtained is inserted, the data/files restricted with
this function can be deleted.
• Settings that are saved on the UIM are as follows:< (Confirming specs)>
- Phone number display - SMS Center settings - PIN1 and PIN2
- Select language - SMS validity period setting - Setting to enable or disable DoCoMo certificate 1
• If the UIM is inserted into another i-Channel compatible handset, the ticker will not appear. The latest
information is downloaded and ticker is shown after you press Q for 1+ seconds to obtain the channel list.
Function UIM (Blue)
UIM (Green / White)
Reference
The number of digits of a phone number that
can be saved to the UIM contact Up to 20 digits Up to 26 digits P79
World Wing Usage Not available Available P270
Service dialing Not available Available P262
WORLD WING
WORLD WING is DoCoMo's FOMA international roaming service that provides telephone and other types of
mobile communications. It allows the subscriber's phone number to stay constant overseas by inserting the
UIM(green/white) into a FOMA handset or a mobile phone designed for overseas use (W-CDMA or GSM
systems).
• If you subscribed to the FOMA service after September 1, 2005, a separate subscription is not required.
However, if you unsubscribed to the FOMA service subscription or canceled the service, a separate
subscription is required.
• If you initially subscribed to the FOMA service before August 31, 2005 and have not subscribed to
"WORLD WING", a separate subscription is required.
• This service is not available with some billing plans.
• In the case that your UIM (green/white) is lost or stolen overseas, contact DoCoMo immediately and
temporarily suspend your subscription. For contact information, see "DoCoMo Information Center" on the
back of this manual. Call and communication charges apply after the handset was lost or stolen are still
charged to you.
41
Before Using the Handset
Inserting/Removing the Battery Pack
• Turn off the handset and hold it closed in your hand.
Inserting
aWhile pushing the rear
cover in the direction of the
arrow a, slide the cover in
the direction of arrow b.
Pick up the cover as shown
by arrow c.
bAlign the metal contacts of
the battery pack and the
FOMA handset, attach the
battery pack in the direction
of the arrow a,andinsert
the battery pack in the
direction of the arrow b
䍃When mounting the
battery pack, press it
underneath the tab and
push it down.
c
Align the tabs for Rear Cover
and while pushing it in the
direction of arrow
a
, slide it
in the direction of arrow
b
;
push until you hear a "click"
sound.
Note
• For further details on how to handle the Battery Pack, refer to the Battery Pack L03 instruction manual.
Make sure there
are no gaps
between the
FOMA headset
and the rear
cover.
(Approximately
3mm)
Hold the battery pack with
the product name side up.
42
Before Using the Handset
Removing
Charging the Mobile Handset
Use the AC adapter (optional), Desk Adapter (optional) or DC adapter (optional) designed for
the handset to charge the FOMA handset. When using the FOMA handset abroad, you must
use the FOMA foreign use AC adapter 01 (sold separately). To make full use of the FOMA
handset, use the Battery Pack L03 exclusively designed for the handset.
䂓Battery pack lifetime
• Battery packs are expendable. As charging is repeated, available time by each charging will gradually
become shorter.
• When the available time of each charging becomes approximately half of that of the time of purchase, it is
recommended to replace the current battery pack with a new one as early as possible. It is normal for the
battery pack to grow in size towards the end of its operational lifetime.
• If the i-appli or video phone functions are used for long periods of time while charging the battery pack, the
battery pack lifetime will be reduced.
aWhile pushing the rear
cover in the direction of the
arrow a, slide the cover in
the direction of arrow b.
Pick up the cover as shown
by arrow c.
bPress down the battery
pack in the direction of the
arrow a, lift the tab in the
direction of the arrow b,
and remove in the direction
of the arrow c.
Note
• For further details on how to handle the Battery Pack, refer to the Battery Pack L03 instruction manual.
To protect the environmental, be sure to bring the exhausted battery
pack to an NTT DoCoMo store, sales agent, or recycle shop.

43
Before Using the Handset
䂓Charging
• For details, refer to the instruction manuals for the FOMA AC Adapter 01/02(optional), FOMA Overseas/
Domestic AC Adapter 01 (optional) and FOMA DC Adapter 01 /02(optional).
• The FOMA AC Adapter 01 can be used only for AC100V. The FOMA AC Adapter 02 can be used from
AC100V to 240V.
• Even though the FOMA Overseas/Domestic AC Adapter 01 can be used from AC100V to 240V, the shape of
the AC adapter plug is for AC100V (for Japan). When you use the FOMA handset overseas, a conversion
plug adapter appropriate for the location may be required. Do not charge the handset with a transformer
designed for overseas trips.
• Insert the battery pack into the FOMA handset before charging the battery pack with the AC or DC adapter.
The battery pack cannot be charged unless it is in the handset.
• Plug/Unplug the connector slowly and securely while avoiding excess force.
• Even during a call, the charge start tone sounds from the Earpiece (if you start charging during a call).
• If you start charging the battery pack when it is empty, the handset may not be turned on for a while.
• During a long video call while charging, the inside of the FOMA handset may become hot and charging may
stop. If this happens, try charging again later.
䂓Do not charge the battery pack for a long time (several days) with the handset power turned on.
• If the FOMA handset is left with the power turned on for a long time while charging, after the charging
completes, the handset uses the power supplied from the battery pack, and the actual time to use the battery
pack becomes short and the low battery alert may sound in a short time. In this case, recharge the battery
pack properly. When recharging the battery pack, once disconnect the AC adapter or DC adapter from the
handset and reconnect it, then start recharging.
䂓Approximate battery pack usage time
The battery pack usage time may vary depending on the operating environment and the battery pack
deterioration.
• Continuous call time is approximate duration of time to be spent for talking with normal radio wave reception
level.
• Continuous standby time is approximate duration of battery time while in motion. Depending on the battery
level, set functions, operating environment such as ambient temperature, or radio wave reception level (Poor
or weak radio wave reception level), battery life can reduced to half. When i-mode communications are
performed, the call (communication)/standby time becomes shorter. Even if you do not make calls or perform
i-mode communications, the call (communication)/standby time becomes short if you compose an i-mode
mail, start a downloaded i-appli, start the i-appli Stand-by display, perform data communications or
multiaccess, use a camera, or playback videos or music.
• Depending on network conditions in your location, this may be shorter than the published values.
• Continuous standby time in a stationary state is the average usage time in a stationary state with normal radio
wave reception level while the handset is closed.
• Continuous standby time in motion is the average usage time in a state combining "standstill", "in motion"
and "out of service area" in an area with normal radio wave reception level while the handset is closed.
䂓Estimated battery pack charging time
• The estimated charging time is the duration of time to charge the battery pack with the FOMA handset turned
off and with a fully drained battery pack.
The charging time becomes longer with the FOMA handset turned on.
Network Continuous Standby Time Continuous Call Time
FOMA䋯3G Motionless: Approx. 䃂䃂䃂 hours
In motion: Approx. 䃂䃂䃂 hours Voice call: Approx. 䃂䃂䃂 minutes
Video call: Approx. 䃂䃂䃂 minutes
GSM/GPRS Approximately 䃂䃂䃂 hours Approximately 䃂䃂䃂 minutes
FOMA AC adapter 01/02 Approximately 䃂䃂䃂 minutes
FOMA DC adapter 01/02 Approximately 䃂䃂䃂 minutes

44
Before Using the Handset
Charging with the AC Adaptor and the Desk Adaptor
aThe AC Adapter (optional)
attaches to the Desk Adapter.
bThe AC Adapter plug connects
to the outlet.
cInsert the head of FOMA
handset into the Desk Adaptor's
stopper as shown by arrow a.
While doing that, push down the
bottom of the FOMA handset in
the direction of an arrow b.
• The charge start tone sounds and charging
begins.
• Make sure the
FOMA handset is flush against the
desktop holder.
Be careful not to nip the
connector cap or straps between the handset
and the holder.
• When charging finishes, a Charging complete
sound will be heard.
dOnce charging is complete, while holding down the desk adapter
with your fingers, firmly remove the FOMA headset from the
adapter.
• During long periods of disuse, please disconnect the AC adapter from the outlet.
䂓AC Adapter charging method
Slide the connector securely until it clicks into place. When removing the power, hold the release button while
removing the connector.
• Make sure the AC Adaptor's connector is facing the correct side. Forcibly trying to remove the adaptor could
damage the handset.
䂓DC adapter (optional)
The DC adapter attaches to a 12V/24V cigarette socket, while attached to FOMA handset.
For details, please see the FOMA DC Adaptor 01/02 instruction manual.
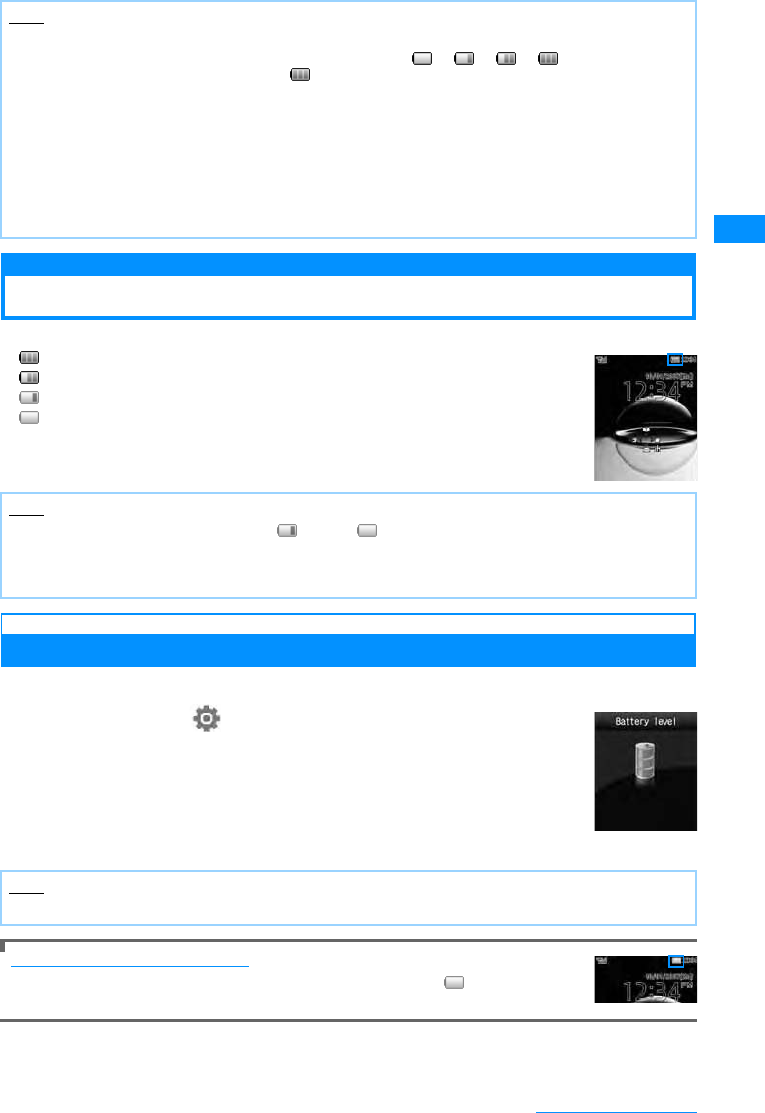
45
Before Using the Handset
Battery Meter
Checking the Battery Level
An icon indicating the approximate battery level is displayed at the top of the screen.
(Blue) : The battery is full
(Blue) : The battery is getting low
(Red) : Battery is almost completely exhausted Charge the battery.
(Red) : Battery is almost completely exhausted The handset will turn itself off in a
moment. Charge the battery.
Checking Battery Level with the Sound and Display
Battery Level can be checked through display and sounds.
aM
[Menu]
X
(Settings)
X
"Others"
X
"Battery level"
The confirmation screen is displayed, a sound indicating the remaining
power is produced The display screen for the battery level disappears
in approximately 3 seconds.
"Beep Beep Beep": Battery Power is full.
"Beep Beep": Battery power is running out.
"Beep": Battery Power is almost all gone. Charge the battery.
When the battery pack is running out
A warning message sounds, saying "Low battery. Please charge". The (Red) at the top
the screen flashes. After a little while, the phone turns off automatically.
Note
• You can set whether to light the Charging Indicator during charging.→P103
• During charging, the battery level icon changes in the order of →→→ (Blue) in animation
display, and after the charging completes, (Blue) lights up.
<AC Adapter/DC Adapter>
• Use the adapter with the specified power source and voltage. Failing to do so may result in fire or
malfunction.
<DC Adapter>
• The DC adapter is exclusive for a negative ground car (12V/24V).
• A fuse (2A) is a consumable item. Purchase a replacement fuse from any car parts shop.
• Do not charge while the car engine is not running to avoid exhausting the car battery.
Note
• When an icon indicating battery level is (Red) or (Red), the following actions are performed.
- Camera functions (including the barcode reader) and infrared communication functions are unavailable.
- When the Music player or the SD-Audio player is started, the warning screen indicating the low battery
level appears.
Note
• When "Key tone" is set to "Silent" or "Manner mode" is in active, you will not hear anything.
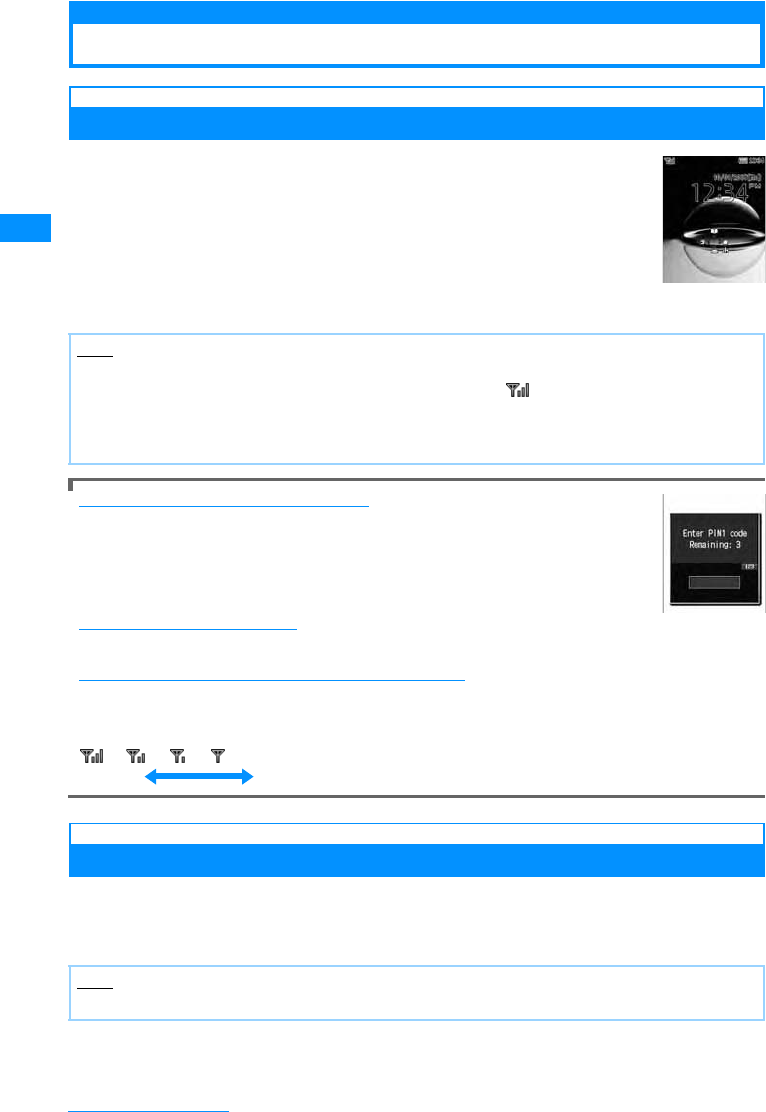
46
Before Using the Handset
Power On/Off
Turn On/Turn Off
Turn On
aIn a situation where power is cut, P(hold for 2
Seconds)
The FOMA Handset's dial button's backlight and touchpad light light up,
and after the wakeup screen is shown, the Stand-by display is shown.
When the "PIN1 code request" is set to "ON"
The UIM PIN entry screen opens.
After UIM PIN (P111) is entered, the Wakeup screen appears and then the Stand-by
display appears.
You can make emergency calls (to 110, 119 or 118) even when the PIN1 entry screen is
open.→P112
When the "Lock all" is set to "On"
It is required to enter the Security Code to view the contents of the folder.
When "Out of service area" appears at the top of the screen
You are out of service area or in the poor radio wave reception level. Move to a location where the icon
indicating the radio wave reception level appears. The radio wave reception level is indicated in 4 levels as
follows:
→→→
Turning the Power Off
aHold P(for 2+ seconds) when the FOMA handset is turned on.
The Exit screen opens and the power is turned off.
• To turn the handset off with the handset closed, cancel the Keypad lock and press p
(for 2+ seconds).
Note
• You will receive an "UIM not ready" message if the UIM is not inserted, or if the UIM is malfunctioning.
• A call may be disconnected even if the handset is not moved with displayed.
• Setting Time and Date →P47
• Sending Caller ID notification →P48
• Changing Terminal Security code →P111
Note
• You cannot turn off the handset with the handset closed if "Keypad lock" is set to "Slide up only".
Stand-by
Strong Weak
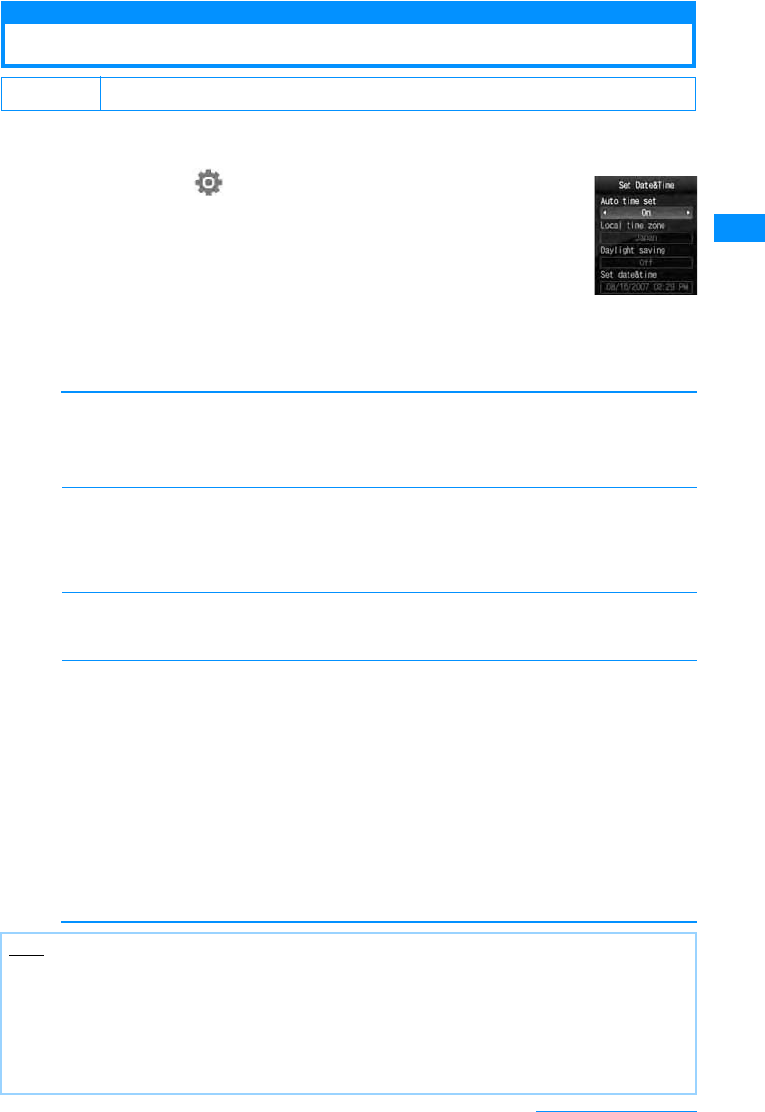
47
Before Using the Handset
Set Date&Time
Setting the Date and Time
You can set to update the time automatically. Also, the Local time zone, Daylight Saving and
Date&Time setting can be set.
aM[Menu]X(Settings)X"Date&Time"X"Set
Date&Time"
bPerform the following operations
• If [Auto time set] is set to [On], you cannot set [Local time zone], [Daylight saving], and [Set Set
Date&Time].
[Auto time set]
Set whether to update the time on the FOMA handset based on the time information from the network.
[Local time zone ]䋪
Set the time zone for the current date and time.
For selecting from the country/city name list by pressing c[List], press M[Prev.] or I[Next] to switch
the list by page.
XSelect a time zone
[Daylight saving]䋪
Set whether to use Daylight savings time.
X"Off"/"+1 hour"/"+2 hours"
[Set date&time]䋪
You can manually set the time and date .
To set the date, use J to move the cursor to the value to change and enter the date with the dial keys
(to set the date on the calendar screen, press C[List] in the date entry field). Operations on the calendar
screen→P234
To set the time, use J to move the cursor to the value to change, enter the time with dial keys, and
switch between [AM] and [PM] with C(pressing C in the time entry field opens the time settings screen
on which you can enter a time using dial keys and J).
• Depending on the settings in [Date&Time format](P106), the display format or order of the date and time may
differ.
䋪
G
:GAfter selecting a field, press C to switch between "AM" and "PM".
• Depending on the set values of "Date&Time format", these items may be displayed in a different order,
or "AM/PM" may not appear.
• You can set the value between 1908/01/01 and 2099/12/31.
Default Auto time set Settings Present
Settings Present
no setting
䋺The date and time are updated automatically.
䋺Auto update will not be performed.
Note
<Auto Time Set>
• Time may not be updated depending on the radio wave reception level.
• When using the FOMA handset overseas, the time or time zone may not be updated depending on the
network in use. As well, the time may not be displayed properly. Use the handset after setting the time of
the place you stay by World Clock.→P240
• Time is not updated when an i-appli is running or the UIM is not inserted.
• An error of a few seconds may occur.
Time and Date
Settings Screen

48
Before Using the Handset
Caller ID Notification
Sending Caller ID
You can set to show/hide your Caller ID to the network in advance.
• Your Caller ID (phone number) is valuable information. Be cautious about sending your Caller ID
• Caller ID notification cannot be set when "Out of service area" is displayed.
aM[Menu]X(Service)X"Caller ID notification"
bPerform the following operation
[Activate/Deactivate caller ID notification]
Set to show/hide Caller ID.
X"Notify"/"Not notify"XEnter the network security code
[Check Caller ID notification setting]
Check the status of the setting.
Own Number
Viewing Your Own Number
You can view your own phone number (My Number) saved in the UIM.
aM[Menu]X(Own number)
䂓To view the saved detailed information
Pressing C[Detail] and entering the security code on the own number screen
open the own number detail screen.You can also save items other than the own
number.→P239
• If you have saved a phone number other than your own number, mail address,
or URL, you can make a call, create i-mode Mail, or connect to a site by moving
the cursor to the item and pressing I.
Note
• Your Caller ID is only displayed if the other party's phone is capable of displaying it.
• You can set to Caller ID notification for each dialed call.→P58
Own number
screen

49
Voice/Videophone Calls
Using the Phone / Video Phone
About Video Phone ........................................................................................................... 50
Making Voice/Video Calls................................................................................................. 50
Using Redial/Received Call Logs .................................................................................... 54
Using the Recent Calls ..................................................................................................... 57
Showing/Hiding Caller ID for Each Call ........................................................... 184/186 58
Sending Touch-tone Signals Quickly................................................................... Pause 58
Making International Calls........................................................................WORLD CALL 59
Set the Prefix Added to the Telephone Number...................................Prefix Settings 63
Making a Call by Specifying a Sub Address.............................................Sub Address 63
Setting the Alarm Sounding until the Reconnecting is
Performed ........................................................................................... Reconnect Alarm 64
Clarifies Conversations in Noisy Locations ......................................Noise Reduction 64
Talking in a Car with Hands-Free ..................................................... In-Car Handsfree 64
Answering a Call/Video Call
Receiving Voice/Video Call .............................................................................................. 64
Setting how to answer incoming voice calls <Answer mode> .............Answer mode 66
End/Hold Calls by Closing the FOMA Handset ...................................... Close Setting 66
Adjusting the Volume during a Call .................................................. Receiver volume 67
Adjusting the Ring Volume ........................................................ Incoming call volume 67
When You are Unable to Answer Calls/Video Calls
Placing a Call on Hold When You Cannot Answer a Call Immediately .......... On hold 67
Setting the "On Hold Tone"...................................................................... On Hold Tone 68
Setting the Holding Tone...........................................................................Holding Tone 68
Using Public mode (Drive mode)....................................... Public mode (Drive mode) 68
Public mode (Power Off) ....................................................... Public mode (Power off) 70
Checking Missed Calls ................................................................................ Missed Call 71
Recording of Voice Message from a Caller When You Cannot Answer
a Call..................................................................................................... Record message 71
Video Call Settings
Setting the Image to Send to the Other Party................................................................. 73
Changing the Video Call Settings.............................................. Video phone settings 73
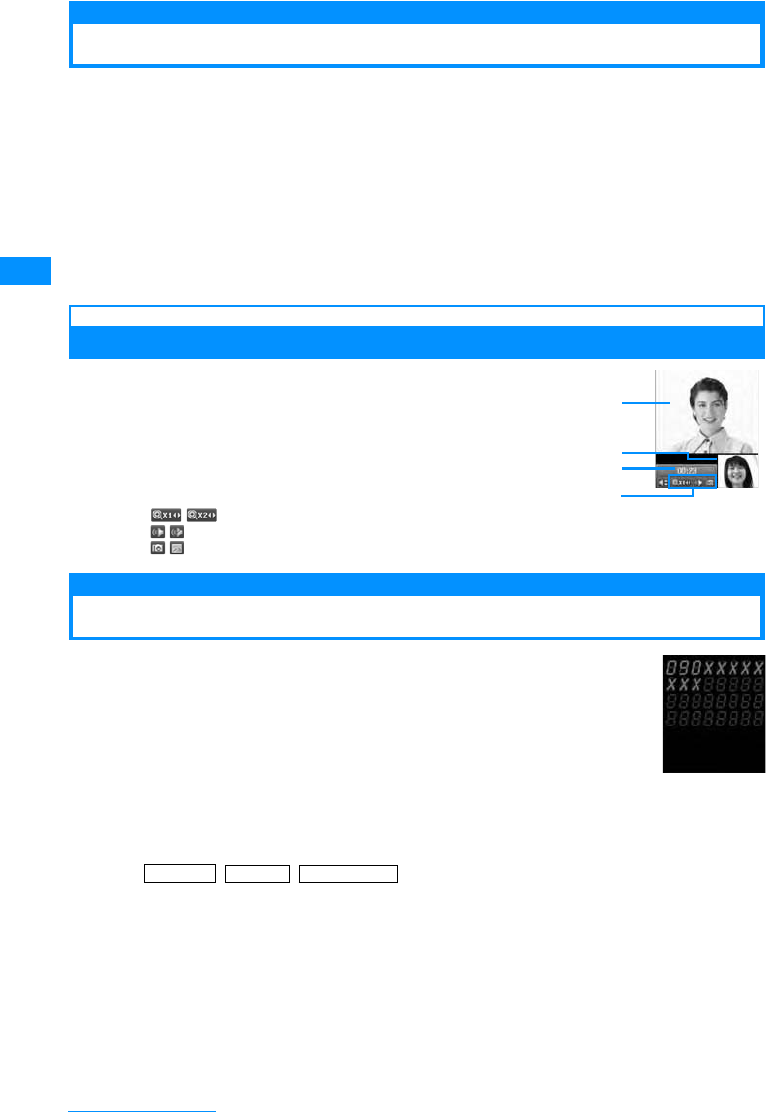
50
Voice/Videophone Calls
About Video Phone
The Video phone function can be used with a handset that supports DoCoMo's Video phone
service.
• DoCoMo's Video phone service complies with "ISO 3GPP
䋪
1 standardized 3G-324M
䋪
2." DoCoMo's Video
phone cannot connect with handsets that support a different form of video call.
䋪1䋺3GPP (3rd Generation Partnership Project) is local standardization organization established for the
development of common technical specifications related to 3rd Generation Mobile Communication
System (IMT-2000).
䋪2䋺3G-324M is the international standard of 3rd Generation Mobile Video Phone.
• Though Video phone may have communication speeds of 64K (64K bps) or 32K (32K bps), this FOMA handset
cannot make 32K Video call.
• This FOMA handset does not support remote monitoring.
Components of Video Call Screen
aMain window
The other party's image appears by default.
bSub window
Your image appears by default.
cCall Duration
Display in the format of Minutes: Seconds.
dSettings icons
/ Zoom Adjustment→P53
/ Handsfree ON/OFFState Display→P49
/ Picture mode ("Send camera image"/"Private mode")→P53
Making Voice/Video Calls
aEnter a phone number
• Up to 80 digits can be entered. Since the screen can display up to 32 digits, as
more than 32 digits are entered, the first entered digits will be hidden.
• Enter a number from "0" to "99" to display the phone number in the Phonebook
entry of the corresponding memory number. Also, entering a number with 3 digits
or more finds phone numbers containing the number from the Phonebook.→P89
• Start from the area code even for a local call.
•C[Save] : Add a new or extra phone number to Phonebook.→P80
•I[Mail] : Create a mail to the phone number that you entered.→P161
䂓When making a call to a fixed line phone
䂓When making a call to a mobile phone
090䋭XXXX䋭XXXX/080䋭XXXX䋭XXXX
䂓When making a call to a PHS
070䋭XXXX䋭XXXX
a
c
b
d
Phone number
entry screen
Area Code - City Code - Phone Number
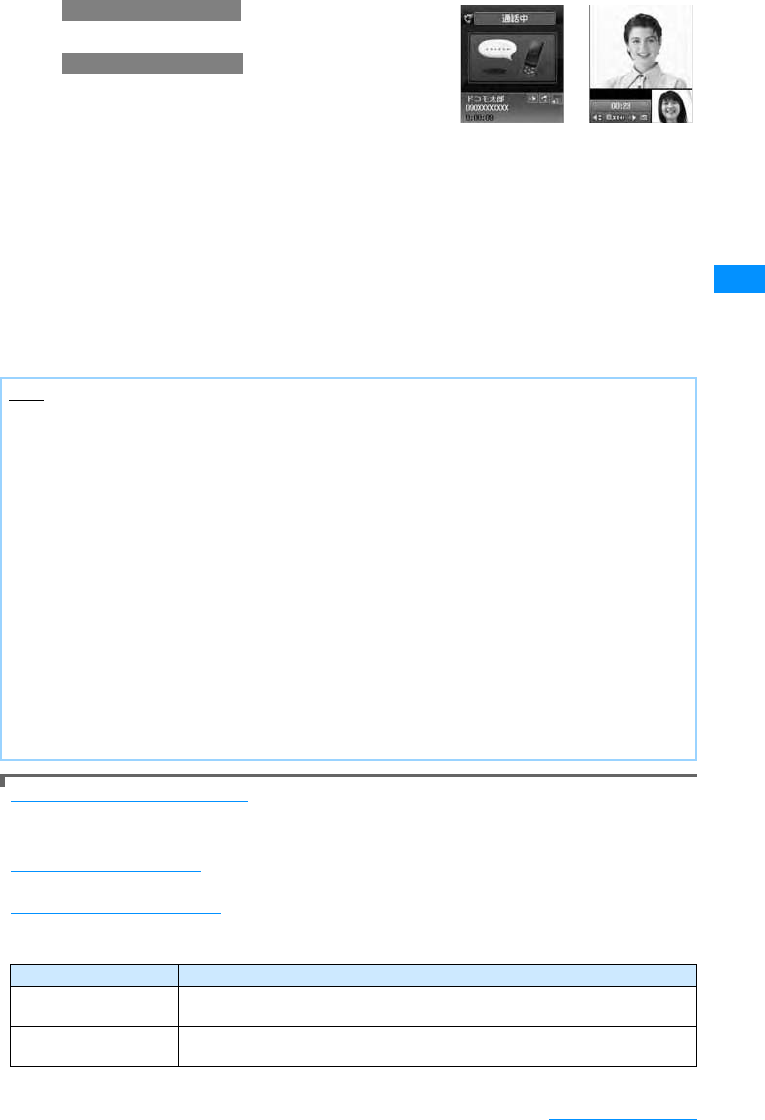
51
Voice/Videophone Calls
bA
M
A ringing tone sounds from the earpiece, and "Voice
Calling..." the dialing screen with until the other party
answers the call.
• When the Touchpad is not illuminated, touchpad keys are unavailable. Press a dial key /*/# to
illuminate the touchpad, then operate with the touchpad keys
•C[Spk on/Spk off] : Toggle Hands-free On or Off.
• Pressing a dial key/*/# during a call allows you to send Touch-tone signals.
䂓During a video call
•I[Image/Camera] : Switch the image to send between the alternate image and the camera
image.
•A: Switches between the Inner and Outer Camera for the image to send to the other party
cTo terminate the call P
To correct an entered phone number
To delete an entered digit, use LXK to move the cursor to the right of the digit and press Q.
To add a digit, use LXK to move the cursor to the position and enter the digit with the Dial Keys.
Screen Display during Dialing
The other party's name is displayed if the other party's number is saved in the phone book.
If a video call could not be made
The following messages appear if a video call could not be made (depending on the other party's mobile
phone model or subscribed network services, the displayed messages may not describe the actual situation).
Note
• If you hear the voice guidance of Caller ID Request, make a call again sending the Caller ID.
• You cannot switch to a voice/video call during a voice call using this FOMA handset.
• When the "Close setting" is set to "End the call", closing the FOMA handset during a call terminates the call.
However, when using accessories such as a flat-plug earphone/microphone with switch (option), the call will
not be terminated when the handset is closed.
<Video call>
• To use this function, terminate those applications in the task list screen.→P231
• It is impossible to make a connection if you make a video phone call to a phone without video phone
capabilities, or if the other party is out of service area, or his phone is off. If the other party's phone doesn't
support video phone, and you have set Auto redial as voice to "On", before making a video call connection
it will cut out and automatically redial the number as a voice call. However, if the other party is using an ISDN
64k or a PIAFS connection and their video phone does not support the 3G-324M standard (As of 䃂 2007),
or when calling a wrong number, it may not behave in this fashion. Communication charges may apply.
• If you make a video phone call to an emergency number such as "110", "119" or "118", it will make a voice
call automatically.
• i-mode mail or Message R/F arriving during a video call is stored at the i-mode Center. SMS can be received
even during a video call.
• There is a digital charge for sending the Substitute Image.
• During a call, the low battery alert sounds from the Earpiece every 30 seconds. You can keep talking;
however, the call will be terminated momentarily when the handset power is automatically turned off.
Message Description
Check number,
then redial.
The phone number is not valid.
Number Busy The other party is on a call (this message may appear when the other party is in
packet communication depending on the handset).
Video call screenVoice call screen
When making voice call
When making video call
Continue on the next page
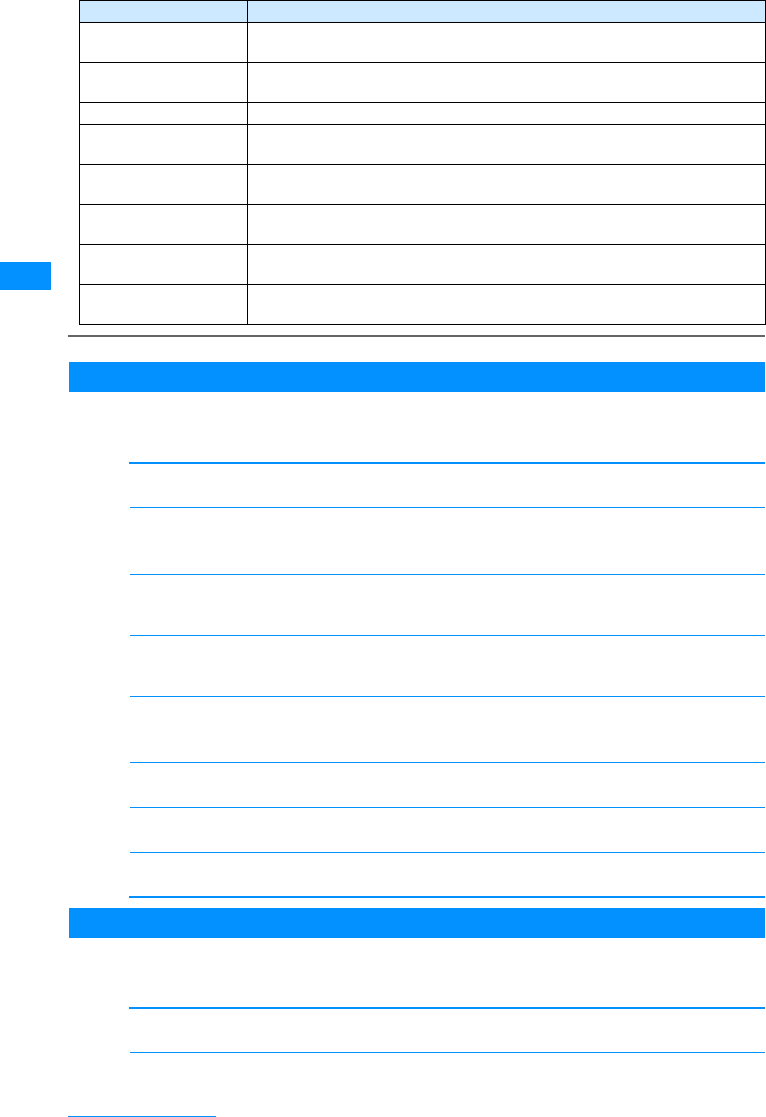
52
Voice/Videophone Calls
Sub Menu on the Phone Number Entry Screen
aPhone number entry screen (P50) XM[Menu]XPerform the
following operations
[Video phone call]
Make a Video Phone.
[Caller ID]
Sets whether the other party receives your Caller ID information when you make a phone call.→P58
X"Not notify"/"Notify"/"Cancel"
[International dial]
After selecting the country code to make a call, "009130010" (WORLD CALL) and the country code will
be inserted at the beginning of the phone number.→P59
[Select prefix]
Adds the prefix number at the beginning of the entered phone number. You can do that only one time.
→P60
[Multi number]
If you subscribe to Multi number, select a number to use for Caller ID when making calls.→P262
X"Basic Number"/"Additional number1"/ "Additional number2"/"Cancel"
[Compose mail]
Creates a new i-mode mail to the entered phone number.→P161
[Add to phonebook]
Adds an entry to the phonebook→P80
[Search phonebook ]
Search the phonebook with the number already entered→P83
Voice Call Screen Sub Menu
aIn-call display (P49) XM[Menu] XPerform the following
operations
[Add new]
䋪
1
Making a Call Putting Current Call on Hold and immediately dial another party.
[End active call ]
Disconnect the call.
Number in packet
communication
The other party is in packet communication.
Out of Service Area/
Power Off.
The other party's handset is either out of the service area or turned off.
Activate Caller ID The Caller ID was not sent (when the call is made to V-live or Visualnet)).
Call forwarded.
Please wait
The call is being forwarded.
Redial as a voice call The Call forwarding service is activated, and the forwarding destination is a
non-video phone.
Limit exceeded. Call
cannot be connected
Your usage fee limit plan (Type limit or Family wide limit) has been exceeded.
Connect from i-mode The video call was not dialed from the official i-mode site information provider
(when the call is made to V-live).
Video Call Failed Activate the "Caller ID notification" and redial.
• This message may appear for other reasons, as well.
Message Description
53
Voice/Videophone Calls
[Hold/Cancel held call]
䋪
1
Put a call on hold, or cancel the hold on the call.
[Mute/Unmute]
Enable or disable to mute your voice on the other party's handset.
[Send My Info.]
Creates an i-mode mail in which the phone number(Own number) is entered in the body. →P161
[Search phonebook]
䋪
2
Search for a Phonebook entry.→P83
䋪1䋺 Not available if you do not subscribe to the Call Waiting service.
䋪2䋺 Not available if you make a call using Redial or Received calls or Phonebook is activated. To use
this function, terminate those applications in the task list screen.
Sub Menu During a Video Call
aVideo call screen (P49) XM[Menu] XPerform the following
operations
[End call]
Disconnect the call.
[Hold]
Place the call on hold the active call. To cancel, press C.
[Substitute image/Camera image]
Switch the image to send between the alternate image and the camera image.
[Camera settings]
Configure the camera for video calls. Press J to select an icon. After setting, press M[Close].
[Video phone set]
You can set the display and lighting for video calls. After setting, press I[Done].
[Screen size]
Sets the display size of the main window.
X"Normal"/"Large"
[Visual preference]
Configures the preferences for the images sent to the other party
[Switch camera]
Switches the camera to send the image to the other party between the Inner camera and the Outer
camera.
[Search phonebook]
䋪
Search for a Phonebook entry.→P83
Zoom
Brightness
Night mode
: Zooms the camera image (x1 / x2).
: Adjusts the brightness of the camera screen (High /Standard /Low).
: Set this when using in dark places (et cetera..).
Display setting
Other-Me
Other-Me
Other only
Me only:
: Other-Me: Display the other party's image on the main window and your image on the sub
window.
: Other-Me: Display your image on the main window and the other party's image on the sub
window.
: Other only: Display only the other party's image.
: Me only: Display only your image.
Backlight
"Always 'ON'" : Always lights during a call.
"Alert setting" : In accord with "Light" in (Settings)→P103
Prefer img qual
Standard
Prefer motion spd
: Set priority to sent image quality. Effective when there is little movement.
: Set the sent video quality and motion to standard.
: Set priority to motion for sent images. Effective when there is a lot of movement.
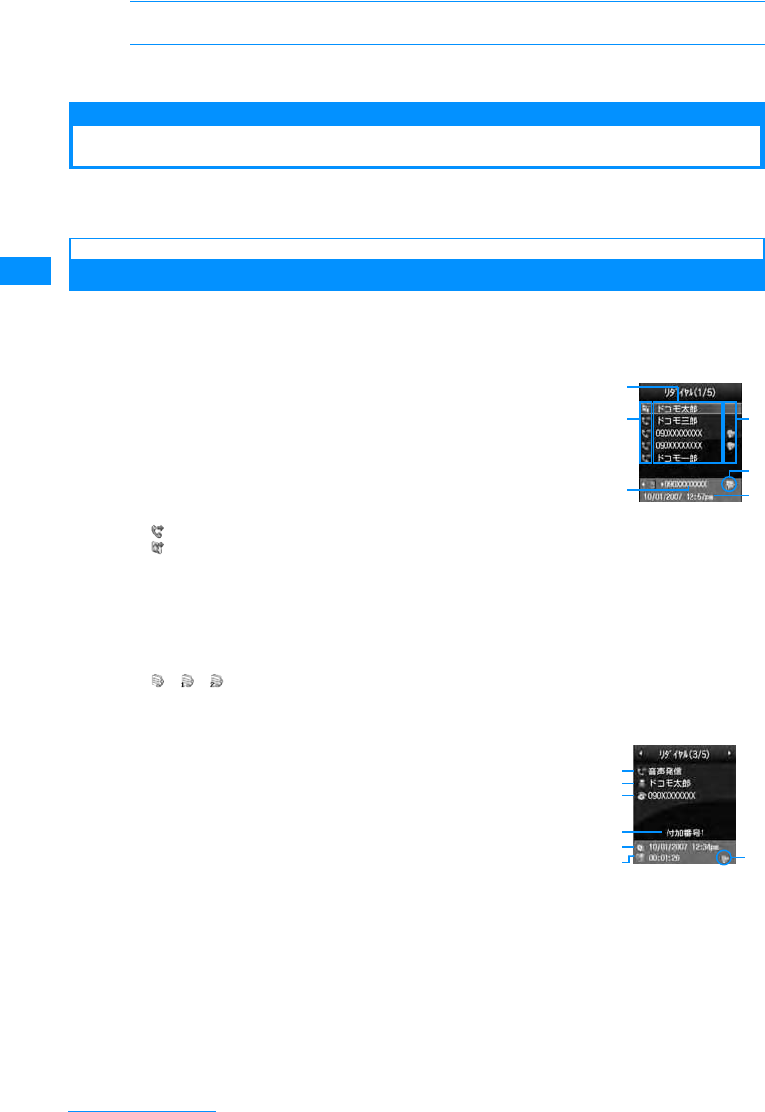
54
Voice/Videophone Calls
[Own number]
Displays your phone number(Own number).
䋪䋺 Not available if you make a call using Redial or Received calls or Phonebook is activated. To use
this function, terminate those applications in the task list screen.
Using Redial/Received Call Logs
Redial and the Received call logs can be used to make phone calls. Also, the Recent calls (sent
and received) can be used to make calls.
Redial
Calling the Same Party Again
Redial maintains a list of the last 30 calls and video phone calls made. The phone number and
the calling date/time are stored in the call logs.
• If there have been more than 30 calls made, the most recent 60 calls are retained.
aThe Stand-by display XR
• The call logs also saves the names of people called if they are in the
phone book. The call logs saves the phone number and category of
people who called if they are not in the phone book.
aThe other party's name as saved in the Phonebook
If the name is not saved, the phone number will be displayed.
bOutgoing phone call type
䇭Dialing a voice call
䇭Dialing a video call
cThe Other Party's Phone Number
dDialing an International Call
䃨䇭 Calling overseas from Japan
䃨䇭 Calling from overseas
䃨䇭 Dialing an international call using international roaming overseas
eDialed from Multi Number
䋪
䋯䋯 Basic number/Additional number 1/Additional number 2
䋪
: Appears if you subscribe to the Multi number service.
fSent Date and Time
bMove cursor to the Number to RedialXC
aOutgoing phone call type
bThe name entered into the phone book
If not entered into the phone book, "Unregistered" is displayed.
cThe Other Party's Phone Number
dDialed from Multi Number
The name registered for the line in "Number settings" in P262 appears
with an outgoing Multi number call.
䋪
: Appears if you subscribe to the Multi number service.
eSent Date and Time
fCall Duration
Redial List Screen
d
e
f
b
c
a
Redial Details
Screen
a
b
c
d
e
fg
55
Voice/Videophone Calls
gInternational Call Duration
䃨䇭 Calling overseas from Japan
䃨䇭 Calling from overseas
䃨䇭 When making voice call
cA
M[Menu] and then selectX"Video phone call"
Redial List Screen / Redial Details Screen Sub Menu
aThe Redial List Screen(P54)/ Redial Details Screen(P54)XM
[Menu]XPerforms the following operations
[Video phone call]
Make a Video Phone.
[Compose mail]
Creates an i-mode mail to the phone number on the Redial screen.→P161
[Add to phonebook]
Adds a number to the phonebook from the redial list.→P80
[Customize call]
Make a call changing the phone number in the ridial. You can save the phone number to the phonebook
by using C [Save].
XLon the Phone number entry screen XKto move the cursor to the place where you want change the
number Xchange the phone number XA
[Change list]䋪
Switch logs to display.
[Delete 1 item]
Delete the selected/displayed Redial entry.
XC[Yes]
[Delete all]
䋪
Deletes all redial entries.
XC[Yes]
䋪䋺 Not displayed on the Detail screen.
Note
• You can also make a call by selecting an entry on the Dialed Calls list screen and pressing A. You can
also make a video call if you select M[Menu] X"Dialed video call".
• If the same phone number is saved repeatedly in the Phonebook, the name found first in a Reading search
is displayed.
• Phone numbers dialed with "184" or "186" will be recorded as a different phone number.
• Press I[Mail] on the Redial List Screen / Redial Details Screen, to create an i-mode mail to the phone
number on the selected redial entry.
Recent calls
Recent mail
Received Calls
Received mail
Sent mail
: Display the recent call list screen.→P57
: Display the recent mail list screen.→P178
: Display the Received call log list screen.→P56
: Display the received mail log list screen.→P178
: Display the sent mail log list screen.→P178
When making voice call
When making video call
Continue on the next page
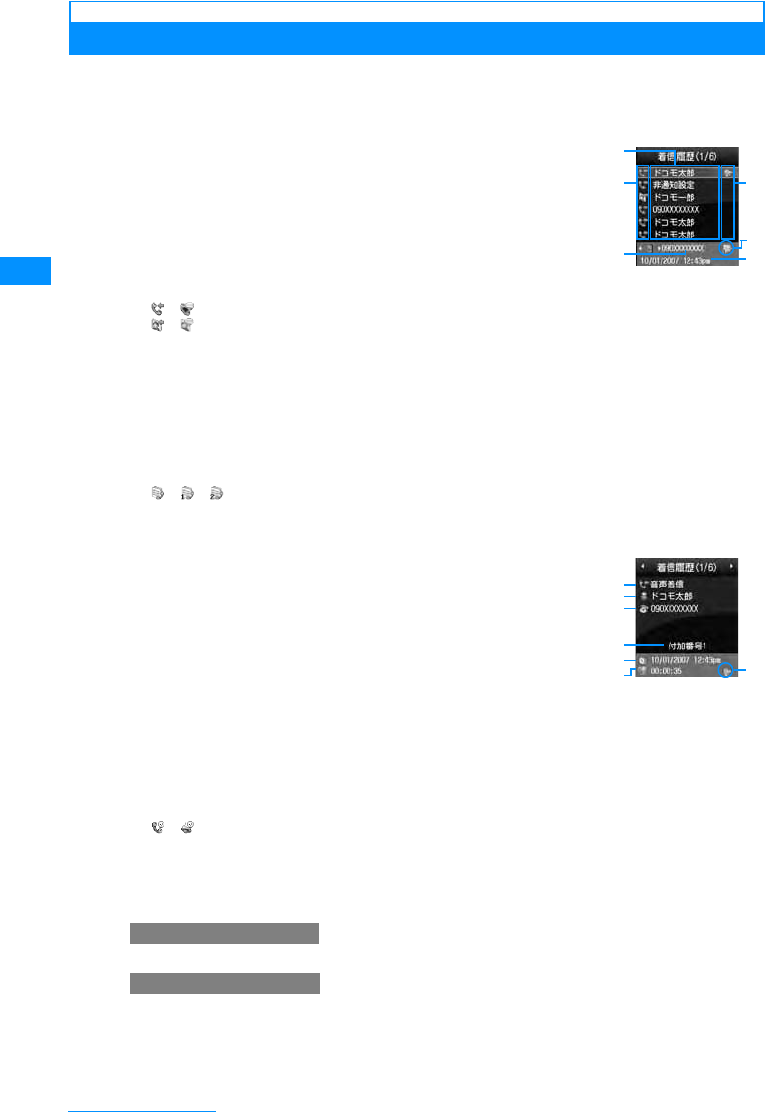
56
Voice/Videophone Calls
Received Calls
Using the Received Calls Log
Up to 30 incoming voice or video call entries are recorded in Received Calls. The phone
number and the date/time are stored in the call logs.
• If there have been more than 30 calls made, the most recent 30 calls are retained in the log.
aThe Stand-by display XL
• If the caller sends Caller ID, the type of call and a name saved in the
Phonebook are displayed. If the caller is not saved in the Phonebook, the
call type and the phone number are displayed. If the caller did not send
the Caller ID, the reason for No Caller ID is displayed.
aThe other party's name as saved in the Phonebook
If the name is not saved, the phone number will be displayed.
bIncoming Method
䋯 Arrived /Miss voice call(includes "Reject call")
䋯 Arrived /Miss video call(includes "Reject call")
cThe Other Party's Phone Number
If the phone number has not been saved in the phone book, "Not recorded" is displayed.
If there are arrows right and left of the icon, press J to view the content.
dIncoming international call
䃨䇭 Incoming international call from overseas
䃨䇭 Calling from overseas
䃨䇭 Dialing an international call using international roaming overseas
eIncoming Multi number call
䋪
䋯䋯 Basic number/Additional number 1/Additional number 2
䋪
: Appears if you subscribe to the Multi number service.
fReceived Date and Time
bMove cursor to a log XC
aIncoming Method
bThe name entered into the phone book
If the phone number is not in the phone book, "Unregistered" is
displayed, and if the information of the phone number has not been
received, "User unset" is displayed.
cThe Other Party's Phone Number
dIncoming Multi number call䋪
The name registered for the line in "Number settings" in P262 appears
with an incoming Multi number call.
䋪 : This is displayed when you subscribe to Multi number.
eReceived Date and Time
fCall Duration
䋯䇭
Arrived /Miss voice call
gInternational Call Duration
䃨䇭 ᶏᄖ䈎䉌 ࿖㓙㔚䈪⌕ା
䃨䇭 ᶏᄖ䈪࿖㓙䊨 䊷䊚 䊮 䉫 ਛ䈮⌕ା
䃨䇭 ᶏᄖ䈪࿖㓙䊨 䊷䊚 䊮 䉫 ਛ䈮࿖㓙㔚䈪⊒ା
cA
M[Menu] and then select X"Video phone call"
Received Calls List
d
e
f
b
c
a
Received Calls
Details Screen
a
b
c
d
e
fg
When making voice call
When making video call

57
Voice/Videophone Calls
Sub Menu of the Received Calls List/Details Screen
aThe Received Calls List Screen(P56)/ Received Calls Details
Screen(P56)XM[Menu]XPerforms the following operations
[Video phone call]
Make a Video Phone.
[Compose mail]
Creates an i-mode mail to the phone number on the Received calls screen.→P161
[Add to phonebook]
Adds a number to the phonebook from the Received call logs .→P80
[Customize call]
Pick up a phone number from the Received calls list screen, edit the phone number, then make a call.
Use C[Save] to register the phone number to the Phonebook.
XL on the Phone number entry screen XK to move the cursor to the place where you want change
the number X change the phone number XA
[Change list]
Switch logs to display.
[Delete 1 item]
Delete the selected/displayed Redial entry.
XC[Yes]
[Delete all]
Delete all entries from the Received calls.
XC[Yes]
䋪䋺 Not displayed on the Detail screen.
Recent calls
Using the Recent Calls
Up to 60 incoming and outgoing calls can be recorded in "Recent call logs".
• When more than 60 items have been added, items are deleted sequentially from the oldest ones.
aThe Stand-by displayuA
For subsequent steps and the description of screen components, see the
"Redial"(P54), "Received calls"(P56) section.
Note
• You can also make a call by selecting alog on the Received Calls list screen and pressing A. You can
also make a video call if you select M[Menu]XDialed video call".
• The reason for the lack of a Caller ID is displayed in the history for a call without Caller ID.→P119
• If the same phone number is saved repeatedly in the Phonebook, the name found first in a Reading search
is displayed.
• Received calls from parties using dial-in service may have a different number from the number they actually
dialed from.
• Press I[Mail] on the Received Calls List/Details Screen, to create an i-mode mail to the phone number
on the selected received entry.
Recent calls
Recent mail
Received mail
Redial
Sent mail
: Display the recent call list screen.→P57
: Display the recent mail list screen.→P178
: Display the received mail log list screen.→P178
: Display the redial list screen.→P54
: Display the sent mail log list screen.→P178
58
Voice/Videophone Calls
184/186
Showing/Hiding Caller ID for Each Call
There are 2 ways to show/hide Caller ID for each call: adding "184"/"186", or using the sub
menu on the Phone number entry screen.
Showing/Hiding Caller ID by Adding 184/186
aEnter "184"(Not notify)/"186"(Notify) XEnter the phone number
bA
M[Menu] and then select X"Video phone call"
Showing/Hiding Caller ID Using the Sub Menu
Example: Using the Sub menu of the Phone number entry screen
a
Enter the phone number
X
M
[Menu]
X
"CallerID"
X"Notify"/
"Not notify"/"Cancel"
bA
M[Menu] and then select X"Video phone call"
Pause
Sending Touch-tone Signals Quickly
Enter "P" and a number after the phone number and make a voice call to the number. It will
send a Push signal (DTMF) to the number after "P".
• The signal may not be received depending on the device on the receiving side.
aEnter the phone number
X
Press *3timesandenter"P"
X
Enter
the number to send
X
A
After the call is connected, the number after "P" is displayed. The displayed number is send
by pressing A.
Note
• The sub menu of the Recent call list screen/detail screen is the same as the one of the Redial and Received
call list screen/detail screen.→P55, P57
Note
• You can set to show/hide Caller ID to the network in advance.→P260
When making voice call
When making video call
When making voice call
When making video call
59
Voice/Videophone Calls
WORLD CALL
Making International Calls
WORLD CALL is an international calling service available on DoCoMo mobile phones.
FOMA service subscribers are also signed up for WORLD CALL at the time of initial
subscription (except subscribers explicitly declining this service).
• This service works with approximately 240 countries and regions around the world.
• Charges for "WORLD CALL" are added to the monthly FOMA service call charges.
• No initial fee and no fixed monthly charges apply.
• This service is not available with some billing plans.
• For details on WORLD CALL, contact the "DoCoMo Information Center" shown at the back of this manual.
• When using international carriers other than DoCoMo, please contact the carrier directly.
Change to the International Call Dialing Procedure
The "MY LINE" service is not applicable to mobile phone communications, including WORLD
CALL service. Along with the introduction of the "MY LINE" service, the dialing procedure for
international communications using a mobile phone has been changed. Consequently, the
previous dialing procedure (Omitting "010" from the following dialing procedure) can no longer
be used.
Enter the Phone Number And Make a International Call
Enter the number in the following order.
a"009130-010-Country code- Area Code (City Code) - Phone
Number"
• Generally, in the situation where a "0" appears before the Area Code (City Code), please remove "0".
(In a few countries, like Italy, "0" must not be removed).
bA
䂓When making International video call
M[Menu] and then select X "Video phone call"
If an overseas party uses a specific 3G mobile phone, you can make an International video call to that party
by pressing M[Menu] X Select "Video phone call" after the following dialing procedures.
• For information about the countries where connection can be made and telecommunications carriers, visit
the DoCoMo's web site.
• The other party's image displayed on the FOMA handset may blur and may be unable to be connected
depending on the handset connecting the international video-phone.
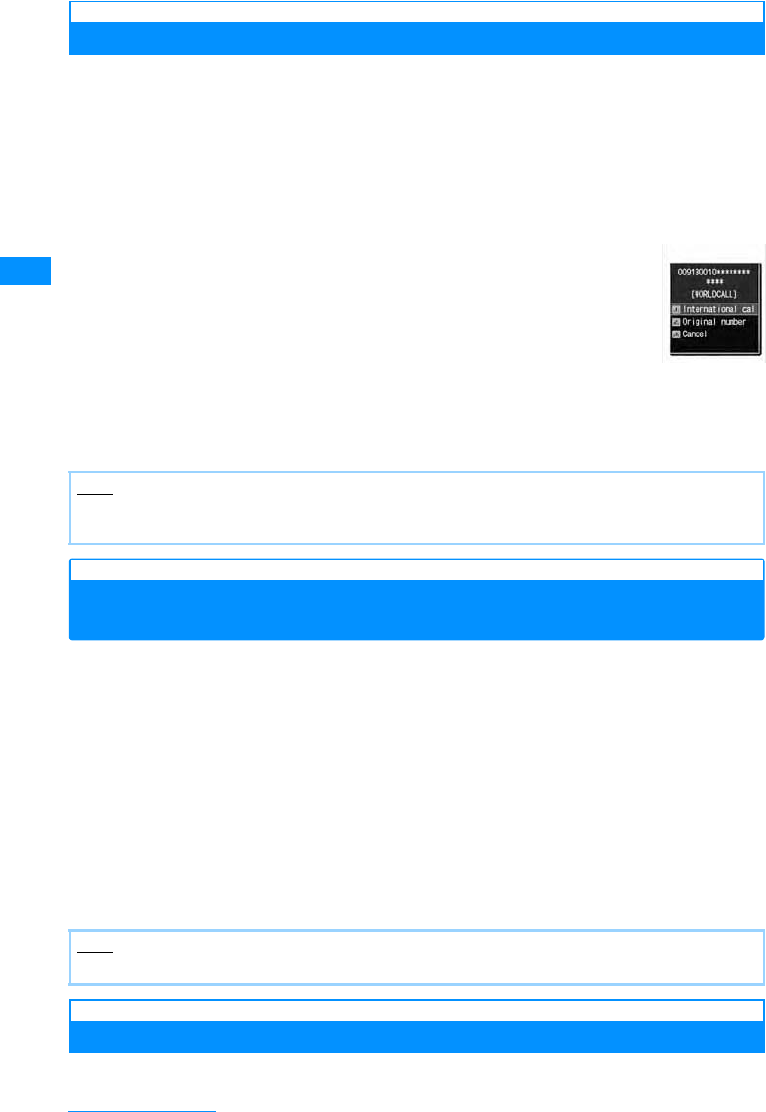
60
Voice/Videophone Calls
Making an International Call Using "+"
Enter "+" at the beginning of a phone number and dial to replace "+" with an international
access code automatically. Press 0for more than one second to enter "+".
• The WORLD CALL (009130010) is set to be added automatically by default.→P61
a0(for 1+ seconds) XEnter "Country Code - Area Code (City
Code) - Phone Number"
• Generally, in the situation where a "0" appears before the Area Code (City Code), please remove "0".
(In a few countries, like Italy, "0" must not be removed).
bA
International call
: Make a call after converting "+" into an international access code.
Original number
: Make a call without converting "+"into an international access code.
Cancel 䋺Cancel dialing.
䂓When making International video call
M[Menu] and then select X "Video phone call"
cSelect a dialing method
Making an International Call Adding International Access
Code
You can select an international access code from the sub menu and add it to the phone
number.
aEnter "Area code - other party's phone number"
• Generally, in the situation where a "0" appears before the Area Code (City Code), please remove "0".
(In a few countries, like Italy, "0" must not be removed).
bM[Menu]X"Select prefix"XSelect an international access code
The selected international access code is inserted at the beginning of the entered phone
number.
cA
䂓When making International video call
M[Menu] and then select X "Video phone call"
Making an International Call Easily
The International Call settings can be changed.
Note
• This option is available only inside the FOMA network service area.
• If the phone number has "+81" as its prefix, "+" will not be converted into the International Access Code.
Note
• By default, WORLD CALL(009130010) is registered to "Prefix 1".→P63
Dialed call
confirmation
screen
61
Voice/Videophone Calls
Setting to Add the International Access Code Automatically<Auto assist
setting>
You can set whether to add an international access code automatically instead of "+" when
you make a call by entering "+" at the beginning of the phone number.
aM[Menu]X(Settings)X"International dial"X"Auto assist
setting"X"Auto"/"OFF "
Auto 䋺 When set, it automatically sets the international access code prefix.
None䋺 Doesn't change the number.
Setting International Access Codes<International Prefix Settings>
When setting "Auto assist setting" to "Auto", specify the international access code to add
automatically.
aM[Menu]X(Settings)X"International dial "X"IDD prefix
setting"
bPerform the following operation
[IDD prefix name]
Enters the International Dial number of the country from the Auto Assist Settings
[IDD prefix code]
Enters the International Dial number of the country from the Auto Assist Settings
cI[Done]
Setting Auto Assist of Country Code<Auto internastional dial>
Set whether to automatically replace leading "0", if entered, of a phone number with "+ Country
code" during international roaming. Also, you can specify Country code to be added
automatically.
aM[Menu] X(Setting) X"International dial" X"Auto
international dial" XPerform the following operations
[Auto international dial]
X"On" / "Off"
[Target country]
XSelect a Country code
bI[Done]
Default Auto
Default IDD prefix name: WORLDCALL IDD prefix code: 009130010
Default Auto international dial: On Target country: Japan 81
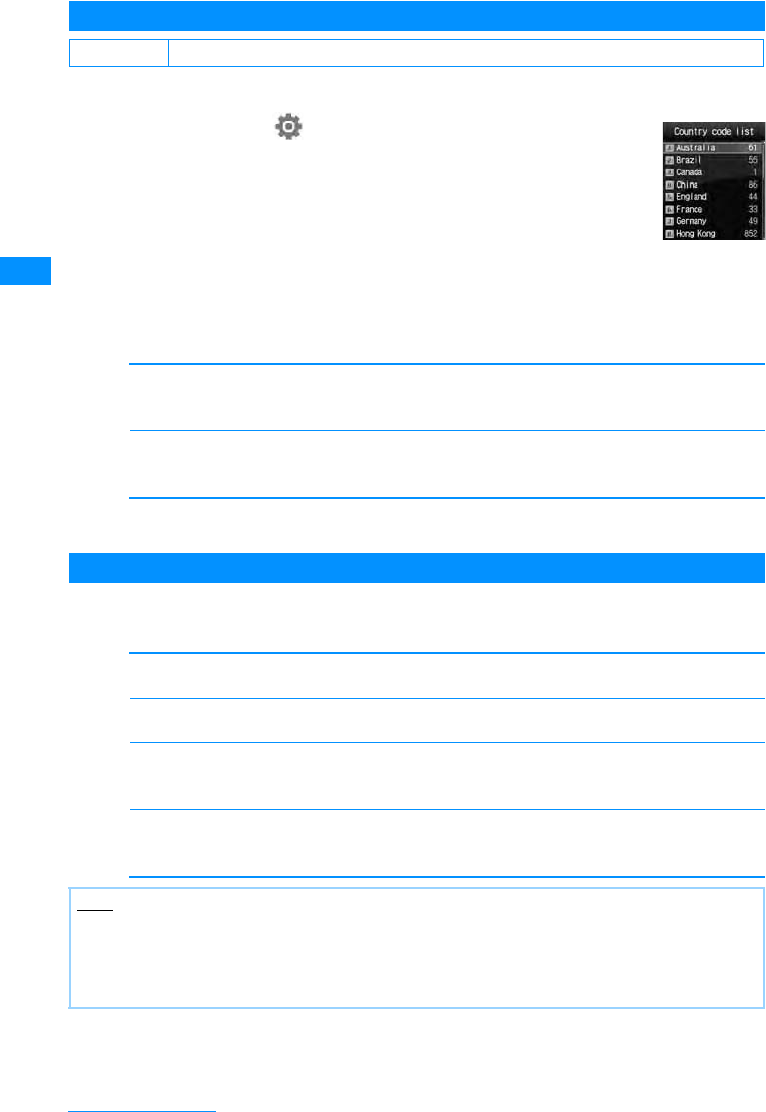
62
Voice/Videophone Calls
Registering Country Code<Country code list>
Up to 50 Country codes can be registered.
aM[Menu] X(Setting) X"International dial" X
"Country code list"
bI[Menu] XPerform the following operations
•C : Edit the selected county code.
[Country name]
Register a name of Country code. Up to 7 full-pitch or 14 half-pitch characters can be entered.
XEnter name
[MCC]
Up to 5 digits can be stored.
XSelect a Country code
cI[Done]
Sub menu of the "Country code list" screen
a"Country code list" screen (P62) XM[Menu] XPerform the
following operations
[Add new]
Go to Step 2 (P62) in "Registering Country Code".
[Edit]
Edit the selected country code. Go to Step 2 (P62) in "Registering Country Code".
[[Delete]
Delete the selected country code.
X"Yes"
[Delete all]
Delete all country codes.
X"Yes"
Default 22 country codes have been stored
Note
<Edit>
• You can edit a default country code.
<Delete>
• You cannot delete the country code that is set to be added automatically in "Auto international dial" (P61).
"Country code
list" screen
63
Voice/Videophone Calls
Prefix Settings
Set the Prefix Added to the Telephone Number
Up to 3 numbers number (prefix) to add to the beginning of the phone number such as an
international access code, "184", "186 can be stored .
aM[Menu]X(Settings)X"Call/VT/Dialing "X"Prefix dial"
bSelect Prefix Input Column XEnter the NumberXI[Done]
• Up to ten digits can be entered as a prefix.
Sub Address
Making a Call by Specifying a Sub Address
Allows user to set if digits after ":" in a phone number with a ":" are identified as a sub-
address. A sub-address is used to call up a specific device connected to an ISDN line or to
select contents on "V live".
aM[Menu]X(Settings)X"Call/VT/Dialing "X"Sub-address
setting"X"On"/"Off"
On 䋺Separates sub addresses by ":".
Off 䋺Doesn't separate Sub addresses by ":".
Default Prefix 1: 009130010 Prefix 2/Prefix 3: Unregistered
Note
• Please do not add Pauses and the such to the prefix. If they are present, the call can not be connected.
Default On
Note
•":" is not identified as a delimiter of a sub-address if:
-"
:" is entered at the beginning of the phone number.
- A specific number such as "184" or "186" is entered at the beginning of the phone number and ":" is
entered right after it.

64
Voice/Videophone Calls
Reconnect Alarm
Setting the Alarm Sounding until the
Reconnecting is Performed
You can set an alarm that keeps sounding until a voice or video call is reconnected when the
call was disconnected due to weak signals.
aM[Menu]X(Settings)X"Call/VT/Dialing "X"Call feature"
X"Reconnection alarm"XSelect Alarm
High alarm䋺Sets to High alarm.
Low alarm 䋺Sets to Low alarm.
No Alarm 䋺Sets not to sound an alarm.
Noise Reduction
Clarifies Conversations in Noisy Locations
Noise Reduction reduces background noise. The other party can more easily understand the
conversation, even in a noisy locale.
aM[Menu]X(Settings)X"Call/VT/Dialing "X"Call feature"X
"Noise reduction"X"On"/"Off"
On 䋺Noise Reduction is engaged.
Off 䋺Noise Reduction is disengaged.
Receiving Voice/Video Call
aIncoming Call Arrives
The ringtone sounds.
•P䋺Place the call on response hold.→P67
䂓During a voice call
•I[Silent] : Stop the ring tone or vibration.
Again, if I[Reject] is pressed, the call is rejected.
䂓During a video call
•C[Substitute image] : Answer the call using the
substitute image.
Default High alarm
Note
• Reconnection depends on the situation and signal strength.
• If the signal suddenly worsens, the call may be dropped without the alarm sounding.
• The billed airtime will continue during the reconnection attempt.
• If the call is dropped, the other party will hear nothing.
Default Off
Incoming voice
call screen Incoming video
call screen
65
Voice/Videophone Calls
bA
Answer the call.
• When the Touchpad is not illuminated, touchpad keys are unavailable. Press a dial key /*/# to
illuminate the touchpad, then operate with the touchpad keys
•C[Spk on/Spk off] : Toggle Hands-free On or Off.
• Pressing a dial key/*/# during a call allows you to send Touch-tone signals.
䂓During a voice call
•I[Hold/Release] : If you subscribe to the Call waiting service, you can hold the call or cancel the
hold.
䂓During a video call
•I[Image/Camera] : Switch the image to send between the alternate image and the camera
image.
•A: Switches between the Inner and Outer Camera for the image to send to the other party
cWhen talking is over, P
When the caller has sent Caller ID
• If you subscribe to Multi number, the name registered for the line in "Number settings" in P262 appears with
an incoming call.
When the caller has sent Caller ID
The reason for no Caller ID is displayed instead of a phone number.→P119
Note
• The incoming call actions such as a ring tone or vibration vary depending on the settings in "Profile" or the
settings saved in the Phonebook.→P77, P92, P95
• When "General manner" is activated, the ring tone does not sound. But if "Original manner mode" is set, the
ring tone may sound depending on the settings.→P98
•When "Answer mode " is set to "Slide up", you can answer a call by opening the handset.→P66
• When the "Close setting" is set to "End the call", closing the FOMA handset during a call terminates the call.
However, when using accessories such as the flat-plug earphone/microphone with switch (option) the call
will not be terminated when the handset is closed.
• If subscribed to the Voice mail, Call waiting or Call forwarding service, when "Arrival call act" is set to
"Answer" and "Set in-call arrival act." is set to "Activate", a tone during a call sounds if a call arrives during
another call. If tone sounds during a call , the network services are available.→P261
• When the Public mode (Drive mode) is activated, incoming call is not informed (The ring tone does not
sound). Also, even if a call arrives when the display is turned off, the backlight of the display will not be
turned on.
• When the caller is registered in the Phonebook, the phone number and registered name appear.
• You can set "Set mute ring (sec.)" to delay the incoming call actions for a call made from the other party not
saved in the or without Caller ID.→P121
• Use the following functions to reject incoming calls from a caller not saved in Phonebook/specific caller.
- In "Accept/Reject call ", activate "Reject unknown "→P121
- In "Accept/Reject call ", activate "Reject on list"→P118
<Video call>
• You cannot switch to a video call during a voice call using this FOMA handset.
• During a call, the low battery alert sounds from the Earpiece every 30 seconds. You can keep
talking;however, the call will be terminated momentarily when the handset power is automatically turned off.
• This FOMA handset does not support handsfree devices (such as In-car handsfree kit 01) via USB
connection.
• When the Voice mail service is activated during a video call, a SMS notifies you of a new message.
• Even if the Call forwarding service is activated, an incoming video call is not forwarded if the forwarding
destination is not a video-phone device supporting 3G-324M. Check the forwarding destination device
before setting the Call Forwarding.
• i-mode mail or Message R/F arriving during a video call is stored at the i-mode Center. SMS can be received
even during a video call.
• You cannot receive 32K video calls and they are not recorded in Received Calls.
• You cannot switch between a voice and video call during a call using the FOMA handset.
66
Voice/Videophone Calls
Incoming Call Screen Sub Menu
aIncoming call screen (P64) XM[Menu]XPerform the following
operations
[Voice mail]䋪1
Connect a call to the Voice mail service center.
[Call rejection]䋪2
Reject an incoming call and hang up.
[Call forwarding]
Transfer an incoming call to the specified number.
䋪1䋺This option is not available unless you subscribe to the Voice mail service.
䋪2䋺This option is not available unless you subscribe to the Call forwarding service and you specify a
forwarding destination.
Answer mode
Setting how to answer incoming voice calls
<Answer mode>
You can set to answer an incoming voice call by opening the FOMA handset (Slide up) or
pressing a dial key in addition to A.
aM[Menu]X(Settings)X"Call/VT/Dialing"X"Incoming call "
X"Answer mode"
bPerform the following operation
[Slide up]
You can answer a call by opening the FOMA handset.
[Any key answer]
You can answer a call by pressing dial keys, *,# other than A.
[SEND key only]
You can answer a call by pressing A.
Close Setting
End/Hold Calls by Closing the FOMA Handset
aM[Menu]X(Settings)X"Call/VT/Dialing"X"Call feature"X
"Close settings"XSelect conditions of closing the FOMA handset
End Call䋺Ends the call.
Continue䋺Continues the call.
On Hold 䋺Place the call on hold the active call.
Default SEND key only
Default End Call
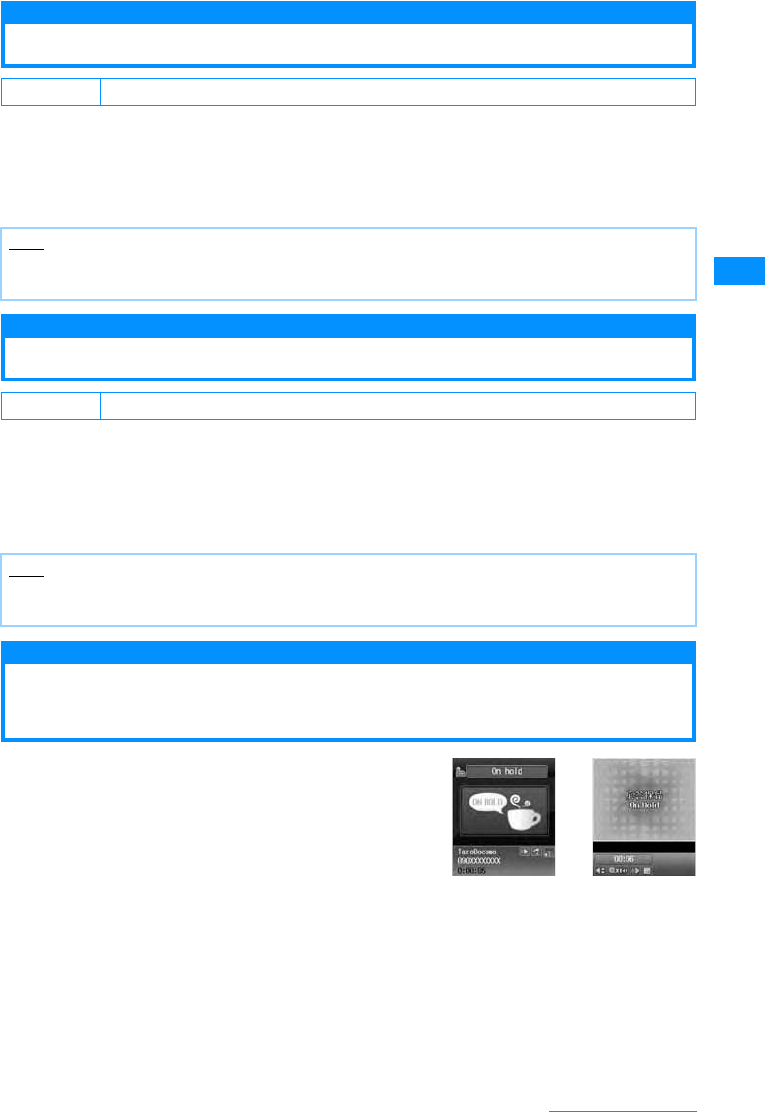
67
Voice/Videophone Calls
Receiver volume
Adjusting the Volume during a Call
The Receiver volume can be adjusted in 7 levels from 1䌾7.
aIncoming Call Screen (P49) XF䋯E
•F䋺 Increase the volume.
•E䋺 Decreases the volume.
Incoming call volume
Adjusting the Ring Volume
The ring volume can be adjusted in 8 levels from 0 to 7.
aThe Stand-by display XF䋯E
The sound volume adjustment screen opens, and each press of F䋯E changes the volume.
• If no action is taken for approximately 2 seconds, the sound volume adjustment screen closes
automatically and the volume is set.
On hold
Placing a Call on Hold When You Cannot
Answer a Call Immediately
aIncoming Call Screen (P64) XP
The tone set in the "On hold tone"(P68) is played.
The image set in the "Response hold image"(P73)
appears for video calls.
bwhen you can resume the callA
• You can also cancel the hold on a video call by pressing c [Answer]. If you press A to cancel the
hold, the alternate image will be sent to the other party.
䂓To terminate a voice call/video call
Press P.
Default 3
Note
• The adjusted Earpiece volume will be retained after the call.
• "Receiver volume" in "Volume" (P94) is changed, too.
Default 3
Note
• Not available when Manner Mode is activated.
• "Incoming call volume" in "Volume" (P94) is changed, too.
Voice Call on
Hold screen Video Call
ResponseHold
screen
Continue on the next page
68
Voice/Videophone Calls
On Hold Tone
Setting the "On Hold Tone"
Instead of answering the ring, you can select to play one of the 3 on-hold-tones (guidance) to
the calling party.
aM[Menu]X(Settings)X"Call/VT/Dialing"X"Incoming call "X
"On hold tone"X"Hold tone 1"/"Hold tone 2"/"Hold tone 3"
•I[Play] : plays back the hold tone.
Holding Tone
Setting the Holding Tone
The Holding tone which the other party hear can be selected from 3 tones.
a
M
[Menu]
X
(Settings)
X
"Call/VT/Dialing "
X
"Call feature"
X
"Holding tone"
X
"
Hold tone 1"/"Hold tone 2"/"Hold tone 3"
•I[Play] : plays back the hold tone.
Public mode (Drive mode)
Using Public mode (Drive mode)
Public mode (Drive mode) is an automatic response service to assist in observing manners in
public locations. When Public mode (Drive mode) is activated, a voice guidance is played to
the other party indicating that you are driving or at a place where you cannot talk (such as on a
train, bus, or in a movie theater) and cannot answer the call, and the call is disconnected.
• You can set or cancel Public mode (Drive mode) in Standby (and when "out of service area" is displayed).
• This option is not available during data communication.
a*(One second later)
When a call arrives, a voice guidance is played in Japanese saying that "The person you
are calling is currently driving or in the area where cellphone should not be used. Please try
again later" is played.
Note
• The other party is charged even during a hold.
• If you subscribe to the Voice mail service/Call forwarding service, you can connect the incoming call to the
Voicemail service center/forward the incoming call to the specified phone number.→P256, P259
Default Hold Tone 1
Default Hold Tone 1
69
Voice/Videophone Calls
When Public mode (Drive mode) is set
Even when a call arrives to your handset, the ring tone does not sound. appears on the Stand-by display
and Received call log is recorded.
A voice guidance indicating that you are driving or you are at a location where you cannot use the handset is
played to the caller, and the call is disconnected.
To cancel Public mode (Drive mode)
Press * (for more than 1 second) at the Stand-by display.
Incoming Call Actions in a Network Service and Public mode (Drive
mode)
Actions performed when Public mode and a Network Service are set concurrently.
䋪䋺 If the Network Service ringing duration is set to 0(zero) seconds, the Public Mode voice (Drive mode)
guidance is not played, and the call is not recorded in Received Calls.
Note
• appears at the top of the screen when Public mode is activated.
• Even when Public mode (Drive mode) is activated, you can make calls as usual.
• If a call with "Private ID" arrives when Caller ID request is set, the voice guidance of Caller ID Request is
played (instead of Public mode (Drive mode) voice guidance).
• If Manner Mode is activated concurrently, Public mode settings take precedence.
• Tones other than from operations (ring tones or alarms, etc.) do not sound when Public mode (Drive mode)
is set.
• Even if mail arrives when the Public mode (Drive mode) is activated, incoming call actions such as sounding
the ring tone, blinking the Illumination Indicator, or vibrating the FOMA handset will not take place.
Service name Incoming Actions for a Voice Call Incoming Actions for a Video Call
Voice mail service After the Public mode (Drive mode)
voice guidance is played, the call is
connected to the Voice mail service
center.䋪
The Public mode (Drive mode) image
prompt does not appear, and the call is
connected to the Voice mail service
center.
Call waiting The Public mode (Drive mode) voice
guidance is played and the call is
disconnected.
After the Public mode (Drive mode) image
prompt is shown, the call is disconnected.
Call Forwarding Service After the Public Mode (Drive mode)
voice guidance is played, the call is
forwarded to the forwarding
destination.䋪
Whether the Public mode voice
guidance is played is according to the
settings of Call forwarding service
voice guidance option.
The Public mode (Drive mode) image
prompt does not appear, and the call is
forwarded to the forwarding destination.
If the forwarding destination cannot
handle video calls, the call is
disconnected.
Nuisance Call Blocking
service If the caller is saved to reject a
nuisance call, the reject call message
is played and the call is disconnected.
In a case other than the above, the
Public mode (Drive mode) voice
guidance is played and the call is
disconnected.
If the caller is saved to reject a nuisance
call, the reject call image prompt is
displayed and the call is disconnected.
In a case other than the above, the Public
mode (Drive mode) image prompt is
shown and the call is disconnected.
Caller ID Request If the caller does not send the Caller
ID, the voice guidance of Caller ID
Request is played and the call is
disconnected.
If the caller sends the Caller ID, the
Public mode (Drive mode) voice
guidance is played and the call is
disconnected.
If the caller does not send the Caller ID,
the image prompt of Caller ID Request is
displayed and the call is disconnected.
If the caller sends the Caller ID, the Public
mode (Drive mode) image prompt is
shown and the call is disconnected.
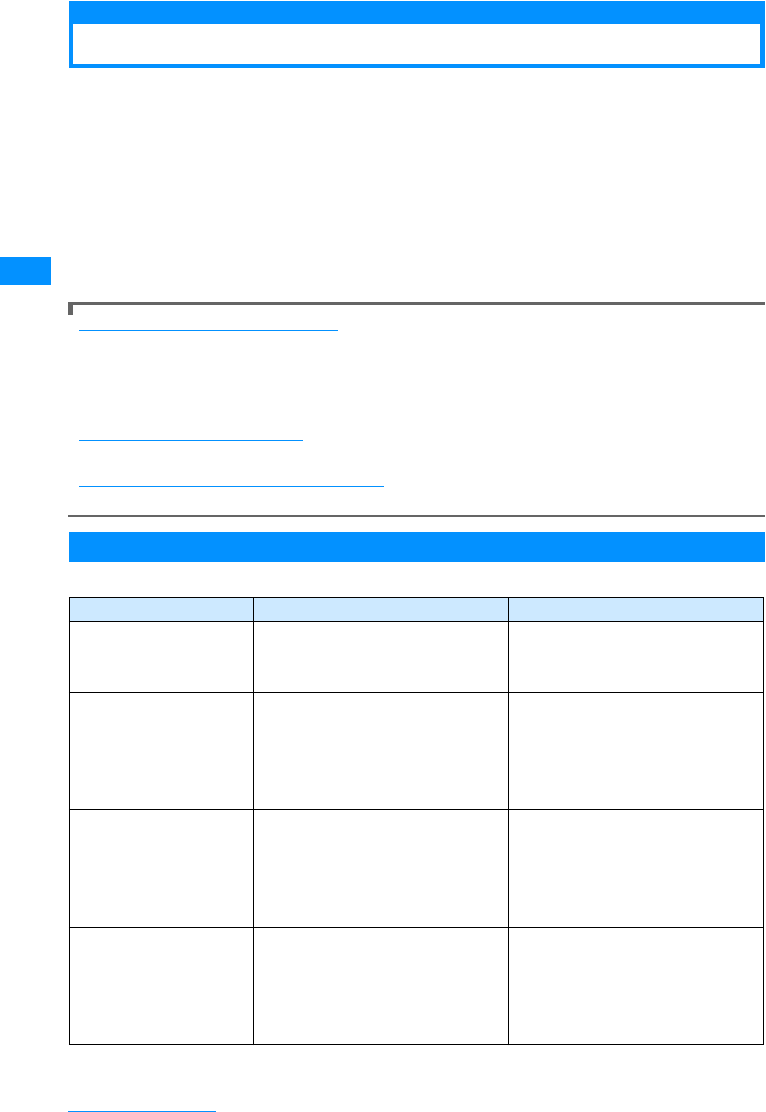
70
Voice/Videophone Calls
Public mode (Power off)
Public mode (Power Off)
Public mode (Power Off) is a response service to help maintain decorum in public locations.
When Public mode (Power Off) is set, when a call arrives while the power is turned off, a voice
guidance is played to the other party indicating that you are at a place where the handset must
be turned off (such as in hospitals, in aircraft, or near priority seats on a train) and cannot
answer the call, and the call is disconnected.
a":25251" is enteredXA
Public mode (Power Off) is activated (the Stand-by display opens the same).
After Public mode (Power Off) is set, when a call arrives while the power is turned off, "The
person you are calling is currently in the area where use is prohibited and cannot pick up
the phone. Please try again later.". " is played.
After activating Public mode (Power Off)
Public mode (Power Off) is activated until it is cancelled by dialing ":25250". Turning the power on does not
deactivate the mode.
The Public mode (Power Off) voice guidance is played even when you are out of service area or in the poor
radio wave reception level. A voice guidance indicating that you are at a location where you must turn the
handset off is played to the other party, and the call is disconnected.
To cancel Public mode (Power Off)
Enter ":25250" and press A.
To check the status of Public mode (Power Off)
Enter ":25259" and press A.
Incoming Call Actions in a Network Service and Public mode (Power Off)
Actions performed when Public mode and a Network Service are set concurrently.
䋪䋺 If the ringing duration for the Network Service is set to 0 (zero) seconds, the Public mode (Power Off) voice
guidance is not played.
Service name Incoming Actions for a Voice Call Incoming Actions for a Video Call
Voice mail service After the Public mode (Power Off) voice
guidance is played, the call is
connected to the Voice mail service
center.䋪
The Public mode (Power Off) image
prompt is not displayed, and the call is
connected to the Voice mail service
center.
Call Forwarding Service After the Public mode (Power Off)
voice
guidance is played, the call is connected
to the forwarding destination.
䋪
Whether the Public mode (Power off)
voice guidance is played is in accord
with the settings of Call forwarding
service voice guidance option.
The Public mode (Power Off) image
prompt does not appear, and the call is
forwarded to the forwarding destination.
If the forwarding destination cannot
handle video calls, the call is
disconnected.
Nuisance Call Blocking
service If the caller is saved to reject a nuisance
call, the reject call message is played
and the call is disconnected.
In a case other than the above, the
Public mode (Power Off) voice
guidance is played and the call is
disconnected.
If the caller is saved to reject a nuisance
call, the reject call image prompt is
displayed and the call is disconnected.
In a case other than the above, the
Public mode (Power Off) image prompt
is shown and the call is disconnected.
Caller ID Request If the caller does not send the Caller ID,
the voice guidance of Caller ID Request
is played and the call is disconnected.
If the caller sends the Caller ID, the
Public mode (Power Off) voice guidance
is played and the call is
disconnected
.
If the caller does not send the Caller ID,
the image prompt of Caller ID Request
is displayed and the call is
disconnected.
If the caller sends the Caller ID, the
Public mode (Power Off) image prompt is
shown and the call is
disconnected
.
71
Voice/Videophone Calls
Missed Call
Checking Missed Calls
If you could not answer a call, the Missed call notification screen opens on the Stand-by
display. The Received Calls List Screen can be accessed from its icons, allowing the user to
confirm who has called.
aAn incoming call terminates
The missed call icon is shown on the Stand-by display. The
number on the icon indicates the number of calls.
bCXKto select an missed call icon
The Received Calls list screens (P56) displayed.
Record message
Recording of Voice Message from a Caller
When You Cannot Answer a Call
When record message is activated, if you cannot answer the call, the voice guidance is played
and the other party’s message is recorded.
Setting the Record Message
aM[Menu] X(LifeKit)X"Record message"X"Record msg.
setting"
bPerform the following operation
•C [List] : List of the items is displayed.
[Activate record msg.]
Set the Record Message. When selecting "Off", you cannot set the following items:
X"On/"Off"
[To answer]
When a phone call is received, set a time between 0 and 120 seconds for the Record Message to
auto-answer the call.
XEnter Response Time
[Answer message]
Select an answer message.
X"Japanese1"/"Japanese2"/"English"
•I You can listen to the response message.
cI[Done]
Note
• After he Received Calls list screen is displayed, the missed call icon will vanish.
Default Activate record msg.: Off
Stand-by display
Missed
call icon
(The number indicates
the number of calls)
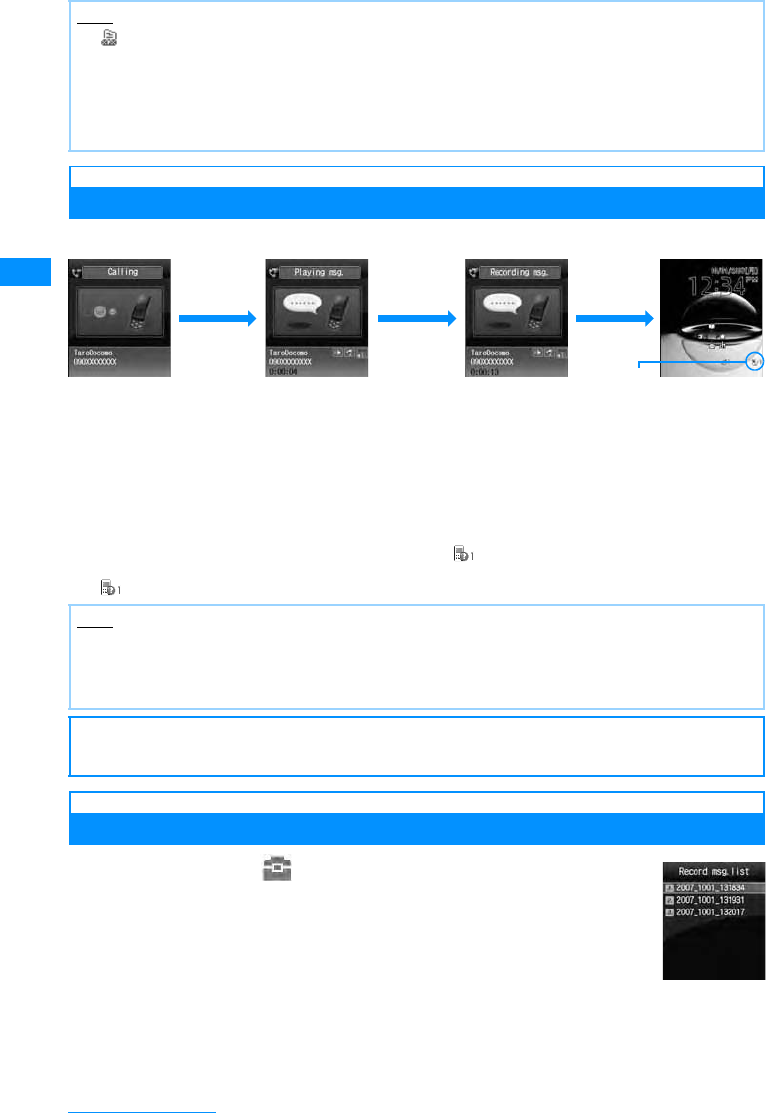
72
Voice/Videophone Calls
When a Call Arrives with Record Message Activated
In a Voice Call, the other party's voice is recorded.
䂓To answer the caller while you are playing or recording messages
Press A.
䂓To play Record Message
The Stand-by displayXPress C[OK]XJ and then select or press E for 1+ seconds. The Record
Message list screen (P72)is displayed.
• disappears after the Record Message is.
Playing/Deleting Record Message
aM[Menu]X(Lifekit)X"Record message"X
"Record Msg. list"
•I[Delete] : The selected Record Message is deleted.
䂓To delete all Recorded Messages
M[Menu] on the Record Message list screen XSelect "Delete all".
bMove the cursor to a Record MessageXC[Play]
The Record message is played.
•C䋺Stop the message.
•Q䋺Return to the Record Message list screen.
Note
• (Blue) appears at the top of the screen when the Record Message is activated.
<Response Time>
• If the set Response time is longer than the set ringing time for Voice mail service/Call forwarding service,
the settings of the ringing time for the Voicemail service/Call Forwarding service take precedence.
• If the response time is set shorter than the set "Set mute ring (sec.)", Record message starts without the
ringing action.
Note
• The Record Message cannot be recorded when "Out of service area" is displayed, the handset power is
turned off, or Public mode (Drive mode) is set.
• If a call arrives when the Additional guidance is being played or when a Record message is being recorded,
the call is rejected.
䂓䈍㗿䈇
It is recommended that you write down messages from the Record Message and store them in a separate
location. DoCoMo is not responsible for lost data due to failure or repair of the FOMA handset.
During an
incoming call PlayingAdditional
Guidance
Recording a
Record Message
Displaying an
icon
The set time
has elapsed
Recorded
Displaying
an new
Record
message icon
(The number
indicatesthenumber
of calls)
RecordMessage
List Screen
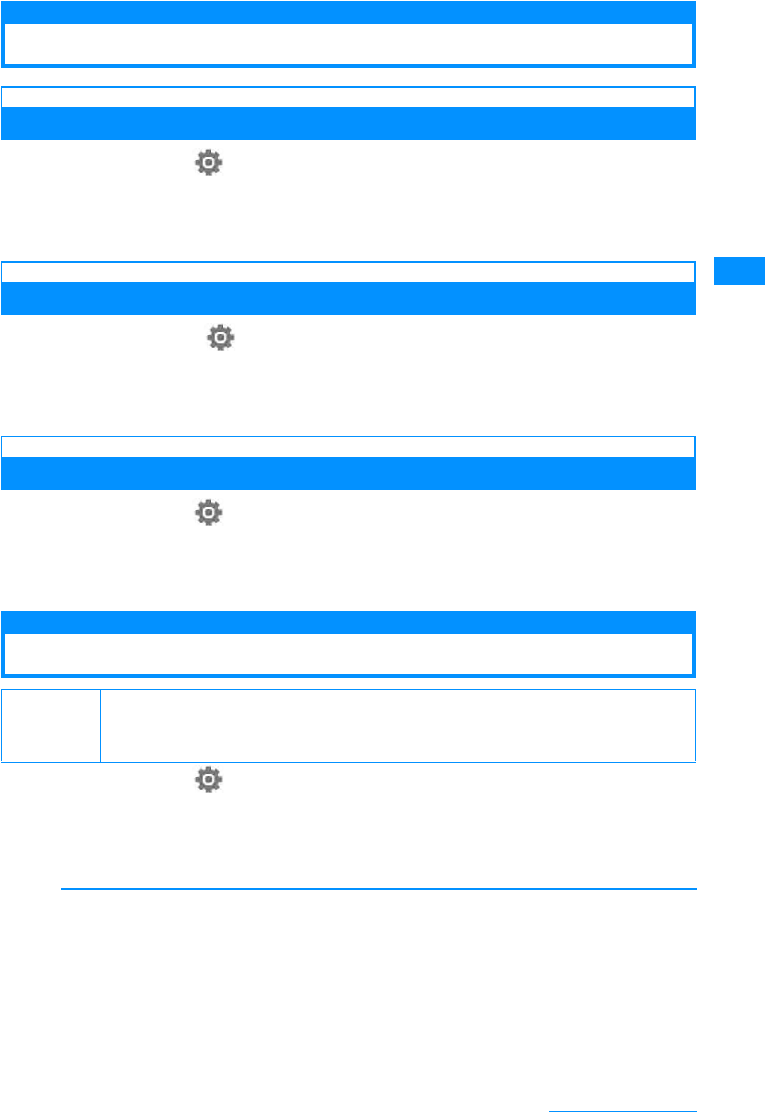
73
Voice/Videophone Calls
Setting the Image to Send to the Other Party
Substitute image
Setting the Substitute Image
aM[Menu]X(Settings)X"Call/VT/Dialing"X"Video phone"X
"Substitute image"X"Default"/"Select image"XI[Done]
• When "Select image" is selected, press D on "Select file" field. XC[List] and then select from the
images saved in "My picture" in "Data box".→P194
Response hold image
Setting the Response Hold Image
aM[Menu] X(Settings) X"Call/VT/Dialing" X"Video Phone"
X"Responseholdimage"X"Default"/"Select image"XI[Done]
• When "Select image" is selected, press D on "Select file" field. XC[List] and then select from the
images saved in "My picture" in "Data box".→P194
Holding image
Setting the Holding Image
aM[Menu]X(Settings)X"Call/VT/Dialing"X"Video Phone"X
"Holding Image"X"Default"/"Select image"XI[Done]
• When "Select image" is selected, press D on "Select file" field. XC[List] and then select from the
images saved in "My picture" in "Data box".→P194
Video phone settings
Changing the Video Call Settings
aM[Menu]X(Settings)X"Call/VT/Dialing "X"Video phone"X
"Videophone set"
bPerform the following operation
•C[List] : List of the items is displayed.
[Display setting]
Sets the output of the main window and sub window for the Video Phone.
Default Displaying setting : Me-Other Send camera image: On Screen size: Large Visual
preference: Normal Light: Always on Auto redial as voice: Off
Hand-free switch: On
Me-Other
Other-Me
Other only
Me only
: The caller's image is displayed on the main window, and your image on the sub window.
: Your image is displayed on the main window, and the caller's image on the sub window.
: Other Party's Image only displayed.
: Your image only displayed.

74
Voice/Videophone Calls
[Send camera image]
Sets whether one sends the other party one's image. When "Off" is set, the other party receives a
substitute image.
X"ON"/"OFF"
[Screen size]
Sets the display size of the main window.
X"Normal"/"Large"
[Visual preference]
Configures the preferences for the images sent to the other party
[Light]
Sets the talking screen's backlight level.
[Auto redial as voice]
You can set whether to automatically redial after switching to a voice call if the handset of the receiving
party does not support video calls.
X"ON"/"OFF"
[Hands-Free switch]
S et whether or not to do a Hands-free call during a video call.
X"ON"/"OFF"
cI[Done]
Prefer img qual
Standard
Prefer motion spd
: Set priority to sent image quality. Effective when there is little movement.
: Set the sent video quality and motion to standard.
: Set priority to motion for sent images. Effective when there is a lot of movement.
Always on
Terminal setting : Always stays on during a call.
: In accord with the "Light" in (Settings).→P103

75
Phonebook
About the Phonebook on the FOMA Handset ................................................................ 76
Saving to FOMA Hanset Phonebook............................................................................... 77
Saving UIM Contacts ........................................................................................................ 79
Saving Contacts to the Phonebook from Received or Dialed Calls ............................. 80
Saving/Editing a Group Name.......................................................................................... 81
Making a Call from the Phonebook .....................................................................Search 80
Viewing a Phonebook Entries.......................................................................................... 84
Editing the Phonebook Entries........................................................................................ 87
Deleting Contacts.............................................................................................................. 87
Checking the Phonebook Capacity and Utilization ................... Number of Contacts 88
Setting the Phonebook ..................................................................................................... 88
Call with the Least Number of Buttons ......................................Dialing Quick Search 89
Display the History of Call/Mail........................................................................................ 90
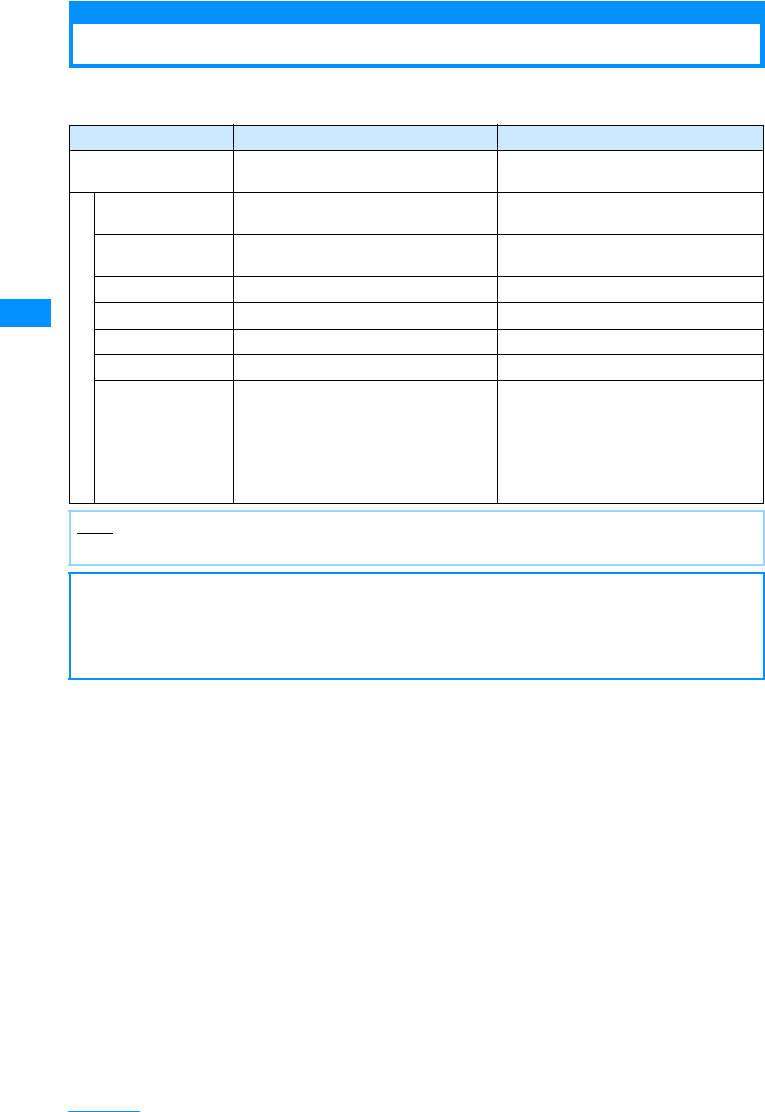
76
Phonebook
About the Phonebook on the FOMA Handset
There are 2 Phonebooks: one is saved on the FOMA handset (Phone) and the other is saved on
the UIM. The following can be saved/set for each phonebook.
Item FOMA handset phonebook UIM phonebook
Number of Entries Up to 1000 entries
(More than 700 entries) Up to 50 entries
E
n
t
r
y
D
e
t
a
i
l
s
Name Up to 16 full-pitch or 32 half-pitch
characters Up to 10 full-pitch or 21 half-pitch
characters
Reading Up to 32 half-pitch characters Up to 12 full-pitch or 25 half-pitch
characters
Phone Number Only 5 Number Only 1 Number
Email address Only 3 address Only 1 address
Group Select from 31 types Select from 11 types
Image 1 image available Not available
Other setting items Secret code, Ring tone, Mail tone, URL,
Zip code, Home address, Company
name, Job title, Co. zip code, Office
address, Record message, Birthday,
Video call substitute image, Secret mode
setting (It is displayed when "Secret
mode" is set to "On".)
Not available
Note
• If you insert your UIM into another FOMA handset, your Phonebook data is available on it.
䂓䈍㗿䈇
• It is recommended for you to backup your Phonebook entries by taking them down on a paper...etc. If you
have a PC, your Phonebook data can be stored on your hard drive using DoCoMo keitaidatalinkand a
FOMA USB Cable (optional).
• Note that the service counter such as DoCoMo shop may not be able to copy data from your existing
FOMA handset to the new one, depending on the specifications.
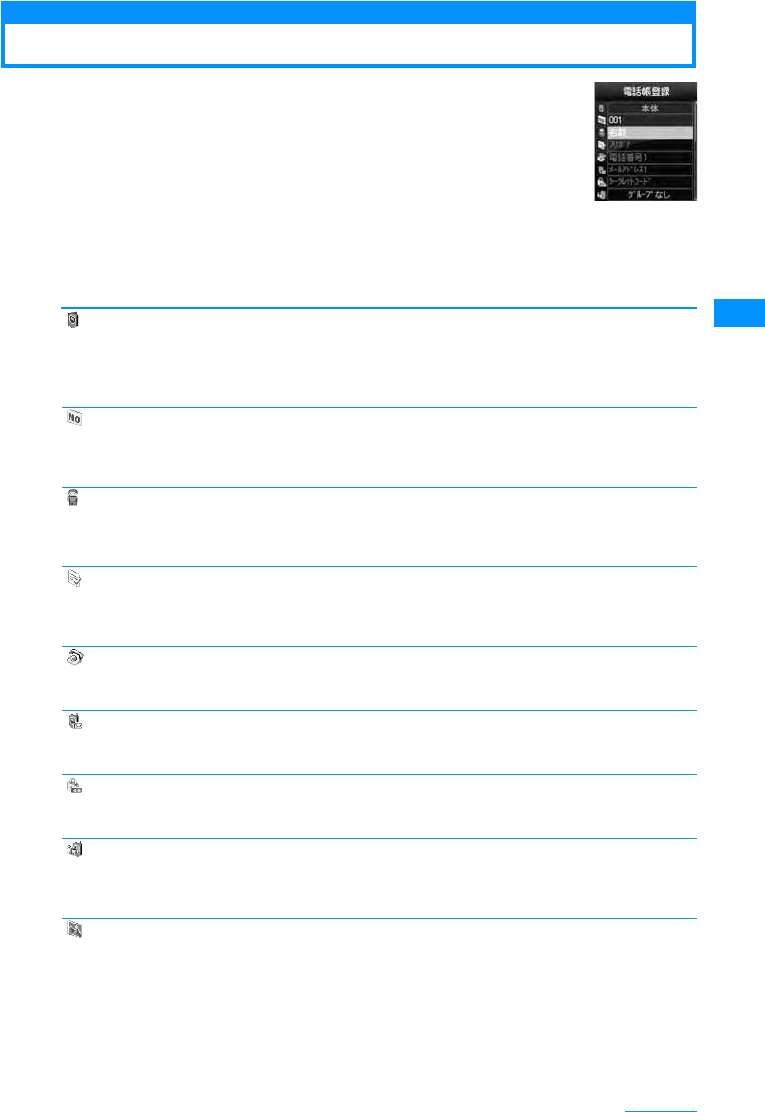
77
Phonebook
Saving to FOMA Hanset Phonebook
aThe Stand-by displayXU(1+ seconds)
bPerform the following operations
[(Saveto)]
Select save location. This section explains the case where "Handset" is specified as the saving
destination. When "UIM" is specified as the saving destination, the UIM phonebook entry screen is
displayed. →P79
X"Handset"/"UIM"
[(MemoryNo.)]
The smallest un-assigned number is allocated to a new record automatically. You can still re-allocate it
to your favorite number from 000 to 999 manually.
XEnter Memory Number
[ Name]
Up to 16 full-pitch or 32 half-pitch characters can be entered. Enter using Kanji, Hiragana, Pictograph,
symbol, alphanumeric character, or Katakana.
XEnter name
[Reading]
Enter or edit when necessary. Up to 32 half-pitch characters can be entered. Enter using Katakana,
alphanumeric or symbol.
XEnter reading
[ Phone number]
Up to 26 digits can be entered.
XEnter the phone number
[ Mail address]
Up to 50 half-pitch characters can be entered. Enter using alphanumeric characters or symbols.
XEnter a mail address
[ Secret code]䋪
Enter the security code, set the secret code. I When pressing [Release], the settings are deleted.
XEnter Secret code
[䉫䊦䊷䊒 (Group)]
You can select from among 31 types of groups, from "No group" or from "Group1" to "Group 30". Groups
can be used for a Group search (P83)
XSelect a group
[Image]
When sending/receiving calls, or when checking Phonebook data, set the screen image/i-motion/etc...
Character
My Pictures
i-motion
Still image photography
Terminal setting
䋺Set the Character. When H is pressed, each part (hair, face, top, bottom,
accessories, background) can be selected, J allows each item to be
selected. After setting, press C[Done].
䋺Select an image saved in "Image" in the "Data box".→P194
䋺Select a movie/i-mode saved in "i-motion" in "Data box".→P201
䋺Start the camera, and capture an image as a group image .→P129
In accord with the "Call display" settings.→P100
"Add to
phonebook"
screen
(FOMA handset
("Handset"))
Continue on the next page
78
Phonebook
[ Ringtone]
Select the ring tone played when receiving voice/video calls from the parties in Phonebook.
[ Mail tone]
Select a ring tone played when receiving mails from the parties in Phonebook.
[URL]
Up to 256 half-pitch characters can be entered.
XEnter URL
[Zipcode]
XEnter contact's postal code
[ Home address]
XEnter contact's home address
[ Company name]
XEnter contact's company name
[Jobtitle]
XEnter contact's title
[ Co. zip code]
XEnter contact's company postal code
[ Company Address]
XEnter contact's company address
[Memo]
Enter using Kanji, Hiragana, full-pitch or 200 half-pitch characters can be entered. Pictograph, symbol,
alphanumeric character, or Katakana. Up to 100
XEnter the memo
[(Birthday)]
XEnter birthday
[ Substitute image]
Sets the substitute image for the video call.
[ (Secret)]
This option appears when Secret mode setting (P117) is set to "Secret mode". Set this option to "On" if
you save the created Phonebook entry as secret data.
䋪䋺 For details on the Secret code, refer to "Mobile Phone User's Guide i-mode <FOMA>".
cI[Done]
Music
Melody
i-motion
Terminal setting
䋺Select a song saved in "Music" in the "Data box".→P224
䋺Select from melodies saved in "Melody" in the "Data box".→P204
䋺Select a movie/i-mode saved in "i-motion" in "Data box".→P201
䋺In accord with the "Select ring tone" settings.→P92
Music
Melody
i-motion
Terminal setting
䋺Select a song saved in "Music" in the "Data box".→P224
䋺Select from melodies saved in "Melody" in the "Data box".→P204
䋺Select a movie/i-mode saved in "i-motion" in "Data box".→P201
䋺In accord with the "Select ring tone" settings.→P92
Data box
Terminal setting䋺Select an image saved in "Image" in the "Data box".→P194
䋺In accord with the "Call display" settings.→P100
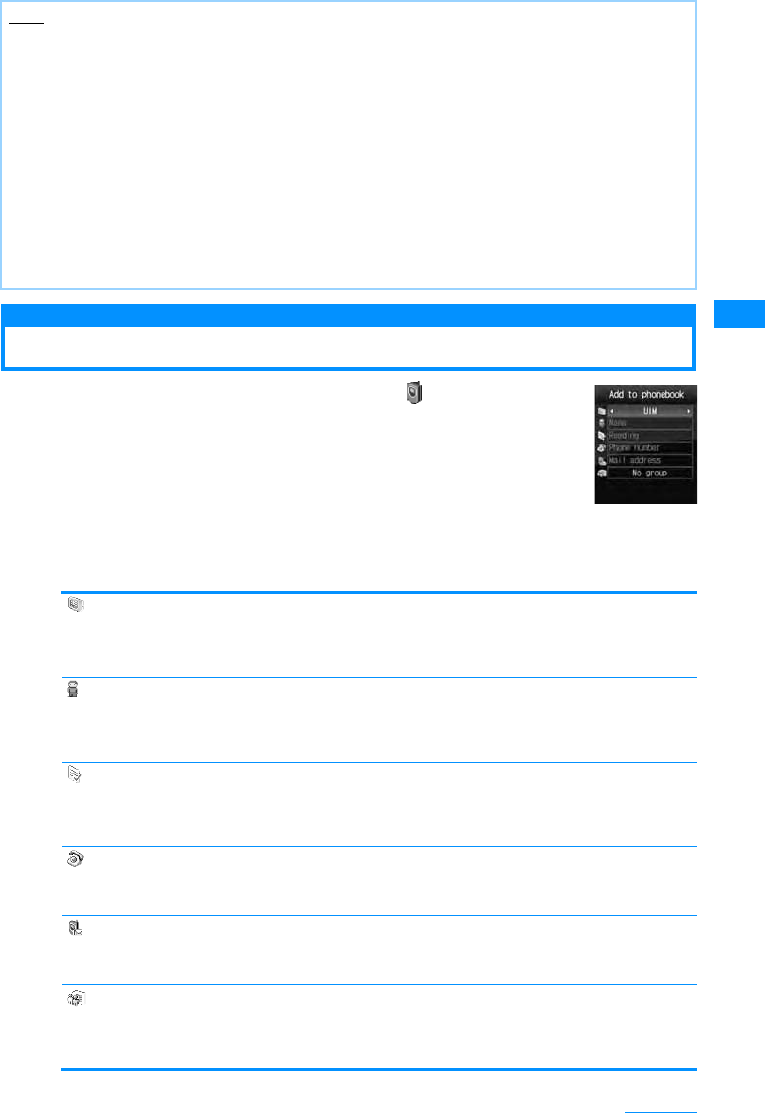
79
Phonebook
Saving UIM Contacts
a"Add to phonebook" screen (P77) X(Save to) field X
"UIM"
bPerform the following operations
[ Save to]
Select save location. When "Handset" is specified as the saving destination, the FOMA handset
(Handset) phonebook entry screen is displayed.→P79
X"Handset"/"UIM"
[ Name]
Up to 10 full-pitch or 21 half-pitch characters can be entered. Enter using Kanji, Hiragana, symbol,
alphanumeric character, or Katakana.
XEnter name
[Reading]
Up to 12 full-pitch or 25 half-pitch characters can be entered. Enter or edit when necessary. Enter using
full-pitch katakana, half-pitch alphanumeric, or half-pitch symbol.
XEnter reading
[ Phone number]
For green or white UIM, up to 26 digits can be entered. For blue UIM, up to 20 digits can be entered.
XEnter the phone number
[ Mail address]
Up to 50 half-pitch characters can be entered. Enter using alphanumeric characters or symbols.
XEnter a mail address
[䉫䊦䊷䊒 (Group)]
You can select from among 11 types of groups, from "No group" or from "Group1" to "Group 10".Groups
can be used for a Group search (P78)
XSelect a group
Note
<Secret code>
• If you add a new mail address defined as "Phone number + secret code@docomo.ne.jp" to Phonebook, you
may not receive or send mails to that contact. Save the mail address in the format "Phone number@
docomo.ne.jp" first, then insert the Secret code.
<Secret>
• When the Secret mode setting (P117) is set to "Secret only mode", the Phonebook entry is saved as secret
data.
• The secret entry is shown only when the "Secret mode" is set to "On" or "Secret only mode".
• Secret entries cannot be saved in UIM Phonebooks.
• The names saved in the secret entries are shown in the Redial log, history, or mail list/detail screen only
when the "Secret mode" is set to "On" or "Secret only mode". The phone numbers and mail addresses are
shown when the "Secret mode" is set to "Off".
• When the "Secret mode" is set to "Off" , the name, image, melody applied to the secret contact will not be
used when you received a call or mail from the contact.
"Add to
phonebook"
screen
(UIM)

80
Phonebook
cI[Done]
Saving Contacts to the Phonebook from
Received or Dialed Calls
You can save entries to a Phonebook from the list or detail screens of call history, mail, SMS,
or bookmarks that contain a phone number, mail address, or URL. Also, you can save a phone
number currently being entered/displayed on the phone number entry screen or web site, etc.
aOpen the screen containing items to save
䂓To save phone numbers using "Dialed calls" list screen (P54), "Dialed calls" detail screen (P54),
"Received calls" list screen (P56), "Received calls" detail screen (P56):
Press M[Menu] X Select "Add to phonebook".
• To save phone numbers from the "Dialed calls" or "Received calls" list screen, select the target
number from the history first.
• If you already have the number in your Phonebook, the "Store" command will not be shown.
䂓To save phone numbers using the phone number entry screen
Press C[Save].
䂓To save the sender or recipient mail address
Press M[Menu] in the mail details screen X Select "Store" X "Add to phonebook".
• If there are several mail addresses, select the one to save first).
䂓To save items using other screens
Select an item or phone number on the screen and press M[Menu] X Select "Add to phonebook".
bPerform the following operations
[New registration]
Add a new entry to a Phonebook. Go to Step 3.
• "Add to phonebook" screen opens for the new entry.
[Add registration]
Add an item to a saved Phonebook entry. Press M[Menu] on the phonebook entry screen to change
the Phonebook search method.→P82
XSelect a Phonebook entry to edit.
• The updated "Add to phonebook" screen is displayed.
• When you edit Phonebook entries in UIM, the updated entry is displayed in the "Add to phonebook"
screen.
cModify/save Phonebook entries XI[Done]
• To save the entries, see Step 2 described in "Saving FOMA Handset (Phone) Contacts" (P77).
Note
• The data scanned from barcodes can be saved in a Phonebook, too.→P134
• If you attempt to input a string longer than the maximum number of characters allowed, a warning screen
notifying of the problem is displayed. Then, the truncated string will be shown in the "Add to phonebook"
screen.
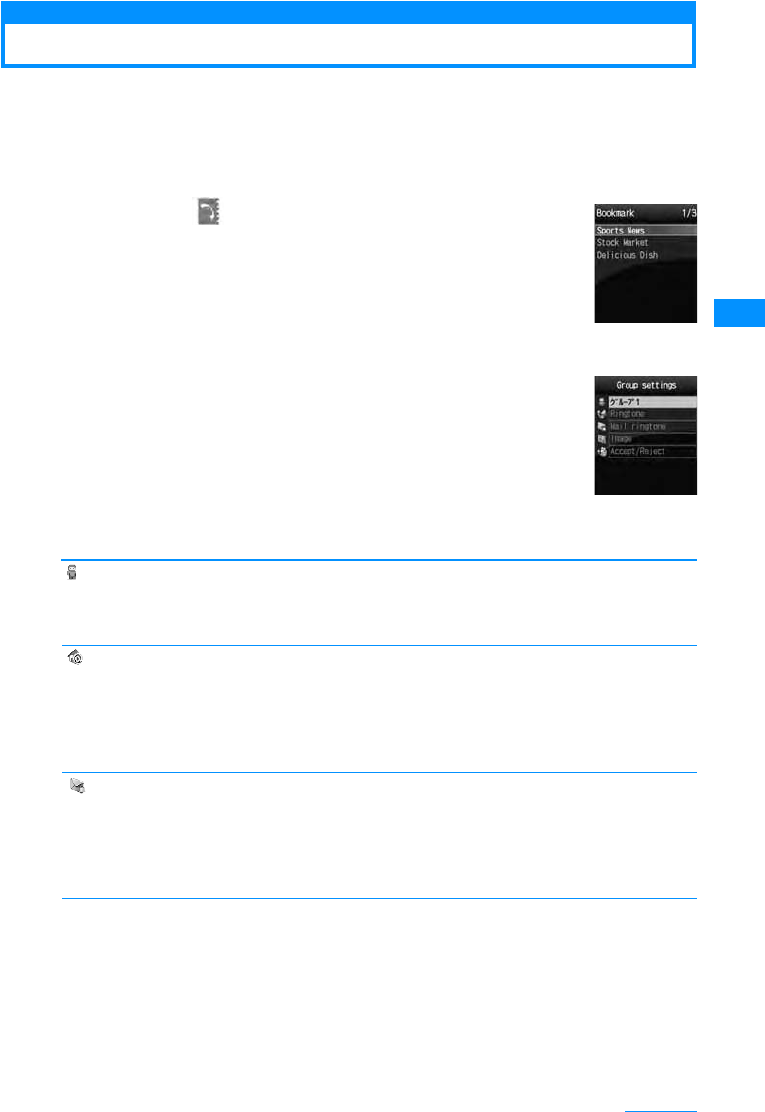
81
Phonebook
Saving/Editing a Group Name
You can group the contacts in the FOMA handset Phonebook or UIM Phonebook. Up to 31
groups can be saved in the FOMA handset Phonebook, and up to 11 groups can be saved in
the UIM Phonebook. "No group" is ascribed to one group.
• "No Group" can not be edited.
• Only the category names and members can be saved/edited in the UIM Phonebook.
aM[Menu]X(Phonebook)X"Search phonebook"
X"Group search"XMove the cursor to the target
groupXI[Settings]
•I[UIM]/[Handset] : Switches between the handset and the UIM's group settings.
•J: Displays the selected group's setting.
• For the operations on the screen (Group List screen) that opens for "Group
search", see Step 2 in "Searching Phonebook" (P79)
bC[Settings]
cPerform the following operations
[ (Group name)]
Up to 10 full-pitch or 21 half-pitch characters can be entered. Enter using Kanji, Hiragana, pictographs
(E-Moji), symbols, or Katakana.
XEntering a group name
[ Ringtone]
Set the ringtone for a voice call.
䌛Mail tone]
Set the ring tone for when receiving mail.
Music
Melody
i-motion
Terminal setting
䋺Select a song saved in "Music" in the "Data box".→P224
䋺Select from melodies saved in "Melody" in the "Data box".→P204
䋺Select a movie/i-mode saved in "i-motion" in "Data box".→P201
䋺In accord with the "Select ring tone" settings.→P92
Music
Melody
i-motion
Terminal setting
䋺Select a song saved in "Music" in the "Data box".→P224
䋺Select from melodies saved in "Melody" in the "Data box".→P204
䋺Select a movie/i-mode saved in "i-motion" in "Data box".→P201
䋺In accord with the "Select ring tone" settings.→P92
Group Settings
List screen
Group Settings
Continue on the next page
82
Phonebook
[Image]
Add an image to a group.
[ Reject/Accept call]
Set to accept/reject calls by groups. To set this item, entering the security code is needed.
Enter the security code X"Accept call"/"Reject call"/"Not set"
dI[Done]
The same icon as on the "Add to phonebook" screen is displayed on each item.→P87
Sub Menu on the Group List Screen
aThe Group setting screen (P81) XM[Menu] XPerform the
following operations
[Reset]
Resets the selected group settings. Group name is restored to its default.
X"Yes"/"No"
[Move]
Changes the display position of the selected group.
XLocate the new display position XC[OK]
[Settings]
Edit the selected group settings.→P81
[Reset all]
Reset the group settings or group order.
X"Yes"/"No"
Search phonbook
Making a Call from the Phonebook
• When searching Phonebook entries set as secret, set "Secret mode" to "ON" in advance.→P117
Calling after Invoking the Phonebook
It is easy to make a call after invoking Phonebook.
My Pictures
i-motion
Still image photography
Terminal setting
䋺Select an image saved in "Image" in the "Data box".→P194
䋺Select a movie/i-mode saved in "i-motion" in "Data box".→P201
䋺Start the camera, and capture an image as a group image .→P129
䋺In accord with the "Call display" settings.→P100
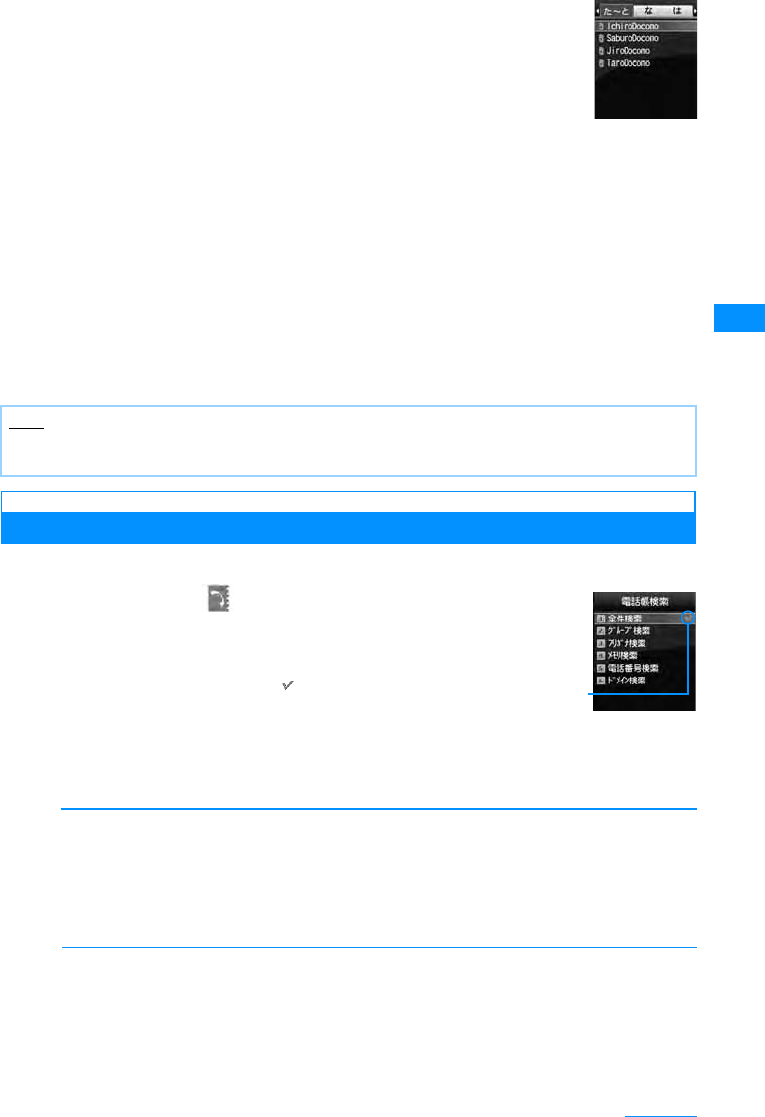
83
Phonebook
aStand-by display XU
The contacts found by normal search appears in the Phonebook Contacts
List Screen.→P88
bSelect a Phonebook entry
The Phonebook details screen opens with the phone number displayed.
•C[Display] : From the Phone number display, press C[Send] to make a call.
䂓When multiple phone number is saved in the Phonebook entry.
• Press H to select the number to make a phone call to.
• Press A to select the number from the phone number selection screen. The selected number is
immediately called.
cI[Send]
䂓When making video call
M[Menu]X [Call function] X "Video call"
Searching Phonebook
You have various ways to search phonebook.
aM[Menu] X(Phonebook) X"Search
phonebook"
•I[Default] : Search method at the cursol is set to the search
method of Phonebook list screen which is displayed when you
press U on the Stand-by screen. is displayed to the set search
method.
bPerform the following operation
[Search all data]
Displays all Phonebook entries for readings starting with (䈅line to 䉒 line) line and "others" (for readings
other than the Japanese Kana syllables.
•Press
J to switch the reading line.
• You can switch the displayed line by pressing the keys 1 to 0,*(䈅line to 䉒 line, and others)
corresponding to reading lines.
XSelect a reading line
[Group search]
Phonebook entries are searched/displayed with respect to each group (Group List Screen). Switch
between FOMA handset (Handset) Phonebook and UIM Phonebook by J. Select a group with
HXC[Select], Phonebook entries saved in each group are displayed.
• In the group list screen, you can perform the following operation.
- Scroll the screen by page using F/E.
- Move the cursor by entering a group number (1 to 20) with dial keys.
XSelect a group
Note
• If the "Secret mode" is set to "Secret only mode" (P117), only Phonebook entries set as Secret (P78) can
be searched/displayed.
Phonebook
Contacts List
Screen
(Example:When
searching all
data)
"Search
phonebook"
screen
The usual
search method
is displayed.

84
Phonebook
[Reading search]
Enter a part of the contact name "reading" to be search all the Phonebook entries. Up to 32 half-pitch
characters can be entered for a reading.
• All Phonebook entries are displayed when a reading is not entered.
• You can search readings using other than the leading characters.
XEnter reading
[Memory No. search]
All the Phonebook entries in the FOMA handset (phone) is displayed every 50 entries.
•J to switch the display of memory number.
• The UIM Phonebook entries can not be displayed.
• The Phonebook entries can also be displayed by entering memory numbers with dial keys.
XSelect the memory memory number display tab
[Phone number?]
Enter a part of the phone number saved to search all the Phonebook entries. Up to 26 digits can be
entered for a phone number.
• All the Phonebook entries are displayed when a phone number is not entered for a number search.
• You can search phone numbers using other than the leading numbers.
XEnter the phone number
[Domain?]
Sort the Phonebook entries by domain name within the mail address.
• Press J to switch the target domain.
• Register a domain to be searched in advance.→P88
XSelect a domain
Sub Menu on the Group List Screen
a"Searchphonebook"screen(P82)X"Group search" XM[Menu]
Xperform the following operation.
[View UIM/View Phonebook data]
Swithches between the UIM Phonebook and FOMA handset (Phone) Phonebook group search screen
and display them.
[Settings]
The Group setting screen (P81) is displayed.
[Select]
Select the group at the cursor to search.
Viewing a Phonebook Entries
aStand-by display XU
aSave locations for the Phonebook entries
Saved in the handset Phonebook䋪
Saved in the UIM Phonebook
䋪䋺 An icon representing "Phone Number 1" is displayed.
bPhonebook entry's image screen
When an image is assigned to the phonebook entry, it is displayed on the
screen.
Phonebook list
screen
a
b
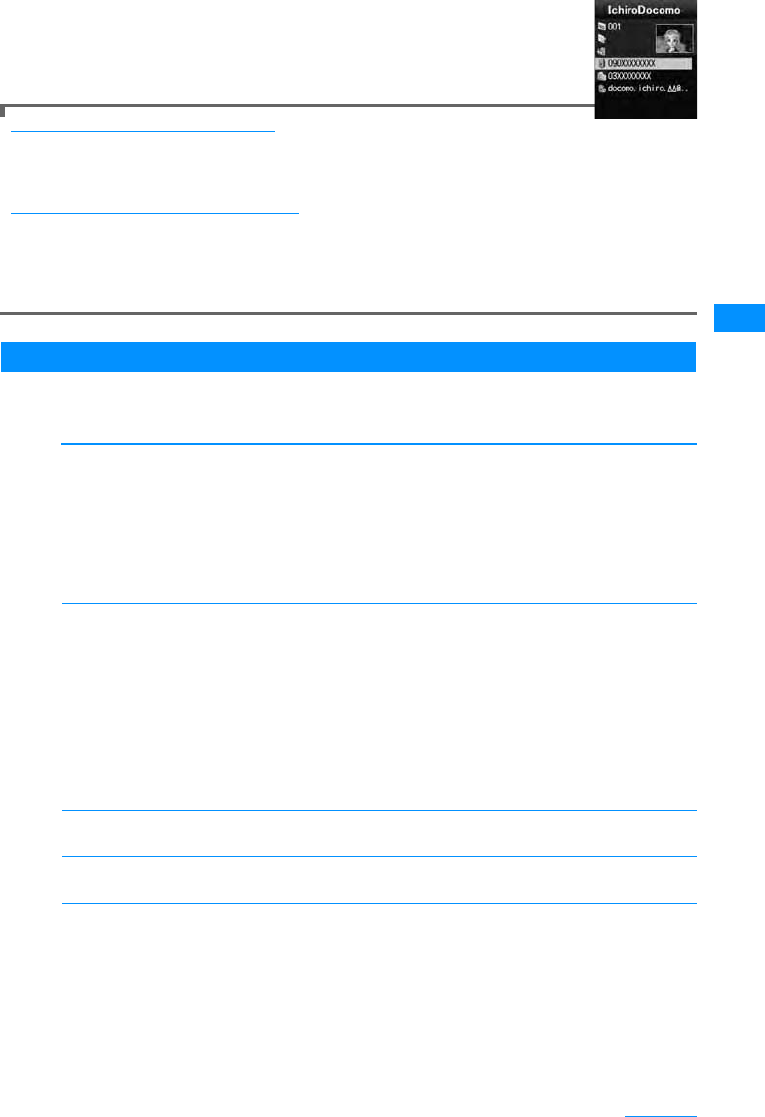
85
Phonebook
bSelect a Phonebook entry
• When an image is assigned to the phonebook entry, it is displayed on the screen.
• The same icon as on the "Add to phonebook" screen is displayed on each item.→
P77
Operations on the Phonebook list screen
Selecting the Phonebook entry in which a phone number or a mail address is saved,
pressA to make a call, press I[Mail] to sends a mail. If multiple phone numbers or mail
addresses are registered, the Phone number or mail address selection screen opens.
Operations on the Phonebook details screen
Selecting a saved phone number, mail address, or URL display the following items at the lower right screen,
and you can perform the following operations by pressing I.
Send : Make a call to the selected phone number.
Mail : Create a message and send it to the selected phone number/mail address.→P161
Connect : Connect to the site of the selected URL.
Sub Menu in the Phonebook List Screen
aPhonebook list screen (P84) XM[Menu] XPerform the
following operations
[Mail/URL]
Create mail or access URL.
[Call function]
Selects the calling method. If multiple phone numbers are saved, after selecting the calling method,
select the number from the phone number selection screen.
[Add new]
Create a new Phonebook entry.→P77
[Edit]
Edit the selected contact.→P87
[Copy]
Copy or back up the selected contact.
Compose mail
Attach to mail
Compose message
Connect to URL
䋺Create an i-mode mail address to the selected mail address or phone number.
→P161
䋺Create an i-mode mail with the selected Phonebook entry attached.→P161
䋺Create a short message address to the phone number in the selected phonebook.
→P181
䋺Connect to the URL saved in the currently selected entry.
Video Call
Customize call
International Call (Japan)
䋺Make a Video Phone.
䋺XMake a call changing the registered phone number. L on the Phone
number entry screen XK to move the cursor to the digit to change X
change the number XA
䋺If you make a call to a phone number saved in the phonebook from
overseas, the Country Code for Japan "+81" is added automatically at the
beginning of the phone number.
• If the phone number has a leading "0", it is automatically deleted.
to the UIM䋪1
to the phone䋪2
to microSD
Backup
䋺Copy the selected contact to UIM.
䋺Copy the selected contact to the handset.
䋺Copy the selected contact to a microSD memory card.
䋺Copy all data to a microSD card as a backup.
• Images saved in the Phonebook cannot be copied.
Phonebook
details screen

86
Phonebook
[Delete]
Delete saved data in the Phonebook.
[Multiple choice]
Select multiple contacts to copy or delete them. After you select the storage location to save multiple
phonebook entries from "Handset"/"UIM"(FOMA handset (Handset) Phonebook/UIM Phonebook),
perform the following operations.
XCheck off the contacts to be selected XM[Menu]
[Search by]
Temporarily change the Phonebook search method.→P83
[Send Ir data]
Send a contact to an external device using infrared transmission.→P212
[Create domain list]
Create a domain to be searched using "Domain search".→P88
㶎1䋺 Displayed when using the handset phonebook.
㶎2䋺 Displayed when using the UIM phonebook.
Sub Menu in the Phonebook Details Screen
aPhonebook details screen (P85) XM[Menu] XPerform the
following operations
[Mail/URL]
Create mail or access URL.
[Call function]
Selects the calling method.
[Edit]
Edit the displayed contact.→P87
Delete
all in phone
all in UIM
䋺Delete the selected Phonebook entry.
䋺Delete all Phonebook data on the handset.
䋺Delete all Phonebook data on the UIM.
Copy to UIM䋪1
Copy to phone 䋪2
Copy to microSD
Delete
Mark/Unmark
䋺Copy the selected contact to UIM.
䋺Copy the selected contact to the handset.
䋺Copy the selected contact to a microSD memory card.
䋺Delete the selected Phonebook entry.
䋺Delete all of saved data in the Phonebook.
Focused data
all in phone
all in UIM
䋺Send the selected contact.
䋺Send all data saved in the handset Phonebook.
䋺Send all data saved in the UIM Phonebook.
Compose mail
Attach to mail
Compose message
Connect to URL
䋺Create an i-mode mail address to the the mail address or phone number in the
displayed (current) contact.→P161
䋺Create an i-mode mail with the displayed contact data attached.→P161
䋺Create a short message address to the phone number in the displayed contact.
→P181
䋺Access to the URL saved in the selected contact.
Video Call
Customize call
International Call (Japan)
䋺Make a Video Phone.
䋺Make a call changing the registered phone number.
XL on the Phone number entry screen XK to move the cursor to the
digit to change X change the number XA
䋺If you make a call to a phone number saved in the phonebook from
overseas, the Country Code for Japan "+81" is added automatically at the
beginning of the phone number.
• If the phone number has a leading "0", it is automatically deleted.
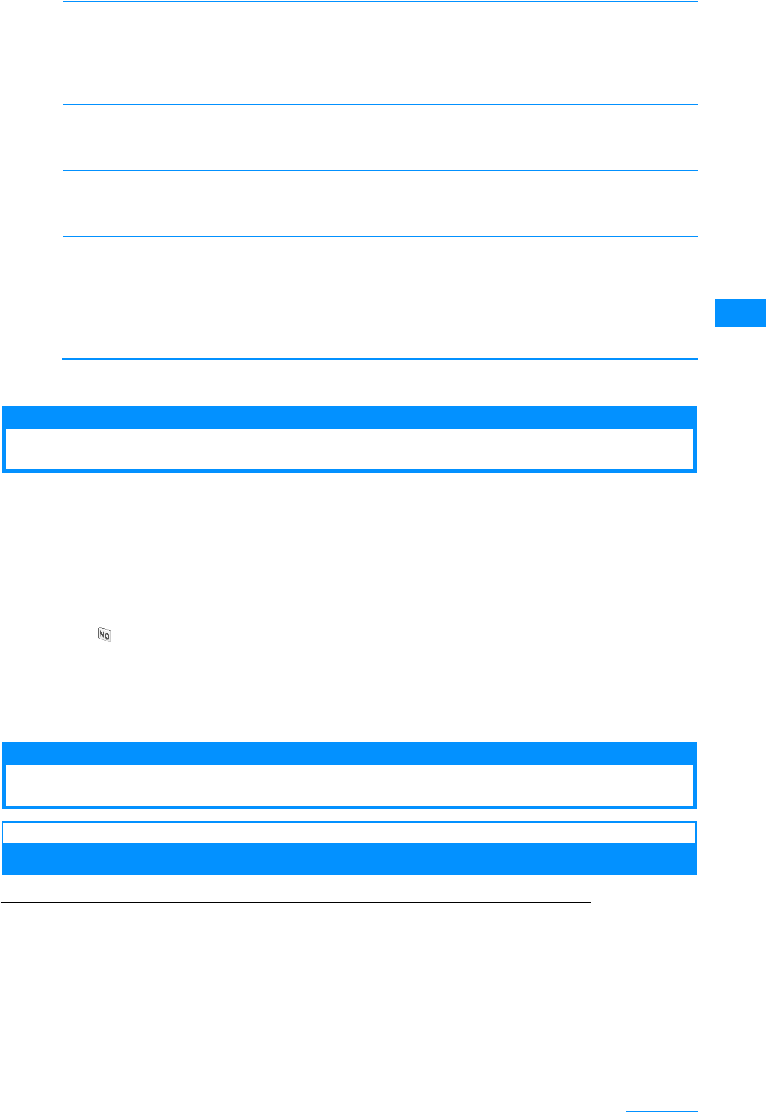
87
Phonebook
[Copy]
Copy the displayed contact.
[Delete]
Delete the displayed contact.
X"Yes"/"No"
[Send Ir data]
Send the displayed contact using infrared transmission.→P212
X"Yes"/"No"
[Accept/Reject call]
Select to accept or reject calls by the phone numbers in the FOMA handset "Handset" phonebook
The phone number saved in the "Reject on List"(P119) cannot be set to "Accept".
XEnter security code XHto select item XI[Settings/Set as]
㶎1䋺 Displayed when using the handset phonebook.
㶎2䋺 Displayed when using the UIM phonebook.
Editing the Phonebook Entries
aPhonebook details screen (P85) XM[Menu] X[Edit] XEdit the
entries.
See "Saving FOMA Handset (Phone) Contacts" (P77) or "Saving UIM Contacts" (P79) on
how to edit the desired entry.
䂓When saving a Phonebook contact to another memory number.
A new memory number is added if you edit and save the existing memory number, leaving the
original contact data as is.
XXEnter any un-assigned memory number (000-999)
bPress I[Done] when finished.
䂓When saving in UIM
Edited entries are overwritten.
XI[Done] X "Yes"
Deleting Contacts
Deleting Individual or All Entries
Example: To delete a Phonebook entry from the Phonebook contacts list screen
aMovethe cursor to deleteaPhonebook contact on thePhonebook
list (P84) screen XM[Menu]X"Delete" XSelect a deleting
method
Delete 䋺 Delete the selected Phonebook entry.
all in phone䋺 Delete all Phonebook entries saved in the FOMA handset. The security code is required
to delete.
all in UIM 䋺 Delete all Phonebook entries saved on the UIM. The security code is required to delete.
to the UIM䋪1
to the phone䋪2
to microSD
䋺Copy the displayed contact to UIM.
䋺Copy the displayed contact to the handset.
䋺Copy the displayed contact to a microSD memory card.
Phone Number
In-call arrival action
䋺Press J to select a desired phone number.
䋺Press J to select the in-call arrival action (Not set /Reject call/Accept call).
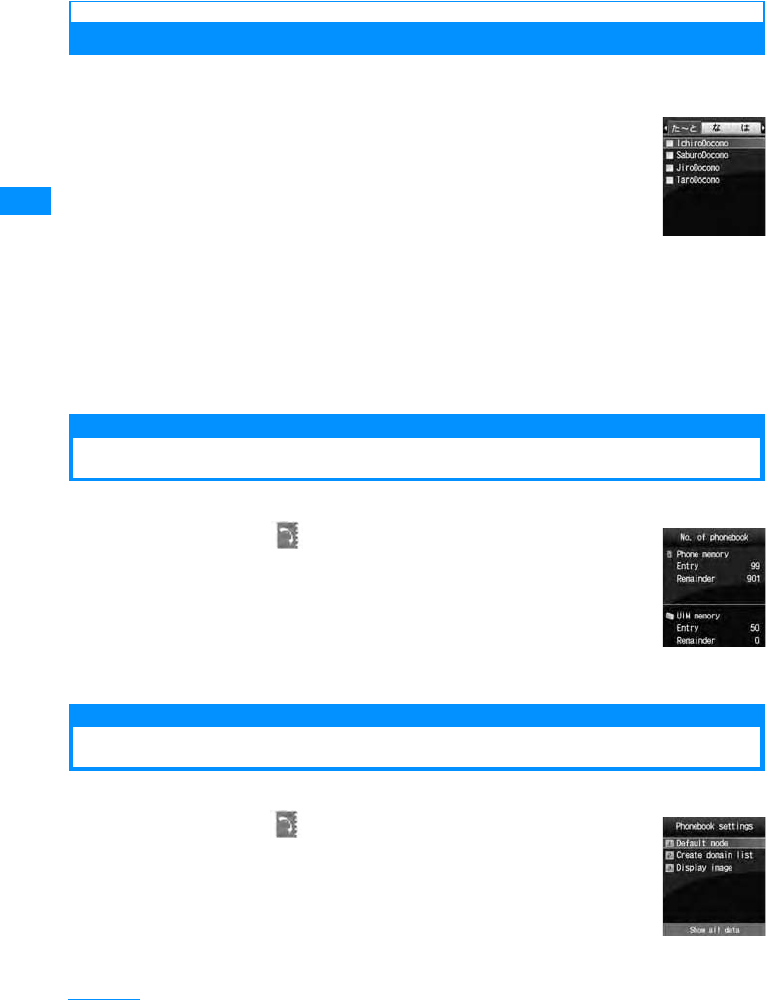
88
Phonebook
b"Yes"
The selected/displayed Phonebook entry will be deleted.
䂓To delete a Phonebook entry from the Phonebook detail list screen
You can delete Phonebook entries one at a time.
Phonebook detail screen (P84) XM[Menu] X "Delete" X "Yes"
Selecting and Deleting Multiple Contacts
• If either of the handset (Phone) Phonebook or UIM Phonebook is displayed, contacts are deleted from the
displayed (active) Phonebook.
aPhonebooklist screen(P84)XM[Menu] X[Multiple
choice] X"Handset"/"UIM"
bSelect the contacts to be deleted XM[Menu] X
"Delete"
• Put check marks at all unnecessary contacts, then select "Delete".
c"Yes"
The selected contacts will be deleted.
Number of Contacts
Checking the Phonebook Capacity and Utilization
You can check the available space on the handset/UIM Phonebook.
aM[Menu] X(Phonebook) X"No. of Phonebook"
• "Secret entry" is shown when the secret mode is set to "Secret mode" or "Secret
only mode".
Setting the Phonebook
You can configure Phonebooks or images to be invoked from the Stand-by display.
aM[Menu] X(Phonebook) X"PhoneBook
settings"
Multiple choice
screen
(when deleting
contacts)
"No. of
Phonebook"
screen
"PhoneBook
settings" screen

89
Phonebook
bPerform the following operation
[Default mode]
Search method for invoking the Phonebook list screen directly from the Stand-by display.
XSelect search method
[Create domain list]
Create a domain to be searched using "Domain search". Enter a domain name selecting items that are
not in the list.
XEnter a domain name XC[Set]
[Display image]
Set whether to display image assigned to the Phonebook or not.
X"Show" / "Do not show"
To edit the domain name
Select the domain you want to edit from the list XC[Select] X Edit the domain name.
You cannot edit "docomo.ne.jp" on that domain.
To Delete the set Domain Name
Select the domain you want to delete from the list XM[Menu] X Select "Delete"
Dialing Quick Search
Call with the Least Number of Buttons
As you are in the Stand-by display, you can make a call easily using dial keys by dialing one or
two digits number which is a memory number from "0" to "99" which corresponds to the phone
number in the Phonebook.
Example: To find a Phonebook entry by entering a memory number<
aEnter one or two digits numberXA
The content of the Phonebook entry of the corresponding
memory number which is entered is displayed and a call
is made to that number.
䂓If you enter 3 or more digits
The phone numbers saved in the Phonebook containing the
entered number sequence will be displayed. DXH to select
a phone number and press A.
•M[Menu] : Display the sub menu of the phone number entry screen.→P52
•C[Save] : Add a new or extra phone number to Phonebook.
→P80
•I[Mail] : If you enter a 1 or 2 digit number, an i-mode mail with the address found in the numbered
memory address will be created. If you enter 3 or more digits, an i-mode mail can be created to an
address containing the entered number sequence.
•H : When you enter a 1 or 2 digit number, the Phonebook entries assigned to the previous and
subsequent memory numbers will be displayed. If you enter 3 or more digits, you can select to call
from phone numbers containing the same sequence.
•J : If the entered number has 1 or 2 digits, you can select from phone numbers from phone numbers
saved in the entry at the numbered memory address.
Note
• When "Dialing Quick Search" in the "Dialing" is set to "Off", this option does not function.→P101
• This function does not work when you enter a 2-digit number which begins with "0" such as "01" because it
is not recognized as a memory number.
The content of
the Phonebook
entry of the
entered phone
number or the
corresponding
memory
number is
displayed.
90
Phonebook
Display the History of Call/Mail
aM[Menu] X(Phonebook)X[Call/Mail history] XSelect the
log to be displayed
Received Calls 䋺 Show logs for Voice/Video calls.
Redial 䋺 Show redial logs for Voice/Video calls.
Received mails 䋺 Displays the Received mails.
Sent mails 䋺 Displays the Sent mails.
Note
• Received mails can be accessed from the Stand-by display by pressing L.→P56
• Redial can be accessed from the Stand-by display by pressing R.→P54

91
Sound/Screen/Light Settings
Tone Settings
Changing the Ring Tone.......................................................................Select ring tone 92
Changing the Ringer Volume.............................................................................. Volume 94
Vibrating Instead of Ring tone or Alarm ..........................................Vibration settings 95
Setting the Sound When a Key is Pressed ..................................Select Effect Sound 96
Having a FOMA Terminal Warn You Before a Call Drops Out .............. Quality alarm 97
Setting Ring Time Duration for Receiving Mails ...........................Mail Ring Duration 97
Muting Handset Tones..............................................................................Manner mode 97
Changing Manner Mode ......................................................................Manner Settings 98
Screen/Light Settings
Changing Stand-by Display ................................................................. Set as stand-by 99
Setting the Image When Receiving a Call...................................................Call display 100
Setting the Screen When Dialing.........................................................................Dialing 101
Displaying a Wake-up Message..........................................................Wake-up display 102
Displaying an Image Saved in the Phonebook on the Incoming Call
<Display phonebook image> ............................................. Display phonebook image 102
Setting the Back Light of Display ................................................................. Back Light 103
Displaying in the Power Saving Mode ........................................... Power saver mode 103
Setting the Display Color .......................................................................... Color Theme 103
Changing the Appearance of Main Menu...............................................Menu settings 104
Setting Incoming Call Light.................................................. Illumination dot Settings 105
Setting Time Format .............................................................................. Set Date&Time 106
Switching the Display Language to English...................................... Select language 107
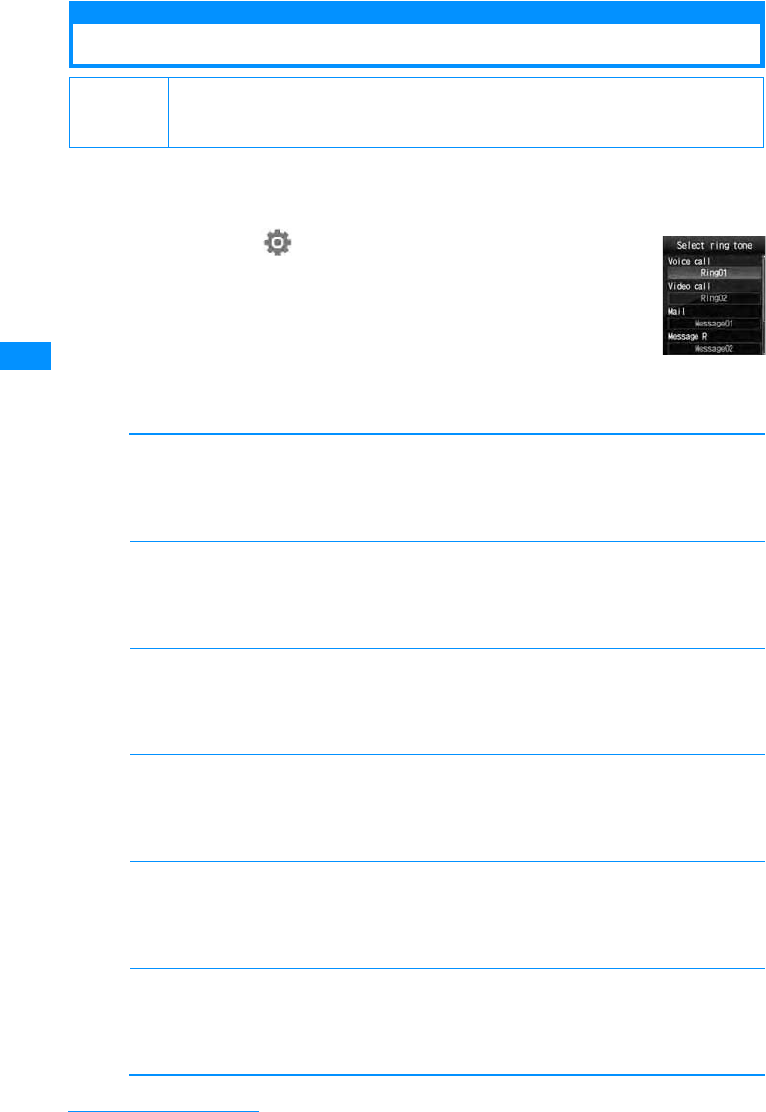
92
Sound/Screen/Light Settings
Select ring tone
Changing the Ring Tone
You can change the ring tone for Voice/Video calls, mails, etc.
• In addition to the pre-installed ring tones and melodies, i-motion programs, melodies and Chaku-Uta®,
Chaku-Uta-Full® downloaded from i-mode sites or websites can be set as ring tones.
aM[Menu]X(Settings)X"Sounds&Vibration" X
"Select ring tone"
bPerform the following operation
•C[List] : The ring tone screen of the selected item opens.
[Ring tone]
Select the ring tone for a voice call.
[Video call]
Select the ring tone for a video call.
[Mail/Message/SMS]
Select the Mail tone for a mail.
[Message R]
Select the ring tone for a Message R.
[Message F]
Select the ring tone for a Message F.
[SMS tone]
Select the ring tone for SMS.
Default Ring tone: Ring01䇭Video ring tone: Ring02䇭Mail/Message/SMS Volume: Message01
MessageR: Message02䇭Message F: Message03
SMS ring tone: Message04
Music
i-motion
Melody
䋺Select from music data saved in "Music" in the "Data box" .→P224
䋺Select a movie/i-motion saved in "i-motion" in the "Data box".→P201
䋺Select from melodies saved in "Melody" in the "Data box".→P204
Music
i-motion
Melody
䋺Select from music data saved in "Music" in the "Data box" .→P224
䋺Select a movie/i-motion saved in "i-motion" in the "Data box".→P201
䋺Select from melodies saved in "Melody" in the "Data box".→P204
Music
i-motion
Melody
䋺Select from music data saved in "Music" in the "Data box" .→P224
䋺Select a movie/i-motion saved in "i-motion" in the "Data box".→P201
䋺Select from melodies saved in "Melody" in the "Data box".→P204
Music
i-motion
Melody
䋺Select from music data saved in "Music" in the "Data box" .→P224
䋺Select a movie/i-motion saved in "i-motion" in the "Data box".→P201
䋺Select from melodies saved in "Melody" in the "Data box".→P204
Music
i-motion
Melody
䋺Select from music data saved in "Music" in the "Data box" .→P224
䋺Select a movie/i-motion saved in "i-motion" in the "Data box".→P201
䋺Select from melodies saved in "Melody" in the "Data box".→P204
Music
i-motion
Melody
䋺Select from music data saved in "Music" in the "Data box" .→P224
䋺Select a movie/i-motion saved in "i-motion" in the "Data box".→P201
䋺Select from melodies saved in "Melody" in the "Data box".→P204
Ring tone
Selection screen
93
Sound/Screen/Light Settings
cI[Done]
List of the Ring tone (Pre-installed)
• Each melody is the copyright of LG ELECTRONICS.
Note
• The ringtone is displayed as its file name.
• The following file formats can be set for the ring tone (but some files such as restricted files or files including
only movies or sounds may not be set).
SMF, MFi, MP4 (Mobile MP4), AMR
• When the Ringtone is set to Videos/i-Motions, the "Call display"(P100) will be changed to the same.
• Audio only Videos/i-Motions can be set for "Mail", "Message F", "Message R" and "SMS".
• An Videos/i-Motions included with movie only cannot be set as the ring tone.
A Mystique Message03 Ring03
A Red Sky Message04 Ring04
Alarm01 Morning Dew Ring05
Alarm02 Musette Show My Love
Alarm03 New Wave Stand Tall
Alarm04 Next Time Statlight
Bell of Temple Piacer d'amor Steppers
Cigar and Wine Pocket Watch Stranger
Csardas Power Off Sunday Morning
Go Go Cart Power On Tail of Light
Higher Right on Wake Me up
Message01 Ring01
Message02 Ring02
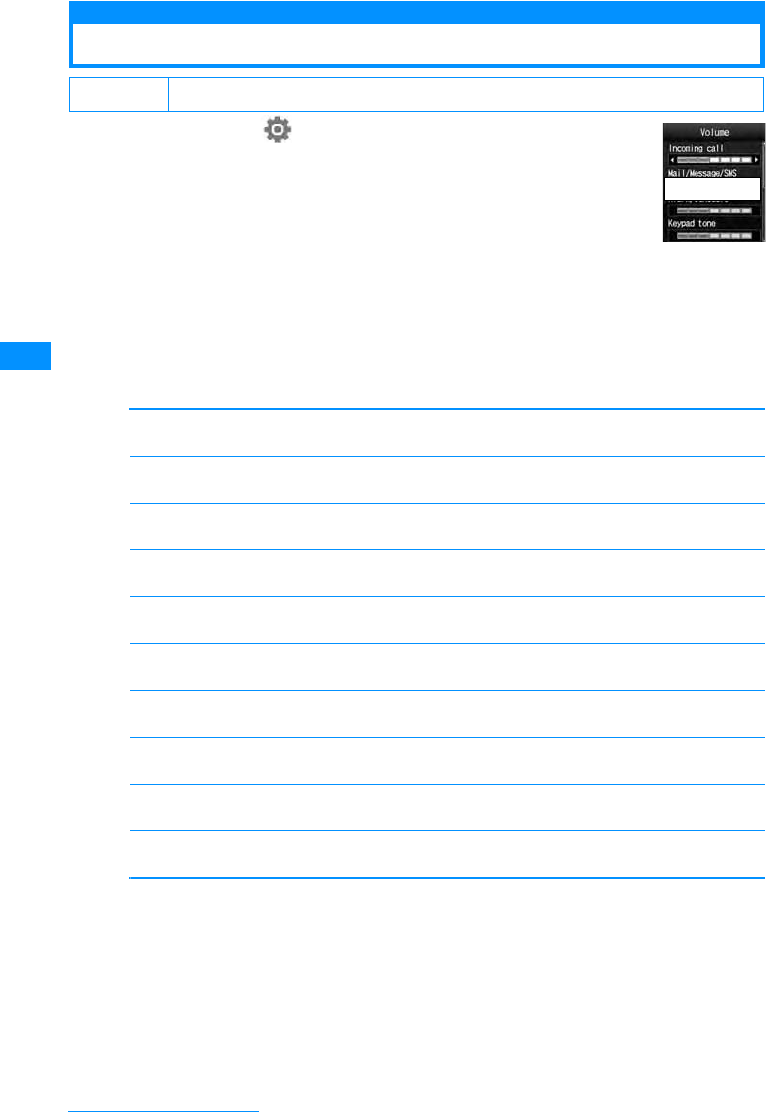
94
Sound/Screen/Light Settings
Volume
Changing the Ringer Volume
aM[Menu]X(Settings)X"Sounds&Vibration"X
"Volume"
bPerform the following operation
•J : Adjust the volume of the selected item. When the volume level is lowest, "Silent" is displayed and
the sound is not emitted. Every time the volume is adjusted, the tone for the item sounds in the new
volume.(Except "Receiver volume")
•C[Select] : Volume Setting screen of the selected item is displayed
[Ring tone]
Adjust the incoming call volume for voice/video call.
[Mail/Message/SMS]
Adjust the incoming tone volume for Mail/Message R/F/SMS.
[Alarm/Schedule]
Adjust the alarm tone volume for Alarm/Schedule.
[Dial sound]
Adjust the dial sound volume
[Slide tone]
Adjust the volume when the FOMA handset is opened.
[Key tone]
Adjust the volume of keypad sound except dial tone and munu effect.
[Menu effect]
Adjust the volume for main menu operation.
[Power On/Off]
Adjust the volume when the handset is turned on/off.
[Popup tone]
Adjusts the volume when the popup window is displayed.
[Receiver volume]
Adjust the earpiece volume during a call. It can not mute the sound.
cI[Done]
Default (All) Level 3
Volume Setting
screen
To be replaced
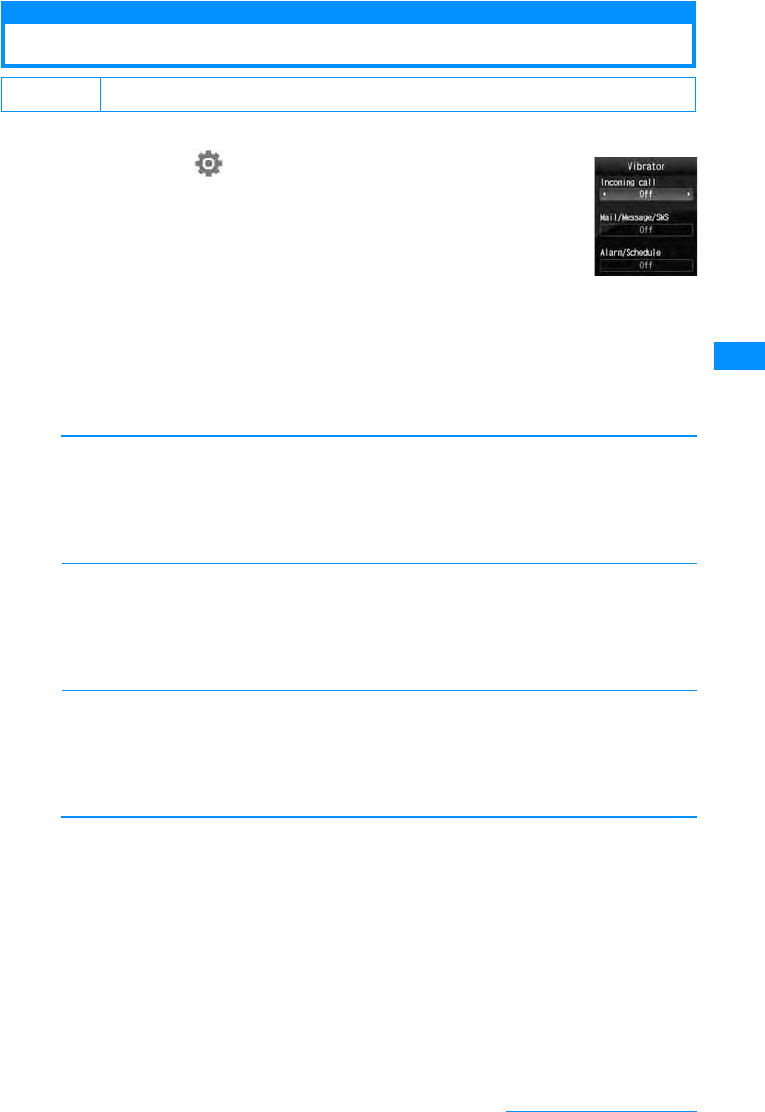
95
Sound/Screen/Light Settings
Vibration settings
Vibrating Instead of Ring tone or Alarm
You can set the handset to vibrate when a call or mail arrives or at a Schedule alarm time.
aM[Menu]X(Settings)X"Sounds&Vibration"X
"Vibrator"
bPerform the following operation
•J : Set the vibrate pattern of the selected item. Every time the vibration patter is changed, the
handset vibrates in the new pattern.
•C[List] : Vibrate pattern setting screen of the selected item is shown.
[Incoming call]
Sets the vibration pattern for voice/video call.
[Mail/Message/SMS]
Sets the vibration pattern for receiving mail/message R/F.
[Alarm/Schedule]
Sets the vibration pattern for the Alarm/schedule alert.
cI[Done]
Default (All) Off
Off
Pattern 1
Pattern 2
Pattern 3
䋺The handset does not vibrate.
䋺The handset repeatedly vibrates for 0.5 seconds, then stops vibrating for 0.5 seconds.
䋺The handset repeatedly vibrates for 1 seconds, then stops vibrating for 0.5 seconds.
䋺The handset repeatedly vibrates for 3 seconds, then stops vibrating for 0.5 seconds.
Vibrate Setting
screen
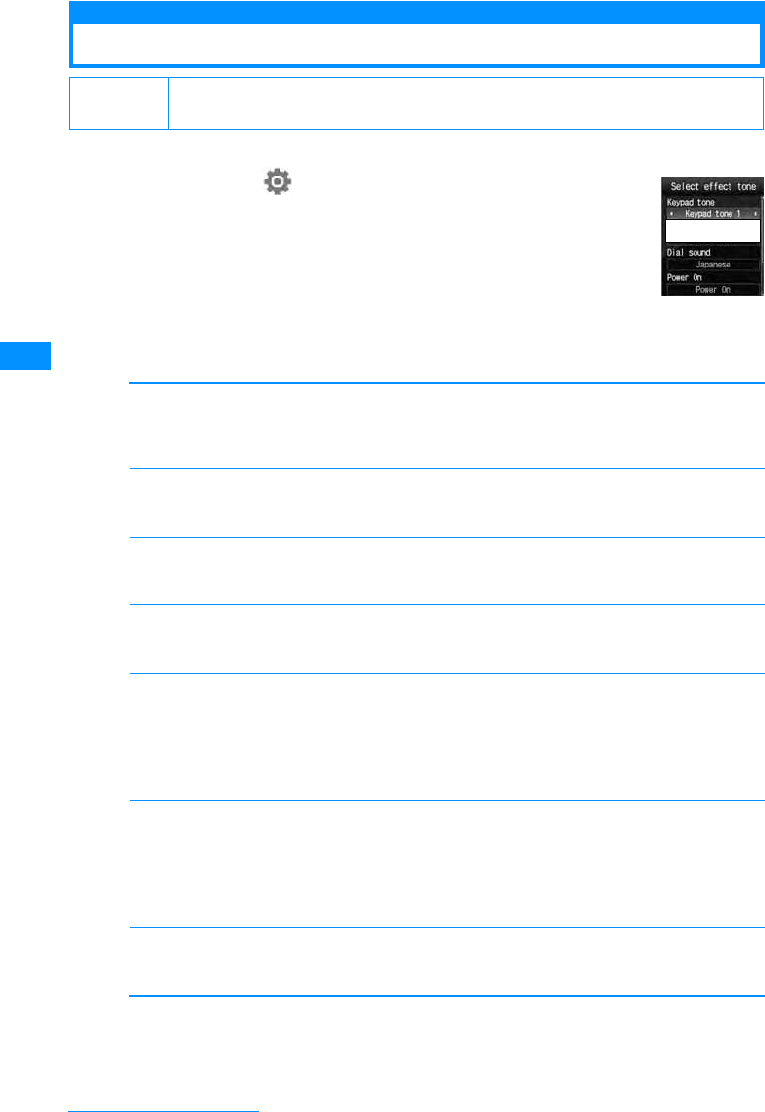
96
Sound/Screen/Light Settings
Select Effect Sound
Setting the Sound When a Key is Pressed
You can set the effect sound when a key is pressed or a function is performed.
aM[Menu]X(Settings)X"Sounds&Vibration"X
"Select effect tone"
bPerform the following operation
•C[List] : List of the items of the selected item is displayed.
[Dial sound]䋪
Selects the effect sound when dial keys are pressed on the Stand-by screen or the Phone number entry
screen. If set to "Japanese", "English", or "Korean", the numbers entered with dial keys will be read out.
X"Japanese"/"English"/"Korean"/"Digital tone"
[Slide tone]䋪
Selects the effect sound when the FOMA handset is opened.
X"Slide tone 1"/"Slide tone 2"/Slide tone 3"/"Slide tone 4"
[Keypad sound]䋪
Select sound effects that sound when a key is pressed other than the Dial sound and Menu effect.
X"@@Keypad sound 1"/"Keypad sound 2"/"Keypad sound 3"/"Keypad sound 4@@"
[Menu effect]䋪
Selects the effect sound when a main menu is selected.
X"Menu effect 1"/"Menu effect 2"/"Menu effect 3"/"Menu effect 4"
[Power On]
Selects the effect sound when the handset is turn on.
[Power off]
Selects the effect sound when the handset is turned off.
[Low battery alert]
Set whether to sound an alarm when the battery level is low.
X"ON"/"OFF"
Default Dial sound: Japanese Slide tone: Slide tone 1 Keypad tone: Keypad tone 1 Menu effect:
Menu effect 1 Power On: Power On Power Off: Power Off Low battery alert: On
Music
i-motion
Melody
䋺Select from music data saved in "Music" in the "Data box" .→P224
䋺Select a movie/i-motion saved in "i-motion" in the "Data box".→P201
䍃Videos/i-motion movies with only graphics cannot be set.
䋺Select from melodies saved in "Melody" in the "Data box".→P204
Music
i-motion
Melody
䋺Select from music data saved in "Music" in the "Data box" .→P224
䋺Select a movie/i-motion saved in "i-motion" in the "Data box".→P201
䍃Videos/i-motion movies with only graphics cannot be set.
䋺Select from melodies saved in "Melody" in the "Data box".→P204
Select Effect
To be replaced
97
Sound/Screen/Light Settings
䋪䋺 Press M[Play} on the Sound effect select screen to sound the sound effect selected by using J.
Press M[Mute] not to sound a tone. You can also check the sound effect by pressing I[Play]
and H on the Sound effect list screen.
cI[Done]
Quality alarm
Having a FOMA Terminal Warn You Before a
Call Drops Out
A FOMA handset uses this function to sound an alarm tone during a voice or videophone call
warning you that the signal quality is deteriorating and the call is likely to drop out.
• If the signal rapidly deteriorates, the call may be drop out without warning.
aM[Menu]X(Settings)X"Call/VT/Dialing"X"Call feature"X
"Quality alarm"X"High alarm"/"Low alarm"/"Alarm off"
Mail Ring Duration
Setting Ring Time Duration for Receiving Mails
You can set how many times or for how long the ring tone sounds when mail arrives.
aM[Menu]X(Settings)X"Sounds&Vibration"X"Mail ring
duration"
bPerform the following operation
•C[List] : List of the items is displayed.
[Mail ring]
cI[Done]
Manner mode
Muting Handset Tones
Turn off the tones that sound from the handset so as not to disturb others.
a#(for 1 + seconds) or U(for 1 + seconds)X"Yes"
To cancel Manner Mode
Press # (for 1 + seconds) or select F(for 1 + seconds) X "Yes" at the Stand-by display.
Default High alarm
Default 1࿁
Off
Once
Select time
䋺Sets not to sound a ring tone.
䋺Set to sound the ring tone once.
䋺Set the duration of the ring tone. D Enter ring time between 1-30 seconds in the ring time
field
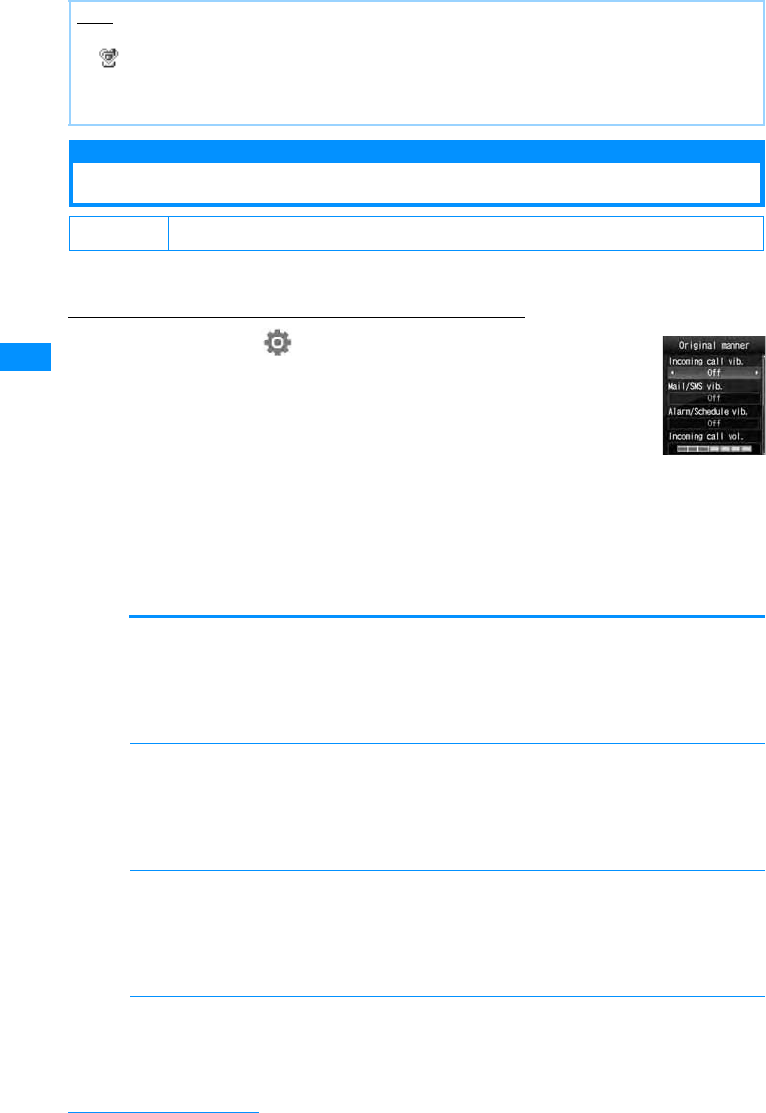
98
Sound/Screen/Light Settings
Manner Settings
Changing Manner Mode
Selects the action of Manner Mode from "General manner" or "Original manner mode".
The setting of the set Manner mode can be changed for the Original manner mode.
Example: To change the settings of the Original manner mode
aM[Menu]X(Settings)X"Sounds&Vibration"X
"Manner settings"X"Original manner mode"XI
[Edit]
䂓To select the Manner mode type
"Manner mode"/"Original manner mode"X Press C
The Manner mode setting will terminate.
bPerform the following operation
•J : Select the vibrate pattern or volume of the selected item. When the volume level is lowest, "Silent"
is displayed and the sound is not emitted.
•C[List] : Vibration pattern and their volume setting screen of the selected item is displayed.
[Incoming call vib.]
Sets the vibration pattern for voice/video call.
[Mail/SMS vib.]
Sets the vibration pattern for receiving mail/message R/F.
[Alarm/Schedule vib.]
Sets the vibration pattern for the Alarm/schedule alert.
[Incoming call vol.]
Adjust the incoming call volume for voice/video call.
Note
• There are 2 types of Manner Mode: "General manner" and "Original manner mode".→P98
• appears at the top of the screen when Manner Mode is activated.
• A notification screen appears when you try to play a melody, video or i-motion, while Manner Mode is
activated.
• Even when Manner Mode is activated, the camera shutter tone sounds.
Default Manner Mode
Off
Pattern 1
Pattern 2
Pattern 3
䋺The handset does not vibrate.
䋺The handset repeatedly vibrates for 0.5 seconds, then stops vibrating for 0.5 seconds.
䋺The handset repeatedly vibrates for 1 seconds, then stops vibrating for 0.5 seconds.
䋺The handset repeatedly vibrates for 3 seconds, then stops vibrating for 0.5 seconds.
Originalmanner
mode setting
screen
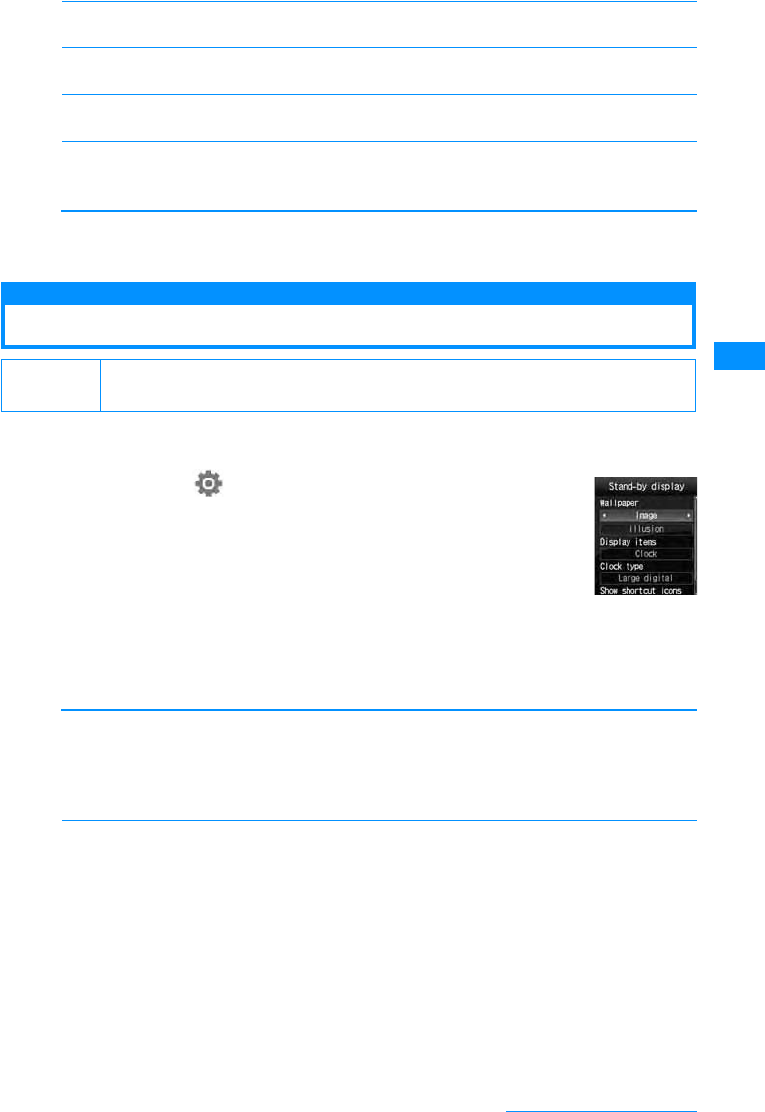
99
Sound/Screen/Light Settings
[Mail/SMS vol.]
Adjust the incoming tone volume for Mail/Message R/F/SMS.
[Alarm/Schedule vol.]
Adjust the alarm tone volume for Alarm/Schedule.
[Effect/Popup tone]
Adjusts the effect sound or volume when the popup is displayed.
[Low battery alert]
Set whether to sound an alarm when the battery level is low.
X"On" / "Off"
cI[Done]
Set as stand-by
Changing Stand-by Display
Sets the items (Time, Calender, Schedule, Shortcuts, Wallpaper) to be shown on the Stand-by
display.
aM[Menu]X(Settings)X"Display"X"Set as
stand-by"
bPerform the following operation
•C[List] : List of the items screen of the selected item is displayed.
•M[Preview] : The selected preview screen is displayed.
[Wallpaper]
Sets the image to be displayed on the Wallpaper screen.
XDXon the image name field, C[List]XSelect image data
[Display items]
Sets the display of Clock or Calendar on the Stand-by display.
Default Wallpaper: Image, illusion Display items: Clock Clock type: Large digital
Show shortcut icons: ON䇭
Image
i-motion 䋺Select an image saved in "Image" in the "Data box".→P194
䋺Select a movie/i-mode saved in "i-motion" in "Data box".→P201
Do not show:
Clock:
Calendar:
䋺Do not display the Clock or the Calendar.
䋺Display the Clock.
䋺Display the calendar.*1
䍃You can display the calendar Schedule screen on the Stand-by screen (P234) by
performing XCX Display a calendar XC[OK]
Calendar + Schedule:
䋺Display a calendar and schedule events for today.*2
䍃You can view the schedule list screen from the Stand-by screen (P234) by performing
XCX Display a Schedule XC[OK] . Also, the calendar screen of Schedule (P234)
can be displayed from the Stand-by screen by performing the same steps as in setting
the "Calendar".
Stand-by display
screen
Continue on the next page
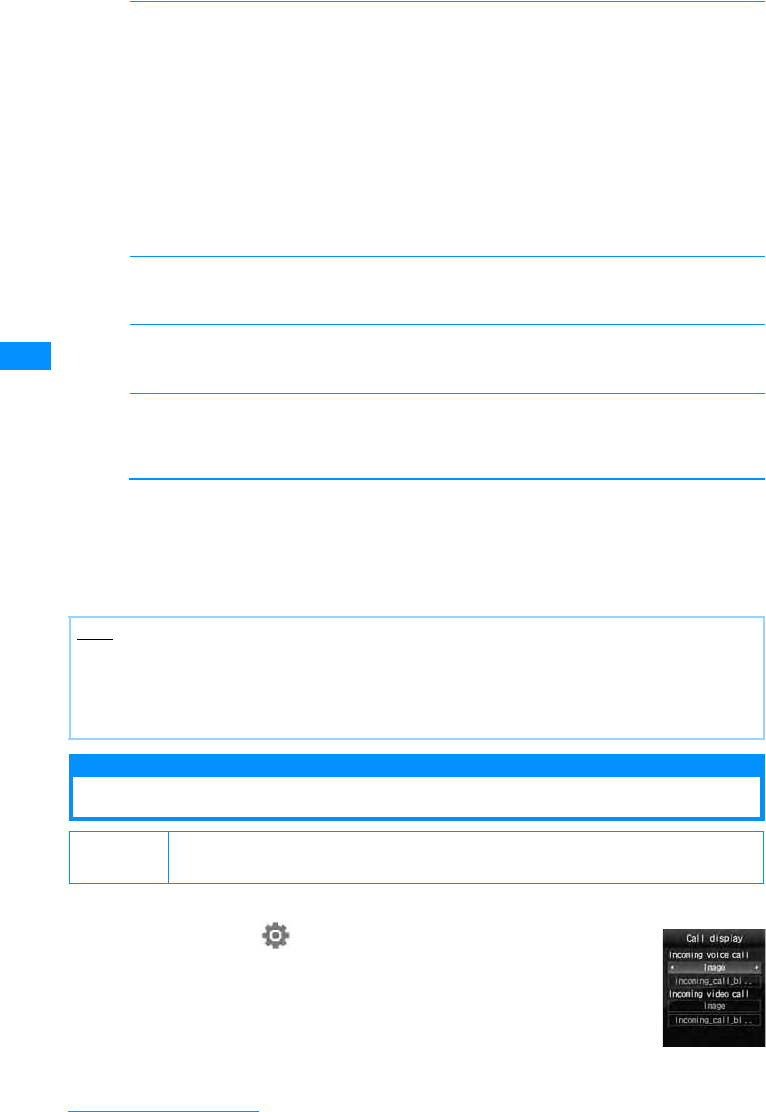
100
Sound/Screen/Light Settings
[Clock type]䋪2
Sets the displaying method of the Clock type.
• The following screen will be displayed from the Stand-by screen by performing XCX Clock type
XC[OK]
- If "Small Digital", "Large Digital" or "Analog" is set Alarm List Screen (P231) can be displayed.
- If "Dual clock" is set
If you select a clock for the Home city (P240), the "Time and Date Settings Screen"(P47) is displayed.
If you select a second City, "Stand-by display" opens.
[Clock font color]䋪3
Sets the font color of the Clock.
XJselects the color.
[Sub clock]䋪4
Set the city for the second clock.
XC[List]XSelect a city by using J
[Show shortcut icons]
Set whether to display the function mark (shortcut icons) assigned to each key of the touchpad to the
Stand-by display.→P33
X"ON"/"OFF"
䋪1䋺 Can not selected if a Flash movie is set as wallpaper.
䋪2䋺Shown when "Clock" is selected on "Display items" menu.
䋪3䋺 Shown when "Dual clock" is selected on "Clock type" menu.
䋪4䋺 Shown when "Small digital" is selected on "Clock type" menu.
cI[Done]
Call display
Setting the Image When Receiving a Call
Sets the image shown on the screen when receiving a call.
aM[Menu]X"Settings"X"Display"X"Call display".
Small Digital
Large digital
Analog
Dual clock
䋺Shrinks the digital clock to fit to screen.
䋺Enlarge the digital clock to fit to the screen.
䋺Sets to display the analog clock on the screen.
䋺Displays the time/date for two cities on the Stand-by display. Selects the second city to
be displayed on the bottom of screen from the "2-nd City" menu.
Note
• Some images/Movies/i-motion may not be set for the Stand-by display.
• The Movies/i-motion movie set for the Stand-by display is played when the FOMA handset is opened and
stops when the handset is closed. When the FOMA handset is opened, use P to play or stop the i-motion
movie.
• Web To function from Movies/i-motion set to the Stand-by display is not available.
Default Incoming voice call: Image, incoming_call_black Incoming video call: Image,
incoming_call_black
Call display
Setting screen
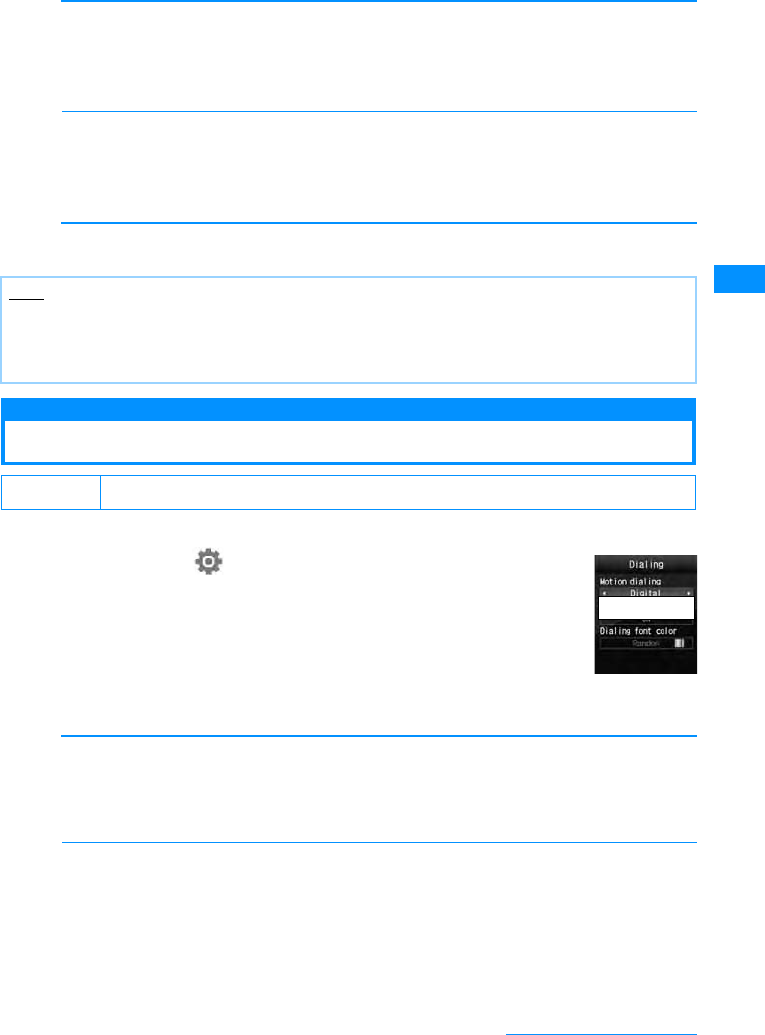
101
Sound/Screen/Light Settings
bPerform the following operation
•C[List] : List of the items screen of the selected item is displayed.
•M[Preview] : The selected preview screen is displayed.
[Incoming voice call]
Sets the image shown on the screen when receiving a voice call.
XDXon the image name field, C[List]XSelect image data
[Incoming video call]
Sets the image to be displayed on the incoming voice call screen.
XDXon the image name field, C[List]XSelect image data
cI[Done]
Dialing
Setting the Screen When Dialing
Sets the screen to enter numbers on the Stand-by display.
aM[Menu]X(Settings)X"Display"X"Dialing"
bPerform the following operation
•C[List] : List of the items screen of the selected item is displayed.
[Motion dialing]
Sets the display method of the entered numbers.
[Dialing Quick Search]
When the number is entered 1 digit or 2 digits, sets whether to search the Phonebook entry of
corresponding registration number.
X"On"/"Off"
Image
i-motion䋺Select an image saved in "Image" in the "Data box".→P194
䋺Select a movie/i-mode saved in "i-motion" in "Data box".→P201
Image
i-motion䋺Select an image saved in "Image" in the "Data box".→P194
䋺Select a movie/i-mode saved in "i-motion" in "Data box".→P201
Note
• Movies/i-motion that includes sounds only cannot be set as the Call display.
• When the Call display is set to Movies/i-motion, the "Select ring tone"(P92) will be changed to the same.
• If you change the setting of Incoming call screen from the movies or i-motion which has sound to which does
not, the ring tone settings goes back to the previous settings automatically.
Default Motion dialing: Digital Dialing Quick Search: ON
Digital
Picture
Off
䋺Display in digital design.
䋺Display in painting design.
䋺Display in no effect.
Dialing screen
To be
Continue on the next page
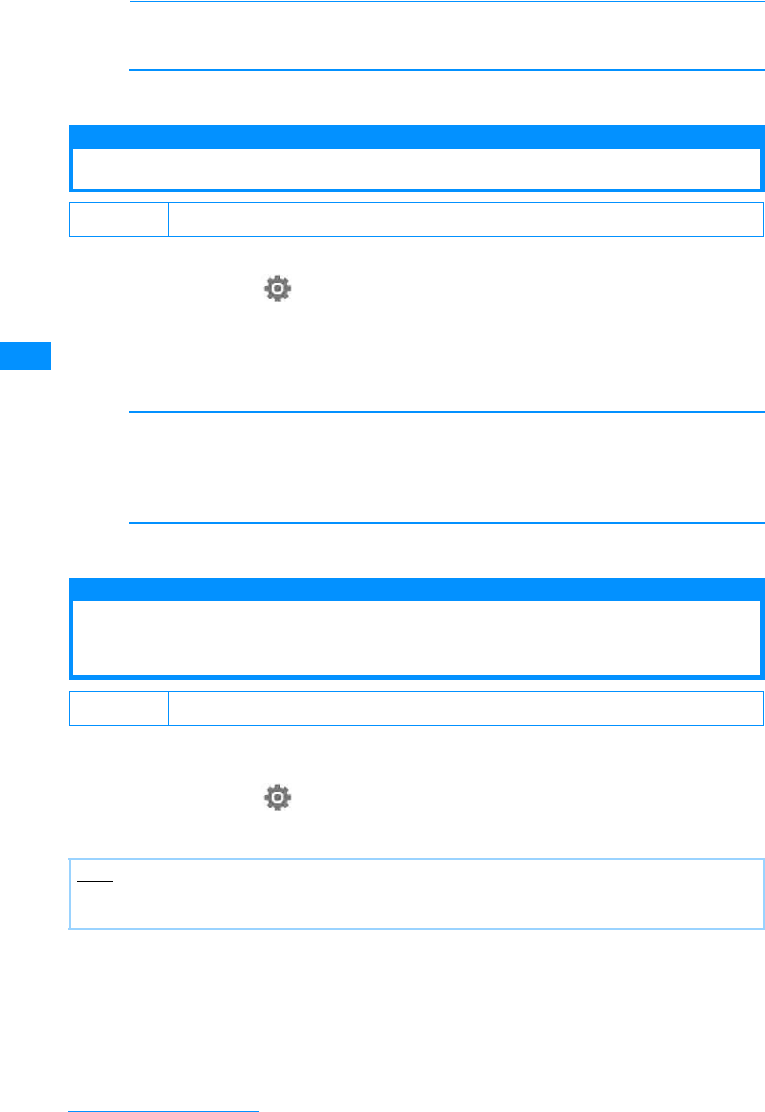
102
Sound/Screen/Light Settings
[Dialing font color]
Sets the font color of the number entered when "Motion dialing" is set to "OFF".
XSelect Dialing font color
cI[Done]
Wake-up display
Displaying a Wake-up Message
You can display a greeting when you turn the handset power on.
aM[Menu]X"Settings"X"Display"X"Wake-up display"
bPerform the following operation
•C[List] : List of the items is displayed.
•M[Preview] : The selected screen is shown
[Wake-up display]
Sets the image shown on the screen when the handset is starting.
XDXon the image name field, C[List]XSelect image data
cI[Done]
Display phonebook image
Displaying an Image Saved in the Phonebook on
the Incoming Call <Display phonebook image>
When a call with the Caller ID from the other party saved in the phonebook arrives, you can
display the image set in the phonebook.
aM[Menu]X(Settings)X"Call/VT/Dial"X"Incoming call"X
"Display phonebook image"X"On"/"Off"
Default Image, pwron
Image
i-motion 䋺Select an image saved in "Image" in the "Data box".→P194
䋺Select a movie/i-mode saved in "i-motion" in "Data box".→P201
Default On
Note
• The priority order for image display on an incoming call is as follows:
aImage set in the Phonebook bImage set for Group in the Phonebook cImage set for Call display
103
Sound/Screen/Light Settings
Back Light
Setting the Back Light of Display
You can set the Display backlight (Backlight).
aM[Menu]X(Settings)X"Display"X"Light"
bPerform the following operation
•C[List] : List of the items screen of the selected item is displayed.
[Display duration]
Set the Display backlight duration of the Display between 5-30 seconds.
XEnter Display duration
[Display brightness]
Sets the backlight level of the Display.
X"100%"/"80%"/"60%"/"40%"
[AC connected]
Sets the brightness when the AC charger is connected.
cI[Done]
Power saver mode
Displaying in the Power Saving Mode
Sets the backlight level of the Display to the power saving mode of the lowest level.
aM[Menu]X(Settings)X"Others"X"Power saver mode"X
"ON"/"OFF"
Color Theme
Setting the Display Color
You can select a combination of screen colors and a menu format.
aM[Menu]X"Settings"X"Display"X"Color theme"X
"Illumination dot"/"Equalizer line"
Illumination dot 䋺 Displays the menu in icon shape list with the black-based color scheme.
Equalizer line 䋺 Displays the menu in list with bright blue and gray-based color.
Default Display duration: 10 Seconds Display brightness: 100% AC Connected: Display setting
Terminal setting
Always on
䋺In accordance with the setting in "Display duration" and "Display brightness".
䋺Light is always on.
Default Off
Default Illumination dot
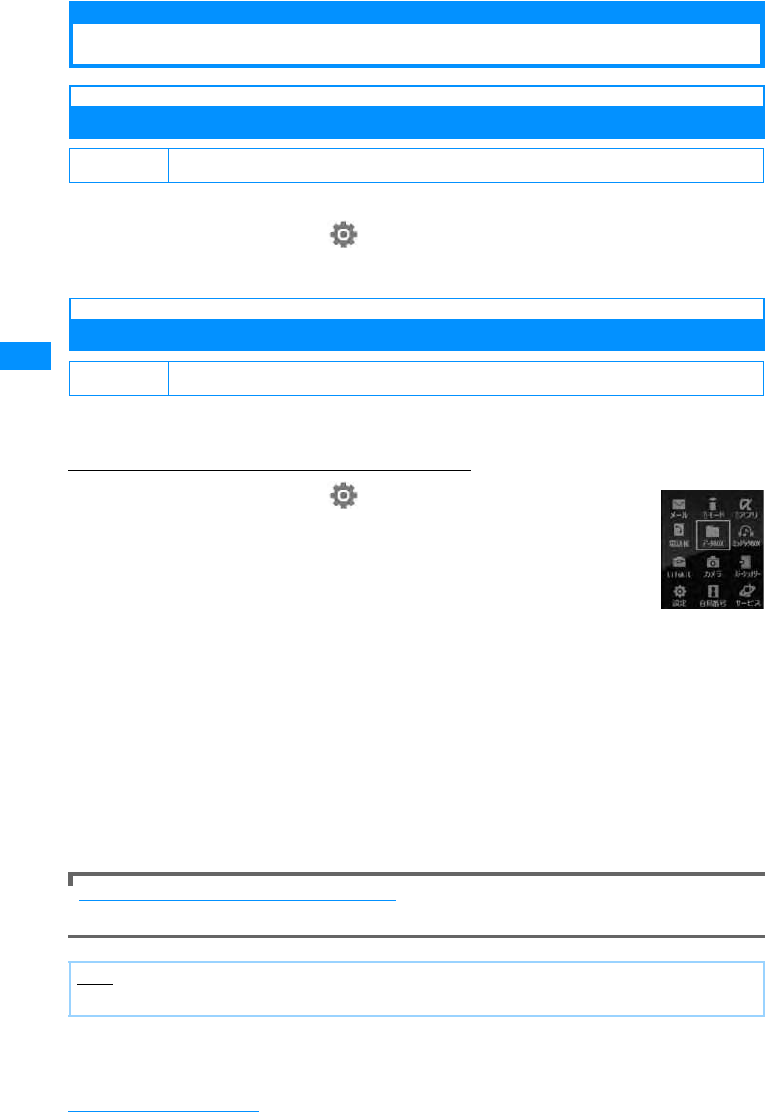
104
Sound/Screen/Light Settings
Menu settings
Changing the Appearance of Main Menu
Menu guidance
Showing Guidance of Main Menu
You can set whether display the guidance of an icon selected on Main Menu.
aSelect M[Menu]X(Settings)X"Display"X"Menu settings"X
"Menu guidance"X"ON"/"OFF"
Menu Customization
Changing the Display Method of Main Menu
You can change the display of the Main menu. Also, you can save up to two combinations of
Main menu icons.
Example: Changing a combination of Main menu icons
aSelect M[Menu]X(Settings)X"Display"X"Menu
settings"X"Menu customization"X"Customize 1"/
"Customize 2"
Select a saving destination for combinations of icons from "Customize 1"
or "Customize 2".
• To open a preview screen of the main menu, move the cursor to an item to change
and press M[Preview] on the "Menu customization" screen.
䂓When you do not wish to change the combination of icons
Select "Color theme".
The Main menu display will be in accord with the "Color Theme".
Menu customization will terminate.
bMove cursor to an icons to changeXC[Change]XSelect new
iconXI[Done]X"Yes"
Select an icon from images saved in "My picture" in the "Data box"
䂓To cancel changing of the icons
Select "No" on the confirmation screen for saving.
To initialize the main menu to the default settings
On the customize screen you want to restore M[Menu]X"Restore to default"XSelect "Yes"
Default On
Default Color theme
Note
• Images smaller than 80 x 70 in pixels can be used as icons for customization.
Customize
screen
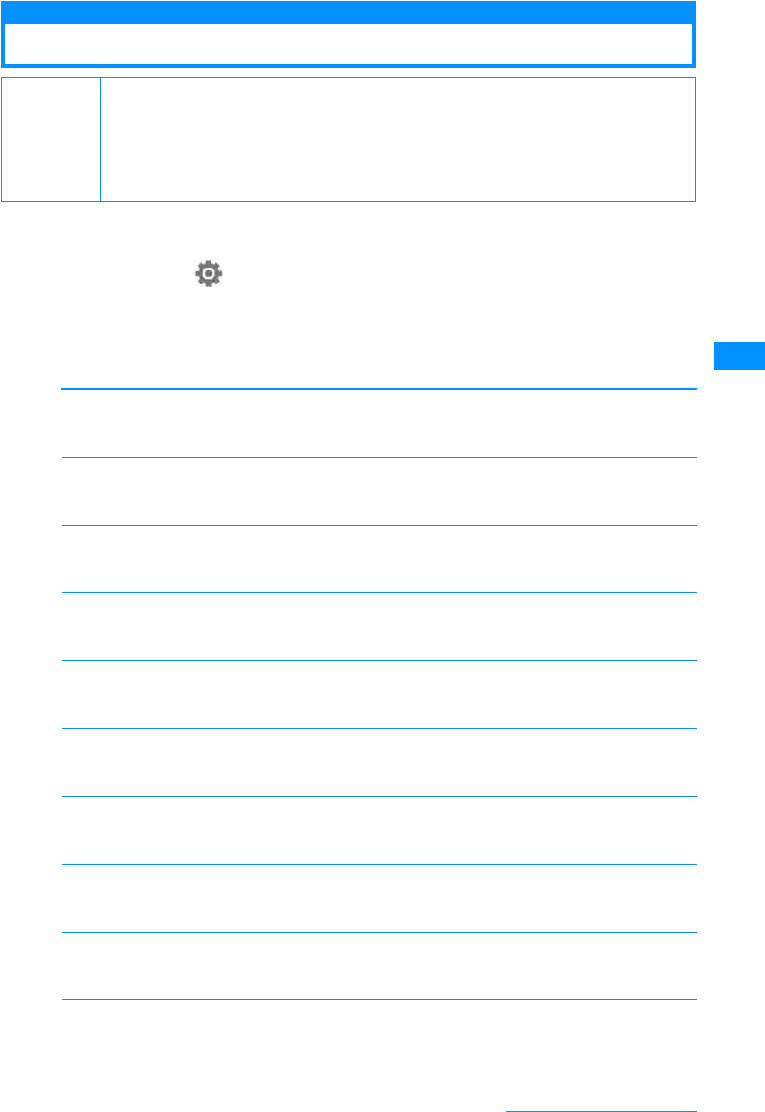
105
Sound/Screen/Light Settings
Illumination dot Settings
Setting Incoming Call Light
You can set the incoming or alarm illumination to On or Off, or set a combination of illumination
colors for each item.
aM[Menu]X(Settings)X"Display"X"Lighting LED"
bPerform the following operation
•C[List] : List of the items screen of the selected item is displayed.
•M[Preview] : The selected lighting pattern is displayed.
[Lighting]
Sets whether to light/blink the light of the illumination.
X"ON"/"OFF"
[Incoming voice call]
Sets illumination pattern/color when receiving a call.
XSelect pattern
[Incoming video call]
Sets illumination pattern/color when receiving a video call.
XSelect pattern
[New mail]
Sets illumination pattern/color when receiving a new mail.
XSelect pattern
[New message R]
Sets illumination pattern/color when receiving a new message R.
XSelect pattern
[New message F]
Sets illumination pattern/color when receiving a new message F.
XSelect pattern
[New SMS]
Sets illumination pattern/color when receiving a new SMS.
XSelect pattern
[New Voice mail]
Sets illumination pattern/color when playing a Voice mail message.
XSelect pattern
[New Record message]
Sets illumination pattern/color when playing Record message.
XSelect pattern
[Playing music]
Sets illumination pattern/color when playing music.
XSelect pattern
Default
Lighting: ON Incoming voice call: Red Incoming video call: Red & White New mail: Blue
New message R: Blue & White
New message F: Yellow & Pink New SMS: Yellow & Aqua Voice mail: Pink & White
Record message: Green & Yellow Playing music: Pink & Aqua Alarm; Blue & Pink & Aqua
Schedule/To Do list: Blue & Pink & Aqua
Unread message: OFF
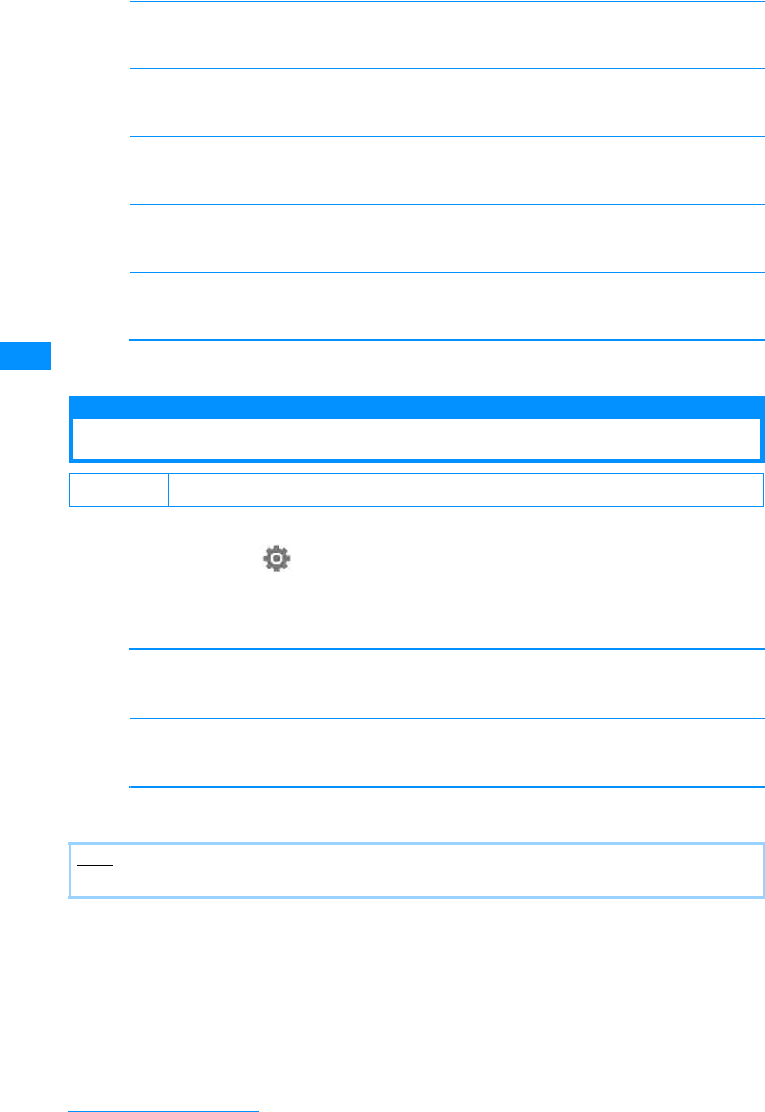
106
Sound/Screen/Light Settings
[Alarm]
Sets illumination pattern/color when an alarm is activated.
XSelect pattern
[Schedule/To do list]
Sets illumination pattern/color for the set time of Schedule/To do list.
XSelect pattern
[During call]
Sets illumination pattern/color during a call.
XSelect pattern
[Missed call]
Sets whether to light the call indicator if you could not answer a call.
XON/OFF
[Unread message]
Sets whether to light the call indicator when an unread message remains.
XON/OFF
cI[Done]
Set Date&Time
Setting Time Format
You can set the display format for date/time.
aM
[Menu]
X
(Settings)
X
"Date&Time"
X
"Date&Time format"
bPerform the following operation
•C[List]: List of the items screen of the selected item is displayed.
[Date format]
Set the display format for the date.
X"dd/mm/yyyy"/"mm/dd/yyyy"/"yyyy/mm/dd"
[Time format]
Set the display format for the time.
X"12-hour"/"24-hour"
cI[Done]
Default Date format: MM/DD/YYYY Time format: 12-hour
Note
• yyyy=year, mm=month, dd=day in the display.
107
Sound/Screen/Light Settings
Select language
Switching the Display Language to English
You can switch the language of the displayed function names or messages between Japanese
and English.
aM[Menu]X(Settings)X"Others"X"䊋䉟 䊥 䊮䉧䊦 (Bilingual)"
X"ᣣᧄ⺆ (Japanese)"/"English"
Default Japanese
Note
• When set to English, "Select language" is displayed as "䊋䉟 䊥 䊮䉧䊦 (Bilingual)"
• The settings of this function are recorded on the UIM. If another UIM is inserted into the phone, the setting
on a another UIM has priority.


109
Security Settings
Password
Passwords ......................................................................................................................... 110
Changing Passwords............................................................................New Passwords 111
Setting the UIM PIN ........................................................................................... PIN code 112
Unlocking a Locked UIM................................................................................................... 112
Restricting the Handset Operations
Lock Functions.................................................................................................................. 113
Locking the Handset to Prevent Use by Others............................................... Lock all 113
Stopping Incoming/Outgoing Calls ................................................................................. 114
Disabling Phonebook or Datebook Viewing.....................................Data access lock 115
Preventing Sidekey Operations .............................................................Keypad unlock 116
Restricting a Call/Mail/Data Transfer
Setting Redial/Received Call Log Display .............................. Display Call/Mail Logs 117
Displaying Secret Data .............................................................................. Secret mode 117
Rejecting Calls from a Specific Number ................................................ Reject on List 118
Rejecting All Incoming Calls..................................................................Reject all calls 119
Actions When Receiving Calls from Unknown Callers ................. Anonymous caller 119
Muting Ring Tones for Unknown Callers ...................................... Set mute ring(sec.) 121
Rejecting Calls from Unknown Caller ................................................ Reject unknown 121
Other "Security Settings"
Other "Security Settings"................................................................................................. 122
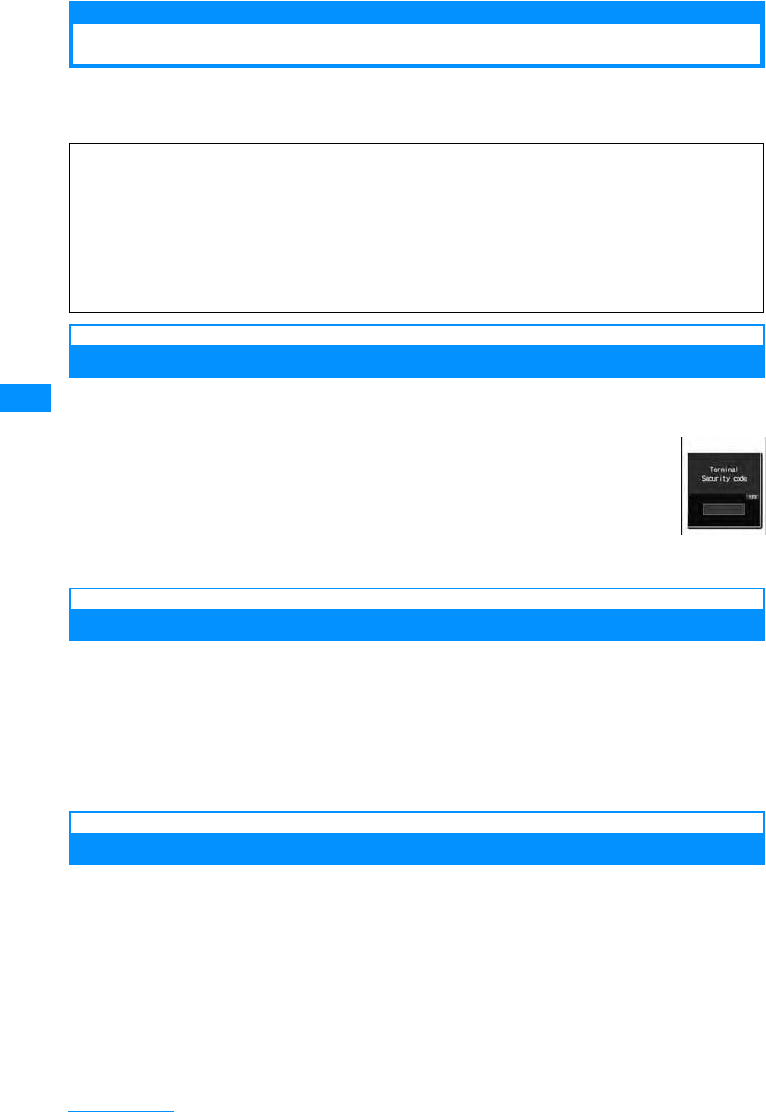
110
Security Settings
Passwords
Some functions of the FOMA handset require a password. In addition to the Security Code,
there are the network security code and the i-mode Password. These passwords help you
utilize your handset.
Security Code
The Security Code is a 4-8 digit number. The Security Code is set to "0000" by default and ,
however, you can change the code by yourself.→P111
If the Security Code entry screen opens, enter the 4䌾8 digit Security Code and
press C[OK].
• The Security Code is marked as "䋪" on the screen. The actual numbers entered will not be
displayed.
Network Security Code
The Network Security Code is a 4-digit number that is required to access procedures and to
use network services and is set to the number you selected at subscription. You can change
the code by yourself. If you have "DoCoMo ID/Password" for "My DoCoMo", the
comprehensive support site for PCs, you can change the network security code by visiting the
web site from your PC. You can change the Network Security Code by yourself by accessing
"ฦ⒳ᚻ⛯䈐 (Procedures)" on DoCoMo e-site using i-mode.
• For information on accessing "My DoCoMo" and the "DoCoMo e-site", see the back of this manual.
i-mode Password
Add/remove from my menu, message service, i-mode service fees/cancellation require the
4-digit "i-mode password" to change.
(Some other information service providers may set passwords for their sites)
i-mode password is originally set to "0000", but you can change it at any time. Access "iMenu"
X"ENGLISH" X"Options" X"Change i-mode Password" if you are using i-mode.
Warning about Passwords
• Avoid setting a password using your birthday, a part of your phone number, your address or room number,
1111 or 1234, that can be easily guessed by others. Be sure to write down the set passwords and store
them in a separate location.
• Do not reveal your passwords to others. DoCoMo is not responsible for damage caused by misuse of your
security codes by others.
• DoCoMo will never ask you for your passwords.
• If you forget your passwords, you need to bring an ID (driver's license, etc.), the handset and the UIM to a
service counter such as DoCoMo shop. For details, contact a "DoCoMo Information Center" on the back of
this manual.
Security Code
entry screen
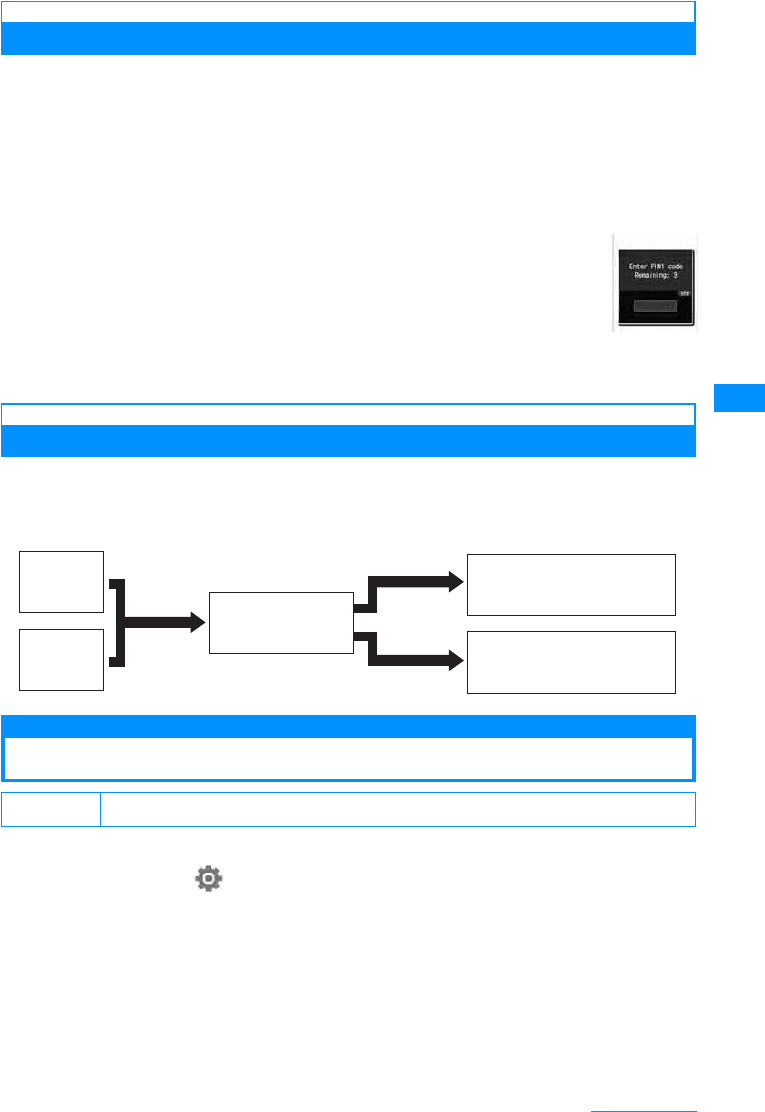
111
Security Settings
UIM PIN/UIM PIN2
You can assign 2 PIN numbers to the UIM, UIM PIN and UIM PIN2. These codes are set to
"0000" by default, however, you can change them by yourself.→P112
The UIM PIN is a 4- to 8-digit number (code) required to identify the user every time the UIM is
inserted into the handset or the handset power is turned on in order to prevent unauthorized
use. The UIM PIN entry is required to make or receive calls, and operate the handset. The UIM
PIN2 is a 4- to 8-digit number used to reset outgoing call charges, incoming call charges (if
any) and the total of both, to reset total call charges, to set the maximum limit for call charges,
to set the currency, or to use or apply for User certificates.
If the UIM PIN/UIM PIN2 entry screen opens, enter the 4- to 8-digit UIM PIN/
UIM PIN2 and press C[OK].
• The entered UIM PIN/UIM PIN2 is marked as "䋪" on the screen. The numbers actually
entered will not be displayed.
• Use the UIM PIN and UIM PIN2 you set previously if you purchase a new handset but keep
the same UIM.
PIN Unlock Code
The PIN Unlock Code is an 8-digit number to unlock the UIM PIN or UIM PIN2.→P112
You cannot change it.
• If you fail to enter the correct Pin Unlock code 10 times, the UIM PIN1PIN2 functions will be completely locked.
New Passwords
Changing Passwords
The security code can be changed.
aM[Menu]X(Settings)X"Lock/Security"X"Change Security
code"
bEnter the current security code
Change Security code screen opens.
cEnter a new security code
dEnter the new security code again.
䈗 ᄾ⚂ᤨ Security code (4 digits): 0000
UIM PIN
entry screen
(Example: UIM
PIN)
ᣂⷙ PIN1 䋯PIN2 䉮䊷䊄䈱⸳ቯ
10 ࿁ㅪ⛯
ജ䊚 䉴
ജ OK
䈱႐ว
3࿁ㅪ⛯
ജ䊚 䉴 PIN 䊨 䉾 䉪 ⸃㒰䉮 䊷䊄
䈱ജ
䊄 䉮 䊝䉲䊢 䉾 䊒⓹ญ䈮䈍䈇ว䉒
䈞䈒 䈣䈘 䈇䇯
PIN1 䉮䊷䊄
䈱ജ
PIN2 䉮䊷䊄
䈱ജ
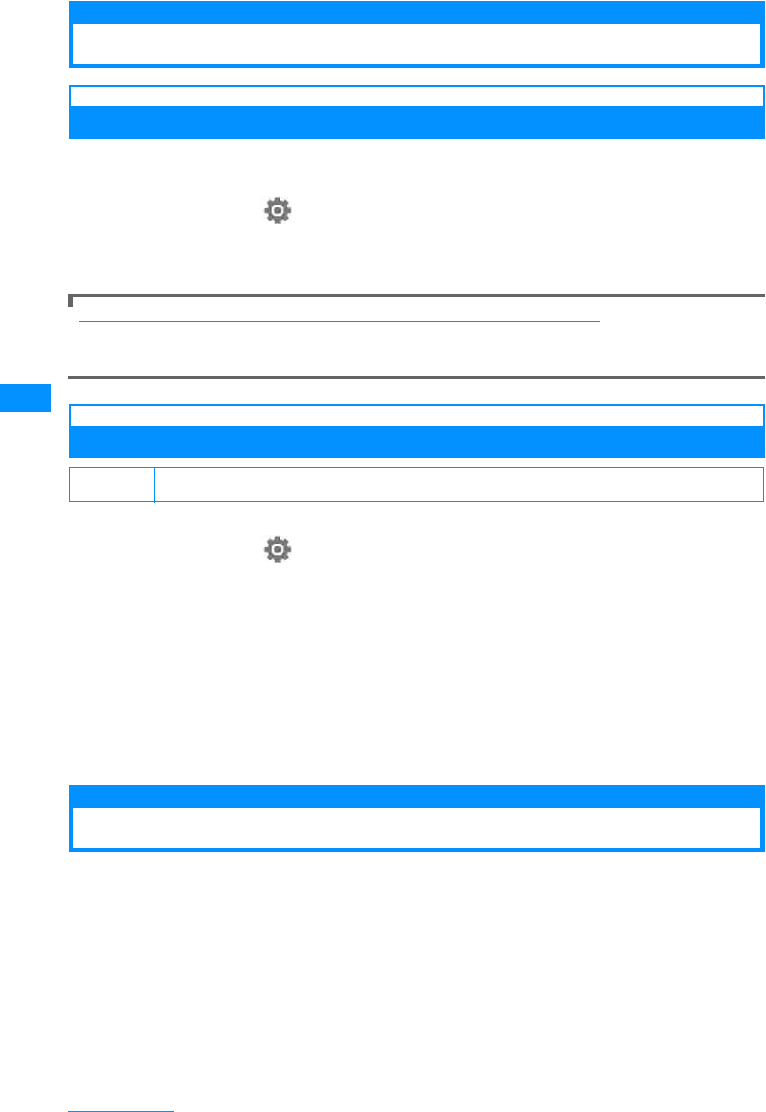
112
Security Settings
PIN code
Setting the UIM PIN
PIN1 code request
Setting to Enter UIM PIN when the Handset is Turned On
Sets the FOMA Handset so it displays UIM PIN 1 entry screen and can't be used without
entering the UIM PIN at startup.
aM[Menu]X(Settings)X"Lock/Security"X"PIN code"XEnter
security codeX"PIN1 code request"X"ON"/"OFF"XEnter PIN1
code
Making emergency calls (to 110, 119 or 118) when the PIN1 entry screen is open.
You can make emergency calls (to 110, 118 or 119) even when the PIN1 entry screen is open.
XI[Emergency] Xmove the cursor to an emergency number XC[OK]/A
UIM PIN/UIM PIN2Change code
Changing UIM PIN/UIM PIN2
• Set "PIN1 code request" to "ON" before changing the UIM PIN.
aM[Menu]X(Settings)X"Lock/Security"X"PIN code"XEnter
Security code
b"Change PIN1 code"/"Change PIN2 code"XEnter Current UIM
PIN/UIM PIN2
The new UIM PIN/UIM PIN2 entry screen opens.
cEnter the new UIM PIN/UIM PIN2 (4- to 8-digit)
The new UIM PIN/UIM PIN2 reentry screen opens.
dReenter the UIM PIN/UIM PIN2 entered in Step 3
Unlocking a Locked UIM
If you enter an incorrect UIM PIN/UIM PIN2 three times in a row and the PIN lock screen opens,
enter the PIN unblock code to cancel the lock.
• The PIN Unlock code is written on the FOMA subscription application form (customer's copy).
• You need to set new UIM PIN/UIM PIN2 after unlocking UIM PIN.
䈗ᄾ⚂ᤨ UIMPIN: 0000 UIMPIN2: 0000
113
Security Settings
aPIN Lock screenXEnter PIN Unlock code (8 digits)
The new UIM PIN/UIM PIN2 entry screen opens.
bEnter the new UIM PIN/UIM PIN2 (4- to 8-digit)
The reentry screen for confirmation screen opens.
cReenter the UIM PIN/UIM PIN2 entered in Step 2
Lock Functions
Lock all
Locking the Handset to Prevent Use by Others
Locks the handset to prevent from using it.
• When Lock all is activated, the only operations you can perform are power On/Off, emergency calls, and cancel
Lock all.
aM[Menu]X(Settings)X"Lock/Security"X"Lock"X"Lock all"
XEnter Security codeX"Yes"/"No"
Calling Emergency Numbers (110, 119, and 118) During Lock all
Emergency numbers (110, 119, and 118) can be called during Lock all.
XI[Emergency]XMove the cursor to the emergency number XC[OK]/A.
To Cancel Lock all
Enter the security code. If an incorrect security code is entered 5 times, the phone automatically shuts off.
Lock Function Description Reference
Lock all Lock the handset to prevent unauthorized use. P113
Call/Mail lock To prevent unauthorized use of the FOMA handset, you can disable
making calls, entering an address with dial keys, answering calls, or
displaying mail.
P114
Self mode You can disable all functions requiring communications such as making/
receiving calls, using i-mode, or sending/receiving mail. P115
Data access lock You can specify specific functions to lock. P115
Keypad unlock You can lock the Sidekeys to prevent improper operations if the keys are
pressed accidentally when the closed FOMA handset is kept in a bag. P116
Display Call/mail logs You can hide Redial, Received calls, Sent mail logs, and Received mail
logs. P117
Secret mode You can keep someone from displaying the Phonebook entries, schedule,
To Do tasks set as secret data. P117
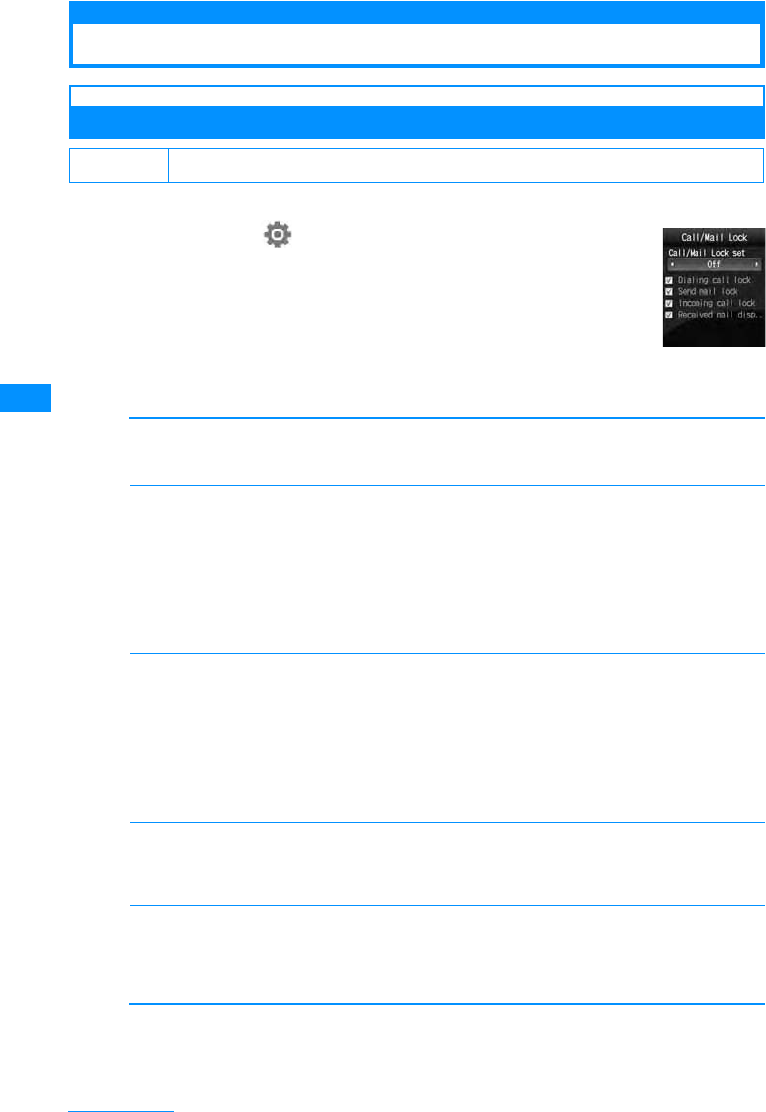
114
Security Settings
Stopping Incoming/Outgoing Calls
Call/Mail lock
Disabling Outgoing or Incoming Communications
Disable making calls, entering an address with dial keys, answering calls, or displaying mail.
aM[Menu]X(Settings)X"Lock/Security"X"Lock"
X"Call/Mail Lock"XEnter Security code
bPerform the following operation
•C[List] : List of the items is displayed.
[Call/Mail Lock set]
Sets whether to activate the Call/Mail Lock. When setting to "On", select from the items follow.
X"On"/"Off"
[Dialing call lock]
Disable the following operations.
• Making calls entering numbers with dial keys
• Making calls using Received calls or mail history
• Making calls to a phone number in the redial list (while allowing calls to a number saved in the phonebook or
an emergency number such as "110", "119", or "118")
• Saving, editing, or deleting a phonebook entry (including exchanging data via infrared communication, or
copying/moving to the microSD memory card)
XCheck off/Uncheck
[Send mail lock]
Disable the following operations.
• Entering a mail address with dial keys
• Sending mail to an address in the redial or received call log (while allowing mail to an address saved in the
Phonebook)
• Performing data communications connecting to a PC, etc.
• Saving, editing, or deleting a phonebook entry (including exchanging data via infrared communication, or
copying/moving to the microSD memory card)
XCheck off/Uncheck
[Incoming call lock]
While the dialing call lock is activated, a missed call icon will not be displayed and the Received call log
cannot be viewed
XCheck off/Uncheck
[Received mail display lock]
While the dialing call lock is activated, an icon will indicate that incoming mail will not be displayed, and
mail in the FOMA handset and received mail log can not be viewed. Disables display of send or received
mails or Message R/F.
XCheck off/Uncheck
cI[Done]
䈗 ᄾ⚂ᤨ Lock Settings: Off
Call/Mail Lock
screen
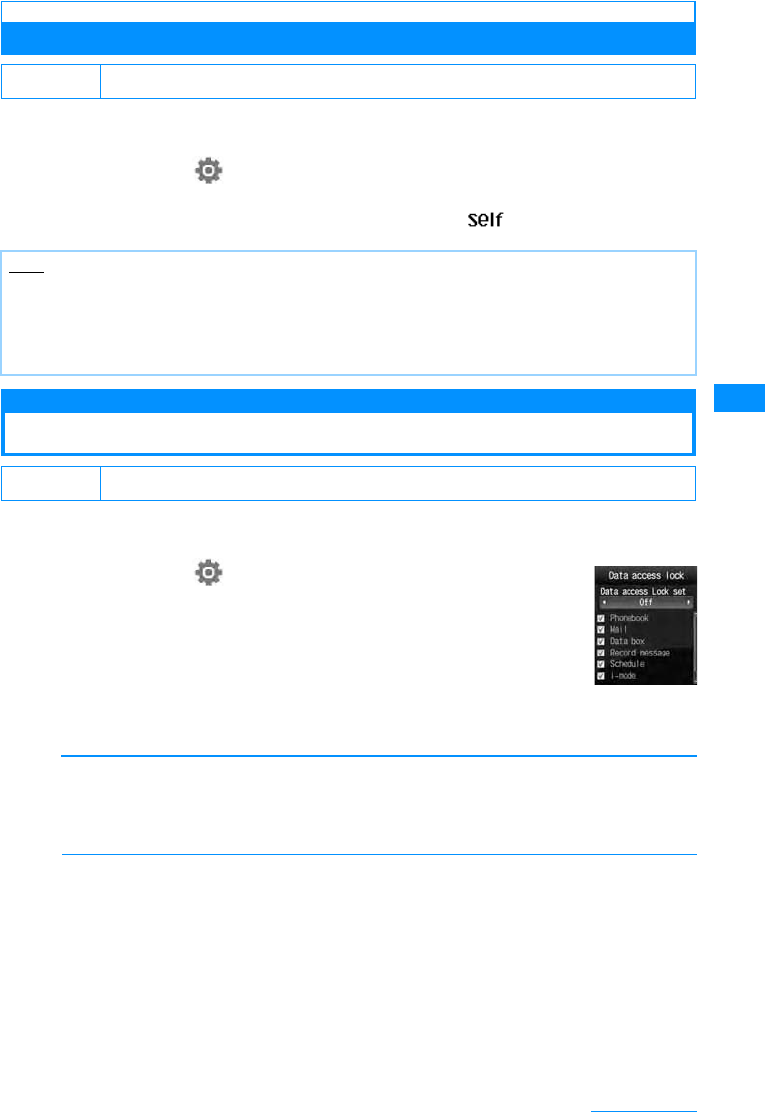
115
Security Settings
Self mode
Stopping All Incoming/Outgoing Calls
Disables all network functions, such as phone, i-mode and mail. Infrared communication is also
impossible.
aM[Menu]X(Settings)X"Call/VT/Dialing"X"Self mode"X
"On"/"Off"
When Self Mode is "On", the Stand-by display displays a .
Data access lock
Disabling Phonebook or Datebook Viewing
You can lock specified functions and require the security code to use the handset, or restrict
the use of the handset.
aM[Menu]X(Settings)X"Lock/Security"X"Lock"
X"Data access lock"XEnter security code
bPerform the following operation
•C[List] : List of the items is displayed.
[Data access Lock set]
Set whether to activate the "Data access lock". When setting to "On", select from the items follow.
While the dialing call lock is activated, an icon will indicate that incoming mail will not be displayed, and
mail in the FOMA handset and received mail log can not be viewed.
X"On"/"Off"
[Phonebook]
The Phonebook can not be used until the Security code is entered.
• In the Redial list or logs, the phone number or mail address sent by the caller/sender will be displayed instead
of the name saved in the Phonebook.
• Receiving Phonebook entries using infrared communication becomes unavailable.
XCheck off/Uncheck
䈗 ᄾ⚂ᤨ Off
Note
• Self mode is deactivated if you try to call an emergency number.
• If Self Mode is active, incoming callers will hear a message indicating that the phone is off.
• Voice mail service and call forwarding service still works in Self Mode.
• All Mails, Message R/F and SMS received while in Self Mode are stored at the i-mode center and SMS
center (respectively). When receiving, after shutting off self mode, check new message/SMS.
䈗 ᄾ⚂ᤨ Lock Settings: Off
Data access
lock set
Continue on the next page
116
Security Settings
[Mail]
The mail function can not be used until the Security code is entered.
• Receiving mail using infrared communication becomes unavailable.
• SMS send while this function is activated is not received automatically. Perform "Check new SMS"
XCheck off/Uncheck
[Data box]
The mail function can not be used until the Security code is entered.
• Receiving data such as images or melodies to be saved in the Data box using infrared communication
becomes unavailable.
XCheck off/Uncheck
[Record message]
The Record message can not be used until the Security code is entered.
• If the Record message is set to "On" and locked, $4 record msg.eps$ is not displayed on the Stand-by screen
even when a message is recorded.
XCheck off/Uncheck
[Schedule]
The schedule function can not be used until the Security code is entered.
• An alarm set for a Schedule event will not sound.
• Receiving schedule events using infrared communication becomes unavailable.
XCheck off/Uncheck
[i-mode]
The i-mode can not be used until the Security code is entered.
• i-mode connections such as "Web to" other than from the i-mode menu screen become unavailable.
• i-Channel tickers will not be displayed.
• Updating software or pattern data for the scanning function becomes unavailable.
• Receiving Bookmarks using infrared communication becomes unavailable.
XCheck off/Uncheck
[i-appli]
The i-appi can not be used until the Security code is entered.
• Receiving i-appli data using infrared communication becomes unavailable.
XCheck off/Uncheck
cI[Done]
Keypad unlock
Preventing Sidekey Operations
The handset can be set to lock the Sidekey when it is closed.
aM[Menu]X(Settings)X"Lock/Security"X"Keypad unlock"X
Perform the following operation
Slide up only 䋺Sidekeys are not available with the FOMA handset closed.
Allow manual unlock 䋺Press F/E 2times while the FOMA handset is closed, the key lock is temporarily
disabled.
䈗 ᄾ⚂ᤨ Allow manual unlock
Note
• If the phone is closed at Photo-mode/Movie-mode, Keypad unlock is not set.
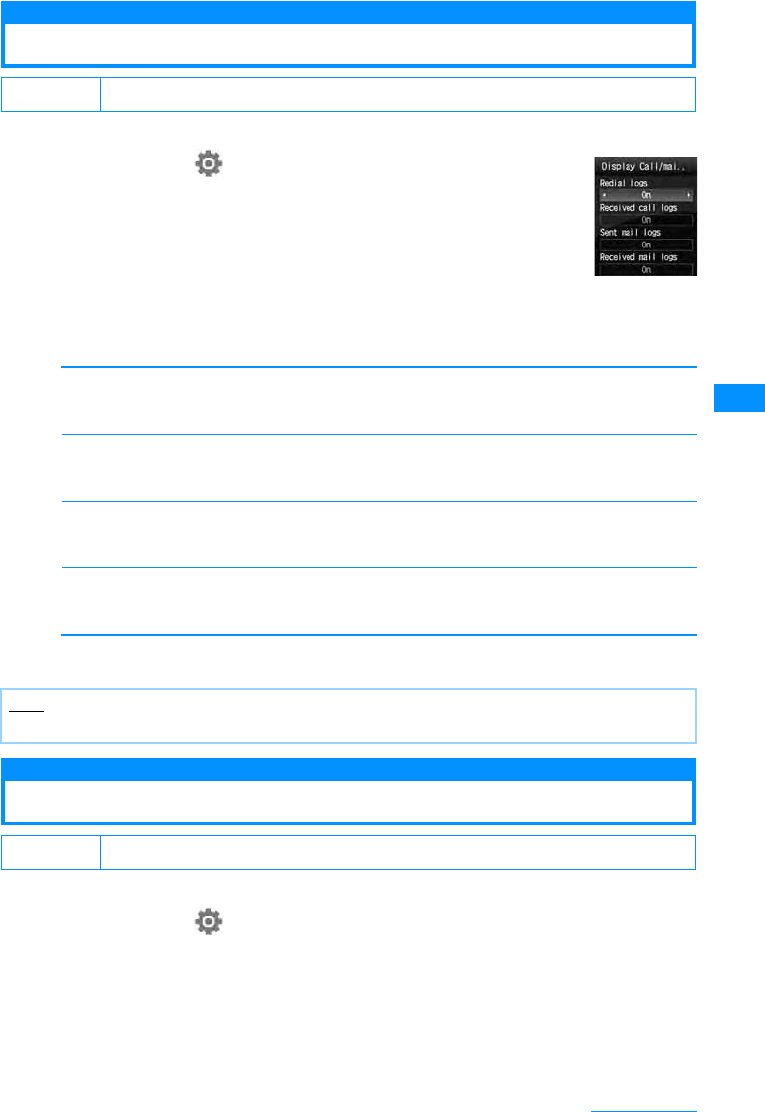
117
Security Settings
Display Call/Mail Logs
Setting Redial/Received Call Log Display
Disables display of redial, received call, sent mail, and received mail logs.
aM[Menu]X(Settings)X"Lock/Security"X
"Display Call/Mail logs"XEnter Security code
bPerform the following operation
The items set to "On" will not be displayed.
•C[List] : List of the items is displayed.
[Redial logs]
Set whether to display the redial function.
X"On"/"Off"
[Missed call logs]
Set whether to display the Received call logs.
X"On"/"Off"
[Sent mail logs]
Set whether to display the sent mail logs.
X"On"/"Off"
[Received mail logs]
Set whether to display the received mail logs.
X"On"/"Off"
cI[Done]
Secret mode
Displaying Secret Data
You can set whether or not to view a secret Phonebook/schedule.
aM[Menu]X(Settings)X"Lock/Security"X"Secret mode"X
Enter security codeXSelect Secret mode settings
䈗 ᄾ⚂ᤨ (All) ON
Note
• If "Received call logs" is set to "Off", Record message cannot be played back.
䈗 ᄾ⚂ᤨ Off
Display Call/
Mail logs
Setting screen
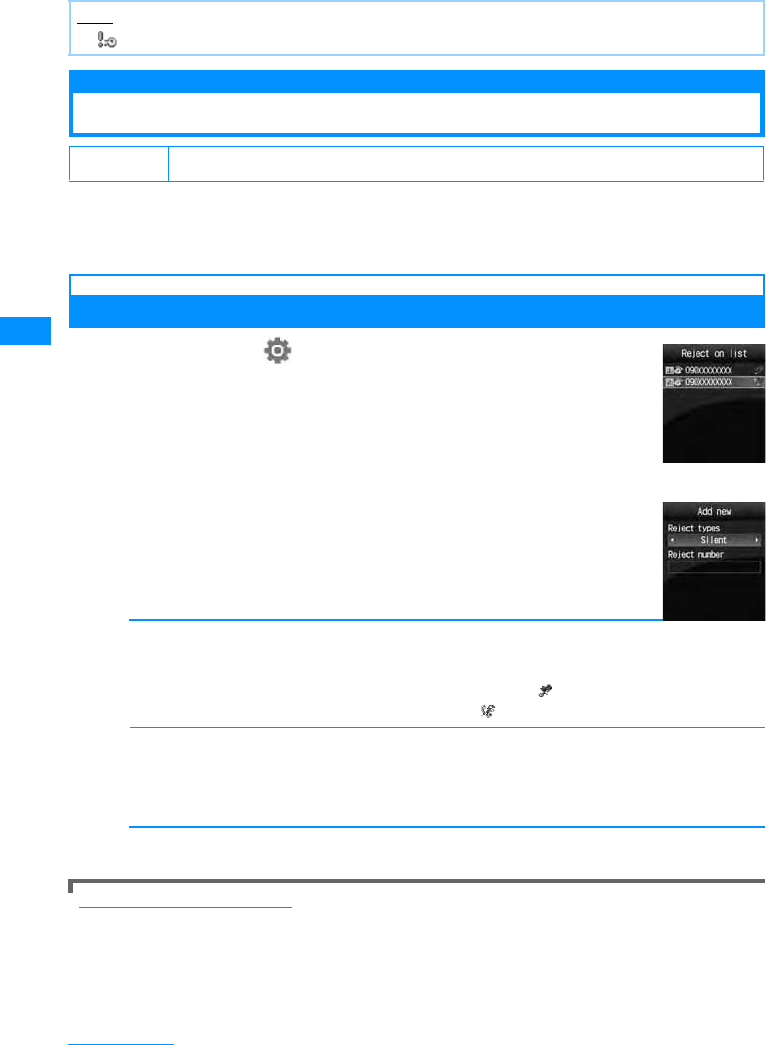
118
Security Settings
Off 䋺Display only general data.
On 䋺Display secret and general data.
Secret only mode 䋺Secret only mode Display only secret data.
Reject on List
Rejecting Calls from a Specific Number
You can reject calls from the specific parties stored in a list.
• This function is available only when the caller sends Caller ID.
• You should set the Caller ID request concurrently.
Saving a Phone Number to Reject
aM[Menu]X(Settings)X"Send/VT/Dialing"X
"Incoming call"X"Accept/Reject call"XEnter security
codeX"Accept/Reject set"XMove to the cursor to
"Reject on list"XI[List]XI[Add]
bPerform the following operation
[Reject types]
Selects action for rejected call.
•C[List] : List of the items is displayed.
[Reject number]
Sets phone number for call rejection.
•M[Search] : Searches and sets number from Phonebook. The name saved in the Phonebook is
displayed on the list.
•C[Select] : Enter and set phone number. The entered phone number is displayed in the list.
cI[Done]
To delete a saved phone number
Select the number to delete from the Reject on list screenXM[Menu]X"Delete"/"Delete all"X"Yes"
Note
• appears at the top of the screen when Secret mode is activated.
䈗 ᄾ⚂ᤨ Accept
Silent
Disconnect all
䋺Receive a call without the Ring tone. Displays a on the list.
䋺You do not receive the call. Displays a on the list.
Reject on List
screen
Add new
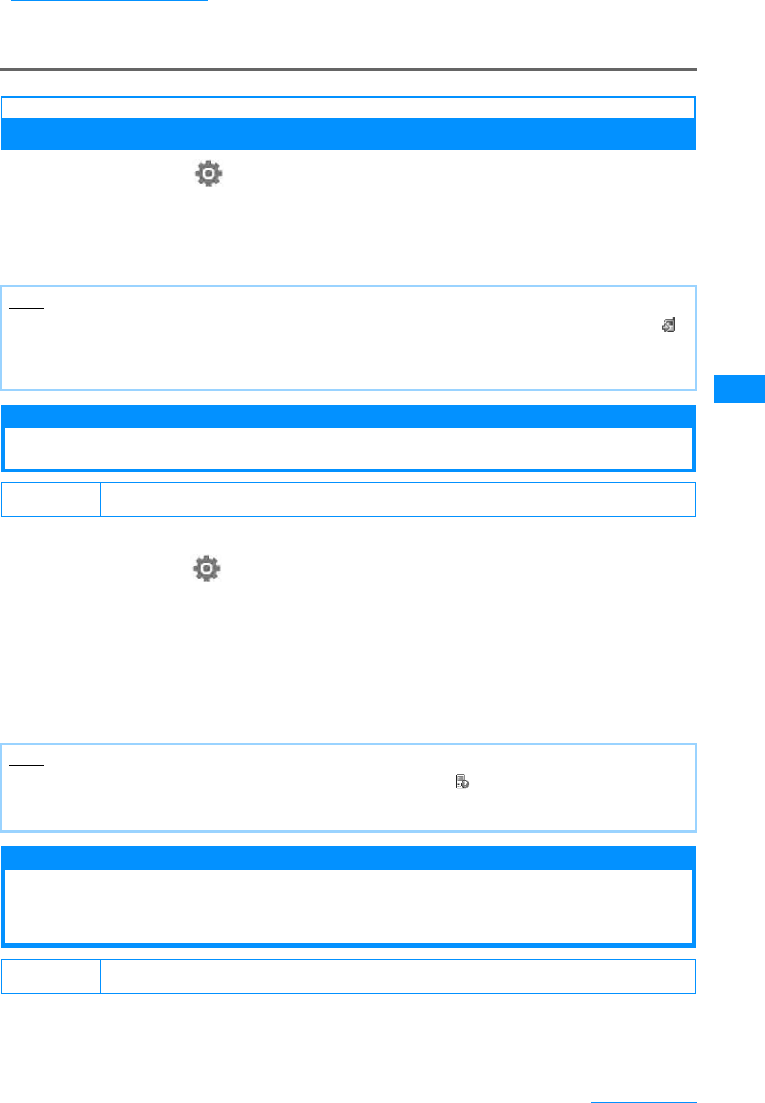
119
Security Settings
To edit a saved phone number
Select a phone number to edit on the Reject on list screen XM [Menu] X Select "Edit"
• If the phone number has already been saved, you can also save the phone number by performing from the Reject
on list screen XM[Menu] X "Add new".
Setting the Reject on List
aM[Menu]X(Settings)X"Send/VT/Dialing"X"Incoming call"
X"Accept/Reject call"XEnter security codeX"Accept/Reject set"
X"Reject on list"
䂓To Release
Select "Accept" on "Accept/Reject call" screen.
Reject all calls
Rejecting All Incoming Calls
You can mute all incoming calls and disconnect without incoming call actions.
aM
[Menu]
X(Settings)X"Send/VT/Dialing"X"Incoming call"
X"Accept/Reject call"XEnter security codeX"Accept/Reject set"
X"Reject all calls"X"Silent"/Disconnect call"
Silent 䋺Receives all calls with the ring tones silent.
Disconnect all䋺 Does not perform the incoming call actions for all incoming calls.
䂓To Release
Select "Accept" on "Accept/Reject call" screen.
Anonymous caller
Actions When Receiving Calls from Unknown
Callers
You can set whether to accept or reject calls without Caller ID depending on the reason for no
Caller ID.
Note
• When the Reject call list is activated,and receive a call from the party registered in the Reject call list,
appears on the Stand-by display and Received call log is recorded as a Missed call. The other party hears
a busy signal.
• i-mode mails or SMS are received regardless of rejection settings.
䈗 ᄾ⚂ᤨ Accept
Note
• When you have a call from the party registered in the Reject call list, appears on the Stand-by display
and Received call log is recorded as a Missed call. The other party hears a busy signal.
• i-mode mails or SMS are received regardless of rejection settings.
䈗 ᄾ⚂ᤨ Anonymous Caller: Disabled Public Phone: Disabled Not Support: Disabled
Continue on the next page
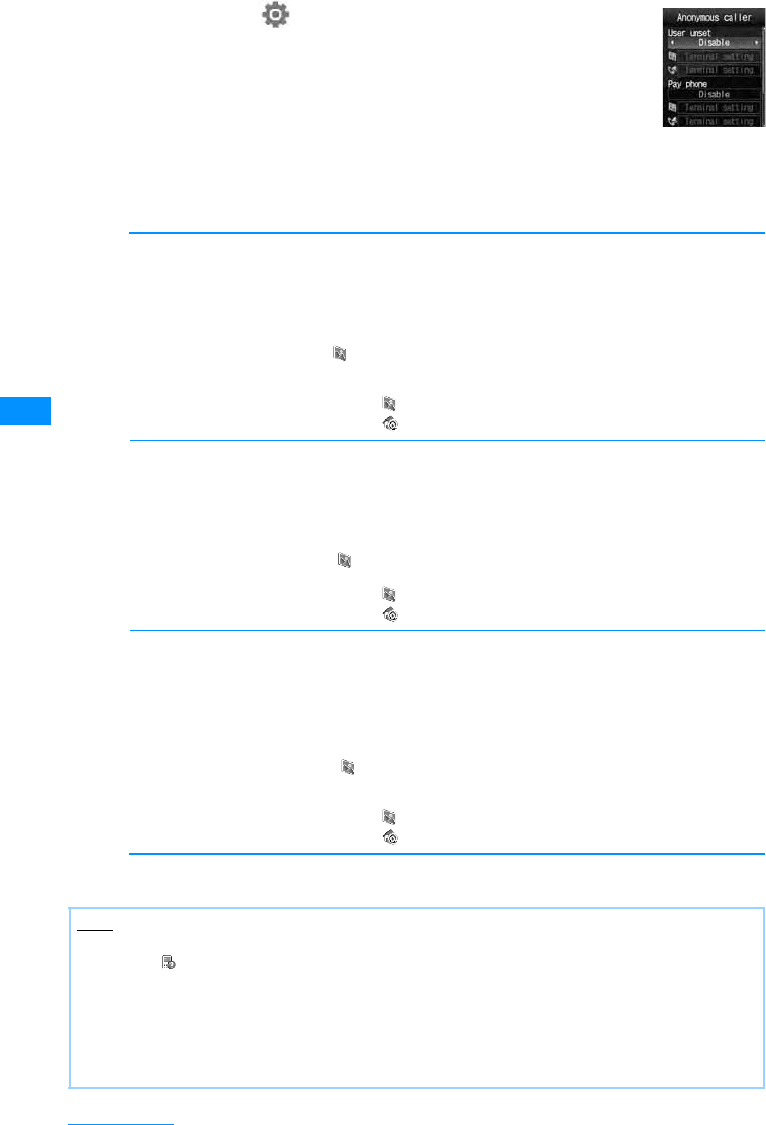
120
Security Settings
aM
[Menu]
X(Settings)X
"Call/VT/
Dialing"X
"Incoming call "X"Anonymous caller"XEnter security
code
bPerform the following operation
•C[List] : List of the items is displayed.
[User unset]
Set options for calls made without the Caller ID because the caller chose not to send Caller ID.
[Pay phone]
Set an option for calls made from Payphone.
[Not support]
Set an option for calls made from overseas or from a fixed line phone via forwarding services, from which
Caller ID cannot be sent. (Caller ID may be sent depending on the carrier.)
cI[Done]
Disable
Call rejection
Silent alert
Terminal setting
䋺Cancel the setting.
䋺Reject a call.
䋺Recei ve the call without playing Ring tone. You can select an image saved in "My
picture" in the "Data box" for the Incoming call screen.→P194
XDXSelect field X "My picture" /"i-motion" X Select the Image
䋺You can select a file from the "Data box" for the Incoming call screen or the ring tone.
Incoming call screen : XDX Select field X "My picture"/"i-motion" X Select an image
Ring tone : XDX Select field X "Music"/"i-motion"/"Melody" X Select a ring tone
Disable
Call rejection
Silent alert
Terminal setting
䋺Cancel the setting.
䋺Reject a call.
䋺Receive the call without playing Ring tone. You can select an image saved in "My
picture" in the "Data box" for the Incoming call screen.→P194
XDX Select field X "My picture"/"i-motion" X Select an image
䋺You can select a file from the "Data box" for the Incoming call screen or the ring
tone.
Incoming call screen : XDX Select field X "My picture"/"i-motion" X Select an image
Ring tone : XDX Select field X "Music"/"i-motion"/"Melody" X Select a ring tone
Note
• When User unset is activated, if a call without caller ID set to "Reject unknown" arrives, the call will not be
indicated, is displayed on the Stand-by screen, and the call is recorded in Received call log as a missed
call. Calls are rejected even when Voice mail or Call forwarding service is activated. However, if Ringing
Time is set to 0 second or the handset is out of service area or turned off, each network service starts.
• i-mode mails or SMS are received regardless of rejection settings.
<[User unset]>
• If the Caller ID Request service is activated, it takes precedence over the settings of "Anonymous caller".
the caller hears a message requesting the Caller ID.
Anonymous
caller

121
Security Settings
Set mute ring(sec.)
Muting Ring Tones for Unknown Callers
You can set the handset not to ring when a call arrives from other parties not saved in Contacts
or without Caller ID. This prevents nuisance calls such as "1 ring calls" that disconnect after a
short ringing time.
aM
[Menu]
X(Settings)X"Sounds&Vibration"X"Set mute ring
time"
bPerform the following operation
•C[List] : List of the items is displayed.
[Set mute ring(sec.)]
Sets the time before the ringer is played when a call is received. When setting to "On", select from the
items follow.
X"Off"/"On"
[Mute seconds ]
Set an interval from when a call arrives until the ring action starts between 0 and 99 seconds.
Xto enter the time
[Mute time]
Set whether to show the Received call logs for the call that was terminated within the time specified in
"Mute seconds".
X"Show"/"Do not show"
cI[Done]
Reject unknown
Rejecting Calls from Unknown Caller
You can set to reject calls from other parties not saved in Contacts.
• This function is available only when the caller sends Caller ID.
• It is recommended that you set the Caller ID request and "Anonymous caller" concurrently.
䈗 ᄾ⚂ᤨ Off
Note
• When a relevant caller calls while this function is activated, incoming call actions, such as sounding the Ring
tone, will not be taken for the set time; however, the Incoming call screen is shown.
• This option works, even when Secret Mode is set enabled and there is a call from a party whose Phonebook
entry is set as secret.
<Set mute ring(sec.)>
• If the Ring Delay is set longer than the response time of the Voice mail/Call forwarding services, the Record
Message starts without the ring action.
• If the Ring Delay is set longer than the response time of "Record message", the Record Message starts
without the ring action.
• You cannot change the "Mute seconds" setting when "Reject unknown" is set to "On".
䈗 ᄾ⚂ᤨ Off
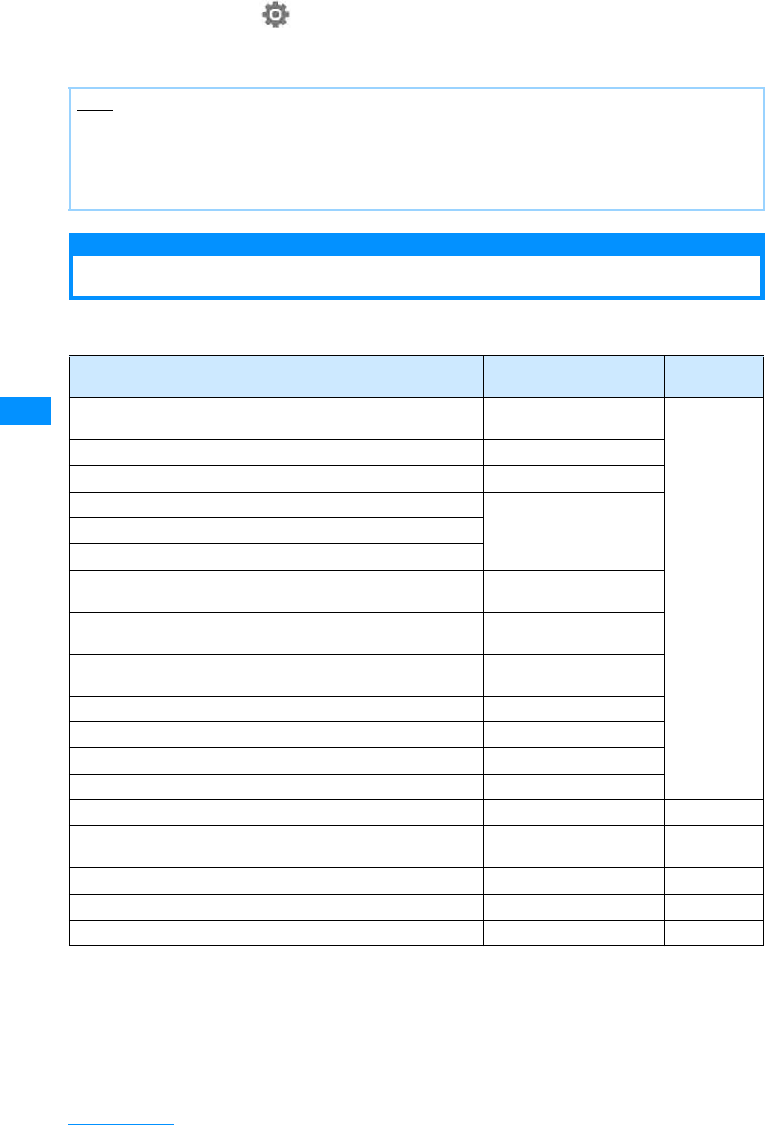
122
Security Settings
aM
[Menu]
X(Settings)X
"Call/VT/Dialing"
X
"Incoming call"
X
"Accept/Reject call"
X
Enter security code
X
"Reject unknown"
X
"On"/"Off"
Other "Security Settings"
In addition to the security functions described in this chapter, the following functions and
services are available.
Note
• The handset does not start incoming call actions for a rejected incoming call, but the call is recorded in
Received call logs. The other party hears a busy signal.
• Calls are rejected even when Voice mail or Call forwarding service is activated. However, if Ringing Time is
set to 0 second, each network service starts.
• i-mode mails or SMS are received regardless of rejection settings.
Purpose Function Names/
Service Names Reference
To upload or check safety messages through i-mode in case of
disaster. "i-mode Disaster Message
Board Service" service For further
details,
please see
"Mobile
Phone User's
Guide
(i-mode
<FOMA>
Chapter)".
To Change Email address Change Mail Address
View an Email address if you forget it Confirm Mail Address
To receive/reject mail from a specified domain Spam Mail Prevention
(Reject/Receive Mail
Settings)
To receive/reject Email via i-mode only
To receive/reject mail from a specified address
Want to reject SMS Spam Mail Prevention
(SMS Rejection Settings)
Do not receive mail containing an URL Spam Mail Prevention
(Reject mail with URL)
To reject incoming i-mode mail in excess of 200 a day from an
i-mode phone Restrict i-mode Spam
To reject unsolicited mail Reject Unsolicited Ad Mail
To check the Email setting status Confirm Settings
To restrict incoming Email size Limit Mail Size
To temporarily disable mail functions Suspend Mail
To select and download Email Receive option P167
To register and reject calls from a nuisance caller Nuisance Call Blocking
service P259
To ask a caller to show Caller ID Caller ID Request P260
To update software on the handset when necessary Software Update P325
To protect the handset from harmful data Scanning Function P327

123
Camera
Before Using the Camera ................................................................................................. 124
Capturing Still Images ..................................................................................Photo-Mode 129
Capturing Movies ..........................................................................................Movie-Mode 127
Changing the Capture Settings ....................................................................................... 132
Changing the Camera Settings................................................................ Camera Setup 133
Using Bar code Reader........................................................................ Barc code reader 134
124
Camera
Before Using the Camera
Notes for Capturing Images
• The camera employs high precision technology, but some pixels or lines may seem brighter or darker than
others. Also, when capturing in places with insufficient lighting, noise, seen as white lines, increases. This is
normal.
• Clean the lens with a soft cloth before capturing. If the lens is stained with fingerprints or oil, the captured image
may appear out of focus or blurred.
• Do not leave the handset in a warm place or under a direct sunlight for a long period. The image or video to
capture may deteriorate.
• If you capture under a fluorescent light, mercury lamp or sodium lamp flickering at high speed, flickering such
as stripes may appear. The color tone of still images or movies may vary depending on the capturing timing.
• Do not expose the lens to direct sunlight for a long period and do not capture at the sun or bright lamp directly.
The image may become discolored or the camera may fail.
• Do not cover the lens with your fingers, hair or the handset lanyard when capturing.
• Capturing a fast moving object may result in an image slightly distorted from the image displayed on the screen
at the time of capturing, or the image may be blurred.
• When the battery level is low, you may not be able to save captured still images or movies. Check the battery
level before capturing.
• Captured still images or movies may differ from the actual subjects in brightness or color tone.
•
Even in Manner mode, the shutter tone sounds at a fixed volume.
The shutter tone sounds from the Speaker
even when a Flat-plug earphone/microphone with switch (optional) is connected to the FOMA handset.
Copyrights and Portrait Rights
You have no right to copy, modify, or distribute the contents such as text, images, music, or
software downloaded from web sites on the Internet, or images captured by the cameras of
this product without permission from the copyright except for when the copy or quote is for
personal use that is allowed by the Copyright Law. Note that it may be prohibited to capture or
record live performances or exhibitions even for personal use. Refrain from taking portraits of
other persons and uploading such portraits on websites without consent, as this violates
portrait rights.
Please be considerate of other people's privacy when capturing and sending pictures using
camera-equipped mobile phones.
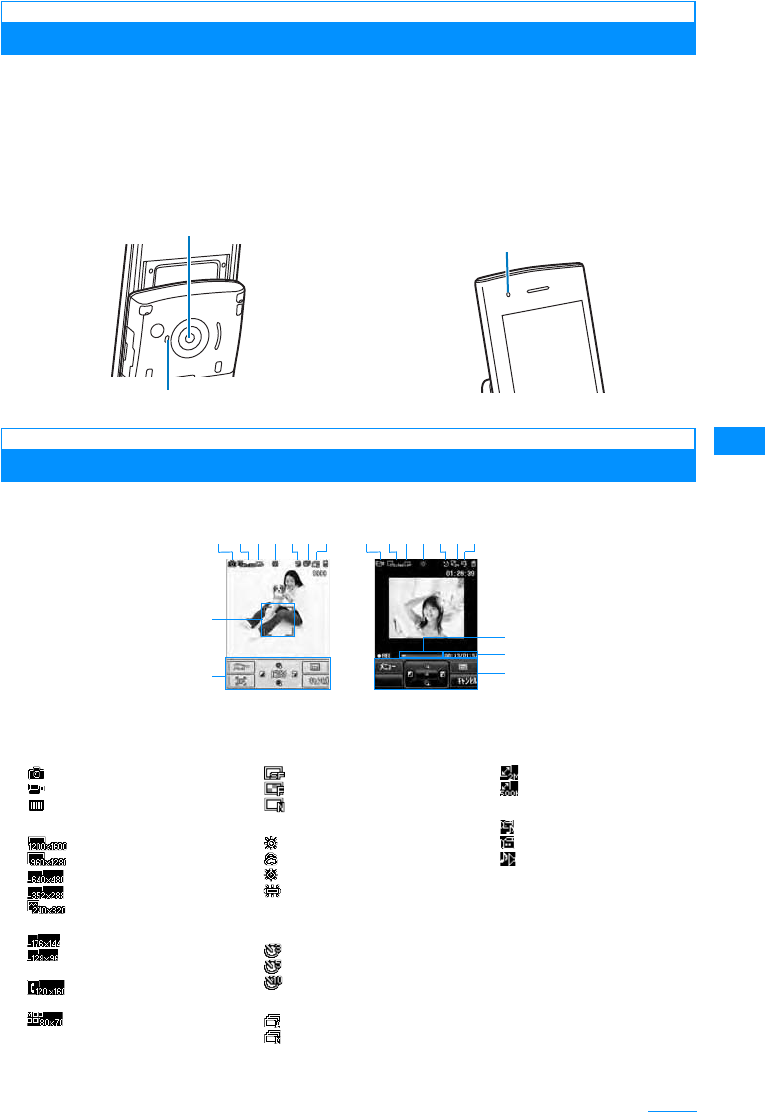
125
Camera
Using the Camera
You can select the Inner or Outer camera, depending on the situation. Switching Cameras
→P133
䂓Outer camera
This is useful for taking pictures of scenery or other
people. The screen output is similar to what you
see (normal image). AF adjusts the focus of the
Outer camera. →P129
䂓Inner camera
Useful for taking pictures of yourself. The screen
shows the true (normal) image. The image can
saved to appear as a mirror (vertically flipped)
image or as normal image. →P129
Capturing Screen Components
The meanings of marks (icons and others) on the still image photography/video capture screen are as
follows:
Outer Camera
䊐䉤䊃 䊤 䉟䊃
Inner Camera
Movie capture
screen
Still image
photography
b
l
k
af
eg
k
m
cd b
acd h
ei
j
a
Camera-mode→P129, P131
Photo-mode
Movie-mode
Barcode Reader
bImage size→P129, P131
䇭UXGA (1200x1600)
䇭SXGA (960x1280)
䇭VGA (640䌸480)
䇭CIF (352䌸288)
䇭Stand-by display
(240 x 320)
䇭QCIF (176䌸144)
䇭Sub-QCIF
(128䌸96)
䇭Phonebook
(120䌸160)
䇭Menu Icon (88 x 70)
c
Quality→P129, P131
Super fine
Fine
Standard
dWhite balance→P129, P131
Daylight
Cloudy
Incandescent
Fluorescent
eNight mode→P129, P131
fDelay timer→P129
3sec
5sec
10sec
gContinuous mode→P129
Auto
Manual
h
Size restriction→P131
2MB
500KB
iType→P131
Sound+Video
Movie only
Sound only
jFocus Frame →P129
kControl Key
Available keys for navigation
lElapsed capturing time/
Maximum capturing time
Elapsed capturing time/
Maximum capturing time
mCapturing progress bar
Displays the elapsed
capturing time with a bar.
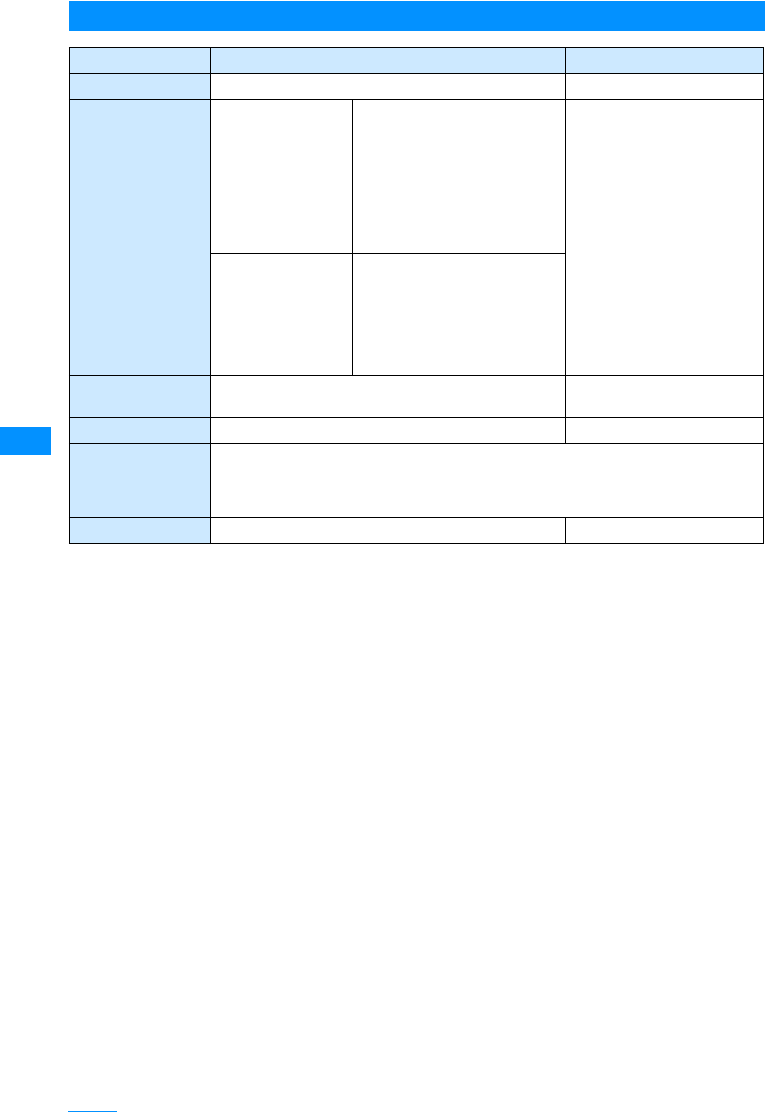
126
Camera
Save Format of Still Images or Movies
Still Image File Movie File
File Format JPEG MP4 (Mobile MP4)
Resolution Outer camera UXGA (1200x1600)
SXGA (960x1280)
VGA (640x480)
CIF (352x288)
Stand-by display (240 x 320)
QCIF (176x144)
Sub QCIF (128x96)
Phonebook (120x160)
Menu Icon (88 x 70)
SQCIF (128x96)
QCIF (176x144)
Inner camera VGA (640x480)
CIF (352x288)
Stand-by display (240 x 320)
QCIF (176x144)
Sub QCIF (128x96)
Phonebook (120x160)
Menu Icon (88 x 70)
Encoding Format 䋭Video: MPEG-4
Voice: AMR
File Extension .jpg .3gp
File Name The year, month, date, hour and minute of the time of capture will be added automatically.
Example: If taken at: 2007/10/1 10:10
Photo Name: "P2007_1001_1010_0"
Movie-mode: "V2007_1001_1010_0"
Maximum File Size Approx. 2MB Approx. 58MB
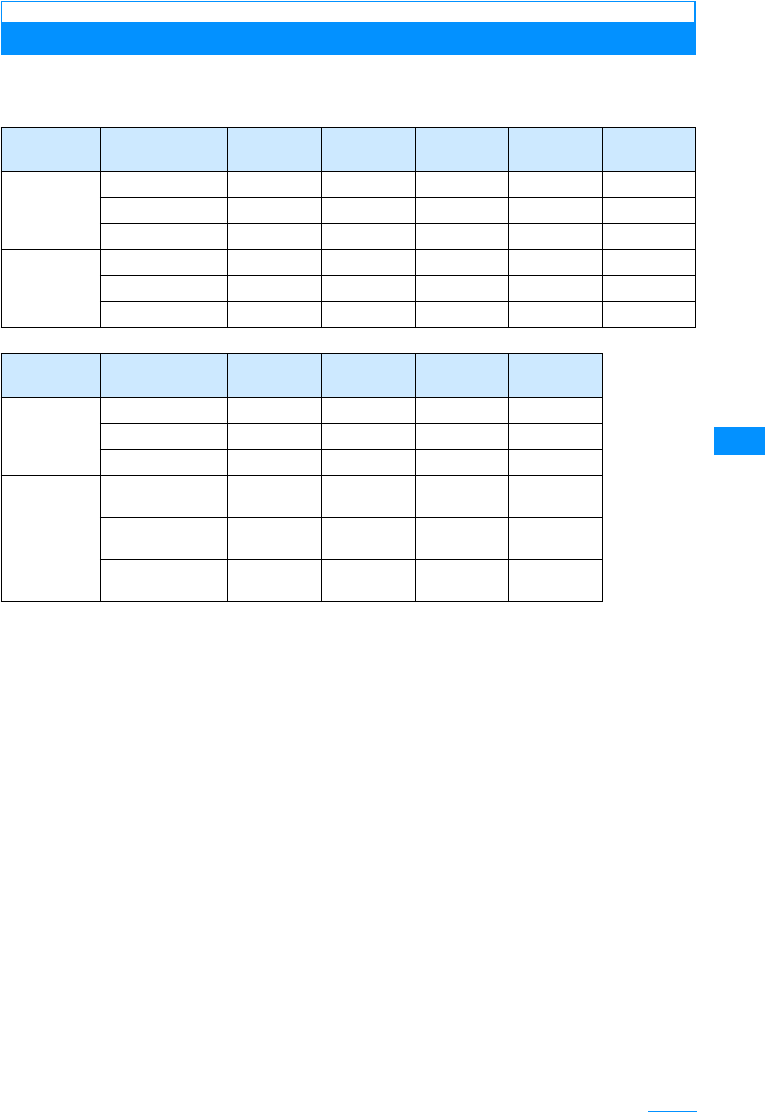
127
Camera
Number of Savable Still Images as a Rough Guide
The number of still images that can be saved on this FOMA handset or the microSD memory
card varies depending on the resolution, image quality, capturing conditions, and capture
objects.
Location ResolutionQuality UXGA
(1200x1600) SXGA
(960X1280) VGA
(640X480) CIF
(352X288) Wallpaper
(240X320)
L705i
(Handset) Superfine Approx.250 Approx.1000 Approx.1000 Approx.1000 Approx.1000
Fine Approx.280 Approx.1000 Approx.1000 Approx.1000 Approx.1000
Standard Approx.400 Approx.1000 Approx.1000 Approx.1000 Approx.1000
microSD
memory
card(64MB)
Superfine Approx.160 Approx.800 Approx.800 Approx.1700 Approx.2100
Fine Approx.180 Approx.1200 Approx.1200 Approx.2100 Approx.2600
Standard Approx.250 Approx.1400 Approx.1400 Approx.2600 Approx.3200
Location ResolutionQuality QCIF
(176x144) Sub-QCIF
(128X96) Phonebook
(120X160) Menu Icon
(88X70)
L705i
(Handset) Superfine Approx.1000 Approx.1000 Approx.1000 Approx.1000
Fine Approx.1000 Approx.1000 Approx.1000 Approx.1000
Standard Approx.1000 Approx.1000 Approx.1000 Approx.1000
microSD
memory
card(64MB)
Superfine Approx.3200 Approx.1280
0Approx.3500 Approx.1800
0
Fine Approx.3500 Approx.2100
0Approx.4000 Approx.2500
0
Standard Approx.4000 Approx.2600
0Approx.4200 Approx.3200
0
Continue on the next page
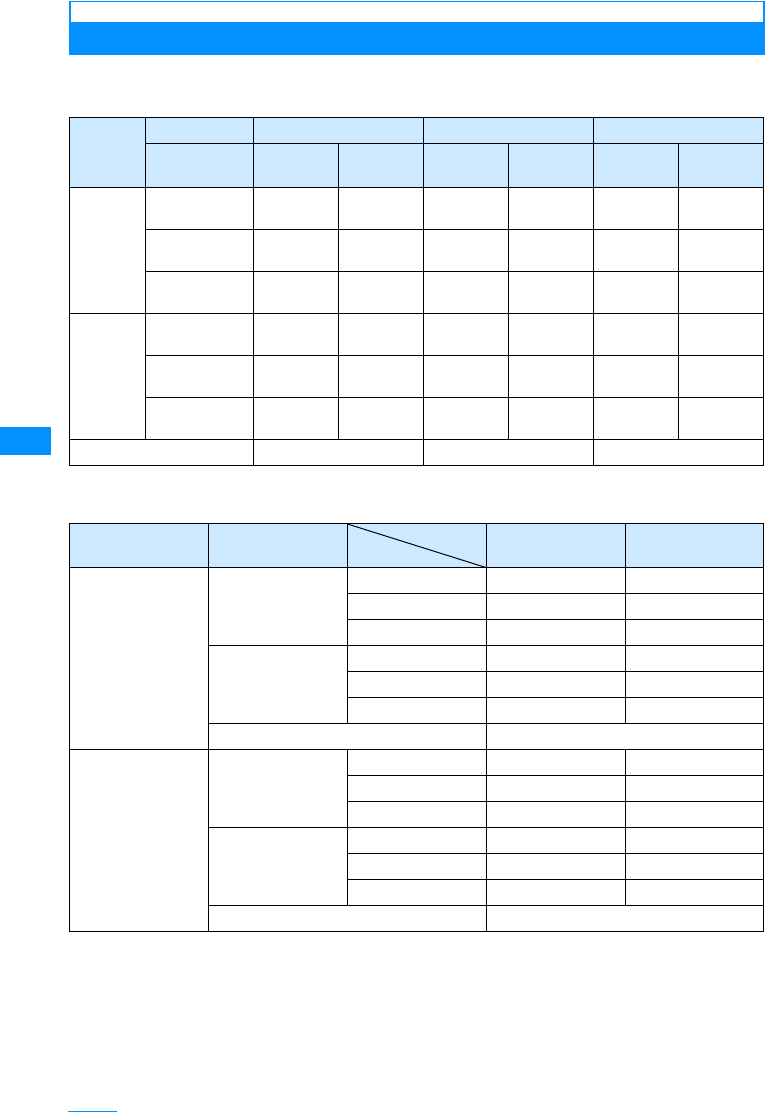
128
Camera
Movie Capture Duration as a rough guide
The movie capturing duration varies depending on the movie length, quality, capturing
conditions, and captured objects.
䂓Continuous Recording Time for files on the L705i(Phone)/micro SD memory card (except*)
㶎䋺 micro SD memory card can save approx.50 minutes.
䂓Total Recording Time: Common Restriction on each File
Capture
Type
Size restriction No restriction 2MB 500KBB
Resolution
Quality QCIF
(176x144) Sub-QCIF
(128X96) QCIF
(176x144) Sub-QCIF
(128X96) QCIF
(176x144) Sub-QCIF
(128X96)
Audio and
Graphics Superfine Approx.60
minutes* Approx.60
minutes Approx.117
seconds Approx.220
seconds Approx.29
seconds Approx.55
seconds
Fine Approx.60
minutes Approx.60
minutes Approx.153
seconds Approx.285
seconds Approx.38
seconds Approx.71
seconds
Standard Approx.60
minutes Approx.60
minutes Approx.222
seconds Approx.400
seconds Approx.55
seconds Approx.100
seconds
Graphics
only Superfine Approx.60
minutes Approx.60
minutes Approx.153
seconds Approx.285
seconds Approx.38
seconds Approx.71
seconds
Fine Approx.60
minutes Approx.60
minutes Approx.200
seconds Approx.400
seconds Approx.50
seconds Approx.100
seconds
Standard Approx.60
minutes Approx.60
minutes Approx.285
seconds Approx.500
seconds Approx.71
seconds Approx.125
seconds
Audio only Approx.60 minutes Approx.19 minutes Approx.284 seconds
Location Capture Type Resolution
Quality QCIF
Åi176 X 144Åj Sub-QCIF
Åi128X96Åj
L705i(Handset) Audio and Graphics Superfine Approx.80 minutes Approx.150 minutes
Fine Approx.110 minutes Approx.190 minutes
Standard Approx.150 minutes Approx.260 minutes
Graphics only Superfine Approx.90 minutes Approx.180 minutes
Fine Approx.120 minutes Approx.240 minutes
Standard Approx.180 minutes Approx.340 minutes
Audio only 䋼Confirming specs䋾
microSD memory
card(64MB) Audio and Graphics Superfine Approx.50 minutes Approx.100 minutes
Fine Approx.70 minutes Approx.130 minutes
Standard Approx.100 minutes Approx.160 minutes
Graphics only Superfine Approx.63 minutes Approx.122 minutes
Fine Approx.84 minutes Approx.160 minutes
Standard Approx.123 minutes Approx.230 minutes
Audio only 䋼Confirming specs䋾

129
Camera
Photo-Mode
Capturing Still Images
• Captured still images are stored in the "Camera"
folder under "My Picture" in "Data box" on the
handset. To change the saving destination to the
microSD memory card, access "Saving option"
(P133).
aM[Menu] X(Camera) X"Photo-
mode".
䂓Key operation on still image photography screen
bPoint the camera to the subject XC
[Take]䋯G
A still image is captured
A still image is captured and
automatically saved in the
destination specified in "Auto
saving" (P133).
The Confirm save screen
opens and the Still image
capture screen returns.
• You can use AF while
capturing images.→P129
• When using the inner
camera, images on the
capture screen are
displayed as mirror images, however, images
will be saved as normal images. To save the
image as a mirror image, set "Auto saving" to
"Off".
• Press I to compose an i-mode mail attached
with the capture still image file.
Using AF
The subject in the center of the screen is
automatically focused on. Auto focusing starts
when you press A[AF] on the still image
photography screen, then the Auto focus function
starts and the focus frame turns red when focused
When "Saving option" (P133) is set to Off
After an image is captured, the Captured image
confirmation screen opens, and you can select
whether to save the image.
To save the image
Press C [Save] to open the Specify saving
destination screen. Select a destination folder X
C [OK] to open the Confirm save screen. Press
C [OK] to save the captured image and the Still
image capture screen returns.
To not save the image
Press I [Cancel].
• Even after you pressed C [Save], you can
cancel saving by pressing Q
䋯
I [Cancel]
from the Specify saving destination screen or
pressing Q on the Confirm save screen.
For images captured with "Continuous mode"
You can select, delete, or display images to save
on the Captured image confirmation screen.
• To save selected images, select images to save
and press C [Save] or M [Menu] X "Save
selected". The Specify saving destination
screen opens.
• To save all captured images, press M [Menu]
X "Save all". The Specify saving destination
screen opens.
• To delete selected images, select images to
delete and press M [Menu] X "Delete".
• To display only the selected images, press I
[View].
Saving the Mirror Image of the Picture Taken by
the Inner camera
If "Saving option" (P130) is set to "Off", the
captured image can be saved as a mirror image
(flipped vertically).
•XOn the Captured image confirm screen,
M[Menu] X "Save mirror image" Xselect a
folder XC[OK]
• You can confirm the image as a normal image
when press M [Menu] select "View normal
image".
Still Image Photography Screen sub menu
Key Description
C[Take]䋯GShutter
HZoom
JBrightness controls
F䋯ESelect Inner or Outer camera
M[Menu] Display sub menu
I䌛䌝List of Pictures in "Camera" folder in
"My Picture"
A[AF] Start AF
Q[Cancel] Exit Photo-mode
Still image
photography
Confirm save
(Example: Case
of Outer Camera)
Note
• Even when Manner mode is activated, the
shutter tone sounds when capturing.
Default
Select camera: Outer camera
Frame shot: OFF
Continuous mode: OFF
Night mode: OFF
Effect: None
White balance: Auto
Delay timer: None
Select size: Wallpaper(240x320)
Quality: Fine
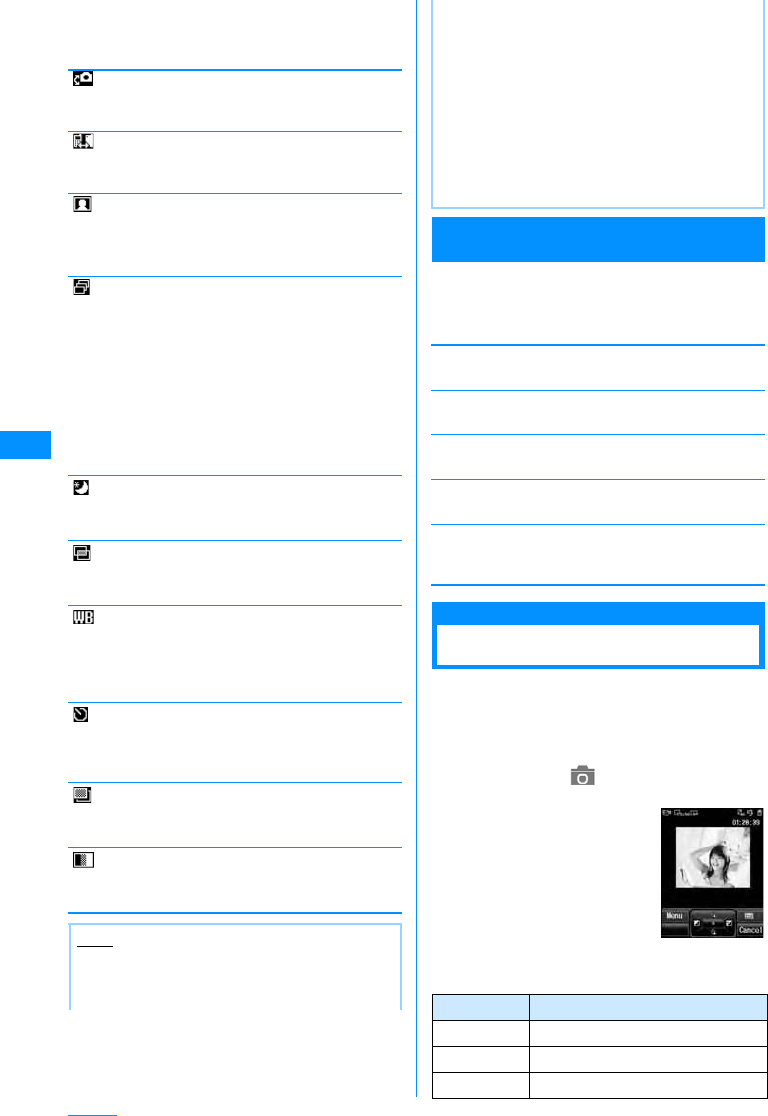
130
Camera
aStill image photography screen(P129)
XM[Menu] XPerformsthe following
operations
[ Camera-mode]
Change photo modes
X"Photo-mode"/"Movie-mode"/"Bar code reader"
[ Switch camera]
Select Inner or Outer camera.
X"Inner camera"/"Outer camera"
[Frameshot]
Adds a frame to the subject when capturing an image.
[ Continuous mode]
Captures continuous (sequential) images when the
shutter is pressed.
Captures up to 4 continuous images of "CIF(352 x
288)" pixels, or up to 6 images of less than "CIF(352 x
288)" pixels.
[Nightmode]
Activate when using in dark places.
X"OFF"/"ON"
[ Effect]
Add an effect to the pictures to be taken.
X"None"/"Black & White"/"Sepia"/"Negative"
[ White balance]
Sets hue/tint for the image. When set according to the
conditions, a naturally colored image is produced.
X"Auto"/"Daylight"/"Cloudy"/"Incandescent"/
"Fluorescent"
[ Delay timer]
Set the number of seconds from the time the shutter is
pressed until the picture is taken.
X"None"/"3sec"/"5sec"/"10sec"
[ Select size]
Sets the image size.
XSelect image size→P126
[ Quality]
Sets still images save settings.
X"Super fine"/"Fine"/"Normal"
Still Image Capture Completion Screen sub
menu
aConfirm Save screen (P129) X
M[Menu] XPerforms the following
operations
[New picture]
Return to the still image photography screen.
[Compose mail]
Attach the picture to a mail and send it.→P161
[Edit image]
Edit a still image.→P198
[Delete]
Cancel to save and delete a still image.
[Set as wallpaper]
Set a captured image as the Stand-by display's
wallpaper.
Movie-Mode
Capturing Movies
• Captured movies are stored in the "Camera" folder
under "i-motion" in "Data box" on the handset by
default. To change the saving destination to the
microSD memory card, access "Saving option"
(P133).
aM[Menu] X(Camera) X"Movie-
mode"
䂓Key operation on movie capture screen
OFF
Choose frame
䋺Does not attach a frame.
䋺Select a frame from "My picture".
OFF
Auto
Manual
䋺No continuous capturing.
䋺Takes continuous pictures by pressing the
shutter once.
䋺Takes continuous pictures by pressing the
shutter consecutively.
Note
• If the "Select size" is set to "UXGA(1200x1600)"
or "SXGA(960x1280)", the zoom feature cannot
be used.
• When "Continuous mode" is set, the picture size
is reduced to "CIF (352x288) ", if the "Select
size" is set to "CIF (352x288)".
• When "Continuous mode" is set, the "Delay
timer" is disabled.
• When "Continuous mode" is set to "Auto", the
pictures will be taken the following intervals.
Inner camera: About 0.7 seconds
Outer camera: About 0.2 seconds
• When "Continuous mode" is set to "Manual",
only press C[Take] to take a picture after
second shot. Not available to press G.
Key Description
C䋯GStart capturing/Resume
䋪
1
HZoom
䋪
2
JBrightness control
䋪
2
Movie capture
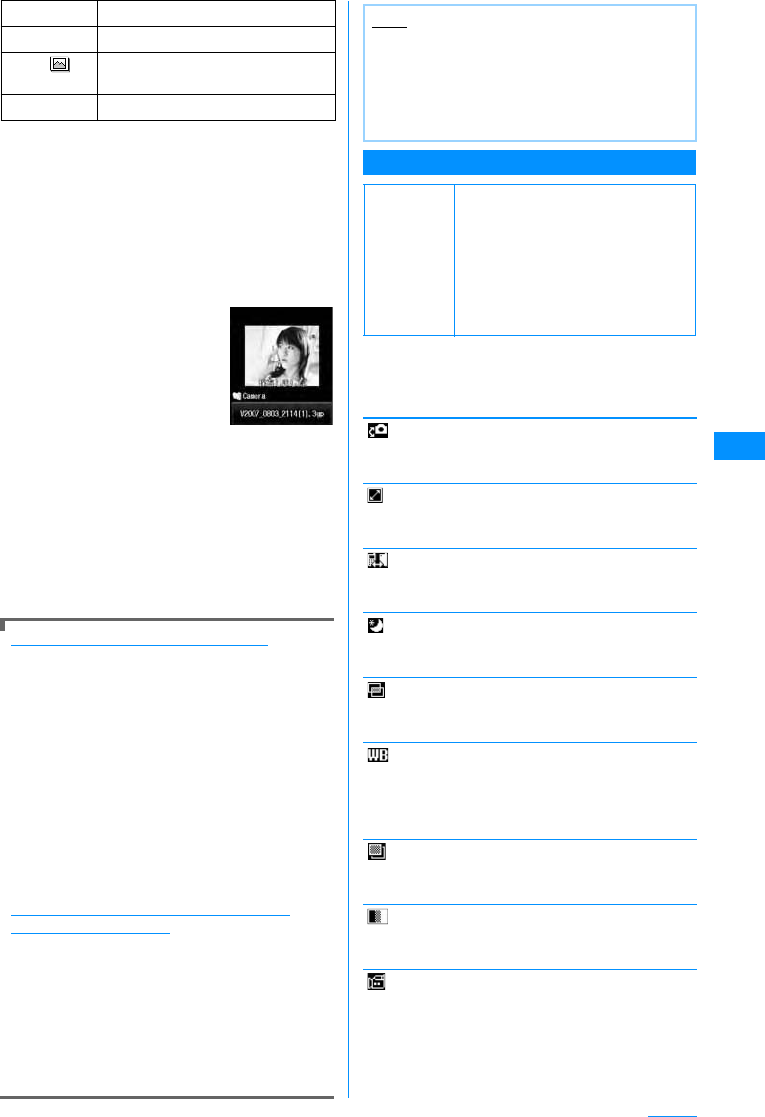
131
Camera
䋪1䋺Resumption is not available when "Type" is
"Sound only".
䋪2䋺Can be used while capturing a movie.
bPoint the camera to the subject XC䋯
G
Start capturing a movie.
•C: Pause/resume the capturing.
cI
Capturing ends, and the
captured video automatically
will be saved in the
destination specified in "Auto
saving" (P133).
The Confirm save screen
opens and the Video capture
screen returns.
• Auto focus function is
availble when taking.
• When using the inner camera, images on the
capture screen are displayed as mirror images,
however, images will be saved as normal
images. To save the image as a mirror image,
set "Auto saving" to "Off".
• Press I [Mail] on the Confirm save screen to
create i-mode mail with the captured video
attached.
When "Saving option" (P133) is set to Off
After a video is captured, the Confirm save screen
opens, and you can select whether to save the
video.
To save the video
Press C [Save] to open the Specify saving
destination screen. Select a destination folder X
C [OK] to open the Confirm save screen. Press
C [OK] to save the captured video and the Video
capture screen returns.
To not save the video
Press I [Cancel].
• Even after you press C [Save], you can cancel
saving by pressing Q/I [Cancel] from the
Specify saving destination screen or pressing
Q on the Confirm save screen.
To save a still image captured with the inner
camera as a mirror image
If the "Saving option" (P133) is set to "Off", the
captured video can be saved as a mirror image
(flipped vertically).
XFrom the Confirm save screen, M[Menu]
X"Save mirror image" Xselect a folder X
C[OK]
• From the Confirm save screen, select M
[Menu] X "View normal image" to play the video
in a normal image.
Movie Capture Screen Sub Menu
aMovie capture screen(P130) XM
[Menu] XPerforms the following
operations
[ Camera-mode]
Change photo modes
X"Photo-mode"/"Movie-mode"/"Bar code reader"
[ Size restriction]
To limit the file size of captured movie.
X"No restriction"/"2Mbyte"/"500Kbyte"
[ Switch camera]
Select Inner or Outer camera.
X"Inner camera"/"Outer camera"
[Nightmode]
Activate when using in dark places.
X"OFF"/"ON"
[ Effect]
Add an effect to the pictures to be taken.
X"None"/"Black & White"/"Sepia"/"Negative"
[ White balance]
Sets hue/tint for the image. When set according to the
conditions, a naturally colored image is produced.
X"Auto"/"Daylight"/"Cloudy"/"Incandescent"/
"Fluorescent"
[ Select size]
Set the image size to take.
X"QCIF (176䌸144)"/"Sub-QCIF (128䌸96)"
[ Quality]
Sets the quality of the saved movie.
X"Super fine"/"Fine"/"Normal"
[Type]
Sets voice settings when taking videos.
X"Voice+Video"/"Movie only"/"Sound only"
F䋯ESelect Inner or Outer camera
M[Menu] Display sub menu
I䌛䌝
List of Pictures in "Camera" folder in
"i-motion"
Q[Cancel] Exit Movie-mode
Confirm save
Note
• Even when Manner mode is activated, the
shutter tone sounds when capturing starts and
ends.
• Video capturing will be terminated when it is
interrupted by a call. After the call is over, the
confirm save screen appears.
Default
Size restriction: No restriction
Select camera: Outer camera
Night mode: OFF
Effect: None
White balance: Auto
Select size: QCIF (176x144)
Quality: Super fine
Type: Sound + Video
Common mode: OFF
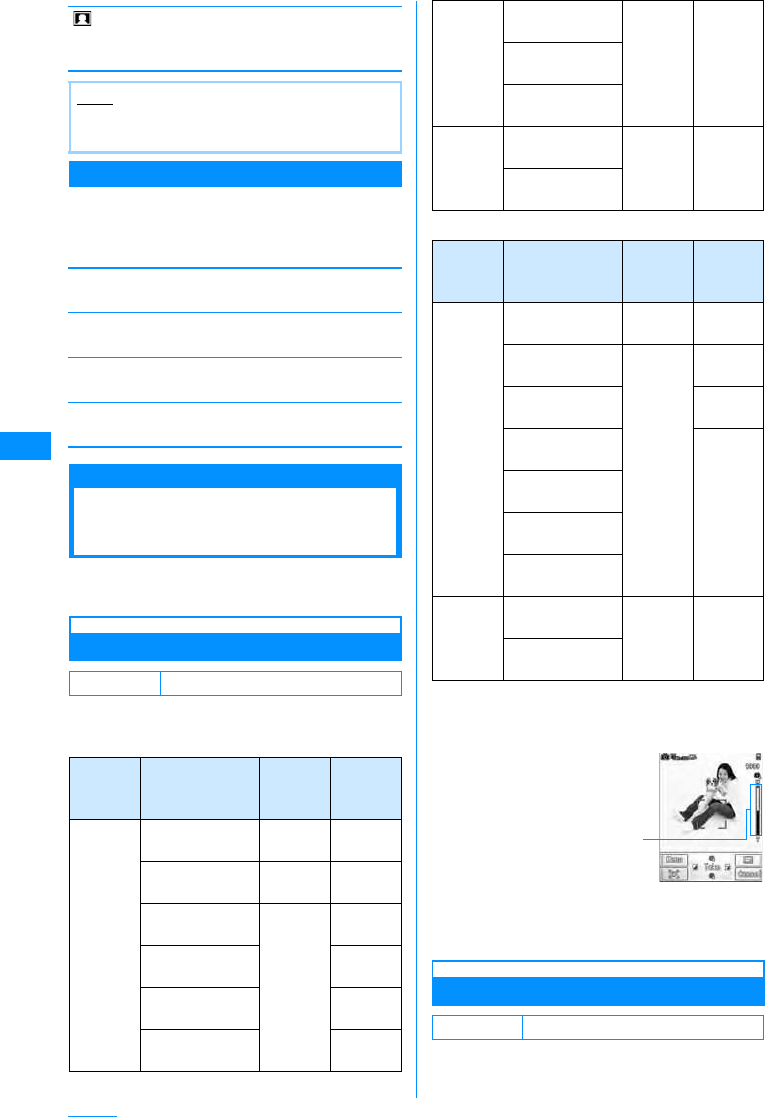
132
Camera
[ Common mode]
Sets maximum file size to 500KB.
X"OFF"/"ON"
Confirm Save Screen Sub Menu
aConfirm Save Screen(130) XM
[Menu] XPerforms the following
operations
[New movie]
Return to the movie capture screen.
[Compose mail]
Attach the video to an i-mode mail and send it.→P161
[Delete]
Cancel to save the video data and delete it.
[Set as wallpaper]
Set as the Stand-by display's wallpaper.
Changing the Capture
Settings
Sets the Camera functions according to the
conditions.
Using Zoom
Set the image zoom magnification.
Available setting of the image size are as follows:
䂓Outer Camera
䂓Inner Camera
aStill image screen (P129) / video
capture screen (P130) XHallows you
to set zoom.
Adjusting Brightness
Adjust the brightness (exposure) of the image. The
brightness can be set from -2
to +2.
Note
• When setting "Common mode" to "ON",
"Quality" is not available to set.
Default Still Image/Movie: 1X
Camera
Mode Size Zoom Max.
magnific
ation
Photo
Mode
UXGA
䋨1200㬍1600䋩
䋭䋭
SXGA
䋨960㬍1280䋩
䋭䋭
VGA
䋨640㬍480䋩
10 steps Approx.1
.2
CIF
䋨352㬍288䋩
Approx.1
.7
Wallpaper
䋨240㬍320䋩
Approx.2
.5
QCIF
䋨176㬍144䋩
Approx.3
.4
Photo
Mode
Sub-QCIF
䋨128㬍96䋩
10 steps Approx.3
.4
Phonebook
䋨120㬍160䋩
Menu icon
䋨80㬍70䋩
Video
Mode QCIF
䋨176㬍144䋩
10 steps Approx.3
.4
Sub-QCIF
䋨128㬍96䋩
Camera
Mode Size Zoom Max.
magnific
ation
Photo
Mode VGA
䋨640㬍480䋩
䋭䋭
CIF
䋨352㬍288䋩
10 steps Approx.1
.7
Wallpaper
䋨240㬍320䋩
Approx.2
.5
QCIF
䋨176㬍144䋩
Approx.3
.4
Sub-QCIF
䋨128㬍96䋩
Phonebook
䋨120㬍160䋩
Menu icon
䋨80㬍70䋩
Video
Mode QCIF
䋨176㬍144䋩
10 steps Approx.3
.4
Sub-QCIF
䋨128㬍96䋩
Default Still Image/Video: 0
Zoom Settings
(Ex.: Still image
photography
Screen)
Zoom
Magnification
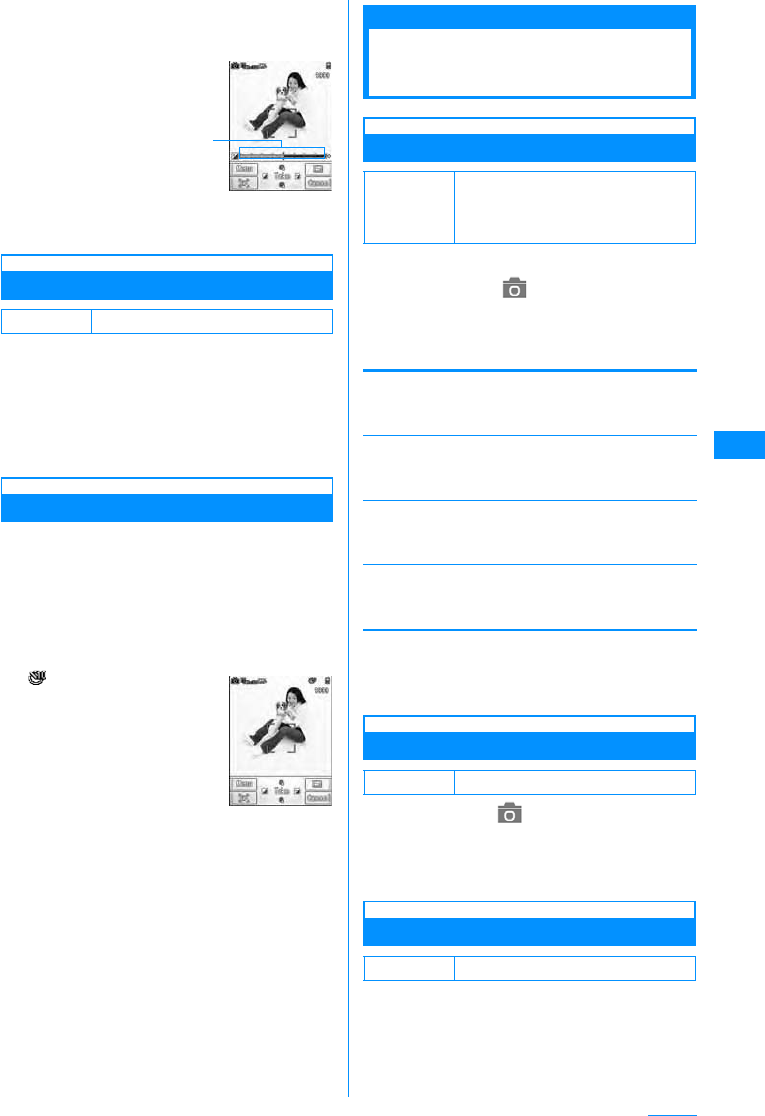
133
Camera
aStill image screen (P129) / video
capture screen (P130) XJSelects
brightness (exposure) of the image
Selecting Inner or Outer Camera
You can select Inner or Outer camera according to
your capturing style.
aStill image screen (P129) / video
capture screen (P130) XF/E
You can switch Inner and Outer cameras each
time you press F/E.→P125
Setting the Delay Timer
Set the number of seconds from the time the shutter
is pressed until the capturing is performed.
• The Auto Timer is not available for video capturing.
aStillimage (P129)XM[Menu]X[Delay
timer]
b"None"/"3sec"/"5sec"/"10sec"
(number: second)
appears at the top of the
screen.
cC[Take]䋯G
Activate Delay timer. Takes a photo after the set
number of seconds automatically.
After pressing the shutter button, the photo light
flashes and the timer sound rings during the
picture will be taken.
Camera Setup
Changing the Camera
Settings
Saving option
Saving Option
Sets still image photography / video auto save.
aM[Menu] X(Camera) X"Camera
settings" X"Saving option"XPerform
the following operation
•C[List] : List of the items is displayed.
[Save]
Set where picture is saved.
X"Handset"/"microSD card"
[Auto saving]
Sets whether phone automatically saves picture/video.
X"ON"/"OFF"
[Save picture to]䋪
Set where picture is saved.
XSelect save location
[Save movie to]䋪
Set where movie is saved.
XSelect video save location
䋪䋺 "Save to" is set to "Handset" when "Saving
option" is set to "ON".
bI[Done]
Shutter Sound Settings
aM[Menu]X(Camera)X"Camera
settings"X"Shutter sound"XSelect
shutter tone
Select an item and listen to the sample sound.
Flicker Tuning
The flicker in screen under a fluorescent light, etc.
may be reduced depending on the setting.
Default Still Image/Movie: Outer camera
Display brightness
(Ex.: Still image
photography Screen)
Brightness
correction
Delay Timer
Capture Screen
Default
Save to: Handset
Auto saving: ON
Save picture to: My picture/Camera
Save movie to: i-motion/Camera
Default Shutter Tone 1
Default Auto

134
Camera
aM[Menu] X(Camera) X"Camera
settings" X"Flicker tuning" XSelect
the tuning method
Auto
䋺
Controls the flicker automatically.
50Hz
䋺
Set where the frequency of the power is
50Hz.
60Hz
䋺
Set where the frequency of the power is
60Hz.
Barc code reader
Using Bar code Reader
You can scan information embedded in a Japan
Article Number code or QR code using the handset
camera. You can create i-mode mail or connect to
the Internet using the scanned information.You can
also save or play the scanned information, image or
melody.
• UP to 5 pieces of scanned information can be saved.
• Scan the code when the entire code is displayed on
the screen.
• Hold the camera parallel to the code.
䂓Japan Article Number code
The Japan Article Number code is a barcode
representing numbers using vertical bars in
different thickness and spaces. 8-digit (JAN8) or
13-digit (JAN13) barcode can be scanned.
•The scanned result of the following Japan Article
Number code is "4942857123456".
䂓QR codes
The QR code is one of the 2 dimensional codes
that expresses text including Kanji, Kana or
Pictograph (E-Moji) in the vertical and horizontal
patterns. Some QR codes have an image or
melody embedded, and there are split QR codes
where multiple images contain 1 larger piece of
information.
•The scanned result of the following QR code is
"ᩣᑼળ␠NTT䊄䉮䊝
".
Scanning Codes
aM[Menu]X(Camera)X"Bar code
reader"
䂓Key operations on the Scan screen.
䋪䋺 Press C[Scan] to operate only on the screen
after adjusting AF.
bFocus a camera on the code to scan
XC[Scan]
After the auto focusing, scan the code. When
scanning completes, a tone sounds and the
scanned data is displayed (Scan data screen).
• When the bar code reader is activated, it starts
scanning automatically.When focused, scan the
code automatically without pressingC[Scan].
• When "Keypad sound" is set to "Mute", or
"Manner mode" is activated, the beep does not
sound.
cDepending on the type of scanned
data, performs the following operations
• Depending on the scanned data, the display or
operation may differ.
• Always save the scanned data if you want to
use it later.
• Up to 16 divided QR codes can be continuously
scanned and combined.→135
䂓For phone numbers
Select the displayed phone number to open
the Phone number entry screen with the
scanned phone number already entered.
If "Add to Phonebook" is displayed, select the
phone number to save to the Phonebook.
Key Description
C[Scan] Start AF
M[Menu] Change the photo mode to
Photo-mode/Movie-mode/Bar
code reader
I[List] List the saved scanned data
A[Retry]䋪Readjust the AF.
Q[Cancel] Exit the Bar code reader
Scan Screen
135
Camera
䂓For mail addresses
Select the displayed mail address to create i-
mode mail with the scanned mail address or
subject already entered.
If "Add to Phonebook" is displayed, select the
address to save to the Phonebook.
䂓For URLs
Select a displayed URL to access the URL.
If "Add to bookmark" is displayed, select the
URL to save as a Bookmark.
䂓For text
The scanned characters are displayed.
䂓For images
The scanned image is displayed.
䂓For melodies
Press C[Play] to play the scanned melody.
䂓For i-appli
If "Start i-appli" is displayed, select the i-appli
to launch it.
Scanned data screen sub menu
• Displayed items vary depending on the type of
scanned data.
aOn the Scanned data screen (134) X
M[Menu] Xperforms the following
operations
[Copy]
Copy selected URL, phone number or address on the
scanned result screen.
[Save the scanned data in a list]
Save the scanned data in a list.
[Save to Data box]
Saves the scanned image/melody to "Data box".
[Add to phonebook]
The scanned name/phone number, URL, mail address
is saved to the phonebook.
[Add bookmark]
The scanned URL is saved to the "Bookmark".
[Retry]
Scan the code again.
To scan split QR codes
aPerform Steps 1 to 3 of "Scanning Codes"
(P134)
bAfter the message "Scan next QR code"
appears, scan the next code
cRepeat b
• To cancel the scanning, press Q [Cancel], and
to readjust AF, press A[Retry].
File name of the scanned data
The scanned data is automatically named with the
year, month, date, hour, minute, and second. The
file cannot be renamed.
Example: If taken at: 2007/10/1 10:10
Japan Article Number code:
P2007_1001_1010_1.QR䇹
OR code: P2007_1001_1010_1.JAN䇹
Note
<Common Functions>
• Barcodes other than Japan Article Number
code and QR Codes and 2 dimensional codes
cannot be scanned.
• Barcodes may not be correctly scanned
because of scar, smudge, damage, printing
quality or reflection of lights.
• Some codes may not be scanned depending on
the type, size or QR code version.
• If trying to save more than 5 pieces of data, you
will see a message asking to delete older data
first. "Yes"XSelect ScannerXSelect "Yes".
• If Bar code reader can not scan the code within
30 seconds after activation, a message
indicating that it fails to scan the code appears.
And if the Bar code reader can not scan the
code in a certain period of time, it automatically
ends.
<Compose message/Send Mail>
• If the address has invalid characters, nothing is
entered in the address.
<[Make Call]>
• Valid characters are numbers and symbols
(#, :, +, -, P, "(" and ")"). If the phone number
contains characters other than these, the call
cannot be made.
<Start i-appli>
• If "Barcode i-appli to"(P189) is not set, you can
not start an i-appli from scanned data
Continue on the next page
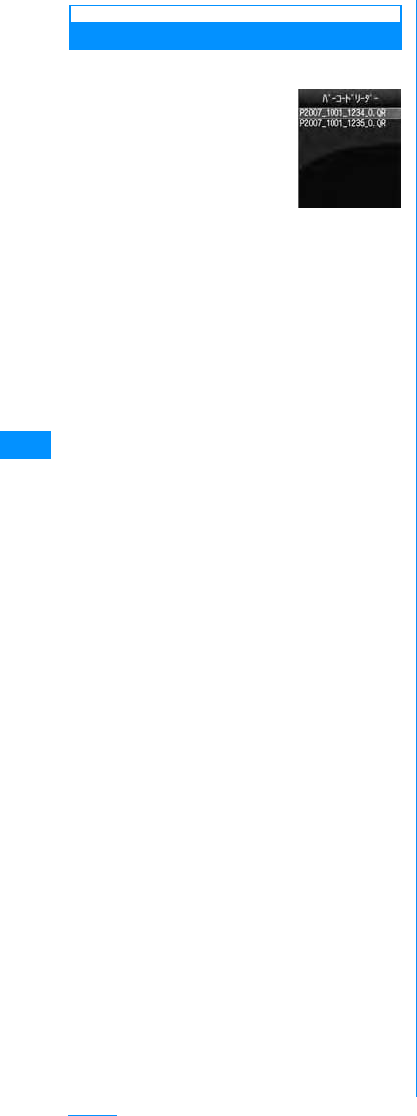
136
Camera
Using/Deleting Saved Data
aScanner start screen (P134)XI[List]
䂓Deleting Saved Scanned
Data
Move the cursor to data to
be deleted, M
[Menu]X[Delete]XSelect
"Yes"
䂓Deleting Saved Scanned
Data
Scanned data list screen,
M[Menu]X
"Delete all"XEnter the terminal sssecurity
codeXSelect "Yes"
䂓To start scanning
On the Scan data list screen, press M[Menu]
X select "Scan".
bSelect the scanned data
For the operation after this, refer to the Step 3
(P134) of "Scanning Codes" depending on the
type of data.
Scanned Data
List

137
i-mode/i-motion/i-Channel
i-mode ................................................................................................................................ 138
Displaying the i-mode Menu ...................................................................... i-mode Menu 138
Accessing Sites
Accessing Sites................................................................................................................. 139
Operations on i-mode/Web Sites..................................................................................... 140
Saving Entries in My Menu................................................................................My Menu 141
Changing i-mode Password................................................. Change i-mode Password 142
Opening Web Site ...................................................................................Internet Access 142
Save and Quickly Display a Site/Homepage................................................Bookmarks 143
Save Site Contents..................................................................................... Screen Memo 144
Downloading Videos/Melodies from a Site
Saving Images from a Site or Screen Memo ...............................................Save image 145
Downloading Melodies from a Site....................................................................i-melody 146
Downloading Templates from a Site ........................................... Download Templates 146
Downloading Dictionaries from a Site ......................................Download Dictionaries 147
Useful i-mode Functions
Using the Phone To䋯Mail To䋯Web To 䋯 i-appliTo Functions
....................................................................... Phone To/Mail To/Web To/i-appliTofunction 147
Configuring i-mode Settings
Modifying i-mode Settings ...................................................................... i-mode Setting 147
Using the Message Service
When Receiving Messages .................................................................Receive Message 149
Checking for Messages ................................................................. Check new message 150
Displaying Messages in the Message Box ................................. MessageR/MessageF 150
Using Security Certificates
Handling SSL Certificates ............................................................... SSL Certificate Info 152
Using i-motion
i-motion .............................................................................................................................. 152
[Delete] .......................................................................................Introduction to i-motion 152
Using i-Channel
About i-Channel ................................................................................................................ 154
Displaying the i-mode Menu ............................................................................................ 155
Configuring i-Channel .........................................................................i-Channel Setting 155
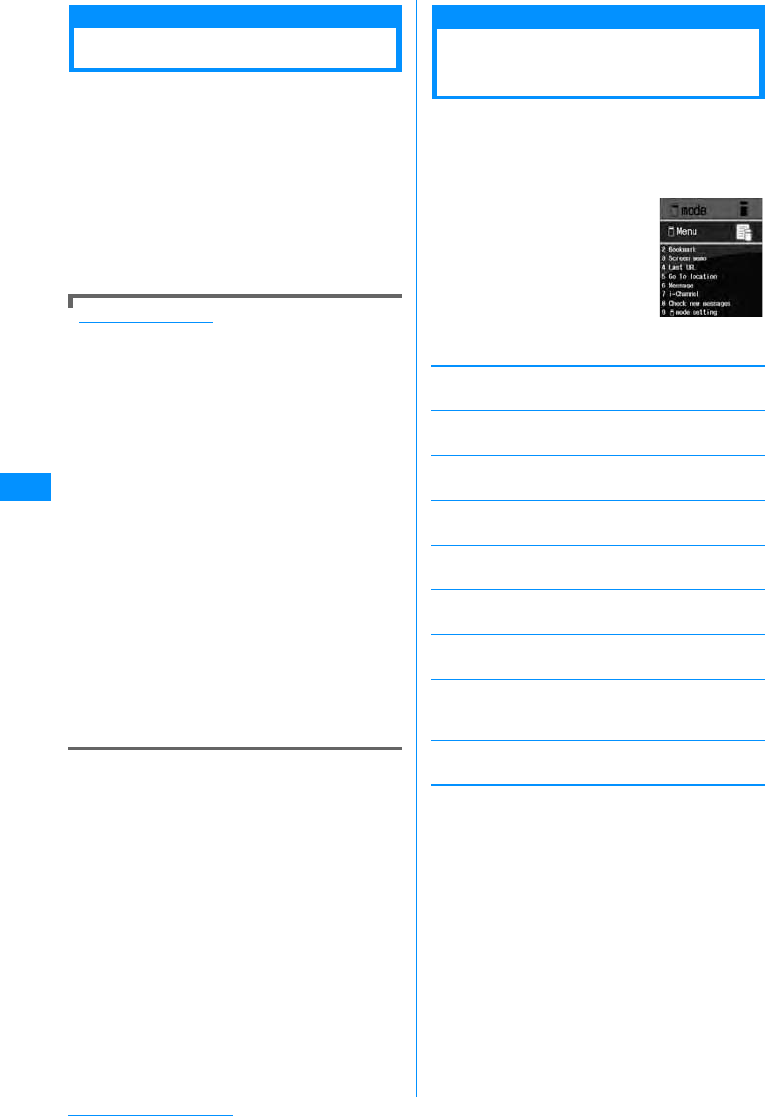
138
i-mode/i-motion/i-Channel
i-mode
i-mode is a service that makes use of the display of
the FOMA handset supporting i-mode (i-mode
handset) to enable you to use online services such
as sites (programs) access, Internet access and
i-mode mail.
• i-mode is a fee-based service requiring a separate
subscription. For details on subscription, contact the
"DoCoMo Information Center" on the back of this
manual.
• The i-mode service contents are subject to change.
For details, refer to the latest "Mobile Phone User's
Guide [i-mode]".
Before Using i-mode
• Contents of sites (programs) and web sites are
generally protected by copyright law. Data, such
as text or images you download to the i-mode
handset from sites (programs) or web sites, can
be used only for personal entertainment but
cannot be used, in whole or in part, as it is or after
modification, for sale or redistribution, without
the consent of the copyright holders.
• It is possible that contents saved on the i-mode
handset (Mail, Message R/F, Screen memo,
i-appli, i-motion) or Bookmarks will be deleted if
the battery pack is removed for more than a
month.
It is recommended that you make a copy of
important data and keep it in a separate place.
DoCoMo is not responsible for lost data .
• If you insert another UIM or turn the handset
power on without the UIM, depending on the
model of the handset, still images, videos,
melodies, mail attachments (still images, videos
or melodies), screen memos or Messages R/F
cannot be viewed or played.
• When the data with UIM restriction is set as the
Stand-by display or Ring alert, the setting will
revert to its default if a different UIM is inserted or
the handset power is turned on without a UIM.
i-mode Menu
Displaying the i-mode
Menu
You can use i-mode functions from the i-mode
Menu.
aThe Stand-by displayXIXPerforms
the following operations
[iMenu]
Connect to the i-mode Center.→P139
[Bookmark]
Open the Bookmark folder list screen.→P143
[Screen memo]
Open the Screen memo folder list screen.→P144
[Last URL]
Open the last viewed i-mode site or web site.→P140
[Go to location]
Enter a URL to connect to the Internet.→P142
[Message]
Display a list of Messages R/F.→P150
[i-Channel]
Open the i-channel menu screen.→P155
[Check new messages]
Check whether i-mode mail or Message R/F are stored
at the i-mode Center.→P150
[i-mode setting]
Configures the handset's i-mode functions.→P147
i-mode menu
screen

139
i-mode/i-motion/i-Channel
Accessing Sites
You can various services offered by IPs (Information
Providers).
• Services vary depending on the information
provider. Some sites require a separate
subscription.
ai-mode menu screen(P138)X"iMenu"
X"䊜 䊆䊠 䊷䋯ᬌ⚝ (Menu/Search)"
appears at the top of the screen during i-mode
communications.
• Press I [Stop] to interrupt a page download.
bSelect an item (link)
•I[Bookmark] : Save the URL to the current
page to bookmark.
•P : Exit i-mode. Select "Yes".
Site Display Screen Sub Menu
aSite being displayedXM[Menu]X
Performs the following operations
[Bookmark]
[Screen memo]
[Save image]
Save images contained in the displayed page.→P145
[Show properties]
[Go to location]
[Home]
Connects to the URL set as the "Home" page.
[Reload]
If the site is changed, the browser is updated with the
site's new contents.
䌛 䊜 䊷䊦ᚑ䌝
Create i-mode mail with the URL of the open page
pasted in the message text. Go to Step 2 in "Creating
and Sending i-mode Mail" (P161).
Select from the following options when a linked item is
selected.
[Change char code]
If characters do not display correctly, try changing the
character encoding.
[Add to phonebook]
Save the highlighted phone number or mail address to
the phonebook.→P141
[Retry]
Play, from the start, the animation/Flash file contained
in the displayed page.
Note
• When a number appears in front of a linked
item, press the corresponding Dial Key to visit
the site. It may not be possible to connect to
some sites.
• Some sites require the "serial number of your
mobile phone/UIM" to be sent in order to gain
access.
The "serial number of your mobile phone/UIM"
is sent to the IP (Information Provider) so that
the IP can recognize you and provide
customized information. The serial number is
also used to judge whether the contents that the
IP provides can be used on your mobile phone.
The "serial number of your mobile phone/UIM
card" is sent via the Internet to the IP
(Information Provider) and it may be seen by a
third party. This action does not reveal your
postal address, age, or sex to the information
provider.
C[Select]
Save
List
䋺
Save the URL of the open site as a Bookmark.
Go to Step 2 in "Saving in Bookmarks" (P143).
䋺
Open the Bookmark folder list screen.
→
P143
Save
List
䋺
Save the displayed page to the Screen memo.
→
P140
䋺
Open the Screen memo folder list screen.
→
P140
ShowURL
Page
Properties
Certificates
䋺Display the URL of the open page.
䋺Display the URL and title of the open
page.
䋺If the displayed Screen memo is an SSL
page, the SSL certificate is displayed.
XSelect certificate
Enter
URL
URL
history
䋺
You can view a web site by entering its URL.
Go to Step 2 (P142) of "Opening Web Site".
䋺
You can visit a web site by selecting an entry in
the URL history. Go to Step 2 (P142) of "Using
the URL History".
This page
Next page
䋺
Attaches the URL of the current page.
䋺
Attaches the URL of the link.
Continue on the next page
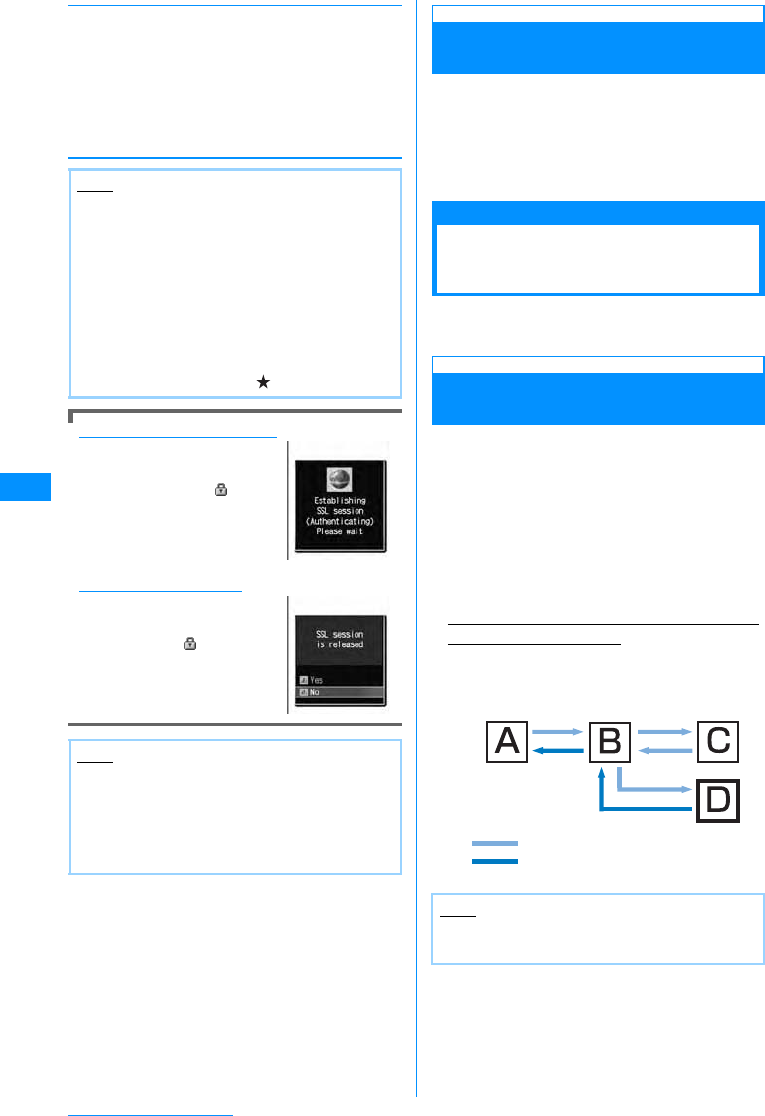
140
i-mode/i-motion/i-Channel
[Settings]
When an SSL page is acquired
The right screen opens when
you access an SSL site. After
acquisition is completed, the
SSL page opens and is
displayed on the top of the
screen.
To return to a normal site
The right screen opens when
you return to a non-SSL site.
Select "Yes" to return to a
normal site, and
disappears.
Last URL
Open the Most Recently Accessed
Web Site
After i-mode is terminated, the URL of the last open
page is saved in "Last URL". You can re-connect to
the most recently accessed page using Last URL.
ai-mode menu screen (P138) X"Last
URL" XC[Connect]
Operations on i-mode/
Web Sites
This section describes basic operations on i-mode/
Web sites (pages).
Going Back to the Previous Page/
Going to the Next Page
FOMA handset temporarily saves the displayed site
data in a cache.
Data saved to the cache can be displayed, without
visiting the site, by pressing J.
• However, the site will be reloaded if the data is larger
than the cache size, or if the site requires the latest
information always be loaded.
• Entered characters or settings at the site will not be
stored in the cache.
• Terminating i-mode deletes data from the cache.
Ex. Pages are displayed in the order of Screen
"A"→"B"→"C"→"B"→"D"
If opening the pages in the order "A"→"B"→"C",
then returning to "B", and opening "D", "C" is
deleted from the cache. Pressing J displays
"B"→"D".
Display image
Sound effect
settings
i-motion type
䋺Set whether to display images
contained on the current page.
X"On"/"Off"
䋺Set whether to play sound effects in
the Flash file contained in the site.
X"ON"/"OFF"
䋺
Set i-motion acquisition settings.
→
P153
Note
<Change character code>
• If characters do not display correctly, repeat the
operation. However, after changing the code 4
times, the default character code restores.
• Characters may not be displayed correctly even
after repeatedly changing the code.
The new character encoding is valid only for the
open site.
<Image display>
• Images may not be displayed correctly even set
to "Display". In that case, appears.
Note
• If the SSL Certificate has already expired or the
site does not support SSL, a warning indicating
that this site may not be secure may appear.
When connecting, select "Yes". However, your
personal information (credit card number or
contact address) may not be sent safely.
Note
• When a Flash file is played, displayed action
may be different from a standard site display.
㵺䊕䊷䉳䈱␜䈱㗅⇟
㵺↹㕙䇸 D䇹 䈎䉌 ೨䈱䊕䊷䉳 䉕 ␜䈘 䈞䈢
䇭䈫䈐䈱㗅
⇟
LL
L
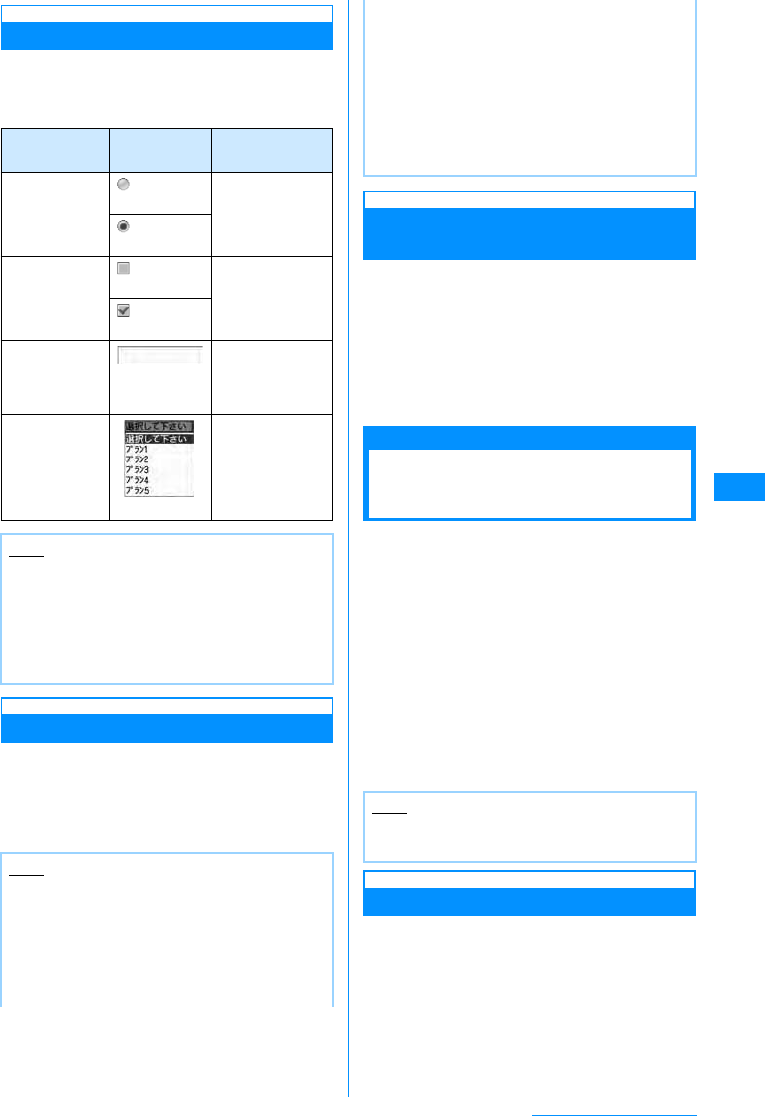
141
i-mode/i-motion/i-Channel
Selecting Links or Items
You may need to perform operations using the
following items while connected to i-mode. For
details, refer to "Mobile Phone User's Guide
[i-mode]".
Displaying Flash Animations
The FOMA handset supports Flash, an animation
technology using images and sounds. You can
access sites that provide various kinds of
animations using the handset. You can also
download a Flash file and set it as the Stand-by
display.
Adding Mail Address/Phone
Number to Phonebook
Saves the displayed phone number or mail address
on the site page to the phonebook.
aDisplayed siteXMove cursor to Phone
number/Mail address XM[Menu]X
"Add to Phonebook"X"Yes"
Go to Step 2 in "Saving Contacts to the
Phonebook from Received or Dialed Calls" (P80).
My Menu
Saving Entries in My
Menu
Frequently accessed sites can be saved in My
Menu for quick connection.
• Up to 45 entries can be saved in My Menu.
• Some sites cannot be saved in My Menu.
aDisplay a site to saveXSelect "䊙䉟 䊜
䊆䊠 䊷⊓㍳(Store in My Menu)"
• Item names may vary depending on the site.
bSelect i-mode password text boxX
Enter i-mode passwordX"OK"
• The entered i-mode password is masked by
asterisks "䋪".
• i-mode password→P142
Accessing a Site from My Menu
ai-mode menu screen (P138) X"iMenu"
X"English iMenu" X"My Menu"X
Select the site to visit
Name Display
example Details
Radio button (Not selected) You can select
only 1 choice.
(Selected)
Check box (Not selected) You can select
multiple choices.
(Selected)
Text Box Enter text. Select
a text box to open
the text entry
screen.
Pull down
Menu Select an item
from a list of
options.Click pull
down menus to
show these
options.
Note
<Text Box>
• Perform the following steps to transfer data from
the FOMA handset, such as Phonebook entries,
your own number, or data scanned with the
Barcode reader, into a text box. M[Menu]X
"Quote"X"Phonebook"/"Own number"/"Bar
code reader".
Note
• Even if a Flash file is shown, the animation may
not be shown correctly.
• Some Flash files can use data saved on your
handset. To allow Flash files to use the data, set
"Use phone info" to "Yes".
• Some Flash files play sound effects. To turn off
sound effects, set "Sound effect" to "OFF".
• If you play a Flash file with vibration set, the
handset vibrates regardless of what the
"Sounds&Vibration" setting is on the handset.
• Flash files are not displayed if "Image" is set to
"OFF".
• In some cases, the Flash file cannot be viewed
if it was saved or set as a Screen memo, but can
be viewed on the site.
• Flash sound effects are not played if they are
set to the Stand-by display / Call Display.
Note
• When you subscribe to a fee-based site in
"䊜 䊆䊠 䊷䋯ᬌ⚝ (Menu/Search)", .
142
i-mode/i-motion/i-Channel
Change i-mode Password
Changing i-mode Password
"i-mode Password" (4 digit) is required to subscribe
to and unsubscribe from Message Services or
fee-based i-mode sites, or configure Email settings.
The password is set to "0000" by default. Change it
to a number of your own choice. Do not reveal your
i-mode password to others.
ai-mode menu screen(P138)X"iMenu"
X"English iMenu"X"Options"X
"Change i-mode Password"
bSelect "Current Password" text boxX
Enter i-mode password (4 digits)
cSelect "New Password" text boxX
Enter new i-mode password (4 digits)
dSelect "New Password (Confirmation)"
text boxXEnter new i-mode password
(4 digits)
e"Select"
Internet Access
Opening Web Site
You can view a web site by entering its URL. A URL
consists of half-pitch alphanumeric characters and
symbols.
ai-mode menu screen(P138)X"Go to
location"
b"Input Address" XEnter the URL X
C[Set]
• You can enter up to 256 half-pitch characters.
Using the URL History
Up to 10 previously entered URLs are stored as the
URL History. You can visit a web site by using the
URL history.
ai-mode menu screen (P138)X"Go to
location"X"URLhistory"
URL History List Screen is shown.
bSelect the url to display
URL History List Screen Sub Menu
aURL history list screen(P142)XMove
cursor over URL historyXM[Menu]
XPerform the following operation
[Connect]
Connect to the selected site in the URL history.
[Edit URL]
Edit and connect to the site of the selected URL.
XEdit URLXC[Set]
[Delete]
[Compose mail]
Create i-mode mail with the URL of the selected
Bookmark in the message text. Go to Step 2 in
"Creating and Sending i-mode Mail" (P161).
Note
• If you forget the i-mode password, you need to
bring an ID such as your driver's license to a
service counter such as DoCoMo shop to have
the i-mode password reset to "0000".
Note
• Web sites that do not support i-mode may not
be viewed correctly.
• When connected by entering the same URL as
one in the history, the old information is
overwritten and the entry is shown on top as the
latest URL entry in the history.
Note
• If more than 10 URLs are entered, the oldest
URLs will be overwritten.
• The URL visited will be re-displayed at the top of
the URL history list.
Delete
this item
Deletes
selected
item
Delete
all
䋺Delete the selected/displayed URL history
entry. X"Yes"
䋺Select and delete an entry in the URL
history.
XCheck off the URL to be deletedXI
"Done"X"Yes"
• Press M[Menu], choose "Mark all" and
"Release all"
䋺Delete entire URL history.
XEnter the security codeX"Yes"

143
i-mode/i-motion/i-Channel
Bookmarks
Save and Quickly
Display a Site/
Homepage
Save frequently viewed sites or web sites in
Bookmarks to display the page quickly.
Saving in Bookmarks
• Up to 100 URLs can be saved in Bookmarks for all
folders.
aBrowse a web page XI[Bookmark]
bEdit the title & URLXI[Done]X
Select the save folder
• If there is already the same URL saved, a
confirmation screen to overwrite appears.
Select "Yes".
Accessing Web Sites from
Bookmarks
ai-mode menu screen(P138)X
"Bookmar k"
•I [Add]:You can add a folder. Up to 16 full-
pitch or 32 half-pitch characters can be entered
for a folder name.
bSelect a Folder
cSelect the url to display
•I[URL] : Shows the URL.
Bookmark Folder List Screen Sub Menu
aBookmark folder list screen(P143)X
Move cursor to folderXM[Menu]
XPerform the following operation
[Manage folders]
[Delete]
[Send all via IrDA]
Send all bookmarks via Infrared.
XEnter security codeXEnter Auth. Password
X"Yes"
[Copy all microSD]
Copies all bookmarks to a microSD memory card.
XEnter the security codeX"Yes"
[Memory status]
Displays number of saved bookmarks.
Note
• Up to 256 half-pitch characters can be saved for
each URL Bookmark.
• Up to 12 full-pitch or 24 half-pitch characters
can be saved for a Bookmark title.
• If the maximum number of Bookmarks has been
saved, an confirmation screen is shown.
Choose "Yes"XSelect folderXSelect Bookmark
to delete XSelect folder to save in.
Icon Description
(Grey) "Bookmark" (pre-installed folder)
(Blue) User defined folder
Bookmark
Folder List
Screen
Create folder
Edit folder name
Sort folder
䋺Create a folder. Up to 16 full-pitch
or 32 half-pitch characters can be
entered for a folder name.
XEnter folder name
䋺Edit selected folder name.
XEnter folder name
䋺Sort folders.
Select certificate
Delete Folder
Delete all
䋺Delete selected folder.
XEnter the security codeX"Yes"
䋺Deletes select folder's bookmarks
XEnter the security codeX"Yes"
Note
<Edit folder name/Sort folder/Delete a folder>
• The pre-installed "Bookmark" folder cannot be
renamed, moved, or deleted.
<Delete Folder>
• If there are bookmarks in the folder, user is
prompted to confirm deletion. Select "Yes" to
delete.
Bookmark list
screen
Continue on the next page
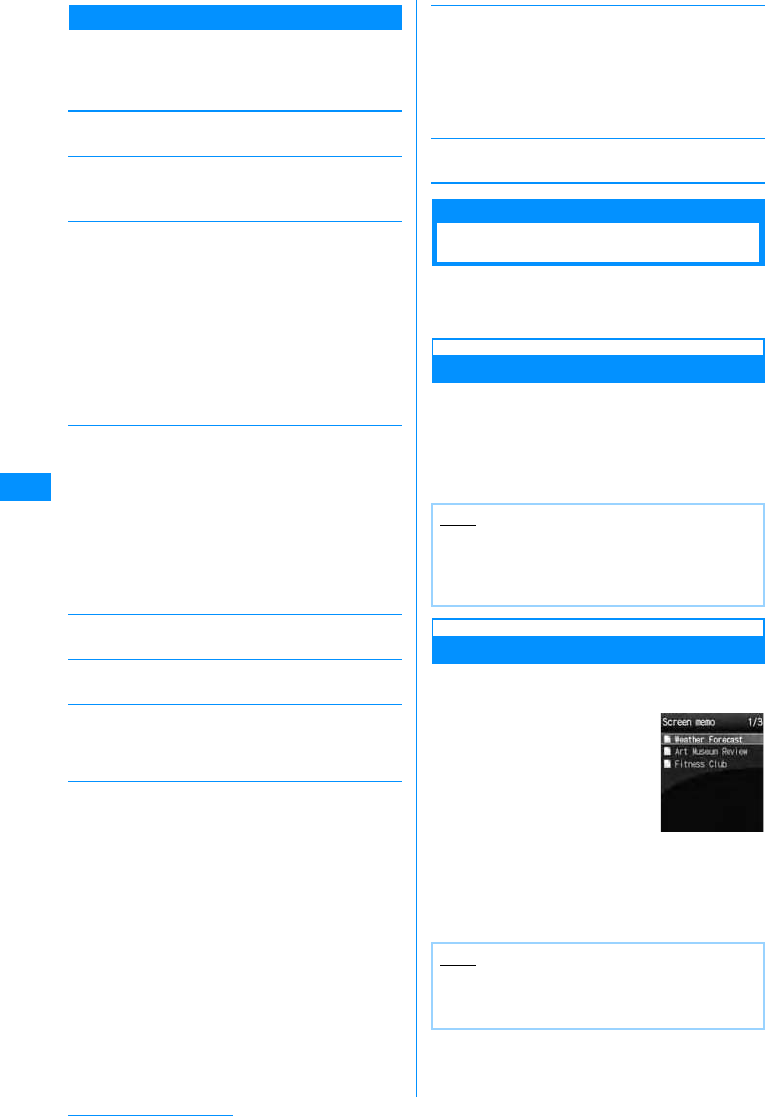
144
i-mode/i-motion/i-Channel
Bookmark Folder List Screen Sub Menu
aBookmark list screen(P143)XMove
cursor to folderXM[Menu]XPerform
the following operation
[Connect]
Connect to the selected bookmark's site.
䌛Edit title䌝
Edit the title & URL of the selected Bookmark.
XEdit title & URLXI[Done]
[Move]
[Delete]
[URL]
Display the URL of the selected Bookmark.
[Copy URL]
Copy the URL of the selected Bookmark.
䌛Compose message䌝
Attach the selected bookmark to a new i-mode mail.
Go to Step 2 (P161) in "Creating and Sending i-mode
Mail".
[Ir exchange]
䌛Copy to microSD card]
[Memory status]
Displays number of saved bookmarks.
Screen Memo
Save Site Contents
Save displayed site contents as a screen memo.
Saved Screen memo pages can be opened without
connecting to i-mode.
Saving Screen Memos
• Up to 50 Screen memos can be saved. However, the
number may be less if the saved pages are large.
• Each page can have up to a maximum of 100KB.
aSite displayedXM[Menu]X"Screen
memo"X"Save"X"Yes"
Viewing Screen Memos
ai-mode menu screen(P138)X"Screen
memo"
bSelect the Screen Memo to Display
The Screen memo detail screen is displayed.
•I[URL] : Shows the URL.
Move
this
Move
selected
Move all
䋺Move the selected bookmarks to another
folder.
XSelect destination folder
䋺Select bookmark and move.
XCheck off the bookmark to moveXI
[Done]XSelect destination folder
• Press M[Menu], choose "Mark all",
"Release all".
䋺Move all mail in the folder to another folder.
XSelect destination folder
Delete
Deletes
selected
item
Delete
all
䋺Delete selected bookmark.
X"Yes"
䋺Delete selected bookmark.
XCheck off the URL to be deletedXI
[Done]X"Yes"
• Press M[Menu], Choose "Mark all" and
"Release all"
䋺Delete all bookmarks.
XEnter the security codeX"Yes"
Send
Sendall
data
䋺Sends selected bookmark via Infrared.
X"Yes"
䋺Send bookmarks in folder via infrared.
XEnter security codeXEnter Auth.
Password X"Yes"
Copy one
Copy all
䋺Copies selected bookmark to microSD
memory card.
X"Yes"
䋺Copies selected bookmark to microSD
memory card.
XEnter the security codeX"Yes"
Note
• If the Screen memos save limit has been
reached, user will be prompted to select
something to delete. To continue, choose
"Yes"Xand select a Screen memo to delete.
Note
• The information saved in Screen memo is as of
the time it was saved. The memo may not
contain the latest information.
Screen memo
List Screen
145
i-mode/i-motion/i-Channel
Screen Memo List Screen's Sub Menu
aBookmark folder list screen(P144)X
Move cursor to Screen memoXM
[Menu]XPerform the following
operation
[View]
View selected Screen memo.
䌛Edit title䌝
Edit the title of the selected Screen memo.
XEdit the title
[Delete]
[URL]
Display selected Screen memo's URL.
[Protect on/off]
[Memory status]
Displays number of Screen memos
Screen Memo Detail Screen's Sub Menu
aScreen Memo details screen (P144)X
M[Menu]XPerform the following
operations
[Save image]
Save images contained in the Screen memo. Go to
Step 2 in "Saving Images from a Site or Screen memo"
(P145).
䌛Show properties䌝
[Add to phonebook]
Save the highlighted phone number or mail address to
the phonebook.→P141
䌛Retry䌝
Play a Flash movie or an animation contained in the
Screen Memo from the beginning.
[Sound effect]
Set whether to play sound effects of the Flash movie
contained in the Screen memo.
䌛Edit title䌝
Edit the title of the selected Screen memo.
XEdit the title
䌛Delete䌝
Delete Screen memos.
X"Yes"
䌛Protect on/off䌝
Protect or release the displayed Screen memo.
X"Yes"
Save image
Saving Images from a
Site or Screen Memo
You can save images contained in the site, Screen
memo to the handset.
• Obtained images will be saved in "i-mode" folder in
"My Pictures" of the "Data box".
Example: when saving the image viewed on site
aOn a site XM[Menu]X"Save image"
b"Select image" XSelect savable image
䂓To save the background image from a site
Select "Save background".
Delete
Deletes
selected
item
Delete
all
䋺Delete the selected Screen memo.
X"Yes"
䋺Delete selected Screen memo.
XCheck off the URL to be deletedXI
[Done]X"Yes"
• Press M[Menu], Choose "Mark all" and
"Release all"
䋺Delete all bookmarks.
XEnter the security codeX"Yes"
Protect On/Off
Protect
selected on/
off
Protect all on/
off
䋺Disable/Enable protection for the
selected Screen memo.
X"Yes"
䋺Select a Screen memo and toggle
"protect".
XCheck off the Screen memo to be
protectedXI[Done]X"Yes"
• Press M[Menu], Choose "Mark
all" and "Release all"
䋺Delete all Screen memos.
XEnter the security codeX"Yes"
ShowURL
Page
Properties
Certificates
䋺Display the URL of the displayed Screen
memo.
䋺Display the URL and title of the open
Screen memo.
䋺If the displayed Screen memo is an SSL
page, the SSL certificate is displayed.
XSelect certificate
On
Off
䋺Play the Flash's sound effects.
䋺Don't play the Flash's sound effects.
Note
<Delete>
• Protected Screen memos cannot be deleted.
Release Screen memo(s) before deleting.
<Protect On/Off>
• Up to 10 Screen memos can be protected. The
number of Screen memos that can be protected
may vary depending on the data.
Savable images have
a dotted border.
Continue on the next page
146
i-mode/i-motion/i-Channel
c"Yes"
i-melody
Downloading Melodies
from a Site
• Downloaded melodies will be saved in "i-mode"
folder in "Melody" of the "Data box".
aOn a siteXSelect a melody
When the download completes, a confirmation
opens.
b"Save"
Play 䋺Plays a downloaded melody.
File property
䋺Displays downloaded melody's
information.
Back 䋺Return to site without saving
melody.
Download Templates
Downloading Templates
from a Site
You can download templates for Deco-mail.
• Downloaded templates will be saved in "Template of
the Mail menu" (P165).
aOn a siteXSelect a template
When the download completes, a confirmation
opens.
b"Save"
Preview : Display the downloaded template.
File property
: Displays downloaded template's information.
Compose message/Send Mail
: Use a downloaded template to create Deco-mail.
Back : Return to site without saving template.
cI[Done]
• To save a renamed file, CX rename the file X
Press I[Done].
Note
• Images cannot be saved if "Image display" is set
to "Not display".
• The file cannot be saved if a file of the same
name already exist in the folder.
• The FOMA handset's saved images may not
display correctly even if they can be displayed at
the site.
• Some obtained images may not be displayed
correctly.
•
Image files of JPEG, GIF, or Progressive JPEG
䋪
formats cannot be displayed after saving them if
their size (pixels) exceed the following size.
However, they can be output to external devices
as mail attachment...etc.
䋪 Progressive JPEG is an image format that
used in the Internet, being improved image
sharpness gradually as downloading
proceeds.
- JPEG image files that exceed 1600x1200
pixels
- GIF or Progressive JPEG image files that
exceed 800x600 pixels
䂓Information
The stored content may be lost due to the
handset failure or repair. DoCoMo is not
responsible for lost data. It is recommended
that you keep saved content from the handset
on a microSD memory card. You can connect
the handset to a PC using Data Link Software
and a FOMA USB Cable (optional) and save
data to the PC.
Note
• Download may not be possible depending on
the site.
• The file cannot be saved if a file of the same
name already exist in the folder.
• Some downloaded melodies may not play
correctly.
• Some downloaded melodies may have a
section to be played already specified. These
melodies will be played in their entirety under
playback, however, as a melody set for a
ringtone only the specified part is played.
䂓Information
The stored content may be lost due to the
handset failure or repair. DoCoMo is not
responsible for lost data. It is recommended
that you keep saved content from the handset
on a microSD memory card. You can connect
the handset to a PC using Data Link Software
and a FOMA USB Cable (optional) and save
data to the PC.

147
i-mode/i-motion/i-Channel
Download Dictionaries
Downloading
Dictionaries from a Site
• Downloaded dictionaries are saved in "Download
dictionary" (P254)
• Up to 10 dictionaries can be saved. However, up to
5 can be used.
aOn a siteXSelect dictionary
After downloading the dictionary, the dictionary is
saved automatically on "Download Dictionary".
Phone To/Mail To/Web To/i-appliTofunction
Using the Phone To䋯
Mail To䋯Web To䋯
i-appliTo Functions
When the highlighted phone number,Email address
or URL is displayed on site page or mail, you can
use this function to easily make a call, send an
i-mode mail or display a web site.
• Phone To, AV Phone To, Mail To, or Web To
function in mail sent from a PC may not be available.
Phone To/AV Phone To Function
Make a voice call/video call (AV Phone). To the
highlighted phone number at a site or in a mail
message.
aSelect phone numberXPerform the
following operation
[Make Call]䋺 Make a voice call.
Video Call 䋺 Make a Video Phone.
Copy 䋺 Copies the selected phone number.
Mail To Function
You can send mail to an Email address highlighted
on a site page or mail.
aSelect mail address
• Go to Step 3 in "Creating and Sending i-mode
Mail" (P161).
Web To Function
Access a URL highlighted on a site page or mail.
aSelect URL
• In case of mail, press C[Connect] after Step1.
i-appli To Function
You can start i-appli from a URL highlighted on a
site or in i-mode mail.
• If there is no check in "Set i-appli to"(P189), "Site
i-appli to", "Mail i-appli to", the i-appli does not
function.
aSelect i-appli informationX"Yes"
i-mode Setting
Modifying i-mode
Settings
Set i-mode or Message R/F function.
Communication
Configuring Communication
Settings
a
i-mode menu screen (P138)
X
"i-mode
setting"
X"Communication"XPerform
the following operation
[Connection timeout]
Set the time until the connection is automatically
terminated if no response was returned due to network
traffic.→P148
Note
• Using Downloaded Dictionaries→P254
Note
• The Phone To/AV Phone To function may not
be available depending on a site.
Note
• The Mail To function may not be available
depending on a site.
• Correct the Email address before sending Email
if necessary.
Note
• The Web To function may not be available
depending on a site.
• Display of a URL varies depending on a site.
• The Web To function is available using a
highlighted item other than a URL.
Note
• It may not be possible to save an i-appli that
immediately starts after using the i-appli To
function.
Default Check new messages :
All checkmarked
Continue on the next page
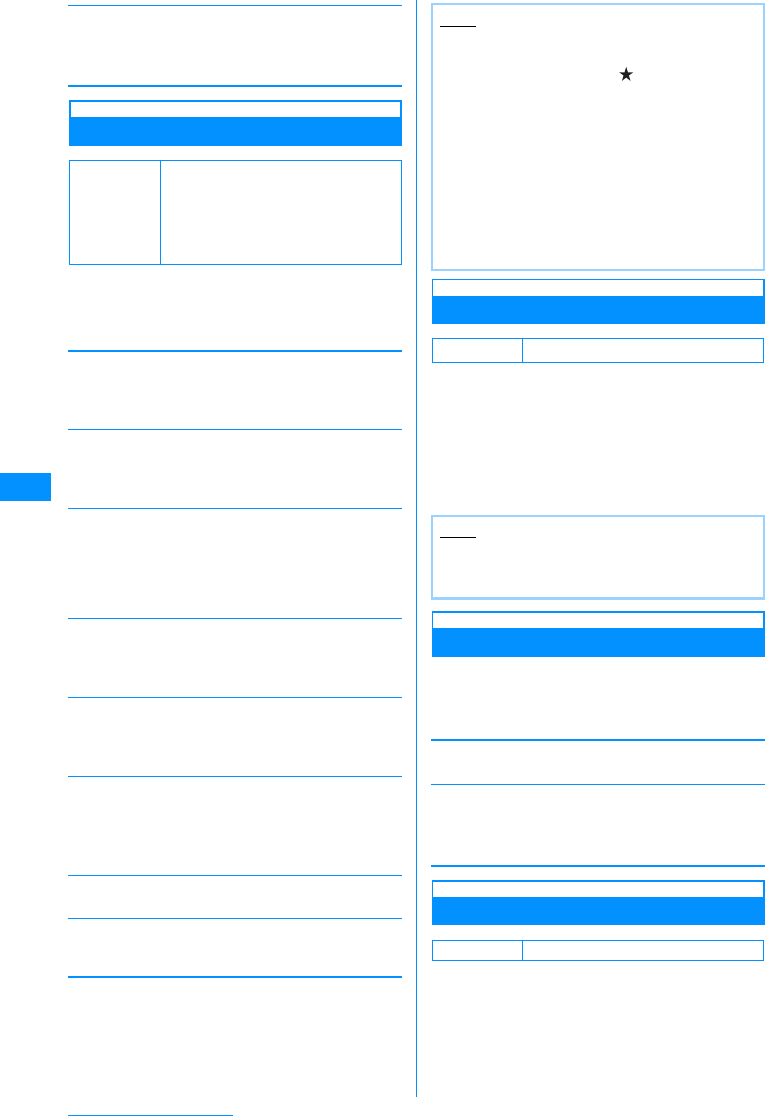
148
i-mode/i-motion/i-Channel
[Check new messages]
Sets request settings when using "Check new
messages",
XCheck off item to checkXI[Done]
Display
Configuring Display Settings
a
i-mode menu screen (P138)
X
"i-mode
setting"
X"Display" XPerform the
following operation
[Image]
Set whether to display images or Flash images
contained on the site page or Screen memo.
X"On"/"Off"
[Sound effect]
Set whether to play sound effects of the Flash movie
contained in the site/Screen memo.
X"ON"/"OFF"
[Use phone info]
When a Flash image is displayed on a site or in a
Screen memo, information saved on the handset may
be used. Sets whether to use the information on the
phone.
X"On"/"Off"
[Font size]
Set the font size for text on a site, Screen memo or
Message R/Fs.
X"Small"/"Standard"/"Large"
[Scroll]
Set the number of lines scrolled after pressing H on a
site, Screen memo or Message R/F.
X"1 line"/"3 lines"/"5 lines"/"Page"
[Message list]
Configures Message R/F list screen display.
[Auto-display]
Set to automatically display Messages R/F.→P150
[Melody auto play]
Set whether to automatically play melodies when
Messages R/F are displayed.→P150
Home
Configuring Home Settings
To set the home URL, select "Home" from the site
display screen sub menu.
a
bSelect "Enable" XSelect "http" field X
Enter the URL XI[Done]
Others
Configuring Other Settings
a
i-mode menu screen (P138)
X
"i-mode
setting"
X"Others" XPerform the
following operation
[Check settings]
Confirm the contents set in "i-mode setting".
[Reset settings]
Reset the contents set in "i-mode setting" to the
default.
XEnter the security codeX"Yes"
Connection Timeout
Setting the Connection Timeout
Set the time until the connection is automatically
terminated if no response was returned due to
network traffic.
Default
Image:ON
Sound effect : ON
Use phone info: Yes
Font size: Standard
Scroll: 1 line
Mail list: 2 lines
One Line
Two Lines
䋺Display subject alone on one line.
䋺Displays subject and receive time on two
lines.
Note
<Image>
• Images may not be displayed correctly even set
to "Display". In that case, appears.
<Sound Effect>
• Even if set to "ON", Sound Effects may not used
depending on the Flash file.
<Use phone info.>
• When this option is set to "Use", the battery
level, signal strength, Date & Time, Ring
Volume, Language, and handset model
information may be sent to IP (Information
Provider) via the Internet, and a third party may
intercept the information.
Default Disable, No URL
Note
• If "Home" is set to "Disable", even selecting
"Home" does not open the specified page. The
URL entered in the "http://" field will remain.
Default 60 seconds
149
i-mode/i-motion/i-Channel
a
i-mode menu screen (P138)
X
"i-mode
setting"
X"Communication" X
"Connection Timeout"
X
"60 seconds"/
"90 seconds"/"Unlimited"
• If "Unlimited" is selected, the connection will not
be automatically cancelled.
Host Selection
Changing the Access Point from
i-mode
Set an APN (Access Point Name) when you use
services other than i-mode (DoCoMo). i-mode and
i-mode mail become unavailable when you connect
to an APN other than DoCoMo.
Add Access Point
aM
[Menu]
X
(Settings)
X
"International
Roaming"
X
"Network"
X
"Host Selection"
Host Selection screen opens.
bI[Add]XEnter security codeX
Perform the following operation
[Host name]
Enter the host name within 15 full-pitch or 30 half-pitch
characters.
XEnter access point name
[Host number]
Enter the host number within 99 half-pitch alphanumeric
characters.
XEnter access point number
[Host address]
Enter the host address within 30 half-pitch alphanumeric
characters.
XEnter access point address
[Host address 2]
Enter the host address within 30 half-pitch
alphanumeric characters.
XEnter access point address
cI[Done]
Changing the Access Point
aHost Selection screen (P149) XSelect
Access point to change
Access Point Screen Sub Menu
aAccess Point screen (P149) XMove
cursor to Access pointXM[Menu]
XPerform the following operation
• "i-mode" functions cannot be carried out while
selecting an access point.
[Add new]
Add new connection.→P149
[Edit]
Edit the access point settings.
XEnter security codeXEdit Access point settingsX
I[Done]
[Delete]
Delete the selected Access point.
X"Yes"XEnter security code
[View]
Display the selected access point's settings.
•C[Edit] : Edit the access point settings.
Receive Message
When Receiving
Messages
When the handset is in the service area, Messages
R/F are sent automatically from the i-mode Center.
When Messages R/F arrive, the display, ringtone or
vibration notifies you of new messages.
• Up to 100 both message Rs/Fs can be saved.
However, the number of savable messages varies
depending on the message size.
Viewing New Messages
When Message R/F arrives, the latest message is
appears automatically.
• "Message auto-display" can be configured to allows
the detail screen to automatically open when
receiving a message R/F.→P150
Note
• Even if this option is set to "Unlimited", the
connection attempt may be terminated because
of the radio wave reception level.
Default i-mode
䋪If you use the i-mode service of DoCoMo, do
not change the access point.
Note
• Pake-Hodai is not applied to packet
communication with an APN other than
"i-mode".
• When an access point is changed, the ticker of
the i-Channel does not appear. When the
information is updated or you download the latest
information by pressing Q for 1+ seconds, the
ticker will be turned on automatically.
• If the set Access point is deleted, it is replaced
with "i-mode".

150
i-mode/i-motion/i-Channel
aAutomatically Receiving a Message
R/F When it Arrives
• After messages are received, the reception
result of Messages R/F is displayed.
• You are forced to return to the screen before
receiving mails if no operation is performed for
approximately 15 seconds,
Auto-display Message
Displaying Messages
Automatically
Set how to automatically display MessageR or
MessageF.
a
i-mode menu screen (P138)
X
"i-mode
setting"
X"Display" X"Auto-display"
XPerform the following operation
MessageR preferred
: If a Message R and F are received
simultaneously, MessageR is automatically
shown.
MessageR Only
: Only MessageR are automatically displayed.
MessageF preferred
: If a Message R and F are received
simultaneously, MessageF is automatically
shown.
MessageF Only
: Only MessageF are automatically displayed.
Auto-display off
: Messages are not displayed automatically.
Melody Auto Play
Playing a Melody Automatically
When a Message is Displayed
Set whether to automatically play melodies when
Messages R/F are displayed.
a
i-mode menu screen (P138)
X
"i-mode
setting
X"Display" X
"Melody Auto
Play"
X
"ON"/"OFF"
Check new message
Checking for Messages
MessageR/F that were not received because the
handset was out of service area are stored at the
i-mode Center and , , and will be
appeared on the top on the screen. Checking new
messages downloads the stored messages.
• You cannot check new messages when the handset
is out of service area.
• Set what to check (i-mode mail and Messages R/F)
in "Check new messages" (P180).
a
i-mode menu screen(
P138
)
X"
Check
New Message"
When check has completed, the reception result
screen opens.
b"MessageR"/"MessageF"
MessageR/MessageF
Displaying Messages in
the Message Box
When Messages R/F arrive from the i-mode Center,
, appears at the top of the screen.
ai-mode menu
screen(
P138
)X"Me
ssage"X"Message
R"/"Message F"
aReceived date
bSubject
bSelect a MessageR/F
•I[Delete] : Deletes
the Selected
MessageR/F
aReceived date and time
bSubject
䂓Icons displayed on the
Message R/F list/detail
screen
Default MessageR preferred
Default ON
Note
• Incoming Message R/F is saved at the i-mode
Center when:
- When Power is off
- During Video Call
- During Self mode settings
- When out of service area
- When FOMA handset's Message R/F is full.
Icon Description
䋯Unread Messages R/F
䋯Read Messages R/F
Protected.
Received date and time
䋯䋯 A melody/still picture/video is
attached.
Ex.:MessageR
List Screen
a
b
Ex.:MessageR
details
screen
a
b
151
i-mode/i-motion/i-Channel
Messages R/F List Screen Sub Menu
aMessageR/F List screen(P150)XMove
cursor to messageXM[Menu]
XPerform the following operation
[Delete]
[View settings]
[Filter]
Shows MessageR/F that meet certain conditions.
[Read all]
Set all MessageRs/Fs to "read".
X"Yes"
䌛Protect on/off䌝
[Memory status]
Display number of MessageRs/Fs.
Messages R/F Detail Screen Sub Menu
aMessageR/F Details Screen (P150)X
M[Menu]XPerform the following
operations
[Delete]
Delete the MessageR/F.
X"Yes"
䌛 ⼔䋯⼔⸃㒰䌝
Protect or release the displayed MessageR/F.
X"Yes"
䌛 㔚Ꮽ⊓㍳䌝
Save the addressor phone #/mail address highlighted
in the MessageR/F to the phonebook.
XSelect the address to save to the phonebookX
"Yes"
Go to Step 2 in "Saving Contacts to the Phonebook
from Received or Dialed Calls" (P80).
[Attach file]
Save/Play/View an attachment from the currently
displayed messageR/F.
Perform the following steps to save attachments.
XSelect the attachment X"Save" X"Yes"
Perform the following steps to play/view the
attachment.
X"Pay/View"
Attaches multiple copies of the same
file.
Damaged file.
䋨䋩
(Grey) Deleted(Ex. when a still image file)
䋨䋩
(blue) Not received(Ex. when a still image
file)
䋨䋩 Obtain a part of a message(Ex. when
a still image file)
Error
䋨䋩 Attachment with UIM operation
restriction activated
Subject
Delete
Deletes
selected
item
Del all
read
Delete all
䋺Delete the selected MessageR/F.
X"Yes"
䋺Delete selected MessageR/F.
XCheck off the MessageR/F to be
deletedXI[Done]X"Yes"
• Press M[Menu], choose from "Mark
all", "Release all", "Switch view"
䋺Delete all MessageRs/Fs.
XEnter the security codeX"Yes"
䋺Delete all MessageRs/Fs.
XEnter the security codeX"Yes"
Switch
View 䋺Configures Message R/F list screen display.
Display subject alone on one line.
Displays subject and receive time on two lines.
Sort 䋺Sorts MessageR/F by the set conditions.
X"Subject Asc"/"Subject Desc"/"Date Asc"/
"Date Desc"
Subject
Unread
Read
Protected
Not
protected
Image
Melody
All
䋺Only display MessageR/F with a
particular subject XEnter subject
䋺Only display unread messages.
䋺Only display read MessageR/F.
䋺Only display protected MessageR/F.
䋺Only display unprotected MessageR/F.
䋺Only display MessageR/F with
attachments.
䋺Only display MessageR/F with melodies.
䋺Display all MessageRs/Fs.
Protect On/Off
Protect
selected on/
off
Protect all
Unprotect all
䋺Protect or release the displayed
MessageR/F.
X"Yes"
䋺Select a MessageR/F and toggle
"protect".
XCheck off the MessageR/F to be
protectedXI[Done]X"Yes"
• Press M[Menu], choose from
"Mark all", "Release all", "Switch
view"
䋺Protect all MessageRs/Fs.
X"Yes"
䋺Unprotect all MessageRs/Fs.
X"Yes"
Note
<Delete>
• If there are unread MessageRs/Fs, user is
prompted to confirm deletion. Select "Yes" to
delete.
Continue on the next page
152
i-mode/i-motion/i-Channel
[Inline image]
Save an image inserted in the currently displayed
messageR/F.
XSelect the image X"Save" X"Yes"
• To view information about the selected image,
select "Info.".
Save background
Save the background of the displayed messageR/F.
X"Save" X"Yes"
•To view information about the image, select "Info.".
[View settings]
SSL Certificate Info
Handling SSL Certificates
View SSL Certificate contents, or set valid or invalid.
a
i-mode menu screen (P138)
X
"i-mode
setting"
X"Certificates"
Certificate list screen opens.
•C[Select] : Display the selected certificate's
details.
b
Move the cursor onto the certificate
X
M
[Enable] / [Disable]
•M[Menu] : Select "Certificate Info" and
"Enable/Disable" If you enable "Certificate Info",
the detail of the selected certificate will be
shown.
Certificate List Screen Sub Menu
aCertificateList screen(P152)XMovethe
cursor onto the certificateXM
[Menu]XPerform the following
operations
䌛Certificate info.䌝
Display detailed information about the selected
certificate.
䌛Valid/Invalid䌝
Set the selected certificate to valid or invalid.
Certificates used for SSL communication
Issued by an authentication company and saved
on the handset by default.
i-motion
i-motions are composed of video and sound files.
They can be obtained from sites, played, saved, and
even as the Stand-by display or Ringer ID, etc.
i-motion Types
There are 2 types of i-motion movies.
䂓Standard
There are 2 forms standard type.
aPlayback after downloading-type (Up to 500KB)
bPlayback while downloading-type (Up to 500KB)
• Some standard type i-motion movies cannot be
saved.
䂓Streaming Type
Playback while downloading an i-motion movie. Up
to 2MB of i-motion can be played. The data is
deleted after playback. It cannot be saved on the
FOMA handset.
Introduction to i-motion
Downloading i-motion
Movies from Sites
Up to 1000 i-motion movies can be saved. However,
the savable number depends on the amount of the
data.
• Downloaded i-motions are saved in the "i-mode"
folder under "i-motion" in the "Data box".
aOn a siteXSelect an i-motion
• When "i-motion auto play" is set to "ON", an
i-motion movie is played automatically after
being downloaded. Operations during Playback
→P201
Scroll
Font Size
䋺Sets the number of lines scrolled when H
is pressed at the MessageR/F Display
Screen.
X"1 line"/"3 lines"/"5 lines"/"Page"
䋺Set a font size for message R/F display
screen.
X"Small"/"Standard"/"Large"
Note
<Protect>
• Up to 100 MessageR and up to 100 MessageF
can be protected.
<Delete>
• Protected messages cannot be deleted.
Default All valid
Note
• i-motion movies that can be downloaded and
played are in MP4 (Mobile MP4) format.
i-motion movies in ASF format cannot be
downloaded or played.
• When you fast forward/rewind an i-motion
movie during playback, only sound is played;
video may not be displayed correctly.
153
i-mode/i-motion/i-Channel
䂓Streaming-Type i-motions
• Playback confirmation screen opens. When
"Yes" is selected, the i-motion plays during
download.
• If "i-motion type" is set to "Standard type",
streaming is impossible. If switching
between "Std/Streaming", please download
the i-motion again.→P153
bAfter downloadQX"Save"
Play
: Play a downloaded i-motion movie.
File property
: Display detailed information about the
downloaded i-motion movie.
Back
: Returns to the site display page without saving
the i-motion.
When Ticker Text is Highlighted
When a ticker is set in an i-motion movie, the ticker
is displayed during playback. You can use the
Phone To, AV Phone To, Mail To or Web To function
by selecting the highlighted phone number, mail
address or URL.
aAfter ending i-motion playbackXM
[Yes]
䂓To use the above functions while playing
i-motion
Pause the i-motion to use Phone To, AV
Phone To, Mail To, Web To function. While
playing i-motionXC/UXCXM[Yes].
i-motion Auto Play
Setting Whether to Play an
i-motion Movie Automatically
Toggle playing an i-motion automatically when it is
downloaded from a site or mail.
a
i-mode menu screen (P138)
X
"i-mode
setting"
X
"i-motion"
X
"i-motion Auto
Play"
X
"ON"/"OFF"
i-motion type
Set i-motion Acquisition Aettings.
When downloading a new i-motion, sets the
i-motion's type.
a
i-mode menu screen (P138)
X
"i-mode
setting"
X"i-motion" X"i-motion type"
XSelect he type
Standard
: Only download standard-type i-motions.
Standard type / Streaming type
: Download standard and streaming-type
i-motions.
Note
• Depending on the connected site or i-motion
movie, the i-motion movie may not be
downloaded, or played during the download.
• If you play a movie while downloading it, the
movie may stop playing or the picture may
become distorted due to signal reception.
• Some i-motion movies cannot be saved on the
FOMA handset.
• The file cannot be saved if a file of the same
name already exist in the folder.
• Some i-motion movies have playback
restrictions.
If an i-motion has a restricted playback
(IE: repetitions/length of time, or an expiry date),
is displayed. An i-motion movie with
playback period restrictions cannot be played
prior to or after the restriction period.
• Some downloaded i-motion movies may not
play correctly.
䂓Information
The stored content may be lost due to the
handset failure or repair. DoCoMo is not
responsible for lost data. It is recommended
that you keep saved content from the handset
on a microSD memory card. You can connect
the handset to a PC using Data Link Software
and a FOMA USB Cable (optional) and save
data to the PC.
Default ON
Note
• Even if set to "OFF", streaming-type i-motions
will be auto-played.
Default Standard
Note
• When downloading streaming-type i-motions,
"Std/Streaming" must be set.
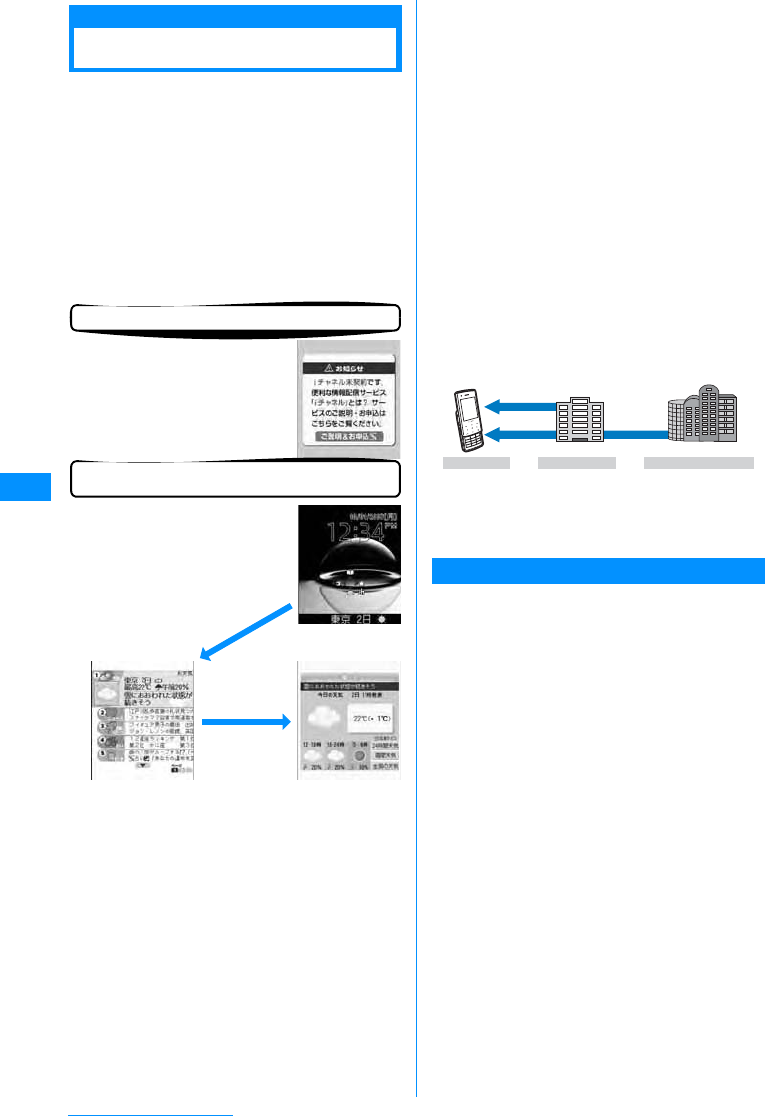
154
i-mode/i-motion/i-Channel
About i-Channel
The service which DoCoMo or IP (Information
Provider) provide graphical view of information such
as news or weather forecasts, especially for
i-Channel compatible handset.
It periodically updates information and displays it as
a ticker on the Stand-by display. If Qis pressed
for more than 1 second, the channel list is shown.
Moreover, rich detail information can be acquired
by selecting favorite channels from a channel list.
• Display method of Channel list→P155
• For precautions to take and more details about
i-Channel, refer to "Mobile Phone User's Guide
(i-mode<FOMA>)".
㶎䋺 Screens shown are images. They differ from
actual ones.
There are 2 types of channels: "Basic channels" and
"Favorite channels".
"Basic channels" is channel provided by DoCoMo.
Because it is registered by default, it is immediately
available upon subscription to i-Channel. Packet
communication charges applying to automatic
update of information delivered for "Basic
channels" is included in i-Channel service fee.
"Favorite channels" is provided by IP (Information
Provider) other than DoCoMo and available when
you register a favorite one. Packet communication
charges applying to automatic update of
information delivered for "Favorite channels" is not
included in i-Channel service fee.
Information for "Basic channels" and "Favorite
channels" can be displayed as a ticker on the
Standby-display.
• Some "Favorite channels" may require an
information fee for use.
• Some "Favorite channels" may require a separate
subscription to their sponsoring IP (Information
Provider).
• Both "Basic channels" and "Favorite channels"
require packet communication charges for viewing
detailed information from a channel list, on top of the
i-Channel service fee.
• The i-Channel service charge does not includes the
packet communication charges for auto-updating
the "Basic channels" information that is delivered
during International Roaming.
• i-Channel is a fee-based service requiring a
separate subscription (i-mode contract is necessary
for subscription).
• Operations→P155
Trial Service
When you use an i-Channel compatible handset and
have subscribed to i-mode, but not to i-Channel for
the subscriber line using the i-Channel compatible
handset, you can use "Basic channels" for a
predetermined period of time without service
charges. Note that you will be charged packet
communication charges apply for viewing detail
information from a channel list.
• For precautions and details of using the trial service,
refer to "Mobile Phone User's Guide [i-mode]".
Trial service will be started automatically in principle
when a predetermined period of time has elapsed
after inserting UIM and starting to use i-Channel
compatible handset. When automatic start is
disabled, i-channel can be started by pressing Q
for one second. Trial service can be used only once
for 1 subscriber line. Trial service will be terminated
automatically when a predetermined period of time
has elapsed after the start. For the procedure to
terminate it halfway, refer to "Mobile Phone User's
Guide [i-mode]".
Before subscribing to the service
When you have not subscribed to
i-Channel
After the service subscription procedures
have been completed
After subscribing to i-Channel, a
ticker appears on the Stand-by
display. At a fixed period of time,
information is received or
channel list is displayed.
Pressing Q for more
than 1 second brings up
the channel list. You can
view in list format
information, etc. given in
ticker of each channel.
You can view
detail
information
screen of each
channel by
selecting it.
Q(for 1+ sec)
IP (Information Provider)
i-mode Handset i-mode Center
Information of
Preference Channel
Information of
the Basic Channel
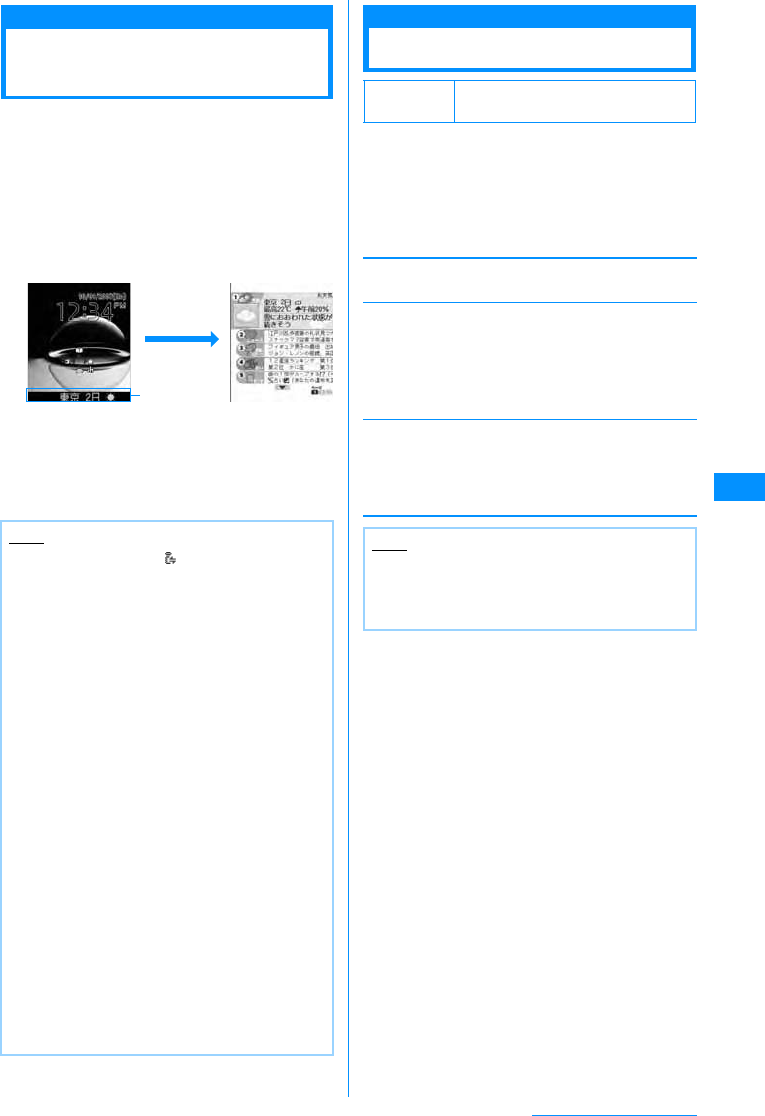
155
i-mode/i-motion/i-Channel
Displaying the i-mode
Menu
When subscribed to an i-Channel, information
appears, when received, as a ticker on the Stand-by
Display.
• To automatically display the ticker, set "Ticker
display" to "ON".→P155
• When Public Mode (Drive Mode) is set, the ticker will
not be displayed.
aThe Stand-by displayXQ(More than
1 second)
bSelect Channel item
The site is connected and detail information
appears.
•L : Returns to the channel list screen.
i-Channel Setting
Configuring i-Channel
You can set whether to display the ticker on the
Stand-by display or to set the ticker display style.
All the i-channel data in the FOMA handset will be
deleted.
aIX"i-Channel"XPerforms the
following operations
[i-Channel list]
Open the Channel list screen.
䌛Ticker setting䌝
䌛Reset i-Channel䌝
Deletes all i-channel information on the FOMA handset
and restores defaults. Ticker Display is also reset to
default settings.
X"Yes"
Note
• While receiving data, blinks.
• Even when information is received, no ring alert
or vibrator operates. Also, the Call Indicator
does not light/blink.
• Information may not be received when the
handset power is turned off, while out of service
area, or when the signal reception is weak.
Press Q to receive information. The Stand-by
display ticker will show the information
automatically. Also, information may not be
received while using default settings. In this
case, hold down Q. The ticker on the Stand-
by display will automatically display the
information.
• In some conditions, information may be
received only when a channel list is displayed.
• If you change the connection destination in
"Host selection" of "i-mode setting", the
connection destination of i-Channel is also
changed. (Normally, you do not need to change
the settings).
• The ticker will not appear after i-Channel is
cancelled.
• When an i-motion is set to the Standby display,
the ticker will not be shown during playback.
• There may be a notice of failure to acquire
channel information in the following cases.
- When i-Channel connection destination has
been changed
- When UIM has been replaced
Channel list
Ticker
Q
(One
second or
Ticker
Default Ticker display : ON
Ticker speed: Normal
Ticker Display
Ticker speed
䋺
Set whether to display a Ticker on the
Stand-by display.
X
"ON"/"OFF"
䋺
Set the ticker display rate.
X
"Slow"/"Normal"/"Fast"
Note
<Ticker Display>
• If you cancel the i-mode service before
canceling i-channel, the "Ticker Display" setting
remains.


157
Mail
Mail Functions of FOMA Handset.................................................................................... 158
What is i-mode Mail? ........................................................................................................ 158
Displaying Mail Menu.......................................................................................Mail Menu 160
Creating i-mode Mail/Deco-Mail
Creating and Sending i-mode Mail .........................Creating and sending i-mode mail 161
Creating and Sending Deco-mail.................................................................... Deco-mail 162
Creating Deco-mail Using Template.................................................................Template 164
Attaching a File ...........................................................................................Attaching file 166
Receiving/Operating i-mode Mail
When i-mode Mail is Received......................................... Automatic Reception of Mail 166
Selecting and Receiving i-mode Mail .....................................................Receive option 167
Checking for i-mode Mails ............................................................ Check new message 168
Replying to i-mode Mail............................................................ Replying to i-mode Mail 168
Forwarding i-mode Mail to Another Receiver......................... Forwarding i-mode Mail 168
Registering Mail Address/Phone Number to Phonebook ............................................. 169
Playing/Saving an Attached File from i-mode Mail ........................................................ 169
Operating Mail BOX
Displaying Mail in Received/Sent/Unsent Mailbox
......................................................Received Mail BOX/Sent Mail BOX / Unsent Mail BOX 170
Using Mail History
Using Mail Logs..............................................Received Mails/Sent Mails/Recent Mails 178
Configuring Mail Settings
Setting FOMA Handset Mail Functions Settings.........................................Mail setting 179
Using SMS (Short Message Service)
Creating and Sending SMS (Short Message Service) Message ...................................
.................................................................................................................. SMSCompose/Send 181
Automatically Receiving SMS (Short Message Service) Message......... Receive SMS 181
Checking for SMS (Short Message Service) Message .......................Check new SMS 182
Configuring SMS (Short Message Service) Settings .............................. SMS Settings 182
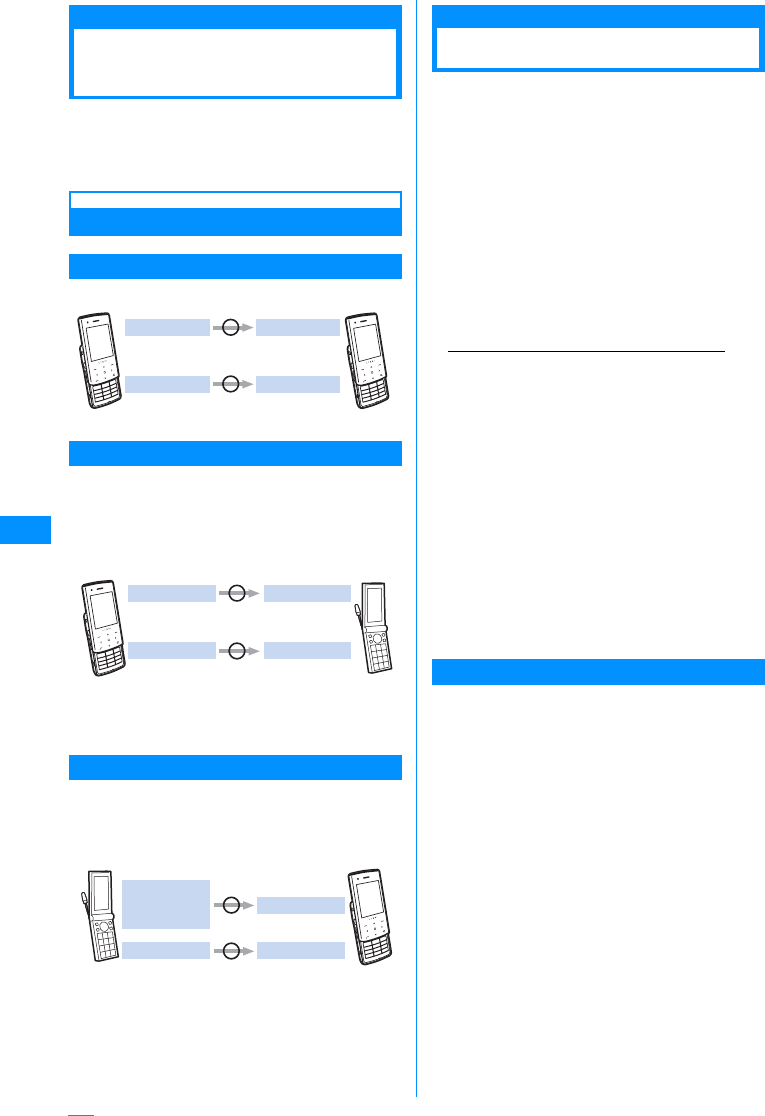
158
Mail
Mail Functions of FOMA
Handset
FOMA handset provides 2 mail functions: i-mode
mail and SMS.
• Using i-mode mail requires i-mode subscription.
• Using SMS requires no i-mode subscription.
Sending and Receiving Mail
FOMA Handset→FOMA Handset
Both i-mode mail and SMS can be used.
FOMA Handset
→
mova i-mode Handset
Both i-mode mail and SMS can be used.
• SMS sent from a FOMA handset is received by a
mova i-mode handset as an i-mode mail.
• When "SMS report request" is "ON", SMS cannot be
sent to a mova i-mode handset.
䋪䋺 This differs depending on the mova i-mode
handset settings.
mova i-mode Handset
→
FOMA Handset
i-mode mails and SMS sent from mova i-mode
handset can be received.
•Short mail䋪 sent from a mova i-mode handset can
be received by a FOMA handset as a SMS.
䋪䋺 Short mail is a service that allows sending and
receiving text messages with a mova handset.
What is i-mode Mail?
Upon subscription to i-mode, you can send and
receive e-mails via internet, as well as between
i-mode handsets (including mova handset).
On top of the text, a total of 2MB of attachments
can be sent in 10 files (JPEG, etc..). Also, i-mode
mail can be decorated by changing the font color,
size, or background color of the message text. In
addition, you can insert Deco-mail pictograms from
the many pre-installed ones that can be inserted in
the same manner as Pictographs, to easily create
and send expressive mail.
The Mail address given at i-mode subscription is as
below.
<When newly subscribing to i-mode>
Before the "@", a random number is inserted;
please make certain of the Mail address.
Example: abc1234 ... 789xyz@docomo.ne.jp
Checking your mail address
"iMenu" →"English iMenu" →"Options" →"Mail
Settings" →"Confirm Mail Address"
• Between i-mode handsets (including mova
handsets), mails can be sent and received using
only the address preceding @.
• When sending mails from PC, etc. to FOMA
handset, use the whole address containing
@docomo.ne.jp.
•Sending mail →P161
• Receiving mail →P166
• The i-mode service contents are subject to
change. For details, refer to "Mobile Phone
User's Guide [i-mode]".
䂓Receive option
The subject of mail stored at the i-mode Center can
be viewed beforehand; it can then be deleted
(without downloading) or downloaded.→P167
Mail Setting
You can make various settings as described below.
<Setting procedure>
"iMenu" → "English iMenu" → "Options" → "Mail
Settings" → Specify each item
• For details, refer to "Mobile Phone User's Guide
[i-mode]" that was provided when you subscribed
to i-mode.
䂓Changing your mail address [Mail Address
(Change Mail Address)]
You can change characters preceding mark @ in a mail
address, e.g., "docomo.xx_ab1234yz@docomo.ne.jp".
䂓Confirm Mail Address [Mail Address (Confirm
Mail Address)]
You can confirm the current mail address.
Up to 70 characters (Japanese)
Up to 160 characters (English)
Up to 5000 full-pitch characters
SMS SMS
i-mode Maili-mode Mail
FOMA handset FOMA hands
e
FOMA handset i-mode hands
mova servi
c
Up to 2000 full-pitch characters?
Up to 70 characters (Japanese)
Up to 160 characters (English)
SMS i-mode Mail
i-mode Mail i-mode Mail
FOMA hand
s
i-mode
handset
of mova service
Up to 50 characters
Up to 250 full-pitch characters
Short mail
Dial special
number 1655 SMS
i-mode Mail i-mode Mail
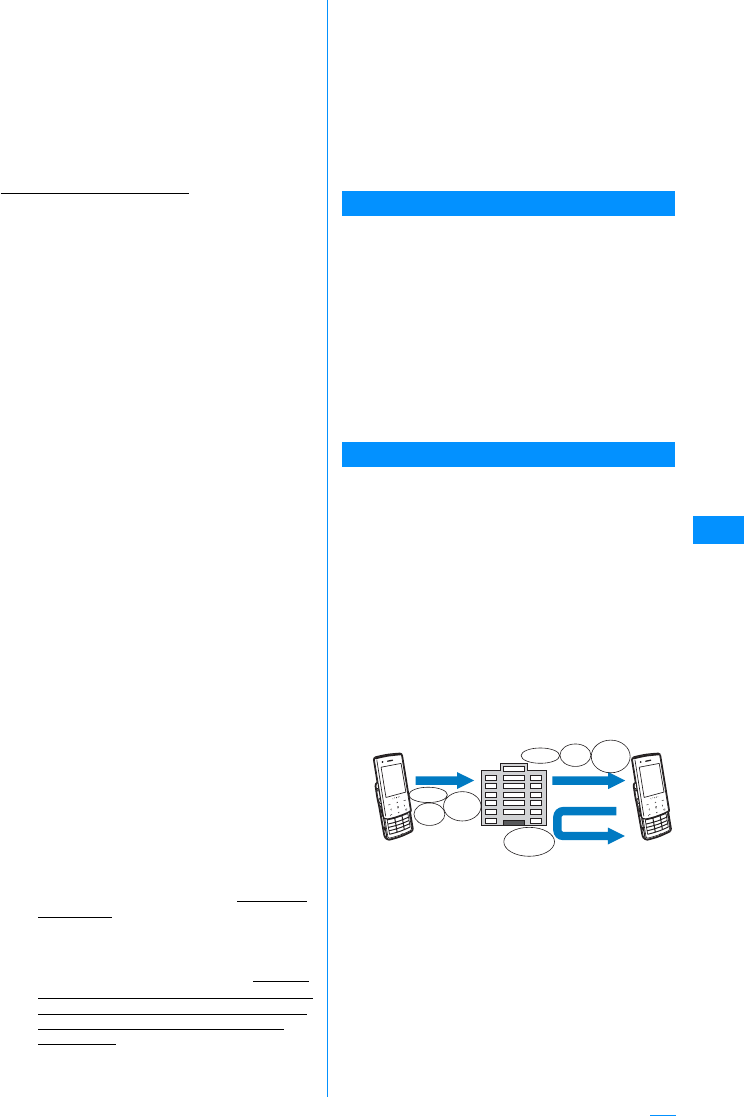
159
Mail
䂓Registering secret code [Mail Address (Other
Settings) →Register a Secret Code]
When using a mail address of format "mobile phone
number@docomo.ne.jp", you can register 4-digit
secret code in addition to the mail address.
Because mails with no secret code attached are not
received, you can avoid receiving unnecessary
messages.
䂓Resetting mail address [Mail Address (Other
Settings) →Reset Mail Address]
You can set your mail address to
"phone number@docomo.ne.jp".
䂓Spam Mail Prevention
You can set your mail address to "mobile phone
number@docomo.ne.jp".
aReject Mail with URL[Spam Mail Prevention)
→ Reject mail with URL]
Can set i-mode to reject mails classified by the
NetStar corporation as being from Dating, Adult,
Illegal and Insecure domains.
bReject/Receive Mail Settings [Receiving Mail
(Spam Mail Prevention) → Reject/Receive Mail
Settings]
• You can specify the senders from which you
receive mails among DoCoMo, au,
SoftBank, Tu-Ka and WILLCOM.
You can specify sender's domains or email
addresses from which you receive mails.
Also, you can exclude specific mail
addresses to reject, even if they are from the
accepted senders or domains you specified.
You can reject mail pretending to use a
mobile phone or PHS domain from Internet
other than the above.
cSMS Rejection Settings [Receiving Mail (Spam
Mail Prevention) → SMS Rejection Settings]
• You can restrict incoming SMS by selecting
an option from "SMS৻ᜎุ (Reject All
SMS)", "㕖ㅢ⍮SMSᜎุ (Reject
Anonymous SMS)", "࿖㓙SMSᜎุ (Reject
Intl. SMS)" or "㕖ㅢ⍮SMS䈶࿖㓙SMSᜎ
ุ (Reject Anonymous and Intl. SMS)". You
can also view the current settings.
dRestricting reception of mails from mass i-mode
mail senders [Receiving Mail (Other Settings)
→Reject Mass i-mode Mail Senders]
• You reject 201st and subsequent i-mode
mails sent from one i-mode handset
(including mova handset) a day. "Reject" is
set by default, so you do not have to change
the settings to reject messages sent from
mass mail senders.
eReject Unsolicited Ad Mail [Receiving Mail
(Other Settings) → Reject Unsolicited Ad Mail]
• You reject reception of mails with "Reject
Unsolicited Ad Mail" description added to a
mail subject which are sent unilaterally for
advertisement and/or promotion without
agreement of the receiver. "Reject" is set by
default, so you do not have to change the
settings to reject such messages. (Senders
are obligated by law to give description "ᧂᛚ
⻌ᐢ๔䋪 (Unsolicited Ad Mail)" (6 full-pitch
characters) to the beginning of the mail
subject field.)
䂓Limiting mail size [Receiving Mail (Limit Mail
Size)]
You can limit i-mode mails to be received with the
predetermined size.
䂓Confirm Settings [Receiving Mail (Confirm
Settings)]
You can check the current settings of mail
reception/rejection and others.
䂓Suspending mail function [Suspend Mail]
You can suspend the mail function in the i-mode
Center when it is not necessary.
When Mail Cannot be Received
Mail delivered to i-mode Center will be immediately
sent to your i-mode handset. When the i-mode
handset is powered off or the i-mode service area
or due to other reasons, the mail is held at the i-
mode center, the center resends this mail to the i-
mode handset within a span of 720 hours by the
time you receive it.䋪
Also, if the Receive option settings are set, they
allow a user to set which i-mode mails will be
downloaded from the i-mode center.
䋪䋺 Mails you have not received are stored in i-mode
Center for 720 hours. Mail resend conditions
change according to the unsent condition.
Other Functions
䂓Sending/Receiving Files
i-mode mails can store 2MB of attachments that
can be of any type. A limit of 10 files, with a total
size of 2MB, can be attached and sent. When
receiving an i-mode mail (2MB), all files can be
received, or just the first 100KB (Auto receive file
attachment); any remaining files that are desired
can be selected and downloaded (Selected
attachment download). As well, the handset's file
send settings permit leaving files less than 100KB
on the server, letting the user choose whether or
not to download it.
Depending on the recipient's handset, some files
may not be properly received because of included
file types and sizes.
Sending Receiving
Receive option
Auto receiving
Auto
receive
attach
file
Attach
File
Receive
option
attach file
Message Decomail
picture
Attach
File
Message
Continue on the next page
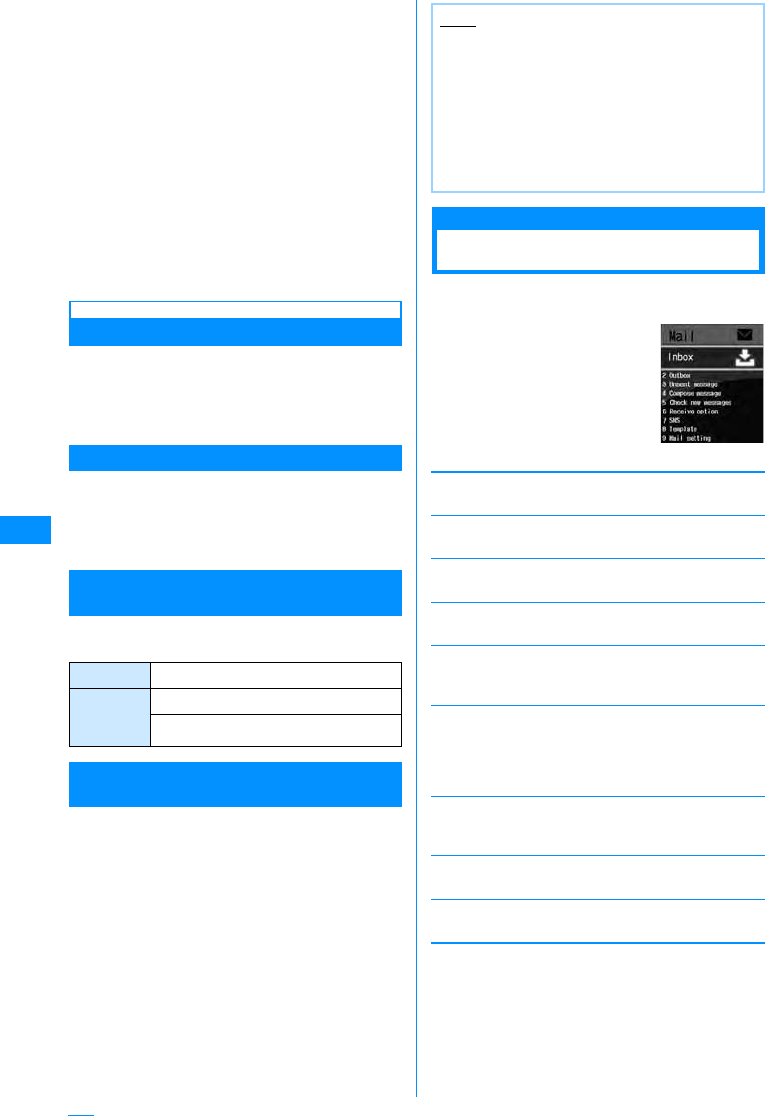
160
Mail
䂓Deco-mail
You can create and send or receive enjoyable
i-mode mail edited in a decorative manner such as
changing the font size and/or background color or
pasting an image in the text. The many preinstalled
deco-mail pictographs, like emoticons, can be
easily inserted into a mail and be sent. (In the case
of emails sent from a PC, deco-mail pictographs
may not display properly).
If deco-mail is sent to a non-supporting phone or
one with a 10KB download limit, the other party
may receive a mail containing URL. In this case,
the receiver can view the Deco-mail by selecting
the indicated URL.
• Editing/Sending Deco-mail →P162
• Applicable models: Available on Deco-mail
compatible handsets. For details, refer to "Mobile
Phone User's Guide [i-mode]".
SMS (Short Message Service)
You can send/receive text messages using only the
mobile phone numbers without subscription to
i-mode.
Sending →P181䇭Receiving →P181䇭
Checking →P182
SMS (Short Message Service) Destination
SMS destination is "subscribed mobile phone
number".
• For destinations used for sending/receiving SMS to/
from overseas carriers other then DoCoMo, visit
DoCoMo's web site.
Number of Characters That Can be Sent/
Received
The number of characters that can be sent/
received in SMS is as listed below.
When SMS (Short Message Service)
Messages Cannot be Received
SMS delivered to SMS Center will be immediately
sent to your FOMA handset. Note that, however;
when your FOMA handset is OFF or out of service
area, the SMS is stored in SMS Center.
Mail Menu
Displaying Mail Menu
aThe Stand-by displayXDXPerforms
the following operation
[Received mail]
Displays received mail folder list screen.→P170
[Sent mail]
Displays sent mail folder list screen.→P170
[Unsent message
Open the Unsent maillist screen.→P171
[Compose message]
Create a new i-mode mail.→P161
[Check new messages]
Receive i-mode mail stored in i-mode Center by i-mode
check.→P168
[Receive option]
You can check subjects of i-mode mails stored in
i-mode Center and select ones to be received or
deleted without reception from the i-mode Center.
→P167
[SMS]
Compose new SMS and receive SMS stored in SMS
Center by Check new SMS.→P181, P182
[Template]
Show a list of saved templates.→P165
[Mail setting]
Set the mail function.→P179
Receiver 21 characters (including "+")
SMS text
entry
settings
Japanese (70 characters)
English (160 characters)
Note
• The maximum storage period of SMS in SMS
Center is 72 hours. The sender can specify the
storage period within "SMS validity period".→
P182
• SMS expired is automatically deleted.
• SMS stored in SMS Center can be received by
"Check new SMS".→P182
• When SMS stored in SMS Center is received, it
is deleted from SMS Center.
Mail Menu screen
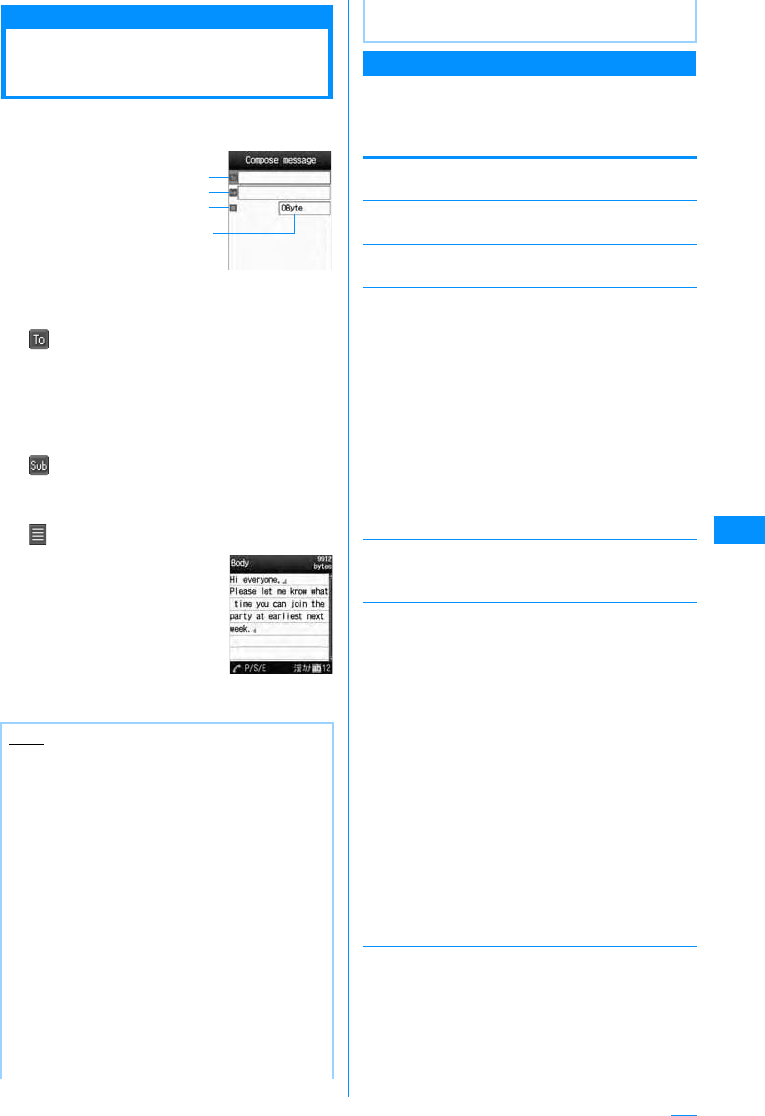
161
Mail
Creating and sending i-mode mail
Creating and Sending
i-mode Mail
aMail menu screen(P160)X"Compose
message"
b(Receiver)Select fieldX"Input
Address"XEnter the address
• Up to 50 half-pitch characters can be entered.
• The address can be selected from the
Phonebook, Sent mail logs and Received mail
logs.→P161
cSelect (Subject) fieldXInput subject
• Up to 15 full-pitch or 30 half-pitch characters
can be entered.
dSelect (Body) fieldXInput body
• Up to 5000 full-pitch or
10000 half-pitch characters
can be entered.
eI[Send]
I-mode Mail Creation Screen Sub Menu
ai-mode mail creation screen(P161)X
M[Menu]XPerform the following
operations
[Send via]
Send mail.
[Preview]
Displays a preview of the sent mail.
[Save]
Save mail being created or edited in Unsent box.
[Add address]
Send to several addresses Up to five addresses can be
added.
[Delete address]
Delete a selected receiver.
X"Yes"
[Cng. rcv. type]
[Template]
Note
• To decorate mail →P163
• To send with attached file →P166
• You can insert a new line feed while editing the
message text. The line feed is counted as
1 full-pitch character.
• A space is counted as 1 half-pitch character.
• Characters may not be sent correctly to the
receiver depending on the radio wave reception
level.
• Half-pitch katakana and pictographs (E-Moji)
except for mail exchanged between i-mode
handsets may not be displayed correctly.
• The secret code is added automatically when
the mail whose address is set with the secret
code is sent. However, the address of the sent
mail does not display the added secret code.
• Even if i-mode mail is sent successfully, an error
message "Transmission failed" appears
depending on the radio wave reception level.
Compose
i-mode mail
screen
Receiver
Subject
Message
Total
number of
bytes of
characters
and
decoration
Mail body input
screen
• When using deco-mail pictograms, the mail is
automatically sent as a deco-mail.
Open
Phonebook
Sent Address
Received
address
Input Address
䋺Select an address from the
phonebook.
XSelect phonebook
䋺Select an address from the Sent mail
logs.
XSelect history
䋺Select an address from the Received
mail logs.
XSelect history
䋺Enter the receiver address directly.
XEnter Mail Address
Change to
To
Change to
Cc
Change to
Bcc
䋺Change the selected receiver to To. The
mail address entered in usual Receiver
will be shown to recipients.
䋺Change the selected receiver to Cc. You
can specify additional addresses to send
a copy of the same mail to other
recipients in addition to the direct
recipients. The mail addresses entered in
the Cc field will be shown to other
recipients.
• The mail address may not be displayed
depending on the recipient's handset,
device or mail software.
䋺Change the selected receiver to Bcc. You
can specify addresses of people to
receive copies but whose identity will not
be shown to other recipients. The mail
addresses entered in the Bcc field will not
be shown to other recipients.
Load
template
Save
䋺Read a template to create Deco-mail.
→P164
䋺The Deco-mail which you are creating is
saved as a template.
X"Yes"
Continue on the next page
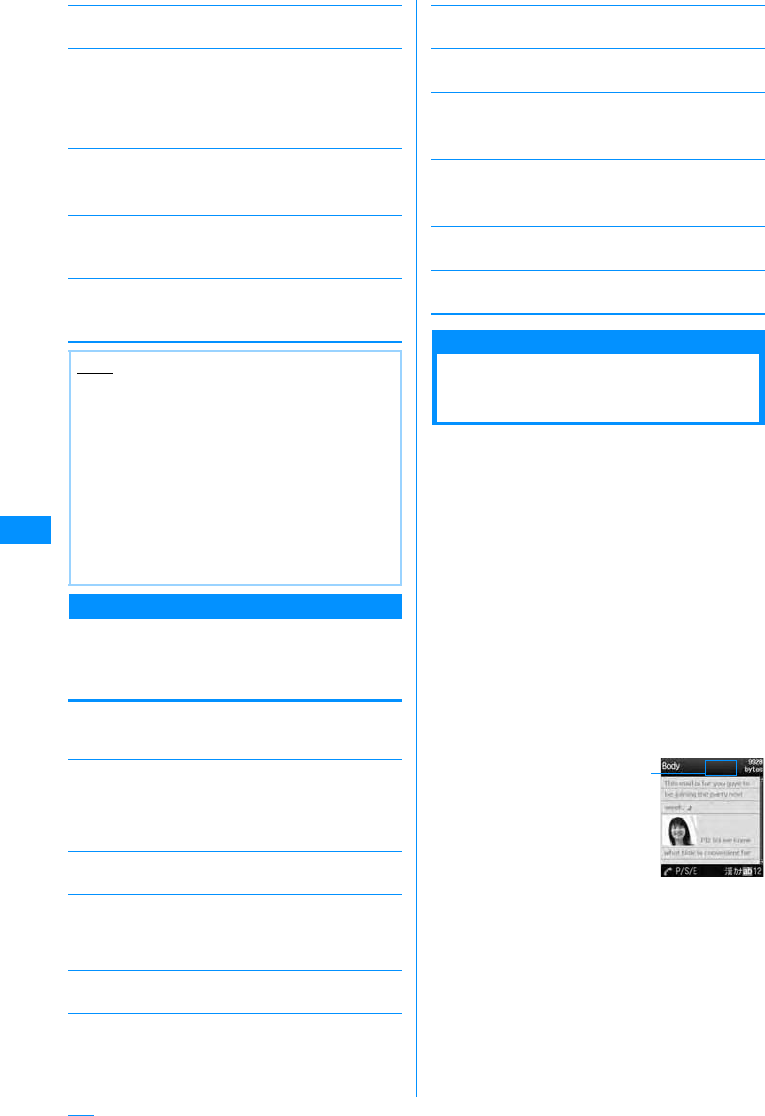
162
Mail
[Attach file]
Play/Display/Delete attached file.→P169
[Activate camera]
[Header/Sign.]
[Delete body]
Body software.
X"Yes"
[Delete Mail]
Delete mail being composed.
X"Yes"
Mail Body Entry Screen Sub Menu
amail body entry screen(P161)XM
[Menu]XPerform the following
operations
[Decorate mail]
Open the palette to select the decoration of Deco-mail
(Decoration).→P163
[Range choice]
Specify the range of text to decorate.
Go to Step 2 (P164) of "Changing Decoration".
• This cannot be selected when no text has been
entered in the message.
[Common phrases]
Enter or edit Common phrases.→P250
[Edit character]
Select a character/decoration in the body and copy/cut/
paste. Undo the last entry or pasting of characters.
→P252
[Edit word]
Edit Dictionary stored in the FOMA handset.→P253
[Quote]
Quote the contents of the phonebook.→P250
[Input setting]
Configure character entry.→P250
[Special input]
Enter Space / Line feeds and Kuten codes.→P250
[Header/Sign.]
[Jump]
[File property]
Display detailed information about the attached file.
[Preview]
Open preview screen of message.
Deco-mail
Creating and Sending
Deco-mail
You can create your own designer mail by adding
decorations such as changing font size, font color
or background color, or inserting images when you
edit i-mode mail messages.
• Deco-mail up to 100KB can be sent.
• 20 deco-mail items with 90KB of data can be
inserted.
• When a Deco-mail is larger than
10KB, other than the following䋪 Deco-mail
compatible handsets will not browse itself but only
URL to refer it.
䋪 : 903i, 904i, 703i (except P703i㱘), 704i model
series
• When a non-compatible i-Mode handset sends a
Deco-mail, the receiving handset sees only a URL.
When a Deco-mail is larger than 10KB, some Deco-
mail incompatible handsets will not browse it but only
URL to refer it, and the other incompatible handsets
will browse only Deco-mail's body text without URL.
aMail menu screen(P160)X"Compose
message"
bEnter the receiver and subject
• Entering the receiver and subject → Step 2 and
3 in "Creating and Sending i-mode Mail" (P161)
Photo Mode
Movie Mode
䋺Capture and attach a still image.
XTake still pictureXC[OK]
䋺Capture and attach a video.
XTake videoXC[OK]
Attach header
Attach Signature䋺Attach set header.
䋺Attach set header.
Note
<Add Address>
• When selecting a Phonebook entry with multiple
mail addresses saved, you need to further
specify which addresses are to be added.
<Cng. rcv. type>
• This option is not available when no address is
entered.
<Template>
• If the text is already entered, a confirmation
screen whether to delete the text opens. To
fetch the template, select "Yes".
header
Signature䋺Attach set header.
䋺Attach set header.
Top
Bottom
䋺Move to the top.
䋺Move to the bottom.
Body Entry
Decoration being set
at the cursor position
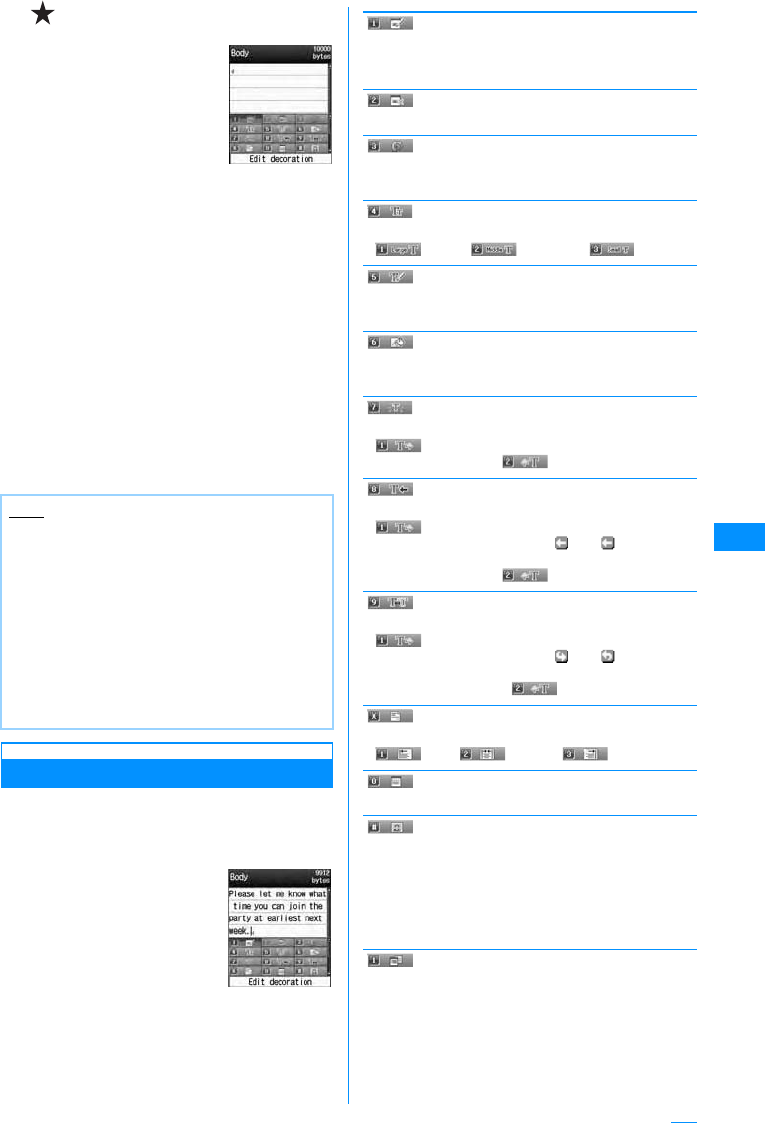
163
Mail
cSelect (Body) fieldXM[Menu]
X"Decorate mail"
dUse the palette to decorate a message
text
䂓Selecting a decoration before entering
characters
For operations, see "Decorating the Text"
(P163).
䂓To decorate entered characters
For operations, please see "Changing
Decoration" (P164).
eI[Body]
䂓To view the Deco-mail message
M[Menu] and then select X "Preview"
fC[OK]XI[Send]
Decorating the Text
aMail body entry screen(P161)XM
[Menu]X"Decorate mail"XPerform the
following operations
•I[Body] : Switch from
palette functions to
character entry.
[ (Edit decoration)]
Specify the range of text to decorate.→P164
• This cannot be selected when no text has been
entered in the message.
[ (Clear Decoration)]
Delete Decoration under the cursor.
[(Undo)]
Restores a set decoration to previous setting.
X"Yes"
[ (Font size)]
Set a font size.
X(Large)/ (Standard)/ (Small)
[ (Font color)]
Set a color of characters.
XSelect colorXEnter text
[ (Background color)]
Set a background color of mail text.
XSelect a color
[ (Toggle On/Off)]
Make characters blinking.
X(Blink : Begin)XEnter text
• To stop blink, select (Blink : End).
[(Ticker)]
Set a ticker to the text.
X(Ticker : Begin)XEnter text
• Characters entered between and appear as a
ticker.
• To stop blink, select (Ticker : End).
[(Swing)]
Set text to swing.
X(Swing : Begin)XEnter text
• Characters entered between and appear as a
swing.
• To stop Swing, select (Swing : End).
[ (Word alignment)]
Set a position to enter characters or insert an image.
X(Left)/ (Center)/ (Right)
[ (Insert line)]
Insert a line in mail text.
[ (Insert image)]
[(Copy)]
Specify the range and copy text, an image or line.
XKSelect start point XKSelect end point
Note
• When non-i-mode handsets received
deco-mail, the decorations may not be correctly
displayed.
• After decorated text is deleted, the decoration
codes may remain and this may result in a
reduction in the number of characters available
for the text. Cancel any decoration before
deleting the text. When text is deleted by
pressing Q for 1+ seconds, the text including
any decoration will be deleted.
• If a template contains an image that cannot be
sent by mail, the image may be deleted.
Palette display
screen
Databox
Capturing
Still Images
䋺Insert an image saved in "My picture" to
mail text.
XMove cursor to
folderXC[Open]XSelect Image
䋺Capture and attach a still image.
XTake still pictureXC[OK]
Continue on the next page
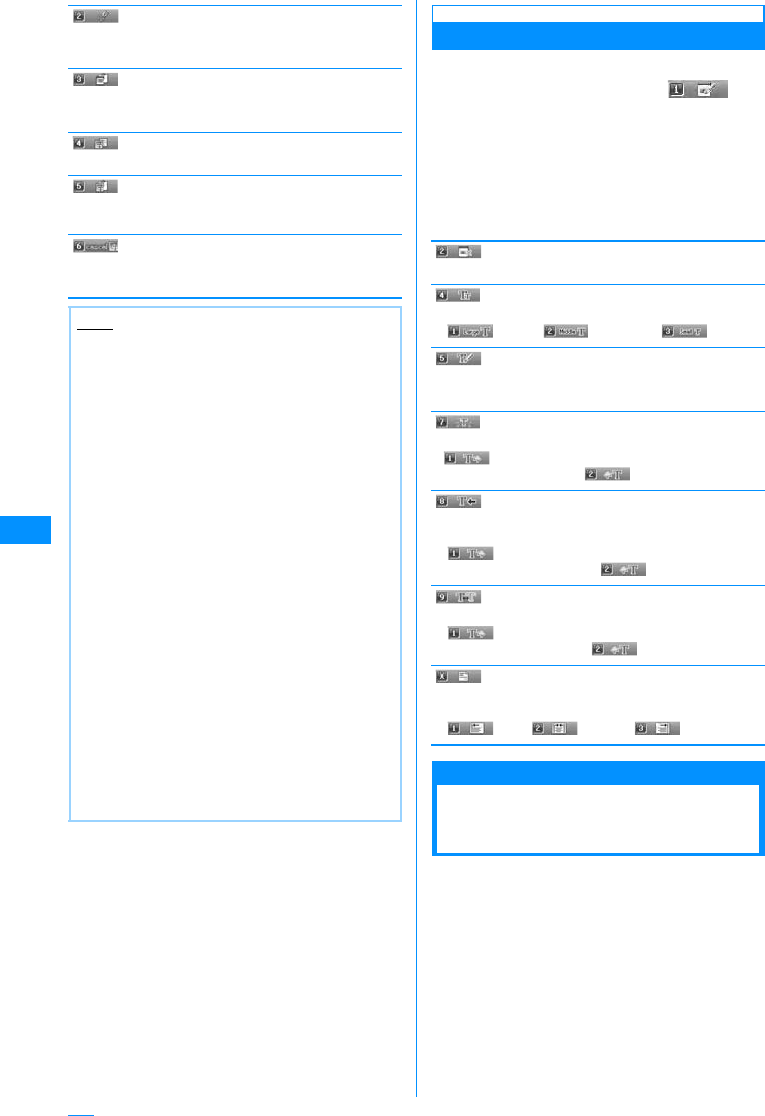
164
Mail
[(Cut)]
Specify the range and cut the text, image or line.
XKSelect start point XKSelect end point
[(Paste)]
Paste the copied or cut data after the cursor.
X"Yes"
[ (Copy decoration)]
Copy all decorations set to the line at the cursor.
[ (Paste decoration)]
After copying with "Copy Decoration", you can paste to
where the cursor is.
[ (Reset all)]
Delete all decorations.
X"Yes"
Changing Decoration
aMail body entry screen(P161)XM
[Menu]X"Decorate mail"X
Select (Edit decoration)
bStart selection with K
•I[SelAll] : Select the entire message.
cPress Kto select End point X
Perform the following operation
[ (Clear Decoration)]
Cancel the decoration of the specified range.
[ (Font size)]
Change the size of characters in the specified range.
X(Large)/ (Standard)/ (Small)
[ (Font color)]
Change the color of characters in the specified range.
XSelect a color
[ (blink)]
Blink the characters in the specified range.
X(Blink :Select)
• To cancel blink, select (Blink: End).
[ (Ticker)]
Display the text in the specified range as a ticker from
right to left.
X(Ticker : Select)
• To cancel a ticker, select (Ticker: Reset).
[(Swing)]
Swing the text in the specified range.
X(Swing : Select)
• To cancel swing, select (Swing: Reset).
[ (Word alignment)]
Change the position of characters or an image in the
specified range.
X(Left)/ (Center)/ (Right)
Template
Creating Deco-mail
Using Template
Templates are form data for Deco-mail with
decorations such as the font size and image
insertion already set. In addition to templates pre-
installed, you can use those downloaded from sites.
• Templates pre-installed→P292
Note
<Copy/Cut>
• When characters with "Ticker" or "Swing" set
are selected and "Copy" or "Cut" is carried out,
the settings for "Ticker" or "Swing" are not
affected.
<Character Size>
• The size of Deco-mail pictographs cannot be
changed.
<Font color>
• Pictographs (E-Moji) are also displayed in the
specified color. To restore the default color,
select "Default" from the color palette.
<Blink>
• If applied, blink is displayed on the preview
screen or the Compose message screen, the
blink ends after a certain period of time.
<Insert image>
• A maximum of 90KB and 20 items can be
inserted. The number of attachments possible is
reduced by the file size. If too many are inserted
or the size is too large, a warning message is
displayed.
• By default, they are saved in the "Deco-mail
picture" and "Deco-mail pictogram" folders.
→P292
• If the same image is inserted multiple times, it is
considered that 1 image is inserted.
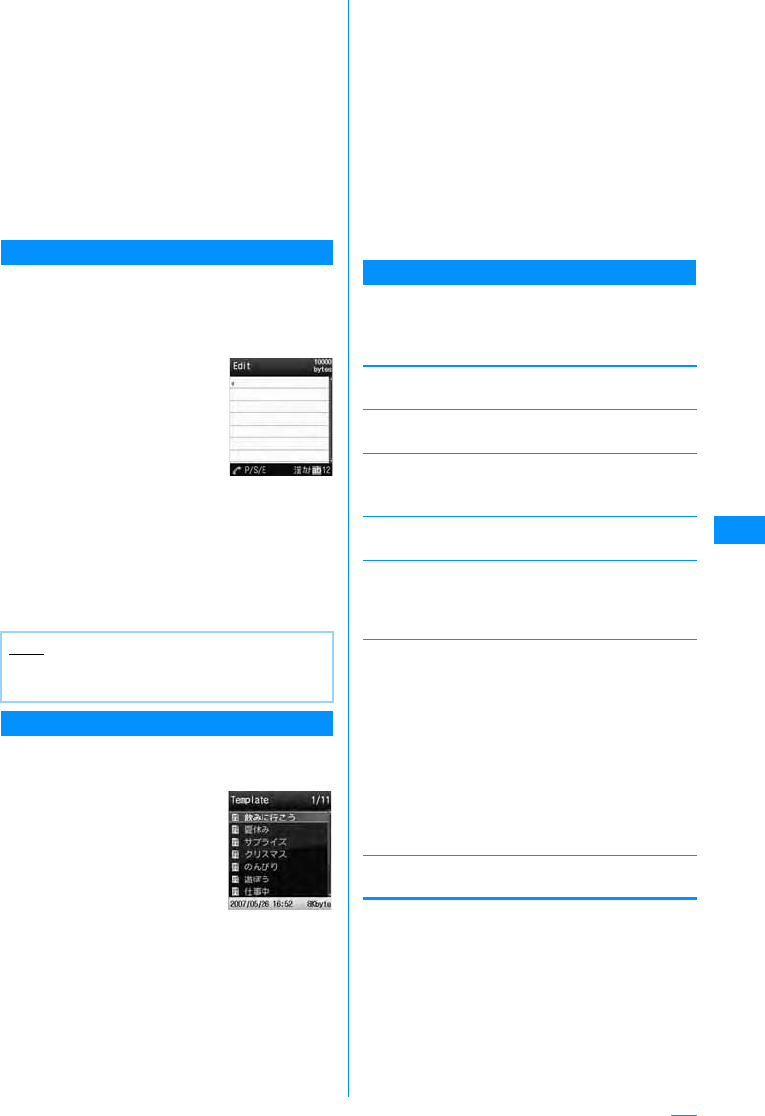
165
Mail
ai-mode mail screen(P161)XM[Menu]
X"Template"X"Load template"X"YES"
• If the mail has message text entered, the
entered text will be deleted and the template will
be loaded.
b
Select a template
X
C
[Select]
The selected template is inserted in the message
text.
• Selecting a template then pressing J allows
you to select the template while viewing it.
• You can edit the message text after inserting a
template.
Creating a New Template
Create user-defined templates. Created templates
are saved in the "Template" of Mail menu.
aMail Menu Screen(P160)X"Template"
XM[Menu]X"New template"
bComposing Templates
• Decorating operations→P163
cAfter making Template XC[Set]XC
[Select]XEdit File NameXI[Done]
Editing Templates
You can edit user-defined templates.
aMail menu screen(P160)X"Template"
bSelect TemplateXC[Edit]XEdit
template
• Decorating operations→P163
c
After editing template
XC[Select]X
"Overwrite save"/"New save"
Overwrite
: Save the edited template over the source
template.
Save new entry
: Save the edited template as a new template.
XC[Select]XEdit file name
dI[Done]
Template list screen sub menu
aTemplate list screen(P165)XMove
cursor to templateXM[Menu]X
Perform the following operation
[New template]
Creates a New Template.→P165
[Edit]
Edit the selected template.→P165
[Edit title]
Edit the selected template's title.
XEdit the title
[File property]
Display the selected template's properties.
[Sort]
In some situations, the template can be output
differently.
X"Date asc"/"Date desc"/"Title asc"/"Title desc"
[Delete]
[Memory status]
Show a list of saved templates.
Note
• Undecorated text cannot be saved as a
template.
Template
Creation screen
Template
List screen
Delete
Deletes
selected
item
Delete all
䋺Delete the selected template.
X"Yes"
䋺Selects and deletes a template.
XCheck on the template to be deleted X
I[Done] X "OK"
XCheck off the Template to be
deletedXI[Done]X"Yes"
• Press M[Menu], Choose "Mark all" and
"Release all"
䋺Delete all templates.
XEnter the security codeX"Yes"
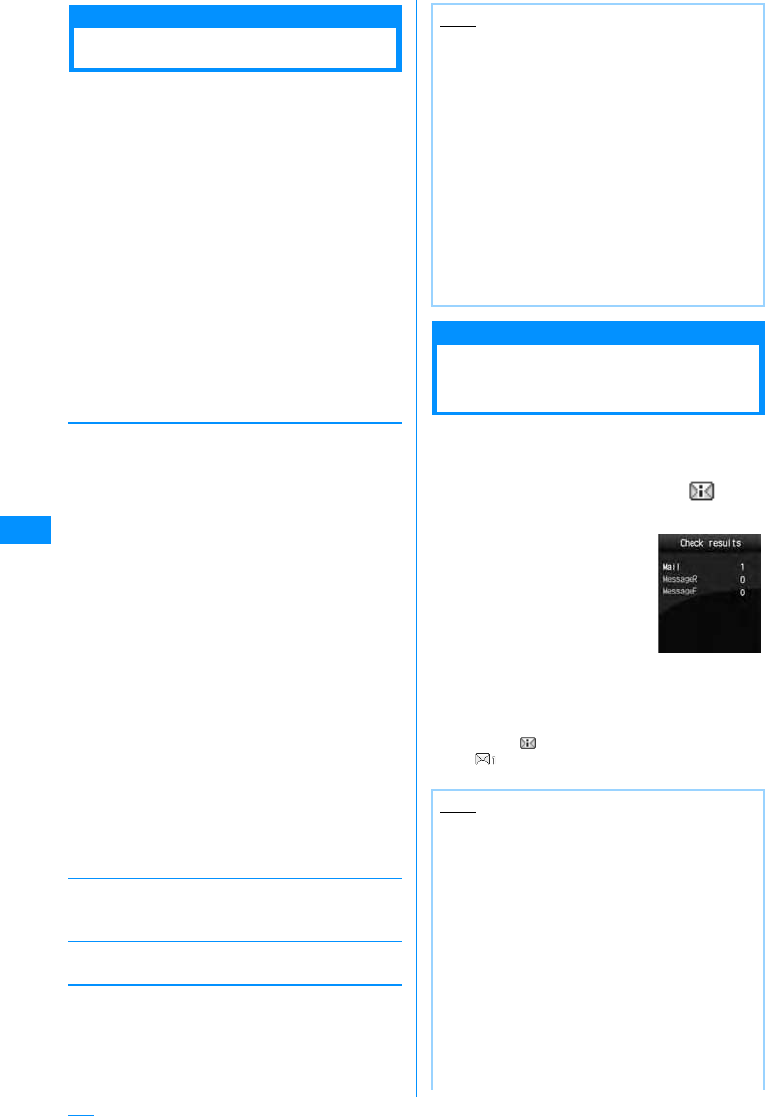
166
Mail
Attaching file
Attaching a File
You can send i-mode mail attached with images or
melodies.
• Maximum of 2MB and 10 items can be attached. The
number of attachments possible is reduced by the
file size.
• The following table shows attachable file types:
- Image (JPEG, GIF)
- Video/i-motion Movie
- Melody
- Phonebook
- Schedule
-To Do
- Bookmark
• A file prohibited to be attached to mail or to be output
from FOMA handset cannot be attached.
ai-mode mail creation screen(P161)X
M[Menu]X"Attach file"XPerform the
following operations
[Attach file]
[Del. attach]
Delete the selected attachment.
X"Yes"
[Play/disp file]
Play/display an attached file.
Automatic Reception of Mail
When i-mode Mail is
Received
When the FOMA handset is in the service area,
i-mode mail is automatically sent from i-mode
Center.
aWhen receiving i-mode mail, is
shown at the top of the screen
When the reception is
complete, the Reception
result screen opens.
• You are forced to return to
the screen before
receiving mails if no
operation is performed for
approximately 30
seconds.
• Selecting "Mail" opens the
Received mail folder list screen.
• Until the Detail screen of received i-mode mail
opens, appears at the top of the screen and
(the number indicates the number of
messages) appears on the Stand-by screen.
Image
i-motion
Melody
Phonebook
Calendar
To Do
Bookmark
䋺Select from images saved in "My
picture" of "Data box".
XMove cursor to folderXC[Open]X
Select Image
䋺Select from videos/i-motion movies
saved in "i-motion" of "Data box".
XMove cursor to folderXC[Open]X
Select Image
䋺Select from melodies saved in "Mellody"
of "Data box".
XMove cursor to folderXC[Open]X
Select Melody
䋺Selects an entry in the phonebook.
XSelect phonebook
䋺Select a schedule saved in the FOMA
Handset
X Select the dateX Select the Schedule
event
䋺Select a To Do item saved in the FOMA
Handset.
XSelect To Do
䋺Select bookmarks saved in "Bookmark"
of "i-mode".
X Move cursor to folderXC[Open]X
Select Bookmark
Note
<Attach file>
• Attached GIF images and melodies cannot be
received with an i-mode handset using the
mova service.
• A video-clip/i-motion movie over 2MB cannot be
attached. Reduce the size under "Clipping" to
the available size before attaching it.→P203
• Depending on the receiving handset, a video-
clip may be displayed coarsely or as sequential
still images. When sending than to these
devices䋪, the settings below are
recommended.
Size restriction: 500KB,
䋪: 903i, 904i, 703i (except P703iI), 704i
model series
• Some i-motion movies may not be attached.
Note
• When new i-mode mail is delivered, other
i-mode mail and/or Message R/F stored in
i-mode Center are received at the same time.
• When Receive option for i-mode mail has been
set, sent i-mode mail is stored in i-mode Center.
You can confirm a subject, etc. of i-mode mail
stored in Center and select and receive it.
→P167
• If mail is received from a handset that is capable
of setting To, Cc, or Bcc, you can check how the
mail was addressed to you using the FOMA
handset.→P172
• Melodies, video clips and still images can be
received as attachments to i-mode mail.
Incompatible files may be automatically deleted
at the i-mode Center. If an attached file is
deleted, a message "Del. attach" is added.
Reception result
screen
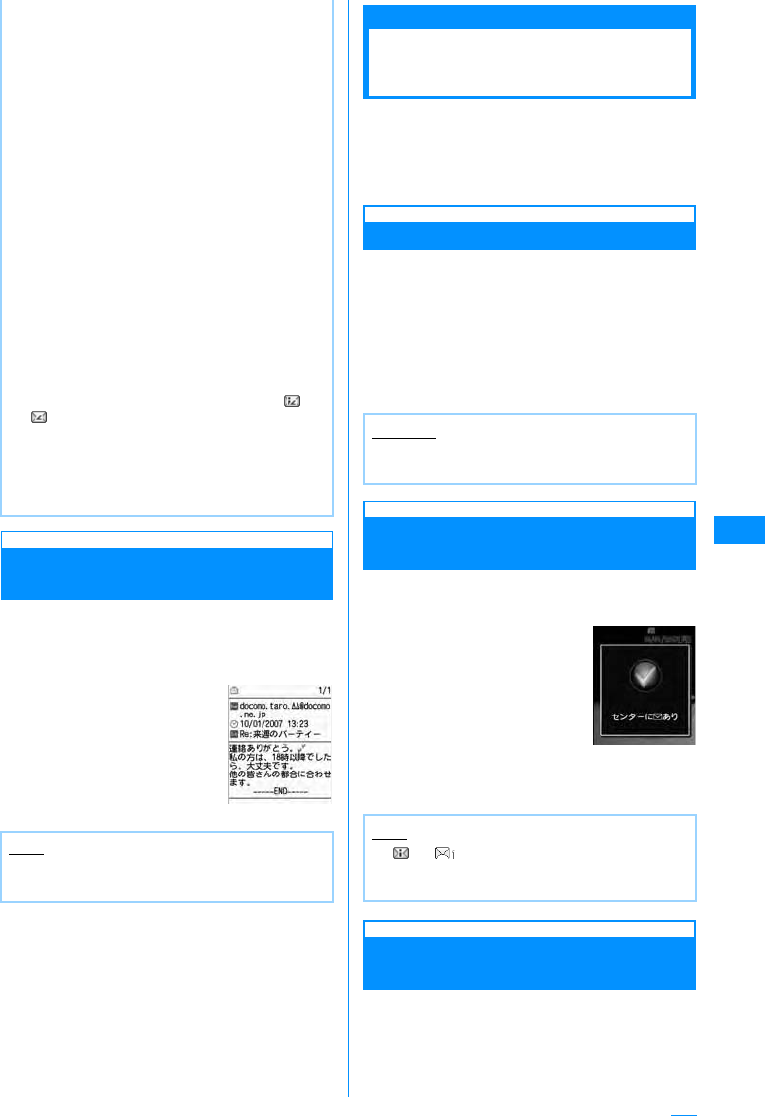
167
Mail
Displaying Newly Received
i-mode Mail
aReceiveResults Screen(P166)X"mail"
XSelect a folder
bSelect mail to be displayed
Receive option
Selecting and Receiving
i-mode Mail
You can confirm a subject, etc. of i-mode mail
stored in i-mode Center and select mail to be
received or delete it in i-mode Center before
reception. To use Receive option, set "Receive
option" to "ON" in advance.
Setting the Receive option
Set "Receive option" to "On" to receive selected i-
mode mail.
aMail menu screen (P160) X"Receive
option" XC[Select] Xselect "On" X
I[Done]
After this option is set, i-mode mail will not be
received automatically.
If i-mode mail arrives when
Receive option is set
aThe Notification of received mail screen
opens
Press C [Select] or Q䋯P
to close the notification screen.
Setting Receive Option for i-mode
Mail
After "Receive option" is set to "On", perform the
following steps to select and receive i-mode mail:
aMail menu screen (P160) X"Receive
option"
• i-mode mails that are less than 100KB (with
attachments included) are automatically
downloaded. Those with attachments greater
than 100KB must be manually downloaded from
the i-mode center.→P169
• You can set whether to receive attached
melodies or images under "Receive attach file".
→P179
• If the size of a received mail exceeds the
number of characters set under "iMenu" →
"English iMenu"→ "Options" → "Mail Settings"
→ "Limit Mail Size", you can download it by
selecting the attached file name and the
destination file name to copy the body text to.
→P169
• Incoming mail is saved at the i-mode Center
when:
- When Power is off
- During Video Call
-During Self mode settings䇭
- When out of service area
- The "Receive option set" is set to "ON"
- The Inbox is full with protected or unread
mail
• When mail remains at the i-mode Center, or
is shown. When power is off or out of service
area, the icons may not be displayed.
• If multiple i-mode mail messages or Message R/
F are received concurrently, the ringtone set to
the i-mode mail or Message R/F received the
last sounds.
Note
• Videos attached to an i-mode mail may not be
properly displayed.
Received Mail
䈍⍮䉌 䈞
• Set "Receive option" to "Off" in "Receive option
set" (P179)
Note
• or indicating the incoming i-mode mail
will not be displayed, and the mail ring tone will
not sound.
Receiving
message
screen

168
Mail
For subsequent steps, see "Mobile Phone User's
Guide [i-mode]"
䂓Icons displayed on the Receive option screen
indicating attachments
Check new message
Checking for i-mode
Mails
i-mode mails, if any, that could not be received
because FOMA handset was out of service area or
for other reasons are stored in i-mode Center. You
can receive stored i-mode mails by checking to
i-mode Center.
• appears at the top of the screen when mail is
kept at the i-mode Center.
• You can select items to check (mail or Message
R/F) under "Check new messages" (P180).
• You cannot check from an out of service area.
aMail Menu Screen(P160)X"Check new
message"
When check has completed, the reception result
screen opens.
Replying to i-mode Mail
Replying to i-mode Mail
You can reply to i-mode mail sender. Replying can
be made by entering new text or quoting the text of
received i-mode mail.
aReceived Mail Details Screen(P170)X
M[Menu]X"Reply"X"Reply"/"Reply
quoted"
• You can reply to mail also by pressing I
[Reply] on Received mail detail screen.
• When the mail is sent to receivers other than
your mail address simultaneously, you can
select "Reply all" or "Rep. quoted all".
bEnter subject, body
• "Re:" is added to a subject.
• When replying by quoting, ">" is added to the
beginning of quoted message.
• Editing subject and message → "Creating and
Sending i-mode Mail" (P161).
cI[Send]
Forwarding i-mode Mail
Forwarding i-mode Mail
to Another Receiver
You can forward received i-mode mail to another
receiver.
aReceived Mail Details Screen(P170)X
M[Menu]X"Forward"
bEntering Receiver
• "Fw:" is added to a subject.
• Editing subject and message → "Creating and
Sending i-mode Mail" (P161).
cI[Send]
Icon File type
An image is attached.
An i-motion movie is attached.
A melody is attached.
Other file is attached.
Note
• Even with "Receive option set" set to "ON", all
mails are received when "Check new message"
is used. When you do not want to receive mails,
delete "Mail" from the inquiry items.→P180
• Receive option can also be carried out from
"iMenu". Select "iMenu" → "䊜 䊆䊠 䊷䋯ᬌ⚝
(Menu/Search)" → "䊜 䊷䊦ㆬᛯฃା (Receive
Option)".
Note
• Even when i-mode mail is kept at the i-mode
Center, may not appear on the screen if mail
arrived while the FOMA handset power was
turned off.
Note
• After exceeding the storage capacity of the sent
mail BOX, a reply cannot be created. Delete
mails saved in the sent mail BOX before
replying.
• The reply to received Deco-mail with quotation
has original decoration and images entered in
the message text. However, restricted images
and highlighted URLs will not be forwarded.
Note
• When a file that is prohibited from being
attached/distributed from FOMA handset is
attached/pasted to an i-mode mail forward, it is
deleted.
• After exceeding the storage capacity of the sent
mail BOX, a reply cannot be created. Delete
mails saved in sent mail BOX before forwarding.
• The forwarded Deco-mail has original
decoration and images entered in the message
text. However, restricted images and
highlighted URLs will not be forwarded.
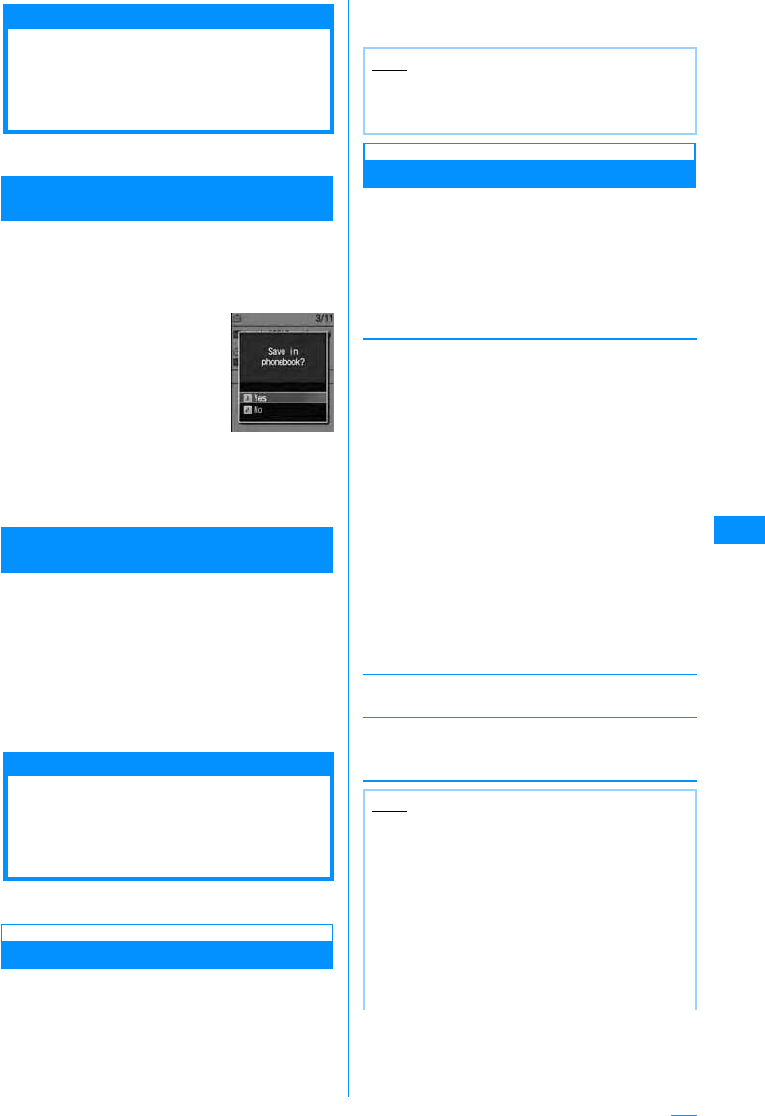
169
Mail
Registering Mail
Address/Phone Number
to Phonebook
You can save email addresses/phone numbers in a
mail to the Phonebook.
To register an address/phone number in the
message text
aReceived mail detail screen (P170)X
Movecursorover addresses/numberto
saveXM[Menu]X"Save"X"Add to
Phonebook"
b"Yes"
Go to Step 2 in "Saving Contacts to the
Phonebook from Received or Dialed Calls" (P80).
When Saving Reciever/Origin mail address/
Phone number
aReceived Mail Details Screen(P170) X
M[Menu] XSelect "Store" X"Store
address"
If there are multiple recipients/senders, further
select the addresses/phone numbers to register.
b"Yes"
Go to Step 2 in "Saving Contacts to the
Phonebook from Received or Dialed Calls" (P80).
Playing/Saving an
Attached File from
i-mode Mail
You can play or save an image, melody, video or
i-motion movie attached or pasted to i-mode mail
Retrieve Selected Attached File
When the size of a received message including
attachments exceeds 100 KB, you will need to
download the attachments from the i-mode Center.
• All the attached files selected are downloaded
regardless of the setting of "Receive attach file"
option in "Mail setting" X "Communication".
• The expired files cannot be downloaded.
aReceived Mail details screen (P170) X
Select filename
Display/Play/Delete Attached File
aReceived mail details screen (P170)
Move the cursor onto the attach file X
Move cursor over attached file
•C[Select] : Display/Play selected attachment.
bM[Menu]X"Attach file"XPerform the
following operations
[Save]
Save the selected attachment.
X"Yes"
• Obtained images will be saved in "i-mode" folder in
"My picture" of the "Data box". (If the image can be
used as a Deco-mail pictogram, it will be saved in
"Deco-mail pictogram".)
• Movies/i-motion movies are saved in the "i-mode"
folder under "i-motion" in the "Databox".
• Obtained melodies will be saved in "i-mode" folder in
"Melody" of the "Data box".
• Phonebook entries are saved to the Phonebook in
the FOMA handset.
• Schedule events are saved to Schedule in the FOMA
handset.
• To Do entries are saved to the To Do 䊥䉴䊃 in the
FOMA handset.
• Obtained bookmarks will be saved in "Bookmark" in
the "i-mode" folder.
• Attached files other than the above cannot be saved.
[View/Play]
Play/Display the selected attachment.
[Delete]
Delete the selected attachment.
X"Yes"
Address
Confirmation
Note
• When there is less empty space in the received
mail BOX than the file size, the attachment
cannot be added.
Note
• i-mode mails too large for the Handset are not
received and an error message is returned to
the source address.
• i-mode mails that are less than 100KB (with
attachments included) are automatically
downloaded. An attachment over 100KB can be
downloaded separately from the i-mode center.
• One can set a size limit for i-mode mail
messages.→P159
• When the image size is larger than the screen,
it is shrunk and displayed.
Continue on the next page
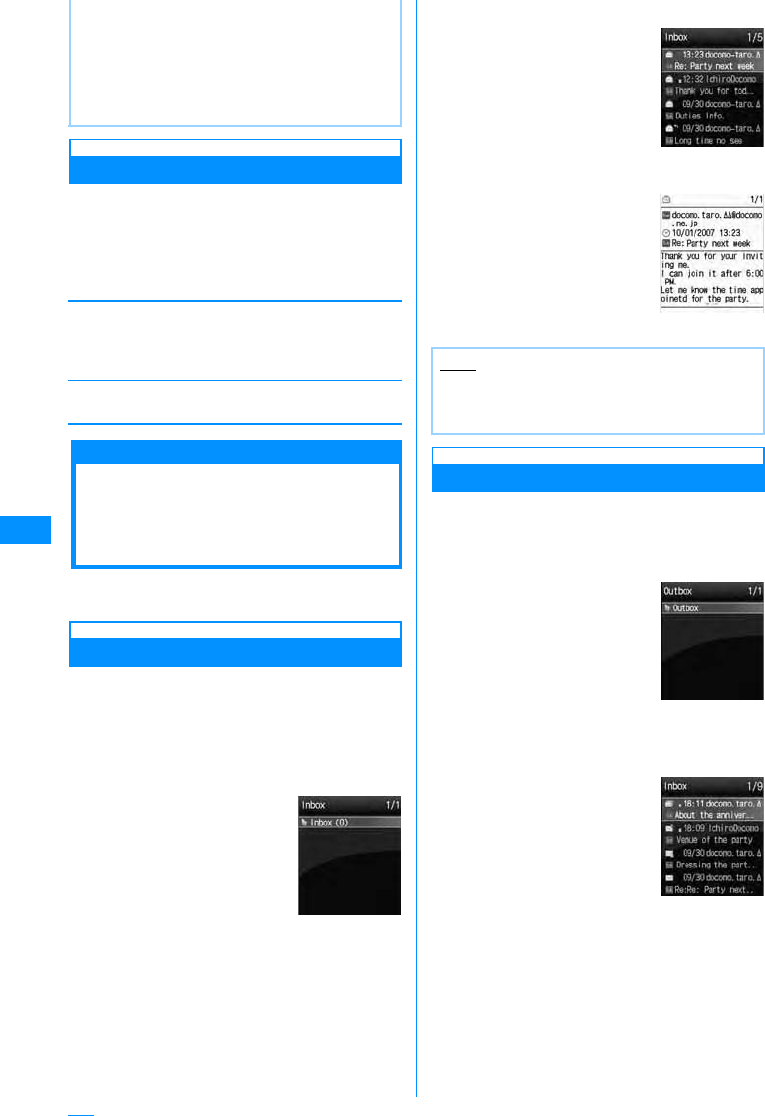
170
Mail
Saving Attached Images
aReceived mail details screen (P170) X
M[Menu]X"Inline image"
bSelect imageXPerform the following
operation
[Save]
Obtained images will be saved in "i-mode" folder in "My
picture" of the "Data box".
X"Yes"
[Inline image]
Display detailed information about the selected image.
Received Mail BOX/Sent Mail BOX / Unsent Mail BOX
Displaying Mail in
Received/Sent/Unsent
Mailbox
• To display contents of a folder with security set,
enter the Security Code.
Displaying Received Mails
• Up to 1000 i-mode mails and SMS can be saved in
the Inbox. However, the savable number depends
on the amount of the data.
• By default, "䊄䉮䊝䈎䉌䈱䈍⍮䉌䈞
(DoCoMo
News)" mails are saved.
aMail menu screen(P160)X"Inbox"
bSelect a Folder
•J: Open the previous or
next page when there are
2 or more pages.
•I[Reply] : Reply to the
sender and/or receivers of
simultaneous mail sending.
→P168
cSelect a message
•J: Open the previous or
next mail.
•I[Reply] : Reply to the
sender and/or receivers of
simultaneous mail sending.
→P168
Displaying Messages in the Outbox
• Up to 500 i-mode mail, SMS, and unsent messages
can be saved in the Outbox. However, the savable
number depends on the amount of the data.
aMail menu screen(P160)X"Outbox"
bSelect a Folder
•J: Open the previous or
next page when there are
2 or more pages.
• Some images, videos/i-motion movies may not
be displayed or played.
• When "Melody auto play" is set to "ON", an
attached melody is played automatically when
you open a received i-mode mail.
• The deriver program is required to play an
i-motion mail on a PC.
Received mail
folder list screen
Note
• If you run an i-appli from the "䊄䉮䊝䈎䉌䈱䈍⍮
䉌䈞
Announcement from DoCoMo",
communication charges apply.
Received mail list
Received Mail
Details Screen
Sent mail folder
list screen
Sent mail list
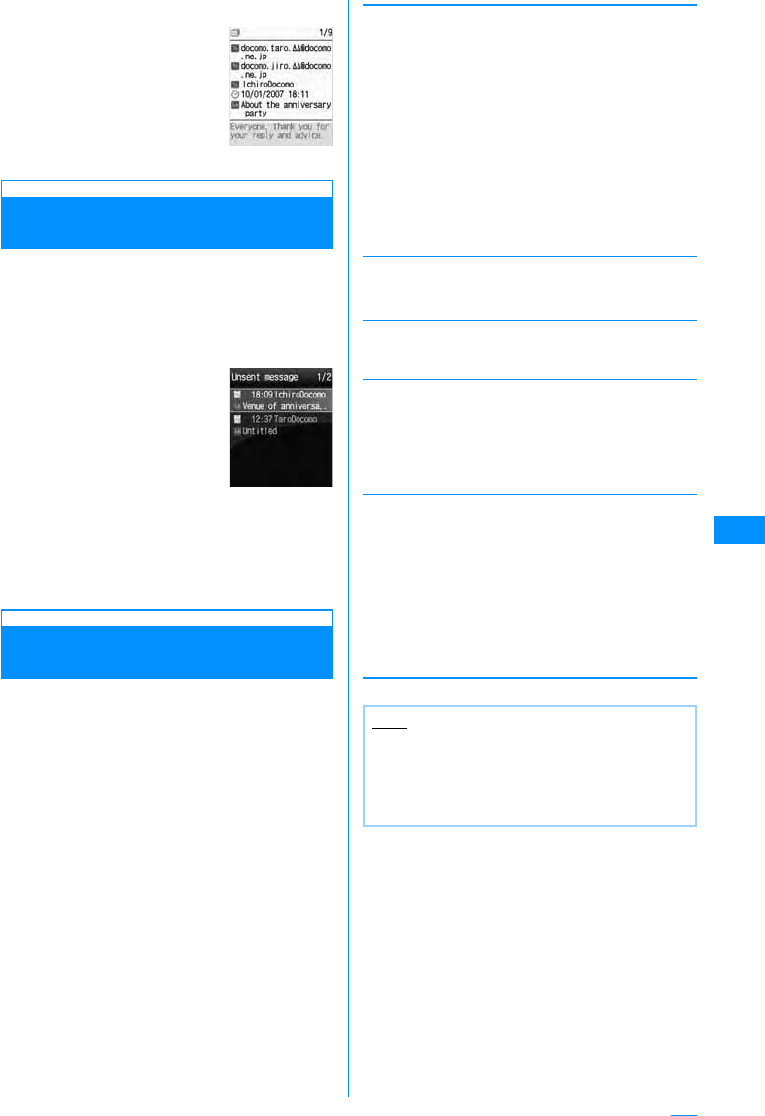
171
Mail
cSelect a message
•J : Open the previous or
next mail.
•I[Edit] : Open Compose
message or SMS creation
screen.→P161, P181
Displaying Messages in Unsent
Message
• Messages saved in the Unsent Mail BOX are
included in the maximum number of savable
messages in the Outbox.
aMail menu screen(P160)X"Unsent
message"
•I
[Delete] : Delete i-mode
mail
or SMS.
bSelect a message
The i-mode mail or SMS creation screen opens
depending on the type of the selected mail. You
can also edit unsent mail.
Auto sort
Sorting Sent/Received Mails
Automatically to Folders
Set conditions for automatically saving mails in
specified folders.
• This option is not available with the default "Inbox"
and "Outbox".
a
Received mail folderList Screen(P170)/
Sent Mail Folder List Screen (P170)X
Select FolderXM[Menu]X"Auto
sort"
•I[Phonebook] : Settings for selecting mail
address from Phonebook.
bM[Menu]XPerform the following
operations
[Address]
Set mail address as a sort keys. You can specify more
than one mail address.
[Subject]
Set a mail subject as a condition.
XEnter subject
[Reply invalid]䋪
Route messages with Reply impossible to the selected
folder.
[Switch view]
Select a view to display the condition of "Auto sort"
setting.
[Release]
䋪䋺 This icon is not displayed for the sent BOX
Sent Mail Details
Screen
Unsent mail list
screen
Open
Phonebook
Sent Address
Received
address
Input Address
䋺Select and set from a phonebook.
XSelect phonebook
䋺Select an address from the sent
mail logs.
XSelect history
䋺Select an address from the
received mail logs.
XSelect history
䋺Directly enter and set a mail
address.
XEnter Mail Address
Name display
Address display
䋺Display name saved to phonebook.
䋺Display mail address.
Delete
Release
selected
Unmark
all
䋺Delete the selected Auto sort rule.
X"Yes"
䋺Select and delete the auto-sort rule.
XCheck off the rules to be
deletedXI"Done"X"Yes"
•Press
M[Menu], choose from "Mark
all", "Release all", "Switch view"
䋺Delete all rules set to the selected folder.
X"Yes"
Note
• You cannot set the multiple conditions such as
"Address", "Subject", and "Reply impossible" to
a folder concurrently.
• The same sorting conditions as ones set to
another folder cannot be set.
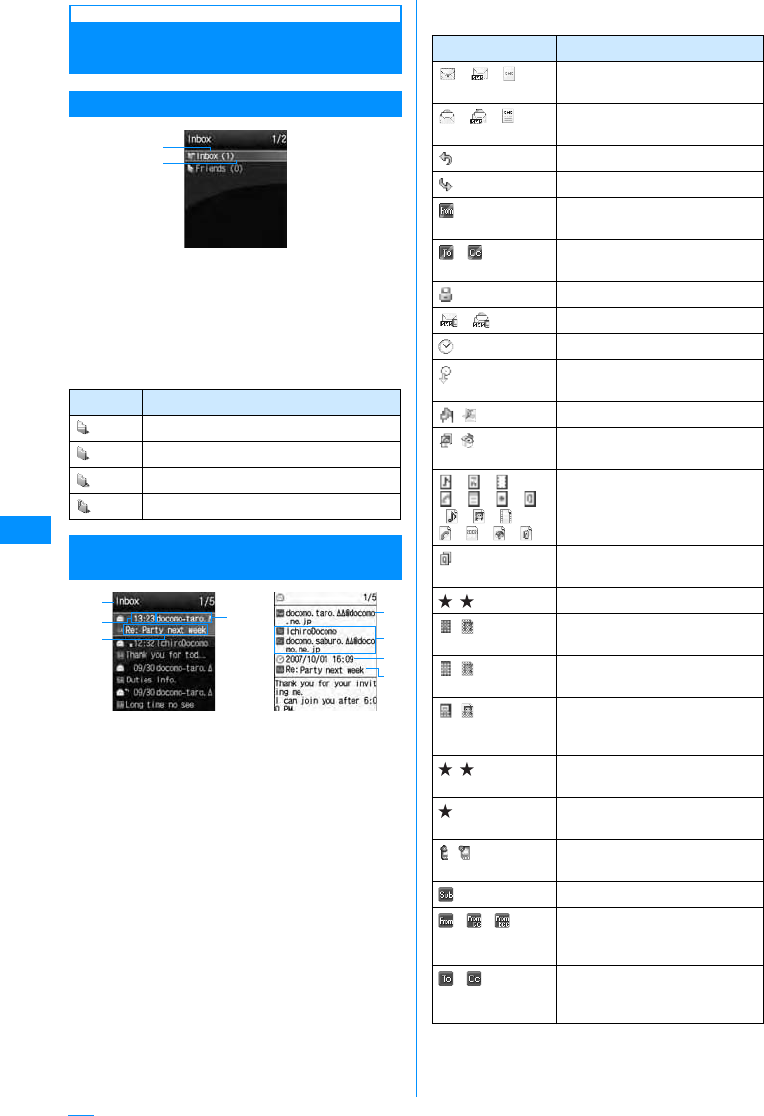
172
Mail
Reading Received/Sent/Unsent
Mail Screen
Received/Sent Mail Folder List Screen
aFolder name
bUnread Mail count
Displays on the Received Mail Folder List
screen.
䂓Icons displayed on the Received/Sent screen
Received Mail List Screen/Received Mail
Detail Screen
aDisplayed folder name
bReceived date and time
On the Received mail list screen, messages
received before today have the date displayed,
and messages received today have the time
displayed.
cSender's phone number/mail address
If the phone number or mail address is saved in
the Phonebook, the name in the Phonebook
appears.*
*䋺When the name is set to appear in "Switch
view" → P171
dSubject
"SMS" is displayed on an SMS message.
eAddress types and Simultaneous Receivers
If you send a mail to simultaneous receivers,
their address types (To, CC) are displayed. If
the mail address is saved in the Phonebook,
the name in the Phonebook appears.
䂓Icons displayed on the Received mail list screen/
Received mail detail screen
䋪䋺 If details screen's display differs, the difference is
enclosed in ( ).
Icon Description
(Grey) "Inbox"/"Outbox" (Default save folders)
(Blue) User composer folder
Auto sort
Security is set
Ex: Received Mail Folder List
a
b
Received Mail
List Screen Received Mail
Details Screen
a
bc
d
c
e
d
b
Icon Description
䋯䋯 Unread i-mode mail/SMS/SMS
report request
䋯䋯 Unread i-mode mail/SMS/SMS
report request
Replies Only
Forward Only
Sender's mail address which
can not reply
䋯Invalid simultaneous receivers
address which can not reply
Protected.
䋯Unread/read SMS saved in UIM
Received date and time
Different-Timezone SMS
received
䋨䋩 Melody is attached.
䋨䋩 The Mail body can trigger an
i-appli
䋯䋯䋯
䋯䋯䋯
䋨䋯䋯䋯
䋯䋯䋯䋩
Melody/Still Image/Video/
Phone book/schedule/
Bookmark/other file is attached.
Attaches multiple copies of the
same file.
䋨䋩 Damaged file.
䋨䋩 Deleted attached file(Ex. case
of still image file)
䋨䋩 Not received attached file(Ex.
case of still image file)
䋨䋩 Attached file which is canceled
on the way of receiving (Ex.
case of still image file)
䋨䋩 Attached file which is failed to
obtain
Files in multiple types are
pasted or attached.
䋨䋩 Attachment with UIM operation
restriction activated
Subject
䋯䋯 The message was received
from the sender as To, Cc, or
Bcc
䋯Simultaneous receivers
address type other than own
address as (To/Cc)
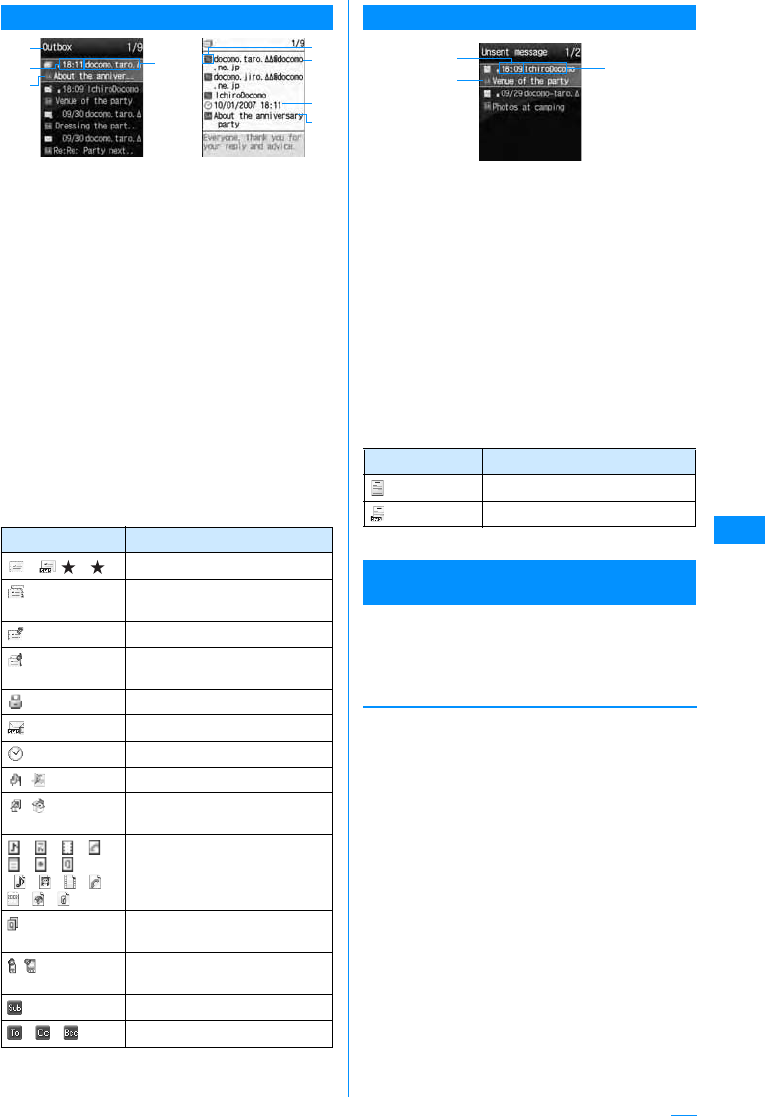
173
Mail
Outbox List Screen/Outbox Detail Screen
aDisplayed folder name
bSent date and time
On the Outbox list screen, messages sent
before today have the date displayed, and
messages sent today have the time displayed.
cRecipient's phone number/mail address
If the phone number or mail address is saved in
the Phonebook, the name in the Phonebook
appears.*
䋪䋺 When the name is set to appear in "Switch
view" → P174
dSubject
"SMS" is displayed on an SMS message.
eReceiver type
Indicate the receiver type of the received mail
(To, Cc, or Bcc).
䂓Icons displayed on the Outbox list screen/
Outbox detail screen
䋪䋺 If details screen's display differs, the difference is
enclosed in ( ).
Unsent Mail List Screen
aSaved date and time
Messages saved before today have the date
displayed, and messages saved today have the
time displayed.
bSubject
"SMS" is displayed on an SMS message.
cRecipient's phone number/mail address
If the phone number or mail address is saved in
the Phonebook, the name in the Phonebook
appears.*
䋪䋺 When the name is set to appear in "Switch
view" → P174
䂓Icons displayed on the Unsent mail list screen
䋪 Other than the above, it is the same as sent mail.
Received Mail Folder/Sent Mail Folder List
Screen Sub Menu
a
Received mail folder list screen(P170)/
Sent mail folder list screen (P170)X
M[Menu]XPerform following
operation
[Manage folders]
Icon Description
䋯(䋯)Sent i-mode mail or SMS
i-mode mail sent to many
recipients
Send failed
Mails that failed to send to
multiple recipients
Protected.
SMS saved in UIM
Received date and time
䋨䋩 Melody is attached.
䋨䋩 The Mail body can trigger an
i-appli
䋯䋯䋯䋯
䋯䋯
䋨䋯䋯䋯䋯
䋯䋯䋩
Melody/Still Image/Video/
Phone book/schedule/
Bookmark/other file is attached.
Attaches multiple copies of the
same file.
䋨䋩 Attachment with UIM operation
restriction activated
Subject
䋯䋯 Send by To/Cc/Bcc
Sent mail
list screen Sent Mail
Details Screen
a
bc
d
c
b
d
e
Icon Description
Unsent i-mode mail
Unsent SMS
Create
folder 䋺Create a folder.
XEnter folder name
Edit folder name
䋺Edit selected folder name.
XEnter folder name
Sort folder 䋺Select the display position of the
folders and sort folders.
Select the position
Folder security
䋺Set or release security to the selected
folder.
XEnter the security codeX"Yes"
Unsent mail
list screen
a
bc

174
Mail
[Delete]
[Auto sort]
Set mails to save them automatically in specified
folders.→P171
[Send all via IrDA]
Transmit all mail in Received mail folder/sent mail
folder via infrared.
XEnter security codeXEnter Auth. Password X
"Yes"
[Copy all microSD]
Copies all messages in the selected folder to the
microSD memory card.
XEnter the security codeX"Yes"
[Memory status]
Display number of mails in Received mail folder/sent
mail.
[Open folder]
Display contents of a selected folder.
䋪䋺 This icon is not displayed for the sent BOX
Received Mail List Screen Sub Menu
aReceived mail list screen(P170)XMove
cursor to mailXM[Menu]XPerform
the following operation
[Move]
[Delete]
[View settings]
Delete Folder
䋺Delete selected folder.
XEnter the security codeX"Yes"
Delete all read
䋪
䋺Deletes all read messages in the
folder.
XEnter the security codeX"Yes"
Deletes folder contents
䋺Deletes all messages in the selected
folder.
XEnter the security codeX"Yes"
Note
<Manage Folder>
• If I[Add] is pressed at the received mail
folder/sent mail folder list screen, a folder can
be added.
<Edit folder name/Sort folders/Delete folder/
Auto sort>
• This option is not available with the default
"Inbox" and "Outbox" folders.
<Delete>
• A folder containing protected mails cannot be
deleted.
• Protected mails or SMS saved in UIM are not
deleted.
• If "Delete one" is selected for a folder with
unread mail, there will be a confirmation prompt
asking permission to continue. Select "Yes" to
delete.
Move
this
Move
selected
Move all
䋺Move the displayed mail to another folder.
XSelect destination folder
䋺Select mail messages and move them to
another folder.
X Check off the mail to move XI
[Done]X Select destination folder
䋺Move all mail in the folder to another folder.
XSelect destination folder
Delete
Deletes
selected item
Del all read
Delete all
SMS rmv. in fd.
䋺Delete the selected message.
X"Yes"
䋺Select and delete message.
XCheck off the mail to
deleteXI[Done]X"Yes"
• Press M[Menu], choose from
"Mark all", "Release all", "Switch
view"
䋺Deletes all read messages in the
folder.
XEnter the security codeX"Yes"
䋺Delete all mails in the folder.
XEnter the security codeX"Yes"
䋺Deletes all SMS reports in the folder.
XEnter the security codeX"Yes"
Switch
View
Sort
䋺Set how to display mail.
X"1 lines subjt"/"1 lines add"/"1 lines name"/
"2 lines add"/"2 lines name"
䋺Sort mails by the condition you specify.
X"Subject asc"/"Subject desc"/"Address
asc"/"Address desc"/"Date asc"/"Date
desc"/"Size asc"*/"Size desc"*
䋪䋺 Sort mails in ascending order of data
size.

175
Mail
[Filter]
Shows messages that meet certain conditions.
[Read all]
Mark all mail in the folder as read.
X"Yes"
[Protect on/off]
[Send Ir data]
[Copy to microSD card]
[FOMA card (UIM)]
[Memory status]
Display number of mails in Received mail BOX.
Received Mail Detail Screen Sub Menu
aScreen Memo details screen (P170)X
M[Menu]XPerform the following
operations
[Reply]
Reply to the viewed mail.→P168
[Forward]
Forward a the viewed mail→P168
[Move]
Move the displayed mail to another folder.
XSelect destination folder
[Delete]
Delete a displayed mail.
X"Yes"
[Protect on/off]
Protect or release the displayed mail.
X"Yes"
[Store]
Save the phone numbers and email addresses in the
displayed mail to Phonebook.→P169
[Attach file]
Save, play or view, or delete images attached to the
displayed mail.→P169
[Inline image]
Save images contained in the displayed mail or view
the information.→P170
Address
Subject
Unread
Read
Protected
Not protected
Image
i-motion
Melody
Mail
SMS
All
䋺Only display mails with a particular
address
XSelect itemXSelect/input address
䋺Display mail with a specific subject.
XEnter subject
䋺Only display unread mails.
䋺Only display read mails.
䋺Display protected mail.
䋺Display unprotected mail.
䋺Display mail with an image attached.
䋺
Display mail with an i-motion movie
attached.
䋺Display mail with a melody attached.
䋺Display i-mode mail.
䋺Only display SMS, SMS Report.
䋺Display all mail in the folder.
Protect On/Off
Protect
selected on/
off
Protect all
Protect all on/
off
䋺Protect or unprotect the selected mail.
X"Yes"
䋺Select and protect or unprotect mail.
XCheck off the mail to
protectXI[Done]X"Yes"
•Press
M[Menu], choose from
"Mark all", "Release all", "Switch
view"
䋺Protect all mail in the folder.
X"Yes"
䋺Unprotect all mail in the folder.
X"Yes"
Send
Send all
data
䋺Sends selected mail via Infrared.
X"Yes"
䋺Send all mail in the folder by infrared.
XEnter security codeXEnter Auth.
Password X"Yes"
Copy one
Copy all
䋺Copies selected mail to microSD memory
card.
X"Yes"
䋺Copies all mail in folder to microSD
memory card.
XEnter the security codeX"Yes"
Copy to UIM
䋺
Copy the selected SMS to the UIM.
Move to UIM䋺
Move the selected SMS to the UIM.
Copy from
UIM
Move from
UIM
䋺Copy the
selected
SMS to the
handset.
䋺Move the
selected
SMS to the
handset.
Note
<Delete>
• If there are unread messages, user is prompted
to confirm deletion. Select "Yes" to delete.
<Filter>
• Addresses matched completely and subjects
matched even partially are displayed.
Continue on the next page

176
Mail
[View settings]
[Copy]
Copy contents of the displayed mail.
[Save template]
Save Deco-mail as a template.
XC[Select]XEdit titleXI[Done]
[Export]
Sent Mail List Screen Sub Menu
aSent mail list screen(P170)XMove
cursor to mailXM[Menu]XPerform
the following operation
[Edit]
Edit and send a sent mail.→P161, P181
[Move]
[Delete]
[View settings]
Scroll
Character Size
䋺Sets the number of lines scrolled
when H is pressed at the mail
Display Screen.
X"1 line"/"3 lines"/"5 lines"/"Page"
䋺Set a font size for text on mail display
screen.
X"Small"/"Standard"/"Large"
Message
Subject
Address
䋺
Select and copy contents of text.
→P252
䋺Copy a subject.
䋺Copy a destination. If there are multiple
addresses, select an address from the mail
address list screen.
Send IrDA 䋺Send the displayed mail via IrDA.
X"Yes"
Copy to microSD
䋺
Copy the displayed mail to the microSD
memory card.
X"Yes"
FOMA card (UIM)
䋺:Copy or move the selected SMS to
the UIM, or copy or move the selected
SMS from the UIM to the handset.
X"Copy to UIM"/"Move to UIM"/"Move
from UIM"/"Copy from UIM"
Note
<Protect>
• Up to 1000 mails can be protected.
<Delete>
• Protected mails cannot be deleted.
Move
this
Move
selected
Move all
䋺Move the selected mail to another folder.
XSelect destination folder
䋺Select mail messages and move them to
another folder.
X Check off the mail to move XI
[Done]X Select destination folder
䋺Move all mail in the folder to another folder.
XSelect destination folder
Delete
Deletes
selected
item
Delete
all
䋺Delete the selected message.
X"Yes"
䋺Select and delete message.
XCheck off the mail to
deleteXI[Done]X"Yes"
• Press M[Menu], choose from "Mark
all", "Release all", "Switch view"
䋺Delete all mails in the folder.
XEnter the security codeX"Yes"
Switch
View
Sort
䋺Set how to display mail.
X"1 lines subjt"/"1 lines add"/"1 lines name"/
"2 lines add"/"2 lines name"
䋺Sort mails by the condition you specify.
X"Subject asc"/"Subject desc"/"Address
asc"/"Address desc"/"Date asc"/"Date desc"/
"Size asc"*/"Size desc"*
䋪䋺 Sort mails in ascending order of data
size.