LG Electronics USA L705I PCS GSM Phone User Manual
LG Electronics USA PCS GSM Phone
Contents
- 1. Users Manual 1
- 2. Users Manual 2
Users Manual 2
177
Mail
[Filter]
Shows messages that meet certain conditions.
[Protect on/off]
[Send Ir data]
[Copy to microSD card]
[UIM]
[Memory status]
Display number of mails in sent mail BOX.
Sent Mail Details Screen Sub Menu
aSent mail details screen (P171) XM
[Menu]XPerform the following
operations
[Edit]
Edit and send a sent mail.→P161䇮P181
[Move]
Move the displayed mail to another folder.
XSelect destination folder
[Delete]
Delete a displayed mail.
X"Yes"
[Protect on/off]
Protect or release the displayed mail.
X"Yes"
[Store]
Save the phone numbers and email addresses in the
displayed mail to Phonebook.→P169
[Attach file]
Save, play or view, or delete images attached to the
displayed i-mode mail.→P169
[Inline image]
Save images contained in the displayed mail or view
the information.→P170
Address
Subject
Protected
Not protected
Image
i-motion
Melody
Mail
SMS
All
䋺Display mail sent to a specific
address.
X Select item X Select/input
address
䋺Display mail with a specific subject.
XEnter subject
䋺Display protected mail.
䋺Display unprotected mail.
䋺Display mail with an image
attached.
䋺
Display mail with an i-motion movie
attached.
䋺Display mail with a melody
attached.
䋺Display i-mode mail.
䋺Only display SMSes.
䋺Display all mail in the folder.
Protect On/Off
Protect
selected on/off
Protect all
Protect all on/
off
䋺Protect or unprotect the selected
mail.
X"Yes"
䋺Select and protect or unprotect mail.
XCheck off the mail to
protectXI[Done]X"Yes"
• Press M[Menu], choose from
"Mark all", "Release all", "Switch
view"
䋺Protect all mail in the folder.
X"Yes"
䋺Unprotect all mail in the folder.
X"Yes"
Send
Send all
data
䋺Sends selected mail via Infrared.
X"Yes"
䋺Send all mail in the folder by infrared.
XEnter security codeXEnter Auth.
Password X"Yes"
Copy one
Copy all
䋺Copies selected mail to microSD memory
card.
X"Yes"
䋺Copies all mail in the folder to microSD
memory card.
XEnter the security codeX"Yes"
Copy to UIM
䋺
Copy the selected SMS to the UIM.
Move to UIM
䋺
Move the selected SMS to the UIM.
Copy from
UIM
Move from
UIM
䋺Copy the
selected
SMS to the FOMA
handset.
䋺Move the
selected
SMS to the FOMA
handset.
Note
<Filter>
• Addresses matched completely and subjects
matched even partially are displayed.
Continue on the next page
178
Mail
[View settings]
[Copy]
Copy contents of the displayed mail.
[Save template]
Save Deco-mail as a template.
XC[Select]XEdit titleXI[Done]
[Export]
Unsent Mail List Screen Sub Menu
aUnsent mail list screen (P171) XMove
cursor to mailXM[Menu]XPerform
the following operation
[Delete]
[View settings]
[Filter]
Shows messages that meet certain conditions.
[Send Ir data]
[Copy to microSD card]
[Memory status]
Display number of mails in unsent mail BOX.
Received Mails/Sent Mails/Recent Mails
Using Mail Logs
Received / Sent mail logs show the last 30 mails
that were sent/received. Also, up to 60 received or
sent mails are recorded in "Recent Mails". These
logs can be used to make emails, and save
addresses to the phonebook.
• If more entries have been recorded than can be
saved, the oldest entries will be overwritten first.
Scroll
Character Size
䋺Sets the number of lines scrolled
when H is pressed at the mail
Display Screen.
X"1 line"/"3 lines"/"5 lines"/"Page"
䋺Set a font size for text on mail display
screen.
X"Small"/"Standard"/"Large"
Message
Address
Subject
䋺Select and copy contents of text.
→P252
䋺Copy a destination. If there are multiple
recipients, select addresses to copy.
䋺Copy a subject.
Send IrDA 䋺Send the displayed mail via IrDA.
X"Yes"
Copy to microSD
䋺
Copy the displayed mail to the microSD
memory card.
X"Yes"
FOMA card (UIM)
䋺Copy or move the selected SMS to the
UIM, or copy or move the selected
SMS from the UIM to the handset.
X"Copy to UIM"/"Move to UIM"/
""Copy from UIM"/"Move from UIM"
Note
<Protect>
• Up to 500 mails can be protected.
<Delete>
• Protected mails cannot be deleted.
Delete
Deletes
selected
item
Delete
all
䋺Delete the selected message.
X"Yes"
䋺Select and delete message.
XCheck off the mail to
deleteXI[Done]X"Yes"
• Press M[Menu], choose from "Mark
all", "Release all", "Switch view"
䋺Delete all unsent messages.
XEnter the security codeX"Yes"
Switch
View
Sort
䋺Set how to display mail.
X"1 lines subjt"/"1 lines add"/"1 lines name"/
"2 lines add"/"2 lines name"
䋺Sort mails by the condition you specify.
X"Subject asc"/"Subject desc"/"Address
asc"/"Address desc"/"Date asc"/"Date desc"
Address
Subject
Image
i-motion
Melody
Mail
SMS
All
䋺Display mail sent to a specific address.
X Select item X Select/input address
䋺Display mail with a specific subject.
XEnter subject
䋺Display mail with an image attached.
䋺
Display mail with an i-motion movie
attached.
䋺Display mail with a melody attached.
䋺Display i-mode mail.
䋺Only display SMSes.
䋺Display all unsent messages.
Send
Send all
data
䋺Sends selected mail via Infrared.
X"Yes"
䋺Send all unsent messages via infrared.
XEnter security codeXEnter Auth.
Password X"Yes"
Copy one
Copy all
䋺Copies selected mail to microSD memory
card.
X"Yes"
䋺
Copy all unsent mail to the microSD
memory card.
XEnter the security codeX"Yes"
179
Mail
Example: When displaying the received mail logs
aThe Stand-by displayXL(Hold for 1+
seconds)
䂓To display Sent mails
The Stand-by display
XR(for 1+ seconds)
䂓To display recent mail
The Stand-by display
XA(for 1+ seconds)
bSelect a Logged mail
•I[Mail] : Creates
mail to selected
entry's recipient/
sender.
aThe name entered
into the phone book
bOther party's mail address
cReceive/Sent date & time
䂓Icons displayed on the received/send log/Recent
Mails
䋪䋺 The received/sent date and time is shown on
local time.
Received/Sent Mail Log/Recent Mail Sub
Menu
aMove cursor to the received/sent logX
M[Menu]XPerforms the following
operations
[Video phone call]
Make a Video Phone.
[Compose mail]
Creates mail to selected entry's recipient/sender.
Go to Step 3 in "Creating and Sending i-mode Mail"
(P161).
[Add to phonebook]
Save the selected log's address to the phonebook.
Go to Step 2 in "Saving Contacts to the Phonebook
from Received or Dialed Calls" (P80).
• Saves only unsaved mail addresses.
[Customize call]
Edit the phone number in the selected entry and dial.
You can save a phone number to the Phonebook using
C [Save].
XLon the Phone number entry screen XLXK
to move the cursor to the place to change Xchange
the phone number XA
[Change list]䋪
• The item for the currently displayed log is not shown.
[Delete]
Delete the selected log entry.
X"Yes"
[Delete all]䋪
Delete all entries from the mail logs.
X"Yes"
䋪䋺 This option does not appear on the received/sent
mail logs/recent mail detail screen.
Mail setting
Setting FOMA Handset
Mail Functions Settings
Communication
Configuring Communication
Settings
aMail menu screen(P160) X"Mail
setting" X"Communication" X
Perform the following operations
[Receive option set]
To enable/disable the Receive option (P167), set
whether to receive i-mode mail automatically.
[Receive attach file]
Set attachment files to be acquired when receiving
i-mode mail.
XCheck off the item to be downloadedXI[Done]
Icon Description
Received mail
Sent mail
Received SMS
Sent SMS
䃨Mail and SMS that were
Received/Sent while Roaming*
Ex.: Received
Mail History
List Screen
Ex.: Received
Mail History
List Screen
a
b
c
Recent calls
Recent mail
Received
Calls
Received
mail
Redial
Sent mail
䋺Display all incoming and outgoing call
logs.
䋺Display all incoming and outgoing mail
logs.
䋺Display Received calls.
䋺Displays the Received mail logs.
䋺Displays phone redial log.
䋺Displays the Sent mail logs.
Default
Receive option set: OFF
Receive attch file: All checkmarked
Check new messages : All
checkmarked
On
Off
䋺Do not automatically receive mails.
䋺Automatically receive mails.
Continue on the next page
180
Mail
[Check new messages]
Sets request settings when using "Check new
messages".
XCheck off item to checkXI[Done]
Edit
Editing Header/Sign/Quotation
aMail menu screen (P160) X"Mail
setting" X"Edit" XPerform the
following operations
[Edit Header]
Set a header to be inserted into the i-mode mail text.
XC[Edit]XEnter header
[Edit Signature]
Set a signature to be inserted to i-mode mail text.
XC[Edit]XEnter signature
[Edit Quotation]
Set a symbol indicating quotation from a received mail
used for replying by quoting.
XC[Select]XEdit quotesXI[Done]
[Auto attach]
Set whether to automatically attach a header or
signature when composing i-mode mail.
XPlace a check mark next to an item to be attached
XI[Done]
View
Configuring Display Settings
aMail menu screen(P160) X"Mail
setting" X"Display" XPerform the
following operations
[Font size]
Set a font size for text on the Mail detail screen screen.
X"Small"/"Standard"/"Large"
[Scroll]
Sets the number of lines scrolled when H is pressed
at the the Mail detail screen or the Preview screen.
X"1 line"/"3 lines"/"5 lines"/"Page"
[Mail list]
Set how to display mail on the Mail list screen.
X"1 line subject"/"1 line address"/"1 line name"/"2
lines address"/"2 lines name"
[Folder security]
Sets security for Mail Menu's send/receive/unsent mail
box. To display a security-enabled mail box, the
security code must be entered.
XEnter security codeXCheck the items to enable
security onXI[Done]
[Melody auto play]
Set whether to automatically play attached or pasted
melodies on the Mail display screen.
X"ON"/"OFF"
[Receiving display]
Set whether to preferentially open the Receive results
screen when i-mode mail or Message R/F is received
while operating the FOMA handset.
Other
Configuring Other Settings
aMail menu screen (P160) X"Mail
setting" X"Others" XPerform the
following operations
[Check setting]
Confirm the contents set in "Mail setting".
[Reset setting]
Reset the contents set in "Mail setting" to the default.
XEnter the security codeX"Yes"
Note
<Receive option set>
• When this option is set to "ON", i-mode mail
cannot be received automatically. Incoming
i-mode mail is kept at the i-mode Center, and
the Receive notify screen(P162) appears.
<Attach File>
• When receiving the attached file so as to be set
the unreceivable file type, you can receive
attachments by selecting their file names shown
in the body text.→P169
Default
Edit header: Non
Edit signature: Non
Edit quotation>
Auto attach: Checkmarked on
"Signature"
Default
Font size: Standard
Scroll: 1 line
Mail list: 2 lines name
Folder security: Non checkmarked
Melody auto play: ON
Receiving display: Alarm mode
Alarm
preferred
Operation
preferred
䋺Open the Received Results screen.
䋺Carry out FOMA handset operations
without displaying the Received result
screen.
Note
<Reset Settings>
• The contents of the header and signature will
not be reset.
181
Mail
SMSCompose/Send
Creating and Sending
SMS (Short Message
Service) Message
• You can send and receive SMS to/from parties of
overseas carriers other than DoCoMo. Visit
DoCoMo's web site for countries and overseas
carriers available.
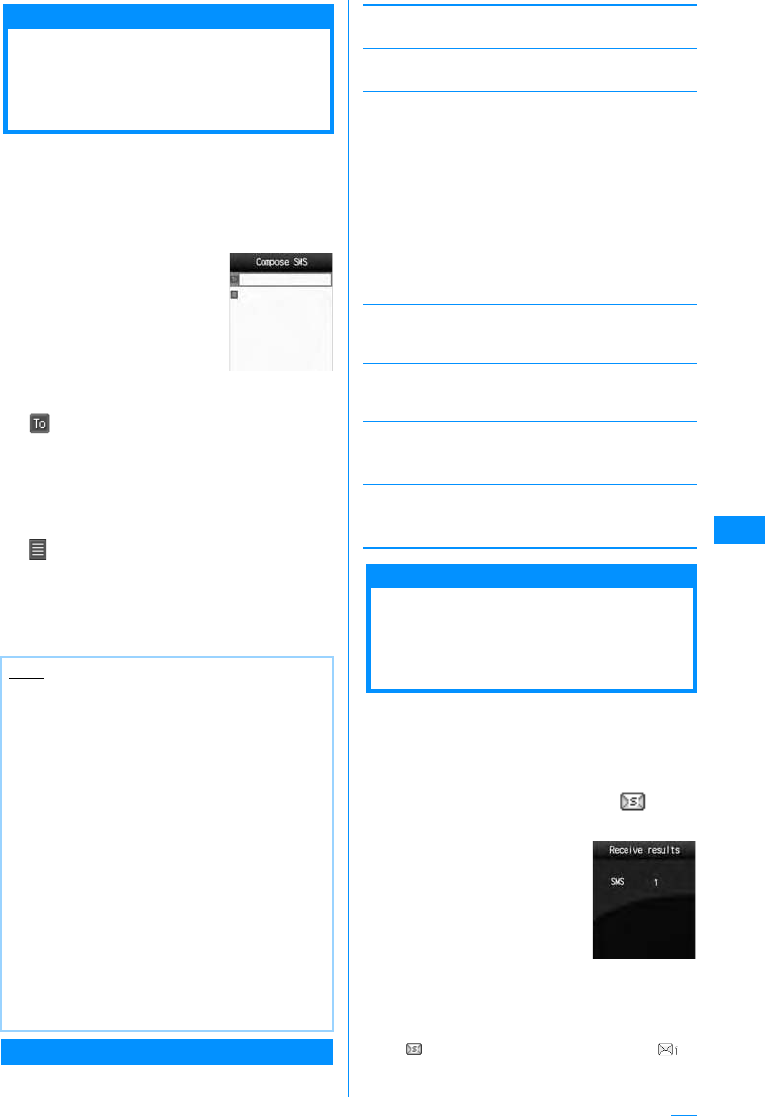
aMail Menu Screen(P160)X"SMS"X
"Compose SMS"
bSelect (Receiver) fieldX"Input
Address"XEnter the phone number
• Up to 21 digits (including "+") can be entered.
• The address can be selected from the
Phonebook, Sent mail logs or Received mail
logs.→P181
cSelect (Body) fieldXInput body
• The number of characters which can be entered
differs depending on the settings in "SMS input
character".
dI[Send]
Create SMS Screen Sub Menu
aSMS Composition Screen (P181) X
M[Menu]XPerform the following
operations
[Send via]
Send SMS.
[Save]
Save SMS being created or edited in Unsent mail box.
[Add address]
[Report request]
Set whether to request for SMS delivery notification
when SMS is sent.→P182
[Validity period]
Set the duration a sent SMS can be kept undelivered
at the SMS center.→P182
[Delete body]
Body software.
X"Yes"
[Delete SMS]
Delete the SMS being composed.
X"Yes"
Receive SMS
Automatically Receiving
SMS (Short Message
Service) Message
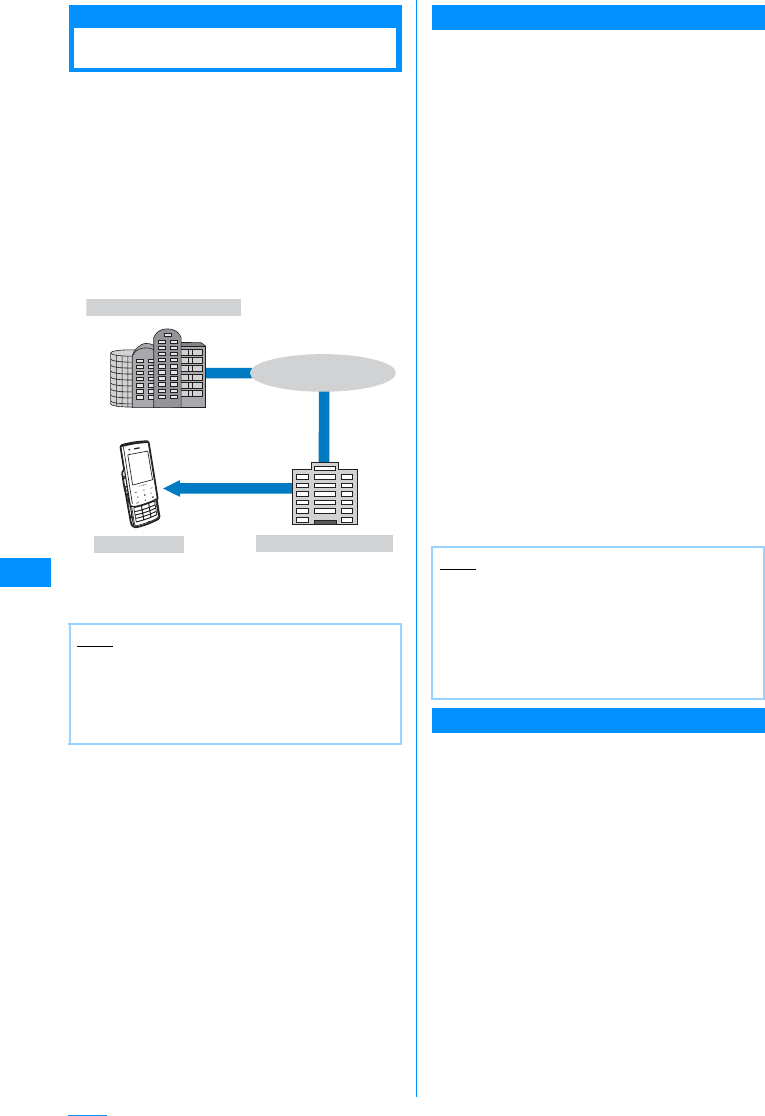
When FOMA handset is in the service area, SMS is
automatically received.
• Up to 1000 received SMS messages including
i-mode mail can be saved. However, the savable
number depends on the amount of the data.
aWhen receiving i-mode mail, is
shown at the top of the screen
When the reception is
complete, the Reception result
screen opens.
• You are forced to return to
the screen before receiving
mails if no operation is
performed for
approximately 30 seconds,
• Selecting "SMS" opens the
Received mail folder list
screen.
• Until the Detail screen of received SMS opens,
appears at the top of the screen and
(the number indicates the number of messages)
appears on the Stand-by screen.
Note
• For a destination of an overseas carrier other
than DoCoMo, enter in the order of "+" (Press
0 for 1+ seconds), "Country Code" and
"other party's mobile phone number". For the
mobile phone number, omit leading "0", if exist.
Numbers may be entered in the order of "010",
"Country Code" and "other party's mobile phone
number" (to reply to overseas SMS received,
enter "010").
• Characters may not be sent correctly to the
other party depending on the radio wave
reception level.
• When you send an SMS to a receiver who uses
a foreign carrier and the characters not
supported by the carrier are included in the text
you sent, those characters may not be
displayed correctly.
• Even if you set "Activate/Deactivate" to "Not
notify", your Caller ID is sent to the other party.
• You cannot reply to SMS sent with Unknown ID
or from a public phone.
Compose SMS
Screen
Open
Phonebook
Sent Address
Received
address
Input Address
䋺Select an address from the
phonebook.
XSelect phonebook
䋺Select an address from the Sent
mail logs.
X Select a logged SMS
䋺Select an address from the
Received mail logs.
X Select a logged SMS
䋺Enter the receiver address directly.
X Enter the phone number
Reception
Result Screen
182
Mail
Displaying New SMS Received
aReceived Result Screen (P181)X"SMS"
XSelect folder
bSelect the SMS to display
Check new SMS
Checking for SMS (Short
Message Service) Message
SMS that could not be received because the
handset was out of service area (or for other
reasons) are stored in SMS Center. You can receive
stored SMS by checking the SMS Center.
• You cannot check from an out of service area.
aMail Menu Screen (P160) X"SMS"X
"Check new SMS"
When the reception is complete, the Reception
result screen opens.
SMS Settings
Configuring SMS (Short
Message Service)
Settings
SMS Report
Set whether to request an SMS delivery report after
sending SMS. If this option is set to "ON", a
message indicating that the SMS has been
delivered to the receiver will be sent to you.
aMail setting screen (P160) X"Mail
setting" X"SMS" X"SMS Report
request" X"ON"/"OFF"
SMS Validity Period
Set the length of time that a sent SMS will be kept at
the SMS center if it cannot be delivered because
the recipient is out of service area, etc.
• If "None" is selected, sending the SMS message is
retried after a while, then the message is deleted
from the SMS center.
aMail setting screen(P160) X"Mail
setting" X"SMS"X"SMS Validity
Period" XSelect the period
Entering SMS Message Text
Sets maximum number of characters for SMS body.
aMail setting screen(P160) X"Mail
setting" X"SMS"X" SMS input
character"
Japanese (70 characters)
: Maximum 70 characters.
English (160 characters)
: Maximum 160 characters.
Japanese cannot be
input.
SMS Center
You can configure the SMS center.
aM[Menu]X(Settings)X"International
roaming"X"Network"X"SMS center"
XPerform the following operation
[SMSC]
[Address]
When "Others" is selected for "SMS center", input
connection address.
[Type of number]
Set when "Others" is selected for "SMS center",
bI[Done]
Default OFF
Note
• The report will show the sent time and the
number of the receiver.
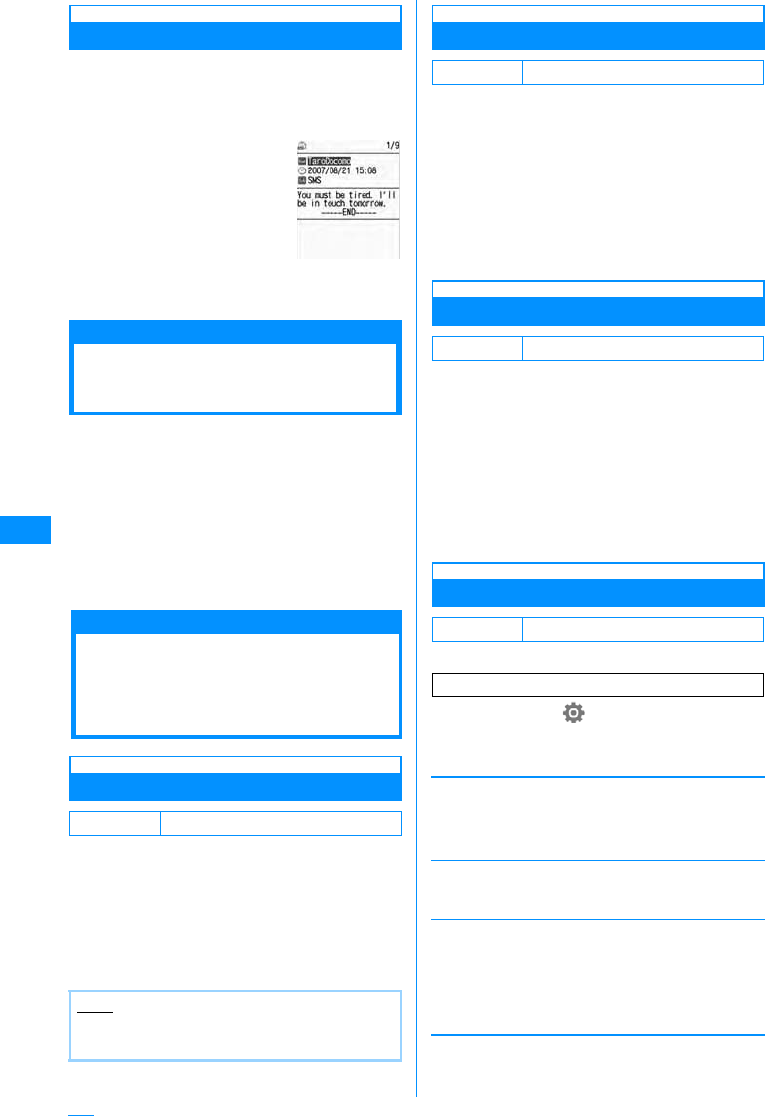
Received Mail
Details Screen
Default 3 days
Default Japanese (70 characters)
Default SMS center : DoCoMo
You usually do not need to change this setting.
DoCoMo
Other
䋺
Set DoCoMo as SMS Center address
.
䋺
Set something other than DoCoMo as SMS
Center address
.
Unknown
International
䋺If the SMS center phone number may
be long distance, use this setting.
䋺If the SMS center phone number is
long distance, use this setting.

183
i-appli
What is i-appli?.................................................................................................................. 184
Downloading i-appli from Site ......................................................................................... 185
Starting i-appli ................................................................................................................... 185
Save Mails from a Site or Mail.......................................................... i-appli To Function 189
Automatically Starting i-appli .................................................................. Auto Start Set 189
Viewing Various Information............................................................................................ 190
Deleting i-appli .................................................................................................................. 190
Displaying i-appli Site from i-appli .................................................................................. 190
184
i-appli
What is i-appli?
By downloading i-appli from site, i-mode
compatible FOMA handset (hereinafter, referred to
as i-mode handset) can be made more convenient.
For example, you can enjoy various games
downloaded to i-mode handset and automatically
check price by downloading i-appli for stock price
information. In addition, map i-appli downloads
minimum data that is required so that you can scroll
the map smoothly. In addition, map i-appli
downloads only necessary data, allowing smooth
scrolling. Some i-appli allows to directly register
data to phonebook or schedule or link with the Data
box for saving and acquiring images.
• Downloading i-appli →P185
• Activating i-appli →P185
• Automatically Starting i-appli →P189
䂓Using registered data
Some i-appli software may be able to refer to,
register or operate your i-mode handset registration
data (phonebook, bookmark, schedule, images,
Icon information). Following operations are enabled
usingregistration data:
• Add to phonebook
• Using Icon information
• Bookmark registration
• Schedule registration
• Image acquisition from Data box
• Image saving to Data box
What is i-appli DX?
i-appli DX makes With i-appli DX, you can use
i-appli more conveniently in such manners as to
create mail with your favorite character screen or let
you notified of the sender of received mail with a
character's comment by linking with i-mode
handset information (such as mail text, sent/
received mail history, phonebook data).
䂓Using registered data
Some i-appli DX may be able to refer to, register or
operate registration data such as mails, sent mail
logs, received mail logs, ring tone, in addition to
registration data available to ordinary i-appli
(Phonebook, Bookmark, schedule and images).
Following operations are enabled usingregistration
data:
• Add to phonebook
• Phonebook referencing
• Using Icon information
• Bookmark registration
• Schedule registration
• Using mail menu
• Using Compose message screen
• Referencing latest Redial logs
• Open latest received call record
• Referencing latest unread mail
• Saving melody
• Changing Ring tone (phone, mail, message)
• Image acquisition from Data box
• Image saving to Data box
• Changing screen settings (the Stand-by display,
Voice/Video call)
Other Functions
䂓Automatically starting i-appli
You can automatically start software at a specified
time, date or day of week. Some software can be
automatically started at a time interval predefined in
the software.→P189
䂓Using camera
You can use i-mode handset Camera from i-appli.
• This function is available with i-appli compatible
with Camera function.
䂓IrDA
You can communicate with a device installed with
Infrared communication function using the i-appli. It
can link to infrared communication-compatible
devices to increase its functionalities.→P211
• This function can be used with infrared-
compatible i-appli.
• Depending on the other party's device,
communication of some data may be restricted
even with Infrared communications available.
Note
• Some i-appli may use a "serial number of your
mobile phone/UIM".
• Some i-appli may perform communications at
starting. You can set to disable the
communications.→P188
IP䋨 ᖱႎ䉰䊷䊎 䉴 ឭଏ⠪䋩
䌩䊝䊷䊄䉶䊮䉺䊷
䌩 䊝䊷䊄 ┵ᧃ
䌩䉝䊒䊥
䉻䉡 䊮䊨 䊷䊄
䉭䊷䊛 䇮 ᩣଔᖱႎ䇮 etc.
Note
• i-appli DX may perform communications
regardless of software communication settings
to confirm software validity. The
communications count and timings differ from
software.
• You need to set the Time and Date in order to
start an i-appli DX.→P47
185
i-appli
䂓Infrared remote control
You can operate various device from i-appli such
as household electrical appliances compatible with
infrared remote control.→P213
For example, "G䉧䉟 䊄 ⇟⚵䊥 䊝䉮 䊮 (G-GUIDE
EPG Remote Control)", saved by default, can be
used as a remote TV controller linked with a TV
program.→P188
• This function is available with i-appli compatible
with infrared remote control function. The other
party's device must have related i-appli.
Downloading i-appli
from Site
You can download software from a site and save it
to FOMA handset.
• A maximum of programs can be downloaded and
saved. This number may be reduced by the
software's data size.
aSite DisplayedXSelect Program
•I[Cancel] : Cancel downloading.
䂓When "Display SW info" is set to "Display"
Software information is displayed. When
C[OK] X "Yes" to download the program.
bAfter downloading has completedX
"Yes"
The downloaded software starts.
• After the software is downloaded, the network
set screen may be displayed depending on the
software. To allow the software to carry out
network communications, when the software is
running, select "Yes". The settings can be
changed afterwards from "SW setting".→P188
Display SW info
Display i-appli Information When
Downloading
Set whether to display software information when
downloading the software.
aM[Menu]X"i-appli"X"i-appli
settings"X"Display SW info"X
"Display"/"Not Display"
Starting i-appli
aStand-by display XI(1+ seconds
after)
䂓Icons on the Software List screen
Note
• At downloading, the confirmation screen may
appear notifying of using "the phone-
information data (stored data and serial number
of your mobile phone/UIM)". Press "Yes" to start
downloading. Select I[Detail] to check the
details of the phone information data to be used.
In this case, the "serial number of your mobile
phone/UIM" is sent to the ISP (Internet Service
Provider) over the Internet, so could be
deciphered by third parties. However, your
phone number, address, age, and gender are
not notified to the ISP (Internet Service
Provider) or others by this operation.
• If you attempt to re-download software that was
downloaded with a different UIM, the
confirmation screen opens asking whether to
overwrite it. Select "Yes" to overwrite.
• If the maximum savable number of software is
exceeded or there is not enough memory
space, there will be the confirmation screen
asking whether or not to delete another i-appli.
If the memory free space is insufficient, you can
select i-appli to delete confirming the required
memory for it.
Select "Yes" to deleteXPlace a check mark next
to the i-appli youi delete confirming the required
memoryXI[Delete]. If "Yes" is selected, the
checked software is deleted and the download
starts.
• If the download of software fails due to weak
signal reception, the software cannot be saved.
• Even if the download of software fails due to
weak signal reception after old software was
deleted to make memory space on the FOMA
handset, the old software cannot be restored.
• Some software that starts immediately after
downloaded cannot be saved.
Default Not display
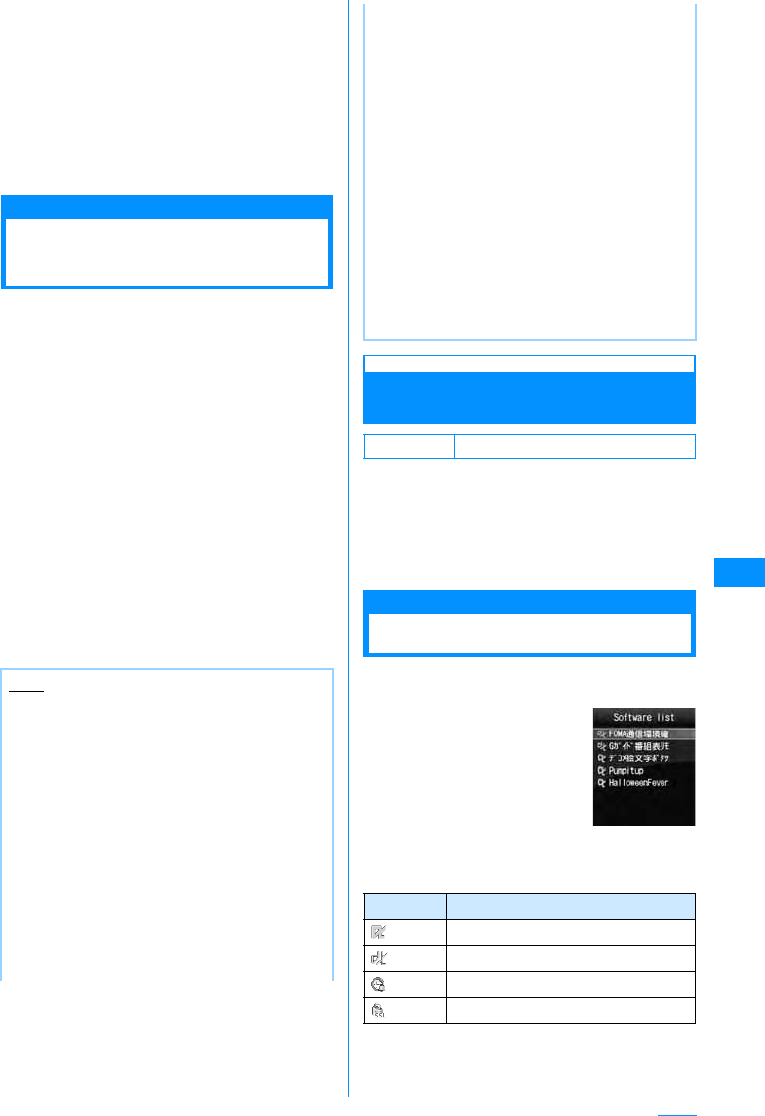
Icon Description
Standard i-appli
i-appli DX
Auto-start set i-appli
i-appli downloaded from an SSL site
Software List
Screen
Continue on the next page
186
i-appli
bSelect software
• If "Network set" of "Software set" is set to
"Confirm every session", a confirmation screen
whether to allow the communication appears.
䇸Select"Yes"/"No"
䂓Exiting i-appli
PXSelect "Yes".
To start software from other software
Some software can start a specified i-appli without
returning to the Software list screen. Some
software already has software to be started
specified, and others do not.
If the software to be started is already specified
While performing an i-appli, a confirmation screen
whether to start the specified software opens.
Select the software while i-appli is runningX
MSelect [Yes]
If the software to be started is not specified
While an i-appli is running, a confirmation whether
to list the software appears. M[Yes]XSelect the
software.
If a security error occurs
If you attempt to perform operations that are not
permitted for the software, a security error is
indicated and the error is recorded in "Security
error history".
→P190
If an abnormality occurs with the software
If an abnormality occurs with the software, you can
check the contents using the Trace output.→P190
To i-appli creators
If software does not behave as expected while
being created, you may want to refer to the Trace
output.
Software List Screen Sub Menu
aSoftware list screen(P185)XMove
cursor to the softwareXM[Menu]X
Perform the following operation
[Set i-appli to]
Set the Activating conditions of the selected software.
→P189
[Auto start time]
Set whether to start the selected software
automatically or not. And if you do, set the date and
time.→P189
[Software set]
Set the selected software.→P188
[Software info]
Displays selected software's information.
[Upgrade]
Upgrade the selected software.
X"Yes"
[Delete]
Delete software.→P190
Note
• Some software performs transmission
whileSome software performs transmission
while activated. You can change the settings in
"Network set" of "Software set" not to
automatically carry out transmission.→P188
• If there is an incoming voice call or video call
when the software is running, you can answer
the call pausing the software. After the call is
terminated, the previous screen returns.
• Even when the software is running, you can
receivemail or Message R/F. The software
keeps running, and at the top of the
screen appears. To view the received
mail or Message R/F, terminate the software.
To view the received mail or Message R/F,
terminate the software.
•Images used by an i-appli䋪 or data you entered
may be automatically sent to a server via the
Internet.
䋪䋺 Images used by the i-appli include: images
captured with Camera that is started from a
Camera-linked (linkage) application,
images obtained using infrared
communication function of the i-appli,
images downloaded from a site or web site,
and images obtained from the Data box by
the i-appli.
• You cannot start software downloaded using
adifferent UIM.
• Some i-appli do not have sounds.
• Depending on the software, the IP (Information
Provider) can access the saved program and
directly disable its use. In this case, the software
cannot be run or updated; it can be deleted, and
the software information can be shown. As
re-enabling the software requires an incoming
signal, please direct your inquiries to the IP
(Information Provider).
• Depending on the software, the IP (Information
Provider) can access the saved program data.
• In the event that the IP disables/re-enables the
software or accesses the data, the FOMA
handset performs transmission and is
displayed on the phone. Packet communication
charges do not apply in this case.
Note
<Upgrade>
• During an update, a confirmation screen may
appear notifying of using the handset's data
(stored data and serial number of the handset/
UIM)".䇸Select "Yes" to start downloading.
Select I[Detail] to check the details of the
phone information data to be used. In this case,
the "serial number of your mobile phone/UIM" is
sent to the ISP (Internet Service Provider) over
the Internet, so could be deciphered by third
parties. However, your phone number, address,
age, and gender are not notified to the ISP
(Internet Service Provider) or others by this
operation.
187
i-appli
i-appli Pre-installed
The following table shows pre-installed i-appli.
• The i-appli title may differ from the name displayed
on the screen.
Halloween Fever
This is a puzzle game that you try to delete monster
when 3 or more of the same monster are adjacent.
The game ends when all the monsters have been
deleted.
Be careful about the order the monsters are
deleted; if there are any undeletable monsters at the
end, you will lose the game.
aSoftware list screen(P185)X
"Halloween Fever"
The menu screen opens.
bPerform the following operation
[䉴䉺䊷䊃 (Start)]
Start the game.
[䉴䊁䊷䉳 (Stage]
Press J to select the stage finished.
[䊓䊦䊒 (Help)]
Display the description and how to play the game.
[䉰䉡 䊮䊄 䉥䊐 (䉰䉡 䊮䊄 䉥䊮) (Sound off (Sound on))]
C toggles the sound effects on and off.
䂓Operations during the game
Pump it up
This is a rhythm and action game that you try to
push the buttons as they are indicated on the
screen in rhythm to the music.
As marks such as arrows scroll up from the bottom
of the screen, please press the corresponding
button when they reach the same marks on the top
of the screen.
In decreasing order, you will get a "PERFECT,
GREAT, GOOD, BAD, MISS" depending on how
close you were to the rhythm. If you get BAD or
MISS above the certain number, the game will end.
When you get several in a row, a combo will be
displayed.
aSoftware list screen(P185)X"Pumpitup"
The game title screen is displayed.
bC
The menu screen opens.
cPerform the following operation
[䉴䉺䊷䊃 (Start)]
Start the game. Select the song and difficulty level.
Use XJto select the music XCX"䊉䊷䊙䊦
(Normal)"/"䊊䊷䊄 䇭 (Hard)"
[ᣇᴺ (How to play)]
Shows the function buttons.
[䉥䊒䉲䊢 䊮 (Options)]
Set whether to display sound, vibration, and
animations or not.
[䉮䊙䊮䊄 (Command)]
Shows codes to make the game harder. Enter the code
at the difficulty level selection screen.
䂓Operations during the game
• This sample screen may be different from the actual
one.
Game Halloween Fever
Pump it up
Softwareother
than the
games
䊂䉮 䊜 ⛗ᢥሼ䊘䉬䉾 䊃 (Deco-mail
pictograph pocket)
G䉧䉟 䊄 ⇟⚵⾮䊝䉮 䊮 (G-GUIDE
Program List Remote Controller)
FOMAⅣႺㅢା⏕䉝䊒䊥
(FOMA Communication
Environment Check Application)
Key Description
KMoving the cursor
CSelect
I[Menu] If "Yes" is selected, the game ends
and the menu screen is shown.
*Restart the game.
#Returns to the previous screen.
Move the cursor
and select a
monster to be
Random
Mirror
Vanish
No Step
Cancel
䋺Randomizes the kind and order of marks.
䋺.
䋺Vanish the marks in the middle of scroll.
䋺Do not show the marks (Press the button
following your memory and music).
䋺Cancels the commands set.
Key Description
1䋯3䋯7䋯9Buttons corresponding to
Left-up/Right up/
Left-down/Right-down
arrows
5the button corresponding
square(foot-shape) mark
When the
gauge
vanishes, the
game is over.
Press the
button right
after the mark
wraps over.
188
i-appli
FOMA
ⅣႺㅢା⏕䉝䊒䊥
(FOMA
Communication Environment Check Application)
This application confirms if the FOMA handset is in
a FOMA High Speed Area.
• Based on the results of FOMAⅣႺㅢା⏕䉝䊒䊥
(FOMA Communication Environment Check
Application), it displays the maximum transmission
speed in the area.
• There is no packet communication charge to use
FOMAⅣႺㅢା⏕䉝䊒䊥 (FOMA Communication
Environment Check Application).
• When using FOMAⅣႺㅢା⏕䉝䊒䊥 (FOMA
Communication Environment Check Application),
please consult the "Usage and Warning" section.
• According to environmental and electrical
conditions, the network could have different speeds
even if one is in the same place.
• Please do not use the Multitask functions while
running FOMAⅣႺㅢା⏕䉝䊒䊥 (FOMA
Communication Environment Check Application).
G䉧䉟 䊄 ⇟⚵⾮䊝䉮 䊮 (G-GUIDE Program
List Remote Controller)
This is a convenient application which combines a
TV program list and a TV remote controller, and is
free of monthly usage charges.
You can obtain TV program information for any time
slot, from anywhere and at anytime. You can
acquire information on a program title, program
description, start and end times and the G-code®
for your local TV station.
When you find a program of interest, you can send
mail, using the "Recommendation Mail" function,
with the program title and broadcast schedule to
your friends. You can also control your TV remotely
(some models cannot be controlled).
• When using this application for the first time, you
need to configure the settings and agree to the
license agreement.
• Separate packet communication charges apply.
• For details, refer to the "Mobile Phone User's Guide
[i-mode]".
• For Infrared remote control, see "Using the Infrared
Remote Control Function" (P213).
䊂䉮 䊜 ⛗ᢥሼ䊘䉬 䉾 䊃 (Deco-mail
pictograph pocket)
This is an i-appli exclusively designed to quickly
search and save Deco-mail pictographs that can be
used as pictographs in i-mode mail.
You can search for a Deco-mail pictograph
provided by an information service provider from a
theme such as "Category" or "Illustration
characters", and save it on the FOMA handset
quickly.
Also, you can save multiple pictographs at once. If
you find a Deco-mail pictograph you like, you can
view the site introduction then access the site.
• The monthly information fee will not be charged for
"Deco-mail pictograph pocket". To access a site
provided by an information provider, i-mode
information fee may be charged separately.
• Separate packet communication charges apply.
• For details, refer to "Mobile Phone User's Guide [i-
mode]".
Setting i-appli Operating Conditions
Set operating conditions for each software. You can
set to make communications automatically while
software is active or whether to allow the reference
to icon information, Phonebook or others.
• Some items may not be changed depending on the
software.
aSoftware list screen(P185)XMove
cursor to the programXM[Menu]X
[Software set]XPerform the following
operation
[Network set]
Set whether to make communications while software is
active.
X"Yes"/"No"/"Confirm every session"
[Icon info]
Set whether to permit the use of icon information for i-
mode mail, Message R/F, in/out of service area,
battery level, or Manner Mode when the software
starts.
X"On"/"Off"
[View P.book/call records]
Set whether to allow to reference the phonebook and
reception history when software is started.
X"Yes"/"No"
[Change ring tone/image]
Set whether to allow, when software is started, to
automatically change an image and/or melody set for
Ring tone or on the Stand-by display
X"Yes"/"No"/"Confirm every start" X"Yes"
• The screen image only provides
an example. They differ from
actual ones. A program list that
is applicable to your location is
displayed.

189
i-appli
i-appli To Function
Save Mails from a Site or
Mail
Sets whether to activate software from a site, mail,
infrared transmission or barcode reader.
aSoftware list screen (P185)XMove
cursor to softwareXM[Menu]X"Set
i-appli to"XCheckmark to software
allowed to activate
Site i-appli to
: Start the software from a site.
Mail i-appli to
: Start the software from a site.
Ir i-appli to
: Start the software from a site.
Barcode i-appli to
: Start the software from the barcode reader.
bI[Done]
Auto Start Set
Automatically Starting
i-appli
• Date and Time need to be set in advance in order to
start an i-appli automatically.→P47
Setting whether to Automatically
Start
You can set whether to start an i-appli automatically.
aM[Menu]X"i-appli"X"i-appli
settings"X"Auto start set"X"On"/"Off"
Setting Start Date/Time
Set the date and time when the software starts
automatically. Up to 3 settings can be configured.
aSoftware list screen(P185)XMove
cursor to the softwareXM[Menu]X
"Auto start time"XPerform the
following operation
[Time interval set]
Applications will be launched at set intervals.
[Start time set]
Enable when you want to set the when i-appli will
automatically start. After setting this option, you can set
the following items.
[Time]
<StepLineLead2Col>To set the date, use J to move
the cursor to the place to change the date and enter the
date with the dial keys (to set the date on the calendar
screen, press C[Select] in the date entry field ).
Operations on the Calendar screen → P234
To set the time, use J to move the cursor to the
position, enter the time with dial keys, and switch
between "AM" and "PM" with C (entering C in the
time entry field, the time settings screen on which you
can enter a date with dial keys and H is displayed).
• Depending on the settings in "Date & Time format"
(P106), the display order or format for the date and
time may differ.
[Repeat]
Select a repeating pattern for auto-start.
bI[Done]
Note
• Depending on the settings, the software may
not connect to the network in some conditions
(Unread messages or battery level, etc.)
<Network Set>
• When this is set to "No", the software may not
start, or real-time information may not be
provided.
• When this is set to "Yes", the software
automatically connects to the network. While
connected, packet communication charges
apply.
<Icon info>
• When set to "Yes", information about the status
of the handset as indicated by the presence of
icons for unread mail, messages, battery level,
Manner Mode, inside the service area, and
outside the service area may be sent to
Information Providers (IP) via the Internet in the
same manner as "serial number of your mobile
phone/UIM" is sent. The icon information may
be intercepted by a third party. Software that
needs Icon data may not function if this is set to
"No".
Default On
1 time
Daily
Weekly
䋺Starts once automatically at the set date
and time.
䋺Starts automatically at the specified time
every day.
䋺Starts automatically at the specified time on
the specified day of the week every week.
XCheck off the day to auto-start every
weekXI[Done]

190
i-appli
Viewing Various
Information
aM[Menu]X[i-appli]X[i-appli info]X
Perform the following operations
[Security error history]
Display a log of errors of software terminated due to a
security error.
•I[Delete] : Deletes the selected error history
entry.
X"Yes"
[Auto start info]
You can check whether software automatically started.
You can view the information and the latest date and
time when software started for up to 3 pieces of
software set to start automatically.
Start 䂾䋺 The software automatically started
successfully
Start 㬍䋺 The software failed to start automatically
Start : The software has not started because the
set time has not arrived
[Trace info]
Display the trace information of the software.
•I[Delete] : Deletes the trace information of the
software.
X"Yes"
Deleting i-appli
aSoftware list screen(P185)XMove
cursor to softwareXM[Menu]X
[Delete]XPerform the following
operation
1䋺You can delete the selected software.
X"Yes"
Select䋺Select and delete items.
X Check off the software to be deleted X
I[Delete] X "Yes"
All 䋺Delete all software.
XEnter the security codeX"Yes"
Displaying i-appli Site
from i-appli
You can connect to a site and use FOMA functions
while i-appli is active.
• You have to download the related i-appli in advance.
• For some i-appli, operations may be different or
disabled.
Using the Camera from an i-appli
• When using the camera from i-appli, captured
images will not be saved in the "My picture" in "Data
box" but as part of the i-appli.
aUsing the camera from an i-appli
Using Barcode Reader from an
i-appli
• The camera can be used from the i-appli to read a
QR code and Japan Article Number code.
• The read result can be used and saved by the
software.
aUse the i-appli to read a code
Note
• The software will not automatically start when:
- The FOMA handset power is turned off
- A call or communication is in progress
- Another function is running
- "Lock all" is set (even at the security code
entry screen)
- "i-appli" in "Data access lock" is currently is
"On" (even at the security code entry
screen)
- The Auto-start time is same as the
scheduled time for software update, an
alarm, schedule, or To Do alarm.
- For i-appli downloaded using another UIM
- For i-appli with "Network set" is set to
"Confirm every session"
- For i-appli whose interval to launch is set
within 10 minutes
• Software is not started at a automatic start time
if other software is active at that time. Also,
software may not start while other functions are
running.
• If auto starts fails, icon appears in the Stand-
by display. Selecting the icon displays the Auto
start info (P190). icon disappears after the
Auto start info is viewed.
Note
• History or information which is not traced will not
be shown.
Note
• When setting "Auto start time", a confirmation
screen whether or not to delete the settings
appears. Select "Yes" to delete.

191
i-appli
Using Infrared Communication
from an i-appli
aUse the i-appli and perform an infrared
communication
Note
• You may not be able to exchange data with
some devices even if they have the infrared
capability.
• According to the infrared transmission, the
i-appli may receive activation data, and the
i-appli may start.
• When the infrared communication is executed
and the handset tries to connects to the site and
receives mail, the site connection/mail reception
will be cancelled.


193
Data Display/Edit/Management
Data Box............................................................................................................................. 194
Making Full Use of Still Images
Displaying Images..................................................................................... Picture viewer 194
Viewing Flash Movies ....................................................................................................... 197
Editing Still Images ................................................................................Edit Still Images 198
Creating Animations ........................................................................................Animation 200
Making Full Use of Videos
Playing Videos/i-motion Movies ..................................................Video/i-motion Player 201
Editing Videos/i-motion Movies ....................................... Edit Videos/i-motion Movies 203
Making Full Use of Melodies
Playing Melodies ....................................................................................... Melody player 204
Making Full Use of a Memory Card
microSD Memory Cards ................................................................................................... 206
Inserting/Removing a microSD Memory Card ................................................................ 206
Using a microSD Memory Card ....................................................................................... 207
Copying/Overwriting Personal Information between the FOMA Handset and
a microSD Memory Card ....................................................................................................
208
Updating the Data on the microSD Memory Card.......................................................... 209
Checking the Space on the microSD Memory Card ...................................................... 209
Folder Structure on the microSD Memory Card............................................................. 210
Reading/Writing Data on a micro SD Memory Card with the FOMA Handset ............. 210
Exchanging Data via Infrared Communication
Using Infrared Communication................................................................................. IrDa 211
Exchanging Data One Piece at a Time ............................... Send Ir DA/Receive Ir Data 212
Receiving or Sending All Data ..............................Send All via Ir DA/Receive All Ir DA 212
Using the Infrared Remote Control Function ................................................................. 213
194
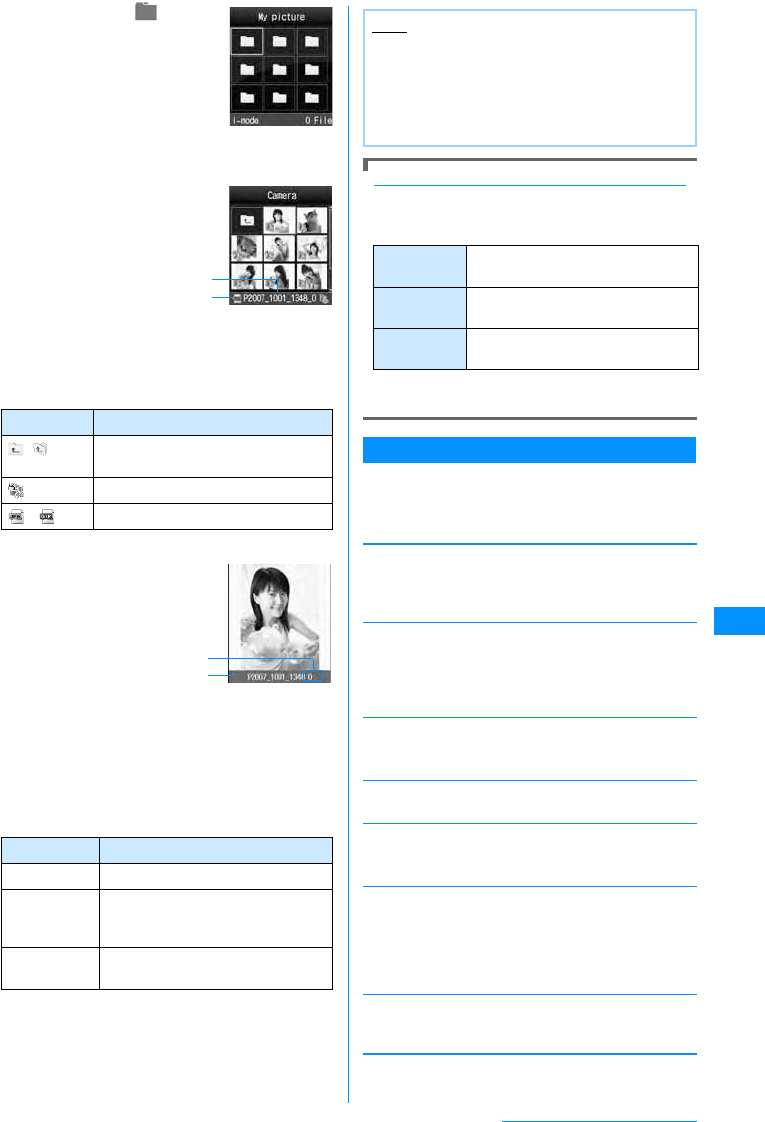
Data Display/Edit/Management
Data Box
The Data box contains the items and folders shown
in the following table. Data obtained from sites or
i-mode mail are saved in folders according to their
respective types.
• Up to 20 folders can be added to My picture, Music,
i-motion, or Melody. Up to 10 folders can be added
to the Music channel.
• Files saved in My picture, Music, i-motion, or Melody
can be moved to other folders within the category.
Files saved in the Music channel can be moved from
the "Distributed program" folder to another folder
within the category, or can be moved between
folders other than "Distributed program".
Picture viewer
Displaying Images
You can display still images you have captured, or
obtained from sites or i-mode mail.
䂓Available File Formats
䋪䋺 Even if a file is in a compatible file format, it may
not be displayed depending on the file.
My Pictures : Still images, etc.
i-mode Still images, etc. obtained from
sites or mail
Camera Still images captured by the
Camera
Deco-mail Pictures Pictures for Deco-mail provided
by default
Deco-mail
pictogram
Deco-mail pictograms that are
pre-installed by default or
downloaded via web sites or
mails
Preinstalled Still images provided by default
Data transfer Still images, etc. obtained via
infrared communication
Item Still images that can be used
for frames or stamps
Animation User defined animations, etc.
micro SD
Still images saved on the
microSD memory card
Camera
image
Still images
captured by the
Camera
Other
images Still images, etc.
Deco-mail
pictogram
Pictograms for
Deco-mail
copied from the
FOMA handset
Music : Playlists created with music data and the
music player
i-mode Data obtained from the site
Playlist Playlists created with the music
player
micro SD Transferable
contents
Music data
saved on the
microSD
memory card
Music channel
Distributed
Program Music programs distributed
through Music channels
i-motion : Videos and i-motion movies, etc.
i-mode Videos/i-motion movies
obtained from sites or mail
Camera Videos captured by the Video
Camera
Preinstalled Videos provided by default
Data transfer Videos, etc. obtained via
infrared communication
i-motion : Videos and i-motion movies, etc.
micro SD
Videos or i-motion movies
saved on the microSD memory
card
Transferable
contents
Copyright
protected
videos or
i-motion movies
moved from the
FOMA handset
Audio Audio only
i-motion movies
Videos Videos captured
by the Video
Camera
Melody : Melodies, etc.
i-mode Melodies, etc. obtained from
sites or mail
Preinstalled Melodies provided by default
Data transfer Melodies, etc. obtained via
infrared communication
micro SD Melody Melodies saved
on the microSD
memory card
SD-audio : SD-Audio compatible music saved on
the microSD memory card and Playlists created
with the SD-Audio Player
File Format
䋪
JPEG, GIF
Pixels JPEG: Up to 1200 x 1600 pixels
Progressive JPEG, GIF: Up to
800x600 pixels
File Size Up to 2MB
File Extension jpg, gif
195
Data Display/Edit/Management
aM
[Menu]
X
(Data
box)
X
"My picture".
bMove the cursor to a
folder XC[Open]
•I[Switch] : Switch
between list and
picture display.
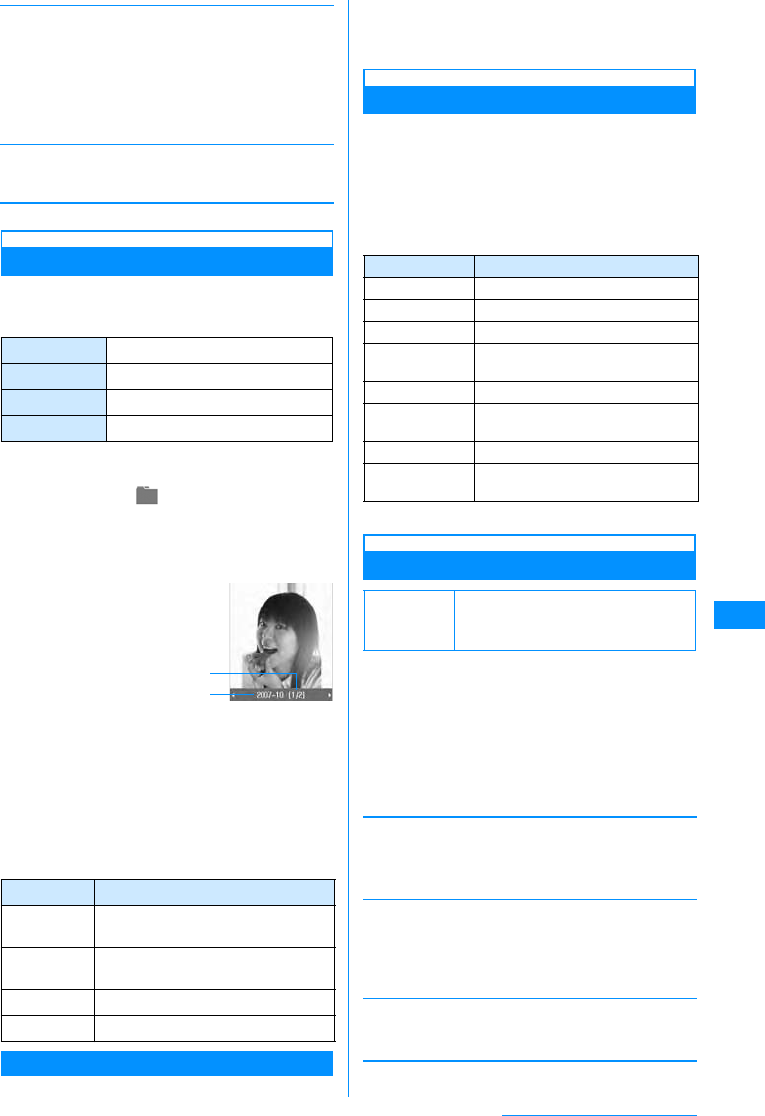
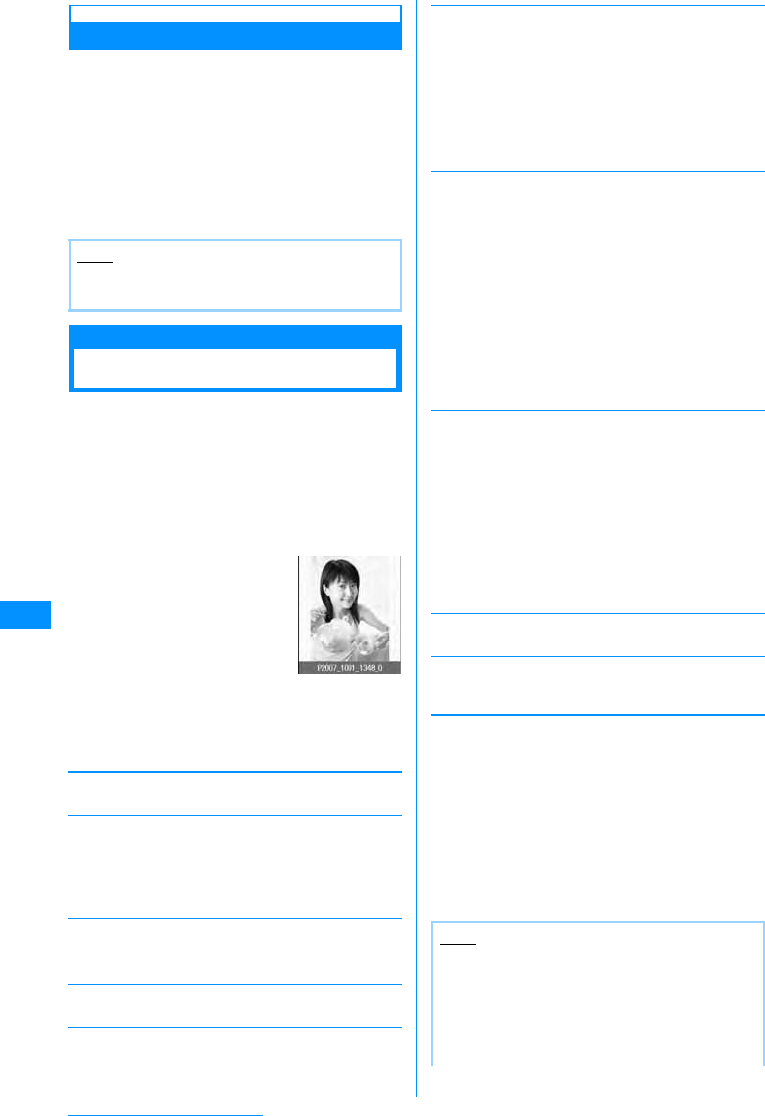
aDisplay name of the selected file
bThe type of the selected file
䂓Icons displayed on the still image file list screen
cMove the cursor to a file XC[View]
aSequential number/number of saved files
Display the sequential number of the current
file and the total number of saved files in the
folder.
bDisplay name of the file
䂓Key operations on the still image display screen
Descriptions of Display name, File Name, and Title
Still images, Flash movies, videos/i-motion movies,
and melodies saved in the FOMA handset have more
than one name.
䋪䋺 Still images and Flash movie files do not have
titles.
Sub Menu on the My Pictures Screen
aMy Pictures screen (P195)XMove the
cursor to a folderXM[Menzu]X
Perform the following operations
[Rename]
Change the name of the selected folder. Up to 30 full-
pitch or half-pitch characters can be entered.
XEdit the folder name
[New folder]
Create a folder.
XEnter a folder name
• You cannot create a sub folder in a user-defined
folder.
[Delete]
Delete the selected folder.
X"Yes"
[List view/Grid view]
Switch how to display folders.
[Sort by]
Sort folders by setting a condition.
X"Name"/"Date"/"Size"/"Source"
[Memory info.]
[Folder property]
Display the name of the selected folder and the
number of files in the folder.
Icon Description
䋨㶎䋩Display the list screen of the next
higher folder
Restricted files
䋯File type (JPEG/GIF)
Key Description
JDisplay the previous/next file
C[Full] Display a full image, hiding the Soft
keys/return to the original display
size
I[Mail] Send the displayed image by mail
→P161
My Pictures
Screen
Still image file
list screen
b
a
Still image
display screen
a
b
Note
• An i-mode mail with the selected image
attached can be created by pressing I[Mail]
on the still image list screen.
• Some images not captured with FOMA L705i
may not be displayed on the Still image file list
screen.
Display
name 䊂䊷䉺 BOXౝ䈱৻ⷩ↹㕙䉇␜䋯ౣ
↢↹㕙䈪␜䈘 䉏䉎 ฬ⒓
File Name Names appear on a PC or other
handsets
Title* Names for management of the FOMA
L705i (they cannot be edited)
Handset
memory
External
memory
䋺Display the status of storage space in the
"Data box".
䋺Display the status of storage space on the
microSD memory card.
Continue on the next page

196
Data Display/Edit/Management
Sub Menu on the Still Image File List
Screen
aStillimage file screen(P195)X
Movethe
cursor to a file
XM
[Menu]
XPerform
the following operations
[Files]
[Multiple choice]
Select and delete files.
XPlace a check mark next to a file to deleteXI
[Delete]X"Yes"
• You can move/copy multiple files by performing the
following steps:
XPlace check marks next to files to move/copy
XM[Menu]X"Move"/"Copy"XSelect the
destination folder*XI[Copy]/[Move]
• You can also select "Delete", "Mark", "Mark all",
"Unmark", or "Unmark all" by pressing M[Menu].
[File property]
Display the file name, size and type, etc. of the
selected file.→P197
[Send via]䋪
[Set as]
Set the selected file as the Stand-by display or Call
display
[List view (Grid view)]
Switch how to display folders.
[Sort by]
Sort files by setting a condition.<Confirming
specification>
X"Display name"/"Date"/"Size"/"Source"
[Memory info.]
[New folder]
Create a folder.
XEnter a folder name
• You cannot create a sub folder in a user-defined
folder.
䋪䋺 Not available for Flash files.
Sub Menu on the Still Image Display Screen
a
Still image display screen (P195)
XM
[Menu]
X
Perform the following
operations
[Edit image]䋪
Edit the displayed file.→P198
[Delete 1 item]
Delete the displayed file.
X"Yes"
[Edit title]
Edit the name of the displayed file.
XEdit a file name
[File property]
Display the file name, size and type, etc. of the
displayed file.→P197
[Send via]䋪
[Full screen]
Display the entire image, hiding Soft keys, etc.
•/
CQ: Restore the full image to the original
display.
•J: Display the next/previous image.
[Zoom]
Display an enlarged image.
•M[+] : Enlarge the image
•I[-] : Restore the previous zoom ratio
•K: Move the display position
• The entire image and the displayed area appear at
the lower right of the screen.
View
Edit
Move
Copy
Delete
Delete
all
Rename
䋺Display the selected file.
䋺Edit the selected file.→P198
䋺Move the selected file to another folder.
XSelect a destination folderXI[Move]
䋺Copy the selected file to another folder.
XSelect a destination folderXI[Copy]
䋺Delete the selected file.
X"Yes"
䋺Delete all files in the folder.
X"Yes"XEnter the security code
䋺Change the display name of the selected
file.
XEdit a display name
Mail
IrDA
䋺Create i-mode mail with the selected file
attached. Go to Step 2 in "Creating and
Sending i-mode Mail" (P161).
䋺Send a file using Infrared communication.
Stand-by Display
Voice call display
Video call display
Wake-up display
䋺Set as the Stand-by display.
䋺Set as a Voice call display.
䋺Set as a Video call display.
䋺Set as the Wake-up display.
Handset
memory
External
memory
䋺Display the status of storage space in the
"Data box".
䋺Display the status of storage space on the
microSD memory card.
Mail
IrDA
䋺Create i-mode mail with the selected file
attached. Go to Step 2 in "Creating and
Sending i-mode Mail" (P161).
䋺Send a file using Infrared communication.
197
Data Display/Edit/Management
[Set as]
Set the displayed file as the Stand-by display or Call
display.
[View settings]
Set the display method of an image, a zoom ratio, or
interval between animation frames.→P197
䋪䋺 Not available for Flash files.
Viewing Flash Movies
You can view Flash moves downloaded from a site,
etc.
䂓Available File Formats
䋪䋺 Even a file in a compatible file format may not play
depending on the file.
aM[Menu]X(Data box)X"My
picture"
b
Move the cursor to a folder
XC[Open]
cMove the cursor to a file XC[View]
aSequential number/number of saved files
Display the sequential number of the current
file and the total number of saved files in the
folder.
bDisplay name of the file
䂓Key operations on the Flash movie playback
screen
Sub Menu on the Flash Playback Screen
a
Flash playback screen (P197)
XM
[Menu]
• The sub menu on the Flash playback screen is
the same as the "Sub Menu on the Still Image
Display Screen" (P196). However, "Edit image"
and "Send via" are not available.
Viewing Image Information
aStill image list screen (P195)/Still image
display screen (P195)/Flash playback
screen (P197)XM[Menu]X"File
property"
•I[Edit] : Edit properties.
䂓Information displayed on the File property screen
䋪䋺 Not displayed for a Flash file.
Setting the View of a Still Image
Set the display method of an image, a zoom ratio, or
interval between animation frames.
aStill image display screen (P195)/Flash
playback screen (P197)/Animation list
screen (P200)XM[Menu]X"View
settings"XPerform the following
operations
[View type]
[Zoom type]
[Animation interval]
Set the interval between animation frames.
X"Slow"/"Medium"/"Fast"
bI[Done]
Stand-by Display
Voice call display
Video call display
Wake-up display
䋺Set as the Stand-by display.
䋺Set as a Voice call display.
䋺Set as a Video call display.
䋺Set as the Wake-up display.
File Format
䋪
Flash
Pixels 240㬍320䊄䉾䊃 એਅ
File Size Up to 100KB
File Extension swf
Key Description
C[Full] Display a full image, hiding the Soft
keys/return to the original display size
I[Retry] Play a Flash movie from the
beginning
JPlay the previous/next file
F/EH Increase/decrease the volume
Flash Movie
Playback
Screen
a
b
Item Description
File Name Display the file name
File Size Display the file size
File Type䋪Display the file format
Date & Time
(Saved) Display the saved date and time
Display size䋪Display the resolution
File Restriction Display whether the file is
restricted
Source Display the source
Move to
microSD Indicates whether the file can be
moved to a microSD memory card
Default View type: Normal
Zoom type: Normal
Animation interval: Medium
Normal
Fit to screen
䋺Display the image in its original size.
䋺Display the image enlarged to fit the
screen.
Normal
Same
magnification
䋺
Zoom in on an image enlarged to fit the
screen.
䋺
Zoom in on an image displayed in its
original size.
Continue on the next page
198
Data Display/Edit/Management
Restricting Files
You can restrict files. A restricted file attached to
mail cannot be sent or forwarded from the recipient
FOMA handset.
aSelect a file to restrictXM[Menu]
X"File property"
The File property screen opens.
bMove the cursor to the "File restriction"
fieldXI[Edit]X"File restricted"
Edit Still Images
Editing Still Images
You can edit still images. The edited still image is
saved in the same folder as the source file.
• Only JPEG files can be edited. However, some files
may not be edited.
• Editing a still image repeatedly may reduce the
image quality or increase the file size.
aStill image display screen (P195)X
M[Menu]X"Edit image"
bM[Menu]XPerform the following
operations
[Save]
Save the edited still image. Go to Step 5.
[Rotate]
[Mirror]
[Resize]
You can change the image size.→P199
[Crop]
You can cut out a part of an image.→P199
[Insert]
You can add a frame, stamp, or text.
[Retouch]
You can change the brightness, contrast or color tone
of an image.
[Effect]
Set special effects for an image.
[Send via mail]
Create i-mode mail with the edited image attached.
[Undo]
Cancel the performed operation and restore the
previous state.
cC[OK]
䂓To cancel editing
Press I[Cancel].
dC[Save]
䂓To restore to the previous state
Press I[Undo].
e"New file"
䂓To overwrite the original file
Select "Original file".
Note
• This option cannot be changed for a file, etc.
downloaded from a site.
Left
Right
180
䋺Rotate the image 90 degrees
counterclockwise.
䋺Rotate the image 90 degrees clockwise.
䋺Rotate the image 180 degrees.
Left/Right
Up/Down
䋺Flip the image horizontally.
䋺Flip the image vertically.
Still Image Edit
Screen
Frame 䋺Add a frame to an image.
Select a folder X Select a frame
• After selecting a frame, you can select
"Change frame" or "Rotate" by pressing
M[Menu].
Stamp
Text 䋺Add a stamp to an image.→P199
䋺You can add text to an image.→P199
Brightness
Contrast
Color
change
Sharpness
Softness
䋺Set the brightness of an image. X Press
J to adjust the brightness
䋺Set the contrast of the image. X Press
J to adjust the contrast
䋺Set the color tone of the image.
X Press K to adjust each RGB value
䋺Sharpen the image.
X Press J to adjust the sharpness
䋺Soften the image.
X Press J to adjust the softness
Sepia
Black & White
Negative
Mosaic
䋺Change the image into sepia tone.
䋺Change the image into black and white.
䋺Change the image into negative.
䋺Select an area and apply mosaic.
XKSelect start pointXKSelect end
point
• Press M[Menu] to Change the
shape of the area into "Rectangle" or
"Circle".
Note
<Frame>
• Frames are in four sizes: CIF (352x288), QVGA
(240x320), QCIF (176x144), and Sub QCIF
(128x96).
•You can only select a frame of the same size as
the source image.
199
Data Display/Edit/Management
Changing the Image Size
aStill image edit screen (P198)XM
[Menu]X"Resize"
bSelect an image size
cC[OK]XSave the still image
• Go to Step 4 (P198) in "Editing Still Images".
Cropping an Image
aStill image edit screen (P198)XM
[Menu]X"Crop"
bSelecta croppingsizeXUseKto move
the frame to the area to be
croppedXC[Select]
䂓When "User define" is selected
Use Kto select a starting pointX, Use K to
select an ending point to specify the cropping
area.
cC[OK]XSave the still image
• Go to Step 4 (P198) in "Editing Still Images".
Adding a Stamp
aStill image edit screen (P198)XM
[Menu]X"Insert"X"Stamp"
bSelect a stampXUse Kto specify the
location
䂓To add a different stamp
M[Menu]X"Change stamp"XSelect a
stampX UseK to specify the location.
䂓To rotate the stamp
M
[Menu]
XSelect from
"Rotate"
X
"Left"/
"Right" and
"180".
cI[Done]XSave the still image
• Go to Step 4 (P198) in "Editing Still Images".
Pasting Characters
You can add text to an image. You can also change
the font color or size, rotate the text, or paste
speech bubbles.
aStill image edit screen (P198)XM
[Menu]X"Insert"X"Text"
bEnter the text to paste
cM[Menu]XModify text
[Edit text]
Change the pasted text.
XEdit the text
[Font size]
Specify the font size.
X"Large"/"Medium"/"Small"
[Font color]
Change the pasted text color.
XSelect a color
[Rotate]
Rotate the text.
X"Left"/"Right"/"180"
[Comic]
Add a speech bubble.
XSelect a speech bubble
dUse Kto specify the location
eI[Done]XSave the still image
• Go to Step 4 (P198) in "Editing Still Images".
<Retouch>
• A source image larger than 640 x 480 dots
cannot be retouched.
<Effect>
• An effect cannot be added to a source image
larger than 640 x 480 dots or with either side
smaller than 8 dots.
Note
• An image cannot be resized when the vertical or
horizontal size of the source image is smaller
than 8 pixels.
• If a size with different proportions than the
source is selected, the original proportions will
be retained for the resized image.
Note
• An image cannot be cropped when the vertical
or horizontal size of the source image is smaller
than 8 pixels.
Note
• A Stamp cannot be added to a source image
larger than 640 x 480 pixels or with either side
smaller than 24 pixels.
• Preinstalled Stamps →P292
Note
• Text cannot be added an image when the
vertical or horizontal size of the source image is
smaller than 24 pixels or when the source image
size is larger than 640x480.
Continue on the next page
200
Data Display/Edit/Management
Animation
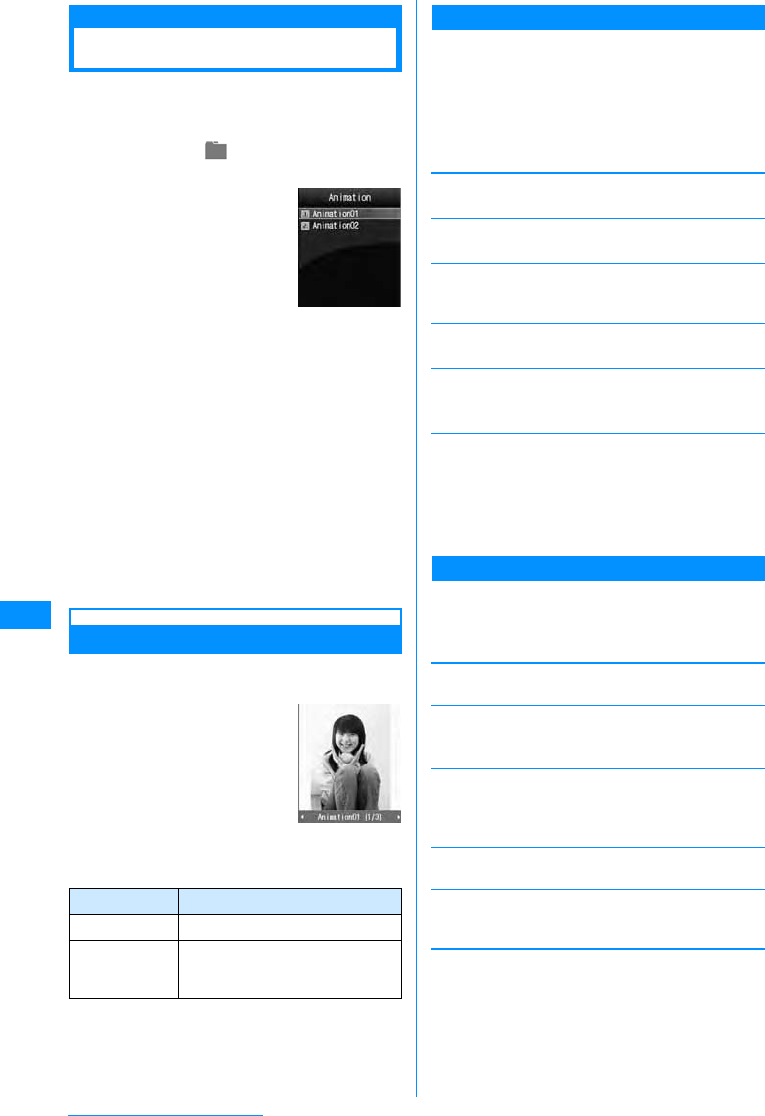
Creating Animations
You can create an animation with up to 20 frames
using saved still images.
• Up to 30 animations can be created.
aM[Menu]X(Data box)X"My
picture"X"Animation"
bI[New]XEntera display name ofthe
file
cC[Add]XMove the cursor to a folder
XC[Open]XSelect an image
Selecting an image displays the registered image
file name.
䂓To delete an added image
Move the cursor to an image to delete and
PressM[Delete].
dRepeat Step 3 to save images X
I[Done]
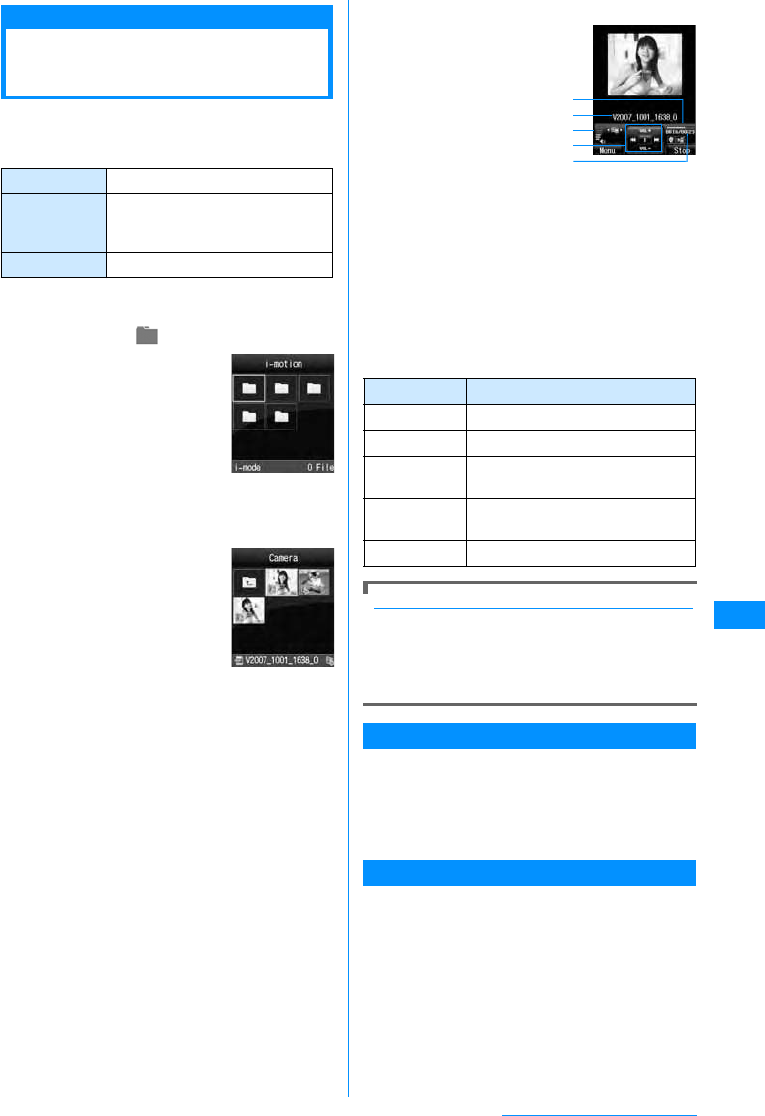
Viewing Animation
aAnimation list screen(P200)XMove the
cursor to an animationXC[View]
䂓Key operations while viewing animation
Image File Selection Screen Sub Menu
You can perform the following operations from the
selection screen to save images:
•I[View]䋺The selected image is displayed.
aFrom a screen where an image is
selected (P200)XM[Menu] X
perform the following operations:
䌛Select䌝
Add the selected image file to the animation.
䌛View䌝
Display the selected file.
䌛File property䌝
Display the file name, size and type, etc. of the
selected file.→P197
䌛List view/Grid view䌝
Switch the display format of files.
䌛Sort䌝
Sort files by specifying a condition.
X"Display name"/"Date"/"Size"/"Source"
䌛Memory info.䌝
Sub Menu on the Animation List Screen
aAnimation list screen (P200)XMove the
cursor to an animationXM[Menu]X
Perform the following operations
[Add images]
Add images to the selected animation.
[Delete 1 item]
Delete the selected animation.
X"Yes"
[Edit title]
Edit the title of the selected animation. Up to 30 full-
pitch or half-pitch characters can be entered.
XModify the title
[Set as stand-by]
Set the selected animation as the Stand-by display.
[View settings]
Set the display method of an image, a zoom ratio, or
interval between animation frames.→P197
Key Description
JPlay the previous/next animation
C[Full] Display a fit-to-screen animation,
hiding the Soft keys/return to the
original display size
Animation List
Screen
Animation
display screen
Handset
memory
External
memory
䋺Display the status of storage space of
the "Data box".
䋺Display the status of storage space of
the microSD memory card.
201
Data Display/Edit/Management
Video/i-motion Player
Playing Videos/i-motion
Movies
You can play video clips you have captured, or
i-motion movies obtained from sites or i-mode mail.
䂓Available File Formats
䋪䋺 Even a file in a compatible file format may not
play depending on the file.
aM[Menu]X(Data box)X"i-motion"
• Go to Step 3 to operate a file
displayed on the i-motion
movie screen.
bMove the cursor to a
folder XC[Open]
• For icons displayed on the
screen, see Step 2 in
"Displaying Images" (P195).
cMove the cursor to a file XC[Play]
•I[Mail] : The
Compose message
screen with the
selected file attached
appears.
aPlayback progress
bar
Shows the playback elapsed time.
bDisplay name of the file
cVolume
dControl Key
Indicates available navigation keys.
ePlayback elapsed time/Maximum playback
time
䂓Key operations on the i-motion playback screen
When the ticker has highlighted text <Confirming specs>
After i-motion playback ends, a confirmation
screen opens asking whether to use Phone To/AV
Phone To/Web To/Mail To. Press M [Yes].
• If you wish to use one of these functions during
i-motion playback, press C/U/FXC.
Sub Menu on the i-motion Screen
a
i-motionscreen(P201)
X
Movethecursor
to a folder
XM
[Menu]
•
The sub menu of the i-motion screen is the same
as the "sub menu on the
My Pictures Screen"
(P195).
Sub Menu on the i-motion File List Screen
a
i-motion file list screen (P201)
X
Move
the cursor to a
fileXM
[Menu]
X
Perform the following operations
File Format
䋪
MP4 (Mobile MP4)
Encoding
Method MP4 file
䇭 Graphics: MPEG-4 and H.263
䇭 Audio: AMR and AAC
File Extension mp4 and 3gp
i-motion Movie
Screen
i-motion
File list screen
Key Description
CPause/Play
JPlay the previous/next file
L
(Hold down) While being pressed, rewinds the
movie/sound
R
(Hold down) While being pressed, fast forwards
the movie/sound
F/EH Adjust the volume
i-motion Movie
Playback Scree
n
b
e
a
d
c
Continue on the next page

202
Data Display/Edit/Management
[Files]
[Multiple choice]
Select and delete files.
XSelect files to deleteXI[Delete]X"Yes"
• You can move/copy multiple files by performing the
following steps:
XPlace check marks next to files to move/copy
XM[Menu]X"Move""/"Copy"XSelect the
destination folder*XI[Copy]/[Move]
䋪䋺 Select the destination from "Handset memory"
(FOMA handset) and "Movablecontents"
(microSD memory card). You can view another
folder by pressing C[Open].
• You can also select "Delete", "Mark", "Mark all",
"Unmark", or "Unmark all" by pressing M[Menu].
[File property]
Display the file name, size and type, etc. of the
selected file.→P203
[Send via]
[Set as ringtone]
Set the selected file as a ring tone, etc.
[Set as display]
Set the selected file as the Stand-by display or Call
display
[List view (Grid view)]
Switch how to display files.
[Sort by]
Sort folders by setting a condition.
X"Display name"/"Date"/"Size"/"Source"
[Memory info.]
[New folder]
Create a folder.
XEnter a folder name
• You cannot create a sub folder in a user-defined
folder.
Sub Menu on the i-motion Playback Screen
ai-motion playback screen (P201)XM
[Menu]
XPerform the following
operations
[Play]
Play an i-motion movie.
[Send via mail]
Create i-mode mail with the selected file attached. Go
to Step 2 in "Creating and Sending i-mode Mail"
(P161).
[Set as ringtone]
Set the file in playback as a ring tone.
Play
Move
Copy
Delete
Delete all
Rename
Reset
name
䋺Play the selected file.
䋺Move the selected file to another folder.
XSelect a destination folderXI[Move]
䋺Copy the selected file to another folder.
XSelect a destination folderXI[Copy]
䋺Delete the selected file.
X"Yes"
䋺Delete all files in the folder.
XEnter the security code X"Yes"
䋺Change the display name of the selected
file.
XEdit a display name of the file
䋺Restore the default title of the file from the
selected file name.
Mail
IrDA
䋺Create i-mode mail with the selected file
attached. Go to Step 2 in "Creating and
Sending i-mode Mail" (P161).
䋺Send a file using Infrared communication.
Voice ring tone
Video ring tone
Mail tone
Message R tone
Message F tone
SMS tone
Alarm tone
䋺Set as a ring tone for a voice call.
䋺Set as a ring tone for a video call.
䋺Set as a ring tone for mail.
䋺Set as a ring tone for Message R.
䋺Set as a ring tone for Message F.
䋺Set as a ring tone for SMS.
䋺Set as an alarm tone.
Stand-by display
Voice call display
Video call display
Wake-up display
䋺Set as the Stand-by display.
䋺Set as a Voice call display.
䋺Set as a Video call display.
䋺Set as the Wake-up display.
Handset
memory
External
memory
䋺Display the status of storage space in the
"Data box".
䋺Display the status of storage space on the
microSD memory card.
Voice ring tone
Video ring tone
Mail tone
Message R tone
Message F tone
SMS tone
Alarm tone
䋺Set as a ring tone for a voice call.
䋺Set as a ring tone for a video call.
䋺Set as a ring tone for mail.
䋺Set as a ring tone for Message R.
䋺Set as a ring tone for Message F.
䋺Set as a ring tone for SMS.
䋺Set as an alarm tone.
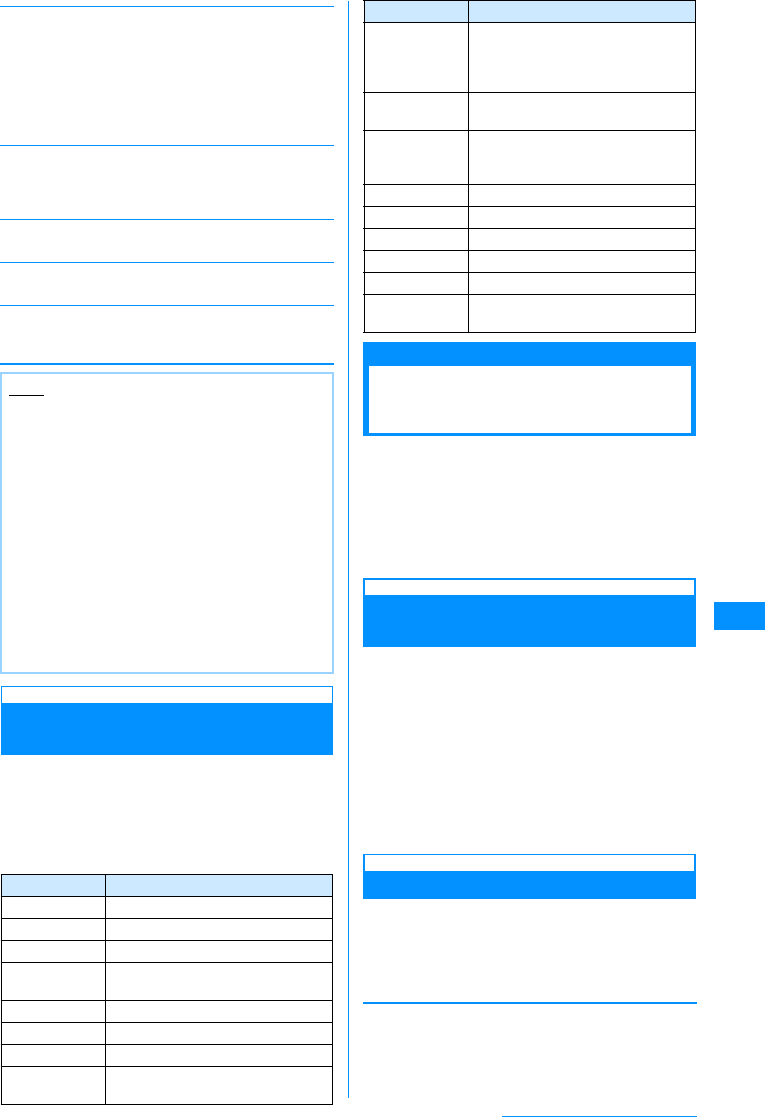
203
Data Display/Edit/Management
[Set as display]
Set the selected file as the Stand-by display or Call
display
[Expand]
Display a fit-to-screen video/i-motion movie, hiding
Soft keys, etc.
• Press Q to restore its original display size.
[Mute (Unmute)]
Mute or unmute the sound.
[Edit]
Edit the video/i-motion in playback.→P203
[File property]
Display the file name, size and type, etc. of the file in
playback.→P203
Viewing Video/i-motion Movie
Information
ai-motion file list screen (P201)/i-motion
playback screen (P201)XM[Menu]
X"File property"
•I[Edit] : Edit properties.
䂓Information displayed on the File detail screen
Edit Videos/i-motion Movies
Editing Videos/i-motion
Movies
You can edit videos/i-motion movies. The edited
video/i-motion movie is saved in the same folder as
the source file.
• The preinstalled files cannot be edited.
• Some files may not be edited.
• The Ticker displayed on i-motion movies cannot be
edited.
Extracting a Frame of a Video as a
Still Image
You can extract a still image from a video/i-motion
movie.
The extracted image is saved in the "Camera" folder
in "My picture" in the Data box.
ai-motion playback screen (P201)X
Display the image to be extracted as a
still image
• Operations during i-motion playback →P201
bM[Menu]X"Edit"X"Capture"
Extracting a Video
You can extract a part of a video/i-motion movie.
ai-motion playback screen (P201)XM
[Menu]X"Edit"X"Clipping"XPerform
the following operations
[500KB]
Extract the video beyond the selected starting point to
500KB or smaller and save it.
XPressCto play a video/i-motion movieXAt the
starting point to clipM[Start]
Stand-by Display
Voice call display
Video call display
Wake-up display
䋺Set as the Stand-by display.
䋺Set as a Voice call display.
䋺Set as a Video call display.
䋺Set as the Wake-up display.
Note
• While the sub menu is accessed, a video/
i-motion movie playback is paused.
<Set as tone/Set as display>
• The following videos/i-motion movies cannot be
set as a Chaku-motion or Call display:
- Files that were sent to a PC or another
FOMA handset via Infrared communication
or Data Link Software and sent back to the
FOMA handset.
- The videos/i-motion movies that were copied
or moved from the microSD memory card to
the FOMA handset, including those copied
or moved from the handset to the microSD
memory card and copied or moved back to
the handset. (except i-motion movies that
support contents migration.)
Item Description
File Name Display the file name
File Size Display the file size
File Type Display the file format
Date & Time
(Saved) Display the saved date and time
Playing time Display the file playback duration
Display size Display the resolution
Audio Display the sound format
File Restriction Display whether the file is restricted
→P198
Item Description
Replays/
Expiration
date/File
period
Display information of replays/
expiration date/file period
Set as tone Display whether the file can be set
as a ring tone
Call display Display whether the file can be set
as the Stand-by display or Call
display
Title Display the default title of the file
Creator Display creator information
Copyright Display copyright information
Description Display the file description
Source Display the source
Move to
microSD Indicates whether the file can be
moved to a microSD memory card
Continue on the next page
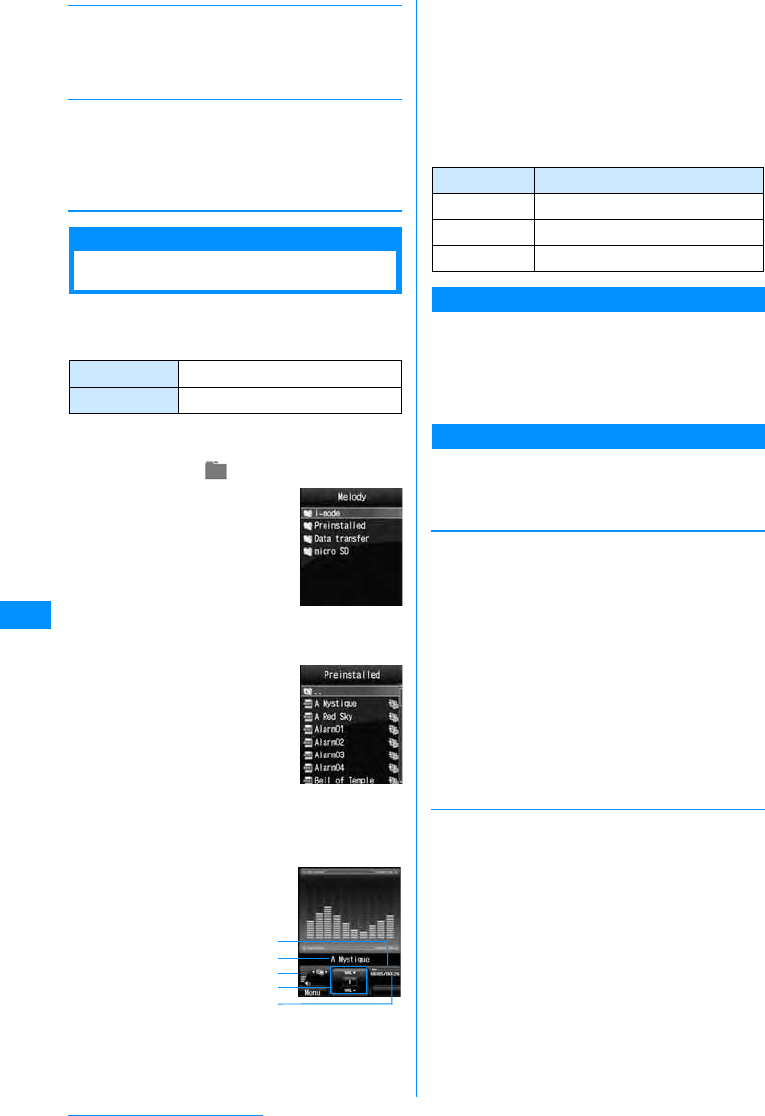
204
Data Display/Edit/Management
[2MB]
Extract the video beyond the selected start point to
2MB or smaller and save it.
XPressCto play a video/i-motion movieXAt the
starting point to clipM[Start]
[Bound]
Crop and save the video from the selected starting
point to the ending point.
XPress Cto play a video/i-motionXAt the start
point to clipM[Start]XAt the end point to
clipM[Done]
Melody player
Playing Melodies
You can play pre-installed melodies or melodies
downloaded from sites.
䂓Available File Formats
䋪䋺 Even a file in a compatible file format may not
play depending on the file.
aM[Menu]X(Data box)X"Melody"
bMove the cursor to a
folder XC[Open]
• For icons displayed on the
screen, see Step 2 in
"Displaying Images"
cMove the cursor to a file XC[Play]
•I[Mail] : The
Compose message
screen with the
selected file
attached appears.
aPlayback progress bar
Shows the playback elapsed time.
bDisplay name of the file
cVolume
dControl Key
Indicates available navigation keys.
ePlayback elapsed time/Maximum playback
time
䂓Key operations on the Melody playback screen
Sub Menu on the Melody Screen
aMelody screen (P204)XMove the
cursor to a folderXM[Menu]
• The sub menu of the Melody screen is the same
as "Sub Menu on the My Pictures Screen"
(P195).
Sub Menu on the Melody File List Screen
aMelody file list screen (P204)XMove
the cursor to a fileXM[Menu]X
Perform the following operations
[Files]
[Multiple choice]
Select and delete files.
XPlace a check mark next to a file to deleteXI
[Delete]X"Yes"
• You can move/copy multiple files by performing the
following steps:
XPlace check marks next to files to move/copy
XM[Menu]X"Move"/"Copy"XSelect the
destination folder*XI[Copy]/[Move]
*䋺Select the destination from "Handset memory"
(FOMA handset) and "Movablecontents"
(microSD memory card). You can view another
folder by pressing C[Open].
• You can also select "Delete", "Mark", "Mark all",
"Unmark", or "Unmark all" by pressing M[Menu].
File Format䋪SMF and MFi
File Extension mid and mld
Melody Screen
MelodyFile List
Screen
MelodyPlayback
Screen
b
e
a
d
c
Key Description
CPause/Play
JPlay the previous/next file
F/EH Adjust the volume
Play
Move
Copy
Delete
Delete all
Rename
Reset
name
䋺Play the selected file.
䋺Move the selected file to another folder.
XSelect a destination folderXI[Move]
䋺Copy the selected file to another folder.
XSelect a destination folderXI[Copy]
䋺Delete the selected file.
X"Yes"
䋺Delete all files in the folder.
XEnter the security codeX"Yes"
䋺Change the display name of the selected
file.
XEdit a display name of the file
䋺Play the selected file.
205
Data Display/Edit/Management
[File property]
Display the name, size and type, etc. of the selected
melody.→P205
[Send via]
[Set as]
Set the selected melody as a ring tone, etc.
[Sort by]
Sort files by setting a condition.
X"Display name"/"Date"/"Size"/"Source"
[Memory info.]
[New folder]
Create a folder.
XEnter a folder name
• You cannot create a sub folder in a user-defined
folder.
Sub Menu on the Melody Playback Screen
aMelody playback screen (P204)XM
[Menu]XPerform the following
operations
[Send via mail]
Create i-mode mail with the melody in playback
attached. Go to Step 2 in "Creating and Sending
i-mode Mail" (P161).
[Set as]
Set the melody in playback as a ring tone.
[Mute (Unmute)]
Mute or unmute the sound.
[File property]
Display the file name, size and type, etc. of the melody
in playback.→P205
Viewing Melody Information
aMelody file list screen (P204)/Melody
playback screen (P204)XM[Menu]
X"File property"
•I[Edit] : Edit properties.
䂓Information displayed on the File detail screen
Mail
IrDA
䋺Create i-mode mail with the selected melody
attached. Go to Step 2 in "Creating and
Sending i-mode Mail" (P161).
䋺Send a file using Infrared communication.
Voice ring tone
Video ring tone
Mail tone
Message R tone
Message F tone
SMS tone
Alarm tone
䋺Set as a ring tone for a voice call.
䋺Set as a ring tone for a video call.
䋺Set as a ring tone for mail.
䋺Set as a ring tone for Message R.
䋺Set as a ring tone for Message F.
䋺Set as a ring tone for SMS.
䋺Set as an alarm tone.
Handset
memory
External
memory
䋺Display the status of storage space in the
"Data box".
䋺Display the status of storage space on
the microSD memory card.
Voice ring tone
Video ring tone
Mail tone
Message R tone
Message F tone
SMS tone
Alarm tone
䋺Set as a ring tone for a voice call.
䋺Set as a ring tone for a video call.
䋺Set as a ring tone for mail.
䋺Set as a ring tone for Message R.
䋺Set as a ring tone for Message F.
䋺Set as a ring tone for SMS.
䋺Set as an alarm tone.
Note
• While the sub menu is accessed, the melody
playback is paused.
Item Description
File Name Display the file name
File Size Display the file size
File Type Display the file format
Date & Time
(Saved) Display the saved date and time
Playing time Display the file playback duration
File
Restriction Display whether the file is restricted
→P198
Set as tone Display whether the file can be set
as a ring tone
Title Display the default title of the file
Source Display the source
Move to
microSD Indicates whether the file can be
moved to a microSD memory card
206
Data Display/Edit/Management
microSD Memory Cards
You can save data on the FOMA handset such as
Phonebook entries, Mail messages, or Bookmarks
to a microSD memory card, or can read data on a
microSD memory card to the FOMA handset. Also,
you can browse data on a microSD memory card
from the FOMA handset.
• FOMA L705i supports commercially available
microSD memory cards up to 2 GB (as of 䃂 2007).
For the latest verified information on operations of
microSD memory cards, including manufacturers
and size of cards, visit the following site. A microSD
memory card not listed at the site may not function.
- From i-mode "iMenu"X"䊜 䊆䊠 䊷䋯ᬌ⚝ (Menu/
Search)"X"䉬䊷䉺 䉟㔚䊜 䊷䉦䊷 (Mobile Phone
Manufacturers)"X"WOW LG"
- From a PC
http://www.jp.lgmobile.com/
Note that the information on the
site shows results of
compatibility checks. However,
the results of the checks are not
guaranteed.
• You can purchase microSD
memory cards and microSD
memory card adapters from
electric appliance stores, etc.
Cautions on Using microSD Memory Cards
• microSD memory cards formatted by another device
such as a PC may not be usable on the FOMA
handset. Use microSD memory cards formatted by
the FOMA L705i handset.→P207
• microSD memory cards may lose data or deform due
to an accident or failure of the handset. It is
recommended that you make a copy of important
data and keep it in a separate place. DoCoMo is not
responsible for loss or alteration of data.
• It may take a while to communicate depending on
the amount of data to transfer. Also, the data may
not be copied.
• Do not turn the handset power off while data is being
read or written.
• Do not unplug the FOMA USB cable (optional) while
data is being read or written, or a microSD is being
formatted. Unplugging the cable may result in data
loss.
• Never remove the microSD memory card while the
card is being accessed such as when data from the
card is being displayed or the storage capacity of the
card is being checked.
• Do not attach labels or stickers on microSD memory
cards. Even the thickness of labels may cause
contact failure or data corruption.
• Do not touch the contacts with your hand or metal
objects.
• Do not apply strong force, do not bend or drop, and
do not let the card become wet.
• Do not leave a removed microSD memory card
within the reach of small infants. .Accidental
swallowing or injury may result.
• When inserting/removing the microSD memory card,
do not place your face close to the card because the
card may suddenly eject when you release your
fingers. Also, do not let small children handle the
card. Injury may result.
• Do not use or store the card in the following places:
- In extremely high temperatures such as inside a
very hot car or under scorching heat
- In direct sunlight
- In an environment with high humidity or corrosive
substances
- In a place where it can be affected by static
electricity or electrical noise
Inserting/Removing a
microSD Memory Card
• Turn the FOMA handset power off before inserting/
removing the microSD memory card.
Inserting
aOpen the microSD memory card slot
cover (a) and carefully insert the card
with the marked side up in the direction
of the arrow buntil the card clicks into
place
bClose the microSD memory card slot
cover (c)
Removing
aOpen the microSD memory card slot
cover (c) and lightly push the card in
the direction of the arrow b
The microSD memory card ejects a little.
QR Code to
Access a Site
Note
• Insert the microSD memory card correctly. If the
card is not inserted correctly, the card cannot be
used.
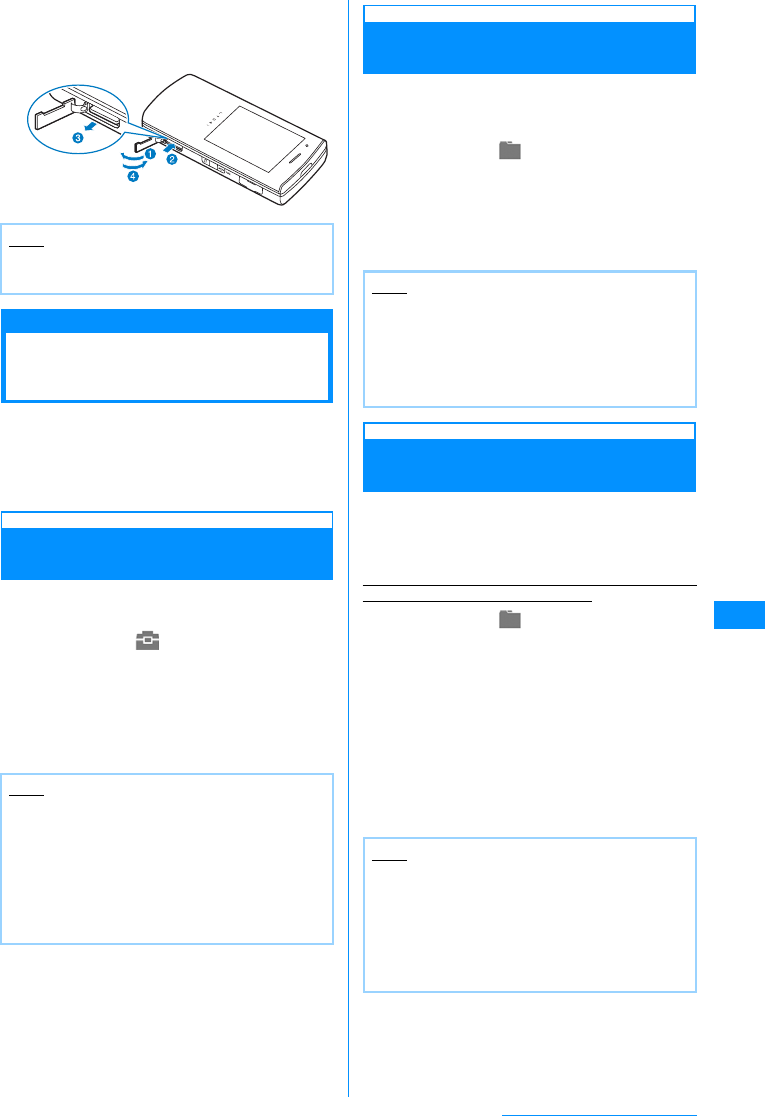
207
Data Display/Edit/Management
bPull the microSD memory card straight
out in the direction of the arrow cand
close the slot cover (d)
Using a microSD
Memory Card
You can move or copy files saved in the Data box
on the FOMA handset, such as still images, video
clips or i-motion movies, to the microSD memory
card, and you can view files saved from a PC to the
microSD memory card on the FOMA handset.
Formatting a microSD Memory
Card
Format (initialize) a microSD memory card so that it
can be used for the FOMA handset.
aM[Menu]X(Lifekit)X"microSD
card"X"Reset microSD card"
A warning indicating all data will be deleted
appears. Select whether you want to continue to
format.
b"Yes" XEnter the security code
Viewing/Playing Files on the
microSD Memory Card
You can view/play files on the memory card in the
same way as ones on the FOMA handset using the
"Data box".
aM[Menu]X(Data box)X"My
picture"/"i-motion"/"Melody"X
"microSD"
• "Displaying Images" →P194
• "Playing Videos/i-motion Movies" →P201
• "Playing Melodies" →P204
Copying/Moving Files between the
FOMA Handset and a Memory Card
You can copy or move files between the FOMA
handset and a microSD memory card by copying or
moving files between the "micro SD" folder in Data
box and another folder.
Example: To move a still image saved on the FOMA
handset to a microSD memory card
aM[Menu]X(Data box)X"My
picture"
bMove the cursor to a folder XC
[Open]
• Select a folder other than "micro SD" folder.
cMove the cursor to a fileXM[Menu]
X"Files"X"Move"
dMove the cursor onto the target folder
XC[Open] XI[Move]
Note
• Do not use excessive force to pull out the
microSD memory card.
Note
• In order to use a microSD memory card with this
FOMA handset, use this handset to format the
card.
• Formatting a microSD memory card deletes all
saved files on the card. Do not lose important
data by mistake.
• Voice/video calls cannot be received while
formatting.
Note
• Some files may not be viewed/played.
• The sub menu on the folder/file list screen for a
microSD memory card is the same as one for
the FOMA handset. However, "Sort by", "Set
as", and transfer via infrared communication are
not available.
Note
• Some files may not be copied/moved.
• Flash saved on the FOMA handset cannot be
copied/moved to a microSD memory card.
• You can move transferable copyright protected
i-motion movies or songs saved in the FOMA
handset to a "Movablecontents" folder in each
"microSD" folder.
Continue on the next page
208
Data Display/Edit/Management
Copying/Overwriting Personal
Information between the FOMA
Handset and a microSD Memory Card
You can copy or overwrite personal information
between the FOMA handset and a microSD memory
card.
Personal information includes the following:
- Phonebook
- Schedule
-Memos
-To Do
- Received mail
-Sent mail
- Unsent mail
- Bookmarks
Copying Personal Information from the
FOMA Handset to a microSD Memory
Card
You can copy personal information saved on the
FOMA handset to a microSD memory card.
Copying Data One Piece at a Time
Example: Copying a Phonebook entry
aUXSelect a Phonebook entry to copy
XM[Menu]X"Copy"X"to microSD"
Selecting a Data Type to Make a
Backup(Backup)
aM[Menu]X(Lifekit)X"microSD
card"X"PIM"
bI[Backup]XSelect a data type to
copy
cEnter the security codeX"Yes"
䂓For Phonebook
A message appears to confirm whether to
copy "Own number" data.
X"Yes"/"No"
Copying Personal Information from a
microSD Memory Card to the FOMA
Handset
You can copy personal information saved on a
microSD memory card to the FOMA handset.
Copying Data One Piece at a Time
aM[Menu]X(Lifekit)X"microSD
card"X"PIM"
bSelect a data type
Data saved on the microSD
memory card is displayed.
䂓
Icons displayed on the PIM data list screen
cMove the cursor to data XM[Menu]
•C[Select] : Display details about data.
d"Copy to phone"X"Yes"
䂓For backup data
"Copy to phone"XEnter the security code
XSelect "Yes".
Sub Menu on the Personal Data List Screen
aPersonal data list screen (P208)XMove
the cursor to dataXM[Menu]X
Perform the following operations
[Rename]䋪
Change the name of the selected piece of data.
XEdit the name of the data
[Copy to microSD card]
Copy (backup) all data of the displayed data type in a
batch from the FOMA handset to a microSD memory
card.
XEnter the security codeX"Yes"
• When copying a phonebook, a message appears to
confirm whether to copy "Own number" data.
XSelect "Yes" or "No"
Icon Description
䋯䋯䋯
䋯䋯䋯
䋯
Phonebook/Schedule/
Memo/To Do/Received
mail/Sent mail/Unsent mail/
Bookmark
䋯䋯䋯
䋯䋯䋯
䋯
Backup data (multiple
pieces of data)
Phonebook/Schedule/
Memo/To Do/Received
mail/Sent mail/Unsent mail/
Bookmark
Note
• In step 3, select backup dataXmove the cursor
to dataXMpress [Menu] to be able to select
"Copy to phone" or "Overwrite to phone".
If you select "Copy to phone", you can further
select "Selected data" or Send all".
Personal Data
List Screen
(Example:
Phonebook)
209
Data Display/Edit/Management
[Copy to phone]䋪
Copy the selected data to the FOMA handset.
X"Yes"
• To make a backup, "Copy to phone"XEnter the
security codeXSelect "Yes".
[Overwrite to phone]䋪
Overwrite the data on the FOMA handset with the
selected data.
→P209
[Multiple choice]䋪
Select and delete data.
XPlace a check mark next to data to deleteXI
[Delete]X"Yes"
• Press M[Menu] to select "Mark/Unmark", "Delete",
"Copy to phone", "Mark all", or "Unmark all" from
"Select"/"Release sel".
[Delete]䋪
Delete the selected data.
X"Yes"
[Memory Info]
Display the status of storage space on the microSD
memory card.
䋪䋺 No information is displayed if there is no data on
the microSD memory card.
Overwriting with Backup Data
You can overwrite the data on the FOMA handset
with data backed up in advance.
• Note that selecting "Overwrite to phone" deletes the
saved data on the FOMA handset and replaces it
with the selected data from the microSD memory
card.
Make sure important data is not saved before
selecting "Overwrite to phone".
aPersonal data list screen (P208)XMove
the cursor to dataXM[Menu]X
"Overwrite to phone"
bEnter the security codeX"Yes"
䂓For Phonebook
A message appears to confirm whether to
copy "Own number" data.
X"Yes"/"No"
Updating the Data on
the microSD Memory
Card
Update the data on the microSD memory card if the
data cannot be displayed correctly on the FOMA
handset after changing, adding or deleting data on
the microSD memory card using another device.
aM[Menu]X(Lifekit)X"microSD"X
"Data update"
bPlace a check mark next to a data type
to updateXI[Done]
Checking the Space on
the microSD Memory
Card
Display the status of storage space on the microSD
memory card.
aM[Menu]X(Lifekit)X"microSD"X
"Memory info."
Note
• Updating data may take a while if a large
amount of data is saved on the microSD
memory card.
• If you use another device to save data on the
microSD memory card, the data saved on the
card may not be displayed correctly on the
FOMA handset due to insufficient available
memory space for managing data on the
handset.
Note
• If the used space is not shown as "0KB" when
no data is saved on the microSD memory card,
format the card.
• The actual available space on a microSD
memory card is smaller than the space printed
on the card.
• Data may not be saved if there is not sufficient
available space on the microSD memory card.
Delete unnecessary data or insert a microSD
memory card with sufficient available space to
save the data.
Continue on the next page
210
Data Display/Edit/Management
Folder Structure on the
microSD Memory Card
When you first move or copy files from the FOMA
handset to the microSD memory card, or when you
first save still images or video clips captured with the
Camera directly to the microSD memory card, a folder
compatible with the appropriate file type will be
automatically created on the microSD memory card.
• When you are writing files to the microSD memory
card from a PC, a folder structure like the following is
required:
• x: Represents half-pitch alphanumeric characters
• a: Represents half-pitch numeric characters
between 0 and 9
䋪1䋺The "TABLE" folder has sub folders that contain
additional files of the types "DCIM", "STILL",
"RINGER", "MMFILE", "DECOIMG", and
"SD_VIDEO".
䋪2䋺The data is encoded and cannot be viewed
directly on the PC.Do not delete, edit, or add
files with these folders.If you do so, the files may
not work properly on the FOMA L705i handset.
䂓Number of items that can be saved on a microSD
memory card
• The number of files that can be saved on the
microSD memory card varies depending on the
size of the microSD memory card.
• You can check the available space on the
microSD memory card by accessing "Memory
info." or "Memory status".→P209, P245
Reading/Writing Data on
a micro SD Memory Card
with the FOMA Handset
Connect the FOMA handset with a microSD
memory card inserted to a PC and read data from/
write data to the microSD memory card.
File Folder Capacity
Still images (DCF-
compliant-JPEG,
GIF other than
animations)
DCIM Up to 999
folders/Up to
999 files per
folder
Still images (non-
DCF-compliant-
JPEG, GIF
animations)
STILL Up to 999
folders/Up to
999 files per
folder
Melodies RINGER Up to 999
folders/Up to
999 files per
folder
Sound only videos/
i-motion movies MMFILE Up to 999
folders/Up to
999 files per
folder
Deco-mail
pictograms DECOIMG Up to 999
folders/Up to
999 files per
folder
Videos/i-motion
movies SD_VIDEO Up to 999
folders/Up to
999 files per
folder
Personal data SD_PIM One folder/
65535 files
Note
• A microSD card used with this FOMA handset
cannot be used with other FOMA handsets that
support microSD memory card because the
folder structure is different.
• Depending on the PC, folder names or files
names may appear in lower case.Also, file
extensions or certain folders (hidden folders)
may not appear.
• Do not delete or move folders on the microSD
memory card using a PC.If you do so, the
folders may no longer be readable by the FOMA
L705i handset.
211
Data Display/Edit/Management
• To use a microSD memory card, you need an
optional microSD memory card.
• Only a PC with Windows Vista, XP, or 2000
(Japanese versions) can be used to read from/write
to a microSD memory card. Operation under another
OS is not guaranteed.
• In order to use the FOMA handset to read from/write
to the microSD memory card, you need to set up the
USB mode. Disconnect the FOMA USB cable
(optional) before setting the USB mode.
aM[Menu]X(Settings)X"Others"
X"USB mode setting" X"microSD
mode"
bOpen the External Connector Terminal
cover of the handset (a)and insert the
external connector of the FOMA USB
cable with the label side up until it
clicks into its place (b)
cInsert the USB connector of the USB
cable to a USB port on the PC (c)
IrDa
Using Infrared
Communication
You can exchange Phonebook entries, Schedule
events or Bookmarks with a device equipped with
infrared communication capabilities.
䂓Available Data for Data Transfer
䋪1䋺Received To Do with the alarm set prior to the
set time may not be correctly saved.
䋪2䋺Up to 2 MB of data per file can be sent or
received.
䋪3䋺Up to 100 KB of data per file can be sent or
received.
䋪4䋺Received Bookmarks may not be filtered
depending on the other party's handset model.
䂓Saving destination of data received via Infrared
Note
• When removing the microSD memory card or
the FOMA USB Cable from a PC, be sure to
perform the steps to "safely remove hardware"
from the task tray of the PC. Removing the
memory card or FOMA USB Cable without
performing the proper steps may result in data
loss.
• When switching to USB mode, first disconnect
the FOMA USB Cable, then switch the USB
mode. When the FOMA handset and the FOMA
USB Cable are connected, the USB mode
cannot be switched.
• If the FOMA USB cable is disconnected, the
USB mode automatically returns to
"Communication mode".
䂓Information
Verify that the handset is correctly connected
to the PC. If it is not connected correctly, data
may not only fail to be exchanged but may also
be lost.
䊥䊥䊷䉴䊗䉺䊮
䊥䊥䊷䉴䊗䉺䊮
ᄖㇱធ⛯䉮 䊈䉪 䉺
䋨 䊤 䊔䊦㕙䈏䋩
USB䉮䊈䉪䉺
Data type Receiving
capability
Sending
capabilit
yNumber of
pieces to
be stored
1All 1All
Phonebook
(Personal
info) 䂾䂾䂾䂾
See P76
Schedule 䂾䂾䂾䂾
Up to 200
To Do䋪1䂾䂾䂾䂾
Up to 50
Received
mail 䂾䂾䂾䂾
Up to 1000
Sent mail 䂾䂾䂾䂾
Up to 500
Unsent mail 䂾䂾䂾䂾
Image files䋪2䂾㬍䂾㬍
Up to 1000
Videos䋪2䂾㬍䂾㬍
Up to 1000
Melodies䋪3䂾㬍䂾㬍
Up to 1000
Bookmarks䋪4䂾䂾䂾䂾
Up to 100
Memos 䂾䂾䂾䂾
Up to 50
Data type Storage Location
Phonebook Phonebook
Schedule Schedule
To Do Schedule
Received mail Inbox
Sent mail Outbox
Unsent mail Unsentmessage
Still images "Data transfer" folder in
"My picture" in "Data box"
Videos "Data transfer" folder in "i-motion"
in "Data box"
Melody "Data transfer" folder in "Melody"
in "Data box"
Bookmarks "Bookmark" folder
Memos Memos
212
Data Display/Edit/Management
Performing Infrared
Communication
• Use the infrared devices within a distance of
approximately 20 cm.
• Do not move the FOMA handset until the data
exchange completes.
• If you hold the FOMA handset in your hand, be sure
to hold it securely, so that it does not shake.
Cautions on Data Transfer
• Calls, i-mode, and data transfer are not available
during infrared communication because the handset
is in the same status as out of service area.
• Data may not be transferred depending on the other
party's FOMA handset conditions. Depending on the
other party's handset model, the filter setting of
received mail or Bookmarks, or category setting of
Phonebook entries may not be reflected, or the
content of Deco-mail may not be saved correctly.
• Infrared communication between a FOMA handset
and a non-FOMA deviceL705i may result in data not
being received or displayed correctly.
• Communication may take a while depending on the
amount of data to be transferred. Also, the data may
not be received.
• Communications may not be performed successfully
under direct sunlight, directly under a fluorescent
light, or near another infrared device, due to possible
interference.
• If an i-mode mail message has attached data, the
data will not be quoted.
• Attachments to i-mode mail are also forwarded.
However, some types of attachments may not be
forwarded.
• When a message text contains pictographs (E-Moji)
or symbols, they may not be displayed correctly on a
recipient handset or PC that is not capable of
displaying them.
• Infrared communication is not available when Lock
all, Data access lock is set, or when Self Mode is
activated.
• When any other function is running, infrared
communication is not available.
• Large size mail may not be sent correctly.
• Only downloaded attachments are forwarded when
the mail is forwarded.
Send Ir DA/Receive Ir Data
Exchanging Data One
Piece at a Time
Sending Data One Piece at a Time
• Set the receiving device to the infrared receiving
mode before sending data.
Example: Sending one Phonebook entry
a"Stand-by displayXUXMove the
cursor to a phonebook entryXM
[Menu]X"Send Ir data"X"Focused
data"X"Yes
Receiving Data One Piece at a
Time
aM[Menu]X(Lifekit)X"Receive Ir
Data"X"Receive"X"Yes"
bPerform the infrared transmission
operation on the sending device
Start the infrared communication.
c"Yes"
Send All via Ir DA/Receive All Ir DA
Receiving or Sending All
Data
You can exchange all data in a batch with a PC or
another FOMA handset.
• To exchange all data, a session code is used to
identify the sender and receiver correctly. The
session code is any 1 to 4-digit number and should
be entered both in the sending and receiving devices
before sending/receiving data.
Sending All Data
• Set the receiving device to the infrared receiving
mode before sending data.
Example: Sending all Phonebook entries on the FOMA
handset
aStand-by displayUXM[Menu]
X"Send Ir data"X"all in phone"
If the Phonebook entry has an image set, a
warning indicating that it may take a while to send
is displayed. Select "Yes" to send.
Infrared Port
15 degrees
15 degrees
Within approximately 20 cm
Note
• A message appears if the destination cannot be
found. Verify the distance and angle with the
other side.
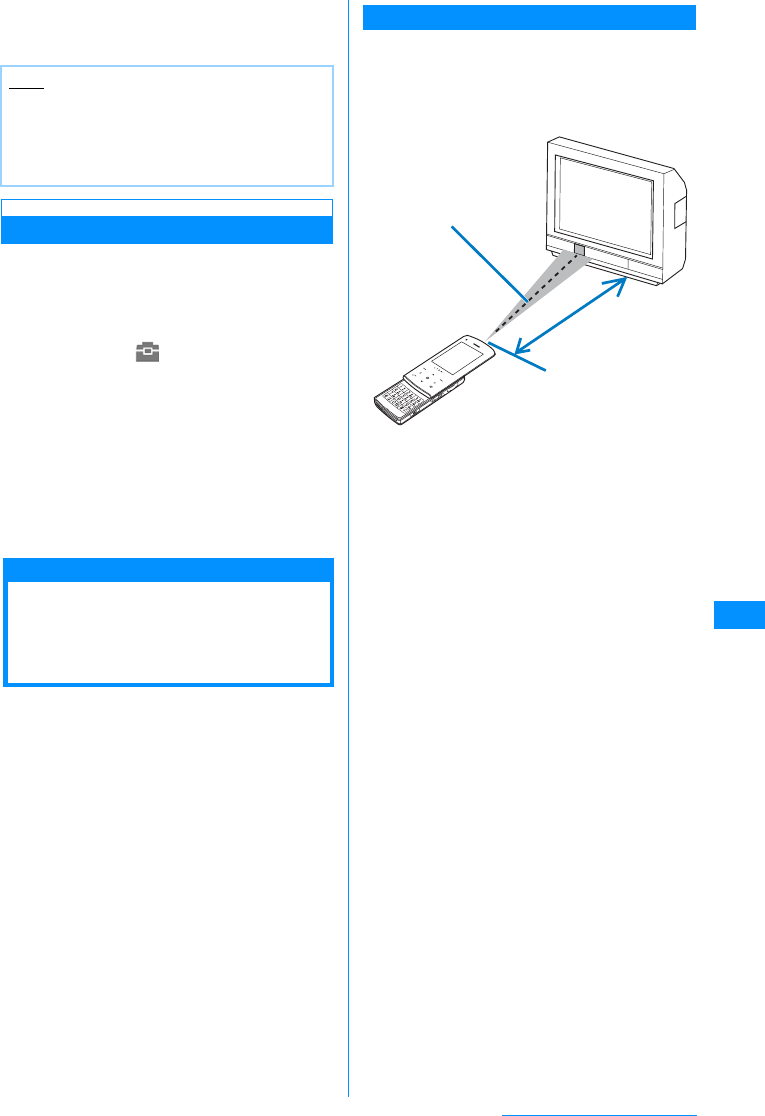
213
Data Display/Edit/Management
bEnter the security codeXEnter the
session codeX"Yes"
Start the infrared communication.
ReceivingAll Data
• Receiving all data overwrites the data on the FOMA
handset and deletes all saved data including
protected mail. Verify that important data has been
saved elsewhere before sending or receiving all
data.
aM[Menu]X(Lifekit)X"Receive Ir
Data"X"Receive all"X"Yes"
bEnter the security codeXEnter the
session code
cPerform the infrared transmission
operation on the sending device
Start the infrared communication.
d"Yes"
Using the Infrared
Remote Control
Function
You can use the FOMA handset as a remote
controller for infrared remote controlled devices. An
i-appli can send remote control signals using the
infrared port.
• In order to use the handset as a remote control for a
device, you need to download software that is
specifically designed for the device. Key operations
for remote control vary depending on the software.
• Some devices may not be controlled.
• Depending on the controlled device or ambient
brightness, communications may not be possible.
• When Self-mode is activated, the infrared remote
controller cannot be used.
Infrared Remote Control Operations
Hold the FOMA handset within approx. 4 meters of,
and with the Infrared Port pointed directly at the
remote control sensor of a TV, etc. to operate.
Depending on the controlled device and ambient
brightness, remote control may not be possible.
Note
• A message appears if the destination cannot be
found. Verify the distance and angle with the
other side.
• Files in "My picture" cannot be sent as a batch
(one file can be sent at a time). From the center
Within +/- 15
degrees
Infrared Port
within approx. 4
meters


215
Music Playback
Music channel
Music Channel................................................................................................................... 216
Specifying Programs ........................................................................................................ 216
Playing Programs.............................................................................................................. 217
Operating the Music Channel from the Data box........................................................... 219
Music Player
Available Players............................................................................................................... 220
Music Player/SD Audio Player ......................................................................................... 220
Saving Music ..................................................................................................................... 220
Playing Music .................................................................................................................... 221
Using Playlist..................................................................................................................... 224
Playing Songs with the SD-Audio Player........................................................................ 227
Playing songs for Special Times or Environments. ...................................................... 228
Using Other Applications While Listening to Music ............. Playback in background 228
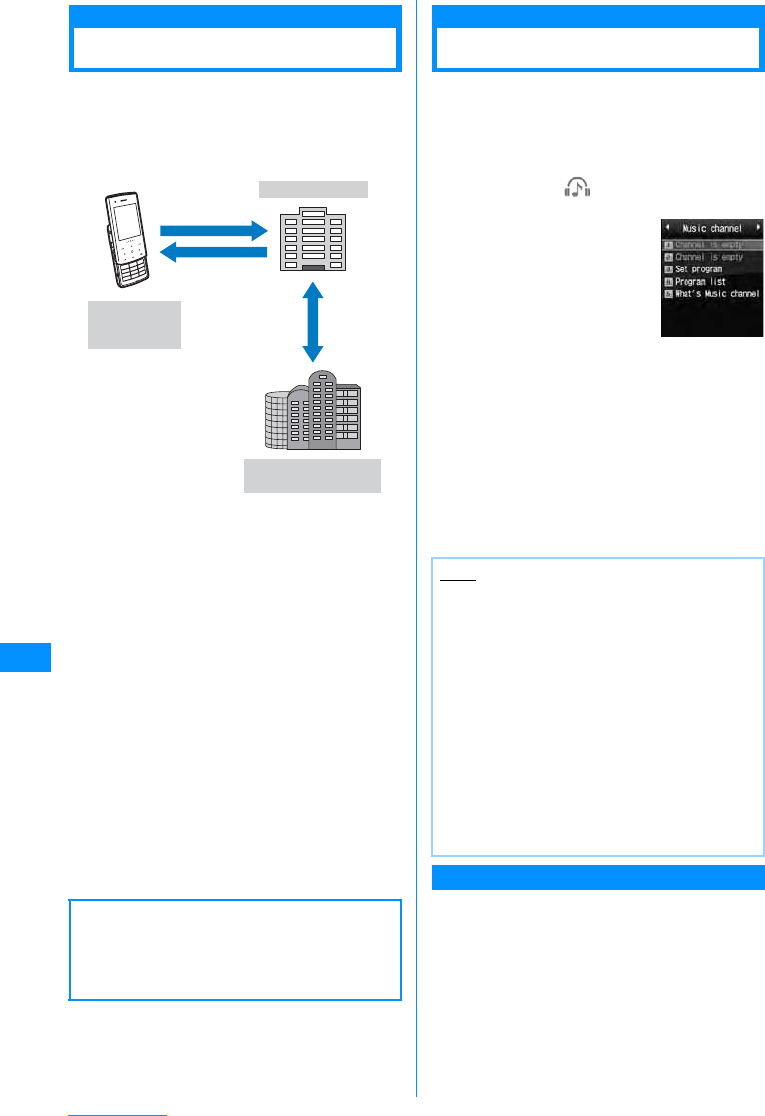
216
Music Playback
Music Channel
The Music channel is a service that automatically
downloads specified music programs at night for as
much as one hour. The programs are updated
regularly. You can enjoy listening to the programs at
any time, such as while commuting.
• The Music channel is a fee-based service requiring
a separate subscription (an i-mode and
Pake-Houdai/Pake-Hodai Full contract is necessary
for subscription).
• In addition to the usage fee for the Music channel,
some programs may require additional information
fees.
• For precautions and details on using the Music
channel service, refer to the "Mobile Phone User's
Guide [i-mode]".
• After you subscribe to the Music channel, if you
insert the UIM into a FOMA handset that does not
support the Music channel, the service is not
available. However, service charges will still apply
unless you cancel the Music channel subscription.
• You cannot specify or download programs while
using the international roaming service. When you
go overseas, deactivate the program download
before you leave Japan. When you come back to
Japan, resume the program download (packet
communication charges apply if programs are
downloaded or specified during international
roaming. Pake-Hodai or Pake-Hodai Full is not
available overseas).
Specifying Programs
Specified programs are downloaded automatically
at night.
• Up to two programs can be specified.
• You need to register My Menu to a site that provides
Music channel programs.→P141
aM[Menu]X(MUSIC)X"Music
channel"
b"Program setting"
• No programs are specified by default.
After programs are specified, the program titles
appear.
cFollow the instructions onthe screento
specify programs
• For details, refer to the "Mobile Phone User's
Guide [i-mode]".
Viewing or Canceling Program Setting
aMusic channel screen (P209)X
"Program setting"
bFollow the instructions on the screen.
• For details, refer to the "Mobile Phone User's
Guide [i-mode]".
䂓Information
Saved programs may be lost due to failure or
repair of the FOMA handset or if the handset is
exchanged. Note that DoCoMo is not
responsible for lost data.
Select the
programsbeforehand
Receive the
programsat night
Handsetsthat
support Music
Channel
i-mode center
Program info.
IP
(Information Provider)
Note
• In order to specify programs with another UIM
inserted, first check the program setting
information from Program setting. Checking the
Program setting information may delete the
programs that have not been moved from
"Distributed Program" folder.
• This is a fee-based service requiring a separate
subscription. If you have not subscribed to the
service, a message indicating that you have not
subscribed to the Music channel appears.
• Selecting the "Program list" on the Music
channel screen opens the list of all programs
offered for the Music channel. Selecting "What's
Music Channel?" displays how to use the
service and any special cautions. Also, you can
subscribe to the service.
Music Channel
Screen
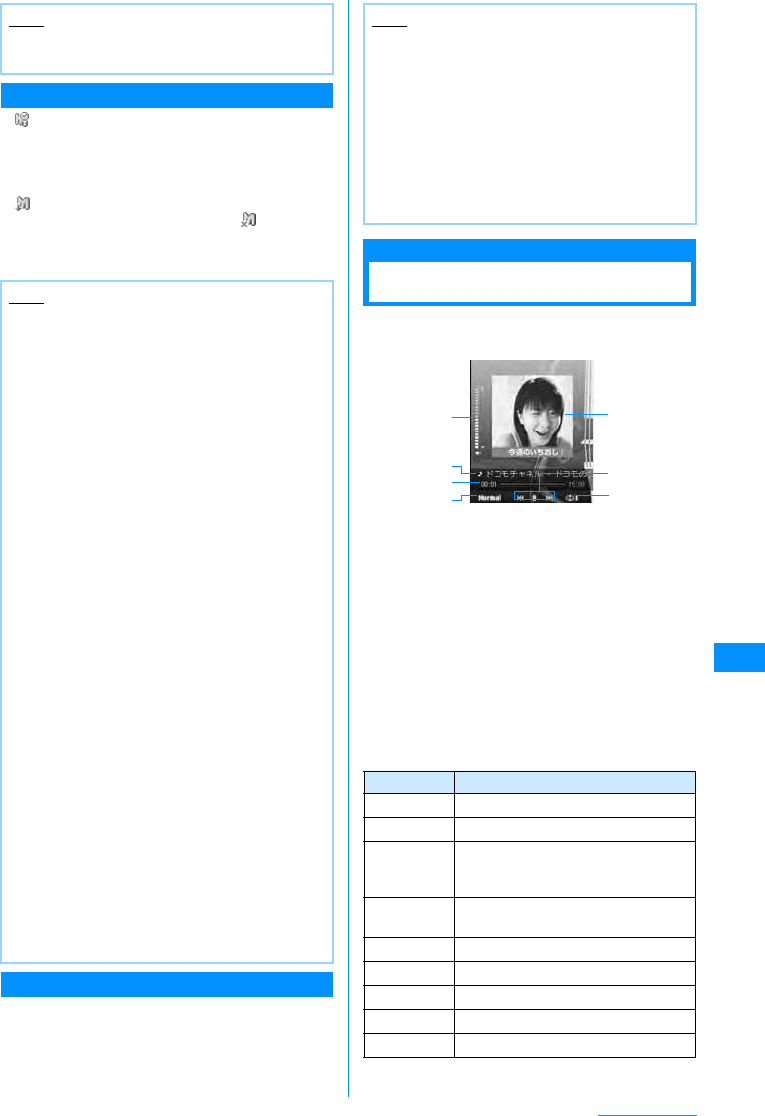
217
Music Playback
After Specifying Programs
• appears on the Stand-by display 12 hours prior to
the program download.
• Programs are automatically downloaded at the
designated download time.
• Programs are downloaded automatically at night.
appears on the Stand-by display when the
download has been successful, and appears on
the Stand-by display when the download has failed.
Once the Music channel screen is opened, the icon
disappears.
Downloading Programs Manually
If the download fails, download remaining programs
manually.
aMusic channel screen (P209)XSelect a
programX"Yes"
•䃨 appears next to each program that was not
downloaded.
Playing Programs
aMusic channel screen (P209)XSelect a
programm
aVolume
bProgram/chapter title or the artist name
cPlayback elapsed time/Progress bar/
Maximum playback time
dEqualizer setting
eShows the playback elapsed time.
fChapter image or program image
gPlayback status
hRepeat setting
䂓
Key operations on the Music channel player
screen
Note
• Canceling programs does not remove the My
Menu registration.
Note
• If the download is interrupted because the
handset is out of service area or the
communication is disconnected, the download
resumes automatically after three minutes. An
attempt to download will be made up to five
times.
• If the programs are not downloaded at the
download time because the handset is not
turned on, the handset is out of service area, or
the signal is weak, the programs will be
downloaded again at the same time the
following night.
• Programs cannot be automatically downloaded
in the following cases. In each case, specify the
programs again on the Music channel screen.
- If a different UIM is inserted after programs
were specified
- If the UIM is inserted in another FOMA
handset that supports the Music channel
after programs were specified
- If "Clear memory" is performed on the
FOMA handset
• It may take a while to download programs.
Verify that the battery level is sufficient and
signal reception is strong.
• Downloaded programs are stored temporarily in
the "Distributed program" folder in the Music
channel of the Data box. If any channel of the
programs is updated, the programs stored in the
"Distributed program" folder are deleted and the
programs can no longer be played. The
programs you want to keep should be moved to
another folder.→P219
However, some programs may not be saved.
• If you specify new programs, cancel a program,
or cancel the subscription to My menu, Music
channel, or i-mode, the programs that have not
been moved from "Distributed Program" folder
are deleted. However, if you specify new
programs when the download is deactivated,
programs are not deleted.
• The ring tone does not sound and the handset
does not vibrate when the program download
starts or completes. Also, the Call Indicator
does not light/blink.
Note
• If you download from the Music channel
program list in the Data box, select a program
that has failed to downloadXSelect "Yes".
• Even if the download was interrupted, the
program can be played up to the chapter
downloaded before the interruption.
• Programs exceeding the number of Replays,
Expiration date, or File period cannot be
downloaded manually.
• Depending on the time frame, it may not be
possible to download manually.
Key Description
CPause/Play
HF/EAdjust the volume
L/RPlay from the beginning of the current
chapter or go to the previous chapter/
play the next chapter
L/R
(Hold down)
Rewind/fast forward while being
pressed
GBackground playback →P228
*Switch the Repeat setting
0Switch the Equalizer setting
1-5Change the screen design
7䋯9Display the previous/next image
Ex: When the player skin is
"Chocolate Melody"
a
c
b
dg
f
e
Continue on the next page
218
Music Playback
Sub Menu on the Music Channel Screen
aMusic channel screen (P209)XMove
the cursor to a programXM[Menu]
XPerform the following operations
[Move Program]
Move the selected programs from "Distributed
Program" folder.→P219
[Delete]
Delete the selected program.
X"Yes"
[Program information]
Display information about the selected program.
[Chapter list]
List chapters of the selected program.→P218
[Connect to URL]
Access the site if the selected program contains a
URL.
X"Yes"
Sub Menu on the Music Channel Player
Screen
aMusic channel player screen (P209)X
M[Menu]XPerform the following
operations
[Program skip]
BGM
Play songs in the background.
[Minimize]
The song is played in background.→P228
[Chapter list]
List chapters of the program in playback.→P218
[Chapter info]
Display information about the chapter in playback.
[Program info.]
Display information about the program in playback.
[Set repeat]
[Equalizer]
Tone control when playing music.
X"Normal"/"Classic"/"Jazz"/"Pop"/"Rock"/
"Dance"/"Bass booster"/"Vocal"
[Chapter Image]
Display or save the chapter image/program image to
the Data box.→P224
[Player skin]
Change the appearance of the Music channel player
screen.
XSelect a skinXC
[Connect to URL]
Access the site if the program in playback contains a
URL.
X"Yes"
Displaying the Chapter List of the
Program
Select and play a chapter, or display information.
aMusic channel player screen (P216)X
I[List]
•䃨 appears next to the chapter in playback.
•C[Play] : Play the selected chapter.
•I[Info.] : Display information about the
selected chapter.
8Show/hide the image
I[List] Open the Chapter list
PToggle Music channel player and
playing backgroung
Note
• Playback is paused for the following. It will
resume automatically after the operation
completes.
- When a voice or video call arrives
- When i-mode mail or SMS is Received
- When an alarm sounds
• A program with restrictions on playback cannot
be played after the number of Replays,
Expiration date, or File period is exceeded. A
confirmation asking whether to delete the
program appears when you attempt to play
such a program. Selecting "Yes" deletes the
program.
You can check the number of Replays,
Expiration date, or File period in the file detail
information.
• When you attempt to play a partially
downloaded program, a confirmation asking
whether to download the remaining data
appears. Select "Yes" to start downloading.
Select "Play" to play the downloaded chapters.
Note
<Delete>
• Deleting programs does not cancel the program
setting. Programs are automatically
downloaded until you access the Music channel
site and cancel the setting.
Key Description
Previous program
Next program
䋺Playback the previous program.
䋺Playback the next program.
None
Current song
All songs
䋺
Playback is not repeated.
䋺
The program in playback is repeated.
䋺
All programs are repeated.
219
Music Playback
Program icons shown on the Music Channel
The following icons found on the Music Channel /
Program List screens show the program download
status or the type of the program.
Moving to "Save Program" folder
Downloaded programs can be moved from
"Distributed program" folder to another folder so
that they will not be overwritten. Moved programs
can be played from the "Music channel" in the
"Data box".
aMusic channel screen (P216)XMove
the cursor to a programXM[Menu]
X"Save program"
bSelect a folderXI[Move]
• Select a folder other than "Download program"
folder
Operating the Music
Channel from the Data
box
You can play or move the programs distributed
from "Music channel" in "Data box", or you can edit
the program titles.
Playing a Program from the Data box
aM[Menu]X(Data box)X"Music
channel"
The Folder list screen opens.
If you have any playable programs, they may be
played.
•I[New] : Create a new folder.
bSelect a folderXC[Open]
The Program list screen opens.
cSelect a programXM[Play]
Sub Menu on the Folder List Screen
aFolder list screen (P219)XMove the
cursor to a folderXI[Menu]X
Perform the following operations
•I[Delete]: Delete the selected program.
[New folder]
Create a new folder.
XEnter a folder name
• You cannot create a sub folder in a user-defined
folder.
[Rename]
XEdit a folder name
[Delete]
Delete the selected folder.
X"Yes"
Sub Menu on the Program List Screen
aProgram list screen (P219)XMove the
cursor to a programXM[Menu]X
Perform the following operations
[Play]
Play the selected program.
[Move program]
Move the selected program from the "Distributed
program" folder.
[Rename]
Change the title of the selected program.
[Delete]
Delete the selected program.
X"Yes"
[Delete all]
Delete all programs in the folder.
X"Yes"
Icon Description
䋯Played or un-played programs with their
played count restricted
䋯Played or un-played programs without
their played count restricted
䋯Programs moved from "Distributred
Program" folder
䋯Programs that are partially obtained
Chapters obtained
Chapters not obtained
Programs that could not be updated
Programs that are scheduled but not
obtained.
Programs that are currently being
obtained.
Note
• Downloaded programs cannot be copied.
• Partially downloaded programs cannot be
moved.
• Programs can be moved only in the FOMA
handset. They cannot be moved on the
microSD memory card.
Note
• The "Distributed Program" folder cannot be
renamed or deleted.

220
Music Playback
[Multiple choice]
Select and delete programs.
XPlace a check mark next to a program to deleteX
I[Delete]X"Yes"
• Press M[Menu] to select "Mark", "Mark all",
"Unmark", "Unmark all"
[Program info.]
Display information about the selected program.
[Chapter list]
Open the Chapter list.→P218
[New folder]
Create a new folder.
XEnter a folder name
• You cannot create a sub folder in a user-defined
folder.
[List view/Grid view]
Switch between list and picture display.
Available Players
You can play music with the FOMA handset in one
of the following ways:
• Playing with the Music player
Play Chaku-Uta-Full® downloaded from sites.
• Playing with the SD-Audio player
Play SD-Audio compatible songs saved to the
microSD memory card from a PC.
• Playing as an i-motion movie
Play an audio only i-motion movie downloaded using
i-mode and saved in the Data box.→P201
You can use mail or access an i-mode site while
listening to music (Background playback).→P228
Music Player/SD Audio
Player
• You can play Chaku-Uta-Full® or SD-Audio
compliant music data.
• Download Chaku-Uta-Full® from i-mode. Save
SD-Audio compliant songs using "SD-Jukebox"
(commercial item) from a PC.
• Before downloading music from a Web site, read the
license agreement (license and prohibited activities,
etc.) carefully.
• Music saved in the FOMA handset or on a microSD
memory card can be played for personal use only.
When playing music, do not violate the third party's
intellectual property rights, such as copyright or
other rights. Do not copy or move music saved in the
FOMA handset or on a microSD memory card to
other media, such as a PC.
• Precautions for Using or Handling a microSD
Memory Card →P206
Saving Music
Downloading Chaku-Uta-Full®
• Up to 998 Chaku-Uta-Full® songs can be saved and
up to 5MB can be saved per song.
• Downloaded Chaku-Uta-Full® is saved in the
"Music" in the "Data box".
aAccess a site that provides Chaku-Uta-
Full®XSelect Chaku-Uta-Full®to
download
When the download completes, a confirmation
opens.
b"Save"
Play
: Play the downloaded Chaku-Uta-Full®.
File property
: Display information about the downloaded
Chaku-Uta-Full®.
Back
: Return to the Web site without saving the
Chaku-Uta-Full®.
Saving SD-Audio data in microSD
memory card
The following is required to play SD-Audio
compliant music data with the FOMA handset:
• FOMA L705i handset
• FOMA USB connection cable
• PC (Windows Vista, Windows XP, Windows 2000
(Japanese version))
• SD-Jukebox (commercial item)
• A CD that contains the music you want to save
• microSD memory card
SD-Jukebox (commercial item)
You can purchase SD-Jukebox from the following
URL:
http://www.sense.panasonic.co.jp/PanaSense/
special/soft/sd_jukebox/
SD-Jukebox supports Windows Vista, Windows XP,
Windows 2000 (Japanese edition).
For detailed information about the requirements for
SD-Jukebox, visit http://panasonic.jp/support/
software/sdjb/
aInsert the bundled CD-ROM into
the CD-drive on your PC
Note
• The Chaku-Uta-Full" files with the same name
cannot be saved in a single folder.
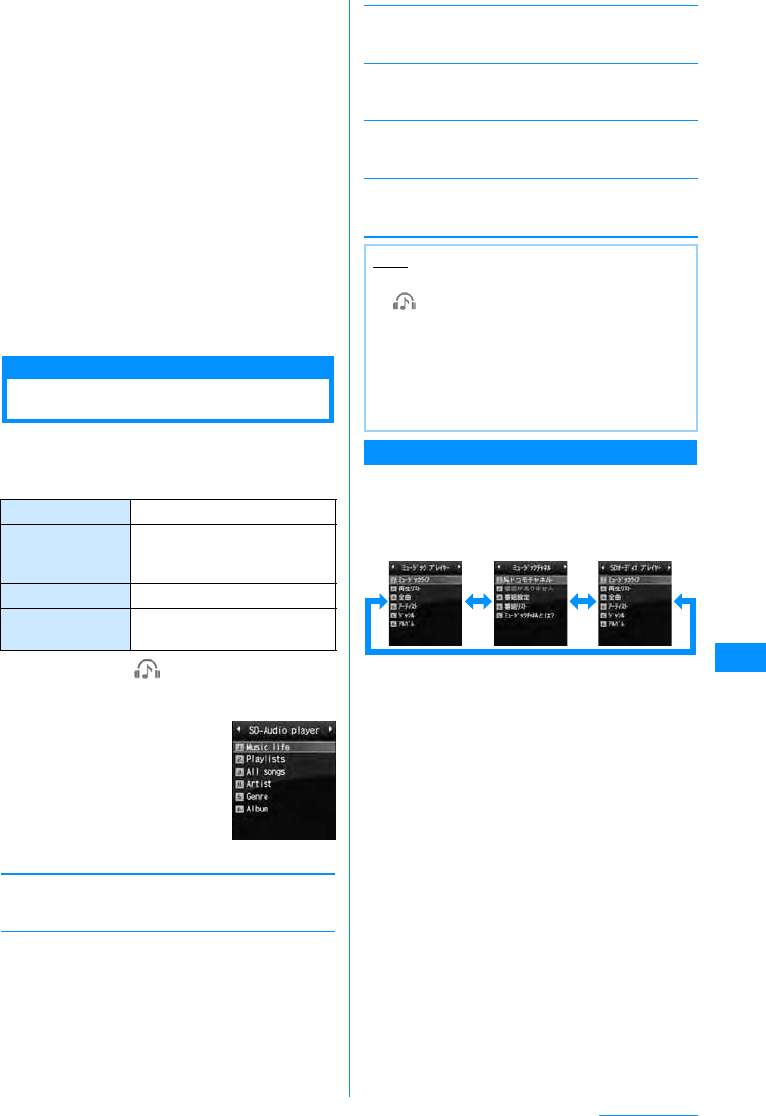
221
Music Playback
bClick "Entertainment Tool"
Follow the on-screen instruction to purchase SD-
Jukebox.
cInstall SD-Jukebox on your PC
For details on how to set up SD-Jukebox, see
dSet the "USB mode setting" to
"microSD mode" to connect the FOMA
handset with your PC.→P210
eSave music data in a microSD memory
card.
Start SD-Jukebox installed on your PC and save
music data in a microSD memory card.
• See SD-Jukebox Help on how to use SD-
Jukebox.
• After you save, remove the FOMA USB
connection cable from your PC.
Playing Music
You can play music (Chaku-Uta Full)®) saved in the
FOMA handset or on a microSD memory card.
䂓
File Format Available with Chaku-Uta-Full
aM[Menu]X(Music)X"Music
player"XPerform the following
operations
[Music life]
You can play songs for special times or environments.
→P228
[Playlist]
Display, create, or play a Playlist.→P225
[All songs]
Display up to 50 songs saved in the FOMA handset
and the microSD memory card.→P222
[Artist]
Sort and display music files in "All songs" folder by
artist.
[Genre]
Sort and display music files in "All songs" folder by
genre.
[Album]
Sort and display music files in "All songs" folder by
album.
MUSIC Menu
Pressing Gon the Stand-by display opens the
"Music channel" and play menus.
The play menu allows you to switch among the
"Music Screen", "SD-Audio Screen", and "Music
Channel Screen" by pressing J.
䋪䋺 Does not appear when no SD-Audio compatible
songs are saved on the microSD memory card.
File format MP4
Bit rate MPEG-4 AAC: 8-128 Kbps
HE-AAC: 8-128 Kbps
Enhanced aacPlus: 16-48 kbps
Capacity 998 songs
Max number of
playlists Up to 10 playlists
Music Screen
Note
• To play the last played song, M[Menu] X
(Music) X Select "Recent played"䋪 or hold
down G for 1+ seconds on the Stand-by display.
䋪 : "Playing" appears during playback.
Selecting the song opens the Player screen
for the song in playback.
• Sorting conditions for Artists, Genre and Album
is in accordance with the detailed information
about the music file.
Music
Screen SD-Audio
Screen䋪Music
Channel
Screen
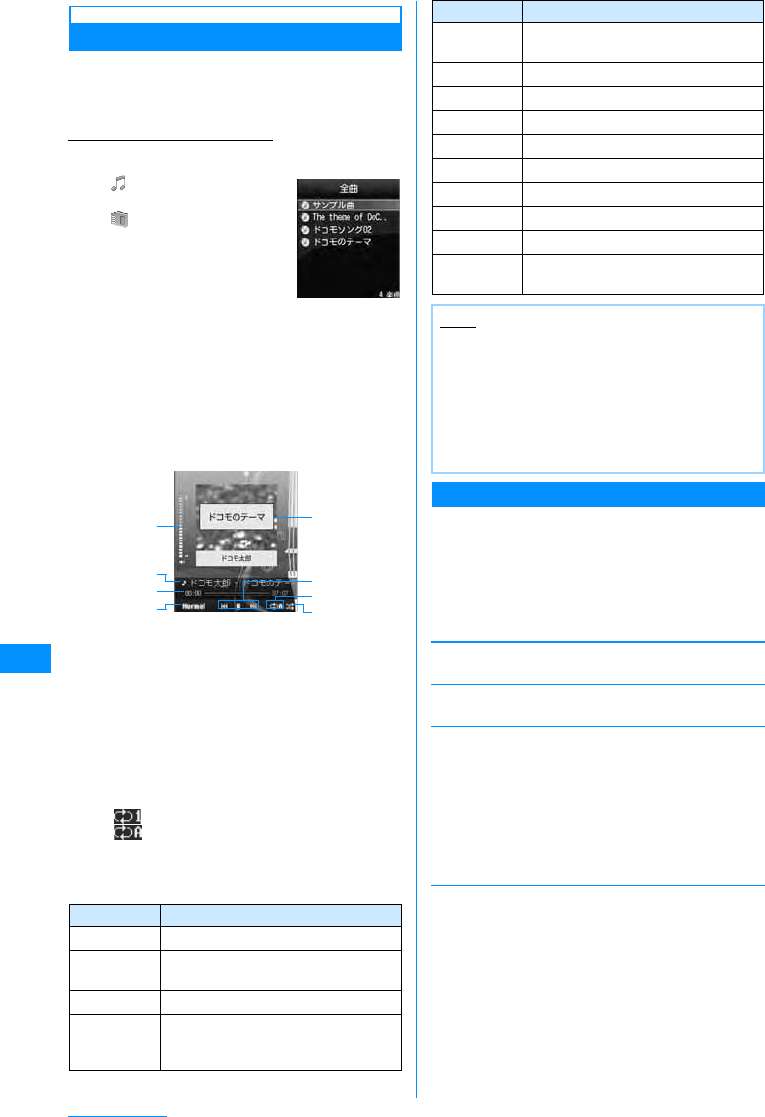
222
Music Playback
Continuously Playing Music
You can continuously play all songs saved in the
FOMA handset and the microSD memory card, or
only songs specified by artist name, genre, or
album title.
Ex: To play music in "All songs"
aGX"Music player"X"All songs"
• : Music saved on the
FOMA handset
• :
Music saved on the
microSD memory card
bMove the cursor to a song XC[Play]
Selected songs are played in the order in the
music list.
aVolume
bSong title and artist name
cPlayback progress bar
Shows the playback elapsed time.
dEqualizer setting
eJacket image/Stand-by image/Lyrics
fPlayback status
gRepeat setting
Current song
All songs
hShuffle setting
Appears when enabling "Shuffle ON"
䂓
Key operations on the Music player screen
Sub Menu on the Music Data List Screen
aMusic data list screen (P222)XMove
the cursor to dataXM[Menu]X
Perform the following operations
•C[Play] : Play the selected music.
•I[Playlist] : Add the selected music to the
playlist.→P226
[Play]
Play the selected song.
[Add to Playlist]
Add the selected music to the Playlist.→P226
[Multiple choice]䋪1
Select and play multiple songs. Operations during
playback are the same as for a Playlist.→P225
XPlace a check mark next each song to playX
I[Play]
•M[Menu] : Select from "Play", "Add to Playlist",
and "Mark/Unmark".
You can add a checked song to a playlist selecting
"Add to playlist"
[Search]䋪2
Specify "Title", "Artist", "Album", "Genre", or "Year" to
search music.
XSelect an itemXEnter the itemXI[Search]
• All songs that match all specified conditions are
displayed.
Key Description
CPause/Play
C(1+ sec) Skip to the beggining of the song,
then pause
HF/EAdjust the volume
L/RPlay from the beginning of the current
chapter or go to the previous chapter/
play the next chapter
Music Data
List Screen
(Ex: When the
player skin is
"Chocolate
Melody")
Music
Player Screen
a
c
b
dg
f
e
h
L/R
(Hold down)
Rewind/fast forward while being
pressed
GBackground playback →P228
#Switch the Shuffle setting
*Switch the Repeat setting
0Switch the Equalizer setting
1-5Change the screen design
7䋯9Display the previous/next image
8Switch Jacket image/Lyrics/Hide
I[List] Display the Music data list screen
PSwitch whether to play in the music
player or to play in the background
Note
• Playback is paused for the following. It will
resume automatically after the operation
completes.
- When a voice or video call arrives
- When receiving i mode mail or SMS
- When an alarm sounds
• Sound effects such as the key tone do not
sound during music playback.
Key Description
223
Music Playback
[Sort by]䋪1
Sort songs by setting a condition.
X"Title"/"Artist"/"Album"/"Genre"/"Track No."/
"Year"
[File property]
View or edit information about the selected song.
XSelect an item XI[Edit] XEdit the item
• Some items cannot be edited.
䋪1䋺Does not appear for the SD Audio player.
䋪2䋺Music data in Artists/Genre/Album will not be in
the list screen.
Sub Menu on the Music Player Screen
aMusic player screen (P222)XI
[Menu]XPerform the following
operations
[Go to MUSIC]
Display music screen while playing music.→P221
[BGM]
Play in the background.→P228
[List]
Display the Music data list screen.→P222
[File property]
View information about the song in playback.
[Shuffle ON/OFF]
Enable or disable shuffle play.
[Set repeat]
[Equalizer]
Control the tone when playing.
X
"Normal"/"Classic"/"Jazz"/"Pop"/"Rock"/"Dance"/
"Bass booster"/"Vocal"
[Jacket image]
Display or save the Jacket image to the Data box.
→P224
[Lyric]䋪
Display or save the Lyrics to the Data box.→P224
[Set as ring tone]䋪
Set the song in playback as a ring tone.→P223
[Player skin]
Change the appearance of the Music player screen.
XSelect a skin
[Connect to URL]䋪
Access the site if the song in playback contains a URL.
X"Yes"
䋪䋺 Does not appear for the SD Audio Player.
Setting a Song as a Ring Tone
a
Music player screen (P222)
XM
[Menu]
X
"Set as tone"
bSelect a ring tone type
Voice ring tone䋺 Set as a ring tone for a voice
call.
Video ring tone䋺 Set as a ring tone for a video
call.
Mail tone 䋺 Set as a ring tone for i-mode
mail.
Message R tone
䋺
Set as a ringtone for Message
R.
Message F tone
䋺
Set as a ring tone for Message
F.
SMS tone 䋺 Set as a ring tone for SMS.
Alarm tone䋺 Set as an alarm tone.
cSelect a range to set as the ring tone
[Full song ring tone]
Set the entire song in playback as a ring tone.
[Point ring tone]
If the song in the playback has already a range
specified, this option can be selected.
XSelect a range
[Free point ring tone]
Specify and set a free range as a ring tone.
XUseJto find a starting pointXM[Start]XUse
Jto find an ending pointXM[Done]
Viewing Details about a Song
aMusic player screen (P222)XI
[Menu]X"Set as tone"
•I[Edit] : Edit properties.
None
Current song
All songs
䋺
Playback is not repeated.
䋺
The song in playback is repeated.
䋺
Play all songs on the Music data list
screen repeatedly.
Note
• If selecting "Alarm tone", further select which
alarm.
• Some songs may not be set as a ring tone.
224
Music Playback
䂓
Information displayed on the File property screen
View Images or Lyrics Contained
in a Song
You can view and save Jacket images, Stand-by
images, Lyrics, or chapters/program images
contained in programs downloaded using the Music
channel.
a
Music player screen(P222)/
Music
channel player screen(P209)XM
[Menu]X"Jacket image"/"Lyric"X
Perform the following operations
[Next image]
View the next image or lyrics.
[Previous image]
View the previous image or lyrics.
[Full view]
View an image or lyrics to fit the screen.
[Display On/Off ]
Show/hide the image or lyrics.
[Save in Data box]
Save the displayed image or lyrics to "i-mode" in "My
Pictures" in the Data box.
"Yes"
Using Playlist
You can specify the order to play songs in a Playlist.
You can play any songs in the order of your choice
from all songs saved in the FOMA handset and on
the microSD memory card.
Creating a Playlist
Up to 10 Playlists and up to 50 songs per Playlist
can be saved.
aGX"Music player"X"Playlist"
The Playlist list screen opens.
bI[New]XEnter a Playlist name
Up to 30 full-pitch or half-pitch characters can be
entered.
cPlace a check mark next to each song
to save to the PlaylistXI[Done]
䂓For the songs in the Music Player, press
M[Menu] to select "File property", "Mark
all", "Unmark all", or "Sort by".
Item Description
Title Display the song name
Artist Display the artist name
Album Display the album name
Year Display the year when the song
was released
Genre Display the genre
Comment Display comments
Track No. Display the song numbers and the
total number of songs in the
album
Composer Display the composer name
Lyricist Display the lyricist name
Right holder Display the copyright holder
Selling agency Display the selling agency
Rights info. Display the information about
rights
Label Display the label
URL Display the related URL
Full song ring
tone Display whether the entire song
can be set as a ring tone
Point ring tone Display whether the pre-set range
of the song can be set as a ring
tone
Free point ring
tone Display whether a user-defined
range of the song can be set as a
ring tone
Savable jacket
image Display whether there is a jacket
image that can be saved
Savable image Display whether there is an image
that can be saved
Savable lyric Display whether there are lyrics
that can be saved
Audio Display the sound format
Bit rate Display the bit rate
Playing time Display the file playback duration
File Name Display the file name
File Size Display the file size
File Type Display the file format
Date & Time
(Saved) Display the saved date and time
Original title Display the default title of the file
File Restriction Display whether the file is
restricted →P198
Source Display the source
Move to
microSD Indicates whether the file can be
moved to a microSD memory card
Replays/
Expiration date/
File period
Display information of replays/
expiration date/file period
DRM info. Display whether the copyright is
controlled
Note
• If you delete Chaku-Uta-Full® songs saved in
the playlists or move them between the FOMA
handset and microSD memory card, they will be
removed from the playlist.

225
Music Playback
Playing a Playlist
aPlaylist list screen (P224)XSelect a
Playlist
The Playlist music list screen opens.
bMove the cursor to a song XC[Play]
Selected songs are played in the order in the
music list.
Sub Menu on the Playlist List Screen
aPlaylist list screen (P224)XMove the
cursor to a PlaylistXM[Menu]X
Perform the following operations
[Play]
Play the selected Playlist.
[New playlist]
Create a Playlist.→P224
[Rename]
Change the Playlist name.
XEdit the Playlist name
[Copy playlist]䋪
Copy the selected Playlist and create a new Playlist.
X"Yes" XEnter a name of the new Playlist
[Delete playlist]
Delete the selected Playlist.
X"Yes"
[Multiple choice]
Select and delete Playlists.
XPlace a check mark next to each Playlist to
deleteXI[Delete]X"Yes"
• Press M[Menu] to select "Delete" or "Mark/
Unmark".
䋪䋺 Does not appear for the SD Audio player.
Sub Menu on the Playlist Music List Screen
aPlaylist music list screen (P225) X
Move the cursor to a song X
M[Menu] XPerform the following
operations
•I[Add] : Add the song to the displayed
Playlist.
[Play]
Play the selected song.
[Add songs]
Add songs to the displayed Playlist.
XPlace a check mark next to each song to add X
I[Done]
• Press M[Menu] to select "File property", "Mark
all", "Unmark all", and "Sort by".
[Move]
Change the order of the selected songs.
XLocate a position to move to.
[Delete from list]
Delete the selected song from the Playlist.
[Multiple choice]
Select and play multiple songs. Operations during
playback are the same as for a Playlist.→P225
XPlace a check mark next each song to playXI
[Play]
•Press
M[Menu] to select "Play", "Delete from list",
and "Mark/Unmark".
[Search]
Specify "Title", "Artist", "Album", "Genre", or "Year" to
search music.
XSelect an itemXEnter the itemXI[Search]
• All songs that match all specified conditions are
displayed.
[Sort by]䋪
Sort songs by setting a condition.
X"Title"/"Artist"/"Album"/"Genre"/"Track No."/
"Year"
[File property]
View or edit information about the selected song.
XSelect an item XI[Edit] XEdit the item
• Some items cannot be edited.
䋪䋺 Does not appear for the SD Audio player.
Note
<Rename/Delete playlist>
• These options are not available for "All songs"
and "Quick playlist".
<Copy playlist>
• This option is not available for "All songs".
226
Music Playback
Adding Songs to a Playlist
aGX"Music player"X"All songs"
bMove the cursor to a song to
saveXI[Playlist]XSelect a Playlist
•I[New] : Create a new Playlist with the
selected song.
• For Chaku-Uta® and Chaku-Uta=Full®, you
can do the following operation.
䂓To save multiple songs
M[Menu]X"Select multiple"XPlace a check
mark next to each song to saveXM[Menu]
XSelect "Add to Playlist".
Saving Songs to the Quick
Playlist
Hold down Aon the Music data list screen to
save the selected song to the "Quick playlist". It is
useful for you to collect up the songs you often
listen to.
To play, select the "Quick playlist" on the Playlist
list screen.
Managing Folders,
Playlists, and Music
Data
Songs are saved in the "Music" folder in the Data
box. SD-Audio compatible songs are saved in the
"SD-audio" folder in the Data box.
Delete or move songs from the Data box.
aM[Menu]X(Data box)X"Music"
•I[Switch] : Switch between list and picture
display.
䂓
Managing SD-Audio Compatible Songs
M[Menu]X(Data box)XSelect
"SD-audio"
bMove the cursor to a songXM[Menu]
XPerform the following operations
䂓To Manage Playlists
Select a "Playlist" X Move the cursor onto the
playlist XM[Menu] X Perform the
operations described in "Sub Menu on the
Playlist Music List Screen" (P225).
䂓To maintain music data in microSD memory
card
"micro SD" X Move the cursor to music data X
M[Menu] X Perform the following operations
䂓Managing Songs on the microSD Memory
Card
"micro SD" X Move the cursor to a song X
M[Menu] XPerform the following operations
[Files]
[Multiple choice]
Select and delete songs.
XPlace a check mark next to the songs to deleteX
I[Delete]X"Yes"
• You can move/copy multiple songs with the
following operation.
•XCheck off the songs you want to copy or delete
•XM[Manu] X "Move"/"Copy" X Select a
destination folder XI"Move"/"Copy"
•M[Menu] : Select from "Move", "Copy", "Delete",
"Mark", "Mark all", "Unmark", and "Unmark all".
[File property]
View or edit information about the selected song.
XSelect an item XI[Edit] XEdit the item
• Some items cannot be edited.
[Send]
Not available
[Set as tone]
Set the selected song as a ring tone.→P223
[List view/Grid view]
Switch between list and picture display.
[Sort by]
Sort songs by setting a condition.
X"Title"/"Artist"/"Album"/"Genre"/"Track No."/
"Year"
[Memory info.]
Play
Move
Copy
Delete
Delete
all
Rename
Reset
display
name
䋺
Play the selected song.
䋺
Move the selected song to another folder.
X
Select a destination folder
XI
[Move]
䋺
Copy the selected song to another folder.
X
Select a destination folder
XI
[Copy]
䋺
Delete the selected song.
X
"Yes"
䋺
Delete all songs in the folder.
X
"Yes"
䋺
Rename the selected song.
X
Edit a file name
䋺
Reset the display name of the selected file to
its default name.
Handset
memory
External
memory
䋺
Shows free space in the FOMA handset.
䋺
Shows free space on the microSD memory
card.
227
Music Playback
[New folder]
Create a new folder.
XEnter a folder name
• Sub folders can be created in a folder up to two
layers.
Sub Menu while a Folder Selected
aMove cursor to a folder XM[Menu]X
Performs the following operations
[Rename]
XEdit a folder name
[New folder]
Create a new folder.
XEnter a folder name
• Sub folders can be created in a folder up to two
layers.
[Delete]
Delete the selected folder.
X"Yes"
[List view/Grid view]
Switch between list and picture display.
[Sort by]
Sort songs by setting a condition.
X"Title"/"Artist"/"Album"/"Genre"/"Track No."/
"Year"
[Memory info.]
[Folder property]
The folder size, the number of files in the folder, and
the number of folders in the folder are displayed.
Playing Songs with the
SD-Audio Player
You can play SD-Audio-compliant songs saved on
the microSD memory card.
䂓
Available SD Audio file formats
aGX"SD-Audio Player"XPerform the
following operations
[Music life]
You can play songs for special times or environments.
→P228
[Playlist]
Display, create, or play a Playlist.→P224
[All songs]
Display up to 999 SD-Audio-compliant songs saved on
the microSD memory card.→P222
[Artist]
Sort and display music files in "All songs" folder by
artist.→P222
[Genre]
Sort and display music files in "All songs" folder by
genre.→P222
[Album]
Sort and display music files in "All songs" folder by
album.→P222
Note
• When the "Playlist" folder or "SD-Audio" folder
is open, press I[New] to create a new
Playlist.→P224
Handset
memory
External
memory
䋺
Shows free space in the FOMA handset.
䋺
Shows free space on the microSD memory
card.
Note
• The "Playlist" and "micro SD" folders cannot be
renamed or deleted.
File Format MPEG-2AAC
Bit rate (stereo) 16䌾128kbps
The number of songs that can
be saved Up to 998 songs
The number of playlists that
can be created Up to 10 playlists
Note
• Operations are the same for the Music player
expect the following:
- Sub menu items not available for the
SD-Audio player are not displayed.
- SD-Audio-compliant song information
cannot be edited.
SD-Audio

228
Music Playback
Music life
Playing songs for
Special Times or
Environments.
You can play songs suitable for occasions such as
when commuting, playing sports, or going to bed.
aGX"Music player"/"SDAudio player"
X"Music life"XPerform the following
operations
[Train]
Vocal sound is emphasized so that lyrics can be clearly
heard even in a low volume when you commute. Songs
are played in random order.
[Sports timer]
Songs are played for a set period. You can use this
option as a timer when you want to run for a certain
time. The selected Playlist is repeatedly played for the
specified time period.
[Sleeping]
You can set an off timer to stop the playback
automatically when lying in bed listening to music. The
volume is gradually reduced about five minutes before
the playback ends. The selected Playlist is repeatedly
played for the specified time period.
bI[Play]
Playback in background
Using Other Applications
While Listening to Music
aPress G during a music playback
Open the Stand-by display during music playback.
Default Train : All songs, level 2
Sport timer : All songs 30 Min.
Sport timer : All songs 30 Min.
Playlist
Vocal
䋺
Select "All songs" or a Playlist.
X
Select "All songs" or a Playlist
•C[List] : List Playlists.
䋺
Place emphasis on vocal sounds.
X
Select the level of emphasis
Playlist
Playing time
䋺
Select "All songs" or a Playlist.
X
Select "All songs" or a Playlist
•C[List] : List Playlists.
䋺
Enter the playback time. Up to 1200
minutes can be entered.
X
Enter the playback time
Playlist
Off timer
䋺
Select "All songs" or a Playlist.
X
Select "All songs" or a Playlist
•C[List] : List Playlists.
䋺
Enter a value of minutes until the playback
stops. Up to 1200 minutes can be entered.
X
Enter the time
Note
• On the Stand-by display, song names and artist
names are displayed.
• During the background playback, press F/Eto
adjust the volume.
• Press G during the background playback to
return to the Music player in playback.
• To stop the background playback, press PX
select "Yes".
• During background playback, an i-motion movie
set for the Stand-by display will not be played.
The default Stand-by display opens instead.
• While a song on the microSD memory card is
played in background, the other functions
cannot access to the microSD memory card.
Select XP "Yes" to stop the background
playback.

229
Other Useful Functions
Multi-access..................................................................................................Multi-access 230
Multitasking .................................................................................................. Multitasking 230
Sounding the Alarm at Set Times.......................................................................... Alarm 231
Managing Schedule Events.............................................................................. Schedule 232
Managing To Do Tasks ..................................................................................... To Do list 235
Managing Anniversaries.................................................................Remembering Dates 237
Quick Access to Frequently Used Applications .....................................Custom Menu 238
Registering Your Name and Image............................................................ Own Number 239
Checking Call Duration/Call Cost .................................................................................... 239
Setting a Call Cost Limit ......................................................................Set call cost limit 240
Using the World Clock................................................................................. World Clock 240
Using the Stopwatch....................................................................................... Stopwatch 241
Using the Unit Converter ......................................................................... Unit Converter 241
Using the Calculator ........................................................................................Calculator 242
Using Memos......................................................................................................... Memos 243
Talking Using the flat-plug earphone/microphone with switch .................................... 244
Automatically Receiving a Call Connecting the flat-plug earphone/microphone
with switch................................................................................................... Auto Answer 244
Chiming the Hour .................................................................................... Hour Indication 245
Checking Memory Usage ........................................................................ Memory status 245
Restoring Various Function Settings to Their Defaults .............................Reset/Clear 245
Deleting All Saved Data at Once.............................................................. Clear memory 246
230
Other Useful Functions
Multi-access
Multi-access
Multi-access is a function that allows the use of
three lines (voice call, packet communication, and
SMS) concurrently.
Making a Voice Call during Packet
Communication
By invoking "New task" screen, a voice call can be
made during packet communication such as
i-mode(P231).
Example: Making a voice call during i-mode
operation
ai-mode screen(P139)XN(1+seconds)
X"Call"
The Phone number entry screen opens.
bEnter a phone numberXA
Receiving a Voice Call during
Packet Communication
A voice call can be received during packet
communication such as i-mode.
Example: Receiving a voice call during i-mode
operation
aA call arrives
The Incoming call screen opens.
bA
Using Other Communications
during a Voice Call
During a voice call, you can perform operations
such as sending/receiving mail or connecting to
i-mode.
Sending Mail
aVoice call screen XN(1+
seconds)X
"Mail"
bCreate and send mail
Receiving Mail
An icon (P32) to notify of incoming mail appears at
the top of the screen.
Connecting to i-mode
aVoice call screen XN(1+ seconds)
X"i-mode"
Multitasking
Multitasking
This FOMA handset provides multitasking that
allows you to start and operate two or more
applications concurrently.
Task manager
Launching a New Function
To launch a new function while another function is
running, open the New task screen (Task manager).
Communication Type Available Line
Voice call 1 line
Packet communication
including i-mode, i-appli,
i-mode mail, and PC
connections
1 line from the left
SMS 1 line
Note
• Combination of Lines
→
P302
• During Multi-access, communication charges
apply for each connected line.
• During a video call, Multi-access is disabled
except for incoming SMS.
Note
• To return to the i-mode screen from the Voice
call screen press
N
and select "i-mode".
Note
• To return to the i-mode screen from the Voice
call screen (P49) press
N
and select "i-mode".
Note
• Creating and sending mail
→
P161, P181
Note
• To return to the Voice call screen, press
PX
Select "Yes"
Voice call
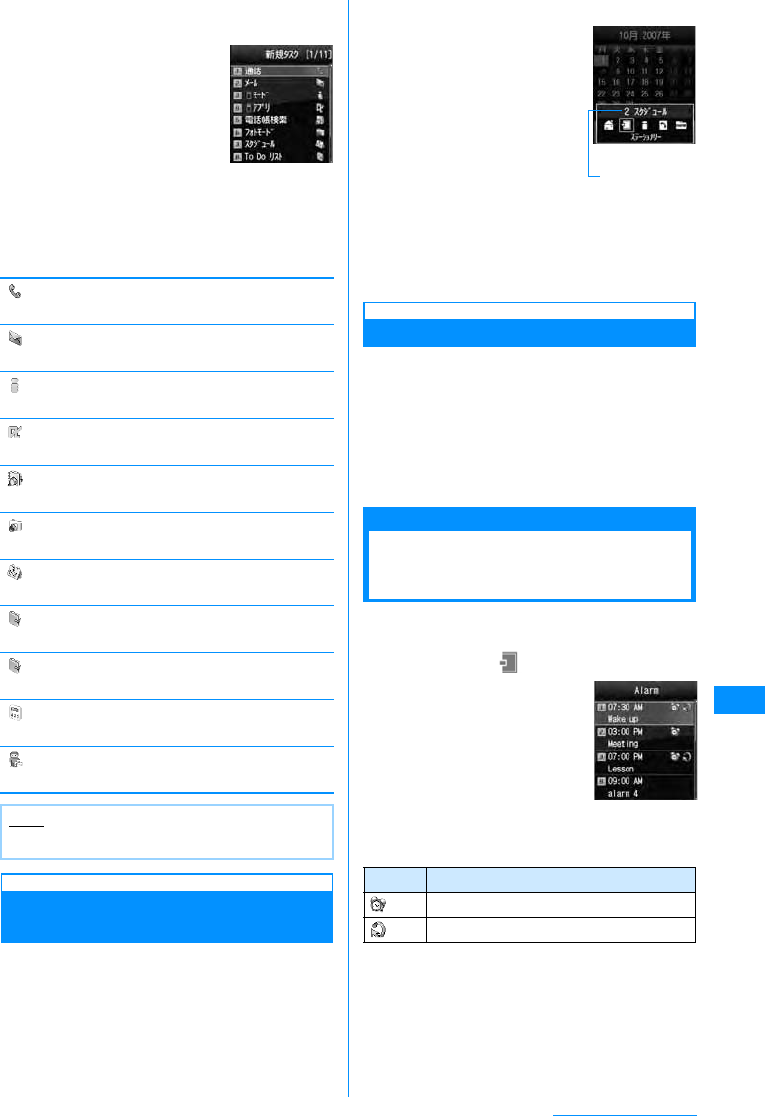
231
Other Useful Functions
aWhile using an applicationXN(for 1+
seconds)
Unavailable functions are
grayed out.
bSelect an application to start
• Available applications vary depending on the
currently running application and its operating
status.
䌛Dialing䌝
The Phone number entry screen opens.䇯→P50
䌛Mail䌝
The Mail menu screen opens.→P160
䌛i-mode䌝
The i-mode menu screen opens.→P138
䌛i-appli䌝
The Software list screen opens.→P185
䌛Search phonebook䌝
The Search phonebook screen opens.→P83
䌛Photo-mode䌝
The Still image capture screen opens.→P129
䌛Schedule䌝
The Month view calendar screen opens.→P232
䌛To Do list䌝
The To do list screen opens.→P235
䌛Memo䌝
The Memo list screen opens.→P243
䌛Calculator䌝
The Calculator screen opens.→P242
䌛Own number䌝
The Own number screen opens.→P48
Switching/Confirming
Applications
To switch or confirm applications, open the Task list
screen.
aWhile using an applicationXN
• Select "New task" on the
Task list screen to open the
New task screen that
allows you to launch
another application.
bUse Kto select an
application
The screen for the selected application will be
displayed.
Terminating an Application
Close the currently displayed application and open
the previously displayed application.
aTo terminate an applicationXQ/P
• To close an application, make it current
application first.
• Repeat these steps to close other
applications.
Alarm
Sounding the Alarm at
Set Times
The FOMA handset can be used as an alarm clock.
Up to ten alarms can be registered.
aM[Menu]X(Stationery)X"Alarm"
• Press to set the selected
alarm "On"/"Off".
䂓Icons displayed on the Alarm list screen.
bMove the cursor to an alarm to be
edited XC[Edit]
cPerform the following operation
•C[List] : Display the setting items list screen
for the selected item.
Note
• Combination of Applications
→
P303
New task
screen
Icon Description
Alarm set to "On".
Alarm with "Set repeat" set.
Task list screen
The running
functions are
Alarm List ScreenAlarm List Screen
Continue on the next page

232
Other Useful Functions
[ (On/Off list)]
Set whether to enable the alarm.
X"ON"/"OFF"
[°e(Set time)]
Set the time for the alarm to sound.
[(Set repeat)]
Select a repetition type.
X "Once"/"Daily"/Daily except holiday"/"Mon-Fri"/
"Weekdays"
• If you select "Daily except holiday", the alarm does
not sound on Sundays and holidays set in "Set
holiday" (P234).
"Weekdays" is selected, perform the following steps to
specify the days of the week for the alarm to start:
XDXC[List] in the "Su MoTu We Th Fr Sa" field
Xplace check marks next to days of the week X
I[Done]
[ (Alarm tone)]
Select an alarm tone.
[(Memo)]
Up to 7 full-pitch or 15 half-pitch characters can be
entered. The entered text is displayed on the Alarm
screen after the alarm starts.
[ (Turbo Alarm)]
Set whether to enable the Turbo Alarm that increases
its volume levels up to the maximum volume and
vibrates the handset.
X "Off"/"On (Max. Ring&Vib)"
[ (Snooze)]
Set whether to enable the Turbo Alarm that increases
its volume levels up to the maximum volume and
vibrates the handset.
dI[Done]
Sub Menu on the Alarm List Screen
aAlarm list screen (P231)XM[Menu]
XPerform the following operations
[Edit]
Edit the selected alarm.→P231
[Turn On(Off)]
Activate/deactivate the selected alarm.
[Multiple choice]
Select alarm and set whether to enable the alarm.
䋺XPlace check marks next to the alarms XM
[Menu] X "On"/"Off"
• You can also select "Mark/Unmark" X "Mark all",
"Mark"*, "Unmark"*, or "Unmark all" by pressing
M[Menu].
䋪䋺 Either one appears depending on the alarm
status.
When the alarms for "Alarm" and "Schedule"/"To
Do" reach the specified time
The following actions are performed by function.
Alarm
The alarm screen appears, the alarm tone sounds
and the illumination lights.
• To stop the alarm, press C[Off].
• When the "Snooze interval" time is set, to stop
the alarm temporarily and sound the alarm tone
again when a set period of time has elapsed,
press I[Snooze].
• When the alarm for which "Snooze interval" time
is set is not stopped, the alarm tone sounds
again in about 5 minutes regardless of the setting
of the snooze interval time. The alarm tone
sounds repeatedly for 1 hour, up to 12 times.
Schedule
The schedule alarm screen appears, the alarm
tone sounds and the illumination lights.
• To stop the alarm, press C[OK] and then
C[Off] on the Schedule detail screen.
• To sound the alarm tone again, select
I[Snooze] X Select a snooze interval.
• When the alarm for Schedule cannot be stopped,
the alarm tone sounds again in about 5 minutes
regardless of the setting of the snooze interval
time. (Confirming specs)
To Do
The To Do alarm screen appears, the alarm tone
sounds and the illumination lights.
• To stop the alarm, press C[OK] and then
C[Off] on the To Do detail screen.
When the alarm for Alarm, Schedule and To Do
are set to the same time
The priority order for the alarm is Alarm →
Schedule alarm → To Do alarm. (Confirming
specs)
Schedule
Managing Schedule
Events
Registering Schedule Events
You can save a schedule event such as a meeting
or appointment. Up to 200 Schedule events and up
to 100 holidays can be saved.
Music
i-motion
Melody
䋺Selects the music saved in "Music" in the
"Data box "folder.→P224
䋺Select a movie/i-mode saved in "i-motion"
in "Data box".→P201
䋺Select from melodies saved in "Melody" in
the "Data box".→P204
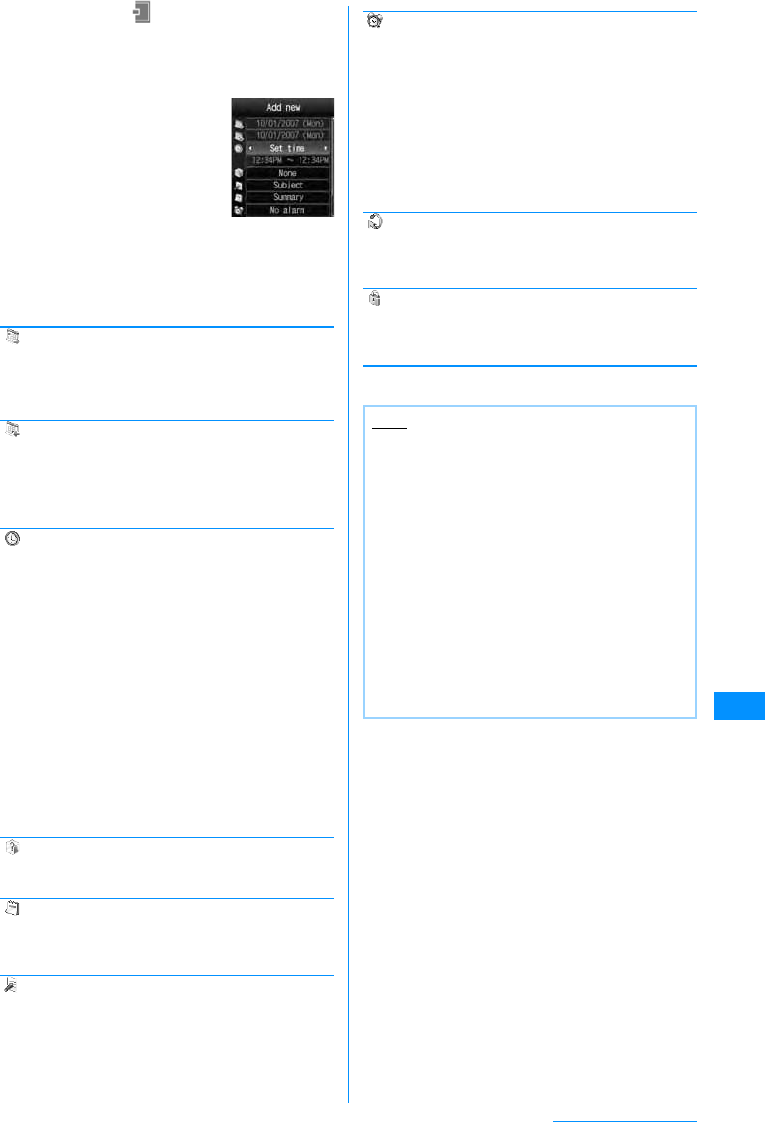
233
Other Useful Functions
aM[Menu]X(Stationery)X"Schedule"
XMove the cursor to the day to be
saved in ScheduleXI[New]X
Perform the following operations
•C[List] : Display the setting
items list screen for the
selected item.
• When the cursor is in the
time setting field, you can
stop creating a schedule
event by selecting M
[Cancel] X "Yes".
[ (Start Date)]
Specify the date to start the Schedule event. To enter
a date, use J to move the cursor to the position and
enter a number with dial keys. Press C[List] to select
the day from a calendar.
[ (End Date)]
Specify the date to complete the Schedule event. To
enter a date, use J to move the cursor to the position
and enter a number with dial keys. Press J[List] to
select the day from a calendar.
The end date cannot be set earlier than the start date.
[(Settime)]
Specify the times to start/end the Schedule event.
[ (Category)]
Select a category of the Schedule event.Icons vary
depending on the selected category.
[ (Subject)]
Up to 200 full-pitch or 400 half-pitch characters can be
entered. The subject is displayed on the Monthly and
Weekly view screen.
[ (Summary)]
Up to 20 full-pitch or 40 half-pitch characters can be
entered. The summary is displayed on the Alarm
screen that opens when the alarm starts.
[(Setalarm)]
Set whether to be notified with an alarm tone of the set
starting date and time.
If you select other than "No alarm", perform the
following steps to select the alarm tone.
[ (Set repeat)]
Set how to repeat the Schedule event. Select "Once"
not to repeat. When selecting "Weekly", further specify
the day of the week.
[ (Secret)]
This option appears when the Secret mode setting
(P117) is "Secret mode". Set this option to "On" if you
save the created Phonebook entry as secret data.
bI[Done]
All day
Set time
䋺Save the schedule event for a whole day
without specifying time.
䋺After setting, use D to move the cursor
and enter the start and end time of the
schedule event.
Use J to move the cursor to the position
and enter the time with dial keys and switch
between "AM" and "PM" with C (pressing
C in the time field opens the Time settings
screen that allows you to enter time with dial
keys and H).
• The end time cannot be set earlier than
the start time.
• Depending on the settings in "Date&Time
format" (P106), the display order or
format for the date and time may differ.
New Memo
Creation
Music
i-motion
Melody
䋺Selects the music saved in "Music" in the
"Data box "folder.→P224
䋺Select a movie/i-mode saved in "i-motion"
in "Data box".→P201
䋺Select from melodies saved in "Melody" in
the "Data box".→P204
Note
<Secret>
• When the "Secret mode" (P117) is set to "Secret
only mode", the Schedule entry is saved as
secret data.
• The secret Schedule is displayed when the
"Secret mode" is set to "On" or "Secret only
mode".
• The secret Schedule is saved as secret data
even if it is edited with the "Secret mode" set to
"On".
• When the set time for the secret Schedule event
for which the alarm is set with the "Secret mode"
set to "Off" comes, the alarm tone sounds
without displaying the saved contents and
"Secret" appears on the notification screen.
Continue on the next page
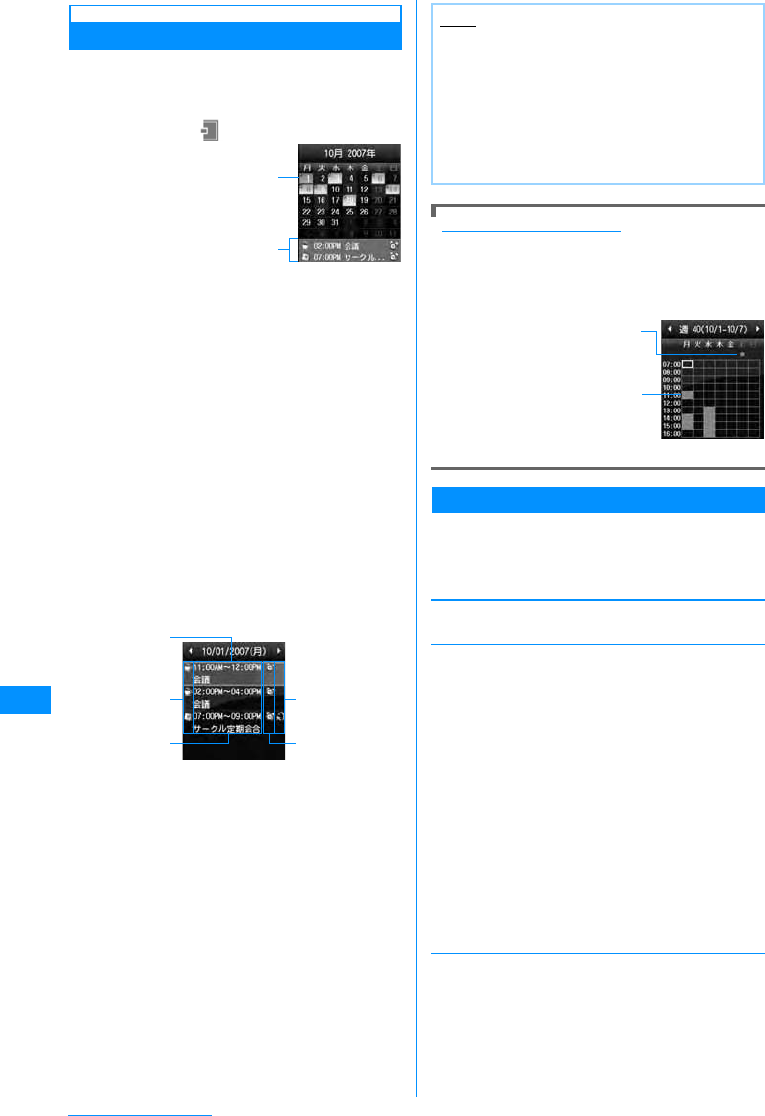
234
Other Useful Functions
Viewing Schedule Events
You can view settings of a schedule event from the
Calendar screen.
• The Month view calendar appears by default.
aM[Menu]X(Stationery)X"Schedule"
aThe day when a schedule event is set
bA schedule event saved for the highlighted
day
Up to 2 events will be displayed. Schedule
events that have passed their start times will
not be displayed.
•13 : Switch the view by year.
•79/FE : Switch the view by month.
•5 : Return to the current date.
• On the Month view, the blue indicates Saturday,
and the red indicates Sunday and holidays.
• You can switch between the Monthly and
Weekly view of the Calendar screen.
bSelect the day to view
•J : Switch to the previous/next day.
aDate
bIcon indicating a "Category"
cStart time – End time, Subject
dlarm icon
eAppears when the alarm is set to sound.
fIcon indicating a schedule event set for other
than Japan time
Appears if the schedule event's "Local time
zone" is set to other than "GMT+9:00" (out of
Japan).
cSelect the event to view
The Schedule detail screen opens.
Switching the Calendar View
The Calendar screen can be viewed on monthly
basis or weekly basis.Perform the following steps
to switch views.
XOn the Calendar screen M[Menu] X
"Weekly view"/"Monthly view"
Sub Menu on the Calendar View
aMonth view screen (P234)/Week view
screen (P225)XM]Menu]XPerform
the following operations
[Add new]
Register a new Schedule event.→P232
[Set holiday/Clear holiday]
Set or release a selected day as a holiday.
To set a day as a holiday, select "Set holiday" X select
an option from the following X enter a "Holiday name"
XI [Done]
[Week view/Month view]
Switch the view by week or by month.→P232
Calendar
screen
(Month View)
Screen
a
b
Schedule list
screen
b
c
a
e
d
Note
• National Holidays are based on "
࿖᳃䈱ᣣ䈮
㑐䈜䉎 ᴺᓞ䈶⠧ੱ䈱৻ㇱ䉕 ᡷᱜ䈜䉎 ᴺᓞ
(
ᐔᚑ
13
ᐕᴺᓞ╙
59
ภ
) (law relating to national
holidays and old-age persons' welfare, as
amended (Law No. 59, 2001))". Spring Equinox
Day and Autumnal Equinox Day are released in
an official gazette on February 1 and may not be
exact (as of
䃂
, 2007).
On the
day
Weekly
Monthly
Annually
䋺Set the highlighted day as a holiday.
䋺Set the day of the week of the highlighted
day as a weekly holiday.
䋺Set the date of the highlighted day as a
monthly holiday.
䋺Set the date of the highlighted day as an
annual holiday.
Duration (2 ~ 31)
䋺Set a period from 2 to 31 days as holidays
from the highlighted day. Enter the number
of days in the "Duration (2-31)" field.
ㅳන␜
䇸⚳ᣣ䇹⸳ቯ䈱䉴䉬䉳䊠䊷
䊦䈏䈅䉎 ᣣ
䍃H䈪␜䈘 䉏䈩䈇䈭 䈇ᤨ㑆䉕 䉴
䉪 䊨 䊷䊦␜䈪䈐 䉁 䈜䇯
䉴 䉬 䉳 䊠 䊷䊦䈱⊓㍳ᤨ㑆
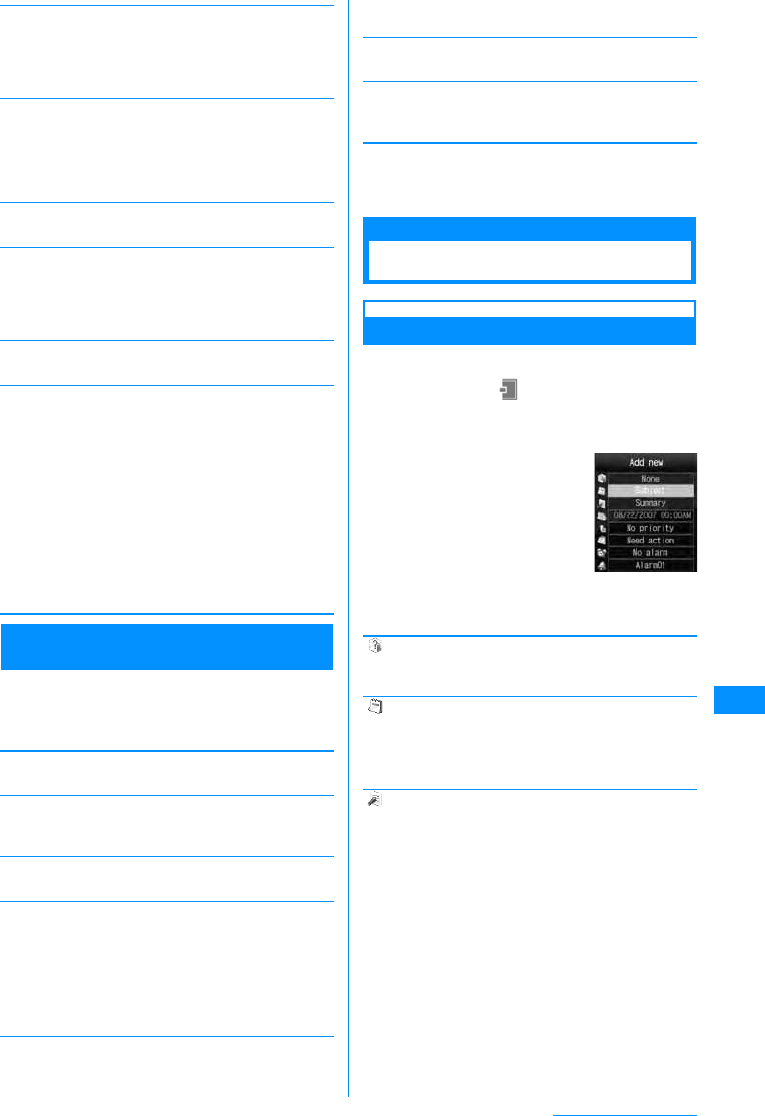
235
Other Useful Functions
[Go to date]
The Calendar view for the specified day appears. Use
J to move the cursor to the position in the "Enter date
you want to go to" field, and enter the date and time
with dial keys.
[Delete]
[Send all via IrDA]
Send all Schedule events via IrDA.→P212
[Memory Info]
Schedule events and holidays status will be displayed.
• If "Secret mode" is set to "On" or "Secret only mode",
the number of pieces of secret data is shown in
"Secret".
[Reset holiday]
Delete the holiday set in "Set holiday".
[Settings]
Configure how the Calendar screen will be displayed.
Sub Menu on the Schedule List Screen/
Detail Screen
aSchedule list screen (P234)/Detail
screen (P234)XM[Mene]XPerform
the following operations:
[Add new]
Register a new Schedule event.→P232
[Send via]䋪1
Send the selected schedule events as an i-mode mail
attachment or via Infrared communication.
[Edit]䋪1
Edit the selected Schedule event.→P232
[Multiple choice]䋪2
You can select and delete a scheduled event set to the
selected day.
XPlace check marks next to the schedule events to
deleteXI[Delete] X"Yes"
• You can select "Mark all" or "Unmark all" from
"Delete" or "Mark/Unmark" by pressing M[Menu].
[Go to date]䋪2
The Calendar for the specified day appears. Use J to
move the cursor to the position in the "Enter date you
want to go to" field, and enter the date and time with
dial keys.
[Delete]
Delete the selected Schedule event.
[Copy to microSD card]䋪1
Copy the selected Schedule events to the microSD
memory card.
䋪1䋺 Not available when you are using the default or
"Set holiday" configuration.
䋪2䋺 Not displayed on the Schedule detail screen.
To Do list
Managing To Do Tasks
Registering To Do Tasks
You can register up to 50 To Do entries.
aM[Menu]X(Stationery)X"To Do
list"XI[New]XPerform the
following operations
•C[List] : Display the setting
items list screen for the
selected item.
• When the cursor is in the
due date setting field, you
can stop creating a To do
task by selecting M
[Cancel] X "Yes".
[ (Category)]
Select the category of the To Do task. Icons vary
depending on the selected category.
[(Subject)]
Up to 200 full-pitch or 400 half-pitch characters can be
entered. The subject is displayed on the To Do list
screen. A Subject is required to register a Schedule
event.
[ (Summary)]
Up to 20 full-pitch or 40 half-pitch characters can be
entered. The summary is displayed on the Alarm
screen that opens when the alarm starts.
Delete
previous
entries
Delete all
䋺Delete all events scheduled prior to today.
䋺Delete all Schedule events.
Default View
䋺Configure the display format of the Calendar
screen when launching Schedule.
XSelect "Week view"/"Month view"
Monthly view type
䋺Select a starting day of the week from
Sunday or Monday.
Weekly start time
䋺Configure the starting time displayed in the
the Week view. New Memo
Creation
Screen
Continue on the next page
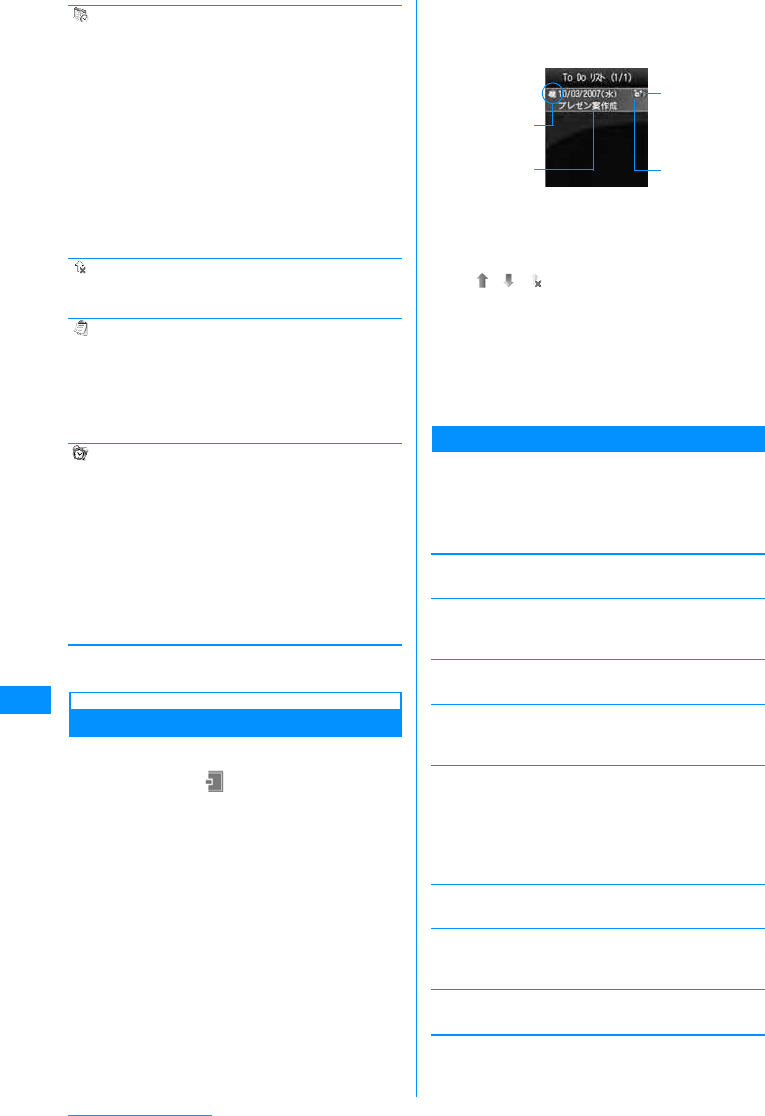
236
Other Useful Functions
[ (Due date)]
Set the due date of the To Do task.To set the date, use
J to move the cursor to the place to change the date
and enter the date with the dial keys (to set the date on
the calendar screen, press C[List] in the date entry
field ). Operations on the calendar screen→P234
Use J to move the cursor to the position and enter
the time with dial keys and switch between "AM" and
"PM" with C (pressing C in the time field opens the
Time settings screen that allows you to enter time with
dial keys and H).
• Depending on the settings in "Date&Time format",
the display order or format for the date and time may
differ.→P106
Press C[List] to select the day from a calendar.
[(Priority)]
Select a priority of the task.Icons vary depending on
the selected priority.
[(Status)]
Select a status of the task.Icons vary depending on the
selected status.
When "Completed" is selected, the due date and the
subject will be crossed out, and the task appears after
tasks with status other than "Completed" on the To Do
list screen.
[(Setalarm)]
Set whether to be notified with an alarm tone at the set
due date and time.
If you select other than "No alarm", perform the
following steps to select the alarm tone.
bI[Done]
Viewing To Do Tasks
You can list and view registered To Do tasks.
aM[Menu]X(Stationery)X"To Do
list"
• Saved To Do tasks are listed in the order of High
→low→No Priority. When two or more To Do
tasks have the same level of Priority, the task
with earlier due date is listed first.
• For To do tasks with "Status" set to
"Completed", the due date and the subject are
crossed out and the task appears after tasks
with status other than "Completed".
aIcon indicating a "Status"
bDue date and subject
cPriority
䋯䋯
"High"/"Low"/"No priority"
dIconindicating aTo Dotask setfor otherthan
Japan time
Appears if the schedule event's "Local time
zone" is set to other than "GMT+9:00".
bSelect a To Do task to view
The To DoDetail screen opens.
Sub Menu on the To Do List/Detail Screen
aTo Do list screen (P236)orToDo
detail screen (P236)
XM[Menu]XPerform the following
operations
[Add new]
Create a new To Do entry.→P235
[Send via]
Send the selected schedule events as i-mode mail
attachment or via Infrared communication.
[Edit]
Edit the To Do entry.→P235
[Change status]
Change the "Status" of the selected To Do entry.→
P235
[Multiple choice]䋪
You can select and delete To do tasks.
XPlace check marks next to To do tasks to
deleteXI[delete] X"Yes"
• You can also select "Mark all" or "Unmark all" from
"Mark/Unmark" by pressing M[Menu].
[Delete]
Delete the selected To Do entry.
[Copy to microSD card]
Copy the selected To Do tasks to microSD memory
card.
[View calendar]
Display the current date of the calendar.
䋪䋺 Not displayed on the Detail screen.
Music
i-motion
Melody
䋺Selects the music saved in "Music" in the
"Data box "folder.→P224
䋺Select a movie/i-mode saved in "i-motion" in
"Data box".→P201
䋺Select from melodies saved in "Melody" in
the "Data box".→P204
To Do listScreen
a
bd
c
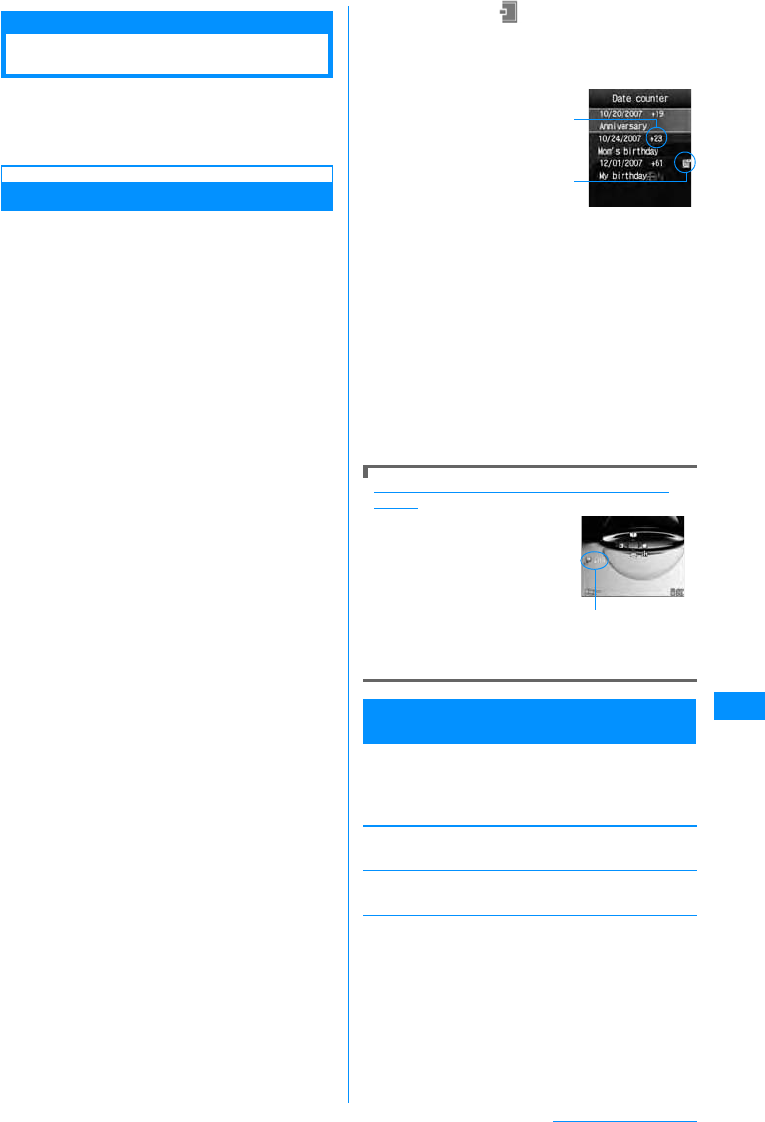
237
Other Useful Functions
Remembering Dates
Managing Anniversaries
You can display the number of days until an
important event on the Stand-by screen or find the
number of days quickly by using the Date counter
and Date search.
Date Counter
Registering in Date Counter
Up to 30 important events can be tracked for
remaining days.
aM[Menu]X(Stationery)X
"Rememberingdates"X"Datecounter"
XI[Add]XPerform the following
operation
aCounter display
Display with - : Show the elapsed days from the
set date to today.
Display with + : Show the remaining days from
today to the set date.
bIcon to display on the Stand-by display
An event that is to be displayed on the Stand-
by screen.
bSelect an event to find the days
• The Event detail screen opens.
To display the remaining days on the Stand-by
display
You can select one of the
registered events and show the
days remaining until that event
on the Stand-by display.
Perform the following steps
from the "Date counter" screen
to display the remaining days:
XMove the cursor to the
event XM[Menu] X
"Display on stand-by screen"
Sub Menu on the Date Counter List/Detail
Screen list/detail
aDate counter screen (P237)XM
[Menu]Xlist/detail Perform the
following operations
[Add new]
Save a new event.→P237
[Edit]
Edit the selected event.→P237
[Display day on stand-by screen/Cancel displaying]
䋪
Specify whether to show the Date counter for the
selected event on the Stand-by display.
Date Counter
Screen
a
b
Category and
remaining
days for an
event
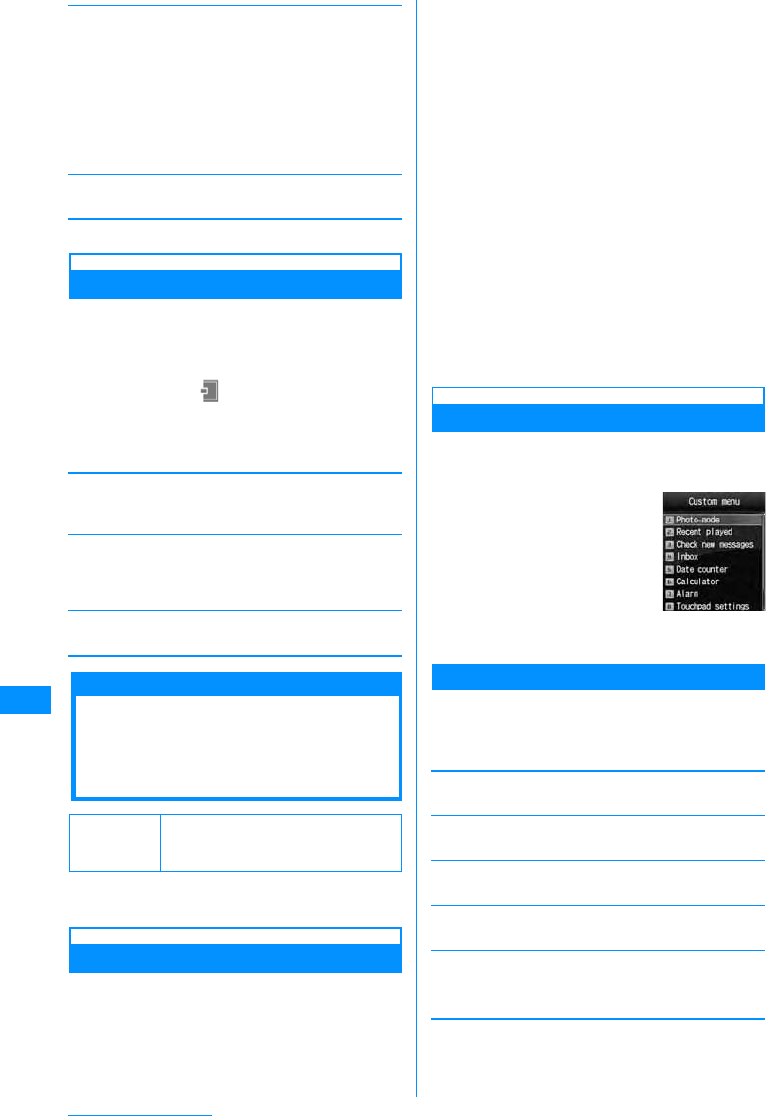
238
Other Useful Functions
[Multiple Choice]䋪
You can select and delete events.
XPlace check marks next to events to
deleteXI[delete] X"Yes"
• You can also select "Mark"*, "Mark all"*, "Unmark"*,
"Unmark all"* from "Delete" or "Mark/Unmark" by
pressing M[Menu].
䋪䋺 Items displayed vary depending on the status of
an event.
[Delete]
Delete the selected ivent Date counter.
䋪䋺 Not displayed on the Detail screen.
Using Date Search
You can find the date (year, month, date) when the
designated days passed. For example, you can
easily find the date 100 days after today. You can
check out the date up to 9999 days after today.
aM[Menu]X(Stationery)X"Remembe
ring dates"X"Date search"XPerform
the following operations
•I[Reset] : Reset the set value.
[Start Date]
Specify the date to start searching. Use J and dial
keys to enter the date.
[After]
Enter the number of days after the start date using dial
key. For example, to find the date 100 days after "Start
Date", enter "100".
[Result]
Show the date when the designated days passed.
Custom Menu
Quick Access to
Frequently Used
Applications
You can quickly access frequently used functions
by saving them to the Custom menu.
Creating the Custom Menu
You can save up to 10 frequently used functions to
the Custom menu.You can also change the default
functions.
Ex: When you assign a function to unregistered
custom menu item [Menu 9]
aM[Menu] (for 1+ seconds) Xselect
[Menu 9] XI[Add]
The "Add new" screen opens.
䂓To change the assigned function
Select the function to re-assign X press I
[Edit]
bSelect a function
The selected function will be registered in the
Custom menu.
• A currently registered function cannot be
registered again.
cSelect an unused menu locationXI
[Add]
Applications that can be registered to the Custom
menu are listed.
dSelect applications
• You cannot select already registered
applications.
Using the Custom Menu
aThe Stand-by screen XM[Menu]
(for 1+ seconds)
• You can also perform the
following steps:
M [Menu] XI
[Custom]
bSelect a function to
launch
Sub Menu on the Custom Menu Screen
aCustom menu screen (P238)XM
[Menu]XPerform the following
operations
[Add new]䋪1
Add applications selected from the list.→P238
[Open]䋪2
Launch the selected application.
[Edit]䋪2
Edit registered applications.
[Delete]䋪2
Delete the selected application.
[Delete all]
Delete all registered applications.
XC[OK]
䋪1䋺 Appears when an unused menu location is
selected.
䋪2䋺 Appears when a registered application is
selected.
Default Check new message, Inbox,
Date counter, Calculator, Alarm,
Touchpad settings
Custom Menu
Screen
239
Other Useful Functions
Own Number
Registering Your Name
and Image
You can store your personal information in the
FOMA handset.
aM[Menu]X(Own number)XC
[Detail]XEnter the security code
The Own number detail screen opens.
bM[Menu]X"Edit"
The Edit own number screen opens.
cEnter informationXI[Done]
For steps to register, see Step 2 (P77) "Saving
FOMA Handset Phonebook (Phone) Contacts".
However, you cannot set secret data.
• The pre-installed own number cannot be
changed or deleted.
Sub Menu on the Own Number Detail Screen
aOwn number detail screen (P239)X
M[Menu]XPerform the following
operations
[Mail/URL]
Create a mail and access to a site with the saved
address information.
[Edit]
You can edit the Own number detail screen.→P239
[Send Ir data]
Send information from your Own number detail screen
via infrared communication.
[Copy to microSD card]
Copy information from your Own number detail screen
to the microSD memory card.
[Customize call]
Change a saved number other than own number and
makes a call using the updated number. You can save
the phone number to the Phonebook using C[Save].
XLon the Phone number entry screen XKto
move the cursor to the area to modify XChange the
phone number XA
[Reset]
Delete all registered information of personal data.
Checking Call Duration/
Call Cost
You can check the last and accumulated call
durations and costs of voice and video calls.
• Voice call duration and digital communication
duration (video call duration) are displayed for Call
duration. Call duration includes both incoming and
outgoing calls.
• Call cost includes only outgoing calls. However, calls
made to toll free numbers or the information number
(104) have "0 YEN" or "䋪䋪 YEN" displayed.
• Call costs are stored in the UIM. When a different
UIM is used, the stored call costs appear (storing
started in December, 2004).
㶎䋺 FOMA handsets released before the 901i Series
cannot display the call costs stored on a UIM
(call costs are stored on the UIM).
• The displayed call duration and call cost can be
reset.
• The displayed call duration and cost are
approximate values and may be different from actual
ones. Note that call cost does not include the
consumption tax.
Call duration
Checking Call Duration
You can check the duration of the previous and
accumulated duration of voice and video calls.
aM[Menu] X(Phonebook) X"Call
duration"
[Last call]
Display duration of the latest call.
[Received calls]
Display the total duration of incoming calls from the last
reset to now.
[Dialed calls]
Display the total duration of outgoing calls from the last
reset to now.
[All calls]
Display the total duration of calls from the last reset to
now.
Note
• If you change a mail address in i-mode, the
address saved to this function will not be
updated automatically.
Compose
mail
Attach to
mail
Compose
SMS
Connect to
URL
䋺Creates an i-mode mail addressed to
other than own number or own address.
䋺Create an i-mode mail with Own number
info. attached in vCard file format.
䋺Creates a SMS message addressed to
other than Own number.
䋺Connects to the saved URL.
Note
• The call duration/cost for i-mode communication
and packet communication is not included. For
checking i-mode usage charges, refer to "Mobile
Phone User's Guide
[i-mode]" which is supplied on your i-mode
contract.

240
Other Useful Functions
To reset individual item for "Call duration" settings
Move the cursor to the item to
resetXI[Reset]XEnter the terminal security
codeXSelect "Yes"
To reset all items for "Call duration" settings
You can reset all items at one time.
XM[Menu]X[Reset all]XEnter the terminal
security codeXSelect "Yes"
Total Call Cost
Checking Call Cost
Call cost includes only outgoing calls.
aM
[Menu]
X
(Phonebook)
X
"Call
cost"
X
Total Call Cost
[Last voice call cost]
Display the previous call cost.
[Last video call cost]
Display the previous video call cost.
[Total call cost]
Display the total cost of calls from the last reset to now.
[Reset date&time]
Display the last reset date and time.
Resetting Total Call Cost
aM[Menu]X(Phonebook)X"Call
cost"XTotal Call Cost
bI[Reset]XEnter PIN2X"Yes"
Set call cost limit
Setting a Call Cost Limit
Save the value of the maximum of total call cost to
prevent further expenditure.
aM[Menu]X(Phonebook)X"Call
cost"X"Set call cost limit"
bEnter the security codeXPerform the
following operations
[Set limit]
Set whether to limit the cost of calls.
[Call cost limit]
Set a limit on the cost of calls.
[Notification]
Select how to indicate that the cost of calls has reached
the limit.
If the limit is exceeded
The call cost icon is shown on the Stand-by
display. When you set "Set call cost limit" to
"Sound+Icon", the call cost tone sounds after the
call that broke the limit.
To hide the Call cost icon
You can delete on the screen.
XM[Menu]X(Phonebook)X"Call cost"
X"Delete call cost icon"
World Clock
Using the World Clock
You can view the date and time in major world cities
stored in the FOMA handset.
aM[Menu]X(Stationery)X"World
Clock"
•C[Change]: Change the selected city.The
World time setting screen opens.
aHome icon
* The home city set in the World Clock is
associated with the city set in "Local time zone".
Changing the city in one setting changes the
other city automatically. Therefore, you cannot
change the Home city if "Auto time set" in "Set
Date&Time" is set to "On".
bThe currently specified city and time
Note
• The displayed Call duration returns to 0 (zero)
seconds and starts counting when the duration
exceeds 99hours59minutesand59seconds.
• The ringing and dialing durations are not
counted.
Note
• International call costs to use WORLD CALL are
counted. Call costs to use other international
telephone services are not counted.
Default Off
Off
䋺
Not notify.
Sound+Icon
䋺
Notify using the call cost icon + the call cost
tone.
Icon
䋺
Notify using the call cost icon.
WorldClock List
Screen
a
b
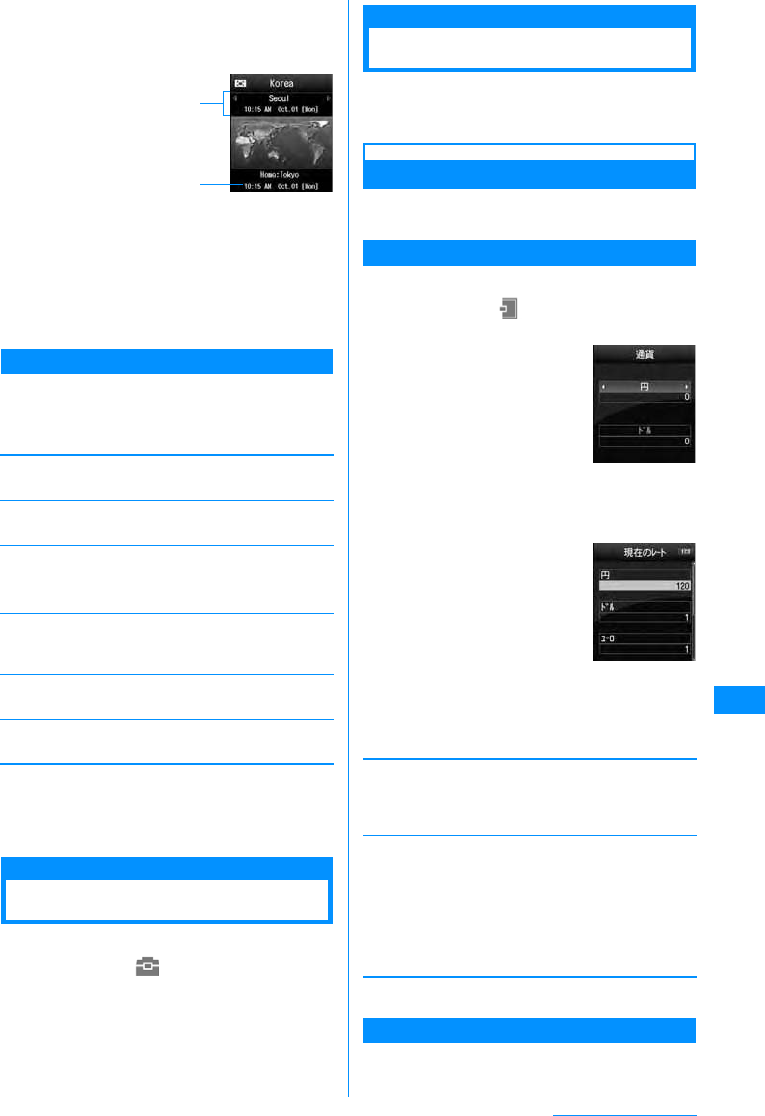
241
Other Useful Functions
bI[Add]
•C[List]: Open the list of cities and select. Press
M[Prev.] or I[Next] to switch the city name
list by page.
aThe selected city name, date, and time
bDate and time of Home (own country)
cPress Jto select a city to add
The selected city is added to the World clock list
screen.
Sub Menu of the World Clock List Screen
aWorld clock list screen (P240) XM
[Menu]XPerform the following
operations
[Change home city]䋪1
Change the city set as Home.
[Change City]䋪2
Changes the selected city.
[Daylight Saving]䋪1
Set whether to use Daylight savings time.
X
+1 hour"/"+2 hours"
[Analog Clock On/Analog Clock Off]
Set whether to display the analog clock on the World
clock list screen.
[Delete]䋪2
Delete a selected city.
[Delete all]䋪2
Delete all cities except the Home city.
䋪1䋺 This option cannot be selected when "Auto time
set" is set to "On".
䋪2䋺 This option is not displayed when the home city
is selected.
Stopwatch
Using the Stopwatch
You can use the FOMA handset as a stopwatch.
aM[Menu]X(Lifekit)X"Stopwatch"
•C[Start]/[Stop] : Start or stop counting.
•I[Reset] : Reset the counted result.
•I[Lap]: Each time you press this key, the lap
time at that moment will be shown at the bottom
of the screen.
Unit Converter
Using the Unit Converter
You can convert the units for measuring currency,
area, length, weight, temperature, volume, and
speed.
Converting Currency Units
This option is useful when you exchange yen to
dollars.
Setting the Exchange Rate
Before converting, set the exchange rate.
aM[Menu]X(Stationery)X"Unit
converter"X"Currency"
bSelect the currency unit fieldXM
[Rate]
cPerform the following operation
•C[List] : List of the items is displayed.
[Currency name field]
Press C [Select] to change the currency name. Up to
7 full-pitch or 15 half-pitch characters can be entered.
"YEN" in the top row cannot be changed.
[Exchange rate field]
Set the exchange rate. Up to 10 digits (including the
decimal point) can be entered. Up to 2 digits can be
entered after the decimal point. For example, to
exchange between US dollars and yen (example: one
US dollar is 120 yen), set 120 to "YEN" and 1 to "USD".
•M䌛䊶䌝䋯
# : Enter a decimal point.
•Q : Delete from the last entered digit.
dI[Done]
Convert Currencies
Convert the one currency to another based on the
rates set for those two currencies.
World Clock
Setting Screen
a
b
Currency
h
ὑᦧ䊧 䊷䊃
⸳ቯ↹㕙
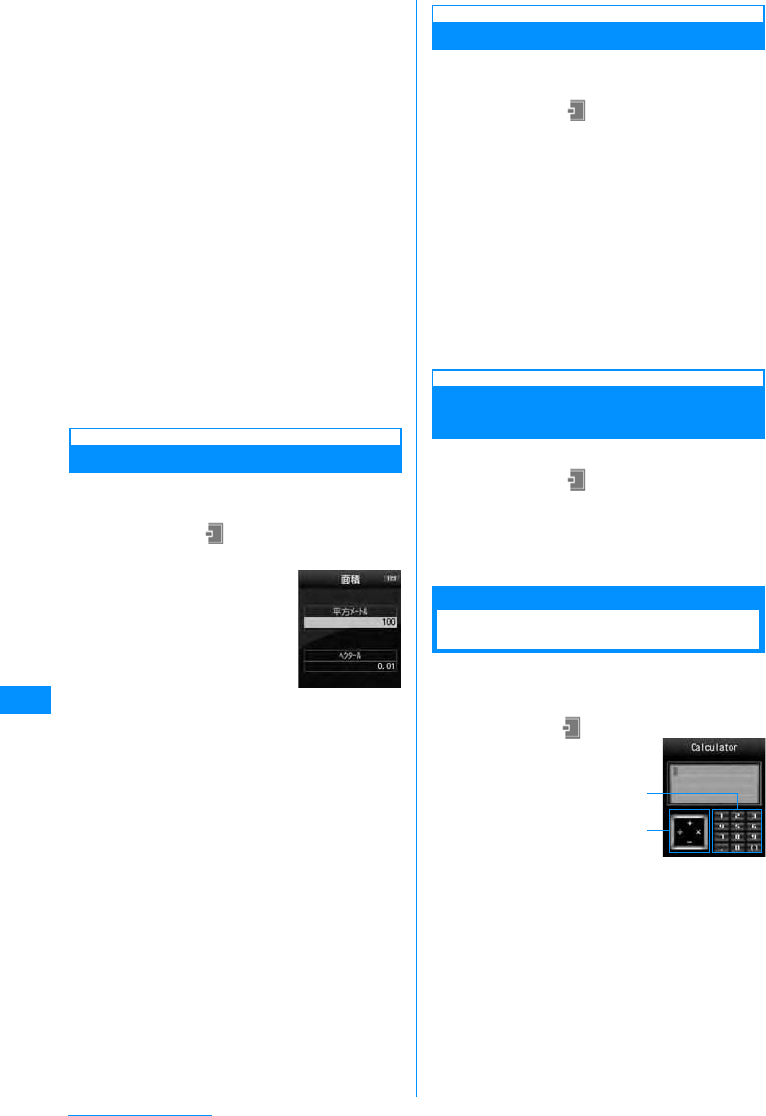
242
Other Useful Functions
aSelect two currencies from the
Currency unit field in the Currency
conversion screen (P241).
•C[List]: The Currency list screen opens.
bEnter the amount in the value entry field
of the source currency
The converted amount will be displayed in the
other value entry field.You can enter/convert in
either value entry field.
• Up to 10 digits (including the decimal point) can
be entered.However, if the converted value
exceeds 14 digits (including the decimal point)
or 2,147,483,647, no more digits can be
entered.
• If the currency in the Currency unit field is
changed after the amount was entered, the new
amount will be displayed in the lower value
entry field using the amount in the upper value
entry field as the source.
•# : Enter the decimal point.
•Q : Delete from the last entered digit.
•I[Reset]: Delete all entered numbers.
Converting Area Units
Convert one defined area unit to another type of
defined area unit.
aM[Menu]X(Stationery)X"Unit
converter"X"Surface"
bSelect a unit in the Surface unit field
(two places)
•C[Unit]: The unit list screen opens.
cEnterthevalueinthe value entryfieldof
the source surface
The converted value will be displayed in the other
value entry field.You can enter/convert in either
value entry field.
• The description of the values is the same as for
the Currency conversion screen.
Converting Temperature Units
You can convert temperature between Fahrenheit
and Celsius.
aM[Menu]X(Stationary)X"Unit
converter"X"Temperature"XEnter
temperature either in "Celsius" or
"Fahrenheit"
The converted temperature will be displayed in the
other value entry field. You can enter/convert in
either value entry field.
• From -40 to 309, or up to 10 digits (including –
(minus) and the decimal point) can be entered.
•M[-]: Enter - (minus) before the value.
•# : Enter the decimal point.
•Q: Delete from the last entered digit.
•I[Reset]: Delete all entered numbers.
Converting Length, Weight,
Temperature, Volume, and Speed
Units
aM[Menu]X(Stationery)X"Unit
converter"X"Length"/"Weight"/
"Temperature"/"Volume"/"Velocity"
Perform the same steps as in "Converting Area
Units" (P242).
Calculator
Using the Calculator
You can use the Calculator to perform arithmetic
operations, memory calculations, percentage
calculations, etc.
aM
[Menu]
X
(Stationery)
X
"Calculator"
aKeyboard
Press the dial keys, #, or * to operate.
bArithmetic operation (+, -, X, ˜ (/)):
Press K,C to operate.
bCalculating
•* : Enter a decimal point.
•# : Enter ( ) parentheses.
•Q : Delete from the last entered digit.
•I[AC] : Clear all entered numbers and
calculated results.
Area unit
conversion
screen
Calculator
a
b
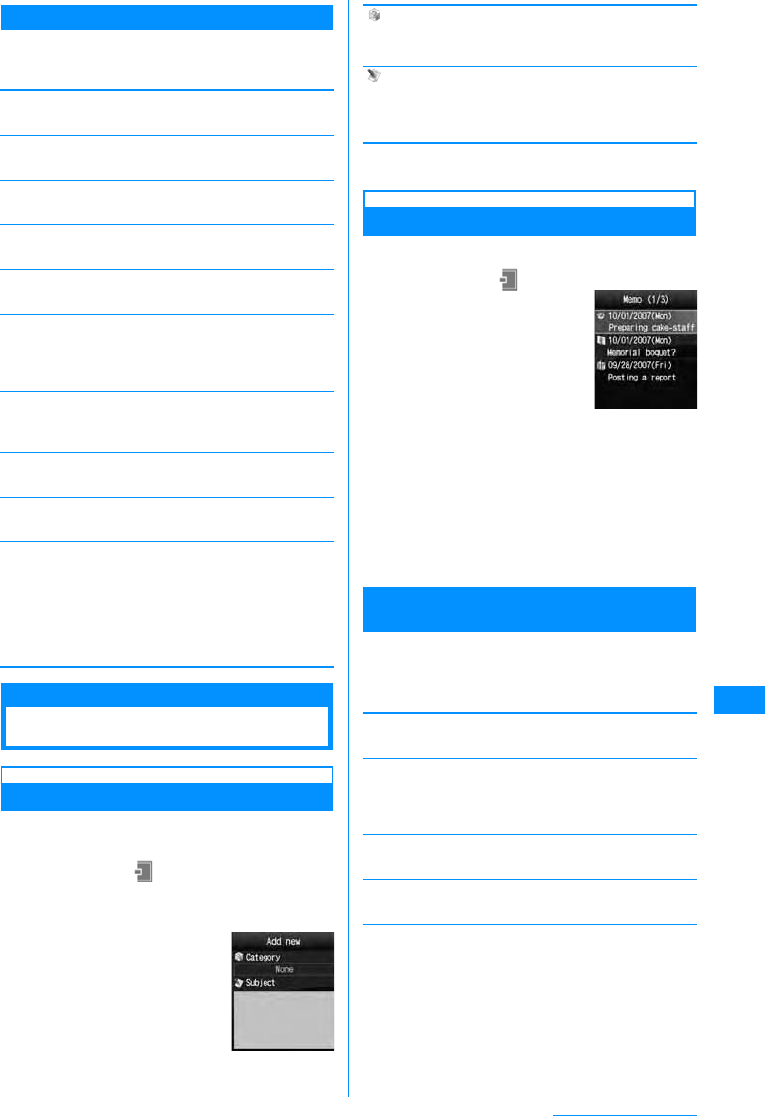
243
Other Useful Functions
Sub Menu on the Calculator Screen
aCalculator screen (P242)XM[Func.]
XPerform the following operations
[䋫䋯䋭]
Switch the sign (+/-) of the entered number.
[sin]
Calculate the tangent of an angle.
[cos]
Calculate the tangent of an angle.
[tan]
Calculate the tangent of an angle.
[log]
Calculate the logarithm of a number.
[ln]
Calculate the natural logarithm of a number.
Calculate the natural logarithm of the specified positive
value (logarithm with the base of e).
[exp]
Calculate the value of a number raised to an
exponential level.
[sqrt]
Calculate the square root of a number.
[deg]
Set the unit of angle to "degree".
[rad]
Set the unit of angle to "radian".
Radian expresses an angle using the constant number
㱜(180 degrees equal䊶adians).䇭
One radian (360 degrees/2
㱜
) is approximately
57.29578 degrees. One degree (2
㱜
/360 degrees) is
approximately 0.01745 radian (where
㱜
=3.141592653).
Memos
Using Memos
Creating Memos
Create and save a memo. Up to 30 memos can be
registered.
aM[Menu]X(Stationery)X"Memo"X
I[New]XPerform the following
operations
•C[List] : List of the items is
displayed.
[ (Category)]
Select a type (category) of Memo.Icons vary
depending on the selected category.
[ (Subject)]
Enter a memo. Up to 50 full-pitch or 100 half-pitch
characters can be entered. A blank memo cannot be
registered.
bI[Done]
Viewing a Memo
You can list and view registered memos.
aM[Menu]X(Stationery)X"Memo"
bSelect a memo to view
The Memo detail screen opens.
•C[Edit] : The new memo creation screen
opens.
•I[Mail] : Compose message screen on
which the contents of "Category" and "Memo"
are inserted in the body opens.
Sub Menu on the Memo List Screen/Memo
Detail Screen
aMemo list screen (P243)/Detail screen
(P243)XM[Mene]XPerform the
following operations:
[Add new]
Register a new Memo.→P243
[Send via]
Send the selected memo as an i-mode mail attachment
or via Infrared communication. Also, you can send all
memo via Infrared communication.
[Edit]
Edit the selected Memo.→P243
[Delete]
Delete the selected Memo.
[Multiple choice]䋪
Select and delete memos.
XPlace check marks next to memo to
deleteXI[delete] X"Yes"
• You can also select "Mark all" or "Unmark all" from
"Mark/Unmark" by pressing M[Menu].
New Memo
Creation Screen
Memo List
Screen
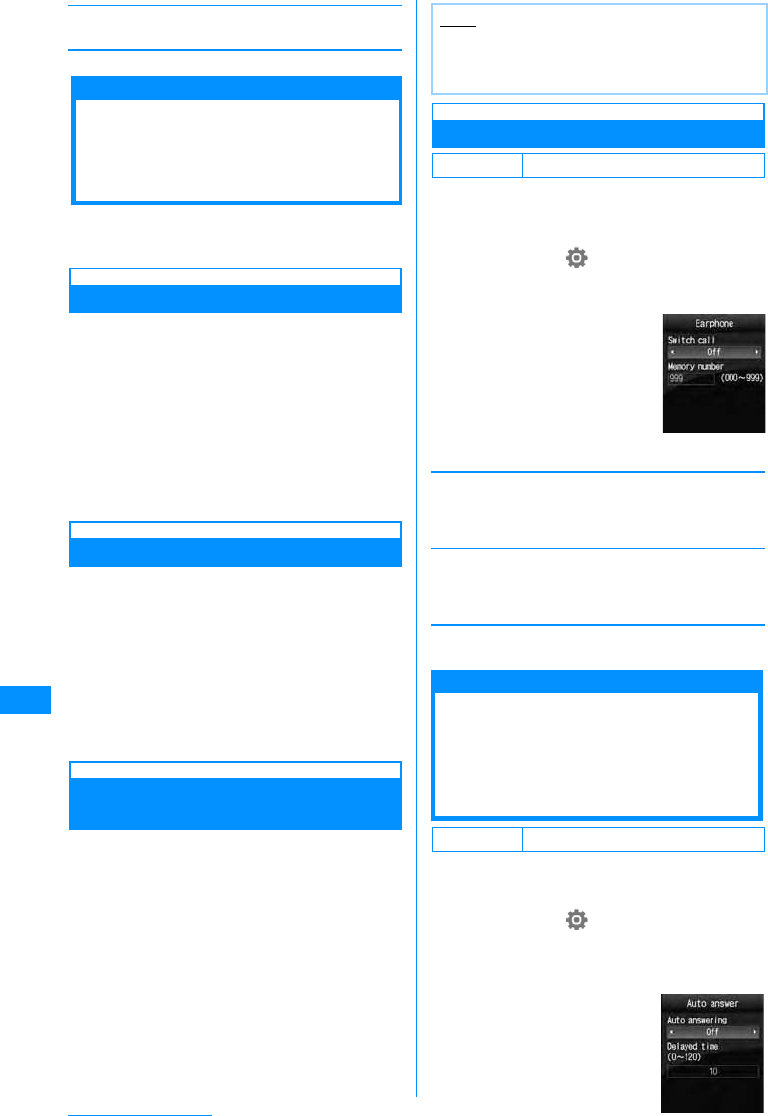
244
Other Useful Functions
[Copy to microSD card]䋪
Copy the selected Memo to the microSD memory card.
䋪䋺 Not displayed on the Detail screen.
Talking Using the
flat-plug earphone/
microphone with switch
You can connect an flat-plug earphone/microphone
with switch (optional) to the FOMA handset to make
and receive calls.
Making a Call Using the Switch
Press the switch of the flat-plug earphone/
microphone with switch to make a voice call to the
number assigned to the memory number of the
Phonebook set under the Earphone setting.
aPress the switch of the flat-plug
earphone/microphone with switch
three times.
bTodisconnect the call, presstheswitch
of the flat-plug earphone/microphone
with switch (for 1+ seconds)
Receiving a Call Using the Switch
aA call arrives XPress the switch of the
flat-plug earphone/microphone with
switch
Answer the call.
• When a video call arrives, the camera image is
sent to the other party.
bTodisconnect the call, presstheswitch
of the flat-plug earphone/microphone
with switch (for 1+ seconds)
Receiving an Incoming Call
during a Call
If Call waiting service is subscribed and activated
when a voice call arrives during another voice call,
you can answer the second call by pressing the
switch of the flat-plug earphone/microphone with
switch.
aA call arrivesXPress the switch of the
flat-plug earphone/microphone with
switch
The active voice call is placed on hold and you can
answer the incoming call.
bTodisconnect the call, presstheswitch
of the flat-plug earphone/microphone
with switch (for 1+ seconds)
Configuring Switch Actions
Specify the party to call using a memory number of
the Phonebook in the FOMA handset when
connecting the flat-plug earphone/microphone with
switch.
aM
[Menu]
X
(Settings)
X
"Call/VT/
Dialing"X"Earphone"XPerform the
following operations
[Switch call]
Select "On" to enable making calls by pressing the
switch of the flat-plug earphone/microphone with
switch.
[Memory number]
Enter the memory number from the Phonebook.
This option can be selected from the Phonebook
search screen by pressing C[Search].
bI[Done]
tAuto Answer
Automatically Receiving a
Call Connecting the
flat-plug earphone/
microphone with switch
You can set to receive a call automatically when the
flat-plug earphone/microphone with switch is
connected after the set ring time has elapsed.
aM
[Menu]
X
(Settings)
X
"Call/VT/
Dialing"X"Incoming voice call"X"Auto
answer"XPerform the following
operations
Note
• When using the flat-plug earphone/microphone
with switch, a call will not be terminated when the
handset is closed during the call.
Default [Switch call] : Off
Default Auto answering: Off
Earphone
Setting Screen
Auto Answer
Setting Screen
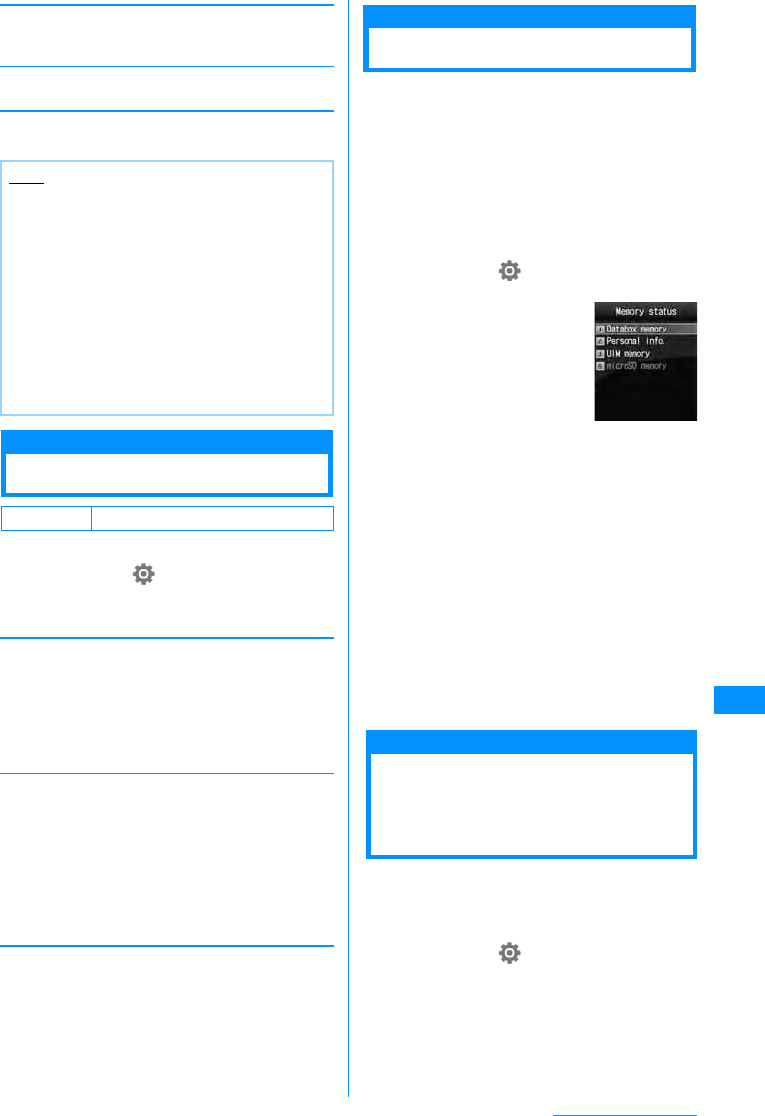
245
Other Useful Functions
[Auto answering]
Select "On" to enable receiving calls automatically
using the flat-plug earphone/microphone with switch.
[Delayed time]
Enter the time until the call is automatically received.
bI[Done]
Hour Indication
Chiming the Hour
Set whether to sound a tone each hour, on the hour.
aM[Menu]X(Settings)X"Date&time"
X"Hour indication"XPerform the
following operations
[Set sound]
Specify the tone.
X"Off"/"Sound 1"/"Sound 2"/"Sound 3"
Press C[List] to open the Set sound list screen.
Press Jto hear the selected sound. From the list
screen, press I[Play] XHto hear the sound.
[Set time]
Set the time to sound the tone.
Use J to move the cursor to the position and enter
the time with dial keys and switch betweenssssssssss
"AM" and "PM" with C (pressing C in the time field
opens the Time settings screen that allows you to enter
time with dial keys and H).
• Depending on the settings in "Date&Time format",
the display order or format for the date and time may
differ. P106
bI[Done]
Memory status
Checking Memory Usage
You can check used and free space of the FOMA
handset memory. If a microSD memory card is
inserted, you can also check the usage of the
microSD memory card.
•
The space used in the FOMA handset includes the
files/dat
a for the following functions
- Data box (My Pictures, i-motion, Melody, and
Music)
- Phonebook - Schedule - Holiday
- Memo - To Do - Date search
aM[Menu]X(Settings)X"Other"X
"Memory status"
bSelect a memory to view
X
"Data box memory"/"Personal info."/"UIM
memory"/"microSD memory"
Databox memory
䋺Show the capacity of the "Data
box".
Personal info.
䋺Show the amount of saved data in
the Phonebook, Schedule, Holiday,
Memo, To do, and Date counter.
UIM memory
䋺Show the memory status of the UIM.
microSD memory
䋺<*StepCLnHLead2l>Show the
memory status of the microSD memory
card.
Reset/Clear
Restoring Various
Function Settings to
Their Defaults
You can restore the settings of various functions to
the defaults.
• For functions that can be restored to the defaults,
see the "Menu List" (P282).
aM[Menu]X(Settings)X"Other"X
"Reset/Clear"X"Reset settings"X
"Yes"XEnter the security code
Note
• When the Voice mail service, Call forwarding
service, or Record message is activated, Auto
answer is not available to receive a video call
with the FOMA handset closed.
• If the Auto Answer ring time is set to the same or
shorter duration as the Voice mail or Call
forwarding service, or Record message, this
function takes precedence. However, if the ring
time is set to the same duration as the response
time in Record message, this function starts
when the set ring tone sounds or the handset
vibrates twice before the response time.
Default Set sound : Off
Memory Status
Screen
246
Other Useful Functions
Clear memory
Deleting All Saved Data at
Once
Delete the saved data.
aM[Menu]X(Settings)X"Other"X
"Reset/Clear"X"Clear memory"
bCheck off the items to be deleted X
I[Done] X"Yes" XEnter the
security code
Pre-installed data
䋺Delete default data in "Data box".
User-defined data
䋺Delete all data other than default
data in "Data box".
PIM data
䋺Delete data in the "Phonebook" and
"Stationery".
To delete data saved on the microSD memory card
You can delete all data saved on the microSD
memory card.
XM[Menu] X(Settings) X"Others" X
"Reset/Clear" X"Clear microSD" X"Yes" X
Enter the security code
Note
• Perform "Reset settings" only when the battery
level is sufficient to complete the task.
• While resetting, applications/communications
are not available
•
After performing "Reset settings" , the ticker of
the i-Channel will not appear. When the
information is automatically updated, or you
download the latest information by pressing
Q for 1+ seconds, the ticker reappears
automatically
.
Note
• The total call duration and total call cost will not
be deleted.
• Protected data is also deleted.
• Data saved in the FOMA handset will not be
deleted.
<Pre-installed data>
• Some files that is used as default data or used
for default settings are not deleted.

247
Entering Text
Character Input.................................................................................................................. 248
Entering Characters.......................................................................................................... 249
Configuring Character Input Settings ....................................................... Input Setting 251
Modifying/Registering Common Phrases.................................................................Edit 251
Copying/Cutting and Pasting Characters ....................................................................... 252
Using the Kuten Code to Enter Characters ...................................... Kuten Code Input 253
Registering Frequently Used Words ............................................................... Edit word 253
Initializing Learned Data...................................................................... Reset Learnt Info 253
Using Downloaded Dictionaries ...................................................Download Dictionary 254
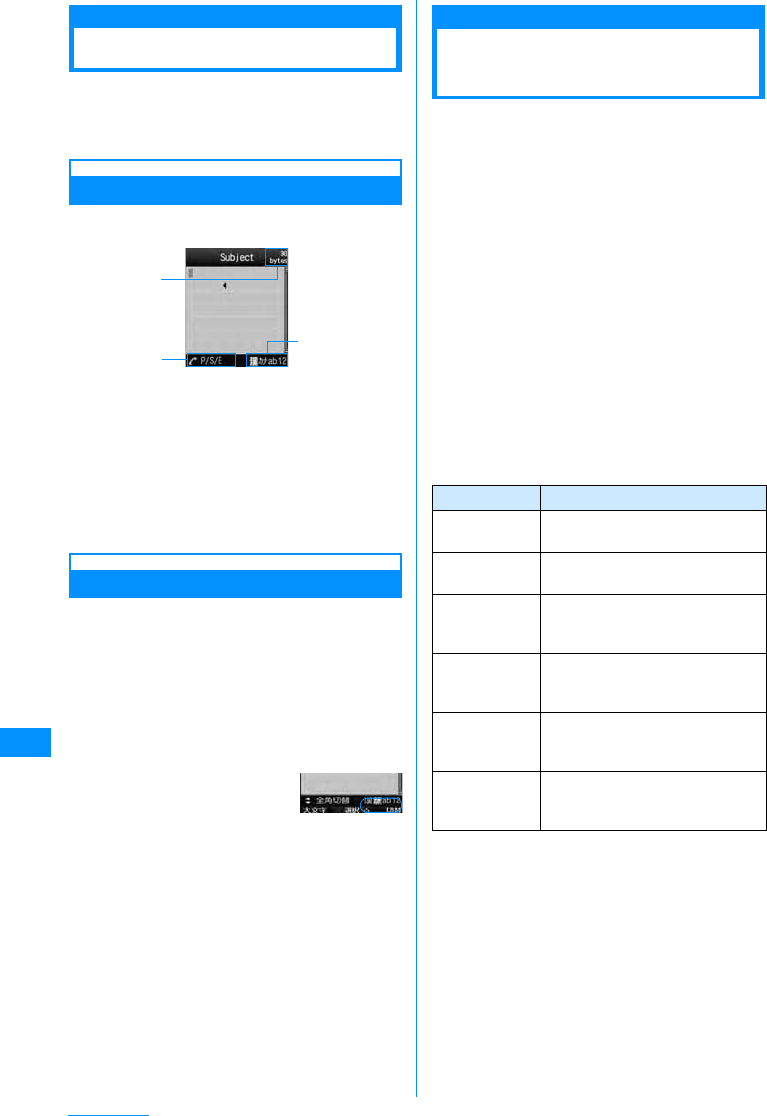
248
Entering Text
Character Input
Various operations require entering characters,
such as registering to the Phonebook or creating
mail. Learn how to enter characters to fully use the
FOMA handset.
Character Input Screen
The Character input screen shows the current input
mode and operation guide.
aAvailable number of characters
Indicates the number of remaining characters
which can be entered, in bytes.
bOperation guide field
Shows switching among pictographs, symbols,
and emoticons, and switching between full- and
half-pitch characters.
cInput mode field
Shows the input mode.
Switching Input Modes
Switch the input mode dependingon the characters
to enter.
• In some input modes, you can switch between full
and half-pitch characters.
• Depending on the input screen, it may not be
possible to switch input modes.
aCharacter input screen(P248), press
I[Mode]
bI[Change]/
JXC[Select]
Each press of I[Change] switches the input
mode. Pressing H before C [Select] switches
between full and half-pitch (excluding Hiragana or
Kanji input mode).
• After switching the input mode, you can enter
characters in the selected input mode without
pressing C [Select].
ṽ䋺 Hiragana or Kanji characters input mode
䉦(䍔䍣)䋺 Katakana characters input mode
a/A䋪(ab/AB䋪)
䋺 Alpabetic characters input mode
1 (12) 䋺Numbers input mode
䋪䋺 Pressing M [Upper] changes to upper case.
Entering Pictographs/
Symbols/Emoticons
You can switch the input modes of pictographs/
symbols/emoticons using A.
• Depending on the current input screen, these
characters may not be entered or modes may not be
switched.
aCharacter input screen (P248) XA
Each press of A switches the input mode, and
the list screen opens.
⛗䋺
Characters input mode
⸥䋺
Full-pitch symbols input mode
䍕䍘䍼 䍑䋺 Half-pitch symbols input mode
㗻䋺
Emoticons input mode
bMove the cursor to the desired
pictograph/symbol/emoticon XC
[Select]
The selected character will be entered.
䂓Available Keys on the List Screen and Their
Functions]
CharacterInput
c
b
a
Key Description
#䋯EDisplay list screens in the order of the
screen numbers.
*䋯FDisplay list screens in the reverse
order of the screen numbers.
1䋯2䋯
3Move the cursor to the left/center/right
of the top row on the Pictograph/
symbol list screen.
4䋯5䋯
6Move the cursor to the left/center/right
of the middle row on the Pictograph/
symbol list screen.
7䋯8䋯
9Move the cursor to the left/center/right
of the bottom row on the Pictograph/
symbol list screen.
0Switch between "Pictograph1" and
"Pictograph2" on the Pictograph list
screen.
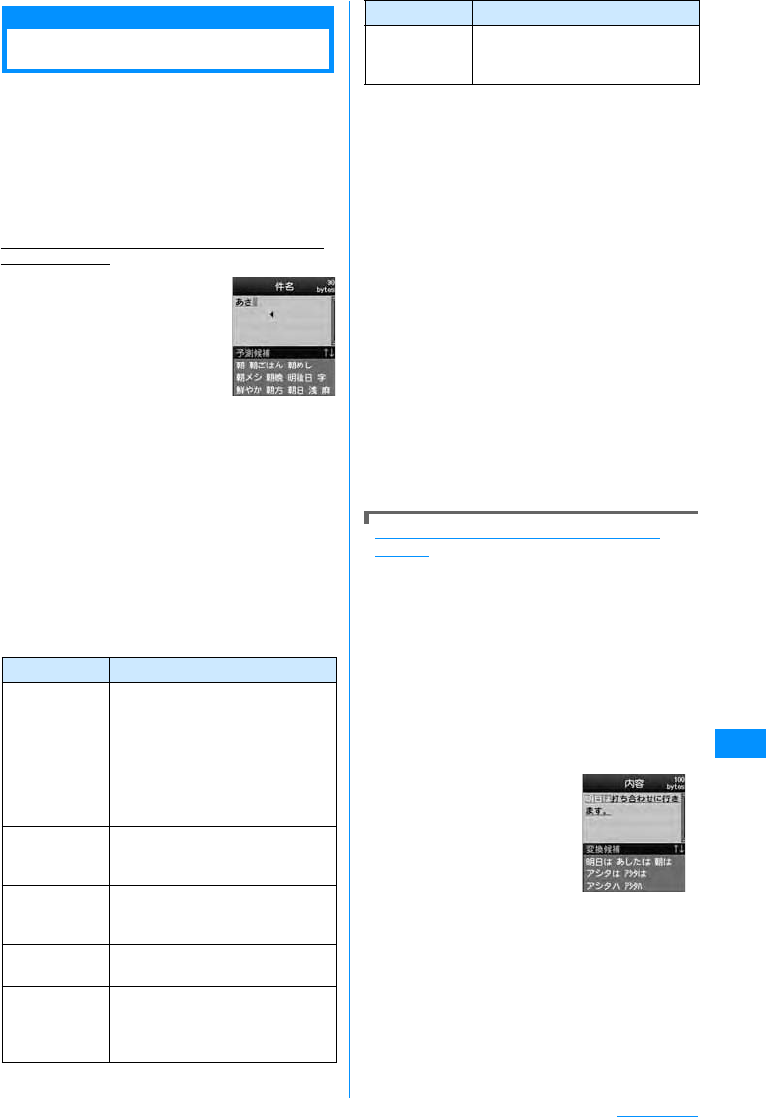
249
Entering Text
Entering Characters
In the Hiragana and Kanji input mode, you can enter
characters using the Prediction function that
predicts conversion options from the characters
being entered, and the Next phrase prediction
function that predicts the next phrase.
• You can turn the Prediction function on or off in
"Prediction" in "Input setting".
• For characters that can be entered with the keys,
see "Dial Keys Assignments to Characters" (P296).
Example: Entering characters in the Hiragana and
Kanji input mode
aEntering on Character
input screen(P248)
Character Entry field
Prediction option field
Conversion options predicted
by the Prediction function are
displayed.
• If the Prediction is set to
"Off", conversion options will not appear.
• Approximately 1.5 seconds after characters
were entered, the cursor moves to right
automatically and the entered characters are
fixed (Auto cursor function). However, this
function does not work in the numeric input
mode. The Auto cursor function can be
disabled, or the duration before characters are
fixed can be changed.→P250
• Pressing R also fixes the entered characters
(pressing D also fixes characters in other than
the Hiragana and Kanji input mode).
䂓The usable keys and function except for entering
character
bUse Hto move the cursor to the
conversion option field
•C [Set]: Fix the entered characters. In the
Hiragana and Kanji input mode, press this key
to fix the characters without converting them.
{0>M䌛䉦䊅⧷ᢙ䌝䋺<}
•M [KanaA1]: Display conversion options
combined with Katakana and alphanumeric
characters.
•I[Conv.]: Display conversion options without
using the Prediction function. Press when there
is no conversion option you want to enter at the
prediction option field.
cMove the cursor to the characters to
convert XC[Select]
The entered characters are fixed. Conversion
options predicted by the Next phrase prediction
function appear in the display area. If desired
characters are displayed, perform Step 2 ? 3 to
select and enter the characters.
•Press
Q to cancel conversion and to resume
entering characters.
Converting Characters without the Prediction
Function
Perform the following steps if desired characters
are not shown as conversion options or if the
Prediction is set to "Off":
a Enter characters on the Character input
screen(P280)
• After entering characters, if the cursor is in
the Predicted conversion option area, press
Q to move the cursor to the character
input area.
bI[Conv.]:
onversion options for the highlighted area will
be displayed.
• To change the
highlighted area, use
J to move the cursor.
c Use H to move the
cursor to the conversion
option display area
d Move the cursor to the
characters to convert →
C [Select]
The entered characters are fixed. As each
phrase is converted, the next phrase will be
highlighted.
Key Description
**Toggle between upper and lower
case.
The key is not available for characters
that cannot be toggled and in the
Numeric input mode. Characters that
can take a voiced symbol will be
toggled after the voiced symbol is
added.
#䋯DEnter a line feed to characters
converted or fixed. Only $D$ is
available in the Numeric input mode.
#
(1+ seconds)
Restore the previous state of a
character converted or fixed.
X "Yes"/"No"
QErase the character in front of the
cursor.
Q
(1+ seconds)
Erase all characters converted or
fixed after the cursor. When the
cursor is at the end of text, all
characters will be erased.
#Display the characters assigned to a
key in the reverse order by pressing
this key before characters are fixed.
Key Description
250
Entering Text
Sub Menu on the Character Input Screen
• Displayed items vary depending on the options or
entered characters on the Character input screen.
aCharacter input screen (P248)XM
[Menu]XPerform the following
operations
[Common phrases]
Select and enter a saved common phrase.
[Edit character]
Copy or cut characters specifying a range and paste.
Go to Step 2 (P252) in "Copying/Cutting and Pasting
Characters".
[Edit word]
Register a word. → P253
[Quote]
[Input setting]
[Special input]
[Cancel]
Erase all entered characters.
䋪䋺 Use A to switch the input screen.→P248
Entering Common Phrases
You can enter text using common phrases saved in
the FOMA handset.
• As a default, "Original-1" and "Original-2" are empty.
aCharacter input screen (P248) XM
[Menu] X"Common phrases"X"Fixed
sentence"
The selecting of the Common phrase type screen
appears.
bSelect a type XSelect a common
phrase
The common phrase is entered.
Entering Pictographs/Symbols/
Emoticons
You can switch the input modes of pictographs/
symbols/emoticons using A.
• Depending on the current input screen, these
characters may not be entered or modes may not be
switched.
aCharacter input screen (P248) XA
Each press of A switches
the input mode, and the list
screen opens.
⛗䇭 䋺 Characters input
mode
⸥䇭 䋺 Full-pitch symbols
input mode
䍕䍘䍼 䍑 䋺 Half-pitch symbols
input mode
㗻䇭 䋺 Emoticons input mode
bMove the cursor to the desired
pictograph/symbol/emoticon XC
[Select]
The selected character will be entered.
䂓Available Keys on the List Screen and Their
Functions
Fixed
sentence
Edit
䋺Select and enter a saved common
phrase.
䋺You can create and save a common
phrase, or edit a saved common phrase.
→ P251
Phonebook
Own number
䋺Quote an entry to the Phonebook.
䋺Quote your phone number. The
security code is required to quote.
Bar Code Reader
䋺Quote information scanned with the
bar code reader.
Full/Half 䋺Switch between full-/half-pitch input
mode.
Upper/Lower
䋺Switch between upper/lower case input
mode in the Alphabetic mode
Prediction䋺Activate or deactivate the prediction
function. → P251
Auto cursor
䋺Set whether to automatically fix the
entered characters and move the
cursor. → P251
Space
Line Feed
Kuten code
Pictograph
Full symbol
Half symbol
Emoticon
䋺Enter a space before the cursor.
䋺Enter a linefeed before the cursor.
䋺Enter a character using its Kuten code.
→ P253
䋺Select and enter a pictograph from a
list.
䋺Select and enter a full-pitch symbol
from a list.
䋺Select and enter a half-pitch symbol
from a list.
䋺Select and enter an emoticon from a
list.
Note
• Common phrases can be edited/registered.
→P251
• Common phrase list →P300
Key Description
#䋯EDisplay list screens in the order of
the screen numbers.
*䋯FDisplay list screens in the reverse
order of the screen numbers.
1䋯2䋯3Move the cursor to the left/center/
right of the top row on the
Pictograph/symbol list screen.
⛗ᢥሼ৻ⷩ↹㕙
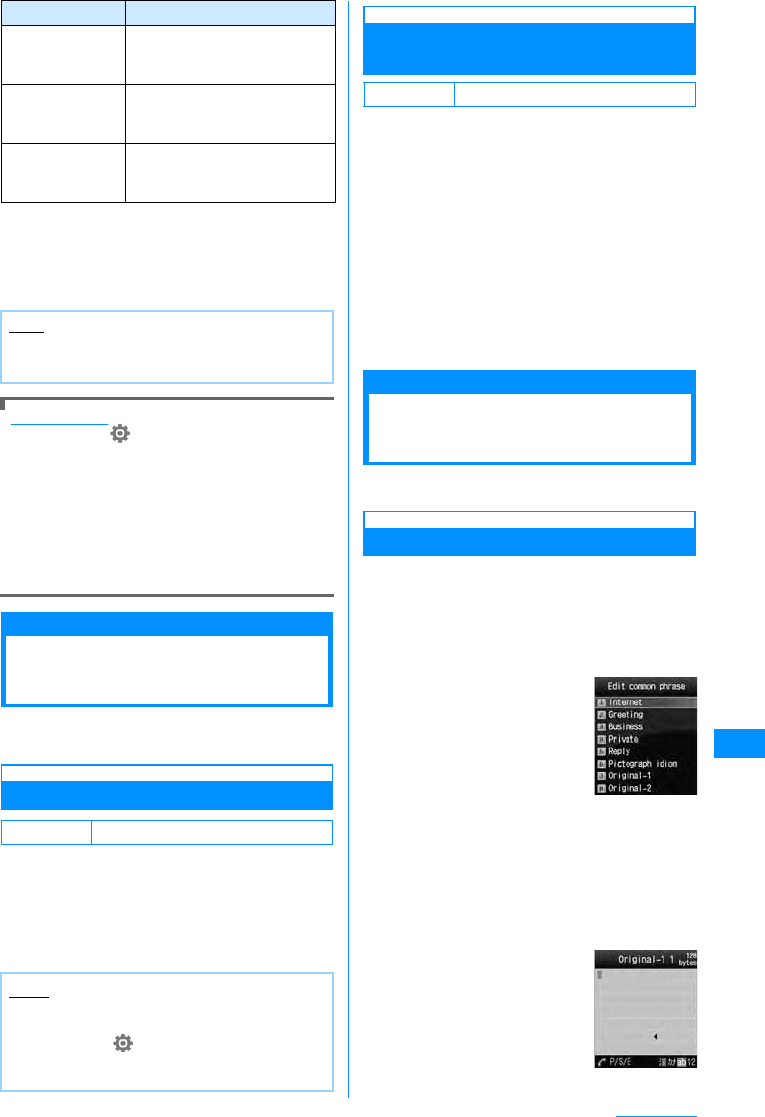
251
Entering Text
䂓Entering Pictographs/Symbols/Emoticons
Consecutively
Characters of each input mode can be
consecutively entered.
XEach input mode screen I[Cont.] Xselect
characters consecutively XI[Set]
Editing Emoticons
aM [Menu] (Settings) X "Others" X
"Character input X "Edit emotion
The Edit Emoticon screen opens.
bSelect a category X Select an emoticon to edit
XI [Edit]
The character input screen opens with the
selected emoticon entered.
cChange the Emoticon XC[Set]
The changed emoticon is overwritten and saved.
Input Setting
Configuring Character
Input Settings
Configure various settings related to character
input.
Set Prediction
Turn On/Off the Prediction function that displays
conversion options predicted to succeed entered
Hiragana characters.
aCharacter input screen(P248) M
[Menu] X"Input setting" X"Prediction"
X"ON"/"OFF"
Fixing Entered Characters
Automatically
You can configure the input method so that the
input characters are automatically fixed after the
timeout you set, then the cursor moves to a new
position for the next input.
aCharacter input screen(P248)M
[Menu] X"Input setting" X"Auto
cursor" XSelect the duration
Off 䋺Characters are not automatically fixed.
Slow
䋺Characters are fixed approximately two
seconds after being entered.
Normal
䋺Characters are fixed approximately one
and a half seconds after being entered.
Fast䋺Characters are fixed approximately one
second after being entered.
Edit
Modifying/Registering
Common Phrases
Register frequently used greetings or phrases as
common phrases to enter them quickly.
Registering Common Phrases
Newly defined common phrases can be saved in
"Original-1" or "Original-2". Up to eight common
phrases can be saved to each folder.
aCharacter input screen(P248) M
[Menu]X"Common phrases"X"Edit"
The common phrase types are listed.
b"Original-1"/"Original-2"XMove the
cursor to a position to add the phrase
to XI[Edit]
Up to 64 full-pitch or 128 half-pitch characters can
be entered.
4䋯5䋯6Move the cursor to the left/center/
right of the middle row on the
Pictograph/symbol list screen.
7䋯8䋯9Move the cursor to the left/center/
right of the bottom row on the
Pictograph/symbol list screen.
0Switch between "Pictograph1" and
"Pictograph2" on the Pictograph
list screen.
Note
• Symbol and Special Characters list → P297
• Pictograph and emoticon lists→P298, P299
Default On
Note
• You can also set the Prediction input by
performing the following steps:
M[Menu]X(Settings) X"Others" X
"Character input" X"Prediction input" X"On"/
"Off"
Key Description
Default Normal
Edit Common
Phrase List
Screen
Edit Common
Phrase screen
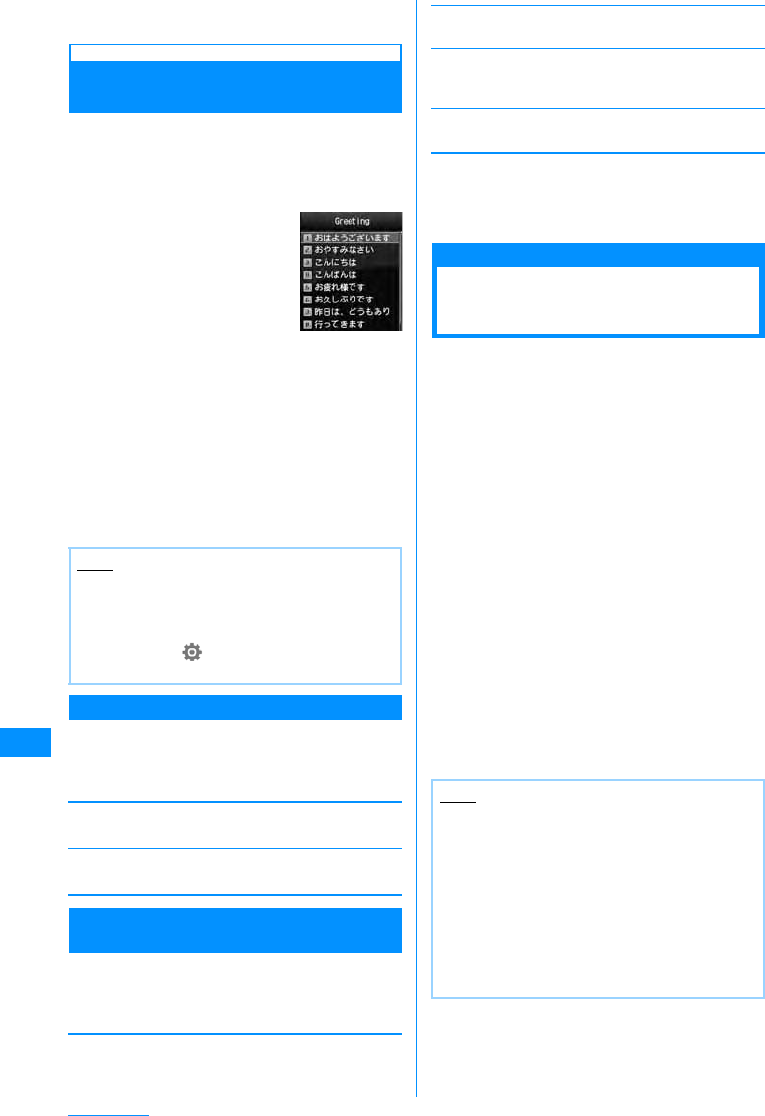
252
Entering Text
cEnter text to register XC[Set]
The common phrase is registered.
Editing Pre-installed Common
Phrases
You can edit a pre-installed common phrase.
aCharacter input screen(P248)
M[Menu]X"Common phrases"X
"Edit"XSelect a common phrase type
bMove the cursor to a phrase XC[Edit]
The Common phrase edit screen opens with the
selected common phrase entered.
•Press
M[Select] to open the full screen with
the common phrase entered.
cEdit the common phrase XC[Set]
The common phrase is registered.
Common Phrase Edit Screen Sub Menu
aTheEditcommonphrasescreen(P251)
XM[Menu] Xperform the following
operations:
Reset all
Restore all common phrases to their defaults.
Cancel
Terminate editing a common phrase.
Sub Menu on the Common Phrase List/
Display All Screen
aCommon phrase list screen (P252) X
M[Menu]XPerform the following
operations
[Delete 1 item]
Delete the selected common phrase.
[Reset 1 item]䋪1
Restore the selected common phrase to its default.
[Category reset]䋪2
Restore all common phrases in the category to their
defaults.
[Cancel]
End editing a common phrase.
㶎1䋺 A common phrase whose type is "Original-1" or
"Original-2". Cannot be selected.
㶎2䋺 Not displayed in the sub menu for full screen
Common phrases.
Copying/Cutting and
Pasting Characters
You can copy/cut characters and paste them to
other locations or on other screens. Copied/cut
characters can be pasted any number of times until
the FOMA handset is turned off or different
characters are copied/cut.
aCharacter input screen (P248) XM
[Menu] X"Edit character" X"Copy"/
"Cut"
bUse Kto move the cursor to the
starting point XC[Select]
cUse Kto move the cursor to the
ending point XC[Select]
dOpen the character input destination
screen XUse Kto move the cursor to
the position to paste
eM[Menu] X"Edit character" X
"Paste" X"Yes"
• To undo a cut or paste operation, select
M[Menu] X "Edit character" X "Undo"
Note
• You can also edit common phrases saved in a
user-defined folder.
• You can also perform the following steps to
save or edit a common phrase.
M[Menu]X(Settings)X"Others"X"Charac
ter input"X"Edit common phrase"
"Greeting"
Common
Phrase List
Screen
Note
• If copied or cut text contains more characters
than the allowable number of characters, the
excess characters are deleted when pasted.
• Characters can be pasted only if copied or cut
text can be entered in the destination text. For
example, Hiragana or Kanji characters cannot
be pasted in the mail address field (half-pitch
alphanumeric characters).
• Line feeds in a copied text string are replaced
with half-pitch spaces if the text is pasted to an
input screen that does not allow linefeeds.
253
Entering Text
Kuten Code Input
Using the Kuten Code to
Enter Characters
You can enter a 4-digit Kuten Code to enter
characters, numeric symbols, etc.
• For the "Kuten Code List", refer to the "Kuten Code
List" on the included CD-ROM in PDFformat
aCharacter input screen (P248) XM
[Menu] X"Special input" X"Kuten
code"
bEnter the Kuten code (4-digit
number) for the character XC
[Select]
The associated character is entered.
• You can also select characters by moving the
cursor with K.
䂓Entering Kuten Codes Consecutively
You can enter consecutive characters using
Kuten codes.
X Kuten code input screen I [Cont.] X
select characters consecutively XI[Set]
Edit word
Registering Frequently
Used Words
You can register up to 100 words not listed as
conversion options, or words with difficultreadings,
along with the readings. Registered words will be
displayed as conversion options when the readings
are entered.
aCharacter input screen (P248) XM
[Menu] X"Edit word"
The Registered word list screen opens.
• To view registered words, select a dictionary
and press C.
bI[Add] XSelect or save the
following item
[Reading]
Enter the reading that is used to find the registered
word. Up to 20 full-pitch Hiragana characters only can
be entered.
[Word]
Enter the word to register. Up to 20 full-pitch or 40 half-
pitch characters can be entered. On the Character
input screen, after the characters of a "Reading" are
entered, the registered word appears as a conversion
option.
cI[Store]
<StepLead2Col>The word is registered to the
dictionary.
Deleting Words
You can delete one word or all words registered
using "Edit dictionary".
Example: Deleting one word
aMove the cursor to the world to delete
on the Stored word list screen (P253)
bM[Menu]X"Delete 1 item" X"Yes"
The selected word will be deleted.
䂓To delete all words
Select M [Menu] X "Delete all" X "Yes" on
the Stored word list screen.
Reset Learnt Info
Initializing Learned Data
Restore the learned data concerning character
entry saved in the FOMA handset to its default.
aM[Menu] X(Settings) X"Others"
X"Character input" X"Reset learnt
info" X"Yes"/"No"
Learned Data
Learned data consists of recorded characters
entered and converted by selecting from
conversion options, or characters fixed by
pressing C without conversion. The next time
you enter the same first character, the learned
word appears as the first conversion option.
Kuten Code
In
p
ut Screen
Note
• You can also perform the following steps to
register a word.
XM[Menu] X (Settings) X "Others" X
"Character input" X "Edit word"
254
Entering Text
Download Dictionary
Using Downloaded
Dictionaries
You can enable dictionaries downloaded from
i-mode sites, etc. and use them for character
conversion. Up to five dictionaries can be enabled.
• Up to ten dictionaries can be stored in the FOMA
handset.
aM[Menu] X(Settings) X"Others"
X"Character input" X"Download
dictionary"
bPlace a check mark next to a dictionary
to enable XC[Enable]
The dictionary is enabled.
䂓To disable a dictionary
Select an enabled dictionary and press C
[Disable].
Downloading dictionaries
You can download dictionaries from the following
site:
<Confirming>
Sub Menu on the Downloaded Dictionary
Screen
aDownloaded dictionary screen (P254)
XM[Menu] XPerform the following
operations
•I[View] : Display details of the dictionary.
[Delete 1 item]
Delete the selected dictionary.
[Delete all]
Delete all listed dictionaries.
Downloaded
Dictionary
Screen
(Image to be
added)
255
Network Services
Network Services Available ............................................................................................. 256
Voice Mail Service............................................................................................Voice Mail 256
Call Waiting....................................................................................................Call Waiting 257
Call Forwarding Service ......................................................................... Call forwarding 259
Nuisance Call Blocking .............................................................Nuisance Call Blocking 259
Caller ID Notification Service ........................................................ Caller ID Notification 260
Caller ID Request .................................................................................Caller ID Request 260
Set In-call Arrival Act .................................................................... Set In-call Arrival Act 260
Selecting Reaction to Incoming Call during a Call ...........................In-call Arrival Act 261
Dual Network .............................................................................................. Dual Network 261
English Guidance................................................................................ English Guidance 261
Service Numbers.................................................................................. Service Numbers 262
Setting Remote Control ......................................................................... Remote Control 262
Multi Number .............................................................................................. Multi Number 262
Using OFFICEED ............................................................................................................... 250
Registering and Using Service ....................Additional Services (USSD Registration) 263
Registering Additional Guidance ................................................. Additional Guidance 264
This manual describes overview of network services through operations of FOMA handset menus.
For details, refer to "Mobile Phone User's Guide [Network services]".
256
Network Services
Network Services
Available
The following DoCoMo network services are
available on the FOMA handset: For descriptions
and usage of each service, see the pages listed in
the table below.
• You cannot use network services while out of service
area or where there are no signals received.
• For details, refer to "Mobile Phone User's
Guide[Network services]".
• For subscription or inquiry, contact the "DoCoMo
Information Center" listed on the back of this
manual.
Voice Mail
Voice Mail Service
When your handset is out of service area or
switched off, or you cannot answer a call, this
service automatically responds to incoming voice/
video calls and records messages.
• Up to 3 minutes can be recorded per voice message,
and messages can be recorded for up to 20 voice
calls and 20 video calls. Messages are retained at
the center for up to 72 hours.
• When a message is recorded, (with the number
of received messages) appears at the Stand-by
display. However, a video message is recorded,
does not appear at the Stand-by display but
Incoming mail information(SMS) notifies you of the
messages.
• When Record Message (P71) is activated
concurrently, to use the Voice mail service first, set
the ringing time of the Voice mail service shorter
than the Response Time of Record Message.
• If you do not answer an incoming voice or video call
when the Voice mail service is activated, the call is
recorded as a "Missed Call" in Received Calls and
the Missed call notification screen opens.
Basic Flow of Voice Mail Service
Step 1 : Set to activate the service
Step 2 : Receive a call䋪
Step 3 : Caller records a message
Step 4 : Replays message
䋪䋺 When you are in a hurry, you may want to
record a message without Response Greeting of
Voice mail service. In such a case, you can
immediately start message recording mode by
pressing #.
Service name
Subscripti
on Monthly
charge
Refere
nce
Voice mail service Required Charged P256
Call waiting Required Charged P257
Call Forwarding
Service Required Free P259
Nuisance Call
Blocking service Required Free P259
Caller ID
notification service Not
required Free P260
Caller ID Request
service Not
required Free P260
Dual Network
service
Required Charged P261
English guidance Not
required Free P261
Multi number Required Charged P262
PublicMode (Drive
Mode) Not
required Free P68
Public Mode
(Power OFF) Not
required Free P70
OFFICEED Required Charged P250
For services requiring subscription, contact
"DoCoMo Information Center" on the back of
this manual.
Note
• "Deactivate" does not mean canceling the
contract of a service such as Voice mail or Call
forwarding service.
• This manual describes overview of network
services through operations of FOMA handset
menus. For details, refer to "Mobile Phone
User's Guide [Network services]".
• Network service is also available overseas.
→P278
• When a new network service is provided from
DoCoMo, it can be registered to the menu.
(Additional Services) →P263
Note
• When you are in the service area or FOMA
handset is ON in Step 2, a ring tone sounds until
Ringing Time set elapses. When an incoming
call is not answered while a ring tone is
sounding, it is connected to Voice mail service
center. The ring time can be changed.
• When a message is recorded in Step 3,
appears at the Stand-by display and missed call
history is stored in Received Calls.
• Even the Voice mail service is disabled, you can
forward an incoming voice call to the Voice mail
center manually using the sub menu.→P66
• To change the setting to connect video calls to
the Voice mail service, make a voice call to
"1412".
257
Network Services
Using Voice Mail Service
aM[Menu] X(Service) X"Voice
mail" XPerform the following
operations
[Active voice mail]
Activate the Voice mail service.
[Set ring time]
Set time before connecting to Voice mail service center
after receiving a call.
[Deactivate voice mail]
Deactivate the Voice mail service.
[Check voice mail setting]
Check the current setting of "Voice mail".
PressM[Menu] to select to activate/deactivate the
Voice mail service or to set a ring time.
[Play messages]
Play back the recorded voice mail message.
[Voice mail setting]
Make a call to Voice mail service center and change
the settings according to the voice guidance.
[Check messages]
Check if new messages are arrived or not.
[Notify missed call]
Through SMS, notify you of the missed calls arrived
while the handset is turned off or out of service area.
You obtain the notification next time the handset is
turned on or moves into the service area.
[Delete voice mail icon]
Delete in the icon area.
[Tone/Vibration message notification]
Activate or deactivate the ring tone when receiving a
new message.
Notify Missed Call
"Notify missed call" is a service that notifies you
through SMS of received calls arrived while the
handset is out of service area or turned off. When
you move into the service area or the handset is
turned on, the short message is sent to you.
• This cannot be operated from a menu.
• For details, refer to "Mobile Phone User's Guide
[Network services]".
a":2001" is enteredXA
Subsequently, follow the voice guidance.
Call Waiting
Call Waiting
When a call arrives during another call, a call
termination during a call sounds. You can place the
active call on hold and answer the other call. Or,
you can place the active call on hold to make
another call.
• To use the "Call waiting" service, set "In-call arrival
act" (P261) to "Answer" in advance. If this option is
set otherwise, a voice call that arrives during another
voice call cannot be answered even if the "Call
waiting" service is activated.
• The caller continues to be charged call fee during
call hold.
• The Call waiting service is not available if:
- Dialing a number or ringing the other party
- A voice call arrives during a video call
- A video call arrives during a voice call
Using Call Waiting
aM[Menu] X(Service)X"Call
waiting"XPerform the following
operations
[Activate call waiting]
Activate the "Call waiting" service.
[Deactivate call waiting]
Deactivate the "Call waiting" service.
[Check call waiting setting]
Check the whether the "Call waiting" service is
activated or deactivated.
Activate missed
call notification
Deactivate
missed call
notification
Check missed
call notification
setting
䋺Activate the "Notify missed call"
service.
䋺Deactivate the "Notify missed call"
service.
䋺Check the status of the "Notify
missed call" setting.
Note
• Up to 5 received calls are provided by 1 missed-
call notification.
• Even when you activate "SMS৻ᜎุ (Reject
All SMS)", the notification will be received.
• Charges do not apply for setting or receiving the
notification (through SMS).

258
Network Services
Answering Call Putting Current
Call on Hold
When there is an incoming call during current Voice
Call, you hear a call termination tone during a call
from the Earpiece and incoming call screen opens.
aReceive a call XA
The active voice call is placed on hold and you can
answer the incoming call. A message "Connecting
3-way" is shown on the 3-way connecting screen.
•I[Switch]: Each time you press this key, the
active call switches to held call or vise versa.
•C[Spk on/Spk off]: Toggle Hands-free On or Off.
•P: Disconnect the active call.
Making a Call Putting Current Call
on Hold
You can make a new voice call, putting a current
voice call on hold.
aVoice call screen (P49)XM[Menu]
X"New call" XEnter a phone number
XA
The new call becomes active, the previous call is
placed on hold, and the connecting 3-way screen
opens.
• To activate a call put on hold, press M[Menu]
X [Switch].
• To disconnect a call put on hold, activate it with
the above procedure and press P.
Answering Incoming Call
Terminating Current Call
Answer an incoming voice call, terminating the
current voice call. You can answer the call even
when using the "Call waiting" service.
aIncoming callXM[Menu]X"End
active call "
A voice call termination screen opens and then the
incoming voice call screen for the incoming call
opens.
䂓To answer after disconnecting a call put on
hold while connecting 3-way, or to answer
after terminating a call on hold
M[Menu] X "End the call" X "End held call"
• The held call is terminated, and you can talk
to the caller of the incoming call.
bA
Sub Menu of the Incoming Call Screen
during a Call
aWhen a call arrives during a call, press
M[Menu] Xperform the following
operations:
Voice mail*1
Connect the incoming call to the Voice mail service
center.
[Call rejection]
Reject an incoming call and hang up.
[Call forwarding]*2
Transfer an incoming call to a specified number.
[End active call]
Terminate the active call. A call is being received.
[Silent/Unmute]
Mute or unmute the current call.
㶎1䋺Not available unless you subscribe to the Voice mail
service.
㶎2䋺Not available if you are not subscribed to the Call
forwarding service or if you have not specified a
forwarding number.
3-way Connecting Screen Sub Menu
aThe 3-way connecting screen XM
[Menu] Xperform the following
operations:
[Switch]
Switch between the active call and held call.
[End call]
Select and terminate a call.
[Silent/Unmute]
Mute or unmute the current call.
[Send My Info.]
Create i-mode mail with own number entered in the
message text.P161
[Search phonebook]*
Search for a Phonebook entry.P83
㶎䋺 <*Ast:2col>This cannot be used when a call is being
made from Redial or a log or while Phonebook is
running.To use this function, terminate those
applications from the task list screen.P231
End all calls
End held call
End all calls
䋺Terminate the active call. The held
call automatically becomes active.
䋺Terminate the held call.
䋺Terminate all calls.
259
Network Services
Call forwarding
Call Forwarding Service
When your handset is out of service area or
switched off, or a call was not answered within the
set ringing time, this service forwards the voice/
video call.
• Forwarded to only a Video phone conforming to
3G-324M if a video call comes in.
• The subscriber to the "Call forwarding" service is
changed the call cost for forwarding a call to a
forwarding destination.
• This service is not available with some billing plans.
• When Record message (P71) is activated
concurrently, to use the "Call forwarding" service
first, set the ringing time of the "Call forwarding"
service shorter than the "Ring time" of "Record
message".
• If an incoming voice or video call was not answered
when the "Call forwarding" service is activated, the
call is recorded as a "Missed call" in "Missed call
logs" and the Missed call notification screen is
displayed.
Basic Flow of the "Call forwarding"
Service
Step 1 : Register a phone number of forwarding
destination
Step 2 : Set to activate the service
Step 3 : Incoming call arrives
Step 4 : Forward call to forwarding destination
Using Call Forwarding Service
aM[Menu] X(Service) X"Call
waiting" XPerform the following
operations
[Activate call forwarding]
Activate the "Call forwarding" service.
[Deactivate call forwarding]
Deactivate the "Call forwarding" service.
[Register the forwarding number]
Register a phone number of forwarding destination.
Press M[Search] to locate the destination from a
Phonebook.
[Setting if forwarding number busy]
Set whether to connect to Voice mail service center
when the forwarding destination is busy.
[Check Call Forwarding setting]
Check the current setting of "Call forwarding" service.
Enable or Disable Forwarding
Guidance
• This cannot be operated from a menu.
• For details, refer to "Mobile Phone User's Guide
[Network services]".
aEnter "1429" XA
Subsequently, follow the voice guidance.
Nuisance Call Blocking
Nuisance Call Blocking
This service rejects incoming nuisance calls. After a
phone number is registered to be rejected, all
incoming calls from that number will be
automatically rejected, and the voice guidance is
played to the caller.
• Up to 30 phone numbers can be registered.
• Even when a call arrives from the phone number to
be rejected, the ring tone does not sound. Also, the
call is not recorded in Missed call logs.
aM[Menu] X(Service) X
"Nuisance call blocking" XPerform the
following operations
[Register nuisance caller]
Set to reject the phone number of the last incoming call
received and you talked over.
Note
• When you are in the service area or the handset
is turned on in Step 3, a ring tone sounds until
"Ring time" you set elapses. When an incoming
call is not answered while a ring tone is
sounding, it is forwarded to a forwarding
destination. The ring time can be changed.
• When the call is forwarded in Step 4, it is
recorded as a "Missed call" in "Missed call logs".
• Even with the "Call forwarding" service is
deactivated, an incoming call can be forwarded
to a forwarding destination manually from the
sub menu.→P66
• You cannot answer a call when you do not
subscribe to the "Call waiting" service even if
you hear a call termination tone during a call.
• When a forwarded call arrives, only the caller's
phone number or name is displayed. The
forwarding party's information will not be
displayed.
Register the
forwarding
number
Set ring time
䋺Register a phone number of forwarding
destination. Press M[Search] to
locate the destination from a
Phonebook.
䋺Set the duration of time from when the
call arrives until the call is forwarded.
260
Network Services
[Register selected number]
Set to reject the phone number you selected.
X"Phonebook" / "Recent call logs" / "Manually"
[Delete all entries]
Delete all phone numbers registered as nuisance
caller.
[Delete last entry]
The last registered phone number is deleted. Repeat
the same steps to delete one phone number from last
saved one at a time.
[Check the number of entries]
Check the number of the rejected callers.
Specifying a Phone Number to Be
Rejected
• This cannot be operated from a menu.
• For details, refer to "Mobile Phone User's Guide
[Network services]".
aEnter "144" XA
Subsequently, follow the voice guidance.
Caller ID Notification
Caller ID Notification
Service
You can notify the other party of your caller ID
(phone number) when you call. Your ID will be
displayed on the screen of the other party's phone,
when the party is using a digital telephony/handset.
• Your Caller ID is valuable information. Be cautious
about sending your Caller ID.
aM[Menu] X(Service) X"Caller ID
notification" XPerform the following
operations
[Activate/Deactivate caller ID notification]
Notify the party of your caller ID when you dialed last
time. You need to enter network security code to
configure the setting.
X"Notify/No notify"
[Check Caller ID notification setting]
Check the current setting of "Caller ID notification".
Caller ID Request
Caller ID Request
This service responds a voice/video call without
Caller ID, plays a voice guidance requesting to send
Caller ID, and terminates the call automatically.
• Calls that were not answered due to the Caller ID
request are not recorded in Received Calls, and the
Missed Call notification screen does not appear.
aM[Menu] X(Service) X"Caller ID
request" XPerform the following
operations
[Activate caller ID request]
Activate the caller ID request.
[Deactivate caller ID request]
Deactivate the caller ID request.
[Check caller ID request setting]
Check the current setting of "Caller ID request".
Set In-call Arrival Act
Set In-call Arrival Act
Activate or deactivate incoming call actions set in
"In-call arrival act" Also, you can check the current
settings.
aM[Menu] X(Service) X"Check
in-call arrival act. setting" XPerform
the following operations
[Activate in-call arrival act]
Activate the reaction set in "Arrival call act"
[Deactivate in-call arrival act]
Deactivate the reaction set in "Arrival call act"
[Check in-call arrival act. setting]
Check the current setting of "Set in-call arrival act".
Note
• This service is applicable only to calls with "User
unset" set as a reason for hiding caller ID.
261
Network Services
In-call Arrival Act
Selecting Reaction to
Incoming Call during a
Call
You can set how to respond to an incoming voice/
video call during a call when you subscribe to the
Voice mail, Call waiting, and Call forwarding
services.
• You cannot respond to an incoming call during a call
if you do not subscribe to the Voice mail, Call
waiting, and Call forwarding services.
• Activate "Set in-call arrival act." to use "In-call arrival
act" options.
aM[Menu] X(Service) X"In-call
arrival act" XPerform the following
operations
[Answer]
Respond to incoming call. Incoming call action will
follow the settings of the Voice mail, Call waiting, and
Call forwarding services, when they are activated.
[Voice mail]
The Voice mail service is used. Voice mail service
comes before "Call waiting".
[Call forwarding]
Forward a call to the phone number you registered
beforehand. "Call forwarding" comes before "Voice
mail" and "Call waiting".
[Call rejection]
Reject a call.
Dual Network
Dual Network
This service allows you to use the mova service with
your FOMA handset phone number. You can switch
between FOMA and mova depending on the service
area.
• You cannot use the FOMA service and mova service
concurrently.
• Switch the services using the Dual Network service
when the handset is not accessing network services.
aM[Menu] X(Service) X"Others"
X"Dual network" XPerform the
following operations
[Dual network switching]
Switch mova to FOMA to make FOMA handset
available.
[Check dual network setting]
Check the status of the setting.
English Guidance
English Guidance
The voice guidance played when a network service
such as Voice mail service is activated or when the
handset is out of service area can be played in
English.
䂓Incoming calls (Guidance to the caller)
䂓Outgoing calls (Guidance to yourself)
• When the caller is using this service at the same
time, the caller's settings for making calls have
precedence over the receiver's settings for receiving
calls.
aM[Menu] X(Service) X"Others"
X"English guidance" XPerform the
following operations
[Guidance Setting]
Configure the guidance setting.
[Check guidance setting]
Check the current setting of "Guidance Setting".
Default Answer
Note
• When switching from FOMA to mova, operate
from a mova handset.
<Dual network switching>
• Switching the network during communication
forcibly terminates it.
Language Description
Japanese Voice guidance is played in
Japanese.
Japanese+
English English guidance will follow the
Japanese guidance.
English+
Japanese Japanese guidance will follow the
English guidance.
Language Description
Japanese
Voice guidance is played in
Japanese.
English Voice guidance is played in
English.
Outgoing+Inc
oming call
Outgoing call
Incoming call
䋺Set guidance languages either for
incoming and outgoing call. Select
the language after you select "Yes".
䋺Set a guidance language for outgoing
call. Select the language after you
select "Yes".
䋺Set a guidance language for incoming
call. Select the language after you
select "Yes".
Continue on the next page
262
Network Services
Service Numbers
Service Numbers
You can make a call to DoCoMo Information Center
and contacts for inquiries concerning malfunctions.
• Depending on your UIM, the items displayed may
differ or some items may not be displayed.
aM[Menu] X(Service) X"Others"
X"Service numbers" XPerform the
following operations
[Malfunction inquiries]
Make a call to contacts for inquiries concerning
malfunctions.
[General Information]
Make a call to DoCoMo Information Center.
Remote Control
Setting Remote Control
You can set a landline phone or pay phone with
push system, or DoCoMo handset to operate the
"Voice mail" or "Call forwarding" service.
• To use the "Voice mail" or "Call forwarding" services
overseas, remote operation must be activated in
advance.
aM[Menu] X(Service) X"Others"
X"Remote control" XPerform the
following operations
[Activate Remote control]
Activate Remote control.
[Deactivate Remote control]
Deactivate Remote control.
[Check remote control setting]
Check the status of the remote control setting.
Multi Number
Multi Number
This service allows you to use up to 2 extra phone
numbers, additional number 1 and additional
number 2, as your FOMA handset phone number in
addition to the basic subscription number.
• On the Dialing/Incoming screen, icons
corresponding to Multi number (Basic number/
Additional number1/Additional number2) appear.
• When dialing from Dialed calls or Received calls, the
Multi number dialed from/received to is displayed,
and this number is used to dial.
Number Settings
Registering Additional Number(s)
You can register or set name, number/ring tone for
additional numbers.
aM[Menu] X(Service) X"Others"
X"Multi number" X"Number settings"
XPerform the following operations
[Basic Number : Name]
Enter a name for the Basic number.
[Phone number]
Display your phone number (Basic number).
[Additional no1 : Name]
Enter a name of additional number 1.
[Phone number]
Enter a phone number of additional number 1.
[Additional no2 : Name]
Enter a name of additional number 2.
[Phone number]
Enter a phone number of additional number 2.
bI[Done]
Setting the Primary Number
You can set a registered additional number as the
primary number used for making ordinary calls.
aM[Menu] X(Service)X"Others"
X"Multi number" X"Set multi number"
X
"Basic number"/"Additional number1"/
"Additional number2" X"Yes"
Confirming the Primary Number
Settings
aM[Menu]X(Service) X"Others"
X"Multi number" X[Check settings]
"Number
settings" screen
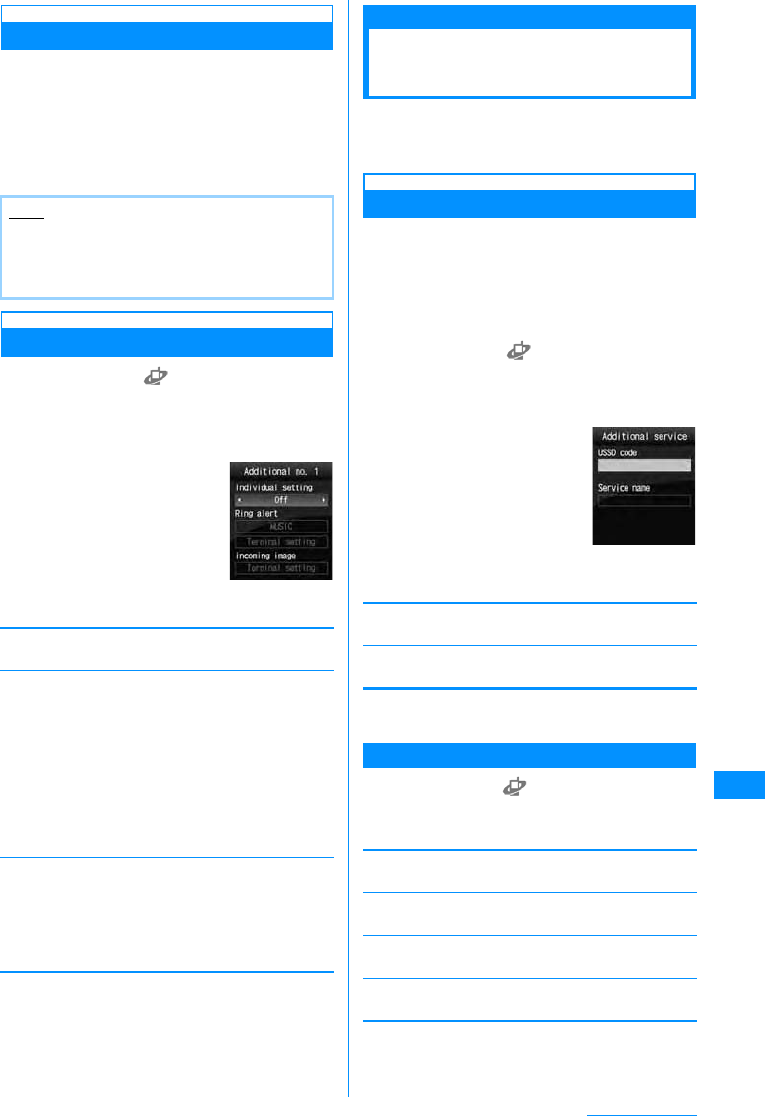
263
Network Services
Setting Dial Number for Each Call
aEnter a phone number
bM[Menu] X"Multi number" XEnter
a name of the additional number
cA
Setting Ring Tone and Image
aM[Menu] X(Service) X"Others"
X"Multinumber" X"Ring tone&image
setting" XSelect an additional number
XPerform the following operations
•C[List] : List of the items is
displayed.
[Individual setting]
Select whether to set the ring tone or image.
[Ring tone]
Set the ring tone.
[Call display]
Set an image to be shown on the incoming call screen.
bI[Done]
Additional Services (USSD Registration)
Registering and Using
Service
When DoCoMo adds a new network service, you
can add the service into the menu. Up to 10 new
network services can be registered.
Adding Service
Register a service name and "Special number"/
"Service number (USSD)" informed from DoCoMo.
• Special number is a number used to connect to
Service Center.
• Service number (USSD) is a code used to notify to
Service Center.
aM[Menu] X(Service) X"Others"
X"Additional Service" XMove the
cursor to "Not recorded" XI[Edit]
XPerform the following operations
[USSD code]
Register Service number (USSD).
[Service name]
Enter a service name.
bC[OK]
Sub Menu on Additional Service List Screen
aM[Menu] X(Service) X"Others"
X"Additional service" XM[Menu]X
Perform the following operations
[Edit]
Modify a selected service.
[Select]䋪1
Perform the selected service.
[Delete]䋪1
Delete a selected service.
[Delete all]䋪2
Delete all services added.
䋪1䋺 Appears only when the recorded item is
selected.
䋪2䋺 This option appears only when more than one
item is recorded.
Note
• When a dial number is selected, the phone
number is followed by ":590# (Basic number)"/
":591# (Additional number 1)"/":592#
(Additional number 2)".
Music
i-motion
Melody
Off
䋺Selects the music saved in "Music" in the
"Data box "folder.→P224
䋺Select a movie/i-mode saved in "i-motion"
in "Data box".→P201
䋺Set the ring tone. DX Select a melody
saved in "Melody" under the "Data box".
→P204
䋺Do not set the ring tone.
Image
i-motion
䋺Select an image saved in "My picture"
under "Data box".→P194
䋺Select a movie/i-mode saved in "i-motion"
in "Data box".→P201
Additional
number setting
Additional
services edit
screen
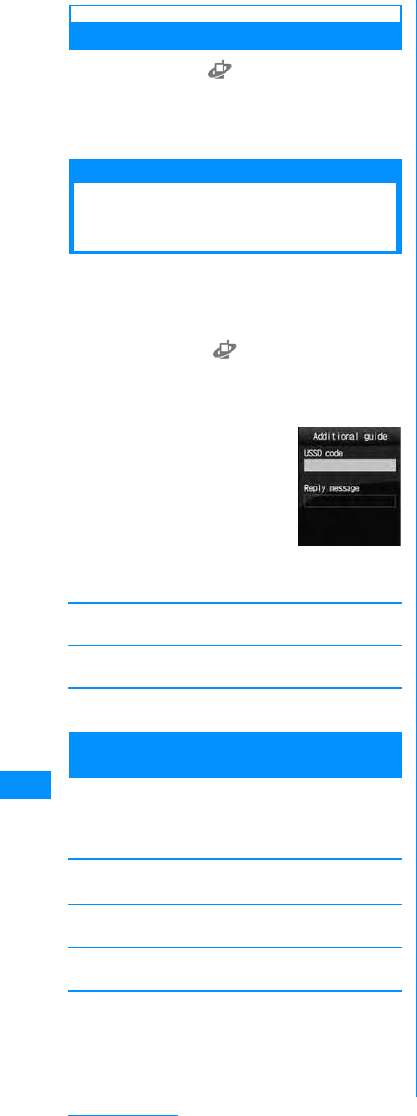
264
Network Services
Performing Added Services
aM[Menu] X(Service) X"Others"
X"Additional service" X
Select a
service
Connect to Service Center.
Additional Guidance
Registering Additional
Guidance
You can register up to 10 guidance for code (USSD)
returned from Service Center when an added
service makes a connection to Service Center with
service code (USSD).
aM[Menu] X(Service)X"Others"
X"Additional guidance" XMove the
cursor to "Not recorded" XI[Edit]
XPerform the following operations
[USSD code]
Register Special number/Service number (USSD).
[Reply message]
Register an Additional guidance name.
bC[OK]
Sub Menu on the Additional Guidance List
Screen
aM[Menu] X(Service) X"Others" X
"Additional guidance" XM[Menu] X
Perform the following operations
[Edit]
Modify the selected guidance.
[Delete]䋪1
Delete a selected/displayed guidance.
[Delete all]䋪2
Delete all guidance.
䋪1䋺 Appears only when the recorded item is
selected.
䋪2䋺 This option appears only when more than one
item is recorded.
Additional
guidance edit
screen
265
Data Communication
Data Communications Enabled from FOMA Handset ................................................... 266
Precautions for Use .......................................................................................................... 266
Before Using...................................................................................................................... 267
Flow Chart for Completing the Data Communication Setup......................................... 267
AT Commands................................................................................................................... 268
CD-ROM ............................................................................................................................. 268
DoCoMo Keitai Datalink.................................................................................................... 268
For details of data communication, refer to "Manual for Data Communication" (PDF format) in included
CD-ROM.
To view "Manual for Data Communication" (PDF format), you must have Adobe Reader (Version 6.0 or
up recommended).
When Adobe Reader is not installed in your PC, you can download the latest version from Adobe
Systems' web site (communication charges apply).
For details, visit Adobe Systems' web site.

266
Data Communication
Data Communications
Enabled from FOMA
Handset
When the FOMA handset is connected to a PC, data
communication is available with packet
communication and OBEX (data transfer).
• This FOMA handset is not compatible with 64K data
communication.
• This FOMA handset is compatible with Remote
Wakeup function.
• This FOMA terminal is not compatible with the FAX
communication.
• This FOMA terminal is not compatible with the DoCoMo
PDA "musea", "sigmarion
㸈
" or "sigmarion
㸉
"
Packet communication
Communication mode charged by the size of data
sent and received. Packet communication is
suitable for the way of using that handset send and
receive the data when needed with connected to
network. Communication speed depends on
communication environment and network
congestion.
Using an access point of DoCoMo internet
connection service such as "mopera U" or
"mopera" which is compatible with FOMA packet
communication, allows you to use data
communication at the maximum rate of 3.6Mbps for
receiving and at 384 Kbps for sending,
This FOMAL705i handset also allows you to use
data communication abroad by using W-CDMA or
access point compatible with GPRS packet
communication.
• Communication charges may become high when
you send or receive great amounts of data.
• The maximum communication speed outside of a
FOMA high speed area is 384 Kbps for receiving and
64 Kbps for sending.
Data Transfer
Data transfer is communication mode for sending or
receiving data using DoCoMo keitai datalink.
Communication charge is not applied.
When you use DoCoMo keitai datalink software, you
need the FOMA USB cable (optional) or FOMA USB
Cable with Charge Function 01 (optional).
Precautions for Use
Usage Fee of Internet Service Provider
When using internet, you will be charged for usage fee
from internet service provider (hereinafter, referred to
as provider) connected. This usage fee is to be paid
directly to the provider, independently of FOMA
service usage fee. For details of the usage fee, contact
the provider.
DoCoMo internet connection service "moperaU" or
"mopera" is available. "mopera U" is a charged
service requiring subscription. "mopera" is a
service free of charge requiring no subscription.
Setting Access Point (Provider, etc.)
Packet communication requires to use an access
point compatible with packet communication
• DoPa access points are not available.
• PHS64K/32K data communication access points for
PIAFS, etc. are not available.
User Authentication for Network Access
Some access points may require user
authentication (ID and password) for connection. In
that case, enter ID and password for connection
using communication software (dialup network). ID
and password are provided from the provider or
network administrator of the access point. For
details, contact the provider or network
administrator of the access point.
Conditions for Packet Communication
Communication using FOMA handset connected
with PC or something requires the conditions given
below. Even with these conditions arranged,
communication may be disabled due to congestion
in the base station or under some radio wave
reception levels conditions.
• FOMA USB Cable (optional) must be available on
the PC.
• FOMA handset must be in FOMA service area.
• The access point must be compatible with FOMA
packet communication.
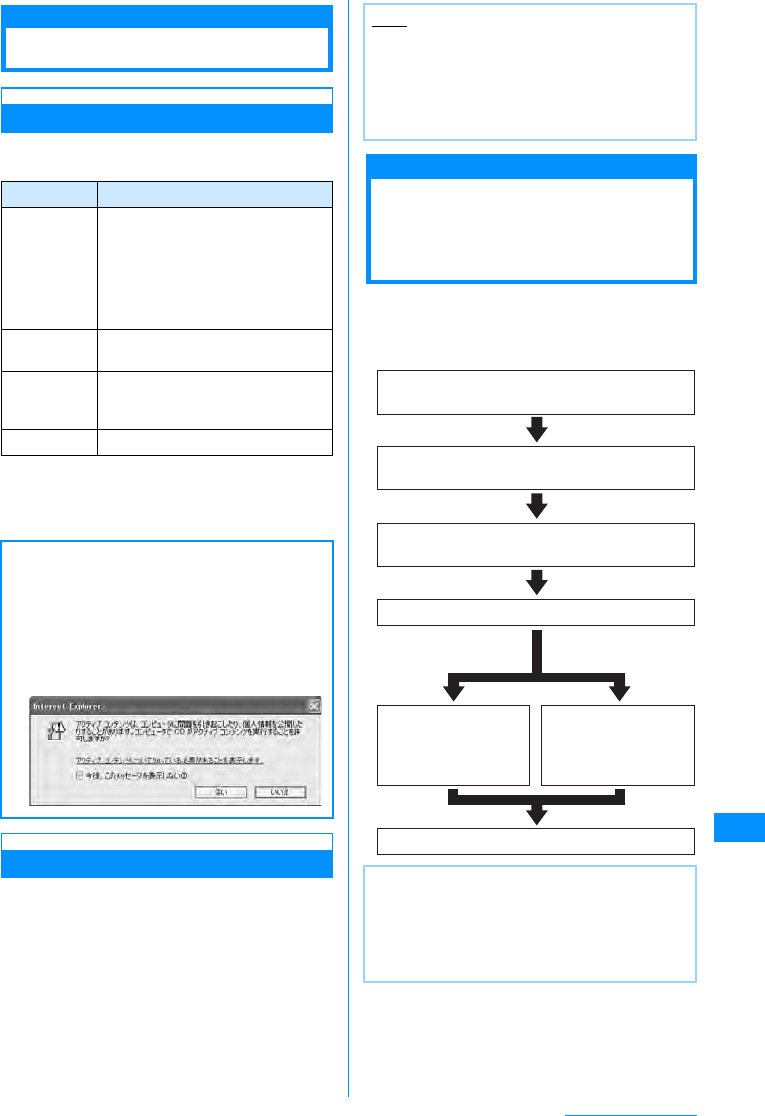
267
Data Communication
Before Using
Operating Environment
PC's operating environmental conditions required
for data communication are given below.
䋪1䋺 DoCoMo does not guarantee proper operation if
you upgrade your OS.
䋪2䋺 Equipments for memory/hard disk may vary
depending on PC system configuration.
Required Devices
To use data communications, the following are
required in addition to the FOMA handset and a PC:
• FOMA USB Cable (optional) or FOMA
Rechargeable USB Cable 01 (optional)
• FOMA L705i CD ROM (accessory)
Flow Chart for
Completing the Data
Communication Setup
This section describes preparation to use packet
communication with FOMA handset connected with
PC. For details, refer to "Manual for Data
Communication" (PDF format).
Item Requirements
PC • PC-AT compatible machine
enabled to use CD-ROM drive
• USB port (Universal Serial Bus
Specification Rev1.1/2.0)
• Display with resolution 800 x 600
dots, High Color (65,536 colors) or
higher recommended
OS䋪1• Windows Vista, Windows XP,
Windows 2000 (Japanese version)
Memory • Windows Vista; 512MB or more
• Windows XP: 128MB or more䋪2
• Windows 2000: 64MB or more䋪2
Hard disk • Empty space of 5MB or more䋪2
When you insert included CD-ROM to a PC, the
following warning screen may appear. This
warning is displayed according to the security
setting of the Internet Explorer. There is no matter
with using the software.
Click [Yes].
• This screen is an example when using Windows
XP The warning screen may differ depending
on the environments of your PC.
Note
• Purchase the specified FOMA USB Cable or
FOMA Rechargeable USB Cable 01. The USB
cable for PC cannot be used because the shape
of the connector is different.
• This manual gives an example when you use
FOMA USB Cable.
Note
• You can also download "L705iCommunication
Setup File (Drivers)" or "FOMA PC Setup
Software" that is contained on the "CD-ROM for
FOMA L705i" from DoCoMo's web site.
http://www.nttdocomo.co.jp/support/download/
Connect FOMA handset to PC using FOMA
USB Cable
Check that you have set USB mode setting to
"Communication mode".
Check for completion of installation
Install the FOMA PC
setting software and
configure the
settings
Connect
Configure the
settings with without
using FOMA PC
setting software.
Install the L705i communication setting file
(Driver)
Continue on the next page

268
Data Communication
Data Communication Software included in "FOMA
L705i CD-ROM (CD-ROM for FOMA L705i)"
L705iCommunication setting file (Drivers)
This file is to be installed on a PC so that
communication or file exchange can be performed
after the FOMA handset and the PC are
connected using the FOMA USB Cable (optional).
FOMA PC Setup Software
This software is to be installed on a PC to quickly
configure settings of dial-up connection, etc. that is
required to perform data communication.
AT Commands
AT command is used to make and confirm function
settings for FOMA handset from a PC. For details,
refer to "Manual for Data Communication" (PDF
format) included in CDROM.
CD-ROM
The bundled CD-ROM contains applications to
perform data communication with the FOMA
terminal, "Manual for Data Communication" and
"Kuten Code List" (PDF). For details, see the
bundled CD-ROM.
<Contained applications/PDF documents>
• L705i communication setting file
• FOMA PC Setup Software
• Introduction to DoCoMo keitai datalink
• "Manual for Data Communication" (PDF)
• "Kuten Code List" (PDF)
• Adobe® Reader® 8.1
DoCoMo Keitai Datalink
"DoCoMo keitai datalink" is software that allows
you to back up your "Phonebook" entries, "Mail",
etc. and edit the data on your PC. DoCoMo keitai
datalink is provided via website of DoCoMo. For
more details and the download, visit the following
DoCoMo website.
http://datalink.nttdocomo.co.jp/
Note
• For details such as transferable data, operating
environment such as supported OS, how to
install/operate the software and restrictions, see
the website above. For how to operate the
software after it is installed, see the help. To use
"DoCoMo keitai datalink", you need to purchase
the "FOMA USB Cable (optional)".

269
Overseas Use
Overview of International Roaming (WORLD WING) ..................................................... 270
Services Available Overseas ........................................................................................... 270
Checking before Using Overseas.................................................................................... 271
Making Calls Overseas ..................................................................................................... 273
Receiving Calls Overseas ................................................................................................ 275
Setting Network Search Mode .......................... Network Search Mode/Network Mode 276
Configuring Preferred Networks...................................................."Preferred NW lists" 276
Displaying Network Name while Roaming............................... Operator name display 277
Activating Roaming Guidance ............................................ Roaming guidance setting 277
Setting to Accept No Incoming Calls during Roaming.............................. Call barring 277
Using Network Services during Roaming....................................................................... 278
270
Overseas Use
Overview of
International Roaming
(WORLD WING)
International roaming (WORLD WING) is a service
that allows to talk or make communications over an
affiliated overseas carrier's network using the same
phone number as that used domestically.
For details of the services available during
international roaming, refer to "DoCoMo WORLD
SERVICE User's Guide". Also, in DoCoMo's
"International service web site", you can see the
latest information on international services and
download the latest issue of "DoCoMo WORLD
SERVICE User's Guide".
Subscribing to WORLD WING
If you subscribed to the FOMA service after
September 1, 2005, a separate subscription is not
required.
• If you subscribed to the FOMA service after
September 1, 2005, a separate subscription is not
required. However, if you unsubscribed to the FOMA
service subscription or canceled the service, a
separate subscription is required.
• If you initially subscribed to the FOMA service before
August 31, 2005 and have not subscribed to
"WORLD WING", a separate subscription is
required.
Services Available
Overseas
Communication services available vary depending
on overseas carriers and/or network used. For
details of communication services available in
international roaming, refer to "DoCoMo WORLD
SERVICE User's Guide" or DoCoMo's web site.
→P270
Communication Services
Available
䋪1䋺 May not be available depending on the carrier or
area.
䋪2䋺 Auto Update is suspended automatically if the
handset is connected to an overseas carrier. To
resume the automatic update of i-Channel
overseas, you need to perform i-Channel
settings again. However, a packet
communication charges apply in addition to the
monthly charge.
䋪3䋺 A packet communication charges apply for Auto
Update of information on the "Basic Channel".
Difference in Communication
Services among Networks
You need to configure the network search mode as
well as preferred network to be searched in order to
use the handset overseas.→P276
䂾: Available
㬍: Not available
䋪: When a call is made, a redial confirmation
screen opens. Select "Redial voice call" to
redial Voice Call.
URL of DoCoMo's "international service web site"
http://www.nttdocomo.co.jp/service/world/
Service Description
Voice call Using the same phone number as
that used in Japan, you can make/
receive calls in a country you stay
and make international calls to
countries other than that you stay in.
Video Phone You can make or receive an
international video call with a user of
an overseas specific 3G carrier or a
FOMA handset user in Japan.
i-mode You can use i-mode to acquire
information of Japan and the country
you stay.
i-mode mail Using the same mail address as that
used in Japan, you can send/receive
i-mode mail.
i-Channel䋪1You can download information
periodically as in Japan.䋪2 You can
also press the i-Channel assigned
key to open a channel list and
download detailed information.䋪3
SMS You can send or receive SMS to/
from a FOMA user in Japan and a
user of an oversea
telecommunication carrier other than
DoCoMo.
Data
Communication
You can connect PC or other devices
to use data communication (packet
data communication).
Service 3G GSM GPRS
Voice call 䂾䂾䂾
Video Phone 䂾㬍
䋪㬍䋪
i-mode 䂾㬍䂾
i-mode mail 䂾㬍䂾
SMS 䂾䂾䂾
i-Channel 䂾㬍䂾
Data Communication 䂾㬍䂾
Service Description
271
Overseas Use
䂓Network for overseas
䋪1䋺 Abbreviation of 3rd Generation Partnership
Project. This is a regional standards
organization for developing common technical
specifications for the third generation mobile
communications system (IMT-2000).
䋪2䋺 Abbreviation of Global System for Mobile
Communications. GSM is one of the standards
for mobile phones unified in Europe.
䋪3䋺 Abbreviation of General Packet Radio Service.
This is a packet communication service that is
widely spread in Europe.
Checking before Using
Overseas
STEP1 : Preparation before departure
STEP2 : Using overseas
STEP3 : Setting after returning to Japan
Preparation before Departure
䂓Subscription
If you have not yet subscribed to WORLD WING
(P270), make a subscription.
• Install UIM subscribed to WORLD WING to
FOMA handset.
䂓Communication services, etc. in countries and
regions
For information such as countries, areas,
telecommunication carriers available, visit
DoCoMo's "International Service Web site".→P270
䂓Charging
• Cautions When Handling the AC Adapter →P21
• Charging Using the AC Adapter →P42, P44
䂓Using i-mode
You have to make "International Settings" in
advance. Select "i Menu" → select "English iMenu"
→ "Options" → "International Settings" to display
setup screen.
䂓Setting network services
You can activate or deactivate the subscribed
network services from overseas. The following
network services can be accessed:
• Caller ID notification service䋪1䋪2
• Voice mail service䋪1䋪3
• Call forwarding service䋪1䋪3
• Caller ID Request service䋪1
• Call Waiting Service䋪1
• English guidance䋪1
• Nuisance call blocking service䋪1
• Roaming guidance䋪1
• Call barring
䋪1䋺 May not be activated in some service
areas.
䋪2䋺 Caller ID may not be sent correctly or not
be sent at all.
䋪3䋺 To operate from overseas, you need to
activate the "Remote control" (P262) while
in Japan in advance.
䂓Convenient functions and services available
overseas
䂓Recommended booklets Other than This Manual
䂓Billing of charges
Overseas charges are billed with your monthly
charge. Note that they may appear on a billing
invoice of the next month or later due to the
situation of the operator of your country of stay.
Also note that the billing invoice for charges in the
same charging period may be sent to you in a
different month.
Network Description
W-CDMA
(3G) W-CDMA is a third generation mobile
communication network complying
with 3GPP䋪1 global standards.
GSM䋪2GSM is the second generation mobile
communication network in digital
communication system that is most
widely used around the world.
GPRS䋪3GPRS is the 2.5 generation mobile
communication system that enables
high-speed packet communication
using GSM.
Functionsand
services Description
Roaming
Guidance (Intl) The other party is notified with a
voice guidance that you are in
international roaming.
Call barring Reject reception during
international roaming.
Dual Clock
Display You can view the date and time in
two cities at once.
Unit converter You can set exchange rate for
currency conversion.
Title Description
Mobile Phone
User's Guide
[i-mode]
Describes how to use i-mode and
i-mode mail overseas and their
fees, etc.
DoCoMo
WORLD
SERVICE
User's Guide
Describes details of international
roaming service including
contents of the service, usage fee,
precautions.
Mobile Phone
User's Guide
(Network
Services)
Describes contents, settings,
precautions, etc., of the network
services.
Note
• This manual contains quick manual "Overseas
Use" that can be used conveniently for
referencing operations. Please reference it
when using FOMA handset overseas.
272
Overseas Use
Overseas Use
䂓Network switching
By default, "Network search mode" is set to "Auto".
It is recommended to set "Network mode" to
"WCDMA only" to save the battery when using in
Japan or in the areas where 3G area networks are
available.→P276
• To switch networks manually →P276
䂓Display on screen
An icon indicating the
connected network is
displayed so that you can
view the available
communication services
(P270). The connected
carrier name also appears
on the Display.
aIcons indicating the connected network
Connected to a FOMA network in Japan
Connected to a 3G network overseas
Connected to a GSM network overseas
Connected to a GPRS network
overseas
bConnected carrier name
䋪The network name does not appear when the
handset is connected to the FOMA network in
Japan.
When Your Mobile Phone Is Lost or Stolen,
etc. While Overseas
䇴DoCoMo Information Center> (24-hour service)
䂓From a DoCoMo handset
䋭81䋭3䋭5366䋭3114䋪(Free)
䋪From a fixed line phone, International phone
call charges to Japan apply.
㶎When using the FOMA L705i handset, call +81-
3-5366-3114. (press and hold 0 for 1+
seconds to enter "+" sign.)
䂓From a fixed-line phone (Universal Number)
䋭800䋭0120䋭0151䋪
䋪Domestic call charges for your overseas
location will apply to calls.
Network Technical Operation Center
<Network Technical Operation Center> (24-hour
service)
䂓From a DoCoMo handset
䋭81䋭3-6718-1414䋪(Free)
䋪From a fixed line phone, International phone
call charges to Japan apply.
㶎When using the FOMA L705i handset, call +81-
3-6718-1414. (press and hold 0 for 1+
seconds to enter "+" sign.)
䂓From a fixed-line phone (Universal Number)
䋭800䋭5931䋭8600䋪
䋪Domestic call charges for your overseas
location will apply to calls.
International Access Codes of Major Countries
(Table1)
International access numbers for major countries
are as follows (as of 䃂 2007):
䋪Codes may be changed.
䋪For the codes of the other countries and details,
see the DoCoMo's "International service web
site".→P270
For loss or theft of the handset, settlement of
accumulated charges, or handset failure while
overseas, refer to "For loss or theft of the
handset or charges while overseas" or "For a
handset failure while overseas" on the back of
this manual. Call and communication charges
apply after the handset was lost or stolen are
still charged to you.
a
b
(Image to be
added)
International Access Codes of Major Countries
(Table1)
International Phone Codes for Universal Numbers
(Table2)
Area Code Area Code
Ireland 00 Turkey 00
U.S.A. 011 New Zealand 00
U.A.E. 00 Norway 00
U.K. 00 Hungary 00
Italy 00 Philippines 00
India 00 Finland 00䋯
Indonesia 001 990
Australia 0011 France 00
Netherlands 00 Brazil
0041
䋯
Canada 011
0021
䋯
Korea 001
0023
Greece 00 Vietnam 00
Singapore 001 Belgium 00
Switzerland 00 Poland 00
Sweden 00 Portugal 00
Spain 00 Hong Kong 001
Thailand 001 Macao 00
Taiwan 002 Malaysia 00
Czech 00 Monaco 00
China 00 Luxembourgr 00
Denmark 00 Russia 810
Germany 00
International access number of your country of
stay (table1)
International Phone Codes for Universal Numbers
(Table2)
273
Overseas Use
International Phone Codes for Universal Numbers
(Table2)
International prefix numbers for the universal
number are as follows (as of 䃂 2007):
䋪Codes may be changed.
䋪For the codes of the other countries and details,
see the DoCoMo's "International service web
site".→P270
Setting after Returning to Japan
When you have returned to Japan, FOMA handset is
automatically connected to FOMA network and
appears at the top of the screen.
• If the FOMA network is not connected, check
whether "Network mode" and "Network search
mode" are both set to "Auto".
Making Calls Overseas
When both of you and the other party are using a
telecommunication carrier applicable to FOMA
Video calls, international Video calls are also
available.
• For information on the countries, areas,
telecommunication carriers that support FOMA
Video calls , visit DoCoMo's "International service
web site.→P270
• Depending on the handset connected via an
international Video call, the video streaming may be
ceased on the other party's handset, or the call may
be disconnected.
Making an International Call
(Including to Japan)
Make a call prefixing "+" and a country code to
another party's phone number.
• Press 0 for more than one second to enter "+".
• To call a WORLD-WING user who is overseas, dial
"81", the country code for Japan.
a0(for 1+ seconds)XEnter "Country
Code - Area Code (City Code) - Phone
Number"
• When making a call to a fixed phone in Japan
from abroad, enter "81" as the country code.
• Generally, in the situation where a "0" appears
before the Area Code (City Code), please
remove "0". (In a few countries, like Italy, "0"
must not be removed).
• When making a call to a mobile phone or PHS
in Japan, omit leading "0" as well.
• Country code →P274
bA
䂓When making video call
M[Menu] and then select X "Video phone
call"
Making a Call Easily to Japan
If a call is made using an entry in Dialed or Received
calls or the Phonebook in which a phone number
with a leading "0" is recorded/ registered, leading
"0" is automatically replaced with "+ Country code
(i.e. +81)".
• By default, your handset is configured to enter "+81"
(country code for Japan) automatically.→P61
aDisplay an entry in history/Phonebook
䂓Using Redial logs
Open the Redial logs (P54) or the Dialed calls
detail screen (P54).
䂓Using Received call log
Open the Received call log (P56) or the
Received call detail screen (P56).
䂓Using Phonebook
Open the Phonebook list screen (P84) or the
Phonebook detail screen (P85).
bSelect a history or Phonebook XA
䂓When two or more phone number exist in the
Phonebook list screen
Press H to select the number to make a
phone call to.
䂓When two or more phone number exist in the
Phonebook detail screen
Press H to display the phone number to call,
then press I[Send].
Area Code Area Code
Ireland 00 Thailand 001
U.S.A. 011 Taiwan 00
Argentina 00 China 00
U.K. 00 Denmark 00
Israel 014 Germany 00
Italy 00 New Zealand 00
Australia 0011 Norway 00
Australia 00 Philippines 00
Netherlands 00 Finland 990
Canada 011 France 00
Korea 001 Brazil 0021
Colombia 009 Belgium 00
Singapore 001 Hong Kong 001
Switzerland 00 Malaysia 00
Sweden 00 Luxembourgr 00
Spain 00
Continue on the next page
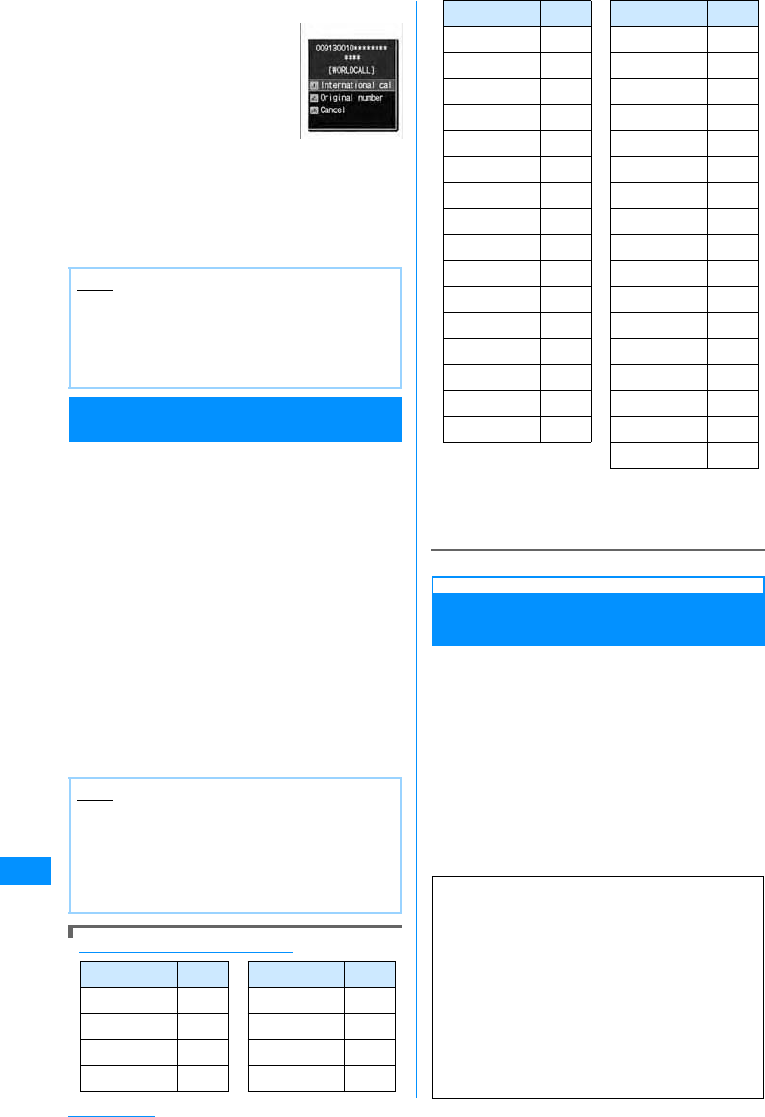
274
Overseas Use
cA
• Dialing confirmation screen
shows a phone number
prefixed with "+ Country
code".
䂓When making video call
M[Menu] and then select
X "Video phone call"
d"Dialing"
"Original number"
䋺: Does not replace the leading "0"
with "+Country code".
"Cancel"
䋺: cancel to call
Making an International Call (Including to
Japan) Selecting Registered Country Code
From sub menu, you can select and add Country
code to an entered phone number.
aEnter "Area code - other party's phone
number"
bM[Menu] X"International Dial"
The "Select Country" screen opens.
cSelect a Country code
The "+ Country code" is added at the beginning of
the phone number.
• When an entered phone number begins with
"0", it is replaced with "+ Country code".
dA
䂓When making video call
M[Menu] and then select X "Video phone
call"
Country Codes of Major Countries
㶎The codes may be changed.
㶎For the codes of the other countries and details,
see the DoCoMo's "International service web
site".→P270
Making Call inside the Country
Where You Stay
Make a call by dialing a receiver's phone number
from Area Code (Toll Number).
• If both of you and the other party are using WORLD
WING overseas, make a call in the same way as
described in "Making a call to a country outside your
country of stay (including Japan)" (P273) even in the
same country/region.
• When "Auto international dial" is set to "On", the
Dialing confirmation screen (P274) opens if a call is
made to a phone number whose area code (city
code) starts with "0" from Phonebook or Dialed/
Redialed calls list. In this case, press select "Original
No" to make the call.
Note
• This conversion is available only out of the
service area (during international roaming).
• The conversion is enabled when you directly
enter a phone number with the leading "0" using
dial keys.
Note
• By default, 22 country codes are stored in the
"Select Country" screen. Country codes can be
added.→P62
• Available operations on the Country code selection
screen are the same as on the Country code list
screen.
Area Code Area Code
U.S.A.
1 China 86
U.K. 44 Germany 49
Italy 39 Turkey 90
India 91 Japan 81
Dialed call
confirmation
screen
Indonesia 62
New Caledonia
687
Egypt 20
New Zealand
64
Australia 61 Norway 47
Australia 43 Hungary 36
Netherlands 31 Fiji 679
Canada 1 Philippines 63
Korea 82 Finland 358
Greece 30 France 33
Singapore 65 Brazil 55
Switzerland 41 Vietnam 84
Sweden 46 Peru 51
Spain 34 Belgium 32
Thailand 66 Hong Kong 852
Taiwan 886 Macao 853
Tahiti 689 Malaysia 60
Czech 420 Maldives 960
Russia 7
When both of you and the other party are using
a telecommunication carrier applicable to
FOMA Video calls, international Video calls are
available by pressing M[Menu] XSelect
"Video phone call" after the international call
dialing procedure.
䍃For information about the countries where
connection can be made and
telecommunications carriers, visit the
DoCoMo's web site.
䍃The video streaming may be ceased on the
other party's handset, or the call may be
disconnected depending on the international
video-phone terminal.
Area Code Area Code
275
Overseas Use
Receiving Calls
Overseas
aA call arrives
The ringtone sounds.
•I[Silent] : Stop the ring tone
•P : Place the call on response hold.→P67
bA
Answer the call.
䂓To answer a Video call using the Camera
image
Press A.
䂓To answer a video call using the alternate
image
Press C[Image].
cTo terminate the call P
Making call to your FOMA handset from Japan
You can be called at your phone number in the
same way as when you are in Japan.
Making call to your FOMA handset from overseas
You are called via Japan regardless of the place
you stay. Similarly to making an international call
to Japan, you can be called in the way described
below.
Making a call by entering "International Access
Code䋪1-81䋪2㵥your phone number with leading
"0" omitted䋪3"
䋪1䋺When dialing to a mobile phone, you may be
able to dial by entering "+" instead of the
International Access Code.
䋪2䋺Enter Country Code of Japan.
䋪3䋺Enter "90-XXXX-XXXX" when the number
begins with "090" or "80-XXXX-XXXX" when it
begins with "080".
When a Call is Interrupted
A Call Cannot Be Made or Received/Stays
Out of the Service Area/Power Cannot be
Turned On
If a call cannot be made or received, the radio wave
reception level stays out of the service area, or
power cannot be turned on, the following situation
is supposed;
• Weak radio wave reception level or out of the service
area
• Malfunction of the local switchboard or the base
station, or temporary circuit congestion
• Wrong operation of the FOMA handset
•Other
Visit the DoCoMo's "International service web site"
for the latest area and interruption information, etc.
→P270
Upon confirming the operation method, try the
following;
• If you are indoors, check to see if the condition is the
same as outdoor, too.
• Check to see if your monthly charge does not
exceed the credit limit.
• Turn on the power again.
• Manually select the operator to connect.→P276
Contact the Network Technical Operation Center on
the back of this manual if the condition does not
recover after checking the above.
Credit Limit (Service Suspension Standard)
• The credit limit is provided for WORLD WING. If we
have confirmed that your monthly charge has
exceeded the credit limit, this service will be
suspended until the end of the corresponding month.
• The accumulated charge is the amount before
applying free communications fee.
• The Credit limit includes call/communication
charges and received call charges for overseas
roaming, digital communications charges such as
video calls and received call charge, packet
communication charges and SMS communication
charges. Note that since the international forwarding
charge and any charge whose data have not been
received by us from the operator of your country of
stay are not included, the billing amount may exceed
the credit limit. In that case, you must pay your
monthly charge for this service used before
suspended.
• When payment of your monthly charge is confirmed,
suspension of the WORLD WING service will be
lifted (After the payment, it may take a while before
the suspension of the service is lifted). You can
make a payment by credit card settlement (Once
payment only) from overseas.
• Contact DoCoMo Information Center on the back of
this manual for details.
Note
• In some countries or regions, you may be
charged also for incoming calls. In that case,
you are charged for both the international
forwarding and reception fees.
• No or different caller ID may be notified for some
telecommunication carriers used.
• When there is an incoming call during
international roaming, international forwarding
from Japan occurs. The caller is charged for the
call fee to Japan and the receiver is charged for
international forwarding fee.
• When the Public Mode (Drive Mode) is
activated, incoming call actions such as
sounding the ringtone or blinking the
Illumination Indicator will not take place. Also,
even if a call arrives when the display is turned
off, the backlight of the display will not be turned
on.
276
Overseas Use
Network Search Mode/Network Mode
Setting Network Search
Mode
Select search mode activated when the network
access point has been changed while using
overseas.
• By default, "Network search mode" is set to "Auto".
When you use the FOMA handset in Japan or in the
areas where 3G area network is available, it is
recommended to switch "Network mode" to
"WCDMA only" to reduce the consumption of the
battery pack.
aM[Menu] X(Setting) X
"Internationalroaming"X"Network" X
Perform the following operations
[Network search mode]
[Network mode]
Specify the network service to search.
• Check available communication systems in the
country of use before specifying a network.→P271
[Preferred lists]
You can register networks to be searched and set by
priority.→P276
[Operator name display]
Specify whether to show the network name that is
currently online in the Stand-by display.→P277
[Host selection]
Specify a host other than i-mode Center.→P149
[ᷣSMSC]
Set the SMS center address.→P182
"Preferred NW lists"
Configuring Preferred
Networks
You can register up to 20 networks to be searched
or configured by priority when searching networks.
aM[Menu]X(Settings)X"International
Roaming"X"Network"X"Host
Selection"
The preferred network list screen opens.
• If the networks have been registered, the
network names appear in order of priority.
•C[Change] : Re-apply the "Preferred lists"
setting to another network.
bI[Menu] XPerform the following
operations
[UPLMN manual select]
Add a network to the Preferred list by entering MCC
(country code) and MNC (network code).
XEnter MCC and MNC XI[Done] X"Yes"
[UPLMN select by list]
Select a presciently registered network from the
network list, then set it as the preferred network.
XSelect a network X"Yes"
•I[Country] : Selecting a country name allows you
to select an available network in the country from the
list.
[Set VPLMN to UPLMN]
Set the network in use as the preferred network.
X"Yes"
Default Network search mode: Auto
Network mode: Auto
Auto
Manual
䋺Automatically search and configure the
network.
䋺The network search screen appears. Select
and configure one of the networks in the list.
X "Yes" X Select a network
• Available networks are followed by the
circular marks.
Re-searching network
䋺Search network manually or automatically
in the same way as described above.
Auto
3G
GSM/GPRS
䋺Search for all available networks
regardless of their communication
systems.
䋺Search only for 3G networks.
䋺Search only for GSM/GPRS networks.
Note
• After coming back to Japan, if the icon indicating
the network status remains out of the service
area, set "Network mode" to "Auto" or "3G" and
"Network search mode" to "Auto".
<Network search mode>
• Searching networks may take a long time.
• When setting to "Auto", networks will be
searched automatically whenever you turn on
the handset or move out of the service area.
Note
• Depending on the signal reception, a network
that is not registered may get connected.
• The settings of this function will be saved on the
UIM.
277
Overseas Use
Sub menu of the "Preferred lists" screen
a"Preferred lists" screen (P276) XM
[Menu] XPerforms the following
operations
[Add new]
Insert a newly detected network above the selected
network in the list. Go to Step 2 described in
"Configuring Preferred Networks" (P276).
[Change]
Re-apply the "Preferred lists" setting to another
network. Go to Step 2 described in "Configuring
Preferred Networks" (P276).
[Delete]
Delete the selected network.
X"Yes"
[Move up]䋪
Move the selected network directly up in the list.
[Move down]䋪
Move the selected network directly down in the list.
䋪䋺 Does not appear depending on the current
position in the list.
Operator name display
Displaying Network
Name while Roaming
Specify whether to show the network name that is
currently online in the Stand-by display.
aM[Menu] X(Settings) X
"International roaming" X"Network" X
"Operator name display" X"ON"/
"OFF" X"Yes"
Roaming guidance setting
Activating Roaming
Guidance
Before you leave Japan, you can set so that the
other party who makes a call to you during
international roaming will be notified of it with a
voice guidance.
• The service may not be operable when "Out of
service area" is displayed.
• You can set to play the guidance from abroad.
→P278
aM[Menu] X(Service) X"Others"
X"Roaming guidance" XPerform the
following operations
[Activate roaming guidance]
Activate the roaming guidance.
[Deactivate roaming guidance]
Deactivate the roaming guidance.
[Check roaming guidance setting]
Check the status of the setting.
b"Yes"
Call barring
Setting to Accept No
Incoming Calls during
Roaming
You can set so that incoming calls, mails, etc., are
all restricted during roaming. You can also set to
restrict only incoming Video calls.
aM[Menu] X(Settings) X"Lock/
Security" X"Keypad unlock" X
Perform the following operation
[Activate barring of incoming call -roam]
XSelect from the following options XEnter the
Network security code X"Yes"
[Deactivate barring of incoming call - roam]
XEnter the Network security code X"Yes"
[Check barring of incoming call settings - roam
setting]
Check the status of the setting.
Default Displayed
Note
• When deactivating the guidance, a call tone set
by the overseas carrier sounds.
• Some overseas carriers may not offer this
option.
• Even if you activated this option, a voice
guidance in a foreign language may be played
due to the overseas carrier's services.
Barring all
incoming calls
Data calls barring
䋺Restrict all incoming calls.
䋺Restrict only incoming Video
calls. (Only inside the 3G network
service area).
Note
• These services may not be operable in some
countries.
278
Overseas Use
Using Network Services
during Roaming
You can use network services of Voice mail service,
Call Forwarding service, and Roaming guidance
settings overseas.
• In order to use Voice mail and/or Call Forwarding
service, you have to subscribe to the network
service(s) and activate"Re,pte access(int.)" in
advance in Japan.→P262
• Using these services overseas costs the fee for
making international call to Japan.
• The services may not be operable in some countries.
Voice Mail (Int.)
Operating the Voice Mail Service
Overseas
You can activate/deactivate the Voice mail service
overseas. You can also replay recorded messages
or change the settings following a voice guidance.
• The service may not be operable when "Out of
service area" is displayed.
aM[Menu] X(Setting) X
"International roaming" X"Voice mail
(Int.)" XPerform the following
operations
[Active voice mail]
Activate the Voice mail service.
[Deactivate voice mail]
Deactivate the Voice mail service.
[Play messages]
Play a Voice mail message.
[Voice mail setting]
Change the settings following a voice guidance.
[Set ring time]
Set time before connecting to Voice mail service center
after receiving a call.
b"Yes"
cOperate according to voice guidance
Call Forwarding (Int.)
Operating the Call Forwarding
Service Overseas
You can activate/deactivate the Call forwarding
service overseas.
• The service may not be operable when "Out of
service area" is displayed.
aM[Menu] X(Setting) X
"International roaming" X"Call
forwarding (Int.)" XPerform the
following operations
[Activate call forwarding]
Activate the Call forwarding service.
[Deactivate call forwarding]
Deactivate the Call forwarding service.
[Call forwarding settings]
Check the status of the setting.
b"Yes"
cOperate according to voice guidance
Roaming Guide (Int.)
Operating Roaming Guidance
Overseas
You can activate/deactivate Roaming guidance
overseas.
• The service may not be operable when "Out of
service area" is displayed.
aM[Menu] X(Settings) X
"International roaming" X"Roaming
guidance (Int.)"
b"Yes"
cOperate according to voice guidance
Note
• To use this service outside the service area at
your overseas location, you need to switch off
the handset where signals can be received.
Note
• To use this service outside the service area at
your overseas location, you need to switch off
the handset where signals can be received.
279
Overseas Use
Remote Access Setting (Int.)
Setting Remote Access Overseas
You can activate/deactivate Remote access
overseas.
• The service may not be operable when "Out of
service area" is displayed.
aM[Menu]X(Settings)X"International
roaming"X"Remote access
setting(Int.)"
b"Yes"
cOperate according to voice guidance
Caller ID request (Int.)
Operating Caller ID Request
Service Overseas
You can activate/deactivate the Caller ID request
service overseas.
• The service may not be operable when "Out of
service area" is displayed.
aM[Menu] X(Settings) X
"International roaming" X"Caller ID
requestU (Int.)"
b"Yes"
cOperate according to voice guidance


281
Appendix/External Devices/
Troubleshooting
Menu List ........................................................................................................................... 282
Default Data ....................................................................................................................... 292
Dial Keys Assignments to Characters ............................................................................ 296
List of Symbols and Special Characters......................................................................... 297
Pictograph (E-Moji) List.................................................................................................... 298
Emoticon List .................................................................................................................... 299
List of Common Phrases.................................................................................................. 300
Combinations of Multiaccess Functions ........................................................................ 302
Combinations of Multitask Functions ............................................................................. 303
Services Available from FOMA Handset......................................................................... 304
Options and Related Devices........................................................................................... 305
Interfacing to External Devices
Video Play Software.......................................................................................................... 305
Troubleshooting
Troubleshooting................................................................................................................ 306
Error Messages ................................................................................................................. 308
Warranty and After-sales Service.................................................................................... 323
About the i-mode Malfunction Check Site ...................................................................... 324
Updating Software .............................................................................. Software Update 325
Protecting Mobile Phone from Dangerous Data ............................Scanning function 327
Major Specifications ......................................................................................................... 330
Number of Items that can be Stored, Registered and Protected on the FOMA
Handset .............................................................................................................................. 331
Authentication ................................................................................................................... 332
Export Administration of This Product and Its Accessories ........................................ 335
282
Appendix/External Devices/Troubleshooting
Menu List
Functions with indicated in "Default settings:" field are those initialized to default settings by performing
"Reset settings".→P245
Function names Default settings Reference
Mail Received mail Mail of "䊄䉮䊝䈎䉌䈱䈍⍮䉌䈞
(Information from DoCoMo)" P170
Sent mail Unregistered P170
Unsent mail Unregistered P171
Compose message 䋭P161
Check new message 䋭P168
Receive option 䋭P167
SMS Compose message 䋭P181
Check new SMS 䋭P182
Template Pre-install data only P164
Mail setting Communication Receive option setting : OFF
Receive attch file : All
checkmarked
Check new messages : All
checkmarked
P179
Edit Edit header : Non
Edit signature : Non
Edit quotation>
Auto attach : Checkmarked on
"Signature"
P180
View Font size : Standard
Scroll : 1 line
Mail list : 2 lines name
Folder security : Non
checkmarked
Melody auto play : ON
Receiving display : Alarm mode
P180
SMS SMS report request : OFF
SMS validity period : 3 days
SMS input character : Japanese
(70characters)
P182
Other Check setting : 䋭
Reset setting : 䋭P180
283
Appendix/External Devices/Troubleshooting
Function names Default settings Reference
i-mode iMenu 䋭P139
Bookmark Unregistered P143
Files contained in Screen Memos Unregistered P144
Last URL 䋭P140
Go To location Input address 䋭P142
URL history No history P142
Message MessageR No message P150
MessageF No message P150
i-Channel i-Channel list Basic channels P155
Ticker setting Ticker display : ON
Ticker speed : Normal P155
Reset i-Channel 䋭P155
Check new message 䋭P150
i-mode setting Communication Connection timeout : 60 seconds
Check new messages : All
checkmarked P147
View Image : ON
Sound effect : ON
Use phone info : Yes
Font size : Standard
Scroll : 1 line
Mail list : 2 lines
Auto-display : Message R
preferred
Melody auto play : ON
P148
i-motion Melody auto play : ON
i-motion type : Standard
P153
P153
Home Disable, No URL P148
Certificates All valid P152
Other Check settings : 䋭
Rest settings : 䋭P148
i-appli Software list Only pre-installed i-appli P185
i-appli info Security error history No history P190
Auto start info No information P190
Trace info No information P190
i-appli settings Display SW info Not display P185
Auto start set On P189
Continue on the next page
284
Appendix/External Devices/Troubleshooting
Function names Default settings Reference
Phonebook Add to phonebook Unregistered P77
Search phonebook Search all data P82
Number of contacts 䋭P88
Phonebook settings Default mode Search all data P89
Create domain list @docomo.ne.jp P89
Display image View P89
Call/Mail history Received Calls Unregistered P56
Redial Unregistered P54
Received mails Unregistered P178
Sent mails Unregistered P178
Call duration 䋭P239
Call Cost Checking total costs 䋭P240
Set call cost limit Off P240
Delete call cost icon
䋭P240
Data box My Pictures i-mode None P194
Camera None P194
Deco-mail Pictures Only pre-installed file P194
Deco-mail pictogram Only pre-installed file P194
Preinstalled Only pre-installed file P194
Data transfer None P194
Item Only pre-installed file P194
Animation None P194
micro SD 䋭P194
Music i-mode Non P217
Playlist None P224
micro SD 䋭P224
Music channel
Distributed Program None P219
i-motion i-mode None P201
Camera None P201
Preinstalled Only pre-installed file P201
Data transfer None P201
micro SD 䋭P201
Melody i-mode None P204
Preinstalled Only pre-installed file P204
Data transfer None P204
micro SD 䋭P204
SD-Audio 䋭P224
285
Appendix/External Devices/Troubleshooting
Function names Default settings Reference
MUSIC Recent played䋪䋭P221
Music Player Music life Train : All songs, level 2
Sport timer : All songs 30 Min.
Sport timer : All songs 30 Min. P228
Playlist Unregistered P224
All songs Unregistered P222
Artist Unregistered P222
Genre Unregistered P222
Album Unregistered P222
Music channel
Program1 Unregistered P216
Program2 Unregistered P216
Set Programs 䋭P216
Program list 䋭P216
What's Music
Channel? 䋭P216
SD-Audio Player Music life Train : All songs, level 2
Sport timer : All songs 30 Min.
Sport timer : All songs 30 Min. P228
Playlist 䋭P224
All songs 䋭P222
Artist 䋭P222
Genre 䋭P222
Album 䋭P222
Lifekit Bar Code Reader 䋭P134
Receive Ir data Receive 䋭P212
Receive all 䋭P213
microSD card PIM 䋭P208
Data update 䋭P209
Memory info. 䋭P209
Reset microSD card 䋭P207
Custom Menu 䋭P238
Record Message Record msg. settings Setting Off P71
Record msg. list Unregistered P72
Stopwatch 䋭P241
Continue on the next page
䋪䋺 "Playing" is displayed when playing a music. Selecting the song opens the Player screen for the song in
playback.
286
Appendix/External Devices/Troubleshooting
Function names Default settings Reference
Camera Photo-mode 㵪P129
Movie-mode 㵪P130
Bar Code Reader 㵪P134
Camera settings Saving option Save to : Handset
Auto saving : ON
Save picture to: My picture/
Camera
Save movie to: I-motion/Camera
P130
P133
Shutter sound Shutter 1 P133
Flicker tuning Auto P133
Stationery Schedule Unregistered P232
Alarm Unregistered P231
Memos Unregistered P243
To do list Unregistered P235
World Clock Japan P240
Calculator 㵪P242
Unit converter Currency Yen/Dollar P241
Surface Acre/Hectare P242
Length mm/cm P242
Weight mg/g P242
Temperature 㵪P234
Volume milliiter1 Liter P242
Velocity km/h / meter/s P242
Remembering dates Date Counter Unregistered P237
Date Search 㵪P238
Settings Sounds&vibration Select ringtone Voice call : Ring01
Video call : Ring02
Mail : Message01
Message R : Message02
Message F : Message03
SMS : Message04
P92
Select effect tone Dial sound : Japanese
Slide tone : Slide tone 1
Keypad sound: Keypad sound 1
Menu effect : Menu effect 1
Power On : Power On
Power off : Power Off
Low battery alert
P96
Volume (All) Level 3 P94
Vibrator (All) Off P95
Manner mode set Manner Mode P98
Mail ring duration Once P97
Set mute ring(sec.)
Off P121
287
Appendix/External Devices/Troubleshooting
Function names Default settings Reference
Settings View Stand-by display Wallpaper : Image, illusion
Display items : Clock
Clock type : Large digital
Show shortcut icons : ON
P99
Call display Incoming voice call : Image,
incoming_call_black
Incoming video call : Image,
incoming_call_black
P100
Wake-up display Image, pwron P102
Dialing Motion dialing : Digital
Dialing Quick Search : ON P101
Menu Display Settings Menu customization : Color
theme setting
Menu guidance : ON
P104
P104
Backlight Display duration : 10 sec.
Display brightness : 100 %
AC connected : Display setting P103
Color theme Illumination dot P103
Illumination dot
Settings Lighting : ON
Incoming voice call : Red
Incoming video call : Red &
White
New mail : Blue
New message R : Blue & White
New message F : Yellow & Pink
New SMS : Yellow & Aqua
Voice mail : Pink & White
Record message : Green &
Yellow
Playing music : Pink & Aqua
Alarm : Yellow & Pink & Aqua
Schedule/To do list : Blue & Pink
& Aqua
During call : OFF
Missed call : OFF
Unread message : OFF
P105
Call/VT/Dialing Incoming call Answer mode : SEND key only
Auto Answer:
̆Auto answering : Off
Reject/Accept call :
̆Reject/Accept call : Accept
̆Reject unknown : Off
Anonymous caller : (All) Disable
On hold tone : Hold tone 1
Display phonebook image : On
P66
P244
P118
P119
P121
P119
P68
P102
Video Phone Video phone set:
̆Displaying setting : Other-Me
̆Send camera image : On
̆Screen size : Large
̆Visual preference : Normal
̆Light : Always on
̆Auto redial as voice : Off
̆Hand-free switch : On
Substitute image : Default
Response hold image : Default
Holding image : Default
P73
P73
P73
P73
P73
P73
P73
P73
P73
P73
Continue on the next page
288
Appendix/External Devices/Troubleshooting
Function names Default settings Reference
Settings Call/VT/Dialing Call feature Reconnect alarm : High alarm
Quality alarm : High alarm
Holding tone : Hold tone 1
Close setting : End the call
Noise reduction : Off
P64
P97
P68
P66
P64
Self mode Off P115
Prefix dial Prefix dial 1 : 009130010
Prefix 2/Prefix 3: Unregistered P63
Sub Address On P63
Earphone Switch call : Off P244
Lock/Security
Lock Lock all : No
Call/Mail Lock : (OFF)
Data access lock : (Off)
P113
P114
P115
Secret mode Off P117
Display Call/mail logs (All) On P117
Keypad unlock Allow manual unlock P116
Change Security code Security code (4 digits):0000 P111
PIN code 㵪P112
Scanning Function Setting Scan Function :
㵪Set scan : ON
㵪Set message scan : ON
Version : 1.1
P327
P327
P329
International
roaming Network Network search mode : Auto
Network mode : Auto
Preferred NW list : (The contents
saved in FOMA card is
displayed)
Operator name display : ON
Host selection : i-mode
SMS center : DoCoMo
P276
P276
P276
P277
P149
P182
Voice mail (Int.) 㵪P278
Call forwarding (Int.) 㵪P278
Remote access setting
(Int.)
㵪P279
Caller ID request (Int.) 㵪P279
Roaming guide (Int.) 㵪P278
Call barring
㵪P277

289
Appendix/External Devices/Troubleshooting
Function names Default settings Reference
International Dial Auto assist setting Auto P61
International Prefix
Coversion Settings IDD prefix name : WORLDCALL
IDD prefix code : 009130010 P61
Auto international dial Auto international dial : On
Target country : Japan +81 P61
Country code list China䇭86䇮Taiwan䇭886䇮
Japan䇭81䇮Korea䇭82䇮Hong
Kong䇭852䇮U.S.A.䇭1䇮U.K.䇭
44䇮
Italy䇭39䇮India䇭91䇮
Indonesia䇭62䇮Australia䇭61䇮
Netherlands䇭31䇮Canada䇭1䇮
Singapore䇭65䇮Spain䇭34䇮
Thailand䇭66䇮Germany䇭49䇮
Philippines䇭63䇮France䇭33䇮
Brazil䇭55䇮Vietnam䇭84䇮
Malaysia䇭60
P62
Settings Date&Time Set date&time Auto time set : On P47
Date&Time format
Date format : MM/DD/YYYY
Time format : 12-hour
P106
Hour indication Set sound : Off P245
Other Character Entry 㵪P251
P252
P253
P253
Memory status 㵪P245
Select language Japanese P107
Power Saving Mode Off P103
Reset/Delete 㵪P245
Software Update 㵪P326
USB mode setting Photo Mode
䋪
P210
Touchpad Setting Vibration feedback: ON
Touchpad sensitivity: Standard P30
Battery Level 㵪P45
Own number Unregistered P239
Continue on the next page
䋪䋺 If the FOMA USB cable is disconnected, the USB mode automatically returns to "Communication mode".
290
Appendix/External Devices/Troubleshooting
Function names Default settings Reference
Service Voice mail Activate 㵪P257
Set ring time 㵪P257
Deactive voice mail 㵪P257
Check setting 㵪P257
Play messages
㵪P257
Voice mail setting 㵪P257
Check messages 㵪P257
Notify missed call 㵪P257
Del. voicemail icon 㵪P257
Tone/Vibration
message notification 㵪P257
Call waiting Activate call waiting 㵪P257
Deactivate call waiting 㵪P257
Check setting 㵪P257
Call forwarding Activate 㵪P259
Deactivate 㵪P259
Register the forwarding
number 㵪P259
Setting if forwarding
number busy 㵪P259
Check setting
㵪P259
Service Nuisance Call
Blocking
Register nuisance caller
㵪P259
Register selected
number
㵪P259
Delete all entries 㵪P259
Delete last entry 㵪P259
Check the number of
entries 㵪P259
Caller ID notification Activate/Deactivate 㵪P260
Check setting 㵪P260
Caller ID Request Activate 㵪P260
Deactivate 㵪P260
Check setting 㵪P260
Set in-call arrival act Activate 㵪P260
Deactivate 㵪P260
Check setting 㵪P260
Arrival call act Answer P261
291
Appendix/External Devices/Troubleshooting
Function names Default settings Reference
Service Other Additional Services Unregistered P263
Additional guide Unregistered P264
English guidance Outgoing call: Japanese
Incoming call: Japanese P261
Service numbers 㵪P262
Roaming guidance
setting 㵪P277
Multi number 㵪P262
Dual Network
㵪P261
Remote Control 㵪P262
292
Appendix/External Devices/Troubleshooting
Default Data
Stand-by display
Incoming display
blend fresh illusion leaf
purity refresh water wine
incoming_call_black incoming_call_white
293
Appendix/External Devices/Troubleshooting
Wake-up display/Shutdown display
Menu Icons
Frame
Stamp
pwron
䂓Menu Icons 䂓Frame
pwroff
294
Appendix/External Devices/Troubleshooting
Deco-mail Pictures
295
Appendix/External Devices/Troubleshooting
i-motion
DiMAGIC eco-motion
296
Appendix/External Devices/Troubleshooting
Dial Keys Assignments to Characters
䋪1䋺Text that has not been confirmed will be indicated with , and more characters can be added/entered. For
characters that can take only a voiced sound symbol, 䉘is added, and for characters that cannot take
voiced or semi voiced sound symbol, 䉘or 䉙is entered.
䋪2䋺You can enter these symbols when they are valid in that field.
Entry Modes Hiragana and Kanji Katakana Alphabetic characters Digits
Key
1䈅䈇䈉 䈋䈍
䈄䈆䈈 䈊䈌
䉝䉟䉡䉣䉥
䉜䉞䉠䉢䉤
. @ / : - 䌾1
2䈎䈐 䈒 䈔䈖 䉦䉨䉪 䉬䉮 2
3䈘 䈚 䈜䈞䈠 䉰䉲䉴 䉶䉸 3
4䈢䈤䈧䈩䈫
䈦
䉺䉼䉿䊁䊃
䉾
4
5䈭䈮䈯䈰䈱 䊅䊆䊇 䊈䊉 5
6䈲䈵䈸䈻䈾 䊊䊍 䊐 䊓䊖 6
7䉁 䉂䉃䉄䉅 䊙䊚 䊛 䊜 䊝 7
8䉇䉉䉋
䉆䉈䉊
䊟䊡䊣
䊞䊠䊢
8
9䉌䉍 䉎䉏䉐
䍵䍃 䍶 䍃 䍷䍃 䍸䍃 䍹
9
0䉒䉕䉖䉑
(Space) ޔޕ㧍㧫
䊪䊭䊮䊩
(Space) ޔޕ㧍㧫
(Space)! ? - , ' ; ( ) " _ ~ &
䎂
0
*䋪2
䇮䇯䊷䊶 䋣䋿
䉘䉙
䇮䇯䊷䊶 䋣䋿
:䋪2
#䋤䋪2
a b c
A B C
d e f
D E F
g h i
G H I
j k l
J K L
m n o
M N O
p q r s
P Q R S
t u v
T U V
w x y z
W X Y Z
䉘䉙
! ? - , ' ; ( ) " _ ~ &
䎂
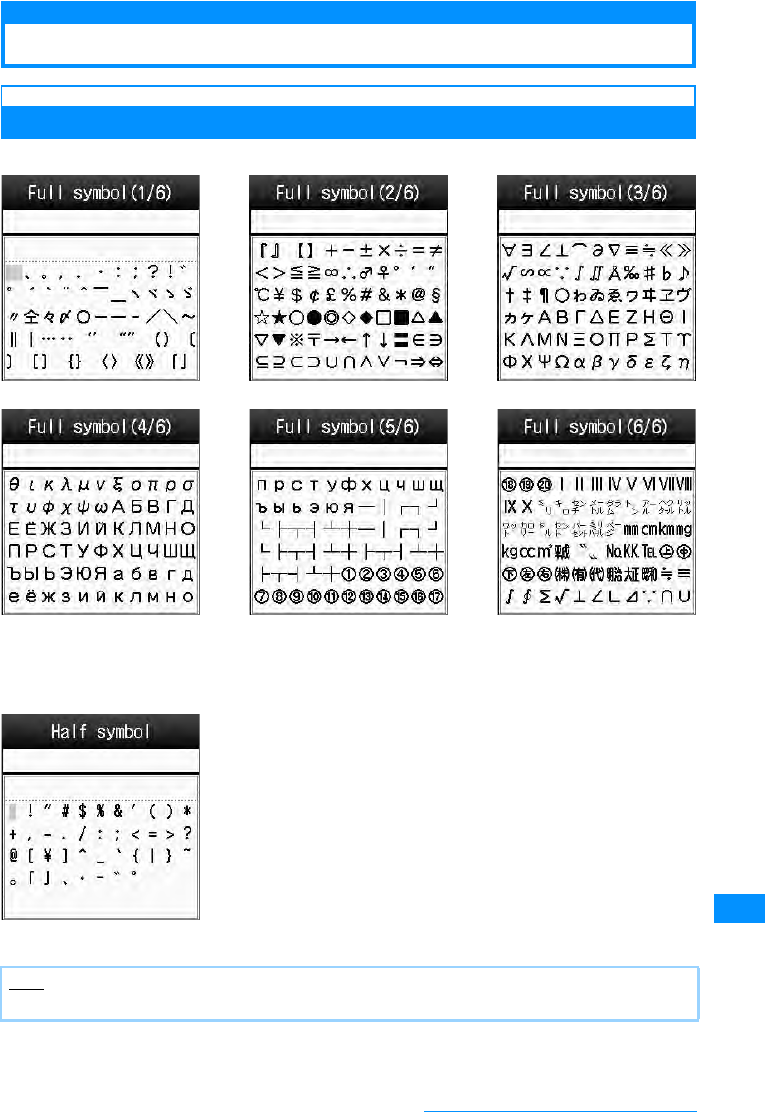
297
Appendix/External Devices/Troubleshooting
List of Symbols and Special Characters
Symbol List
䂓Full symbol
Note
• Special characters sent to an i-mode incompatible mobile phone or PC may not be displayed correctly.
䂓Half symbol
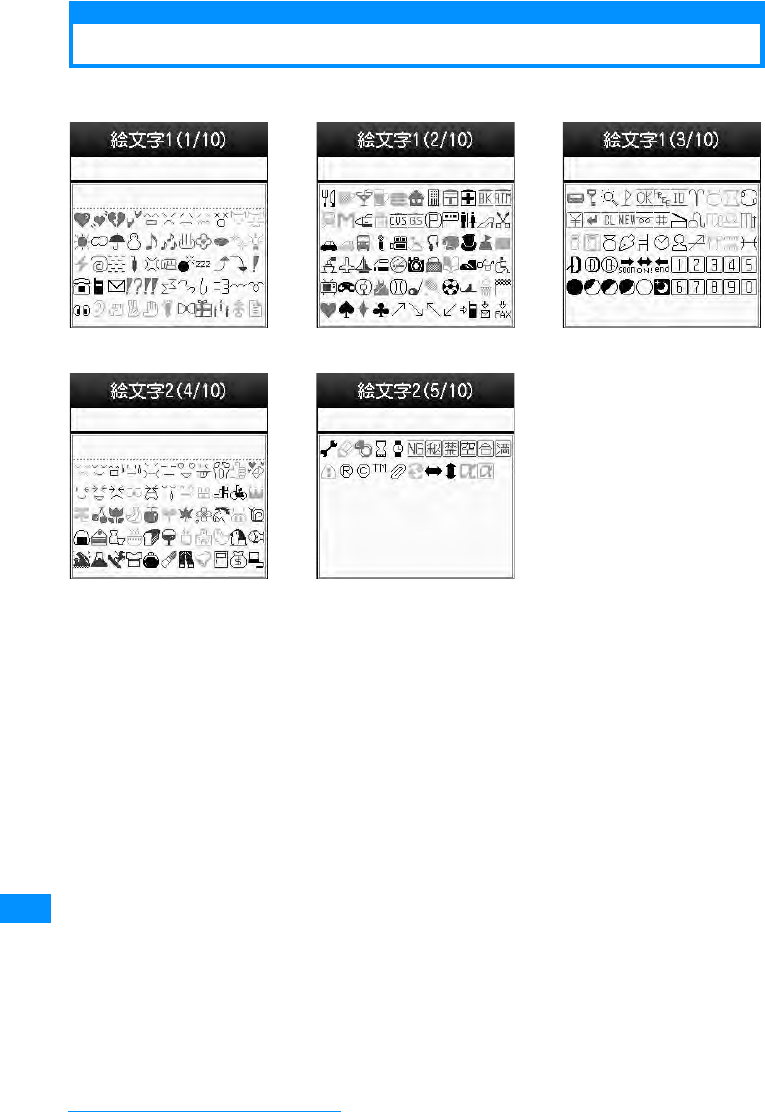
298
Appendix/External Devices/Troubleshooting
Pictograph (E-Moji) List
<Confirming specs>
䂓E-Moji 1
䂓E-Moji 2
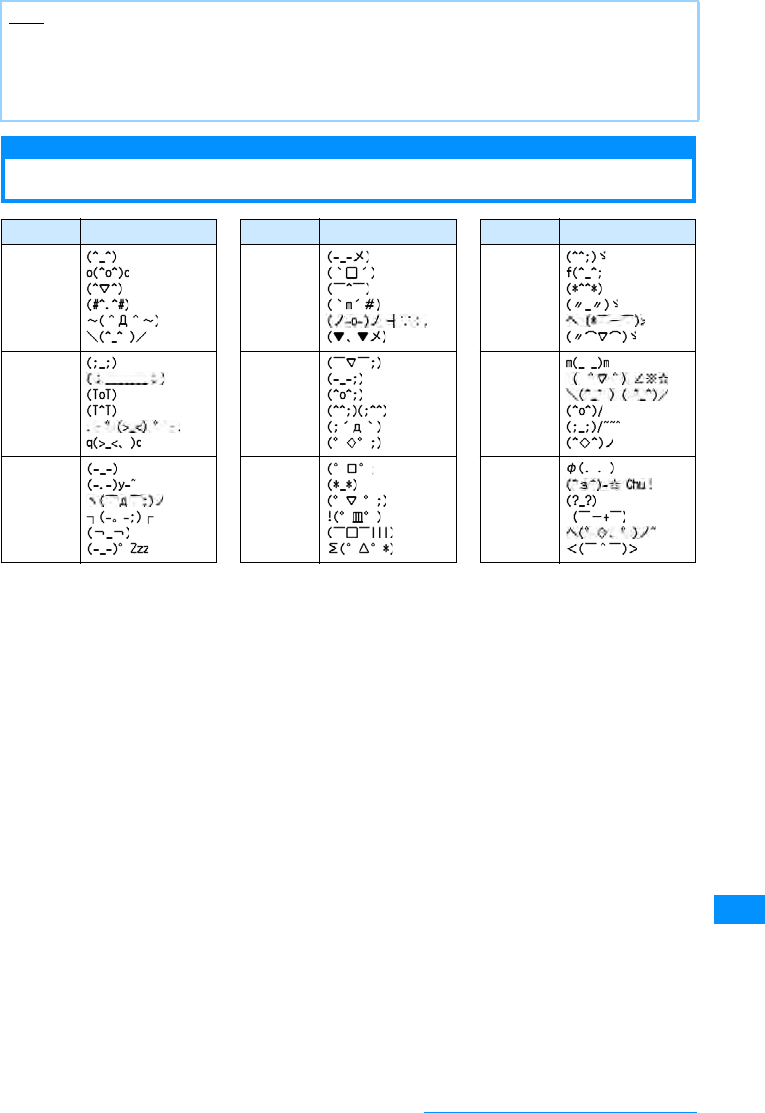
299
Appendix/External Devices/Troubleshooting
Emoticon List
Note
• Pictograph (E-Moji) may not be displayed correctly if they are sent to PCs or mobile phones that do not
support i-mode. Also, the E-Moji may not be displayed correctly even if they are sent to i-mode phones that
support those E-Moji depending on the other party's phone types.
• If a mail containing E-Moji 2 is sent to an i-mode phone that does not support E-Moji 2, pictograph (E-Moji)
may not be displayed correctly.
Category Emoticon Category Emoticon Category Emoticon
Pleasure Anger Embarras
sment
Cry Sweat Greeting
Apathetic Surprise Other
Continue on the next page
300
Appendix/External Devices/Troubleshooting
List of Common Phrases
Category Common Phrases
Internet @docomo.ne.jp
.ne.jp
.co.jp
.com
.or.jp
.go.jp
.ac.jp
http://
www.
.html
Greeting 䈍䈲䉋 䈉 䈗 䈙 䈇䉁 䈜(Good morning)
䈍䉇䈜䉂䈭䈘 䈇(Good night)
䈖䉖䈮䈤䈲
(Hello)
䈖 䉖䈳䉖䈲(Good evening)
䈍∋䉏᭽䈪䈜(See you)
䈍ਭ䈚 䈹䉍 䈪䈜(I haven't seen you for a long time)
ᤓᣣ䈲䇮䈬䈉䉅䈅䉍䈏䈫䈉䈗䈙䈇䉁䈚䈢
(Thank you for your yesterday support)
ⴕ䈦 䈩䈐 䉁 䈜(I will go)
䈇䈦䈩䉌 䈦 䈚 䉆䈇(Take care)
䈍⺀↢ᣣ䈍䉄䈪䈫 䈉 䋣 (Happy birthday!)
Business 䈇䈧䉅 䈍䈮䈭䈦 䈩 䈍䉍 䉁 䈜(Thank you for your every support)
䉋䉐䈚䈒 䈍㗿䈇⥌䈚䉁䈜
(Thank you for your help in advance)
↳䈚 ⸶䈗 䈙䈇䉁 䈞䉖(I'm sorry)
ᄢᄌᄬ␞⥌䈚 䉁 䈚 䈢(I beg your pardon)
⥋ᕆਅ䈘 䈇(Please give me a call as quickly)
ዋ䇱䈍ᓙ䈤㗂䈔䉁 䈜䈎(Could you wait a minute?)
ᓟ䈾䈬 䈗 ㅪ⛊䈇䈢 䈚 䉁 䈜(I'll get back to you later)
ᓟ䈾䈬 䈗 ㅪ⛊䈇䈢 䈚 䉁 䈜(I'll get back to you later)
FAX⏕䉕 䈍㗿䈇䈚 䉁 䈜(Please confirm the facsimile)
㔚ゞㆃᑧ䈱䈢䉄䇮 ㆃ䉏䉁 䈜(I'll be late because of delaying the train)
301
Appendix/External Devices/Troubleshooting
Private ㆆ䈶䈮ⴕ䈖 䈉 (Let's go out)
㘶䉂䈮ⴕ䈐 䉁 䈞䉖䈎䋿 (Shall we go drinking?)
ㆃ䉏䉁 䈜(I'll be late)
ᄌᦝ䈚 䉁 䈜(I'll change)
ਛᱛ䈪䈜(Cancel)
వ䈮ⴕ䈐 䉁 䈜(I'll go first)
వ䈮Ꮻ䉍 䉁 䈜(I'll be back first)
ᤨ㑆䈪䈜(Time's up)
䈚 䈩 䉎 䈱䋿 (What are you doing?)
䈬䈖䈮䈇䉎䈱䋿(Where are you now?)
Reply Thank you!
bye-bye!
䌏䌋䈪䈜
(OK)
䌎䌇䈪䈜
(No)
䈅䉍 䈏䈫 䈉 (Thank you)
䈗䉄䉖䈭䈘䈇(I 'am sorry)
䉅 䈉 ዋ䈚 ᓙ䈦 䈩䈩(Waite a minute)
ᓟ䈪ㅪ⛊䉏䉁 䈜(I'll contact with you later)
䈪䈐 䈭䈇(Cannot make a call now)
ੌ⸃䋣䋣 (I see! !)
Pictograph idiom 䋨䈉䉏䈚䈇䋩(with pleasure)
(OK)
䋨䊤䊑䊤䊑䋩(Lovely)
䋨Ꮻ䉎䋩(I'll be back)
(䋨䈲䋿䋩(what ?)
(䈖䉖䈮䈤䈲
)(Hello)
䋨 㔚ᓙ䈦 䈩 䉁 䈜䋩 (Waiting your call)
䋨䈉䉏䈚䈇䋩(with pleasure)
䋨ᔶ䉎䋩(Anger)
䋨䉪䊥䉴䊙䉴䋩(Christmas)
User composer1/2 Not registered phrase in the Original 1 ~ 10.
Category Common Phrases
302
Appendix/External Devices/Troubleshooting
Combinations of Multiaccess Functions
䂾 : Can be launched.
㬍 : Cannot be launched.
䂦 : Can be launched under certain conditions
䋭 : Not available concurrently.
䋪1䋺An i-appli cannot be transmitted.
䋪2䋺If you subscribe to "Call waiting", you can place the current voice call on hold and make/receive another
call.
䋪3䋺While communicating, the incoming log entry is recorded as a missed call. While not communicating, you
can answer the incoming call.
䋪4䋺i-mode will be disconnected, and a call will be made.
䋪5䋺A call can be made using the Phonebook, Mail (SMS), or the i-mode Browser.
䋪6䋺You can send SMS if the received mail log contains a mail address. You can send Mail or SMS using the
Phonebook.
䋪7䋺The scanning function pattern data update will be terminated.
䋪8䋺The i-mode or SMS will be displayed on the Stand-by display when it arrives.
Communication
Event
Voice call Video Phone Packet communication SMS
Running
Application
Outgoing Incoming Outgoing Incoming
i-mode
Scanning
function pattern
data update
Software
Update
Outgoing Incoming
Outgoing Incoming
Voice call 䂦
䋪
2
䋪
5
䂦䋪2㬍䂦
䋪3䂦䋪1䂾㬍 㬍䂾
䋪6䂾
Video Phone 㬍䂦
䋪3䋭䂦
䋪3㬍㬍 㬍 㬍 㬍䂾
i-mode 䂾䂾䂦
䋪4䂦䋪3䋭䋭 㬍 㬍 㬍䂾
Scanning function
pattern data update 㬍䂦
䋪7㬍㬍㬍㬍
䋪8㬍㬍㬍䂦
䋪8
Software Update 㬍䂾㬍㬍㬍㬍
䋪8㬍䋭㬍䂦
䋪8
303
Appendix/External Devices/Troubleshooting
Combinations of Multitask Functions
䂾 : Can run concurrently.
㬍 : Cannot run concurrently.
䂦 : Can be launched under certain conditions
䋭 : Not available concurrently.
䋪1䋺microSD is not available during music playback.
䋪2䋺Applications in the New task menu can be executed.
䋪3䋺Can be launched using the music key.
䋪4䋺Pause the playback. After the call is terminated, the playback automatically resumes from the paused
position.
䋪5䋺Can be executed only when the Scanning function is turned off.
New Application
i
-
m
o
d
e
M
e
n
u
/
i
-
C
h
a
n
n
e
l
i
a
p
p
l
i
S
e
r
v
i
c
e,
S
e
t
t
i
n
g
s
D
a
t
a
b
o
x
S
t
a
t
i
o
n
a
r
y,
L
i
f
e
k
i
t,
C
a
m
e
r
a
P
h
o
n
e
b
o
o
k
U
s
e
r
d
a
t
a
L
o
w
b
a
t
t
e
r
y
P
l
a
y
i
n
g
m
u
s
i
c
䇭
Voice call
Video Phone
Mail SMS
Running
Application
O
u
t
g
o
i
n
g
I
n
c
o
m
i
n
g
O
u
t
g
o
i
n
g
I
n
c
o
m
i
n
g
S
e
n
d
i
n
g
R
e
c
e
i
v
i
n
g
S
e
n
d
i
n
g
R
e
c
e
i
v
i
n
g
Mail 䋭㬍㬍㬍䂦
䋪
2
䂾䂾䋭䂾
䋪
3䂾䋭䂾䋭㬍䋭㬍䋭
i-mode 䋭㬍㬍㬍䂦
䋪
2
䂾䂾䋭䂾
䋪
3䂾䋭㬍䋭㬍䋭㬍䋭
i-appli 㬍䋭㬍㬍㬍㬍㬍䋭㬍㬍 䋭 㬍 䋭㬍䋭㬍䋭
Service,
Setting 㬍㬍㬍㬍㬍㬍㬍䋭㬍㬍 䋭 㬍 䋭㬍䋭㬍䋭
Data box 䂾㬍㬍㬍䂦
䋪
2
䂾䂾䋭䂾
䋪
3䂾䋭䂾䋭䂾䋭䂾䋭
Stationery,
Lifekit,
Camera 䂾㬍㬍㬍㬍䂾䂾䋭䂾
䋪
3䂾䋭䂾䋭䂾䋭䂾䋭
Phonebook 䂾㬍㬍㬍䂦
䋪
2
㬍䂾䋭䂾
䋪
3䂾䋭䂾䋭䂾䋭䂾䋭
User-defined
data open 䂾㬍㬍㬍䂦
䋪
2
䂾䋭䋭䂾
䋪
3䂾䋭䂾䋭䂾䋭䂾䋭
Alarm is
running 㬍㬍㬍㬍㬍㬍㬍䋭㬍㬍 䋭 㬍 䋭㬍䋭㬍䋭
Voice call 䂾㬍㬍㬍㬍䂾䂾䋭㬍
䂦
䋪
8
䋪
9䂦
䋪
8㬍䂦
䋪
10 䂦
䋪
1䂾䂾
䋪
6䂾
During a
video call䋪14 㬍㬍㬍㬍㬍㬍㬍䋭㬍㬍䂦
䋪
3䋭䂦
䋪
10 㬍㬍㬍䂾
Scanning
function
pattern data
update
㬍㬍㬍䂾㬍䂾
䋪
5䂾
䋪
5䂾
䋪
6䂾
䋪
3㬍䂦
䋪
12 㬍㬍㬍㬍
䋪
13 㬍䂦
䋪
13
Software
Update 㬍㬍㬍㬍㬍㬍㬍䋭㬍㬍 䂾 㬍 㬍 㬍㬍
䋪
13 㬍䂦
䋪
13
Music
Playback
(BGM)䋪15
䂾㬍㬍䂦
䋪
1㬍䂾䂾䋭䋭䂦
䋪
4䋭䂦
䋪
4䋭䂾䋭䂾䋭
Continue on the next page
304
Appendix/External Devices/Troubleshooting
䋪6䋺If update is possible, continuous operation takes precedence; if update is not possible, cancellation takes
precedence. After either operation, the alert will be displayed.
䋪7䋺An i-appli cannot be transmitted.
䋪8䋺If you subscribe to "Call waiting", you can place the current voice call on hold and make/receive another
call.
䋪9䋺A call can be made using the Phonebook, Mail (SMS), or the i-mode Browser.
䋪10䋺 While communicating, the incoming log entry is recorded as a missed call. While not communicating, you
can answer the incoming call.
䋪11䋺 You can send SMS if the received mail log contains a mail address. You can send Mail or SMS using the
Phonebook.
䋪12䋺 The scanning function pattern data update will be terminated.
䋪13䋺 The i-mode or SMS will be displayed on the Stand-by display when it arrives.
䋪14䋺 The Phonebook can be searched during a call, however, mail or SMS cannot be sent.
䋪15䋺 During music playback, the Camera or an i-appli cannot be launched.
Services Available from FOMA Handset
Services Available from FOMA Handset Phone Number
Directory assistance of fixed line phones and DoCoMo mobile phones (pay
service : service and call charges)
(No assistance provided for subscribers not listed)
(No prefix) 104
Telegraph (charges apply : telegram fee) (No prefix) 115
Time check (charges apply) (No prefix) 117
Weather forecast (charges apply) Area code + 177
Police emergency (No prefix) 110
Fire and ambulance (No prefix) 119
Marine emergency call and accident reports (No prefix) 118
Message Dial of disaster (charges apply) (No prefix) 171
Collect call (Charges apply to the receiver) (No prefix) 106
Note
• If you use collect call service (106), the receiver of a call is charged for the call cost and commission of \90
(\94.5 including tax) per call (as of 䃂 2007).
• When you use directory assistance service (104), you are charged for a call cost and service charge of \100
(\105 with tax included). The service is provided free of charge for those visually impaired or physically
disabled in the upper body. For details, contact at 116 (NTT sales contact) from a fixed line phone (as of
䃂䃂 2007)
• When you use "Call Forwarding" of fixed line phone and have specified a mobile phone as its forwarding
destination, the caller may hear a ring tone even if the mobile phone is busy, out of service area or power
OFF depending on the settings of the fixed line phones and mobile phones.
• Services such as call to 116 (NTT sales center), Dial Q2, Message Service and credit card calls are
unavailable. (Credit card calls can be made from a fixed line phone or public phone to FOMA handset.).
• Even when the UIM is not inserted, emergency phone numbers (911, 999, 112, 000, and 08) can be dialed
to make an emergency call overseas. However, when the Self Mode is set to "On", emergency calls cannot
be made.
• This FOMA handset support "✕ᕆㅢႎ⟎ㅢ⍮ (Emergency Location Report)". For a call to 110, 119 or
118 from FOMA handset, the originating location cannot be identified. Depending on your location of dialing
or wave condition, a correct location may not be recognized at the emergency call center. If the call is set
to Not notify call such as adding "184", the location and the phone number is not notified. The term of
opening "✕ᕆㅢႎ⟎ㅢ⍮ (Emergency Location Report)" differs on preparation condition of the
emergency call location report.
• For a call to 110, 119 or 118 from FOMA handset, the originating location cannot be identified. Because the
police or fire department may try to contact you, inform them that you are calling using a mobile phone and
give your phone number and detailed information of the place you are. Do not move while you are talking
over a call to prevent it from being terminated unexpectedly. Do not turn the power OFF immediately after
the call is over; keep FOMA handset ready to receive calls for approximately 10 minutes.
• Depending on the area you are calling from, you may not be connected to the local police or fire department.
In such case, use a public phone or fixed line phone nearby.
305
Appendix/External Devices/Troubleshooting
Options and Related Devices
Using FOMA handset with various option devices makes it applicable to diversified fields covering personal
to business usages. Some of the products listed below may be unavailable in some areas.
For details, contact a service counter such as DoCoMo shop. For details of option devices, see the related
operation manuals.
• Battery Pack L03 • Carry Case S 01
• Rear Cover L04 • FOMA USB Cable with Charge Function 01
• Desktop Holder L01 • FOMAIndoor Booster Antenna (Stand Type)
• Flat-plug earphone/microphone with switch P01 • FOMA USB Cable
• Flat-plug earphone/microphone with switch P02 • FOMA AC Adapter 01
• Earphone Jack Conversion Adapter P001 • FOMA AC Adapter 02
• Earphone/microphone with Switch P001 • FOMA Overseas/Domestic AC Adapter 01䋪
• earphone/microphone with Switch P002 •
• Stereo Earphone Set P001 • FOMA Dry Cell Battery Adapter 01
• Flat-plug stereo earphone set P01 • Bone conduction microphone/receiver 01
• FOMA DC Adapter 01 • FOMAIndoor Booster Antenna
• FOMA DC Adapter 02 • FOMA FOMA Auxiliary Charger Adapter 01
㶎䋺 For overseas use, a compatible conversion plug adapter is required.
Video Play Software
You need Apple Computer Inc.'s QuickTime Player (free of charge) Version 6.4 or higher (or Version 6.3 +
3GPP) to play videos (in MP4 file format) captured with the FOMA handset on a PC.
You can download the QuickTime Player from the following web site:
http://www.apple.com/jp/quicktime/download/
Note
• You need a PC connected to the Internet to download the software. Separate communication charges may
apply for downloading.
• For details about operating environment, downloading or operations, visit the above web site.
306
Appendix/External Devices/Troubleshooting
Troubleshooting
Symptom Check
The FOMA handset cannot be
powered on (the FOMA
handset cannot be used)
• Is the battery pack inserted correctly?→P41
• Is the battery pack charged?→P44
• If mova is enabled under the Dual Network service, some FOMA services are
not available. Check whether FOMA is enabled. For details, refer to "Mobile
Phone User's Guide [Network services]".→P261
A call cannot be made even if
the Dial Keys are pressed • Is Dialing call lock set?→P114
• Is Lock all set?→P113
• Is Self Mode set?→P115
After a call is dialed, a busy
tone sounds and the call
cannot be connected
• Did you enter the city code?→P50
• Is the phone out of service are→P46
The icon indicating the network
status remains out of service
area and "Out of service area"
is displayed
• Are you out of service area, or in the week/poor radio wave reception level?
→P46
The security code entry screen
is open on the Stand-by display • Is Lock all set?→P113
Pressing the Side keys while
the FOMA handset is closed
does nothing
• Is "Keypad unlock" set to "Slide up only"?→P116
Charging is not available (the
charging light of the FOMA
handset does not light, the
illumination blinks in red, the
display blinks)
• Is the battery pack inserted correctly?→P41
• Is the adapter power plug correctly connected to the outlet or cigarette lighter
socket?
• Is the AC adapter is connected to the handset properly?→P44
Display is not bright enough • Is "Power save mode" set?→P103
• Is battery power running out? Charge the battery.→P44
A different ringtone sounds for
incoming mail • Is the sender saved in the Phonebook with a different ringtone?
→P78
• Is the sender saved in the Phonebook under a category with a different
ringtone assigned?→P81
Images or melodies set for
function do not work and
default settings are used
• Is the same UIM installed that was inserted when images or melodies were
obtained?→P39
The accumulated call charges
do not increase • Have you exceeded the call charge maximum? Reset the accumulated call
charge to restart counting.→P240
"Please wait." or "No lines/
channels available" is
displayed.
• Audio line/packet communication facility failed, or audio line/packet
communication network is extremely busy. Try again later.
"Time out." appears and
i-mode mail and SMS cannot
be sent.

307
Appendix/External Devices/Troubleshooting
䂓When overseas
Symptom Check
The icon indicating the network
status remains as out of service
area, and the international
roaming service is not available
• Are you out of the international roaming service area, or in a location with
weak radio wave reception?
• Check whether you are in an available service area and whether you are
using a carrier listed with the "DoCoMo WORLD SERVICE User's Guide" or
DoCoMo's "international service web site".
• Switch to an available network.→P276
Video calls, i-mode mail, SMS,
and packet communication are
not available
• Check whether you are in an available service area and whether you are
using a carrier listed with the "DoCoMo WORLD SERVICE User's Guide" or
DoCoMo's "international service web site".
• Switch to an available network.→P276
Calls or mail cannot be
received • Is "Call Barring Roaming" activated?→P277
After returning to Japan, the
network status icon still shows
out of service area
• Is "Network mode"set to "GSM / only"?→P276

308
Appendix/External Devices/Troubleshooting
Error Messages
Error Messages Description Reference
Not enough data memory There was not enough storage space in the inbox when
attempting to obtain the selected received attached file.
Delete unnecessary received mail. P174, P175
Please check address The SMScannotbe senttothe enteredaddress.Checkthe
address. 䋭
Input address No address was entered. Enter an address. P161
Could not send to the
following address. Mail could not be sent to the displayed address properly.
Move failed The file/data could not be moved because an error or other
problem occurred. 䋭
Some data couldn't save There is data that could not be saved because of not
enough storage space in the save location. Delete
unnecessary files. Delete unnecessary files. 䋭
No response(408) The handset was unable to connect because there was no
response from the site or web page. Try again. 䋭
Same time already set Another i-appli is set to start automatically at the same
time. Two or more i-appli cannot start automatically at the
same time. Two or more i-appli cannot start automatically
at the same time.
P186
Same file already exists
The file/folder cannot be created or saved because a file/
folder of the same name already exists.
䋭
MessageF data cannot be
received while you are
abroad. Remove the check
mark from "MessageF" in
the "Check new messages"
settings. Check the Center
Inquiry functions(566)
MessageF data cannot be received while you are abroad.
Remove the check mark from "MessageF" in the "Check
new messages" settings. Remove the check mark from
"MessageF" in the "Check new messages" settings. P180
No song! No song exists. Save music. P220
Cannot find file! The corresponding music does not exist. 䋭
Select items The operation cannot be performed because no song is
selected. Select a song. Select a song. 䋭
Cannot add songs! Only up to 50 songs can be registered to one playlist.
Delete unnecessary music from the playlist. Delete
unnecessary music from the playlist. P225
Image size over.
Reduced image in message The total file size of images inserted in the Deco-mail
exceeded the specified value. Delete images in the
message. 䋭
Error in image.
Does not work correctly. The operation could not be performed properly because
the image is invalid. 䋭
View images to "Off"
Can't download. Images cannot be downloaded because "Image" is set to
"Off." Change the setting. P148
Save image? The data cannot be saved because it is a Flash file that
cannot be saved or an image that has not been completely
downloaded. 䋭
Number of images does
over.
Reduce image in message
The maximum number of images that can be inserted in
Deco-mail has been reached. Delete images in the
message. 䋭
309
Appendix/External Devices/Troubleshooting
Failed to load screen memo Thescreenmemo cannotbedisplayed becauseanerror or
other problem occurred. 䋭
No screen memos No screen memos have been registered. 䋭
Cannot add screen memo The screen memo cannot be added because an error or
other problem occurred. 䋭
Software failed The handset failed to start the i-appli DX. 䋭
Failed capture The image cannot be cropped because an error occurred. 䋭
Enter MCC No country code (MCC) was entered. Enter the country
code. P276
Out of service area The operation cannot be performed because the handset
is in a location with no signal or out of the FOMA service
area. 䋭
Out of service area The program cannot be downloaded because the handset
is out of the service area. Move to a location with a strong
signal and then try downloading manually. P217
Enter subject No subject was entered for the scheduleor To Do. Enter a
subject. P232, P235
This UIM cannot be
recognized The UIM cannot be recognized or the wrong UIM is
inserted. Reinsert the UIM or insert the correct UIM and
then try the operation again. P38
Can't zoom in case of this
size. "Select size" is set to "UXGA(1200x1600)" or "SXGA(960
x128)" To use the zoom, set the size to other than these. P132
Certificate is
rejected.(tampered) A problem was detected during processing of the
certificate for the SSL session. The connection was
cancelled. 䋭
A connection could not be established because an SSL
certificate that has been tampered with was received.
Unable to download. The data cannot be downloaded because the file is invalid
or an error occurred. 䋭
Unable to download.
Delete program The program cannot be downloaded because there is no
registration for it in My Menu. Register the music channel
program provider site in My Menu. P141
This data may not be
displayed There is a possibility that this data may not be able to be
played. 䋭
Unable to acquire Unable to acquire 䋭
Cannot forward this item The selected data cannot be attached to mail and then
sent. 䋭
Set the clock to obtain data. The data cannot be obtained because the clock has not
been set. P47
File format not supported The setting cannot be configured because the file is in an
unsupported format. 䋭
This file cannot be attached The file cannot be attached to i-mode mail. 䋭
Some function is limited in
UIM Functions are limited because a different UIM card is
inserted than the one that was inserted when thedata was
downloaded from a site or the mail attachment file or
MessageR/F data was saved.
P39
Invalid content.
Change i-motion type for
replay
The handset is set not to obtain streaming type i-motion.
Change the setting. P153
Error Messages Description Reference
Continue on the next page
310
Appendix/External Devices/Troubleshooting
Cannot create folder No more folders can be added because the maximum
number of folders has been reached. 䋭
Too many items are
protected No more screen memos can be protected. 䋭
Invalid content,
Download failed The content cannot be downloaded because it is invalid. 䋭
Incomplete downloading The data is not completely downloaded. 䋭
Size over.
Reduce message or delete
attached file
The mail cannot be sent because it exceeds the maximum
possible size for sending. Reduce the size of the message
or delete attached files. 䋭
Playback error The data cannot be played back because it contains an
error. 䋭
Cannot play this data The data cannot be played back. 䋭
Unable to play. The data could not be played back because an error or
other problem occurred. 䋭
Replay period has not yet
started.
Unable to play.
Playback is not possible because today's date is not in the
playback period set for the i-motion, music data, or music
channel program. Play back the data from a date for which
playback is possible. .
䋭
Replay is restricted
mm/dd/yyyy, hh:mm 䌾
MM/DD/YYYY, HH:MM
Playback is not possible because today's date is not in the
playback period set for the i-motion, music data, or music
channel program. Play back the data during the playback
period.
䋪The year, month, day, and time are indicated in the X
part.
䋭
Replay is restricted
mm/dd/yyyy, hh:mm 䌾
MM/DD/YYYY, HH:MM
Playback is not possible because today's date is not in the
playback period set for the i-motion, music data, or music
channel program. Play back the data within the playback
period.
䋪The year, month, day, and time are indicated in the X
part.
䋭
Unable toobtain data dueto
replay restriction data error The data cannot be obtained because it is invalid or
today's date is not in the playback period. 䋭
no recent played info! The data cannot be played back because there is no
played information. 䋭
Size of this page is not
supported The reception was stopped and only the obtained portion
is displayed because the site or web page is large. 䋭
Size of this page is not
supported The downloading/obtaining of data was stopped because
the data exceeded the maximum size of data that can be
downloaded/obtained. 䋭
Unable to download. The data cannot be obtained because the data size
exceeds the maximum for retrieving. 䋭
Unable to download.
Data exceeds maximum
size (452)
The data could not be received because it exceeds the
maximum size. 䋭
Unable to download,
Data exceeds maximum
size
The data cannot be downloaded because it exceeds the
maximum size of data that can be downloaded. 䋭
Up to 10 screen memos can
be protected. No more
memos can be protected.
Up to 10 screen memos can be protected. unable to
protect it.
URL address changed (301)
Thesite orwebpage isautomaticallyforwardingto anURL
or the URL has changed. . 䋭
Connection failed(403) The handset cannot connect to the site or web page. 䋭
Error Messages Description Reference

311
Appendix/External Devices/Troubleshooting
File with copyright will be
deleted The handset will delete the attached file and then send the
message because the file is copyrighted. 䋭
Cannot be deleted The data cannot be deleted because there was an error. 䋭
There is no bookmark that
can be deleted. The operation cannot be performed because there is no
bookmark that can be deleted. 䋭
There is nota messageto
delete There is no message that can be deleted because all
messages are protected. 䋭
There is nobookmark
thatcan be deleted. There is no message that can be deleted because no
message exists or all messages are protected. 䋭
Failed to delete The handset failed to delete the data because an error or
other problem occurred. 䋭
Canceled deleting Deleting was cancelled deleting because an error or other
problem occurred. 䋭
Number of creating folder is
20EA. A new folder cannot be created because the number of
folders that can be created (20) has been exceeded. P195
Service is not registered You have not subscribed for the i-mode service. 䋭
Service is not provided The handset failed to send the SMS because the service is
not provided. 䋭
Format not supported The operation cannot be performed because it is not
supported. 䋭
Not supported The operation cannot be performed because it is not
supported. 䋭
Page is not found(404) The site or web page does may not exist or the URL may
be wrong. Check the URL and then try again. 䋭
No content is available (204) There is no data available at the specified site. 䋭
No requested software The specified software cannot be started because it does
not exist. 䋭
Requested software
unavailable The operation cannot be performedbecause the specified
software cannot be started. 䋭
No messages There was no message that matched the conditions
specified for the filter operation. 䋭
No data There was no mail that matched the conditions specified
for the filter operation. 䋭
Unable to retrieve the
requested URL (504) The site or web page does may not exist or the URL may
be wrong. Check the URL and then try again. 䋭
Invalid number! An invalid number was entered or no number was entered.
Enter a valid number. 䋭
Invalid address The message cannot be sent because the mail address is
invalid. 䋭
3 i-applis have been already
registered for auto-start The number of i-appli that can be set to start automatically
is up to three. 䋭
Please wait The handset failed to send the SMS. Wait a while and then
try again. 䋭
Low battery.
Can't update There is not enough battery power. Charge the battery. P42
Invalid end time f the start date and end date of a schedule event are the
same, the end time is set to a time earlier than the start
time. Set an end time that is later than the start time. P232, P235
Invarid end date The end date is set earlier than the start date. Set the
schedule event so that the end date is later than the start
date. P232, P235
Error Messages Description Reference
Continue on the next page
312
Appendix/External Devices/Troubleshooting
Receiving.
Please wait The handset is receiving data. Wait a while. 䋭
Cannot receive message The selected message cannot be received because the
host address set for "Host Selection" is wrong. Check the
setting and then try again. P149
There is no empty space in
INBOX.
Please delete unnecessary
mail to receive SMS
SMS cannot be received because there is not enough
storage space in the inbox. Delete unnecessary received
mail. P174, P175
Inbox is full The i-motion cannot be received because there is not
enough storage space in the inbox. Delete unnecessary
received mail. P174, P175
SMS cannot be moved/copied from the UIM because there
is not enough storage space in the inbox. Delete
unnecessary received mail.
No messages There are no received messages. 䋭
Reception rejected The handset failed to send the SMS because the reception
was rejected. 䋭
Canceled receiving The reception was cancelled. 䋭
No Certificates There are no SSL certificates. 䋭
Schedule is full There is not enough storage space for Schedule. Delete
unnecessary schedule events. P235
Already set The mail address cannot be set because it is already set
for auto sort. 䋭
Already exists The network cannot be registered because it is already
registered. 䋭
Host name already exists The host name cannot be registered because it is already
registered. 䋭
Already exist The network cannot be registered because it is already
registered. 䋭
Same URL already saved The URL cannot be saved because it is already registered
on the FOMA handset. 䋭
Already received message
on server The message cannot be sent because it is already stored
on the server. 䋭
All data is invalid. The operation cannot be performed because all the data is
invalid. 䋭
Could not parse all mail to
parameters Some of the parameters exceed the limit. 䋭
Cannot playf or limit size The file attached to the i-mode mail cannot be played
because it exceeds the limit size. 䋭
Cannot play for limit size The file attached to the i-mode mail cannot be played
because it exceeds the limit size. 䋭
Connection failed(400) The handset was unable to connect properly because of
an error on the access point. 䋭
Unable to connect. Unable to connect because of the network problem.
Please retry after a while.
Connection interrupted The connection was interrupted because an error or other
problem occurred. 䋭
Host address is empty There is no host address entered. Enter the host address. P145
Host name is empty There is no host name entered. Enter the host name. P145
Access point is empty There isno accesspointnumber entered.Enterthe access
point number. P145
Error Messages Description Reference
313
Appendix/External Devices/Troubleshooting
Connection failed A connection cannot be established because the host
address set for "Host Selection" is wrong. Check the
setting and then try again. P149
Time out. The i-mode center is congested. Wait a while and then try
again. 䋭
Time out.
Resume download? The attached file linked to the i-mode mail could not be
downloaded within the set time. Do you want to try
downloading again? 䋭
Failed set ! The ringtone could not be set because an error occurred. 䋭
Setting self mode The operation cannot be performed because self mode is
set. Set self mode to "OFF". P115
Not able to insert a chosen
image The selected image could not be inserted because it
exceeds the specified value. 䋭
Service unavailable The handset cannot connect to the network because it is
out of the service area or in a location withno signal. Move
to a location with a strong signal and then set the network. 䋭
Service unavailable The list of networks cannot be displayed because there is
no UIM inserted. Insert the UIM and then try using the
handset. P38
Service unavailable The network list could not be saved with "UPLMNselect by
list" of "Preferred NW lists." 䋭
No decorations. Cannot
save as template. The template cannot be saved because there are no
decorations. 䋭
Preparing to send The handset is preparing to send the i-mode mail. Wait a
while. 䋭
Address is not valid(451)
Check the address.(451) The mail could not be sent properly. Check the address
and then try again. P161, P181
Server is full(551) The mail/SMS could not be sent properly. 䋭
Transmission failed(XXX) The mail could not be sent properly.
䋪A number that indicates the type of error appears
instead of X. 䋭
Could not send mail
Server is full(551) The mail space for the recipient is full. 䋭
Outbox is full SMScannotbe copied/movedfrom theUIM becausethere
is not enough storage space in the outbox. Delete
unnecessary sent and unsent mail.
P174, P176,
P177, P178
No messages There is no outbox mail 䋭
Transmission rejected. The sending of the SMS was rejected. 䋭
Cancelled sending Sending was cancelled. 䋭
Up-to-date software The i-appli cannot be updated because it has already been
updated to the latest version. 䋭
This software contains an
error The i-appli data cannot be downloaded because it
contains an error. 䋭
Downloaded canceled due
to the SW error The i-appli data cannot be downloaded because it
contains an error. 䋭
unsupported card format.
please format again. The format of the microSD memory card is not supported.
Use the FOMA L705i to format the microSD memory card. P207
The data cannot be
displayed because it is not
supported.
The data cannot be displayed because it is not supported. 䋭
Invalid title Invalid characters or no characters were entered for the
title name. Enter a valid title name. 䋭
Error Messages Description Reference
Continue on the next page
314
Appendix/External Devices/Troubleshooting
Time out The handset searched for a network for the set amount of
time, but no network could be found Check whether the
"Switch 3G/GSM" setting is correct. P276
Keypad dial lock The operation cannot be performed because Dialing
Restriction is set. Remove the checkmark for "Keypad dial
lock" in the Call/Mail lock settings. P114
Unable to download in this
time The program cannot be downloaded during this time zone.
Download the program during the distribution time. 䋭
Unable to download.
Check your battery is fully
charged.
There is not enough battery power to download the
program. Charge the battery until appears. P42
Download failed The data could not be downloaded because an error or
other problem occurred. 䋭
Already downloaded An i-appli of the same version has already been
downloaded. 䋭
i-mode mail service is busy.
Please try again later(XXX) The line is very busy. Wait a while and then try again.
䋪A number that indicates the type of error appears
instead of X. 䋭
Security code error The security code is incorrect. Enter the correct security
code. P110
Call rejected An incoming call was rejected because it wasfrom a caller
not registered in the phonebook. To receive calls from
callers not in the phonebook, set "Memory reject call" to
"OFF."
P121
An incoming call was rejected because it was from a caller
registered in "Reject on list." P118
An incoming call was rejected because "Reject all calls" is
set to "Disconnect all." P119
Failed to retrieve channel
information When retrieving i-Channel information, the handset failed
to obtain the information because some or all channel
information could not be retrieved. Move to a location with
a strong signal and then press Qfor at least 1second in
stand-by to receive the information.
䋭
Connection suspended The connection was suspended because the set amount
of time elapsed without finding the other party. Check the
distance from the other party, angle, and operating
procedure.
P212, P213
Exchange failed Communication failed because, for instance, the operation
was suspended. 䋭
Battery low The battery level is low. Charge the battery. P42
Invalid data The operation cannot be performed because the data is
invalid. 䋭
Input data The country name and country code were not entered.
Enter the country name and country code. P62
Receiving canceled Downloading was suspended because the handset went
out of the service area. Move to a location with a strong
signal. 䋭
Error Messages Description Reference
315
Appendix/External Devices/Troubleshooting
Low battery
Cannot start camera-mode The operation cannot be performed because there is not
enough battery power. Charge the battery. P42
Low battery
Can't use The function cannot be used because there is not enough
battery power. Charge the battery. P42
Low battery
Exit microSD mode microSD mode ended because there is not enough battery
power. Charge the battery. P42
No attachable file There is no file that can be attached. 䋭
Attached file is deleted The attached file will be deleted and then the mail will be
forwarded because a different UIM card is inserted than
the one that was inserted when the i-mode mail
attachment file was received.
P39
Template is full There is not enough storage space for Template. Delete
unnecessary templates. P165
Size over The size of the template exceeds the specified value.
Delete the message or inserted images. P165
Phonebook is full There is not enough storage space for the phonebook
entry. Delete unnecessary phonebook entries. P87
Failed Clipping The video could not be edited because an error occurred. 䋭
Check failed The handset failed to check for new SMS. 䋭
Registration is in
progress(554) The operation cannot be performed because user
registration is taking place.Wait a while and then try again. 䋭
No bookmark data. The bookmark cannot be added because there is no
bookmark data that can be added. 䋭
Incomplete data saved The bookmark cannot be added because there is no
bookmark data that can be added. Incomplete data was
saved. To retrieve the rest of the data, perform the
operation manually.
P217
Day is out of range The period specified is incorrect. Set a period from 2 to 31
days. P234
Too muchdata wasentered. Sending is not possible because too many characters
were entered in the site or web page input field. Reduce
the number of characters and then try sending again. 䋭
Input error(205) The input data contains an error. Check the input data. 䋭
Authentication type is not
supported (401) A connection cannot be established because the
authentication type is not supported. 䋭
Authentication failed The wrong security code was entered. Enter the correct
security code. 䋭
Authentication
canceled(401) The connection was suspended because authentication
failed. 䋭
Enter correct Network
security code. The network security code is wrong. Enter the correct
network security code. 䋭
Enter MNC. The MNC was not entered. Enter the MNC. P276
Error Messages Description Reference
Continue on the next page
316
Appendix/External Devices/Troubleshooting
Unableto acquireremaining
data
Data deleted
While attempting to download the remaining data of a
partially saved file, the data was deleted because an error
occurred and downloading failed. 䋭
Password is not
correct(401) The user name or password entered in the authentication
screen of a site or web page was wrong. Enter the
information again. 䋭
Music channel downloading Downloading or playback is notpossible because a music
channel program is being downloaded. Wait a while and
then try again. 䋭
Program is downloading.
Can not start Data back up The data backup cannot be started because a music
channel program is being downloaded.You can press M
[Cancel] to cancel downloading. 䋭
Program is downloading.
Can not update pattern
data.
The pattern data cannot be updated because a music
channel program is being downloaded.You can press M
[Cancel] to cancel downloading. 䋭
Program is downloading.
Can not start ADL. The ADL cannot be started because a music channel
programis beingdownloaded.You canpressM[Cancel]
to cancel downloading. 䋭
Program is downloading.
Can not start i-application Communication with the i-appli is not possible because a
music channel program is being downloaded.You can
press M[Cancel] to cancel downloading. 䋭
Program is downloading.
Can not start i-mode An i-mode connection cannot be established because a
music channel program is being downloaded.You can
press M[Cancel] to cancel downloading. 䋭
Program is downloading.
Can not start PPP A PPP connection cannot be established because a music
channelprogram isbeingdownloaded. Youcan press M
[Cancel] to cancel downloading. 䋭
Receiving failed.
Because mail to indicate
can't replace it
The mail cannot be received because the handset is
attempting to overwrite the mail that is currently displayed. 䋭
There are no files There are no files in the folder. 䋭
This file is not supported. The file cannot be played because the data is not
supported or corrupted. 䋭
Invalid File(493) The operation cannot be performed because the file that
was obtained is corrupted. 䋭
Cannot find file The operation cannot be performed because the selected
file does not exist. 䋭
File error The operation cannot be performed because the file is
invalid. 䋭
File is deleted The file will be deleted and then the mail sent because a
pasted file cannot be forwarded. 䋭
Failed to create file The file could not be moved/copied because an error
occurred. 䋭
Attached file size is over The maximum attachment size has been exceeded. 䋭
Cannot save file The file could not be saved because an error or other
problem occurred. 䋭
Incorrect folder name Invalid characters or no characters were entered for the
folder name. Enter a valid folder name. 䋭
Error Messages Description Reference
317
Appendix/External Devices/Troubleshooting
XXX folder can't delete The selected folder cannot be deleted.
䋪The corresponding folder name is displayed instead of
XXX. 䋭
Delete invalid address. An invalid address was deleted. 䋭
Invalid data Theoperationcannot beperformedbecause thewrongfile
is selected. 䋭
The operation cannot be performed because the data is
invalid.
Invalid title is included Invalid characters or no characters were entered for the
folder name. Enter a valid folder name. 䋭
Bookmark is full. There is not enough storage space for the bookmark.
Delete unnecessary bookmarks. P143, P144
Could not parse all
bookmark data
␜䈪䈐 䈭䈇䉅 䈱䈏䈅 䉍 䉁
䈜
Some bookmarks cannot be displayed because there are
too many bookmarks. 䋭
No bookmarks. There are no bookmarks added. 䋭
Cannot add bookmark. The bookmark cannot be added because an error or other
problem occurred. 䋭
Unknown error. The operation cannot be performed because an unknown
error occurred. 䋭
Cannot add to playlist! The song cannot be added because the maximum number
of playlists/songs in each playlist has been added. Delete
unnecessary playlists/songs. P225
Cannot create playlist! Only up to 10 playlists can be added. Delete unnecessary
playlists. P225
There is not a message
tocancel protection Protection cannot be cancelled because there is no
protected mail. 䋭
There is nota message to
protect Protection cannot be cancelled because there are no
protected messages. 䋭
There is not a messageto
protect There is no mail that can be protected because all mail is
already protected. 䋭
There is not a message to
cancel protection There is no mail that can be protected because all mail is
already protected. 䋭
Not protected message? There are no protected messages. 䋭
Retention period has
expired(492) An unobtained attachment file cannot be obtained
because the retention period at the i-mode center has
expired. 䋭
Network Unavailable The data could not be saved because an error occurred. 䋭
Canceled saving Saving was cancelled because an error or other problem
occurred. 䋭
No save area The operation cannot be performed because there is not
enough storage space in the save location. Delete
unnecessary files. 䋭
Home page not set A connection cannot be established because the home
page is not set. P148
Home page disabled The home page is set to "Disable." Set it to "Enable." P148
Error Messages Description Reference
Continue on the next page

318
Appendix/External Devices/Troubleshooting
Handset memory is full No more settings can be configured. Delete unnecessary
items. 䋭
Cannot send message for
size over.
Delete message
The mail cannot be sent because the maximum number of
characters that can be entered for a message has been
exceeded. Reduce the size of the message. Reduce the
size of the message.
P161
Cannot save message for
size over.
Delete message
The mail cannot be sent because the maximum number of
characters that can be entered for a message has been
exceeded. Reduce the size of the message. P161
Cannot send message for
number of images over.
Reduce image in message
The mail cannot be sent because the number of inserted
images exceeds the specified number. Delete images in
the message. P162
Cannot save message for
number of images over.
Reduce image in message
The mail cannot be saved because the number of inserted
images exceeds the specified number. Delete images in
the message. P162
Messageentrysize exceeds
limited.
Delete message
The maximum possible number of characters for the
message has been exceeded. Reduce the size of the
message. P161
Cannot edit message The message cannot be edited. 䋭
Cannot save imagewithout
playing The data cannot be saved because it is a Flash file.
䋭
The data cannot be saved because itis an unplayed Flash
animation.
Unsent message is full There is not enough storage space for unsent messages.
Delete unnecessary unsent or sent messages. P174, P176,
P177, P178
No messages There are no unsent messages. 䋭
There's empty input.
Input required The operation cannot be performed because some items
have not be entered. 䋭
Empty message cannot be
saved An empty message cannot be saved. 䋭
Expire Music channel
contract, Delete program The program cannot be downloaded because you have not
subscribed to the music channel. Subscribe Music
channel. 䋭
Music player is running. The operation cannot be performed because music player
is running. Press Pto end music player. 䋭
Received invalid data The operation cannot be performed because the received
data contains an error. 䋭
Invalid Data(XXX) The specified site or web page is not supported.
䋪A number that indicates the type of error appears
instead of X.
䋭
Check whether the URL is correct.
䋪A number that indicates the type of error appears
instead of X.
Displayis notpossible becausethe receiveddata contains
an error.
䋪A number that indicates the type of error appears
instead of X.
Invalid date(pop#2) The value is outside the setting range of the date search. P238
Invalid file name is included The file or folder cannot be saved or created because an
invalid character was entered for the file name or folder
nam. 䋭
No messages There is no MessageF data. 䋭
Error Messages Description Reference
319
Appendix/External Devices/Troubleshooting
No messages. There is no MessageR data. 䋭
Folder is full There is not enough storage space for MessageR/F data.
Delete unnecessary MessageR/F data. P151
Message data is broken The message cannot be displayed because the message
data is broken. 䋭
Memory is full There is not enough storage space for memos. Delete
unnecessary memos. P241
Memory is full The operation cannot be performed because there is not
enough storage space in the save location. Delete
unnecessary files. 䋭
Not enough memory
Can't save Only up to 10 access points can be registered. Delete
unnecessary access points. P149
Not enough memory.
Can't record A video cannot be recorded because there is not enough
memory. 䋭
Not enough memory There is not enough storage space in the move/copy
destination. Delete unnecessary files. P195, P190,
P202, P204
Memory shortage The process will be suspended because there is not
enough memory. 䋭
Memory shortage
Stop Browser i-mode will end because there is not enough memory. 䋭
Memory shortage
Return to Main Menu The process will be suspended because there is not
enough memory. 䋭
Folder is full There is not enough storage space for both received mail
and MessageR/F data. Delete unnecessary received mail
and MessageR/F data.
P151, P174,
P175
Characters are too long to
enter No more characters can be entered because the number of
entered characters exceeds the maximum. 䋭
Loading. Wait a while because data is being loaded. 䋭
Loading.
Please wait. Wait a while because data is being loaded. 䋭
Reject list full There is not enough storage space for the list.
Delete unnecessary items. 䋭
International roaming
service denied The operation cannot be performed because you have not
subscribed to WORLD WING. 䋭
Can't save over 50 songs Only up to 50 songs can be added to Quick playlist.
Delete unnecessary music from Quick playlist. P225
Bookmark is full There is not enough storage space for the bookmark.
Delete unnecessary bookmarks. P144
Activationfailure becauseof
different UIM The i-appli could not be started automatically because of
the UIM operation limit function. Insert the UIM that was
inserted when the file was obtained and then try again. P39
Invalid UIM, requested
service not available. The mail cannot be sentbecause of the UIM operation limit
function. Insert the UIM that was inserted when the file was
obtained and then try again. P39
Error Messages Description Reference
Continue on the next page
320
Appendix/External Devices/Troubleshooting
Invalid UIM, requested
service not available. A different UIM card is inserted than the one that was
inserted when the data was downloaded from a site or the
mail attachment file or MessageR/F data was saved. Use
the data with the same UIM card that was inserted when
you downloaded or saved the data.
P39
Invalid UIM cannot send The mail cannot besent becauseof the UIM operation limit
function. Insert the UIM that was inserted when the mail
was created and then try again. P39
Activationfailure becauseof
different UIM The i-appli could not be started automatically because of
the UIM operation limit function. Insert the UIM that was
inserted when the file was obtained and then try again. P39
*****Not enough memory. Ani-appli that is used in conjunction with the UIM inserted
atthe timeofdownload froma siteorother locationcannot
be started. Use the i-appli with the same UIM inserted that
was inserted when the i-appli was downloaded.
P39
Invalid UIM, incorrect
display Some data applicable to restrictions such as images
cannot be displayed because a different UIM card is
inserted than the one that was inserted when the data was
downloaded from a site or the mail attachment file or
MessageR/F data was saved. Use the data with the same
UIM card that was inserted when you downloaded or
saved the data.
P39
Invalid UIM, incorrect
display A different UIM card is inserted than the one that was
inserted when the screen memo was saved. Use the
screen memo with the same UIM card inserted that was
inserted when you saved the data.
P39
UIM reading The UIM is being read. Wait a while and then try again. 䋭
UIM not ready The UIM card is not inserted. Insert the UIM and then try
again. P38
UIM not ready The UIM card is not inserted. Insert the UIM and then try
using the handset. P38
Invalid UIM requested
software can't start The specified software cannot be started because a
different card is inserted than the one inserted when the
software was downloaded from a site or other location.
Use the i-appli with the same UIM inserted that was
inserted when the i-appli was downloaded.
P39
Invalid UIM.
Start not possible. An i-appli that is used in conjunction with the UIM inserted
atthe timeofdownload froma siteorother locationcannot
be started. Use the i-appli with the same UIM inserted that
was inserted when the i-appli was downloaded.
P39
"i-appli To" function is not
set The i-appli cannot be started because there is no
checkmark added to the "Site i-appli to" setting. Add a
checkmark and then try again. P189
Cannot receiving
i-Channel information Thei-Channel informationcannot bereceivedbecause the
UIM is not inserted properly or there is a problem with the
UIM. Check the UIM. P38
Content length exceeds
replayable size for i-motion The data cannot be obtained because the data size
exceeds the maximum for retrieving. 䋭
Receiving data exceeds
replayable size for i-motion The data cannot be obtained because the data size
exceeds the maximum for retrieving 䋭
Check new message is set
all OFF There are no checkmarks added for all items of the"Check
new messages" settings. Add checkmarks to these items
and then try playback again. P180
Error Messages Description Reference

321
Appendix/External Devices/Troubleshooting
microSD not Ready There is no microSD memory card inserted in the FOMA
handset. Insert a microSD memory card. P206
microSD card ejected The microSD memory card was ejected while the contents
of the microSD memory card were displayed. Insert a
microSD memory card. P206
microSDmemory cardis not
available The microSD memory card was not recognized. Insert the
microSD memory card properly. P206
microSD card not ready There is no microSD memory card inserted in the FOMA
handset. Insert a microSD memory card. P206
PIN1 (PIN2) is locked. If the wrong PIN1/PIN2 code is entered 3 times in a row,
the PIN lock is set. Enter the PUK code. P111
PUK code not recognized If the wrong PIN1/PIN2 code is entered 3 times in a row,
the PIN lock is set. Enter the PUK code. P111
PIN1 code not recognized The PIN1 Unlock Code is wrong. Enter the correct PIN1
Unlock code. P111
PUK code error The entered PUK code is wrong. Enter the correct PUK
code. P112
PUK code not recognized Ifyou enterthe wrongPUKcode 10timesin arow, thePUK
code is locked. Contact the service counter of a DoCoMo
shop.
Back cover of
this manual
PUKblocked IfyouenterthewrongPUKcode10timesinarow,thePUK
code is locked. Contact the service counter of a DoCoMo
shop.
Back cover of
this manual
No PLMN found There is no network that can be selected. 䋭
SD audio music is running The operation cannot be performed because the SD audio
player is running.Press Pto end music player. 䋭
Please check SMS Center
settings The handset failed to send the SMS. Check the "SMS
Center" setting. P182
SSL session cannot be
established. A connection could not be established because an SSL
certificate that has been tampered with was received or an
SSL error occurred. 䋭
SSL session failed. A problem was detected during processing of the
certificate for the SSL session. The connection was
cancelled. 䋭
A session was not possible because of an authentication
error on the server.
Root certificate is not valid. The certificate of the FOMA handset is set to invalid.
Change the setting to establish a connection. P152
SSL session was
terminated. The SSL session was terminated because a suspend
operation was performed. 䋭
To do is full There is not enough space in the storage location for To
Do. Delete unnecessary To Do entries. P236
Please set "To type"
receiver There is no address set for the To field. Set at least one
address for the To field. P161
URL is too long to register The URL cannot be registered because it contains too
many characters. 䋭
Invalid URL The handset cannot connect to the site or Internet because
the URL is invalid. 䋭
Error Messages Description Reference
Continue on the next page

322
Appendix/External Devices/Troubleshooting
No URL history The operation cannot be performed because there is no
history of connecting to the URL. 䋭
Unplug the USB cable The FOMA USB connection cable is connected.
Disconnect the cable and then try again. P210
Disconnect USB cable for
microSD mode. Switching to communication mode is not possible while
the FOMA USB connection cable is connected.
Disconnect the cable and then try switching. P210
㱍error An error occurred while an i-appli was starting. 䋭
Error Messages Description Reference

323
Appendix/External Devices/Troubleshooting
Warranty and After-sales Service
Warranty
• Be sure to receive a warranty attached to
FOMA handset you purchase. Read contents of the warranty and
confirm items such as the
"shop name and the date of purchase" and keep it in a safe place. If necessary items
are not described, immediately contact the shop you purchased. The warranty for free repair is valid for 1 year
from the date of purchase.
• This product and its accessories are subject to change, in part or whole, for improvement without prior notice.
•
Saved contents of phonebook and other functions may be altered or lost by failure, repair or other handling of
FOMA handset
. You are recommended to note down the contents of phonebook and other functions as a
precaution. In repair, etc. of FOMA handset, information downloaded with i-mode or i-appli is not transferred to
FOMA handset in repair, with some exceptions, because of the Copyright Law.
䋪This FOMA handset allows you to save files, such as still images stored in the Data box onto the microSD
memory card.
䋪If you have a PC, use proprietary datalink Software and the FOMA USB cable 01 (optional) to transfer/save
data stored in the Phonebook to the PC.
After-sales Service
Malfunctioning
Before requesting for repair, check by yourself referring to "Troubleshooting" in this manual. If the problem
still persists, contact䊶Repairs on the back of this manual.
When Repair is Assumed Necessary by Contacting
Take your FOMA handset to a service center designated by DoCoMo. Be sure to check the opening hours of
the service center. Note that you must bring the warranty.
䂓In Warranty period
• The FOMA handset will be repaired at no charge subject to the conditions of the warranty.
• The warranty must be presented when requesting for repair. Even in the warranty period, you will be charged
for repair if the warranty is not presented or the trouble or damage is caused by your inappropriate handling.
• The subscriber is charged even during the warranty period for repair of failures caused by the use of devices
or consumable items that are not DoCoMo-specified.
䂓Repair may not be possible in the following cases:
• Repair may not be possible when perspiration is detected by the moisture detection seal; when corrosion
due exposure to moisture, condensation or sweat is found in a test result; or if any of the internal boards are
damaged or deformed. Since these conditions are outside the scope of the warranty, any repairs, if at all
possible, will be charged.
䂓After expiration of the warranty
• All repairs that are requested are charged.
䂓Replacement parts
• Replacement parts (parts required to maintain production function) will be kept in stock for at least 6 years in
principle after termination of production. However, repair may still not be possible due to a lack of
replacement parts depending on the failure. Even after the parts holding period, some failures may be
repairable. Contact䊶Repairs on the back of this manual.
324
Appendix/External Devices/Troubleshooting
Notes
• Do not modify FOMA handset or its accessories.
- Fire, injury or damage may result.
- In order to prevent interference of radio waves or network troubles, technical standards are defined for FOMA
handset and UIM by law. FOMA handset or UIM that do not meet these technical standards may not be used.
- If the FOMA handset modified (in a way such as parts replacement, remodeling or painting) will be repaired
only after the handset has been restored to the original conditions (containing DoCoMo genuine parts only).
Note that, depending on the details of modification, repair may be refused.
- Repair of failure or damage caused by modification is charged even in the warranty period.
•
Do not remove rating stickers put on FOMA handset. Rating stickers function to
certify that the FOMA handset
meets the technical standards. If the stickers are removed intentionally or replaced disabling to confirm their
contents, repair may be refused because compliance to the technical standards cannot be confirmed.
• Various function settings and information including total call time may be cleared (reset) by failure, repair or other
handling of FOMA handset. In such a case, you have to make function settings again.
•
FOMA handset contains magnetic components given below. Keep cash cards and other objects
vulnerable to
magnetism off such components or they may become unusable.
Magnetic components : Speaker and Earpiece
• When
FOMA handset has got wet or moistened, immediately turn the power OFF, remove the battery pack and
bring FOMA handset to repair
shop. Note that, depending on the conditions of FOMA handset, it may not be
reparable.
Phonebook and Downloaded Data
• Note down and keep separately the data you registered in your FOMA handset. DoCoMo will not accept any
liability whatsoever for changes of information or loss of information.
• The Data you created or imported or downloaded from external sources may be altered or lost as a result of
changing the
FOMA handset model
or repairing the FOMA handset. DoCoMo is not responsible for data
alteration or loss under these circumstances. Also, at DoCoMo's convenience, your FOMA handset may be
replaced with a substitute product instead of repaired. In this case, only a part of the data on the product can be
transferred to the substitute. For this FOMA handset, images and melody downloaded from i-mode official site
are transferred at repair. (Some contents may not be transferable. Moreover, depending on severity of the
failure, transfer of contents may be disabled.) Moreover, depending on severity of the failure, transfer of contents
may be disabled.)
About the i-mode Malfunction Check Site
You can check by yourself whether your FOMA handset is properly sending / receiving mail, downloading
images and melodies.
ai-mode Menu screen
䋨P138䋩X"䌩Menu"X"䈍⍮䉌 䈞(Information)"X
"䉰䊷䊎䉴䊶 ᯏ⢻(Service/Function)"X"䌩䊝䊷䊄
(i-mode)"X"䌩䊝䊷䊄
㓚⸻ᢿ(i-mode malfunction check site)"
(Image to be
added)
325
Appendix/External Devices/Troubleshooting
Software Update
Updating Software
This function checks whether FOMA handset software requires update and, if required, updates the software
by downloading a part of it using packet communication䋪.Whensoftware update is necessary, you will be
informed of it with DoCoMo's web site and "䈍⍮䉌 䈞䋧䊓䊦䊒 (News & Help)" of iMenu.
Software may be updated in the following two methods : "Now update" and "Timer update".
• Now update : Update immediately when you want.
• Timer update : When you set a schedule to update, software is automatically updated on the scheduled day.
䋪䋺 Communication charges do not apply for packet communication for software update.
Note
• Packet communications charges do not apply for the i-mode malfunction check. (Charges apply when
accessing from overseas).
• Test items will differ depending on FOMA handset model. Test items may change.
• When confirming operations for each test item, perform the test after carefully reading the warnings on the
site.
• When connecting to the i-mode malfunction check test site, and when performing the mail send test, your
FOMA handset's information (model name, mail address, etc.) is automatically sent to the server (i-mode
malfunction check server). The information sent is used only for i-mode malfunction check.
• After the check, if you feel that there is a malfunction, call the "Repairs" number described on the back of
the manual.
• Software update is available even if you have set connection destination from i-mode destination.
• Fully charge the battery pack before updating software.
• Software update (downloading and rewriting) may take a while.
• Updating software with the "PIN1 code request" set to "ON" displays the PIN1 code entry screen in the
automatic restart after installing the software. You cannot make/receive calls or perform communication until
you enter the correct PIN1 code.
• You cannot make or receive calls or use communication or other functions while updating software (you can
receive voice calls while downloading).
• You are recommended to perform software update without moving under conditions with strong radio wave
reception level and 3 antenna icons displayed. If the radio wave reception level go worse during software
download or download is suspended, retry software update under good radio wave reception level.
• If you check software update after software update, message "No Update Required: appears.
• After software update, an icon indicating the i-mode Center storage status disappears. When mail is
delivered during software update with "Receive option" set to "ON", screen indicating that there is mail may
not appear after software update.
• During pattern data update, information (handset model, serial No., etc.) specific to your mobile phone is
automatically sent to the server (software update server managed by DoCoMo). DoCoMo does not use the
sent information for other purposes than Software update.
• Software update is disabled in the following cases:
- While Lock all is set
- While another function is running
- When the date and time are not set
- When the FOMA card (UIM) is not inserted
- When the battery is not charged full
- When "Out of service area" appears at the top of the screen
- Power is OFF
- During international roaming
Continue on the next page
326
Appendix/External Devices/Troubleshooting
Starting Software Update
Check whether to need to update FOMA handset software.
aM[Menu]X(Settings)X"Others"X"Software update"XEnter
your security code
• When Software update has been scheduled, the Schedule notification screen will be appeared.
bCheck the contents on confirmation screen and press "OK"
• The communication starts and inquire to the center. If update is needed, the software update
confirmation screen will be appeared.
Immediately Updating Software
aOn the software update confirmation screen, select "Update now"
X"OK" on the download start screen.
• Download starts, and when the download is completed, the confirmation screen for software rewriting
is displayed.
b"OK"
• The rewriting starts, and the software update confirmation screen is appeared after completing.
• All the operations will be disabled during rewriting.
c"OK"
Updating Software on Scheduled Date
You can select the date and time to update software.
aSelect "Reserve"on the software update confirmation screen
• The desired date and time selection screen is appeared.
bSelect the date and time
• When the reserved time comes, the FOMA terminal starts updating software automatically.
• When you select "Others" on the desired date and time screen, you can set both desired date and time
individually.
Note
• Never remove the battery pack during software update. Doing so may cause update to fail.
• Software update can be carried out with data such as phonebook, camera images, downloaded data maintained.
Note that, however, such data may not be protected depending on the conditions of FOMA handset (failure, damage,
wetting, etc.).
You are recommended to back up important data (some data including downloaded data cannot be backed up).
• When software update has failed, "Rewriting Failed" appears, disabling any kind of operations. In that case, you
have to bring FOMA handset to repair center specified by DoCoMo.
327
Appendix/External Devices/Troubleshooting
Scanning function
Protecting Mobile Phone from Dangerous Data
As for data and programs downloaded to FOMA handset from site or via i-mode mail, etc., you can detect
and delete data or disable applications that may cause troubles.
• Pattern data is used for checking. Update pattern data, which is upgraded as needed when new problems are
detected.→P328
• Scanning Function provides a means to protect FOMA handset from data that may invade when viewing web
site or receiving mail, etc., causing troubles of FOMA handset. Note that this function cannot avoid occurrence
of troubles unless pattern data specific to individual troubles has not been downloaded to FOMA handset or
such pattern data does not exist.
• Pattern data has different contents depending on mobile phone models. Note that, therefore, DoCoMo may stop
distributing pattern data for models that have been on the marker for 3 years or more.
Setting Scanning Function
When Scanning Function is set to "ON", data and programs to be performed are automatically checked.
aM[Menu]X(Settings)X"Lock/Security"X"Scanning function"
X"Set scan"
b"Set scan" / "Set message scan"X"ON"/"OFF"
Setting Scan Function
: When data that may cause troubles is detected, it is alerted in 5 levels.→P317
Setting Message Scan
: When setting to "ON" and described the phone number and URL in SMS, the notation screen that
described phone number and URL will be appeared when displaying the SMS at first.
Note
• In Scheduled date software update, the times for reservation on the sever is displayed.
• Note that if you perform the other functions, the software update does not launch at the scheduled time.
• If you perform alarm function, the software update may not be launched.
• If you perform "Clear memory"(P246) after completing the reservation, the software update may not be
launched at the scheduled time. Reschedule the time for update.
First, update the pattern data to the latest one.
Default Set scan:On Set message scan:On
328
Appendix/External Devices/Troubleshooting
Updating Pattern Data
aM[Menu]X(Settings)X"Lock/Security"X"Scanning function"
X"Update"X"Yes"X"Yes"
Updating starts. Upon completion of update, a screen to notify the completion opens.
• When the pattern data is the latest one, a message to that effect appears.
bC[OK]
To update the pattern data automatically
Automatically update the pattern data to keep the latest data. On the scan screen, select "Set auto-update" to
X"Enable"X"Yes".
Scan Result Display
䂓Display of problem elements after scanning
When problem elements are detected, the problem elements is displayed as lists.
XSelect "Detail"
If data that may cause a problem is detected, a screen appears to show its warning level.
Note
• During pattern data update, information (handset model, serial No., etc.) specific to your mobile phone is
automatically sent to the server (software update server managed by DoCoMo). DoCoMo does not use the
sent information for other purposes than Scanning Function.
• Correctly set the clock of FOMA handset in advance.
• Pattern data update is disabled in the following cases:
- Date&Time is not set - Low battery level
- UIM not inserted - Out of service area
- During a call - Other functions are active
- Self Mode - Lock all
- Date access lock - Connected to external device such as PC
Alert level 0 Alert level 1 Alert level 2 Alert level 3
䂓When you detect
an deletable data 䂓When you detect
an undeletable
data
"OK" : Continue with
the operation. "Yes" : Stop
operation and exit.
"No" : Continue
operation.
"OK" : Stop
operation exit. "Yes" : Delete the
data and return to
the Stand-by display
or the previous
screen.
"No" : Stop
operation and return
to the Stand-by
display or previous
screen.
"OK" : Terminate the
operation. Pressing
"OK" again, returns
to the Stand-by
display returns or
the previous screen.
(Image to be
added) (Image to be
added) (Image to be
added) (Image to be
added) (Image to be
added)
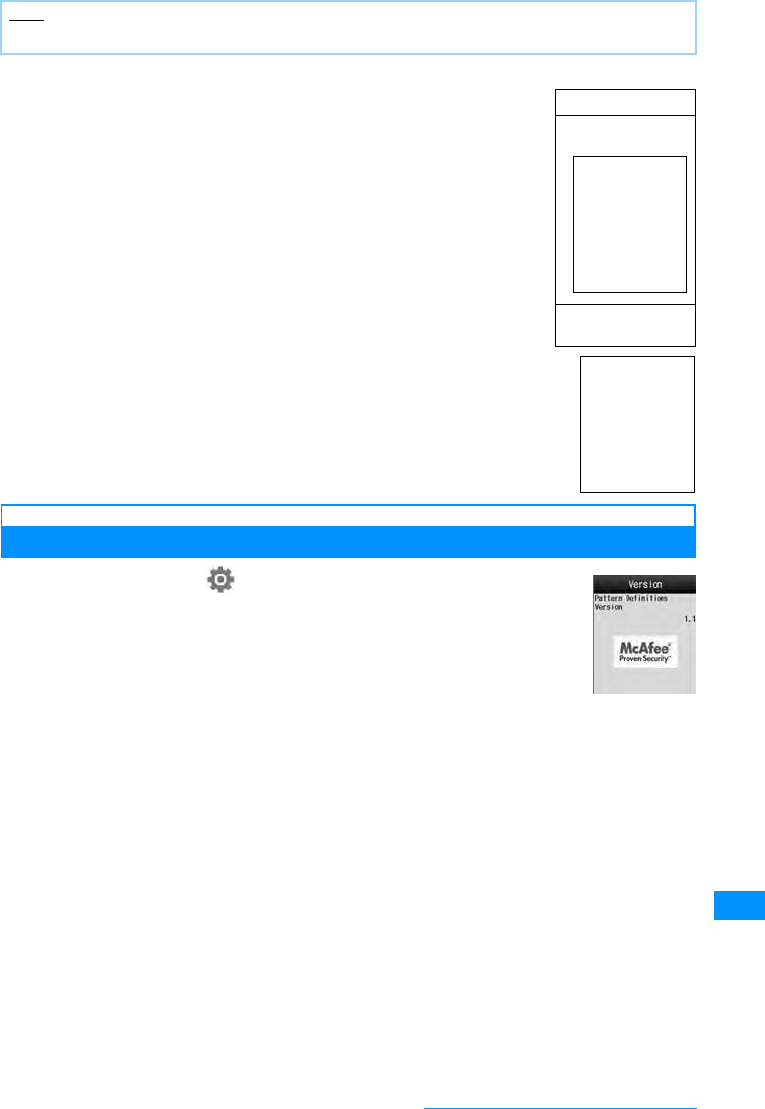
329
Appendix/External Devices/Troubleshooting
䂓Display of problem elements after scanning
Confirming Pattern Data Version
aM[Menu] X(Settings) X"Lock/Security" X
"Scanning function" X"Version"
Note
• <NoteBul>The screen may be different from the above screen depending on the scanned result.
Alert level 4
䂓When you detect
an deletable data
"OK" : Delete the
data and exit.
(Image to be
added)
(Image to be
added)
330
Appendix/External Devices/Troubleshooting
Major Specifications
䋪1䋺Image size : 128㬍96 Image quality : Standard File size : 10 K
䋪2䋺Varies depending on the image size, quality and, capturing conditions.
䋪3䋺Shared with the Music channel
• Continuous call time is approximate duration of time to be spent for talking with normal radio wave reception
level.
• Continuous standby time is approximate duration of battery time while in motion. Depending on the battery level,
set functions, operating environment such as ambient temperature, or radio wave reception level (Poor or weak
radio wave reception level), battery life can reduced to half. When i-mode communications are performed, the
call (communication)/standby time becomes shorter. Even if you do not make calls or perform i-mode
communications, the call (communication)/standby time becomes short if you compose an i-mode mail, start a
downloaded i-appli, start the i-appli stand-by display, perform data communications or multiaccess, use a
camera, or playback videos or music.
Model name FOMA L705i
Dimensions (H䌸W䌸D) ٨٨٨䌸٨٨䌸٨٨.٨ mm
Weight Approximately ٨٨٨g (with battery pack installed)
Continuous Standby Time FOMA䋯3G Stationary : Approx. ٨٨٨hours
Moving : Approx. ٨٨٨ hours
GSM/GPRS Approximately ٨٨٨ hours
Continuous Call Time FOMA/3G Voice Call : Approximately. ٨٨٨ minutes
Video Call : Approximately. ٨٨ minutes
GSM/GPRS Approximately ٨٨٨ minutes
Charging time AC Adapter : Approximately ٨٨٨ minutes
DC Adapter : Approximately ٨٨٨ minutes
Color LCD Type TFT 262,144 colors
Size Approx. 2.2 inches
Pixels 76,800 pixels
䋨240㬍320䋩
Image Censor Type Inner camera : CMOS
Outer camera : CMOS
Size Inner camera : 1/6 inch
Outer camera : 1/4 inch
Effective Pixels Inner camera : Approx. 0.32 mill. pixels
Outer camera : Approx. 1.92 mill. pixels
Camera Recorded Pixels Inner camera : Approx. 0.3 mill. pixels
Outer camera : Approx. 1.92 mill. pixels
Zoom (Digital) Inner camera : Up to approx. 2 times
Outer camera : Up to approx. 3 times
Record Still Image Approx. 40000䋪1
Continuous mode CIF䋺4 images䇭Stand-by screen/QCIF/sub-QCIF/
for Phonebook/Menu icon
䋺6 images
Still image file type JPEG
Movie record time Approx. 60 seconds䋪2
Moviefiletype MP4
Play music Continuous playback time Approximately 30 hours
Capacity Chaku-Uta®
/Chaku-Uta Full®
Approx. 100 MB
331
Appendix/External Devices/Troubleshooting
• Continuous standby time in a stationary state is the average usage time in a stationary state with normal radio
wave reception level while the handset is closed.
•
Continuous standby time in motion is the average usage time in a state combining "standstill", "in motion" and "out
of service area"
in an area with normal radio wave reception level while the handset is closed.
• The estimated charging time is the duration of time to charge the battery pack with the FOMA handset turned
off and with a fully drained battery pack.
The charging time becomes longer with the FOMA handset
turned on.
Number of Items that can be Stored, Registered
and Protected on the FOMA Handset
The number of actual storable or registerable protection of each data counts varies depending on the data
size or usage memory.
䋪1䋺Up to 50 entries can be saved in UIM.
䋪2䋺Including pre-installed i-appli
Type Maximum Number of
Saved Messages Maximum Number of
Saved Messages
Phonebook 1000䋪1䋭
Schedule Schedule 200 䋭
Holiday 100 䋭
To Do 50 䋭
Memos 30 䋭
Mail Received mail 1000 1000
Sent mail 500 500
Unsent mail 䋭
SMS on UIM ٨٨ 䋭
Message Message R 200 100
Message F 150 100
Bookmarks 100 䋭
Files contained in Screen Memos 50 10
i-appli 100䋪2䋭
Databox Image 1000 䋭
Video/i-motion Movie 1000 䋭
Melody 1000 䋭
Animation 30 䋭

332
Appendix/External Devices/Troubleshooting
Authentication
Specific Absorption Rate (SAR) of Mobile Phones
Mobile phone FOMA L705i meets the technical regulation defined by the government for absorption of radio
waved to human body. This technical regulation has been established based on scientific studies so that
radio waves emitted from radio devices such as mobile phones used near a human head give no bad
influence to the human health. It defines that Specific Absorption Rate (SAR), representing the average
amount of energy of radio waves absorbed to a temporal part of human body, should not exceed a
permissible value of 2W/kg䋪. This permissible value includes a substantial safety margin designed to assure
the safety of users, regardless of the age, body size and other conditions of individuals and is equal to the
international guideline recommended by International Commission of Non-Ionizing Radiation Protection
(ICNIRP) which has cooperative relationships with World Health Organization (WHO).
All mobile phones should be confirmed to comply with the governmental regulation according to Radio Law
before they are released. The SAR value of FOMA L705i is W/kg. This value has been acquired by Telecom
Engineering Center (TELEC) and is the maximum value of those measured under the maximum transmission
power of the mobile phone in the procedure defined by the government. Though there may be some
differences in SAR value among individual products, they all meet the technical regulation. In addition,
mobile phones are designed to have the lowest transmission power required for communication with base
stations; therefore, the SAR value during actual phone operation becomes smaller. SAR value of this mobile
phone meets the regulations of individual countries it is available.
For further information about SAR, visit the following web sites:
䋪 : The technical regulation is defined in Article 1-2 of the Ministry Ordinance Regulating Radio Equipment.
Ministry of Internal Affairs and Communications : http://www.tele.soumu.go.jp/e/ele/body/index.htm
Association of Radio Industries Businesses : http://www.arib-emf.org/index.html
DoCoMo : http://www.nttdocomo.co.jp/product/
LG Mobile web page : http://www.jp.lgmobile.com/

333
Appendix/External Devices/Troubleshooting
Radio Frequency (RF) Signals
THIS MODEL PHONE MEETS THE U.S. GOVERNMENT'S REQUIREMENTS FOR EXPOSURE TO RADIO
WAVES.
Your wireless phone contains a radio transmitter and receiver. Your phone is designed and manufactured not to
exceed the emission limits for exposure to radio frequency (RF) energy set by the Federal Communications
Commission of the U.S. Government. These limits are part of comprehensive guidelines and establish permitted
levels of RF energy for the general population. The guidelines are based on standards that were developed by
independent scientific organizations through periodic and thorough evaluation of scientific studies.
The exposure standard for wireless mobile phones employs a unit of measurement known as the Specific
Absorption Rate (SAR). The SAR limit set by the FCC is 1.6W/kg.䋪 Tests for SAR are conducted using standard
operating positions accepted by the FCC with the phone transmitting at its highest certified power level in all
tested frequency bands. Although the SAR is determined at the highest certified power level, the actual SAR level
of the phone while operating can be well below the maximum value. This is because the phone is designed to
operate at multiple power levels so as to use only the power required to reach the network. In general, the closer
you are to a wireless base station antenna, the lower the output.
Before a phone model is available for sale to the public, it must be tested and certified to the FCC that it does not
exceed the limit established by the U.S. government-adopted requirement for safe exposure. The tests are
performed on position and locations (for example, at the ear and worn on the body) as required by FCC for each
model. The highest SAR value for this model phone as reported to the FCC when tested for use at the ear is
0.202W/kg, and when worn on the body, is 0.096W/kg. (Body-worn measurements differ among phone models,
depending upon available accessories and FCC requirements). While there may be differences between the SAR
levels of various phones and at various positions, they all meet the U.S. government requirement.
The FCC has granted an Equipment Authorization for this model phone with all reported SAR levels evaluated as
in compliance with the FCC RF exposure guidelines. SAR information on this model phone is on file with the FCC
and can be found under the Display Grant section at http://www.fcc.gov/oet/fccid after search on FCC ID
BEJL705i.
For body worn operation, this phone has been tested and meets the FCC RF exposure guidelines when used with
an accessory designated for this product or when used with an accessory that contains no metal and that
positions the handset a minimum of 2.5 cm from the body.
Declaration of Conformity
The product "FOMA L705i" is declared to conform with the essential requirements of European Union Directive
1999/5/EC Radio and Telecommunications Terminal Equipment Directive 3.1(a), 3.1(b) and 3.2.
This mobile phone complies with the EU requirements for exposure to radio waves.
Your mobile phone is a radio transceiver, designed and manufactured not to exceed the SAR䋪 limits䋪䋪 for
exposure to radio-frequency (RF) energy, which SAR䋪 value, when tested for compliance against the standard
was 1.00W/kg. While there may be differences between the SAR䋪 levels of various phones and at various
positions, they all meet䋪䋪䋪 the EU requirements for RF exposure.
䋪In the United States, the SAR limit for wireless mobile phones used by the public is 1.6 watts/kg (W/kg)
averaged over one gram of tissue. SAR values may vary depending upon national reporting requirements
and the network band.
䋪
䋪䋪
䋪䋪䋪
The exposure standard for mobile phones employs a unit of measurement known as the Specific
Absorption Rate, or SAR
The SAR limit for mobile phones used by the public is 2.0 watts/kilogram (W/kg) averaged over ten
grams of tissue, recommended by The Council of the European Union. The limit incorporates a
substantial margin of safety to give additional protection for the public and to account for any variations
in measurements.
Tests for SAR have been conducted using standard operating positions with the phone transmitting at
its highest certified power level in all tested frequency bands. Although the SAR is determined at the
highest certified power level, the actual SAR level of the phone while operating can be well below the
maximum value. This is because the phone is designed to operate at multiple power levels so as to use
only the power required to reach the network. In general, the closer you are to a base station antenna,
the lower the power output.

334
Appendix/External Devices/Troubleshooting
Important Safety Information
AIRCRAFT
Switch off your wireless device when boarding an aircraft or whenever you are instructed to do so by airline staff.
If your device offers a 'flight mode' or similar feature consult airline staff as to whether it can be used on board.
DRIVING
Full attention should be given to driving at all times and local laws and regulations restricting the use of wireless
devices while driving must be observed.
HOSPITALS
Mobile phones should be switched off wherever you are requested to do so in hospitals, clinics or health care
facilities. These requests are designed to prevent possible interference with sensitive medical equipment.
PETROL STATIONS
Obey all posted signs with respect to the use of wireless devices or other radio equipment in locations with
flammable material and chemicals. Switch off your wireless device whenever you are instructed to do so by
authorized staff.
INTERFERENCE
Care must be taken when using the phone in close proximity to personal medical devices, such as pacemakers
and hearing aids.
Pacemakers
Pacemaker manufacturers recommend that a minimum separation of 15cm be maintained between a mobile
phone and a pacemaker to avoid potential interference with the pacemaker. To achieve this use the phone on the
opposite ear to your pacemaker and do not carry it in a breast pocket.
Hearing Aids
Some digital wireless phones may interfere with some hearing aids. In the event of such interference, you may
want to consult your hearing aid manufacturer to discuss alternatives.
For other Medical Devices
Please consult your physician and the device manufacturer to determine if operation of your phone may interfere
with the operation of your medical device.

335
Appendix/External Devices/Troubleshooting
Export Administration of This Product and Its
Accessories
(Confirming specs)


337
Index/Quick Manual
Index................................................................................................................................... 338
How to Use the Quick Manual.......................................................................................... 343
Quick Manual................................................................................................... End of the Manual
338
Index/Quick Manual
Index
184 䋯186.................................58
A
A microSD Memory Card........206
Backup ........................208, 209
Copy/overwrite personal
data..................................208
Data update.........................209
Folder Structure...................210
Inserting/Removing .............206
Memory info.........................209
Read/write ...........................210
Reset microSD card ............207
Accessories...............................24
Additional guide ......................264
Additional Services .................263
Adding .................................263
Perform................................264
After-sales Service..................323
Alarm.......................................231
Animation
Create..................................200
Operation.............................200
Anonymous caller ...................119
Answer mode ............................66
Any key answer.........................66
Auto Answer............................244
B
Backlight .................................103
Bar Code Reader....................134
Battery Level.............................45
Battery Pack ............................. 41
Bookmarks.............................. 143
Compose message/
Send Mail ........................144
Connect...............................143
Copy to microSD................. 144
Delete..................................144
Edit title ...............................144
List ......................................143
Send IrDA ...........................144
Store ...................................143
C
Calculator................................242
Call barring ............................. 277
Call display ............................. 100
Call duration............................239
Call forwarding........................ 259
Enable/disable Guidance....259
Call forwarding (Int.) ...............278
Call waiting .............................257
Making Calls........................ 258
Receiving a Call ..................258
Caller ID notification............48, 58
184 䋯186.............................58
Caller ID Request ...................260
Caller ID request (Int.) ............279
Call/Mail history ........................ 90
Call/Mail lock........................... 114
Camera
Capture movie..................... 130
Capture Still Images............129
Movie Capture Duration
as a rough guide..............128
Camera Settings
Brightness........................... 132
Delay timer.......................... 133
Switching between the Inner
and Outer cameras ......... 133
Zoom................................... 132
Camera settings ..................... 133
Flicker turning ..................... 133
Shutter sound ..................... 133
Capture
Still images ......................... 129
Videos................................. 130
Change i-mode Password...... 142
Character Entry ...................... 247
Auto cursor ......................... 251
Input characters .................. 249
Input common phrases ....... 250
Input setting ........................ 251
Kuten Code......................... 253
Switching Input Modes........ 248
character entry
Copy/Cut/Paste................... 252
Character Size
i-mode................................. 148
Mail ..................................... 180
Charge................................ 42, 44
Charging time ....................... 43
Check new message ...... 150, 168
Check new SMS..................... 182
Checking call costs................. 240
Clearing Memory .................... 246
Close setting............................. 66
Color theme............................ 103
Using the Index
䃂This index can be used not only as an usual index but also as a table of contents sorted in alphabetical order.
You can find the terms used in this guide as well as the words that summarize the contents of the chapters or
sections. If you cannot find what you are looking for, try another keywords.
Ex) When you want to create a Deco-mail
䃂For the settings of the i-mode Center, such as Mail Address, Receive/Reject Mail, Limit Mail Size, or
Suspend/Resume Mail settings, refer to "Mobile Phone User's Guide i-mode <FOMA>".
䃂For data communication, refer to the "Manual for Data Communication" guide included in the bundled CD-
ROM.
䊂䉮 䊜 䊷䊦 ................................158
ᚑ........................................158
䊌䊧 䉾 䊃 䈱ᠲ ....................159
䊌䊧 䉾 䊃 ␜ ........................159
䊜䊷䊦ᚑ
................................ 157
ተవㅊട................................ 157
ㅍା ....................................... 157
䊂䉮 䊜 䊷䊦ᚑ .................... 158
䊁 䊮 䊒䊧 䊷䊃 ㆬᛯ ................ 160
䊐䉜䉟䊦䉕ᷝઃ.................... 162
䊒䊧䊎䊠 䊷............................ 157
ሽ ....................................... 157
Numerics

339
Index/Quick Manual
Common Phrases
Input.................................... 250
List ...................................... 300
Compose message/
Send Mail............................ 161
Add Address ....................... 161
Copy files
Image Files ......................... 196
Melody files......................... 204
Video/i-motion Files ............ 202
Copyrights ................................ 22
Country code
Auto international dial ........... 61
Country code list ................... 62
Creating a folder
Bookmarks.......................... 143
Data box ..................... 195, 196
Mail ..................................... 173
Custom Menu ......................... 238
D
Data access lock .................... 115
Data box ................................. 194
Data Communication.............. 265
AT Commands.................... 268
Operating Environment....... 267
Preparing for Data
Communication ............... 267
Date Counter .......................... 237
Date Search............................ 238
Date&Time format .................. 106
Deco-mail ............................... 162
Changing ............................ 164
Create ................................. 162
Palette Display.................... 163
Palette Operations .............. 163
Default settings....................... 292
Delete files
Image Files ......................... 196
Melody files......................... 204
Video/i-motion Files ............ 202
Deleting a folder
Bookmarks.......................... 143
Data box ............................. 195
Mail ..................................... 174
Desk Adapter............................ 44
Dialing..................................... 101
Dialing Quick Search................ 89
Display................................ 26, 32
Display Call/mail logs ............. 117
Display phonebook image ...... 102
Download
Chaku-Uta Full®....................... 220
Dictionary............................ 147
Image.................................. 145
i-melody .............................. 146
Template............................. 146
Download Dictionary............... 254
DTMF........................................ 58
Dual Network.......................... 261
E
Edit ......................................... 251
Modify ................................. 252
Store ................................... 251
Edit Videos/i-motion Movies... 203
Capture............................... 203
Clipping............................... 203
Edit word
Delete ................................. 253
Editing still images ................. 198
Crop.................................... 199
Effect .................................. 198
Insert................................... 198
Mirror .................................. 198
Resize................................. 199
Retouch .............................. 198
Rotate ................................. 198
Undo ................................... 198
Emoticon
List ...................................... 299
English guidance.................... 261
Entering Pictographs/
Symbols/Emoticons ............ 248
Error Messages...................... 308
Export Administration ............. 335
External Connector Terminal.... 27
F
Files contained in Screen Memos
144
Delete ................................. 145
Edit title............................... 145
List ...................................... 144
Protect On/Off..................... 145
Retry ................................... 145
Save ................................... 144
ShowURL ........................... 145
View.................................... 144
View Details........................ 145
Flash ...................................... 141
Operation............................ 197
Play..................................... 197
Setting as the Stand-by
display..................... 196, 197
Flat-plug earphone/
microphone with switch ...... 244
Making Calls ....................... 244
Receiving a Call.................. 244
H
hands-free ................................ 74
Headphone/Microphone Jack .. 27
Holding tone ............................. 68
Hour indication ....................... 245
I
i-appli...................................... 183
Delete ................................. 190
Download............................ 185
Software info....................... 186
Start .................................... 185
Upgrade.............................. 186
i-appli DX................................ 184
i-appli info
Auto start info ..................... 190
Security error history .......... 190
Trace info............................ 190
i-appli settings
Access the Phonebook and
History............................. 188
Auto-start.............................189
Change ring tone/image......188
Display SW info ...................185
i-appli To Function...............189
Icon info...............................188
Network Set.........................188
i-appli To Function ..................147
i-Channel.................................154
Channel list..........................155
Trial Service ........................154
Ticker...................................155
i-Channel Setting
Ticker setting .......................155
Illumination dot Settings..........105
Image
Edit ......................................198
Full screen...........................196
Setting as the Stand-by
display......................196, 197
View settings .......................197
Zoom ...................................196
Image Display .........................194
Operation.............................195
i-melody ..................................146
iMenu ......................................139
i-mode .....................................137
Add to phonebook ...............141
Bookmarks ..........................143
Change character code.......139
Compose message/
Send Mail.........................139
Display image......................140
Files contained in Screen
Memos.............................144
Go To location.....................142
Last URL .............................140
My Menu..............................141
Operations on i-mode/
Web Sites ........................140
Reload.................................139
Retry....................................139
Save image .........................145
Site view ..............................139
Sound effect settings...........140
URL history..........................142
View Details.........................139
i-mode mail .............................158
i-mode Password ....................110
i-mode setting .........................147
Auto-display Message.........150
Connection Timeout ............148
Host Selection .....................149
i-motion Auto Play ...............153
i-motion type........................153
Melody Auto Play ................150
SSL Certificate Info .............152
i-motion ...................................152
Download ............................152
i-motion Auto Play ...............153
i-motion type........................153
In-call Arrival Act .....................261
Incoming call volume ................67
Infrared Port............................212
Infrared remote control............213
Inner camera.............................26
Intellectual Property ..................22

340
Index/Quick Manual
International Access Code ........60
Auto assist setting .................61
International Prefix
Settings..............................61
International Call.......................59
International Dial .................60, 61
International Roaming.............270
IrDA.........................................211
Receive all...........................213
Receive one ........................212
Send all data .......................212
Send one .............................212
Session code.......................212
J
Japan Article Number code.....134
K
Keypad sound...........................96
Keypad unlock ........................116
Kuten Code Input ....................253
L
Last URL .................................140
List of the Ring tone
(Pre-installed)........................93
Lock all....................................113
M
Mail .................................157, 160
Add to phonebook...............169
Auto sort..............................171
Confirm File Attachment......169
Delete.........................174, 175,
.........................176, 177, 178
Filter ....................175, 177, 178
Forward ...............................168
Protect On/Off .............175, 177
Reply ...................................168
Retrieve attached file...........169
Set security/Release
security ............................173
View.............................167, 170
Mail ring duration ......................97
Mail setting..............................179
Mail To Function .....................147
Major Specifications................330
Manner Mode............................97
Manner mode set......................98
Melody
Adjust the volume................204
Set as alarm tone ................205
Set as ring tone ...................205
Memory status ........................245
Memos ....................................243
Store....................................243
View Contents .....................243
Menu Customization ...............104
Menu guidance .......................104
Menu List ................................282
Menu Operation ........................34
Main Menu.............................34
Notation.................................37
Notation Rules.......................38
Sub menu ..............................37
Message R/F
Add to phonebook...............151
Auto-display Message......... 150
Confirm File Attachment......169
Delete..................................151
Melody Auto Play ................150
Protect On/Off ..................... 151
Save image .........................145
View .................................... 150
MessageR/F
Message ............................. 149
Missed Call ...............................71
Move files
Image Files..........................196
Melody files .........................204
Video/i-motion Files.............202
Movie-Mode............................ 130
Multi number ........................... 262
Confirming the Primary
Number............................ 262
Setting Primary Number......262
Multi-Access ........................... 230
Combinations ...................... 302
Multitasking............................. 230
Combinations ...................... 303
Music channel
Chapter list.......................... 218
Operation ............................ 217
Play programs.....................217
Play saved programs .......... 219
Playback in background......228
Save program...................... 219
Set Programs ...................... 216
Music channel player..............217
Music life................................. 228
Music Player ........................... 221
Operation ............................ 222
My Menu (i-mode)...................141
My Pictures ............................. 195
N
Network mode.........................276
Network search mode.............276
Network Security Code...........110
Network Services....................255
New Passwords ......................111
Noise Reduction ....................... 64
Nuisance Call Blocking...........259
Specify ................................ 260
Number of Items that can be
Stored, Registered and
Protected on the FOMA
handset ...............................331
Number Settings.....................262
O
On hold ..................................... 67
On hold tone ............................. 68
Operator name display ...........277
Options and Related Devices ..24,
305
Outer camera............................27
Overseas Use.........................269
After Coming Back to Japan273
Available Services...............270
Making Calls........................ 273
Network Services................ 278
Preparation before Departure...
271
Receiving a Call.................. 275
Usage at destination........... 272
Own number..................... 48, 239
P
Password
Network Security Code....... 110
Security code ...................... 110
Pause ....................................... 58
Phone Call................................ 49
International Call................... 59
making .................................. 50
Receive................................. 64
Phone number display.............. 48
Phone To/AV Phone To
Function .............................. 147
Phonebook ............................... 75
About the Phonebook ........... 76
Delete ................................... 87
Edit........................................ 87
Handset (Phone)................... 77
Multiple choice ...................... 88
Number of contacts............... 88
Save (Received Call
History, etc..) ..................... 80
Save (UIM)............................ 79
View Contents....................... 84
Phonebook settings.................. 88
Photo Light ............................... 27
Photo-Mode............................ 129
Pictograph
List ...................................... 298
PIN Unlock Code............ 111, 112
PIN1 code request.................. 112
Play Melodies ......................... 204
Operation............................ 204
Pause.................................. 204
Play music .............................. 220
Continuous Play.................. 222
Delete ................................. 226
Display Jacket image.......... 224
Download
Chaku-Uta-Full® ............. 220
Music channel player.......... 217
Music life............................. 228
MUSIC Menu ...................... 221
Music Player ....................... 221
Playback in background...... 228
Playlist ................................ 224
Quick playlist....................... 226
Save SD-Audio ................... 220
SD-Audio Player ................. 227
Set as alarm tone................ 223
Set as ring tone................... 223
View Lyrics.......................... 224
Play Videos/i-motion
Movies ................................ 201
Fast forward/Rewind........... 201
Operation............................ 201
Playback in background ......... 228
Playlist
Create ................................. 224
Play..................................... 225
Portrait Rights........................... 22

341
Index/Quick Manual
Power On/Off............................ 46
Power Saving Mode ............... 103
Preferred NW lists .................. 276
Prefix dial.................................. 63
Preinstalled............................. 194
Protect On/Off
Files contained in Screen
Memos ............................ 145
Message R/F ...................... 151
Received mail ..................... 175
Sent mail............................. 177
Public Mode (Drive Mode)........ 68
Public Mode (Power OFF)........ 70
Q
QR Code................................. 134
Quality alarm ............................ 97
Quick Manual.......................... 342
Quick playlist .......................... 226
R
Receive option........................ 167
Received Calls.......................... 56
Add to phonebook.................80
Received mail BOX ................ 170
Received mails ....................... 178
Receiver volume....................... 67
Recent calls.............................. 57
Recent Mails........................... 178
Reconnect Alarm...................... 64
Record Message ...................... 71
Settings................................. 71
Record message ...................... 72
Redial ....................................... 54
Add to phonebook.................80
Reject all calls......................... 119
Reject on List.......................... 118
Reject unknown caller ............ 121
Remote access
setting (Int.)......................... 279
Remote Control ...................... 262
Renaming a folder
Bookmarks.......................... 143
Data box ............................. 195
Mail ..................................... 173
Reset i-Channel...................... 155
Reset learnt info ..................... 253
Reset/Clear............................. 245
Roaming guidance setting...... 277
Roaming guide (Int.)............... 278
S
SAR ........................................ 332
Save/Edit Group Name............. 81
Scanning Function.................. 327
Schedule................................. 232
Register New Schedule
Events ............................. 232
View Contents..................... 234
SD-Audio Player..................... 227
Operation ............................ 222
Search phonebook ................... 83
Domain? ............................... 84
Group search ........................ 83
Memory No. search............... 84
Phone number? .................... 84
Reading Search.................... 84
Search all data...................... 83
Secret mode........................... 117
Security code ......................... 110
Security Settings ............ 109, 122
Select effect tone ..................... 96
Select language ..................... 107
Select ringtone ......................... 92
Self mode ............................... 115
Send a file
Image Files......................... 196
Melody files......................... 205
Video/i-motion Files ............ 202
Sent mail BOX........................ 170
Sent mails .............................. 178
Service numbers .................... 262
Services Available from
FOMA Handset................... 304
Set as alarm
tone..................... 202, 205, 223
Set call cost limit .................... 240
Set date&time........................... 47
Set in-call arrival act............... 260
Set mute ring(sec.)................. 121
shortcut icons ........................... 33
Show shortcut icons ............... 100
Site view................................. 139
Slide up .................................... 66
SMS
Add to phonebook .............. 169
Create................................. 181
Delete . 174, 175, 176, 177, 178
Filter.................... 175, 177, 178
Focused data...................... 181
Forward .............................. 168
Protect On/Off............. 175, 177
Reply .................................. 168
Save ................................... 181
Set security/Release
security............................ 173
UIM Functions ... 175, 176, 177,
178
SMS Settings ......................... 182
Auto sort ............................. 171
Entering SMS Message
Text................................. 182
SMS center......................... 182
SMS Report request........... 182
SMS Validity Period............ 182
softkey...................................... 31
Software Update .................... 325
Sort
Message R/F ...................... 151
Received mail ..................... 174
Sent mail............................. 176
Template............................. 165
Unsent mail......................... 178
Sorting folders
Bookmarks.......................... 143
Data box ............................. 195
Mail ..................................... 173
SSL communication ............... 140
Stand-by display....................... 99
Stopwatch .............................. 241
Sub Address............................. 63
Sub Menu Operation................ 37
Symbol List
List ...................................... 297
T
Template .................................164
Create New .........................165
Delete ..................................165
Download ............................146
Edit title................................165
List.......................................165
Select ..................................165
The UIM ....................................38
Inserting / Removing .............38
Operation Restriction
Function.............................39
Password...............................39
Types.....................................40
Ticker
i-Channel.............................155
i-motion........................153, 201
To do.......................................235
Store....................................235
View Contents .....................236
Touchpad ......................26, 29, 30
Sensitivity ..............................30
Touchpad sensitivity
settings ..............................30
Touch-Tone Signals..................58
Trademarks...............................22
Troubleshooting ......................306
U
UIM PIN ..........................111, 112
Change................................112
UIM PIN2 ................................111
Change................................112
Unit converter..........................241
Unsent mail BOX ....................171
URL history .............................142
Usage Time...............................43
USB mode setting...................210
User Defined Dictionary..........253
V
Valid/Invalid
Set the selected certificate to
valid or invalid..................152
Vibrator .....................................95
Video Phone
Hands-free call ......................74
Holding image .......................73
making...................................50
Receive .................................64
Response hold image............73
Substitute image....................53
Swap View.............................53
Switch camera.......................53
Video phone settings ................73
Video Play Software................305
Video/i-motion Movie
Edit ......................................203
Set as alarm tone ........202, 203
Set as ring tone ...................202
Setting as the Stand-by
display......................202, 203
View file information
Flash file ..............................197
Image Files..........................197
Melody files .........................205

342
Index/Quick Manual
Video/i-motion Files.............203
Voice call’s on-hold-tone...........68
Voice mail ...............................256
Notify missed call ................257
Voice mail (Int.) .......................278
Volume......................................94
W
Wake-up display .....................102
Warranty .................................323
Web To Function.....................147
WORLD CALL...........................59
World Clock.............................240
WORLD WING........................270
Compose message/
Send Mail
Attach file.............................166
Create deco-mail.................162
Focused data.......................161
Preview................................161
Save ....................................161
Select template....................164

344
Index/Quick Manual
How to Use the Quick Manual
To use the Quick Manual bound in this manual, cut the pages along the cutting line and fold them
as shown below.
Take along Quick Manual (For Overseas Use) with you when using international roaming (WORLD
WING) abroad.
• When using scissors, be careful not to hurt yourself.
aDetach the Quick Manual by cutting along the cutoff line
bFold lengthwise
cFold widthwise twice
⚕
⚕ ⚕
䉨䊥 䊃 䊥 ✢
Quick Manual
DoCoMo Information Center
Repairs
• Verify the number before making a call.
Saving Contacts
Saving Contacts on the UIM
1 On the stnad-by display XU(for more
than 1 seconds)
2"(Save to)" X "Phone"
3 " (Enter Memory No.)" X Enter a
memory number
4" Name" X Enter a Name
5 " Reading" X Enter a Reading
6 " Phone number" X Enter a Phone
number
7 " Mail address" X Enter a Mail address
8 " (Group)" X Enter a secret code
9 " (Select group)"" X Select a Group
10 " Image" X Select an image or i-motion
11 " Ringtone" X Select a ring tone if the
caller is stored in the Phonebook
12 " Mail ringtone" X Select a mail tone if
the caller is stored in the Phonebook
13 " URL" X Enter the URL
14 " ZIP code" X Enter a ZIP code
15 " Home Address" X Enter a Home
Address
16 " Company name" X Enter a company
name
17 " Job title" X Enter a Job title
18 " Co. zip code" X Enter a Co. zip code
19 " Co. address" X Enter a Co. address
20 " Memo" X Enter a memo
21 " (Birthday)" X Enter a birthday or
others
22 " Substitute image" X Select a
substitute image
Saving Contacts on the UIM
1M[Menu] X(Phonebook) X "Add to
phonebook"
2 " (Save to)" X "FOMA card (UIM)"
3" Name" X Enter a Name
4 " Reading" X Enter a Reading
䂓From a DoCoMo handset or PHS:
151(no area code) (toll free)
㶎The above number is not available from a fixed line phone.
䂓From a fixed line phone:
0120-800-000
䂓From a DoCoMo handset or PHS:
113 (no area code) (toll free)
㶎The above number is not available from a fixed line phone.
䂓From a fixed line phone:
0120-800-000
5 " Phone number" X Enter a Phone
number
6 " Mail address" X Enter a Mail address
7 " (Select group)" X Select a Group
Saving Contacts from Dialed
Calls/Received Calls
1 Use L/Rto display the Received call/
Redial logs X Select the Received call/
Redial logs XM[Menu] X "Add to
PhoneBook"
2 Select a storing method
• "New registration": Add a new entry to a
Phonebook. Go to Step 4
• "Additional registration": Add an item to
a saved Phonebook entry.
3 Select a Phonebook to save
4 Modify/save Phonebook entries XI
[Done]
Editing Phonebook
Select a Phonebook XM[Menu] X "Edit"X
Store/Edit Phonebook XI[Done]
Input characters
aAvailable number of characters: Indicates the
remaining number of characters that can be
entered in bytes.
bOperation guide field: Shows switching among
pictographs, symbols, and emoticons, and
switching between full- and half-pitch
characters.
cEntry mode guidance area: Indicates entry
mode.
Main Operations on the
Character Entry Screen
䂓Switching entry modes
Press I[Mode] 1 time.
䂓Switching full-pitch/half-pitch
H
䂓Switching Pictograph (E-Moji)/Emoticon/
Symbol entry mode
Press A several times.
䂓Entering voiced/semivoiced sound symbol
or switching upper/lower case
Enter a character and press *several
times
䂓Entering punctuation
Press * several times
䂓Entering line feed
#䋯D
䂓Entering space
M[Menu]X"Special input" X"Space"/at
the end of a sentenceR
Example of Character Entry
䂓Entering " 䊄䉮䊝(DoCoMo)"
1Enter " 䈬䈖 䉅 (DoCoMo)"
"
䈬
(Do)": Press
4
5 times
X*
once
"䈖(Co)": Press 2 5 times
"䉅(Mo)": Press 7 5 times
2 Use D to move the cursor to conversion
options X Use K to select " 䊄䉮䊝
(DoCoMo)"
Using the Camera
Capturing Still Images
1M[Menu] X (Camera) X
"Photo-mode".
2 Frame the shot then C [Take]
3C[Save]
4 Select a destination folder XC[OK]
Character Entry Screen
c
b
a
123
7654
䉨䊥 䊃 䊥 ✢
Capturing Videos
1M[Menu] X (Camera) X
"Movie-mode"
2 Frame the shot thenC
3I
4C[Save]
5 Select a destination folder XC [OK]
Playing Music Data
1GX
"Music player"
X
"All songs"
2 Move the cursor to a song XC[Play]
䂓Key operation while playing
Play a playlists
1GX"Music player"X"Playlist"
2 Move the cursor to playlist you want to
play XC[Play]
Making/Receiving a Video Call
Making Video calls.
1 Enter a phone number
XM[Menu]X"Video phone call"XStart
talking when the other party answers
2 To terminate the call P
Receiving Video Calls
1 A video call arrives
•/
FE: Adjust the Ring Volume
•P: Place the call on response hold.
2A
•I[Substitute image ] : Send
substitute image
3 To terminate the call P
Main Operations
during Video Calls
䂓Placing a call on hold/Canceling hold
M[Menu]X"Hold"
•C䋺Cancel hold
䂓Setting/Canceling handsfree call
C[Spk on]
• Press C again to cancel.
䂓Switching between camera image/
substitute image
I[Substitute]
• Press I again to return to the camera
image.
䂓Switching between the Inner and Outer
cameras
M[Menu] X "Switch camera"
• Select "Switch camera" again to return to
the Inner camera.
i-mode mail
Composing/Sending i-mode Mail
1DX"Compose message"
2 Select (Receiver) field X "Input
Address" X Enter the address
Key Description
CPause/Play
HF/EAdjust the volume
L/RPlay from the beginning of the
current chapter or go to the previous
chapter/play the next chapter
L/R
(Hold down) Rewind/fast forward while being
pressed
GPlayback in background
I[List] Display the Music data list screen
PQuit the Music player
Key Description
Compose i-mode mail screen
Receiver
Subject
Message
3 Select (Subject) field X Enter the
subject
4 Select (Message) field X Enter the
subject
5I[Send]
Attaching Files
䂓Attaching an image
On the Compose message screen(P13),
M[Menu] X "Attach file" X "Attach File"
X "Image" X Move the cursor to the folder
XC"Open" X Select a image
䂓Attaching an i-motion movie
On the Compose message screen(P11),
selectM[Menu] X "Attach file" X "Attach
file" X "Movie" X Move the cursor to the
folder XC"Open" X Select an i-motion
䂓Attaching a melody
On the Compose message screen(P11),
selectM[Menu] X "Attach file" X "Attach
File" X "Melody" X Move the cursor to the
folder XC"Open" X Select a Melody
䂓Capturing and attaching a still image/
video
On the Compose message screen (P11),
M[Menu] X "Activate camera" X
"Photo-mode"/"Movie-mode" X Capture a
still image/video XC[OK]
Receiving i-mode Mails
1 i-mode mail arrives X "mail "X Select a
folder X Select an i-mode mail to display
Check new message
1IX"Check New Message"
Other Mail Functions
䂓Replying to Mail
Select to display the mail to be replaced to X
M[Menu] X "Reply" X "Reply"/Reply
quoted" X Enter subject and message text X
I[Send]
䂓Forwarding Mail
Select to display the mail to forward XM
[Menu] X "Forward" X Enter an address X
I[Send]
Menu List
Icon Function names
Mail
Received mail
Sent mail
Unsent mail
Compose message
Check new message
Receive option
SMS
Template
Mail setting
i-mode
iMenu
Bookmark
Files contained in Screen Memos
Last URL
Go To location
Message
i-Channel
Check new message
i-mode setting
i-appli
Software list
i-appli info
i-appli settings
Phonebook
Add to phonebook
Search phonebook
Number of contacts
Phonebook settings
Call/Mail history
Call duration
Call Cost
Data box
My Pictures
Music
Music channel
i-motion
Melody
SD Audio
MUSIC
Recent played䋪
Music Player
Music channel
SD-Audio Player
Lifekit
Bar Code Reader
Receive Ir data
microSD card
Custom Menu
Icon Function names
15141312
111098
䋪: "Playing" is displayed when playing a music.
䉨䊥 䊃 䊥 ✢
Lifekit
Record Message
Stopwatch
Camera
Photo-mode
Movie-mode
Bar Code Reader
Camera settings
Stationery
Schedule
Alarm
Memos
To Do 䊥䉴䊃
World Clock
Calculator
Unit converter
Remembering dates
Settings
Sounds&vibration
Select ringtone
Select effect tone
Volume
Vibrator
Manner mode set
Mail ring duration
Set mute ring(sec.)
View
Stand-by display
Call display
Icon Function names
Settings
View
Wake-up display
Dialing
Menu Display Settings
Backlight
Color theme
Illumination dot Settings
Call/VT/Dialing
Incoming call
Video Phone
Call feature
Self mode
Prefix dial
Sub Address
Earphone
Lock/Security
Lock
Secret mode
Display Call/mail logs
Keypad unlock
Change Security code
PIN code
Scanning Function
International roaming
Network
Voice mail (Int.)
Icon Function names
Settings
International roaming
Call forwarding (Int.)
Remote access setting (Int.)
Caller ID request (Int.)
Roaming guide (Int.)
Call barring
International Dial
Auto assist setting
International Prefix Settings
Auto international dial
Country code list
Date&Time
Set date&time
Date&Time format
Hour indication
Other
Character Entry
Memory status
Select language
Power Saving Mode
Reset/Delete
Software Update
USB mode setting
Touchpad settings
Battery Level
Icon Function names
Own number
Service
Voice mail
Call waiting
Call forwarding
Nuisance Call Blocking
Service
Nuisance Call Blocking
Caller ID notification
Caller ID Request
Set in-call arrival act
Arrival call act
Other
Additional Services
Additional guide
English guidance
Service numbers
Roaming guidance setting
Multi number
Dual Network
Remote Control
Icon Function names
Manner Mode
#(for 1+ seconds) on the Stand-by display
Public Mode (Drive Mode)
*(for 1+ seconds) on the Stand-by display
Network Services
Voice mail service
Play messages
M[Menu]X(Service)X"Voice mail"X
"Play messages"X"Yes"XFollow the
instructions of the voice guidance
Active voice mail
M[Menu] X (Service) X "Voice mail" X
"Activate voice mail" X "Yes" X "Yes" X Dial
keys to enter the ringing time
Deactive voice mail
M[Menu] X (Service)X"Voice mail" X
"Deactivate" X "Yes"
Call waiting
Activate call waiting
M[Menu] X (Service) X "Call waiting" X
"Activate" X
[Yes]
Deactivate call waiting
M[Menu] X (Service) X "Call waiting" X
Deactivate" X
[Yes]
Answering Incoming Call Putting
Current Call on Hold
Receive a call XA
䂓Switching the calls
M[Menu] X "Switch"
䂓Disconnecting the current call
P
䂓Disconnecting a call put on hold
M[Menu] X "Switch" XP
Answering Incoming Call
Terminating Current Call
Incoming call XM[Menu] X "End active call "
Call Forwarding Service
Activate
M[Menu] X (Service) X "Call
forwarding" X "Activate call forwarding" X
"Yes" X "Register the forwarding number" X
Enter the phone number to forward X "Ring
time" XHDial keys to enter the ringing time
XM"Done"
Deactivate
M[Menu] X (Service) X "Call
forwarding" X "Deactivate" X "Yes"
Services Available from the FOMA Handset
Services Available from FOMA Handset
Phone Number
Directory assistance of fixed line phones
and DoCoMo mobile phones (pay
service: service and call charges)
(No assistance provided for
subscribers not listed)
(No prefix) 104
Services Available from FOMA Handset
Phone Number
Telegraph (charges apply : telegram fee)
(No prefix) 115
Time check (charges apply) (No prefix) 117
Weather forecast (charges apply) Area code + 177
Police emergency (No prefix) 110
Fire and ambulance (No prefix) 119
Marine emergency call and accident reports
(No prefix) 118
Message Dial of disaster (charges apply)
(No prefix) 171
Collect call (Charges apply to the receiver)
(No prefix) 106
23222120
19181716
䉨䊥 䊃 䊥 ✢
Main Icons
a
Strong Weak
Radio wave reception level →P48
a b c ed fg h i j k
l m n o pq r s t u v w x
D E F G
y z A B C
Self Mode is set →P115
Out of Service Area / No Reception →
P48
bRadio wave reception level →P48
Self Mode is set →P115
Out of Service Area / No Reception →
P48
cToggle
On/Offi-mode Connection engaged →P139
Toggle
On/OffOngoing i-mode transmission /
i-channel message reception →P139
Toggle
On/OffEngage/Disengage Packet
connection
During Packet Communication
Sending/Receiving Packet Data
During Packet Communication
Sending/Receiving Packet Data
d(White)
i-mode mail from i-mode center
→
P167
(Pink) i-mode center mailbox is full
(White) There is a MessageR at the i-mode
Center→P150
(Pink) MessageR at the i-mode Center is full
(White) There is a MessageF at the i-mode
Center→P150
(Pink) MessageF at the i-mode Center is full
(White) There is a i-mode mail and
MessageR/F at the i-mode Center
(Pink) i-mode Mail and Message R/F at
i-mode center is full
e(White) There is an unread i-mode mail at the
i-mode Center→P166
(White) There is an unread SMS→P182
(White) There is an unread i-mode mail and
SMS
(Pink) Handset Mailbox is full
UIM's SMS section is full
Handset Mailbox and UIM SMS
sections are full
f(White) There is an unread MessageR→
P150
(Pink) MessageR is full
(White) There is an unread MessageF→
P150
(Pink) Handset MessageR section is full
gA SSL Page is open→P152
hAn i-appli is running →P185
An i-appli i-appliDX is running →P185
iA task is currently being executed
→P230
Several tasks are currently being
executed
A task is currently being restarted in
the background
Several tasks are currently being
restarted in the background
Alarm has executed while several
tasks are running.
j䌾Battery level →P47
kConfiguring Full-lock →P113
l
(Pink)
Manner Mode is activated →P97
(Blue)
Original Manner Mode is activated
→P98
mAudio ringer for voice/video call is
active, vibrator is inactive →P94, P95
Audio ringer for voice/video call is
inactive, vibrator is active →P94, P95
Emergency contact number for lost
<Contact number:䇭䇭䇭 䇭䇭䇭䇭䇭>
<Contact number:䇭 䇭䇭䇭䇭䇭䇭䇭>
<Contact number:䇭 䇭䇭 䇭䇭䇭䇭䇭>
㶎Verify the number before making a call.
Audio Ringer for voice/video call is
active, vibrator is also active →P94,
P95
Audio ringer for voice/video call is
inactive, vibrator is inactive →P94,
P95
nMail/message receipt ringer active,
vibrator is inactive→P94, P95
Mail/message receipt ringer inactive,
vibrator is active→P94, P95
Mail/message receipt ringer active,
vibrator is active→P94, P95
Mail/message receipt ringer inactive,
vibrator is inactive→P94, P95
oPublic Mode (Drive Mode) is set
→P68
pModifying Voicemail Settings →P71
qThere is a set alarm →P231
rThere are TO DO activities today
→P232
There are TO DO activities today with
their alarms activated→P231, P232
sInserting microSD Memory Card
→P206
tConfiguring voice/video calls usage
limit→P114
Configuring voice/video calls
reception limit→P114
Configuring voice/video calls usage
and reception limit→P114
uConfiguring Sent Mail limit→P114
Configuring Received Mail limit
→P114
Configuring Sent and Received Mail
limit→P114
vWhen you set "Call/Mail lock" to "On"
→P115
When you set "Secret mode" to "On"
→P117
When you set both "Call/Mail lock"
and "Secret mode" to "On" →P115,
P117
When you set "Secret data only
mode" to "On"→P117
When you set both "Call/Mail lock"
and "Secret data only mode" to "On"
→P115, P117
wConnecting to an external device via
USB cable→P210
xLinking to Terminal
UIM not inserted / UIM has produced
an error→P40
yi-appli automatic execution has failed
→P190
zCall costs have exceeded the limit
→P240
AMusic channel episode download
complete→P216
Music channel episode download
failed→P216
Downloading music channel episode
→P216
BBooking downloading music channel
program→P216
CPattern Data has been updated→
P328
You should update your pattern data
DSeveral Unread Mails (with number of
the mails)
ESeveral Missed Calls(with number of
the calls)
FThere are Voice mail messages(with
number of the calls)→P256
GNew Record message have been
recorded(with number of the
messages)
31302928
27262524
䉨䊥 䊃 䊥 ✢
Quick Manual(Overseas Use) Overseas Use
<DoCoMo Information Center> (24 hours)
Network Technical Operation Center
<Network Technical Operation Center> (24 hours)
Preparation for Overseas Use
i-mode setting
1IX"䌩Menu" X"English i-menu" X
"Options" X"International Settings" X
"i-mode services Settings" X "Yes" X
Select i-mode password field X Enter
i-mode Password X "Select"
Setting Remote Control
1M[Menu] X(Service) X"Others" X
"Remote control" X"Activate" X"Yes"
Dual Clock Settings
1M[Menu] X(Settings X"Display" X
"Stand-by display" X"Clock type" X"Dual
clock" X"2-nd City" XMover the cursor
to a city by Pressing JXI[Select]X
I[Done]
Communication System and
Available Services
From a DoCoMo handset
-81-3-5366-3114䋪
(Free)
䋪From a fixed line phone, International phone call charges to Japan
apply.
䋪 From L705i dial 䋫 81-3-5366-3114 (to enter "+", press 0 (for 1+
seconds)).
From a fixed line phone:
<Universal Number>
-800-0120-0151䋪
䋪Domestic call charges for your overseas location will apply to calls.
䋪 For International Access Code for Major Countries(Table 1), see
P.13. For the International Phone Code for a Universal Number
(Table 2), see P.14.
International Access
CodeforyourCurrent
Location (Table 1)
International Phone Code
for a Universal Numbers
(Table 2)
From a DoCoMo handset
-81-3-6718-1414䋪
(Free)
䋪Fromafixedlinephone,InternationalphonecallchargestoJapan
apply.
䋪 From L705i dial 䋫 81-3-6718-1414 (to enter "+", press 0 (for 1+
seconds)).
From a fixed line phone:
<Universal Number> -800-5931-8600䋪
䋪Domestic call charges for your overseas location will apply to calls.
䋪 For International Access Code for Major Countries(Table 1), see
P.13. For the International Phone Code for a Universal Number
(Table 2), see P.14.
䃂If your handset is lost or stolen, contact DoCoMo immediately and
temporarily halt the subscription.
䃂If theFOMAhandset which you purchased is broken, please bring it to the
service center.
International Access Code
for your Current Location
(Table 1)
International Phone Code
for a Universal Numbers
(Table 2)
Service 3䌇GSM GPRS
Voice call 䂾䂾䂾
Video Phone 䂾㬍䋪㬍䋪
i-mode 䂾㬍䂾
i-mode mail 䂾㬍䂾
SMS 䂾䂾䂾
i-Channel 䂾㬍䂾
Data
Communication 䂾㬍䂾
䂾䋺 Available
㬍䋺 Not available
䋪䋺 When a call is made, a redial confirmation screen opens.
Select "Redial voice call" to redial Voice Call.
Switching Networks
By default, "Network search mode" is set to
"Auto". When you use the FOMA handset in
Japan or in the areas where 3G area network is
available, it is recommended to switch "Network
mode" to "WCDMA only" to reduce the
consumption of the battery pack.
Setting the Network Manually
1M[Menu] X(Settings) X
"International roaming" X "Network"
2 "Network mode" X "WCDMA only" /"GSM
only"
3 "Network search mode" X"Manual" X
"Yes" X Select a network
Setting Preferred Networks
1M[Menu] X (Settings) X
"International roaming" X "Network"
2 "Preferred NW lists"
Network names appear in order of priority.
3I[Add] X "UPLMN manual select" X
Enter MCC and MNC XI[Done]
Display
An icon indicating the currently connected network
appears on the Display. The connected carrier
name also appears on the Display.
After Coming Back to Japan
When you have returned to Japan, FOMA
handset is automatically connected to FOMA
network and appears at the top of the
screen.
If the FOMA network is not connected
, perform
the following settings.
1M[Menu]X(Settings)X"International
roaming" X "Network"
2"Network mode" X "Auto"
3 "Network search mode" X "Auto"
aIcons indicating the connected network
Connected to a FOMA network in Japan
Connected to a 3G network overseas
Connected to a GSM network overseas
Connected to a GPRS network overseas
bConnected carrier name
䋪The network name does not appear when the
handset is connected to the FOMA network in
Japan.
a
b(Image to be
added)
123
7654
䉨䊥 䊃 䊥 ✢
Making Calls
Making a Call to Japan or Countries
Other than the Country of Usage
10 (for 1+ seconds) X Enter "Country
Code - Area Code (City Code) - Phone
Number"
• Omit the leading "0" (zero) from the city
code or from a phone number of
Japanese mobile phone of PHS (in
some countries or regions such as Italy,
the leading "0" may be required).
• Country code →P12
2Call
•A: Make a voice call
•M[Menu] X"Video phone call"
: Make a video call
3 To terminate the call P
Making Call inside the Country
Where You Stay
1 Enter the phone number with the area code
(city code) in the same way as in Japan
2Call
•A : Make a voice call
•M [Menu] X"Video phone call"
: Make a video call
3 To terminate the call P
Receiving a Call
1 A call arrives
•I [Silent] :Stop the ring tone
•P : Place the call on response hold.
2 Receiving a Call
•A : Answer a voice call
•A : Answer a video call (with Camera
image)
•A [Image] : Answer a video call (with
Camera image)
3 To terminate the call P
Network Services
Remote Control
• Setting must be done while in Japan.
M[Menu] X(Service) X"Others" X
"Remote control" X"Activate"/"Deactivate"
X"OK"
Roaming guidance setting
• Setting must be done while in Japan.
M[Menu] X (Service) X "Others" X
"Roaming guidance" X "Activate"/"Deactivate"
X"OK"
Call barring
• Setting must be done while in Japan.
M[Menu] X (Settings) X "International
roaming" X "Call barring" X "Activate - roam"
X "Barring all incoming calls"/"Data calls
barring" X Enter network security code X "OK"
Voice mail (Int.)
M[Menu] X(Settings) X"International
roaming" X"Voice mail (Int.)" X"Activate"/
"Deactivate"/"Play messages" XFollow the
instructions of the voice guidance
Call forwarding (Int.)
M[Menu] X(Settings) X"International
roaming" X"Call forwarding (Int.)" X"Activate"/
"Deactivate" XFollow the instructions of the
voice guidance
Roaming Guidance (Intl)
M[Menu] X(Settings) X"International
roaming" X"Roaming guide(Int.)" X"Select" X
Follow the instructions of the voice guidance
Country Codes of Major Countries
Use the following numbers when you use
international call or a country number in
international dial As of 䃂2007
䋪For the codes of the other countries and details, see
the DoCoMo's web page international Services.
International Access Codes of
Major Countries (Table 1)
As of 䃂2007
International Phone Codes for
Universal Numbers (Table 2)
As of 䃂2007
For inquiries
For loss or theft of the handset, settlement of
charges, or handset failure while overseas,
contact the DoCoMo Information Center on the
front page of "Overseas Use" or the Network
Technical Operation Center on Page 1.
• The contact numbers must be prefixed with
the code assigned to the country of stay as
shown in the "International Access Codes
of Major Countries (Table1)" or
"International Phone Code for a Universal
Numbers (Table2)".
Area Code Area Code
U.S.A. 1 Czech 420
U.K. 44 China 86
Italy 39 Germany 49
India 91 Turkey 90
Indonesia 62 Japan 81
Egypt 20 New Caledonia 687
Australia 61 New Zealand 64
Australia 43 Norway 47
Netherlands 31 Hungary 36
Canada 1 Fiji 679
Korea 82 Philippines 63
Greece 30 Finland 358
Singapore 65 France 33
Switzerland 41 Brazil 55
Sweden 46 Vietnam 84
Spain 34 Peru 51
Thailand 66 Belgium 32
Taiwan 886 Hong Kong 852
Tahiti 689 Macao 853
Area Code Area Code
Malaysia 60 Russia 7
Maldives 960
Area Code Area Code
Ireland 00 Taiwan 002
U.S.A. 011 Czech 00
U.A.E. 00 China 00
U.K. 00 Denmark 00
Italy 00 Germany 00
India 00 Turkey 00
Indonesia 001 New Zealand 00
Australia 0011 Norway 00
Netherlands 00 Hungary 00
Canada 011 Philippines 00
Korea 001 Finland 00 䋯
Greece 00 990
Singapore 001 France 00
Switzerland 00 Brazil
0041
䋯
Sweden 00
0021
䋯
Spain 00
0023
Thailand 001 Vietnam 00
Area Code Area Code
Belgium 00 Malaysia 00
Poland 00 Monaco 00
Portugal 00 Luxemburg 00
Hong Kong 001 Russia 810
Macao 00
Area Code Area Code
Ireland 00 Thailand 001
U.S.A. 011 Taiwan 00
Argentina 00 China 00
U.K. 00 Denmark 00
Israel 014 Germany 00
Italy 00 New Zealand 00
Australia 0011 Norway 00
Australia 00 Philippines 00
Netherlands 00 Finland 990
Canada 011 France 00
Korea 001 Brazil 0021
Colombia 009 Belgium 00
Singapore 001 Hong Kong 001
Switzerland 00 Malaysia 00
Sweden 00 Luxemburg 00
Spain 00
15141312
111098
Don't forget your FOMA handset or your manners!
When using the FOMA handset, be considerate and do not disturb people around you.
Always turn OFF your FOMA handset in the following situations:
䂓Where use is prohibited
Be sure to turn off your FOMA handset in airplanes and in hospitals.
㶎Persons using electronic medical equipment are in places other than the actual wards.
Make sure you have the power switched off even if you are in a lobby or waiting room.
䂓When in crowded places such as packed trains, where you could be near a person with an
implanted cardiac pacemaker or implanted defibrillator.
The implanted cardiac pacemaker or implanted defibrillator operation may be affected by radio
emissions from the FOMA handset.
In the following cases, be certain to set Public Mode.
䂓While driving
Using the FOMA handset interferes with safe driving and could cause danger.
㶎Park the car in a safe place before using the FOMA handset, or switch to Public Mode.
䂓When in theaters, movie theaters, museums, and similar venues
If you use your FOMA handset where you are supposed to be quiet, you will disturb those
around you.
Pay attention to your surroundings and
the loudness of your voice and Ring tone
䂓Do not raise your voice when using the FOMA handset in quiet places such as in restaurants
or hotel lobbies.
䂓Use the handset so as not to disturb pedestrian traffic.
Consider privacy
Please be considerate of other people's privacy when capturing and sending pictures using
camera-equipped mobile phones.
This manual was produced in such a way as to allow easy recycling. Please recycle this
manual when it is no longer needed.
These functions help you keep your manners in public
Handy functions are available such as for setting the response to incoming calls and setting
the tones to silent
䃂Public Mode (Drive mode/Power off)
The guidance is played announcing that you are in such a place as train, bus or movie
theater where you have to turn off the handset, and the call is disconnected.
→P68䇮P70
䃂Record Message
Callers can record a message when you cannot come to the phone.→P71
䃂Incoming Vibrate
When the vibrate is set, it vibrates for incoming calls.→P95
䃂Manner Mode/Original Manner Mode
In Manner Mode, the Key tone, Ring tone or every other sound generated by the FOMA
handset are silenced.(General manner mode)
→P97
You can change the operation of the FOMA handset in Manner Mode(Original manner
mode)→P98