LG Electronics USA PF80AJE DLP PROJECTOR User Manual G User s manual
LG Electronics USA DLP PROJECTOR G User s manual
UserManual.wiki
>
LG Electronics USA
>
PF80AJE User Manual
>
User Manaul Part 6
Contents
1.
User Manaul Part 1
2.
User Manaul Part 2
3.
User Manaul Part 3
4.
User Manaul Part 4
5.
User Manaul Part 5
6.
User Manaul Part 6
User Manaul Part 6
Navigation menu
Upload a User Manual
Namespaces
Wiki Guide
HTML
PDF
Info
Views
User Manual
Discussion / Help
Navigation

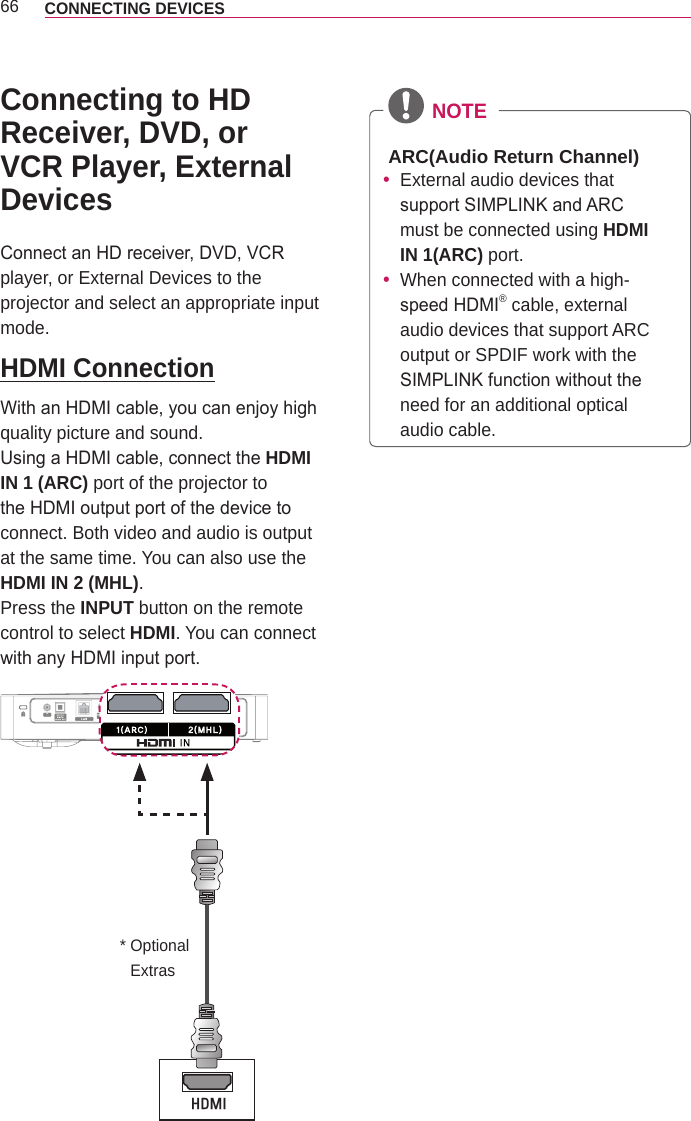
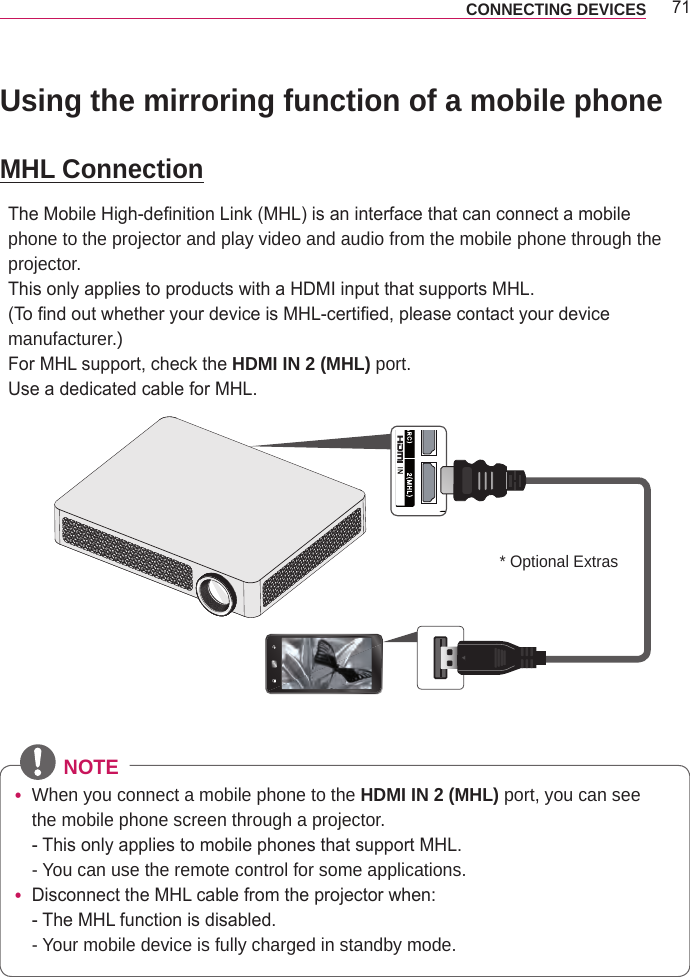
![70 CONNECTING DEVICES Connecting to PC and LaptopThe projector supports Plug & Play. Your PC will automatically detect the projector and requires no driver installation.You can connect the projector to a laptop to use various functions.HDMI ConnectionUsing an HDMI cable, connect the HDMI IN 1 (ARC) port of the projector to the HDMI output port of your PC. Both video and audio is output at the same time. You can also use the HDMI IN 2 (MHL).+'0,The table below shows examples of switching the output. For more information, refer to the External Output, Connecting to an External Monitor, or similar sections of the owner's manual of your computer.Brand Switching OutputNEC [Fn]+[F3]Panasonic [Fn]+[F3]Toshiba [Fn]+[F5]IBM [Fn]+[F7]Sony [Fn]+[F7]Fujitsu [Fn]+[F10]LG [Fn]+[F7]Samsung [Fn]+[F4]Macintosh Adjust the control panel to enable mirroring after start-up.* Optional Extras](https://usermanual.wiki/LG-Electronics-USA/PF80AJE.User-Manaul-Part-6/User-Guide-2253210-Page-11.png)