LG Electronics USA SA565JP LASER PROJECTOR User Manual
LG Electronics USA LASER PROJECTOR
UserManual.wiki
>
LG Electronics USA
>
SA565JP User Manual
>
User Manual 1
Contents
1.
User Manual 1
2.
User Manual 2
3.
User Manual 3
User Manual 1
Navigation menu
Upload a User Manual
Namespaces
Wiki Guide
HTML
PDF
Info
Views
User Manual
Discussion / Help
Navigation


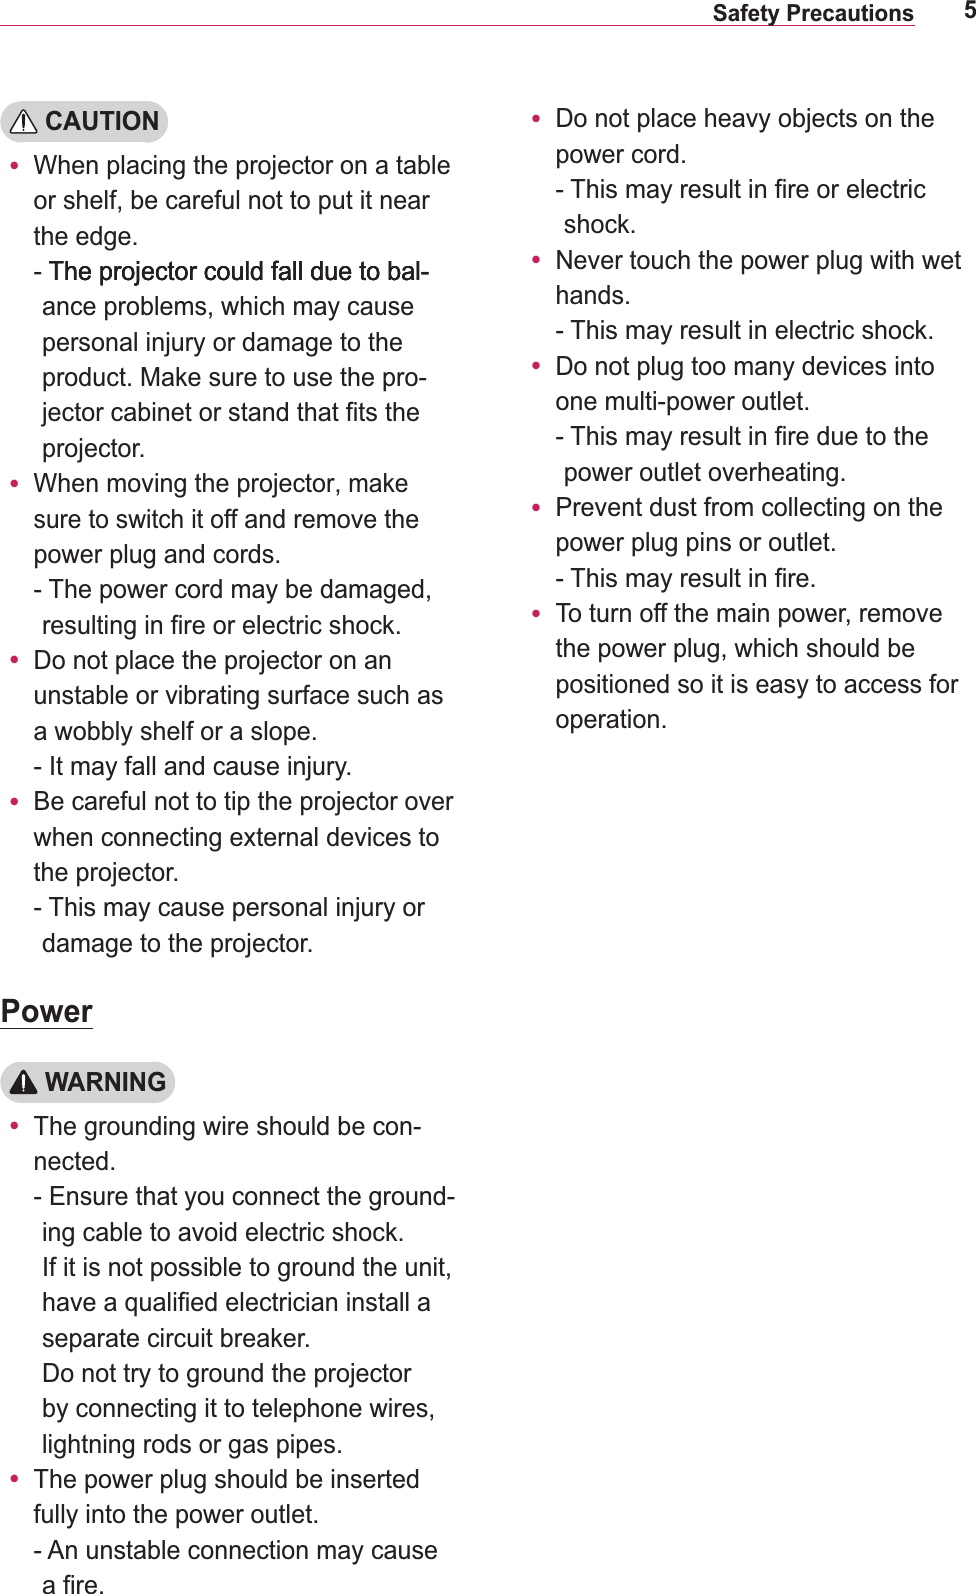
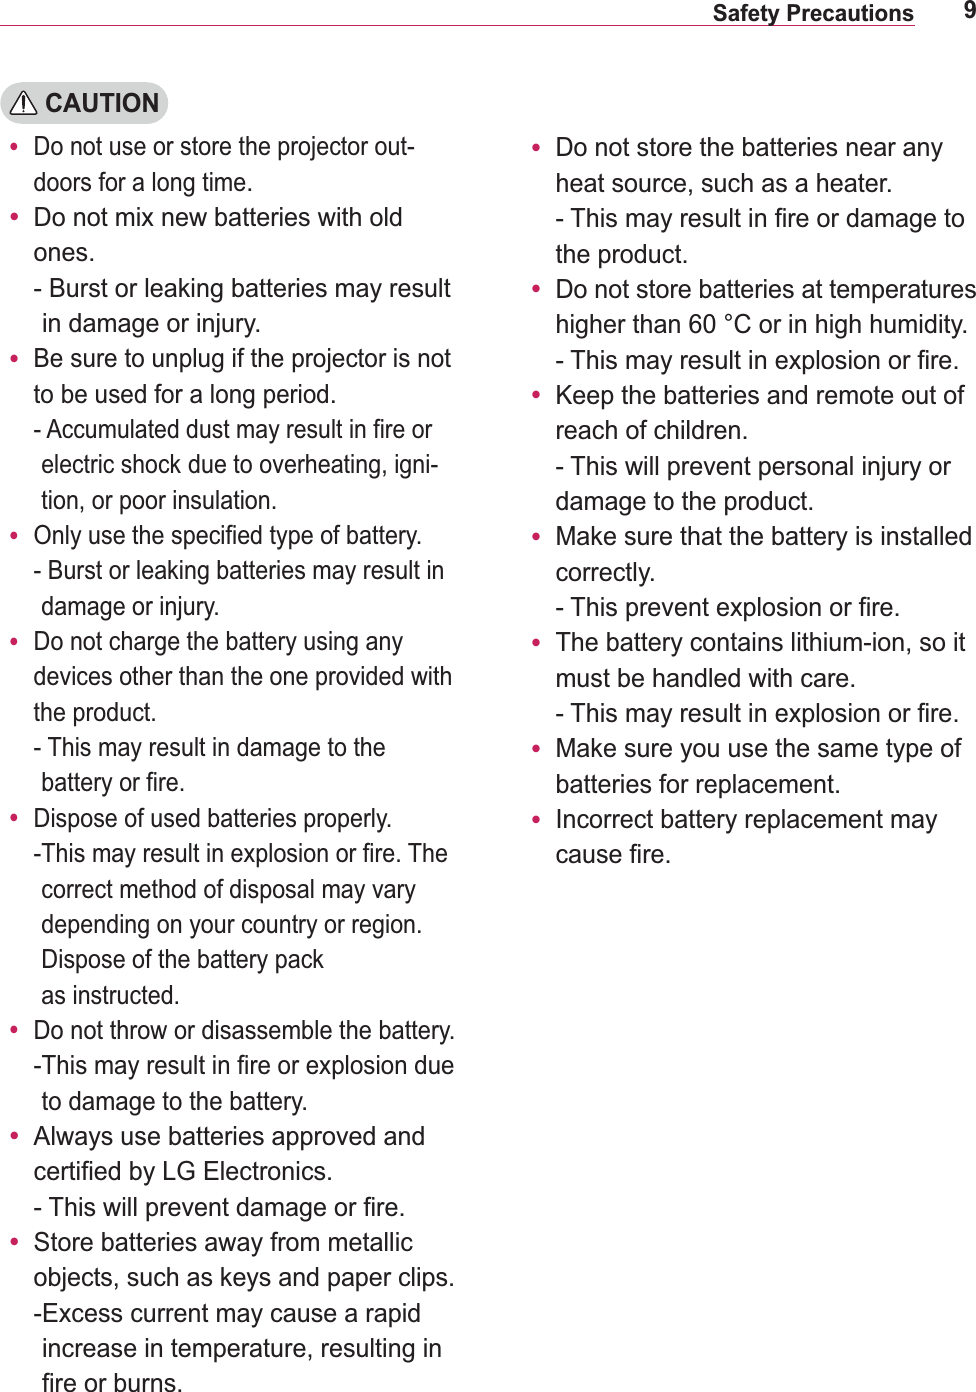
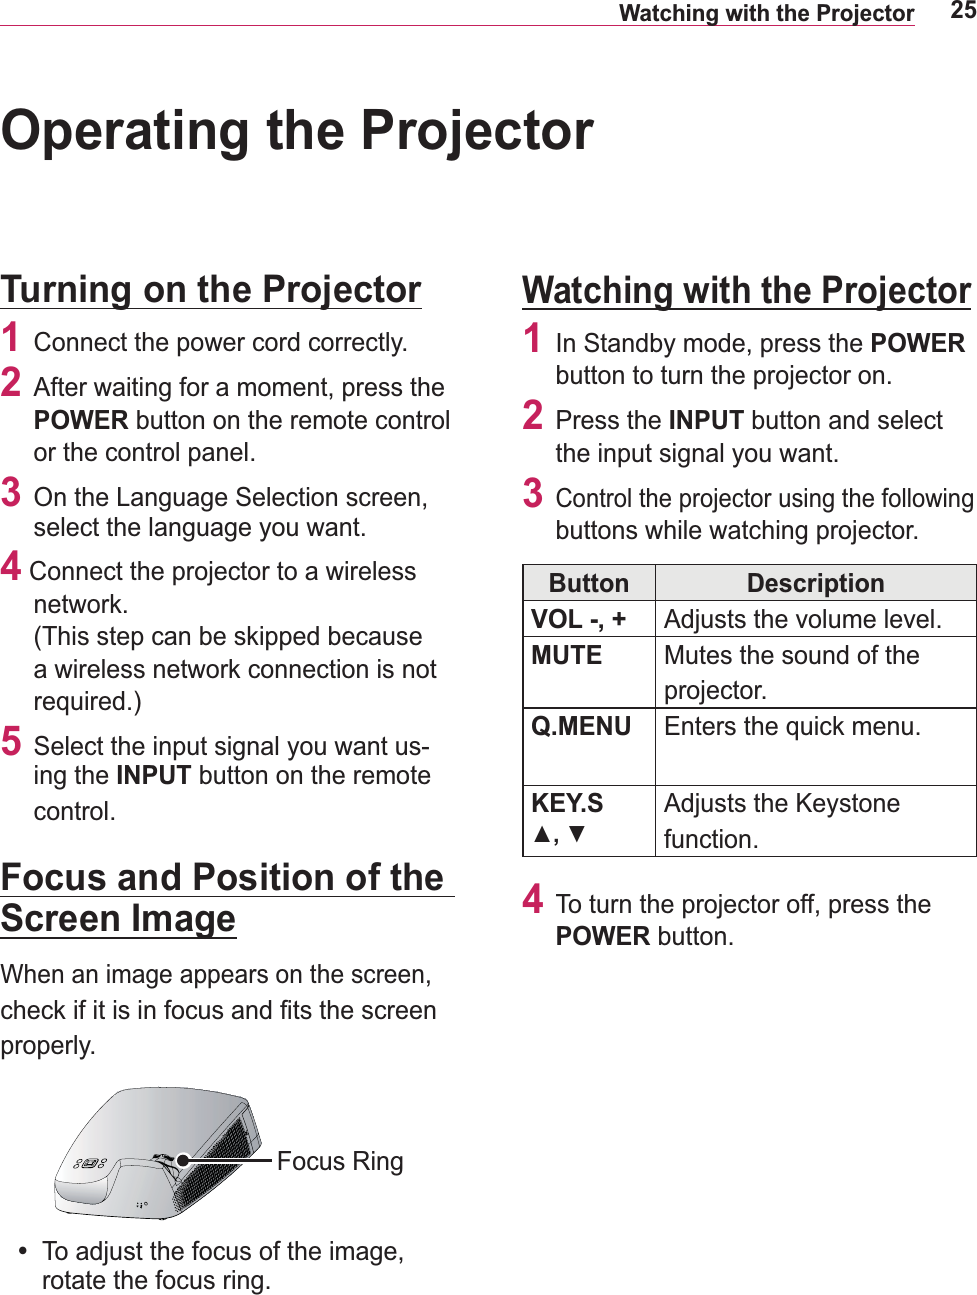
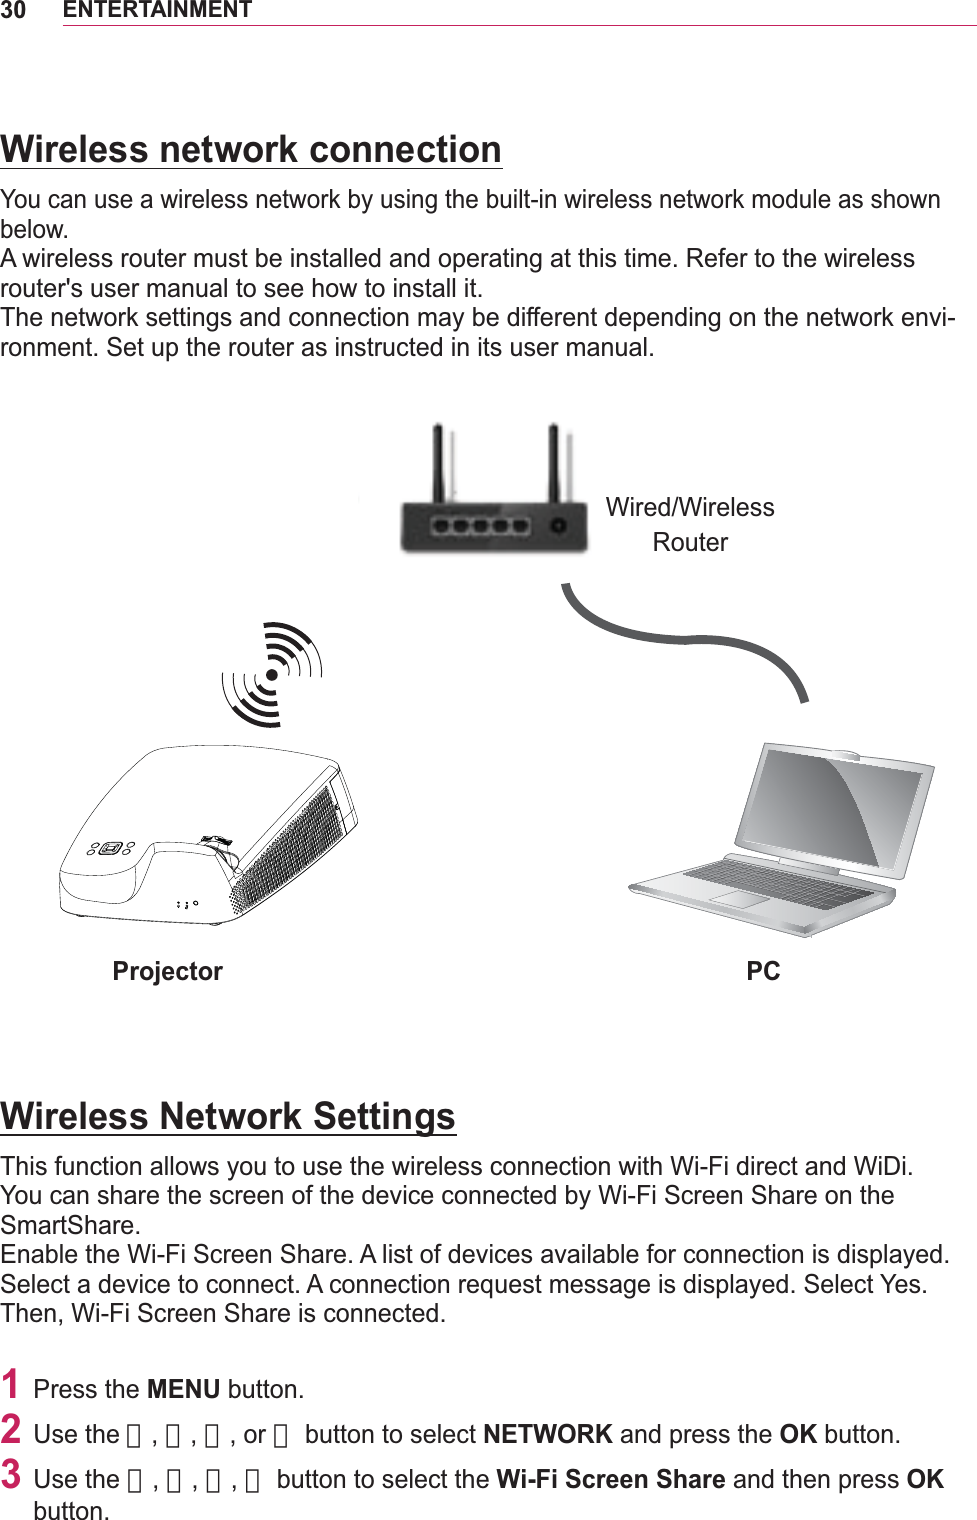
![13PREPARATIONPREPARATIONAccessoriesAccessories included with the project are show below. The pictures may differ slightly from the actual product. Accessories are subject to change without prior notice. New accessories may be added or old ones removed. ᇡ᯦ಆษᯕⓍᱩᱥ༉ऽ 64#≉⋉༉ऽ ⪵໕ᱶḡᮭప ⟹ᯕḡ⪵໕aฝ⪵໕Ⓧʑᖅᱶີە ᯱ࠺᳑ᱶ e⠙ᖅᱶᩢᔢ༉ऽ ӹaʑ┅ᜅ★┅ᜅ★ᰆᖅᱶ ᯱaḥ݉ͪͩͨͧͦͥͤͣ͢͡Remote Control Two AAA Batteries Owner's Manual Power Cord Computer Cableh]0Qhw#Pdqdjhu#Surjudp#FGPdjlfdo#Pluurulqj#Surjudp#FGFG#Rzqhu*v#pdqxdoLqwhudfwlyh#Shq Lqwhudfwlyh#Grqjoh Wls XVE#D#wr#E##FdeohUhfkdujh#Fdeoh Zulvw#vwuds Kdug#fdvh Zl}WhdfkVriwzduh#FG(For SA565 only)](https://usermanual.wiki/LG-Electronics-USA/SA565JP.User-Manual-1/User-Guide-1894017-Page-13.png)