Lexmark LEXM07001 Internal Network Adapter User Manual User s Guide
Lexmark International Inc Internal Network Adapter User s Guide
Lexmark >
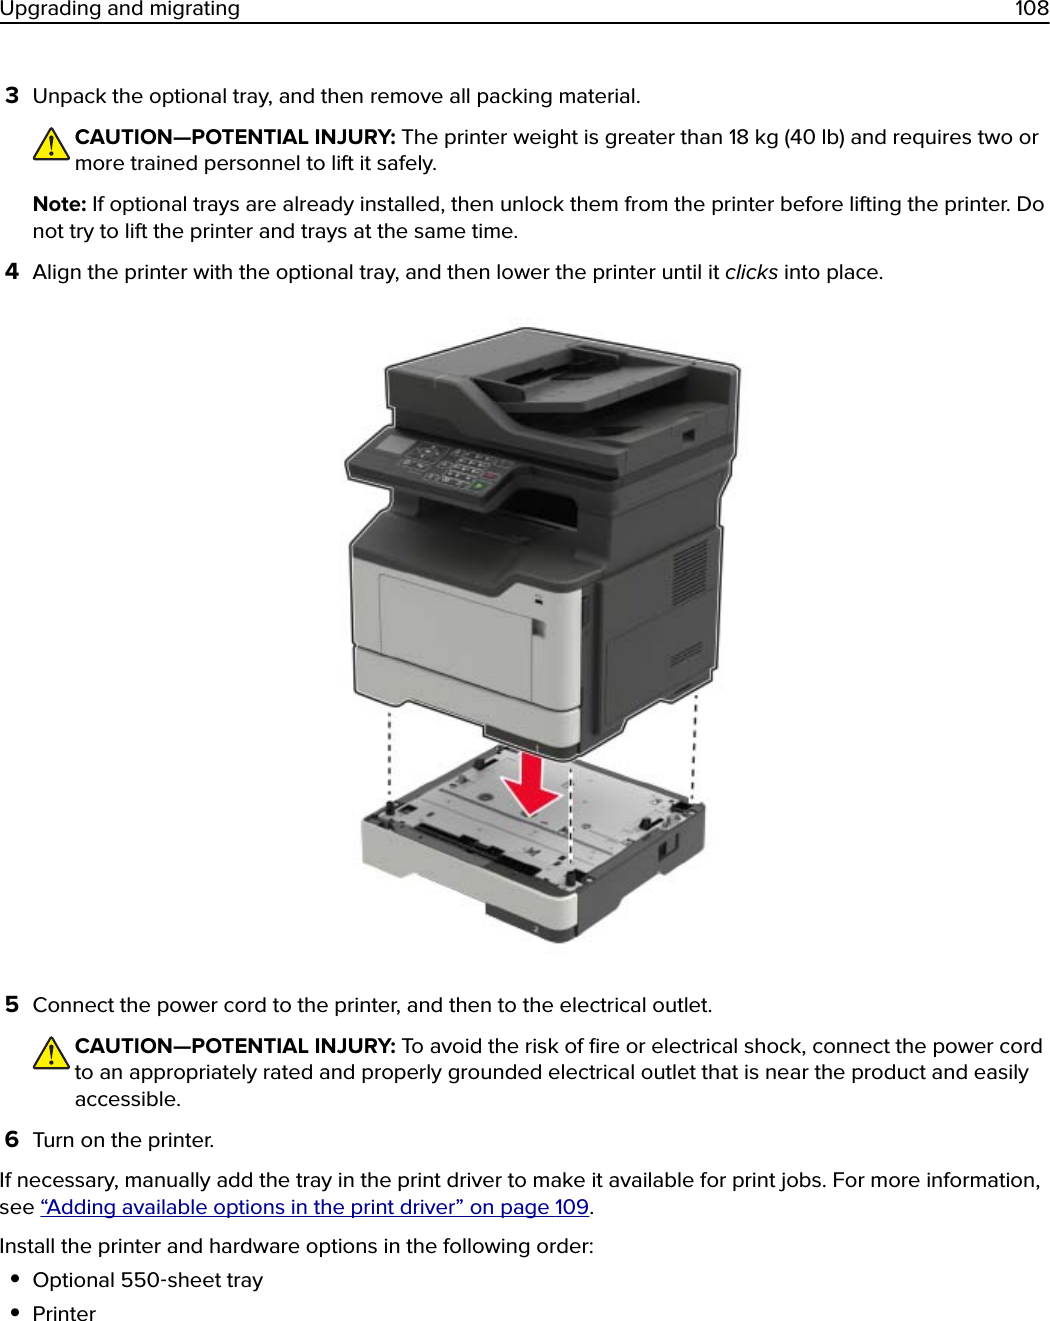
Contents
- 1. Manual - Module
- 2. Manual - Host Device Example Part 1
- 3. Manual - Host Device Example Part 2
Manual - Host Device Example Part 2