Lutron Electronics 0017 Car Visor Control User Manual JPZ0017
Lutron Electronics Company Inc Car Visor Control JPZ0017
JPZ0017 User Manual
Preliminary RadioRA Car Visor Control Instructions 09/19/01
Page 1 of 10
Adding a Car Visor Control
The Car Visor Control is a special type of Master Control. The System can have a maximum of
12 Master Controls. For every 1 Master Control NOT used, a Car Visor Control may be used in
its place.
NOTE: This equipment has been tested and found to comply with the limits for a Class B digital
device, pursuant to Part 15 of the FCC Rules. These limits are designed to provide reasonable
protection against harmful interference in a residential installation. This equipment generates, uses
and can radiate radio frequency energy and, if not installed and used in accordance with the
instructions, may cause harmful interference to radio communications. However, there is no
guarantee that interference will not occur in a particular installation. If this equipment does cause
harmful interference to radio or television reception, which can be determined by turning the
equipment off and on, the user is encouraged to try to correct the interference by one or more of the
following measures: Reorient or relocate the receiving antenna. Increase the separation between the
equipment and receiver. Connect the equipment into an outlet on a circuit different from that to
which the receiver is connected. Consult the dealer or an experienced radio/TV technician for help.
CAUTION: Changes or modifications not expressly approved by Lutron Electronics could void the
user’s authority to operate this equipment.
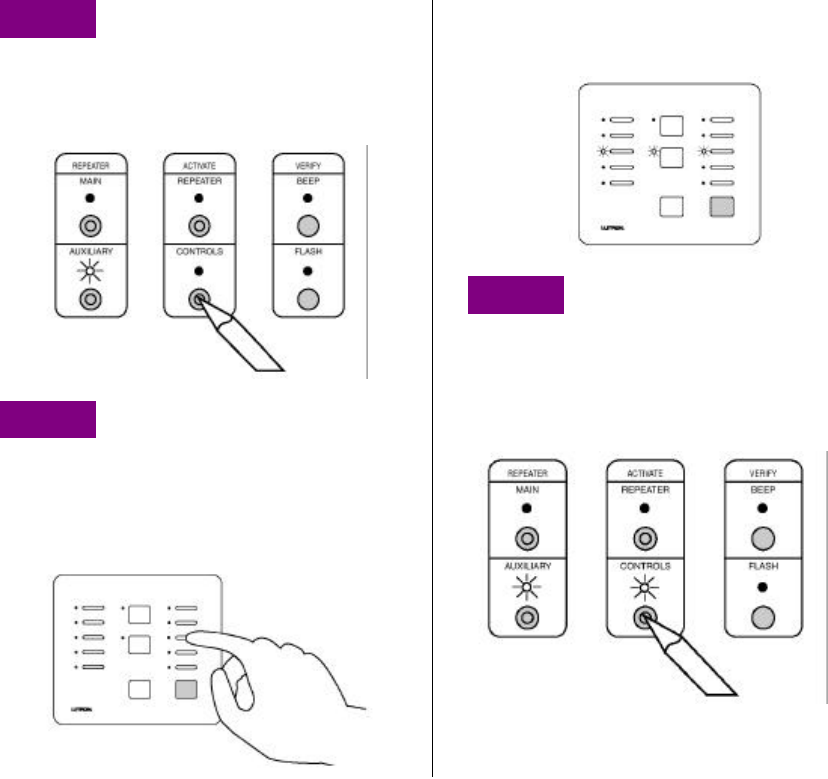
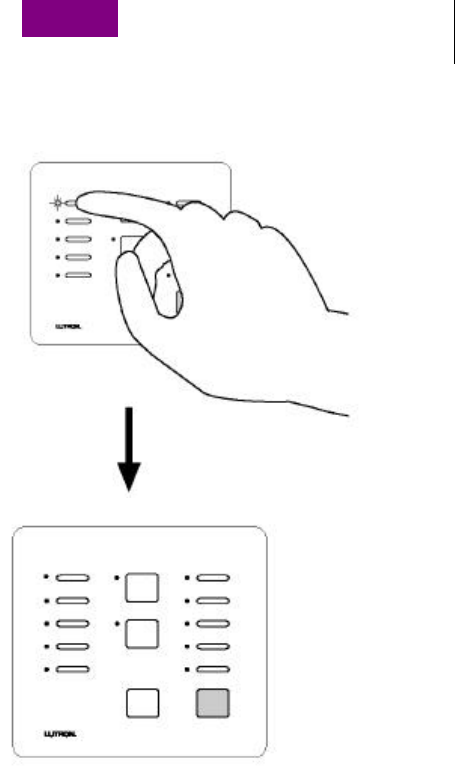
Step 1 Begin Control Activation
Press and hold the ACTIVATE CONTROLS
button on any Repeater until the green
ACTIVATE CONTROLS LED turns ON
(approximately 3 seconds).
Step 2 Activate Controls
To add a Car Visor Control
Press any button.
• All LEDs will flash, then
• Top and bottom row will flash alternately
Middle row of LEDs will turn ON when the
Master Control has been activated.
Car Visor Receiver
Step 3 Complete Car Visor
Control Activation
Press and hold the ACTIVATE CONTROLS
button on any Repeater until the green
ACTIVATE CONTROLS LED turns OFF
(approximately 3 seconds).
The green ACTIVATE CONTROLS LED on
ALL Repeaters will turn OFF. The MAIN or
AUXILIARY LED will remain on.
Preliminary RadioRA Car Visor Instructions 09/19/01
Page 2 of 10
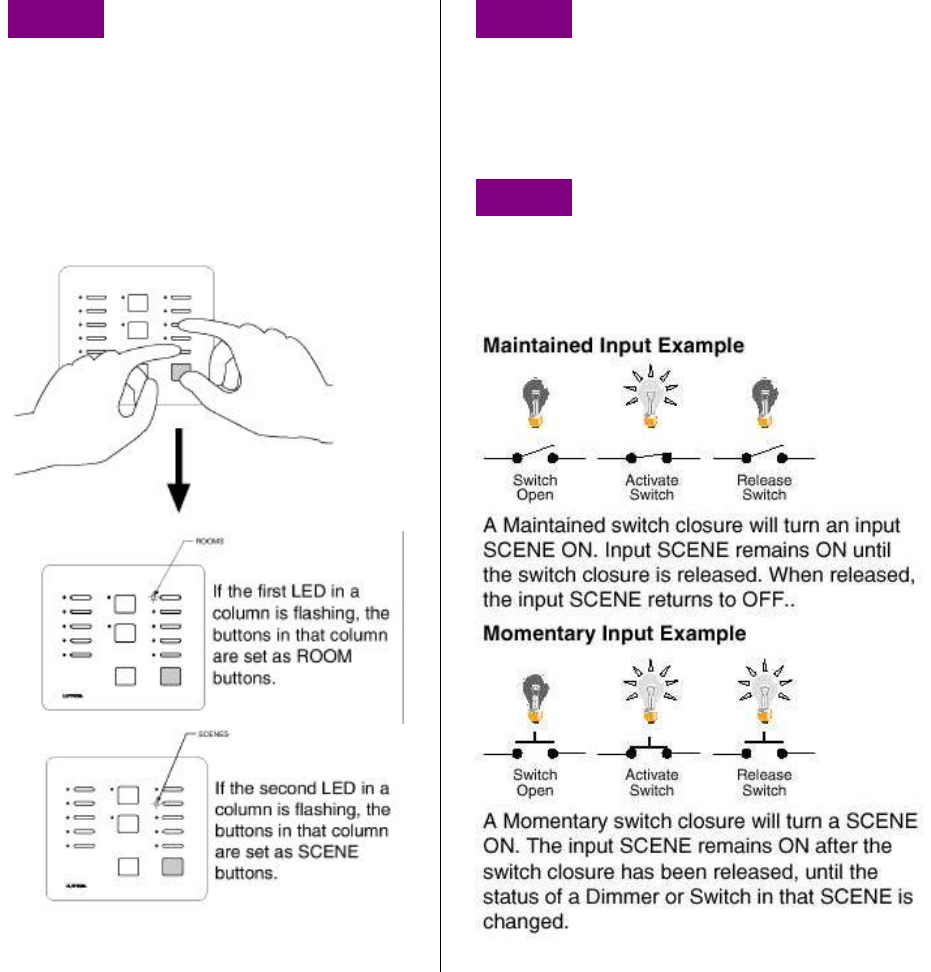
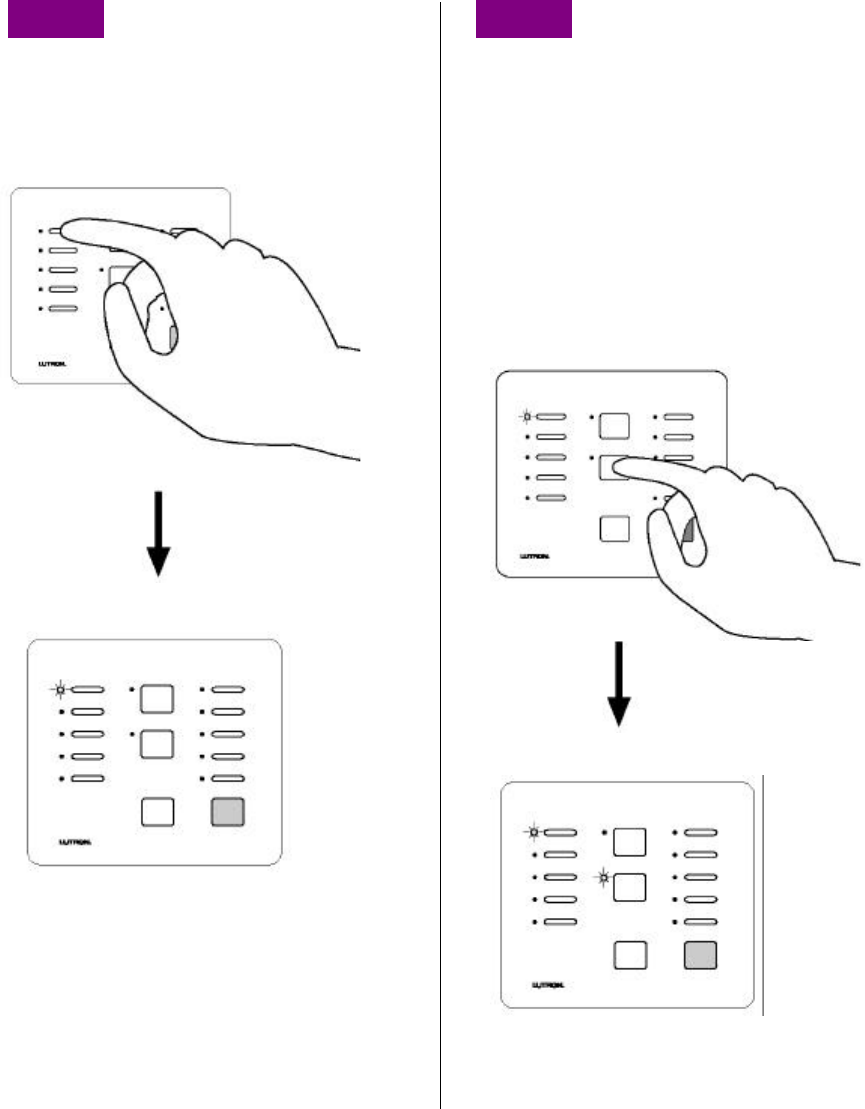
Programming Preparations
Assigning the Lights Column of Buttons as
ROOMS or SCENES on your Car Visor Control
The right most column of buttons on a Car Visor Control can be programmed to be either ROOM
or SCENE buttons.
Step 1 Begin ROOM/SCENE
Assignment
Simultaneously press and hold the 3rd,5th,
and ALL OFF buttons in the right most
column until an LED in the right most
column of the Car Visor Control which you
are programming begins to flash
(approximately 3 seconds).
Step 2 Changing ROOM/SCENE
Assignments
Press the 1st button in a column to make
that column a ROOM column, or press the
2nd button to make it a SCENE column.
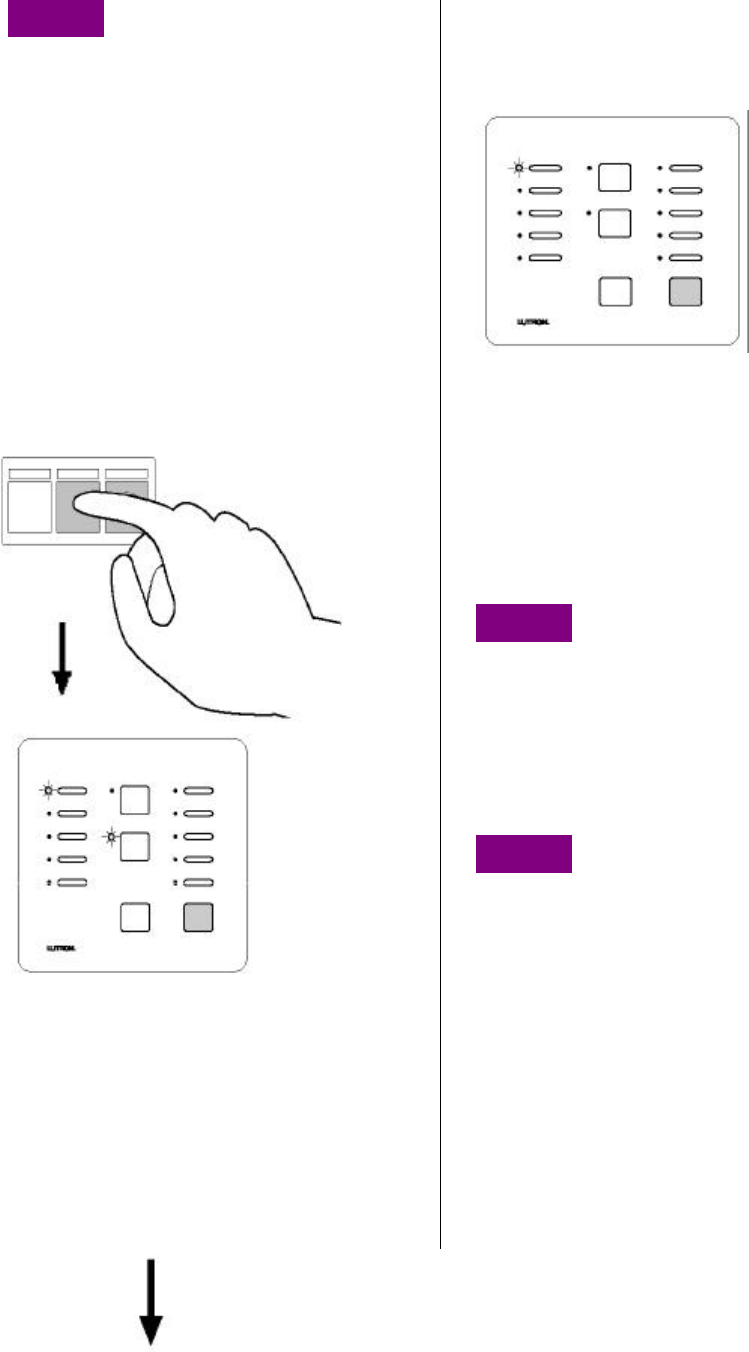
Step 3 Changing the closure
type for the Input buttons
Both CCI’s can be independently selected
as Momentary or Maintained closures.
Continued on next page.
Preliminary RadioRA Car Visor Instructions 09/19/01
Page 3 of 10
Step 3 Changing the closure
type for the Input buttons
(continued)
If a CCI is set as Momentary (default
setting), its LED will be OFF. If a CCI is set
as Maintained, its LEDs will be ON.
To change the setting to Maintained, press
and hold the CCI button until the LED turns
ON.
To change the setting to Momentary, press
and hold the CCI button until the LED turns
off.
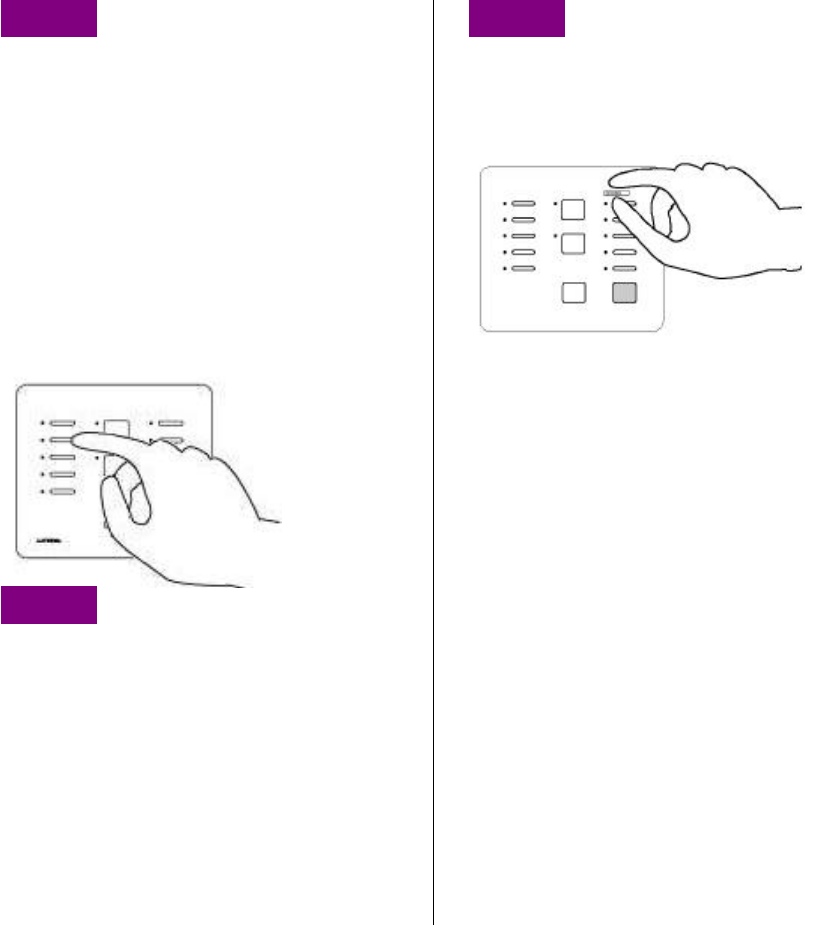
Step 4 Complete ROOM/SCENE
Assignment
Simultaneously press and hold the 3rd, 5th,
and ALL OFF buttons in the right most
column until the LEDs stop flashing
(approximately 3 seconds).
Step 5 Label columns
Apply the supplied ROOMS or SCENES
labels to the space provided over the right
most button column.
Preliminary RadioRA Car Visor Instructions 09/19/01
Page 4 of 10
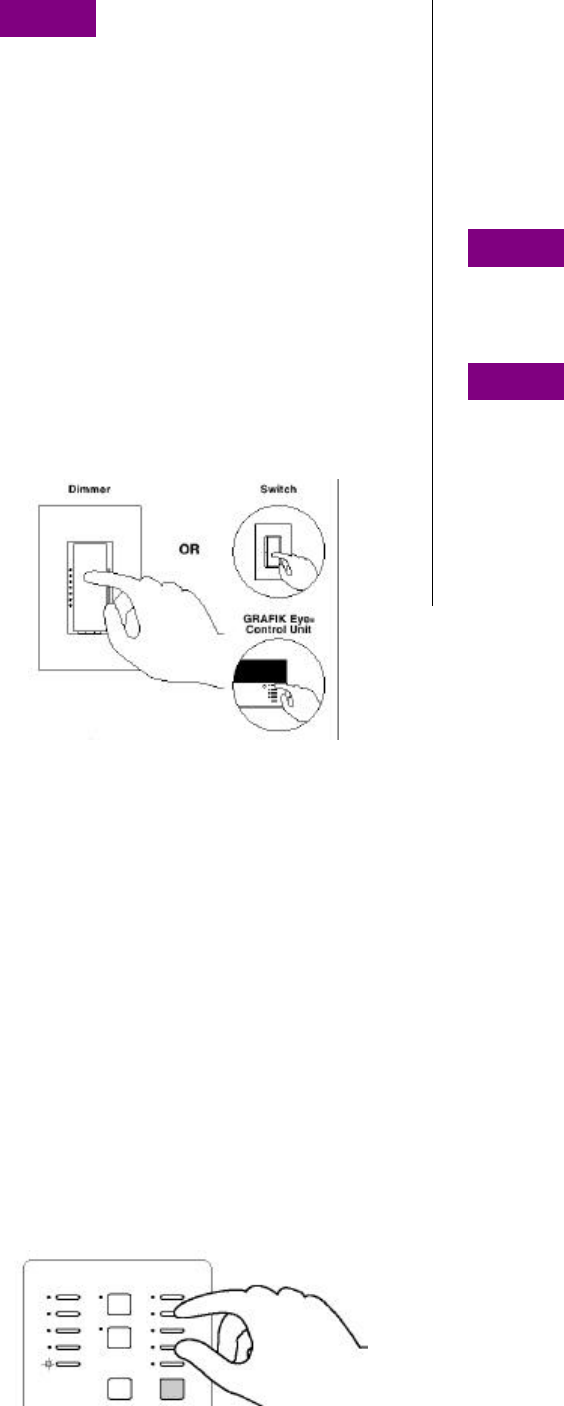
Assigning Dimmers, Switches, or GRAFIK Eye
Control Units to Car Visor Control Buttons
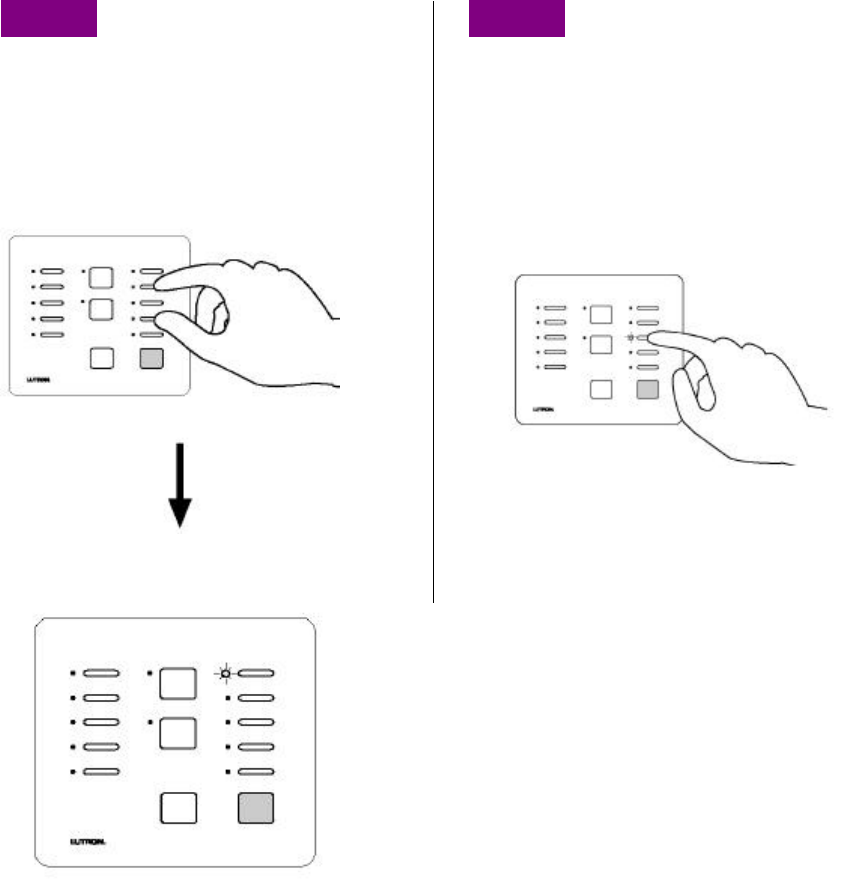
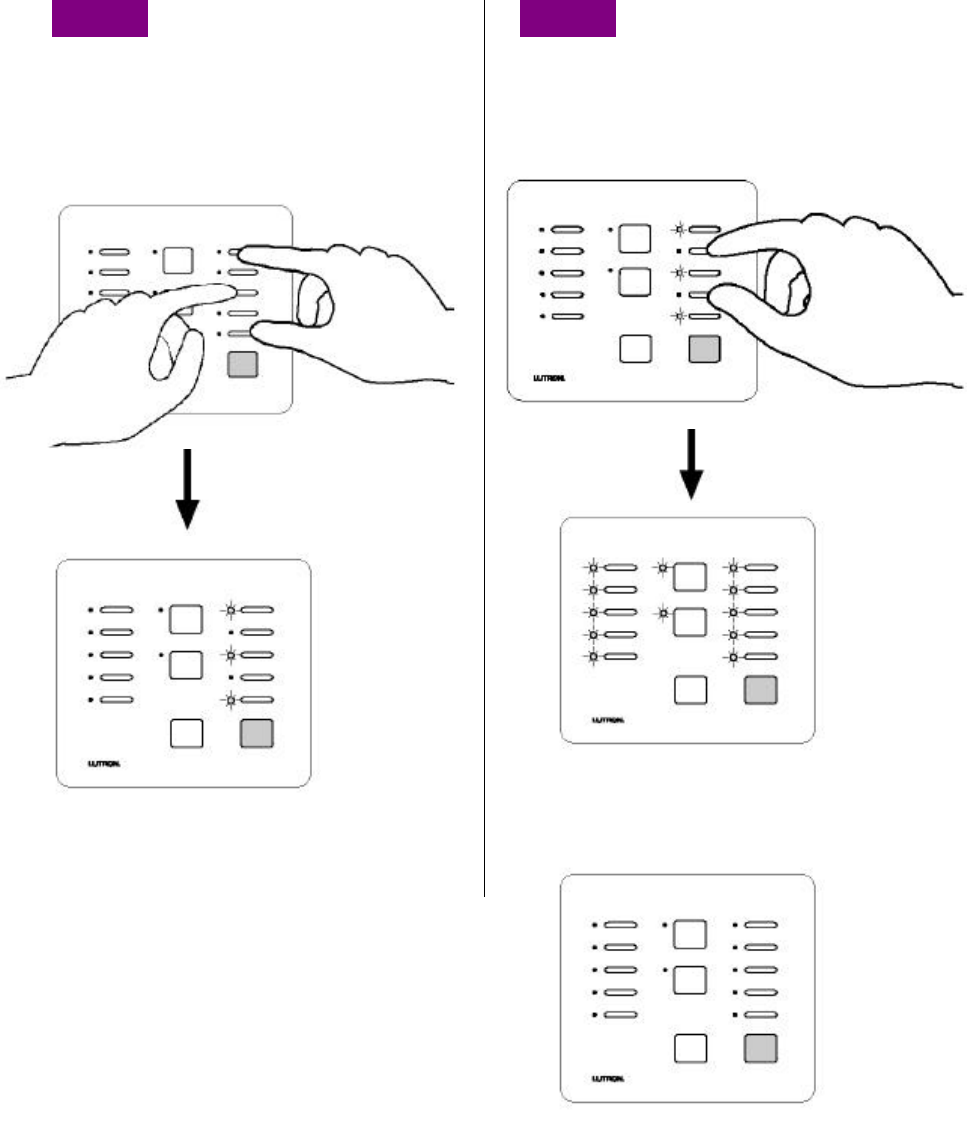
Step 1 Begin assigning
Dimmers, Switches, or GRAFIK
Eye® Control Units to buttons
Simultaneously press and hold the 2nd and
4th buttons in the right most column until the
upper right LED begins to flash
(approximately 3 seconds).
Upper right LED flashes.
Step 2 Select a Button
Press the button that you want to program.
Its LED will begin to flash.
Valid Car Visor buttons that can to be
programmed are the right most column
buttons, ALL ON, ALL OFF, Inputs, or
Security FULL and FLASH buttons.
Preliminary RadioRA Car Visor Instructions 09/19/01
Page 5 of 10
Step 3 Assign a Dimmer,
Switch, or GRAFIK Eye Control
Unit to the button.
Notes:
• Multiple Dimmers, Switches, or GRAFIK
Eye ® Control Units can be assigned to a
button.
• Controls must be assigned to a Car Visor
Control button while its LED is flashing.
Assign Dimmers or Switches to the Car
Visor Control button by turning the Controls
ON.
Assign a GRAFIK Eye ® Control Unit to the
Car Visor Control button by changing the
selected GRAFIK Eye ® scene.
If you assign the wrong Dimmer, Switch, or
GRAFIK Eye ® Control Unit to the Car Visor
Control button, turn the Dimmer, Switch, or
GRAFIK Eye ® Control Unit OFF to unassign
it.
Note: GRAFIK Eye ® Control Units will
automatically turn on to scene 1 once
assigned.
Step 4 Select a Button
2-3 until all buttons are programmed. When
finished, proceed to Step 5.
Step 5 Complete assigning
Dimmers, Switches, or GRAFIK
Eye® Control Units to buttons
Simultaneously press and hold the 2nd and
4th buttons in the right most column until all
LEDs begin to flutter (approximately 3
seconds).
Preliminary RadioRA Car Visor Instructions 09/19/01
Page 6 of 10
Setting Light Levels/Grafik Eye Scene Selection
for ROOM Buttons
Setting Light Levels/ Levels/Grafik Eye Scene for
SCENE Buttons
This section is not complete yet…
For this option, refer to the “Setting Light Levels” section of the
RadioRA Setup Guide
- Use Pages 1-11 and 1-12 for ROOM Buttons
- Use Pages 1-15 and 1-16 for SCENE Buttons
Preliminary RadioRA Car Visor Instructions 09/19/01
Page 7 of 10
Programming a Car Visor Transmitter
The Car Visor Control can learn a maximum of 7 Car Visor Transmitters.
Step 1 Begin Learning a
Transmitter to the Receiver
Press and hold the LEARN button
(approximately 3 seconds) on the Car Visor
Receiver until the LED turns on.
Step 2 Select the Receiver
Button to be learned to the
Transmitter Button
Press and hold the Receiver button
(approximately 3 seconds) that the
Transmitter button will be learned to until the
corresponding LED turns on. If the ALL ON
button is pressed, the right most column of
LEDs will flash upward. If the ALL OFF
button is pressed, the right most column of
LEDs will flash downward.
Preliminary RadioRA Car Visor Instructions 09/19/01
Page 8 of 10
Step 3 Learn the Transmitter
Button to the Receiver
Press and hold the Transmitter button
(approximately 3 seconds) until the LED of
the selected Receiver button flashes for 3
seconds. If the transmitter is learned to the
ALL ON button, the LEDs in the right most
column will rapidly flash upward for 3
seconds. If the transmitter is learned to the
ALL OFF button, the LEDs in the right most
column will rapidly flash downward for 3
seconds.
The Transmitter button may be learned to
any one of the ROOM/SCENE, ALL ON,
ALL OFF, Input, Output, or both FULL ON
and FLASH buttons.
The learned receiver button flashes for 3
seconds before turning off.
The receiver button turns off indicating that
the transmitter button has been learned to
the receiver button.
To verify that the Transmitter Button has
been learned to the Receiver Button, press
the Transmitter button again. The
corresponding Receiver button LED will
begin to flutter indicating that the Transmitter
button is learned to the Receiver button.
To unlearn a Transmitter button, repeat
Steps 2 and 3 for the desired button(s).
Step 4 Select and learn the next
Transmitter Button to the Receiver
Button
Repeat Steps 2 and 3 for any remaining
Transmitter buttons to be learned to
Receiver Buttons. Proceed to Step 5 when
all Transmitter buttons have been learned.
Step 5 Select the next
Transmitter
Repeat Steps 2-4 for any remaining
Transmitters. Proceed to Step 6 when all
Transmitters have been activated.
Preliminary RadioRA Car Visor Instructions 09/19/01
Page 9 of 10
Step 6 Complete Transmitter
Activation
Press and hold the LEARN button on the
Car Visor Receiver (approximately 3
seconds) until the LED turns off.
Preliminary RadioRA Car Visor Instructions 09/19/01
Page 10 of 10
Returning the Car Visor Control to Default Factory
Settings
Step 1 Begin returning to
default factory settings
Press and hold the 1st 3rd and 5th buttons in
the right most column until the
corresponding LEDs begin to flash
(approximately 3 seconds).
LEDs will flash for only 3 seconds.
Step 2 Complete returning to
default factory settings
While the 1st, 3rd, and 5th LEDs are flashing,
press and hold the 2nd and 4th buttons in the
right most column until all LEDs flash.
All LEDs will turn OFF, indicating that the
Car Visor Receiver has been returned to
Default Factory Settings