Lutron Electronics 0078 Low Power Transceiver User Manual
Lutron Electronics Company Inc Low Power Transceiver
Contents
- 1. User Manual
- 2. Warranty and FCC Information
User Manual
Troubleshooting Guide
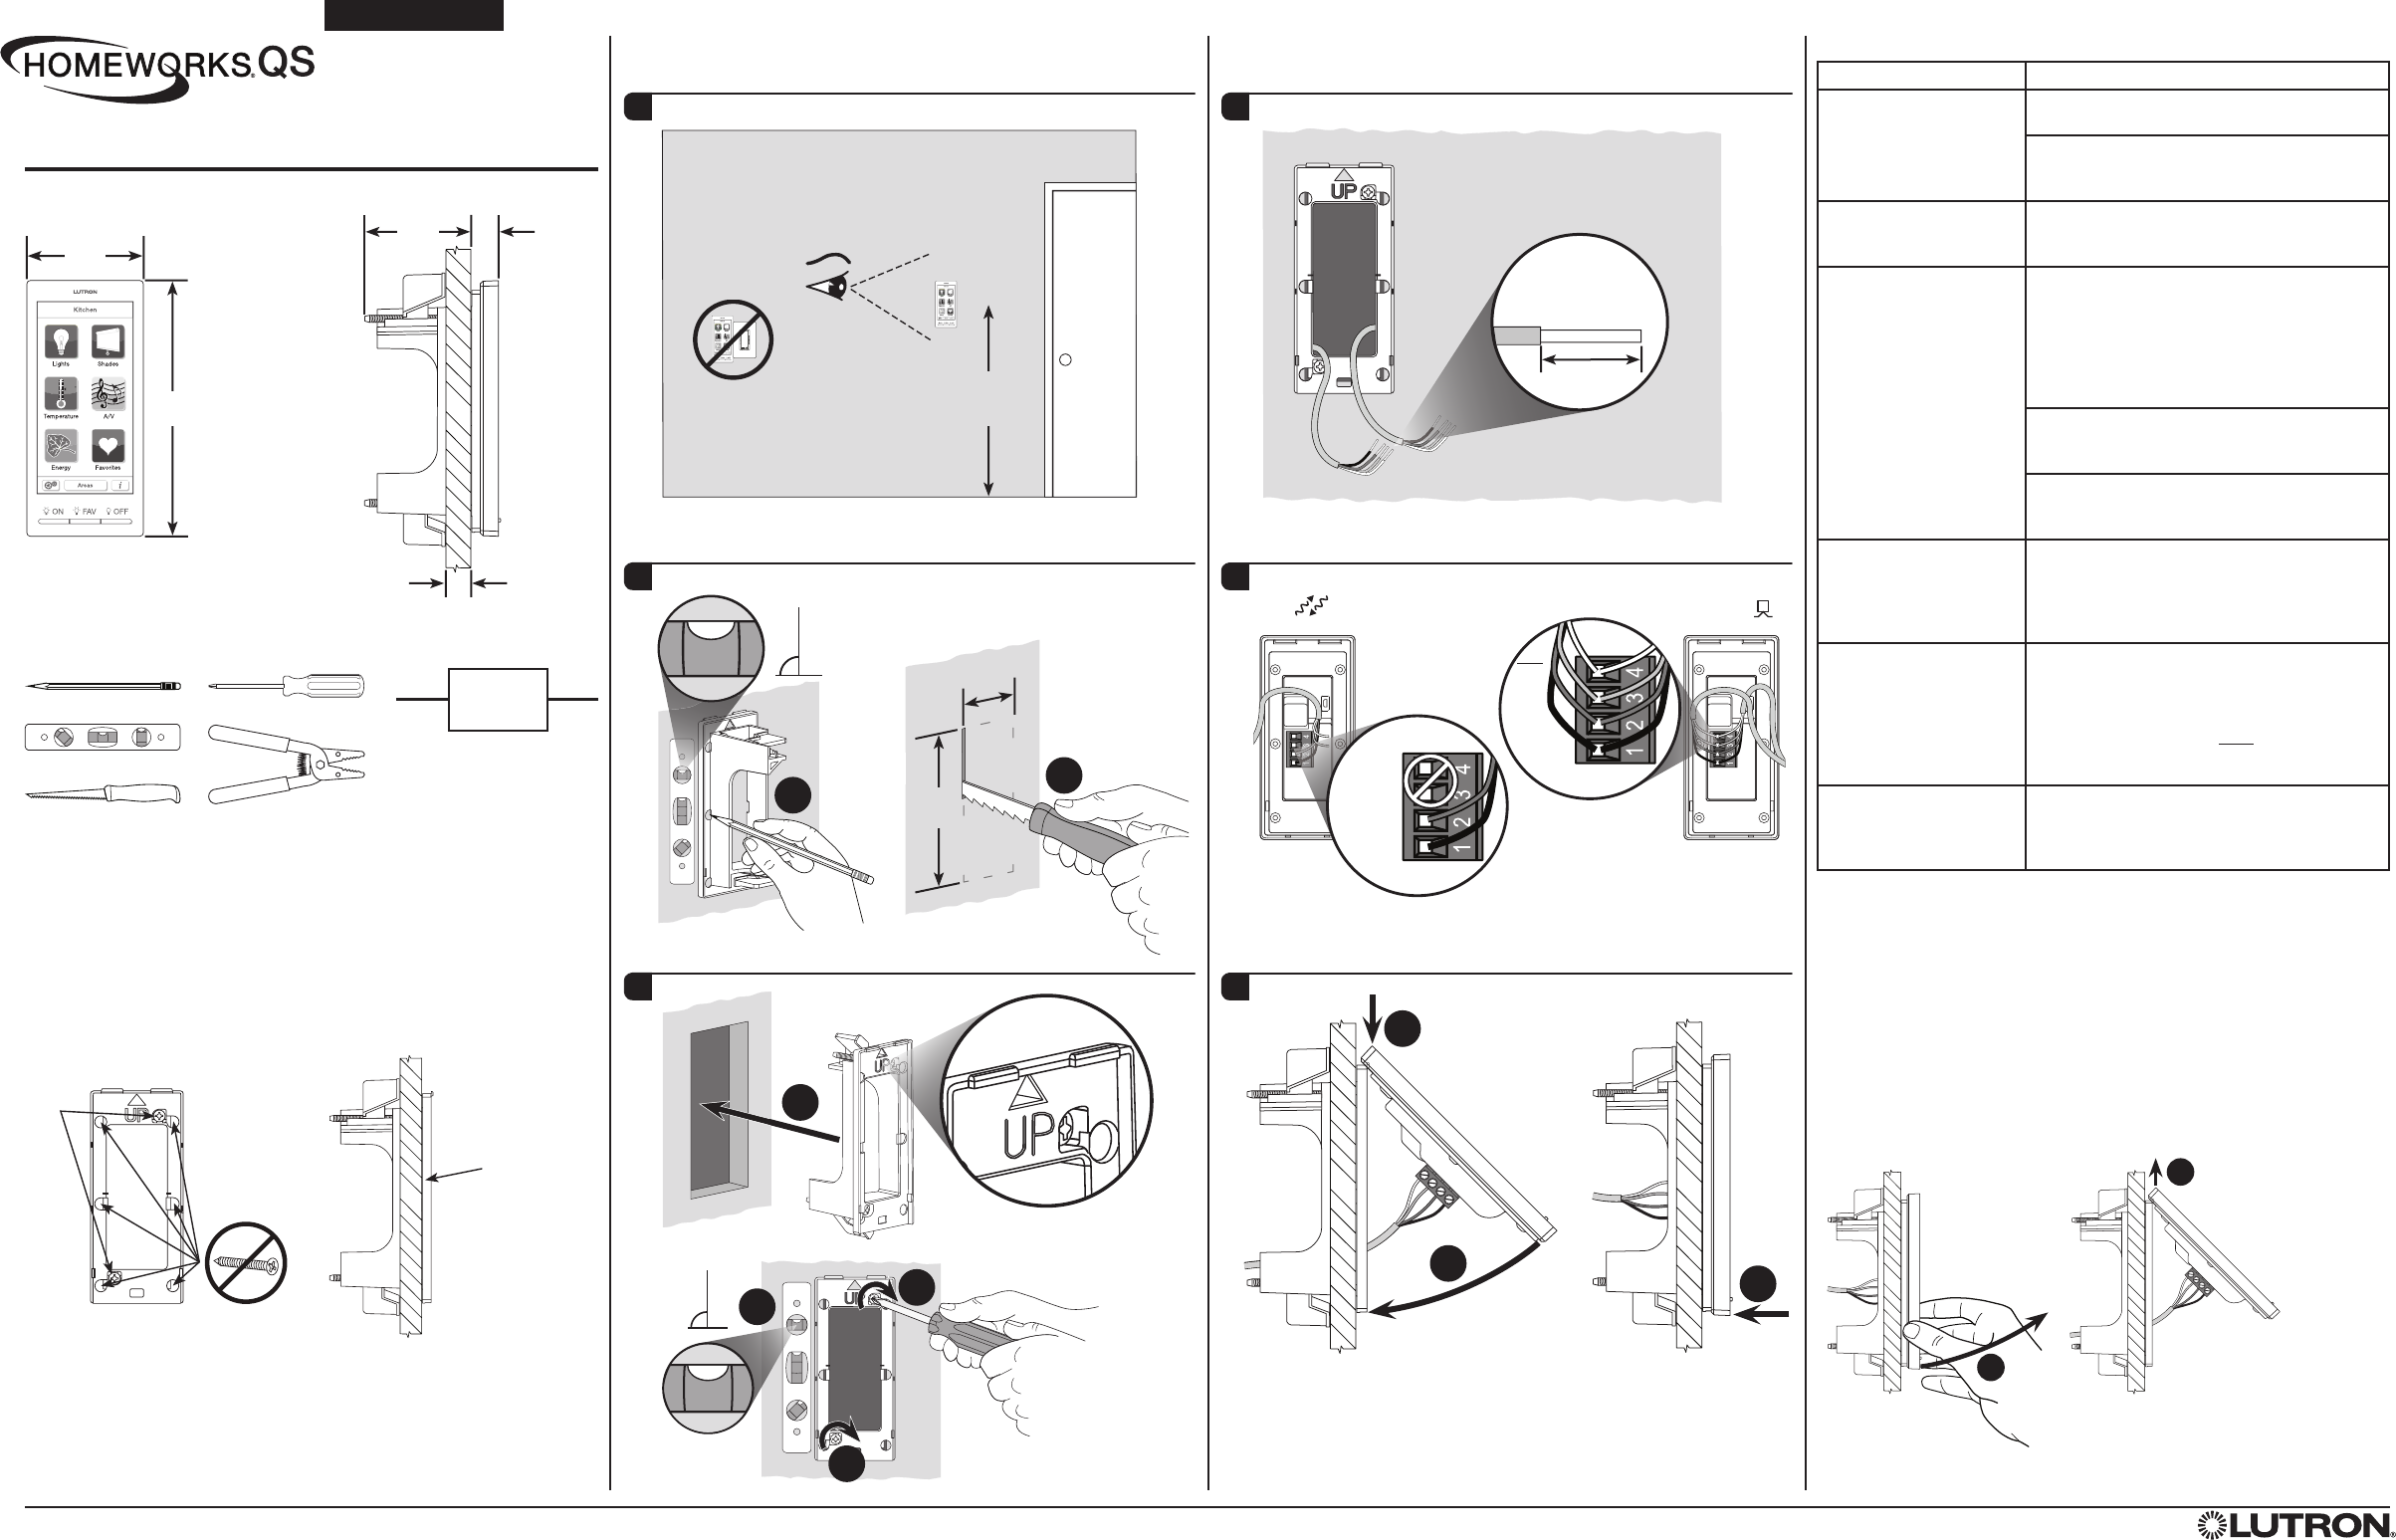
Symptom Probable Cause and Action
Backlight does not turn on
when screen is touched.
Nothing is displayed on
the screen.
Power not present at keypad
• Circuit breaker OFF. Turn ON breaker.
Incorrect wiring.
• Wire the keypad according to the Installation
section.
Blue Lutron® screen with
“Maintenance” or “Startup
failure” at the bottom.
Startup failure.
• Cycle power to the device. If symptom
persists, contact Lutron Technical Support.
The Dynamic Keypad
does not control dimmers,
shades or other system
devices.
All LEDs on the keypad flash when any button
is pressed.
• The device is in the Factory Default Settings
mode and has not been activated into the
system. Use the HomeWorks QS software to
verify activation or re-active the device and
transfer its database.
Device is not communicating with the system.
• Device is out of range of an RF signal
repeater.
Device is not properly programmed.
• Program the device using the HomeWorks QS
software
All LEDs on the keypad
flash when any button is
pressed.
The device is in the Factory Default mode and
has not been activated into the system.
• Use the HomeWorks QS software to verify
activation or re-active the device and transfer
its database.
The Dynamic Keypad
does not enter addressing
mode.
The Dynamic Keypad is not congured for RF
communication.
• Use the information screen on the Dynamic
Keypad to verify that it is configured for RF
communication.
• Ensure MUX (pin 3) and MUX (pin 4) are not
connected.
The Dynamic Keypad
does not snap onto
the mounting frame as
indicated in step 6c.
The mounting frame screws may be too tight
(Step 3B & 3D).
• Remove the Dynamic Keypad, loosen the
mounting frame screws and repeat step 6.
Returning Dynamic Keypads to Factory Settings
Returning Dynamic Keypads to Factory Settings will remove them from the
system and erase all programming.
Step 1: Triple tap any button, below the screen, on the Dynamic Keypad. DO
NOT release after third tap.
Step 2: Keep the button pressed on the third tap until all the buttons start to
flash slowly (approximately 3 seconds).
Step 3: Immediately release the button and triple tap the button again. The
buttons on the Dynamic Keypad will flash quickly.
The Dynamic Keypad has now been returned to Factory Settings.
Removing Dynamic Keypads
Warranty: For warranty information, please see the Warranty enclosed with the
product, or visit www.lutron.com/resiinfo
90˚
Installation
English
Lutron Elec tron ics Co., Inc.
7200 Suter Road
Coopersburg, PA 18036-1299
Print ed in the U.S.A. 03/11 P/N 043-376 Rev. A
NEC is a registered trademark of the National Fire Protection Association, Quincy, Massachusetts.
Lutron, HomeWorks, and the sunburst logo are registered trademarks of Lutron Electronics Co., Inc.
©2011 Lutron Electronics Co., Inc.
Installation Instructions
Please Read Before Installing
Technical Assistance:
U.S.A. / Canada: 1.800.523.9466
Mexico: +1.888.235.2910
Other Countries: +1.610.282.3800
24 hours a day, 7 days a week.
Dynamic Keypads
HQ-J-DK420-WH (434 MHz)
HQ-J-DK420-BL (434 MHz)
24 V- 113 mA
IEC PELV / NECR Class 2
Typical Power Consumption*: 1.5 W
* Typical Power Consumption test conditions: LCD backlight on at 80%, buttons backlight on at 28%,
normal standby mode.
3/8 in
(10 mm)
Click
1
72
�
72
2
3
4
5
COM
+24 V
COM
MUX
MUX
+24 V
Terminals will accept one
or two 22 AWG (0.5 mm()
or 18 AWG (1.0 mm2) wires.
RF Wired
6
6A
6B
6C
�
OR
7 2
5
1⁄8
(130)
2
3⁄8
(60)
Important Notes
Environment: Ambient operating temperature: 32 °F to 104 °F (0 °C to 40 °C),
0 to 90% humidity, non-condensing. Indoor use only.
Cleaning: To clean, wipe with a clean damp cloth. DO NOT use any chemical
cleaning solutions.
RF Device Placement: RF devices must be located within 30 ft (9 m) of an RF
signal repeater.
Mounting frame: A custom mounting frame is included with the Dynamic
Keypad. Only use the screws provided with the mounting frame.
Measurements shown as: in (mm)
90˚
3A
3C
3B
3D
IEC PELV / NEC
Class 2 cable only.
Maximum 1000 ft
(305 m)
1/2
(13)
2
1⁄4
(57)
1/4 (6) to 1 (25)
2
1
NOTICE: Do NOT connect to line / mains voltage.
Do not
gang
Included in box
Required for Installation (Not Included)
* The Dynamic Keypad consumes
6 PDUs. For more information,
see the Dynamic Keypad Spec
Sheet (Part # 369294).
2B
2A4
1⁄4
(108)
1
5⁄8
(41)
Note: Mounting
frame is visible
after installation.
Do NOT paint or
damage visible
surface.
Approximately
54 in
(1.4 m)
Power
Supply*
120 V~24 V-