Master Lock 3681 3681 User Manual Exhibit D Users Manual per 2 1033 b3
Master Lock Company 3681 Exhibit D Users Manual per 2 1033 b3
Exhibit D Users Manual per 2 1033 b3
Installation Instructions • Instructions d’installation
Instrucciones de instalación
Electronic Built-In Lock • Spanish Electronic Built-In Lock • French Electronic Built-In Lock
3681 • 3685
continued on other side / continué a l’autre côté / continuado al otro lado
1. Open box
• To prevent damage to the lock, DO NOT USE a sharp object to open packaging
• Keypad module and lock module will be in same package
2. Remove keypad module and lock module from package
3. Open locker door
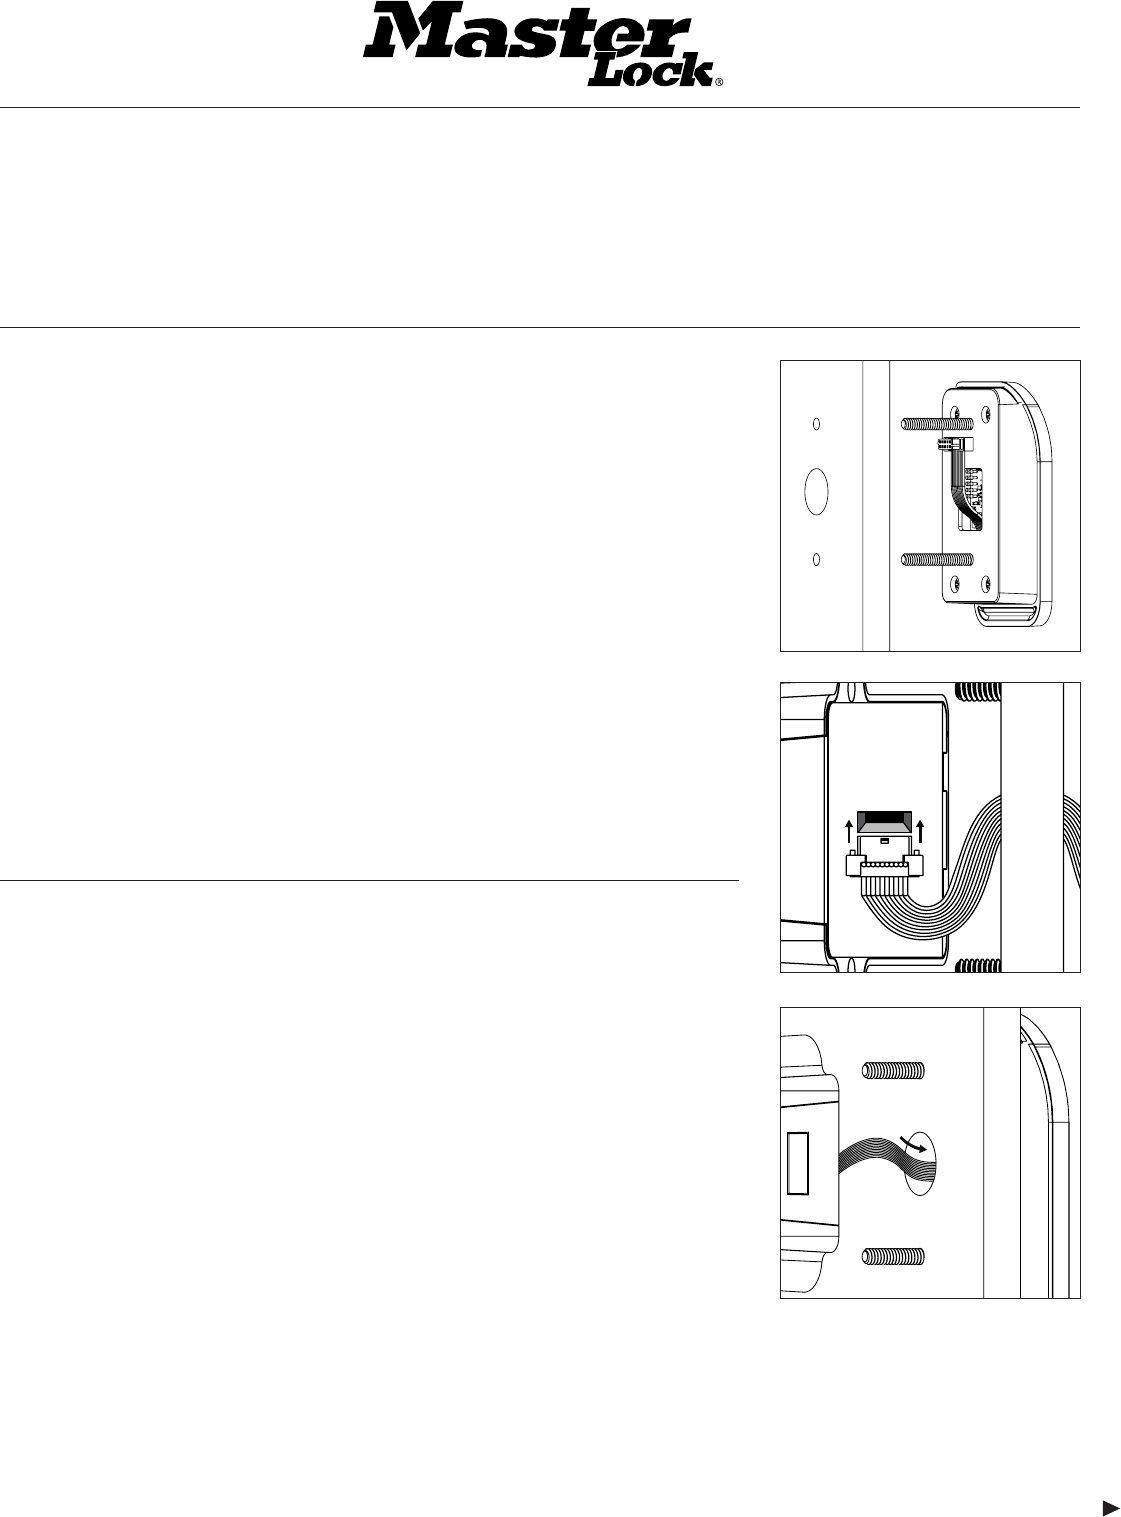
4. With one hand, align front housing through 2 mounting holes on the front of the locker door. (A)
• Pull the connection ribbon through the large middle mounting hole
• Note: The diameter of the mounting holes must be 7/32in minimum for proper installation
and fit. If the holes are undersized, a 7/32in drill bit can be used to widen them.
5. With your other hand, line up the lock module on the back of the door and attach the
connection ribbon (B)
6. Feed excess ribbon cable back into center mounting hole (C)
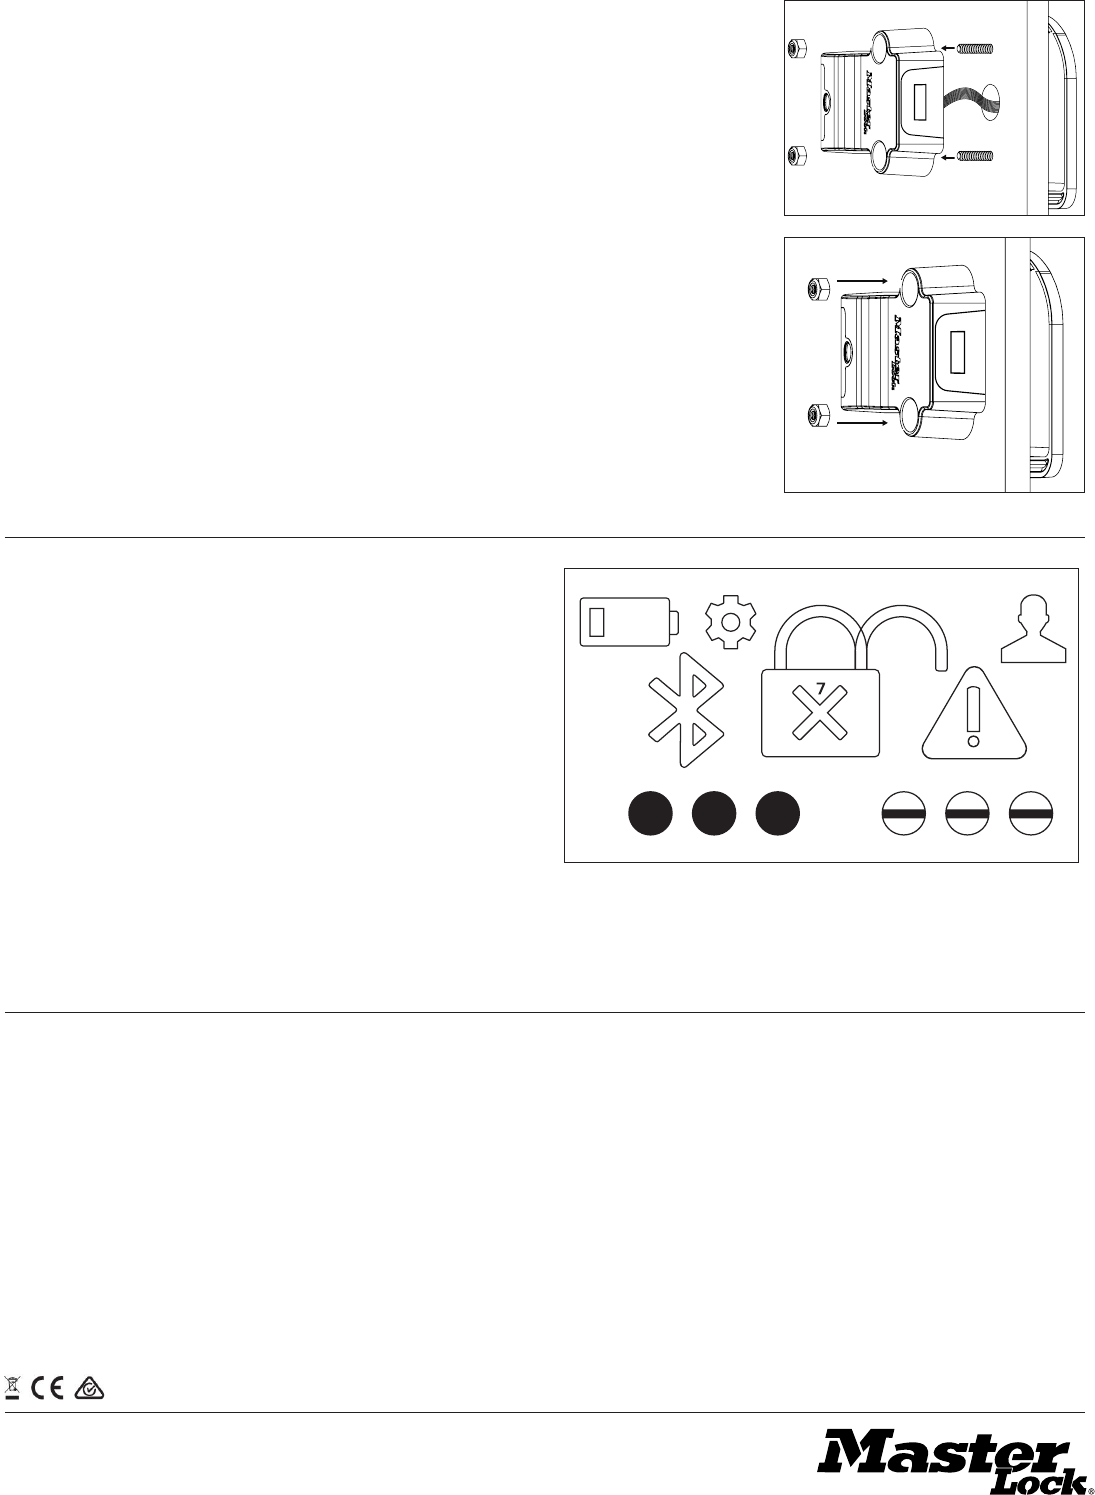
7. Line up the threaded screws from the keypad module with the holes in the lock module (D)
8. Install nuts on the threaded screw and tighten with 3/8in nut driver (E)
• Note: Tighten fastener to a maximum torque of 3N-m (20-25in-lbs) to avoid product damage
or lock failure
9. Close locker door
10. Test lock for functionality (Refer to Multi-User and Single-User Instructions)
Notes:
1. Battery included
2. Lock is configured to work on 1/32in, 1/2in, and 3/4in door depths
3. Lock is configured to work on left and right hinged doors
1. Open box
• To prevent damage to the lock, DO NOT USE a sharp object to open packaging
• Keypad module and lock module will be in same package
2. Remove keypad module and lock module from package
3. Open locker door
4. With one hand, align front housing through 2 mounting holes on the front of the locker door. (A)
• Pull the connection ribbon through the large middle mounting hole
• Note: the diameter of the mounting holes must be 7/32in minimum for proper installation
and fit. If the holes are undersized, a 7/32in drill bit can be used to widen them.
5. With your other hand, line up the lock module on the back of the door and attach the
connection ribbon (B)
6. Feed excess ribbon cable back into center mounting hole (C)
7. Line up the threaded screws from the keypad module with the holes in the lock module (D)
8. Install nuts on the threaded screw and tighten with 3/8in nut driver (E)
• Note: tighten fastener to a maximum torque of 3N-m (20-25in-lbs) to avoid product damage
or lock failure
9. Close locker door
10. Test lock for functionality (Refer to Multi-User and Single-User Instructions)
Notes:
1. Battery included
2. Lock is configured to work on 1/32in, 1/2in, and 3/4in door depths
3. Lock is configured to work on left and right hinged doors
(A)
(B)
(C)
www.masterlock.com
© 2017 Master Lock Company | All Rights Reserved
Master Lock Company LLC, Milwaukee, WI 53210 U.S.A. | 800-308-9244
Master Lock Canada, Oakville, Ontario L6H 5S7 Canada | 800-227-9599
P52953
1. Open box
• To prevent damage to the lock, DO NOT USE a sharp object to open packaging
• Keypad module and lock module will be in same package
2. Remove keypad module and lock module from package
3. Open locker door
4. With one hand, align front housing through 2 mounting holes on the front of the locker door. (A)
• Pull the connection ribbon through the large middle mounting hole
• Note: The diameter of the mounting holes must be 7/32in minimum for proper installation
and fit. If the holes are undersized, a 7/32in drill bit can be used to widen them.
5. With your other hand, line up the lock module on the back of the door and attach the
connection ribbon (B)
6. Feed excess ribbon cable back into center mounting hole (C)
7. Line up the threaded screws from the keypad module with the holes in the lock module (D)
8. Install nuts on the threaded screw and tighten with 3/8in nut driver (E)
• Note: Tighten fastener to a maximum torque of 3N-m (20-25in-lbs) to avoid product damage
or lock failure
9. Close locker door
10. Test lock for functionality (Refer to Multi-User and Single-User Instructions)
Notes:
1. Battery included
2. Lock is configured to work on 1/32in, 1/2in, and 3/4in door depths
3. Lock is configured to work on left and right hinged doors
(D)
(E)
1. Low Battery
2. Settings Mode
3. Locked
4. Unlocked
5. Single-User Mode
6. Bluetooth Mode -
ADA Model Only
(FOB Required)
7. Invalid Code
8. Bolt Jam
9. Entered Code
10. Awaiting Code
1. Low Battery
2. Settings Mode
3. Locked
4. Unlocked
5. Single-User Mode
6. Bluetooth Mode -
ADA Model Only
(FOB Required)
7. Invalid Code
8. Bolt Jam
9. Entered Code
10. Awaiting Code
1. Low Battery
2. Settings Mode
3. Locked
4. Unlocked
5. Single-User Mode
6. Bluetooth Mode -
ADA Model Only
(FOB Required)
7. Invalid Code
8. Bolt Jam
9. Entered Code
10. Awaiting Code
Display Screen Key
Display Screen Key
Display Screen Key
1
23
6
10 9
8
45
Notice: This device complies with Industry Canada’s license-exempt RSSs. Operation is subject to the following two conditions: (1) this device may not cause interference, and (2) this device must accept
any interference including interference that may cause undesired operation of the device.
Notice: This device complies with Part 15 of the FCC Rules. Operation is subject to the following two conditions: (1) this device may not cause harmful interference, and (2) this device must accept any
interference received, including interference that may cause undesired operation.
Changes or modifications made to this equipment not expressly approved by the party responsible for compliance could void the user's authority to operate the equipment.
The Bluetooth® word mark and logos
are registered trademarks owned by
Bluetooth SIG, Inc. and used under
license by Master Lock Company LLC.
La palabra marca Bluetooth®
y los logos son marcas registradas
de propiedad de Bluetooth SIG, Inc.
y utilizadas bajo licencia por
Master Lock Company LLC.
Le mot servant de marque Bluetooth®
et les logos sont des marques
enregistrétés de Bluetooth SIG, Inc.
et, utilisés sous license par
Master Lock Company LLC.