Medtronic MiniMed 2007C Implantable Insulin Pump User Manual Dmp9196021 011 c
Medtronic MiniMed, Inc. Implantable Insulin Pump Dmp9196021 011 c
UserManual.wiki
>
Medtronic MiniMed
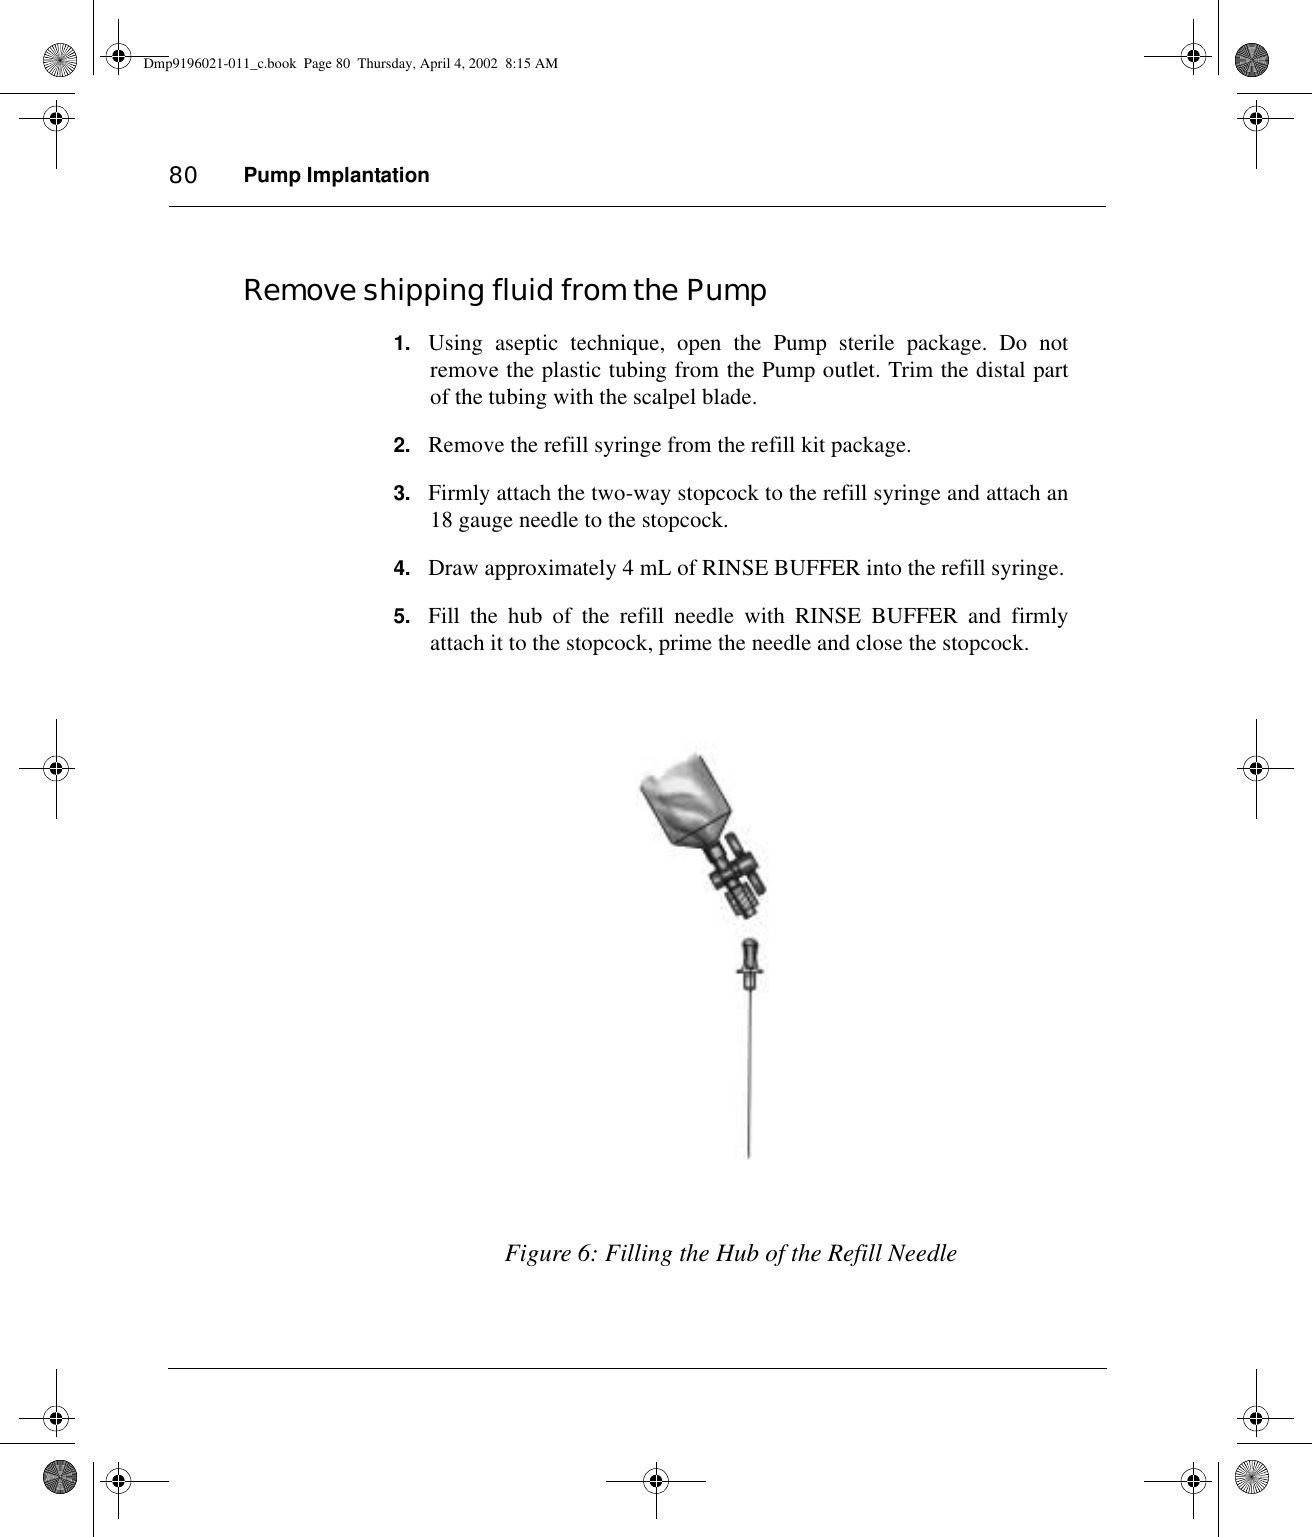
>
2007C User Manual
>
physician part1
Contents
1.
Manual
2.
Patient Manual Cover
3.
Patient Manual
4.
Physician Manual Cover
5.
physician part1
6.
physician part2
7.
physician part3
8.
physician part4
physician part1
Navigation menu
Upload a User Manual
Namespaces
Wiki Guide
HTML
PDF
Info
Views
User Manual
Discussion / Help
Navigation


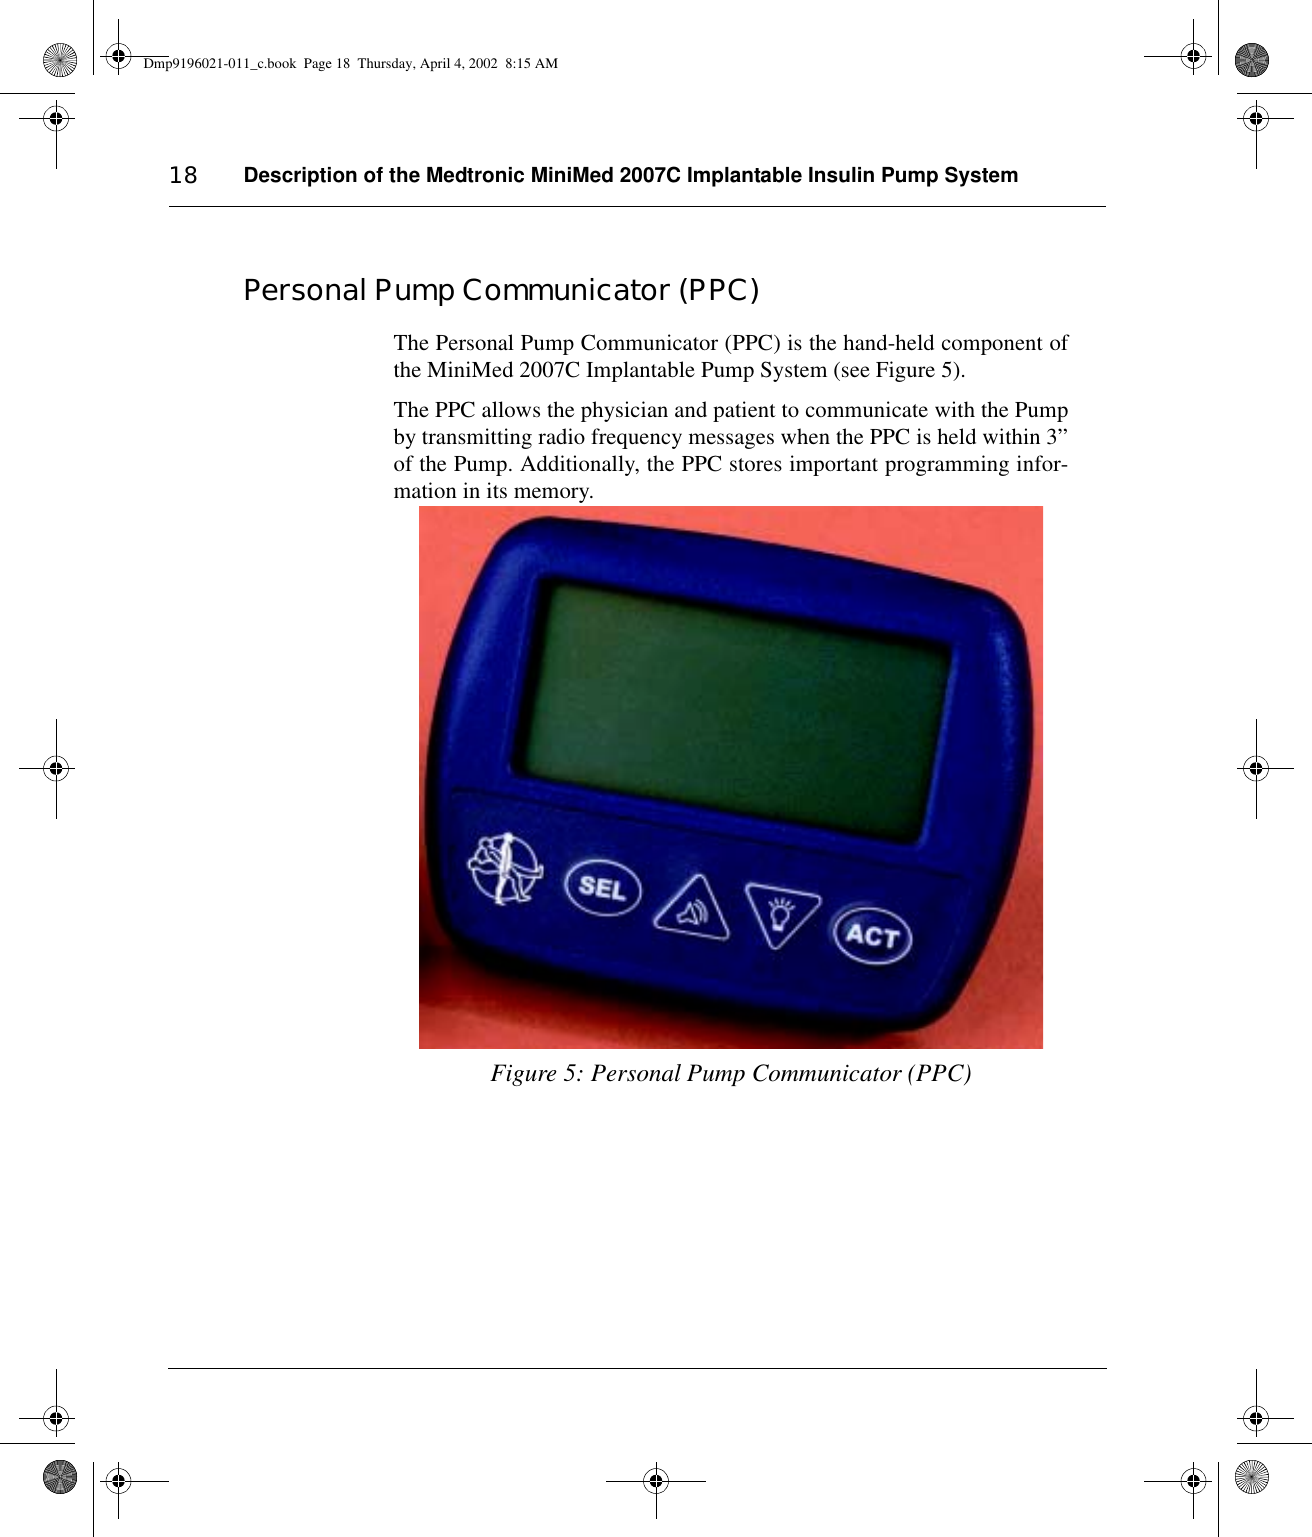


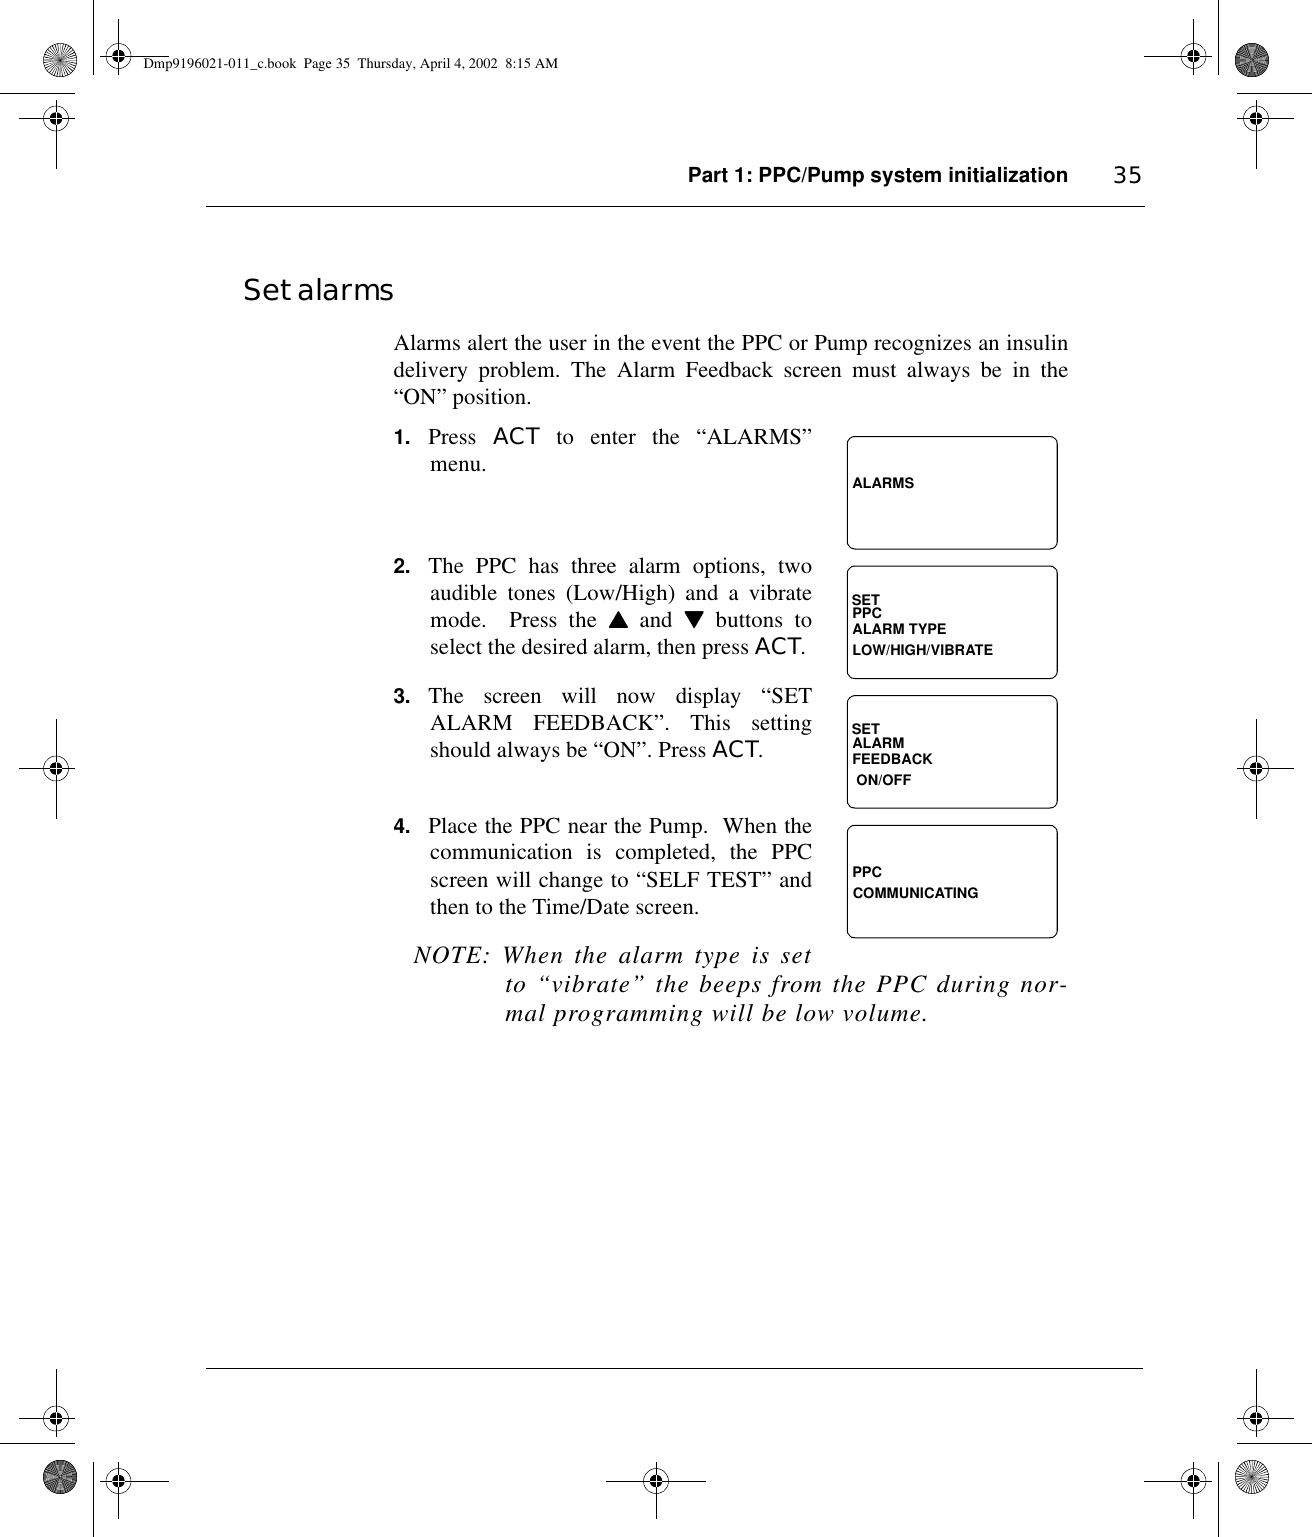

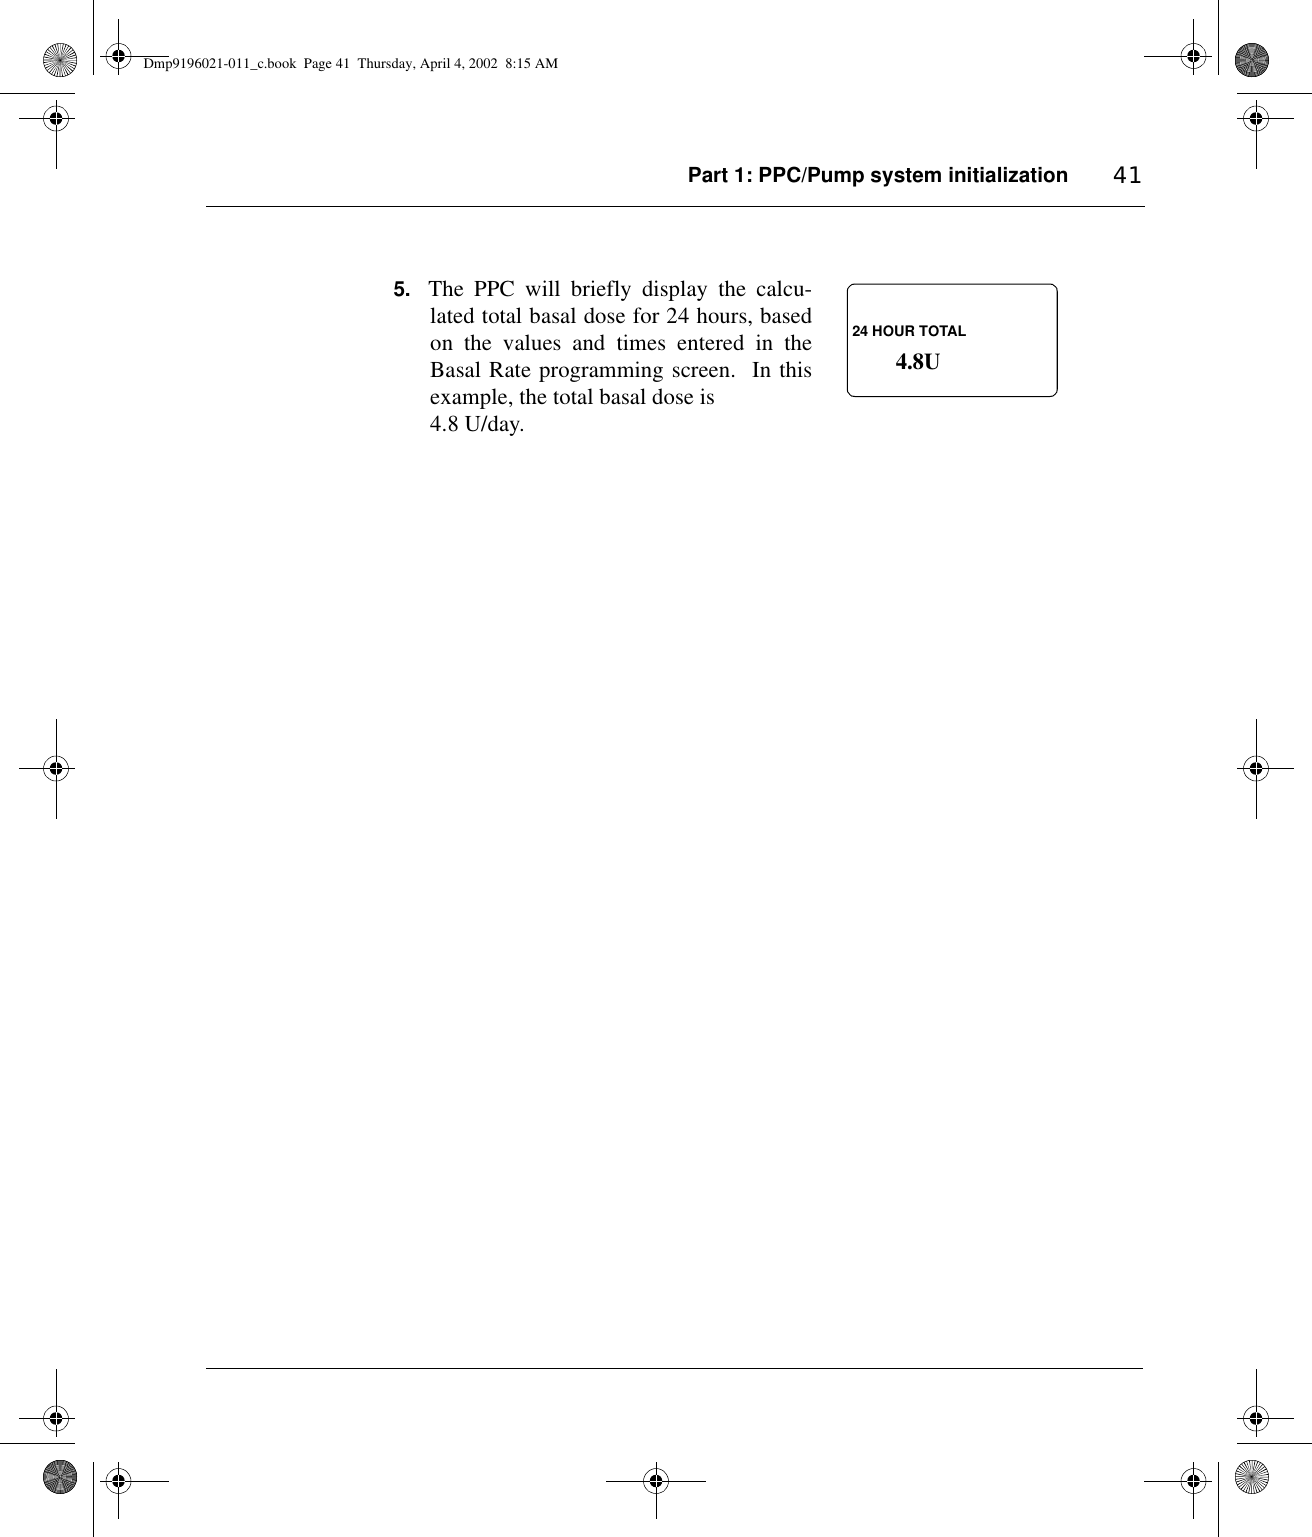
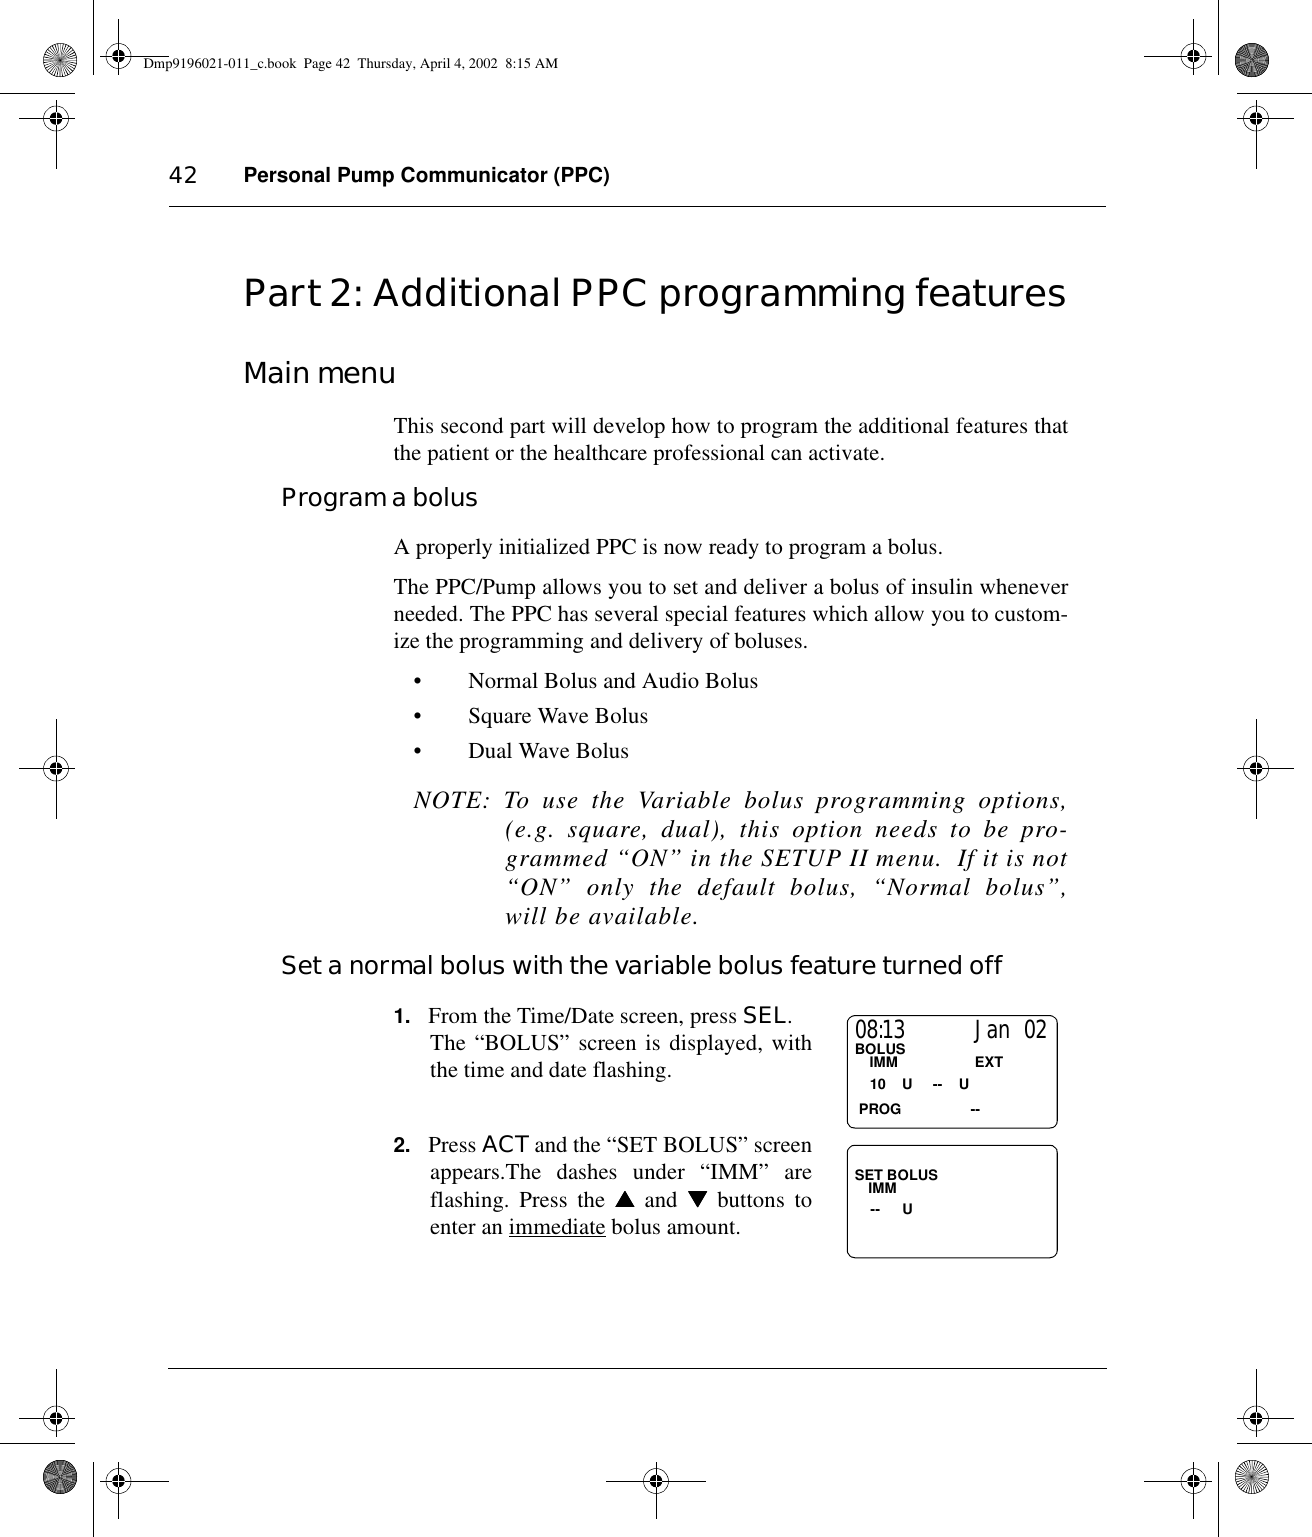
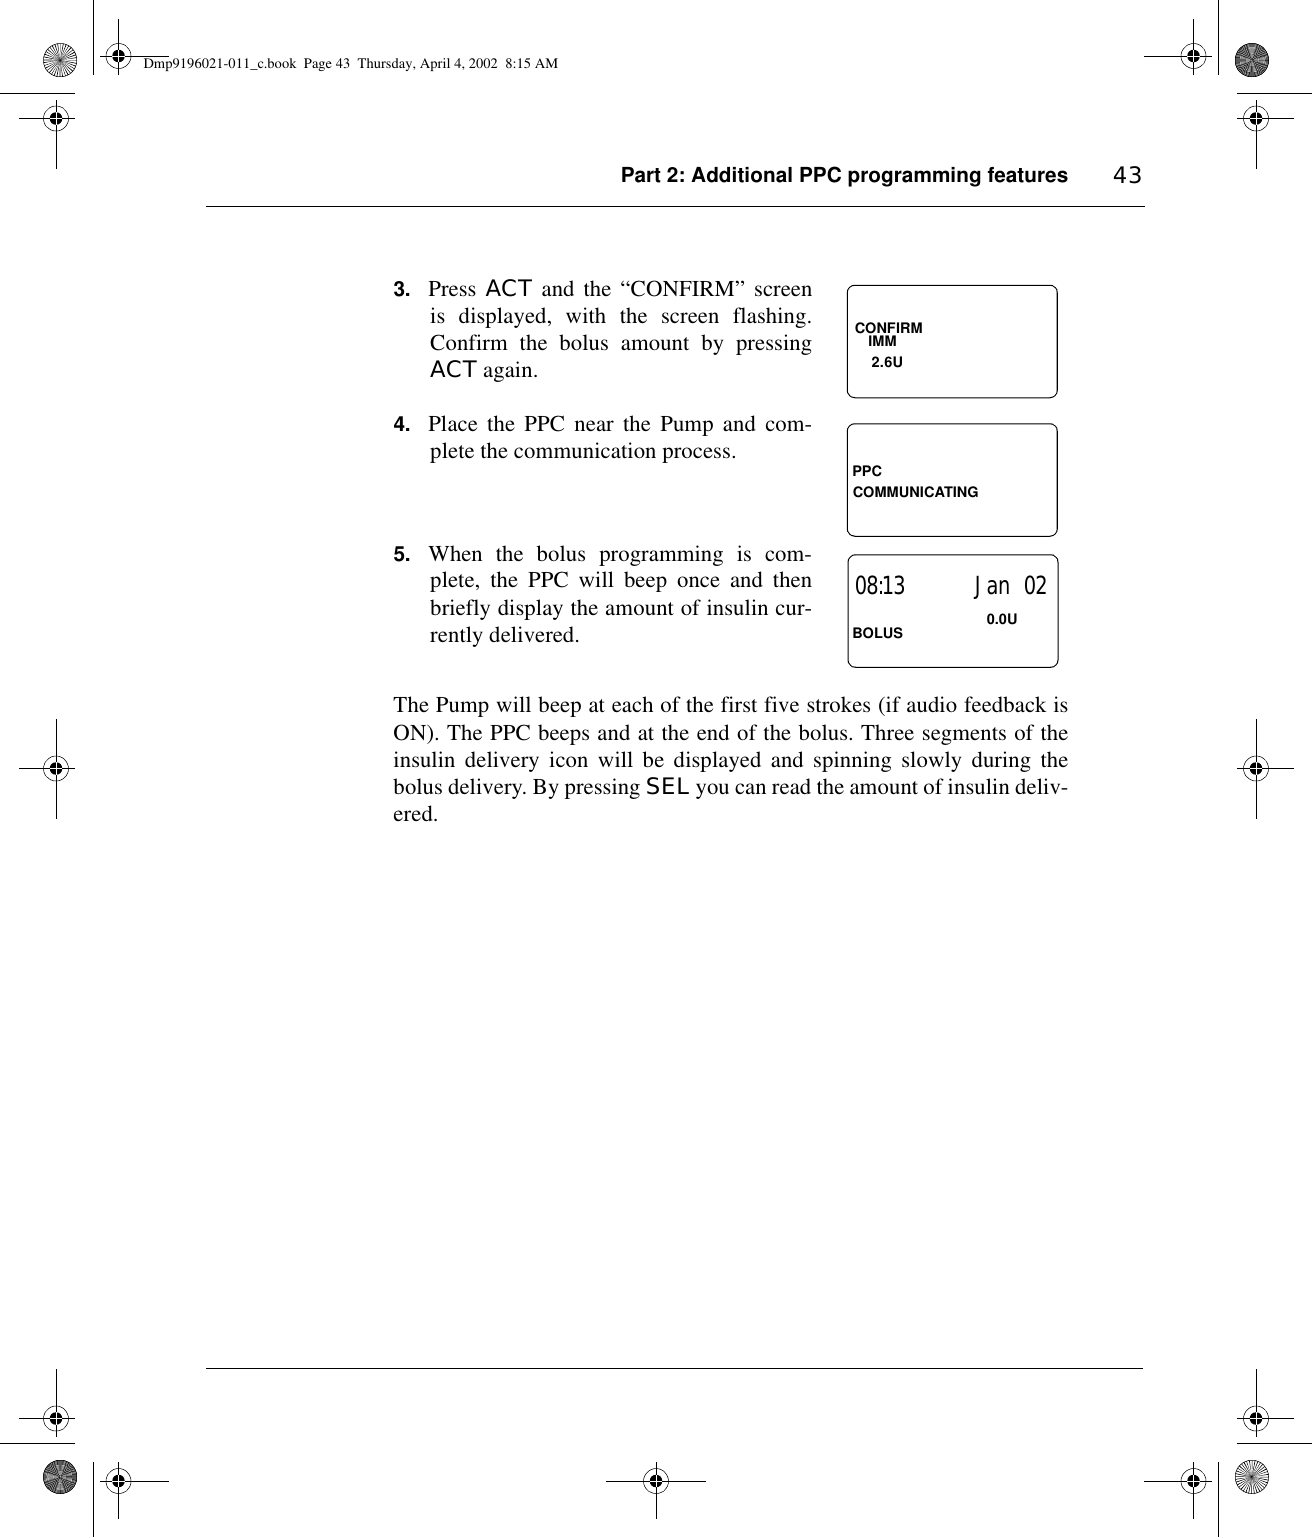
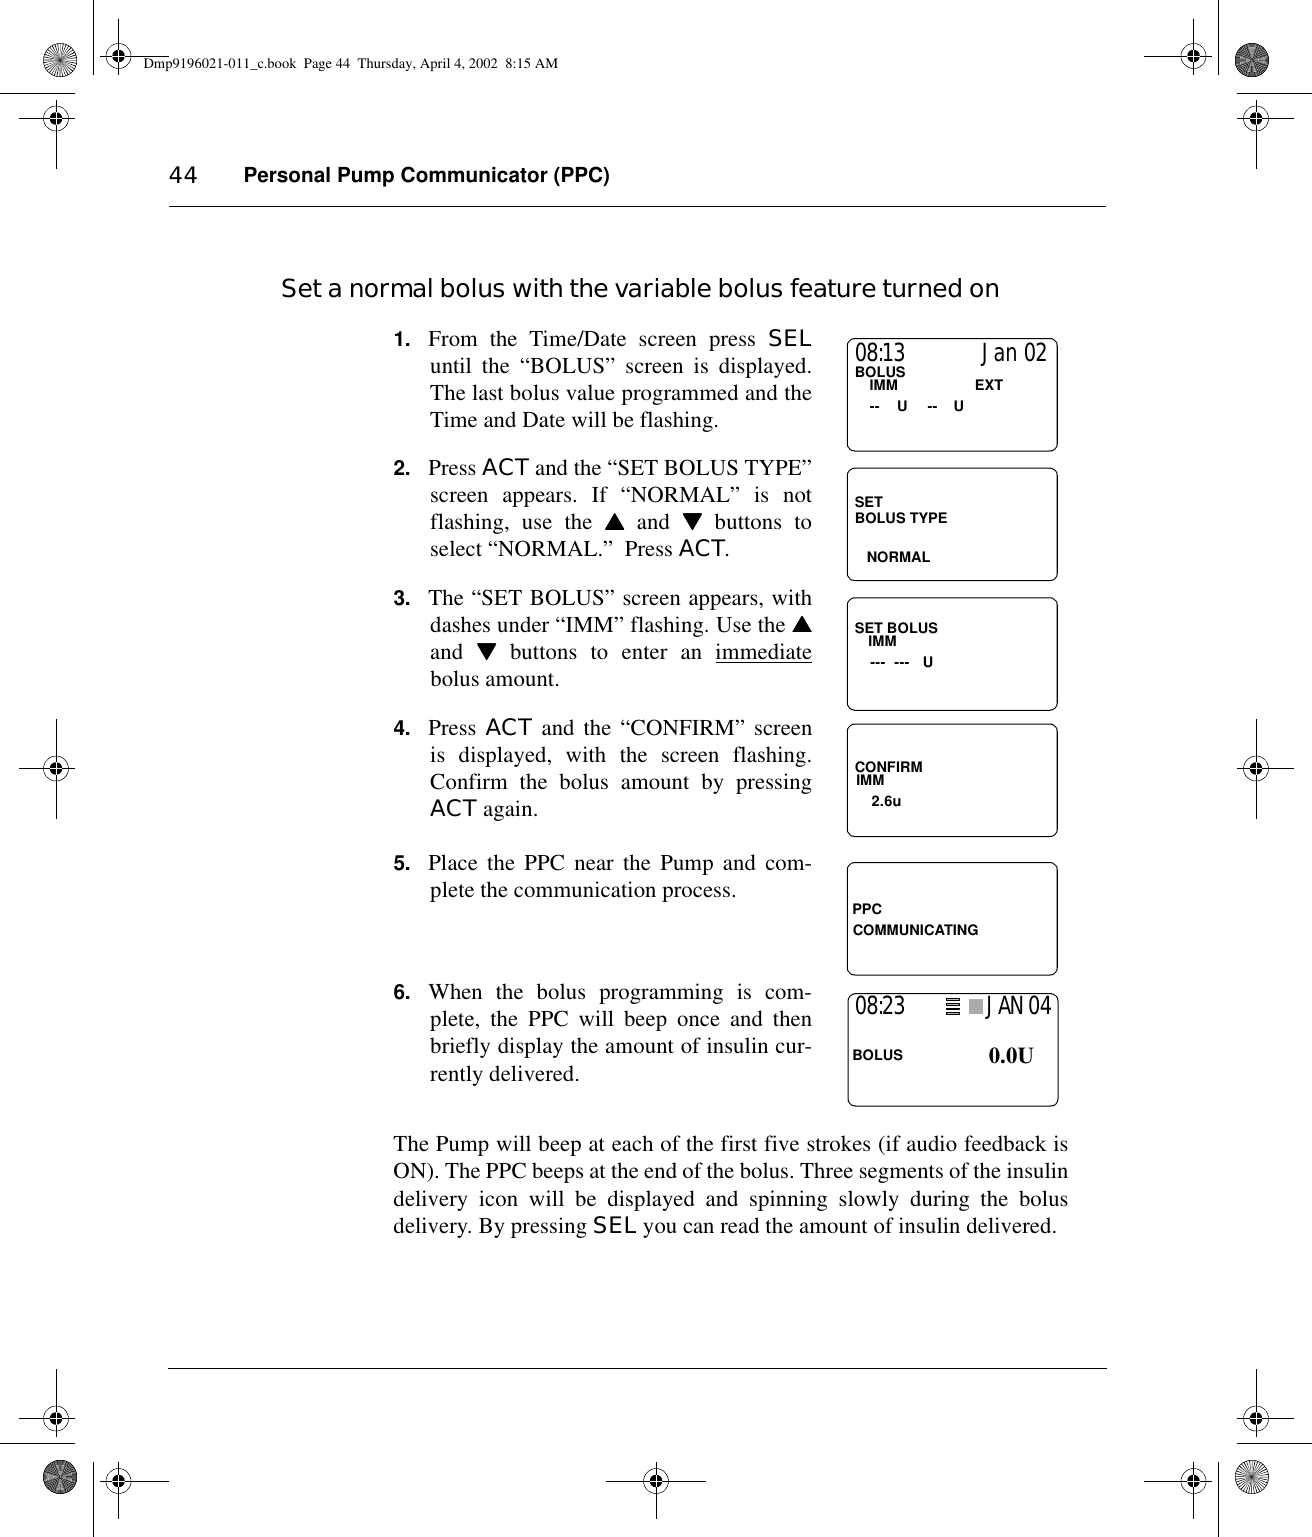
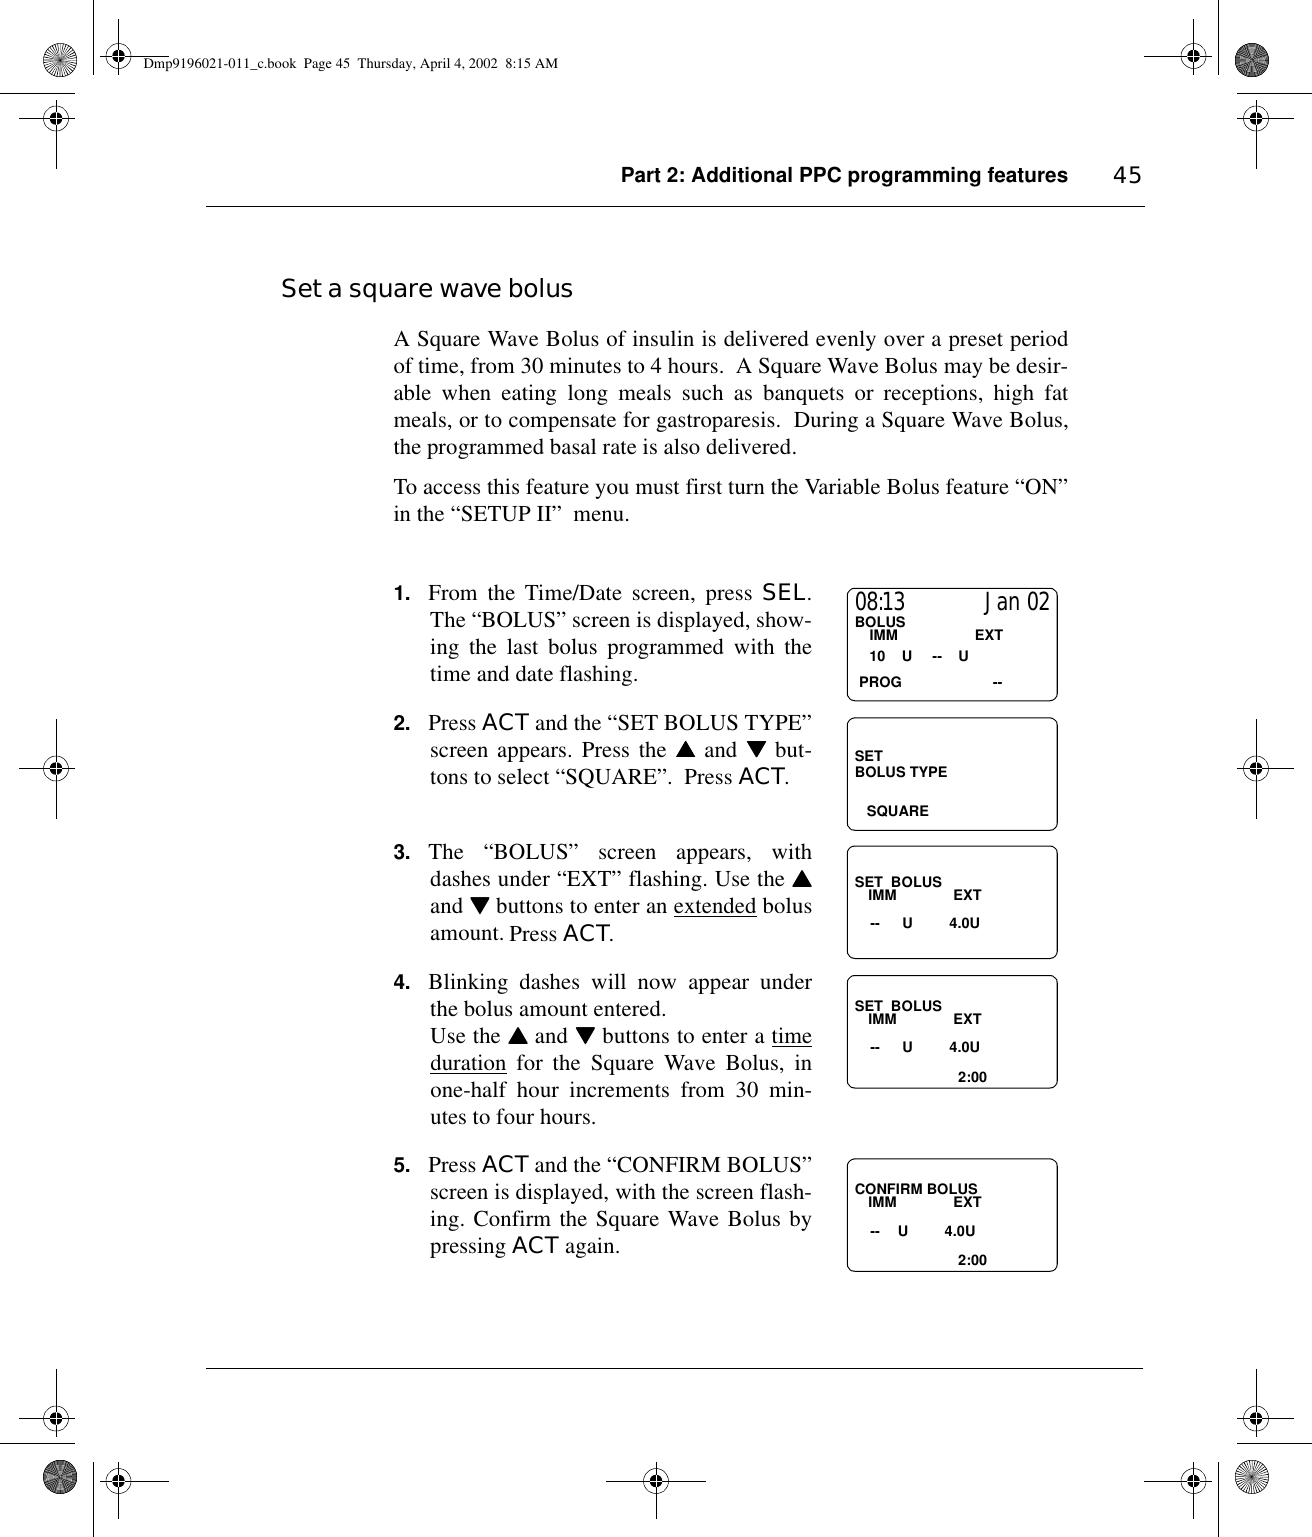
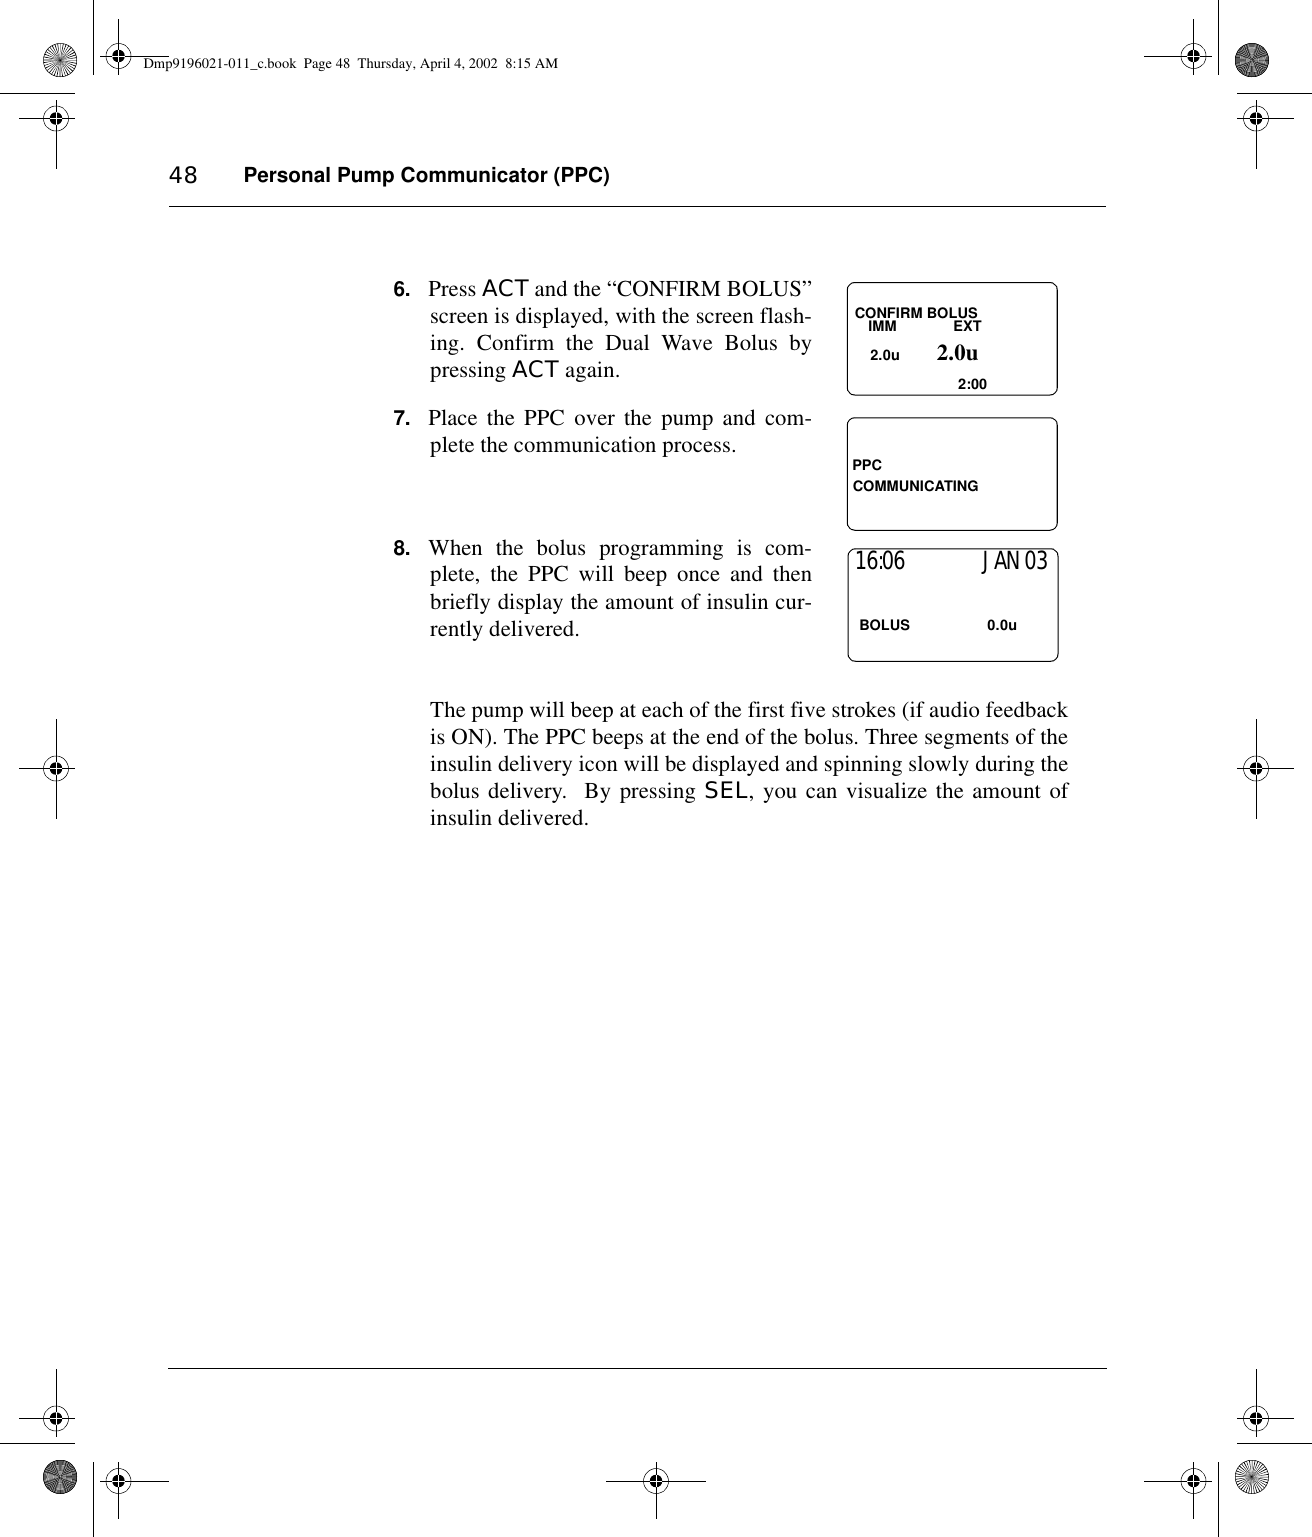
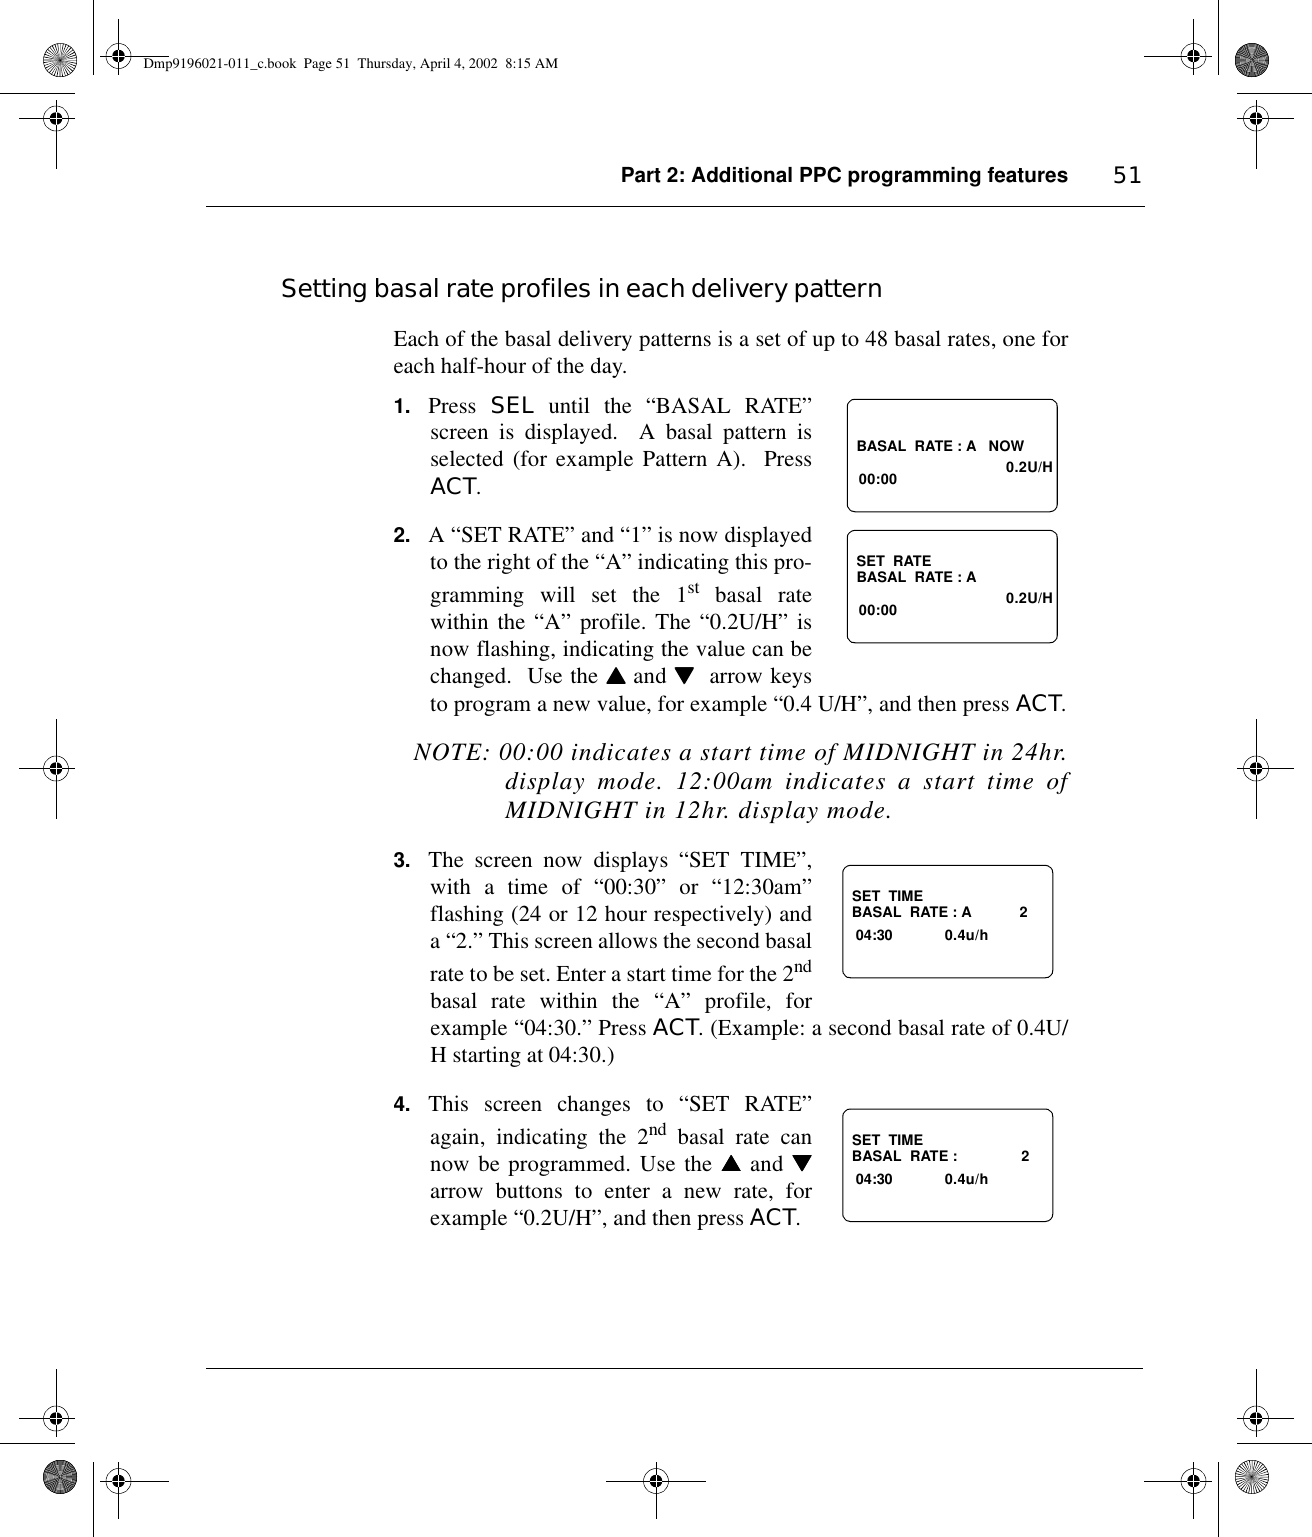
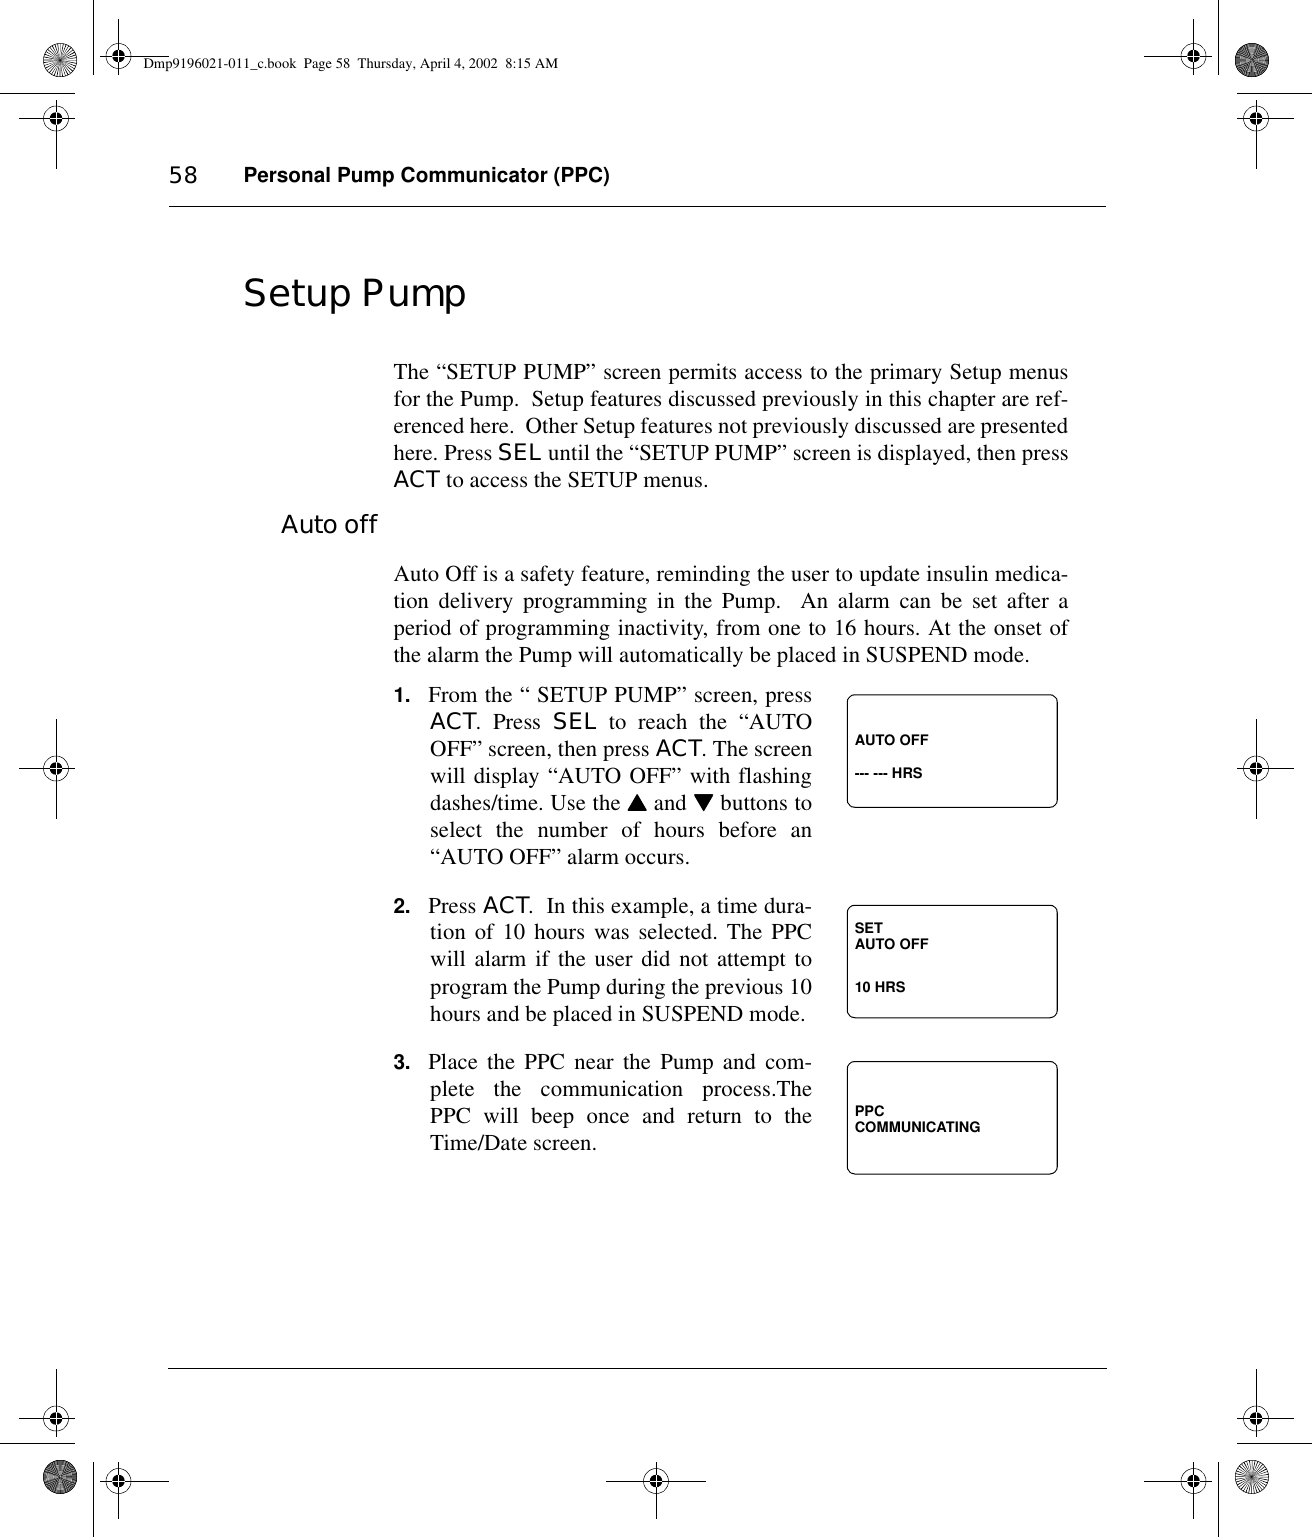
![Personal Pump Communicator (PPC)40Program a basal rate1. From the Time/Date screen, press SELuntil the “BASAL RATE” screen is dis-played. Preset delivery pattern “A”, abasal rate of 0.2 U/H, and the word“NOW” is flashing. Press ACT. 2. A “1” now appears to the right of the “A”indicating that this programming willeffect the 1st basal change within the “A”pattern, (there are 3 patterns available[A,B,C] and 48 basal changes possiblewithin each pattern). The flashing 0.2 U/H indicates the value can be changed. Use the ▲▲▲▲ and ▼▼▼▼ but-tons to change the value and then press ACT. NOTE: 00:00 indicates a start time of MIDNIGHT in24hr. display mode. In 12hr. display mode, thescreen indicates the start time as 12:00am.3. The screen now displays “SET TIME”,and a time of 00:30 or 12:30 am (24 or 12hour respectively) and a “2.” If one basal is all that will be used, pressACT two times. If more than one basalrate is to be programmed, enter a starttime and amount of the new basal rate for that time period, then pressACT and enter the new basal rate. The user can enter a new basal rate at 30 minute intervals, up to 48basal rates.4. Place the PPC near the Pump and com-plete the communication process.08:26 OCT 12 BASAL RATE : A NOW 00:00 0.2u/h -- U/H00:30 SET RATE BASAL RATE: A PPCCOMMUNICATINGDmp9196021-011_c.book Page 40 Thursday, April 4, 2002 8:15 AM](https://usermanual.wiki/Medtronic-MiniMed/2007C.physician-part1/User-Guide-240463-Page-40.png)