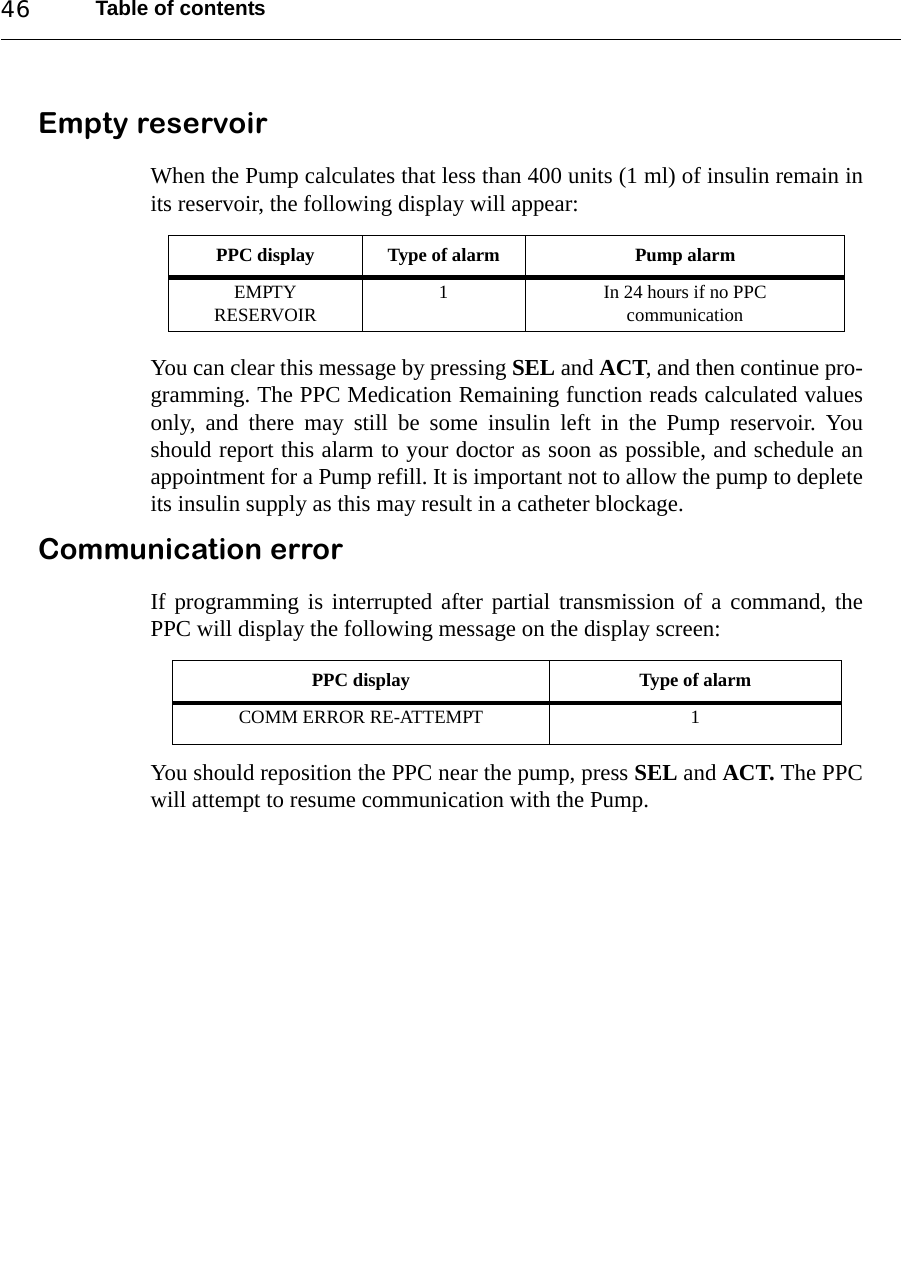
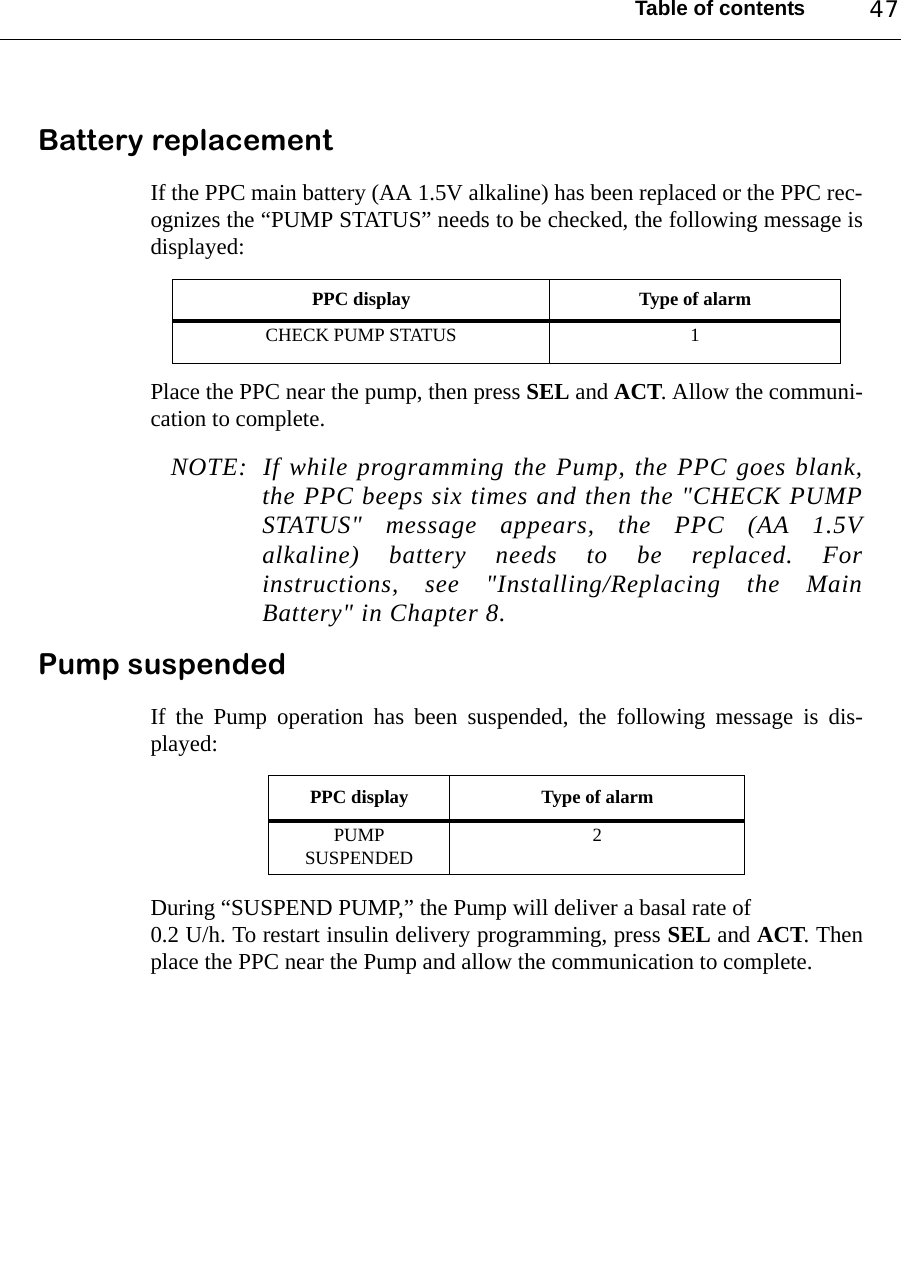
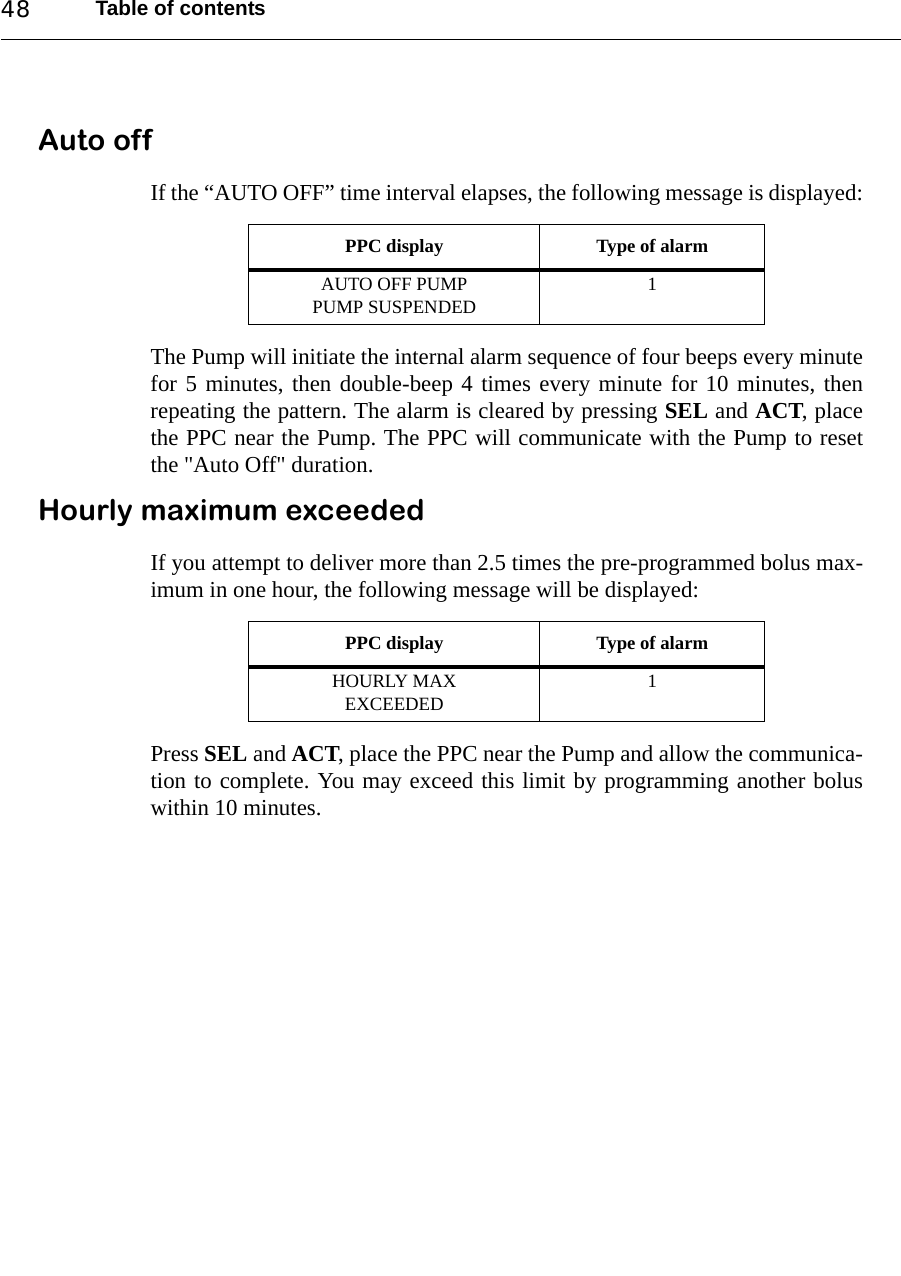
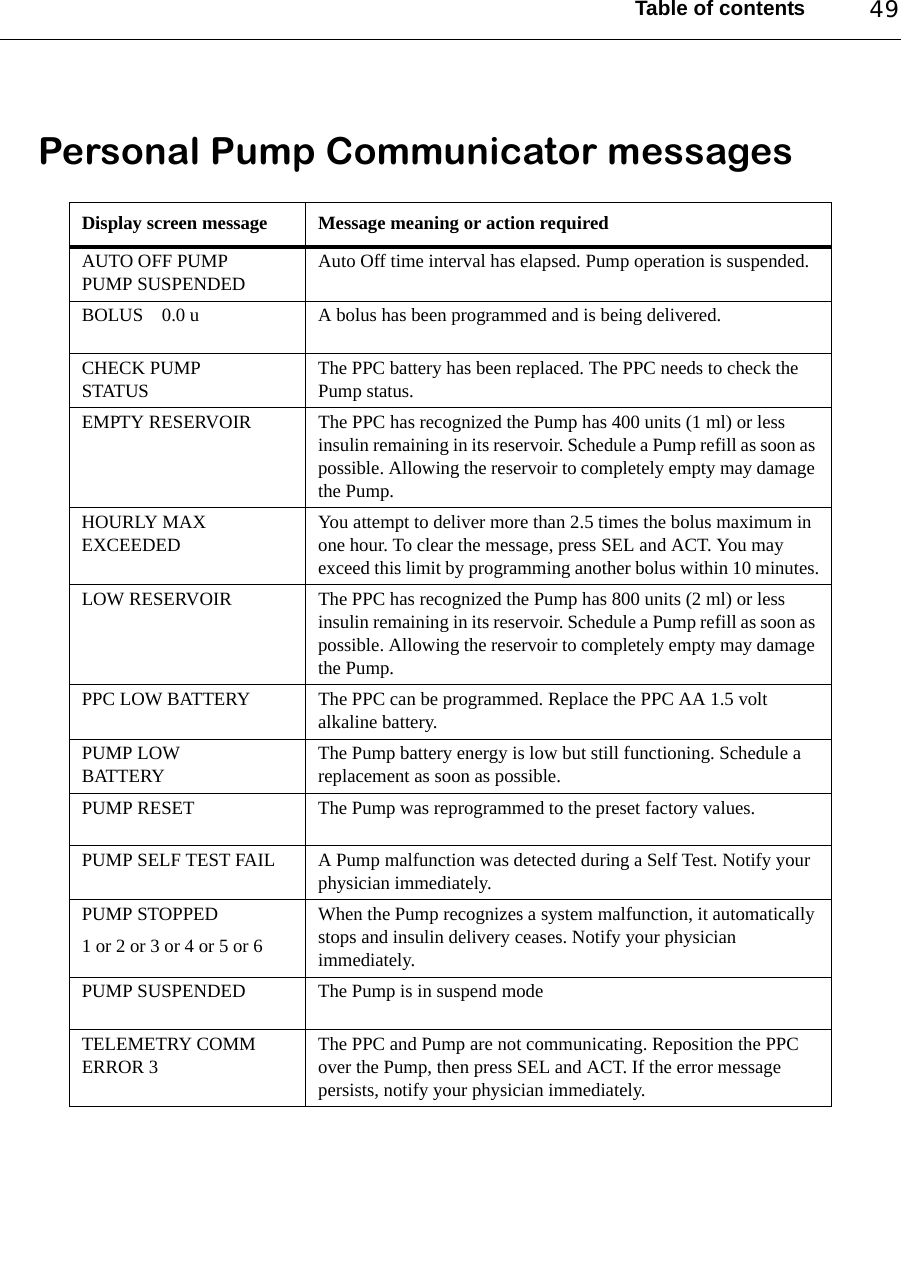
Medtronic MiniMed 3160 Personal Pump Communicator User Manual MiniMed 2007 Implantable Pump Patient Manual
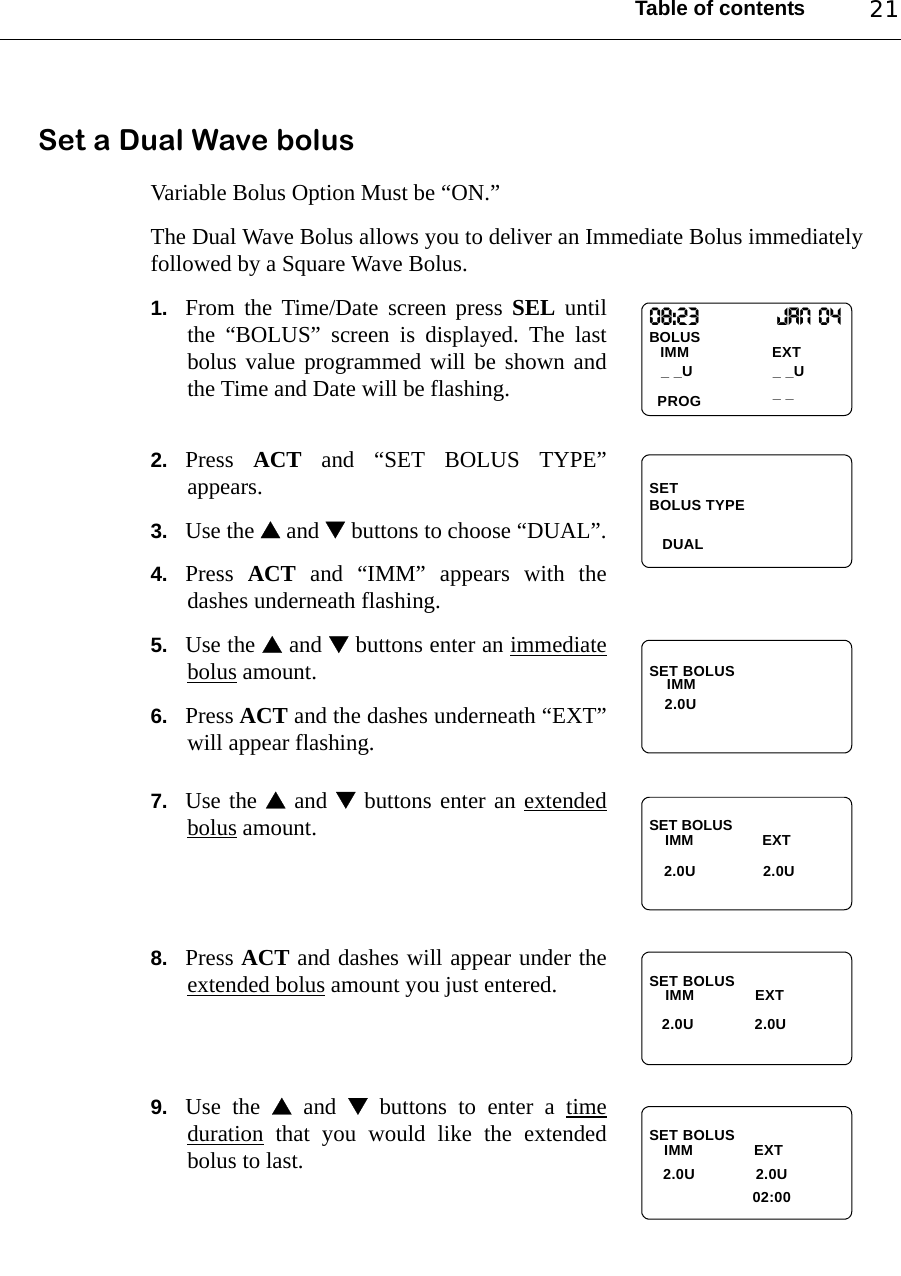
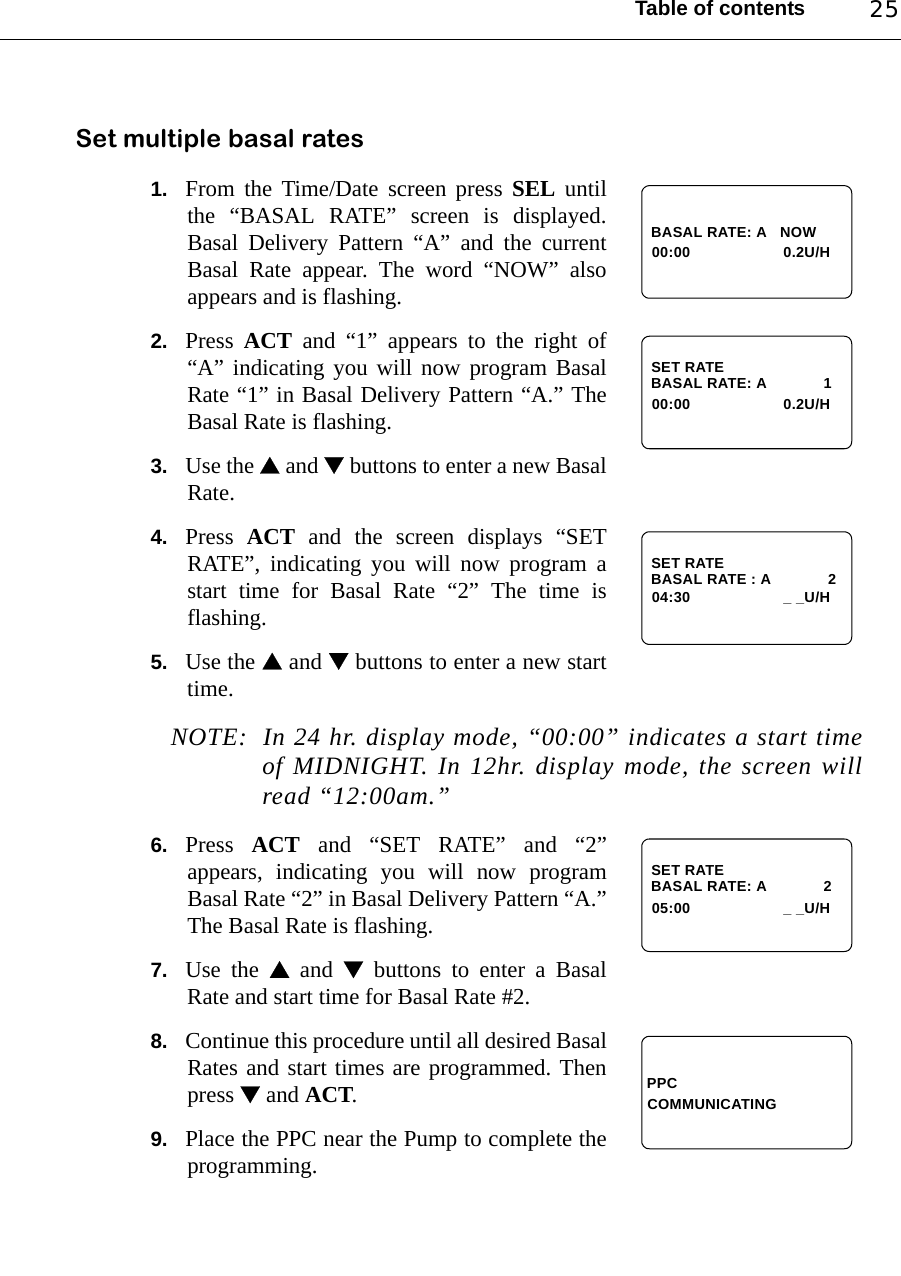
Medtronic MiniMed, Inc. Personal Pump Communicator MiniMed 2007 Implantable Pump Patient Manual
Contents
- 1. Users Manual 1
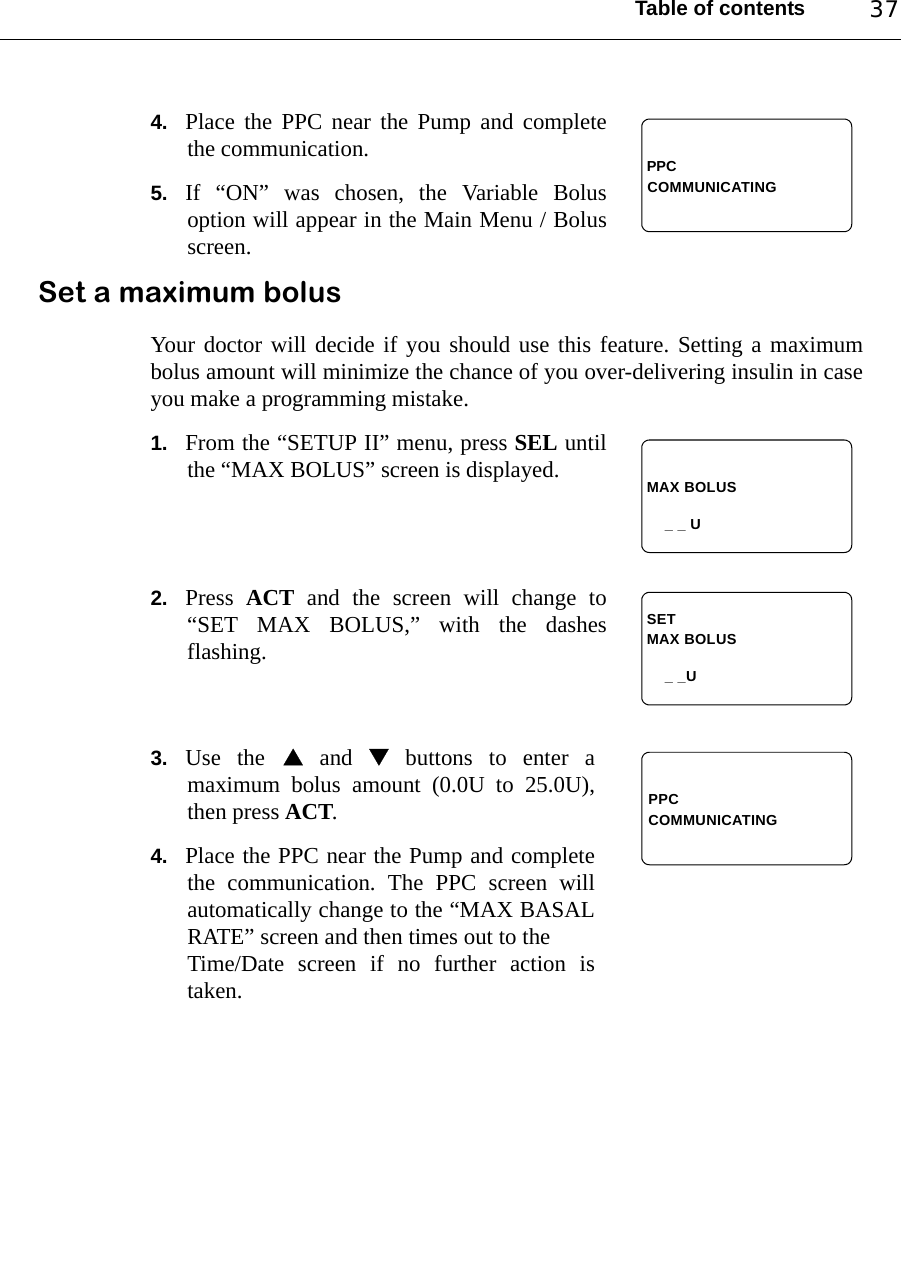
- 2. Users Manual 2
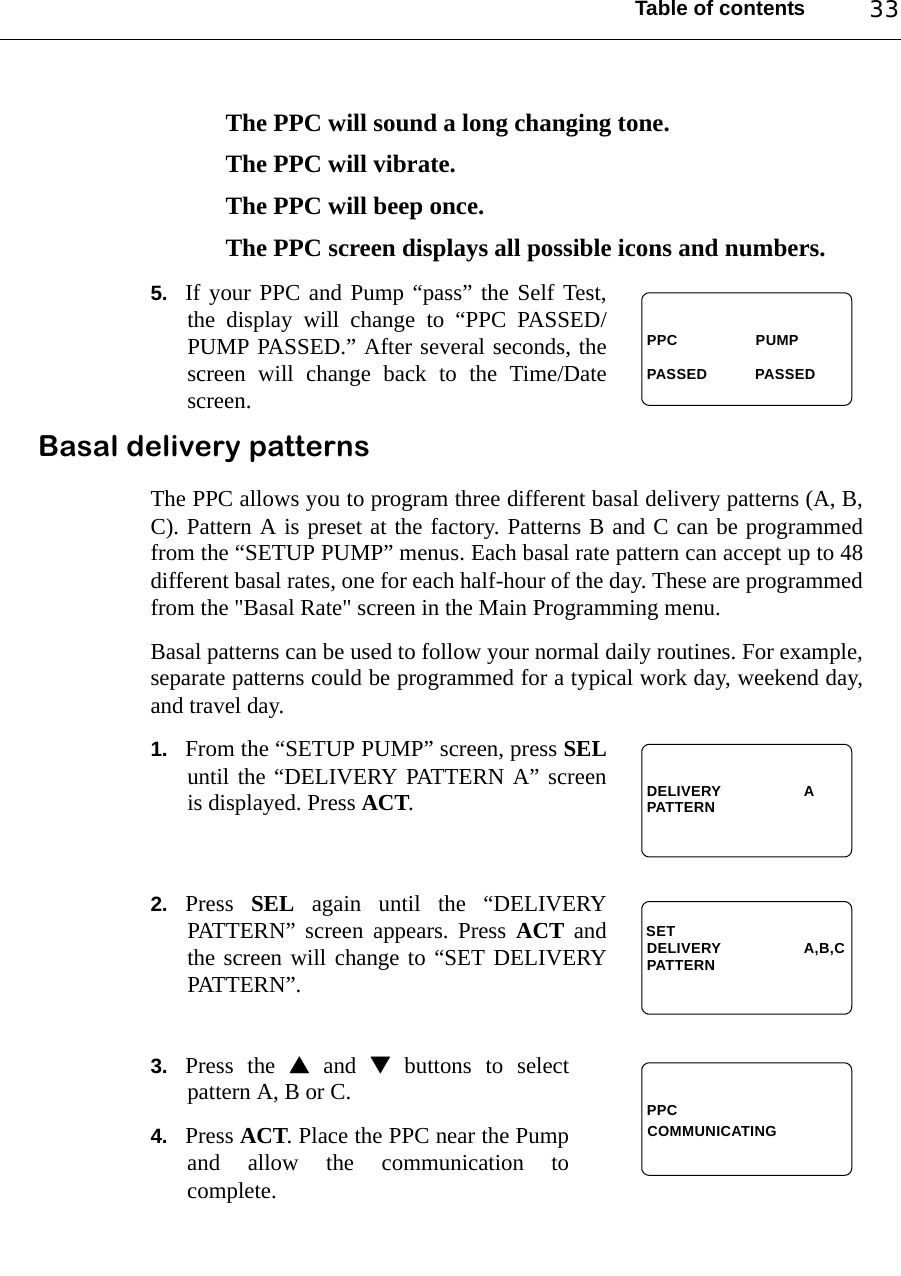
- 3. Users Manual 3
Users Manual 3