Medtronic 97745 97745 User Manual part 4 of 6
Medtronic, Inc. 97745 part 4 of 6
Contents
User Manual part 4 of 6
6 MRI
examinations
Filename Date Time
UC200xxxxxx EN
4.625″ x 6.0″ inches (117 mm x 152 mm)
Medtronic Confidential
PPManual.xsl - PatientProgrammerTemplate.fm
Version: 05-01-2012
M948515A001 Rev X 2013-04

If you have an MRI appointment
w Warning: MRI should not be prescribed for
patients undergoing trial (test) stimulation
or who have any neurostimulation system
components that are not fully implanted. If
an MRI scan is required, the clinician must
explant all trial (test) stimulation
components. MRI has not been tested on
trial (test) stimulation components and may
cause heating of the lead electrodes,
resulting in tissue damage or serious
patient injury.
Depending on what kind of neurostimulation
system components that you have implanted,
you may be eligible for one of the following
types of magnetic resonance imaging (MRI)
scans:
•
MRI scans of the head only (this is referred
to as head-only eligible).
•
MRI scans of any part of your body (this is
referred to as full-body eligible).
English 97745 2013-04
Filename Date Time
UC200xxxxxx EN
4.625″ x 6.0″ inches (117 mm x 152 mm)
Medtronic Confidential
PPManual.xsl - PatientProgrammerTemplate.fm
Version: 05-01-2012
M948515A001 Rev X 2013-04
128
MRI examinations 6

Responsibilities of the patient in
preparing for the MRI
appointment
•
If you have a patient identification (ID) card
given to you by Medtronic for your
implanted neurostimulation system, be
sure to bring your most current card to
every MRI appointment.
The patient ID card shows the MRI clinician
that Medtronic is the manufacturer of your
implanted neurostimulation system. The
patient ID card also identifies your
neurostimulator model number.
The MRI clinician can use this information
to obtain instructions to determine the
eligibility of your implanted
neurostimulation system for the MRI scan
and the MRI scan safety conditions
required by your neurostimulation system.
•
Bring the MRI scan eligibility sheet to the
MRI appointment if you were given one
97745 2013-04 English
Filename Date Time
UC200xxxxxx EN
4.625″ x 6.0″ inches (117 mm x 152 mm)
Medtronic Confidential
PPManual.xsl - PatientProgrammerTemplate.fm
Version: 05-01-2012
M948515A001 Rev X 2013-04
129
MRI examinations 6

from your clinician managing your
neurostimulation system.
Note: The MRI scan eligibility sheet
information should match what is displayed
on the In MRI Mode screen of your
controller.
•
Bring your controller to every MRI
appointment. However, do not take the
controller into the MRI scanner (magnet)
room.
At the MRI appointment
•
If you have a patient identification (ID) card
given to you by Medtronic for your
implanted neurostimulation system,
present your most current card to the MRI
clinician.
•
Be sure to inform the MRI clinician that you
have an implanted neurostimulation
system for chronic pain.
•
If you no longer have an implanted
neurostimulator, be sure to inform the MRI
English 97745 2013-04
Filename Date Time
UC200xxxxxx EN
4.625″ x 6.0″ inches (117 mm x 152 mm)
Medtronic Confidential
PPManual.xsl - PatientProgrammerTemplate.fm
Version: 05-01-2012
M948515A001 Rev X 2013-04
130
MRI examinations 6

clinician of any leads or other components
that still remain implanted.
•
To obtain the MRI guidelines, the MRI
clinician can refer to the contact information
at the back of this manual, or the MRI
clinician can go to
www.medtronic.com/mri.
w Warning: Inform the MRI clinician before
you enter the MRI scanner (magnet) room
that you have an implanted
neurostimulation system. If you do not
provide this important information, you may
be given an inappropriate MRI scan, which
could cause you injury or could cause
damage to your implanted medical device.
The MRI clinician conducting your MRI
scan needs to be aware of all medical
implants in order to assess the conditions
for safely performing your MRI scan.
Determining if you are in MRI mode
Be sure your stimulation is turned off and your
neurostimulator is in MRI mode. Refer to the
97745 2013-04 English
Filename Date Time
UC200xxxxxx EN
4.625″ x 6.0″ inches (117 mm x 152 mm)
Medtronic Confidential
PPManual.xsl - PatientProgrammerTemplate.fm
Version: 05-01-2012
M948515A001 Rev X 2013-04
131
MRI examinations 6
following instructions to determine if you are in
MRI mode.
1. If necessary, unlock your controller by
pressing and holding the Lock ( ) button
on the Unlock screen.
–
You should see the In MRI Mode
screen. Refer to Figure 6.2 on
page 136 for examples of these
screens. If you see the In MRI Mode
screen, you are in MRI mode.
–
If you see the Home screen, you are not
in MRI mode. Refer to "Using your
controller to activate MRI mode" on
page 134.
Notes:
•
If you bring your controller to the MRI
appointment, the information displayed on
the In MRI Mode screen accurately
displays the MRI eligibility for your
neurostimulation system.
•
If you also have an MRI eligibility sheet
from your clinician, the In MRI Mode screen
English 97745 2013-04
Filename Date Time
UC200xxxxxx EN
4.625″ x 6.0″ inches (117 mm x 152 mm)
Medtronic Confidential
PPManual.xsl - PatientProgrammerTemplate.fm
Version: 05-01-2012
M948515A001 Rev X 2013-04
132
MRI examinations 6
should match the information on the MRI
eligibility sheet.
Placing your neurostimulation
system in MRI mode for the MRI
scan
Your implanted neurostimulation system must
be placed in MRI mode before your MRI scan.
MRI mode turns stimulation off.
MRI mode can be activated with your controller
or with a clinician programmer. Table 6.1
shows where to go in this chapter for more
information.
Table 6.1 Activating MRI mode
With a controller See "Using your controller to activate
MRI mode" on page 134.
With a clinician
programmer
See "Visiting your clinician to activate
MRI mode" on page 141.
97745 2013-04 English
Filename Date Time
UC200xxxxxx EN
4.625″ x 6.0″ inches (117 mm x 152 mm)
Medtronic Confidential
PPManual.xsl - PatientProgrammerTemplate.fm
Version: 05-01-2012
M948515A001 Rev X 2013-04
133
MRI examinations 6

Using your controller to activate
MRI mode
If you brought your controller to the MRI
appointment, you can place your
neurostimulation system in MRI mode before
your MRI scan and outside of the MRI scanner
(magnet) room. MRI mode turns stimulation
off.
When you activate MRI mode with your
controller, stimulation is turned off and the In
MRI Mode screen will appear (Figure 6.2 on
page 136). Show this screen to the MRI
clinician.
During the MRI scan, keep your
neurostimulation system in MRI mode
(stimulation must remain off).
After the MRI scan and outside of the MRI
scanner (magnet) room, you can turn
stimulation back on using your controller or you
can return to the clinician managing your
neurostimulation system to have stimulation
turned back on.
English 97745 2013-04
Filename Date Time
UC200xxxxxx EN
4.625″ x 6.0″ inches (117 mm x 152 mm)
Medtronic Confidential
PPManual.xsl - PatientProgrammerTemplate.fm
Version: 05-01-2012
M948515A001 Rev X 2013-04
134
MRI examinations 6
Activating MRI mode
Complete the following steps to activate MRI
mode.
1. If necessary, unlock your controller by
pressing and holding the Lock ( ) button
on the Unlock screen.
2. Press the Menu ( ) button on the Home
screen.
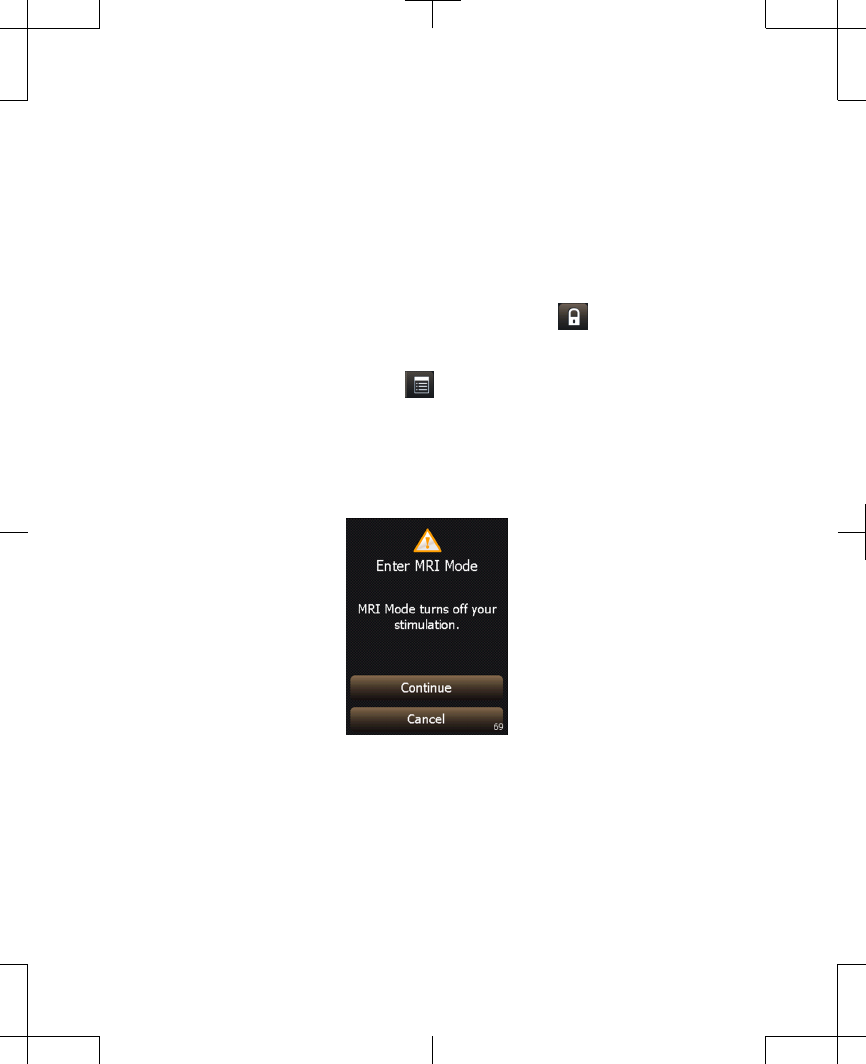
3. Select the MRI Mode button. The Enter
MRI Mode screen appears (Figure 6.1).
Figure 6.1 Enter MRI Mode screen.
4. Press the Continue button to continue.
97745 2013-04 English
Filename Date Time
UC200xxxxxx EN
4.625″ x 6.0″ inches (117 mm x 152 mm)
Medtronic Confidential
PPManual.xsl - PatientProgrammerTemplate.fm
Version: 05-01-2012
M948515A001 Rev X 2013-04
135
MRI examinations 6
When MRI mode is activated, your
implanted neurostimulation system has
been placed in MRI mode and stimulation
is turned off.
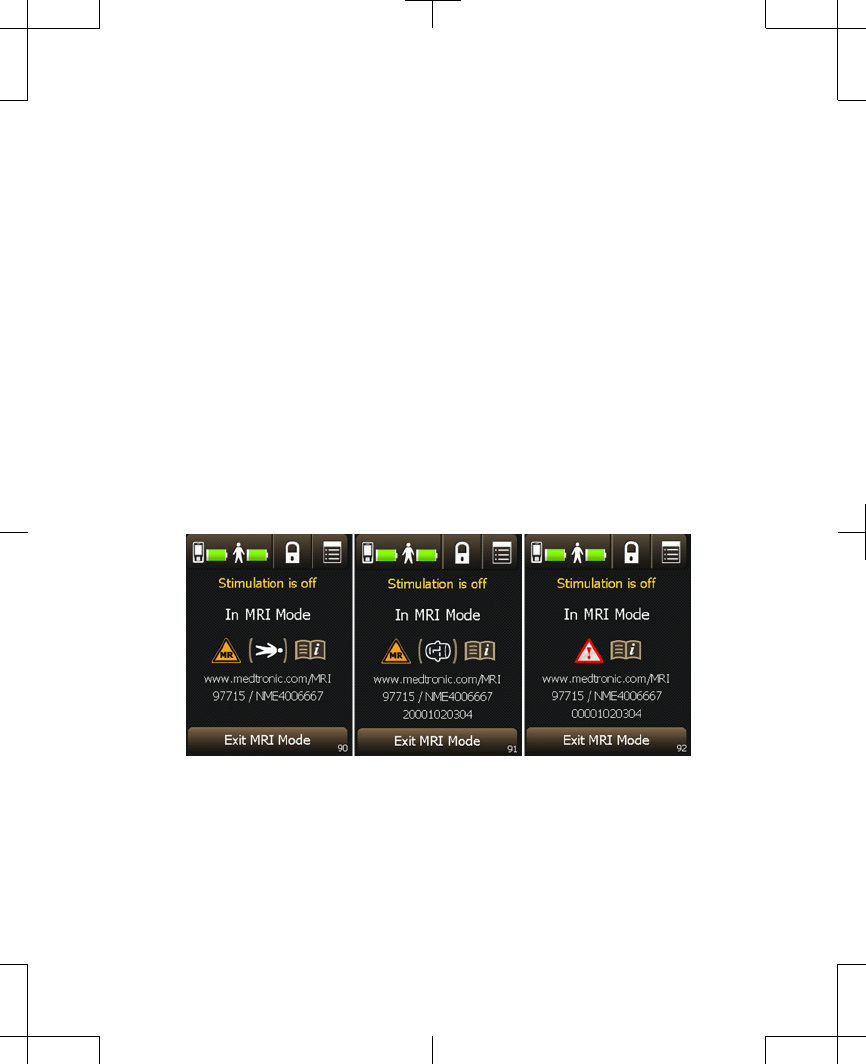
In addition, one of three In MRI Mode
screens will appear showing the MRI scan
eligibility for your implanted
neurostimulation system (Figure 6.2). The
display of the In MRI Mode screen confirms
that your neurostimulation system has
been placed in MRI mode and stimulation
has been turned off.
Figure 6.2 The In MRI Mode screen displays your
MRI scan eligibility.
English 97745 2013-04
Filename Date Time
UC200xxxxxx EN
4.625″ x 6.0″ inches (117 mm x 152 mm)
Medtronic Confidential
PPManual.xsl - PatientProgrammerTemplate.fm
Version: 05-01-2012
M948515A001 Rev X 2013-04
136
MRI examinations 6
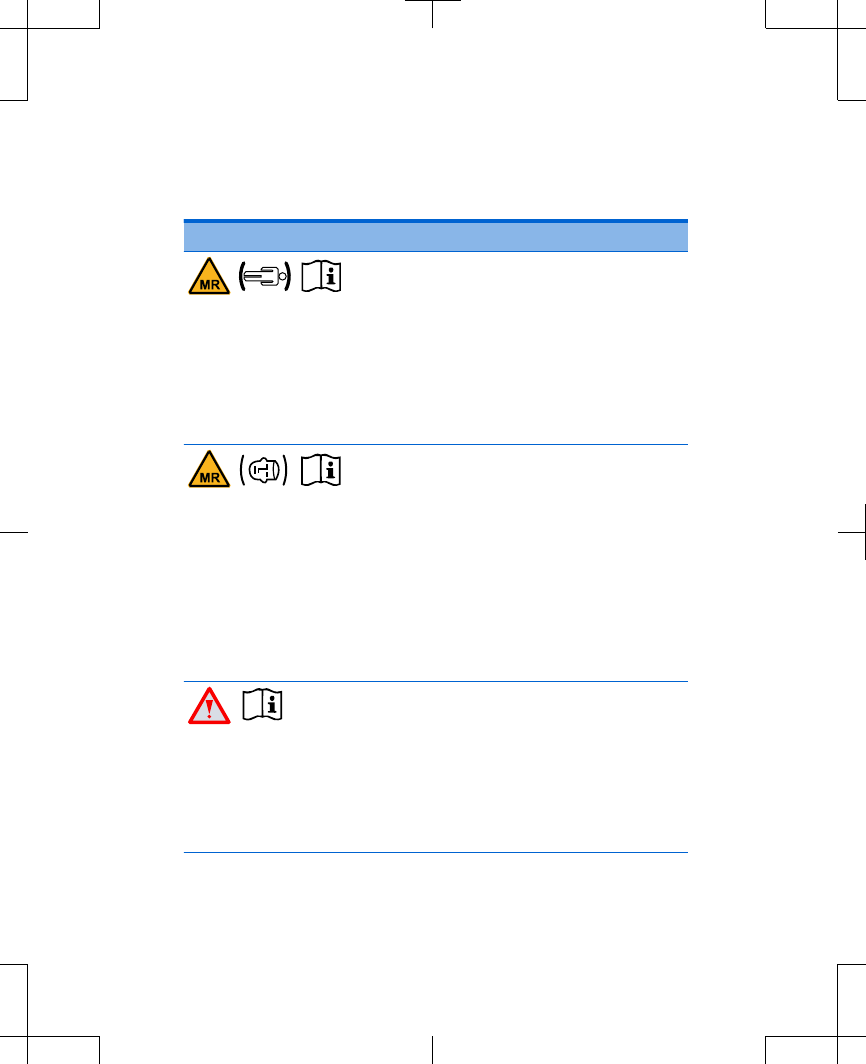
Table 6.2 MRI scan eligibility icons
Icon combination Explanation
Full-body scan eligible
The implanted neurostimulation
system allows the patient to be
eligible to have MRI scans of any
part of the body under specific
conditions. The MRI clinician must
consult the MRI guidelines for those
conditions.
Head scan eligible with transmit/
receive head coil
The implanted neurostimulation
system allows the patient to be
eligible for MRI scans of the head
only using an RF transmit/receive
head coil and under other specific
conditions. The MRI clinician must
consult the MRI guidelines for those
conditions.
The neurostimulation system MRI
scan eligibility cannot be
determined.
The MRI clinician must consult the
MRI guidelines to determine how to
proceed or contact Medtronic
Technical Support.
97745 2013-04 English
Filename Date Time
UC200xxxxxx EN
4.625″ x 6.0″ inches (117 mm x 152 mm)
Medtronic Confidential
PPManual.xsl - PatientProgrammerTemplate.fm
Version: 05-01-2012
M948515A001 Rev X 2013-04
137
MRI examinations 6

5. Do not press any other keys or buttons.
Note: The In MRI Mode screen on the
controller will display for 10 minutes. The
keys on the controller are disabled when in
MRI mode.
6. Give your controller to the MRI clinician
with the In MRI Mode screen displayed.
Note: Do not take your controller into the
MRI scanner (magnet) room. If you brought
the recharger with you to the MRI
appointment, do not take the recharger into
the MRI scanner (magnet) room either.
# Caution: Do not turn stimulation back
on before your MRI scan. Leaving
stimulation on during the scan could
increase the potential for
uncomfortable, unintended stimulation.
English 97745 2013-04
Filename Date Time
UC200xxxxxx EN
4.625″ x 6.0″ inches (117 mm x 152 mm)
Medtronic Confidential
PPManual.xsl - PatientProgrammerTemplate.fm
Version: 05-01-2012
M948515A001 Rev X 2013-04
138
MRI examinations 6
Turning stimulation back on
after the MRI scan
Turn stimulation back on when the MRI scan is
complete and you are outside of the MRI
scanner (magnet) room.
Turning stimulation back on deactivates MRI
mode. Stimulation can be turned on with the
controller or the clinician programmer:
•
If you do not have your controller with you,
go to the clinician managing your
neurostimulation system to turn stimulation
on using the clinician programmer.
•
If you brought your controller to the MRI
appointment, turn stimulation back on
using the controller (see the steps that
follow).
Complete the following steps to turn on
stimulation using the controller.
1. If necessary, unlock your controller by
pressing and holding the Lock ( ) button
on the Unlock screen.
97745 2013-04 English
Filename Date Time
UC200xxxxxx EN
4.625″ x 6.0″ inches (117 mm x 152 mm)
Medtronic Confidential
PPManual.xsl - PatientProgrammerTemplate.fm
Version: 05-01-2012
M948515A001 Rev X 2013-04
139
MRI examinations 6
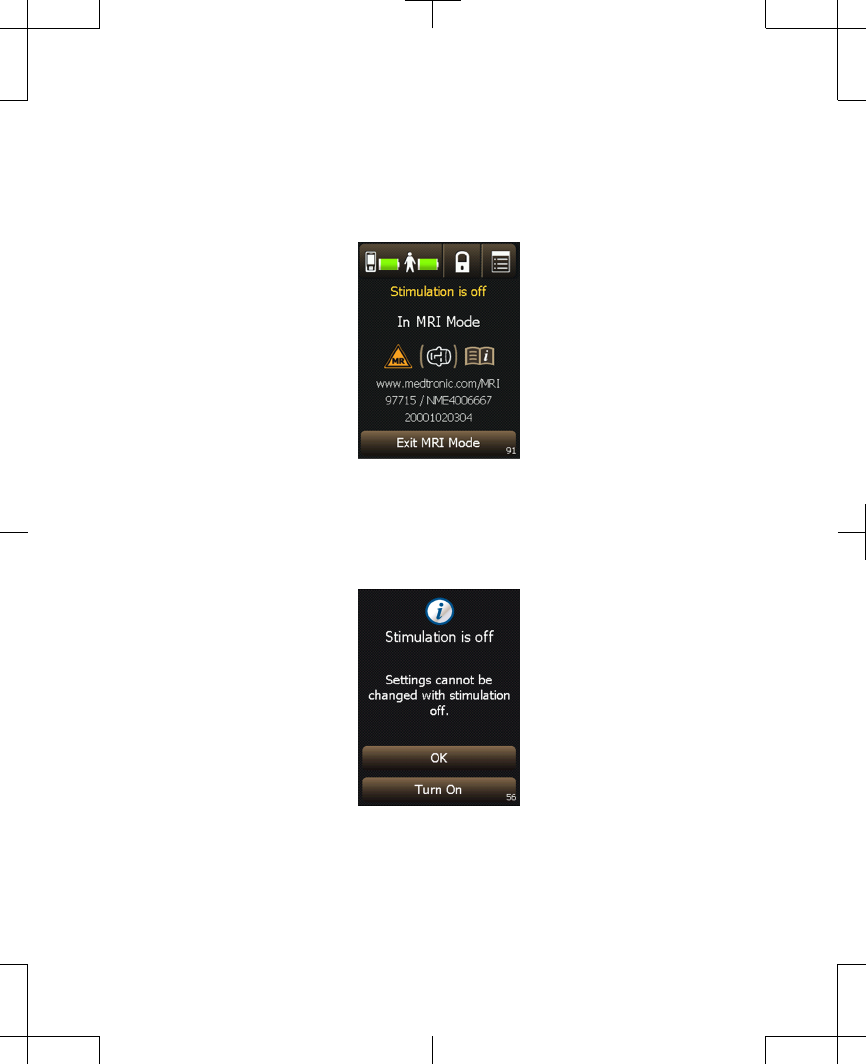
2. Press the Exit MRI Mode button on the In
MRI Mode screen (Figure 6.3).
Figure 6.3 Example In MRI Mode screen.
The Stimulation is off screen appears
(Figure 6.4).
Figure 6.4 Stimulation is off screen.
English 97745 2013-04
Filename Date Time
UC200xxxxxx EN
4.625″ x 6.0″ inches (117 mm x 152 mm)
Medtronic Confidential
PPManual.xsl - PatientProgrammerTemplate.fm
Version: 05-01-2012
M948515A001 Rev X 2013-04
140
MRI examinations 6

3. Press one of the available buttons from the
Stimulation is off screen (Figure 6.4):
–
Press the OK button to keep stimulation
off and to return to the Home screen.
–
Press the Turn On button to turn on
stimulation and return to the
Home screen. Your stimulation settings
will return to how they had been
programmed before you entered MRI
Mode.
If the Home screen is not shown after
exiting MRI Mode, refer to
"Troubleshooting" on page 163.
Visiting your clinician to activate
MRI mode
Note: The model number for your implanted
neurostimulator is on your patient ID card.
If you have a neurostimulator with SureScan
MRI Technology, the clinician managing your
neurostimulation system can place your
neurostimulation system in MRI mode for your
97745 2013-04 English
Filename Date Time
UC200xxxxxx EN
4.625″ x 6.0″ inches (117 mm x 152 mm)
Medtronic Confidential
PPManual.xsl - PatientProgrammerTemplate.fm
Version: 05-01-2012
M948515A001 Rev X 2013-04
141
MRI examinations 6

MRI examination using the clinician
programmer.
You may need to inform your clinician
managing your neurostimulation system that
an MRI examination has been prescribed for
you and that you need MRI mode activated.
MRI mode turns stimulation off. Do not turn
stimulation back on before your MRI scan.
# Caution: Do not turn stimulation back on
before your MRI scan. Leaving stimulation
on during the scan could increase the
potential for uncomfortable, unintended
stimulation.
The clinician may give you an MRI scan
eligibility sheet to bring to your MRI
appointment. Give the eligibility sheet to the
MRI clinician.
During the MRI scan, keep your
neurostimulation system in MRI mode
(stimulation must remain off).
After the MRI scan and outside of the MRI
scanner (magnet) room, you can turn
English 97745 2013-04
Filename Date Time
UC200xxxxxx EN
4.625″ x 6.0″ inches (117 mm x 152 mm)
Medtronic Confidential
PPManual.xsl - PatientProgrammerTemplate.fm
Version: 05-01-2012
M948515A001 Rev X 2013-04
142
MRI examinations 6

stimulation back on using your controller or you
can return to the clinician managing your
neurostimulation system to have stimulation
turned back on.
97745 2013-04 English
Filename Date Time
UC200xxxxxx EN
4.625″ x 6.0″ inches (117 mm x 152 mm)
Medtronic Confidential
PPManual.xsl - PatientProgrammerTemplate.fm
Version: 05-01-2012
M948515A001 Rev X 2013-04
143
MRI examinations 6

English 97745 2013-04
Filename Date Time
UC200xxxxxx EN
4.625″ x 6.0″ inches (117 mm x 152 mm)
Medtronic Confidential
PPManual.xsl - PatientProgrammerTemplate.fm
Version: 05-01-2012
M948515A001 Rev X 2013-04
144
MRI examinations 6
7 Using the
recharging
system with the
implanted
neurostimulator
Filename Date Time
UC200xxxxxx EN
4.625″ x 6.0″ inches (117 mm x 152 mm)
Medtronic Confidential
PPManual.xsl - PatientProgrammerTemplate.fm
Version: 05-01-2012
M948515A001 Rev X 2013-04

This section of the manual provides
instructions on how to recharge your implanted
neurostimulator.
The recharging system is packaged separately
from the controller. Refer to the manual
packaged with the recharging system for more
information about the recharging system
components.
# Caution: Check battery status and charge
the battery regularly. Battery capacity will
continue to slowly drain, even when the
neurostimulator is off. If the battery
becomes completely discharged, therapy
will be lost.
Recharging the implanted
neurostimulator battery
Recharging the neurostimulator
battery
The controller battery pack should be charged
before starting to recharge the neurostimulator
English 97745 2013-04
Filename Date Time
UC200xxxxxx EN
4.625″ x 6.0″ inches (117 mm x 152 mm)
Medtronic Confidential
PPManual.xsl - PatientProgrammerTemplate.fm
Version: 05-01-2012
M948515A001 Rev X 2013-04
146
Using the recharging system with the implanted neurostimulator 7

battery. Refer to "Recharging the controller
battery pack" on page 158.
Only use the controller and recharger with the
implanted neurostimulator listed in this
manual.
Charge the controller battery pack and
implanted neurostimulator even if you are not
using them for an extended period of time. You
cannot charge the controller and
neurostimulator at the same time.
Your ability to locate your neurostimulator and
the depth of the neurostimulator determine the
efficiency of the recharging session. With
practice, you will find the best location on your
skin for placing your recharger.
Note: Recharging quality is affected by factors
such as implant depth and location.
Recharging quality will vary between patients.
Discuss your recharging quality with your
clinician.
w Warning: DO NOT use the recharger on an
unhealed wound. The recharging system is
97745 2013-04 English
Filename Date Time
UC200xxxxxx EN
4.625″ x 6.0″ inches (117 mm x 152 mm)
Medtronic Confidential
PPManual.xsl - PatientProgrammerTemplate.fm
Version: 05-01-2012
M948515A001 Rev X 2013-04
147
Using the recharging system with the implanted neurostimulator 7
not sterile, and contact with the wound can
cause an infection.
1. If desired, place the recharger head into the
opening on the belt.
Note: The belt is packaged with the
recharging system. For more information
about using the belt, refer to the manual
packaged with the recharging system.
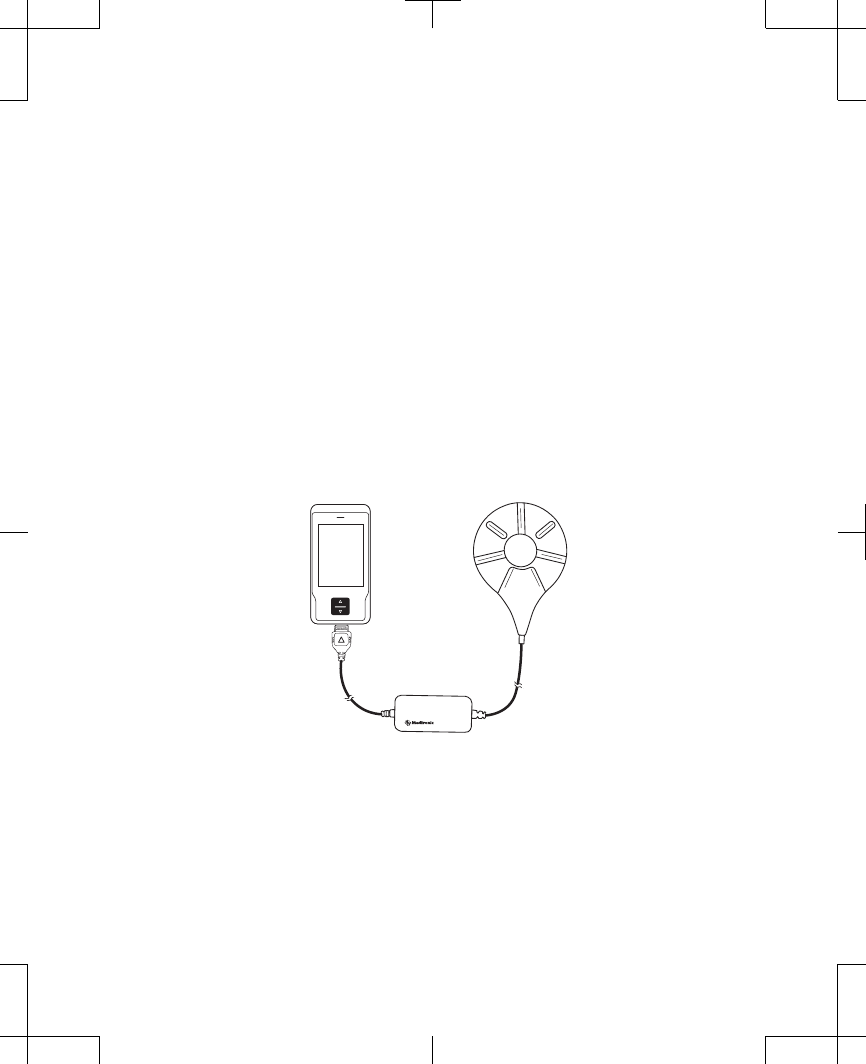
2. Plug the recharger into the controller
charging port (Figure 7.1).
Figure 7.1 Plugging the recharger into the
controller charging port.
English 97745 2013-04
Filename Date Time
UC200xxxxxx EN
4.625″ x 6.0″ inches (117 mm x 152 mm)
Medtronic Confidential
PPManual.xsl - PatientProgrammerTemplate.fm
Version: 05-01-2012
M948515A001 Rev X 2013-04
148
Using the recharging system with the implanted neurostimulator 7

3. If necessary, press and hold the Lock ( )
button on the Unlock screen. The Position
screen will be displayed (Figure 7.2).
Figure 7.2 Position screen.
4. Press your skin where your neurostimulator
is located to determine the best place to
position the recharger.
5. Position the recharger over your
neurostimulator and press the Continue
button.
A series of screens will appear on the
controller screen describing the recharging
activity.
97745 2013-04 English
Filename Date Time
UC200xxxxxx EN
4.625″ x 6.0″ inches (117 mm x 152 mm)
Medtronic Confidential
PPManual.xsl - PatientProgrammerTemplate.fm
Version: 05-01-2012
M948515A001 Rev X 2013-04
149
Using the recharging system with the implanted neurostimulator 7
Note: Your recharger may make clicking
noises while it searches for the
neurostimulator. This is considered
normal.
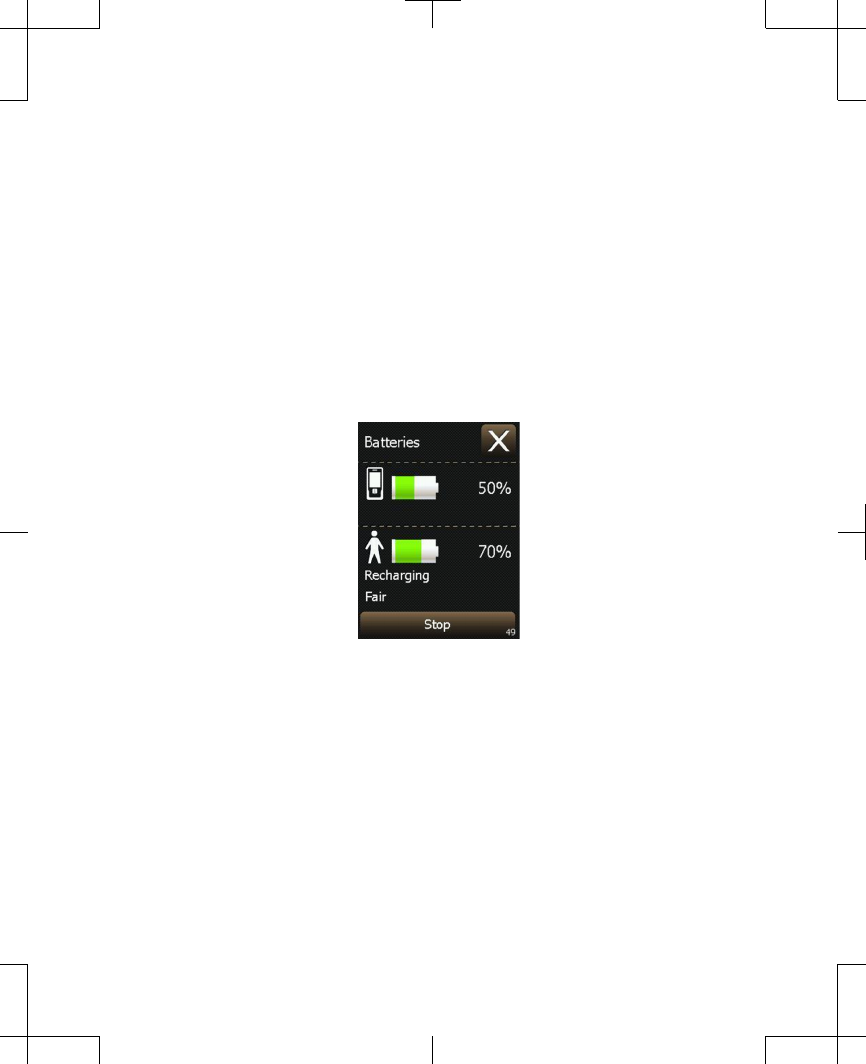
6. If the recharger is able to successfully
locate the neurostimulator, the Batteries
screen (Figure 7.3) will display with the
recharging quality.
Figure 7.3 Batteries screen with the
neurostimulator recharging quality.
Notes:
–
The recharging light will flash green
while your neurostimulator is
recharging.
English 97745 2013-04
Filename Date Time
UC200xxxxxx EN
4.625″ x 6.0″ inches (117 mm x 152 mm)
Medtronic Confidential
PPManual.xsl - PatientProgrammerTemplate.fm
Version: 05-01-2012
M948515A001 Rev X 2013-04
150
Using the recharging system with the implanted neurostimulator 7
–
Refer to Table 7.1 on page 153 for
more information about recharging
status indicators.
7. Press the Exit ( ) button to view the Home
screen. If you intend to make adjustments
to your stimulation while recharging, refer
to "Changing parameter and stimulation
settings" on page 101.
8. Press the Lock ( ) button to lock the
controller while recharging.
Note: When the controller is locked during
the recharging process, it will still continue
to recharge your neurostimulator.
The recharger should remain over your
neurostimulator until the recharging light is
steady green and no longer flashing. When
recharging is complete, the Batteries
screen displays Finished (Figure 7.4).
97745 2013-04 English
Filename Date Time
UC200xxxxxx EN
4.625″ x 6.0″ inches (117 mm x 152 mm)
Medtronic Confidential
PPManual.xsl - PatientProgrammerTemplate.fm
Version: 05-01-2012
M948515A001 Rev X 2013-04
151
Using the recharging system with the implanted neurostimulator 7