Microair Avionics T2000UAV-L UAV AIRCRAFT TRANSPONDER User Manual
Microair Avionics PTY LTD UAV AIRCRAFT TRANSPONDER Users Manual
UserManual.wiki
>
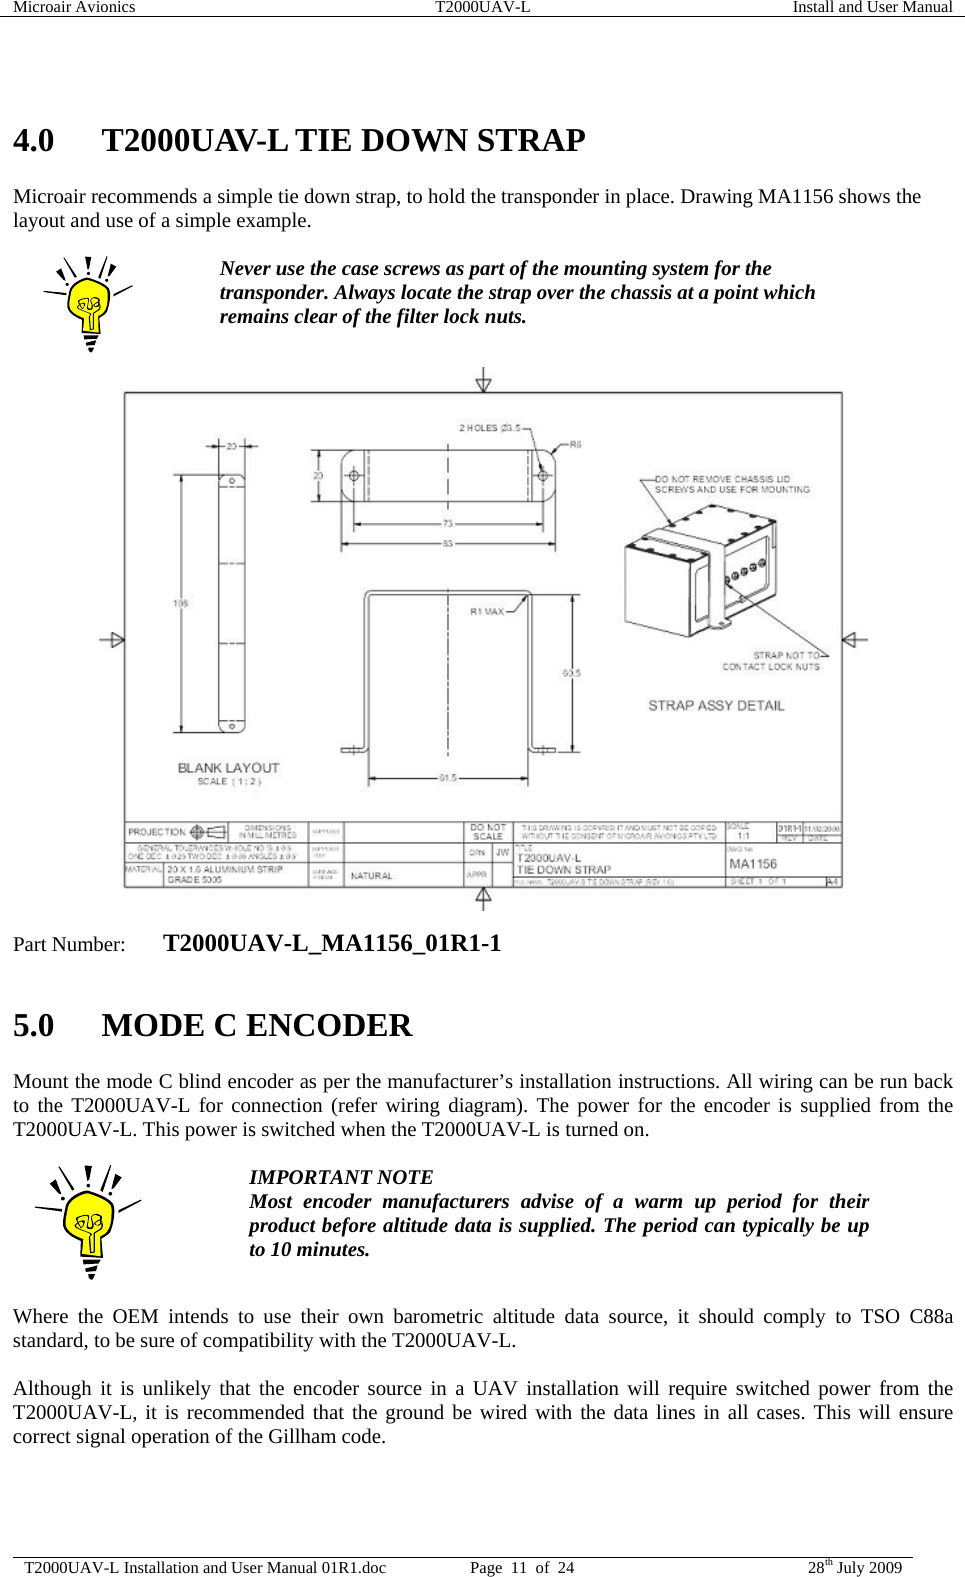
Microair Avionics
>
T2000UAV L User Manual
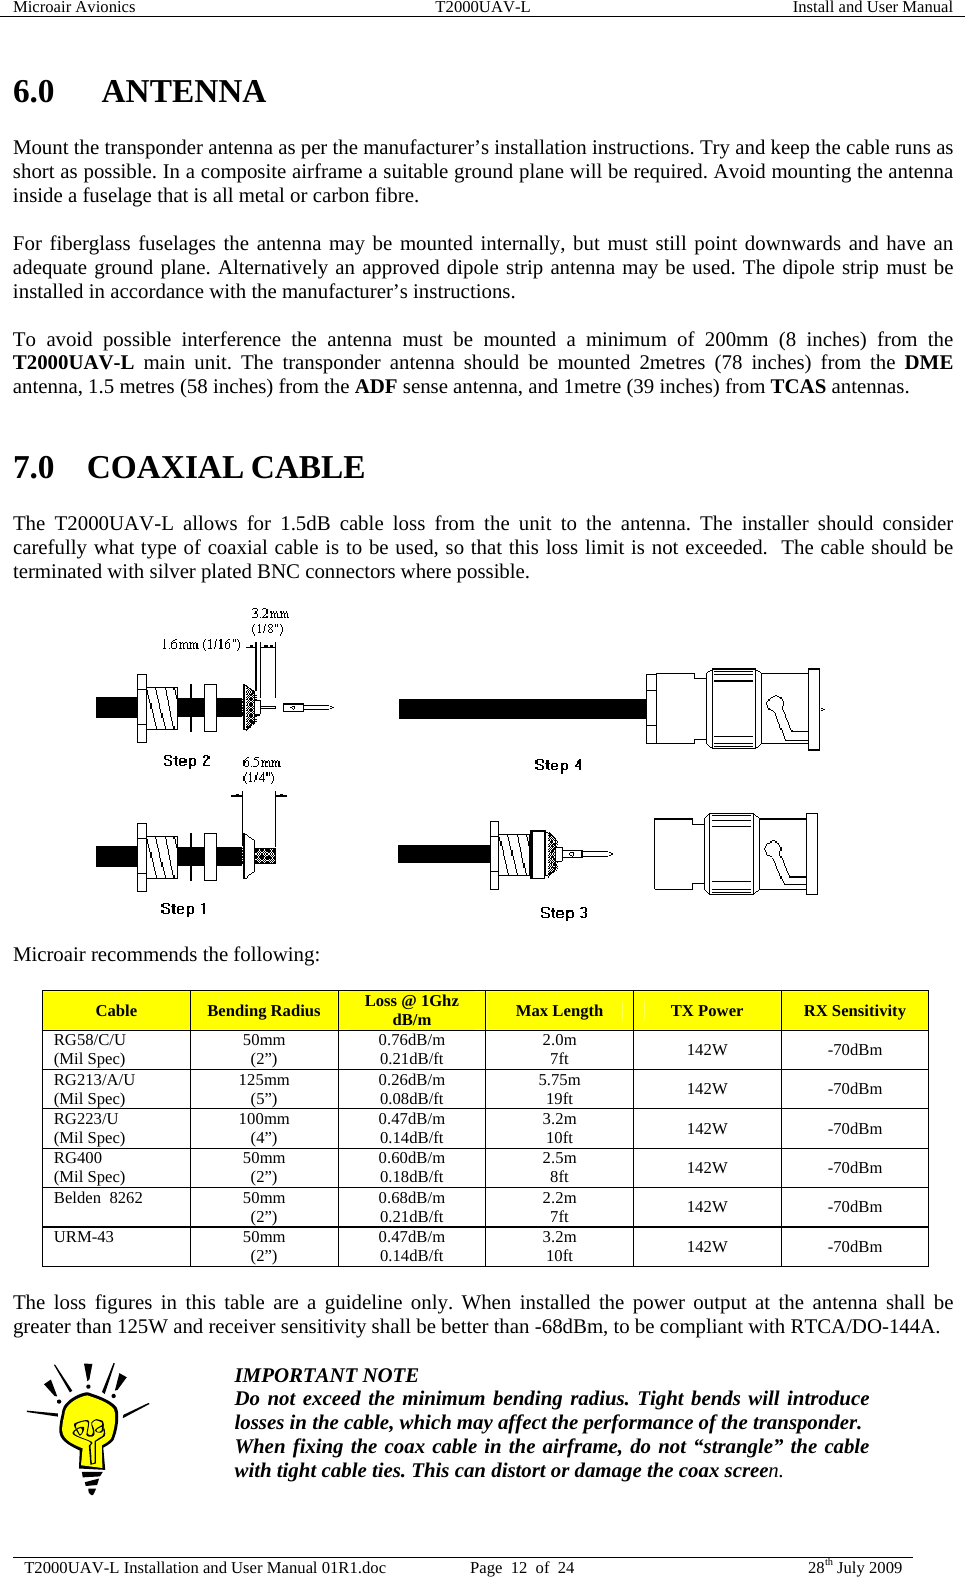
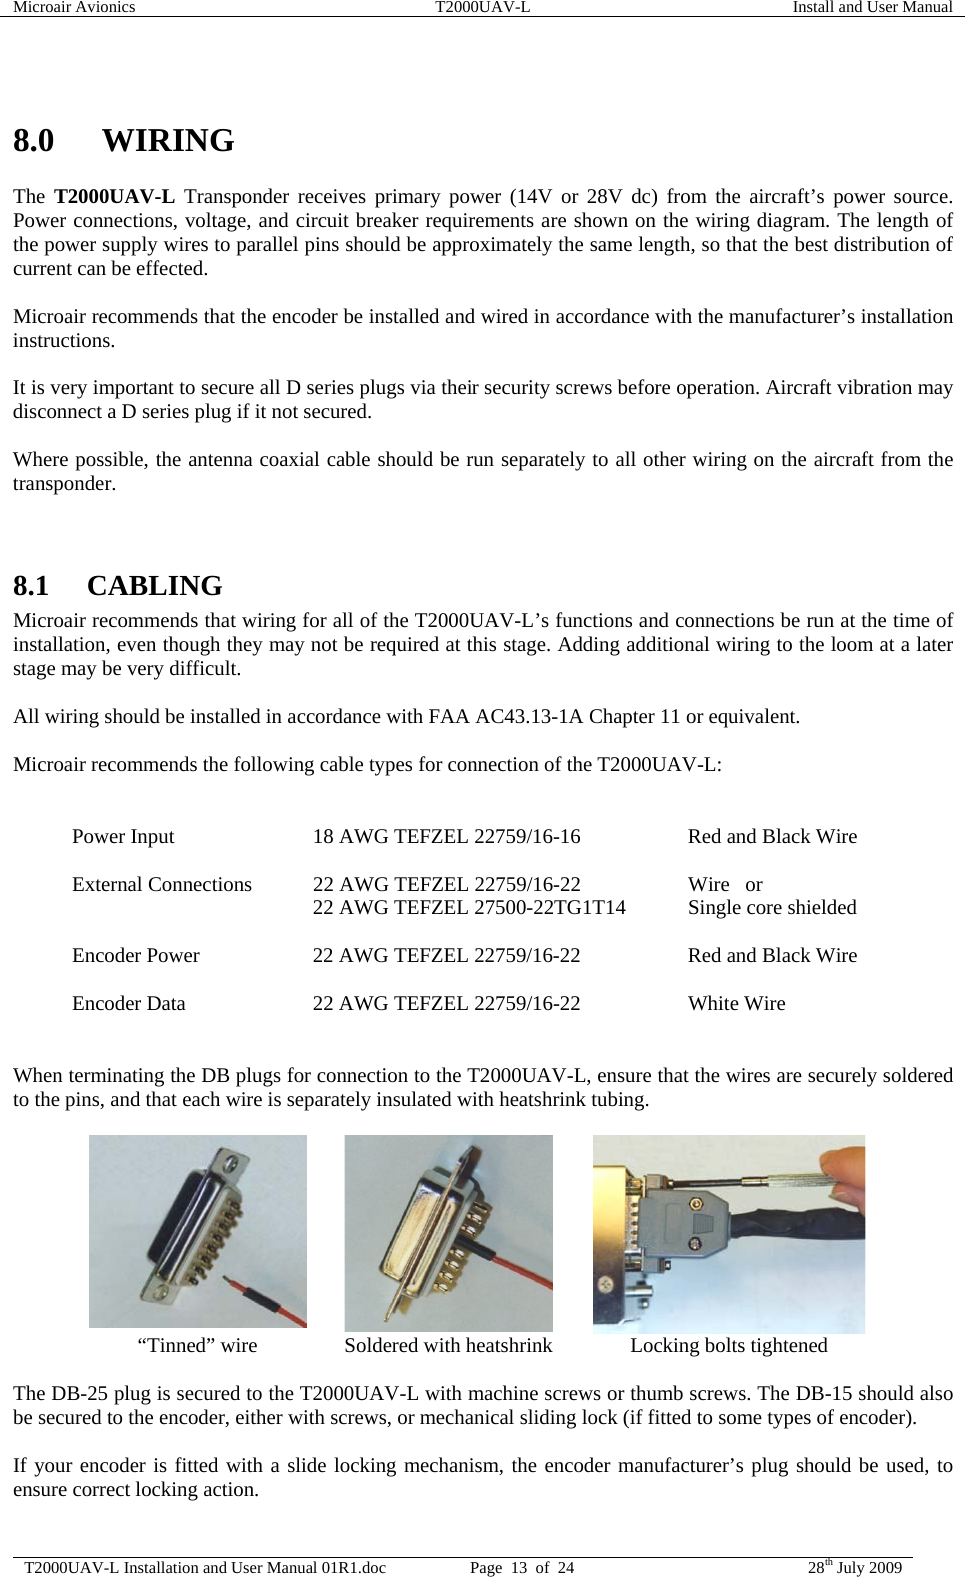
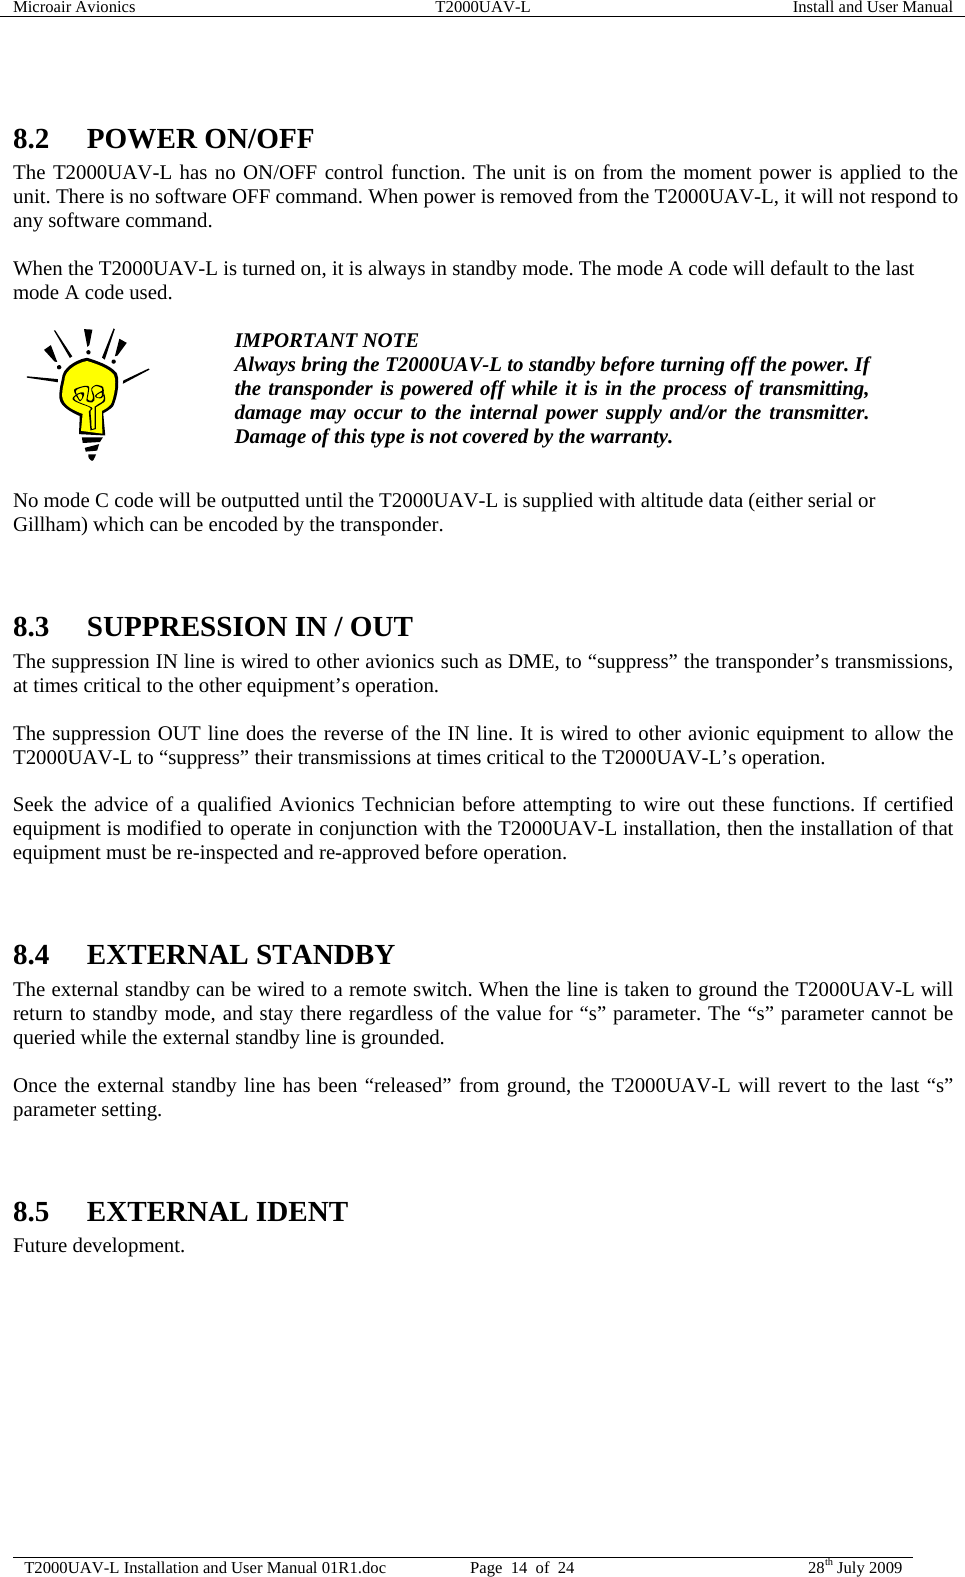
Users Manual
Navigation menu
Upload a User Manual
Namespaces
Wiki Guide
HTML
PDF
Info
Views
User Manual
Discussion / Help
Navigation