Microsoft NEM-2 GSM850/1900 Cellular Telephone User Manual 3300 ENv1 9355979 060503 CDROM
Microsoft Mobile Oy GSM850/1900 Cellular Telephone 3300 ENv1 9355979 060503 CDROM
Contents
- 1. Manual part 1
- 2. Manual Part 2
- 3. Manual part 2
- 4. Manual part 3
- 5. Manual part 4
Manual part 3
36
Copyright © 2003 Nokia. All rights reserved.
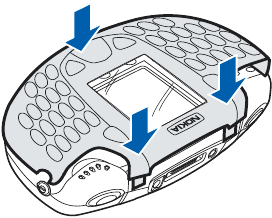
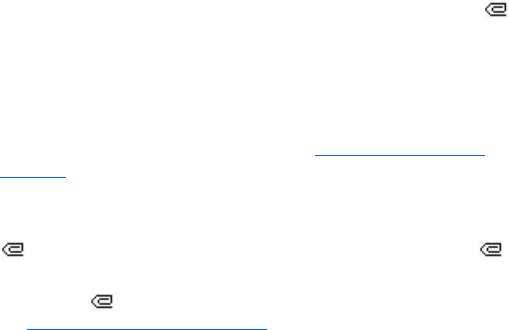
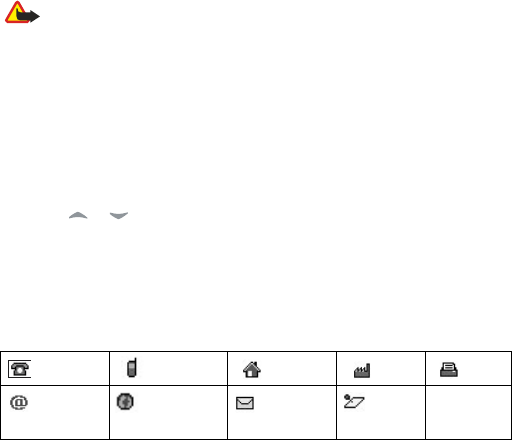
4To replace the front cover,
place the catches on the
lower part of the cover into
the corresponding holes in
the phone (4); then gently
press the cover into place
(5).
5Replace the back cover.
4
5
5
37
Copyright © 2003 Nokia. All rights reserved.
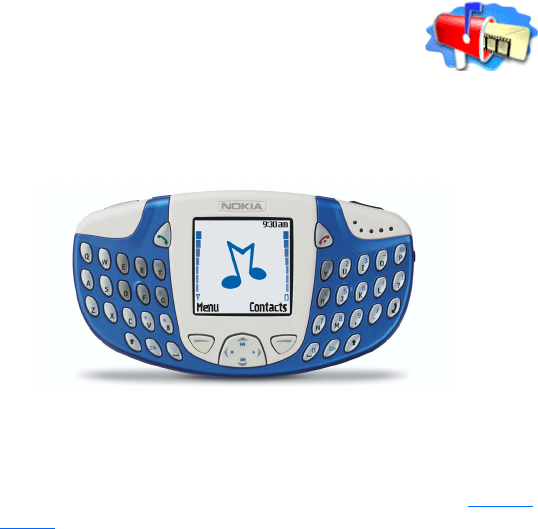
5. Music functions
You can listen to music stored on the memory card in your phone with the
Music player, or you can listen to the FM stereo radio. You can turn the Music
player on and off with the special music key located on the top left of
your phone.
Note: Your phone must be switched on to use this function. Do not
switch the phone on when wireless phone use is prohibited or when it
may cause interference or danger.
You can use the Nokia Audio Manager software to create and organize digital
music files on a compatible PC and transfer them to the memory card in your
phone. Playlists appear as track lists in the phone. See Nokia Audio Manager
for instructions.
You can also record music from the radio or an external music source, for
example, a CD player. See Recorder for instructions.
To adjust the playback volume, use the Volume key on the top right of the
phone.
Warning: Listen to music at a moderate level. Continuous exposure
to high volume may damage your hearing.
38
Copyright © 2003 Nokia. All rights reserved.
Listen to music
You can listen to music on the loudspeaker or with headphones. To connect
the headset to your phone, See Headset.
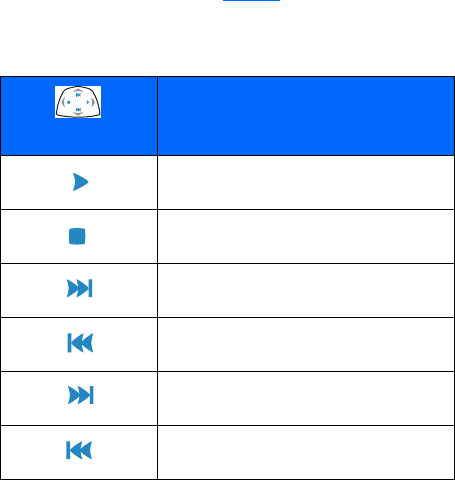
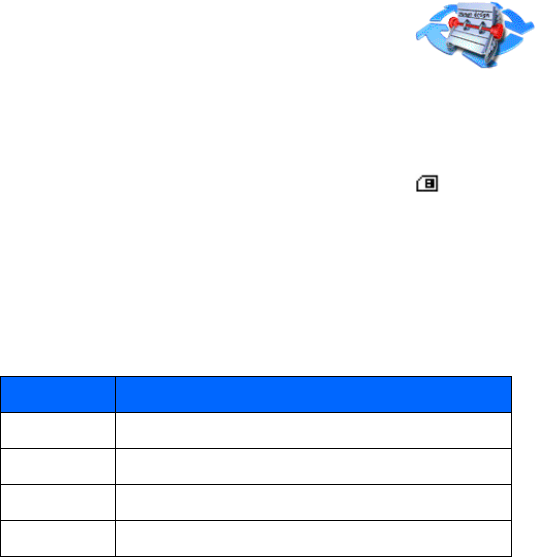
Press the Music key and select Music player. Use the functions of the
four-way scroll key as described in the following table.
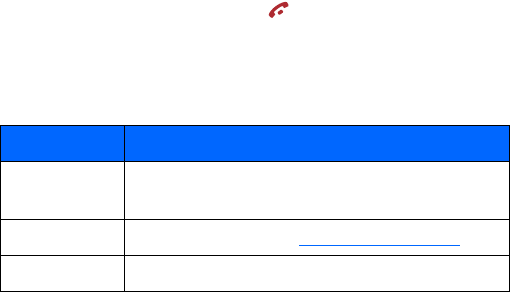
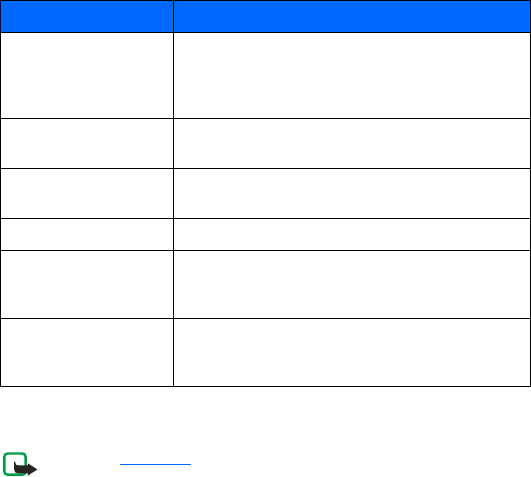
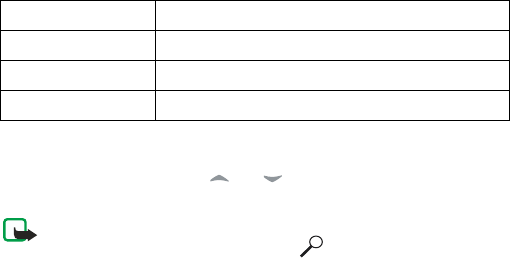
Four-way scroll key Music functions
Play
Stop
Fast forward, press and hold
Rewind, press and hold
Skip to the next track
Skip to the previous track

39
Copyright © 2003 Nokia. All rights reserved.
Press Options to open a list of available Music player options. For example,
from the Options list you can select Loudspeaker to listen to music with the
internal loudspeaker.
To turn the Music player off, press the Music key and select Switch music off.
For more information, see Music player.
Listen to the radio
To listen to the FM radio, you must first connect the headset. The headset
functions as the radio antenna. For the best reception, allow it to hang freely.
1Press the Music key and select Radio.
2To tune a station, press and hold or and the station search starts.
Searching stops when a station is found.
3Press Options to open a list of the available options.
For example, from the Options list you can select Set frequency to
manually key in the frequency of a radio station.
For more information, see Radio.
40
Copyright © 2003 Nokia. All rights reserved.
6. Call functions
Make a call
1The number keys are located on the right side of the keyboard. Key in the
phone number, including the area code. If you key in an incorrect number,
press Clear to delete it.
For international calls, press for the international prefix (the +
character replaces the international access code) and then key in the
country code, area code without the leading 0, if necessary, and the
phone number.
2Press to call the number.
3Press to end the call or to cancel the call attempt.
See Options during a call.
Note: If you are listening to music and receive a call, the music player
and the radio are temporarily muted. When you end the call, the music
player and radio are automatically turned back on.
Make a call using the Contacts list
Press Contacts and select Find. Scroll to the number you wish to call using
the on the four-way scroll key. Press to call the number on the
display. See Search for a contact.
41
Copyright © 2003 Nokia. All rights reserved.
Last number redialing
In standby mode, press once to access a list of the last 20 numbers you
called or attempted to call. Scroll to the number or name you want, and press
to call the number. Calls you dialed from numbers stored in your Contacts
list will appear with the name you saved for the number. Calls you dialed that
are not stored in Contacts will appear with the phone number.
Call your voice mailbox
In standby mode, press and hold , or press and .
If the phone asks for the voice mailbox number, key in the number (obtained
from your service provider) and press OK. See Voice messages.
1-touch dialing
You can assign a phone number to one of the 1-touch dialing keys,
from 2 to 9.
1Go to Contacts and select the number you want to assign a 1-touch
dialing key.
2Select Details to see the phone number.
3Select Options and scroll to 1-touch dialing. Select a number from
2 to 9 and select Assign.
42
Copyright © 2003 Nokia. All rights reserved.
To call the number in standby mode, press the 1-touch dialing key you wish
to call and press . If the 1-touch dialing function is set to On: Press and hold
the corresponding 1-touch dialing key until the call is started. See 1-touch
dialing.
Vanity dialing
You can dial a phone number that is alphanumeric (using both letters and
numbers). For example, many 800 numbers are advertised with a name such
as +1-888-NOKIA-2U. You can enter the numbers and letters, and the phone
will automatically dial the corresponding numbers for the letters you enter.
To use this feature:
1Press the to enter the + symbol.
2Then enter 1 and 888.
3Press the key and enter the letters, such as NOKIA-2U.
4Press to make the call.
Voice dialing
The voice dialing feature allows handsfree operation while you place a call.
You can dial a phone number by saying one or more words that have been
saved as voice tags. Before using this feature, you need to create entries in
the contacts list so you can associate a voice tag with a name and number.
Voice dialing cannot be used while the phone is sending or receiving data over
a GPRS connection.
43
Copyright © 2003 Nokia. All rights reserved.
Add a voice tag to a contact
To create contacts, see Add a contact using the Contacts menu.
1At the start screen, scroll to the name you want to give a voice tag.
2Press Details, then Options.
Add voice tag appears highlighted.
3Press Select.
The phone displays Press Start, then speak after tone.
4Press Start.
You will hear several beeps, and Please speak now appears.
5Speak clearly into the microphone.
6The phone automatically stops recording, then saves and replays the voice
tag.
Note: Do not press Quit unless you want to cancel the recording.
7If the recording is not successful, your phone displays Voice system error.
Press Options, scroll to Add voice tag, and repeat steps 3–5.
Warning: Do not rely only on a voice tag for dialing emergency
numbers. In emergencies, stress causes changes in your voice, which
may keep the phone from recognizing the command.

44
Copyright © 2003 Nokia. All rights reserved.
Notes about voice tags
Before using voice dialing, note the following:
• Voice tags are not language-dependent. They are dependent on the
speaker's voice.
• Voice tags are sensitive to background noise. Record them and make calls
in a quiet environment.
• When recording a voice tag or making a call by saying a voice tag, hold
the phone in the normal position near to your ear.
• Very short names are not accepted. Use long names and avoid similar
names for different numbers.
Note: You must say the name exactly as you said it when you recorded
it. This may be difficult, for example, in a noisy environment or during
an emergency, so you should not rely solely upon voice dialing in all
circumstances.
Make a call using a voice tag
1Press and hold Contacts.
You can also press and hold the down volume key.
When you hear several beeps and Please speak now appears, release the
button.
45
Copyright © 2003 Nokia. All rights reserved.
2Pronounce the voice tag clearly into the microphone.
Searching appears. When the phone finds the voice tag, Found appears,
and the phone automatically dials the number.
If the phone does not locate a number, No match found appears and you
return to the start screen.
Voice dial with the headset
After you have assigned voice tags to those entries you wish to dial, you can
also voice dial a number using a headset.
1At the start screen, press and hold the remote button on the headset.
Your phone beeps and Please speak now appears in the display.
2Pronounce the voice tag into the microphone.
When the phone finds the voice tag, Found appears, and the phone
automatically dials the number.
Listen to a voice tag
1Press Contacts and scroll to Voice tags.
2Press Select; then scroll to the name with the voice tag you want to hear.
3Press Options, scroll to Playback, and press Select.
Change or delete a voice tag
1At the start screen, press Contacts, scroll to Voice tags, and press Select.
Voice tags appear one at a time in alphabetical order.
46
Copyright © 2003 Nokia. All rights reserved.
2Scroll until the voice tag you wish to change or delete appears in the
display; then press Options.
3Scroll to Change or Delete and press Select.
Answer or decline an incoming call
Press to answer the incoming call and press to end the call.
Press to decline the incoming call.
If you press Silence, only the ringing tone is muted. Then either answer or
decline the call.
If the HDS-3H or HDS-3 headset is connected to the phone, you can answer
and end a call by pressing the headset key.
Note: If the Forward if busy function is activated to forward the calls,
for example, to your voice mailbox, declining an incoming call will also
forward the call. See Call forwarding.
Call waiting
During a call, press to answer the waiting call. The first call is put on hold.
Press to end the active call.
To activate the Call waiting function, see Call waiting.
Make a conference call
Conference calling is a system service that allows you to make a conference
call with a maximum of six participants, including yourself.
47
Copyright © 2003 Nokia. All rights reserved.
1Make a call to the first participant.
2To make a call to a new participant, press Options and select New call.
3Key in or search the memory for the phone number of the new participant
and press Call. The first call is automatically put on hold.
4When the new call has been answered, join the first participant in the
conference call. Press Options and select Conference.
5To add a new person to the call, repeat steps 2 to 4.
6To have a private conversation with one of the participants:
Press Options and select Private and select the desired participant. Rejoin
the conference call as described in step 4.
7To end the conference call, press .
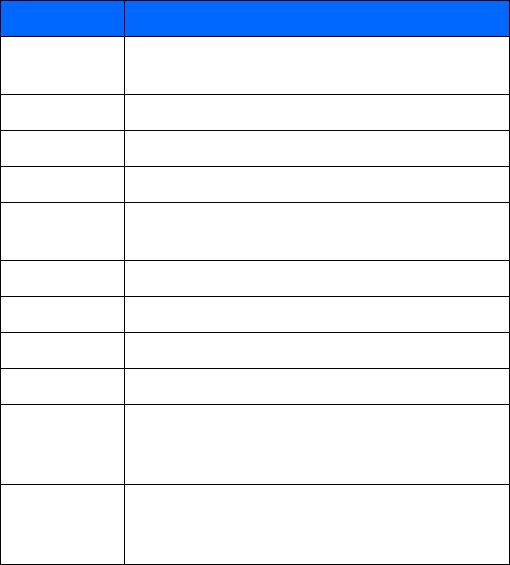
Options during a call
Many of the options that you can use during a call, are network services.
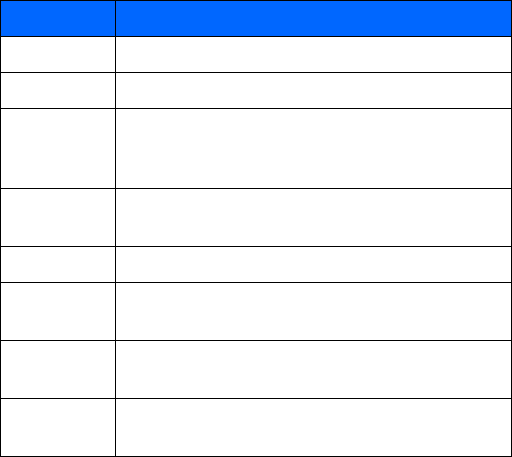
Press Options during a call for some of the following options:
Option Function
Hold
Unhold
Place the current call on hold or remove the call from
hold status.
Lock keypad Activate keyguard. See Keypad lock (keyguard).
Record Records the conversation for up to three minutes.
48
Copyright © 2003 Nokia. All rights reserved.
End call
End all calls
End a call or all calls within a conference call.
New call Place a new call; the first call is put on hold.
Decline call Breaks connection or sends call to voicemail.
Conference Join participants in a conference call.
Private Have a private conversation with one participant in a
conference call.
Swap Switch between the active call and the call on hold.
Touch tones Send touch tones generated by your phone’s keypad.
Contacts Open the Contacts menu.
Menu Display the main menus.
Mute
Unmute
Mute your voice; you can hear the other party but
they can’t hear you; or return to normal from mute
status.
Loudspeaker
Handset
Headset
Routes call audio to the loudspeaker, earpiece, or
headset
(if connected) in your phone.
Option Function

49
Copyright © 2003 Nokia. All rights reserved.
Loudspeaker
You can use your phone as a loudspeaker during a call.
Note: Do not hold the phone to your ear during loudspeaker operation.
• To activate the loudspeaker press Loudsp.
• To deactivate the loudspeaker during a call, press Handset.
If a headset is connected, Handset in the options list changes to Headset, and
the selection key Handset changes to Handsfr. or Headset respectively.
The loudspeaker is deactivated automatically when you end the call, or
connect a headset to the phone.
You can also use the loudspeaker with the music player or stereo radio.

50
Copyright © 2003 Nokia. All rights reserved.
7. Menu functions
Your phone offers an extensive range of functions which are grouped in
menus. Most of the menu functions are provided with a brief help text. To
view the help text, scroll to the menu function you want and wait for 15
seconds. To exit the help text, press Back. See Help text activation.
Scroll to a menu
1To access the menu, press Menu.
2Scroll with or through the menu and select, for example, Settings
by pressing Select.
3If the menu contains submenus, select the one you want, for example Call
settings.
4If the selected submenu contains further submenus, repeat step 3. Select
the next submenu, for example, Call forwarding.
5Select the setting of your choice.
6Press Back to return to the previous menu level, and Exit to exit the menu.
Menu shortcuts
The menus, submenus, and setting options are numbered and you can access
them by using their shortcut number.

51
Copyright © 2003 Nokia. All rights reserved.
To access the menu, press Menu. Key in quickly, within two seconds, the index
number of the menu function you want to access.
Example: To set Create message in Text Messages, press Menu, 011 and
. Press Back to return to the previous menu levels, and Exit
to exit the menu.
52
Copyright © 2003 Nokia. All rights reserved.
Messages (Menu 1)
Your Nokia 3300 Music phone has a messaging keypad
designed to make text messaging fast and easy to use. The
keys are arranged the same as a PC keyboard, with the display screen centered
between the left-hand and right-hand keys. The size and shape of the phone
make it comfortable to hold and easy to use two hands for keying in
characters.
You can read, write, send and save text, multimedia, and e-mail messages. All
your messages are organized into separate folders for each type of message.
Before you can send any text or picture messages, you need to save your
message center number, given to you by your service provider. See Message
settings.

53
Copyright © 2003 Nokia. All rights reserved.
Text messages
A standard text message can be up to 160 characters in length. If you want
to send a long text message (more than 160 characters), you can enter 160
characters in up to five messages that are sent as a series of linked messages.
The number of available characters and the current part number of a linked
message are shown on the top right of the display. For example: 160/1;
125/2; 136/3; 125/4; and 125/5.
Using special (Unicode) characters such as ë, â, á, ì take up more space. If
there are special characters in your message, the indicator may not show the
message length correctly. Before the message is sent, the device tells you if
the message exceeds the maximum length allowed for one message. You can
cancel sending by pressing Cancel or you can save the message in the inbox.
When the message is received, it is displayed as one text message. For this
feature to work, the receiving phone must also support linked messages.
Contact your service provider to subscribe to this type of text messaging.
You can also send and receive text messages that contain pictures. Each
picture message is also made up of several text messages. Just like sending
linked text messages, sending one picture message may cost more.
Note: Only devices that offer compatible multimedia message can
receive and display multimedia messages. Multimedia message
objects may contain viruses or otherwise be harmful to your device or
PC. Do not open any attachment if you are not sure of the
trustworthiness of the sender.
54
Copyright © 2003 Nokia. All rights reserved.
Write and send messages
1Press Menu, and select Messages, Text messages and Create message.
Note: To quickly open the message editor, press in standby mode.
2Key in a message. See Write text. To insert text templates or a picture into
the message, see Templates.
3To send the message, press Options and select Send.
4Enter the recipient’s phone number or search for the phone number in
Contacts.
5Press OK to send the message.
Note: When sending messages via the SMS network service, your
phone may display the words Message sent. This is an indication that
the message has been sent by your phone to the message center
number programmed into your phone. This is not an indication that
the message has been received at the intended destination. For more
details about SMS services, check with your service provider.
Write text
When you write text messages, you can use several special keys for
capitalizing words and switching to number mode. The following table shows
indicators displayed at the top left of the screen in messaging.
55
Copyright © 2003 Nokia. All rights reserved.
You can lock ALL CAPS mode by pressing the SHIFT key twice.
You can lock number mode by pressing twice.
Not all characters available are printed on the keys. The characters available
depend on the language selected in the Language menu. See Language.
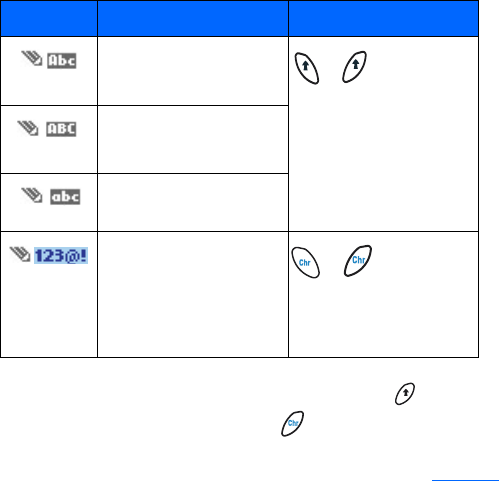
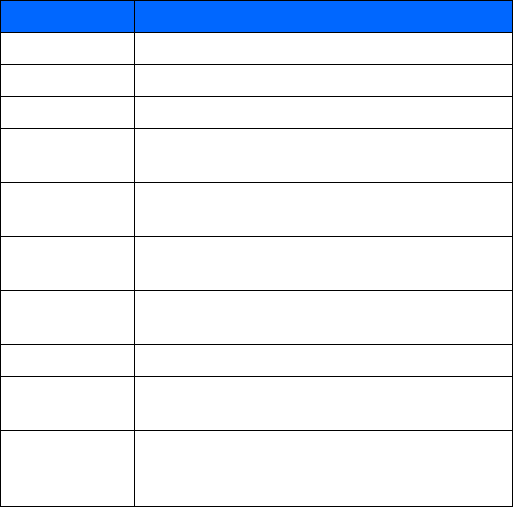
Indicator Function of indicator Special keys
First letter of the word
is capitalized
Use these keys to
change between First
cap, ALL CAPS, and no
caps.
All letters capitalized
No capitalized letters
Number mode
Use these keys to change
between letter and
number mode.
56
Copyright © 2003 Nokia. All rights reserved.
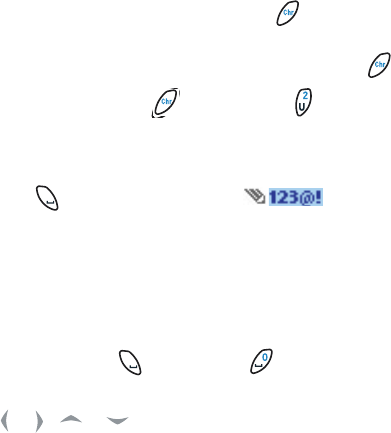
• To insert a number while in letter mode, press . Press twice to lock if
you want to enter a string of numbers.
• To see all the characters available on a key, press and hold while
pressing the key several times in a row.
For example, press and hold . Then press the .
On the first press, 2 is displayed. On the second press, u is displayed.
• The most common punctuation marks and special characters are available
by pressing when the number mode is selected.
Or press Options and select Insert symbol.
Use the four-way scroll key to select the character you want and then
press Insert.
Tips for writing text
The following functions are also available for writing text:
• To insert a space, press on the left, or on the right.
• To move the cursor to the left, right, up, or down,
press , , or on the scroll key, respectively.
• To delete a character to the left of the cursor, press Clear. Press and hold
Clear to delete the characters more quickly.
To delete all the characters at once when writing a message, press
Options and select Clear text.

57
Copyright © 2003 Nokia. All rights reserved.
Options for sending a message
After you have written a message, press Options and select Sending options.
• To send a message to one person, use one of the following options:
• To insert a number while in letter mode, press Options and select
Insert number. Key in the phone number, or find it in Contacts and
press OK.
• To insert a name from Contacts, press Options and select Insert
contact. To insert a phone number or a text item attached to the
name, press Options and select View details.
• To send a message to several recipients, select Sending options, Send to
many. When you have sent the message to everyone you want to send it
to, press Done.
• To send a message using a message profile, select Sending profile and
then the desired message profile, such as Profile 2 or Profile 3.
To define a message profile, see Message settings.
Write and send e-mail
Before you can send e-mail using SMS, you need to save the settings for
sending e-mail. See Message settings. For availability and subscription to e-
mail service, contact your service provider. To save an e-mail address in
Contacts, see Save multiple numbers and text items per name.
58
Copyright © 2003 Nokia. All rights reserved.
1Press Menu, and select Messages, Text messages and Create e-mail.
2Key in the recipient’s e-mail address or search for it Contacts and press
OK.
3If you wish, you can key in the subject for the e-mail and press OK.
4Key in the e-mail message. See Write text. The total number of characters
that you can key in is shown on the top right of the display. The e-mail
address and subject are included in the total number of characters.
Also see Insert a text template into a message or an e-mail. Pictures
cannot be inserted.
5To send the e-mail, press Options and select Send e-mail. If you have not
saved the settings for sending e-mails, the phone asks for the number of
the e-mail server.
Press OK to send the e-mail.
Note: When sending e-mails using the SMS network service, your
phone may display Message sent. This is an indication that the e-mail
has been sent by your phone to the e-mail server. This is not an
indication that the e-mail has been received at the intended
destination. For more details about e-mail services, check with your
service provider.
Read and reply to a message
When you have received a message, the indicator and the number of new
messages followed by message(s) received is shown.
59
Copyright © 2003 Nokia. All rights reserved.
The blinking indicates that the message memory is full. Before you can
receive new messages, delete some of your old messages.
The text messages function uses shared memory. See Shared memory.
1Press Show to view the new message, or press Exit to view it later.
To read a message later, press Menu, and select Messages, Text messages,
and Inbox.
2If more than one message has been received, select the one that you want
to read. An unread text message is indicated by in front of it and a
picture message that has not been viewed is indicated by .
3While reading or viewing the message, press Options.
You can select an option, for example, to delete, forward or edit the
message. You can also move and rename the message you are reading.
Select Copy to calendar to copy text at the beginning of the message to
your phone’s calendar as a reminder note for the current day.
Select Message details to view the sender’s name and phone number, the
message center used, and the date and time of receipt.
Select Use detail to extract numbers, e-mail addresses and website
addresses from the current message.
When reading a picture message, select Save picture to save the picture
in the Templates folder.

60
Copyright © 2003 Nokia. All rights reserved.
4Select Reply to reply to a message. Select Original text to include the
original message in the reply, or select a standard answer (to be included
in the reply, or select Empty screen.
When replying to an e-mail, confirm or edit the address and subject first.
Then write your reply message.
5Press Options, select Send, and press OK to send the message to the
displayed number.
Inbox and Sent items folders
The phone saves incoming text messages in the Inbox folder and sent
messages in the Sent items folder of the Text messages submenu.
Text messages that you wish to send later can be saved in the Archive, My
folders or Templates folder.
Templates
Your phone includes text templates, indicated by , and picture templates,
indicated by . Text templates are messages you can use quickly without
having to key in all the text, such as “I’m in a meeting, please call me later
at.” All you need to do is add a time.
To access the template list, press Menu, and select Messages, Text messages
and Use template (for text templates), or Insert picture.
Insert a text template into a message or an e-mail
When you are writing or replying to a message or an e-mail, press Options.
Select Use template and select the template that you want to insert.

61
Copyright © 2003 Nokia. All rights reserved.
Insert a picture into a text message
When you are writing or replying to a message, press Options. Select Insert
picture and select a picture to view it. Press Insert to insert the picture into
your message. The indicator in the header of the message indicates that
a picture has been attached. The number of characters that you can enter in
a message, depends on the size of the picture.
To view the text and the picture together before sending the message, press
Options and select Preview.
Archive folder and my folders
To organize your messages, you can move some of them to the Archive folder,
or add new folders for your messages.
While reading a message, press Options. Select Move, scroll to the folder to
which you want to move the message, and press OK.
To add or delete a folder, press Menu, and select Messages and My folders.
• To add a folder, press Options and select Add folder.
• To delete a folder, scroll to the folder that you want to delete, press
Options and select Delete folder.

62
Copyright © 2003 Nokia. All rights reserved.
Multimedia messages
Note: Only devices that offer compatible multimedia message can
receive and display multimedia messages. Multimedia message
objects may contain viruses or otherwise be harmful to your device or
PC. Do not open any attachment if you are not sure of the
trustworthiness of the sender.
A multimedia message can contain text, picture and sound. The phone
supports multimedia messages that are up to 45 KB in size. If the maximum
size is exceeded, the phone may not be able to receive the message.
Depending on the network, you may receive a text message that includes an
Internet address where you can view the multimedia message.
If the message contains a picture, the phone scales it down to fit the display
area.
Note: The default setting of the multimedia message service is
generally on.
Multimedia messaging supports the following formats:
• Picture: JPEG, GIF, PNG, and BMP.
• Sound: MIDI, Scalable Polyphonic MIDI (SP-MIDI), monophonic ringing
tones (RGN) and true tones (WB-AMR).

63
Copyright © 2003 Nokia. All rights reserved.
The appearance of a multimedia message may vary depending on the
receiving device. If a received message contains any unsupported elements,
they may be replaced with the file name and the text Object format not
supported.
Note that you are not able to receive any multimedia messages if you have a
call in progress, a game or another Java application running, or an active WAP
connection over GSM data. Because delivery of multimedia messages can fail
for a variety of reasons, do not rely solely upon them for essential
communications.
Write and send a multimedia message
To add the settings for multimedia messaging, see Settings for multimedia
messages. For availability and a subscription to the multimedia messaging
service, contact your service provider.
1Press Menu, and select Messages, Multimedia msgs. and Create message.
2Key in a message. See Write text.
You can insert one picture in a multimedia message. To insert a picture,
press Options, and select Insert image. The list of available folders in the
Gallery is shown. To open a specific folder, select it and then select the
desired picture. The indicator in the header of the message indicates
that a picture has been attached.
To insert a name from Contacts, press Options, select More options and
Insert contact. Scroll to the desired name, press Options and select Insert
contact.
64
Copyright © 2003 Nokia. All rights reserved.
To insert a number, press Options, select More options and Insert number.
Key in the number or search in Contacts, and press OK.
3To view the message before sending it, press Options and select Preview.
4To send the message, press Options and select Send to number or
Send to e-mail.
5Enter the recipient’s phone number (or e-mail address) or search for it in
Contacts. Press OK and the message is moved to the Outbox folder for
sending.
It takes more time to send a multimedia message than to send a text message.
While the multimedia message is being sent, the animated indicator is
displayed and you can use other functions on the phone. If there is an
interruption while the message is being sent, the phone tries to resend it a
few times. If this fails, the message will remain in the Outbox folder and you
can try to resend it later.
The messages that you have sent will be saved in the Sent items folder if the
setting Save sent messages is set to Yes. See Settings for multimedia
messages.
Read and reply to a multimedia message
When your phone is receiving a multimedia message, the animated indicator
is displayed. When the message has been received, the indicator and
the text Multimedia message received are shown.
The blinking indicates that the memory for multimedia messages is full,
see Multimedia messages memory full.

65
Copyright © 2003 Nokia. All rights reserved.
The multimedia message function uses shared memory. See Shared memory.
1Press Show to view the message, or press Exit to view it later.
Reading the message later: Press Menu, and select Messages,
Multimedia msgs. and Inbox.
2Scroll to view the message. Press Options and some of the following
options may be available.
•Delete message to delete a saved message.
•Reply to reply the message. To send the reply, press Options and
select Send. The sender’s phone number (or e-mail address) is used as
the default value.
•Forward to no. or Forward to e-mail to forward the message to a
phone number or e-mail address.
•Edit to edit a message. You can only edit messages you have written.
See Write and send a multimedia message.
•Message details to view the subject, size and class of the message.
•Play to listen to the ringing tone that is contained in the message.
•Save sound clip to save the ringing tone in the Gallery.
•Save image to save the picture in the Gallery.
Note: Copyright protections may prevent some images, ringing tones
and other content from being copied, modified, transferred or
forwarded.

66
Copyright © 2003 Nokia. All rights reserved.
Inbox, Outbox, Saved and Sent items folders
The phone saves the multimedia messages that have been received in the
Inbox folder of the Multimedia msgs. submenu.
Multimedia messages that not yet been sent are moved to the Outbox folder
of the Multimedia msgs. submenu.
The multimedia messages that you wish to send later can be saved in the
Saved items folder of the Multimedia msgs. submenu.
The multimedia messages that have been sent are saved in the Sent items
folder of the Multimedia msgs. submenu.
Multimedia messages memory full
When you have a new multimedia message waiting and the memory for the
messages is full, the indicator blinks and Multimedia memory full, view
waiting msg. is shown. To view the waiting message, press Show. To save the
message, press Options, select Save message and delete old messages by first
selecting the folder and then an oId message to be deleted.
To discard the waiting message, press Exit and Yes. If you press No, you can
view the message.
Delete messages
1To delete text messages, press Menu, and select Messages, Text messages
and Delete messages.
To delete multimedia messages, press Menu, and select Messages,
Multimedia msgs. and Delete messages.

67
Copyright © 2003 Nokia. All rights reserved.
2To delete all messages in a folder, scroll to the folder and press OK. Then
press OK when Delete all read messages from folder? is displayed.
To delete all read messages from all folders, scroll to All read and press
OK. Then press OK when Delete read messages from all folders? is
displayed.
E-Mail messages
The Nokia 3300 music phone has two ways to send e-mail: using the SMS
system or the Java e-mail application. The method available to you depends
on your service provider. Both methods are explained here.
Before you can send and retrieve e-mails,
• You need an active e-mail account and the settings for that account. For
the e-mail settings and availability of your e-mail account, contact your
e-mail service provider.
• You must set the e-mail settings on your phone. See E-mail settings.
• You must activate the e-mail service settings obtained from your service
provider.
Some of these settings my be preset in your phone. Check with your service
provider.
Writing and sending an e-mail with the SMS Method
You can send e-mail to anyone with an e-mail address. First, you will need to
setup an e-mail profile and modify a few other settings. It takes just a few
minutes, and you only need to do this once.

68
Copyright © 2003 Nokia. All rights reserved.
Important:The e-mail address is included in the total character count
for an e-mail message. Leave enough space for the e-mail address while
composing your message or you will be taken back to the editor, where
you will have to delete some text before sending.
Note:You cannot send picture messages with SMS e-mail. Service
providers may customize the SMS message settings interface. For more
details about SMS services, please contact your service provider.
Write down the e-mail server number
Write down your e-mail server number (also known as the “e-mail gateway”
number). You will need this number when setting up an e-mail profile in the
next section. Get this number from your wireless service provider.
Setup an e-mail profile
1At the start screen, press Menu, select Messages, then scroll until
Message settings appears in the display.
2Press Select, select Text messages, then Sending profile.
3Scroll to an empty profile slot and press Select.
4Choose from the following options:
69
Copyright © 2003 Nokia. All rights reserved.
Write and send e-mail
Note:See Write text for ways to write messages faster.
1At the start screen, press Menu, then select Messages, Text messages and
Create e-mail.
Message Setting Function
Message center
number
Save the phone number of the message center,
which is necessary for sending text messages;
obtain this number
from your wireless service provider
Default recipient
number
For text messages, the default number used to
send messages
Delivery reports Request the network to send delivery reports on
your messages
Use GPRS Set GPRS as the preferred method of sending SMS
Reply via same center Allow the recipient of your message to send you a
reply message using your message center
(network service).
Rename sending
profile
Change the name of the selected sending profile;
the sending profile sets display only if your SIM
card supports more than one set
70
Copyright © 2003 Nokia. All rights reserved.
After a brief pause, you are prompted to enter the e-mail address.
2Enter the e-mail address, or press Find to retrieve an e-mail address from
Contacts, and press OK.
3Enter a subject for the e-mail and press OK.
4Compose your e-mail using the keypad and press Options.
Note:Leave enough space in the total character count for the e-mail
address.
5Select Send e-mail.
6Enter the e-mail server number (obtained from your service provider).
7Press OK.
Reply to a message or e-mail
When you have received a text message or e-mail, the number of new
messages and ___ Message(s) received appears in the display.
Note: The blinking indicates that the message memory is
full. Before you can receive new messages, delete some of your old
messages.
Press Show to view the message now, or Exit to view it later.

71
Copyright © 2003 Nokia. All rights reserved.
Reading the message later:
1Press Menu, and select Messages, Text messages, and Inbox.
2If more than one message is received, select the message you want to
read and press Select.
An unread text message is indicated by in front of the message, and
an unviewed picture message by .
Writing and sending an e-mail with the JavaTM Method
Before you can send and retrieve e-mails,
• You need an active e-mail account and the settings for that account. For
the e-mail settings and availability of your e-mail account, contact your
e-mail service provider.
• You must set the e-mail settings on your phone. See E-mail settings.
• Some of these settings my be preset in your phone by your service
provider. If so, you must activate these e-mail service settings.
You can write your e-mail message before connecting to the e-mail service or
connect to the service first, and then write and send your e-mail.
1Press Menu, select Messages, scroll to E-mail and press Select.
Open appears highlighted.
2Press Select.
Create e-mail appears highlighted.
3Press Select.

72
Copyright © 2003 Nokia. All rights reserved.
4Enter the recipient’s e-mail address one of two ways:
Key in the e-mail address with the keypad.
OR
Press Options, scroll to Find and press Select to search for the e-mail address
in Contacts, then press Select.
5Press Options, scroll to Save and press Select.
6Enter the subject of the e-mail, if you want, and press Options, scroll to
Save and press Select.
7Write the e-mail message. See Write text. The number of characters you
can enter appears in the top right of the display.
8To stop writing and save a draft version of the e-mail, press Options, and
select Save draft msg.
9To send the e-mail message, press Options, select Send e-mail, and press
Ok.
10 Select
•Send now to send the e-mail immediately. If you are not currently
connected to the e-mail account, your phone establishes the
connection first and then sends the e-mail.
73
Copyright © 2003 Nokia. All rights reserved.
•Send later saves the e-mail in the Outbox folder. If you want to edit
or continue writing your e-mail later, you can save it in Drafts by
selecting Save to drafts.
Sending the e-mail later: Press Menu, and select Messages, E-mail,
Outbox and Send now.
Other options available for an e-mail application
•Details gives additional information about the application.
•Service settings activates the network connection settings for your
e-mail function.
•Application activates settings that are used for the e-mail
application.
•Default confirms that your e-mail function uses the same settings as
the WAP browser. Contact your e-mail service provider, if in doubt.
Downloading e-mail messages from your e-mail account
You have two choices when checking your e-mail: Retrieve, or Send and
retrieve.
1Press Menu, then select Messages, E-mail, Open.
Scroll to Retrieve to download e-mail messages sent to your e-mail
account.
OR:
Scroll to Send and retrieve to download new e-mail messages and to send
e-mails that have been saved in the Outbox folder.

74
Copyright © 2003 Nokia. All rights reserved.
Your phone makes a connection to the e-mail service. A waiting bar is
shown, while your phone is downloading e-mail messages to your phone.
If the message memory is full, delete some of your older messages before
you start to download new messages.
2To view a new message, press Select or to view it later, press Back to.
To read the e-mail later, press Menu, select Messages, E-mail, Open, and
Inbox.
3If more than one message is received, select the message you want to
read.
An unread e-mail message is indicated by .
Replying to an e-mail message
1While reading or viewing the message, press Options.
You can, for example, select an option to delete, reply, reply to all, forward
or archive the message you are reading.
2Select Reply.
3Select Original text to include the original message in the reply or select
Empty screen.
4Write your reply.
5When finished, press Options, and select Send e-mail and Send now to
send the message to the displayed number.
75
Copyright © 2003 Nokia. All rights reserved.
Inbox, Outbox, Deleted items, Sent items, Drafts, and
Archive folders
Your phone has the following folders in the E-mail menu:
•Inbox for saving e-mails that you have downloaded from your e-mail
account.
•Outbox for saving e-mails that have not been sent. See Writing and
sending an e-mail with the SMS Method.
•Deleted items for e-mails that have been deleted.
•Sent items for saving e-mails that have been sent.
•Drafts for saving unfinished e-mails.
•Archive for organizing and saving your e-mails.
E-mail settings
These settings may already be set up in your phone (depending on your service
provider). If you must enter the settings manually, refer to the table below.
1Press Menu, then select Messages, E-mail, Open, and Settings.
2Select Mailbox in use to view a list of mailboxes, then scroll to the one
you want to edit and select it.
You have five mailboxes that you can use for the e-mail settings of your
phone for saving and retrieving e-mail messages.
3Select Edit active mailbox and select each of the settings one by one.
Enter the required settings according to the information received from
76
Copyright © 2003 Nokia. All rights reserved.
your mail service provider.
Setting Explanation
Mailbox name The name for the mailbox.
E-mail address Your e-mail address.
My name Adds a nickname to your e-mail address.
Outgoing
(SMTP) server
Address for the outgoing (SMTP) server. For example,
smtp.mail.com.
Outgoing
(SMTP) port
SMTP port number for outgoing e-mails (common
value is 25).
Use SMTP
authorization
Set to On, if required for sending e-mails. If not,
select Off.
SMTP user name User name for outgoing e-mails (if required); found
in the first part of your e-mail address.
SMTP password Password for outgoing e-mails (if required).
Include
signature
Personal signature automatically added to e-mail.
Incoming
(POP3/IMAP)
server
E-mail server type for the incoming e-mail. Changing
the server type also changes the incoming port
number.
77
Copyright © 2003 Nokia. All rights reserved.
Incoming
(POP3/IMAP)
port
Port number: 110 for POP3 and 143 for IMAP.
POP3/IMAP user
name
User name to access the mailbox; found in the first
part of your e-mail address.
POP3/IMAP
password
Password to access the mailbox.
Reply-to
address
Sends incoming replies to a different mailbox.
Incoming server
type
Either POP3 or IMAP4. If both types are supported,
select IMAP4. Changing the server type also changes
the incoming port number.
Secure login
APOP
For POP3 only: On for the connection requiring an
encrypted login, otherwise Off.
Retrieve mails Enter the maximum number of emails to be retrieved
at a time.
Setting Explanation

78
Copyright © 2003 Nokia. All rights reserved.
Voice messages
Voice mailbox is a network service, and you may need to subscribe to it.
Contact your service provider to get your voice mailbox number and more
information.
Press Menu, and select Messages and Voice messages. Select:
•Listen to voice messages to call your voice mailbox at the phone number
that you have saved in the Voice mailbox number menu.
Each phone line may have its own voice mailbox number, see Line for
outgoing calls.
•Voice mailbox number to key in, search for or edit your voice mailbox
number and press OK to save it.
If supported by the network, the indicator will show new voice messages.
Press Listen to call your voice mailbox number.
Note: Pressing and holding calls your voice mailbox.
Info messages
With the info message network service you can receive messages on various
topics from your service provider, for example weather or traffic conditions.
For available topics and the relevant topic numbers, contact your service
provider.

79
Copyright © 2003 Nokia. All rights reserved.
If the GPRS connection is set to Always online, the info messages may not be
received. In that case, set the GPRS connection to When needed. See Settings
when GPRS is the selected data bearer.
Message settings
The message settings affect the sending, receiving, and viewing of messages.
Settings for text messages
1Press Menu, and select Messages, Message settings, Text messages, and
Sending profile.
2If more than one message profile set is supported by your SIM card, select
the set you want to change.
• Select Message center number to save the phone number of the
message center that is required for sending text messages. You will
receive this number from your service provider.
• Select Messages sent as to select the message type Text, E-mail,
Paging, or Fax.
• Select Message validity to select the length of time for which the
network should attempt to deliver your message.
• For message type Text, select Default recipient number to save a
default number for sending messages for this profile.
For message type E-mail, select E-mail server to save the e-mail
server number.
80
Copyright © 2003 Nokia. All rights reserved.
• Select Delivery reports to ask the network to send delivery reports for
your messages (network service).
• Select Use GPRS to set GPRS as the preferred SMS bearer.
• Select Reply via same center to allow the recipient of your message
to send you a reply using your message center (network service).
• Select Rename sending profile to change the name of the selected
message profile. The message profile sets are displayed only if your
SIM card supports more than one set.
Overwrite settings
When the text message memory is full, the phone cannot receive or send any
new messages. However, you can set the phone to automatically replace old
text messages in the Inbox and Sent items folders with the new ones.
Press Menu, and select Messages, Message settings, Text messages, and
Overwriting in inbox or Overwriting in sent items. Select Allowed to set the
phone to replace the old text messages with new ones in the Inbox or the Sent
items folder, respectively.
Settings for multimedia messages
1Press Menu, and select Messages, Message settings, and Multimedia
msgs.
2Select one of the following:
•Save sent messages. Select Yes to set the phone to save sent multimedia
messages in the Sent items folder. If you select No, the sent messages are
not saved.
81
Copyright © 2003 Nokia. All rights reserved.
•Allow multimedia reception. Choose No, Yes, or In home network to use
multimedia service. If you choose In home network, you cannot receive
multimedia messages when outside your home network.
•Incoming multimedia messages. Select Retrieve to set the phone to
automatically fetch newly received multimedia messages, or select
Decline if you do not wish to receive multimedia messages.
•Connection settings. Define WAP connection settings for retrieving
multimedia messages. Activate the set where you want to save the
connection settings and then edit the settings.
•Settings' name. Key in the new name for the connection set and press
OK.
•Homepage. Key in the homepage address of the WAP service that you
want to use and press OK.
•Session mode. Select Permanent or Temporary.
•Data bearer. Select GPRS.
•Bearer settings.
•GPRS access point. Key in the access point name and press OK. An
access point name is needed to establish a connection to a GPRS
network. You obtain the access point name from your network
operator or service provider.
•IP address. Key in the address and press OK. You obtain the IP
address from your network operator or service provider.
82
Copyright © 2003 Nokia. All rights reserved.
•Authentication type. Select Secure or Normal.
•User name. Key in the user name and press OK.
•Password. Key in the password and press OK.
•Allow advertisements. You can receive or decline advertisements.
Receive multimedia connection settings as a text message
You may receive the service settings as a text message from the network
operator or service provider that offers the WAP service that you want to use.
For more information, contact your network operator or service provider.
Other settings (font size)
To select the font size for reading and writing messages, press Menu, and
select Messages, Message settings, Other settings and Font size.
Service commands
Press Menu, and select Messages and Service commands. Key in and send
service requests (also known as USSD commands), such as activation
commands for network services, to your service provider.

83
Copyright © 2003 Nokia. All rights reserved.
Call log (Menu 2)
The phone logs the phone numbers of missed, received
and dialed calls, and the approximate length and cost of
your calls.
Missed and received calls are logged only if the network supports these
functions. The phone must be switched on and within the network’s service
area.
When you press Options in the Missed calls, Received calls and Dialed
numbers menu, you can, for example, view the date and the time of the call,
edit or delete the phone number from the list, save the number in Contacts,
or send a message to the number.
Recent calls lists
Press Menu, and select Call log; then select one of the following:
•Missed calls is a system service that allows you to view a list of the last
ten phone numbers from which somebody has tried to call you. The
number in front of the name or phone number indicates the amount of
call attempts from that caller.
Note: When a note about missed calls is displayed, press List to
access the list of phone numbers. Scroll to the number you want to
call back and press .
•Received calls is a system service that allows you to view the list of the
last 10 phone numbers from which you have most recently accepted calls.

84
Copyright © 2003 Nokia. All rights reserved.
•Dialed numbers to view the list of the 20 phone numbers that you have
most recently called or attempted to call. See also Last number redialing.
•Delete recent call lists to delete the recent calls lists. Select whether you
want to delete all the phone numbers in the recent call lists, or only those
numbers in the missed calls, received calls or dialed numbers lists. You
cannot undo the operation.
Call counters and call timers
Note: The actual invoice for calls and services from your service
provider may vary, depending upon network features, rounding-off for
billing, taxes and so forth. Some timers may be reset during service or
software upgrades.
Press Menu, and select Call log, then Call timers to view:
•Duration of last call, shows the approximate duration of your last call in
hours, minutes and seconds. To clear the timers, the security code is
needed.
•Duration of received calls, shows the approximate duration of your
received calls in hours, minutes and seconds since the timers were last
reset. To clear the timers, the security code is needed.
•Duration of dialed calls, shows the approximate duration of your dialed
call in hours, minutes and seconds since the timers were last reset. To
clear the timers, the security code is needed.
85
Copyright © 2003 Nokia. All rights reserved.
•Duration of all calls, shows the approximate total of the duration of your
last call, received calls, and dialed calls in hours, minutes and seconds
since the timers were last reset. To clear the timers, the security code is
needed.
•Clear timers, resets the timers to zero on each of the call log timers. A
security code is needed to clear the timers.
Each phone line has its own call timers and the timers of the selected line
are displayed. See Line for outgoing calls.
•Call costs (system service). Select Last call units or All calls' units to check
the cost of your last call or all calls in terms of units specified within the
Show costs in function.
Select Call cost settings and select Clear counters to clear the counters,
or select Show costs in to set the phone to show the remaining talk time
in terms of charging units, Units, or units of currency, Currency. Contact
your service provider for charging unit prices.
Select Call cost limit to limit the cost of your calls to a certain amount of
charging units or units of currency. The PIN2 code is needed for the call
cost settings.
Note: When no more charging units or currency units are left, calls
may only be possible to the emergency number programmed into your
phone (e.g. 911).
86
Copyright © 2003 Nokia. All rights reserved.
GPRS data counter
With the GPRS data counter you can check the amount of data sent and
received data in last session, data sent and received in total, and to clear the
counters. The counters unit is a byte. To clear the counters, the security code
is needed.
GPRS connection timer
With the GPRS connection timer you can check the duration of the last GPRS
connection or the total GPRS connection since the timers were last reset. You
can also clear the timers. To clear the timers, the security code is needed.
87
Copyright © 2003 Nokia. All rights reserved.
Contacts (Menu 3)
You can save up to 500 names in Contacts, with multiple
numbers and text notes for each name. The amount of
numbers and text entries that you can save may vary, depending on their
length and the total number of entries in Contacts.
You can save names and phone numbers in the phone’s memory (internal
contacts list) and in the SIM card’s memory (SIM contacts list). Names and
numbers saved in the SIM card’s memory, are indicated by .
View the Contacts menu
1At the Start screen, press the right selection key under Contacts. The
menu items in the left column of the following table appear in the display.
2Scroll to an item. Press Select to activate the feature or enter its
submenu.
Menu item Function
Find Find a name or select from a list
Add contact Add a name to your Contacts list
Edit name Edit an existing name
Delete Delete a name and its associated numbers
88
Copyright © 2003 Nokia. All rights reserved.
Copy Copy entries from Phone memory to SIM and vice versa
Add number Add a number to an existing name
Settings Set memory in use (Phone or SIM), change your
contacts list view, and check the memory status of your
Phone and SIM card
1-touch
dialing
Display the list of 1-touch dialing numbers saved
to memory
Voice tags Display a list of voice tags saved
Service
numbers
Display a list of numbers related to your
wireless service provider
Own numbers View the numbers (line 1, Work, HOME) in use by your
SIM card
Caller groups View and edit the properties (such as the ring tone) for
any of the caller groups
Menu item Function

89
Copyright © 2003 Nokia. All rights reserved.
Find a name in Contacts
1Press Contacts and select Find.
2You can key in the first characters of the name you are searching for in
the pop-up window.
Press and to scroll through the names in the list, and or to
move the cursor in the pop-up window.
3Scroll to the name you want, and press Details. Scroll to view the details
of the selected name.
Note: To quickly find a contact and phone number, press or in
standby mode. Key in the first letter(s) of the name, and/or scroll to
the name you want.
Add a contact using the Contacts menu
You can save names and numbers to phone memory or to SIM memory.
1At the Start screen, press Contacts, scroll to Add contact and press Select.
2Enter a name using the keypad and press OK.
3Enter a number and press OK.
4Press Done to return to the Start screen. To key in the numbers, see Make
a call.
Note: In standby mode, key in the phone number. Press Options, and
select Save. Key in the name, press OK and Done.
90
Copyright © 2003 Nokia. All rights reserved.
Quickly save a name and number
1At the Start screen, enter the phone number you wish to save.
2Press Options, ensure Save is highlighted, and press Select.
3Enter a name for the number and press OK.
A confirmation message appears in the display indicating your entry has
been saved.
Quickly save (only) a number
You can save a phone number as a stand-alone entry in Contacts.
1At the Start screen, enter the number you wish to save.
2Press and hold Options.
A message appears in the display confirming your number is saved.
Edit a name, number or text item
Search for the contact name (and number) you want to edit and press Details.
Scroll to the name, number or text item you want to edit, and press Options.
Select Edit name, Edit number, or Edit detail, and edit the name, number, or
text and press OK.
91
Copyright © 2003 Nokia. All rights reserved.
Delete names and numbers
Press Contacts and select Delete.
• To delete contact names and numbers one by one, select One by one and
scroll to the name (and number) you want to delete. Press Delete and
press OK to confirm.
• To delete contact names and numbers all at once, select Delete all. Then
select Phone or SIM card and press Delete. Press OK and confirm with the
security code.
Copy Contacts
You can copy names and phone numbers from the phone memory to your SIM
card memory and vice versa.
1Press Contacts and select Copy.
2Select the copying direction, From phone to SIM card or From SIM card to
phone.
3Select One by one, All or Primary numbers.
If you select One by one, scroll to the name you want to copy and press
Copy.
Primary numbers is shown if you copy from the phone to the SIM card.
Only the Primary numbers will be copied.
4To choose whether you want to keep or delete the original names and
numbers, select Keep original or Move original.
92
Copyright © 2003 Nokia. All rights reserved.
If you select All or Primary numbers, press OK when Start copying? or
Start moving? is displayed.
Caution: Select Keep original if you’re unsure of which copy method
to use. This ensures original entries are merely copied to the new
location. Move original deletes files after copying.
Add number
Save multiple numbers and text items per name
You can save different types of phone numbers and short text items per name
to Contacts. The first number you save for any entry is automatically set as
the default, or primary number.
1Press or in standby mode and scroll to the name you wish to add a
number or text item.
2Press Details, and then press Options.
3Scroll to Add number or Add detail and press Select.
4Scroll to one of the following types and press Select:
5Enter the number or text for the type you’ve selected and press OK.
General Mobile Home Work Fax
E-mail
address
Web address Street
address
Note

93
Copyright © 2003 Nokia. All rights reserved.
6To change the type, select Change type in the options list.
Change the default (primary) number
1At the Start screen, press or and scroll to the entry you wish to
change and press Details.
2Scroll to the number you wish to set as default and press Options.
3Scroll to As primary number and press Select.
Send and receive a business card
You can send and receive a person’s contact information as a business card as
an Over The Air (OTA) message if supported by the network.
Receive a business card
When you have received a business card as an OTA message, press Show. Press
Save to save the business card in the phone’s memory. To discard the business
card, press Exit and then OK.
Send a business card
You can send a business card as an OTA message to a compatible phone or
other handheld device which supports the vCard standard.
1Search for the name and phone number you want to send from Contacts,
press Details and Options and select Send bus. card.
2To send the business card as an OTA message, select Via text message.
Save addresses and notes
To save an E-mail address, you’ll need to add it to an existing entry (name).
94
Copyright © 2003 Nokia. All rights reserved.
1Find the entry (name) in your contacts to which you’d like to add an
address or note.
2With the entry highlighted, press Options, scroll to Add detail and press
Select.
3Scroll to the address or note of your choice and press Select.
4Enter the text for the note or address and press OK.
Settings
Press Contacts and select Settings. Select
•Memory in use to select the Contacts list you want to use. To recall names
and numbers from both lists, select Phone and SIM. The names and
numbers will be saved in the phone and SIM memory. Or you can select
to save in either the Phone or SIM card.
•Contacts view to select how the names (and numbers) in the Contacts list
are displayed.
•Memory status to see how many names and phone numbers are currently
saved and how many can still be saved in the selected contacts list.
1-touch dialing
You can associate any entry in your contacts list with keys 2 through 9 and
then dial those entries by pressing and holding the assigned key.

95
Copyright © 2003 Nokia. All rights reserved.
Assign a key to 1-touch dialing
1At the Start screen, press Contacts, scroll to 1-touch dialing and
press Select.
2Scroll to any empty slot and press Assign.
3Enter the number (including the area code) and press OK, or press Find to
retrieve a number from your contacts list.
4Press Select and view the number.
5Press Select and the number is assigned to the empty slot.
OR
6Enter a name for the number and press OK.
If 1-touch dialing is off, the phone displays a prompt asking if you’d like
to turn 1-touch dialing on. Press Yes to activate 1-touch dialing.
7The entry appears in the slot you’ve assigned.
Make a call with 1-touch dialing
Press and hold the key to which an entry has been assigned. Your phone dials
the entry assigned to the key. See 1-touch dialing.
Change 1-touch dialing numbers
1At the Start screen, press Contacts, scroll to 1-touch dialing and
press Select.
2Scroll to the 1-touch dialing entry you wish to change and
press Options.

96
Copyright © 2003 Nokia. All rights reserved.
3Scroll to Change and press Select.
4Enter the new number, or press Find to retrieve a number from your
Contacts list, and press OK.
5Enter a name for the entry and press OK.
Delete 1-touch dialing numbers
1At the Start screen, press Contacts, scroll to 1-touch dialing and
press Select.
2Scroll to the 1-touch dialing location you wish to delete and
press Options.
3Scroll to Delete and press Select. You’re asked to confirm the deletion.
4Press OK to delete the key assignment.
Voice tags
Press Contacts and select Voice tags to view the list of voice tags you have
saved. See Add a voice tag to a contact to use the voice dialing feature which
allows handsfree operation while you place a call.
View Info, Service, and Own numbers
Your wireless service provider may have saved your phone’s operating number,
as well as various information and service numbers to your SIM card.
Note: This feature may not be supported by your SIM card. If so,
contact your wireless service provider for more information.

97
Copyright © 2003 Nokia. All rights reserved.
1Press Contacts at the Start screen, scroll to one of the number types in
the following table, and press Select.
2To view details of any of the number types in the previous table, press
Details when the number type appears in the display.
Caller groups
You can add contacts list entries to any of 5 caller groups, and then assign a
unique ringing tone or graphic to that group. This enables you to identify
callers from the group by their unique ringing tone or graphic. A caller group
can be as small as one person or as large as your entire contacts list. Caller
groups can be renamed to suit your preference.
Number type Used this number to...
Info numbers Contact your wireless service provider to obtain
information
Service numbers Contact your wireless service provider to obtain
service
Own numbers Display the operating number, or numbers which have
been assigned to your phone by your wireless service
provider
98
Copyright © 2003 Nokia. All rights reserved.
Caller group options
1At the Start screen, press Contacts, scroll to Caller groups, and press
Select. The following Caller groups are available.
2Use the scroll keys to highlight a group. Press Select to display the
following caller group options:
Setup a caller group
1At the Start screen, press and t0 display a list of entries in your
Contacts.
Note: Perform a “quick find” when Contacts entries are displayed by
entering the first letter of a name. appears at the bottom of the
display to indicate you’re performing a search.
2Scroll to a name you’d like to add to a caller group and press Details.
3Press Options, scroll to Caller groups, and press Select.
4Scroll to the caller group to which you’d like to add the name and press
Select. A confirmation message appears in the display.
Family VIP Friends Business Other
Rename group Rename the group to your preference
Group ringing tone Set the ringing tone for the group
Group logo Turn the graphic for the caller group on or off
Group members Add or remove members from the caller group