Microsoft NEM-2 GSM850/1900 Cellular Telephone User Manual 3300 ENv1 9355979 060503 CDROM
Microsoft Mobile Oy GSM850/1900 Cellular Telephone 3300 ENv1 9355979 060503 CDROM
Contents
- 1. Manual part 1
- 2. Manual Part 2
- 3. Manual part 2
- 4. Manual part 3
- 5. Manual part 4
Manual part 4


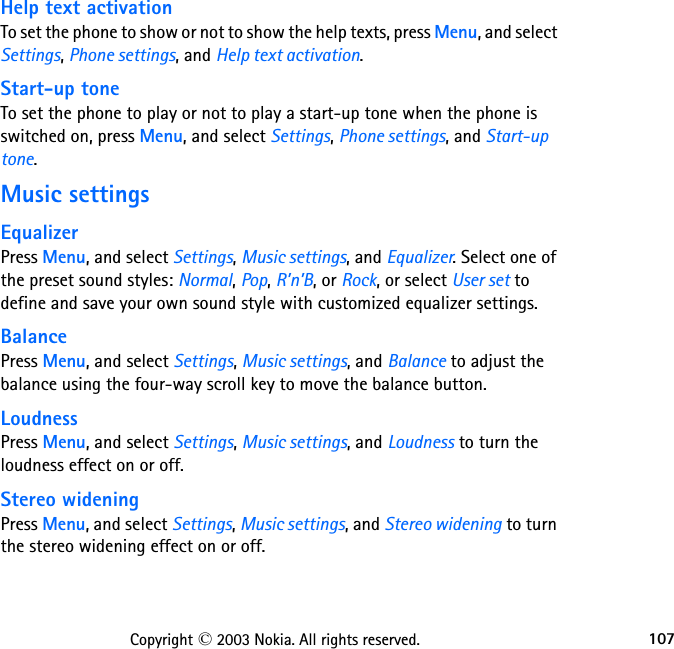


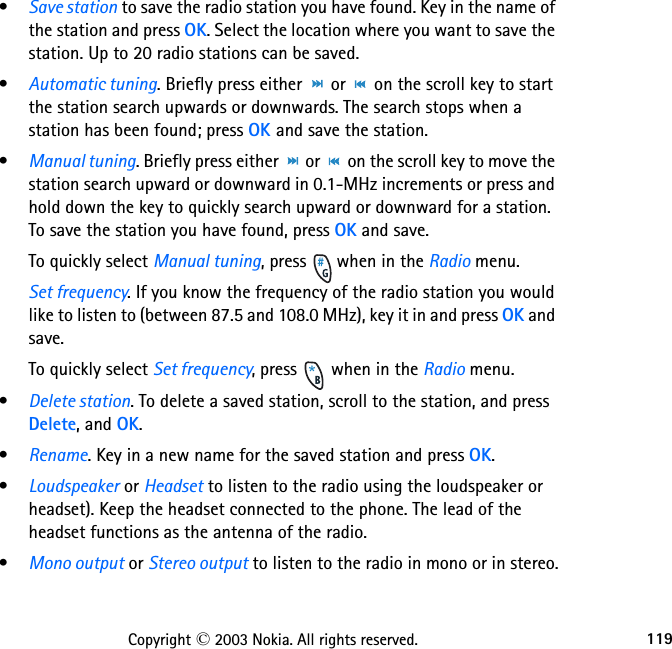


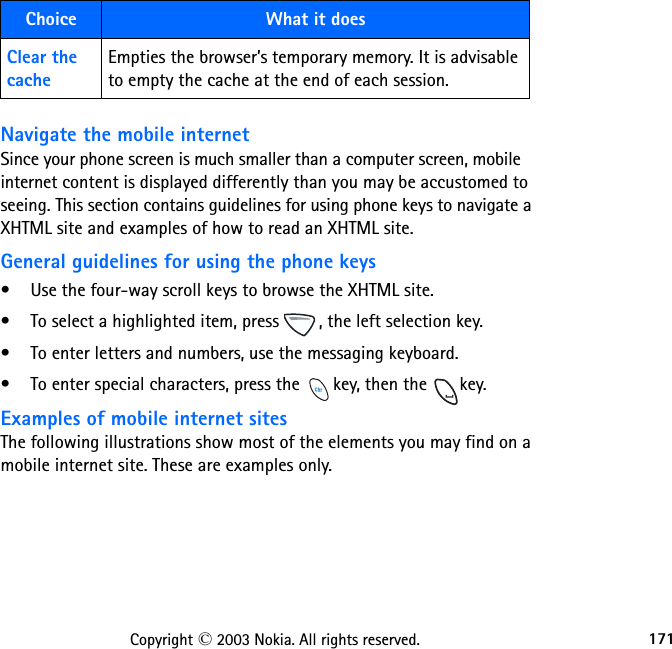
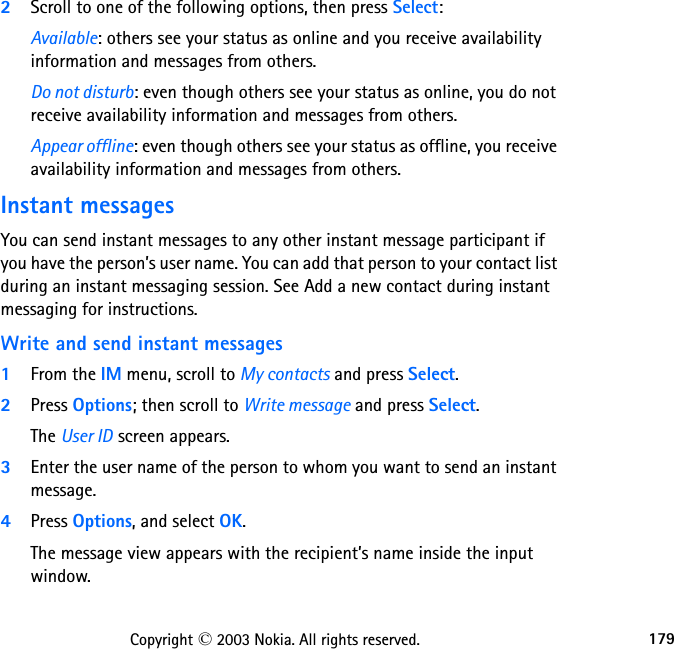
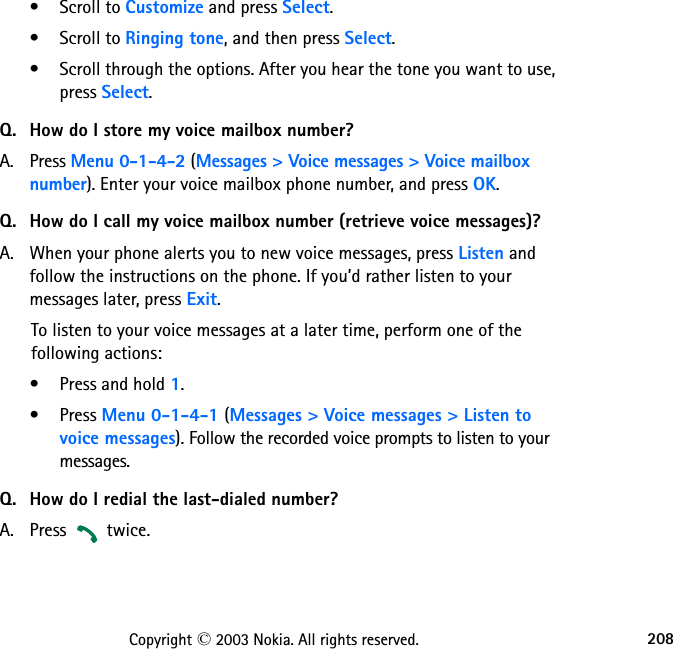
![172Copyright © 2003 Nokia. All rights reserved.1 Header line: shows the current mobile internet site.2 Active link: appears as a highlighted word.3 Inactive link: appears as an underlinedword. 4 Selection list: Brackets [ ] appear when you have the option to enter information.5 Options: Press Options to go to the site menu and/or browser page.6 Back: Press Back to return to the previous page.7 Data entry field: Brackets [ ] that enclose dots indicate when you need to enter information. In this example, you can enter your zip code to receive the local weather forecast.1234576](https://usermanual.wiki/Microsoft/NEM-2.Manual-part-4/User-Guide-333038-Page-74.png)