Mitel Networks 80-001224 IP Phone Base User Manual Regulatory Compliance and Safety Information
Mitel Networks IP Phone Base Regulatory Compliance and Safety Information
Contents
- 1. Manual 1
- 2. Manual 2
- 3. Manual 3
Manual 2
Model 57i CT Installation Guide 17
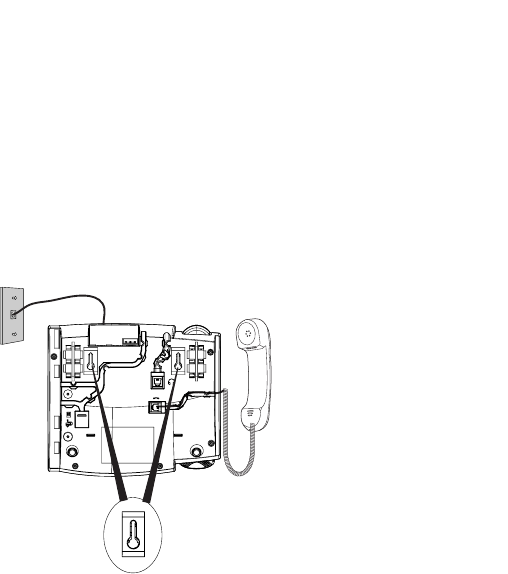
Installation and Setup – 57i CT Base Unit
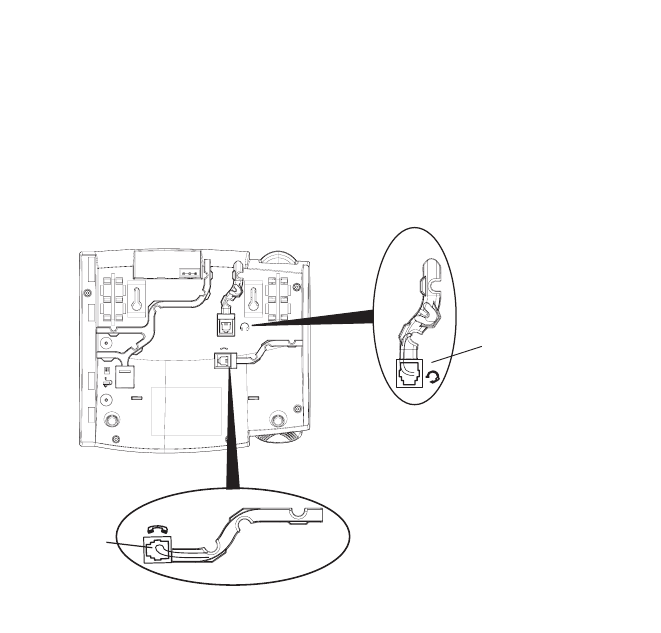
Connecting a Handset or Headset
Handset
Turn the phone over and locate the handset jack marked j. Insert one
end of handset cord into the jack until it clicks into place. Then route the
handset cord through the groove as shown in the illustration below. Attach
the handset to the other end of the handset cord.
Headset (Optional)
Turn the phone over and locate the headset jack marked f. Insert the
headset cord into the jack until it clicks into place. Then route the headset
cord through the groove as shown in the above illustration.
To Handset
To Headset

18 Model 57i CT Installation Guide
Installation and Setup – 57i CT Base Unit
Desk or Wall Installation
Install on the Desk
The desk installation for the 57i CT IP phone consists of two legs that attach
to the back of the phone near the top corners. A total of four different
viewing angles allows users to personalize their phone viewing preference.
Attach each leg by inserting the tabs on the leg into the slots on the bottom
of the phone. There are three pair of leg slots on each corner of the phone;
each leg uses two pairs (1&2, or 2&3) giving two leg positions designating
different viewing angles. Furthermore, the legs can be reversed which
offer two additional viewing angles.
For a higher viewing angle, use the second and third slots from the top. For
a lower viewing angle, use the first and second slots from the top. Then
push the stand towards the phone until it snaps into place.
Three stand slot locations
for customizing the height
of the desk phone.
Total 4 Viewing Angles
20.7 deg.
Incline Angle
23.3 deg.
Incline Angle
26.6 deg.
Incline Angle
30.9 deg.
Incline Angle
Model 57i CT Installation Guide 19
Installation and Setup – 57i CT Base Unit
Install on the Wall
The 57i CT IP phone has two pre-drilled wall mounting holes on the back
of the phone. Using the provided wall mount drilling template, locate and
mark the position for the mounting screws on the wall. Depending on the
wall type, you may need to use wall anchors. Both the screws and wall
anchors are included with your phone.
Place the wall mount holes on the phone over the screw heads on the wall
and pull down to lock the phone in.
Note: You may wish to purchase a short Ethernet cable from a local supplier for a
wall installation. Also, if 802.3af compliant in-line power is not provided on
your network, and you are installing the 57i or 57i CT base unit on a wall
using a PoE in-line power injector, you may also wish to use an equivalent
flat Ethernet cable rather than the one provided.
Wall Mount Holes
20 Model 57i CT Installation Guide
Installation and Setup – 57i CT Cordless Handset
Installation and Setup – 57i CT Cordless Handset
There are two steps involved in setting up the 57i CT cordless handset. The
charging cradle needs to be plugged in and the batteries need to be
installed in the handset.
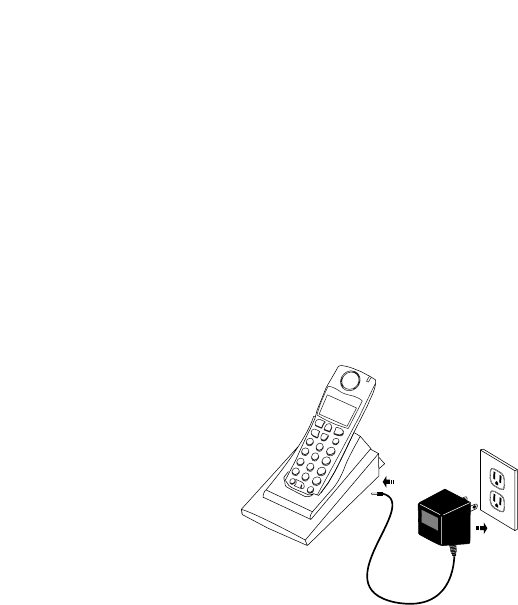
Charging Cradle
The charging cradle is designed to be placed on a desk or any appropriate
flat surface. To set up the charging cradle:
1. Plug the modular cord of the power adapter into the jack on the bottom
of the cradle. Route the cord through the retaining tabs of the molded
cord slot. Verify the cradle rests on all four feet and doesn’t wobble.
2. Plug the other end of the power adapter into a non-switched AC outlet.
It is recommended that the adapter should not be plugged into an elec-
trical power bar and should be the only item plugged into the AC outlet.
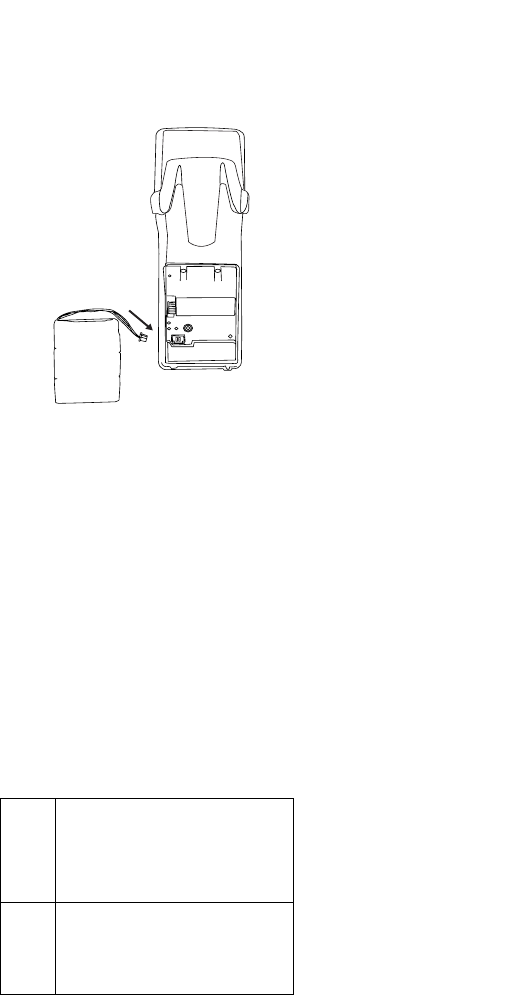
Battery Installation and Charging
The handset is powered by a nickel metal hydride battery pack. To install
and charge the battery:
1. Place the battery pack in the battery compartment with the connector
wires pointing towards the bottom of the handset
2. Connect the battery terminal wire to the charging pins within the bat-
tery compartment
3. Slide the cover of the battery compartment from the bottom of the hand-
set until it locks into place
4. Place the handset, face up, in the charging cradle. The handset should
easily slide into the charging cradle. If it does not, check the battery
compartment cover to ensure it is properly closed.
5. Check the battery icon on the handset screen to confirm that it is blink-
ing and that the battery is properly charging.
The cordless handset is automatically "factory paired" to the base station
and will establish contact with the base station once both units have been
successfully installed. This connection can be verified by checking for the
presence of the Reception range icon m beside the battery icon b on the
handset screen.
Non-switched
AC Outlet
Model 57i CT Installation Guide 21
Installation and Setup – 57i CT Cordless Handset
Note: The battery must be charged for a minimum of six hours prior to initial usage
of the handset.
Belt Clip
To install the belt clip, snap one arm of the clip into the slot on the side of
the handset and then slide the other arm into the slot on the other side of
the handset until it snaps into place.
Using a Headset with your Telephone
The 57i CT cordless handset accepts headsets through the jack on the
bottom of the handset. Contact your telephone equipment retailer or
distributor to purchase a compatible headset. Customers should read and
observe all safety recommendations contained in headset operating guides
when using any headset.
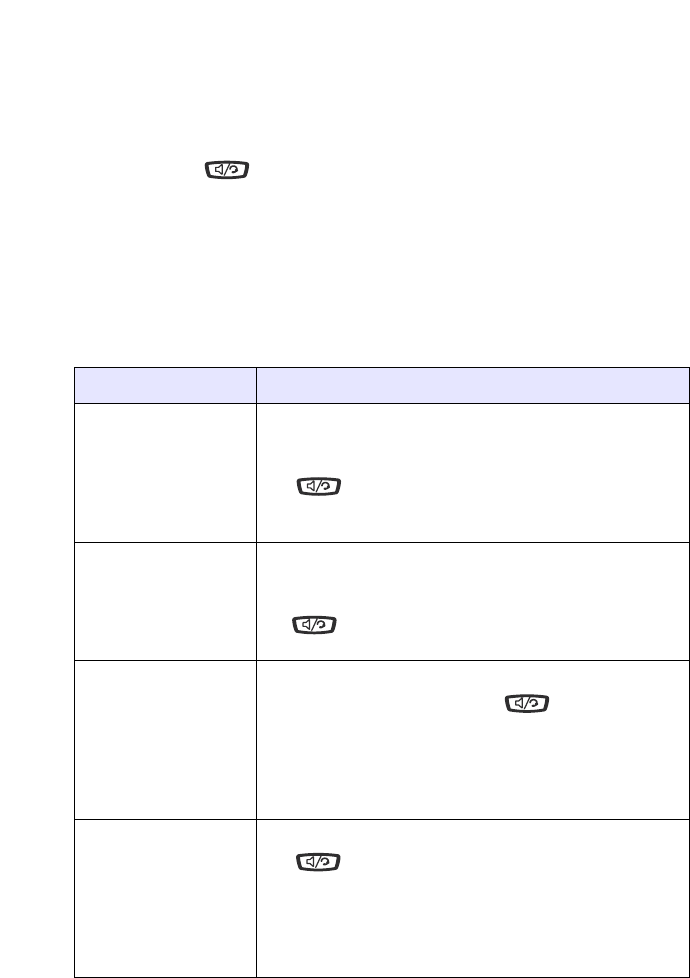
Battery Status Icons
The display provides “at a glance” information on the handset battery:
Note: The handset is designed to recharge the batteries automatically, when
required and placed on the charger stand. The battery icon will not flash and
the handset does not charge every time it is placed on the stand. If a defective
battery is replaced, then the battery icon is not identified until the new battery
is charged for at least 2 minutes.
d
c
b
a
The bars indicate the bat-
tery charge level — 4 for
full, needs recharging
when only 1 bar appears.
fThe bars will flash when
the battery is being
recharged on the charger
stand.
Handset
(face down)

22 Model 57i CT Installation Guide
Customizing your 57i CT Base Unit
Customizing your 57i CT Base Unit
There is a list of configuration options, accessed by pressing the
button.
Setting your Options
1. . Press the Options key on the phone to enter the options list.
2. To go to an Option, use and to scroll through the list, or press the
number corresponding to the Option.
3. Press the Show softkey, the button, or press the digit number of the
corresponding option to select an option.
4. Use the softkeys to change a selected option.
5. Press the Done softkey at any time to exit the option and save the change.
6. Press the Cancel softkey, the button, or the N button at any time
to exit without saving changes.
You can change the following options on the 57i and 57i CT:
Language
Select a language that you would like your phone to use for displaying
prompts and menus.
Note: Supported languages may vary depending on configuration. Contact your
Network Administrator for list of available languages.
Note: Supported languages may vary.
Time and Date
Use these options to set the local time on the phone. Depending upon the
configuration, time set here may be overwritten by the time on your phone
system. If you are having problems with this, contact your Network
Administrator.
• Time Server
Talk to your Network Administrator before making changes to this option.
If the Time Server option is enabled, the display shows the IP address
where the phone is getting time and date information from on the
Network. Whenever the phone starts up, it will automatically
attempt to find the Time Server. If the Time Server is not found and
unknown to the phone, the IP address will display as 0.0.0.0, and the
time and date in the main screen displays the equivalent of “12:00 am
Jan. 1st 2000". If the Time Server option is disabled, the display shows
“Network Time Disabled”. You can set the time and date manually on
your phone.
•Set Time
This option shows the Network time, if the Time Server option is
enabled. It also allows you to set the time manually.
Note: if you set the time manually, the phone will not try to synchronize the time with a
timeserver until the next time it is restarted.

Model 57i CT Installation Guide 23
Customizing your 57i CT Base Unit
• Time Format
Select a time format for how time displays on your phone (12h or 24h
clock).
•Set Date
This option shows the Network date, if the Timeserver option is
enabled. It also allows you to enter the date manually.
Note: if you set the date manually, the phone will not synchronize the date with a
timeserver until the next time it is restarted.
• Date Format
Choose from a list of formats for how the date displays on your phone.
•Time Zone
Choose your current time zone. Select your country by scrolling through
a list, or by entering the country code (i.e., CA, US), then pick from the
time zone list for that country.
• Daylight Savings
This option allows you to specify daylight savings.
Set Ring Tone/Tone Set
Use these options to set the preference of ring tone and call progress tones
for your phone.
• Ring Tone
Press the Change softkey to select one of the five ring tones or silent. Use
the volume bar to increase or decrease the ringer volume level.
•Tone Set
Press the Change softkey to select one of the seven predefined tone sets
for the phone to play country specific call progress tones such as dial
tone, ringing tone, busy tone, congestion tone, call waiting tone, and
ringing cadence.
Clear Message Waiting
To clear the Message Waiting Light, select the Clear softkey. The light will
flash again when there are new messages waiting.
Contrast Level
Use these options to set the preference of contrast level and backlight for
your phone.
• Contrast Level
Use the Change softkey to cycle through eight contrast settings, which
brighten or darken the display.
• Backlight
Use the Change softkey to cycle through different backlighting options of
OFF, ON, or Auto. Auto backlighting sets the phone to turn off the
backlighting after a period of inactivity; the idle period is user definable
under the Advanced softkey when you select the Auto option. The
backlight is turned on with a key press or state change on the phone.
24 Model 57i CT Installation Guide
Customizing your 57i CT Base Unit
Live Dialpad*
This option turns the Live Dial Pad mode ON or OFF. With live dial pad
ON, the 57i CT IP phone automatically dials out and turns ON Handsfree
mode as soon as a dial pad key or softkey is pressed. With live dial pad
OFF, if you dial a number while the phone is on-hook, lifting the receiver
or pressing the initiates a call to that number. Press the Change
softkey to turn ON or OFF the dial pad mode.
*Availability of feature dependant on your phone system or service provider.
Set Audio
The 57i CT allows you to use a handset, a headset, or handsfree to handle
incoming and outgoing calls. The audio mode option provides different
combinations of these three methods to provide maximum flexibility in
handling calls. There are four audio mode options to choose from:
Headset Mic Volume
To adjust the headset microphone volume, press Advanced after selecting
the audio option, and then select the Low, Medium, or High volume level.
Audio Mode Option Description
Speaker This is the default setting. Calls can be made or
received using the handset or handsfree
speakerphone. In handset audio mode, pressing
the button on the phone switches to
handsfree speakerphone. In Speaker audio mode,
lift the handset to switch to the handset.
Headset Choose this setting if you want to make or receive
all calls using a handset or headset. Calls can be
switched from the handset to headset by pressing
the button on the phone. To switch from the
headset to the handset, lift the handset.
Speaker/Headset Incoming calls are sent to the handsfree
speakerphone first when the button is
pressed. By pressing the button again, you can
switch back and forth between the handsfree
speakerphone and the headset. At anytime, lifting
the handset switches back to the handset from
either the handsfree speakerphone or the headset.
Headset/Speaker Incoming calls are sent to the headset first when
the button is pressed. By pressing the button
again, you can switch back and forth between the
headset and the handsfree speakerphone. At
anytime, lifting the handset switches back to the
handset from either the headset or the handsfree
speakerphone.

Model 57i CT Installation Guide 25
Customizing your 57i CT Base Unit
Call Forward
Use this option to call forward your phone. Use the and buttons to
move between the fields to set the call forward Number, Mode, and No.
Rings. The selectable call forward mode includes: All, Busy, NoAns (No
Answer), BusyNoAns (Busy No Answer), or Off; this is selected via the
and buttons.
Network
This is a system administrator level-only option, and requires a password
to access. See the SIP IP phone Aastra 53i, 55i, 57i, 57i CT
Administrator Guide for details.
SIP Settings
This is a system administrator level-only option, and requires a password
to access. See the SIP IP phone Aastra 53i, 55i, 57i, 57i CT
Administrator Guide for details.
Phone Status
This option allows you to:
• View your network status including your phone’s IP and MAC address
• View your firmware version
• Restart your phone
There is also a system administrator level-only option to reset the phone to
factory default settings. See your system administrator for details.
User Password
Use this option to change your user password.
Phone Lock
Use this option to lock the phone from unauthorized users. When the
phone is locked, users are unable to dial from the phone unless it has been
unlocked. To unlock the phone, press the button and enter either
the user or administrator password.
Note: While the phone is locked, only emergency number dialing is permitted. The
default permissible emergency numbers are 911, 999, 112, and 110; this is con-
figurable via the WebUI or configuration file.
Hint: To quickly lock your phone, press the button followed by the
key.

26 Model 57i CT Installation Guide
Customizing your 57i CT Cordless Handset
Customizing your 57i CT Cordless Handset
There are 10 phone configuration options available on the handset.
Highlighted in this guide are those options related to basic handset
operations. To learn more about all configuration options, please consult
the 57i CT User Guide.
To access the options list:
1. Press the μ key when the phone is not in use — the display will indicate
Use to view.Use the
ç and keys for scrolling.
2. Press y key to quit at any time and to return to the main idle display
screen.
Note: The Menu and Options display revert to the regular idle mode display if no
action/activity is initiated within 20 seconds.
Language
The 57i CT cordless handset offers a choice of English, French and Spanish
display languages. The default language setting is English. The language
display in use is always identified with a check mark.
To change the display language, follow the display menu prompts using
the two softkeys as required to change, cancel or select a language option.
The display will always show ƒconfirmedƒ when the selection is changed.
•Pressing the Cancel softkey will return you to the previous display.
•Pressing the y key will return you to the main idle display screen.
Ring Tone
The 57i CT cordless handset offers the choice of four different ring tones.
To change the ring tone, follow the display menu prompts using the two
softkeys as required to change, cancel or select a ring tone. Each of the
four ring tones can be heard prior to selection. The display will always
show ƒconfirmedƒ to indicate when a selection has been made.
•Pressing the Cancel softkey returns you to the options list.
•Pressing the y key returns you to the main idle display screen.
Call Timer
The duration of calls can be displayed by using this option. By default, the
Call Timer option is always Off.
• To turn the timer on, press the Change softkey and the display will indi-
cate Timer On and √confirmed- and will quickly return to the previous
menu display.
•Pressing the y key will return you to the main idle display screen.
Note: When the call timer is enabled, the timer starts with the commencement of the
first call and continues until all other lines have been released. Therefore, the
call timer is not usable for call accounting unless the user has only been on one
line during the timing interval. The call timer continues to increment even
when the call is on hold.

Model 57i CT Installation Guide 27
Customizing your 57i CT Cordless Handset
Vibrate
The Vibrate option allows the 57i CT cordless handset to signal an
incoming call by vibrating as well as ringing. By default, this option is
always Off.
• To enable this feature, press the Change softkey and the display will
indicate Vibrate On and-confirmed- and will quickly return to the previ-
ous menu display.
• Once the Vibrate is On, the p is shown beside the ringer icon on the top
right line of the display.
•Pressing the y key will return you to the main idle display screen.
Key Lock
The key lock option enables the user to lock the keypad keys. This
prevents accidental activation of the phone while carrying it, putting in a
pocket etc.
To lock the keys from the key lock option page:
•Press Change softkey to turn Key lock ON or Off. The screen will display
Key lock On or Key lock Off -confirmed-
•Pressing the y key will return you to the main idle display screen.
Note: You can activate the Key Lock Off or On by pressing only the μ key and then
the * asterisk key.
Backlight
The Backlight option enables the user to have the display diffuser lighted
or not when a keypad key is pressed. Press Change softkey to turn Backlight
ON or Off.
Once the Backlight option is chosen, the screen will display Backlight On or
Backlight Off -confirmed- .
Silent Alert
The Silent Alert option will activate an internal hardware vibrator instead
of a regular ringer during an incoming call. By default, the Silent Alert is
automatically set to Off.
To activate Silent Alert from the option display:
•Press Change softkey to turn alert On or Off. The display will show
√confirmed- and the handset will vibrate if the alert has been turned on
• Once the Alert is On, the p is shown on the Top line of the display.
Note: You can active or deactivate the Silent alert by pressing only the key and
then the – key. The Ringer Icon does not appear on the display when the
Silent alert is On.

28 Model 57i CT Installation Guide
Other Phone Features (57i CT Base Unit)
Other Phone Features (57i CT Base Unit)
Adjusting the Volume
Pressing the volume button adjusts the receiver, headset,
speaker, and ringer volume.
• To adjust the ringer volume, leave the handset in the cradle and press
the volume button while there is no active call. There are 10
settings for the ringer including Off — the display will temporarily
indicate the current ringer volume setting.
• To adjust the handset volume, lift the handset and press the volume but-
ton while the handset is off hook. The handset will remain at
this volume until it is adjusted again.
• To adjust the headset volume, press the volume button while
the headset is activated (activate the headset by pressing ; ensure
headset audio mode is set). The headset will remain at this volume until
it is adjusted again.
• To adjust the speaker volume, press the volume button while
the speaker is activated (activate the speaker by pressing ; ensure
handsfree speakerphone audio mode is set). The speaker will remain at
this volume until it is adjusted again.
Status Lights (LEDs)
The speaker LED, beside the key, and the Message Waiting
Indicator (MWI) LED, on the top right of your phone, provide visual
indications of your phone’s status.
Speaker LED
Message Waiting Indicator (MWI)
Speaker LED Status Description
ON solid Indicates a call is on Handsfree (speakerphone)
Slow Flash Indicates you are using the headset.
Rapid Flash Indicates the call is muted. Press to take the
call off mute.
MWI LED Status Description
Slow Flash Indicates you have a message(s).
Rapid Flash Indicates you have an incoming call.
Even Flash Indicates one or more calls are on hold.

Model 57i CT Installation Guide 29
Other Phone Features (57i CT Base Unit)
Call Timer
• When you make or answer a call, the Timer shows the elapsed time of
the call.
Softkeys
The 57i CT has 12 multi-functional softkeys:
• 6 Top Keys: programmable static softkeys (up to 10 programmable func-
tions)
• 6 Bottom Keys: programmable state-based softkeys (up to 20 program-
mable functions)
These keys are located at the center of the phone on either side of the
display panel. These softkeys make call handling and call managing
easier.
You can set these programmable softkeys to perform specific functions and
access enhanced services provided by third parties (using XML). Other
services include accessing Directory and Call Logs. You must use the
Aastra Web UI to configure the programmable softkeys.
Note: Availability of the services feature is dependant on your phone system and/
or service provider.
These keys can also be set up to quickly access features such as Call return
(*69) or Voicemail.
Note: Quick access features like Call return and Voicemail must first be configured on
your PBX in order to work on your phone. See your system administrator for
more information.
For more information about programmable keys on the 57i IP phone, see
the Aastra Model 57i CT IP Phone User Guide, or contact your System
Administrator.
For more information about softkeys on the 57i IP phone, see the
Aastra Model 57i CT IP Phone User Guide.