Mitel Networks RFP47DRC DECT base station User Manual SIP DECT OM System Manual EN 8 0 2018 09 28
Mitel Networks DECT base station SIP DECT OM System Manual EN 8 0 2018 09 28
UserManual.wiki
>
Mitel Networks
>
RFP47DRC User Manual
>
User Manual II
Contents
1.
User Manual I
2.
User Manual II
User Manual II
Navigation menu
Upload a User Manual
Namespaces
Wiki Guide
HTML
PDF
Info
Views
User Manual
Discussion / Help
Navigation
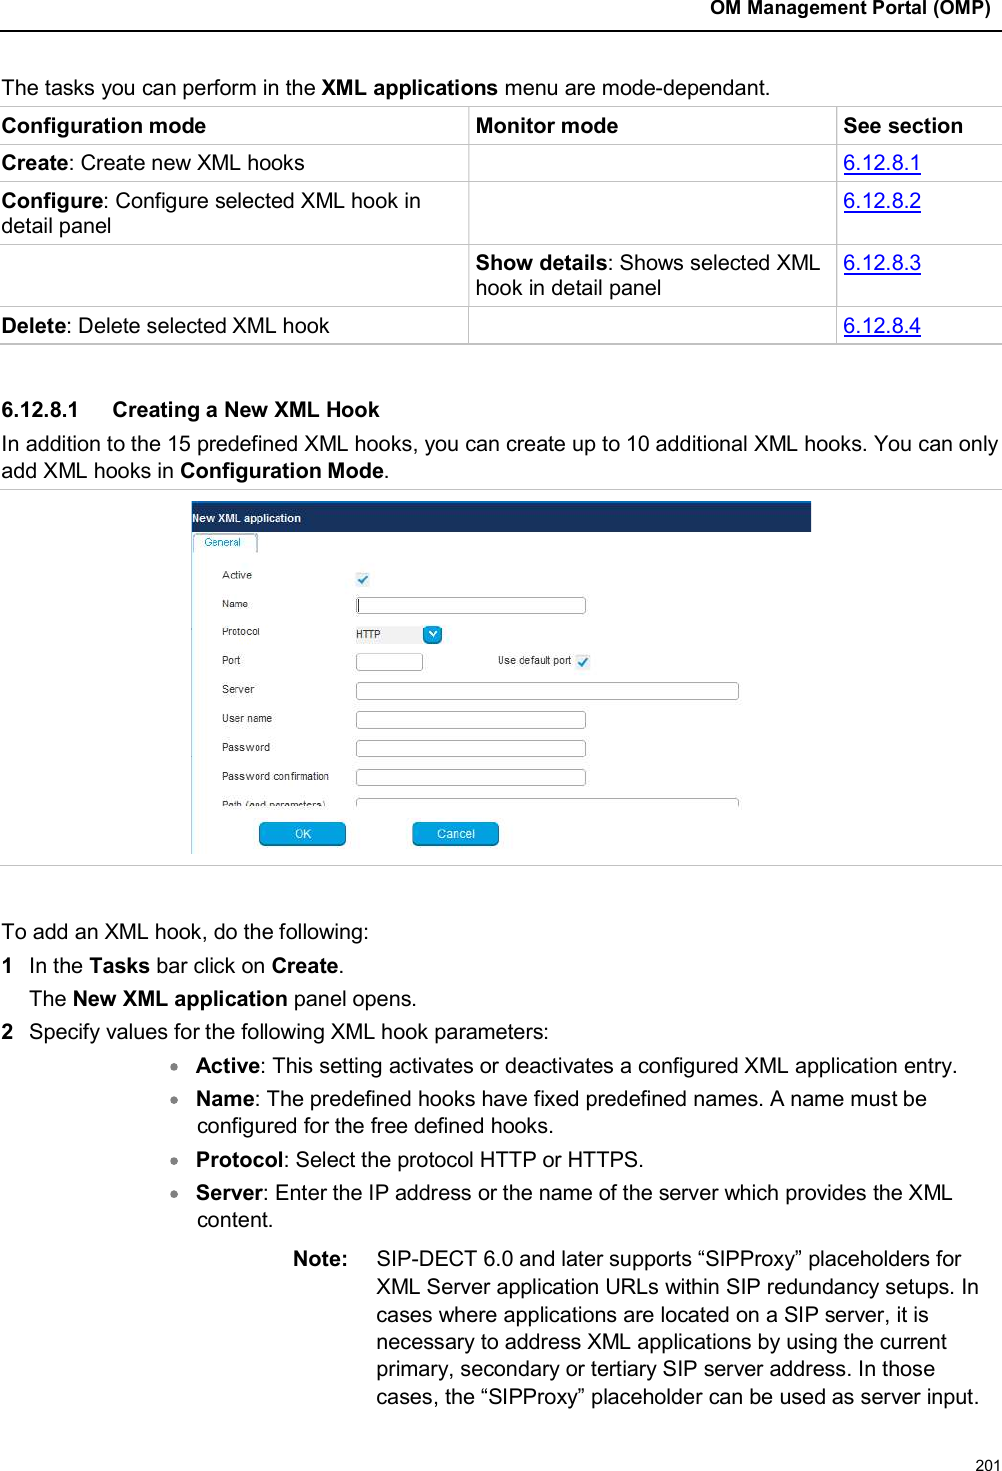


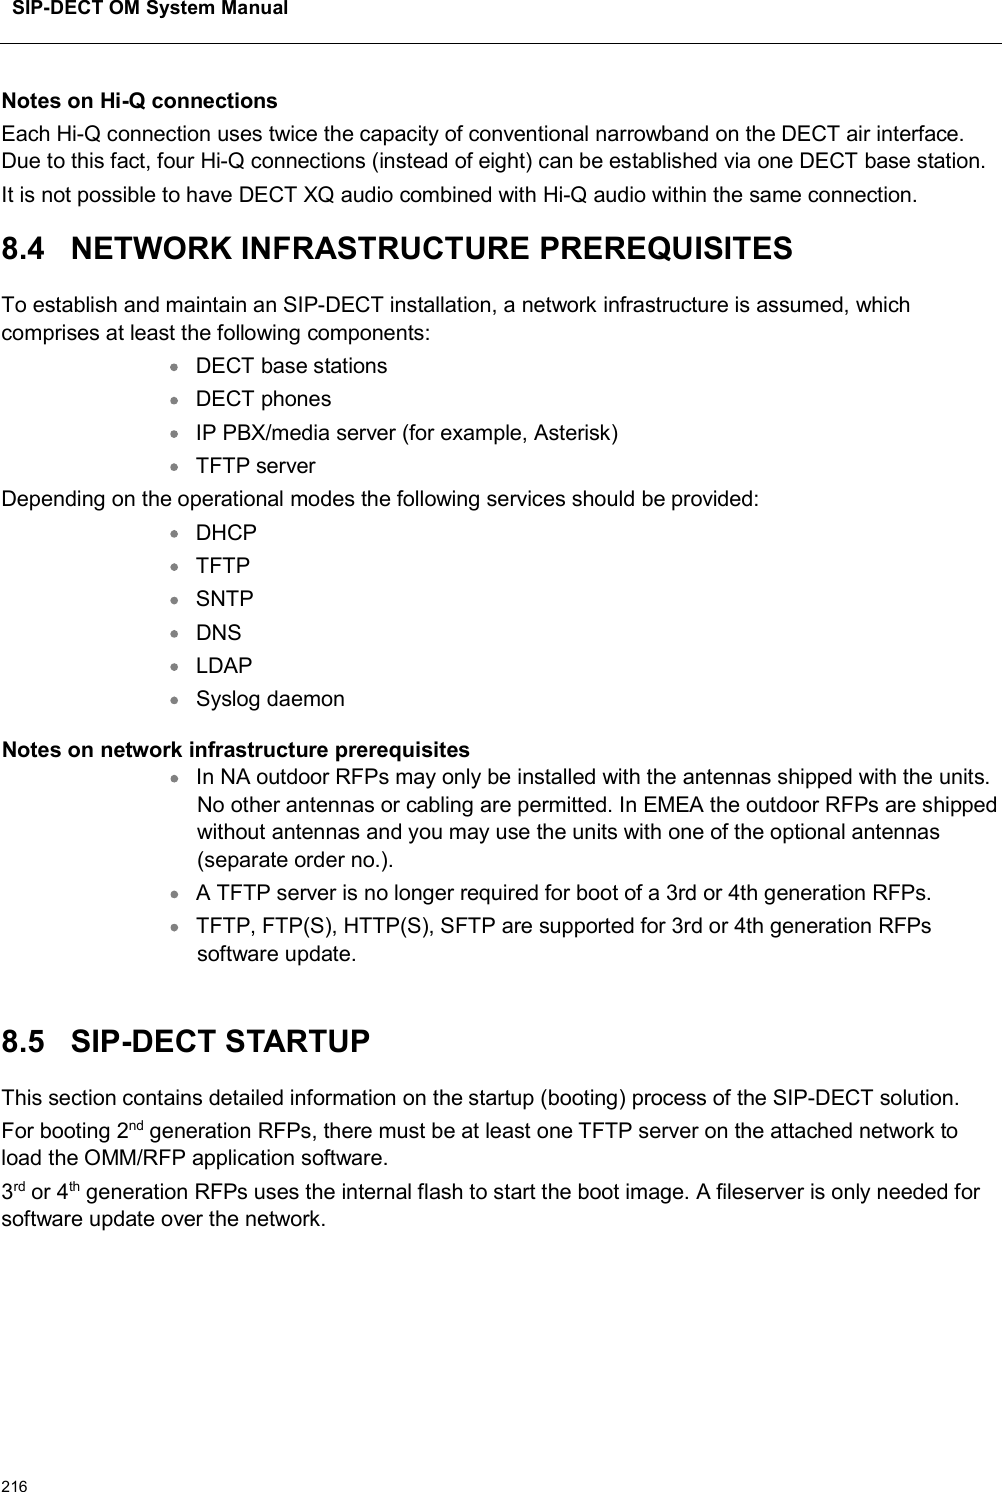

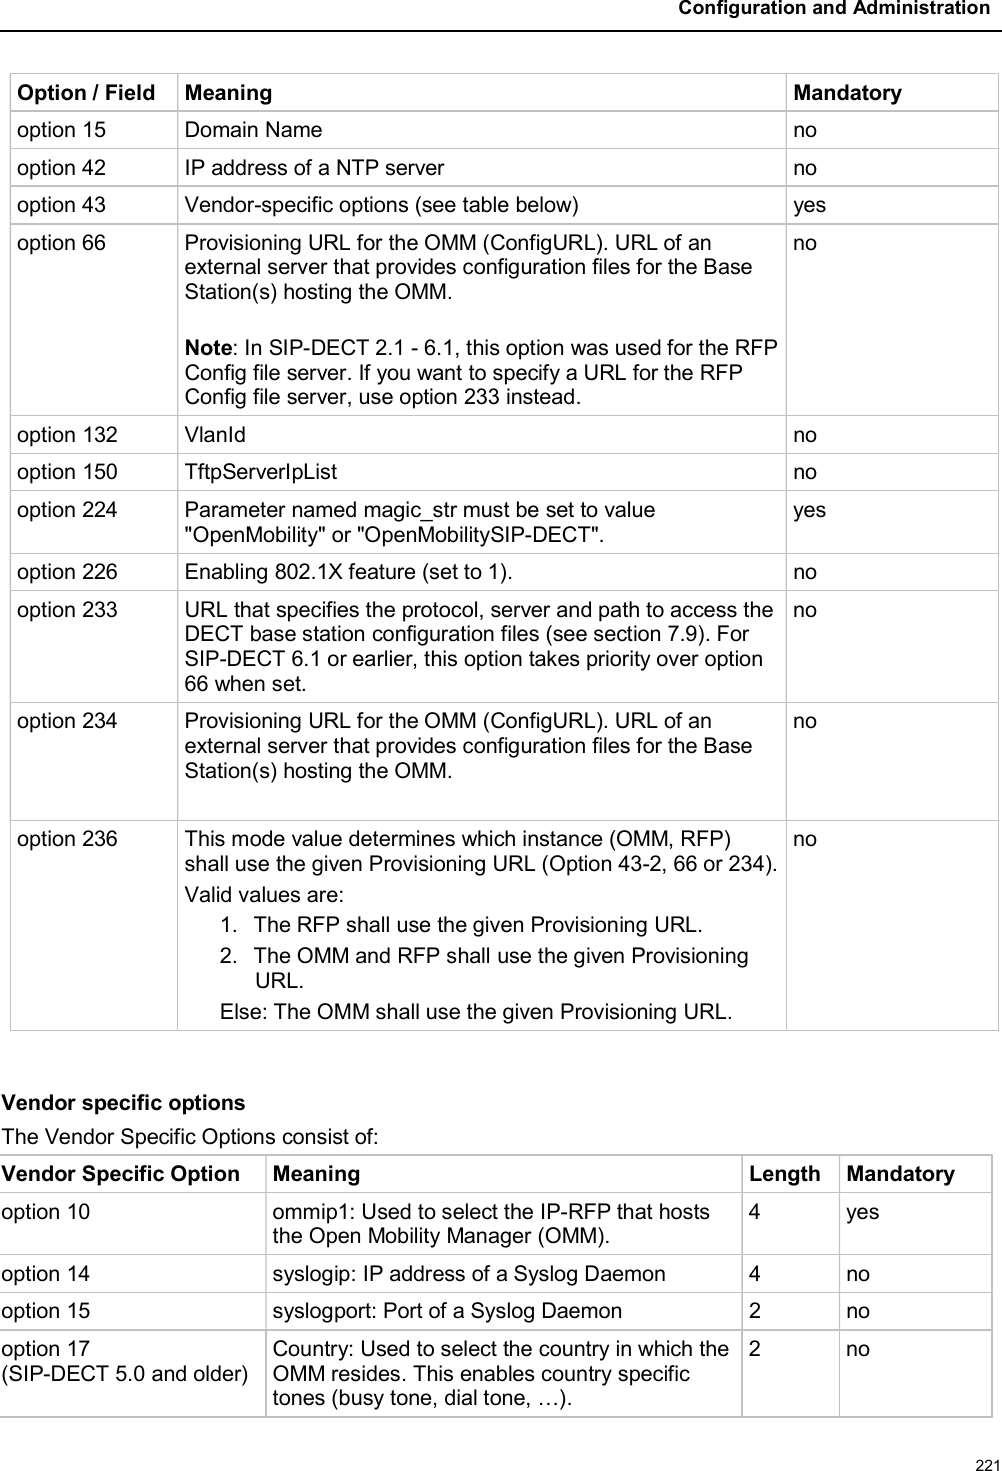

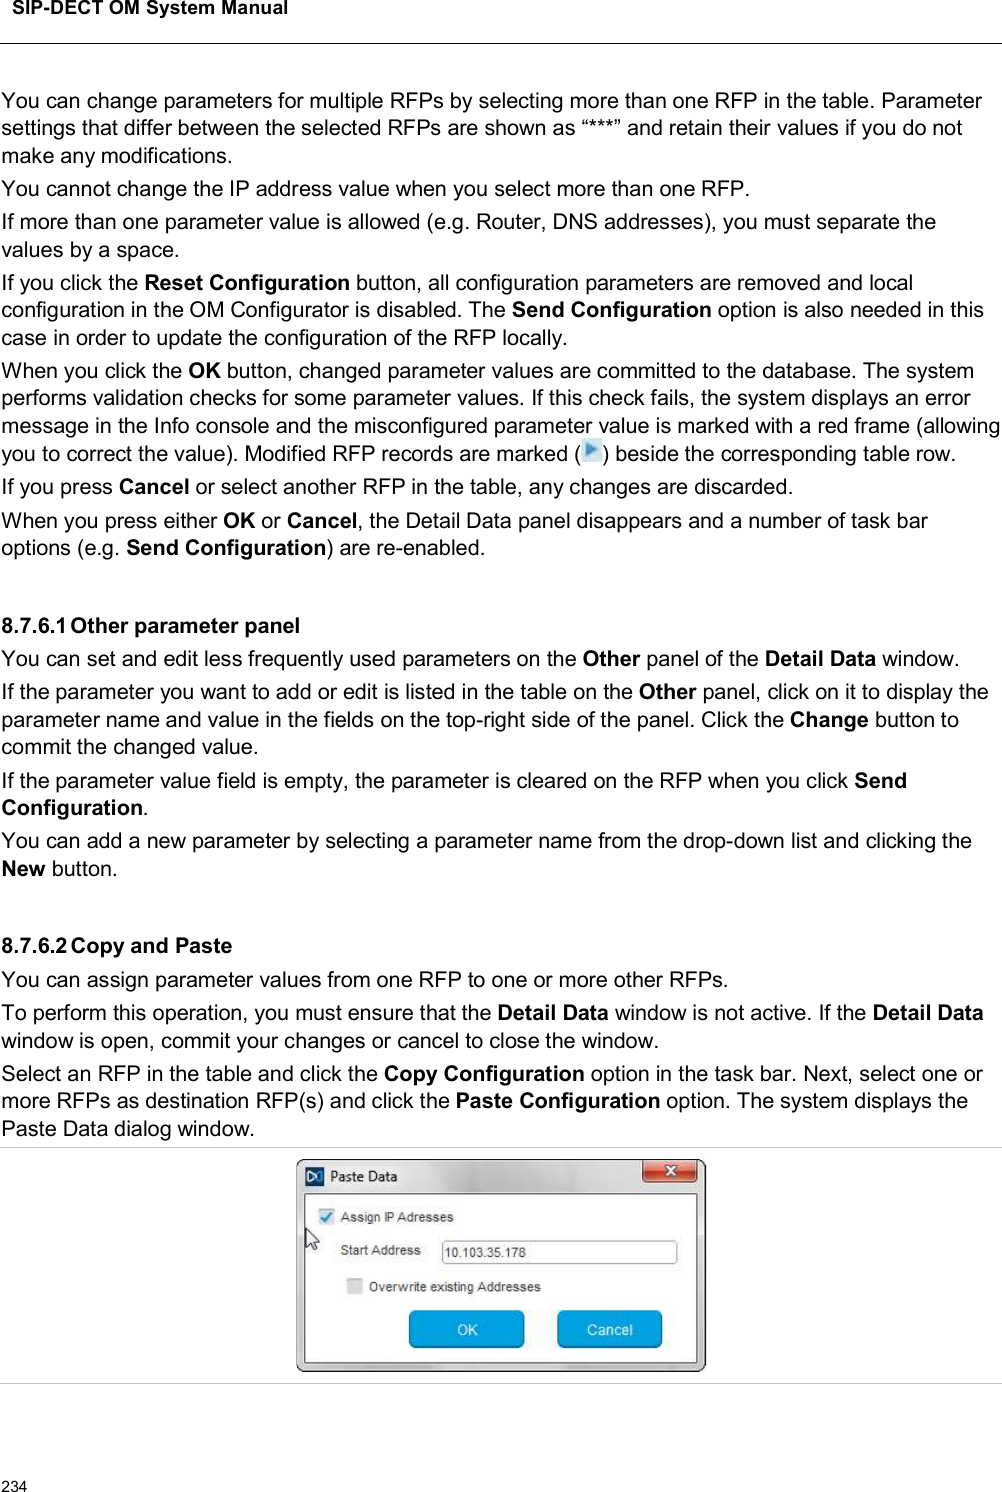
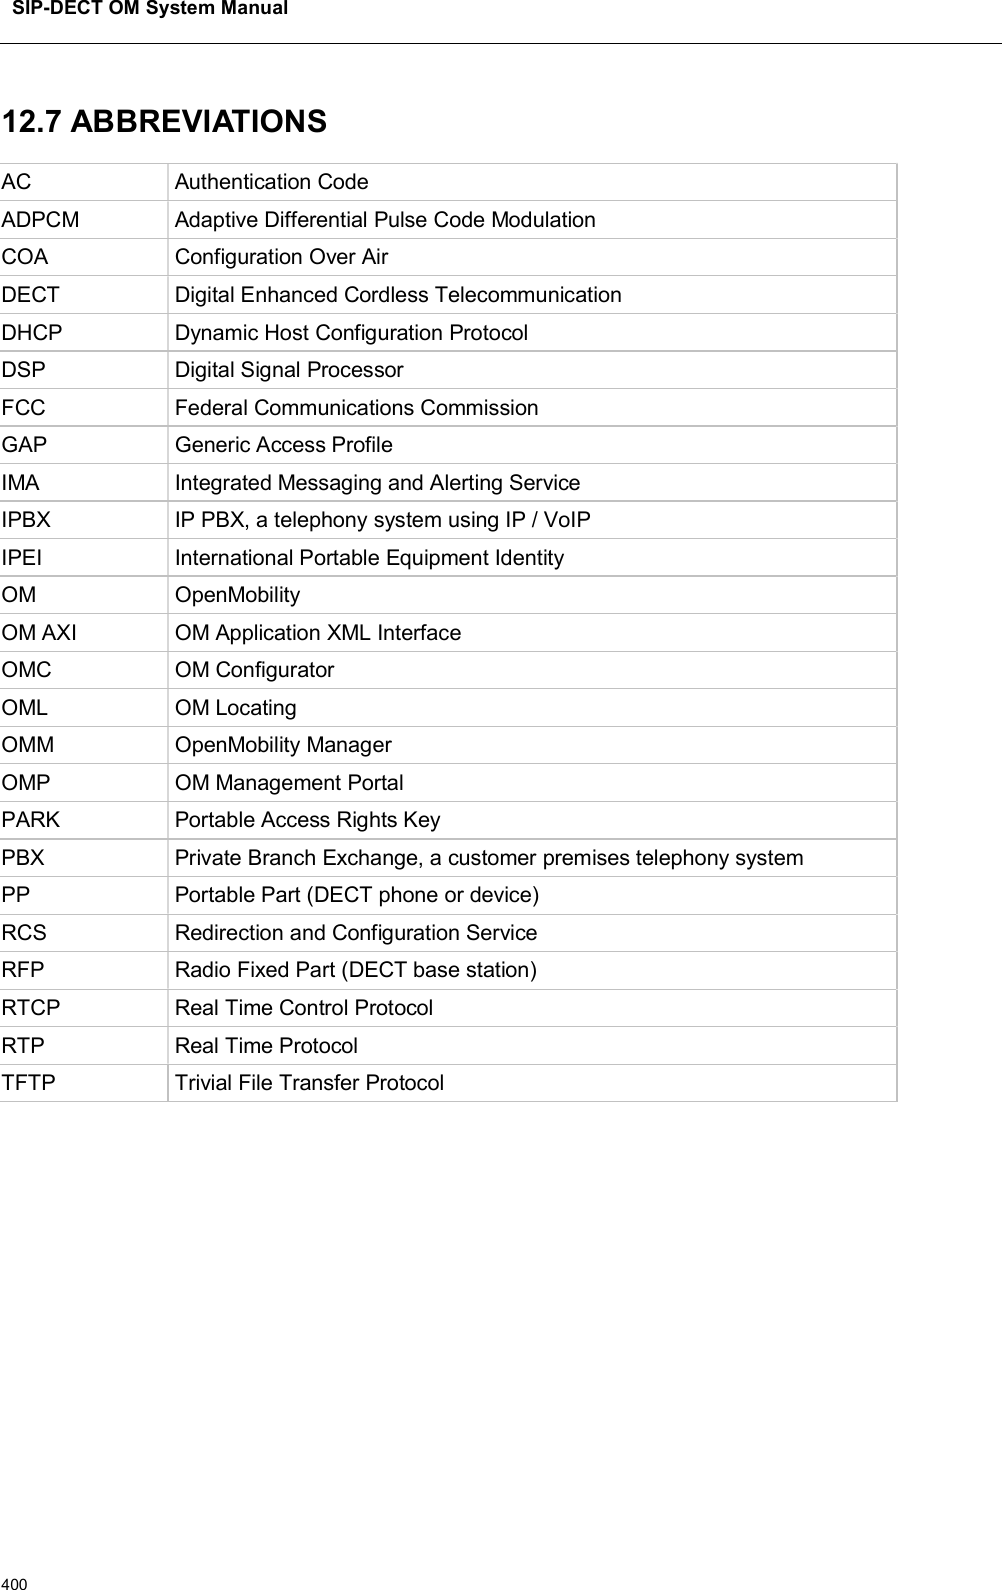
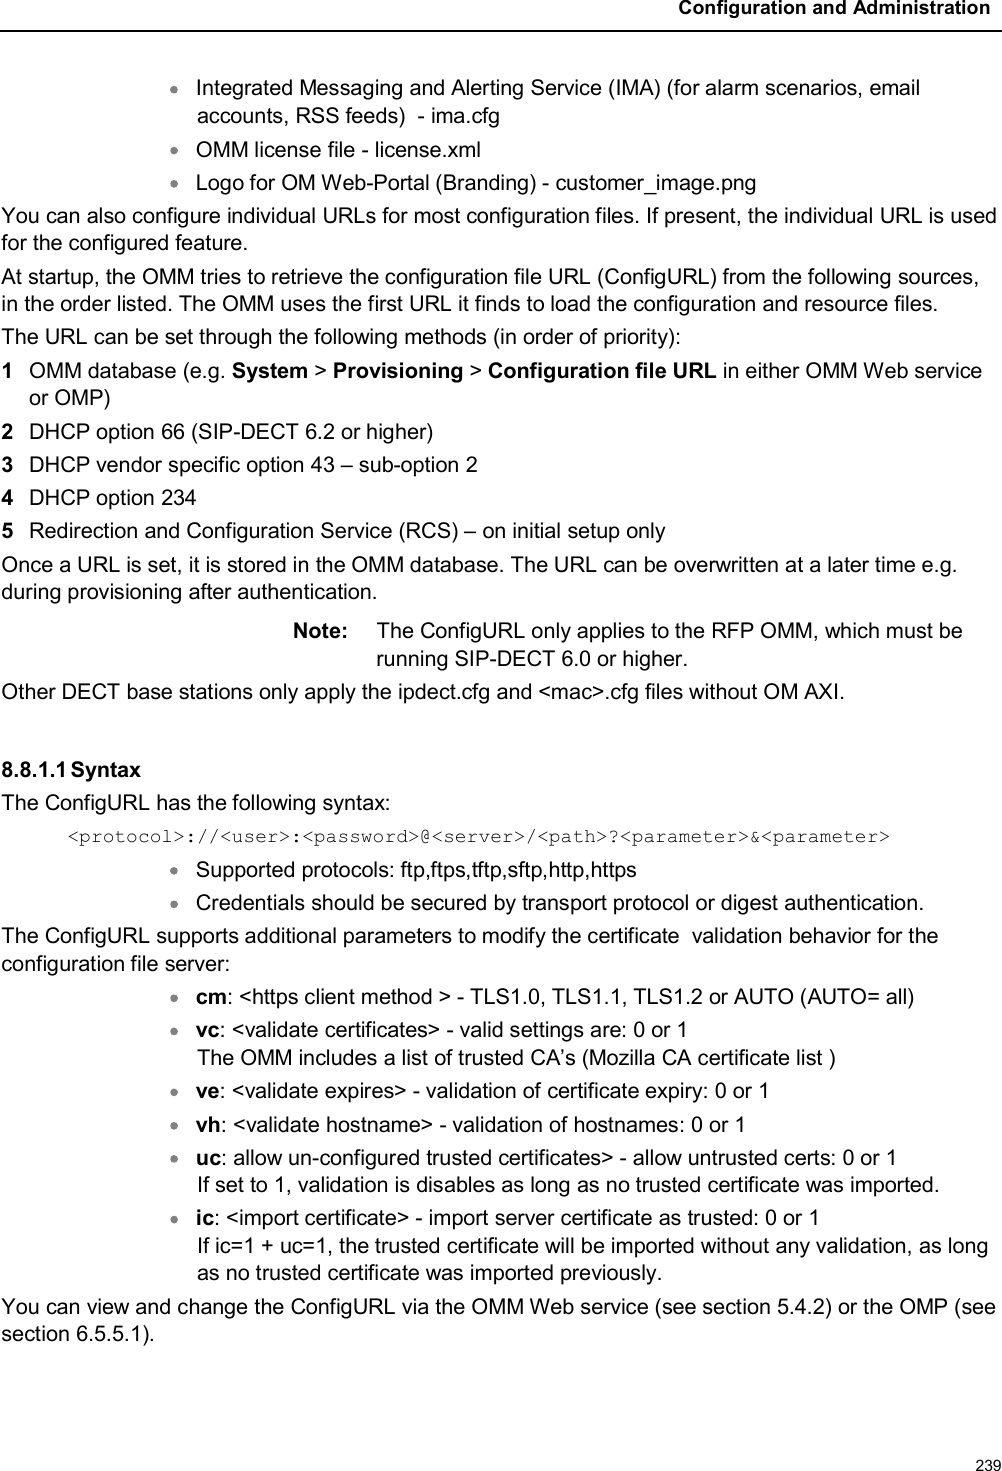
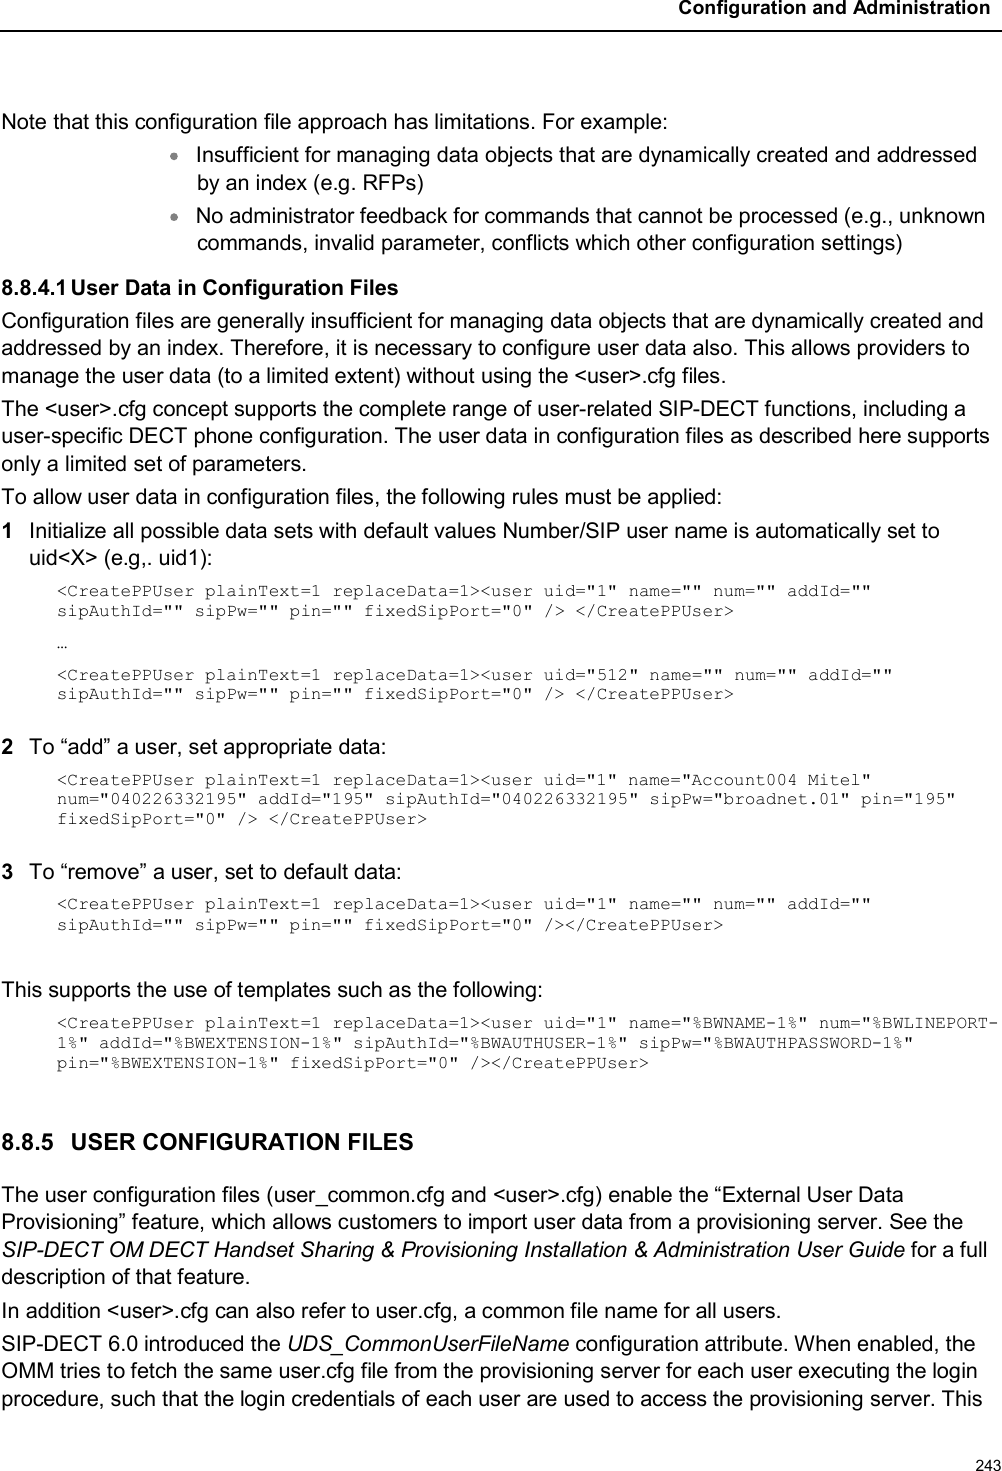
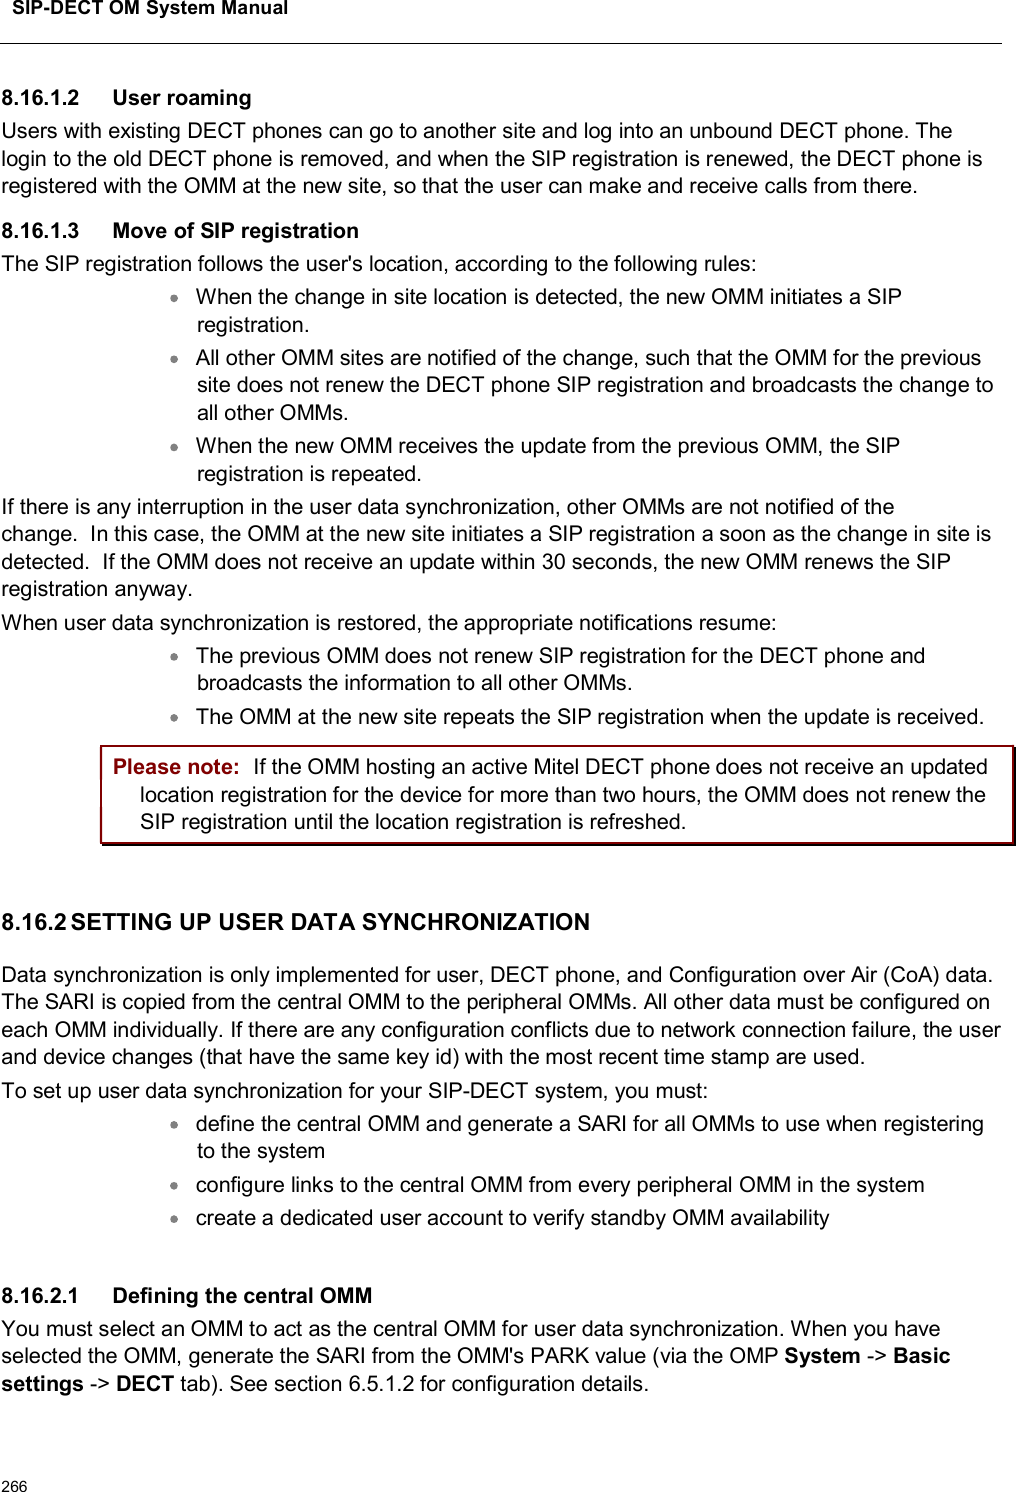
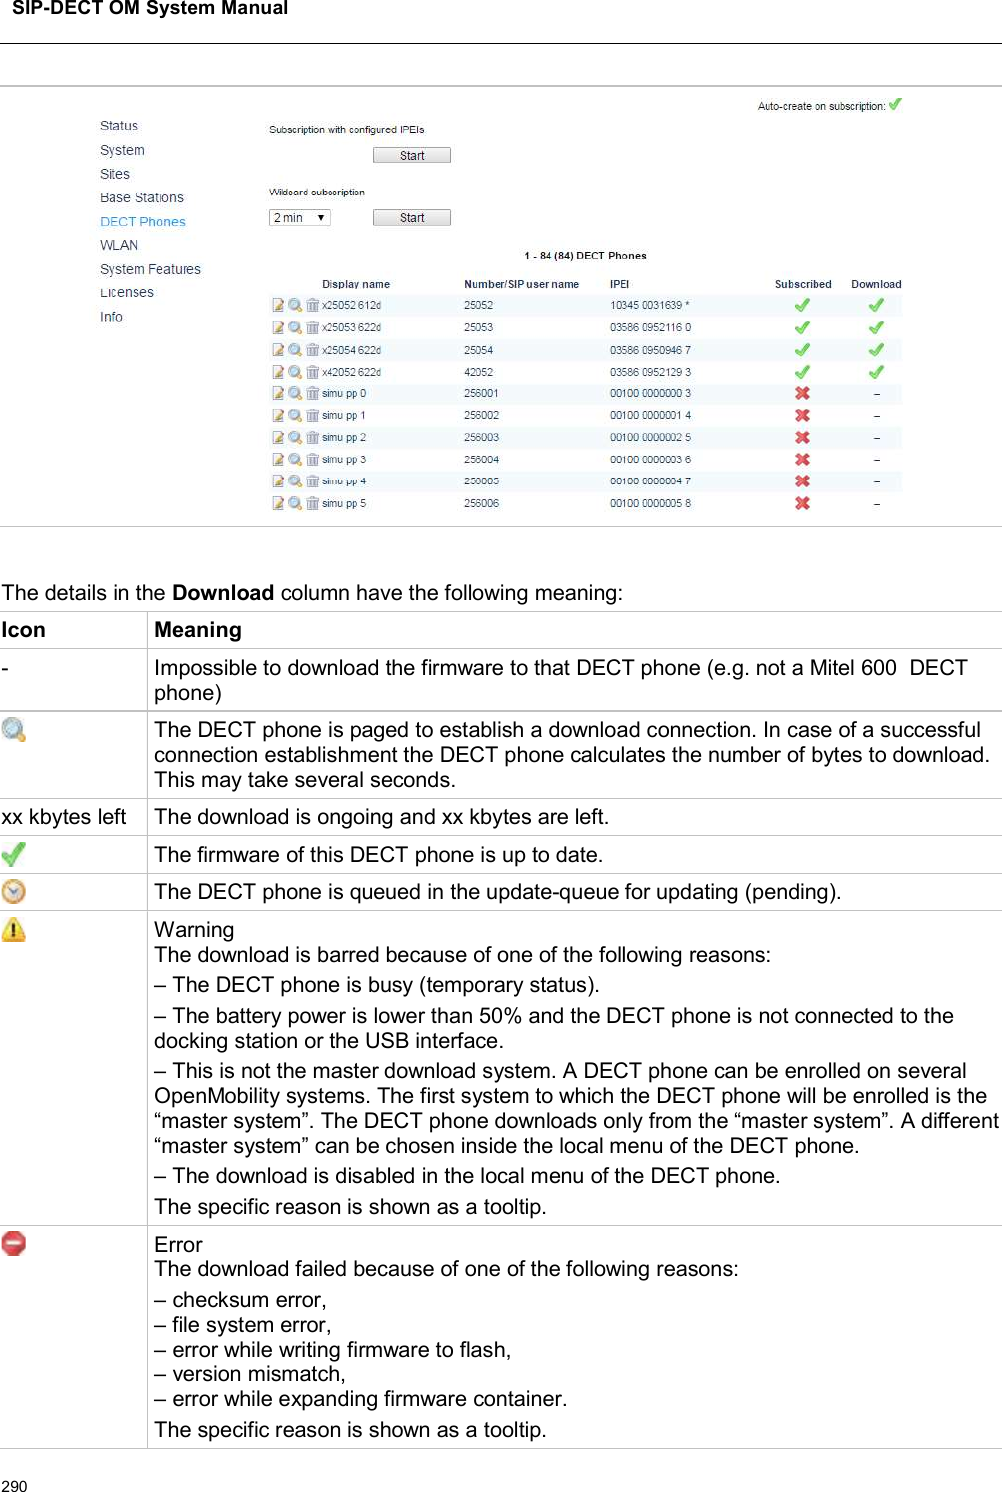
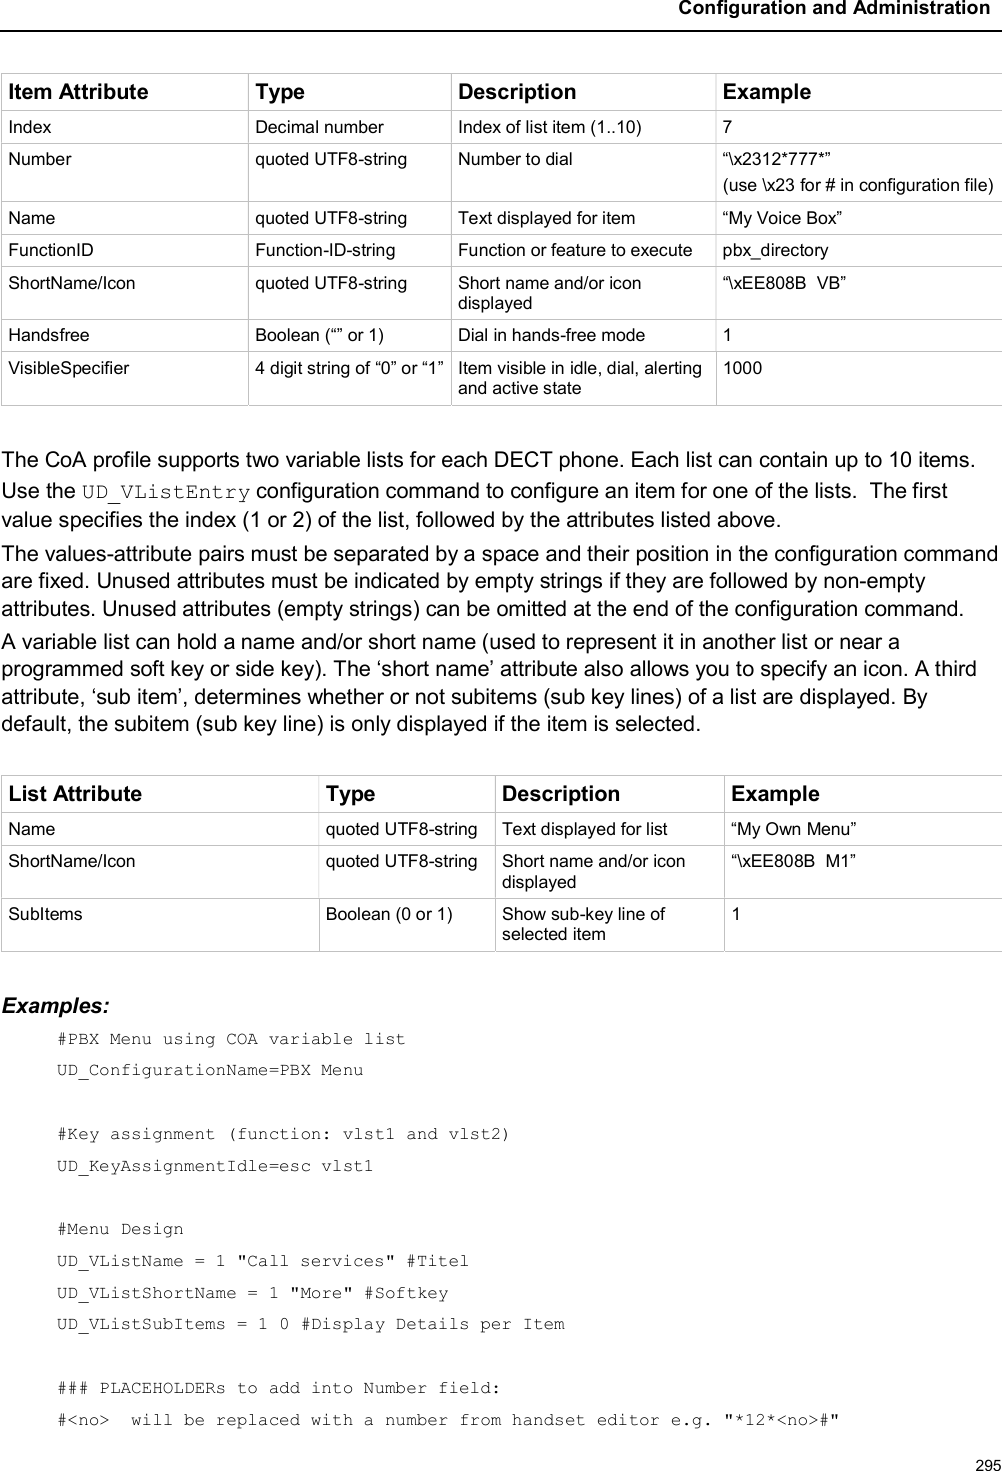
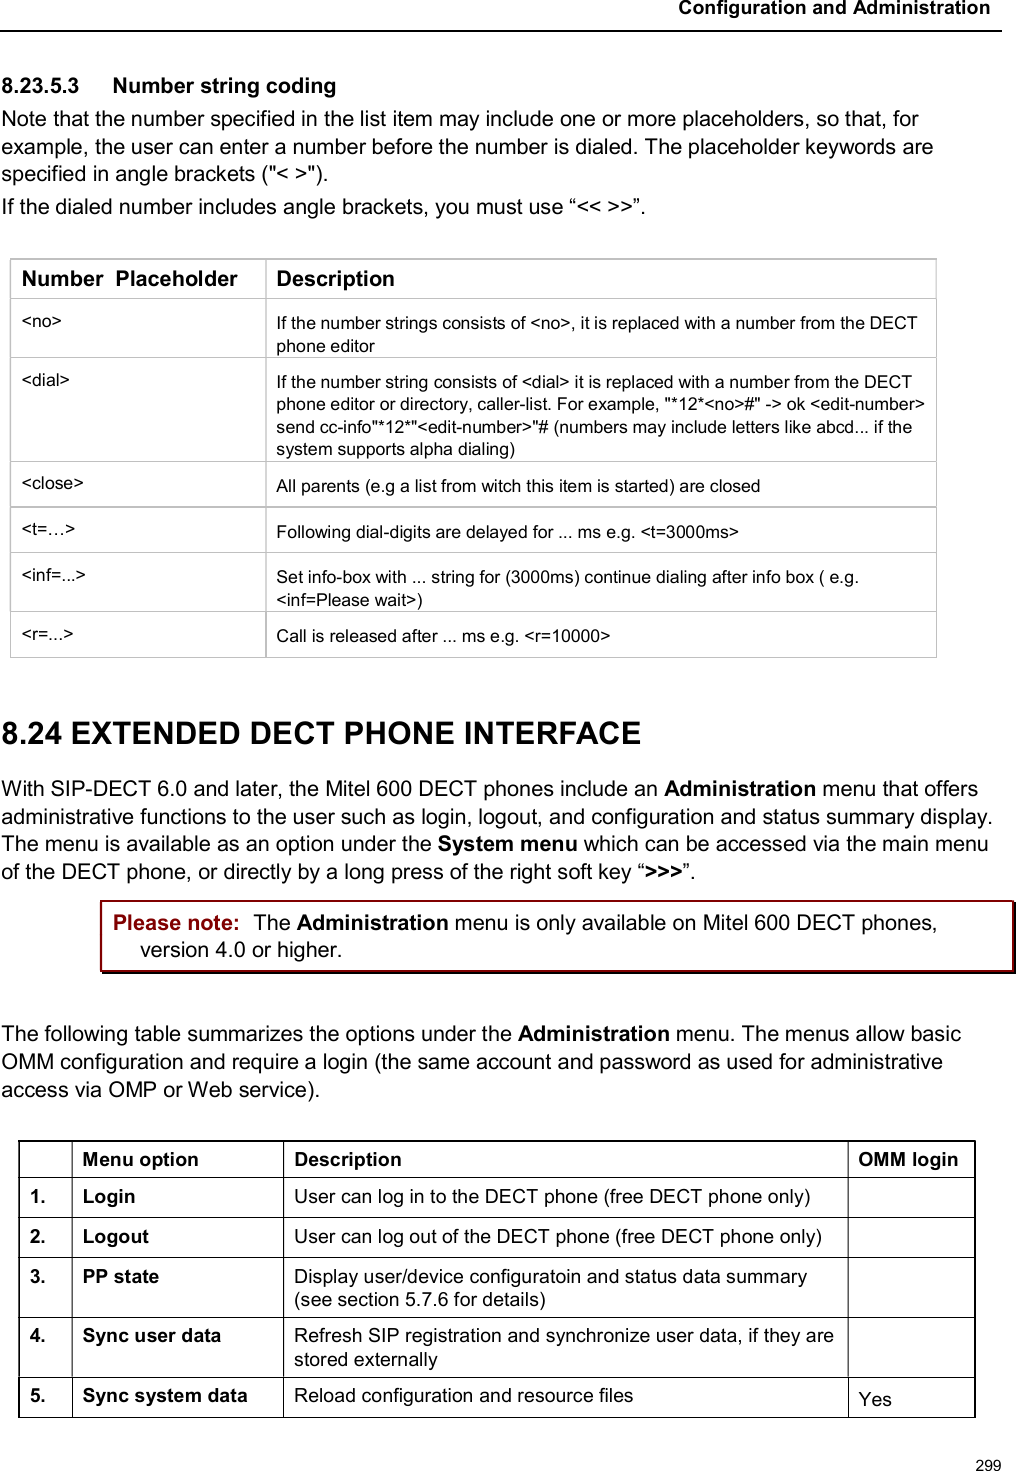
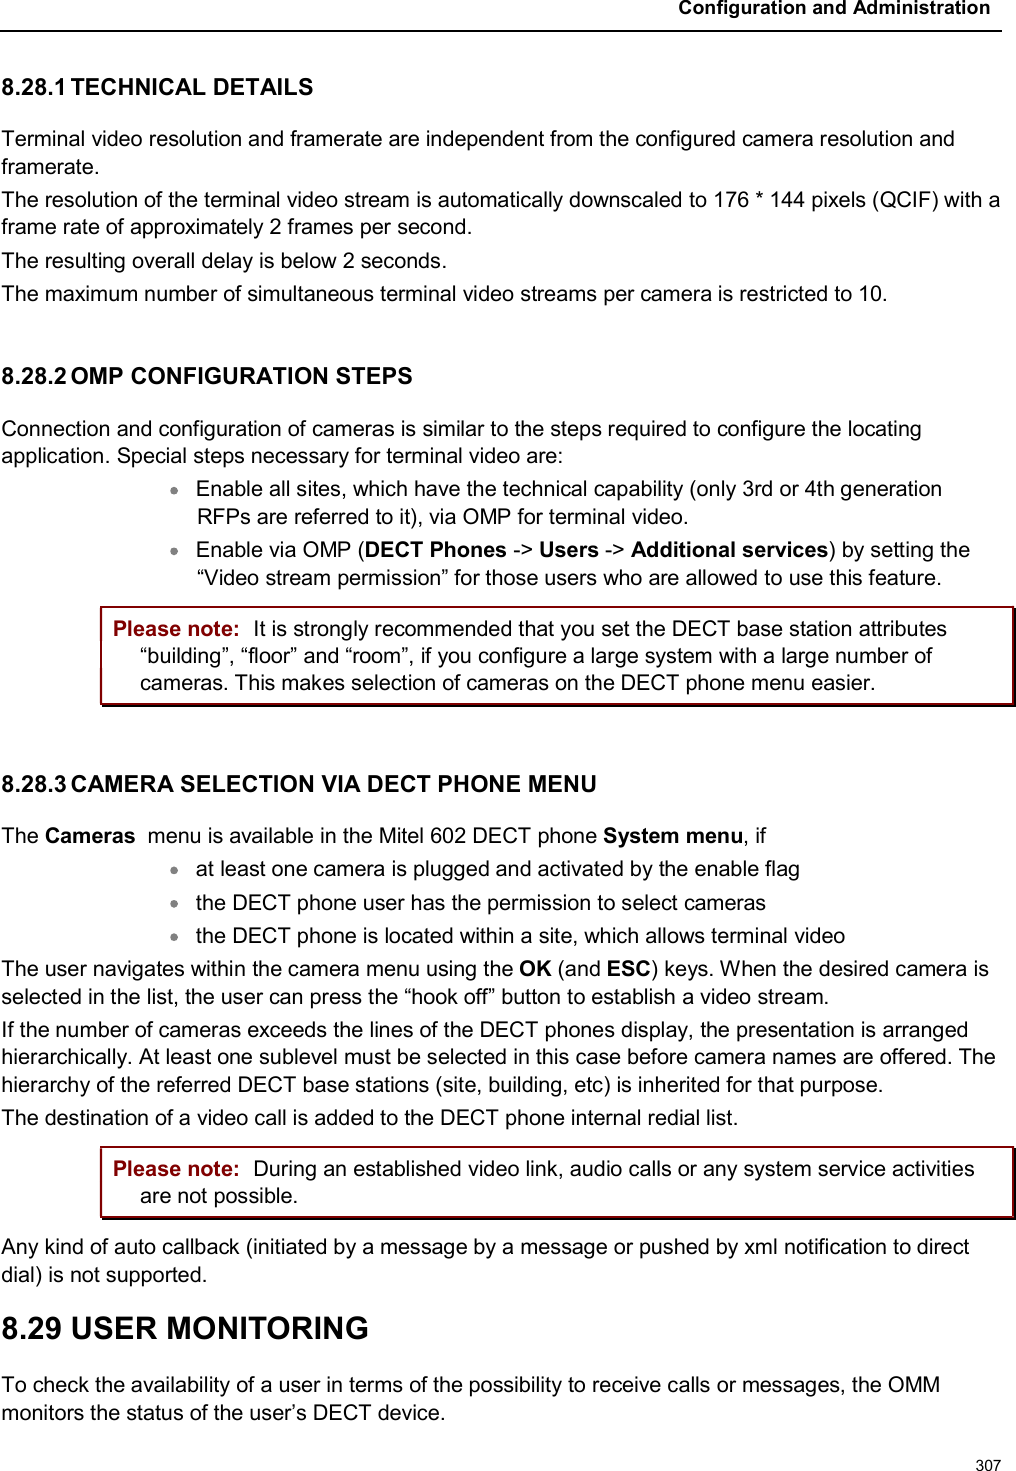
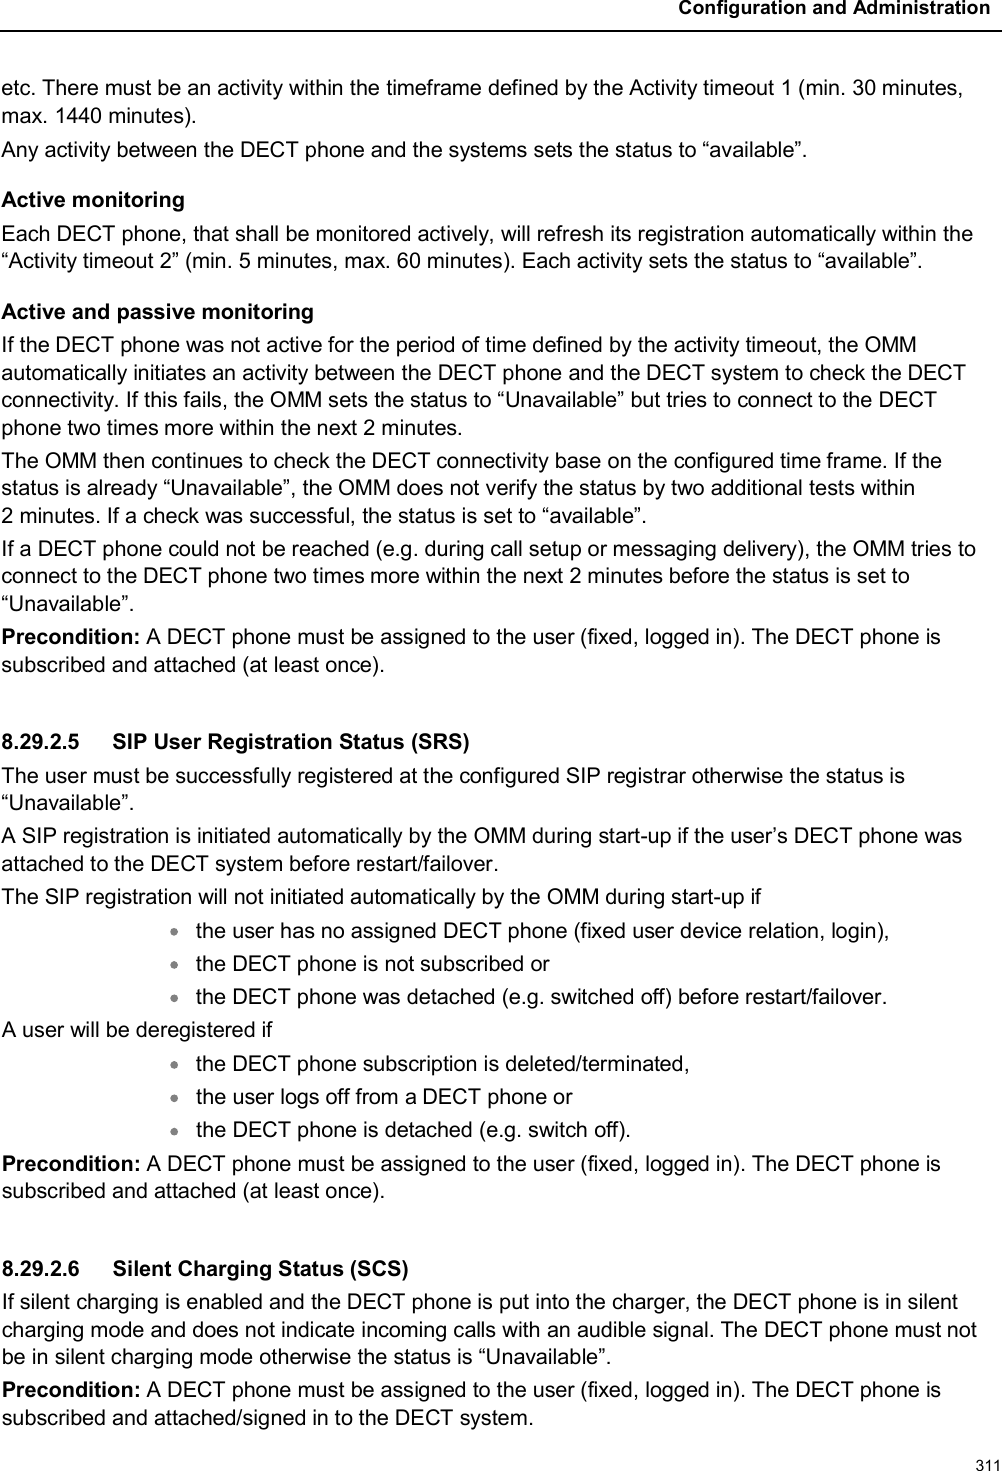
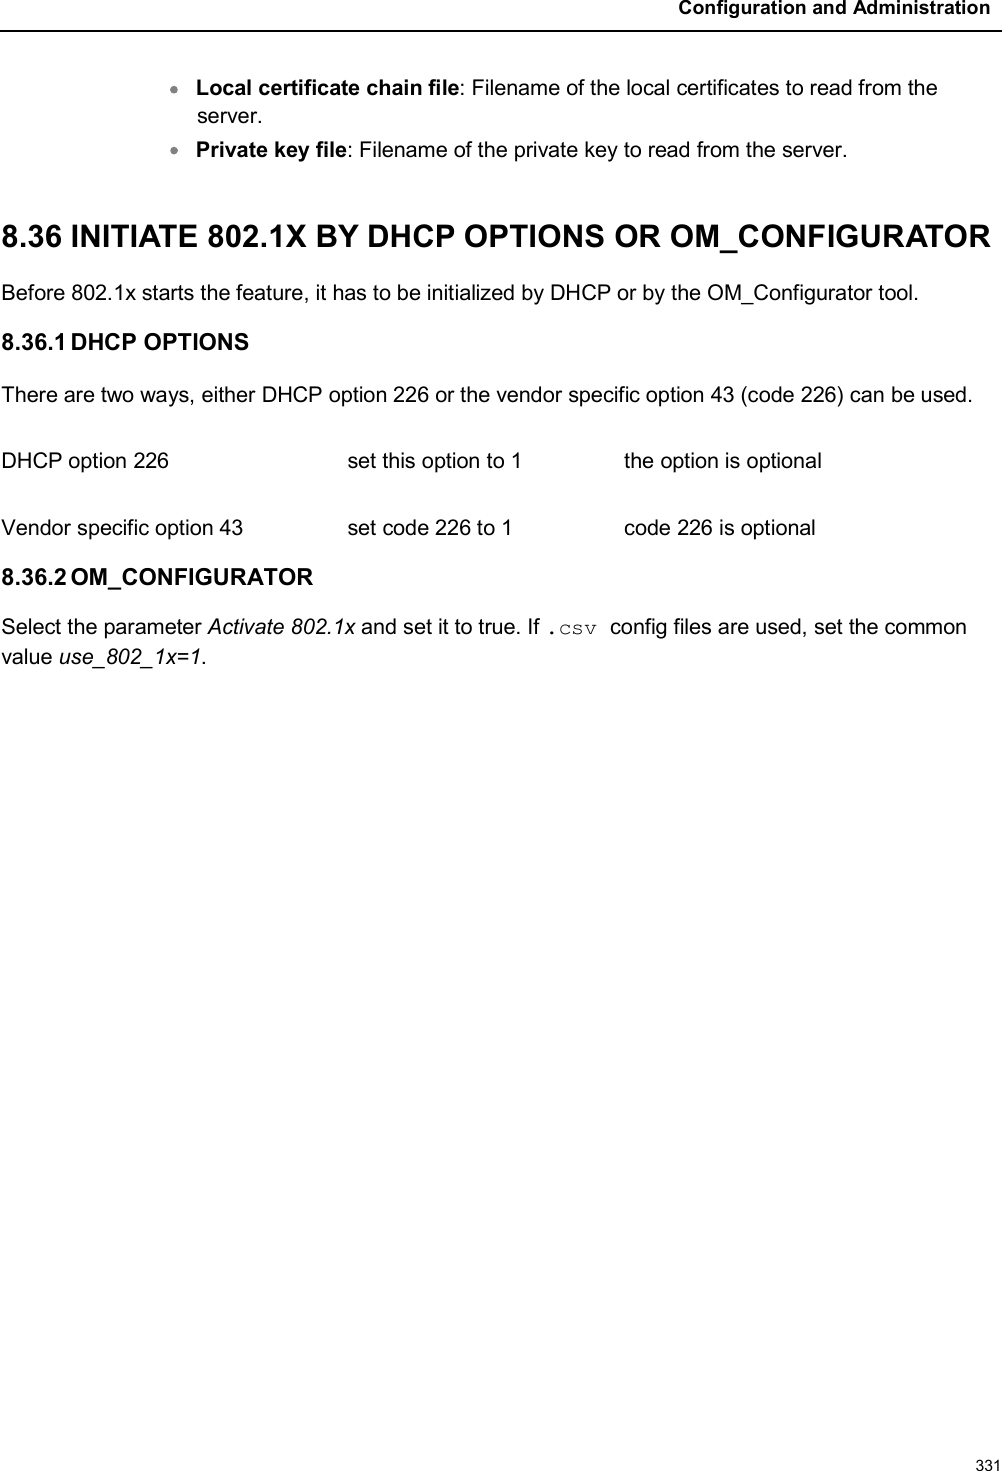
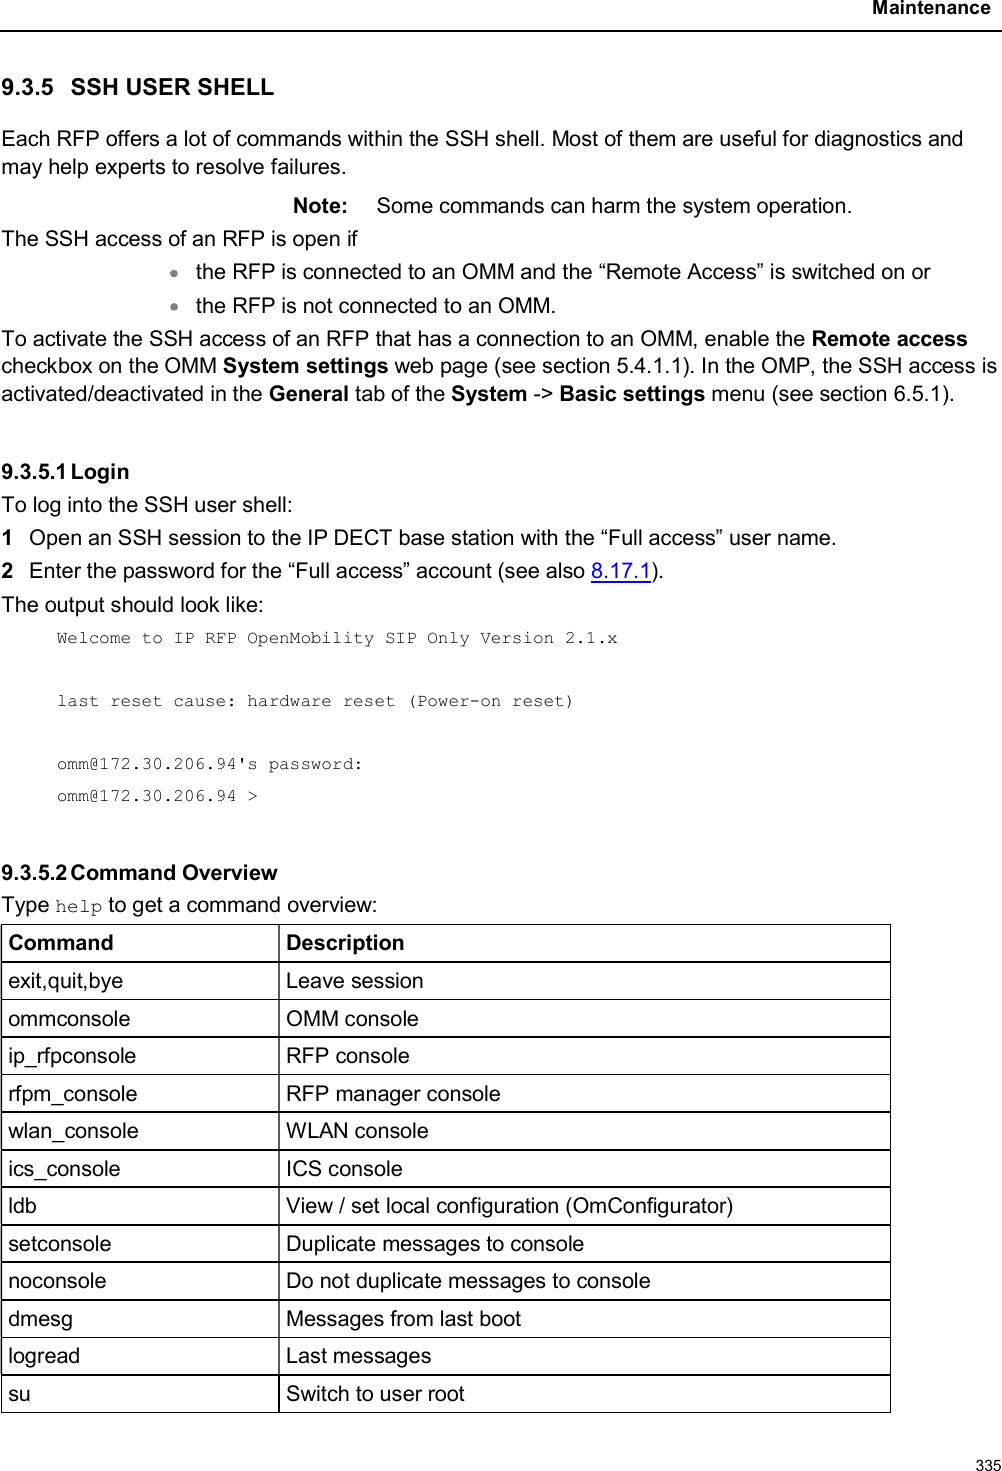
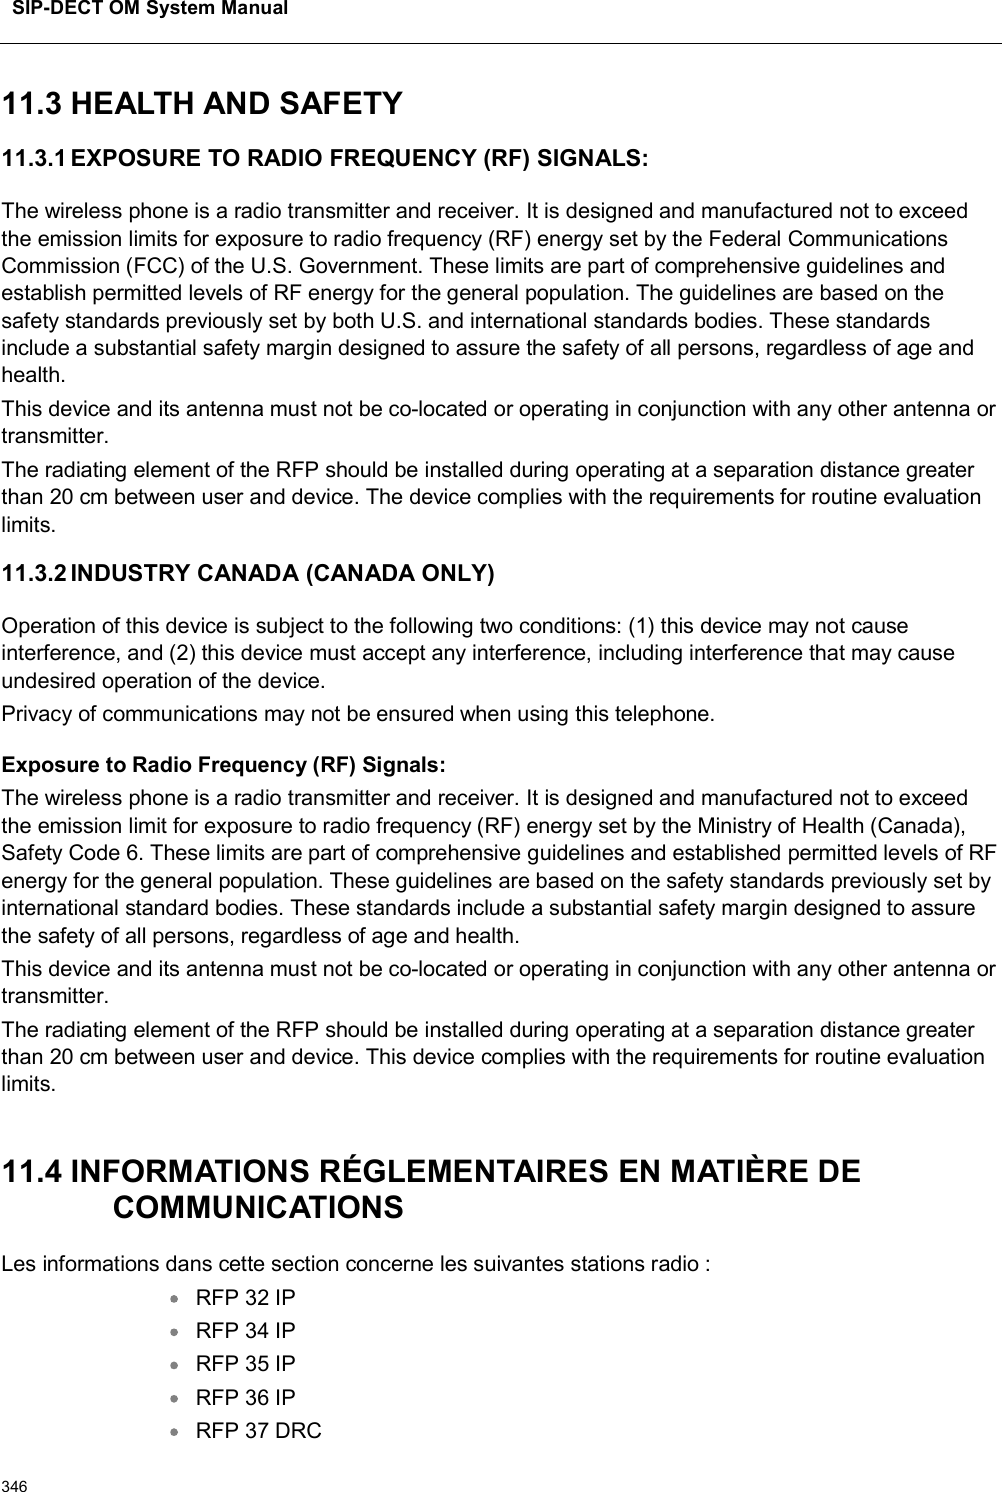
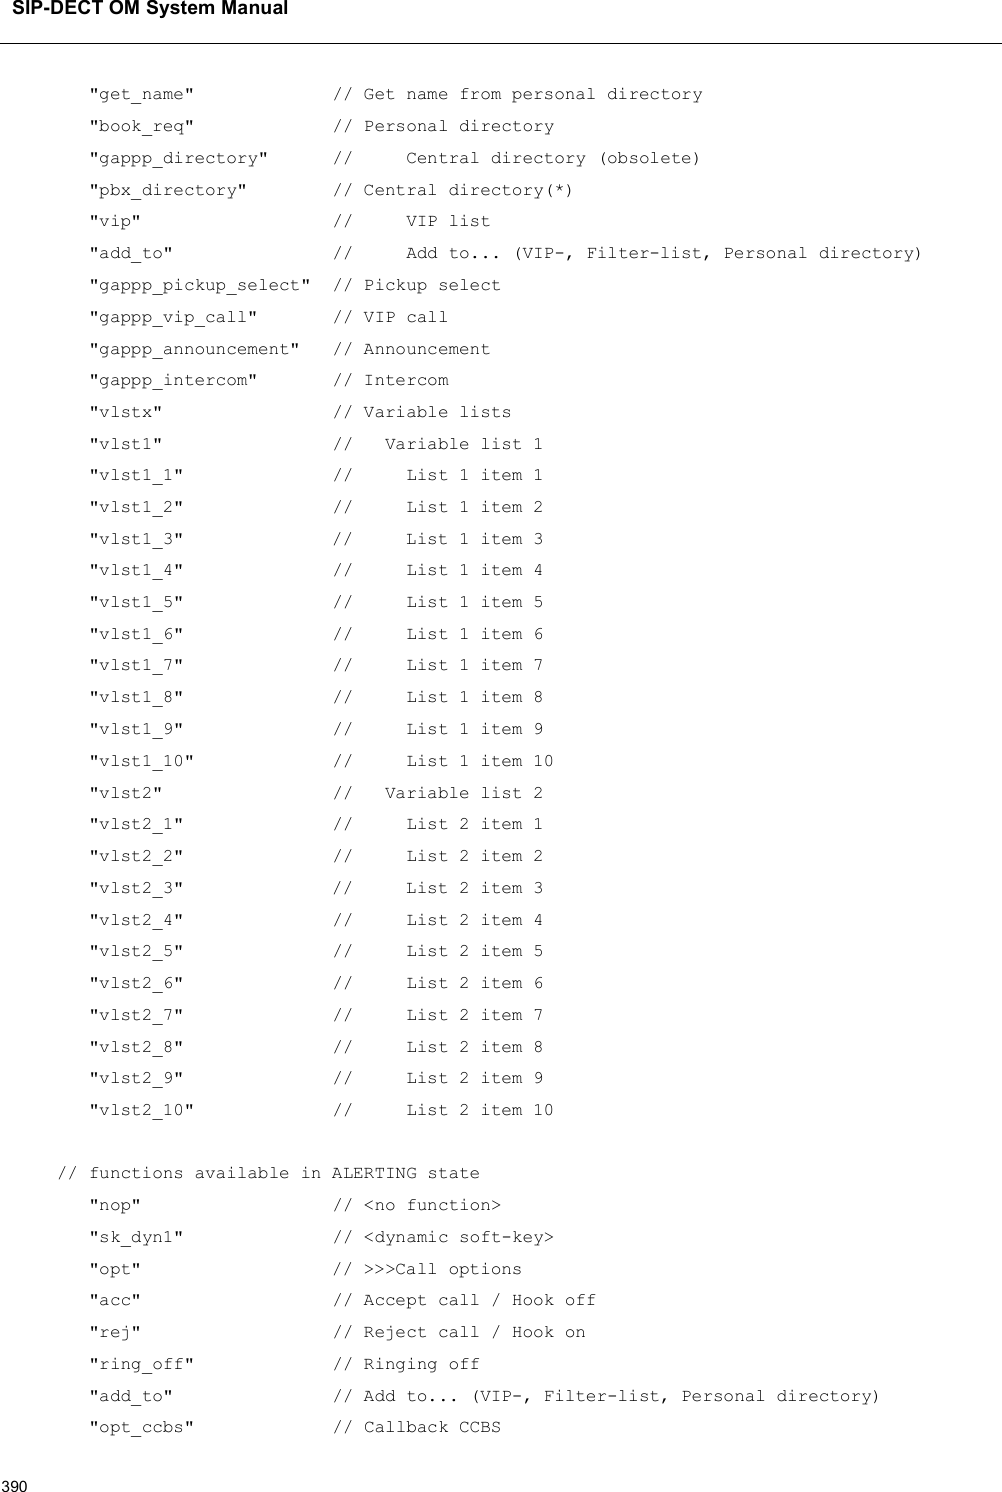
![Configuration and Administration235If the Assign IP Addresses option is enabled, you must provide a valid IP address in the Start Addressfield. The system may display a suggested address, based on a previous paste or Add RFP operation. The IP address is incremented by one for each RFP.If the Overwrite existing addresses parameter is not enabled, an IP address is only assigned if the IP address field of the target RFP is empty.8.7.6.3 Configuration ParametersThe following table lists the available configuration parameters for the DECT base station.Parameter Mandatory/Optional DescriptionUse local config Mandatory Specifies whether the local configuration settings should be used at boot-up or notIP Address Mandatory IP address of the DECT base station.Net Mask Mandatory Subnet mask of the IP networkTFTP server address Mandatory IP address of the TFTP server (set to 0.0.0.0 if not used)TFTP file name Mandatory The boot file to be read from the TFTP serverTFTP server list Used only by:RFP 32/34RFP 42 WLANOptionalList of additional TFTP servers to load the boot filePreferred TFTP server Used only by:RFP 32/34RFP 42 WLANOptionalTFTP server from which to load the boot file firstOMM address Mandatory IP address of the OpenMobility ManagerRouter Optional IP address of the default gatewayDNS address Optional IP address of the DNS serverDNS domain Optional Domain name of the networkBroadcast address Optional Broadcast address for the network2nd OMM address Optional IP address of the standby OMMVLAN ID Optional VLAN identifierUse VLAN and DHCP Optional Specifies whether only the local VLAN configuration settings should be used when booting or notSyslog server address Optional Destination IP address for the syslog fileSyslog server port Optional Destination port address for the syslog fileRFP configuration file serverOptional URL of a server with RFP configuration files (ipdect.cfg|<MAC>.cfg) alternatively or in addition to OM Configurator settings.Syntax: {ftp|ftps|http|https}://[user:password@]server/[directory/]ortftp://server/[directory/]](https://usermanual.wiki/Mitel-Networks/RFP47DRC.User-Manual-II/User-Guide-4037307-Page-35.png)
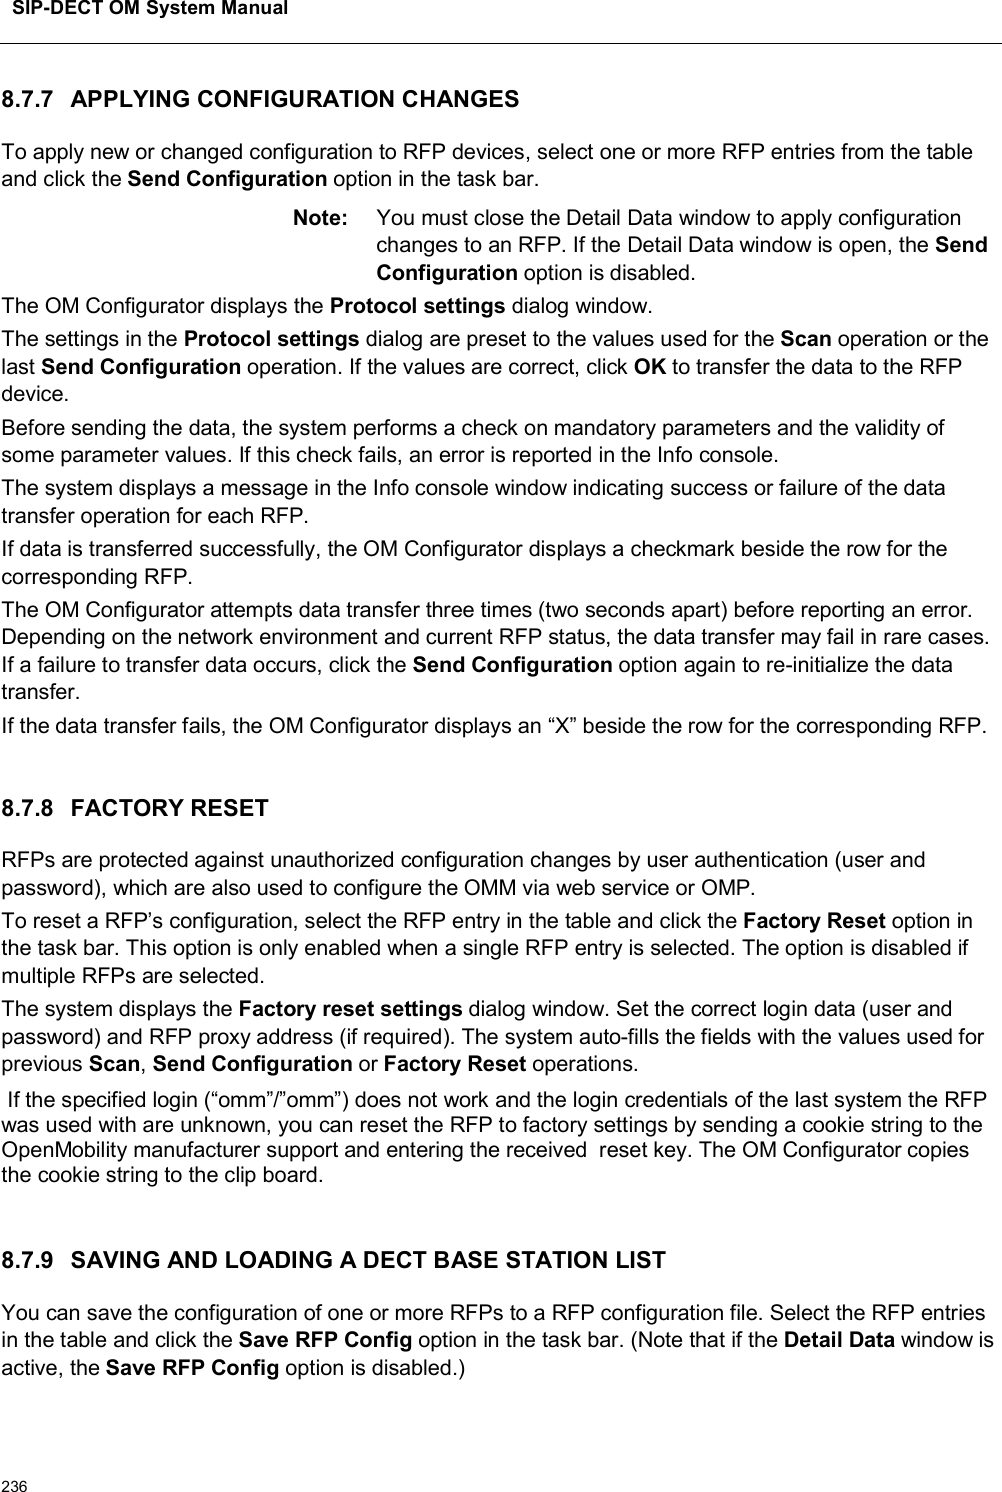
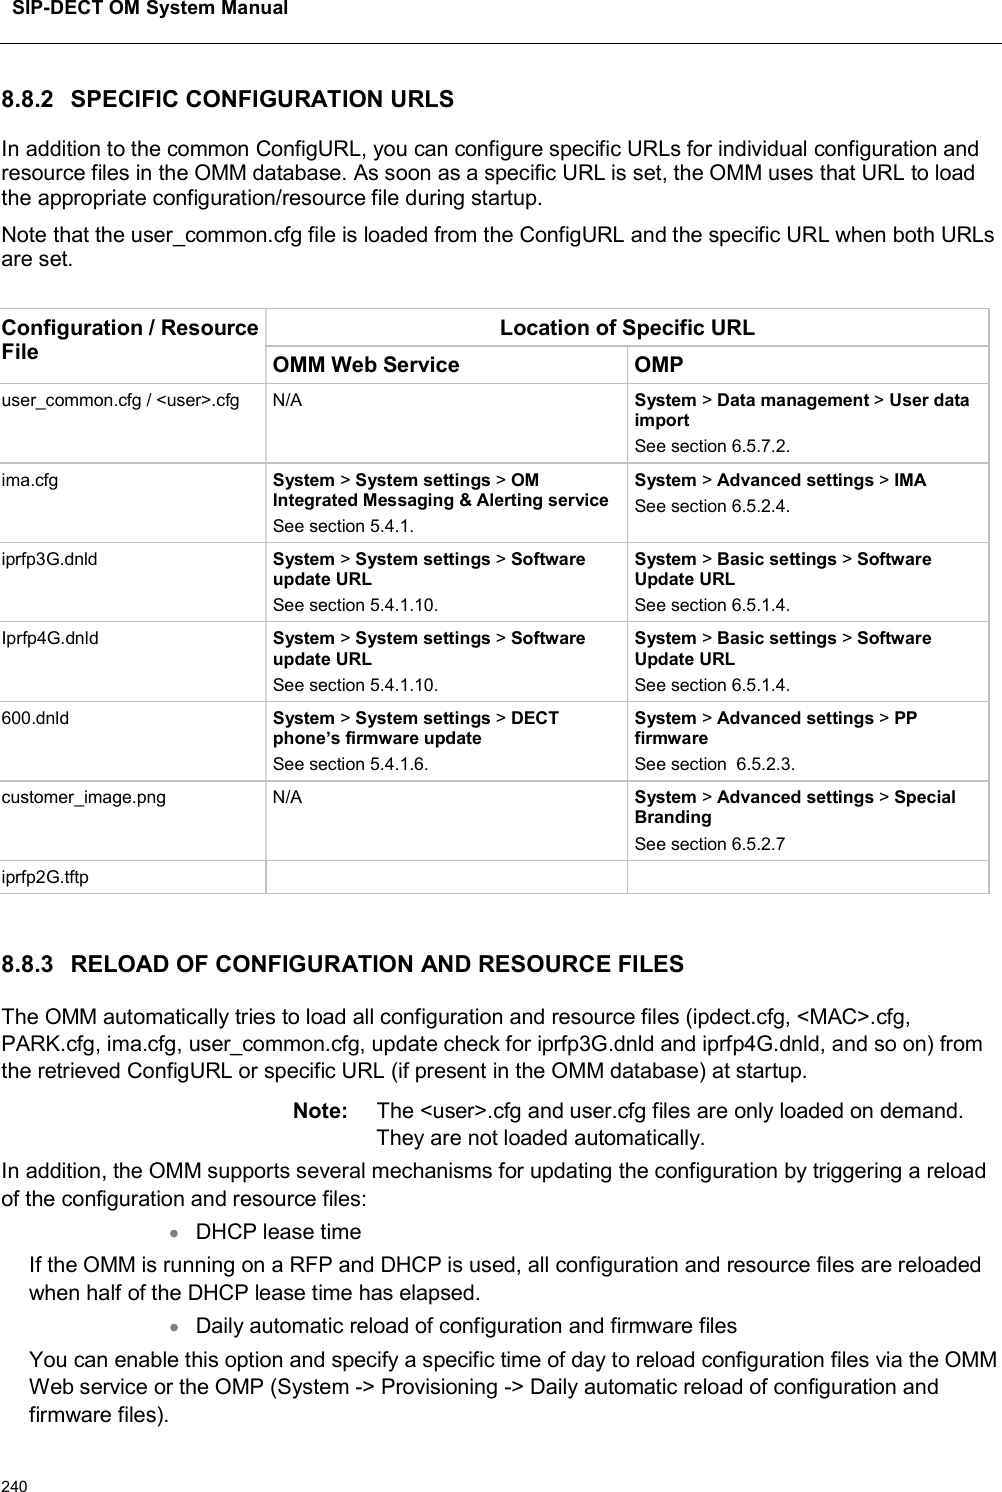
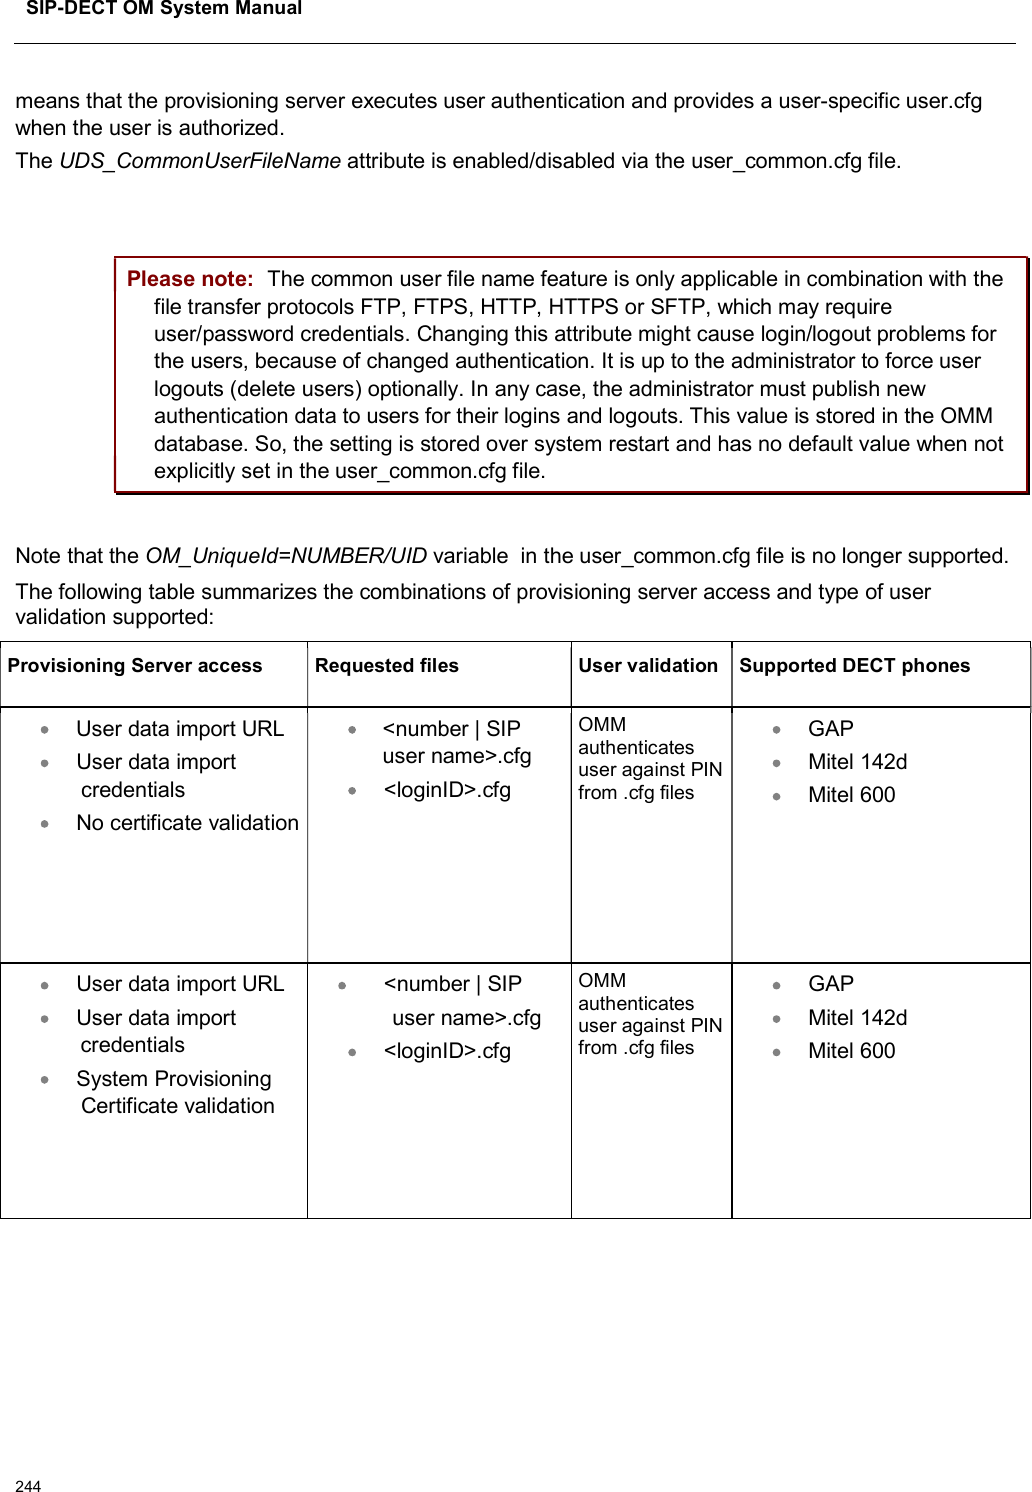
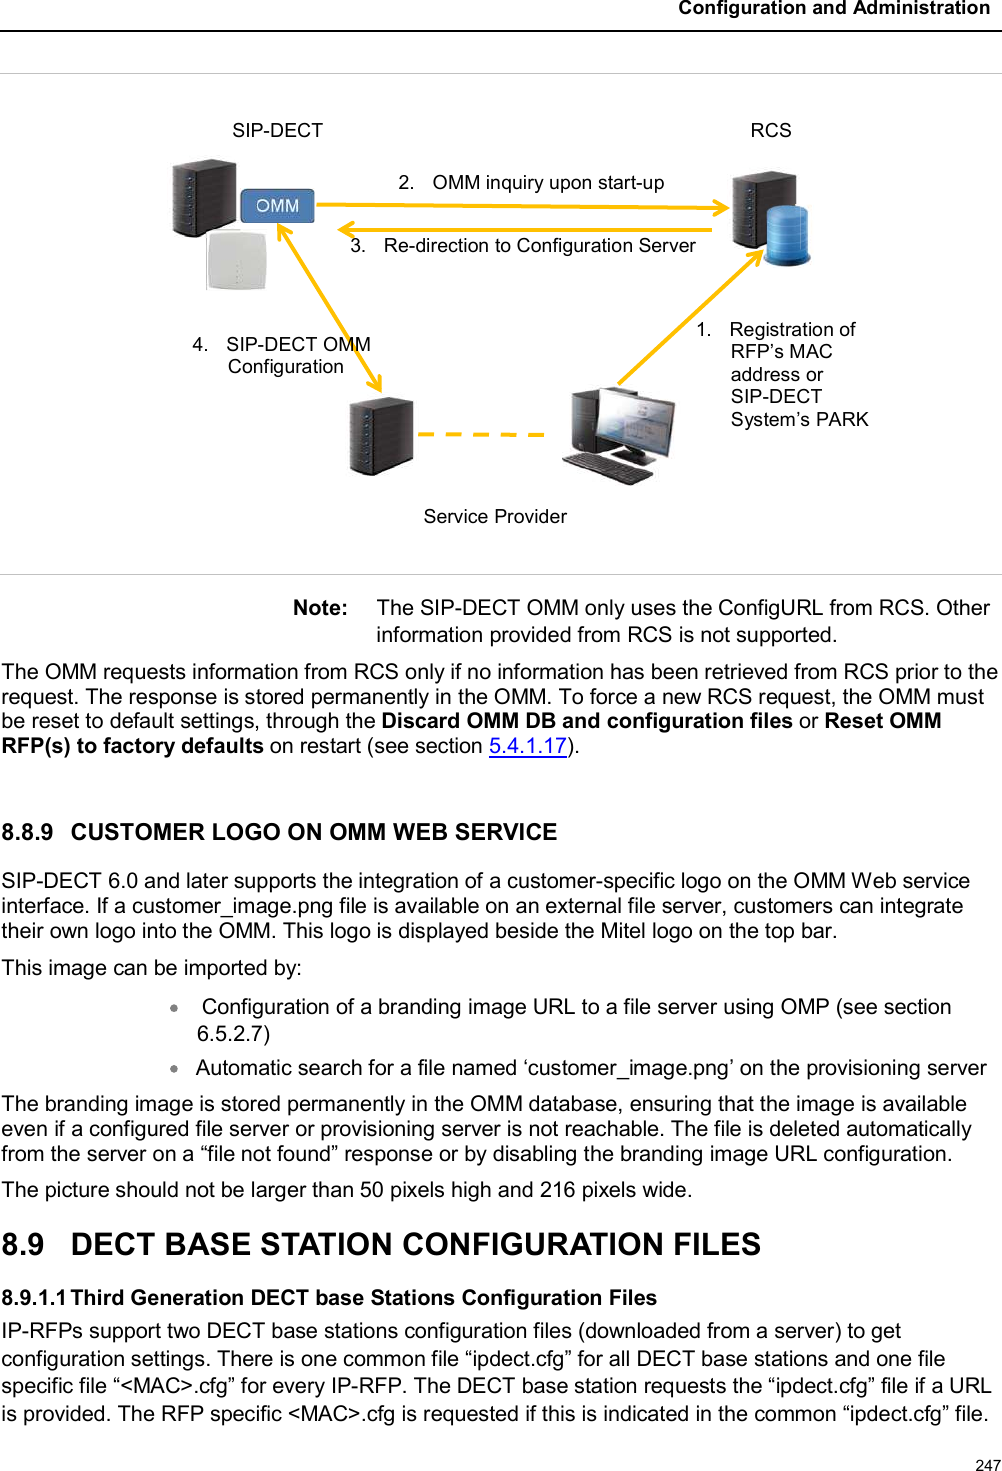
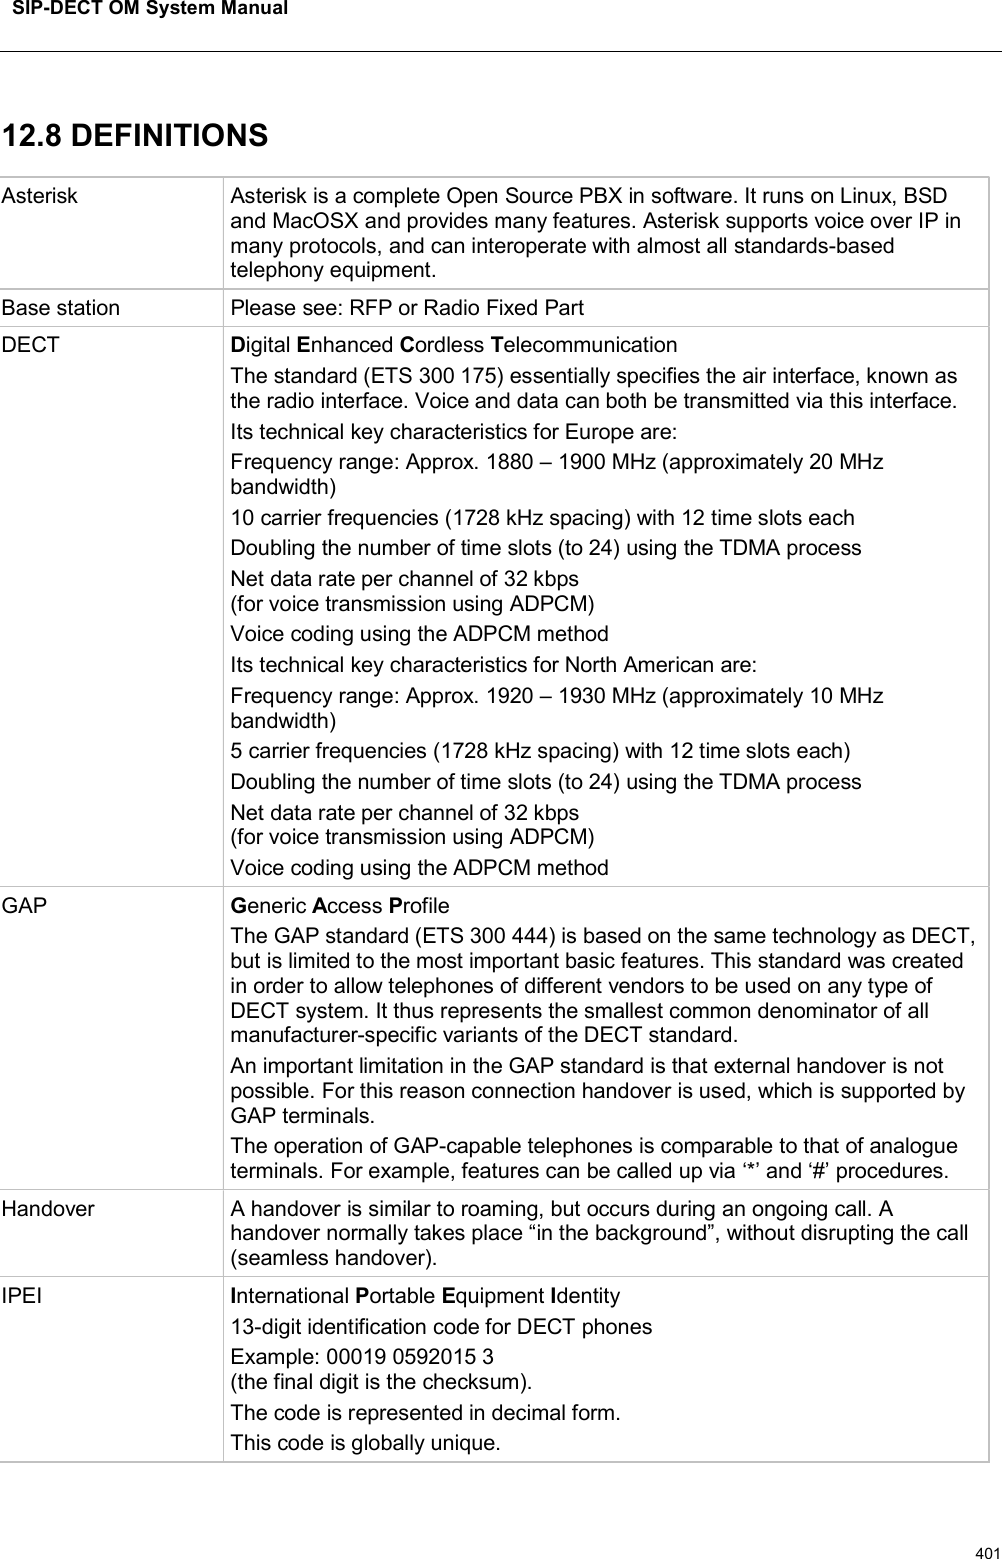
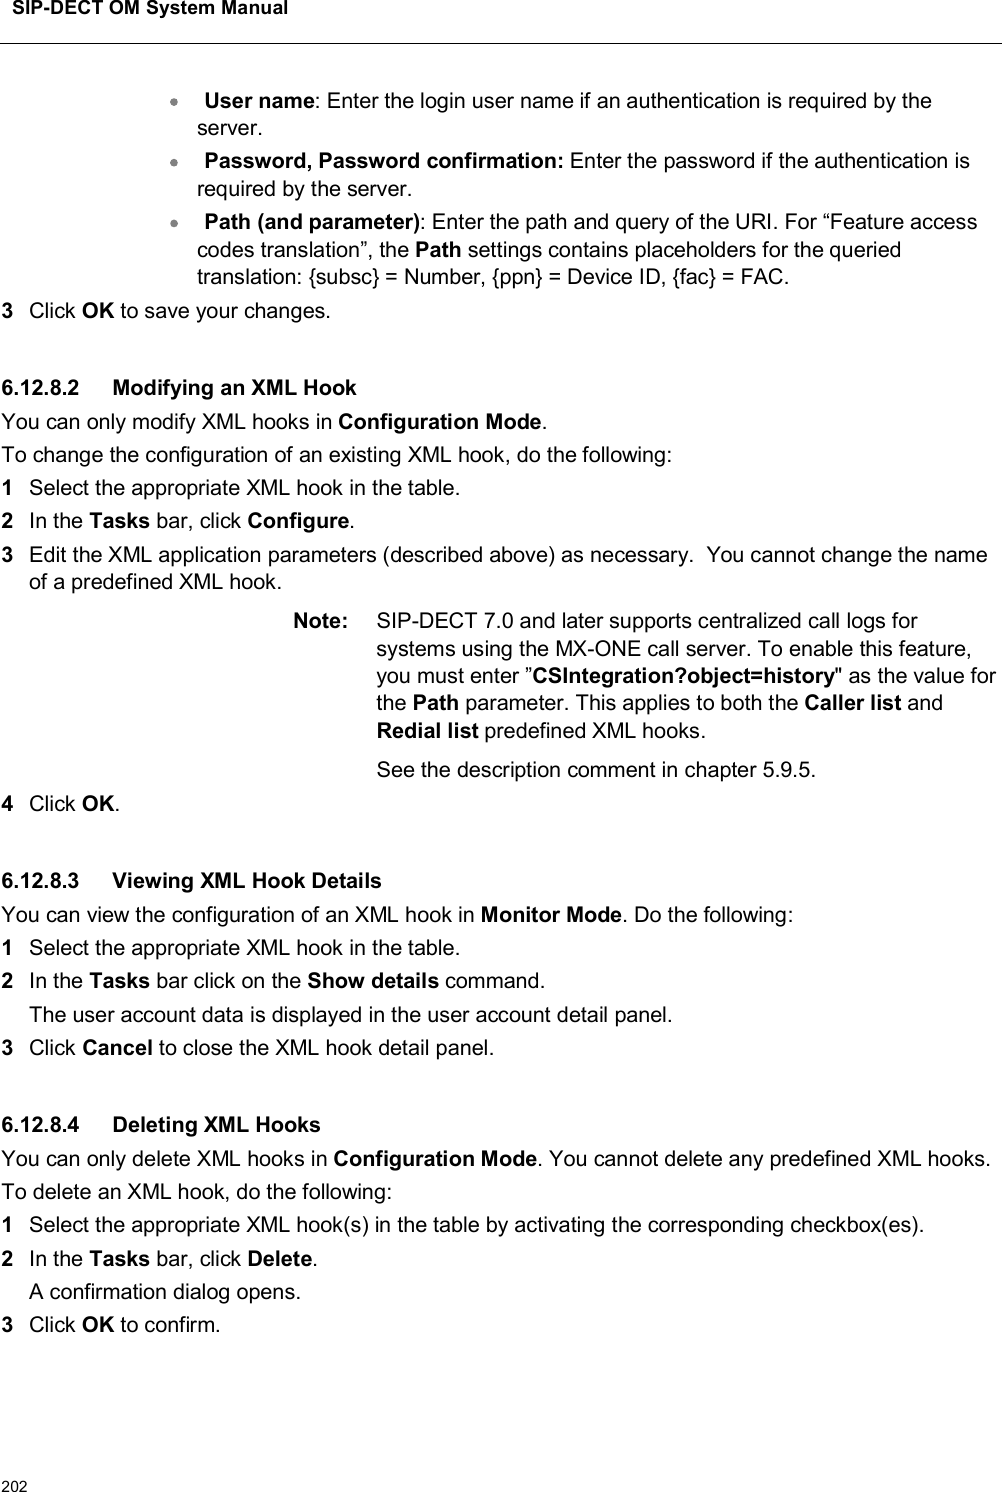
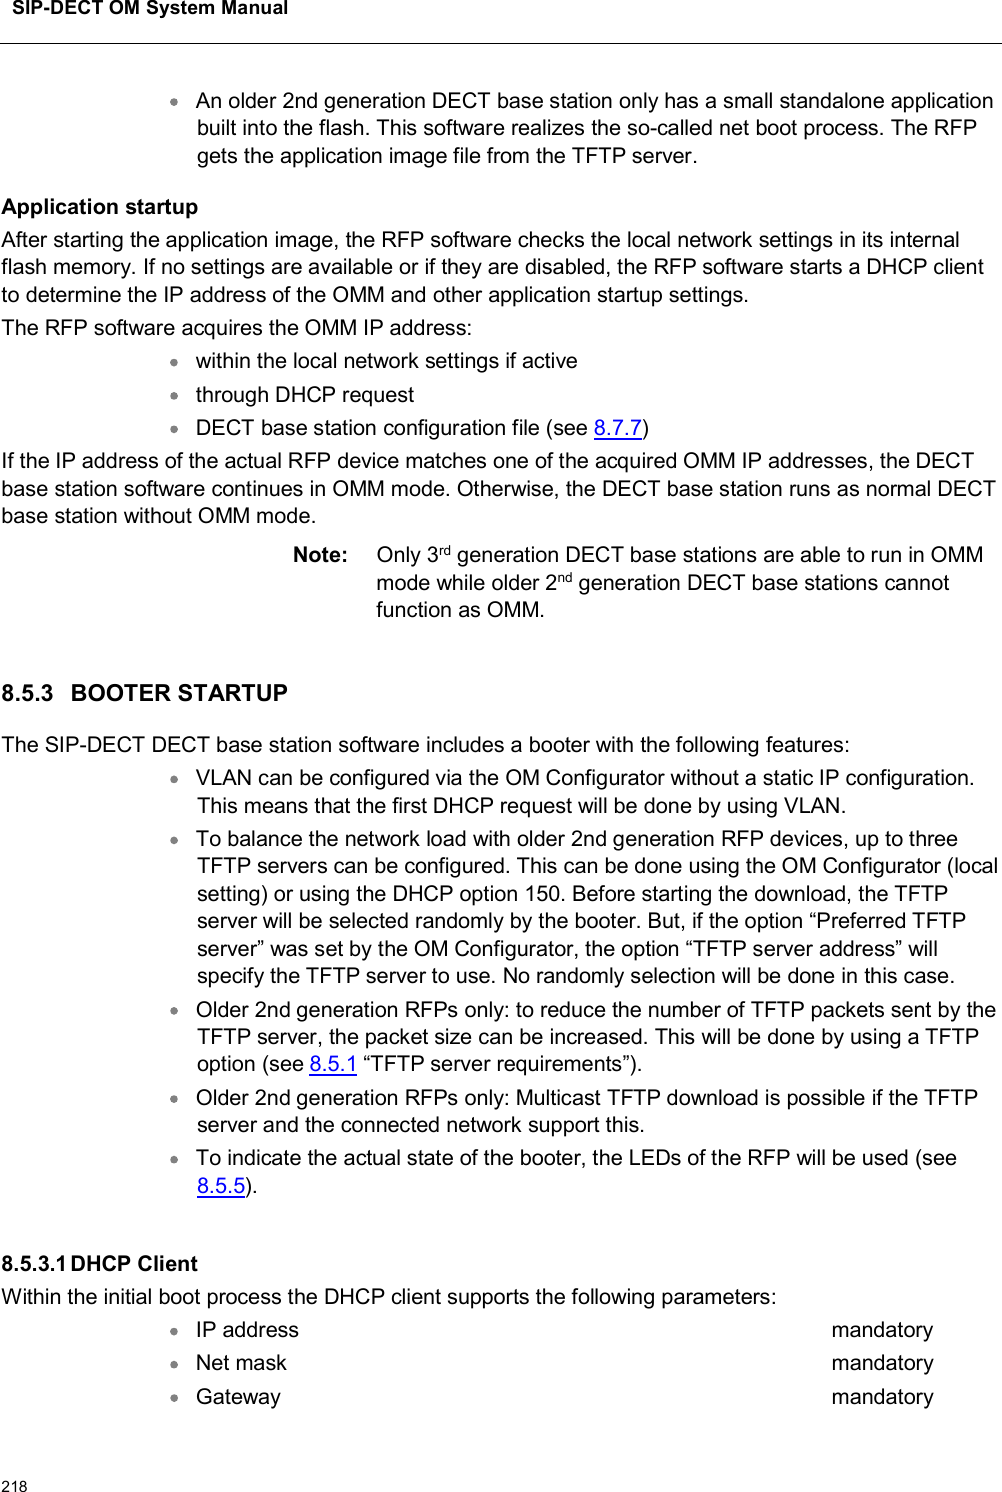
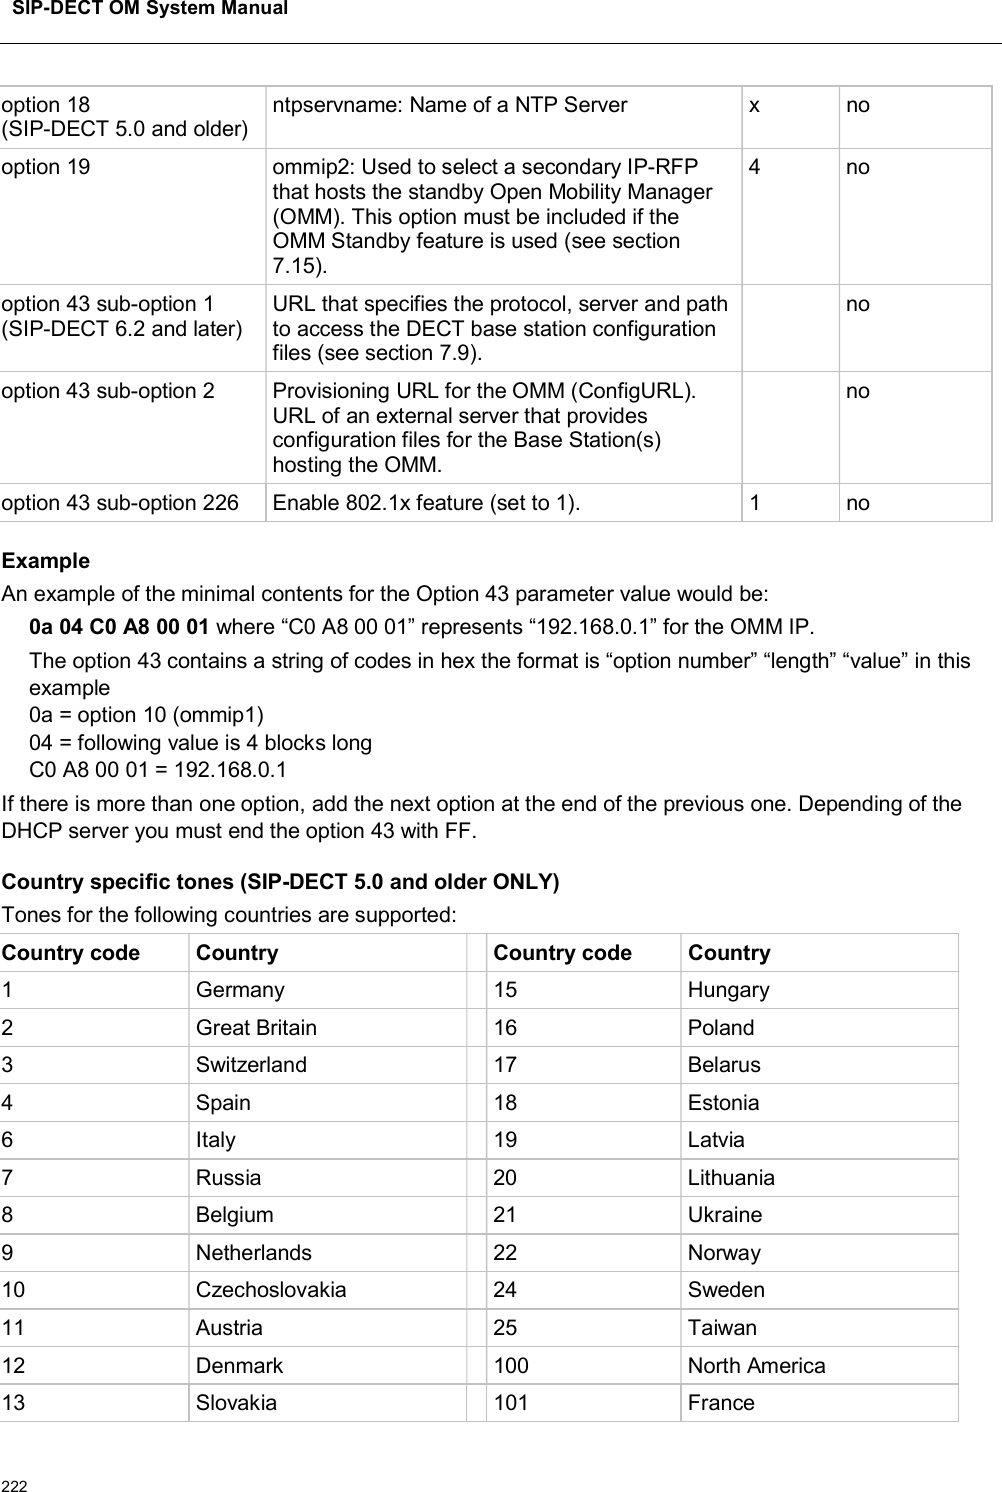
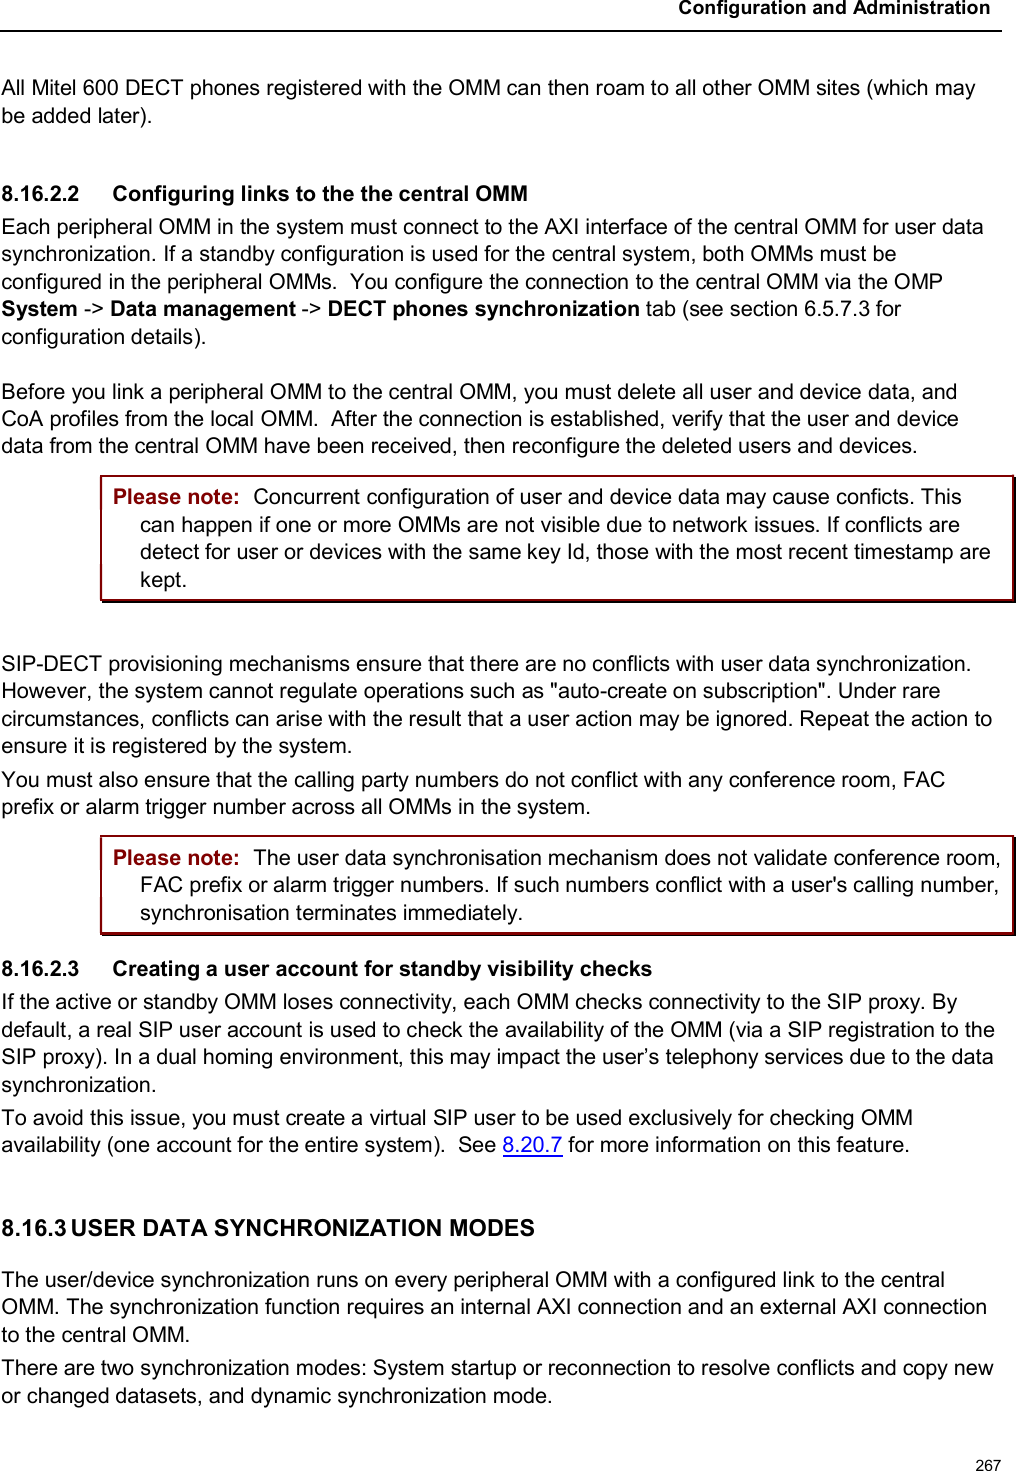
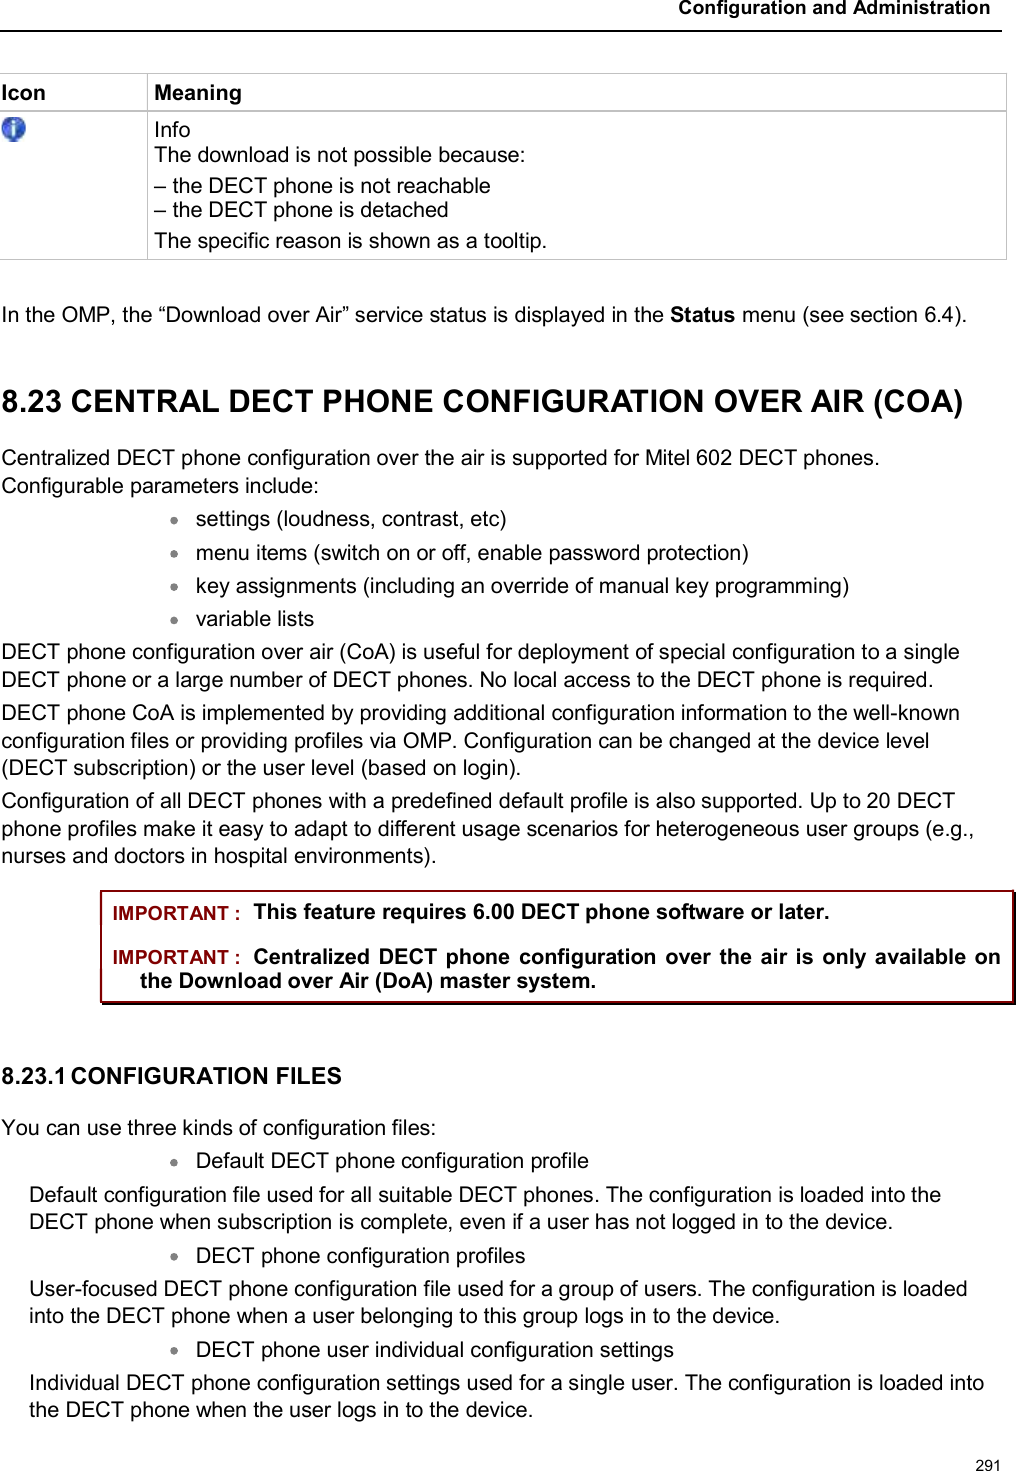
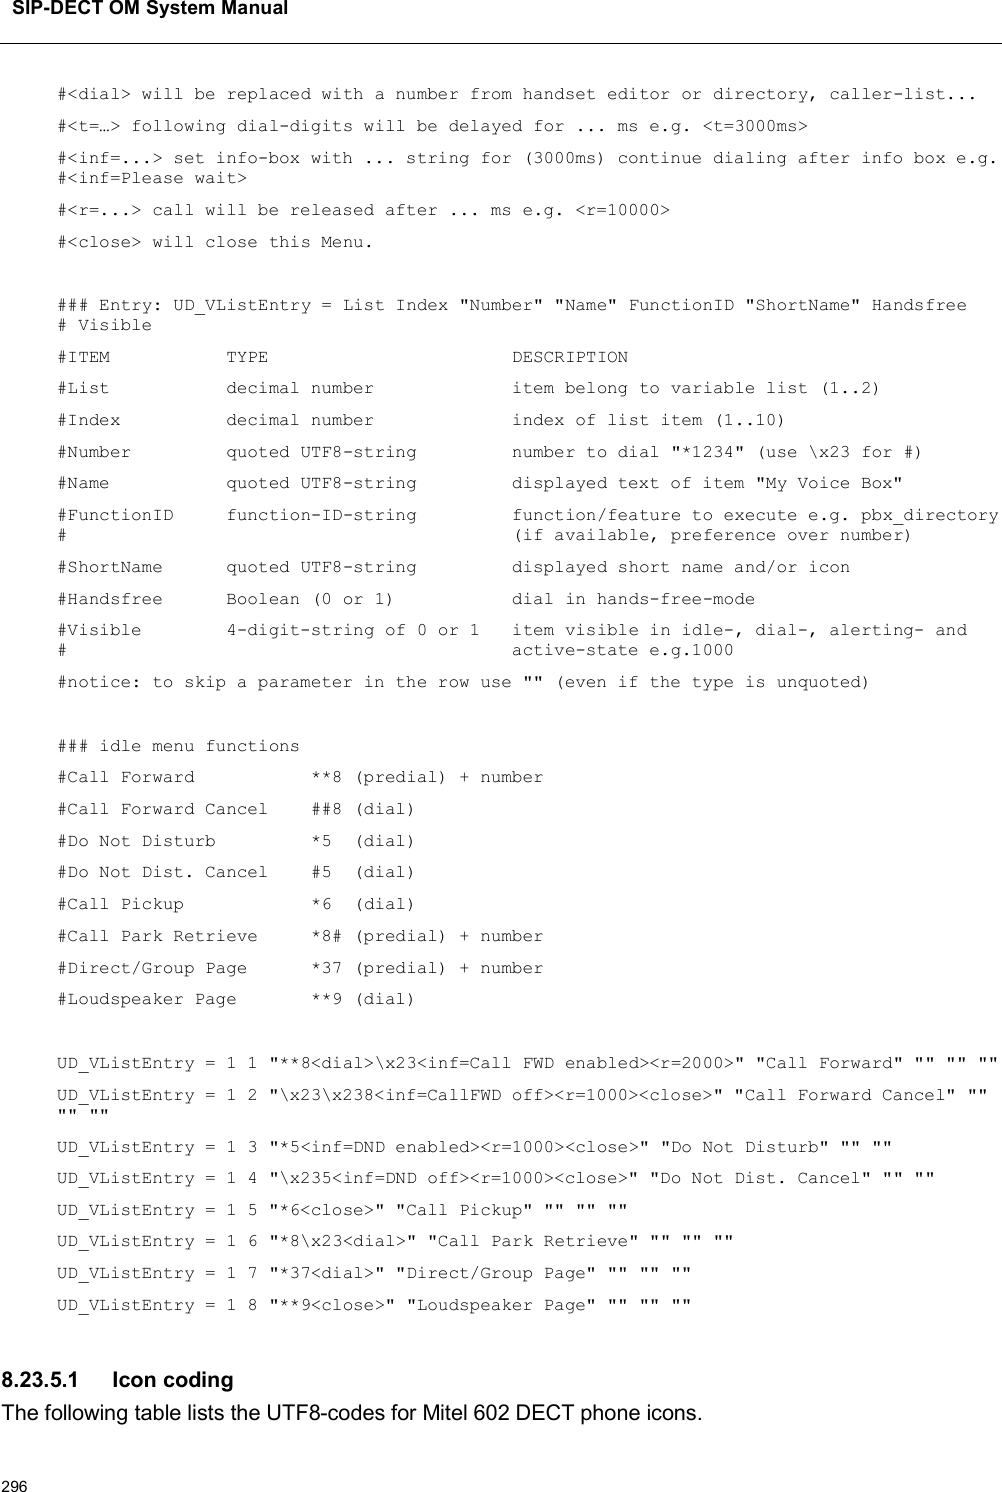
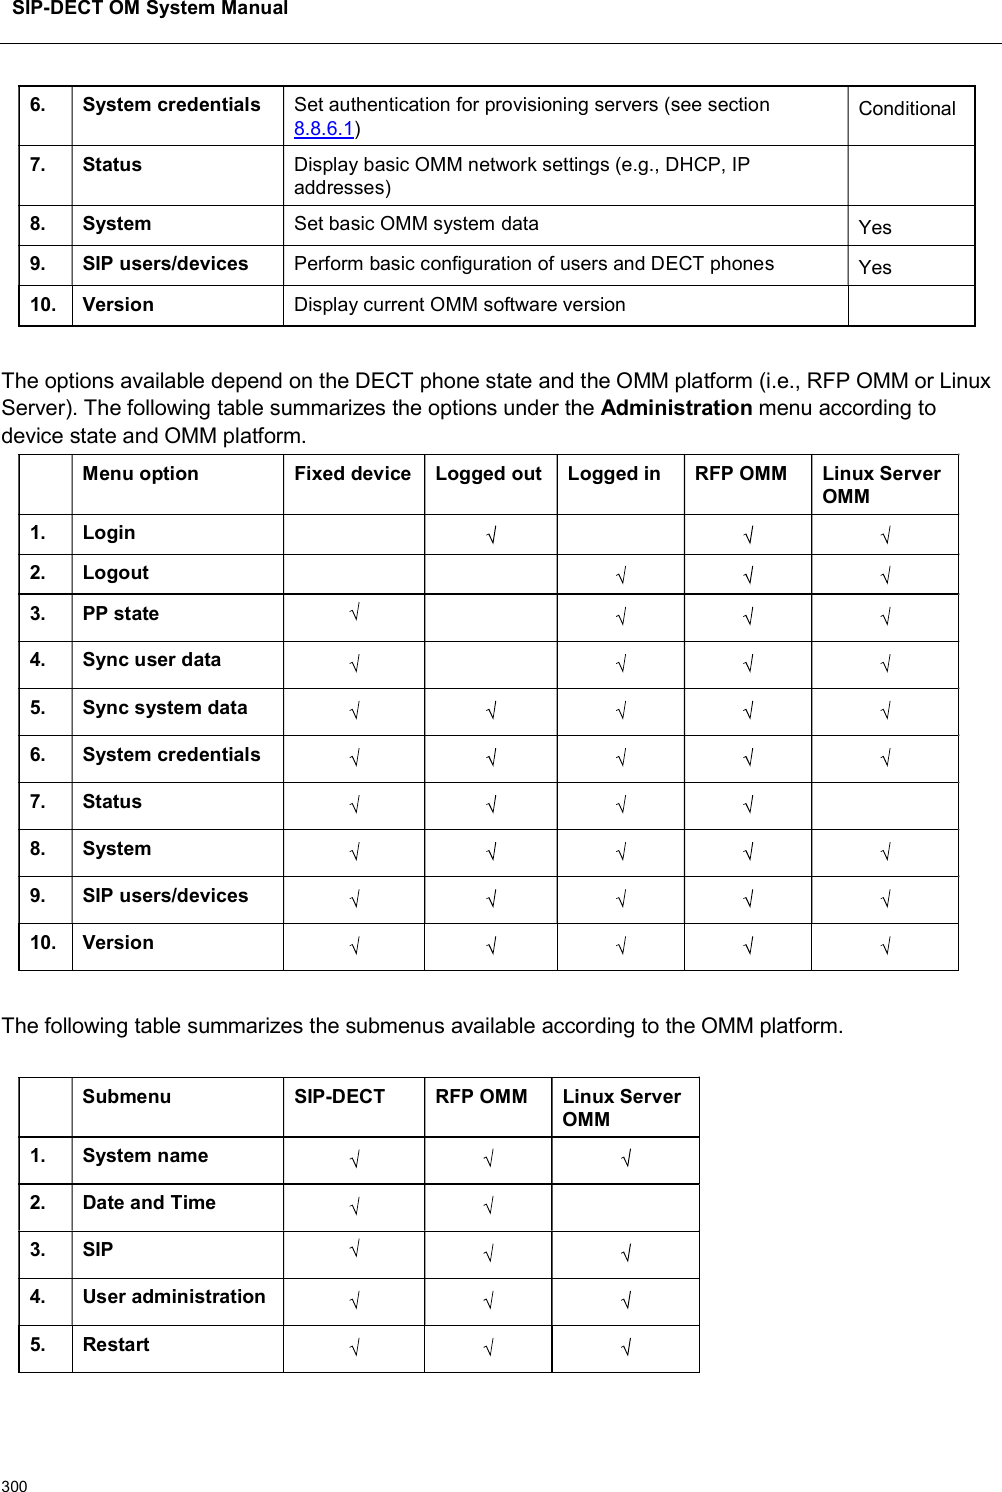
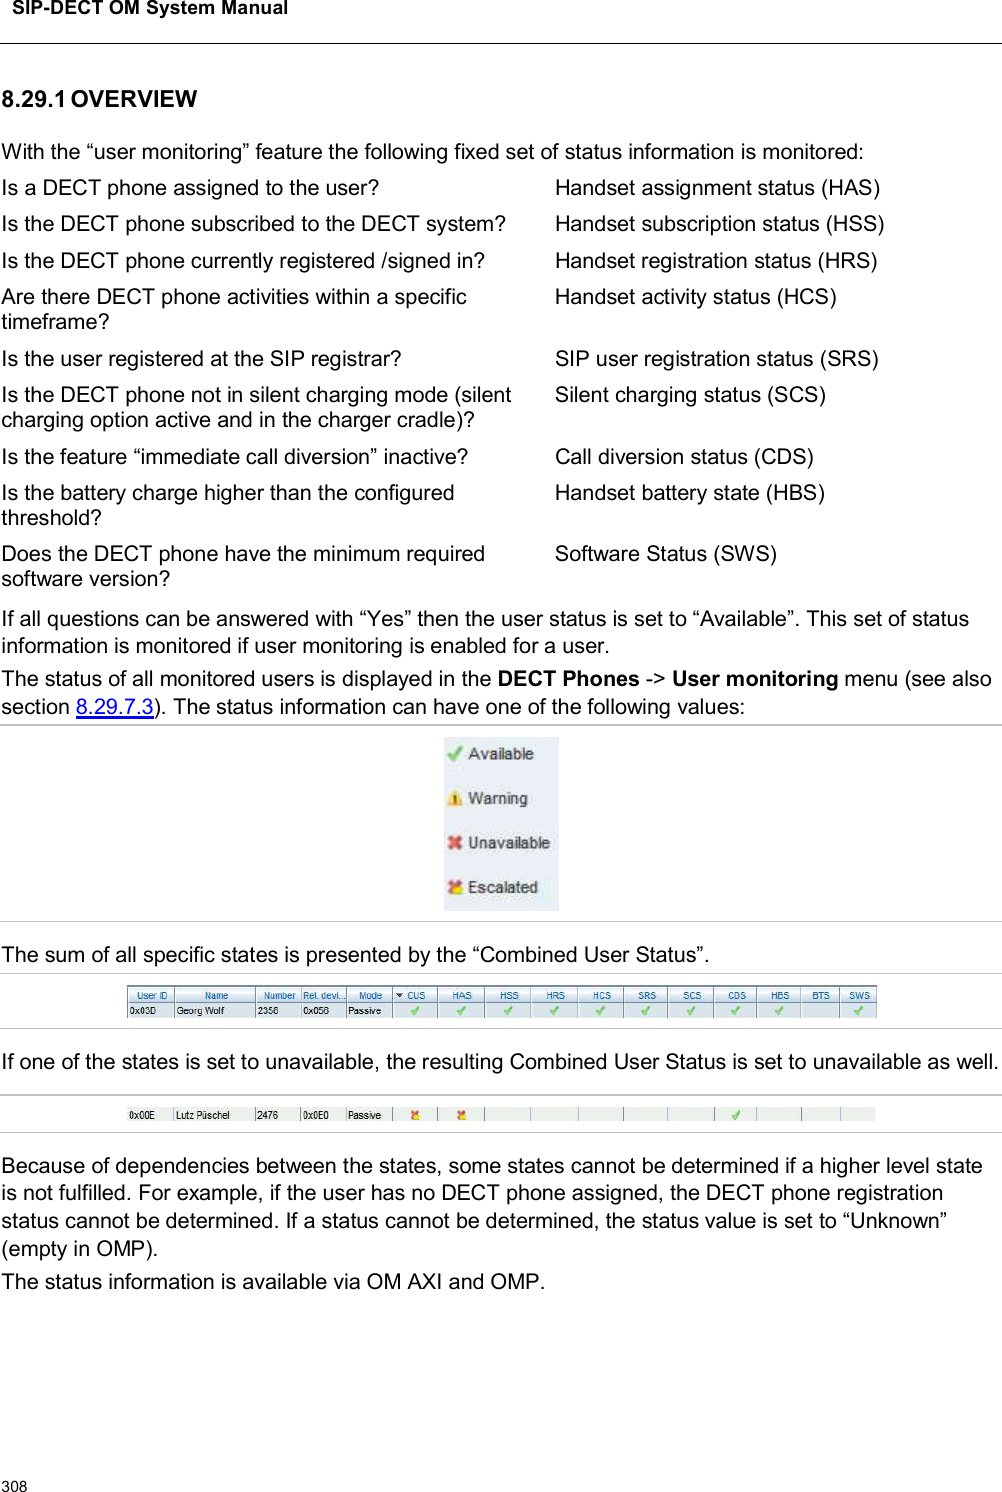
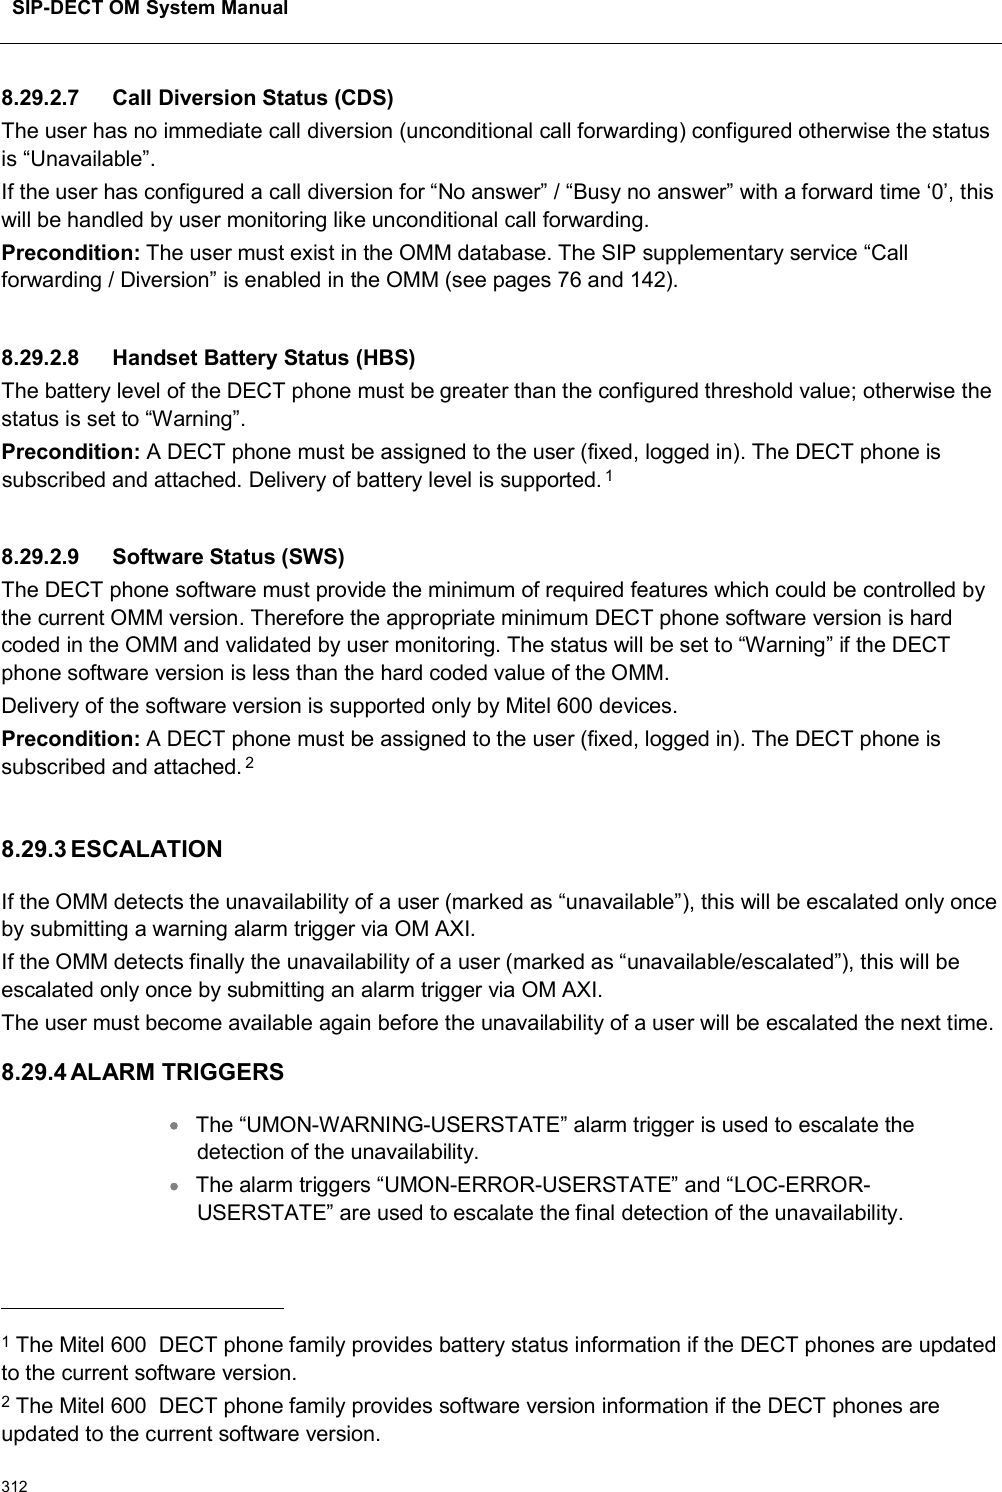
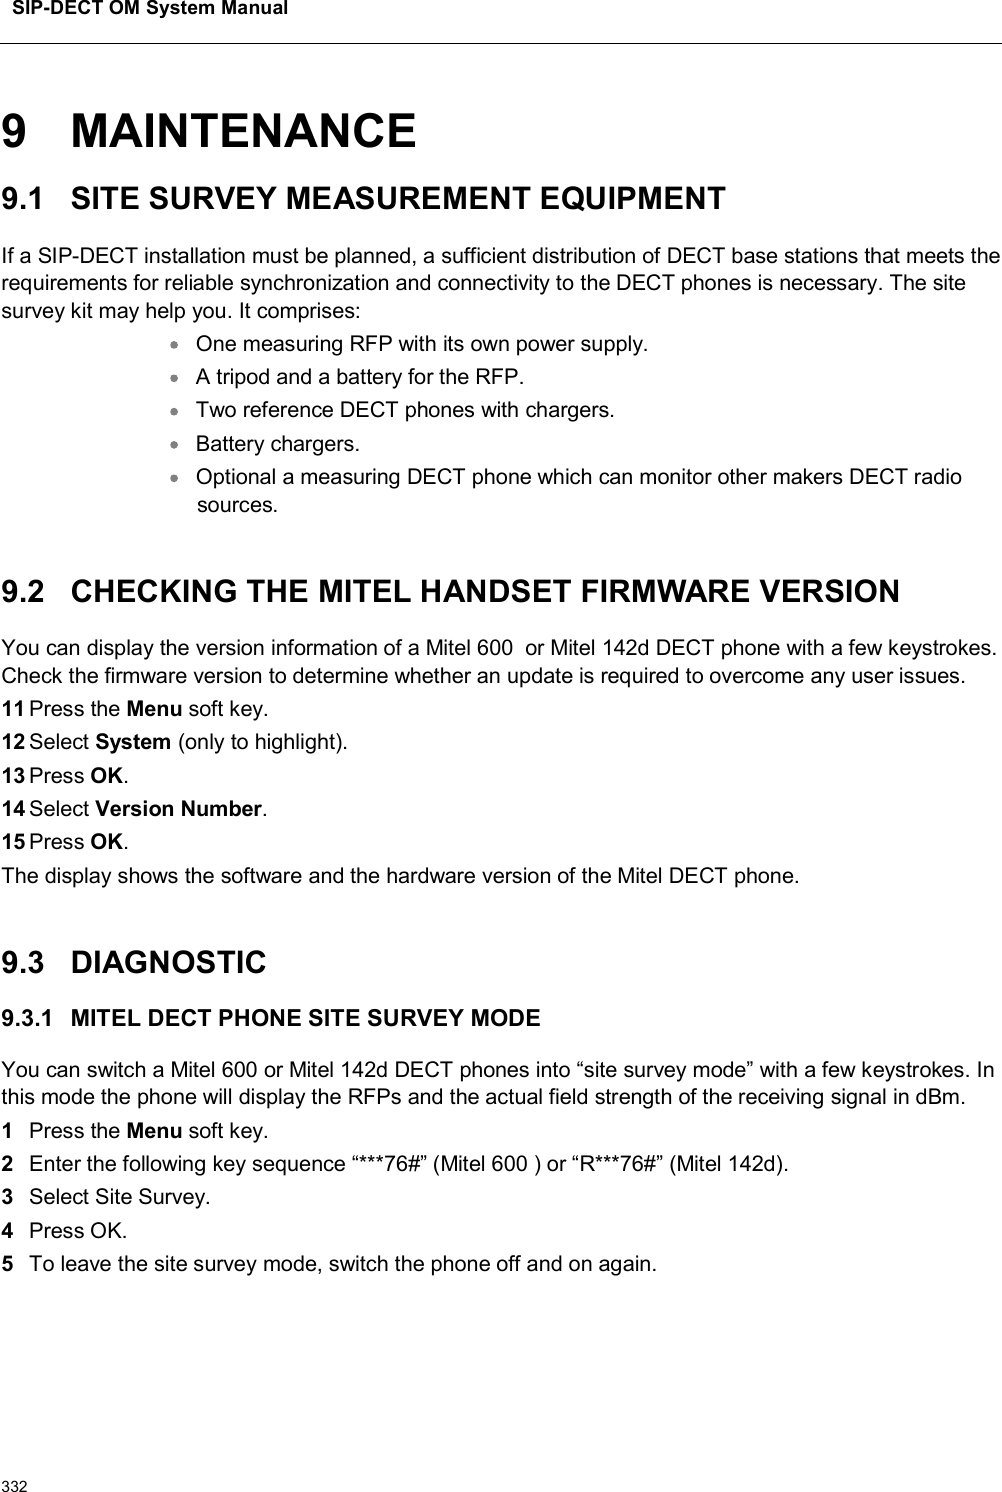
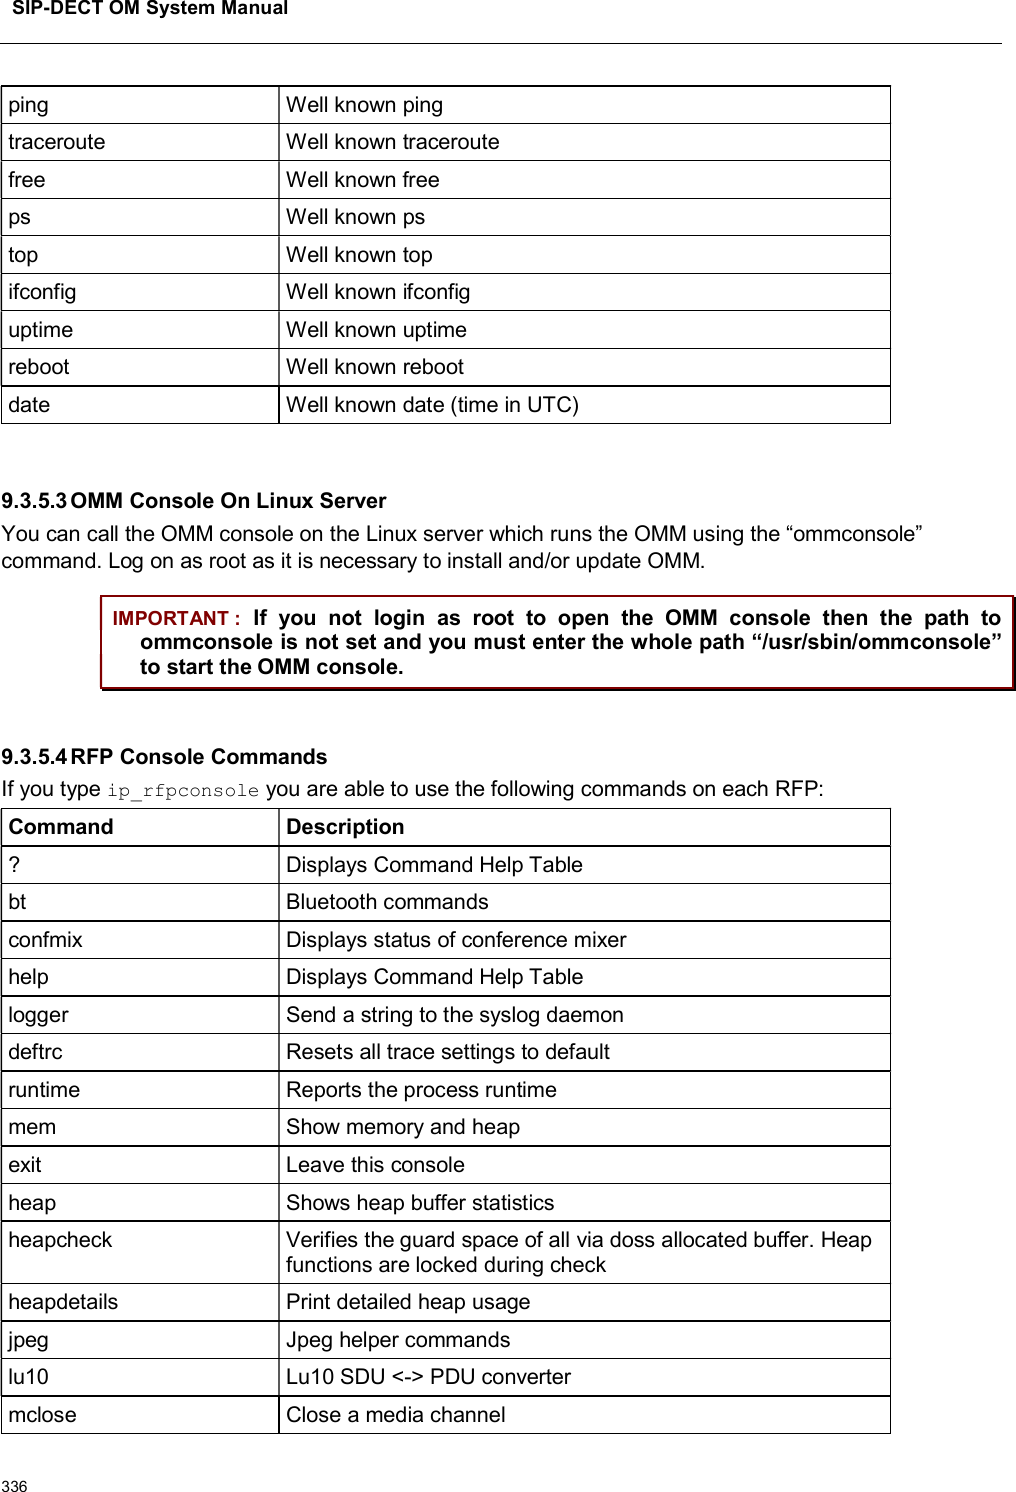
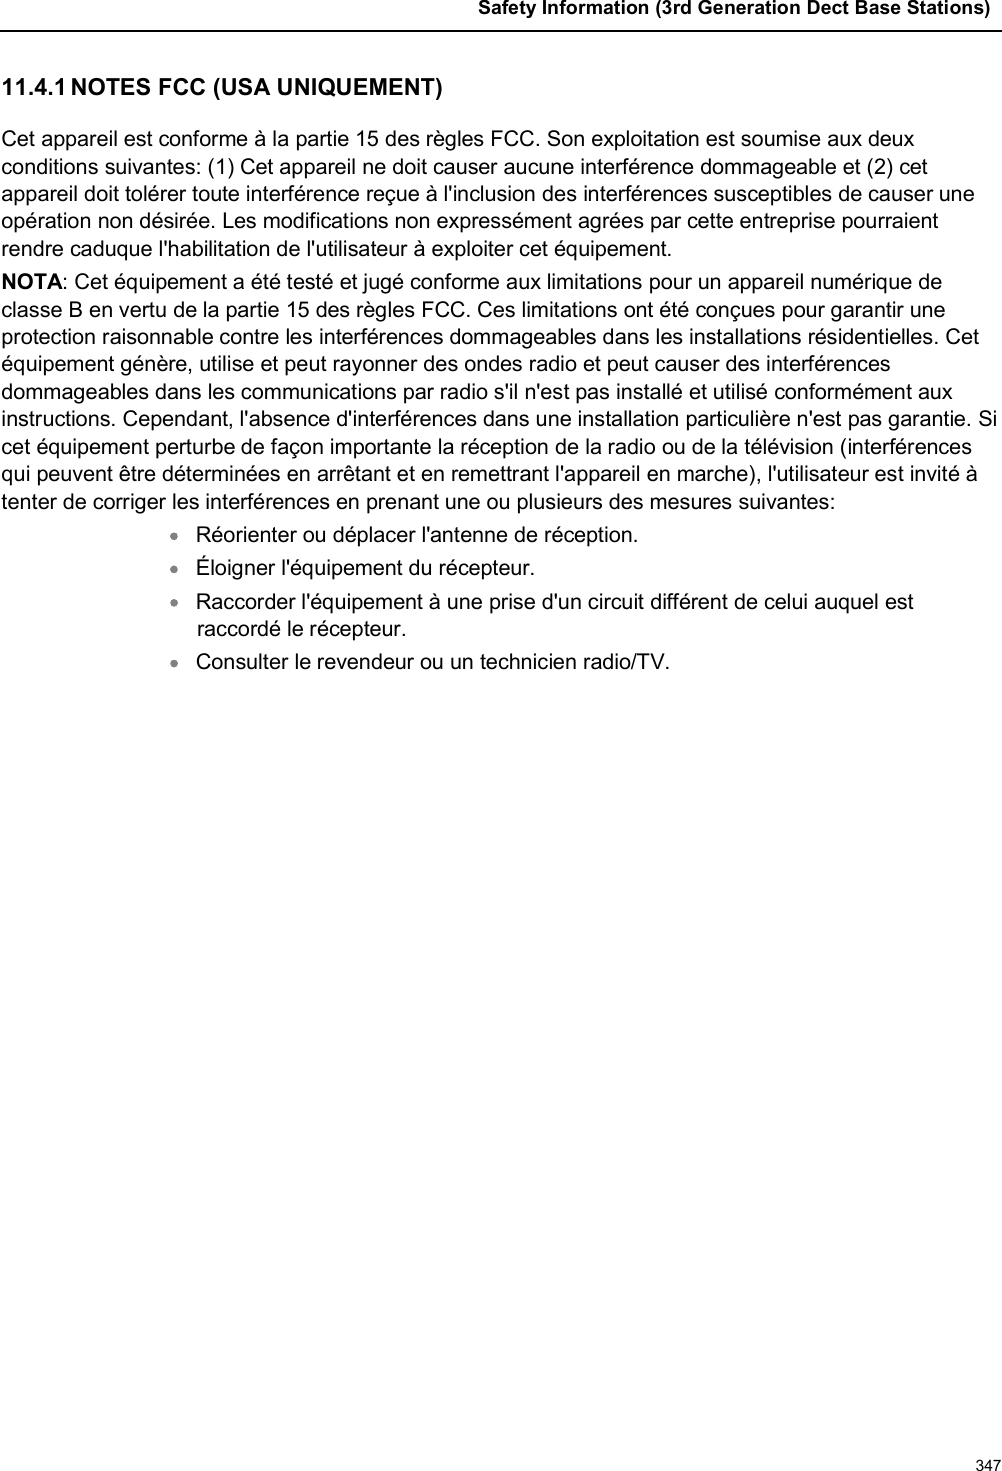
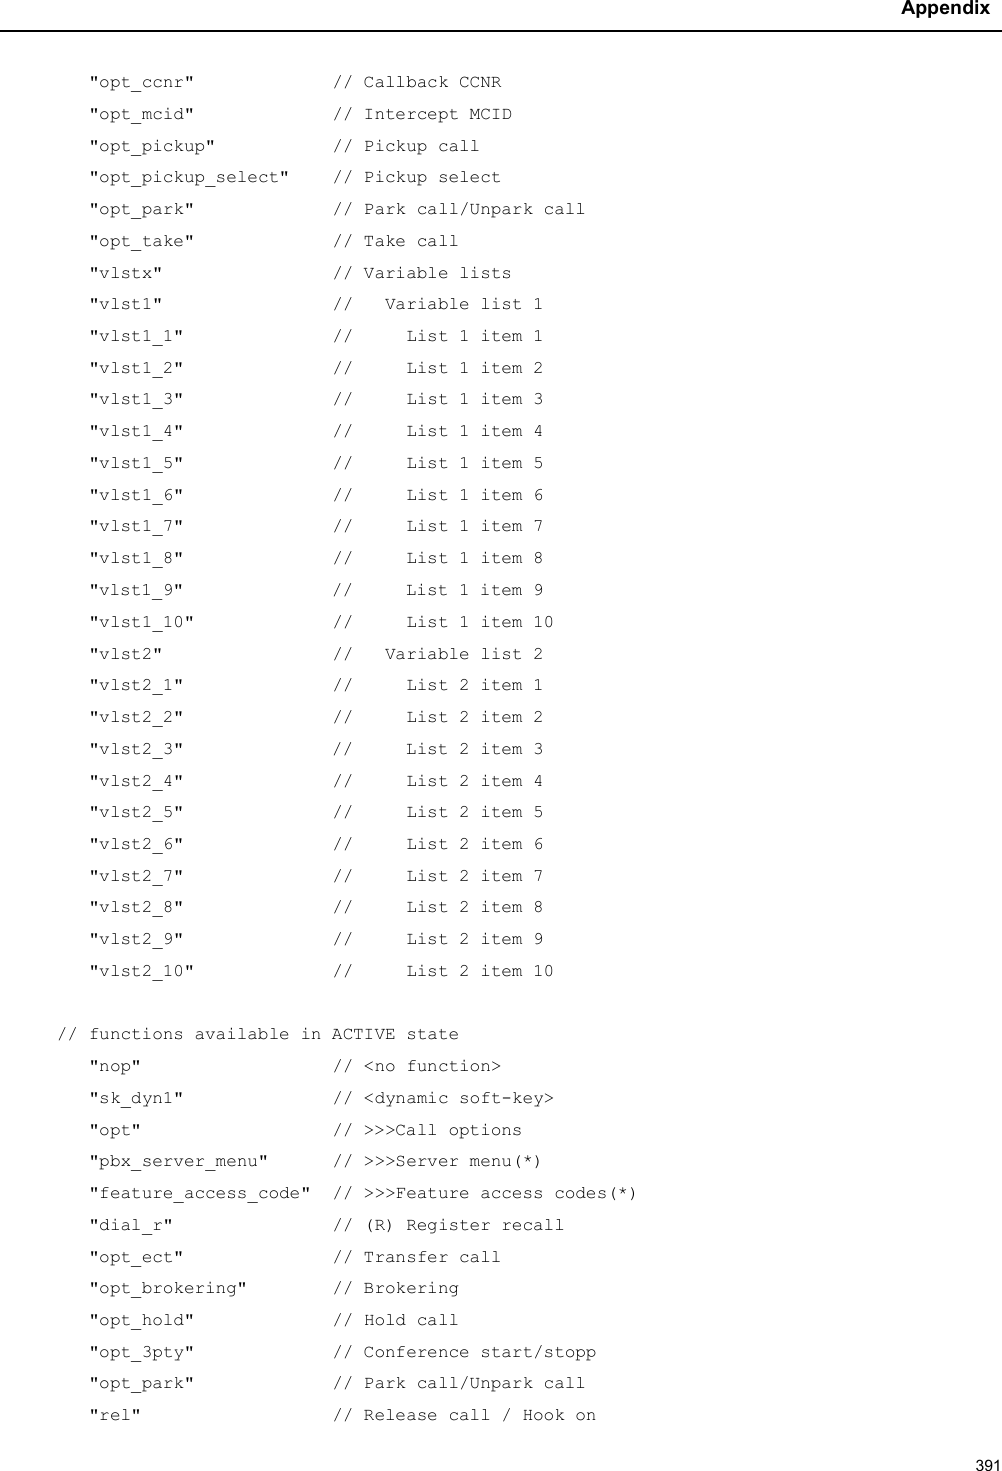
![SIP-DECT OM System Manual248It is possible that all RFPs request “ipdect.cfg” and only selected RFPs request the <MAC>.cfg to obtain a specific configuration on some RFPs.8.9.1.2Fourth Generation DECT Base Stations Configuration FilesThe 4G RFP supports configuration files known as RFP or base station configurations files. Such files can contain the URL for the RFP SW update. As of SIP-DECT 8.0, the new parameter OM_SwImageUrl4G is introduced to configure the SW update URL for 4G RFPs. The SW update URL for 3G RFPs can be configured with the existing parameter OM_SwImageUrl or the new parameter OM_SwImageUrl3G. For example: # path to the software image OM_SwImageUrl=ftp://login:password@server/iprfp3G.dnld OM_SwImageUrl3G= ftp://login:password@server/iprfp3G.dnld OM_SwImageUrl4G= ftp://login:password@server/iprfp4G.dnld.8.9.2 STANDARD IP SETTINGSStandard IP settings (which are necessary for access to the RFP configuration files) are configured via DHCP (see section 8.5) or OM Configurator (see section 8.7). These are:IP addressNet maskGateway (i.e. router)Boot file nameTFTP serverPublic option 224: “OpenMobility” or “OpenMobilitySIP-DECT” (to identify the relevant DHCP offer)Domain Name Server (optional)Domain Name (optional)URL to the RFP configuration filesAll other parameters can be set by using an RFP configuration file even if standard DHCP options or OM Configurator parameters exist.8.9.3 CONFIGURATION FILE SOURCEA TFTP / FTP(S) / HTTP(S) URL specifies the protocol, server and path to access the RFP configuration files. The URL can include account data if appropriate.Syntax:{ftp|ftps|http|https}://[user:password@]server/[directory/]ortftp://server/[directory/]The URL configuration is provided via DHCP option code 233 (prio1), or the OM Configurator.](https://usermanual.wiki/Mitel-Networks/RFP47DRC.User-Manual-II/User-Guide-4037307-Page-48.png)
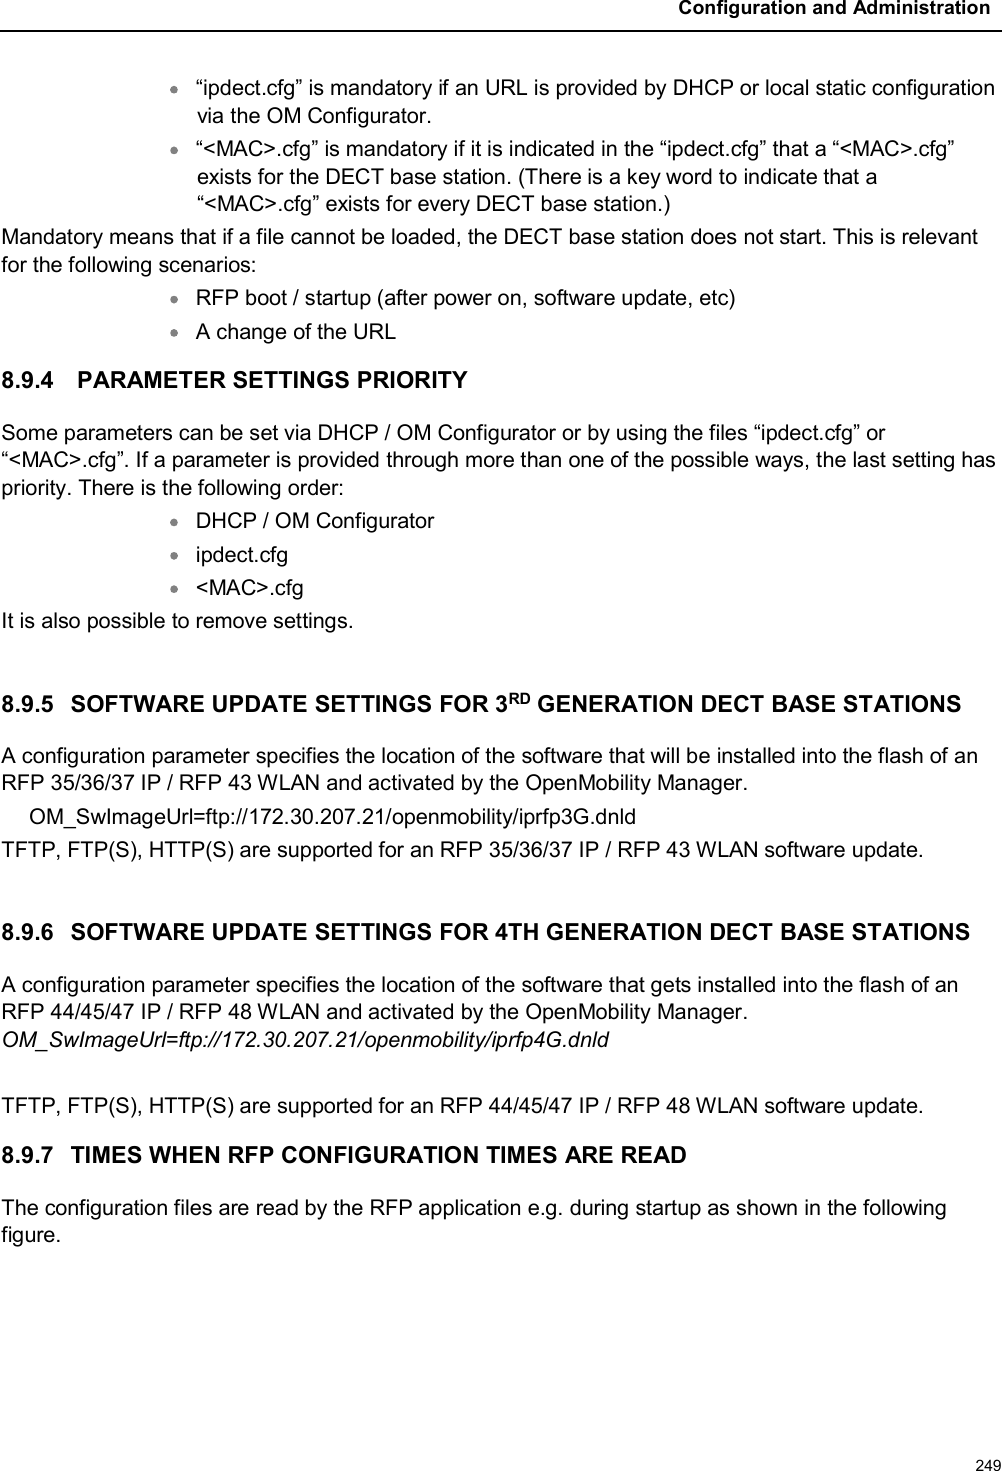

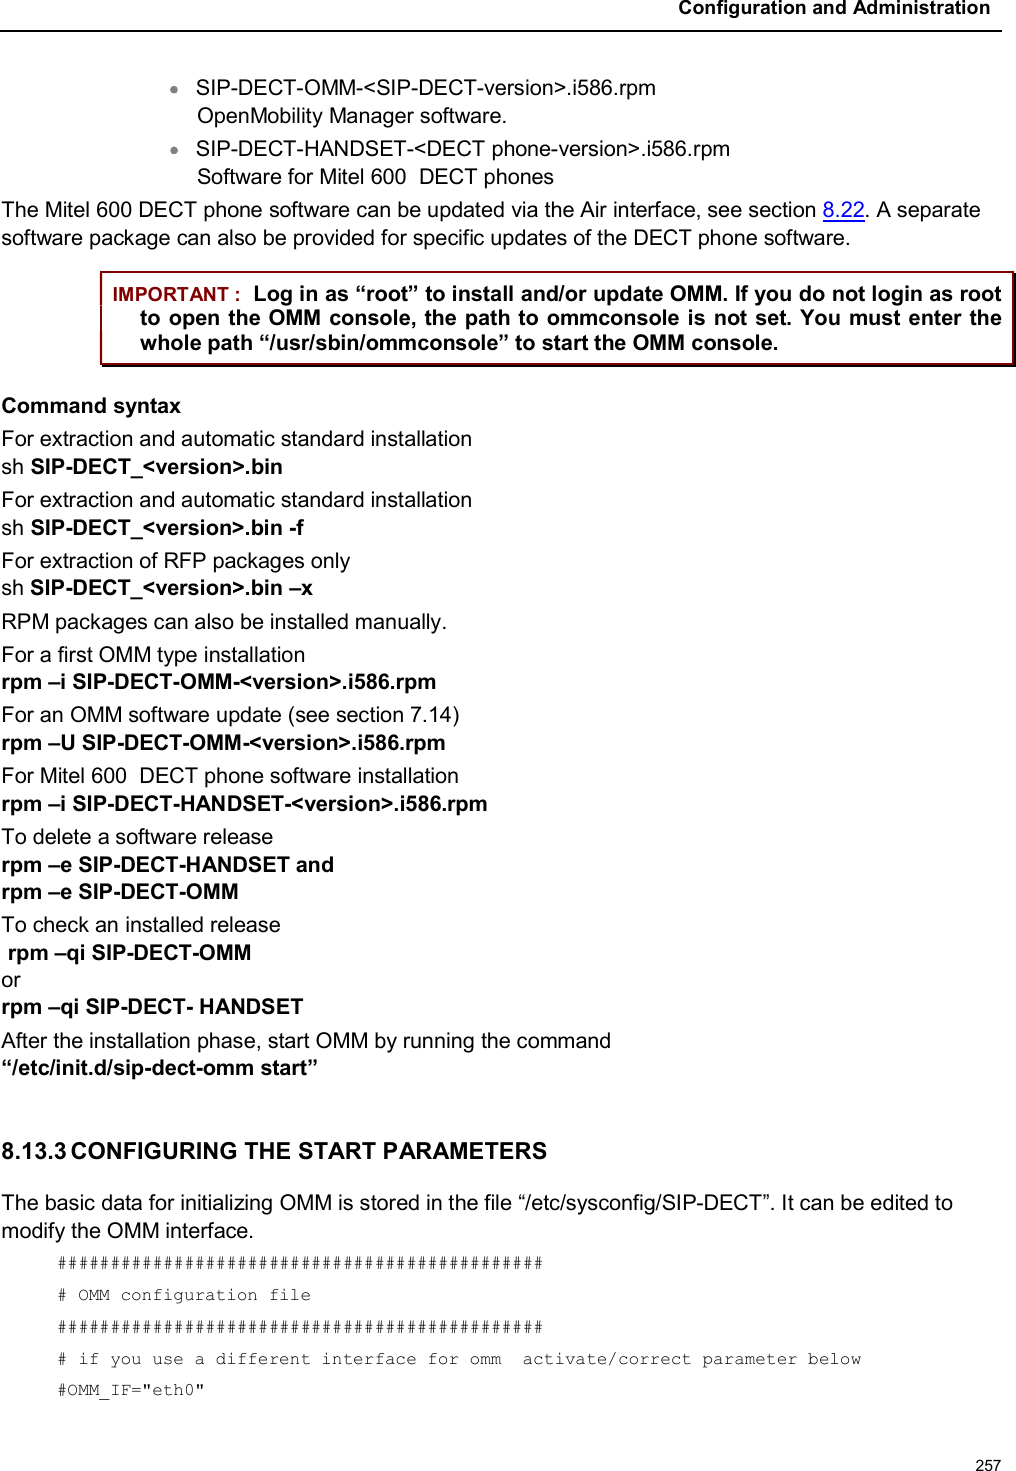
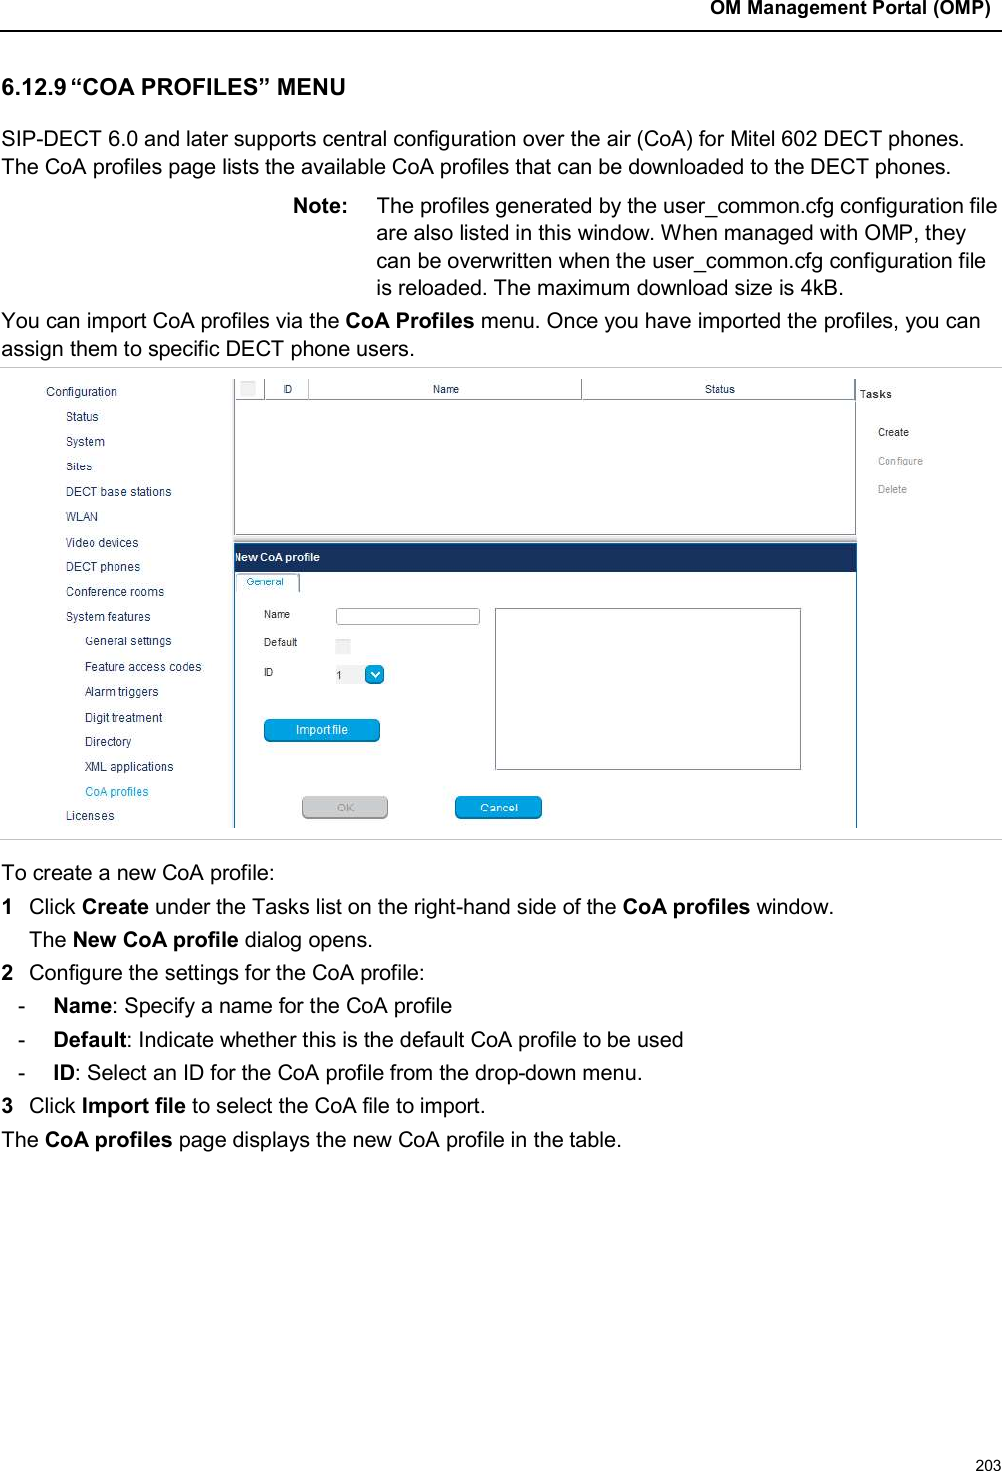
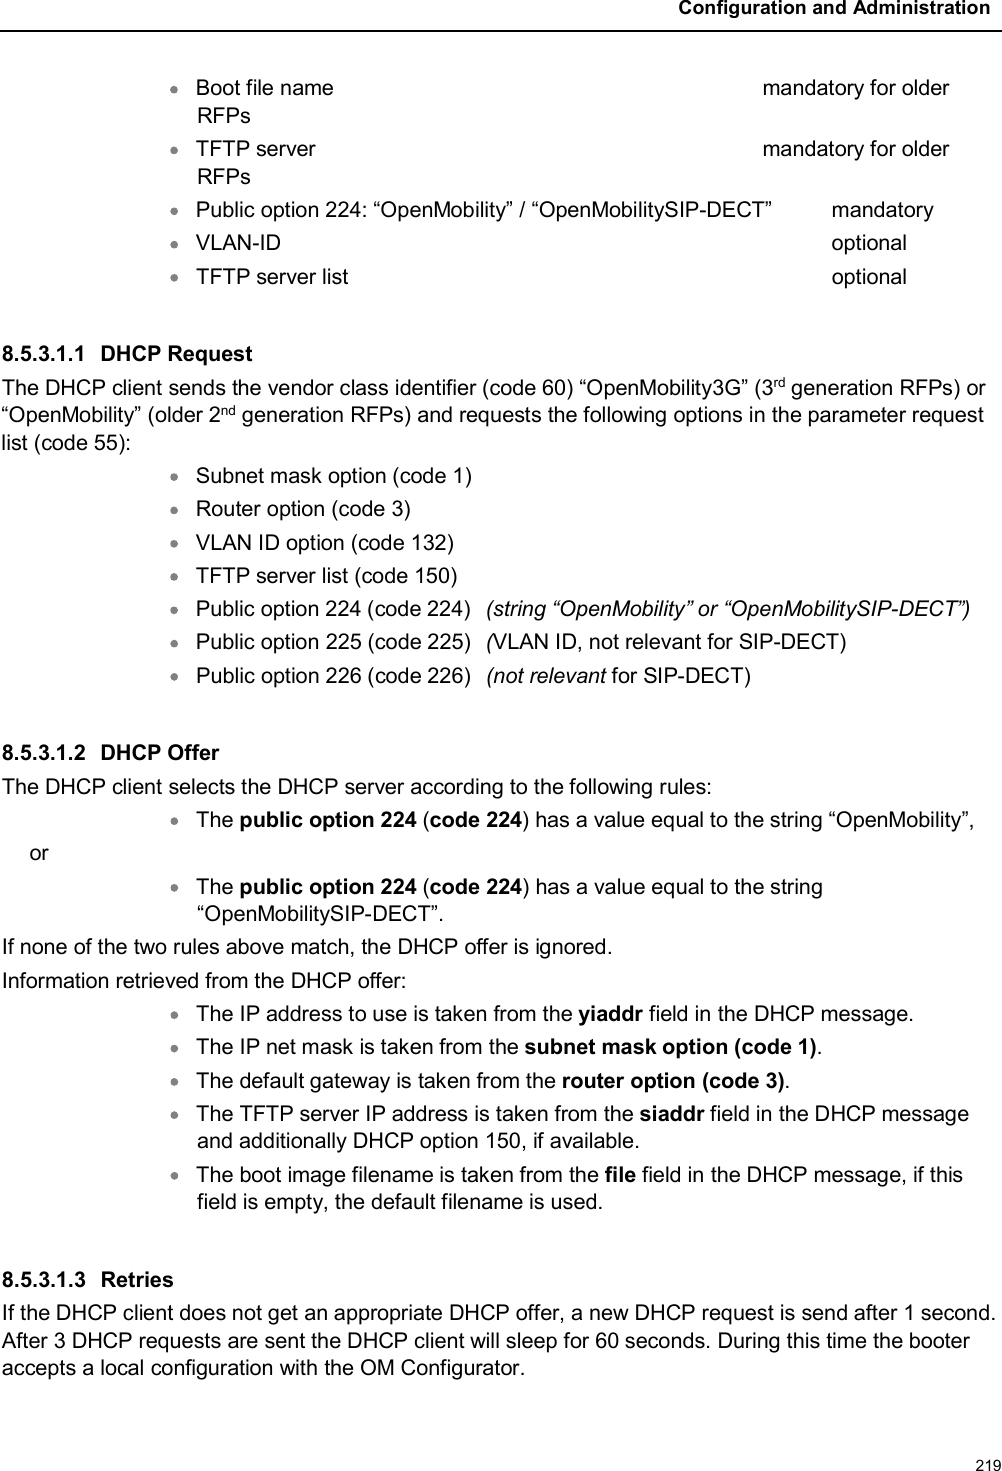
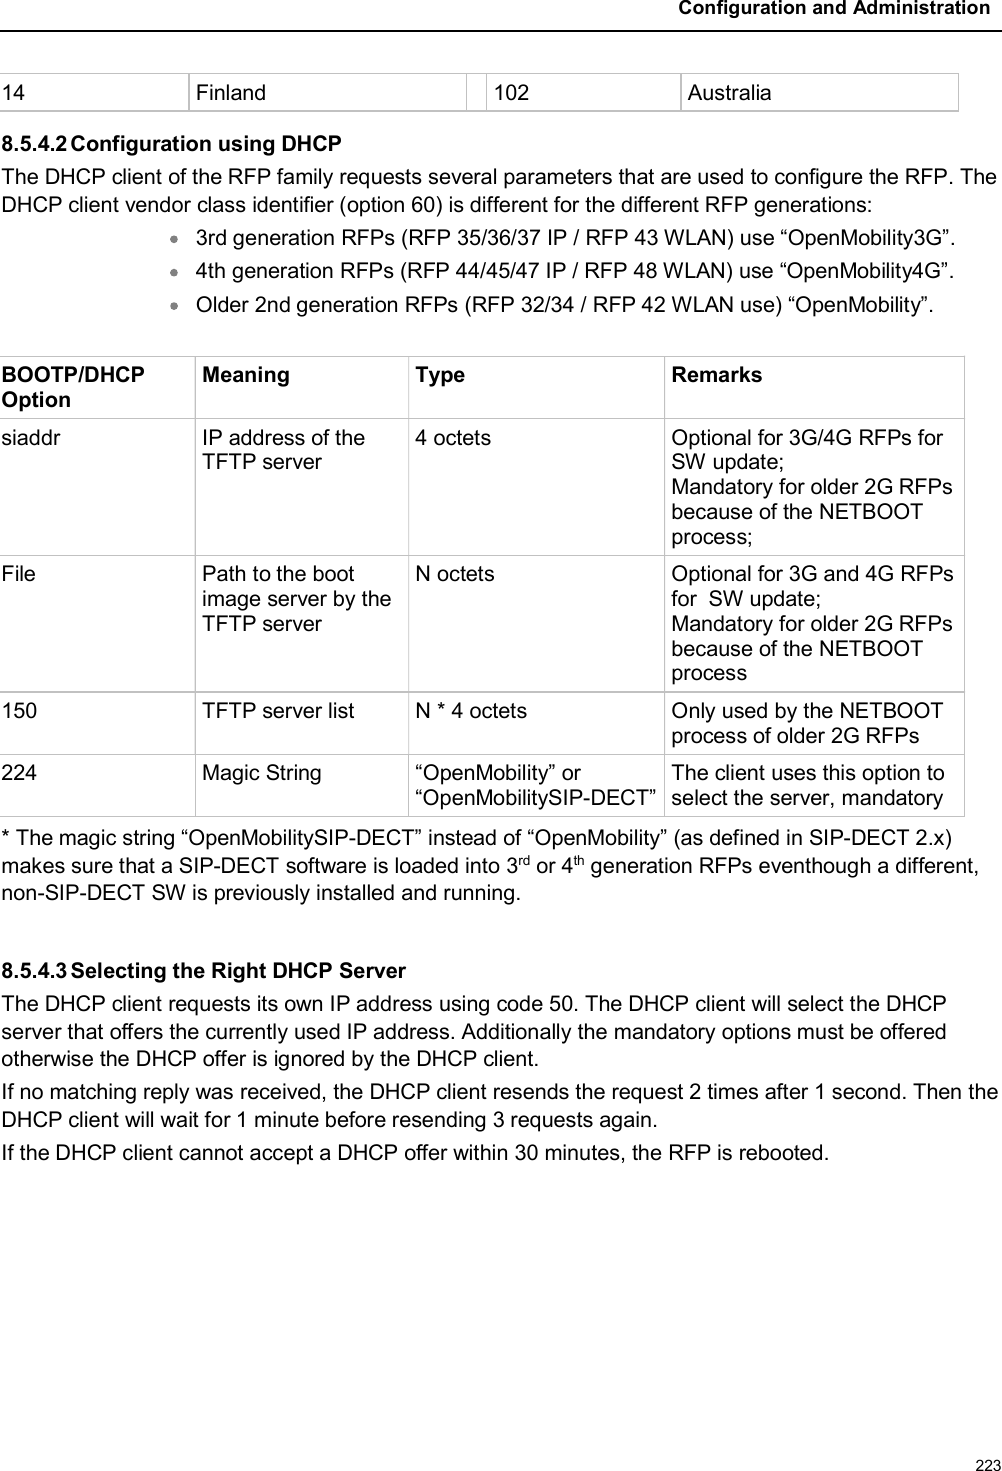
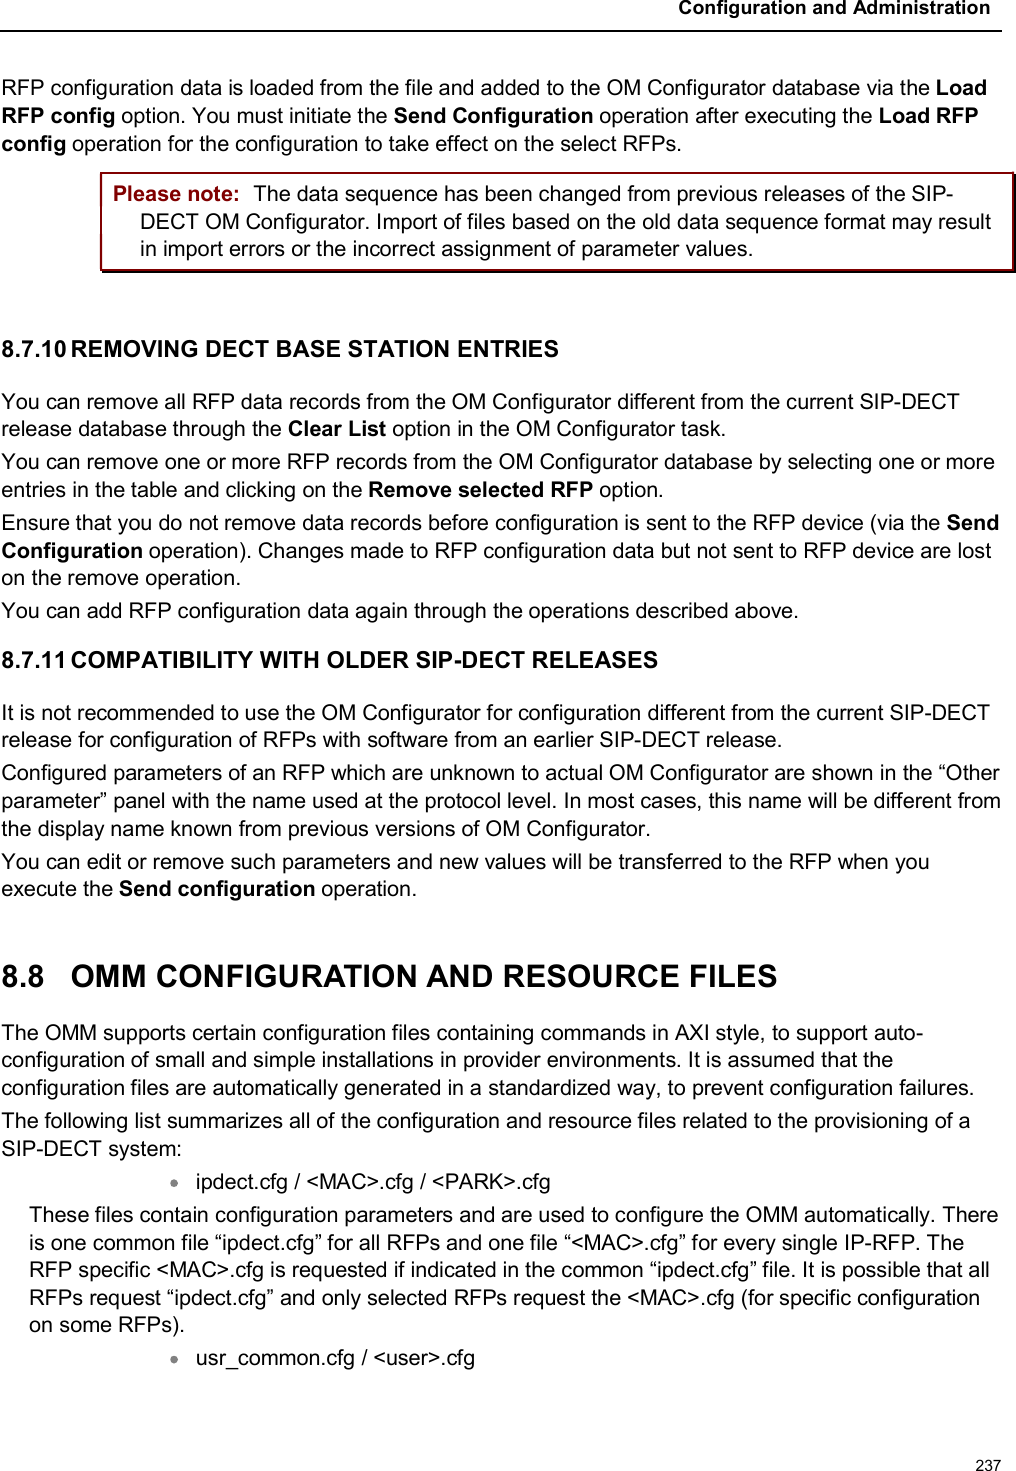
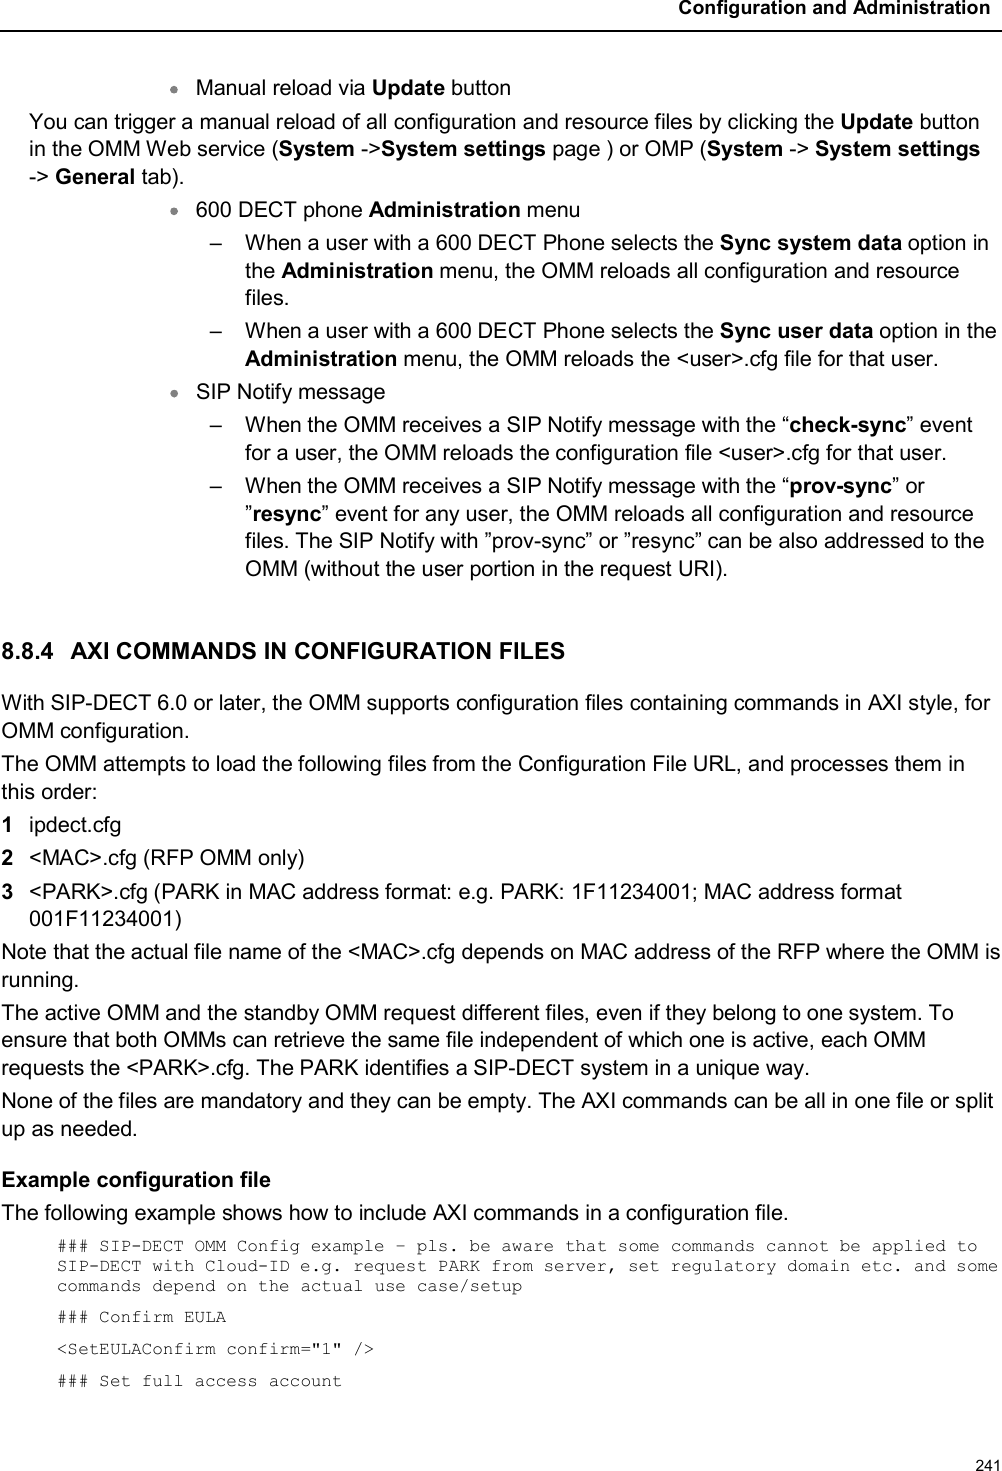
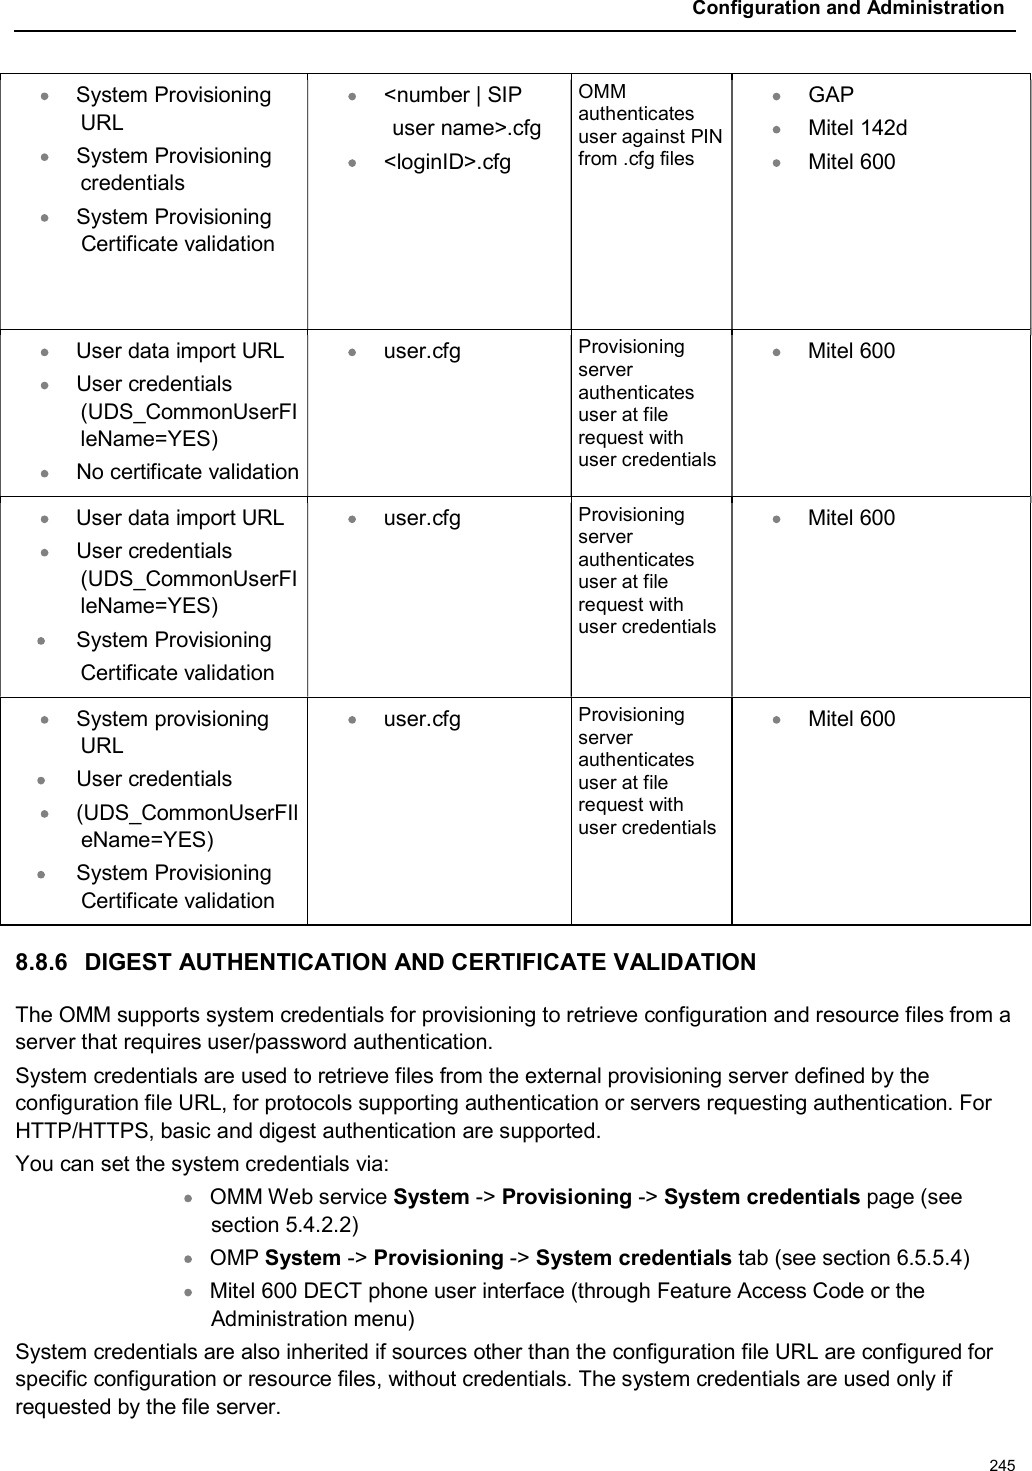
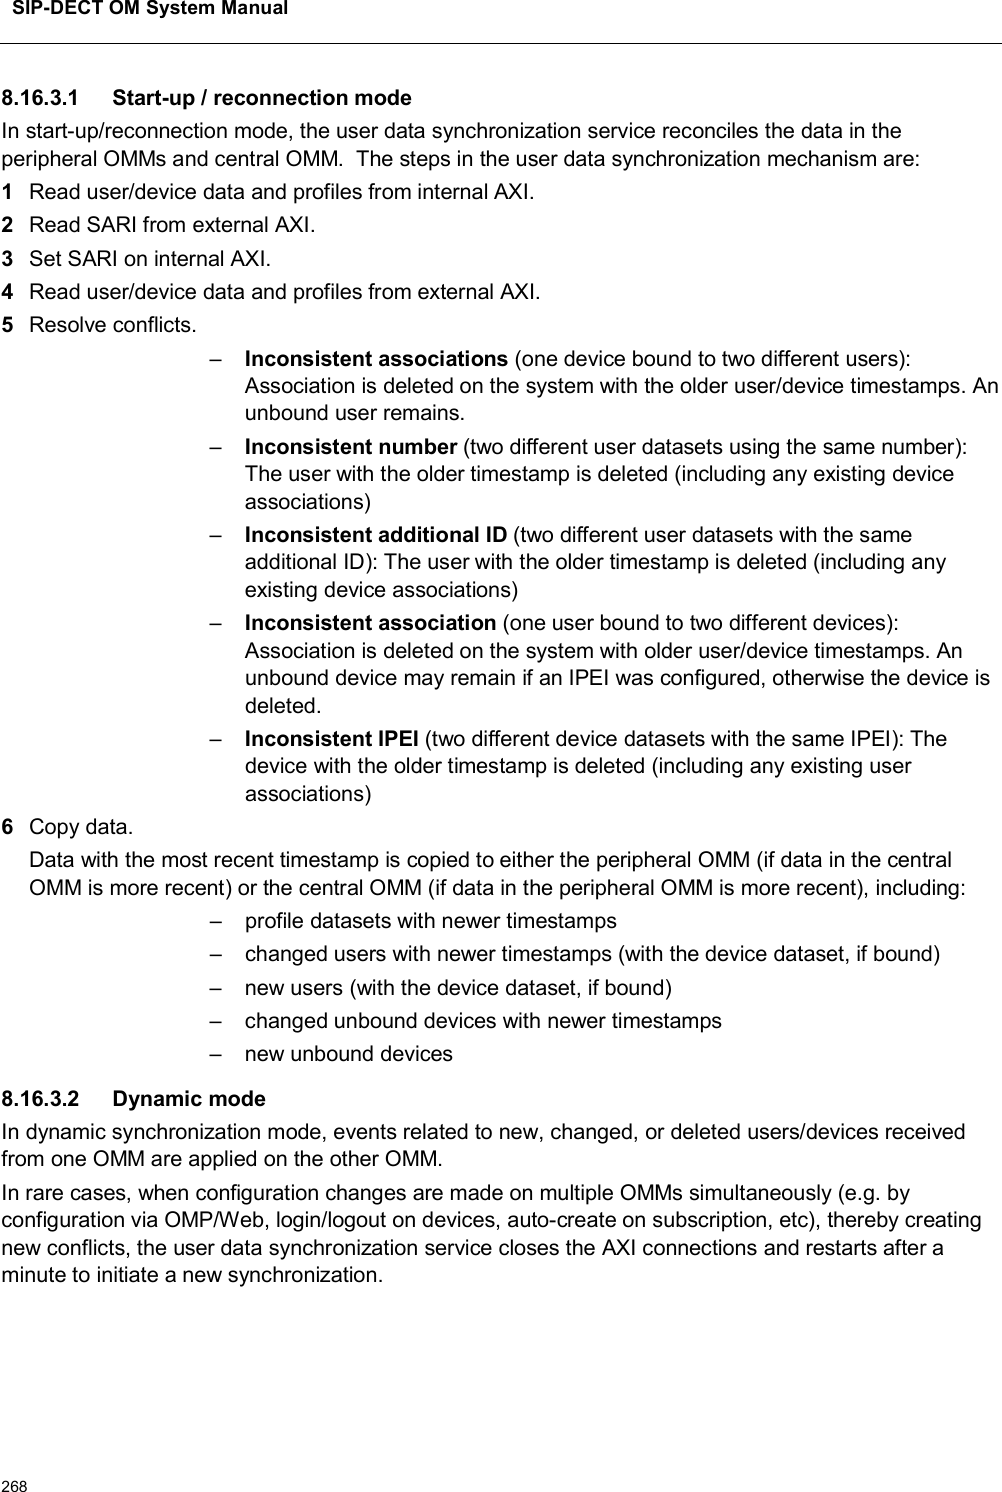
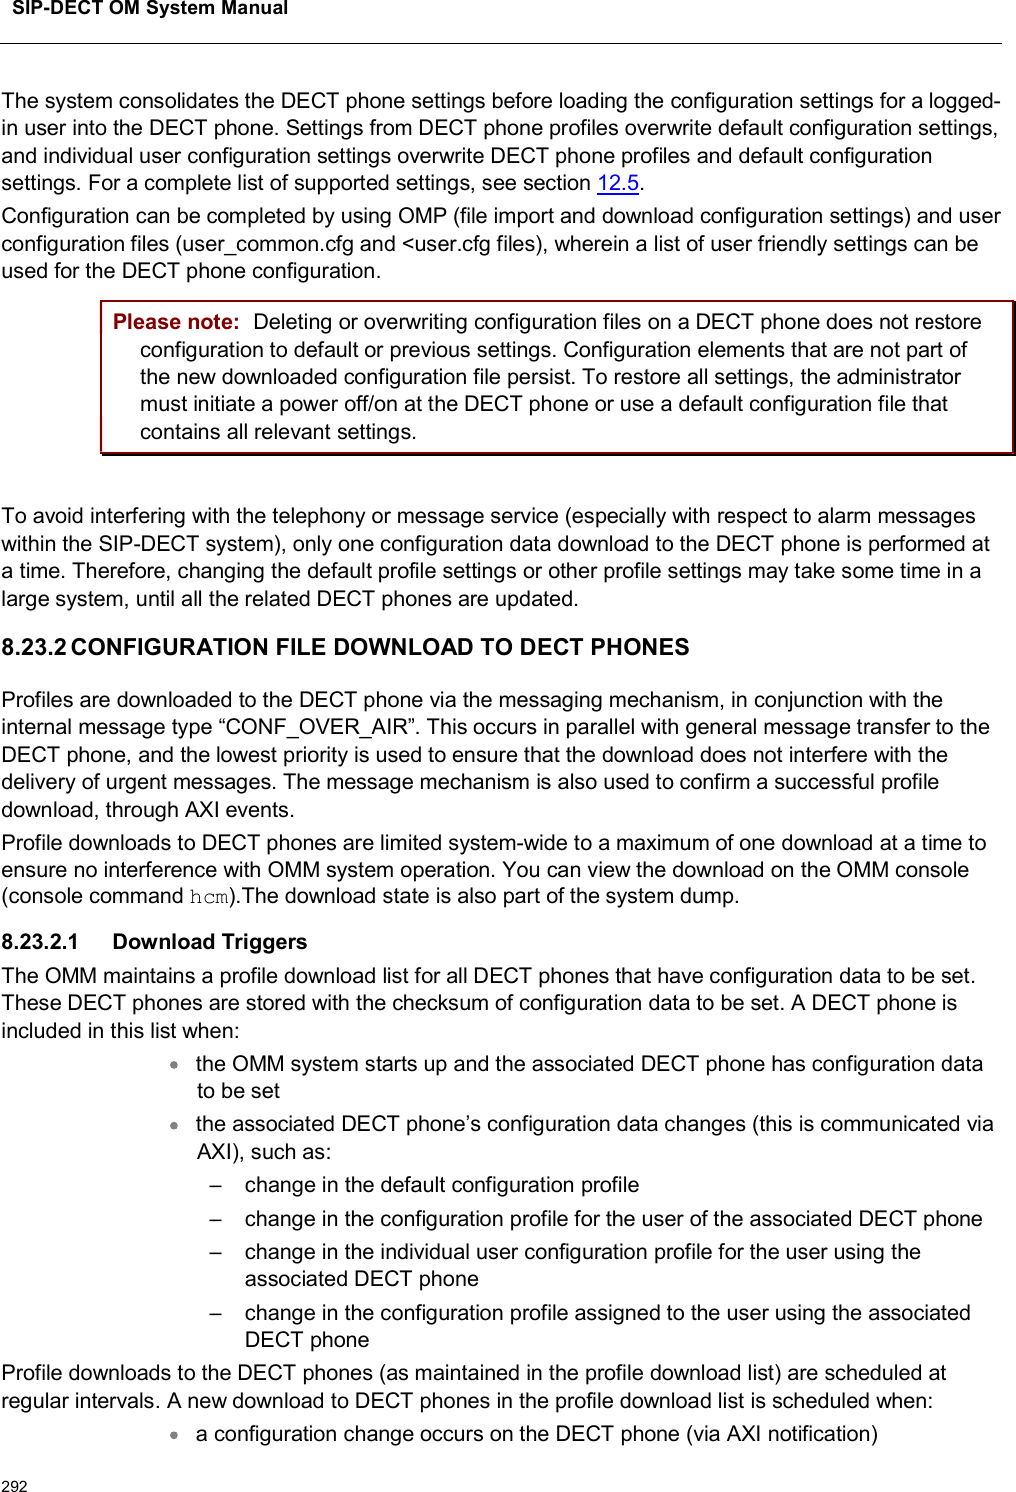
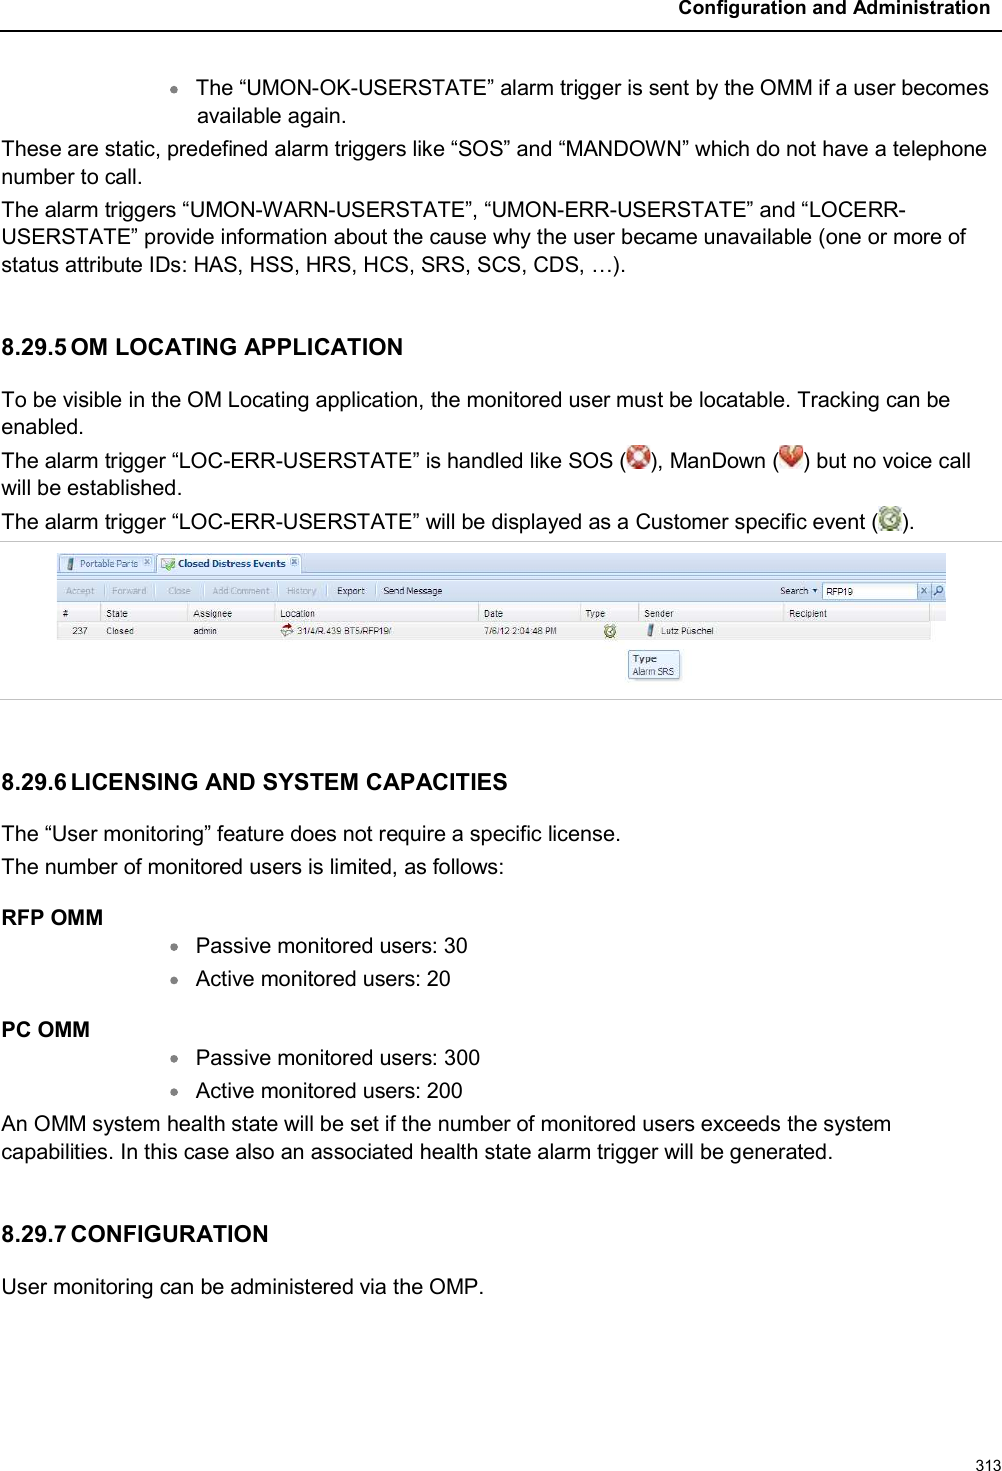
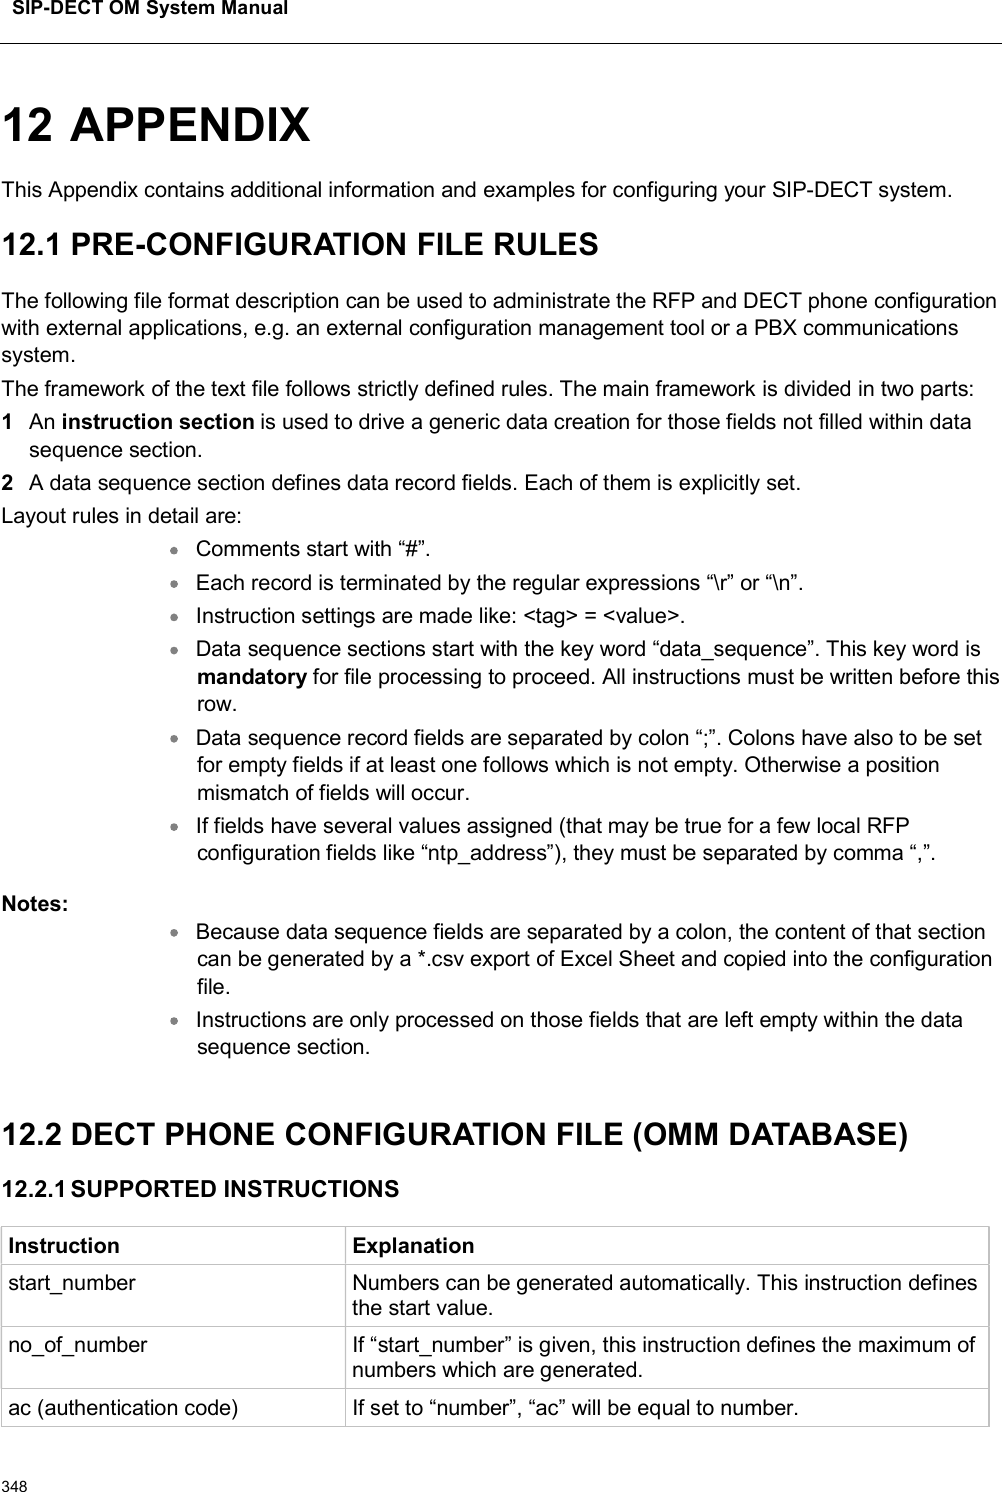
![SIP-DECT OM System Manual258#OMM_CONFIG_FILE=/opt/SIP-DECT/tmp/omm_conf.txt##if you use OMM resiliency for OMM activate parameter below with OMMs IP adresses#OMM_RESILIENCY="192.168.0.1:192.168.0.2"## Automatic OMM database import:# TFTP / FTP / HTTP(S) URL specifies the import server and fileParameters DescriptionOMM_IF Interface for communicating with the RFPs (by default: eth0)OMM_CONFIG_FILE File that contains the OMM configuration (by default: /opt/SIP-DECT/tmp/omm_conf.txt)OMM_RESILIENCY In case of OMM redundancy, enter the two IP addresses of the OMMs. See also section 7.15.8.13.4 SPECIFIC COMMANDS – TROUBLESHOOTINGThe OMM software is installed but does not work automatically when the PC starts. The command below stops or starts OMM manually (User root): /etc/init.d/sip-dect [start|stop|restart].The command line interface for OMM is accessible via telnet on port 8107.MalfunctionTo check whether OMM is working, see the list of procedures for the “SIP-DECT” process. If OMM does not start, delete the lock file “/var/lock/subsys/SIP-DECT”.To delete the OMM configuration remove the OMM configuration file “/opt/SIP-DECT/tmp/omm_conf.txt” (by default).8.14 UPDATING THE OMMThe procedures for updating an existing DECT installation with new software depend on whether a single OMM or standby OMM installation is used whether the OMM is running on an RFP or PCThe OMM “standby” feature is described in section 8.15.The update mechanism allows an update of the RFPs with minimum impact to DECT services, especially for installations with a standby OMM.All RFPs check the availability of a new boot image file automatically when:the DHCP lease is refreshed,the RFP lost the connection to the OMM,one of the service applications running on the RFP must be restarted, andan RFP configuration file update check is done (see section 8.7.7).](https://usermanual.wiki/Mitel-Networks/RFP47DRC.User-Manual-II/User-Guide-4037307-Page-58.png)
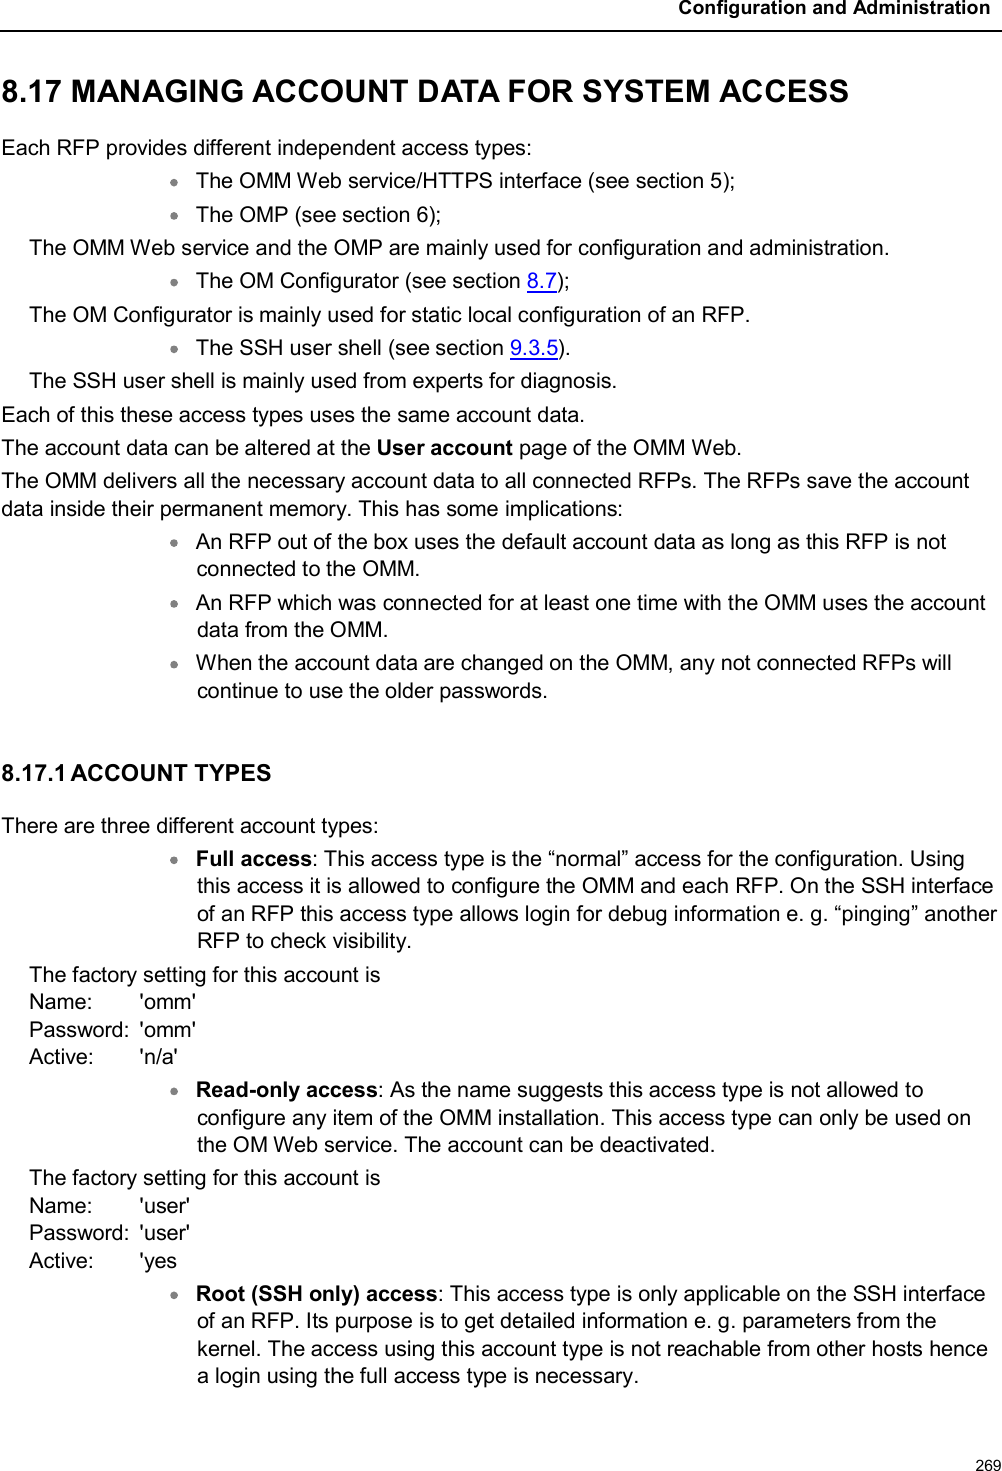
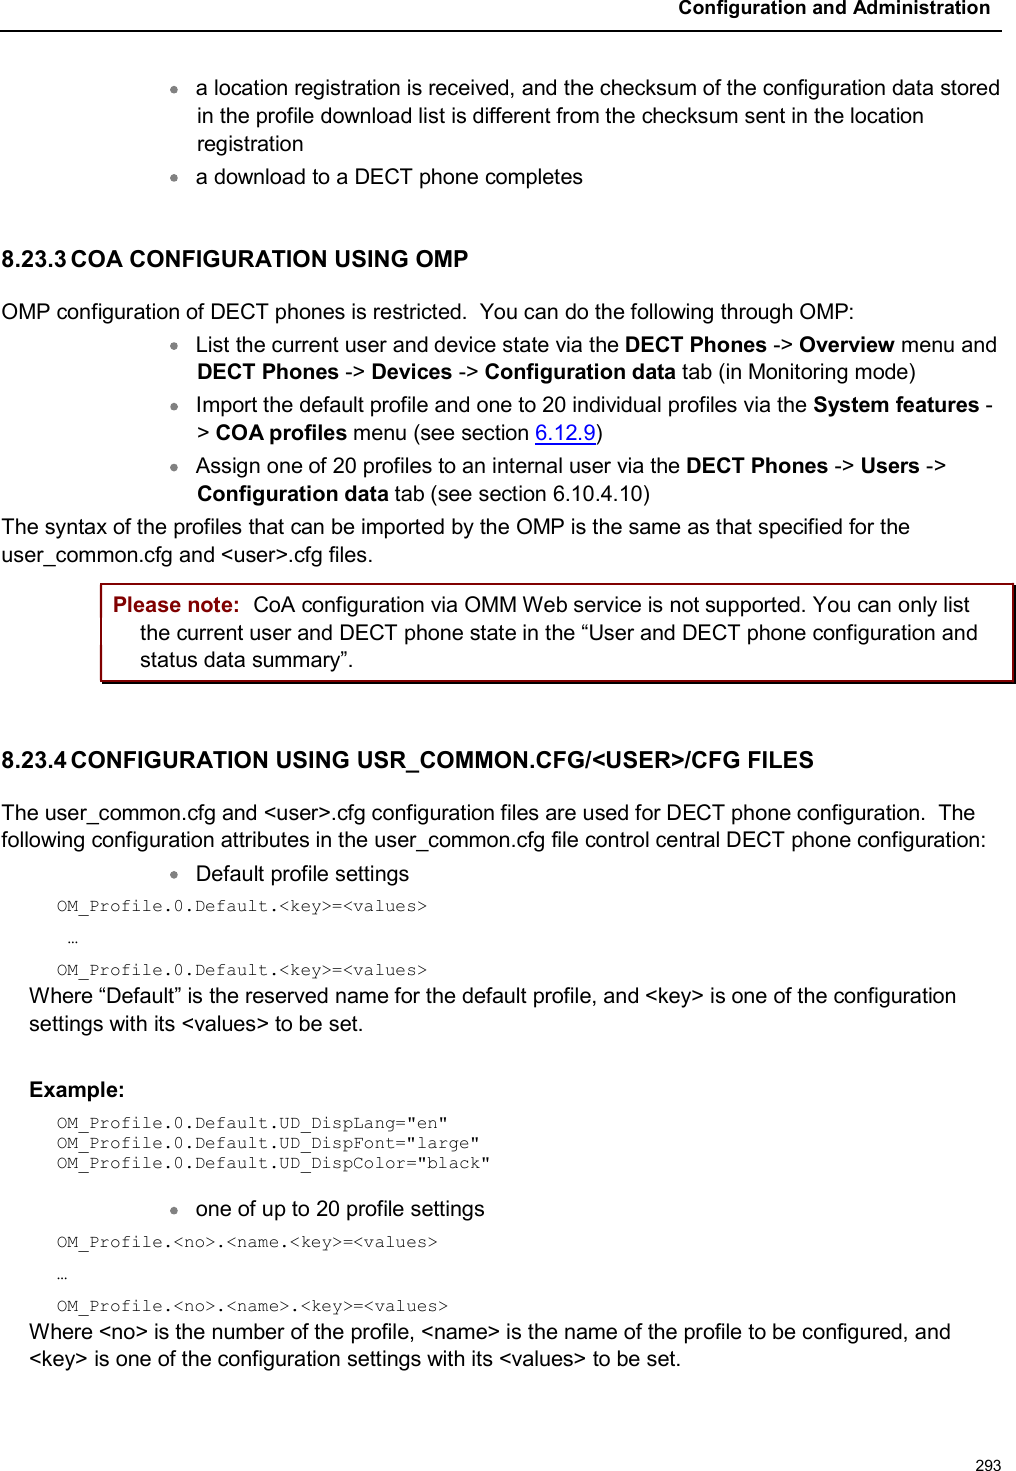

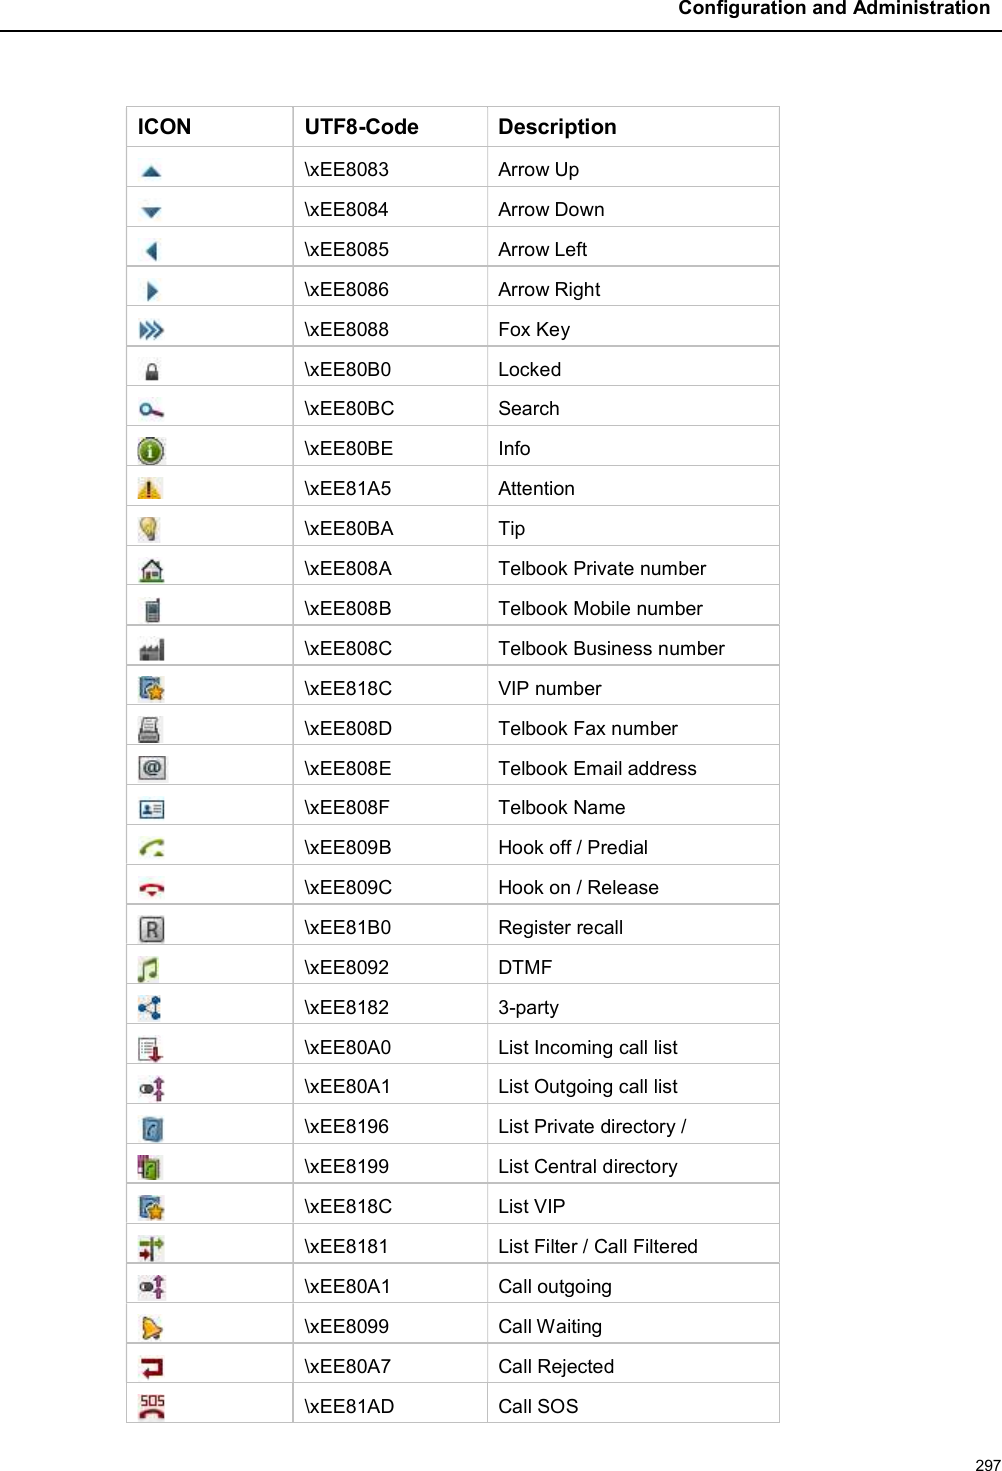
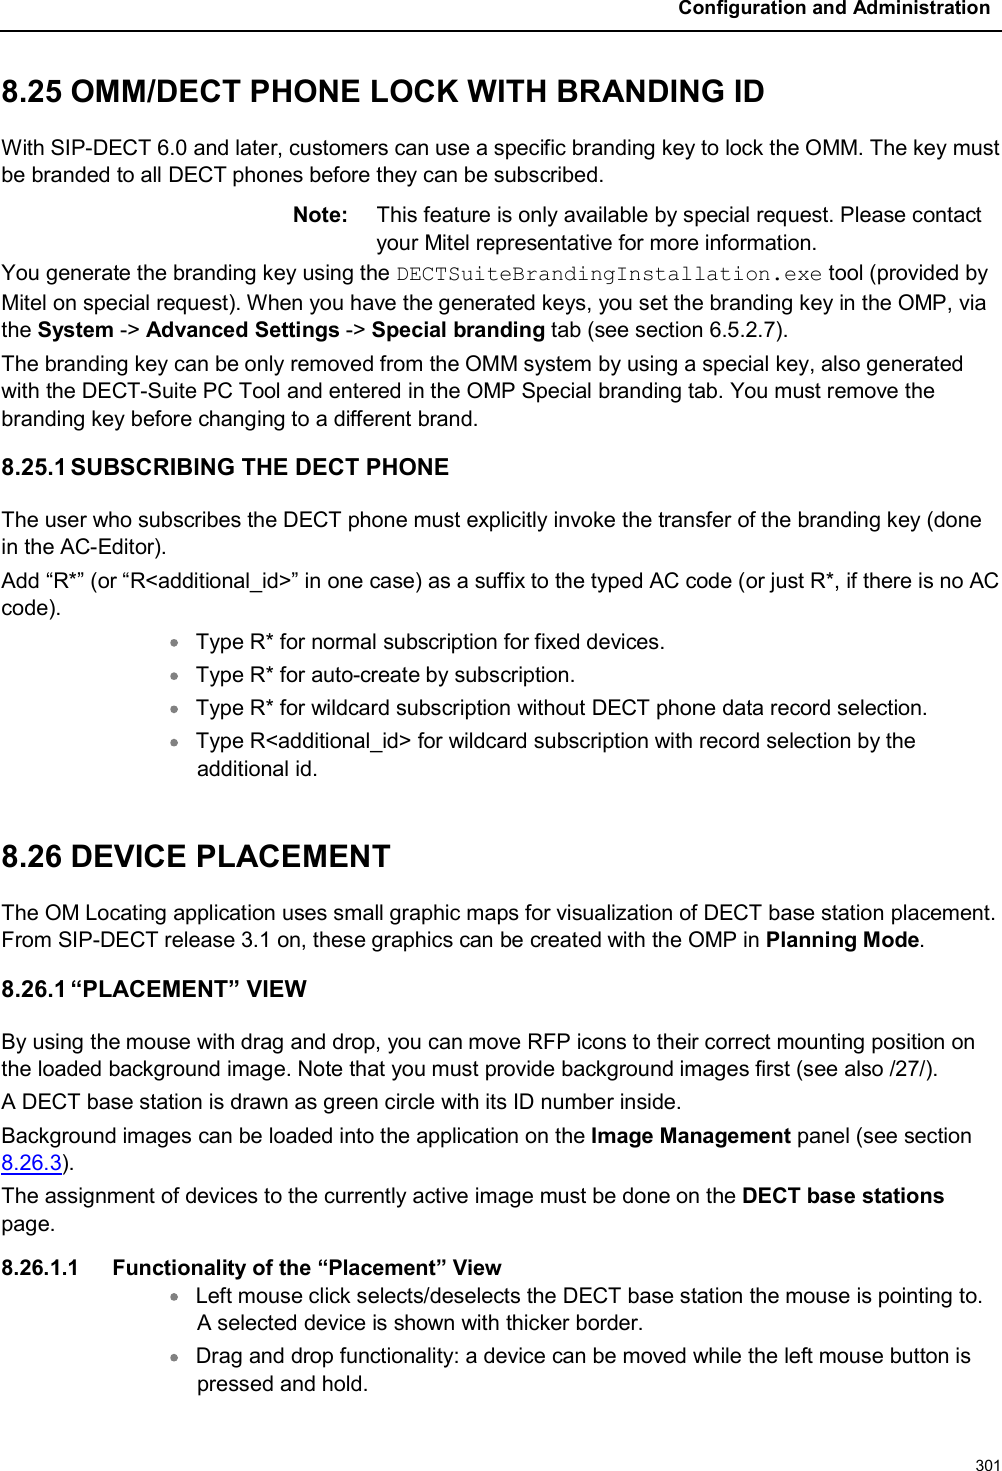
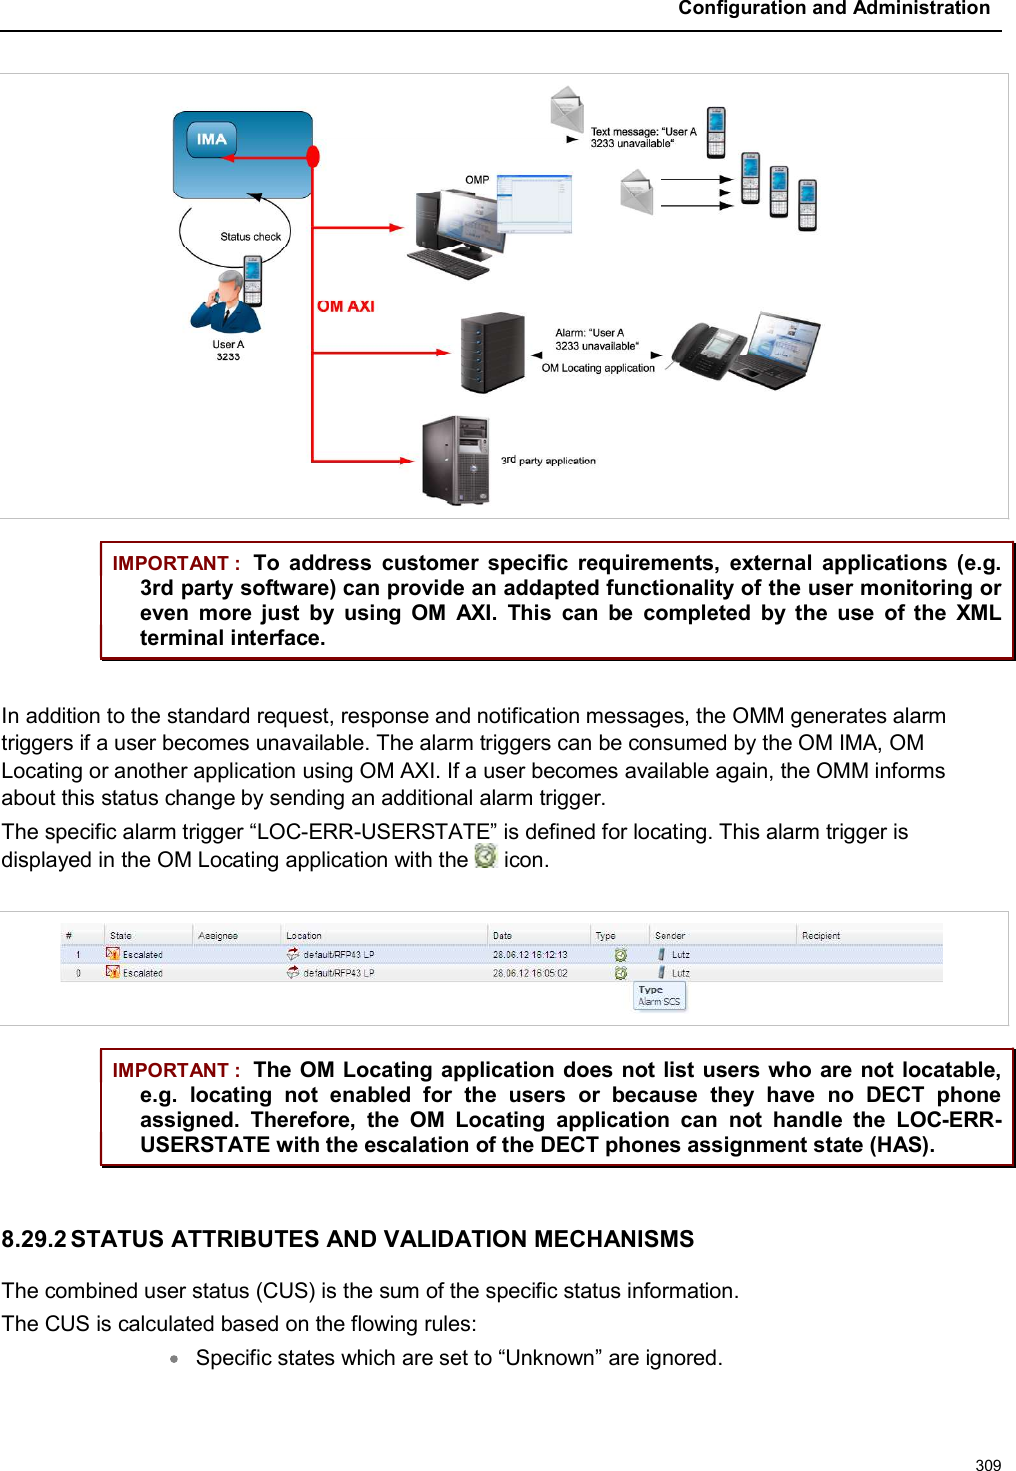
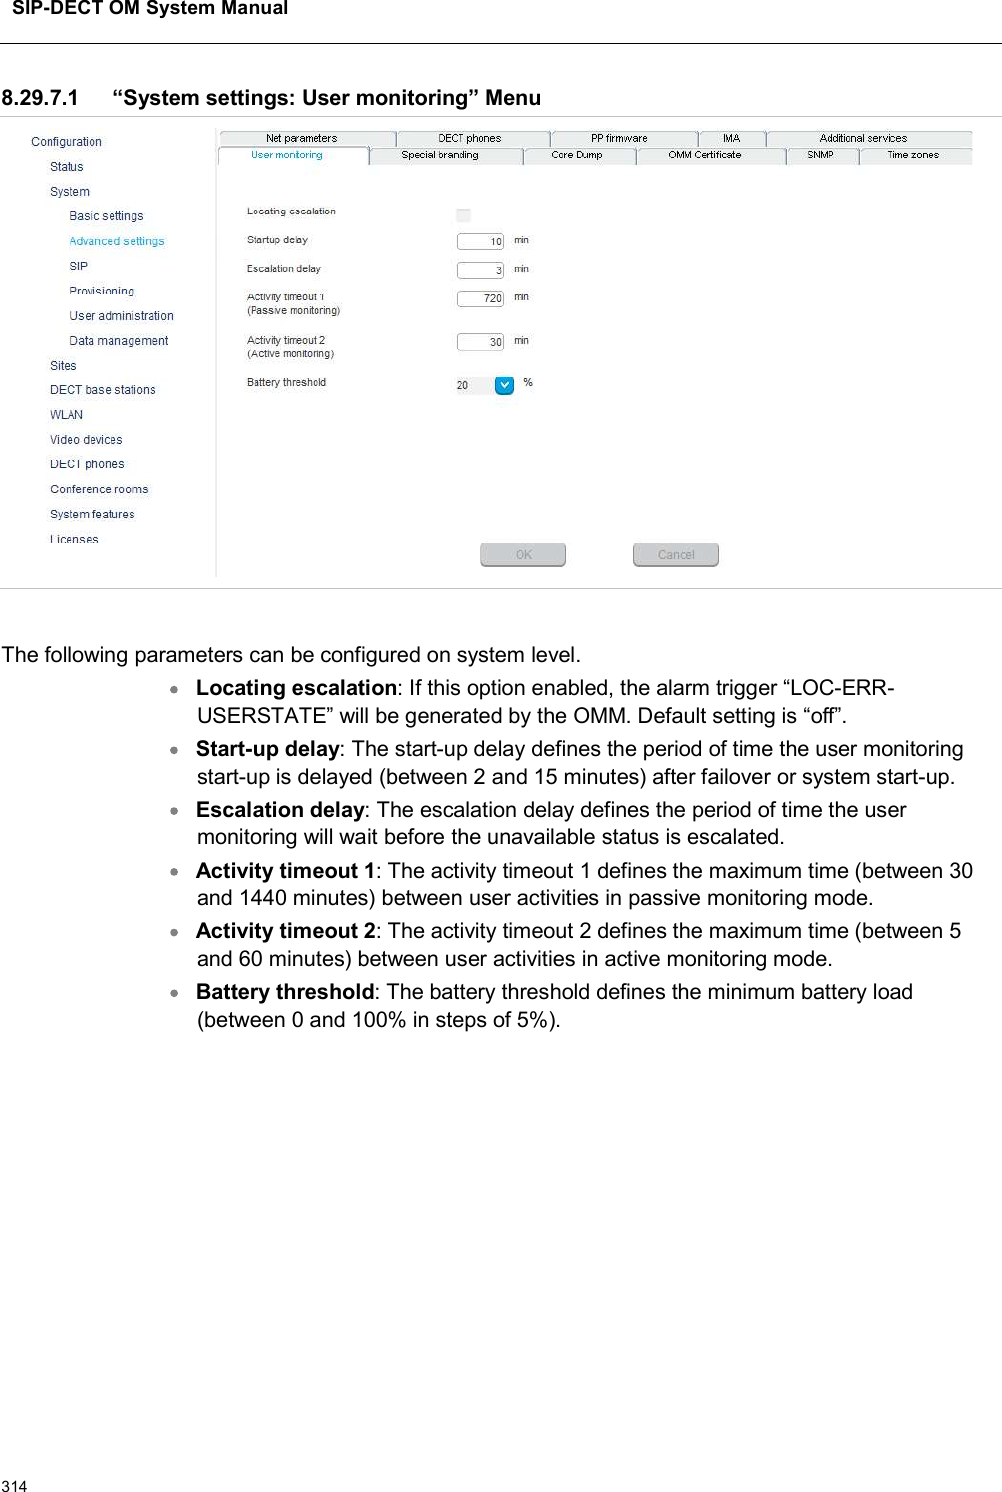
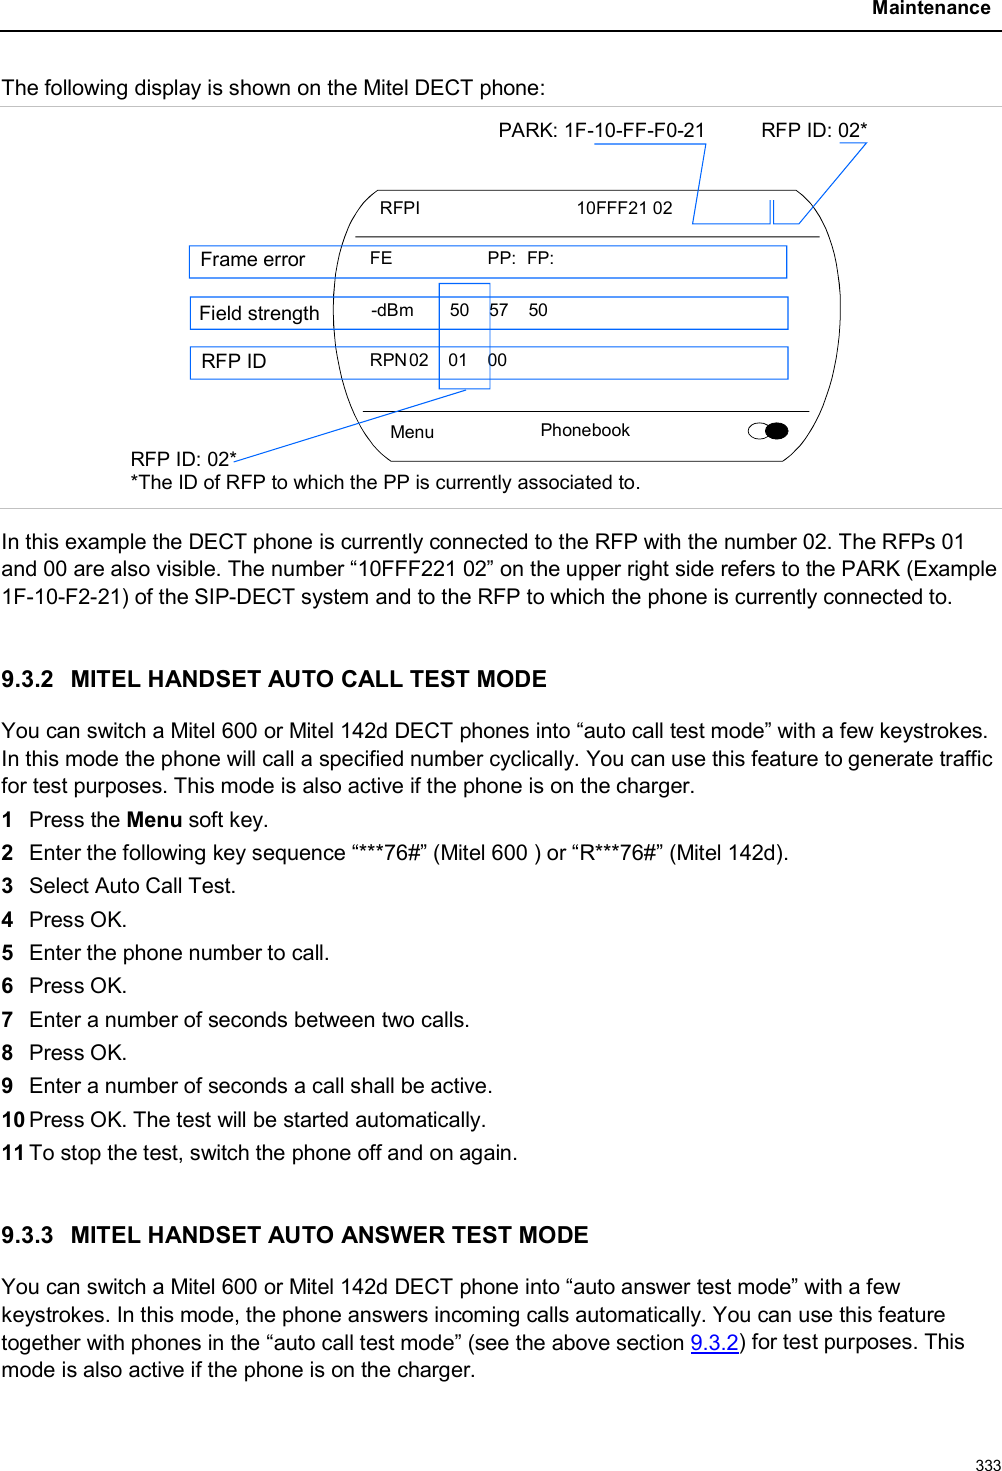
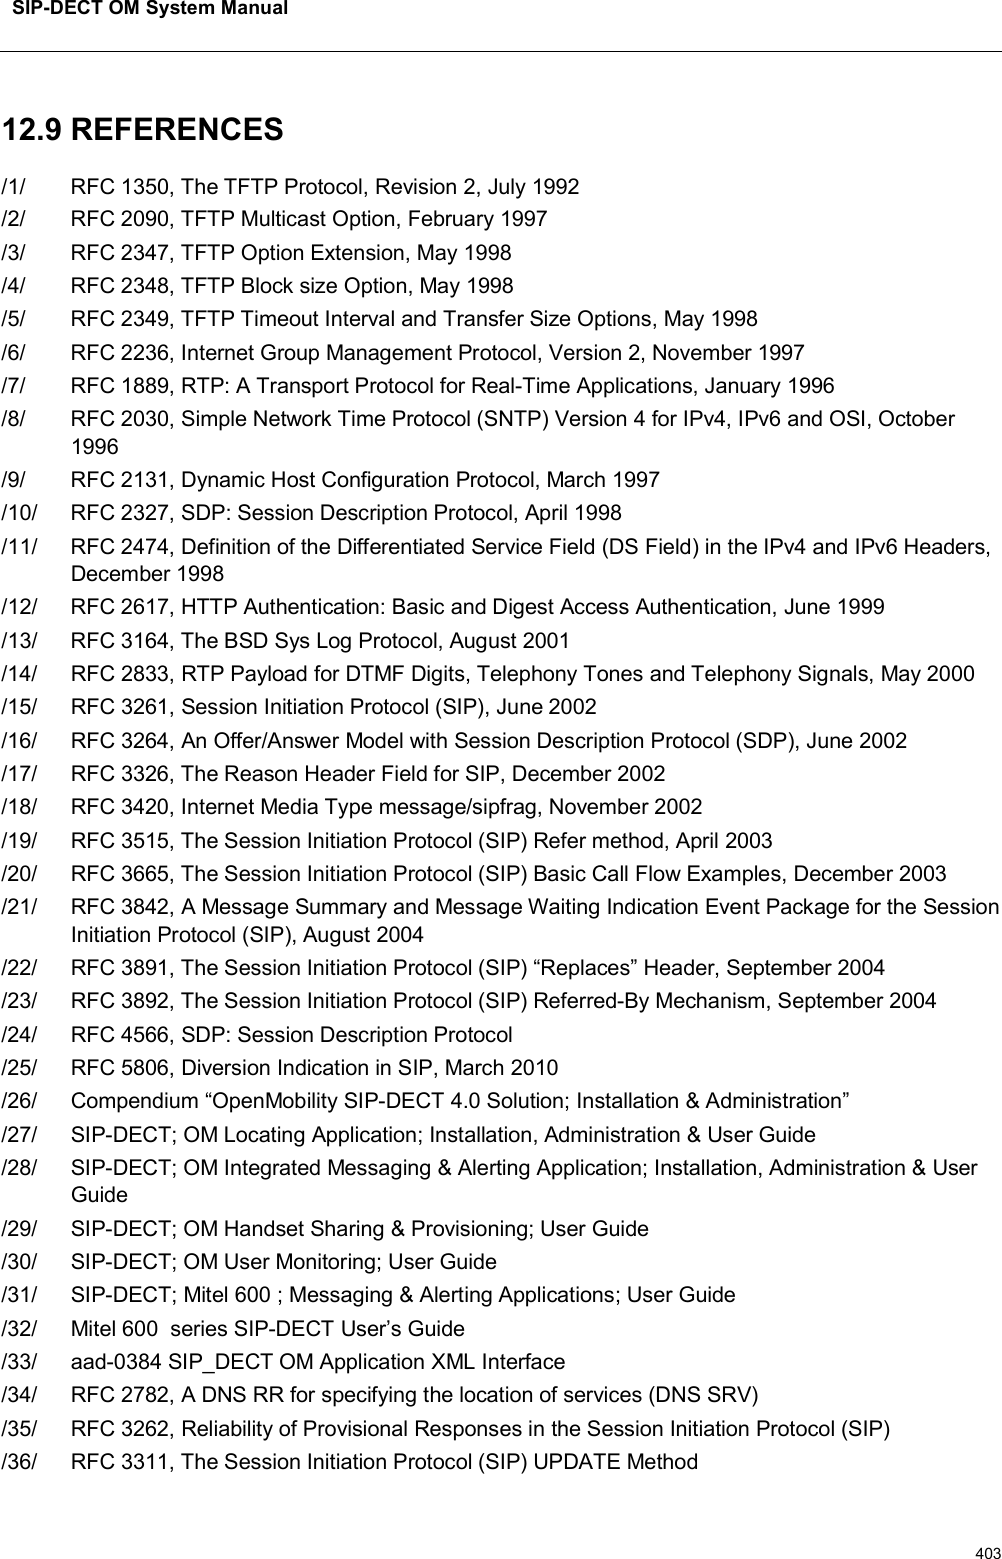
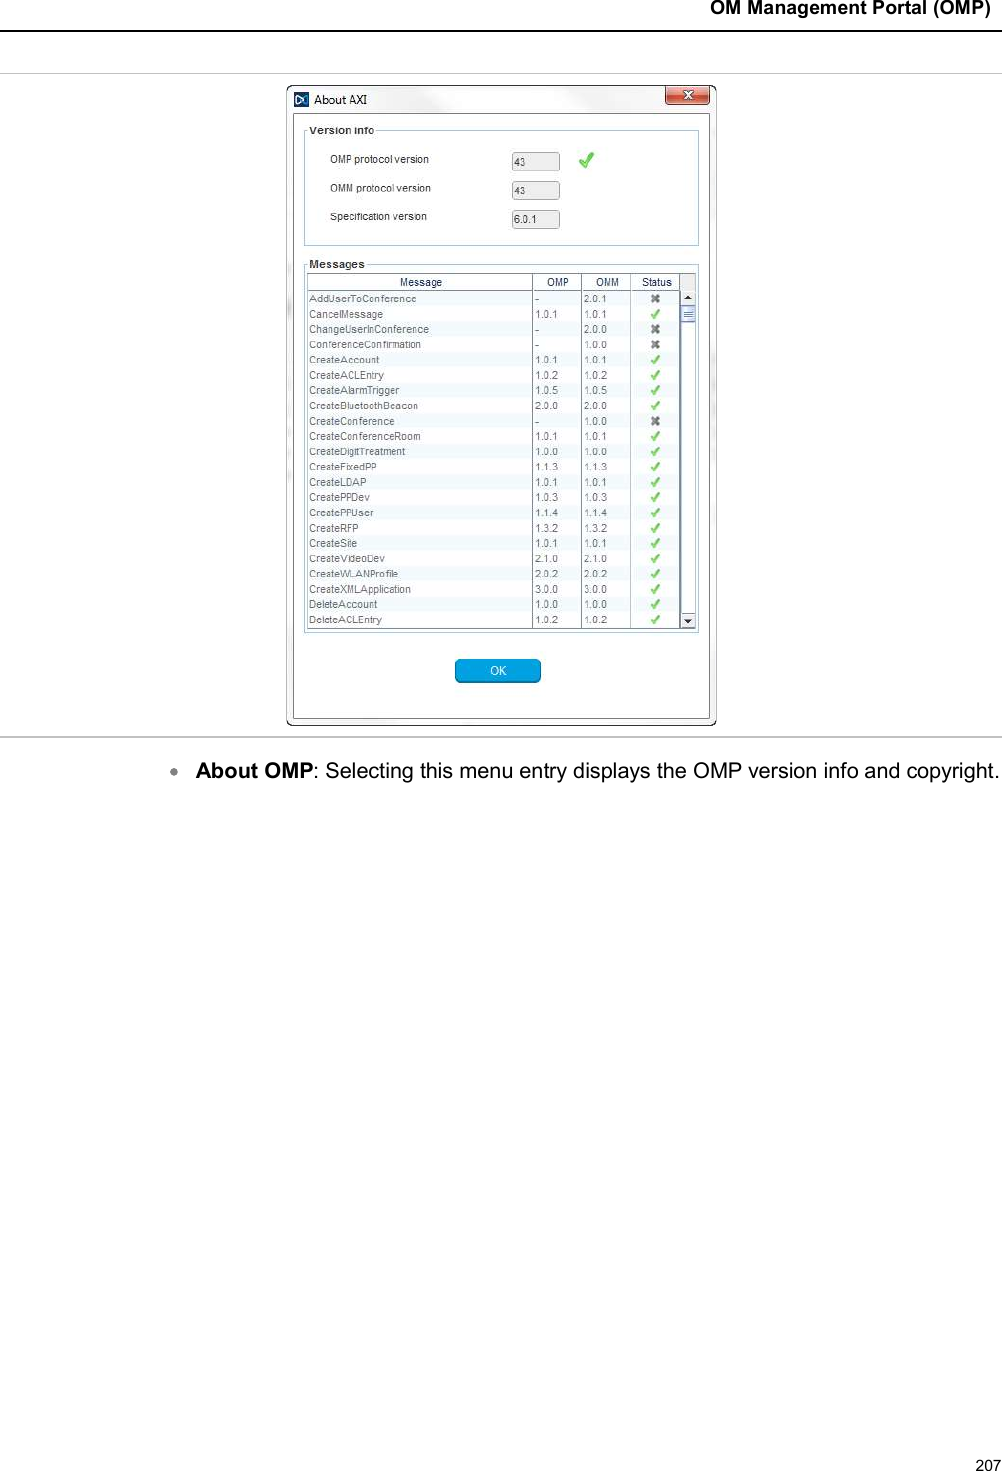
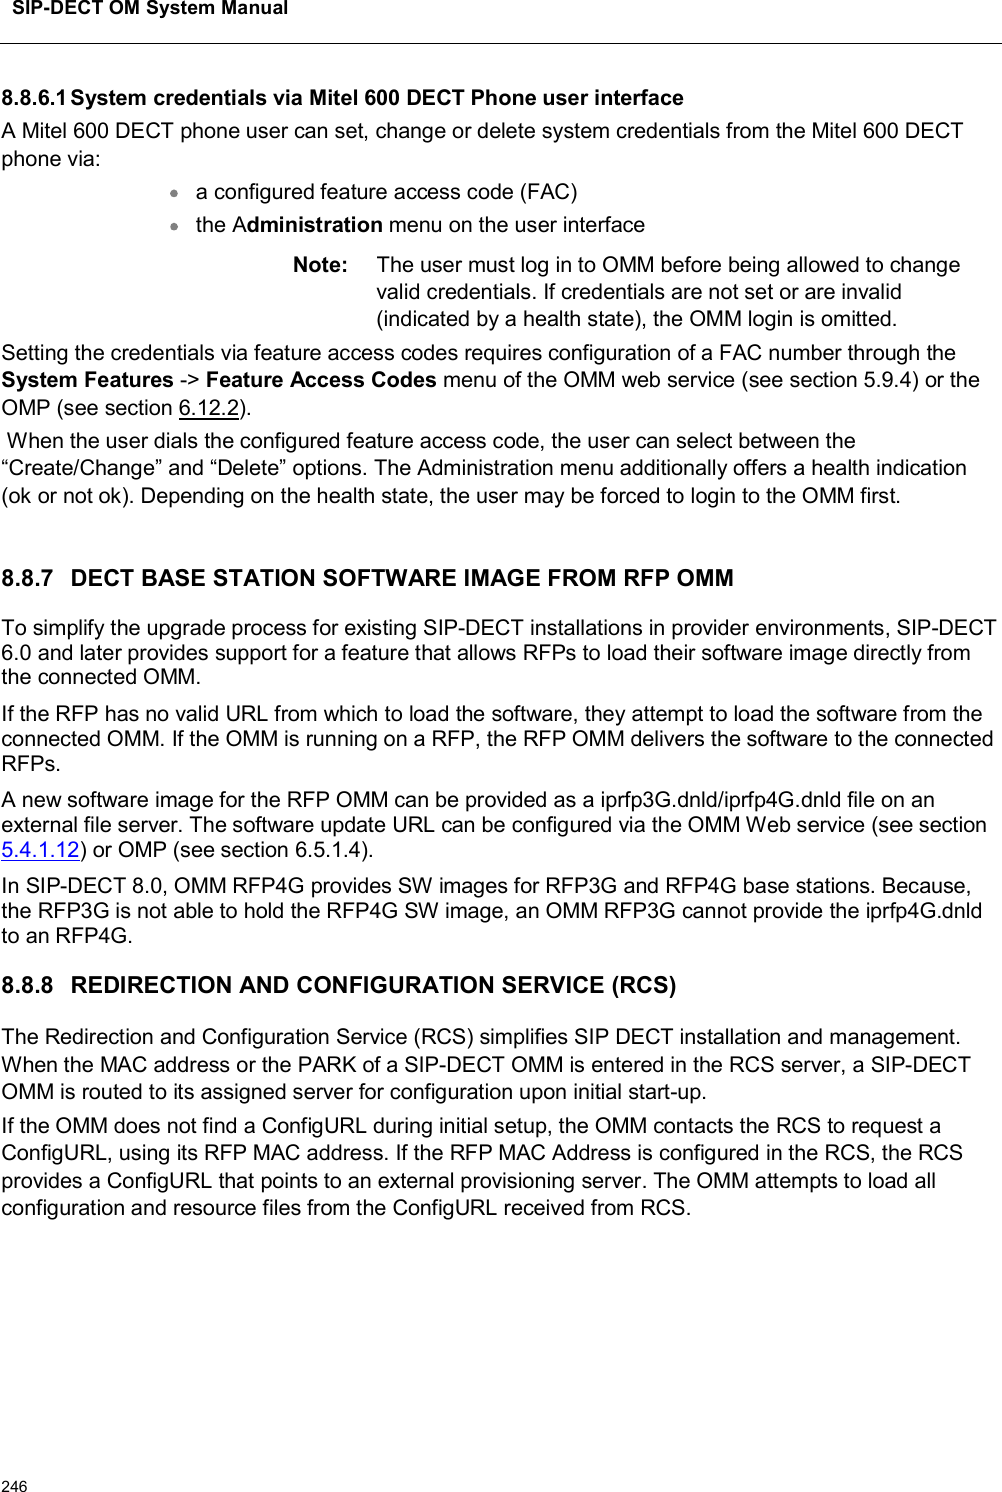
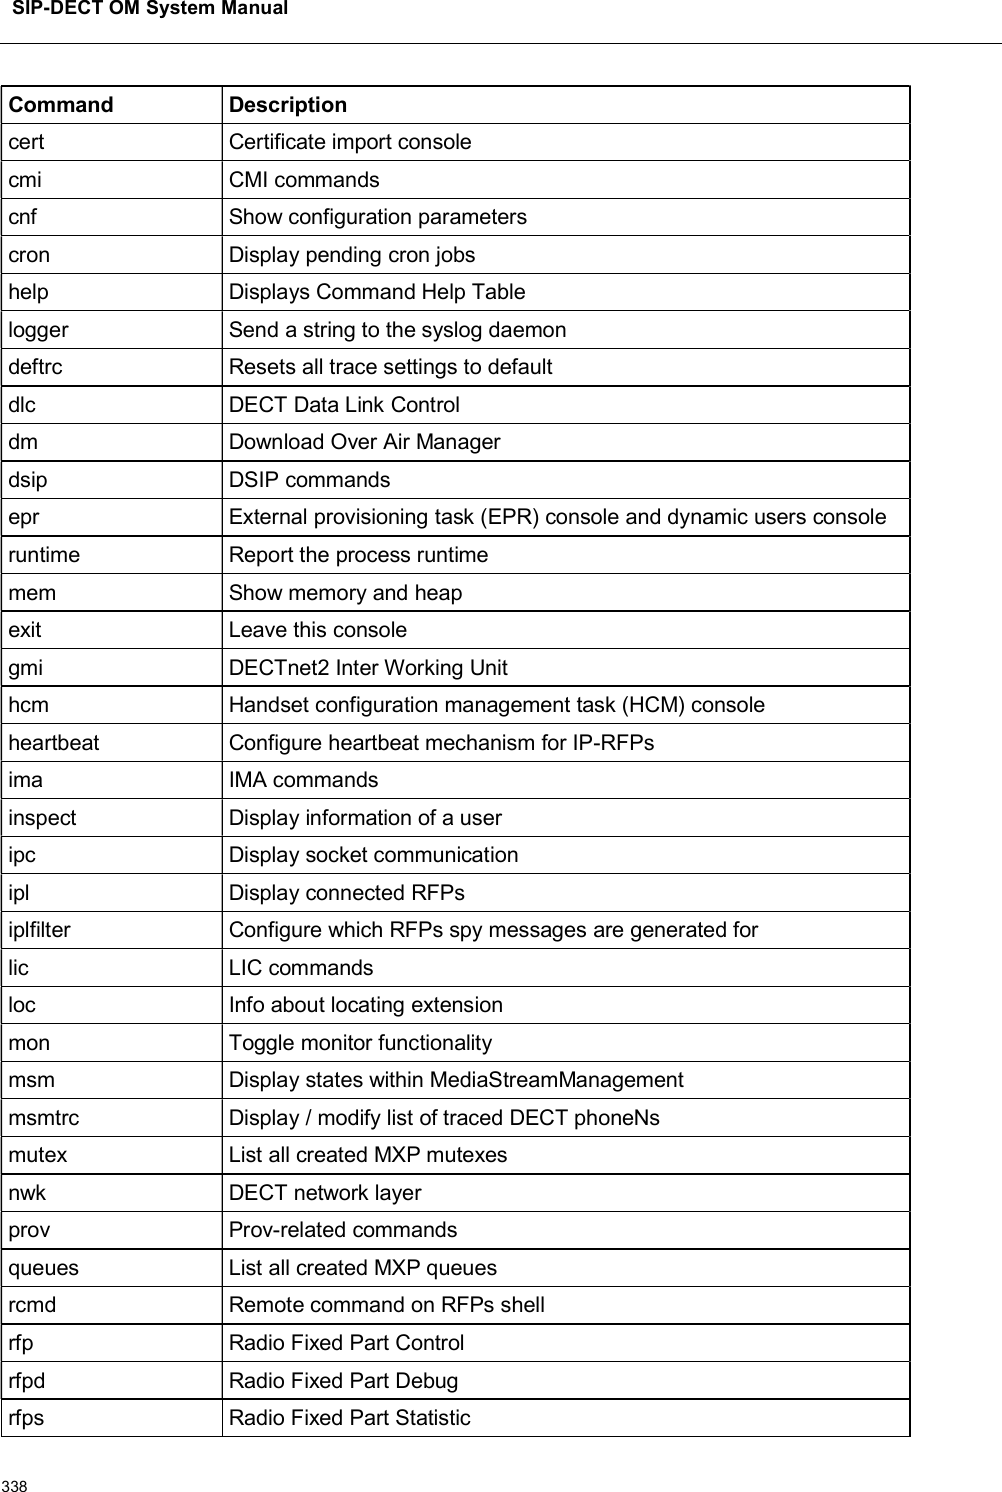
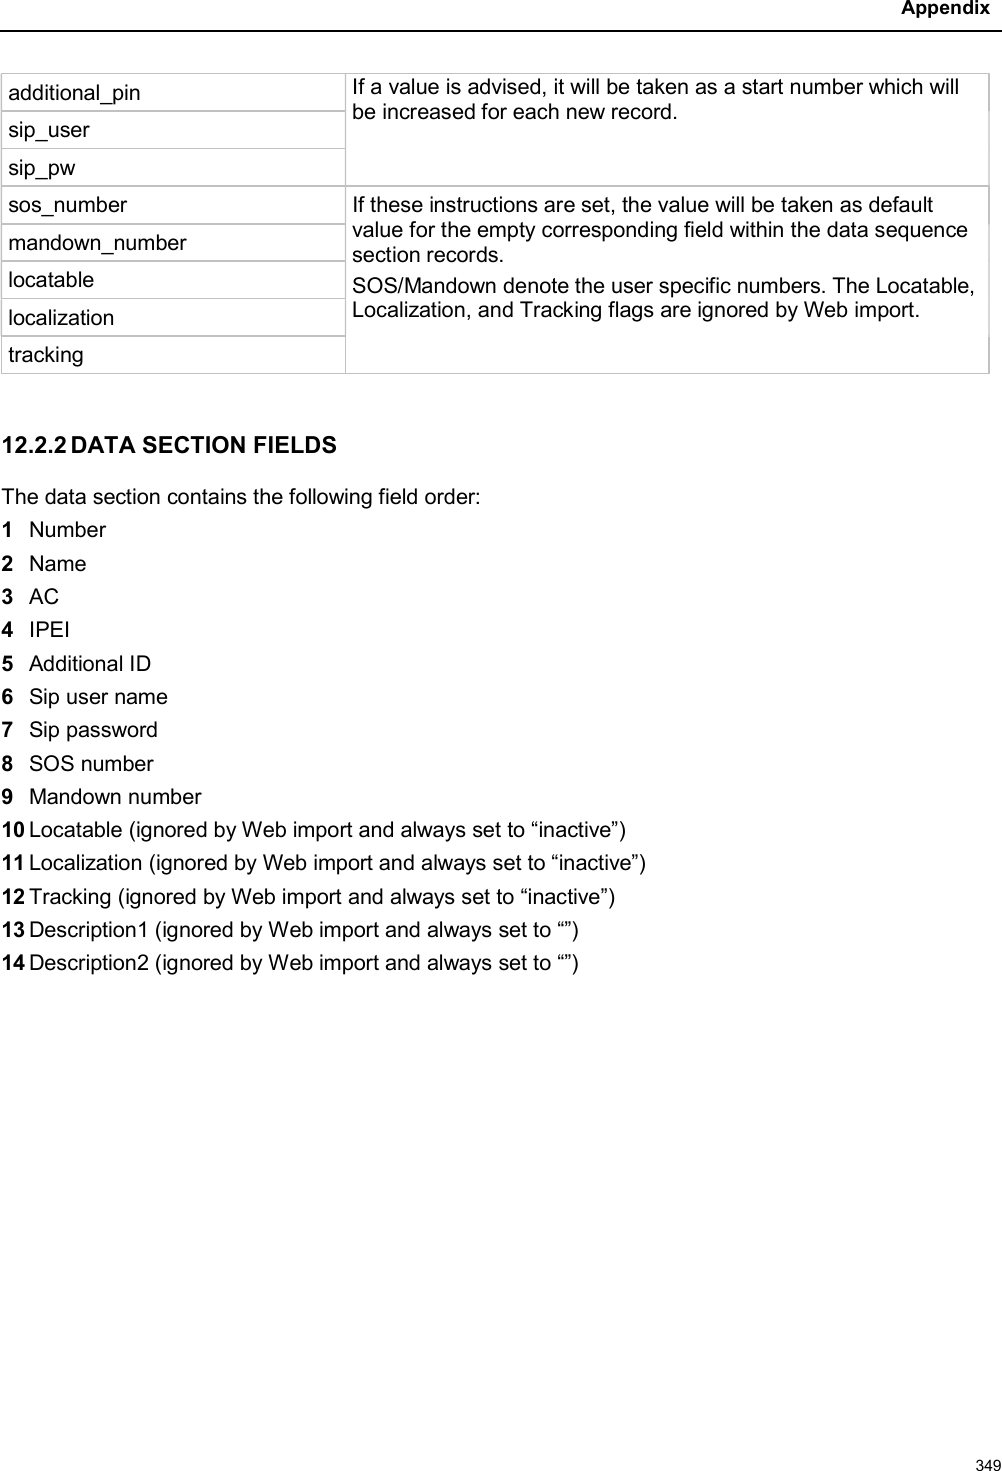
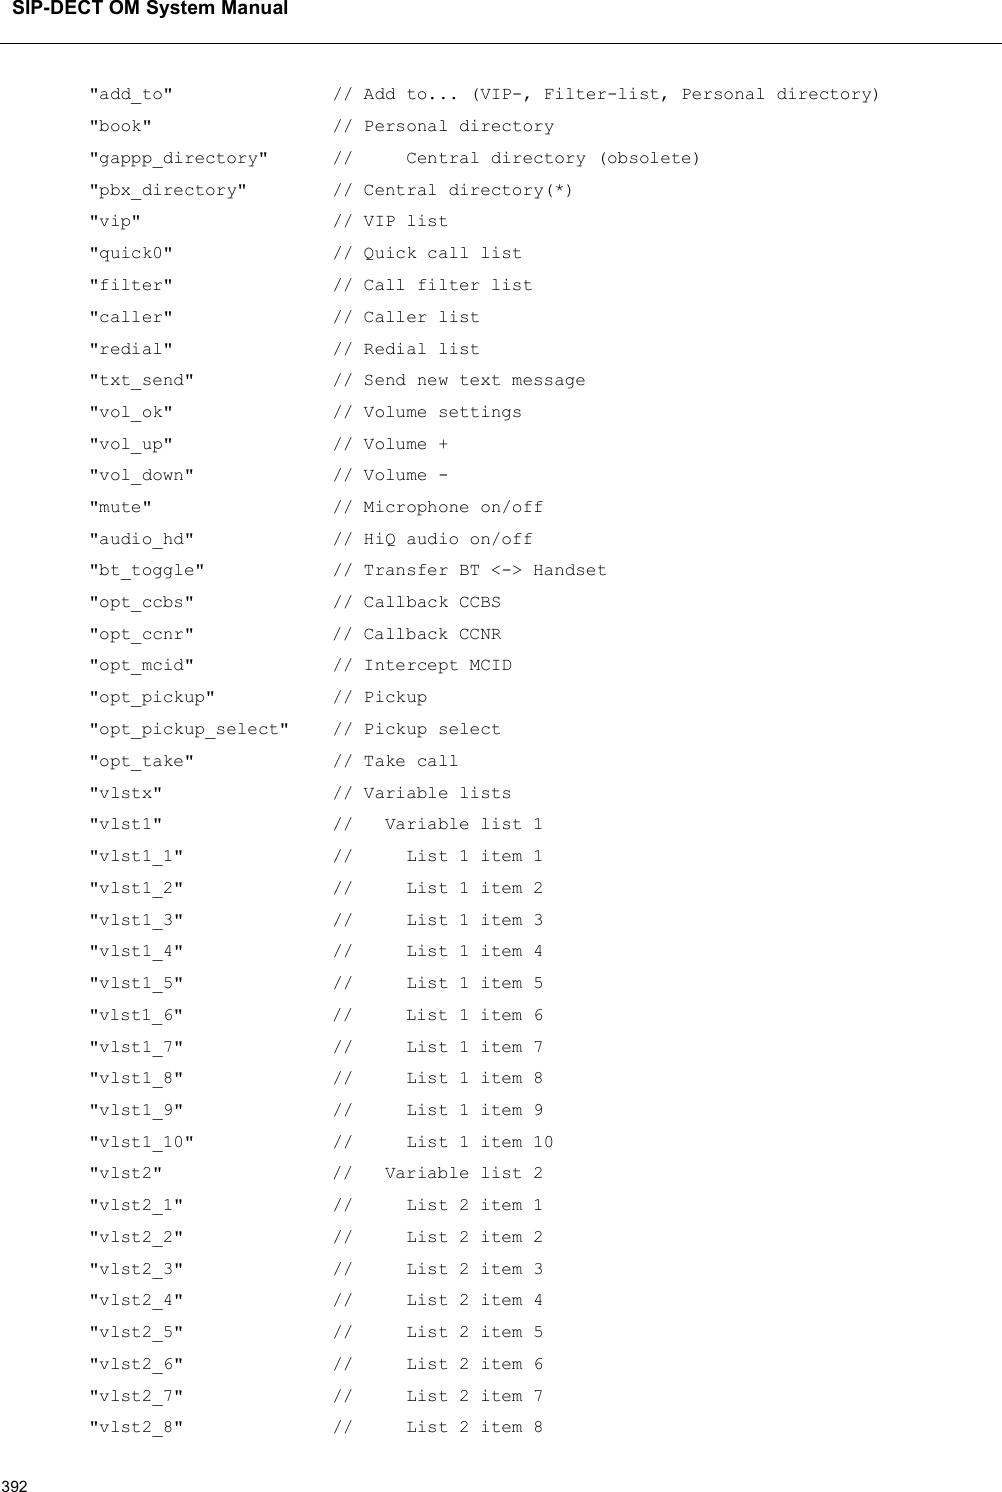
![Maintenance337Command Descriptionmconf Configure IP settings for a media channelmedia Display state of media channelsmopen Open a media channelmroute Display media routesmstart Start a media channelmstop Stop a media channelmswo Codec switch over for an active callmtime Display media time statisticsmutex Lists all created MXP mutexesomms Shows connection status to OMM(s)otpdbCheck Check all OTP pages for valid elementsqueues Lists all created MXP queuesreset Resets the IPRFP applicationresume Resume bmc activitysem Lists all created MXP semaphoressignals Print signal dwell time in queuesspy Set/display spy levels: [ <key #> <level #> ]suspend Suspend bmc activitytasks Lists all running MXP taskstickres Print tick resolutiontimer Print running timervideo Video commandsPlease note: The “spy” command enables you to increase the level of syslog messages. This should be only used by instructions of the support organization because it can harm the system operation.9.3.5.5OMM Console CommandsIf you have opened the session on the OMM RFP and you type “ommconsole”, you are able to use the following OpenMobility Manager (OMM) related commands:Command Description? Displays Command Help Tableadb Automatic DB export and import (ADB) consoleaxi AXI commandsaxic Task console for AXI command processing of provisioning files](https://usermanual.wiki/Mitel-Networks/RFP47DRC.User-Manual-II/User-Guide-4037307-Page-137.png)
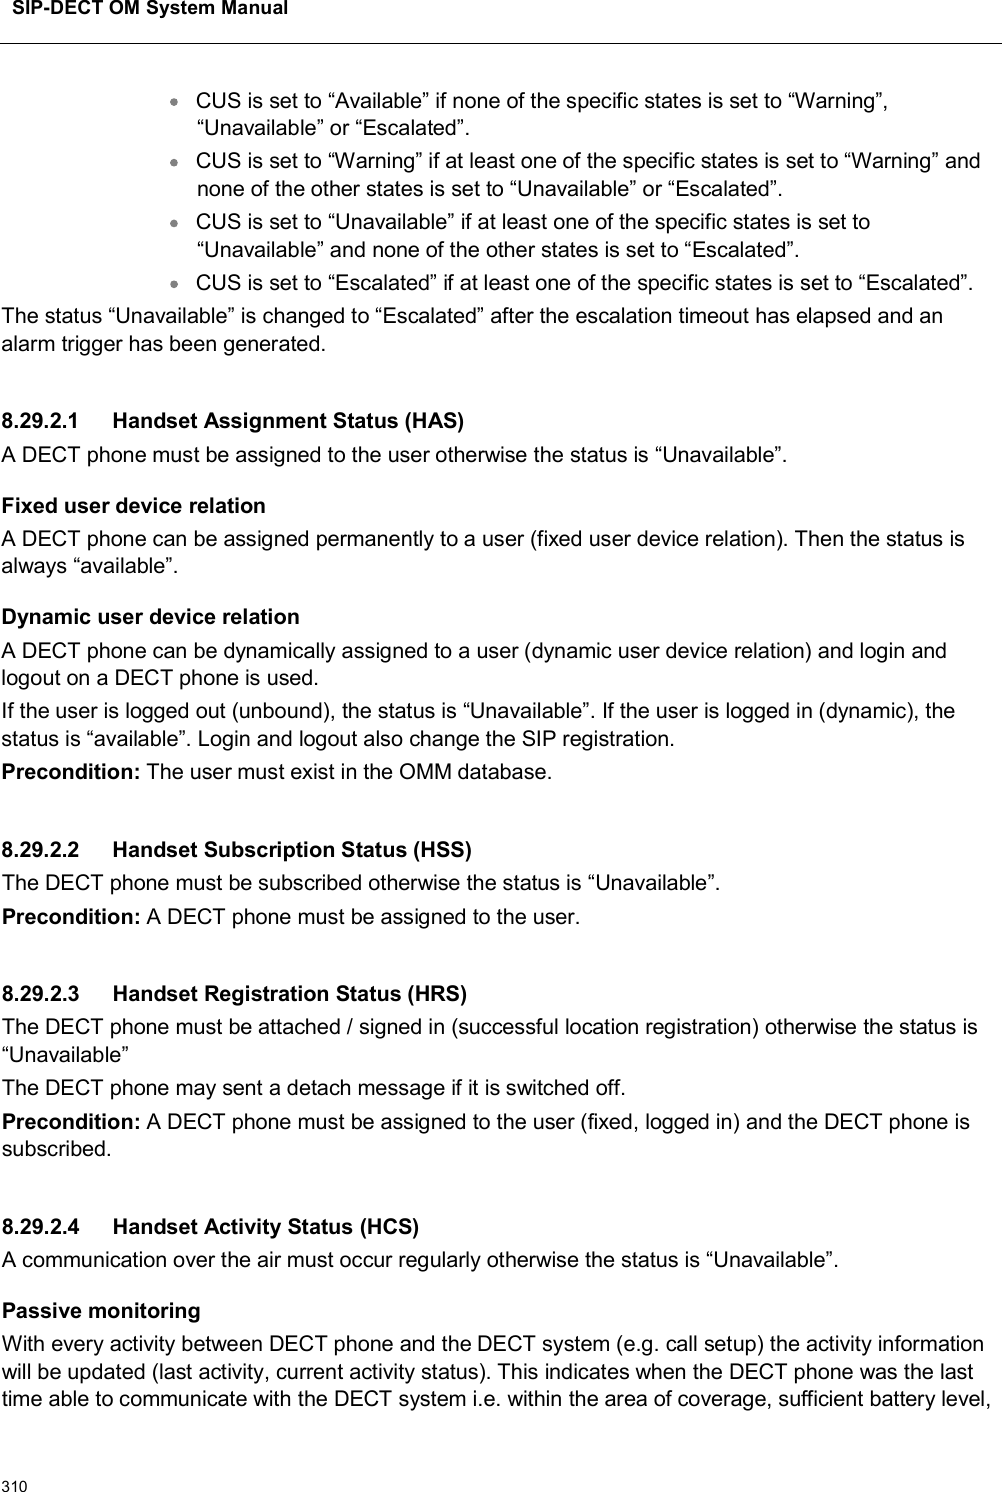
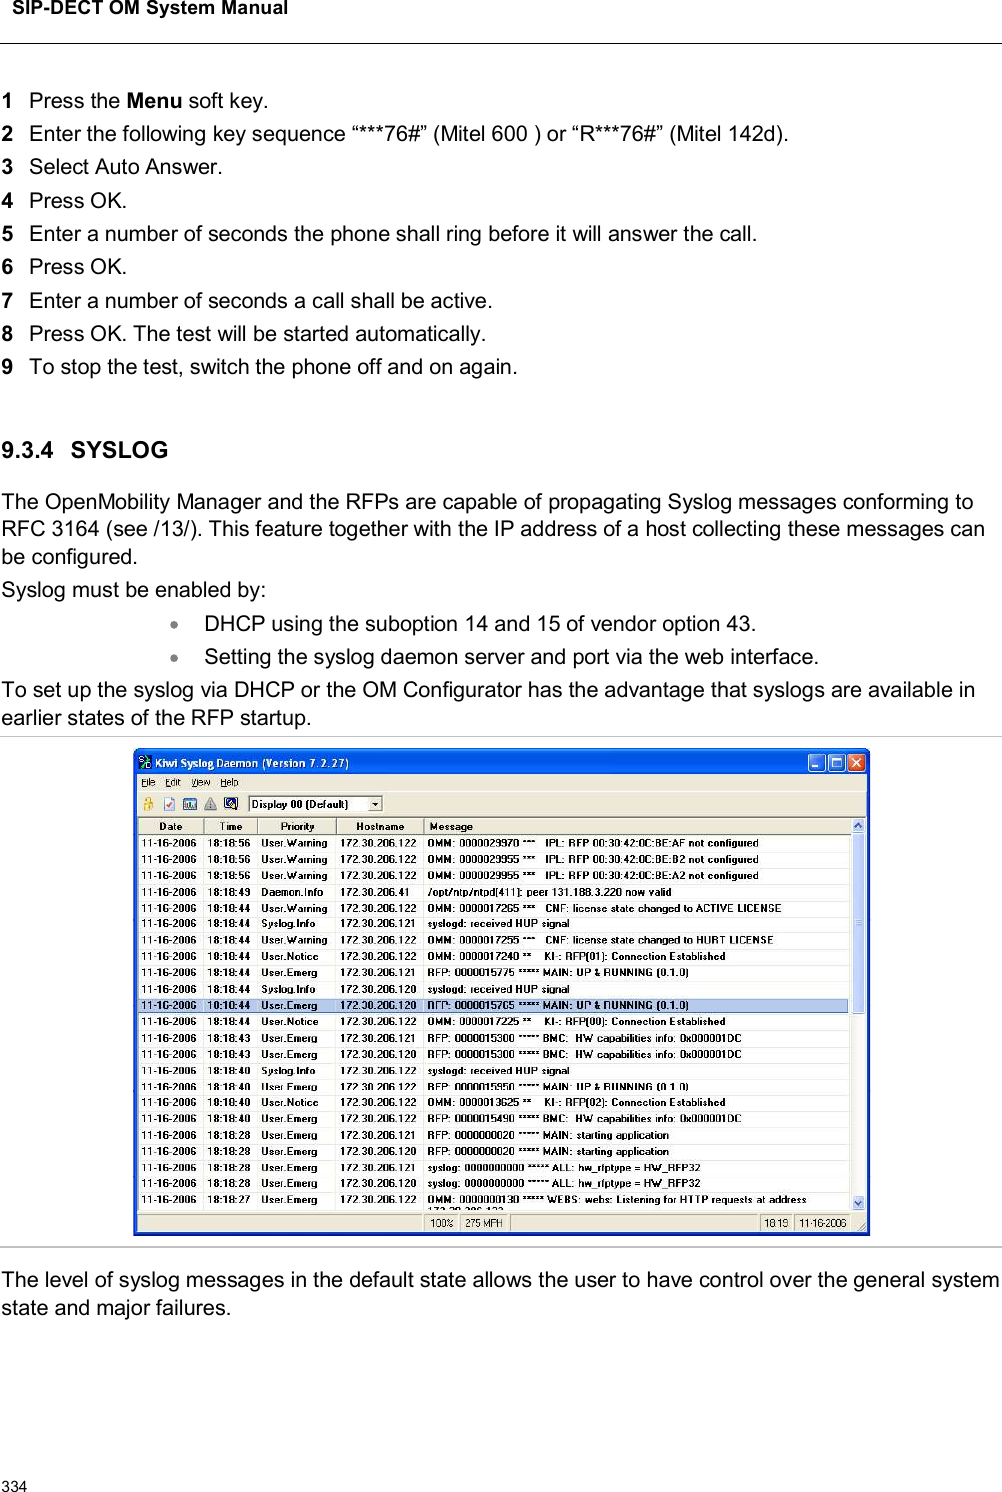
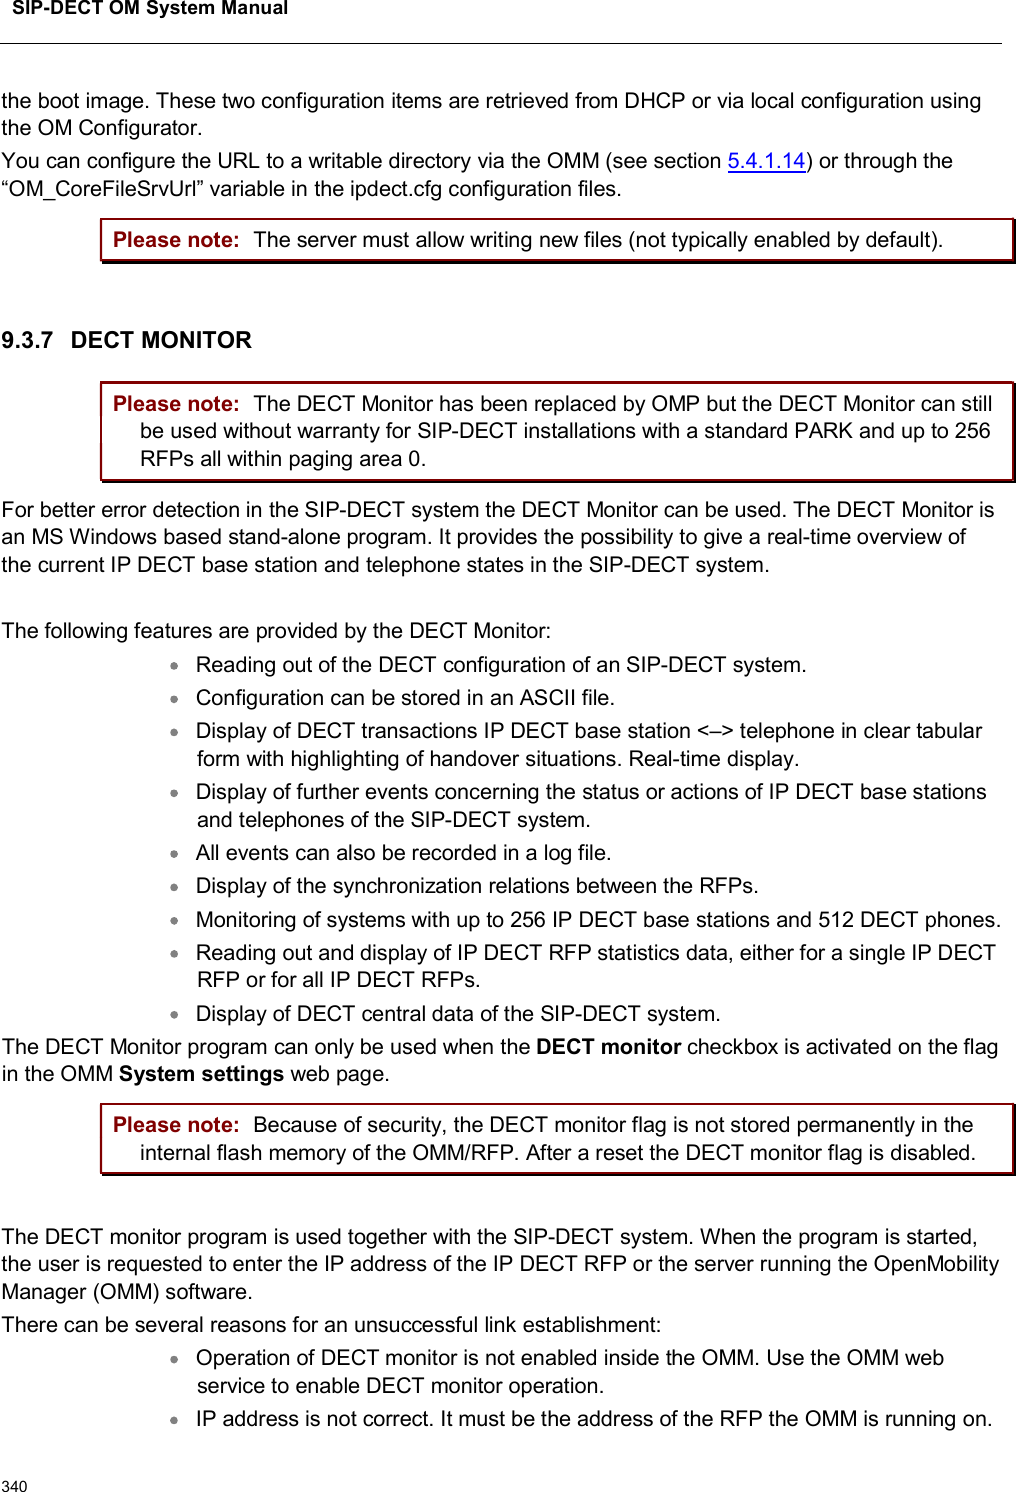
![Maintenance339Command Descriptionrping Request one or more RFPs to ping a hostrspy Remote configure spy levels on IP-RFPsrsx Toggle RSX debug port on RFPsrtt Set event flag for high RTT values / clear valuessem List all created MXP semaphoresspy Set/display spy levels: [ <key #> <level #> ]standby Displays redundant OMMsstat Statisticsync Commands for RFP synchronizationsysdump Initiate system dumptasks List all running MXP taskstickres Print tick resolutiontrc Back trace tasktzone Time zone commandsuds UDS commandsumo UMO commandsupd Display update status of RFPsupdate Force all connected RFPs to search for new softwareuptime Display OpenMobility Manager uptimever Version informationvideo Command for video deviceswlan Display states within Wireless LAN Managementxml XML browser task (XML) consolexsc XSC commandsPlease note: The “spy” command enables you to increase the level of syslog messages especially for subsystems of the OMM. This should be only used by instructions of the support organization because it can harm the system operation.9.3.6 CORE FILE CAPTURINGFatal software problems may result in memory dumps, so called core files. These core files are helpful in analyzing the problem that caused the abnormal termination of the program. The IP RFP is capable of transferring the core files to a remote fileserver. Without any special configuration the files are transferred to the TFTP server that is used to get the system software. The path used is the directory of](https://usermanual.wiki/Mitel-Networks/RFP47DRC.User-Manual-II/User-Guide-4037307-Page-139.png)

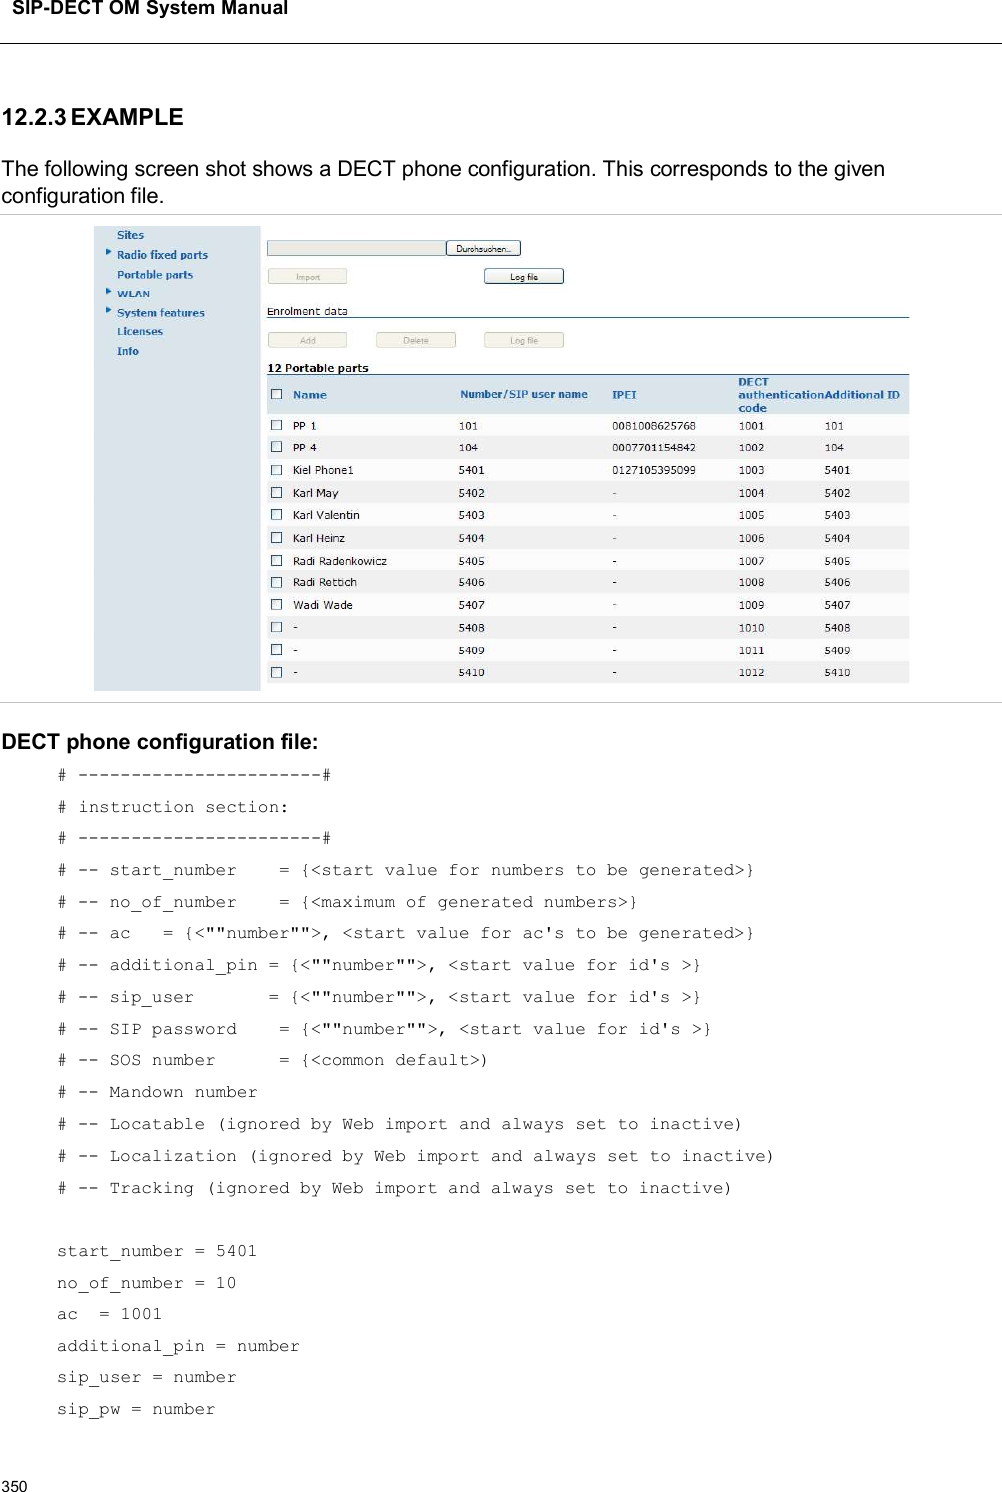
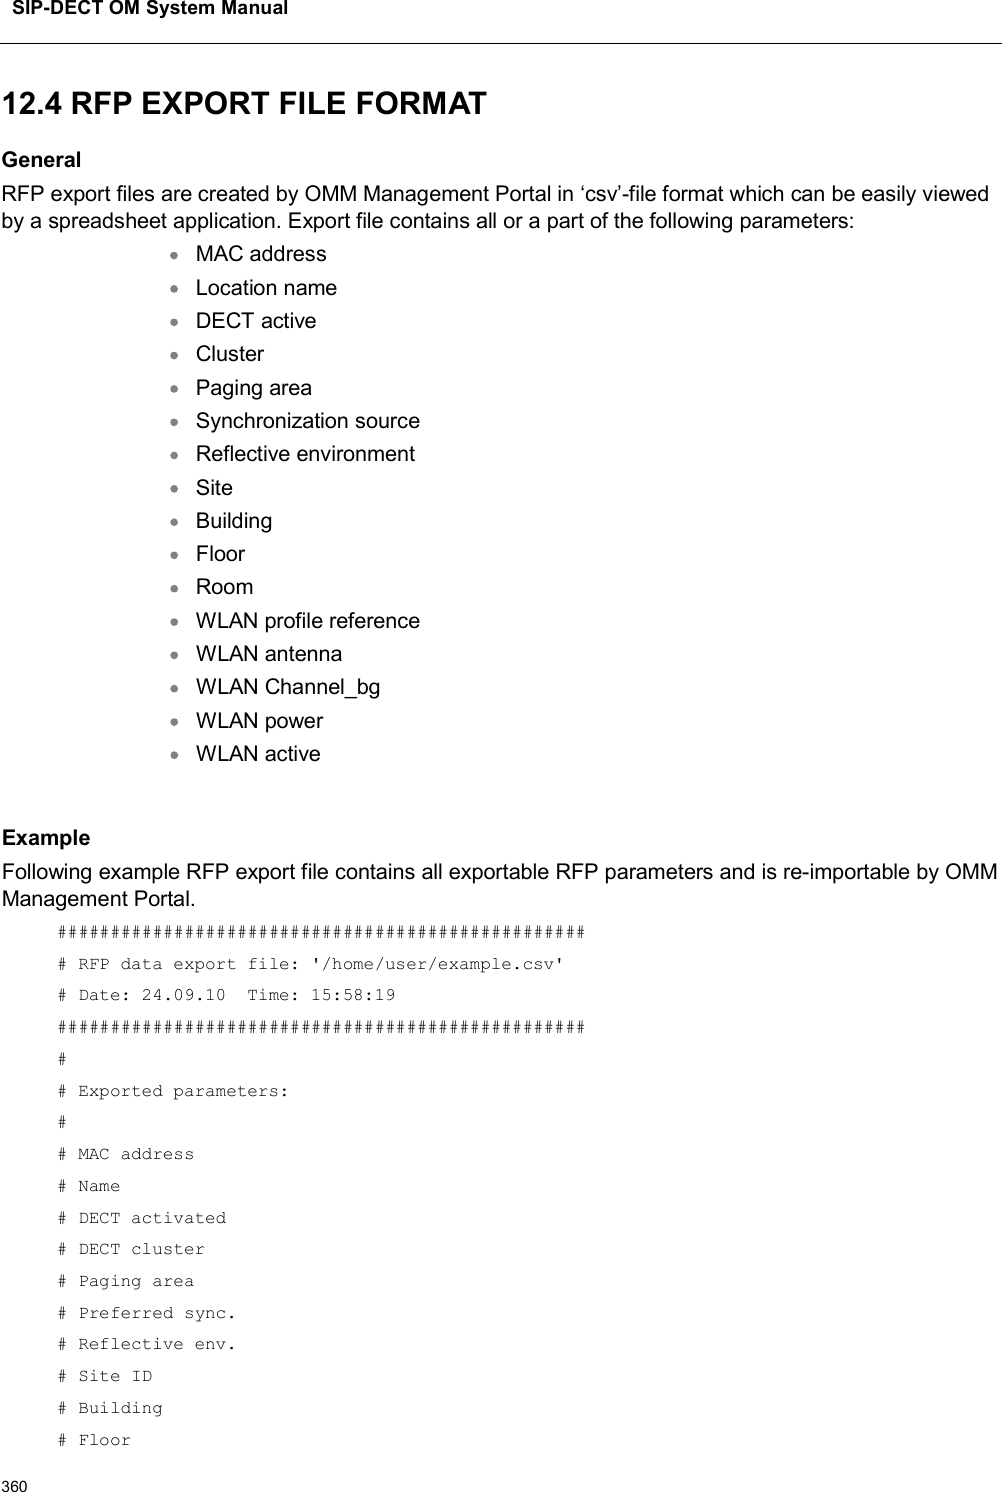
![SIP-DECT OM System Manual352OK: no_of_number = 10Section processing:[…]](https://usermanual.wiki/Mitel-Networks/RFP47DRC.User-Manual-II/User-Guide-4037307-Page-152.png)
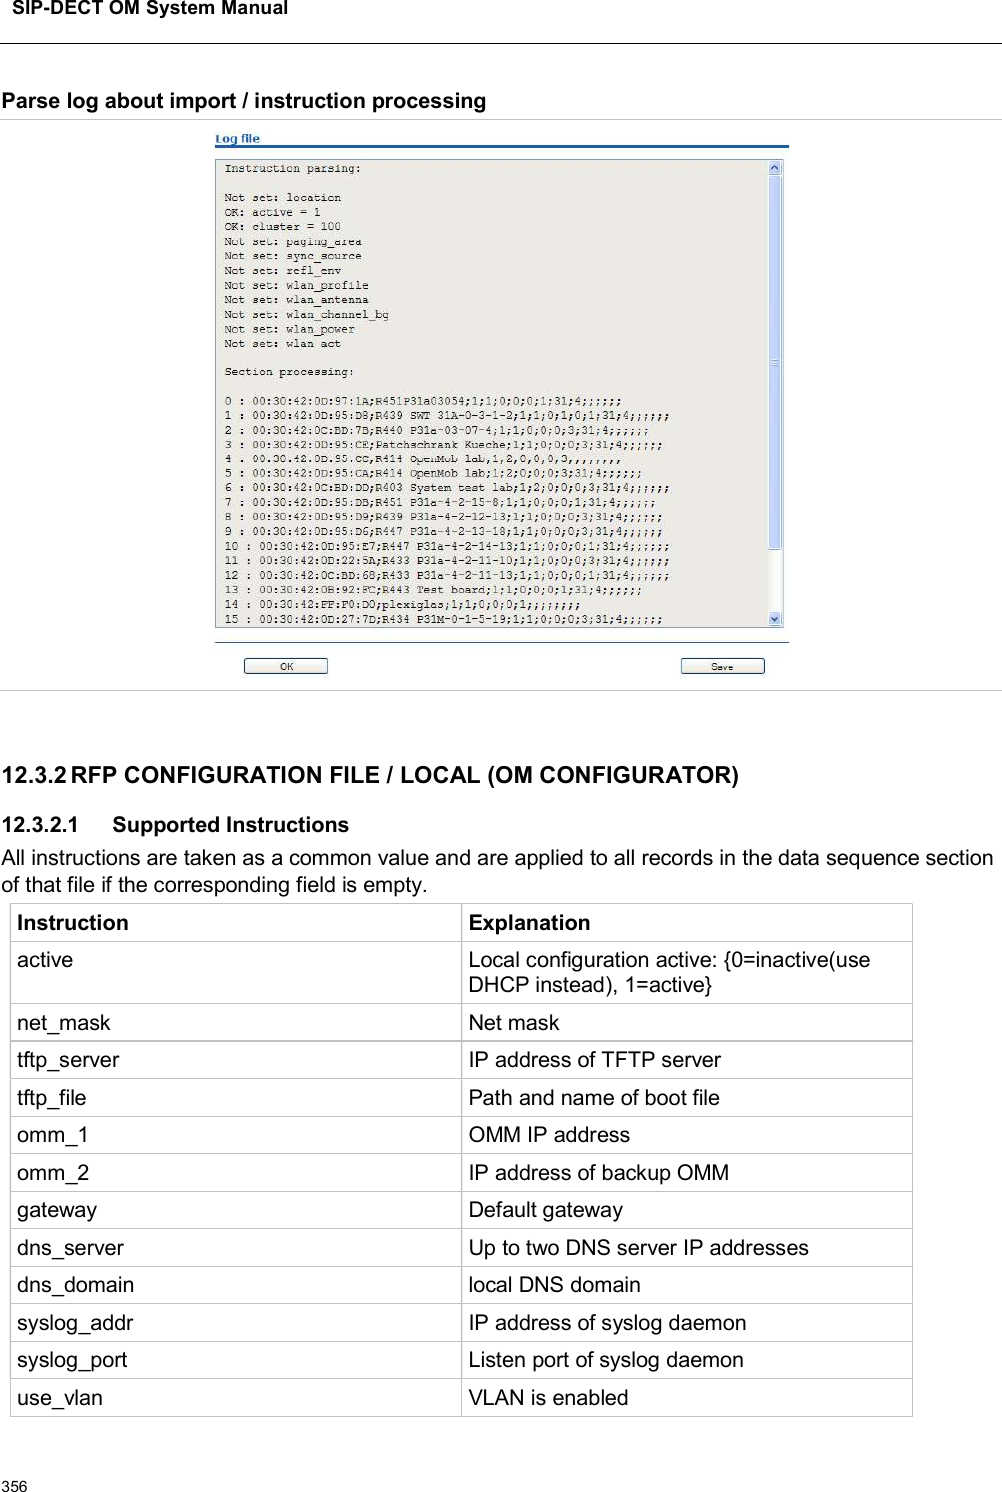
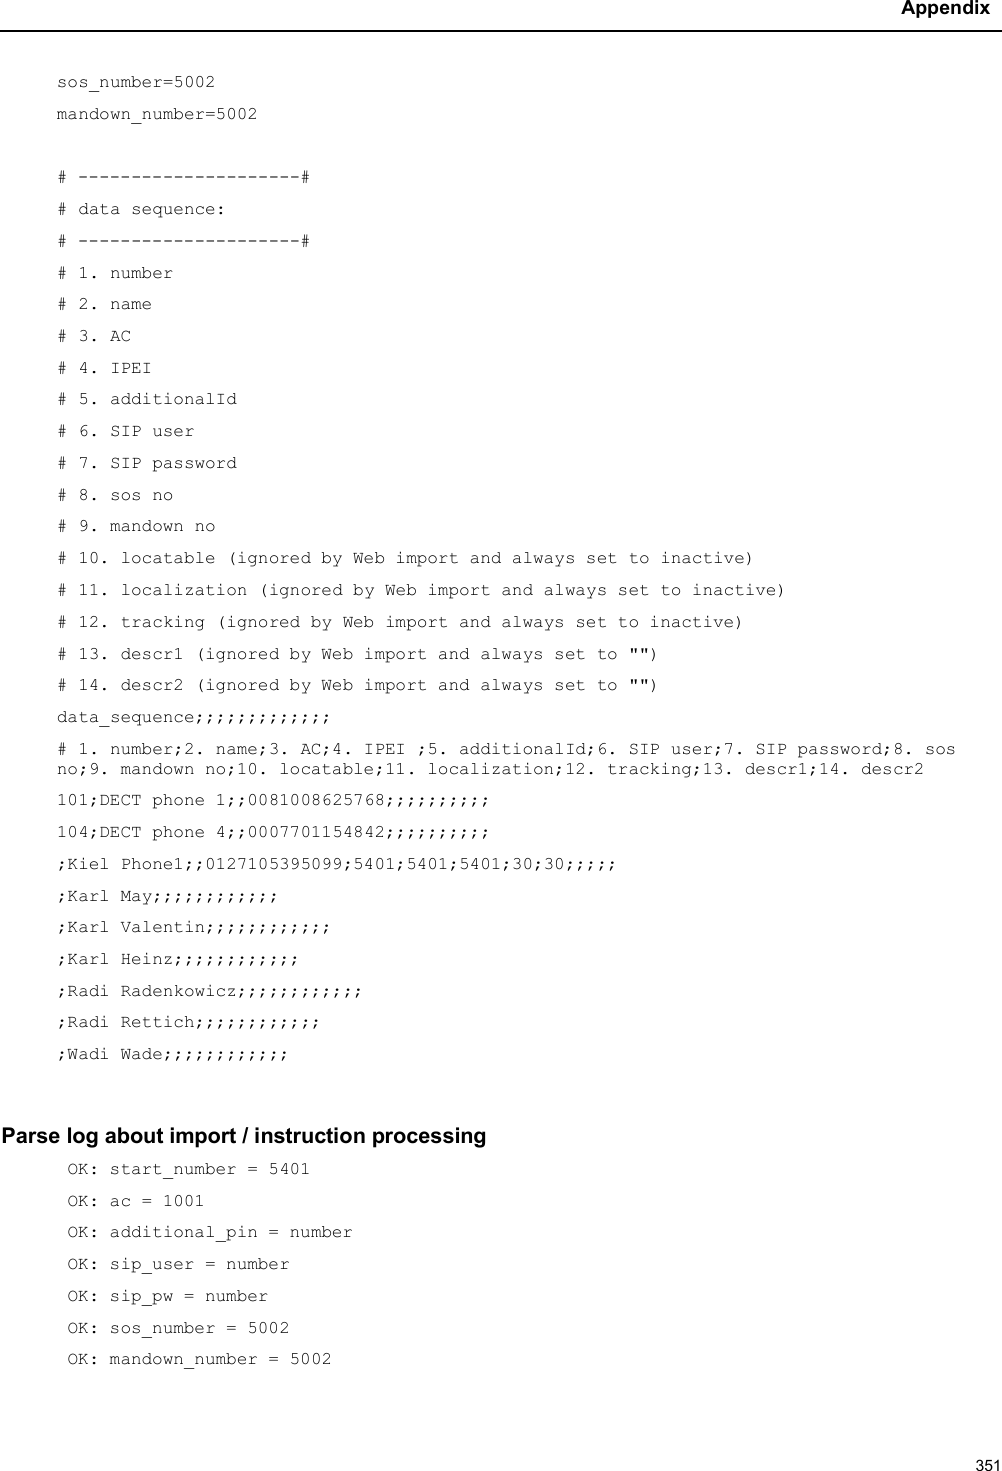
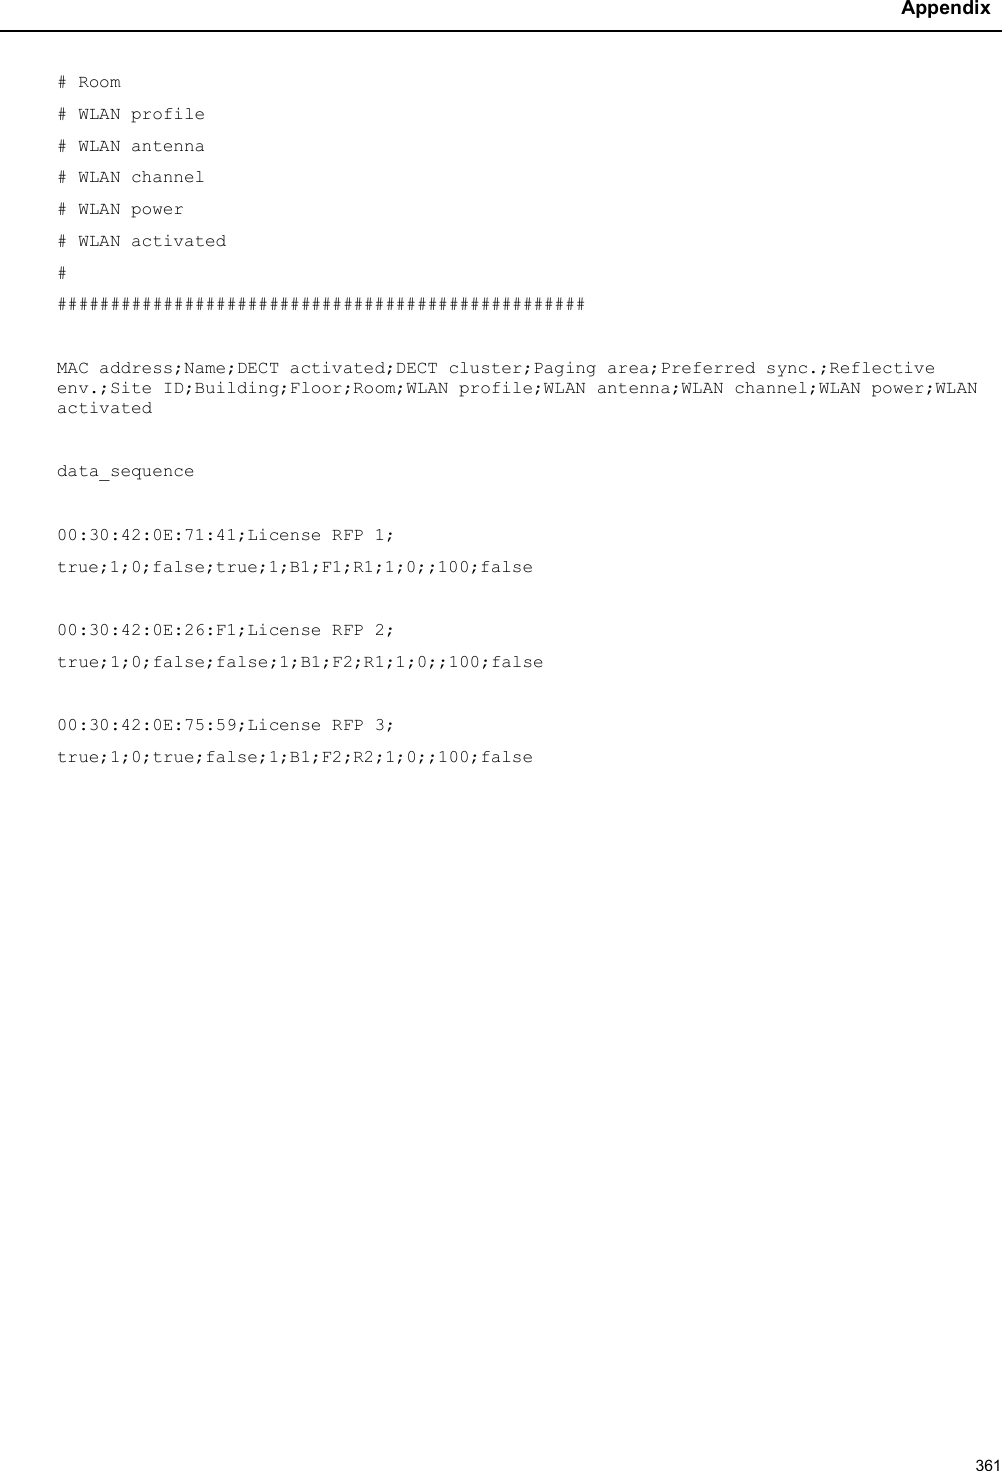
![Appendix359Parse log for import / instruction processingok: active = 1ok: net_mask = 255.255.0.0ok: tftp_server = 172.30.200.92ok: tftp_file = iprfp2G.tftpok: omm_1 = 172.30.111.188ok: omm_2 = 172.30.11.181ok: gateway = 172.30.0.2ok: dns_server = 172.30.0.4,172.30.0.21ok: dns_domain = mitel.comok: syslog_addr = 172.30.200.92not set: syslog_portok: use_vlan = 1ok: srvlist = 172.30.0.4,172.30.0.21ok: broadcast_addr = 172.30.255.255ok: vlan_id = 4ok: preferred_tftp = 1ok: config_file_server = https://server/configfiles/:parsing ok: processing of section: data_sequence[…]create data: […]RFP configuration: […]](https://usermanual.wiki/Mitel-Networks/RFP47DRC.User-Manual-II/User-Guide-4037307-Page-159.png)
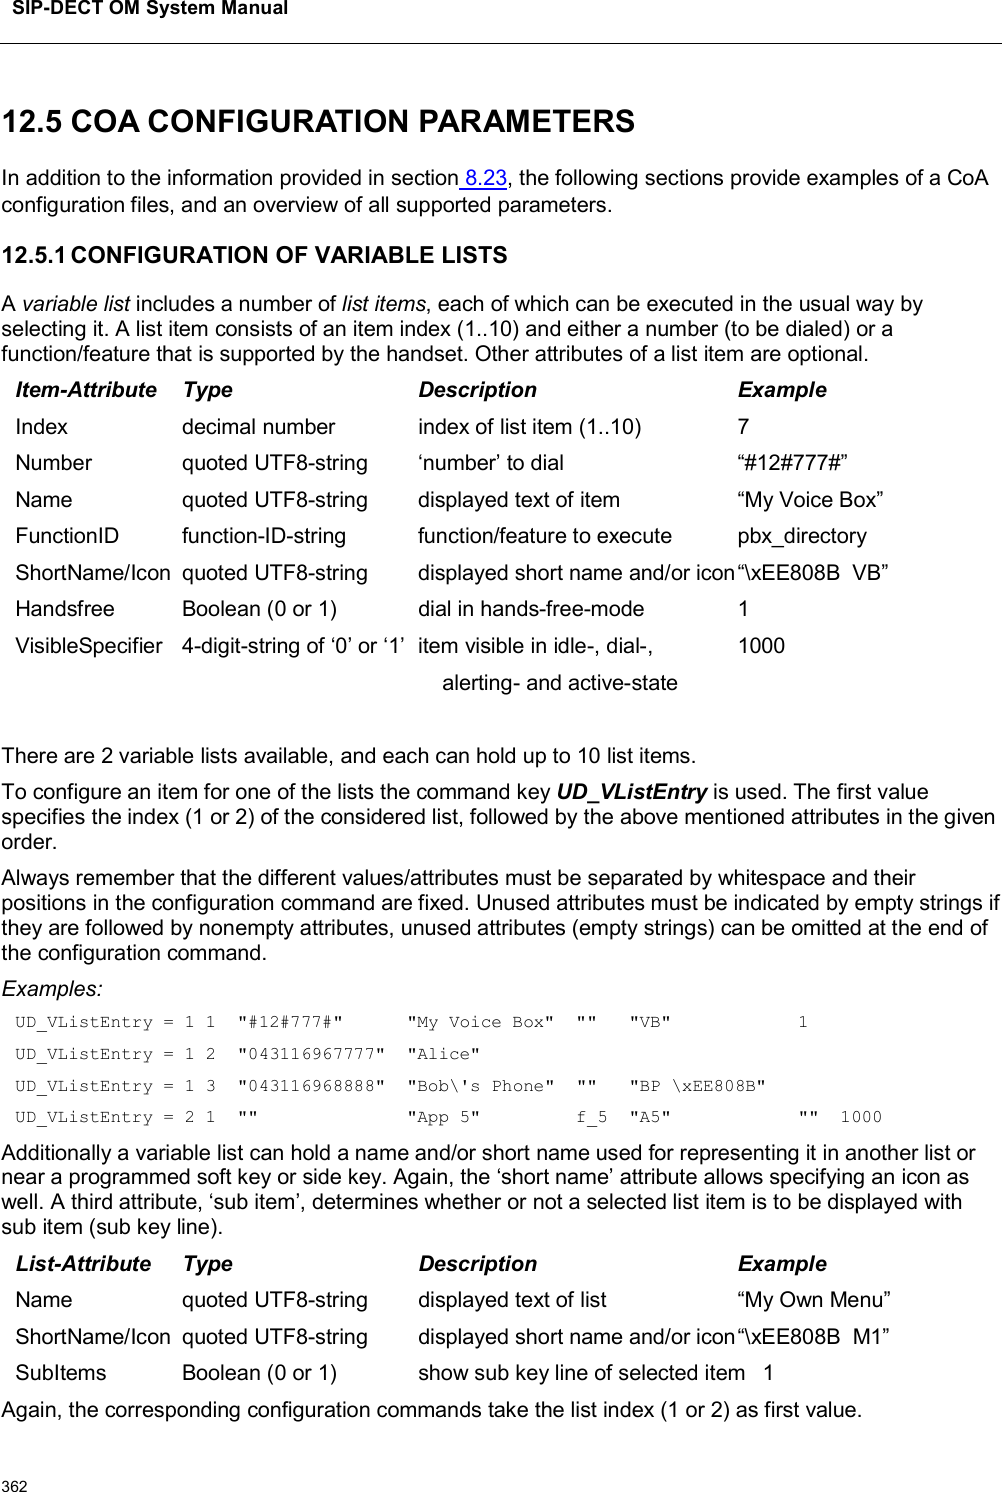
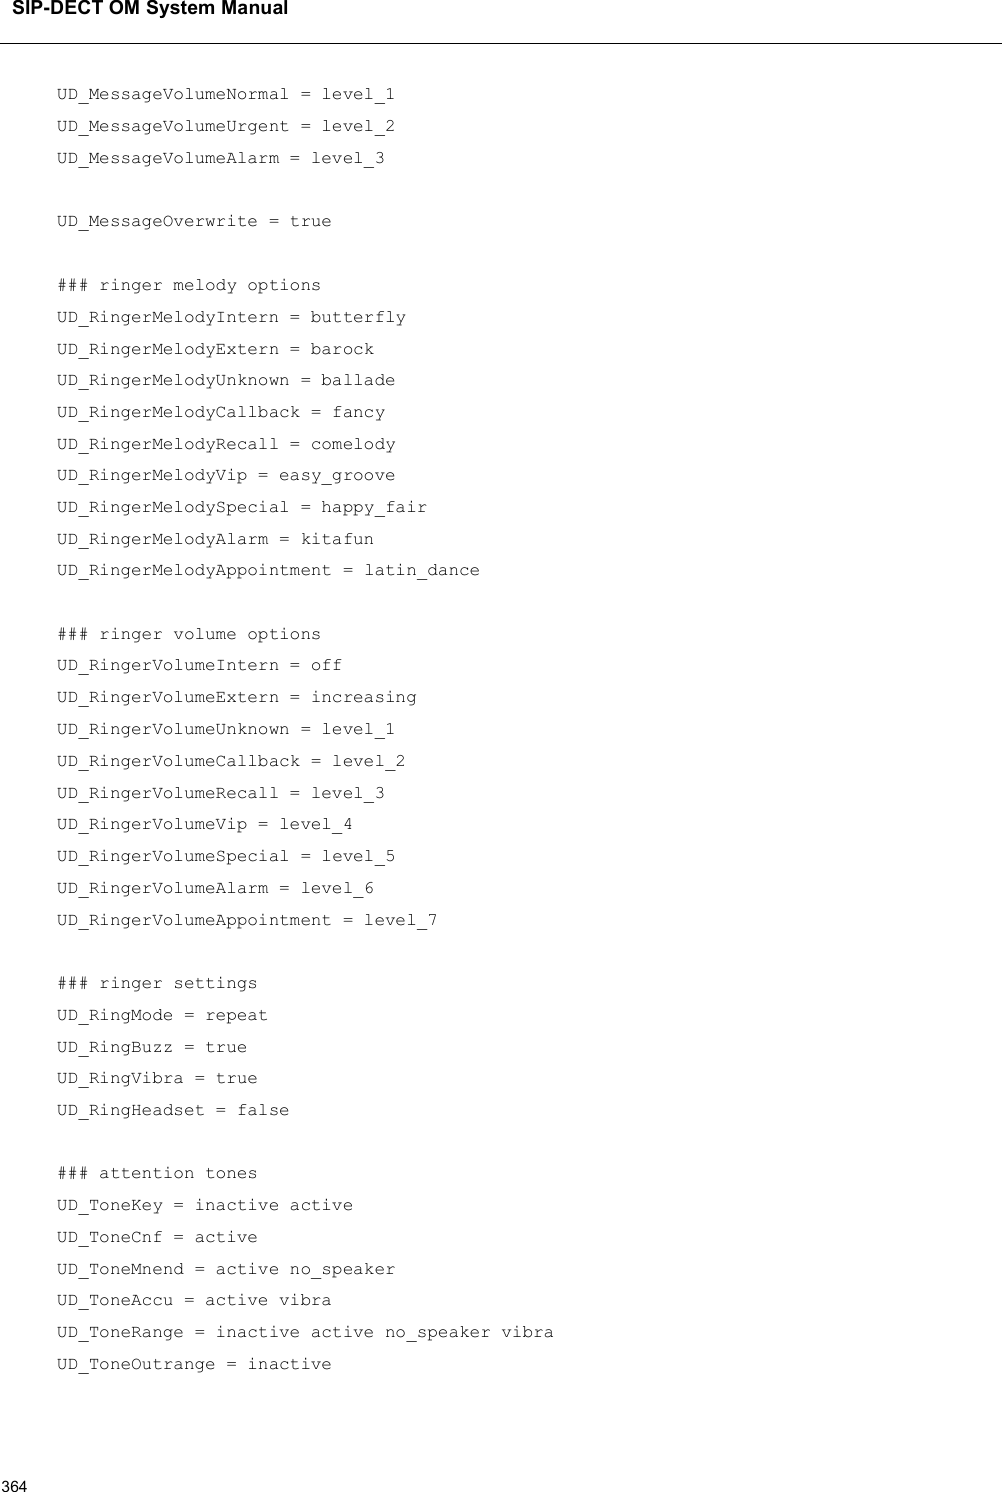
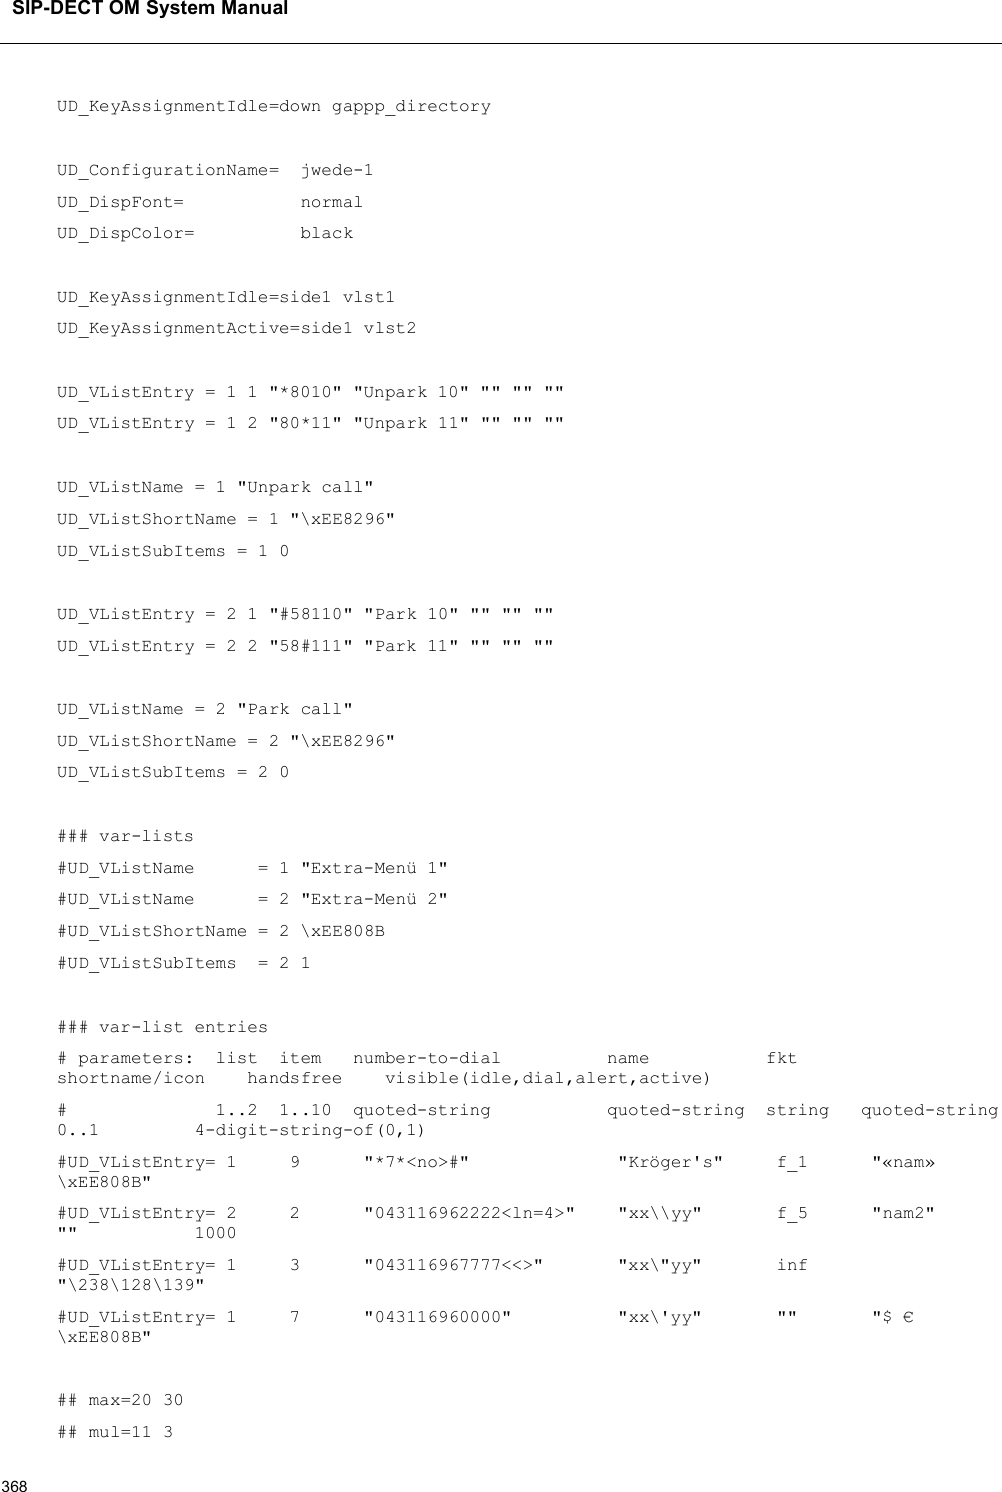
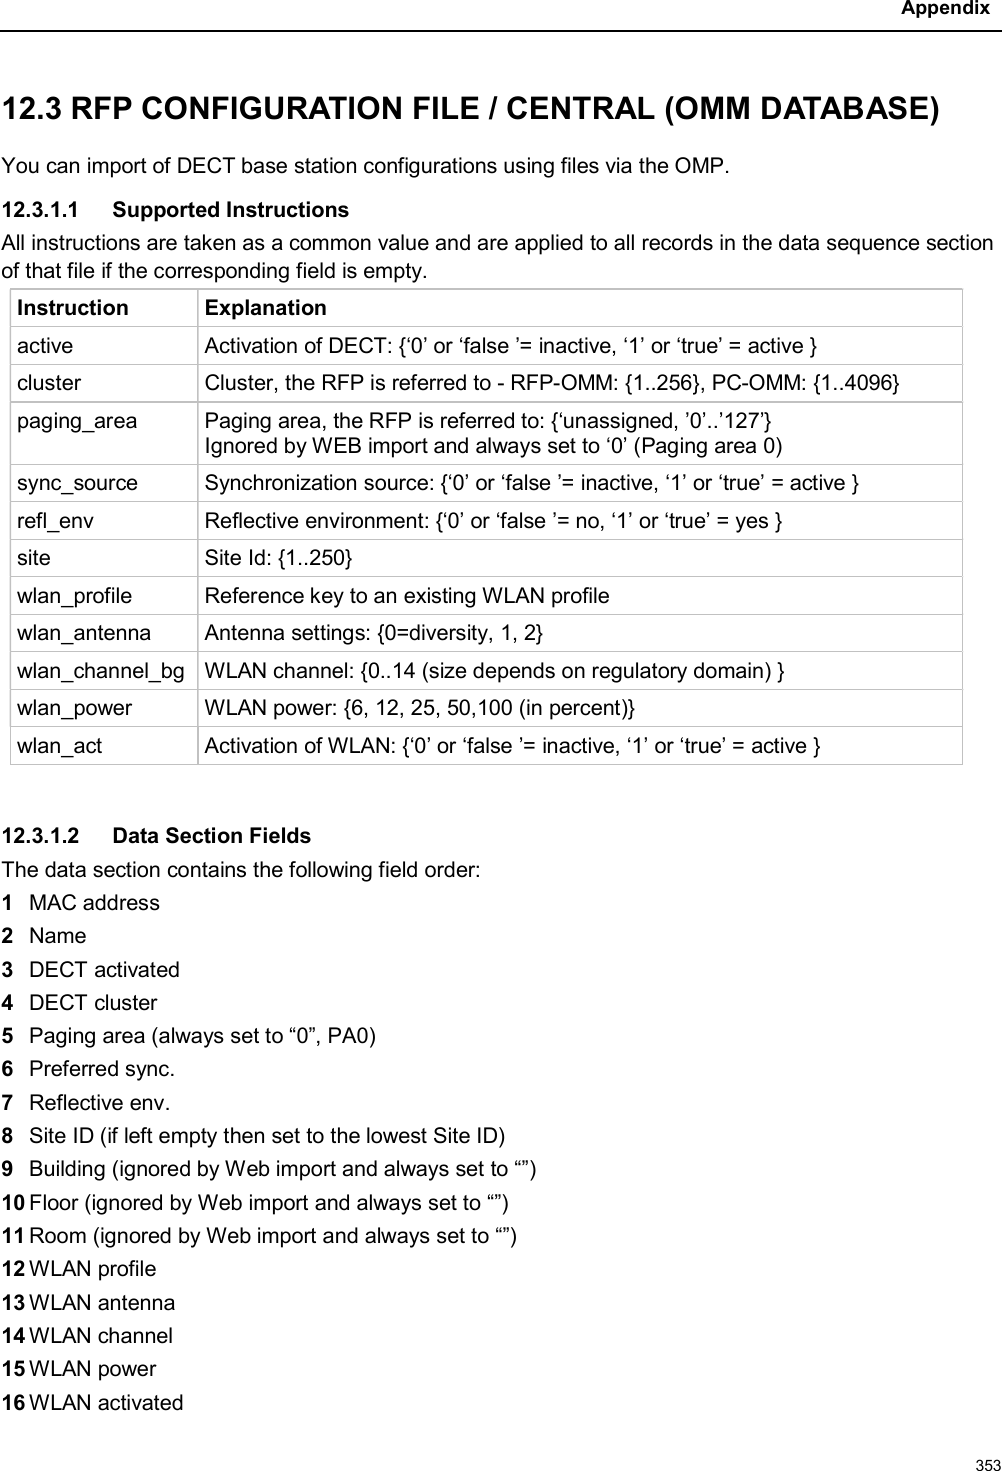
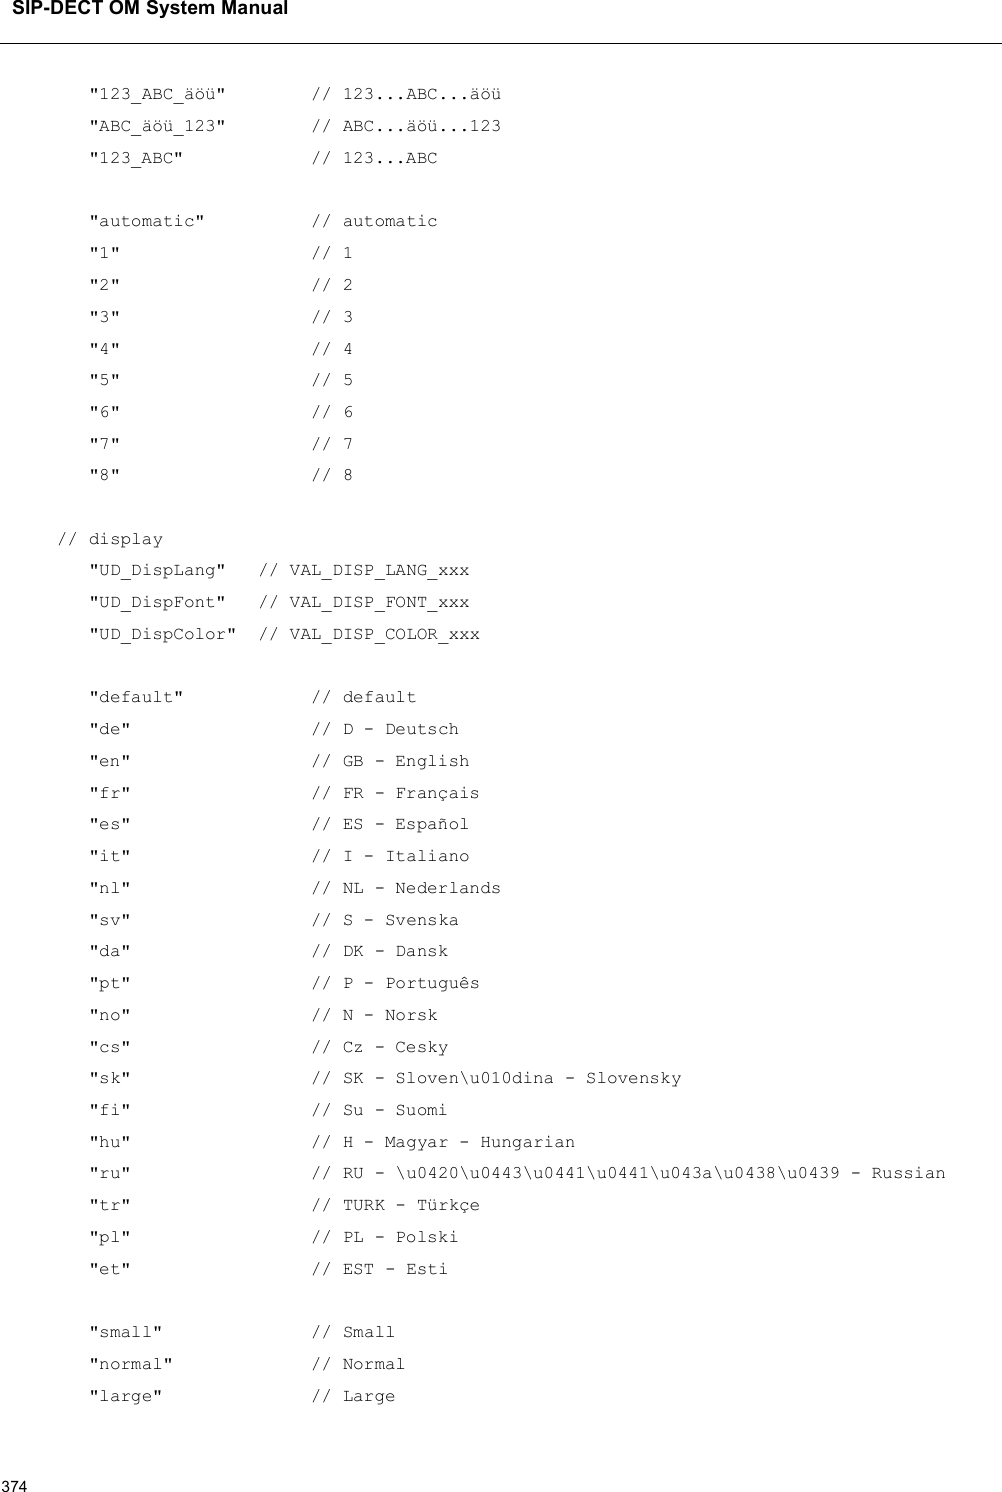
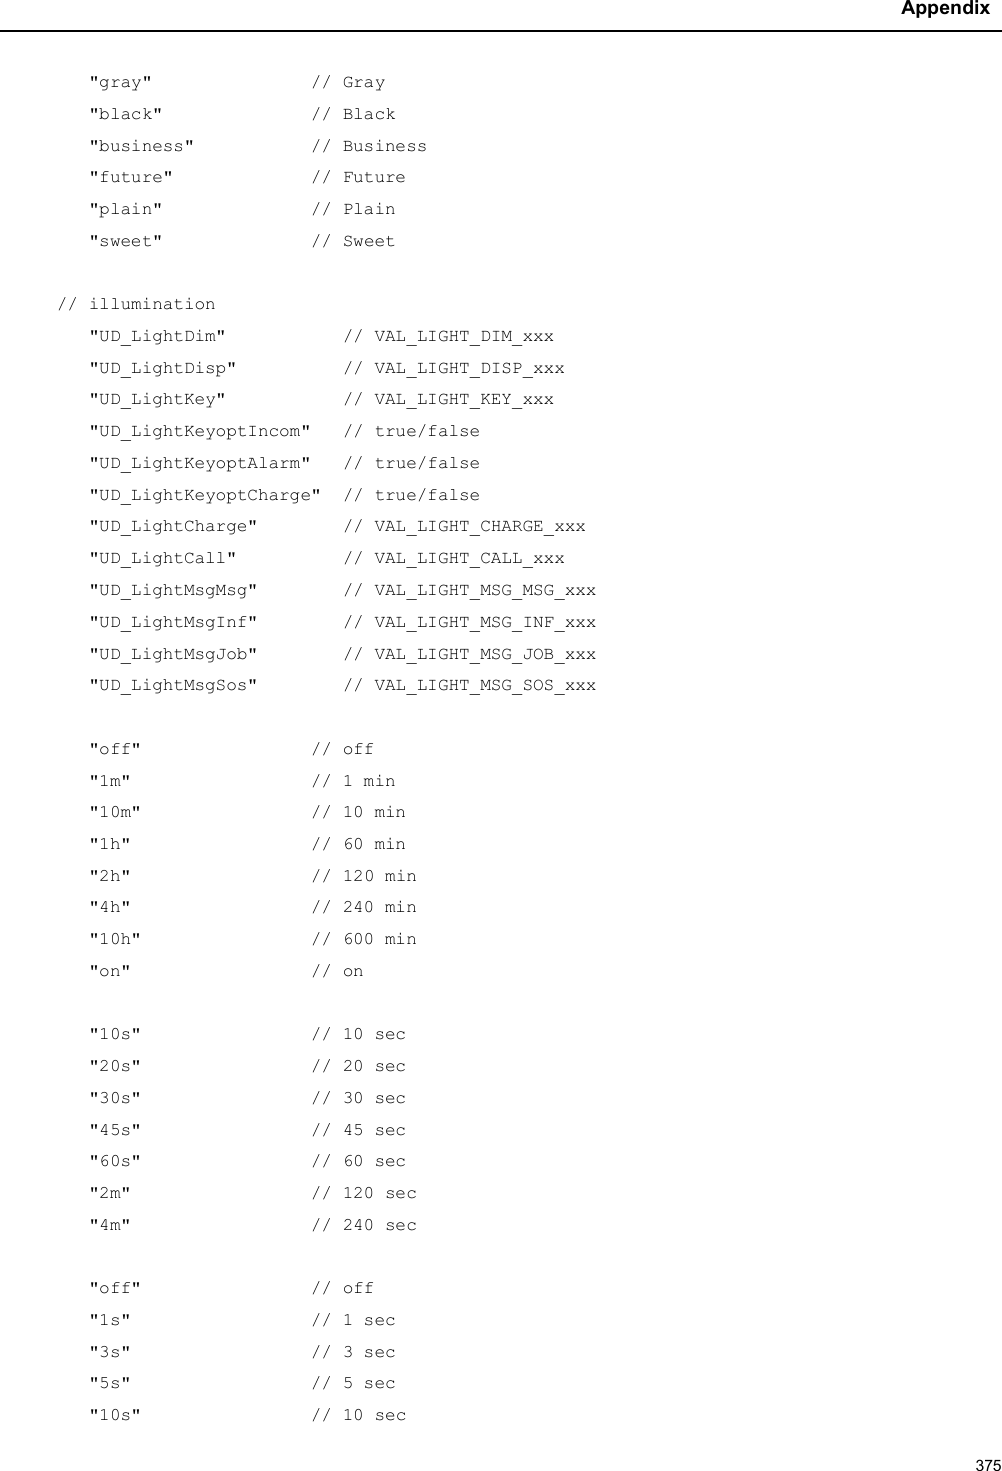
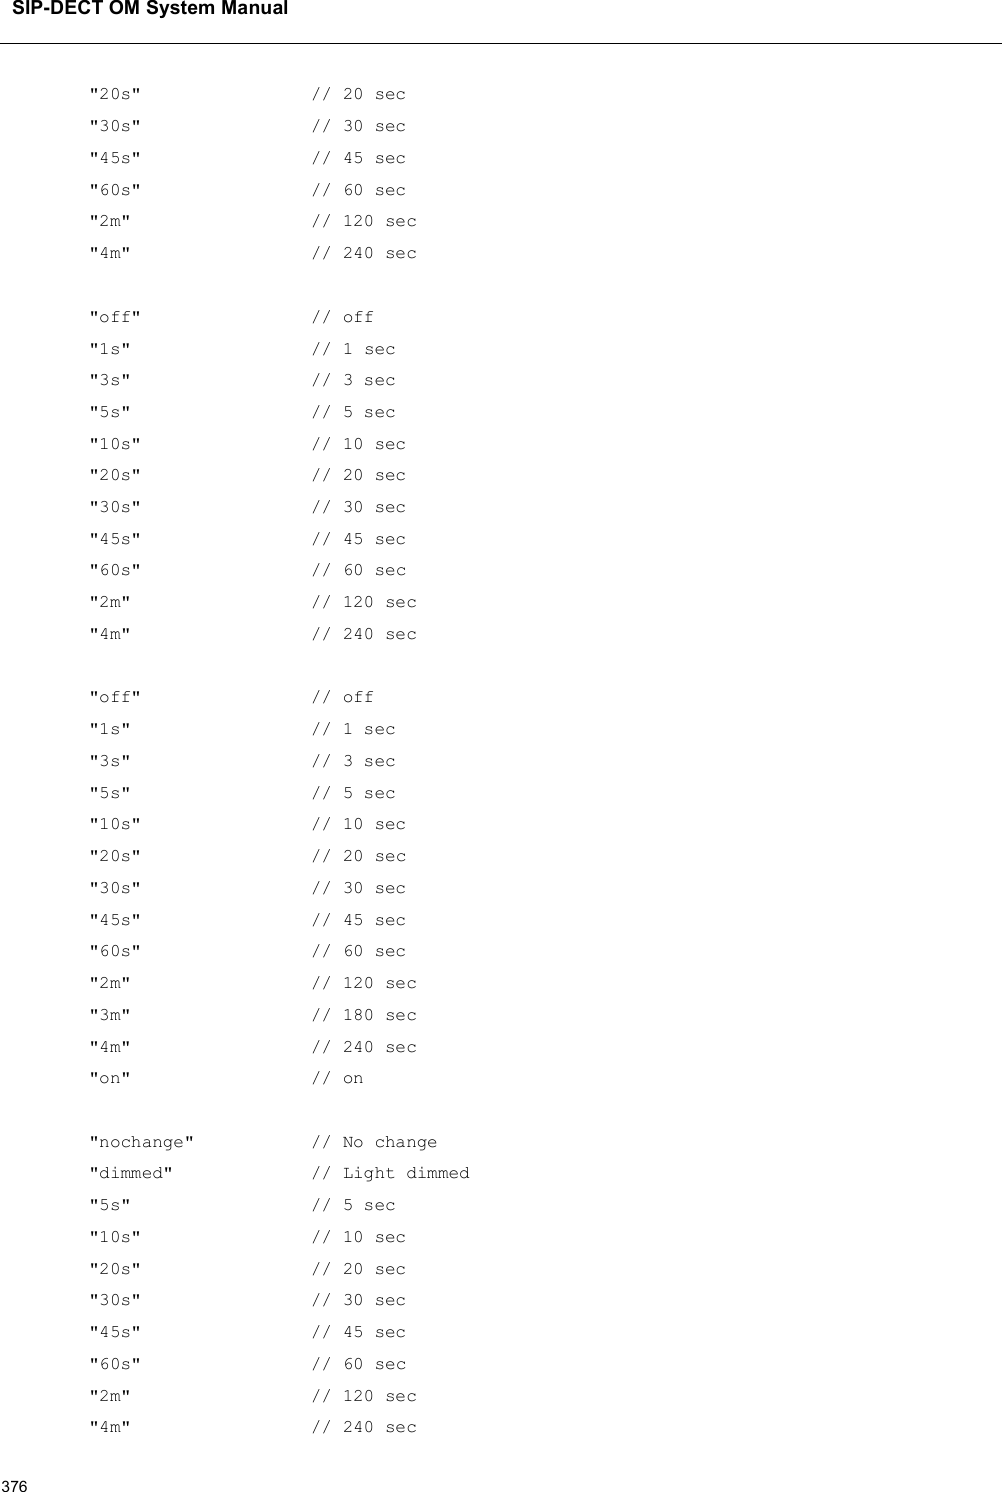
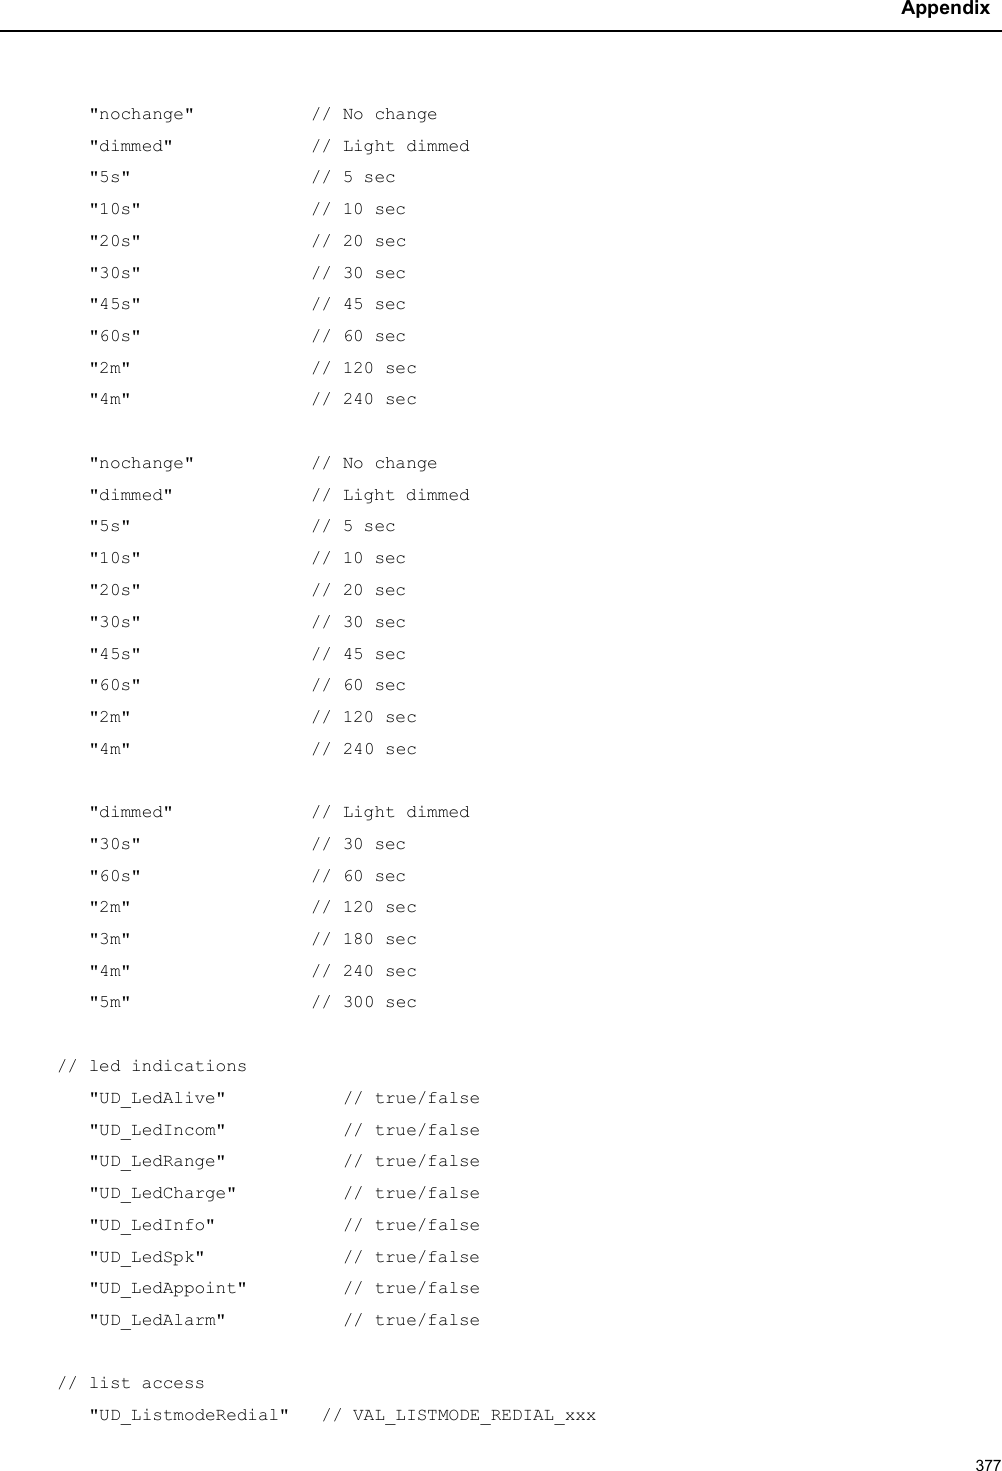
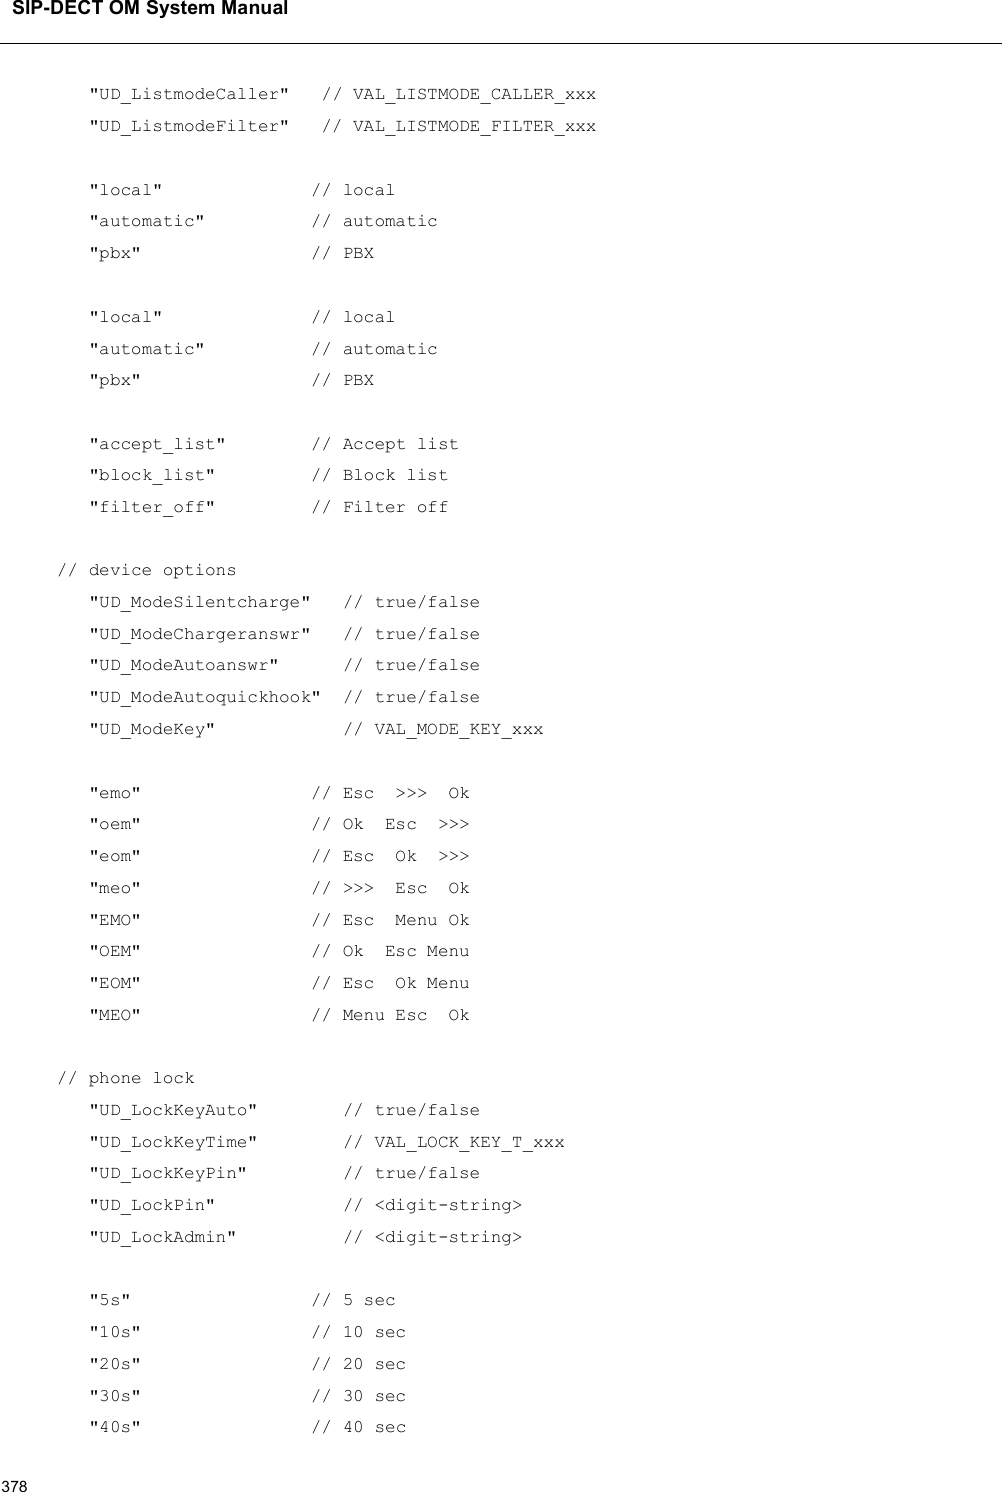
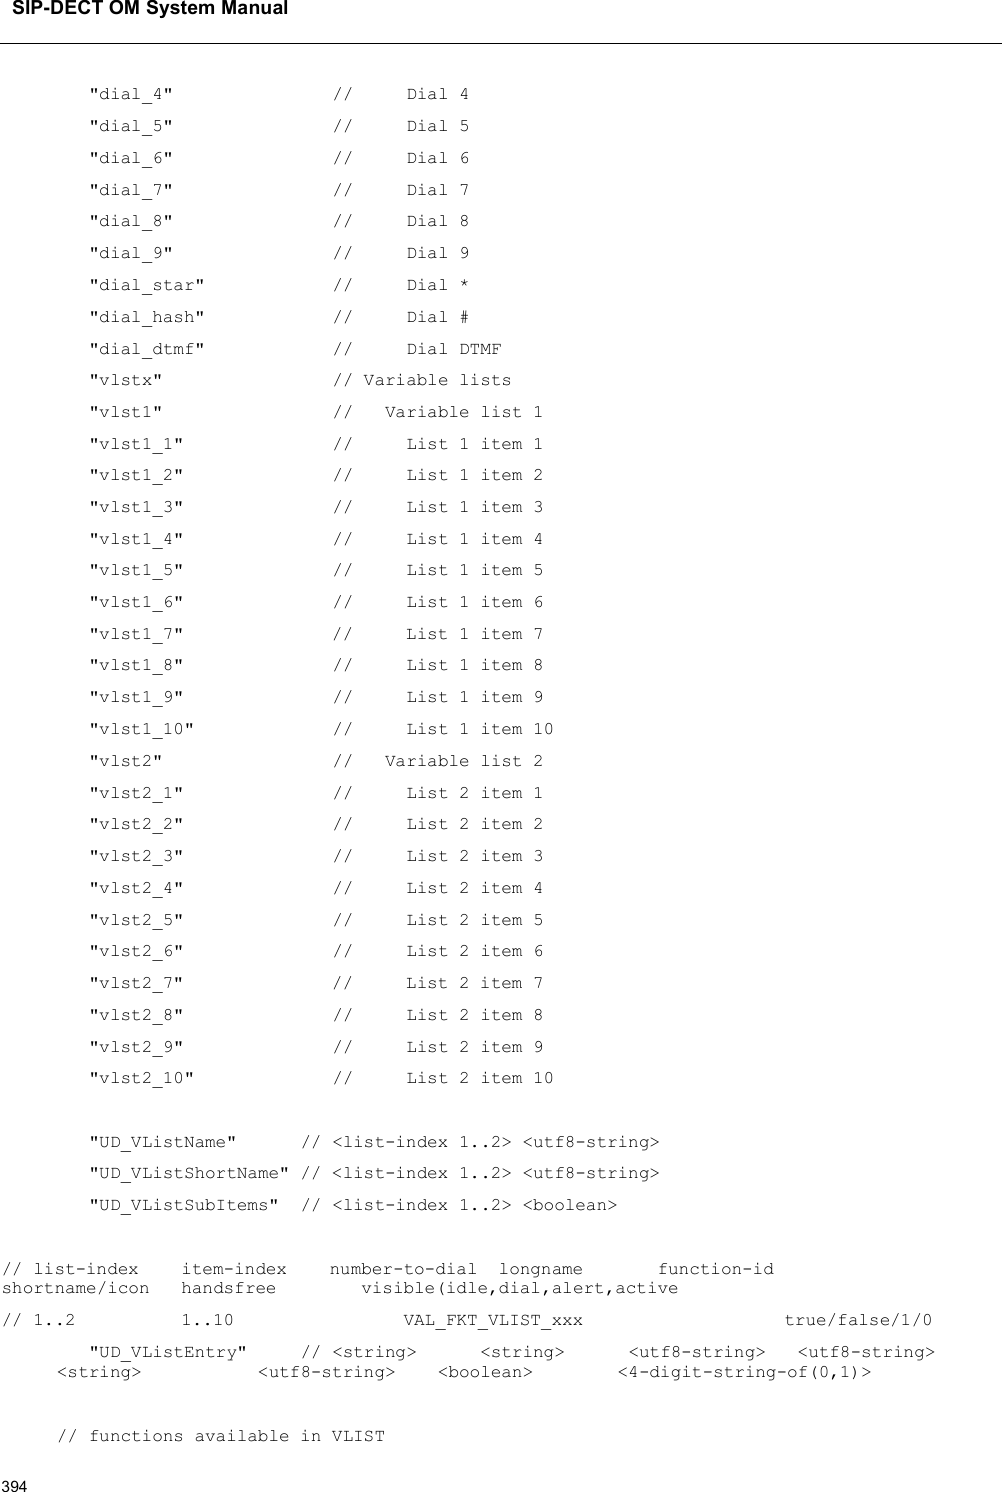
![SIP-DECT OM System Manual370UD_KeyAssignmentActiveSos=star dial_starUD_KeyAssignmentActiveSos=hash dial_hashUD_KeyAssignmentActiveSosMaster=red nop12.5.8 SUPPORTED COA PARAMETERSThe following keys and values are supported in the CoA configuration files.used in configuration commands: <key> = <value> [ <value> ]// KEY_xxx key// VAL_xxx value"UD_ConfigurationName" // <string>// message melody options"UD_MessageMelodyNormal" // VAL_MELODY_xxx"UD_MessageMelodyUrgent" // VAL_MELODY_xxx"UD_MessageMelodyAlarm" // VAL_MELODY_xxx// message volume options"UD_MessageVolumeNormal" // VAL_VOLUME_xxx"UD_MessageVolumeUrgent" // VAL_VOLUME_xxx"UD_MessageVolumeAlarm" // VAL_VOLUME_xxx// message overwrite"UD_MessageOverwrite" // true/false// ringer melody options"UD_RingerMelodyIntern" // VAL_MELODY_xxx"UD_RingerMelodyExtern" // VAL_MELODY_xxx"UD_RingerMelodyUnknown" // VAL_MELODY_xxx"UD_RingerMelodyCallback" // VAL_MELODY_xxx"UD_RingerMelodyRecall" // VAL_MELODY_xxx"UD_RingerMelodyVip" // VAL_MELODY_xxx"UD_RingerMelodySpecial" // VAL_MELODY_xxx"UD_RingerMelodyAlarm" // VAL_MELODY_xxx"UD_RingerMelodyAppointment" // VAL_MELODY_xxx// ringer volume options"UD_RingerVolumeIntern" // VAL_VOLUME_xxx"UD_RingerVolumeExtern" // VAL_VOLUME_xxx"UD_RingerVolumeUnknown" // VAL_VOLUME_xxx"UD_RingerVolumeCallback" // VAL_VOLUME_xxx"UD_RingerVolumeRecall" // VAL_VOLUME_xxx](https://usermanual.wiki/Mitel-Networks/RFP47DRC.User-Manual-II/User-Guide-4037307-Page-170.png)

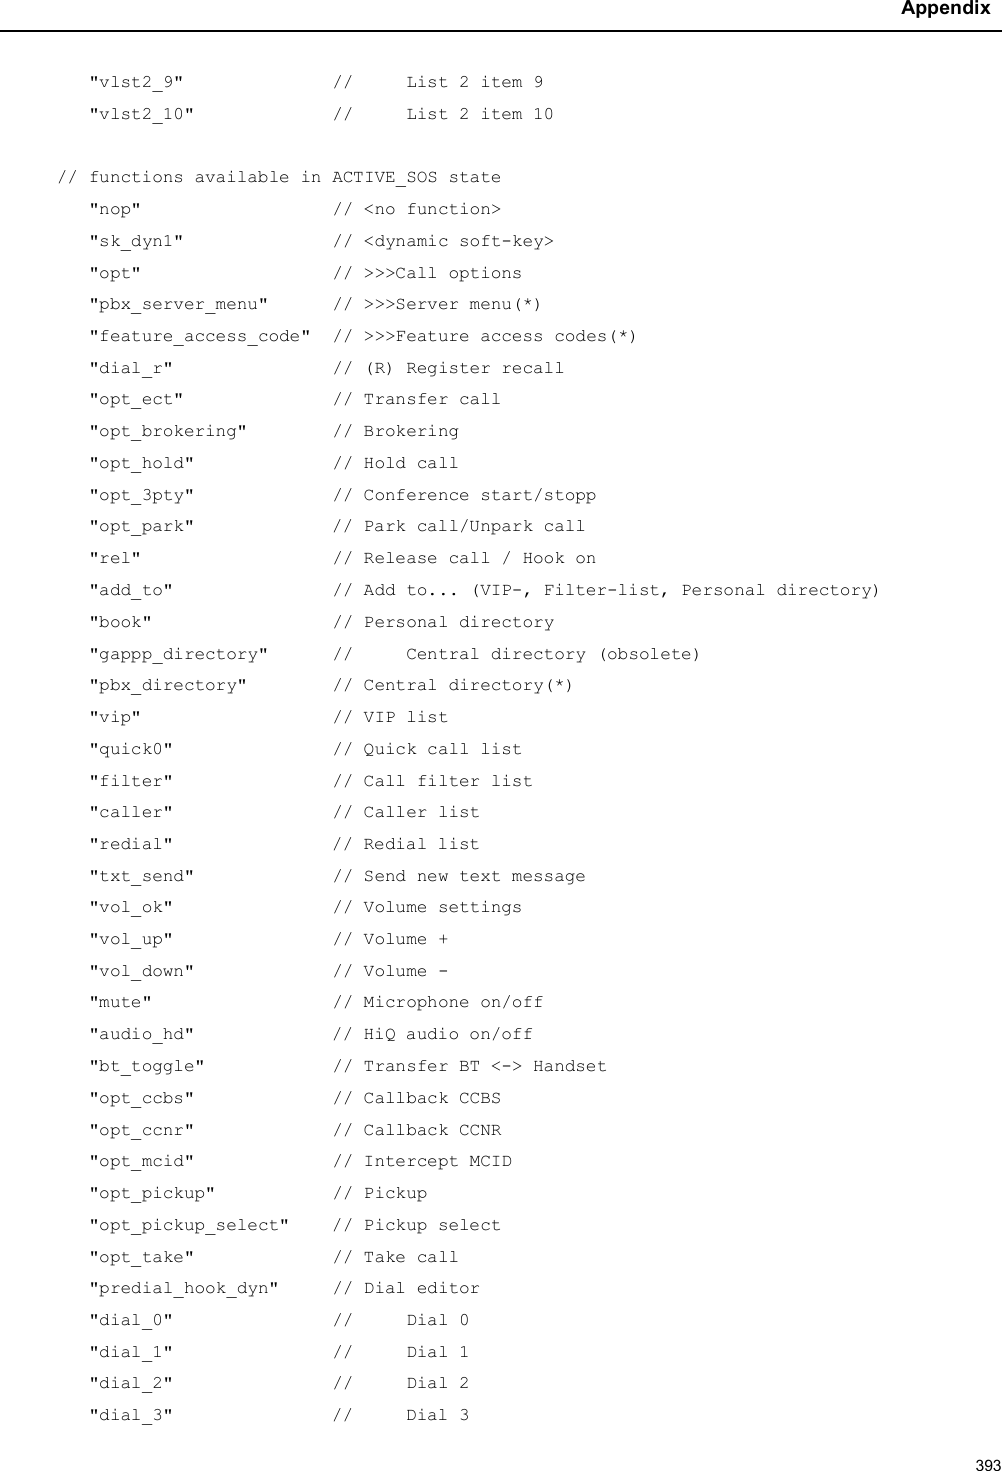
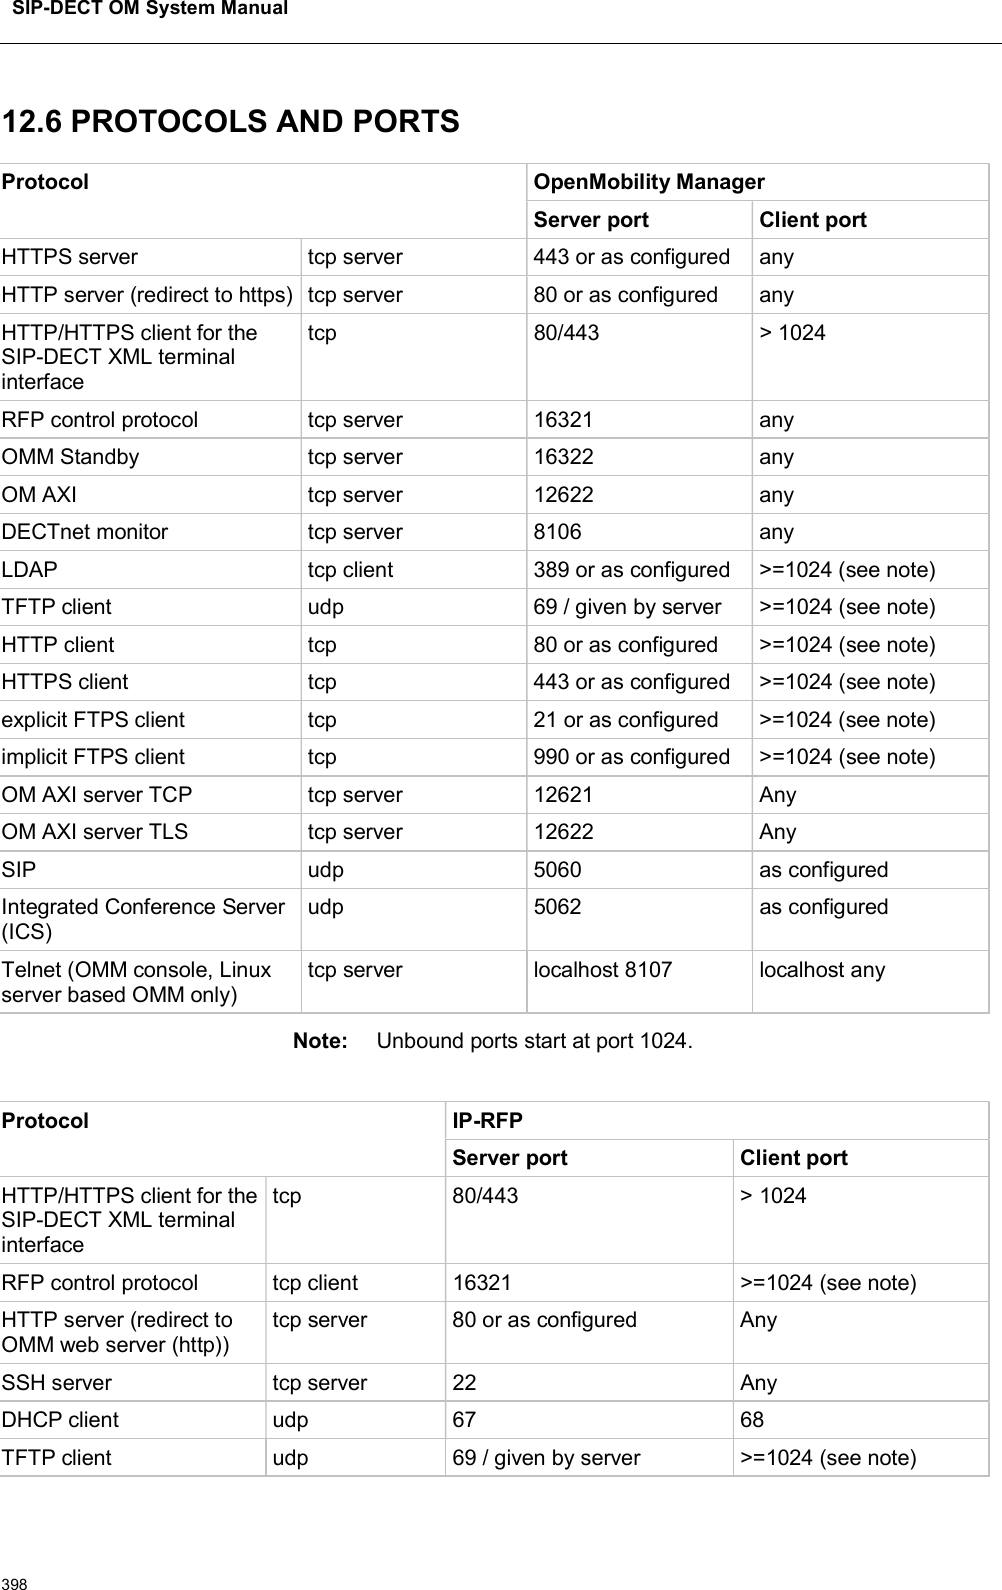
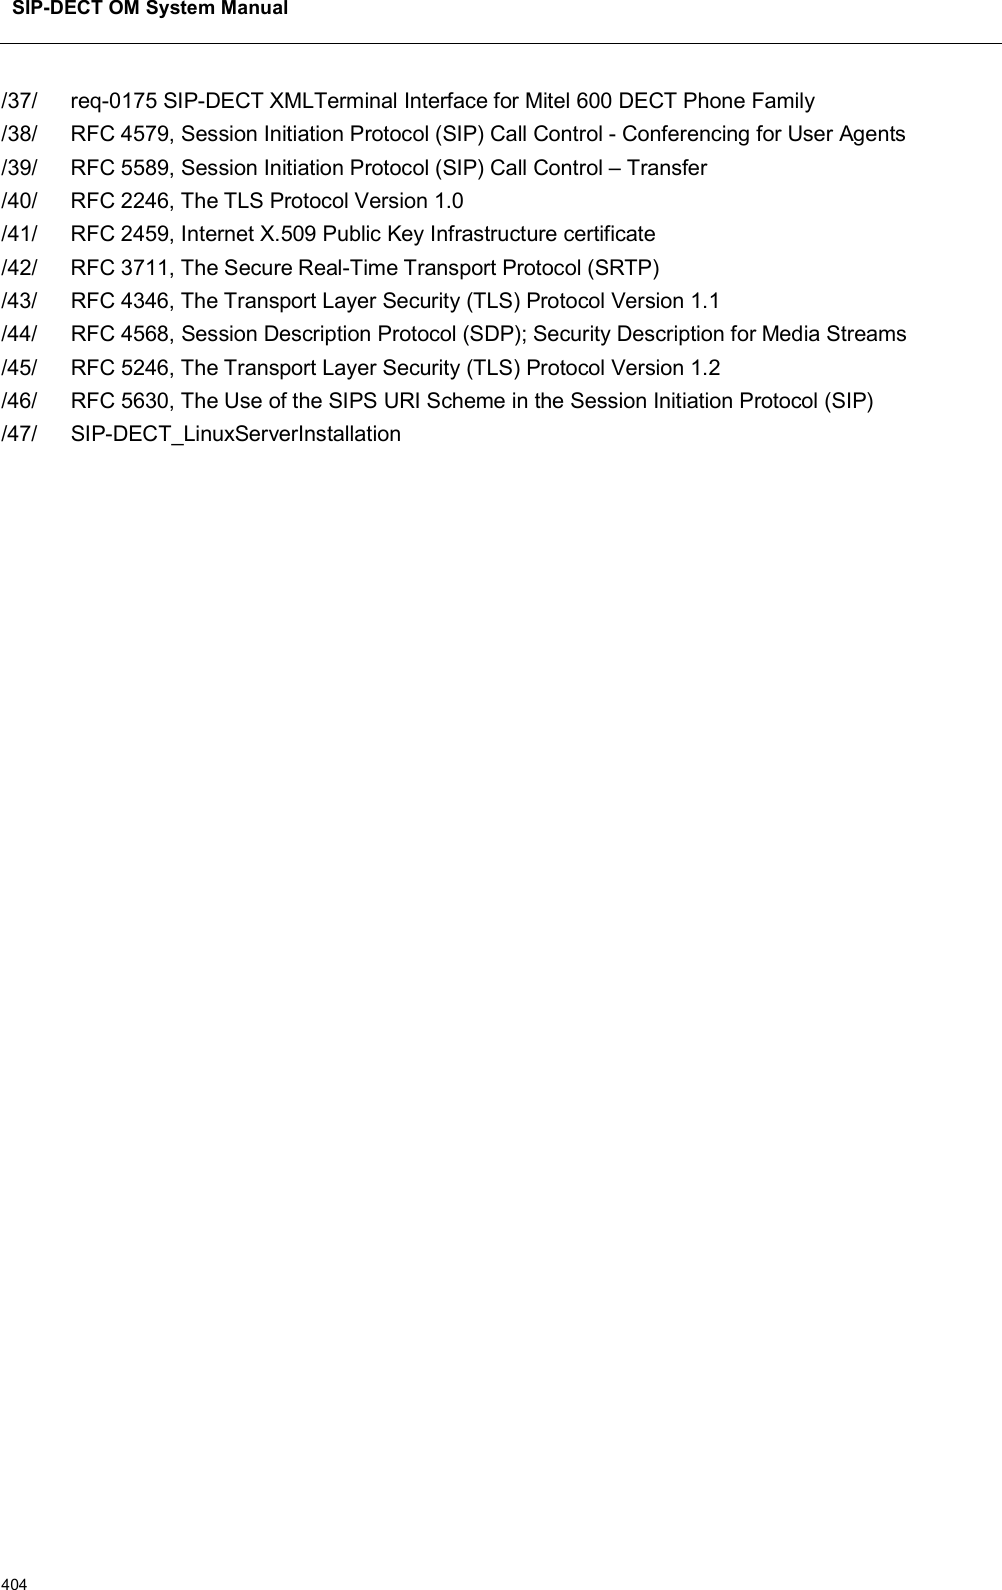
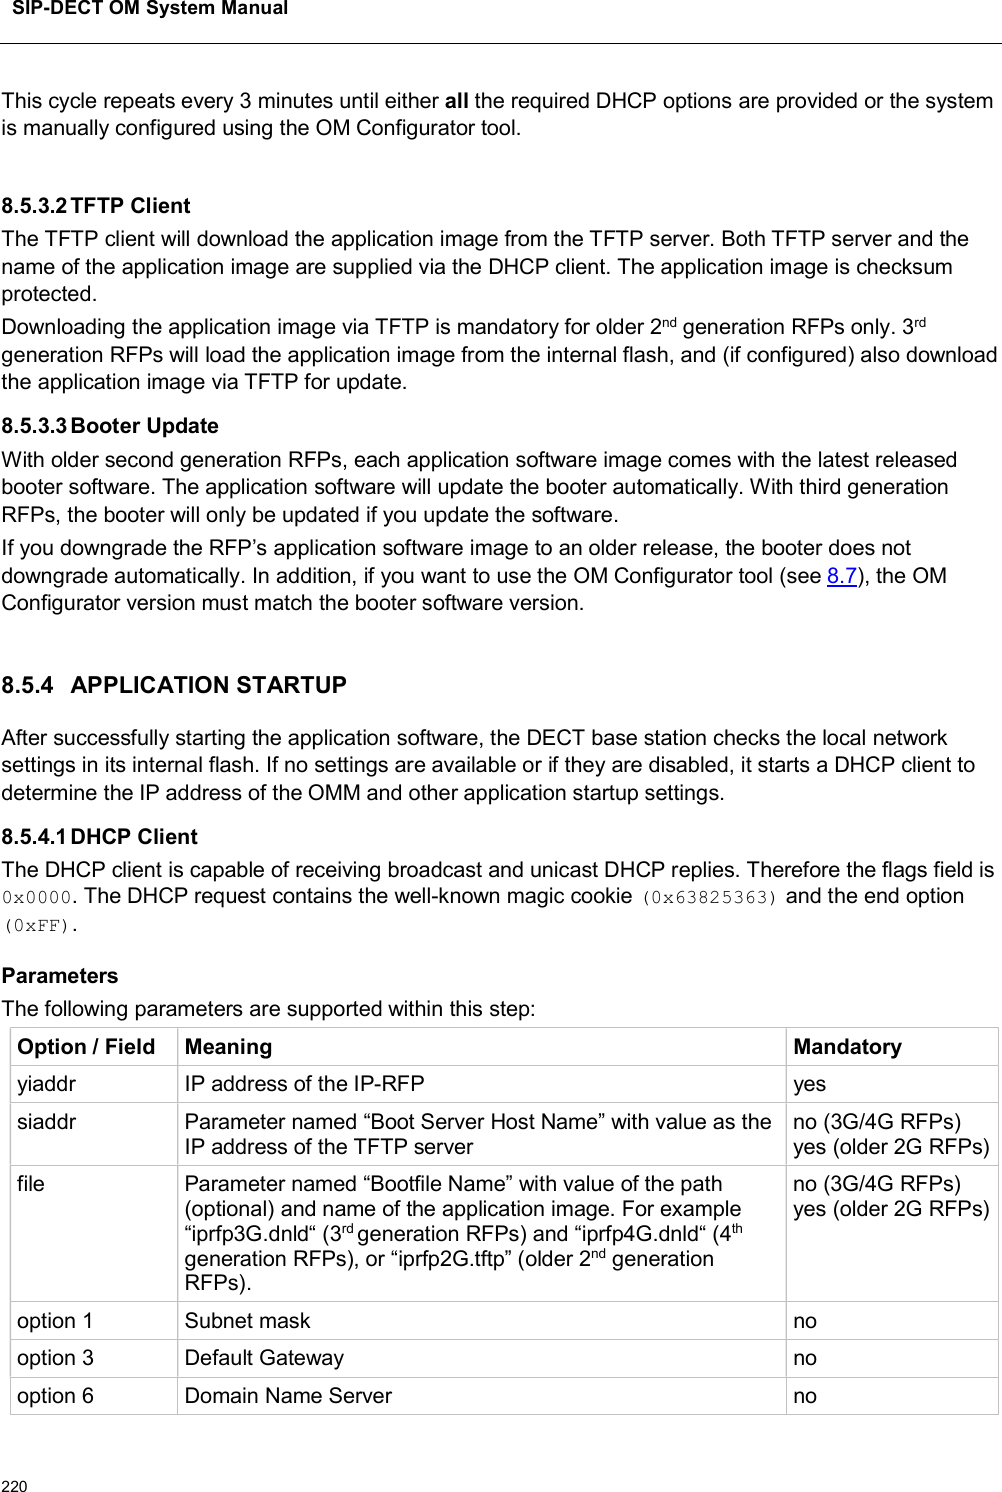
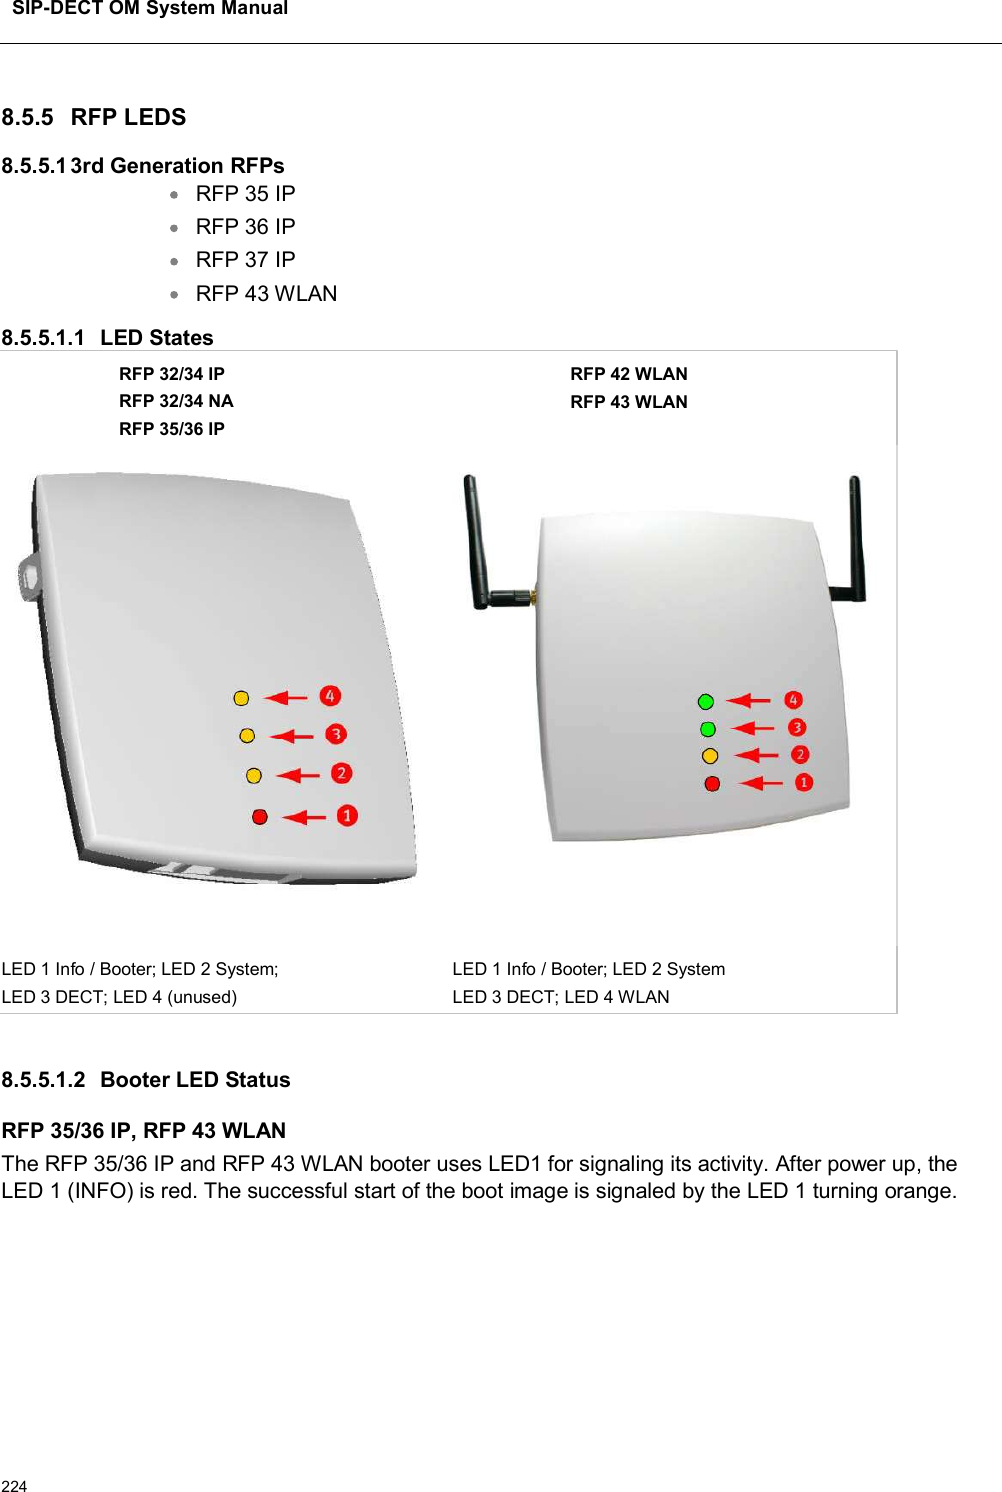
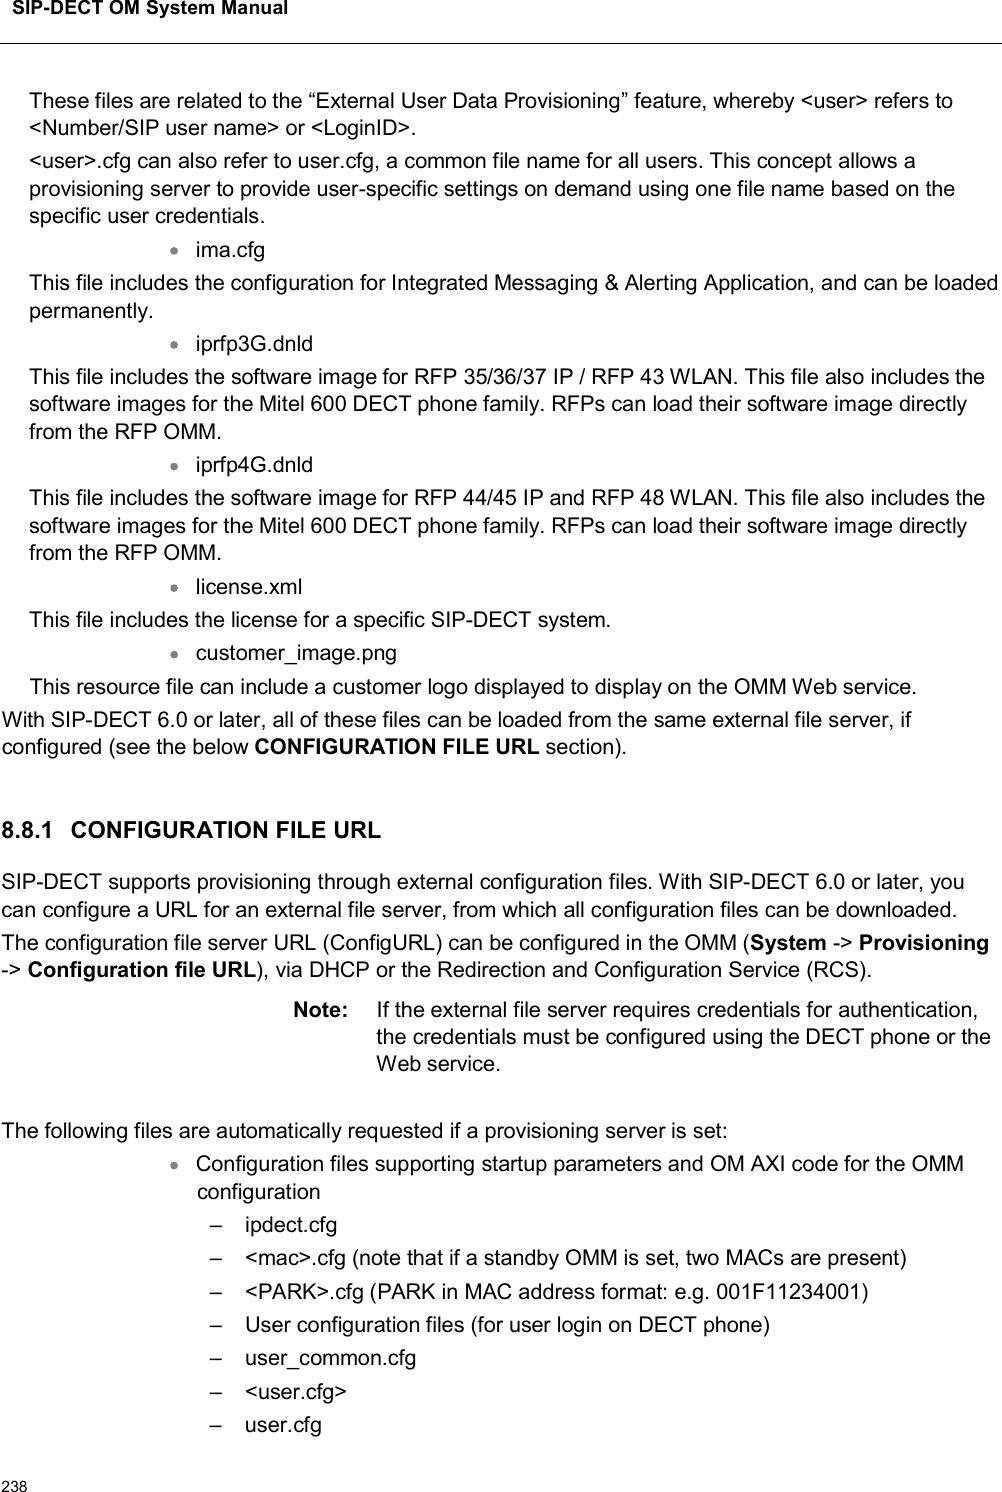
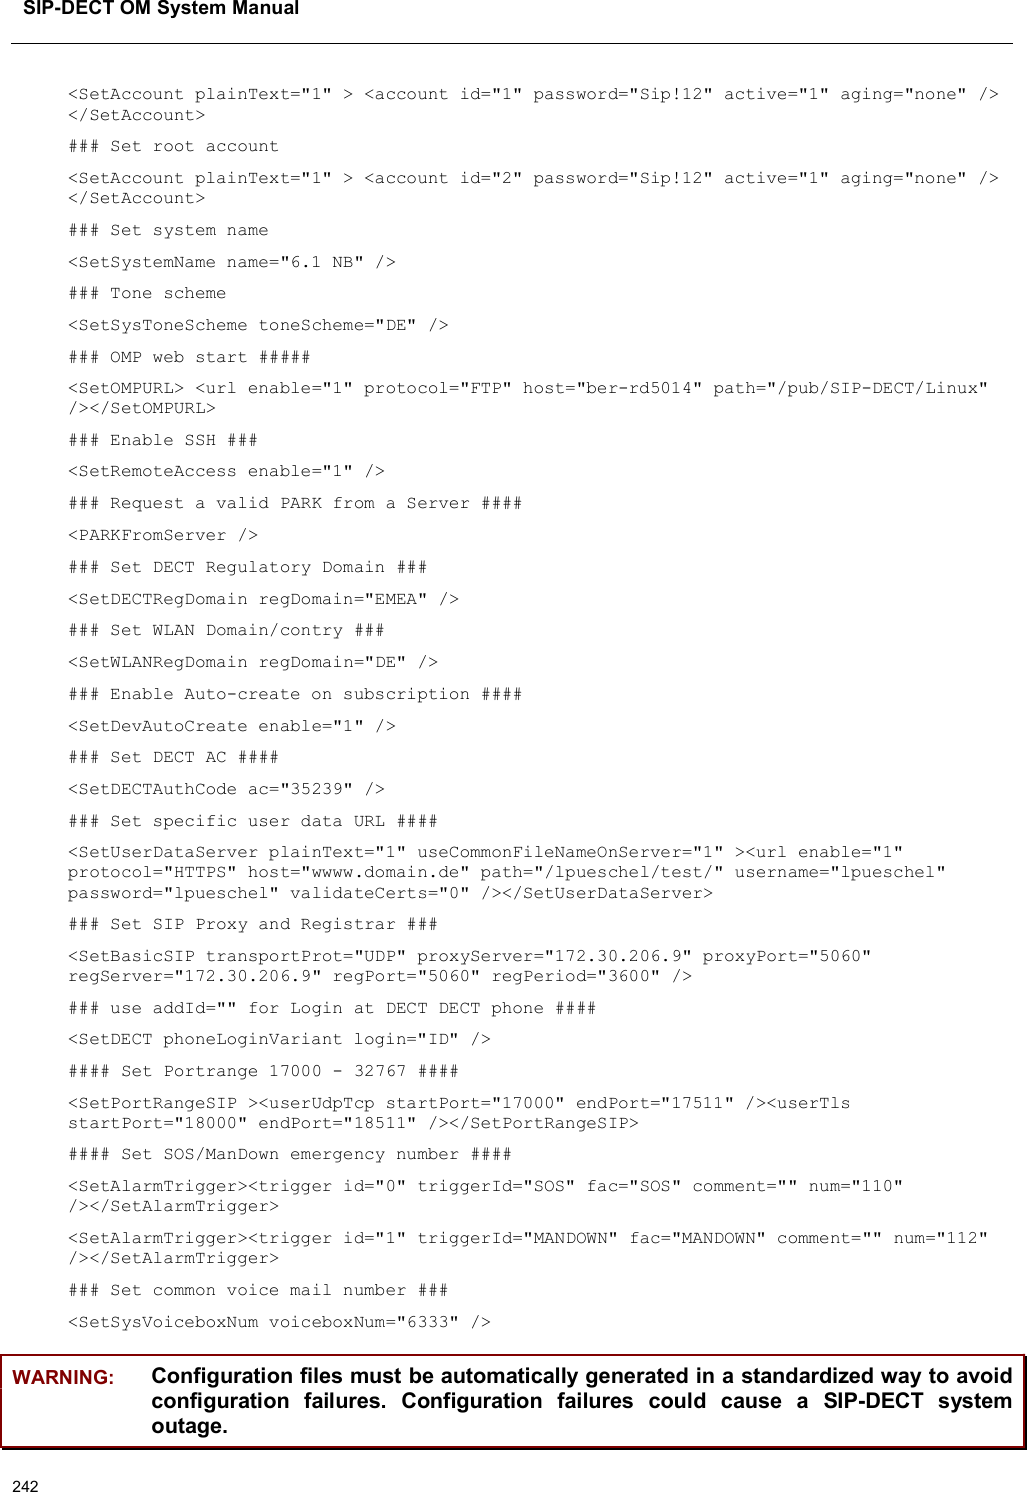
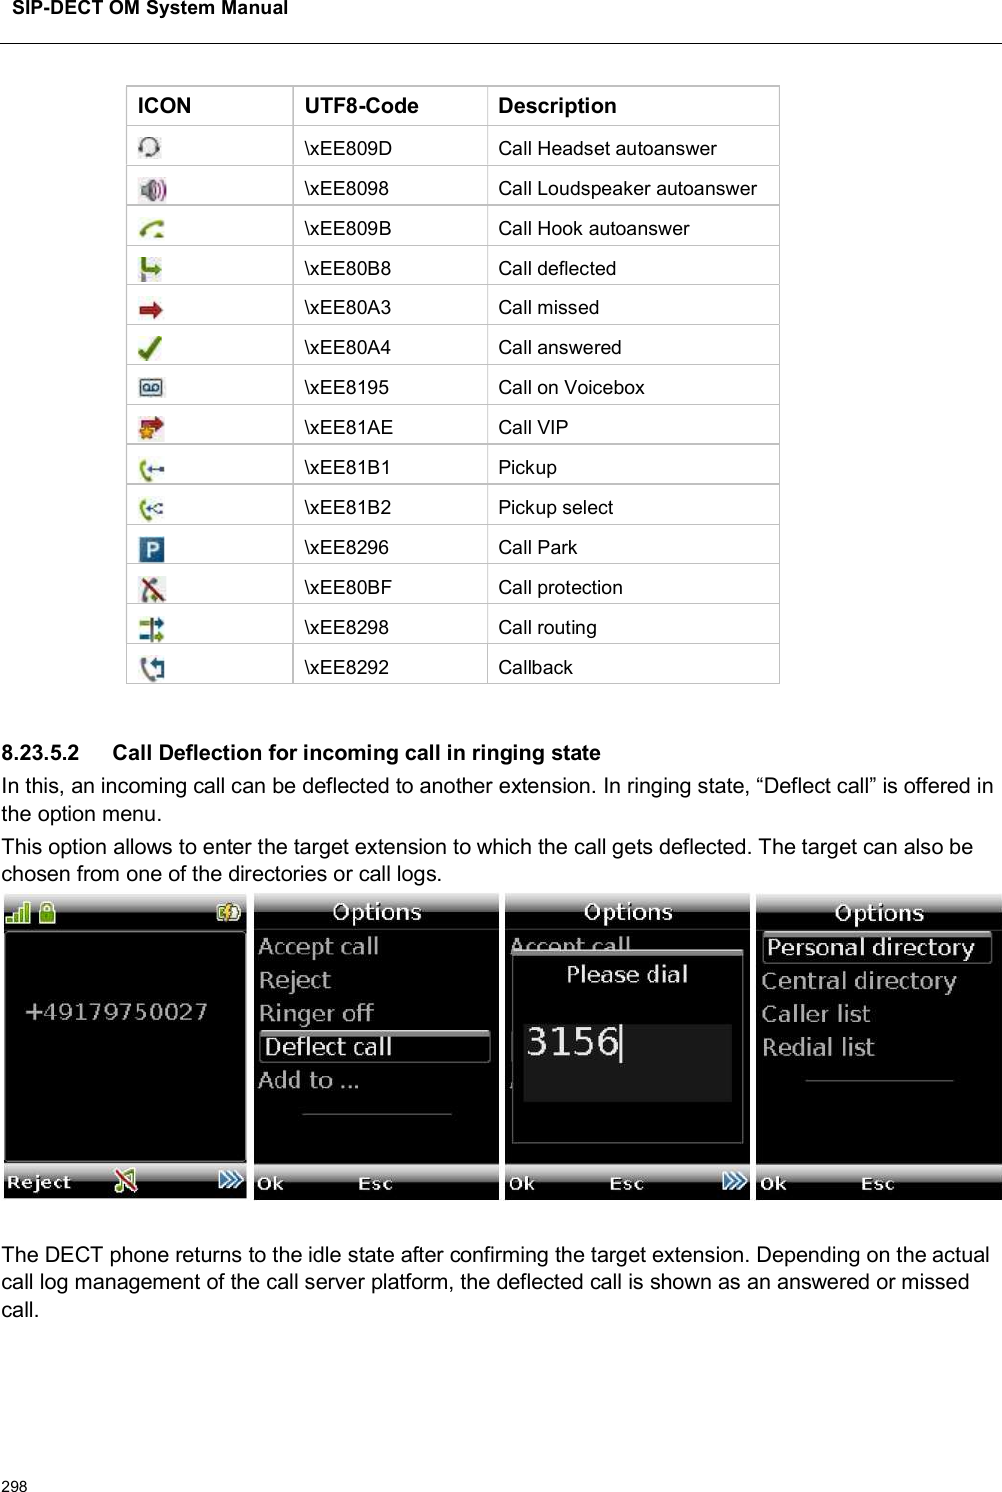
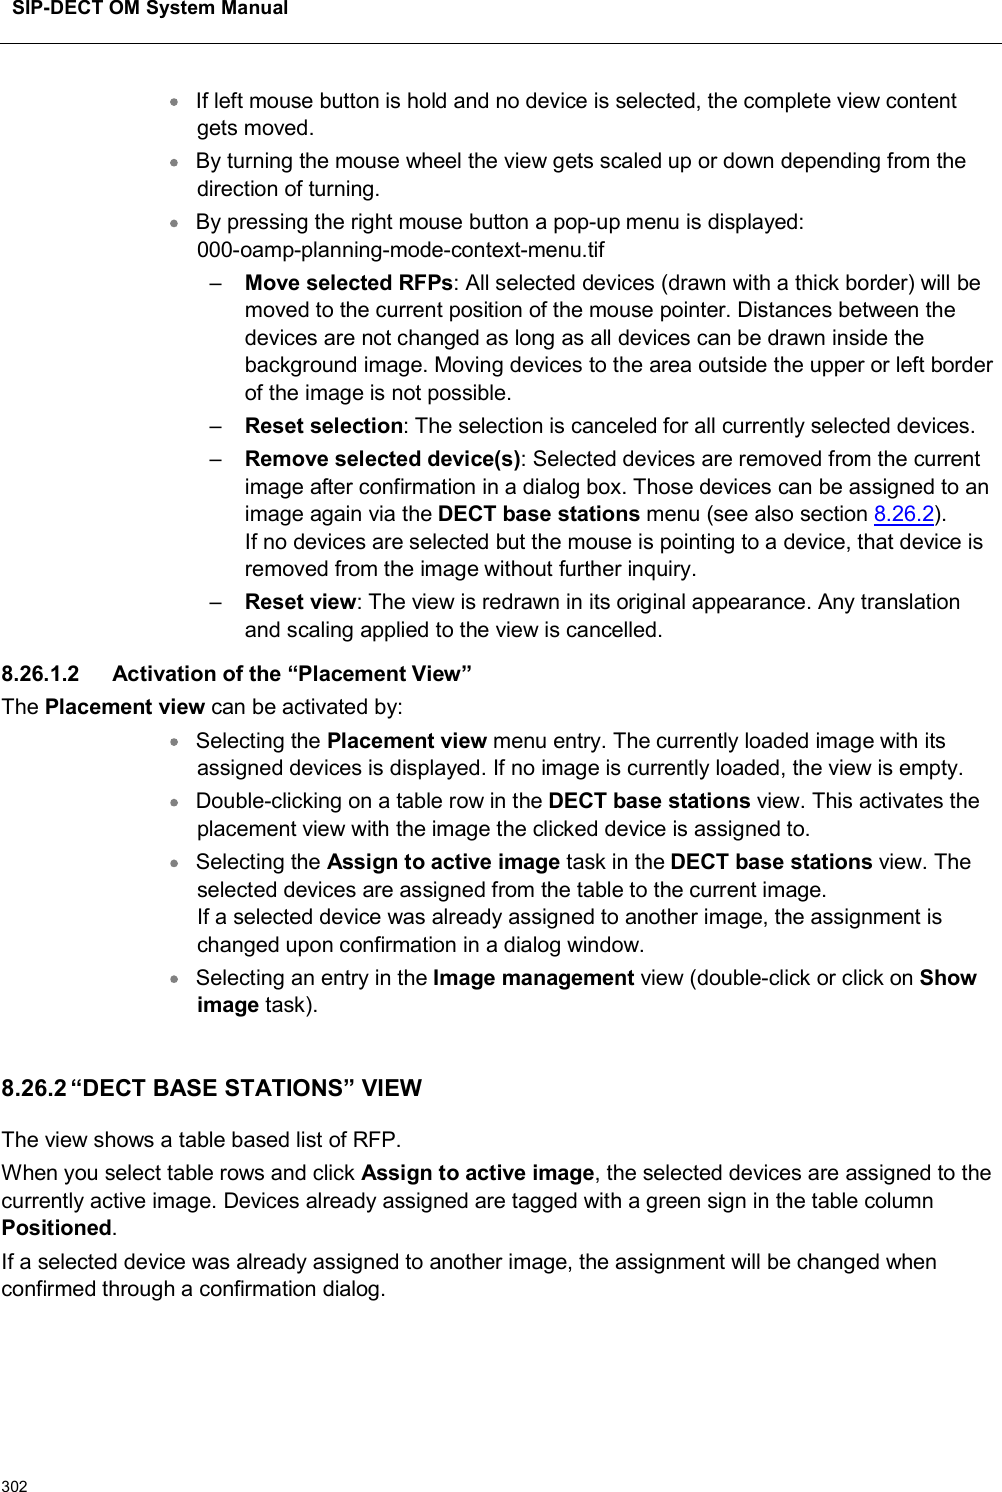
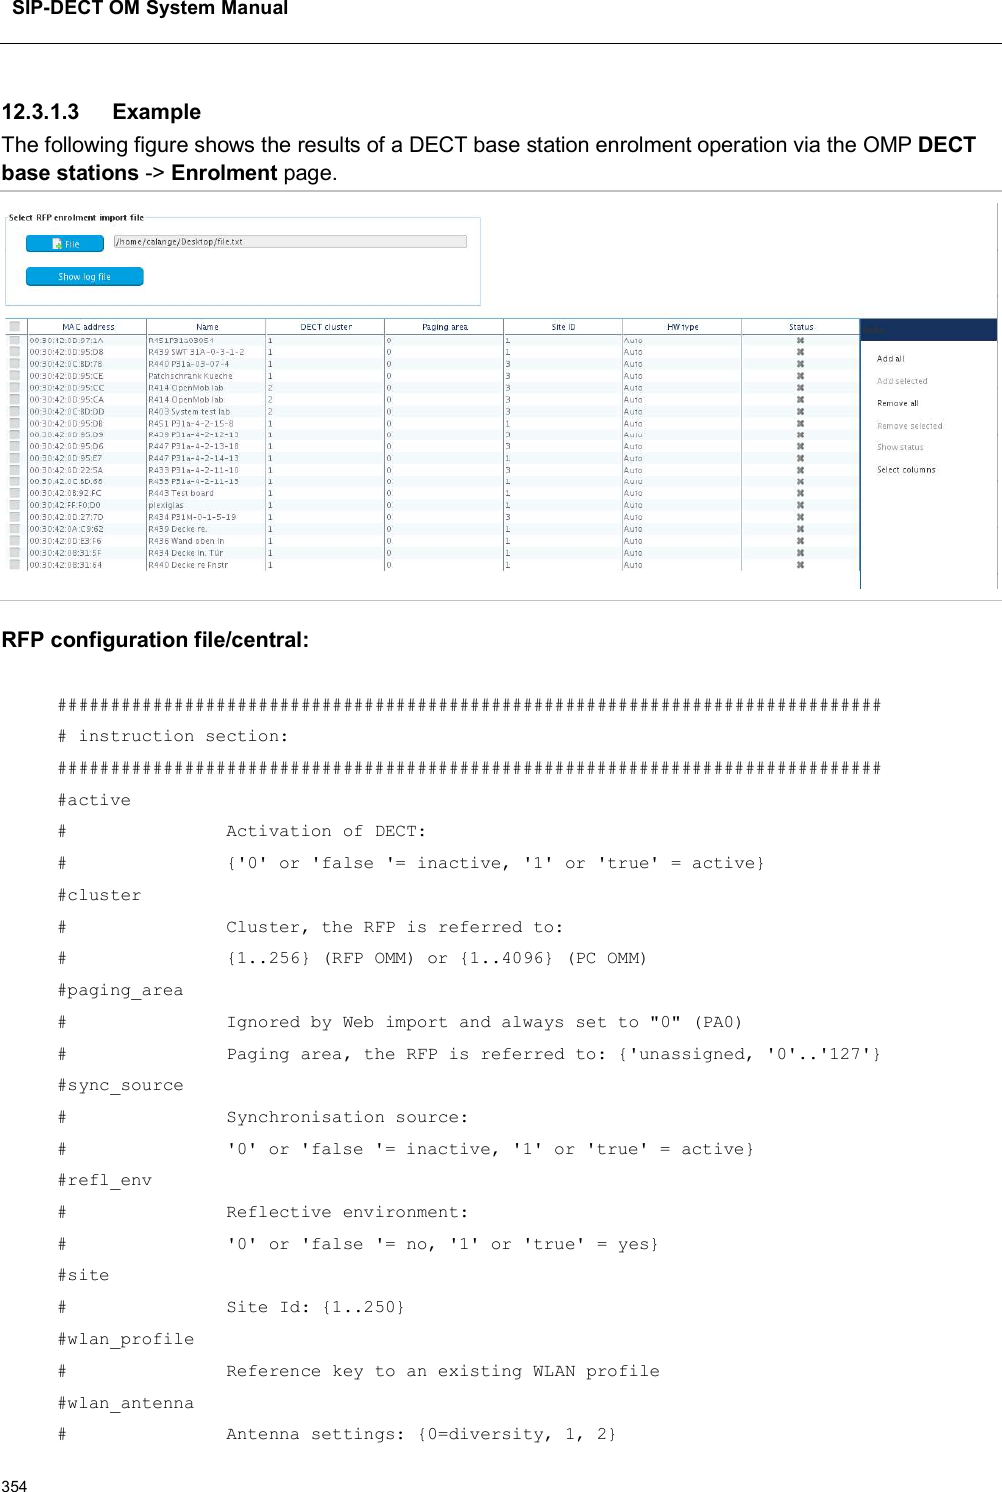
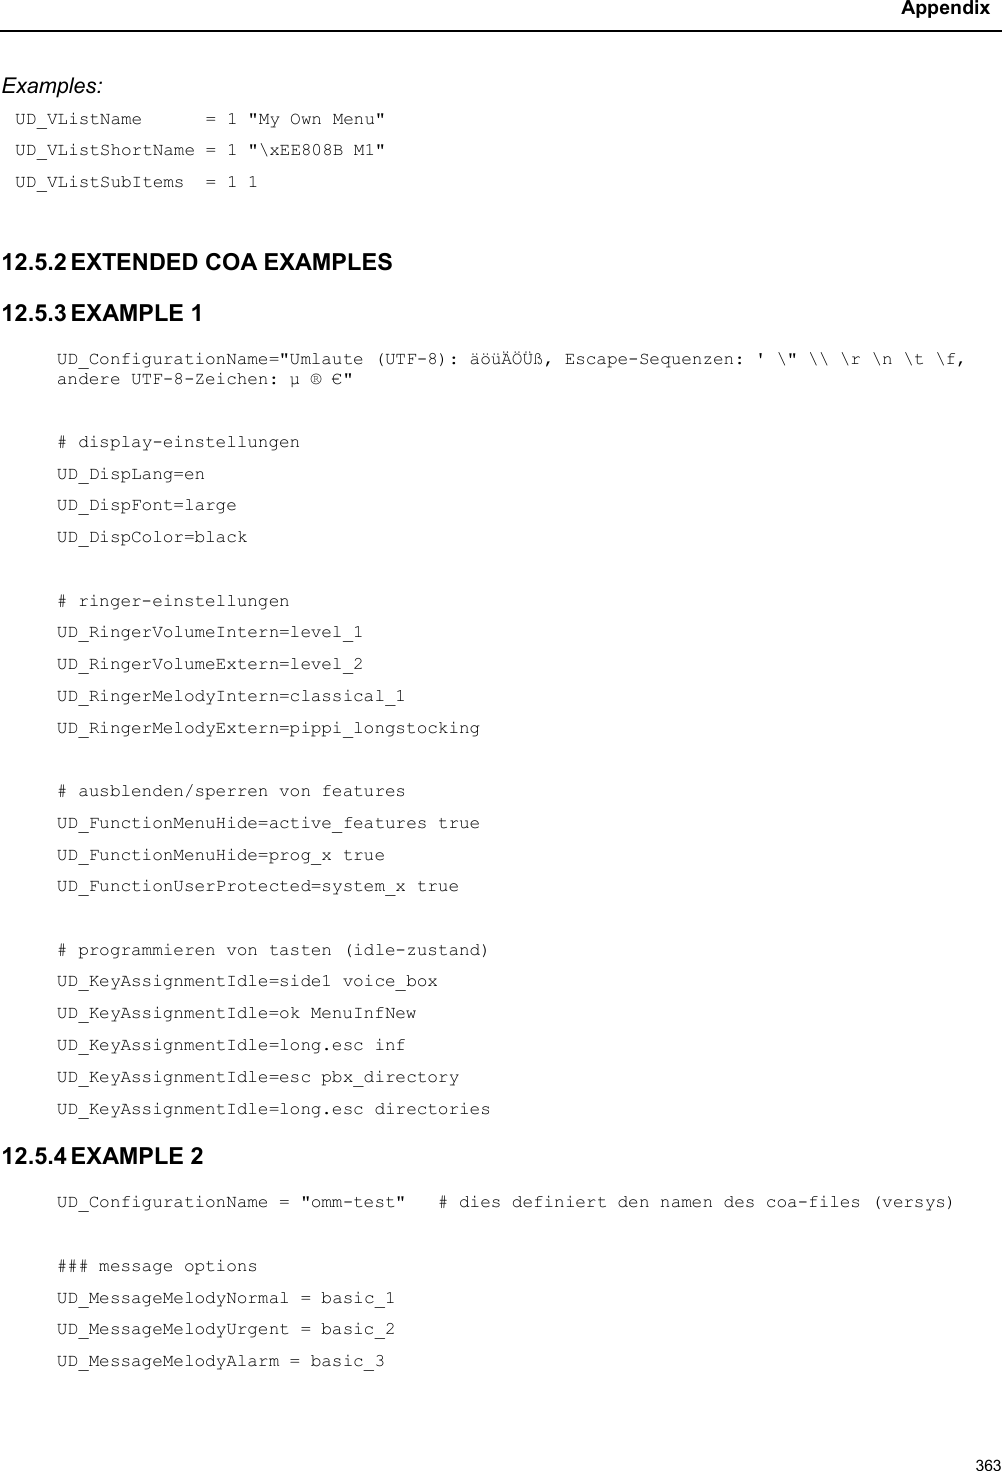
![SIP-DECT OM System Manual399Protocol IP-RFPServer port Client portOMCFG server udp 64000 64000NTP client udp 123 123Syslog client udp 514 or as configured 514DNS client udp 53 >=1024 (see note)SNMP agent (server) udp 161 AnySNMP trap agent (client) udp >=1024 (see note) 162RSXport (debug only) tcp server 38477 AnyRTP/RTCP (server) udp Range of [RTP port base + 71] even ports for RTP, odd ports for RTCP. Port base is 16320 or as configured.AnyRTP/RTCP (client) udp any Range of [RTP port base + 71] even ports for RTP, odd ports for RTCP. Port base is 16320 or as configured.Integrated Conference Server (ICS)RTP/RTCP (server)Range of [ICS RTP port base + 2 * no. conf. channels] even ports for RTP, odd ports for RTCP. ICS Port base is end of RTP range plus 1.AnyIntegrated Conference Server (ICS)RTP/RTCP (client)any Range of [ICS RTP port base + 2 * no. conf. channels] even ports for RTP, odd ports for RTCP. ICS Port base is end of RTP range plus 1.Network Analysis Probe tcp server 18215 AnyNote: Unbound ports start at port 1024.](https://usermanual.wiki/Mitel-Networks/RFP47DRC.User-Manual-II/User-Guide-4037307-Page-199.png)