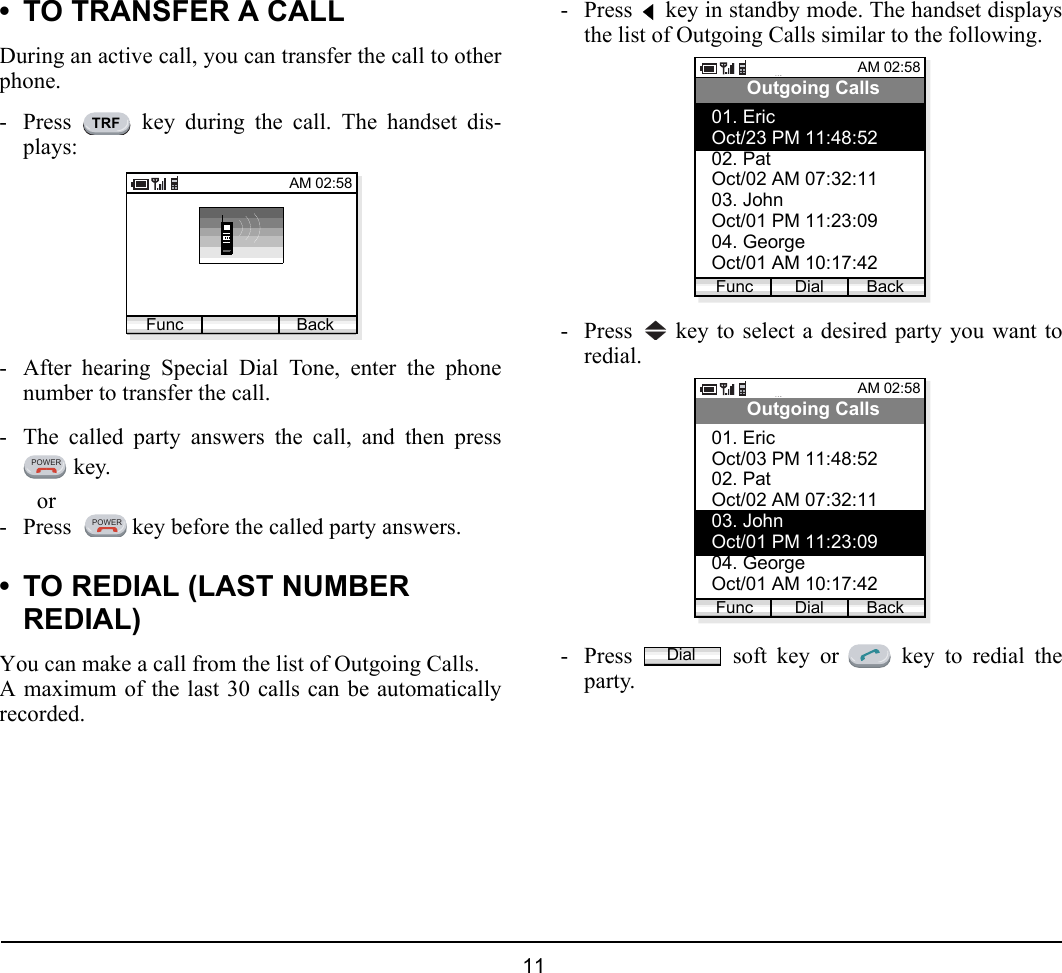
Mitsumi Electric Co WLPS3-1 VoIP Mobile Phone Terminal User Manual MH250 USERS GUIDE
Mitsumi Electric Co Ltd VoIP Mobile Phone Terminal MH250 USERS GUIDE
UserManual.wiki
>
Mitsumi Electric Co
>
WLPS3 1 User Manual
Users Manual
Navigation menu
Upload a User Manual
Namespaces
Wiki Guide
HTML
PDF
Info
Views
User Manual
Discussion / Help
Navigation
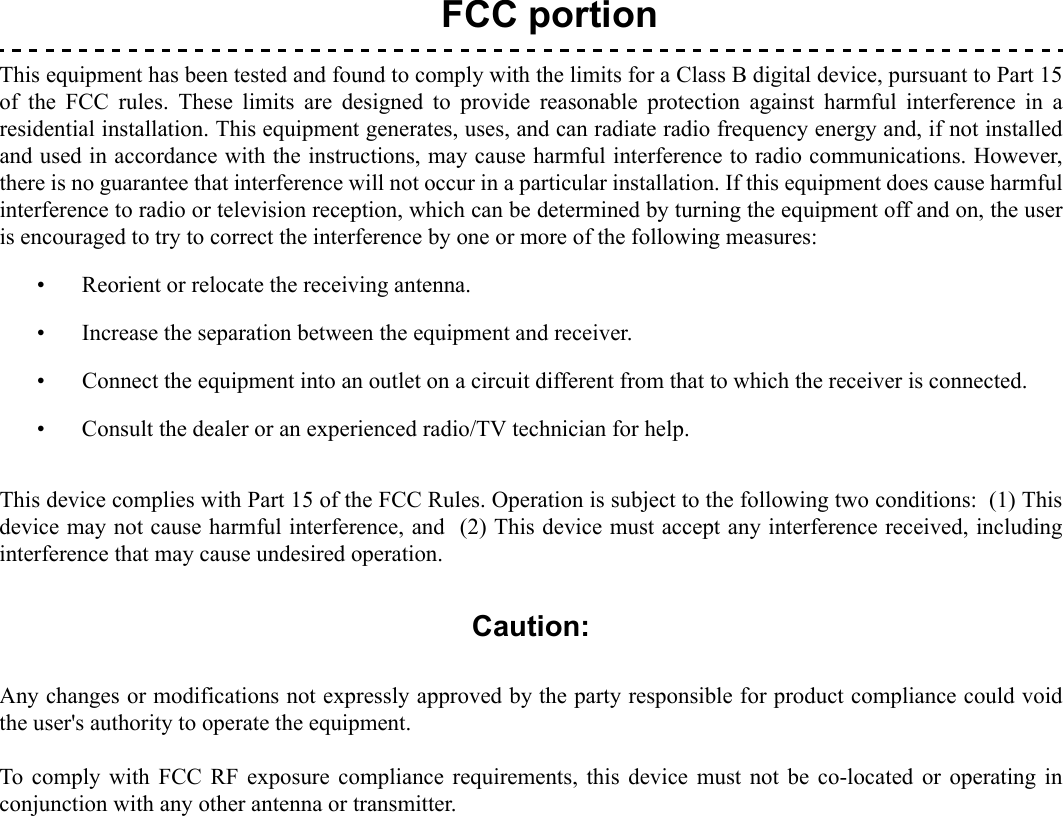


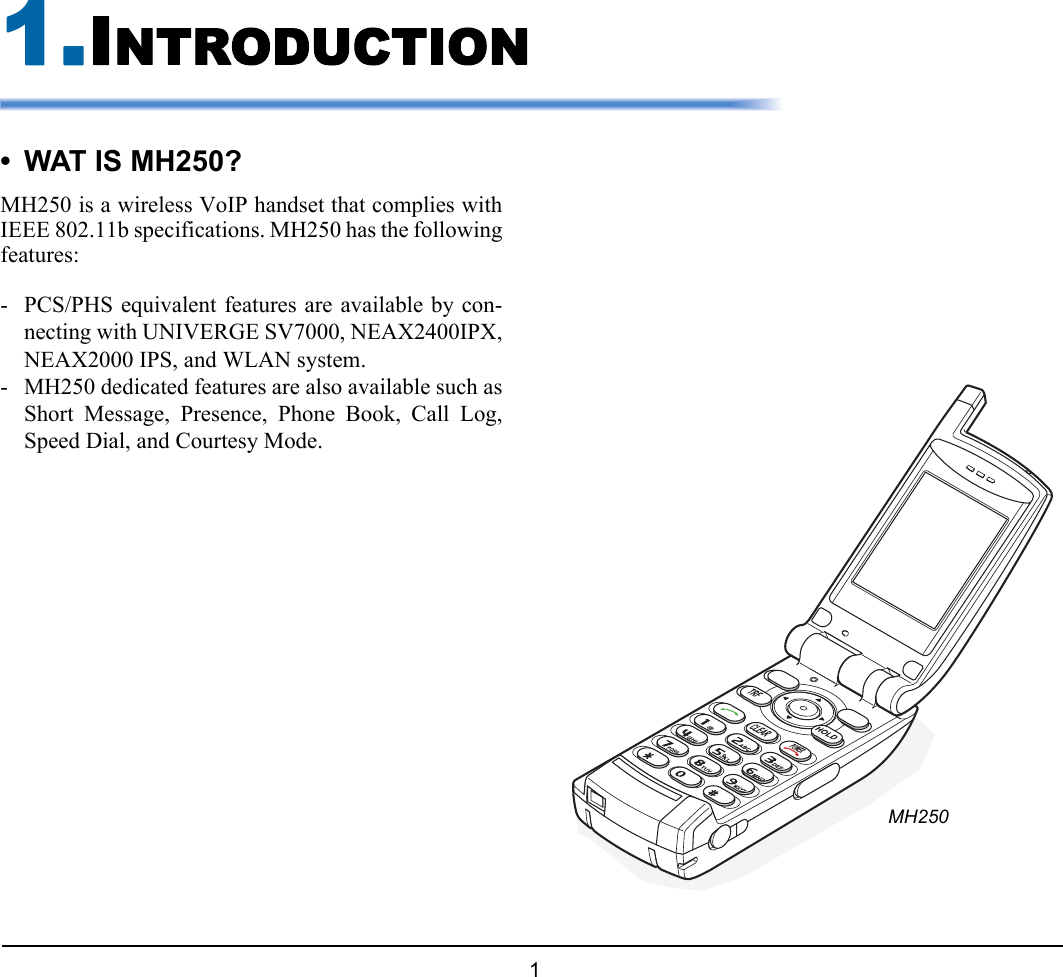
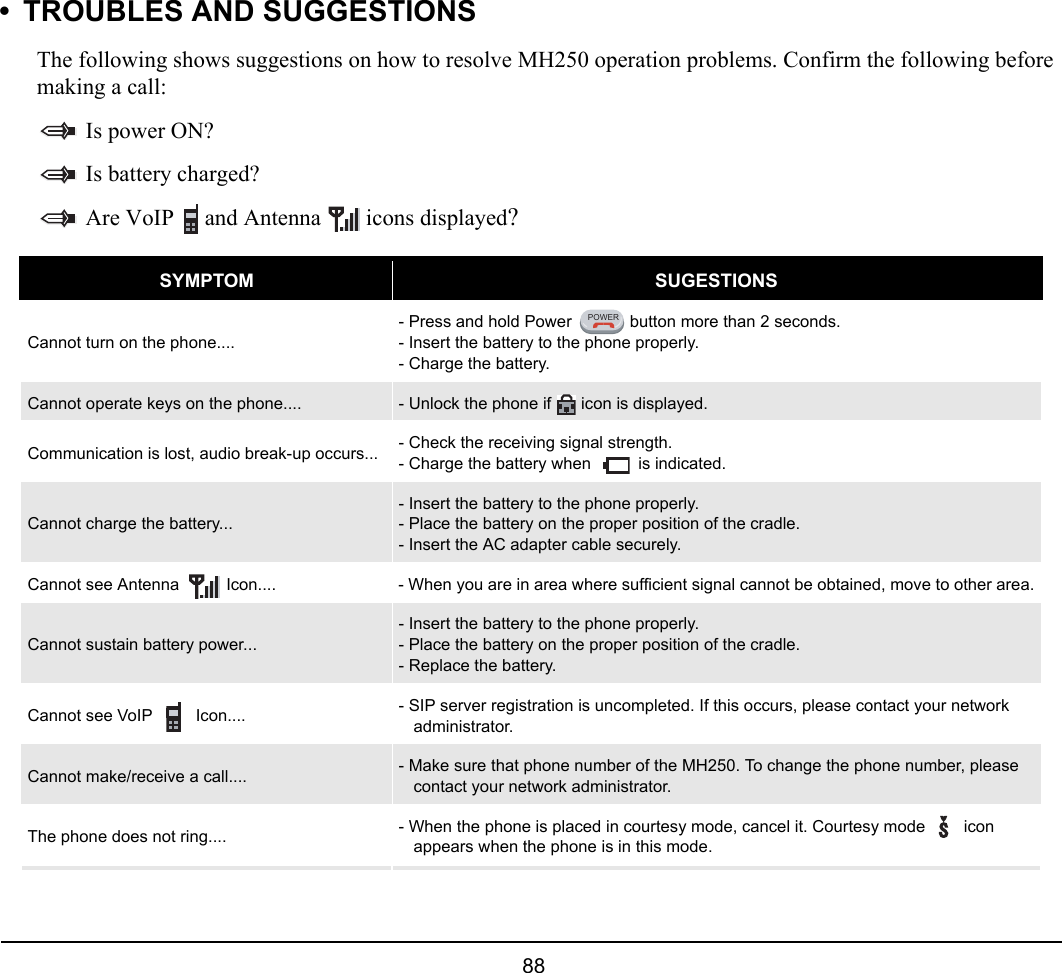
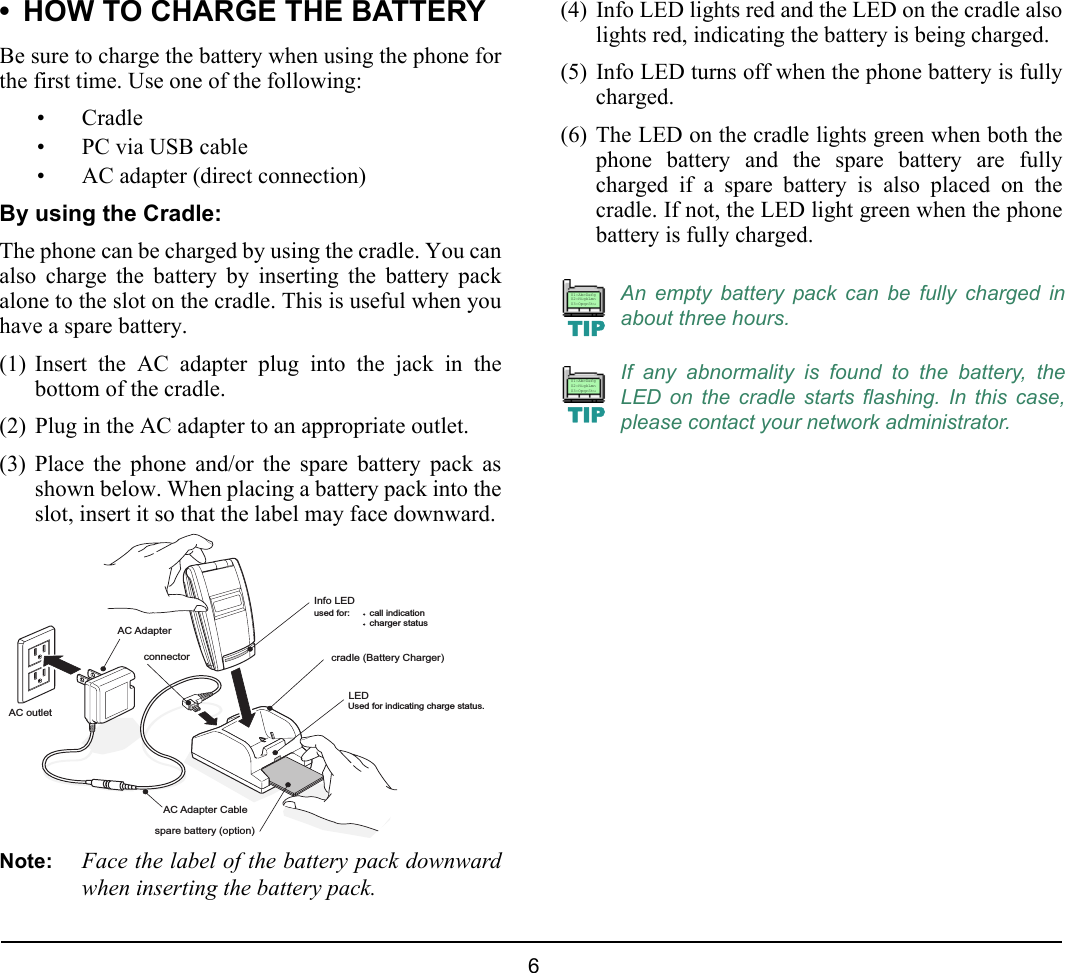
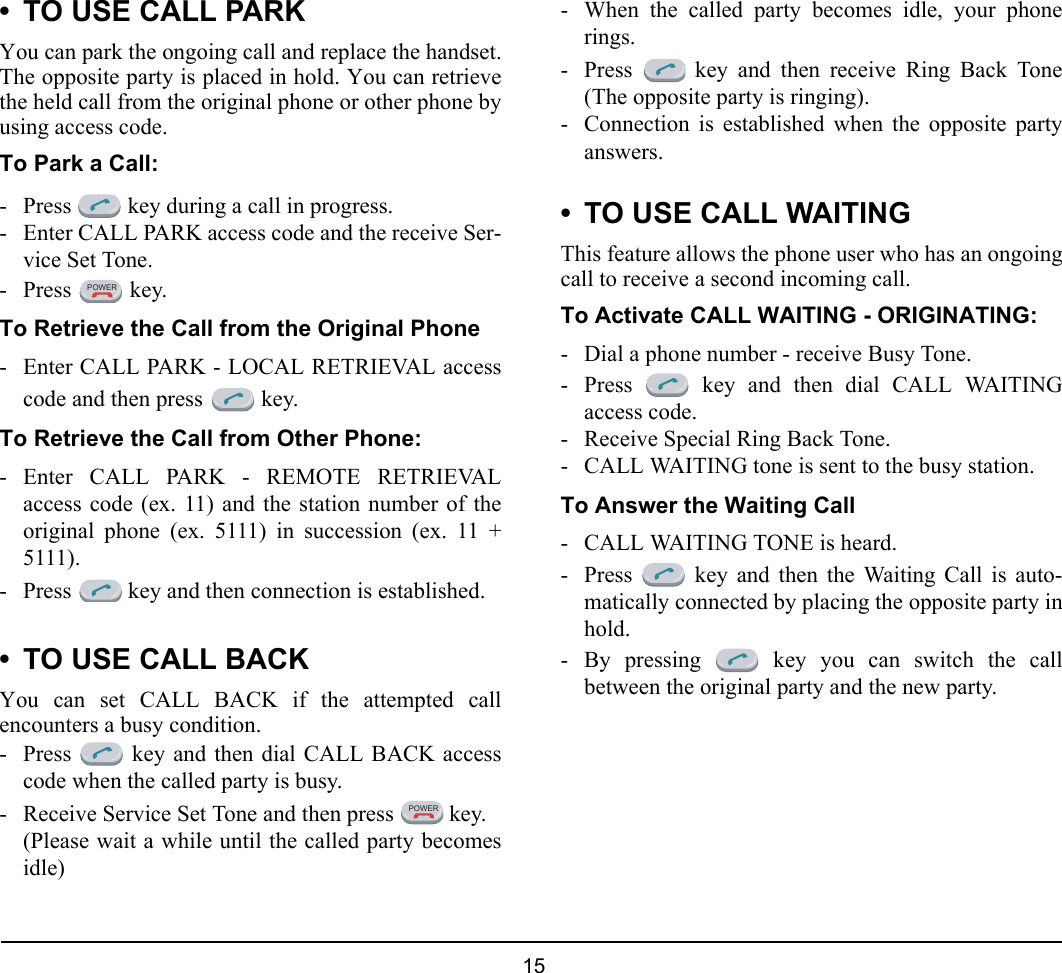
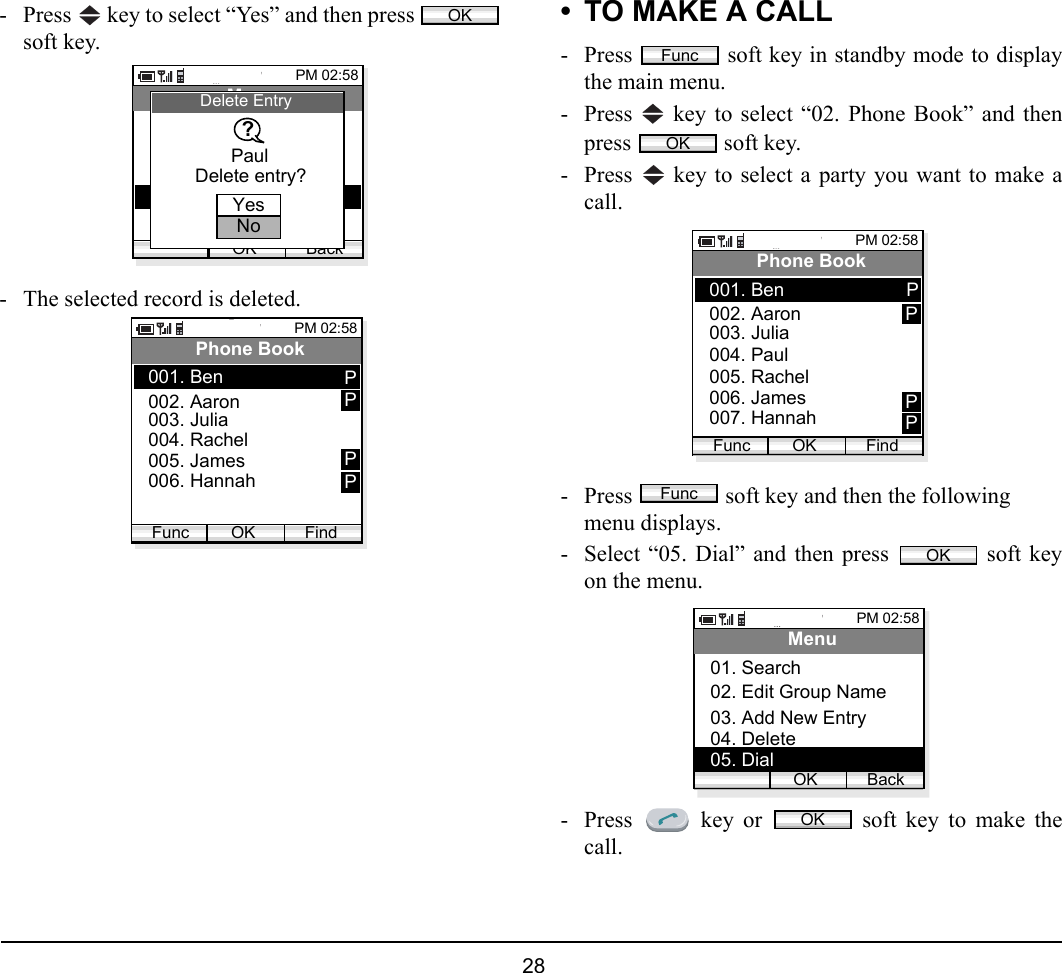
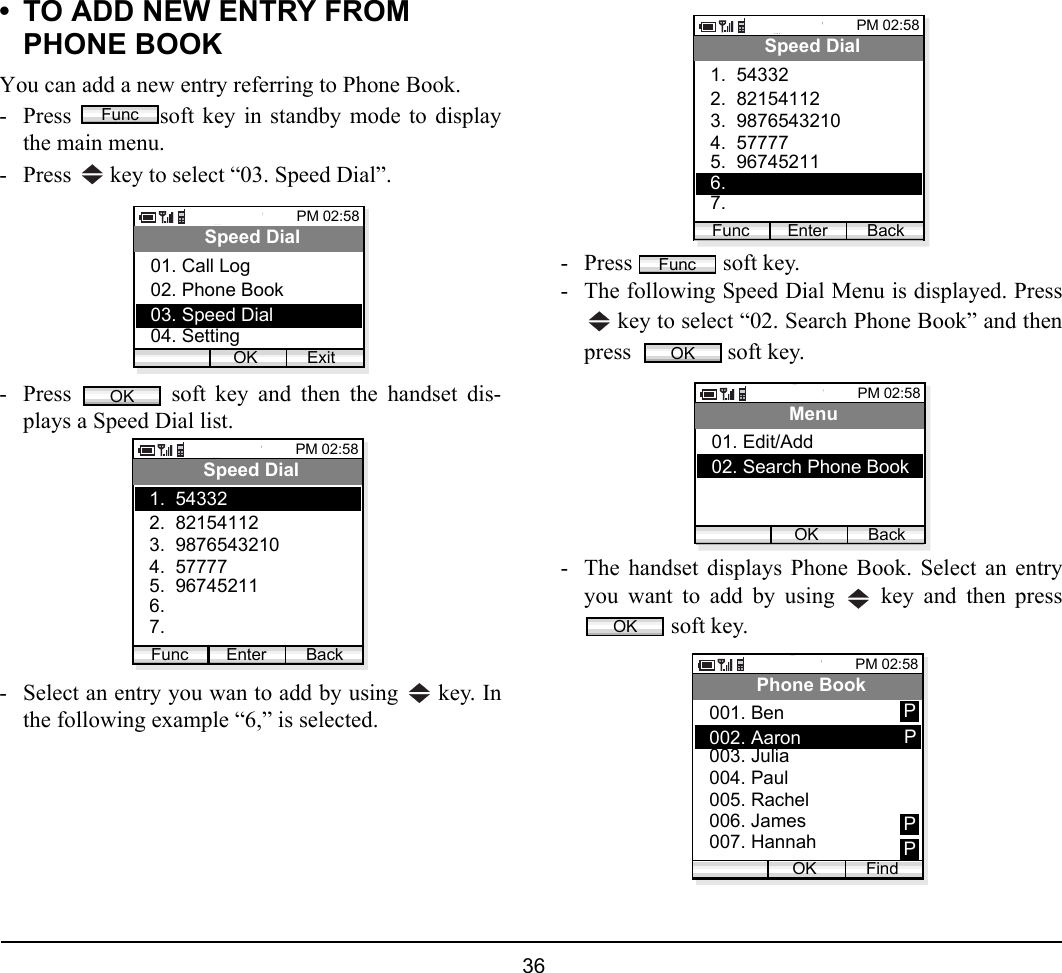
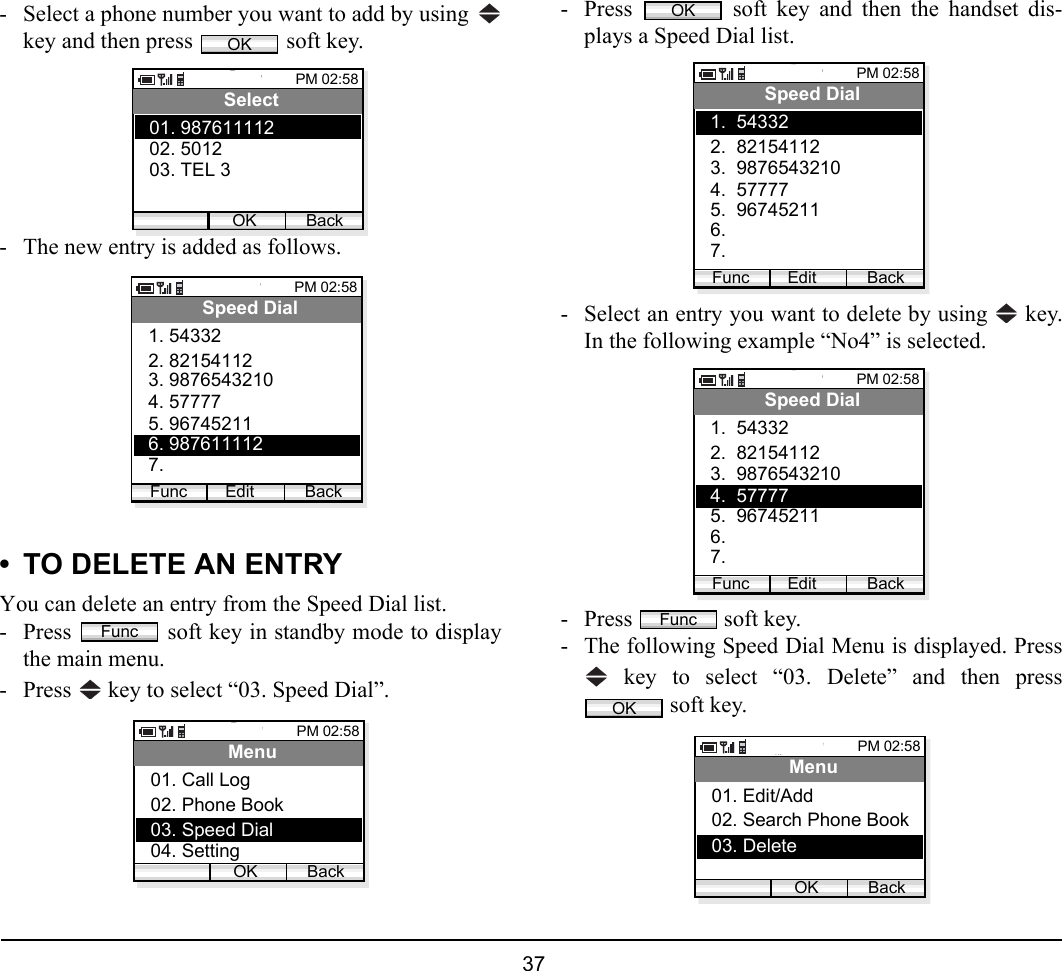
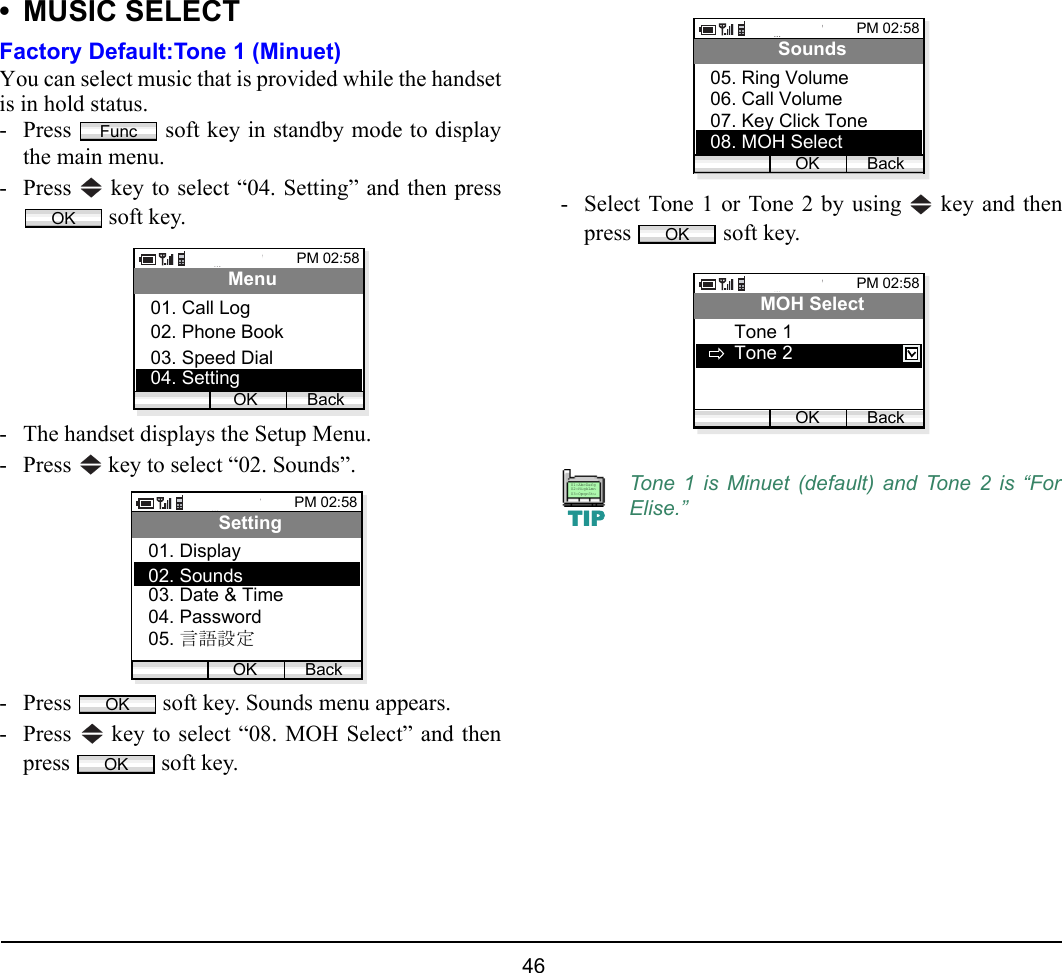
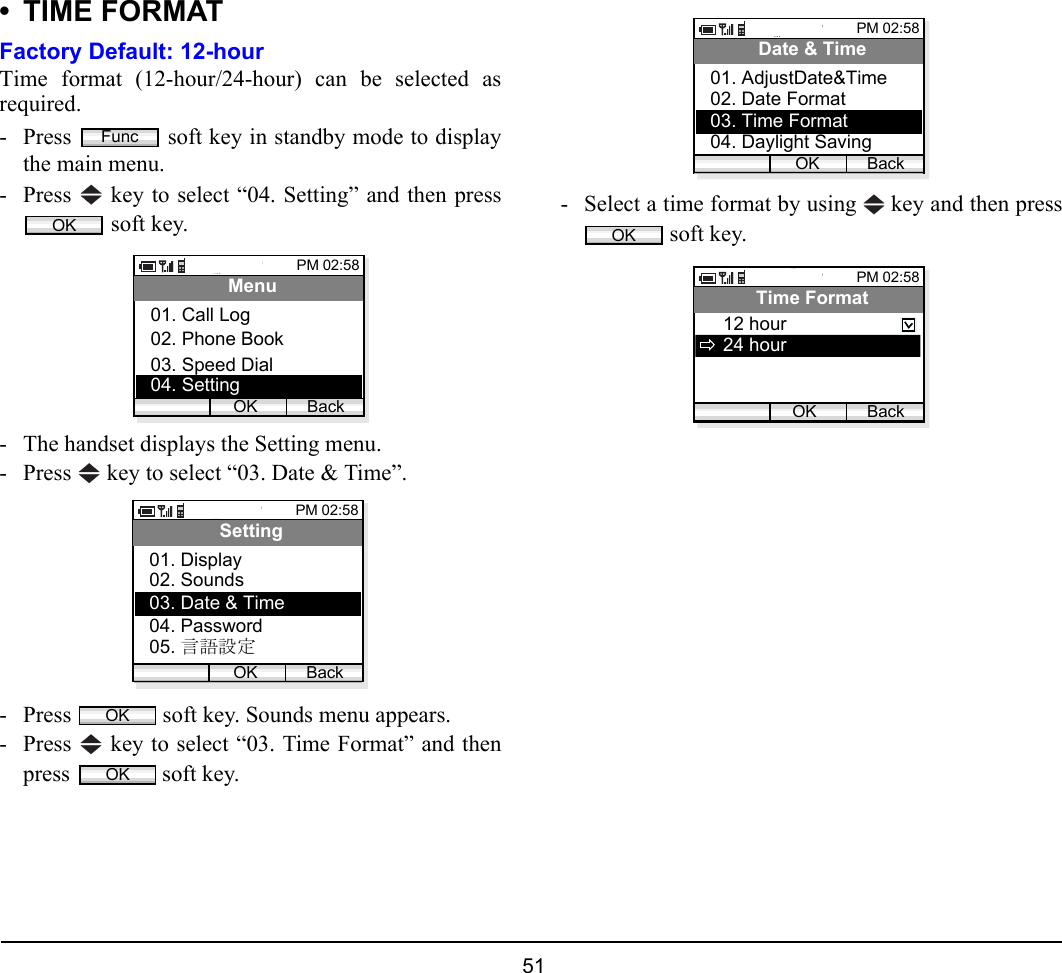
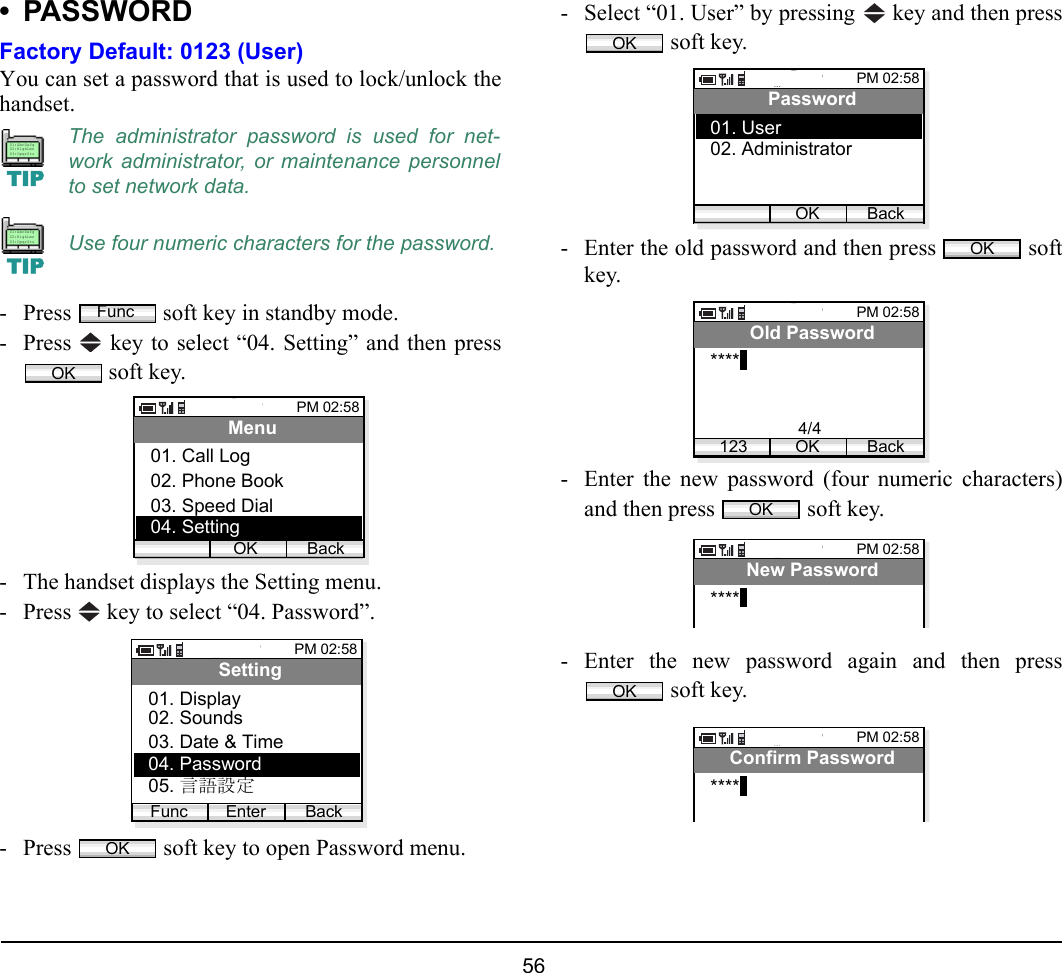
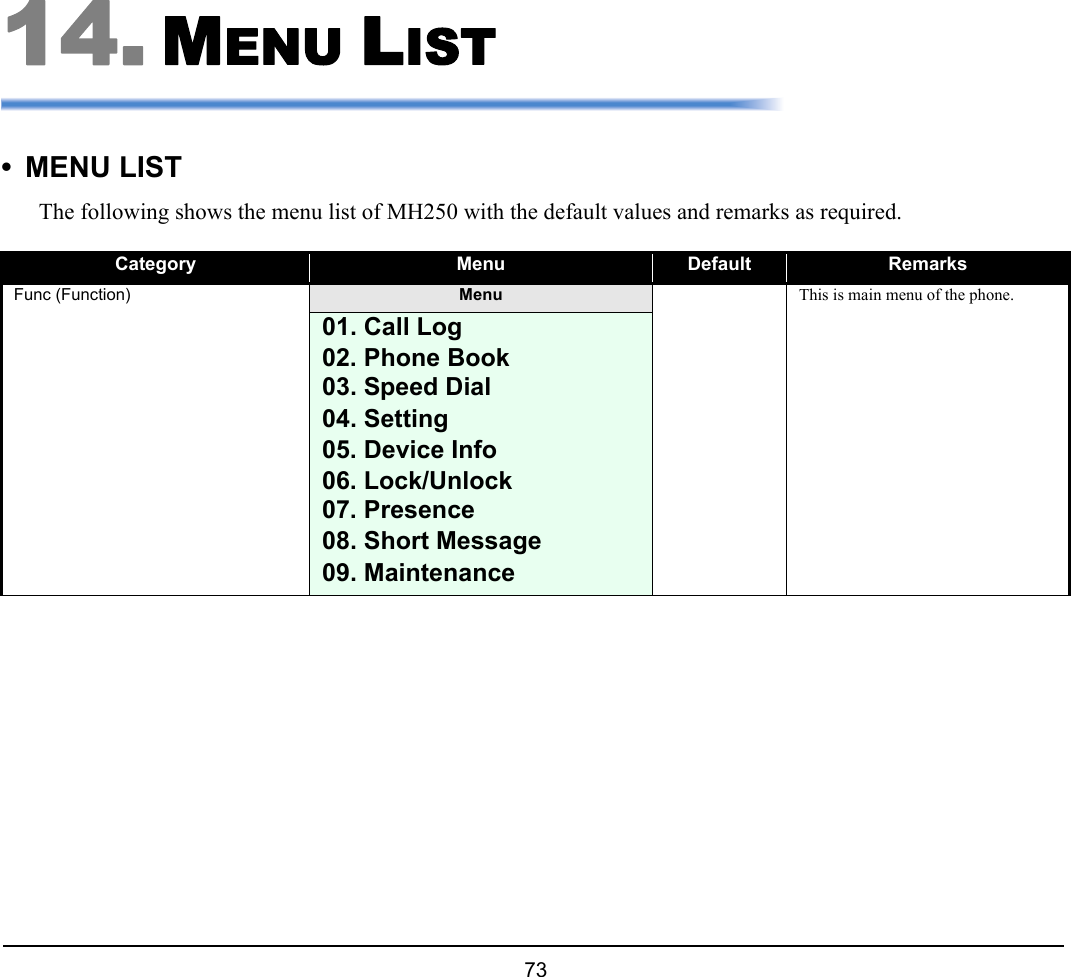
 4-way ScrollLEFT key(12) TRANSFER key(14) SEND keyPM 01:34OK BackMenu01. Call Log02. Phone Book03. Speed Dial04. Setting05. Device Info06. Lock/Unlock07. Presence08. Short Message09. MaintenanceNo. PARTS REMARKS(1) Antenna -(2) Ear Speaker -(3) Display 65,536 color, TFT 2.0 inch LCD, 176 × 220pixels (9 lines × 21 characters)(4) Soft Keys Displayed soft keys depend on the phonestatus.(5) Soft Button 1 Used for selecting Left soft key.(6) OK key Used for selecting Middle soft key.(7) Soft Button 2 Used for selecting Right soft key.(8) 4-way Scroll UP-key Used for selecting a value from the list andmoving the cursor in edit mode.d(9) 4-way Scroll DOWN-key(10) 4-way Scroll LEFT-key(11) 4-way Scroll RIGHT-key(12) TRANSFER key Used for transferring the ongoing call.(13) HOLD key Used for placing the ongoing call in hold.(14) SEND key Used for making/answering a call.(15) CLEAR key Allows you:To return to the previous screenTo delete input character/digit(16) END/PWR key Allows you:To end an active callTo turn on/off the phoneTo exit a menu without making changes(17) Dial Pad Used for dialling number or entering char-acters.(18) USB Connector Used for charging the phone via USB.(19) Headset Connector Used for connecting headset. (∅ 2.5)(20) Info LED Flashes when receiving a call.(21) Microphone -(22) AC Adapter Connector -(23) Speaker Rings when receiving a call.](https://usermanual.wiki/Mitsumi-Electric-Co/WLPS3-1/User-Guide-901322-Page-20.png)
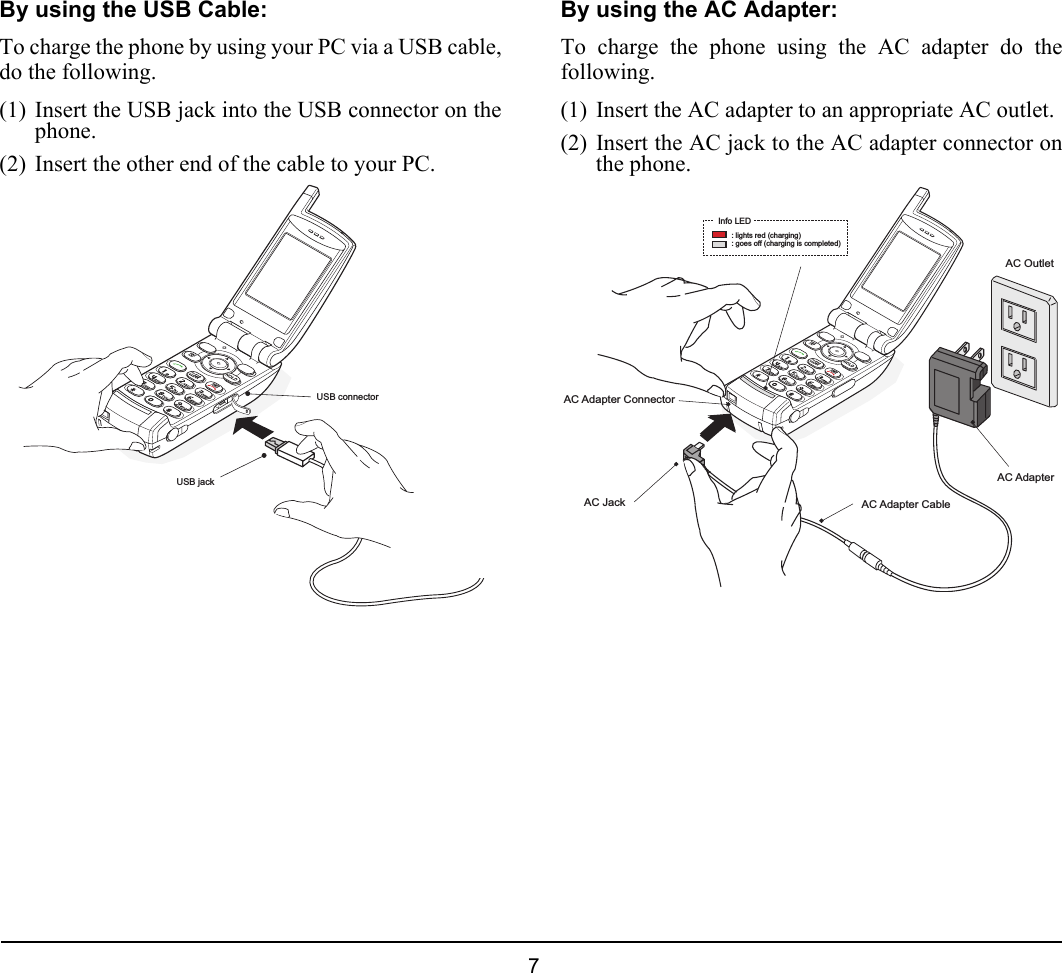

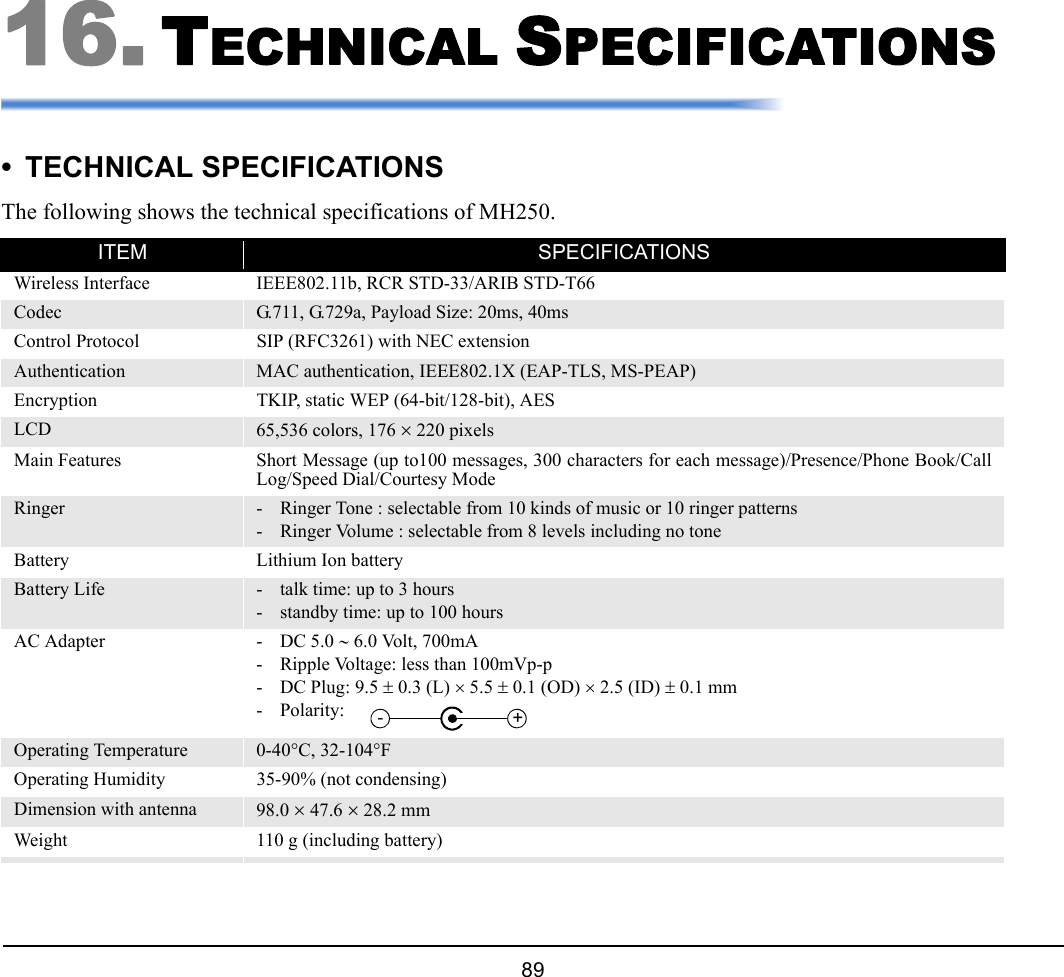
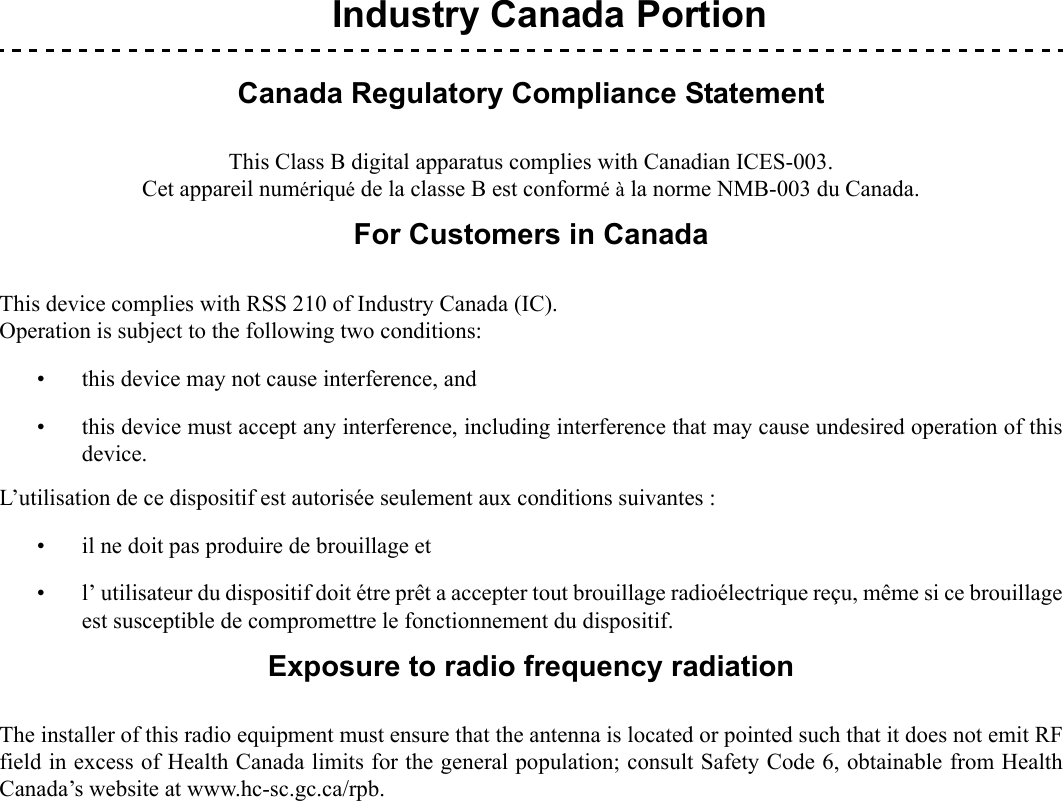
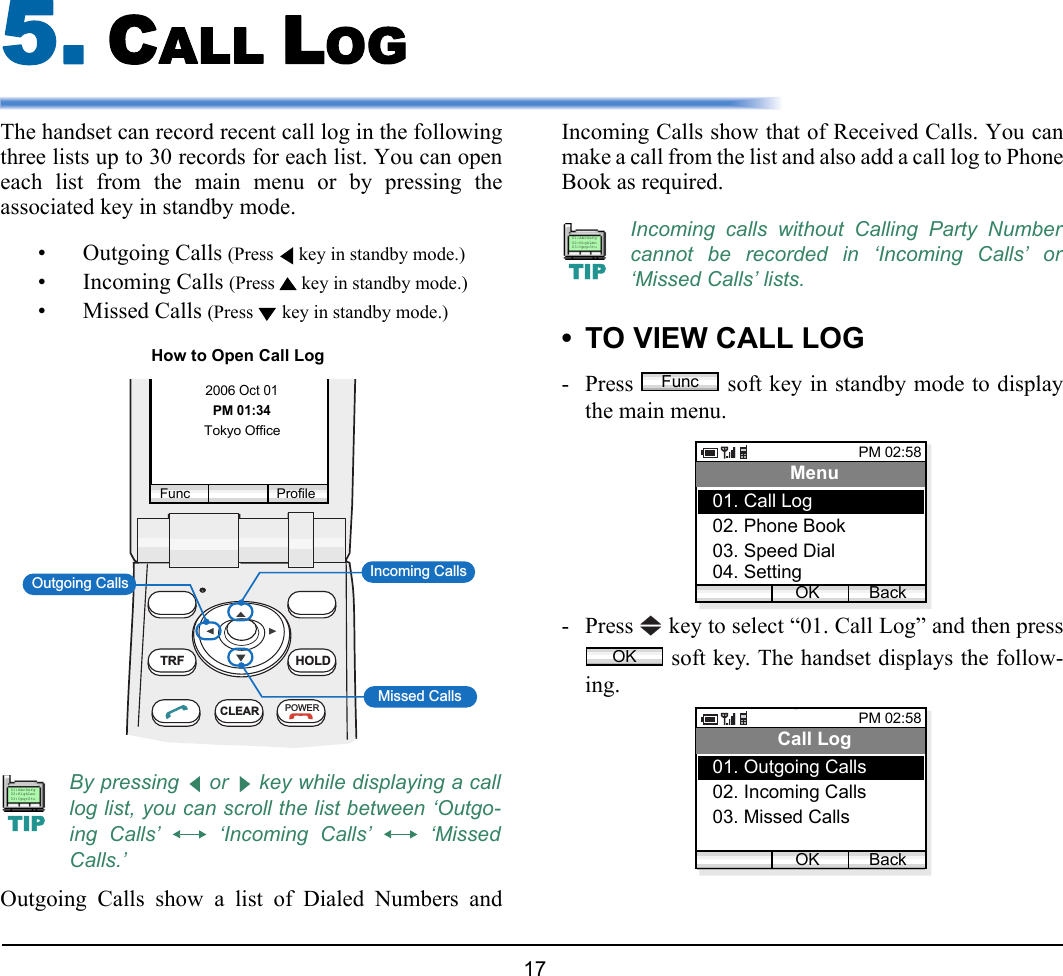
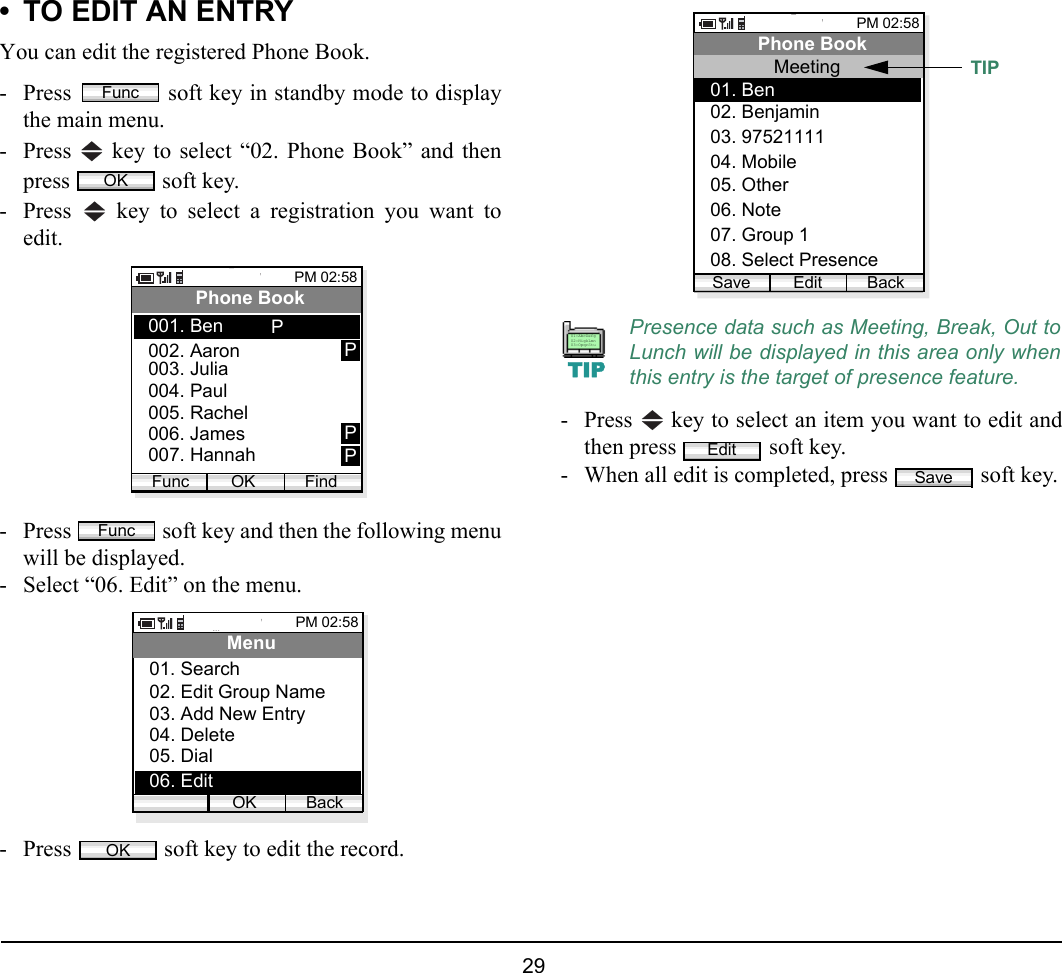
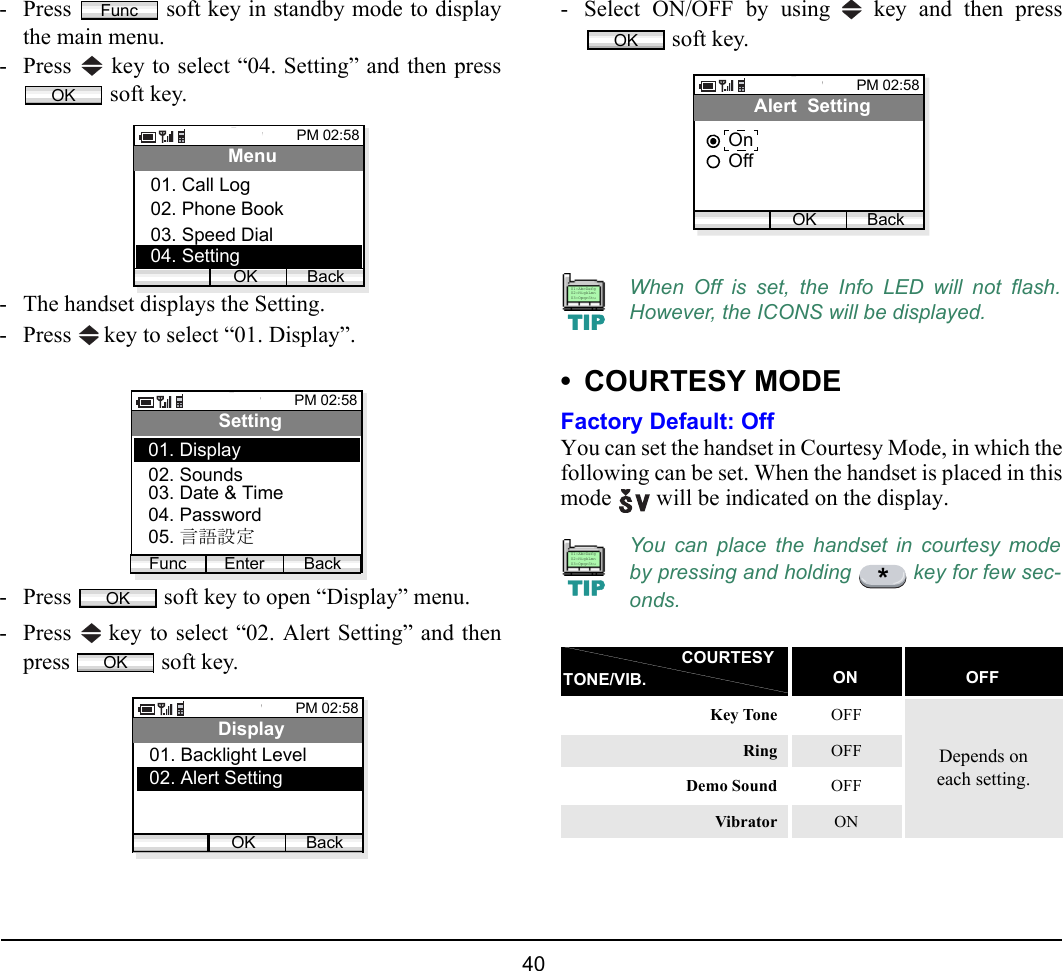
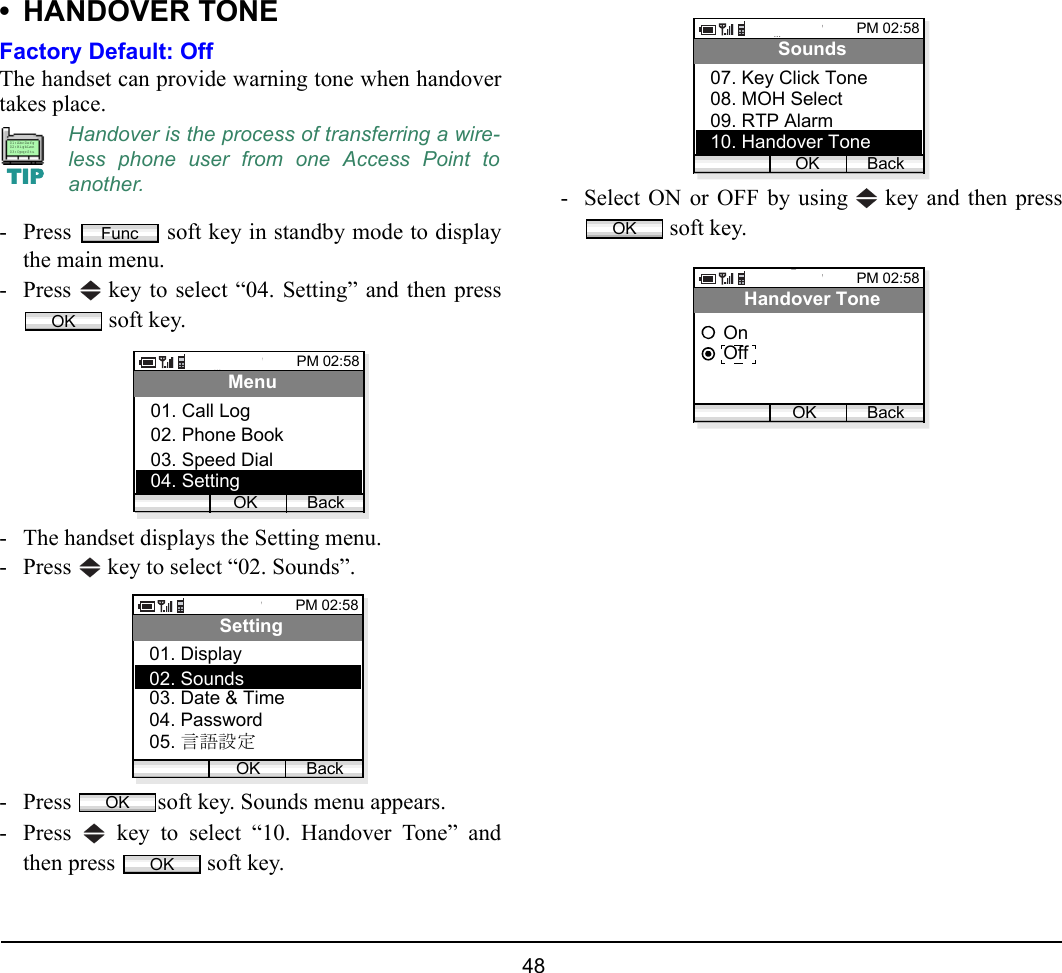
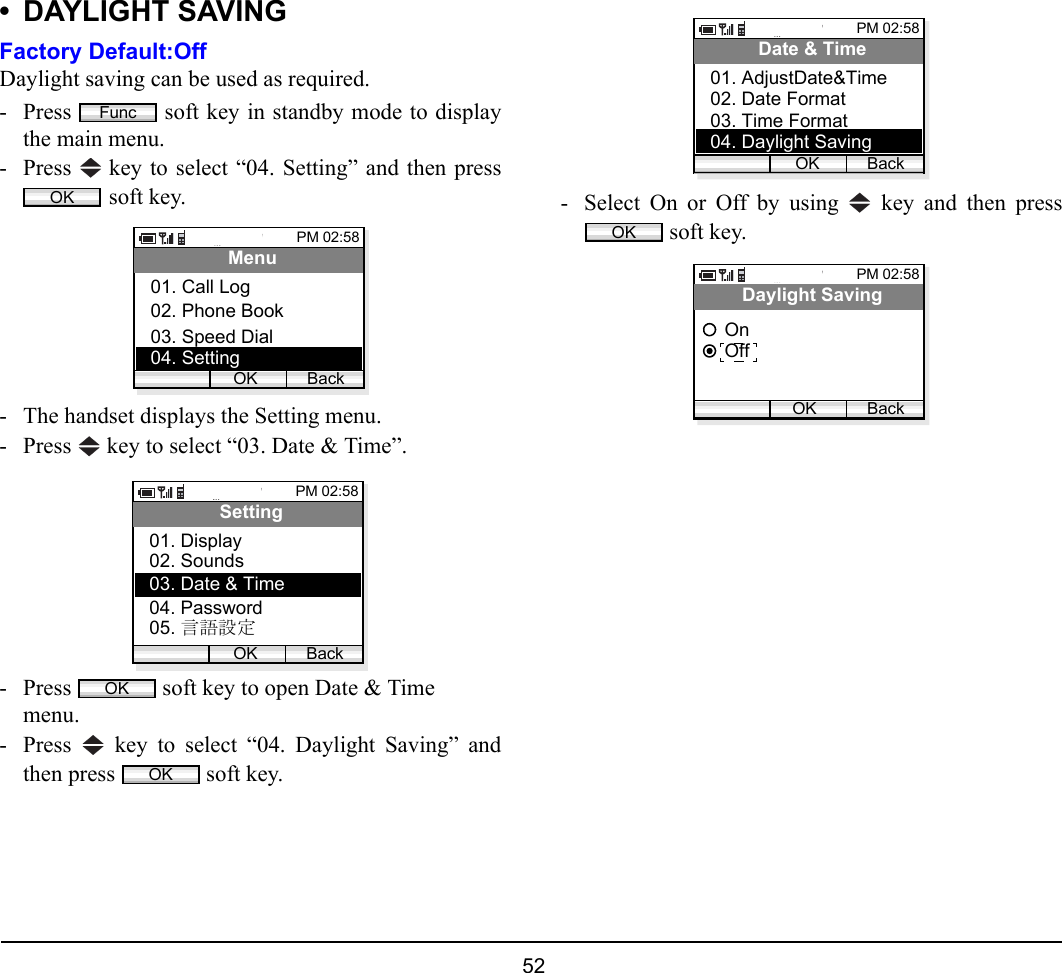
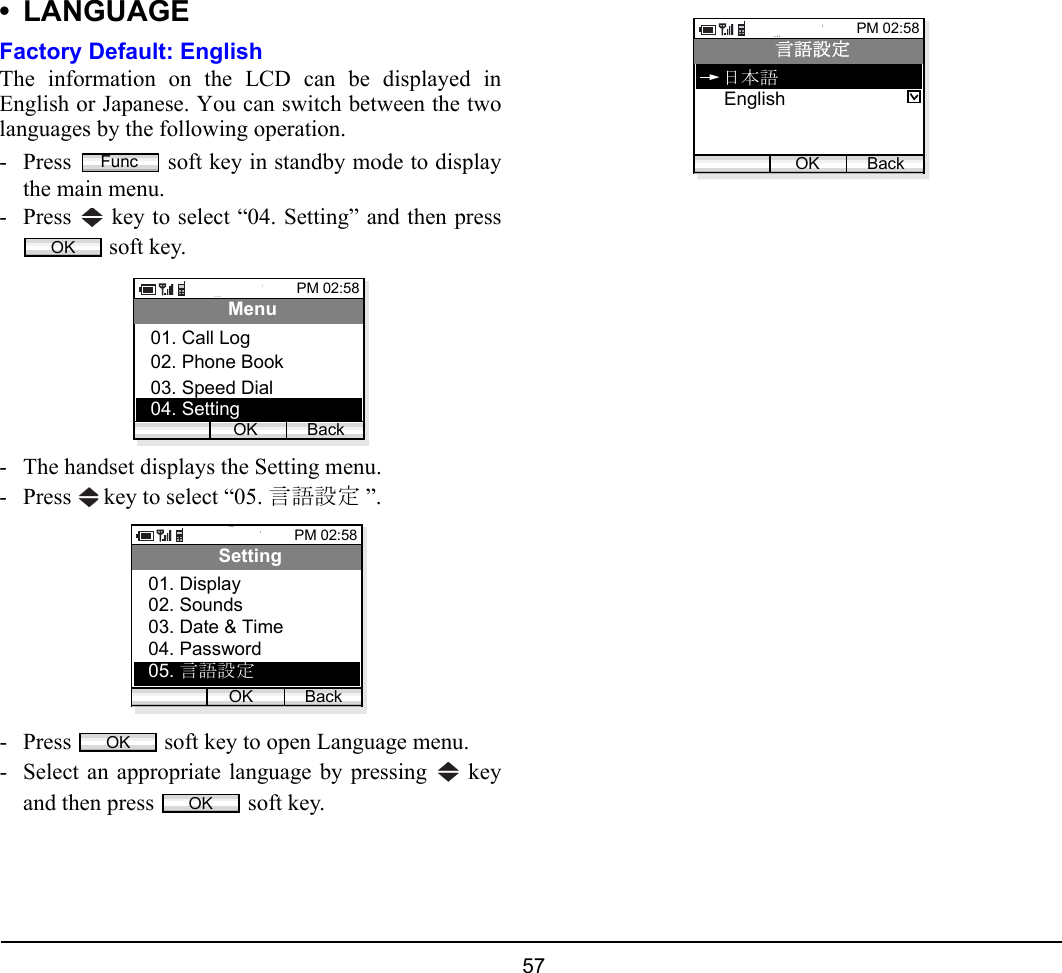
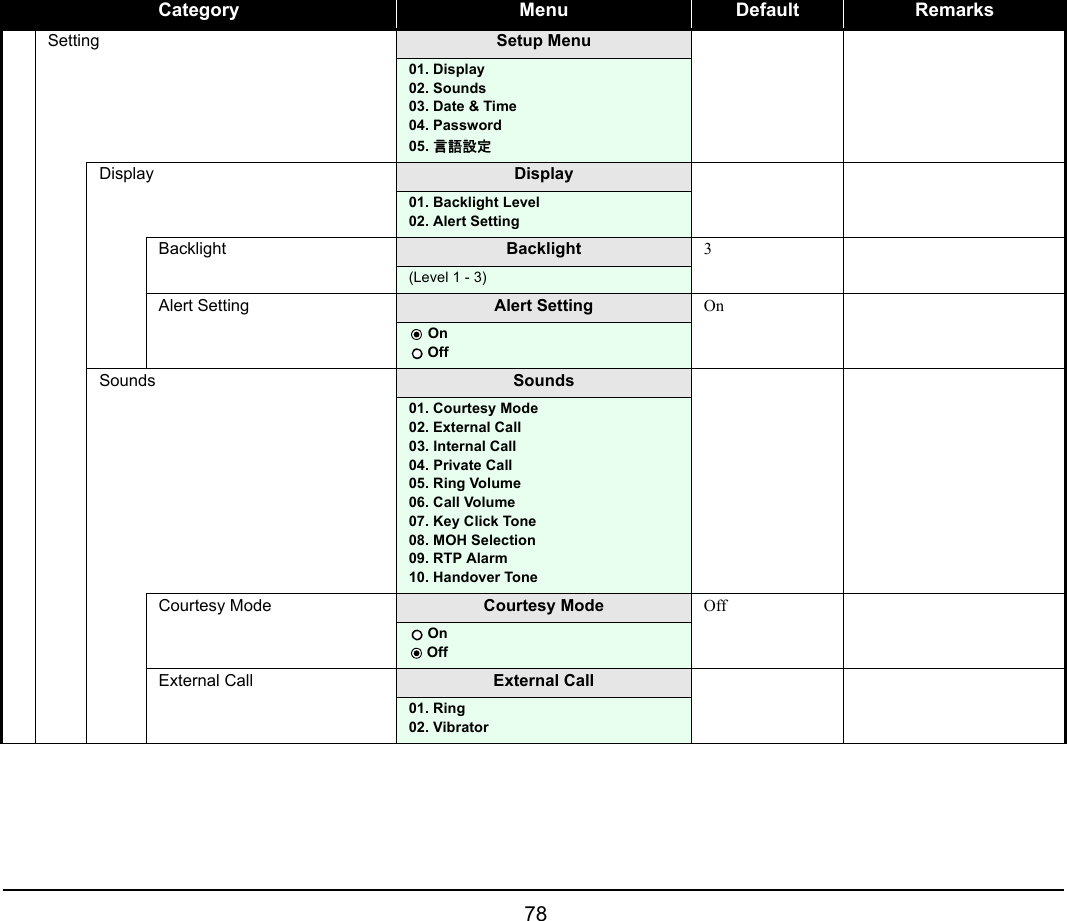
![16 • TO USE CONFERENCEYou can establish a three-way call.- Press key during a call in progress and thenreceive Special Dial Tone. (The opposite party isplaced in hold)- Dial a phone number and then receive Ring BackTone.- When the called party answers, press key.- Three-way conference is established.• TO ADJUST CALL VOLUMEYou can increase or decrease the receiver volume instandby mode or during a call. The volume can be set inseven steps (Level 1[min] ↔ Level 7 [max]). Thefactory value is Level 5.During a Call:Press key to select an appropriate volume and thenpress soft key while talking on the handset.In Standby Mode:- Press soft key in standby mode.The handset displays the main menu.- Press key to select “04. Setting” and then press soft key.- Press key to select “02. Sounds” and then press soft key.- Press key to select “06. Call Volume” and thenpress soft key.- Press key to select an item you want to adjustvolume and then press soft key. In the fol-lowing example, Handset is selected.- Press key to adjust the volume and then press soft key.OKPM 02:58OK BackReceive soundFuncOKOKOKOKPM 02:58OK BackCall Volume02. Headset01. HandsetOKPM 02:58OK BackHandset](https://usermanual.wiki/Mitsumi-Electric-Co/WLPS3-1/User-Guide-901322-Page-34.png)
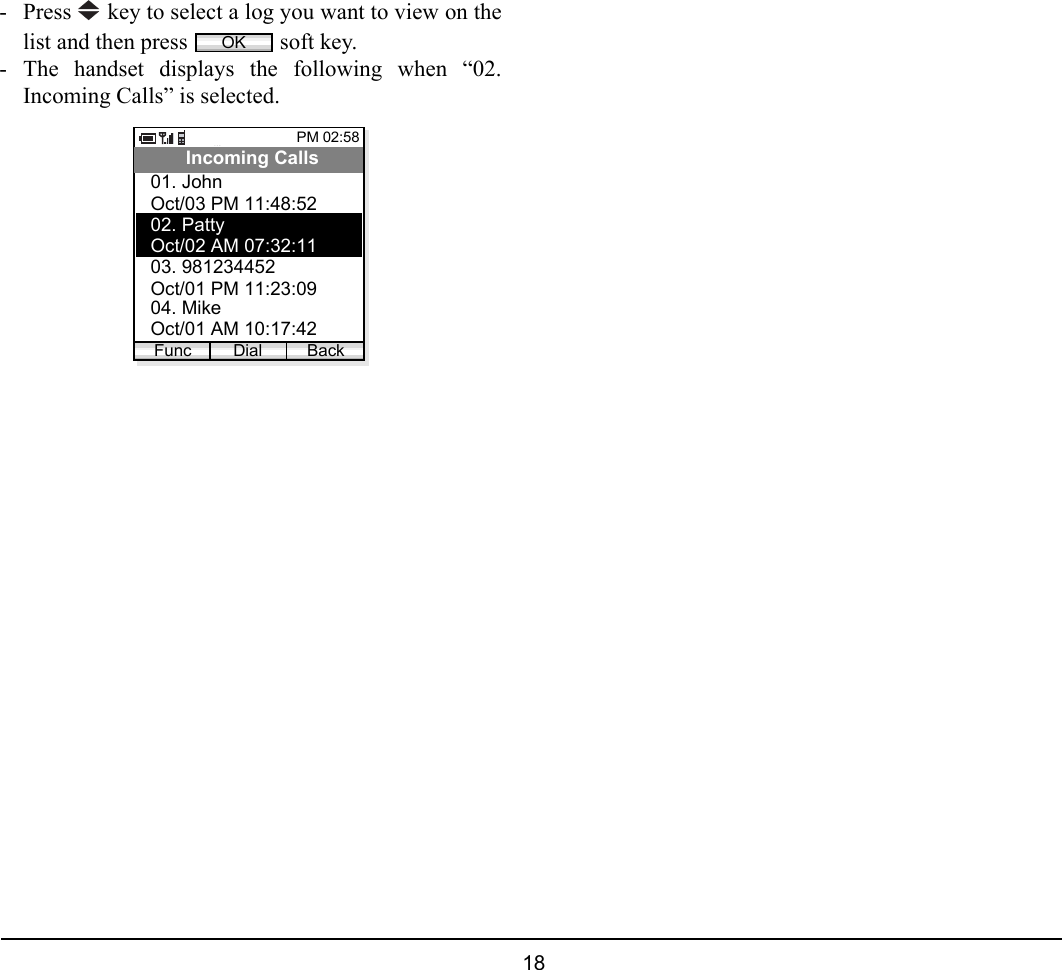
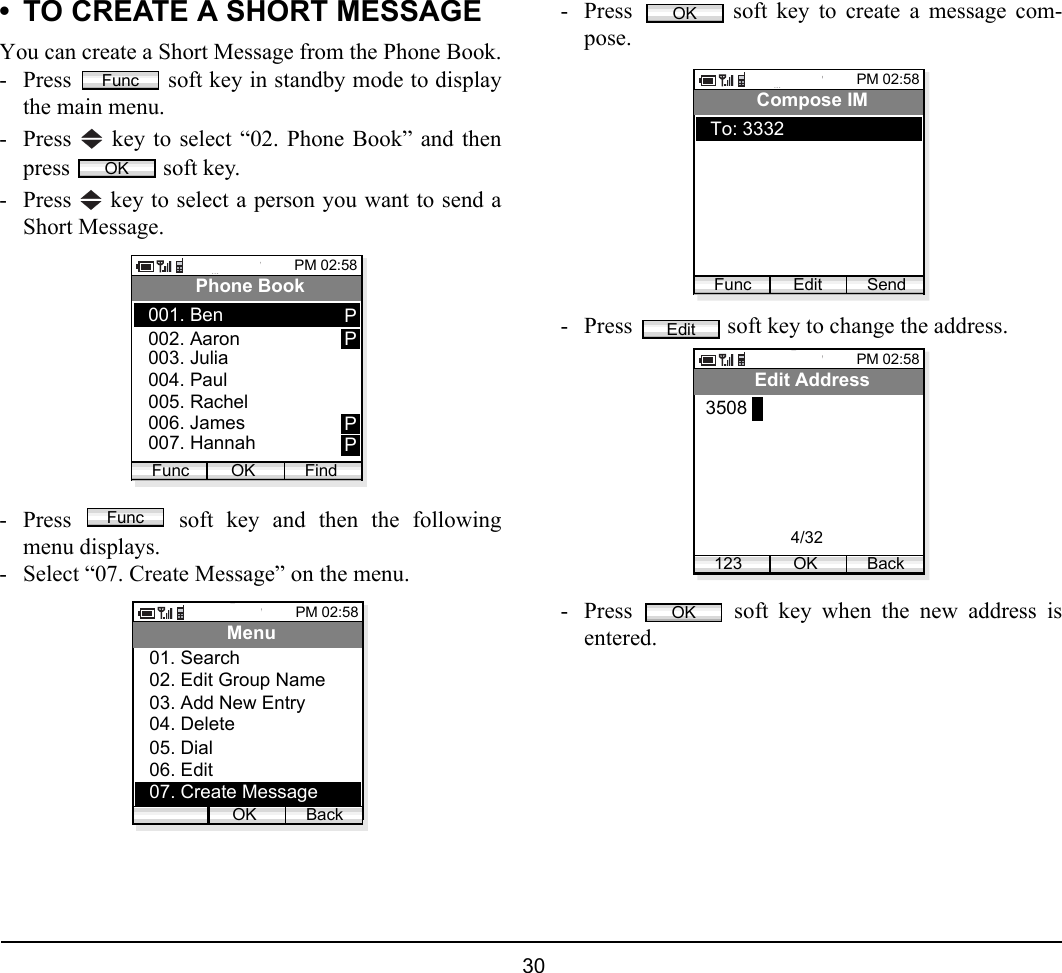
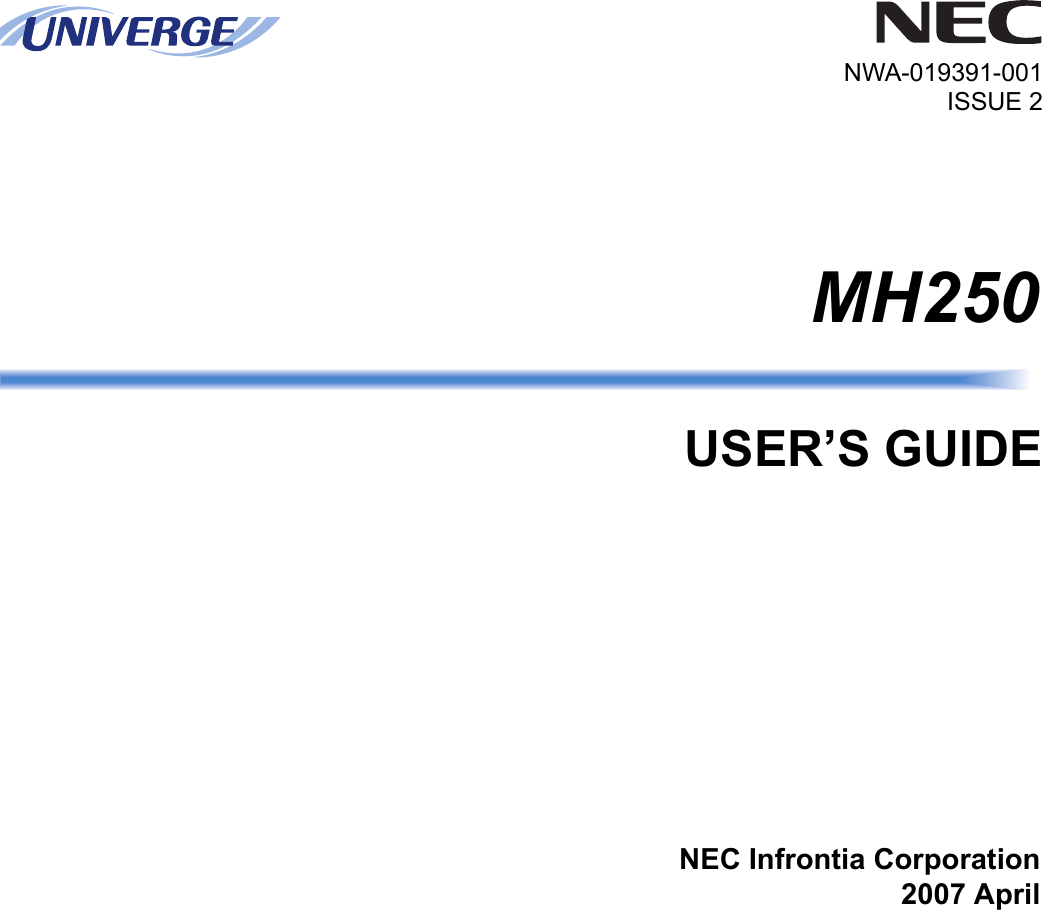
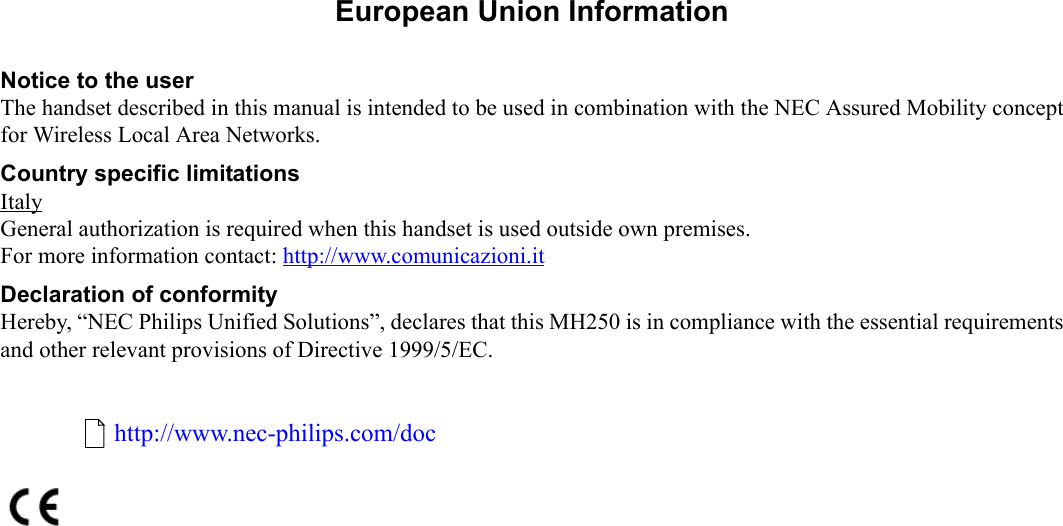
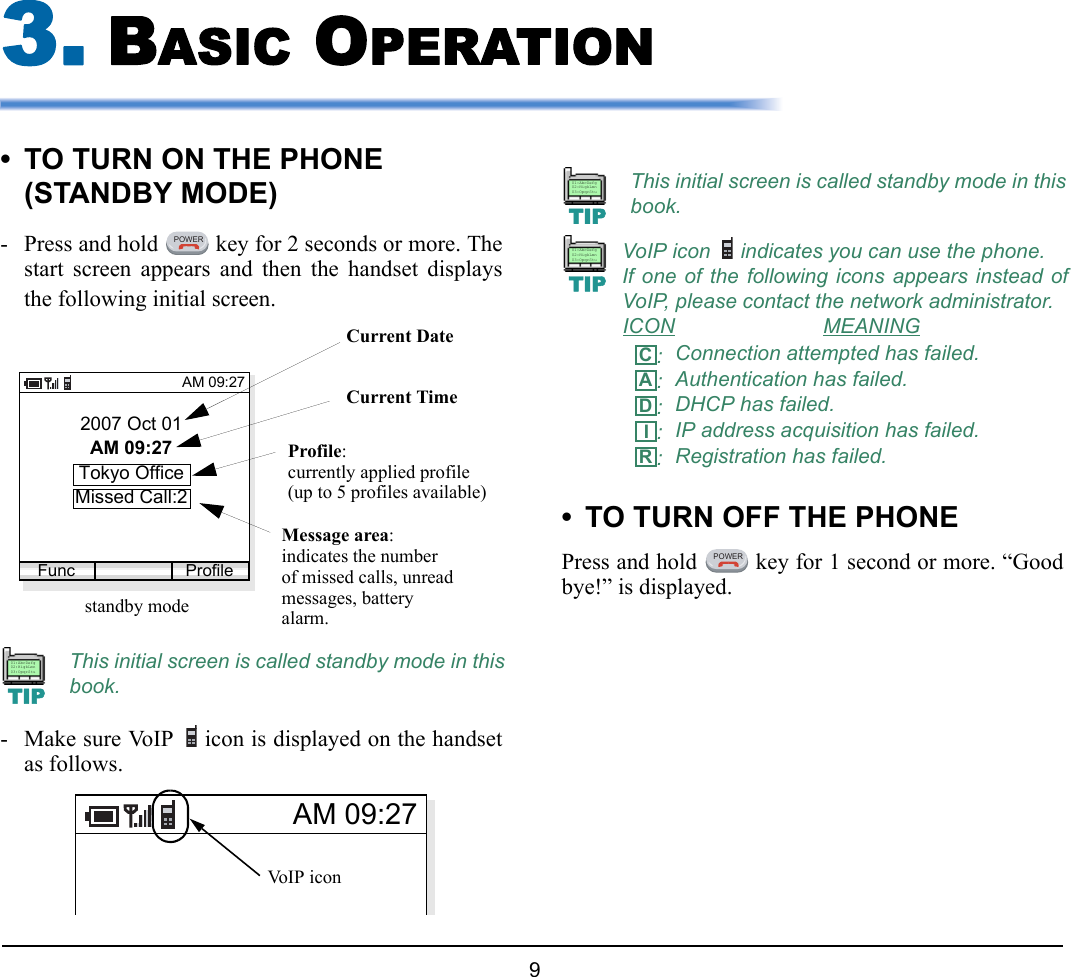
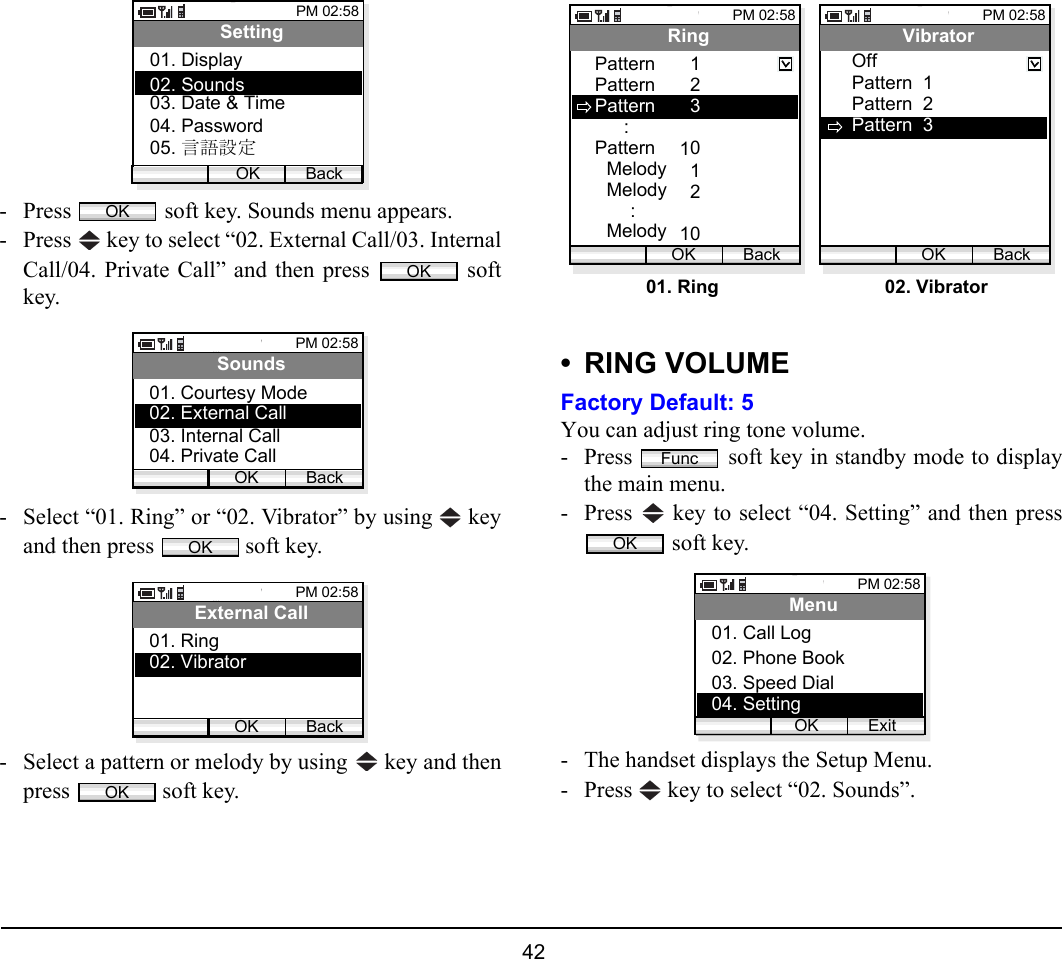
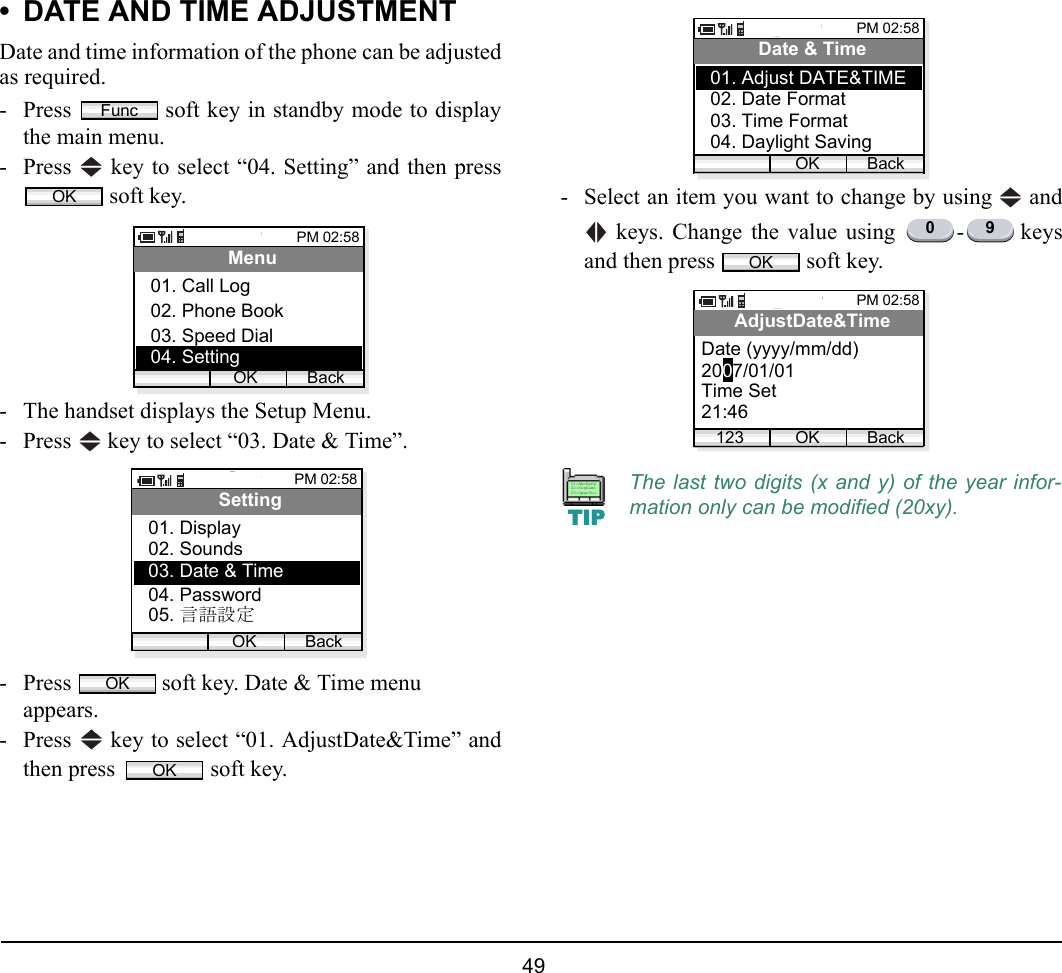
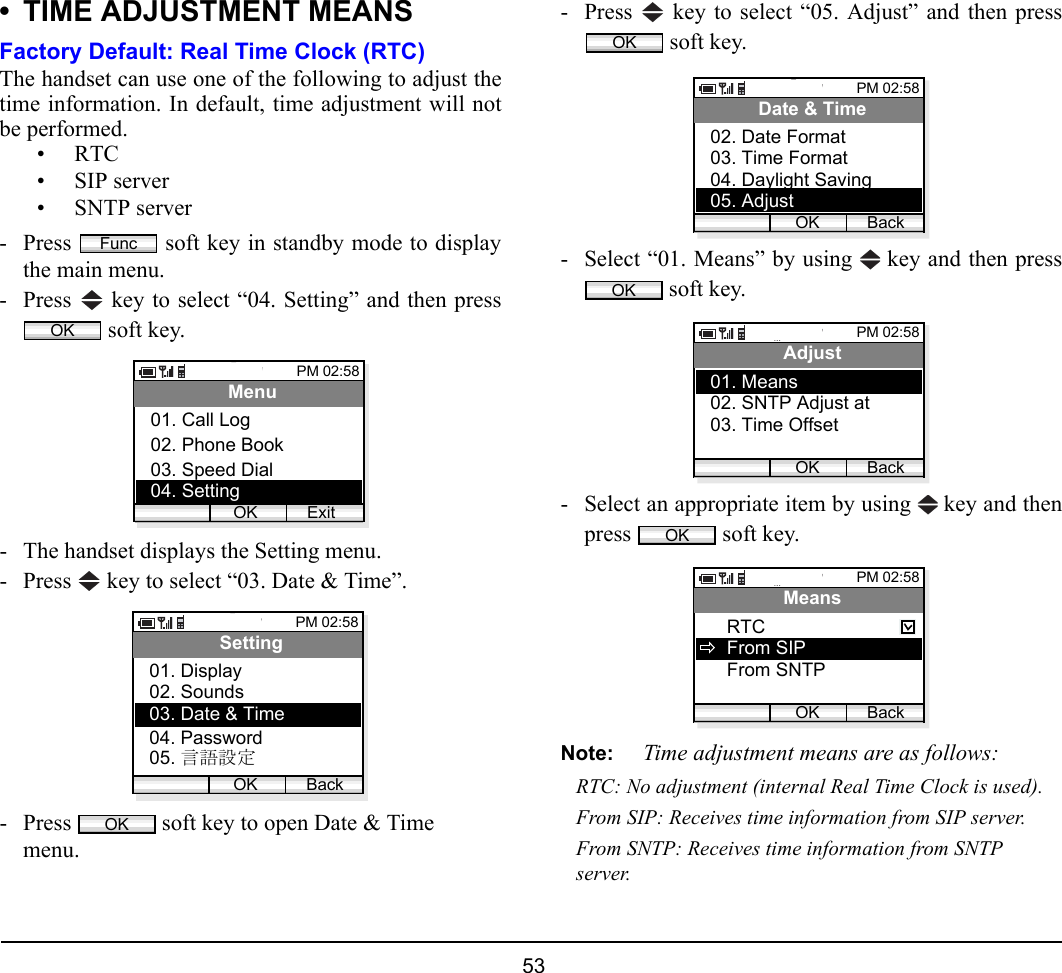
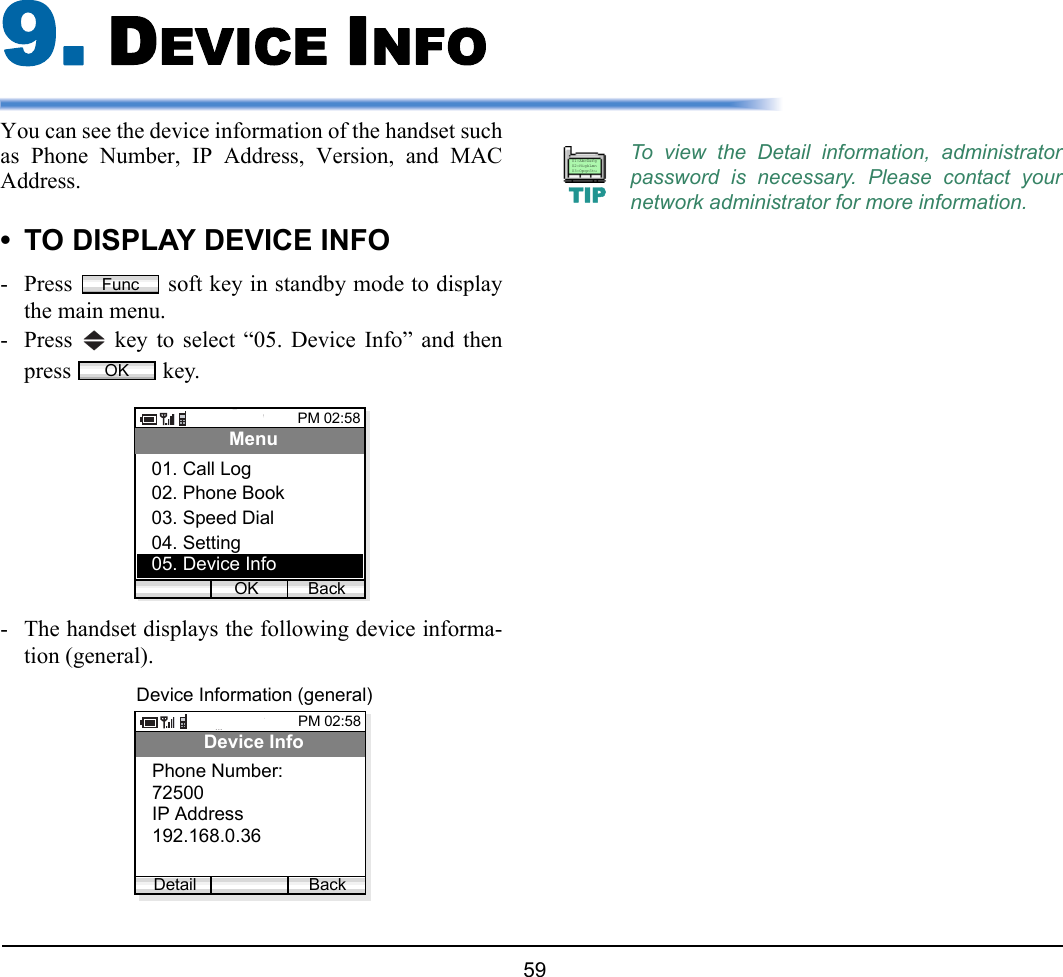
![41 - Press soft key in standby mode to displaythe main menu.- Press key to select “04. Setting” and then press soft key.- The handset displays the Setup Menu.- Press key to select “02. Sounds”.- Press soft key. Sounds menu appears.- Press key to select “01. Courtesy Mode” andthen press soft key.- Select On or Off by using key and then press soft key.• RING/VIBRATORFactory Default: [RING] External Call = Pattern1/Internal Call = Pattern2, Private Call = Pattern3[VIBRATOR] OffYou can set ring tone/vibrator pattern on a call kindbasis (external call/internal call/private call). - Press soft key in standby mode to displaythe main menu.- Press key to select “04. Setting” and then press soft key.- The handset displays the Setup Menu.- Press key to select “02. Sounds”.FuncOKPM 02:58OK BackMenu02. Phone Book03. Speed Dial01. Call Log04. SettingPM 02:58OK BackSetting02. Sounds03. Date & Time01. Display04. Password05. 言語設定OKOKPM 02:58OK BackSounds02. External Call03. Internal Call01. Courtesy Mode04. Private CallOKPM 02:58OK BackCourtesy ModeOffOnFuncOKPM 02:58OK ExitMenu02. Phone Book03. Speed Dial01. Call Log04. Setting](https://usermanual.wiki/Mitsumi-Electric-Co/WLPS3-1/User-Guide-901322-Page-59.png)


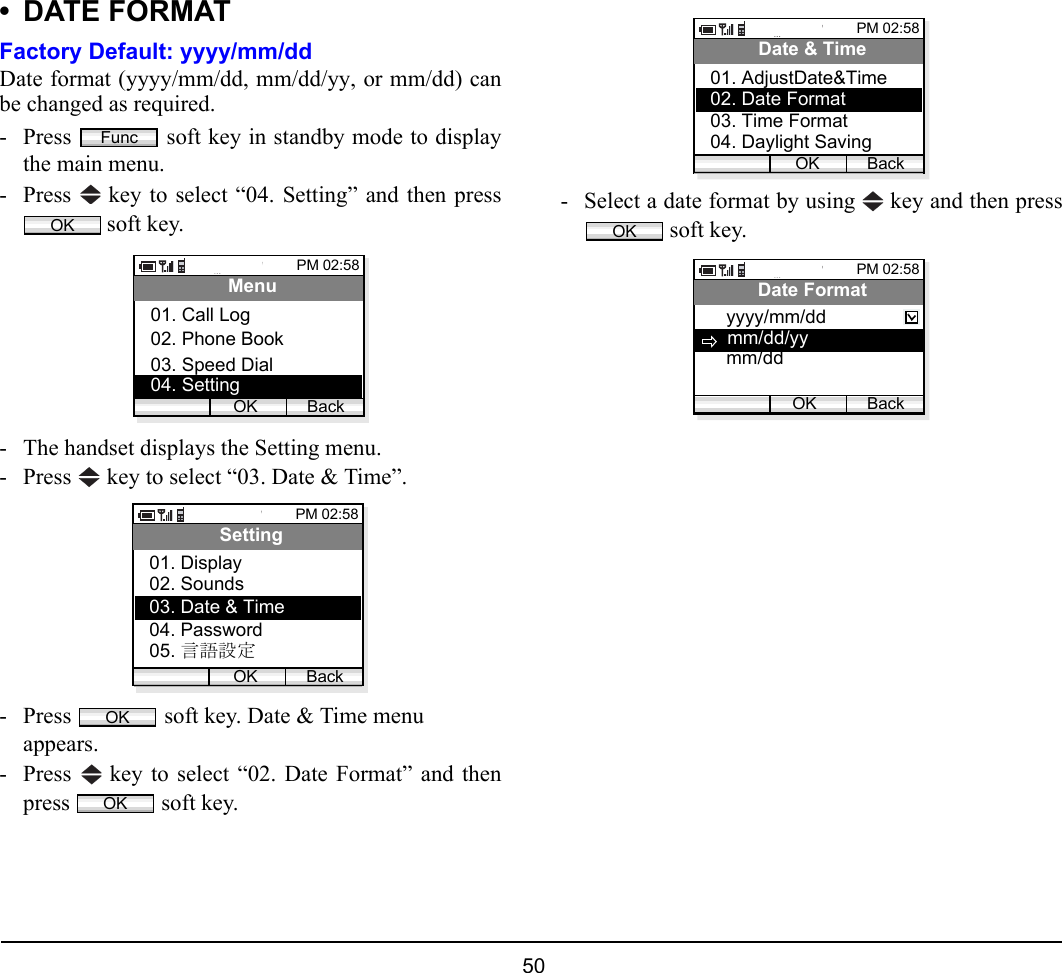

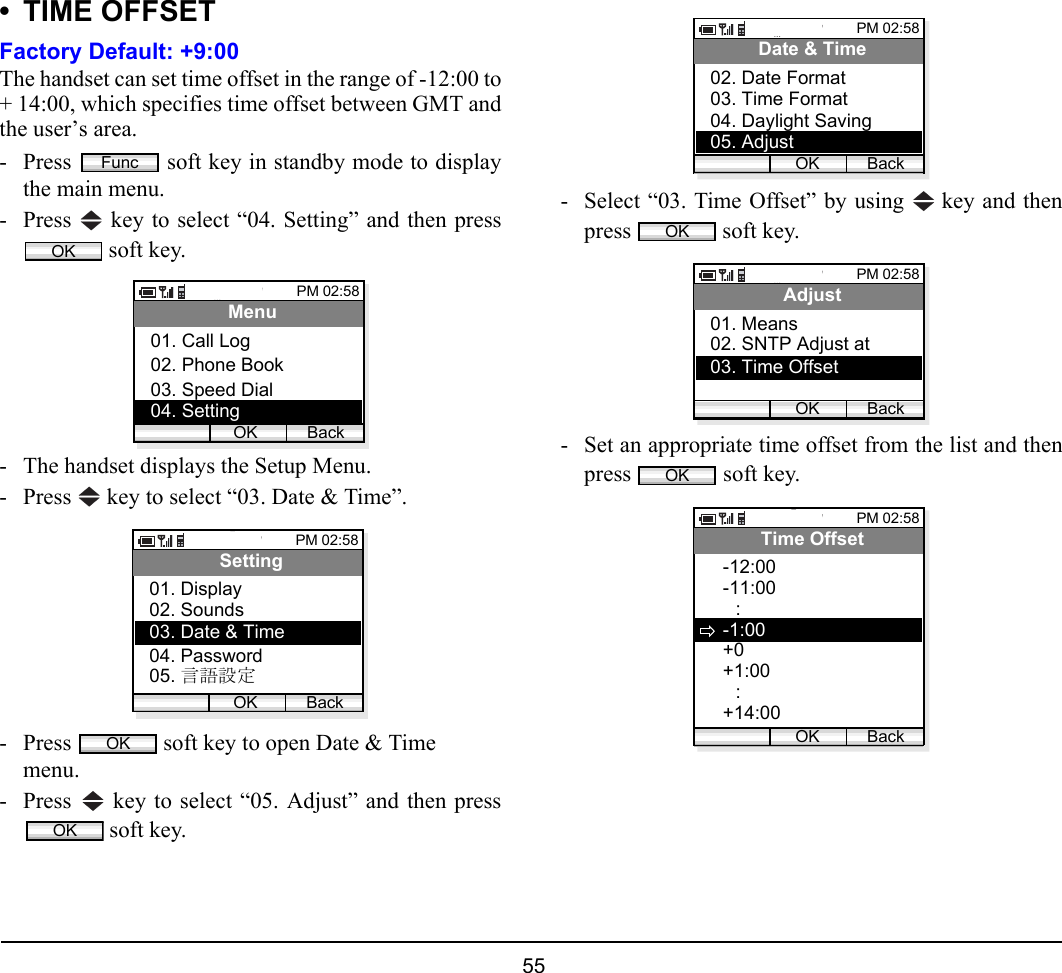


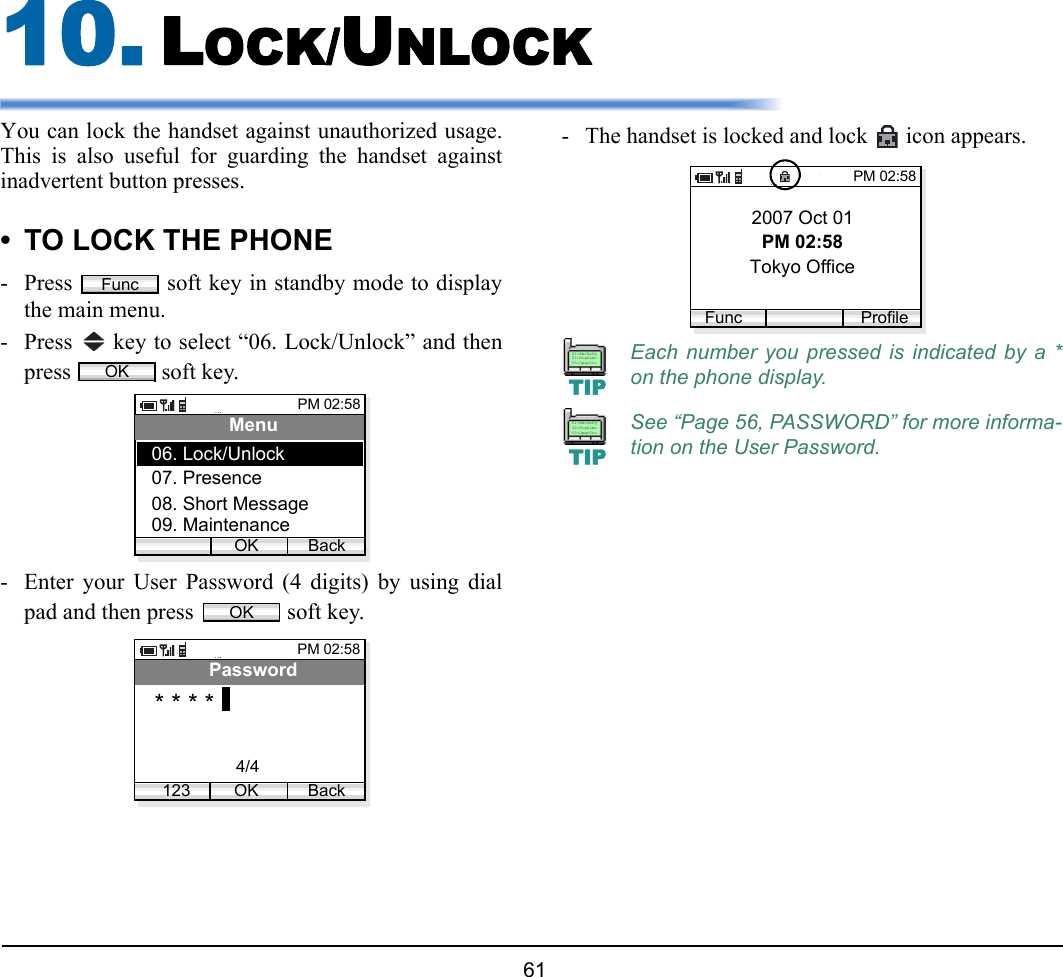
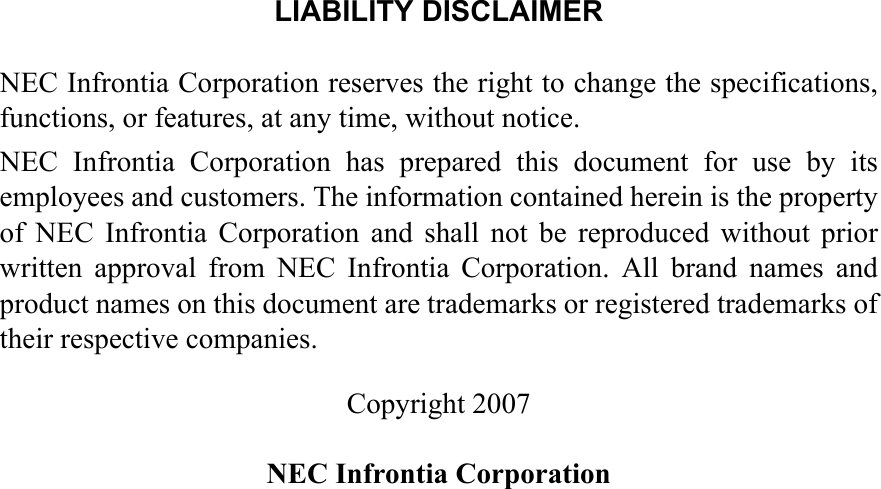
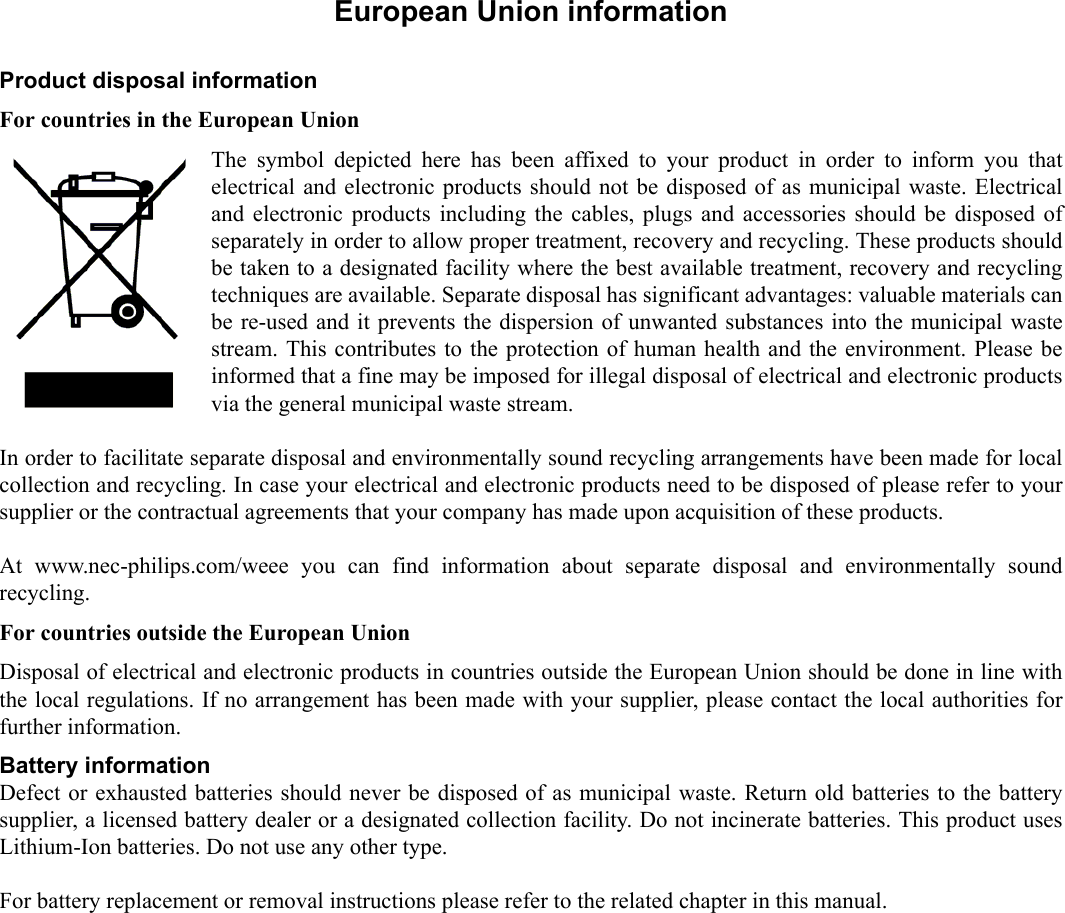
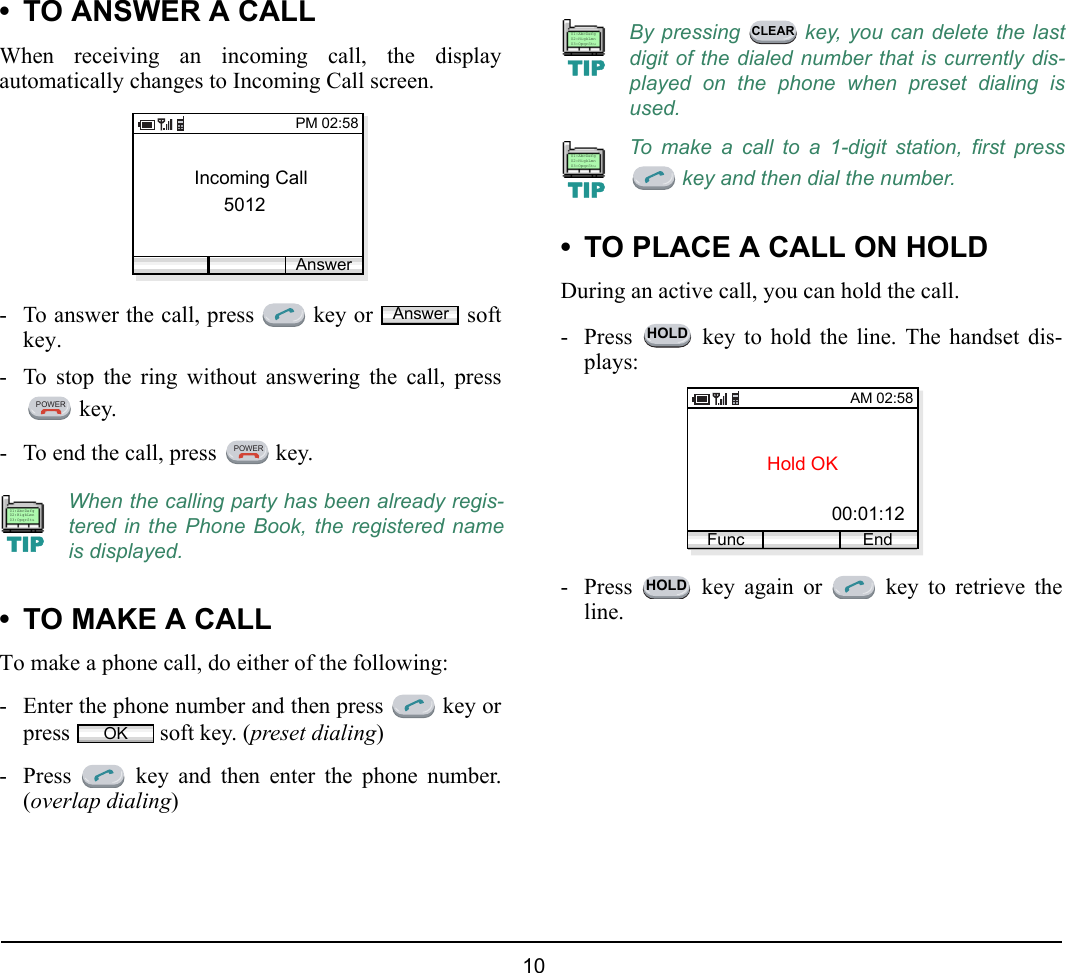
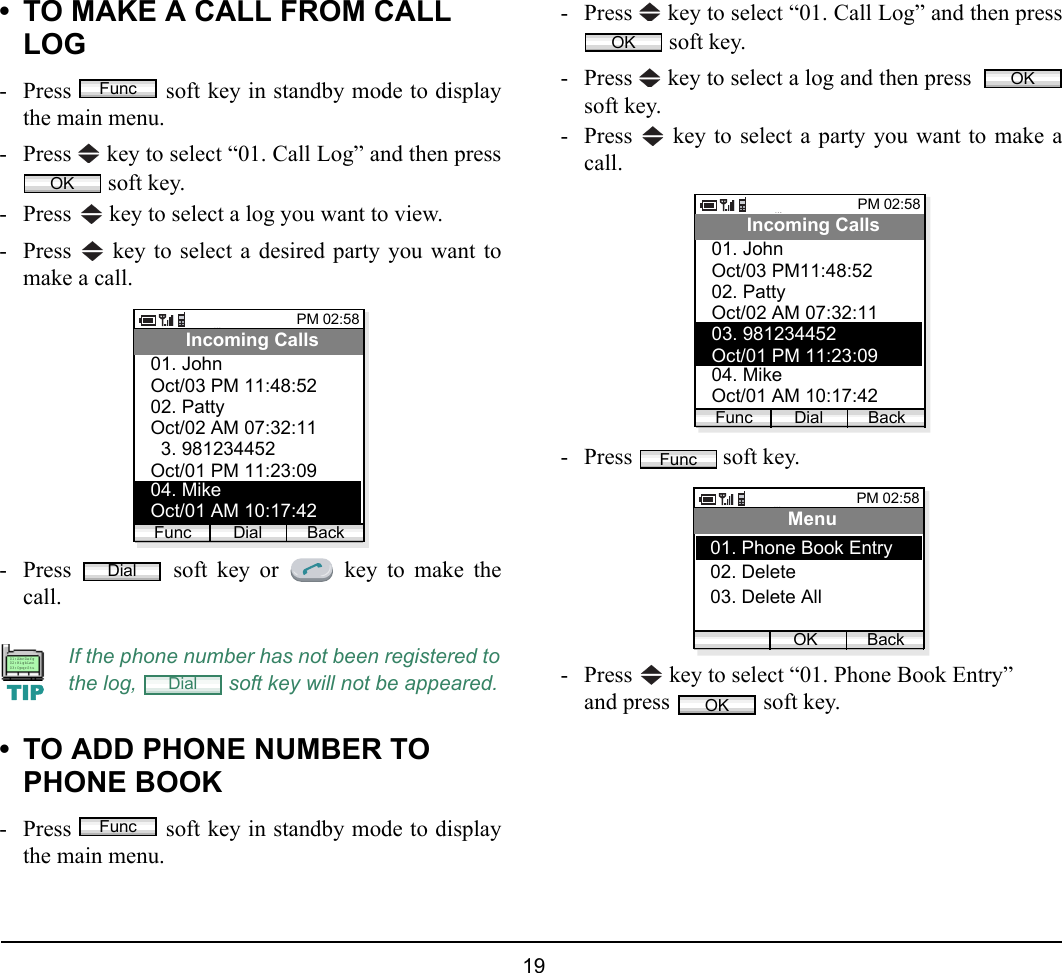
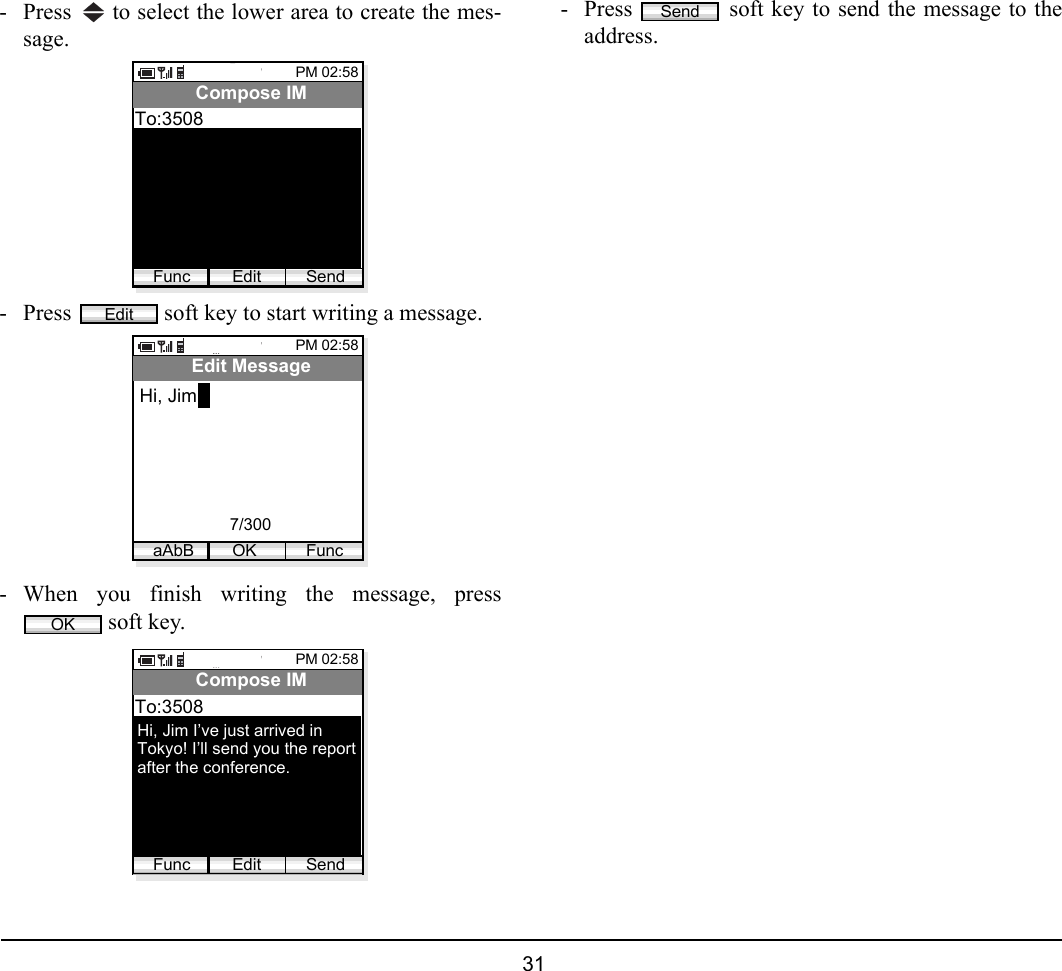
![63 11. PRESENCEYou can set the current presence information on thehandset. The following presence information isavailable.• TO CHANGE PRESENCE- Press soft key in standby mode to displaythe main menu.- Press key to select “07. Presence” and then press soft key.- The handset displays the Presence menu.- Press key to select an appropriate presence.- Press soft key to change your presence tothe selected status.- To change the current presence status, select “Yes”and then press soft key.Available Presence Information01 Online 06 Out to Lunch02 Away from Desk 07 Gone home03 Busy 08 Out of Office04 Meeting 09 On Business Trip05 Break 10 SecretFuncOKPM 02:58OK BackMenu05. Device Info06. Lock/Unlock04. Setting07. PresencePM 02:58OK BackChange Presence02. Away from Desk03. Busy01. Online04. Meeting05. Break06. Out to Lunch[Online] currentpresenceOKPM 02:58OK BackChange Presence02. Away from Desk03. Busy01. Online04. Meeting05. Break06. Out to Lunch[Online]ChangeChange PresenceYesNopresence status??OK](https://usermanual.wiki/Mitsumi-Electric-Co/WLPS3-1/User-Guide-901322-Page-81.png)
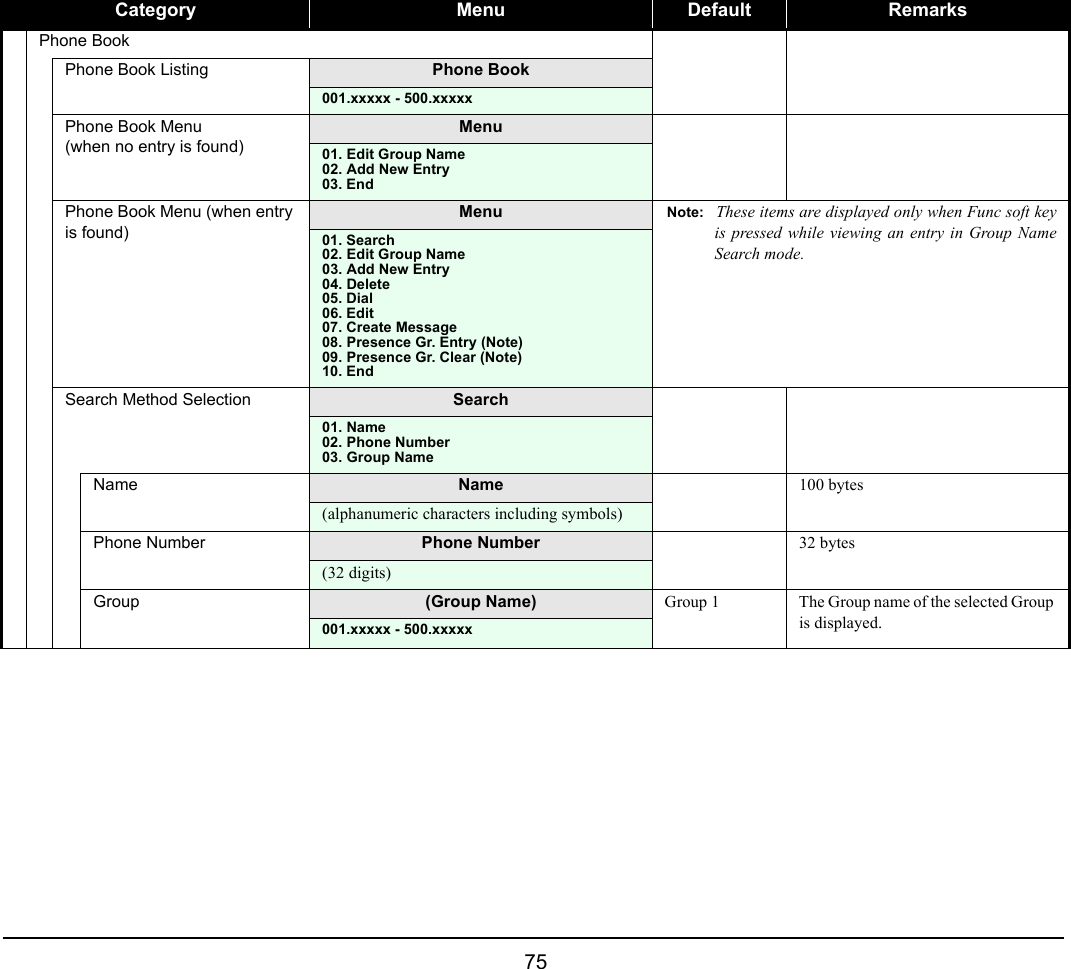
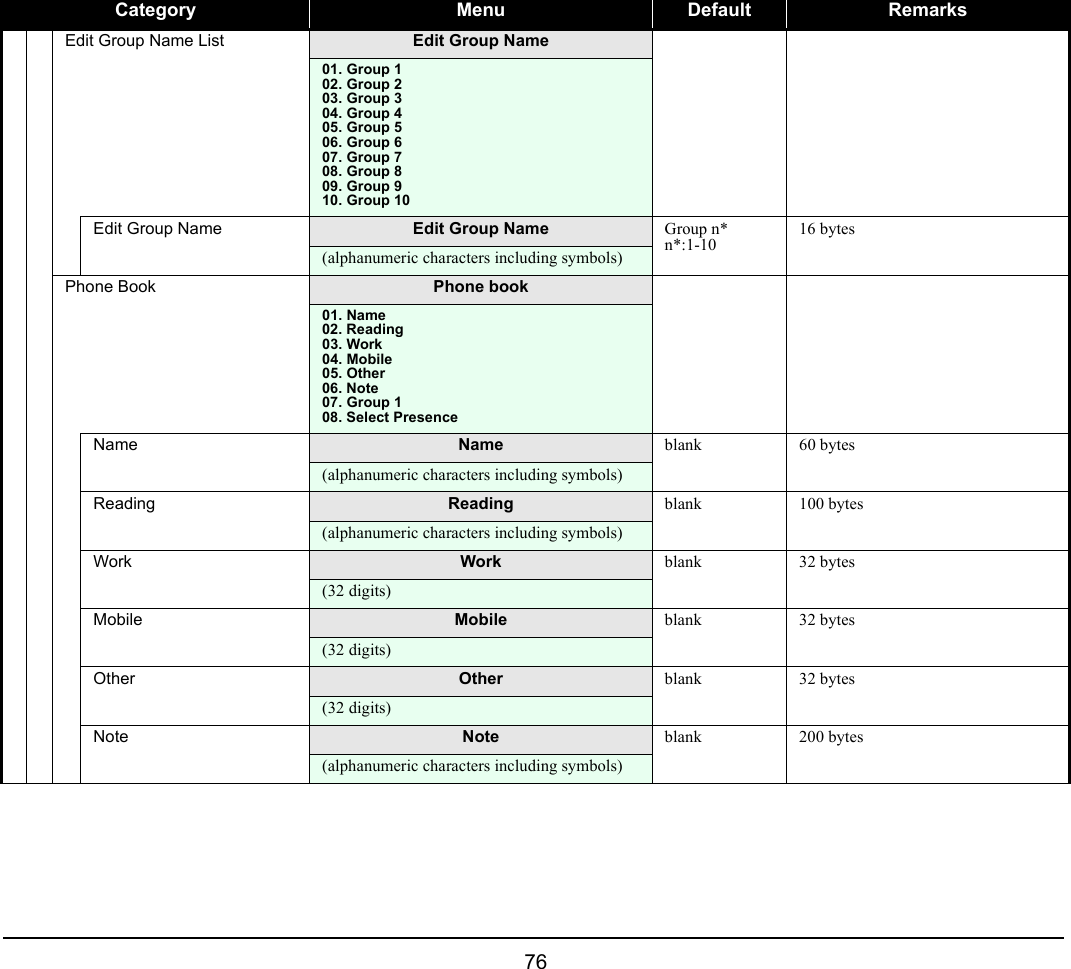
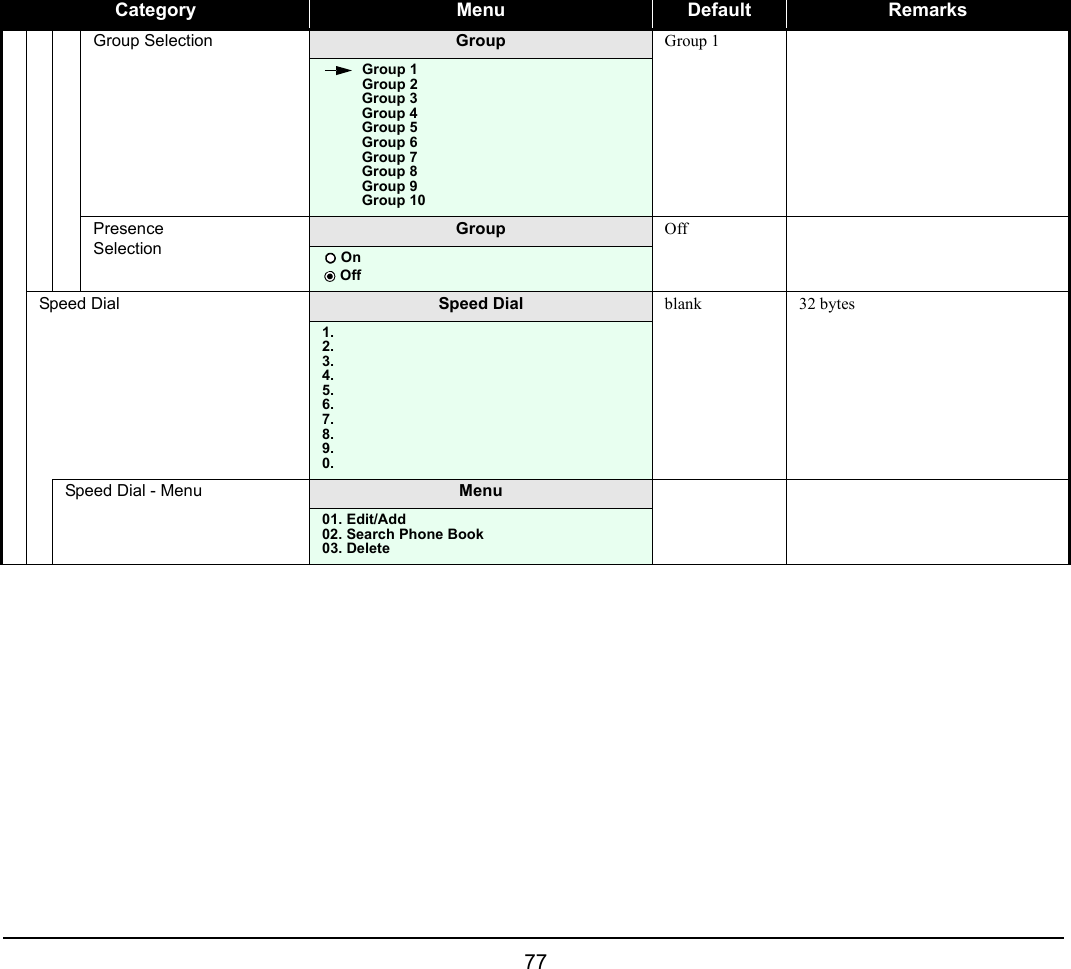
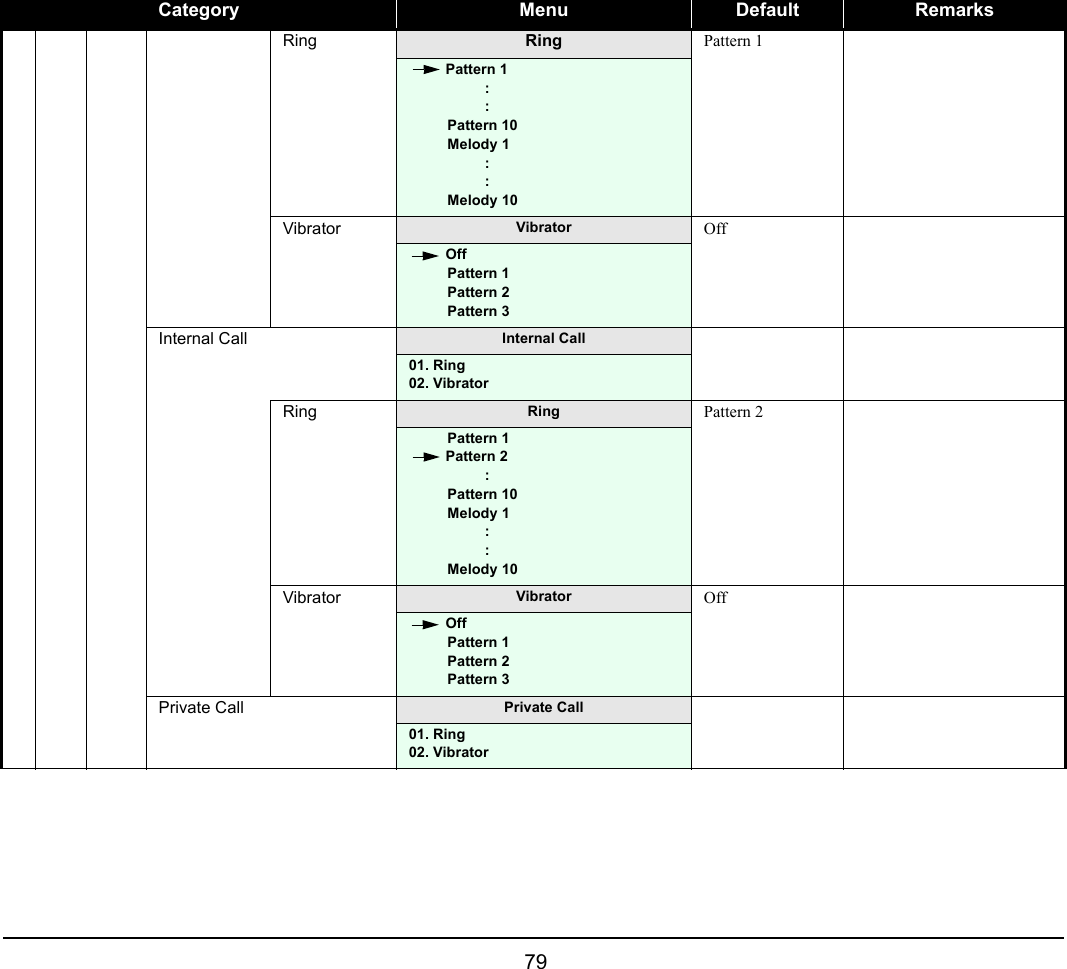
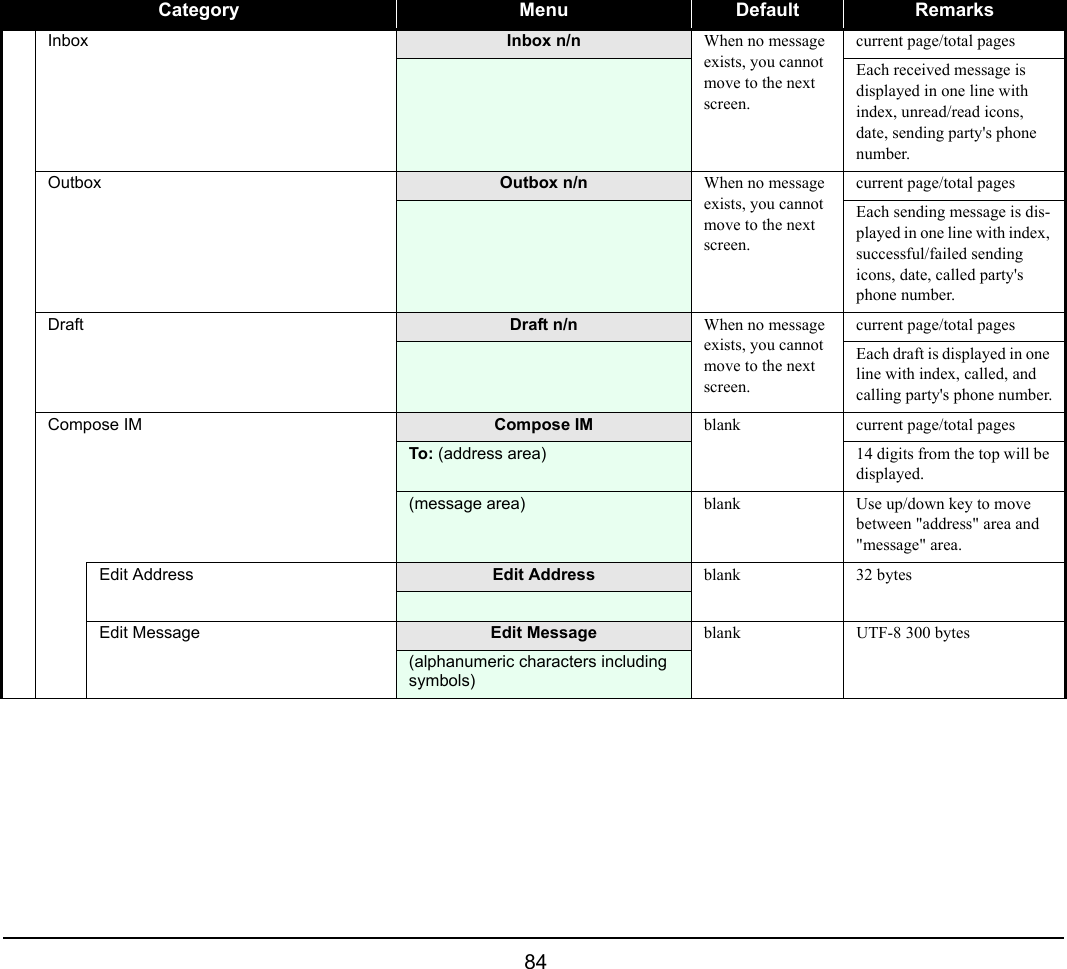
![83 Lock/Unlock(User Password)Password blank 4 bytesChange Presence Change Presence Online selected self-status[Online]01. Online02. Away from Desk03. Busy04. Meeting05. Break06. Out to Lunch07. Gone home08. Out of Office09. On Business Trip10. SecretOnline Select one from 10 presence data.Short Message Short Message number of unread/total01.Inbox 0/ 002.Outbox 0 number of messages03.Draft 0 number of drafts04.Compose IMCategory Menu Default Remarks](https://usermanual.wiki/Mitsumi-Electric-Co/WLPS3-1/User-Guide-901322-Page-101.png)
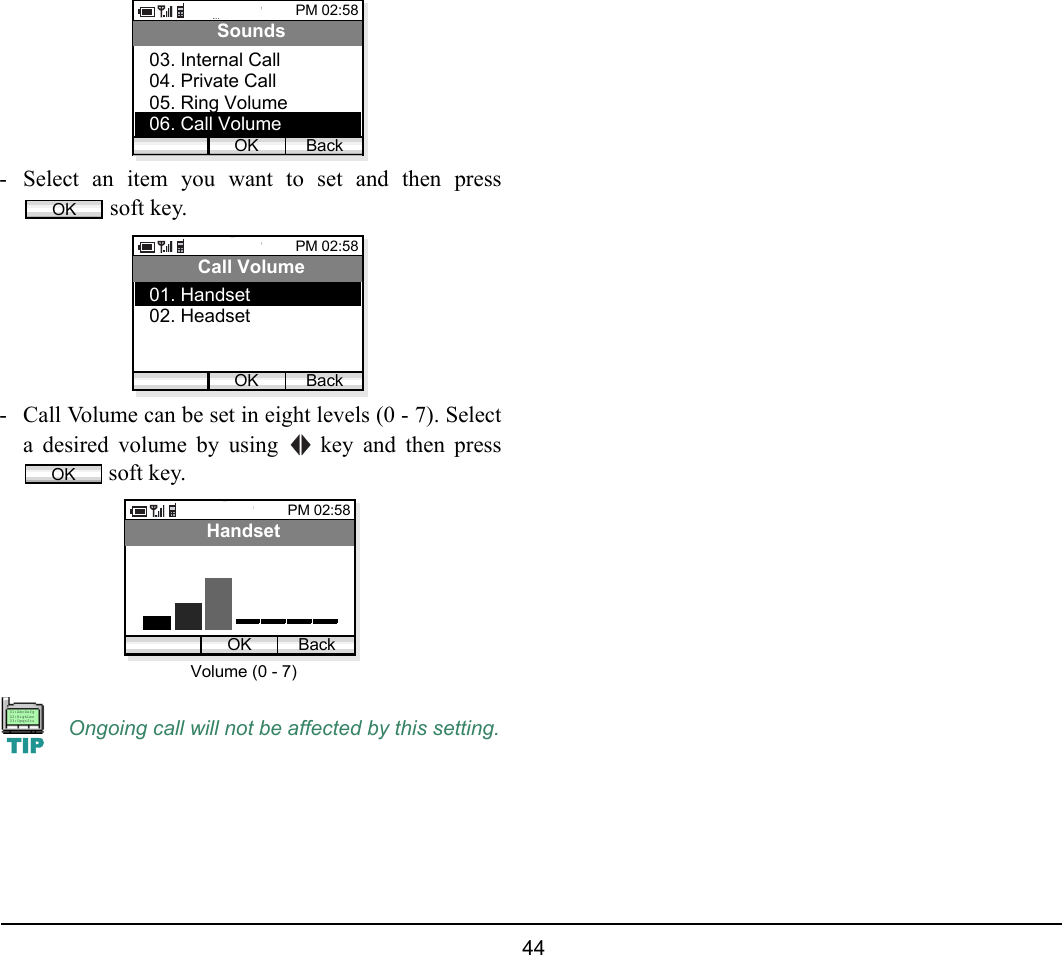
![86 • CHARACTER CODE LISTThe following shows character code list when the phone in edit mode. Character Code List1st 2nd 3rd 4th 5th 6th 7th 8th 9th@./:~-_abcABCde fDEFgh iGHIjklJKLmn oMNOpqr sPQRStuvTUVwxyzWXYZ’;(),“&¥[space][space]-,.!?[CR]1234567890*#HOLD](https://usermanual.wiki/Mitsumi-Electric-Co/WLPS3-1/User-Guide-901322-Page-104.png)
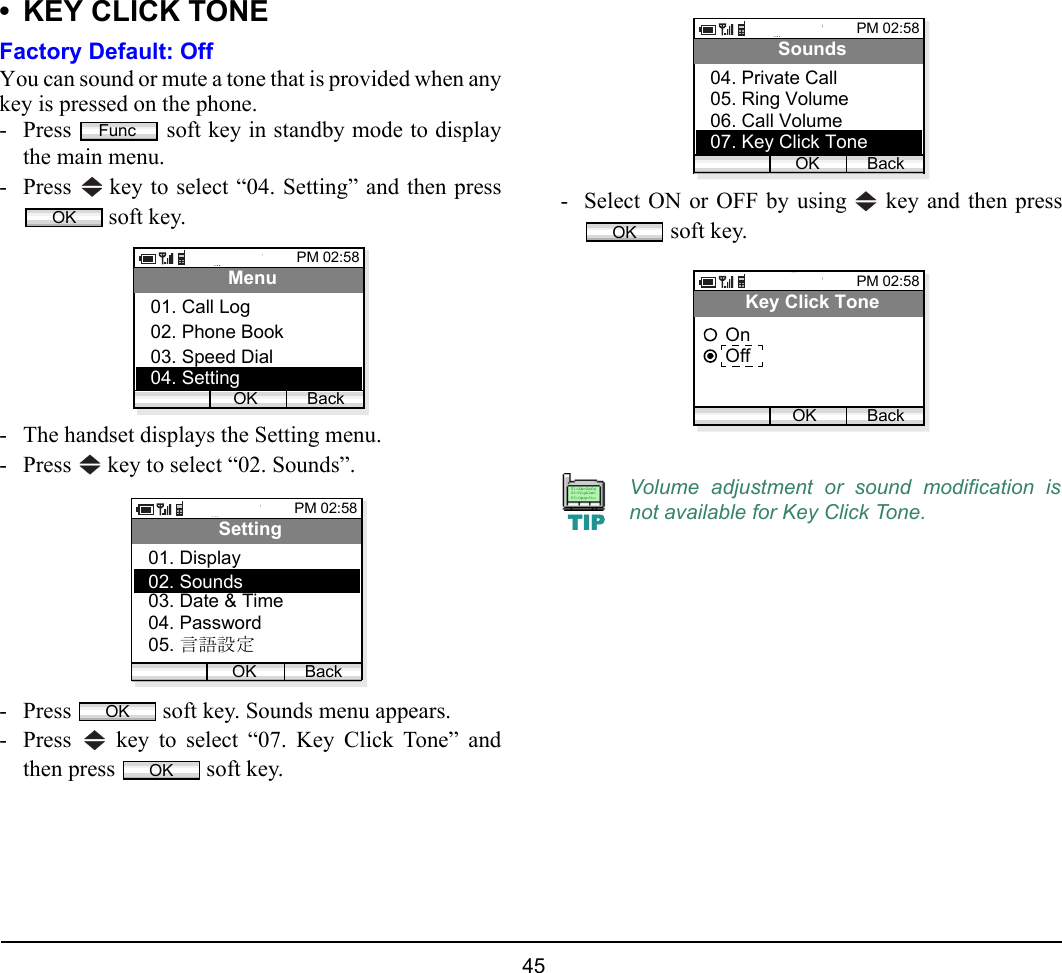
![87 15. TROUBLE SHOOTING• MESSAGE MEANINGS AND SUGGESTIONSThe following shows the meaning and suggestions of messages that may be displayed on the MH250.MESSAGE MEANING & SUGGESTIONS[Connection Failed]Duplicate IP address foundThe IP address of the handset is conflicting with another device. If this is displayed, please contact your network administrator.[Password]Incorrect Password The entered password is not correct. Enter the correct password.[Low Battery]Please charge Battery charge level is low. Charge the battery.[Phone Book]There is no number for this entryThis message appears when attempting to make a call from an entry in Phone book, if the Phone number has not been registered for the entry. Before making a call, register the phone number.[Phone Book]Phone book is fullThe number of entries reaches the maximum. To add new entry, delete some entries in advance.[Key Lock]Key locked Displayed when the handset is locked.[Key Lock]Key unlocked Displayed when the handset is unlocked.[Phone Book] Cannot delete Phone book for the administrator cannot be deleted.[Phone Book]Cannot edit Phone book for the administrator cannot be edited.](https://usermanual.wiki/Mitsumi-Electric-Co/WLPS3-1/User-Guide-901322-Page-105.png)