Mitsumi Electric Co WLPS3-1 VoIP Mobile Phone Terminal User Manual MH250 USERS GUIDE
Mitsumi Electric Co Ltd VoIP Mobile Phone Terminal MH250 USERS GUIDE
Users Manual

MH250
USER’S GUIDE
NEC Infrontia Corporation
2007 April
NWA-019391-001
ISSUE 2
LIABILITY DISCLAIMER
NEC Infrontia Corporation reserves the right to change the specifications,
functions, or features, at any time, without notice.
NEC Infrontia Corporation has prepared this document for use by its
employees and customers. The information contained herein is the property
of NEC Infrontia Corporation and shall not be reproduced without prior
written approval from NEC Infrontia Corporation. All brand names and
product names on this document are trademarks or registered trademarks of
their respective companies.
Copyright 2007
NEC Infrontia Corporation
1.
User Safety Protocol
Important: Read this information before using your MH250 Handset.
Observe the following instructions to use this product safely, prevent you and other people from possible injury, and
protect properties. Improper handling may cause heat, explosion, and fire.
Danger
Recharge the battery with the matching battery charger (see battery label description).
Use the battery only for this MH250 handset system. Do not use it with other electrical devices.
Keep the following warnings to prevent the battery pack from heating, explosion, and fire.
• Do not throw the battery pack into fire.
• Do not solder the battery pack directly.
• Do not short the positive (+) and negative (-) terminal of the battery pack with metal.
• Do not poke the battery nor smash it with hammer.
Do not disassemble nor modify the battery pack. It has a safety circuit and a damaged circuit may cause heat,
explosion, and fire.
The internal liquid of the battery pack has strong acid. If the battery liquid gets into your eye, rinse your eye well
with water and consult with a doctor.
Do not use, leave, nor recharge the battery pack near fire or under the direct sunlight. High temperature may
damage the internal safety circuit and may cause malfunction of the recharge, heat, explosion, or fire.

1.
Warning
Do not use the unit when you notice smoke, strange smell or other unusual happenings. It may cause fire if you
continuously use them. Turn off the power switch of the phone system immediately. For the recharger, disconnect
the power plug immediately. Confirm that smoke is ceased, and then contact the nearest NEC service office.
Never attempt to repair those units by yourself.
If you had an accident such as dropping the phone and broke the unit, turn off the power of the phone system
immediately. For the recharger, disconnect the power plug immediately. Contact the nearest NEC service office.
If you keep using those units, they may cause fire or electrical shock.
If water smeared into the unit, turn off the power of the phone system immediately. For the recharger, disconnect
the power plug immediately. Contact with the nearest NEC service office. If you keep using those units, they may
cause fire or electrical shock.
Do not insert flammable or metal objects into the units. If a foreign object were accidentally placed into the units,
turn off the power of the phone system and plug out the power adapter. Contact the nearest NEC service office.
If you keep using those units, they may cause fire or electrical shock. Pay special attention to children to prevent
from similar accidents.
Do not attempt to disassemble nor modify the units. It may cause fire, electrical shock, or system malfunction.
Modification by a user is prohibited by law.
Do not open the units intentionally. It may cause electrical shock or system malfunction. Ask test adjustment,
and repair of the units for the nearest NEC service office.
Do not twist, put a heavy object, and push the phone system. Such actions may cause damage, fire, or injuries.
Do not place a container with water such as a vase, a plant pot, a cup, cosmetics, chemicals, nor a small metal
object. Splashing water over the units and foreign metal object inserted into the units may cause fire or electrical
shock.
Do not use the unit in a high humid area such as a bathroom or near a humidifier. They may cause fire, electrical
shock, or system malfunction.
Use the specified power adapter, which is attached to the unit. Other adapters may cause fire or system
malfunction.
Do not damage, or modify the power adapter cord. Do not kink, pull, twist, or bundle it. Do not put a heavy object

1.
or heat it. They may cause fire, electrical shock, or system malfunction. Contact the nearest NEC service office
for a damaged adapter cord.
Do not touch the power plug with a wet hand. It may cause electrical shock or system malfunction.
Do not touch the units or replace a battery with a wet hand. It may cause electrical shock or system malfunction.
When you hear thunder during using the phone system outside, immediately stop using it and move to a safe
place.
Do not use multiple plugs to a single outlet. It may cause fire or electrical shock.
Follow the instruction below when you use a battery pack. They may cause heating, explosion, and fire;
• Do not put the battery pack into a microwave oven or a pressure chamber.
• Do not use other batteries with this battery pack.
If the internal battery liquid clung to your skin or clothes, immediately rinse it with clean water to prevent
chemical damage to your skin and clothes.
Do not use the phone or recharge the battery in a place where fire or explosion may occur.
• This phone system does not have explosion protection. Do not use it where a flammable gas such as propane and
gasoline are stored. Turn off the power of the phone immediately. Do not recharge the battery in such a place.
Do not use near microwave ovens, medical equipment and industrial equipment.

1.
This page is for your notes.

1.
FCC portion
This equipment has been tested and found to comply with the limits for a Class B digital device, pursuant to Part 15
of the FCC rules. These limits are designed to provide reasonable protection against harmful interference in a
residential installation. This equipment generates, uses, and can radiate radio frequency energy and, if not installed
and used in accordance with the instructions, may cause harmful interference to radio communications. However,
there is no guarantee that interference will not occur in a particular installation. If this equipment does cause harmful
interference to radio or television reception, which can be determined by turning the equipment off and on, the user
is encouraged to try to correct the interference by one or more of the following measures:
• Reorient or relocate the receiving antenna.
• Increase the separation between the equipment and receiver.
• Connect the equipment into an outlet on a circuit different from that to which the receiver is connected.
• Consult the dealer or an experienced radio/TV technician for help.
This device complies with Part 15 of the FCC Rules. Operation is subject to the following two conditions: (1) This
device may not cause harmful interference, and (2) This device must accept any interference received, including
interference that may cause undesired operation.
Caution:
Any changes or modifications not expressly approved by the party responsible for product compliance could void
the user's authority to operate the equipment.
To comply with FCC RF exposure compliance requirements, this device must not be co-located or operating in
conjunction with any other antenna or transmitter.

1.
Industry Canada Portion
Canada Regulatory Compliance Statement
This Class B digital apparatus complies with Canadian ICES-003.
Cet appareil numériqué de la classe B est conformé à la norme NMB-003 du Canada.
For Customers in Canada
This device complies with RSS 210 of Industry Canada (IC).
Operation is subject to the following two conditions:
• this device may not cause interference, and
• this device must accept any interference, including interference that may cause undesired operation of this
device.
L’utilisation de ce dispositif est autorisée seulement aux conditions suivantes :
• il ne doit pas produire de brouillage et
• l’ utilisateur du dispositif doit étre prêt a accepter tout brouillage radioélectrique reçu, même si ce brouillage
est susceptible de compromettre le fonctionnement du dispositif.
Exposure to radio frequency radiation
The installer of this radio equipment must ensure that the antenna is located or pointed such that it does not emit RF
field in excess of Health Canada limits for the general population; consult Safety Code 6, obtainable from Health
Canada’s website at www.hc-sc.gc.ca/rpb.

1.
European Union Information
Notice to the user
The handset described in this manual is intended to be used in combination with the NEC Assured Mobility concept
for Wireless Local Area Networks.
Country specific limitations
Italy
General authorization is required when this handset is used outside own premises.
For more information contact: http://www.comunicazioni.it
Declaration of conformity
Hereby, “NEC Philips Unified Solutions”, declares that this MH250 is in compliance with the essential requirements
and other relevant provisions of Directive 1999/5/EC.
http://www.nec-philips.com/doc

1.
European Union information
Product disposal information
For countries in the European Union
The symbol depicted here has been affixed to your product in order to inform you that
electrical and electronic products should not be disposed of as municipal waste. Electrical
and electronic products including the cables, plugs and accessories should be disposed of
separately in order to allow proper treatment, recovery and recycling. These products should
be taken to a designated facility where the best available treatment, recovery and recycling
techniques are available. Separate disposal has significant advantages: valuable materials can
be re-used and it prevents the dispersion of unwanted substances into the municipal waste
stream. This contributes to the protection of human health and the environment. Please be
informed that a fine may be imposed for illegal disposal of electrical and electronic products
via the general municipal waste stream.
In order to facilitate separate disposal and environmentally sound recycling arrangements have been made for local
collection and recycling. In case your electrical and electronic products need to be disposed of please refer to your
supplier or the contractual agreements that your company has made upon acquisition of these products.
At www.nec-philips.com/weee you can find information about separate disposal and environmentally sound
recycling.
For countries outside the European Union
Disposal of electrical and electronic products in countries outside the European Union should be done in line with
the local regulations. If no arrangement has been made with your supplier, please contact the local authorities for
further information.
Battery information
Defect or exhausted batteries should never be disposed of as municipal waste. Return old batteries to the battery
supplier, a licensed battery dealer or a designated collection facility. Do not incinerate batteries. This product uses
Lithium-Ion batteries. Do not use any other type.
For battery replacement or removal instructions please refer to the related chapter in this manual.

1.
Regulatory Notices for Taiwan
Other Information for Taiwan
MH250 operating frequency and transmission power for Taiwan are as follows.
• Operating Frequency: 2,400 ∼ 2,483.5 GHz
• Transmission Power: Maximum 20 mW

1.
This page is for your notes.

i
TABLE OF CONTENTS
1.INTRODUCTION
•WAT IS MH250? ................................................................................. 1
•KEYS AND PARTS ............................................................................. 2
•ICONS ................................................................................................. 3
•STANDBY MODE................................................................................ 4
•MAIN MENU........................................................................................ 4
2.GETTING STARTED
•HOW TO INSERT THE BATTERY...................................................... 5
•HOW TO REPLACE THE BATTERY .................................................. 5
•HOW TO CHARGE THE BATTERY.................................................... 6
3.BASIC OPERATION
•TO TURN ON THE PHONE (STANDBY MODE) ................................ 9
•TO TURN OFF THE PHONE .............................................................. 9
•TO ANSWER A CALL ......................................................................... 10
•TO MAKE A CALL............................................................................... 10
•TO PLACE A CALL ON HOLD............................................................ 10
•TO TRANSFER A CALL...................................................................... 11
•TO REDIAL (LAST NUMBER REDIAL)............................................... 11
•TO USE HEADSET ............................................................................. 12
4.FEATURES
•TO USE CALL FORWARDING - ALL CALLS ..................................... 13
•TO USE CALL FORWARDING - DON’T ANSWER ............................ 13
•TO USE CALL FORWARDING - NO RESPONSE.............................. 14
•TO USE CALL FORWARDING - BUSY .............................................. 14

ii
TABLE OF CONTENTS
•TO USE CALL PICKUP....................................................................... 14
•TO USE CALL PARK .......................................................................... 15
•TO USE CALL BACK .......................................................................... 15
•TO USE CALL WAITING..................................................................... 15
•TO USE CONFERENCE..................................................................... 16
•TO ADJUST CALL VOLUME .............................................................. 16
5.CALL LOG
•TO VIEW CALL LOG........................................................................... 17
•TO MAKE A CALL FROM CALL LOG................................................. 19
•TO ADD PHONE NUMBER TO PHONE BOOK ................................. 19
•TO DELETE A CALL LOG................................................................... 21
•TO DELETE ALL CALL LOGS ............................................................ 21
6.PHONE BOOK
•TO VIEW PHONE BOOK .................................................................... 23
•TO EDIT GROUP NAME..................................................................... 25
•TO ADD A NEW ENTRY..................................................................... 26
•TO DELETE A RECORD..................................................................... 27
•TO MAKE A CALL............................................................................... 28
•TO EDIT AN ENTRY ........................................................................... 29
•TO CREATE A SHORT MESSAGE .................................................... 30
7.SPEED DIAL
•TO USE SPEED DIAL......................................................................... 33
•TO ADD NEW ENTRY/EDIT ............................................................... 34
•TO ADD NEW ENTRY FROM PHONE BOOK.................................... 36
•TO DELETE AN ENTRY ..................................................................... 37

iii
TABLE OF CONTENTS
8.SETTING
•DISPLAY BACKLIGHT........................................................................ 39
•ALERT SETTING ................................................................................ 39
•COURTESY MODE............................................................................. 40
•RING/VIBRATOR ................................................................................ 41
•RING VOLUME ................................................................................... 42
•CALL VOLUME ................................................................................... 43
•KEY CLICK TONE............................................................................... 45
•MUSIC SELECT.................................................................................. 46
•RTP ALARM........................................................................................ 47
•HANDOVER TONE ............................................................................. 48
•DATE AND TIME ADJUSTMENT........................................................ 49
•DATE FORMAT................................................................................... 50
•TIME FORMAT.................................................................................... 51
•DAYLIGHT SAVING............................................................................ 52
•TIME ADJUSTMENT MEANS ............................................................. 53
•SNTP QUERY TIME............................................................................ 54
•TIME OFFSET..................................................................................... 55
•PASSWORD ....................................................................................... 56
•LANGUAGE ........................................................................................ 57
9.DEVICE INFO
•TO DISPLAY DEVICE INFO ............................................................... 59
10.LOCK/UNLOCK
•TO LOCK THE PHONE....................................................................... 61
•TO UNLOCK THE PHONE.................................................................. 62

iv
TABLE OF CONTENTS
11.PRESENCE
•TO CHANGE PRESENCE .................................................................. 63
•TO VIEW PRESENCE......................................................................... 64
12.SHORT MESSAGE
•SHORT MESSAGE INDICATION ....................................................... 65
•TO VIEW SHORT MESSAGE............................................................. 65
•TO SEND A SHORT MESSAGE......................................................... 67
13.PROFILE
•TO APPLY A PROFILE ....................................................................... 69
•TO RELEASE THE CURRENT PROFILE........................................... 70
14.MENU LIST
•MENU LIST ......................................................................................... 73
•CHARACTER CODE LIST .................................................................. 86
15.TROUBLE SHOOTING
•MESSAGE MEANINGS AND SUGGESTIONS................................... 87
•TROUBLES AND SUGGESTIONS ..................................................... 88
16.TECHNICAL SPECIFICATIONS
•TECHNICAL SPECIFICATIONS ......................................................... 89
1
1.
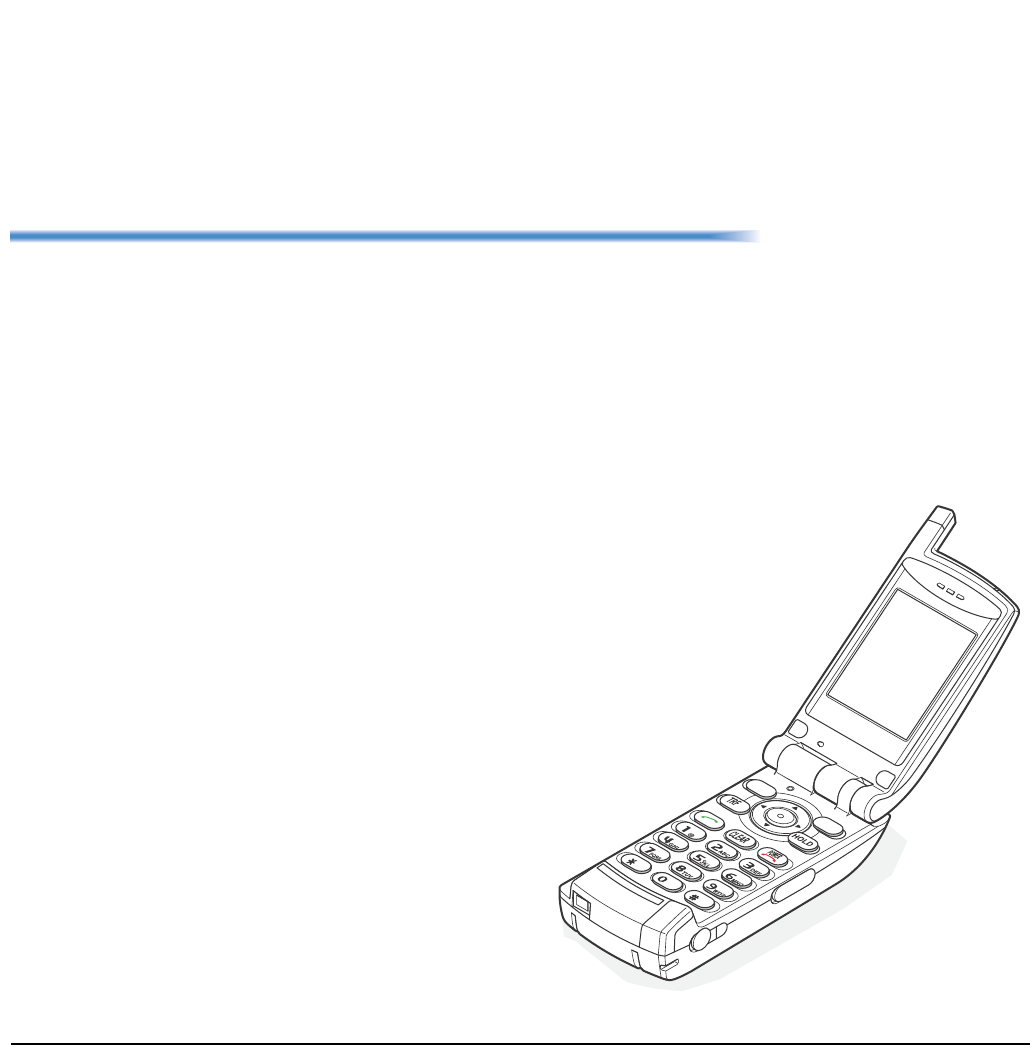
1.INTRODUCTION
• WAT IS MH250?
MH250 is a wireless VoIP handset that complies with
IEEE 802.11b specifications. MH250 has the following
features:
- PCS/PHS equivalent features are available by con-
necting with UNIVERGE SV7000, NEAX2400IPX,
NEAX2000 IPS, and WLAN system.
- MH250 dedicated features are also available such as
Short Message, Presence, Phone Book, Call Log,
Speed Dial, and Courtesy Mode.
MH250
2
1.
• KEYS AND PARTS
The phone has the following keys and parts.
12
CLEAR
HOLD
TRF
3
456
789
*0#
@ABC DEF
POWER
GHI JKL MNO
PQRS TUV WXYZ
(1) Antenna
(2) Ear Speaker
(3) Display
(8) 4-way Scroll UP key
(6) OK key
(7) Soft Button 2
(11) 4-way Scroll RIGHT key
(13) HOLD key
(9) 4-way Scroll DOWN key
(16) END/PWR key
(15) CLEAR key
(18) USB Connector
(17) Dial pad
(21) Microphone
(22) AC Adapter Connector
(19) Headset Connector
(20) Info LED
(4) Soft Keys
(5) Soft Button 1
(23) Speaker
[backside of the unit]
(10) 4-way Scroll
LEFT key
(12) TRANSFER key
(14) SEND key
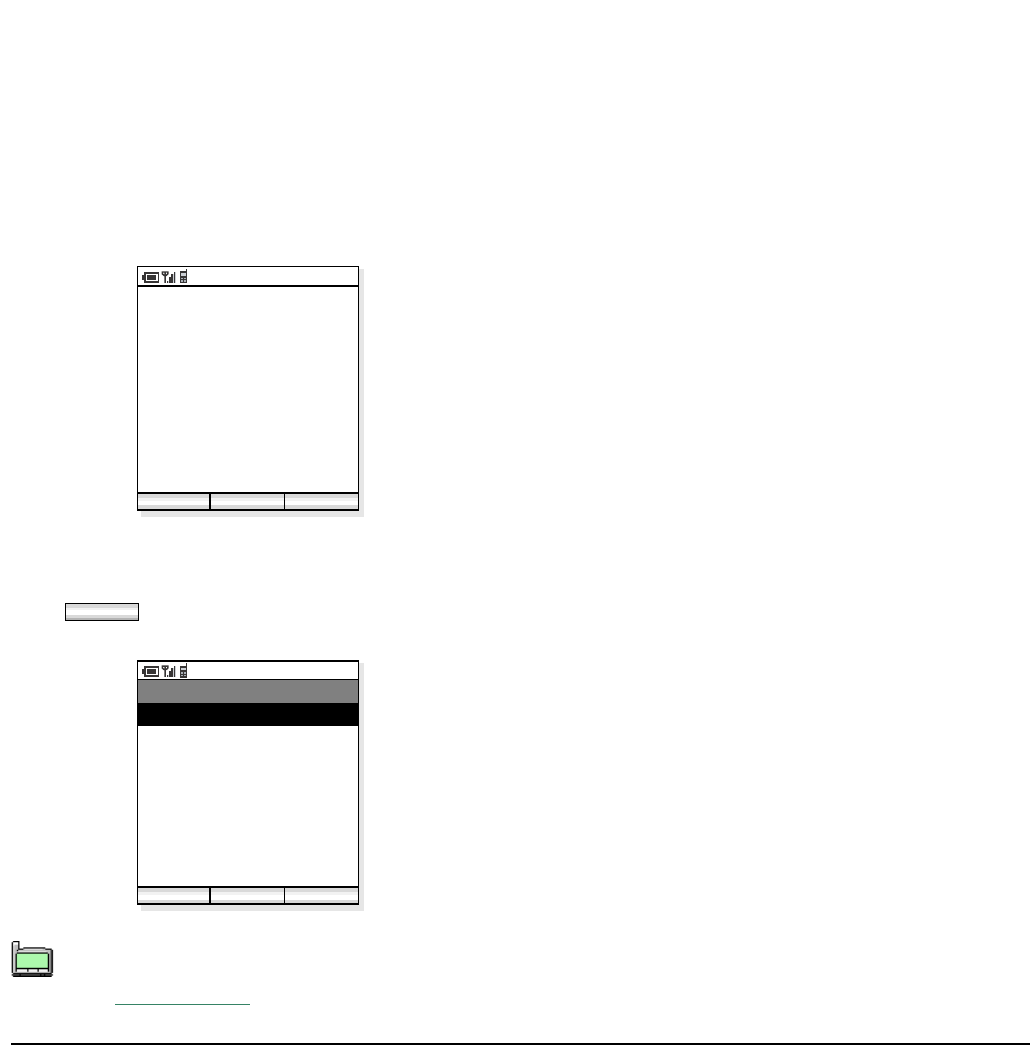
PM 01:34
OK Back
Menu
01. Call Log
02. Phone Book
03. Speed Dial
04. Setting
05. Device Info
06. Lock/Unlock
07. Presence
08. Short Message
09. Maintenance
No. PARTS REMARKS
(1) Antenna -
(2) Ear Speaker -
(3) Display 65,536 color, TFT 2.0 inch LCD, 176 × 220
pixels (9 lines × 21 characters)
(4) Soft Keys Displayed soft keys depend on the phone
status.
(5) Soft Button 1 Used for selecting Left soft key.
(6) OK key Used for selecting Middle soft key.
(7) Soft Button 2 Used for selecting Right soft key.
(8) 4-way Scroll UP-key Used for selecting a value from the list and
moving the cursor in edit mode.d
(9) 4-way Scroll DOWN-key
(10) 4-way Scroll LEFT-key
(11) 4-way Scroll RIGHT-key
(12) TRANSFER key Used for transferring the ongoing call.
(13) HOLD key Used for placing the ongoing call in hold.
(14) SEND key Used for making/answering a call.
(15) CLEAR key Allows you:
To return to the previous screen
To delete input character/digit
(16) END/PWR key Allows you:
To end an active call
To turn on/off the phone
To exit a menu without making changes
(17) Dial Pad Used for dialling number or entering char-
acters.
(18) USB Connector Used for charging the phone via USB.
(19) Headset Connector Used for connecting headset. (∅ 2.5)
(20) Info LED Flashes when receiving a call.
(21) Microphone -
(22) AC Adapter Connector -
(23) Speaker Rings when receiving a call.
3
1.
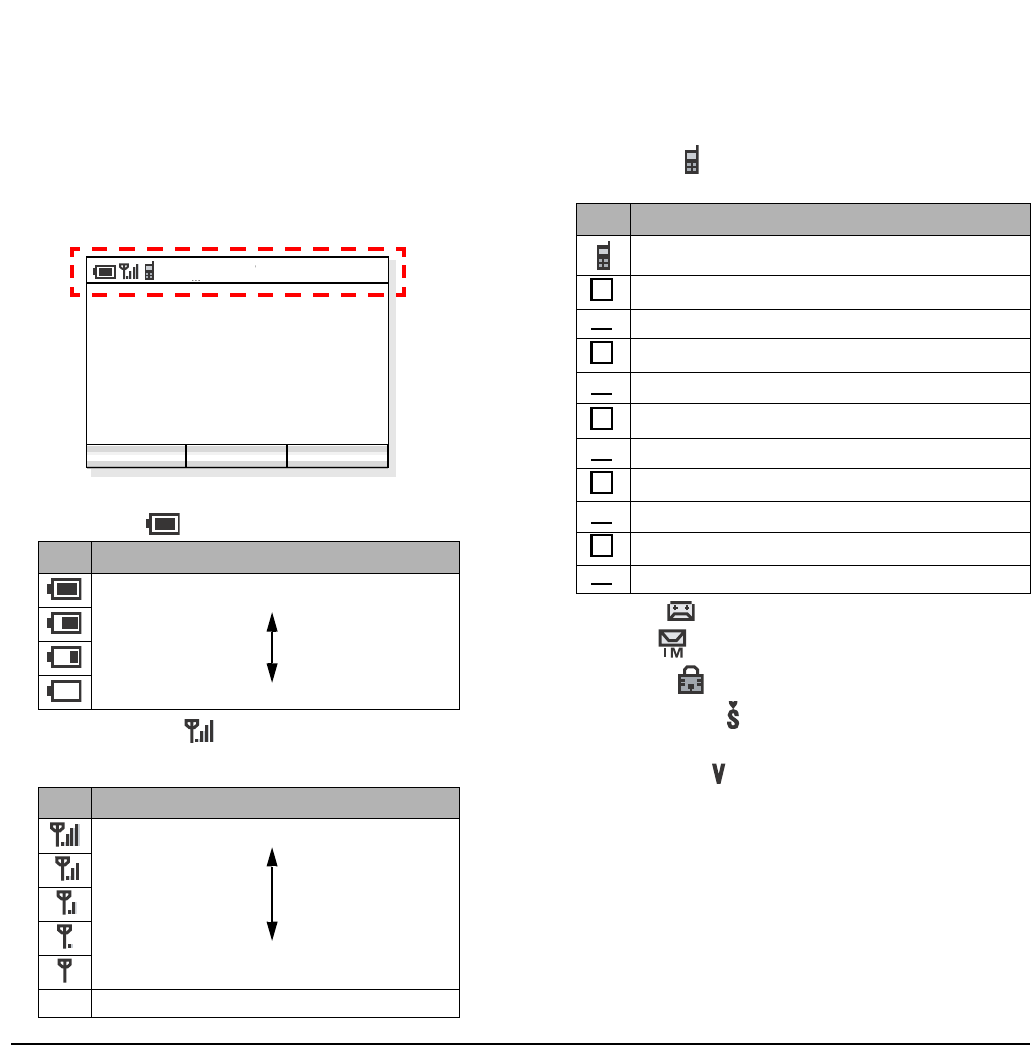
•ICONS
The following explains icons from left to right.
- Power icon ( ): indicates battery charge level.
- Antenna icon ( ): indicates the radio signal
strength received by the handset.
- VoIP icon ( ): indicates communication is avail-
able on your phone.
- VM icon ( ): indicates you have voice mail (s).
- IM icon ( ): indicates you have message (s).
- Lock icon ( ): indicates your handset is locked.
- Courtesy icon ( ): indicates your handset is to
courtesy mode.
- Vibrator icon ( ): indicates vibration is enabled.
icon Battery Charge Level
Full
Empty
icon Radio Signal Strength
Strong
Weak
No
ICON Out of service area
2006 Oct 01
PM 01:34
Profile1
PM 01:34
Func Profile
icon Meaning
SIP server registration is complete and VoIP communi-
cations are available.
SIP server registration has failed!
SIP server registration is being processed...
Static IP address has not been assigned!
Static IP address is being assigned...
IP address acquisition to DHCP server has failed!
Acquiring IP address to DHCP server....
802.1X authentication has failed!
802.1X authentication is being processed...
Association has failed!
connecting to establish association...
R
R
I
I
D
D
A
A
C
C
4
1.
• STANDBY MODE
The handset starts up in this mode after being powered
on. The handset displays the first screen similar to the
following.
• MAIN MENU
Press soft key when the phone is in standby
mode. The following main menu will be displayed.
The menu list attached in the end of this guide
shows all available items with the default value.
See “14.MENU LIST” for more information.
PM 01:34
Func Profile
2006 Oct 01
PM 01:34
Tokyo Office
Func
PM 01:34
OK Back
Menu
01. Call Log
02. Phone Book
03. Speed Dial
04. Setting
05. Device Info
06. Lock/Unlock
07. Presence
08. Short Message
09. Maintenance
TIP
01:AbcDefg
02:HigkLmn
03:OpqrStu
5
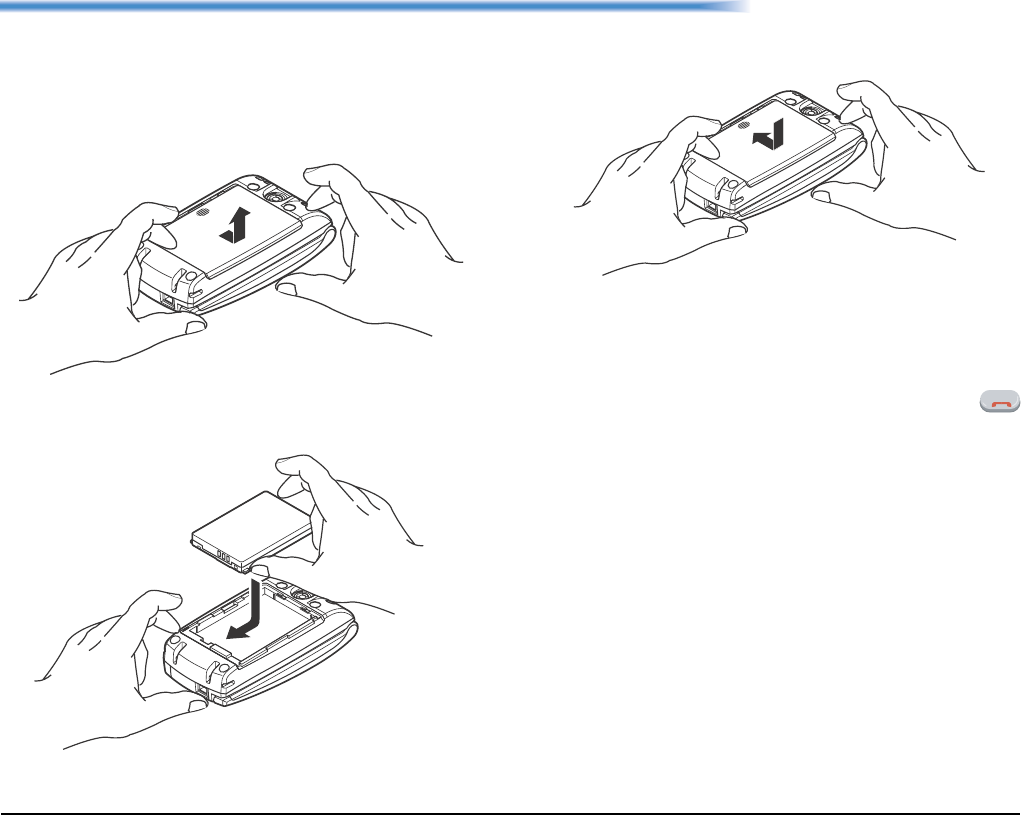
2. GETTING STARTED
• HOW TO INSERT THE BATTERY
Insert the battery into the unit as follows.
(1) Remove the rear cover from the phone.
(2) Place the battery into the unit so that the label may
face toward you.
(3) Attach the rear cover again.
• HOW TO REPLACE THE BATTERY
Replace the battery of the phone as follows.
(1) Turn off the phone by pressing and holding
key for 1 second or more.
(2) Remove the rear cover from the phone.
(3) Remove the battery.
(4) Insert the new battery into the unit so that the label
may face toward you.
(5) Attach the rear cover again.
POWER
6
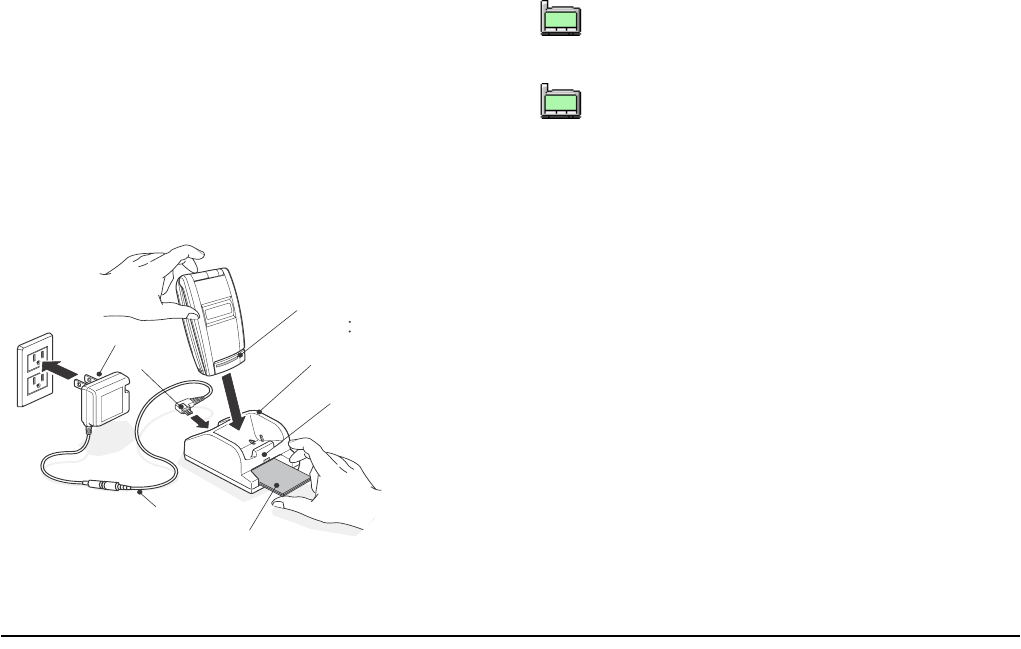
• HOW TO CHARGE THE BATTERY
Be sure to charge the battery when using the phone for
the first time. Use one of the following:
•Cradle
• PC via USB cable
• AC adapter (direct connection)
By using the Cradle:
The phone can be charged by using the cradle. You can
also charge the battery by inserting the battery pack
alone to the slot on the cradle. This is useful when you
have a spare battery.
(1) Insert the AC adapter plug into the jack in the
bottom of the cradle.
(2) Plug in the AC adapter to an appropriate outlet.
(3) Place the phone and/or the spare battery pack as
shown below. When placing a battery pack into the
slot, insert it so that the label may face downward.
Note: Face the label of the battery pack downward
when inserting the battery pack.
(4) Info LED lights red and the LED on the cradle also
lights red, indicating the battery is being charged.
(5) Info LED turns off when the phone battery is fully
charged.
(6) The LED on the cradle lights green when both the
phone battery and the spare battery are fully
charged if a spare battery is also placed on the
cradle. If not, the LED light green when the phone
battery is fully charged.
connector
Info LED
LED
spare battery (option)
AC Adapter
AC Adapter Cable
A
C outlet
cradle (Battery Charger)
used for: call indication
charger status
Used for indicating charge status.
An empty battery pack can be fully charged in
about three hours.
If any abnormality is found to the battery, the
LED on the cradle starts flashing. In this case,
please contact your network administrator.
TIP
01:AbcDefg
02:HigkLmn
03:OpqrStu
TIP
01:AbcDefg
02:HigkLmn
03:OpqrStu
7
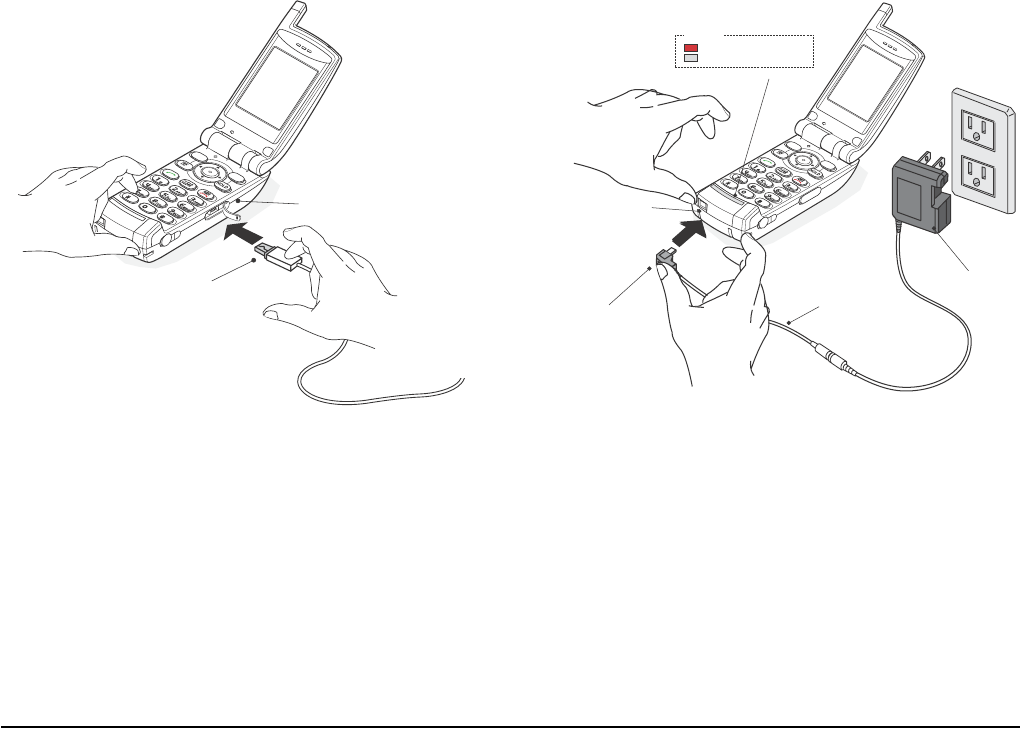
By using the USB Cable:
To charge the phone by using your PC via a USB cable,
do the following.
(1) Insert the USB jack into the USB connector on the
phone.
(2) Insert the other end of the cable to your PC.
By using the AC Adapter:
To charge the phone using the AC adapter do the
following.
(1) Insert the AC adapter to an appropriate AC outlet.
(2) Insert the AC jack to the AC adapter connector on
the phone.
USB jack
USB connector
AC Outlet
A
C Adapter Connector
AC Adapter
AC Adapter Cable
AC Jack
Info LED
: lights red (charging)
: goes off (charging is completed)

8
This page is for your notes.
9
3. BASIC OPERATION
• TO TURN ON THE PHONE
(STANDBY MODE)
- Press and hold key for 2 seconds or more. The
start screen appears and then the handset displays
the following initial screen.
- Make sure VoIP icon is displayed on the handset
as follows.
• TO TURN OFF THE PHONE
Press and hold key for 1 second or more. “Good
bye!” is displayed.
This initial screen is called standby mode in this
book.
POWER
2007 Oct 01
AM 09:27
Tokyo Office
AM 09:27
Func Profile
standby mode
Current Date
Current Time
Profile:
Missed Call:2
Message area:
indicates the number
of missed calls, unread
messages, battery
alarm.
currently applied profile
(up to 5 profiles available)
TIP
01:AbcDefg
02:HigkLmn
03:OpqrStu
AM 09:27
Vo I P ic o n
This initial screen is called standby mode in this
book.
VoIP icon indicates you can use the phone.
If one of the following icons appears instead of
VoIP, please contact the network administrator.
ICON MEANING
:Connection attempted has failed.
:Authentication has failed.
:DHCP has failed.
:IP address acquisition has failed.
:Registration has failed.
TIP
01:AbcDefg
02:HigkLmn
03:OpqrStu
TIP
01:AbcDefg
02:HigkLmn
03:OpqrStu
C
A
D
I
R
POWER
10
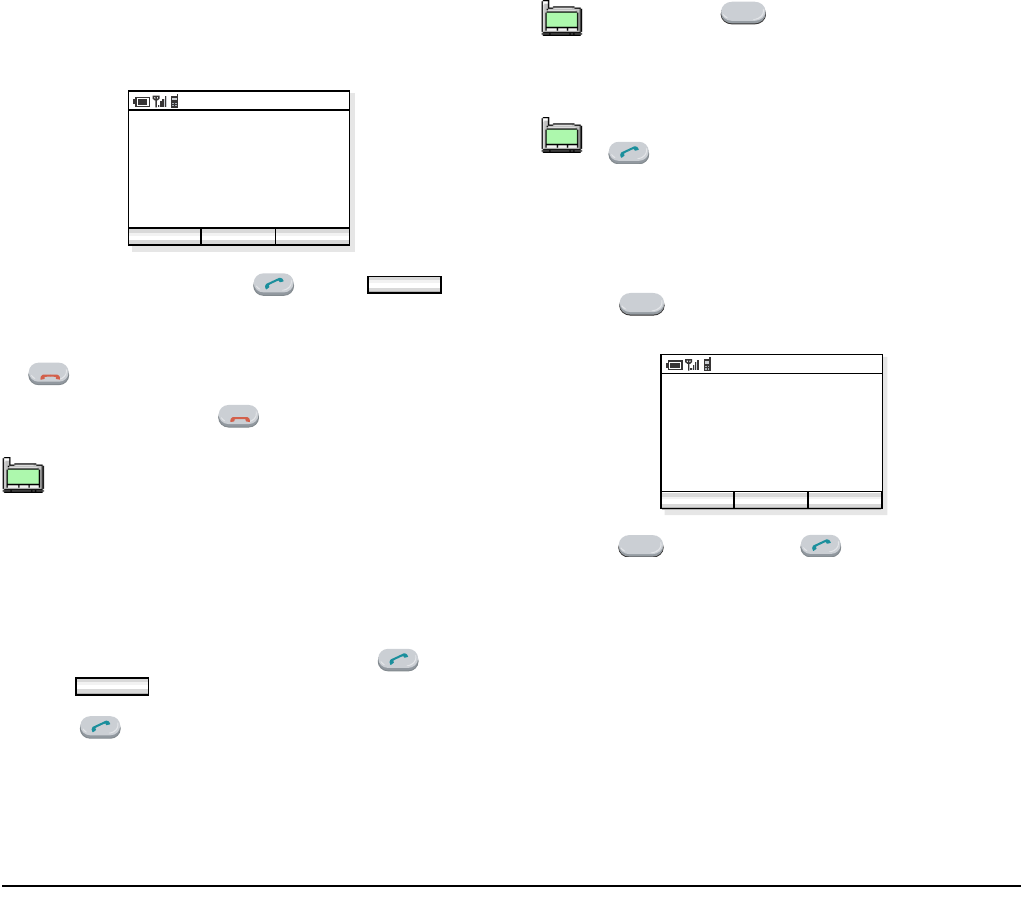
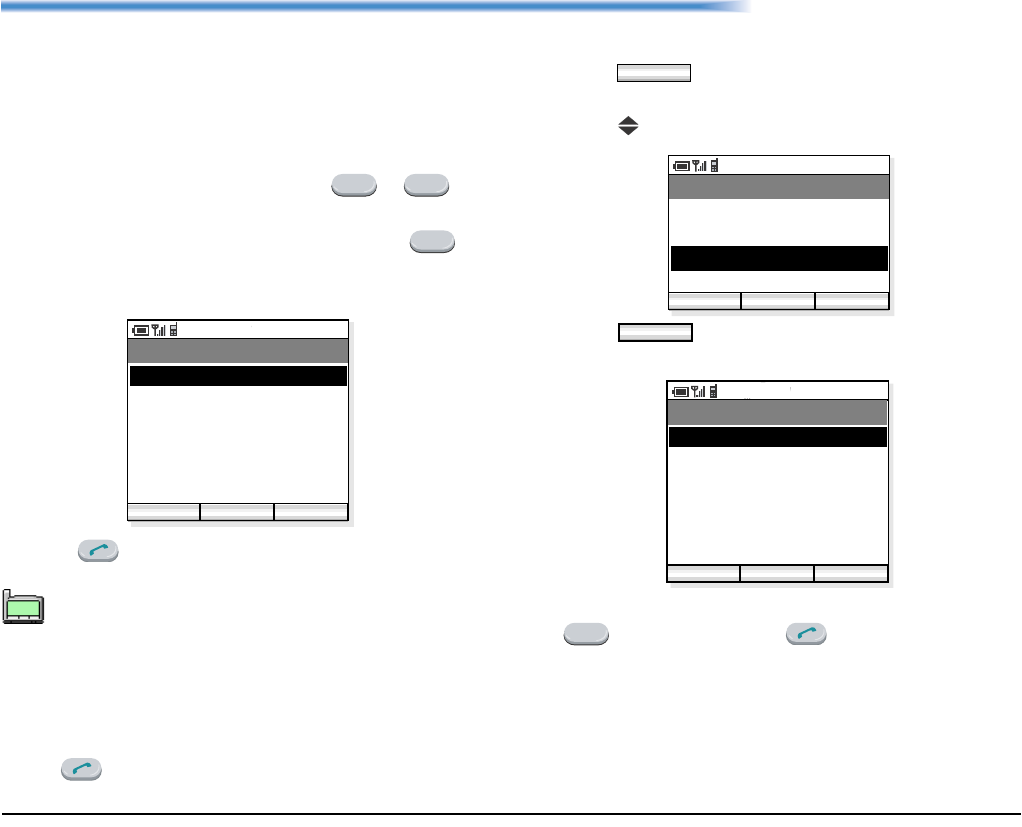
• TO ANSWER A CALL
When receiving an incoming call, the display
automatically changes to Incoming Call screen.
- To answer the call, press key or soft
key.
- To stop the ring without answering the call, press
key.
- To end the call, press key.
• TO MAKE A CALL
To make a phone call, do either of the following:
- Enter the phone number and then press key or
press soft key. (preset dialing)
- Press key and then enter the phone number.
(overlap dialing)
• TO PLACE A CALL ON HOLD
During an active call, you can hold the call.
- Press key to hold the line. The handset dis-
plays:
- Press key again or key to retrieve the
line.
When the calling party has been already regis-
tered in the Phone Book, the registered name
is displayed.
Incoming Call
5012
PM 02:58
Answer
Answer
POWER
POWER
TIP
01:AbcDefg
02:HigkLmn
03:OpqrStu
OK
By pressing key, you can delete the last
digit of the dialed number that is currently dis-
played on the phone when preset dialing is
used.
To make a call to a 1-digit station, first press
key and then dial the number.
TIP
01:AbcDefg
02:HigkLmn
03:OpqrStu
CLEAR
TIP
01:AbcDefg
02:HigkLmn
03:OpqrStu
HOLD
Hold OK
AM 02:58
Func End
00:01:12
HOLD
11
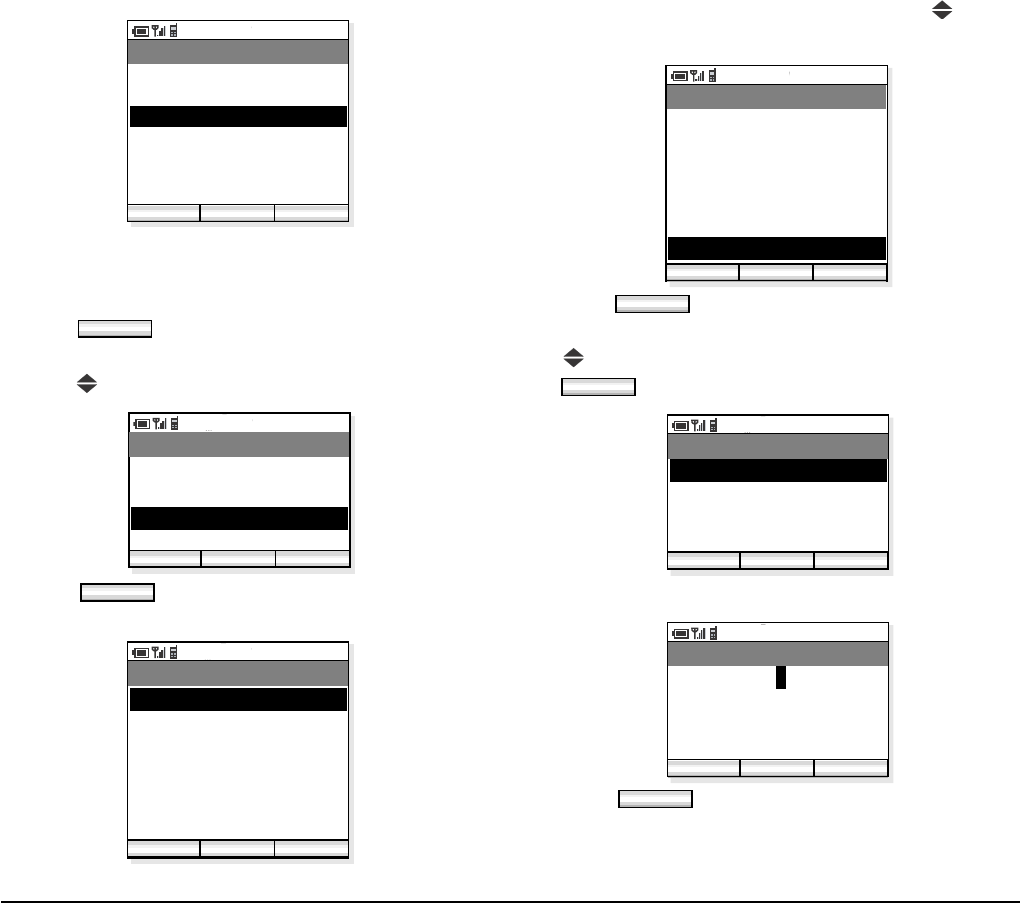
• TO TRANSFER A CALL
During an active call, you can transfer the call to other
phone.
- Press key during the call. The handset dis-
plays:
- After hearing Special Dial Tone, enter the phone
number to transfer the call.
- The called party answers the call, and then press
key.
or
- Press key before the called party answers.
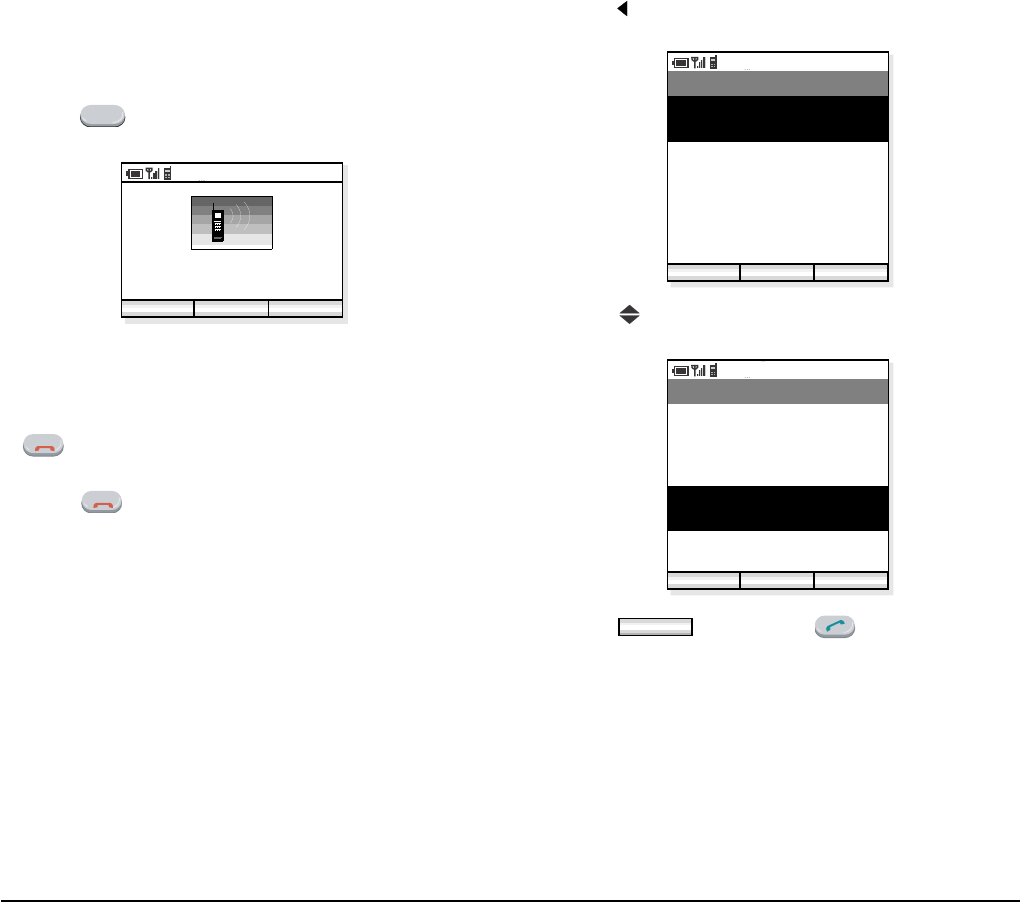
• TO REDIAL (LAST NUMBER
REDIAL)
You can make a call from the list of Outgoing Calls.
A maximum of the last 30 calls can be automatically
recorded.
- Press key in standby mode. The handset displays
the list of Outgoing Calls similar to the following.
- Press key to select a desired party you want to
redial.
- Press soft key or key to redial the
party.
TRF
AM 02:58
Func Back
POWER
POWER
AM 02:58
Dial Back
Outgoing Calls
01. Eric
Oct/23 PM 11:48:52
02. Pat
Oct/02 AM 07:32:11
03. John
Oct/01 PM 11:23:09
04. George
Oct/01 AM 10:17:42
Func
AM 02:58
Dial Back
Outgoing Calls
01. Eric
Oct/03 PM 11:48:52
02. Pat
Oct/02 AM 07:32:11
03. John
Oct/01 PM 11:23:09
04. George
Oct/01 AM 10:17:42
Func
Dial

12
• TO USE HEADSET
When a headset is inserted to the Headset connector,
the phone is in headset call mode.
- Connect a headset to the phone.
- When the phone receives a call, you can hear ring-
ing from the speaker. Press key to answer the
call. (When vibrator is on, it is also available.)
- You can talk using the microphone and ear phone of
the headset.
- Press key to end the call.
When the phone is in headset call mode, the
microphone and ear speaker will not work.
POWER
TIP
01:AbcDefg
02:HigkLmn
03:OpqrStu
13
4. FEATURES
This section explains how to use features on your
phone. Some of features, however, require the entry of
Access Code, which may differ depending on your
office. Please contact your network administrator as to
the information of access codes.
• TO USE CALL FORWARDING -
ALL CALLS
This feature automatically forward all incoming calls to
a predetermined phone. When this feature has been set
on your phone, all incoming calls will be forwarded to
the destination regardless of the busy or idle status of
your phone.
To Set:
- Enter CALL FORWARDING - ALL CALLS (SET)
access code.
- Press key and then hear Special Dial Tone.
- Dial a phone number to which you want to forward
incoming calls and then receive Service Set Tone
(This feature has been set).
- Press key.
To Cancel:
- Enter CALL FORWARDING - ALL CALLS
(CANCEL) access code.
- Press key and then receive Service Set Tone
(The feature has been cancelled).
• TO USE CALL FORWARDING -
DON’T ANSWER
This feature automatically forward an incoming call to
a predetermined phone only when the call is not
answered within a predetermined period time (i.e. 30
seconds).
To Set:
- Enter CALL FORWARDING - DON’T ANSWER
(SET) access code.
- Press key and then hear Special Dial Tone.
- Dial a phone number to which you want to forward
incoming calls and then receive Service Set Tone
(This feature has been set).
- Press key.
To Cancel:
- Enter CALL FORWARDING - DON’T ANSWER
(CANCEL) access code.
- Press key and then receive Service Set Tone
(The feature has been cancelled).
POWER
Cancel this feature when it is not required. If
not, all incoming calls may be forwarded to the
destination until you cancel this feature.
TIP
01:AbcDefg
02:HigkLmn
03:OpqrStu
POWER

14
• TO USE CALL FORWARDING - NO
RESPONSE
This feature automatically forwards an incoming call to
a predetermined destination if the call cannot reach
your phone for some reasons, such as out of service
area or power off.
To Set:
- Enter CALL FORWARDING - NO RESPONSE
(SET) access code.
- Press key and then hear Special Dial Tone.
- Dial a phone number to which you want to forward
incoming calls and then receive Service Set Tone
(This feature has been set).
- Press key.
To Cancel:
- Enter CALL FORWARDING - NO RESPONSE
(CANCEL) access code.
- Press key and then receive Service Set Tone
(The feature has been cancelled).
• TO USE CALL FORWARDING -
BUSY
This feature automatically forward an incoming call to
a predetermined phone only when the incoming calls
encounter busy status.
To Set:
- Enter CALL FORWARDING - BUSY (SET) access
code.
- Press key and then hear Special Dial Tone.
- Dial a phone number to which you want to forward
incoming calls and then receive Service Set Tone
(This feature has been set).
- Press key.
To Cancel:
- Enter CALL FORWARDING - BUSY (CANCEL)
access code.
- Press key and then receive Service Set Tone
(The feature has been cancelled).
• TO USE CALL PICKUP
When a predetermined group (Call Pickup Group)
receive an incoming call, any member of the group can
pick up the call from his/her phone.
- When a phone in the call pickup group receives an
incoming call, the phone starts ringing.
- Enter CALL PICKUP access code and then press
key while the phone is ringing.
- The call is picked up and then connection is estab-
lished.
POWER
POWER

15
• TO USE CALL PARK
You can park the ongoing call and replace the handset.
The opposite party is placed in hold. You can retrieve
the held call from the original phone or other phone by
using access code.
To Park a Call:
- Press key during a call in progress.
- Enter CALL PARK access code and the receive Ser-
vice Set Tone.
- Press key.
To Retrieve the Call from the Original Phone
- Enter CALL PARK - LOCAL RETRIEVAL access
code and then press key.
To Retrieve the Call from Other Phone:
- Enter CALL PARK - REMOTE RETRIEVAL
access code (ex. 11) and the station number of the
original phone (ex. 5111) in succession (ex. 11 +
5111).
- Press key and then connection is established.
• TO USE CALL BACK
You can set CALL BACK if the attempted call
encounters a busy condition.
- Press key and then dial CALL BACK access
code when the called party is busy.
- Receive Service Set Tone and then press key.
(Please wait a while until the called party becomes
idle)
- When the called party becomes idle, your phone
rings.
- Press key and then receive Ring Back Tone
(The opposite party is ringing).
- Connection is established when the opposite party
answers.
• TO USE CALL WAITING
This feature allows the phone user who has an ongoing
call to receive a second incoming call.
To Activate CALL WAITING - ORIGINATING:
- Dial a phone number - receive Busy Tone.
- Press key and then dial CALL WAITING
access code.
- Receive Special Ring Back Tone.
- CALL WAITING tone is sent to the busy station.
To Answer the Waiting Call
- CALL WAITING TONE is heard.
- Press key and then the Waiting Call is auto-
matically connected by placing the opposite party in
hold.
- By pressing key you can switch the call
between the original party and the new party.
POWER
POWER
16
• TO USE CONFERENCE
You can establish a three-way call.
- Press key during a call in progress and then
receive Special Dial Tone. (The opposite party is
placed in hold)
- Dial a phone number and then receive Ring Back
Tone.
- When the called party answers, press key.
- Three-way conference is established.
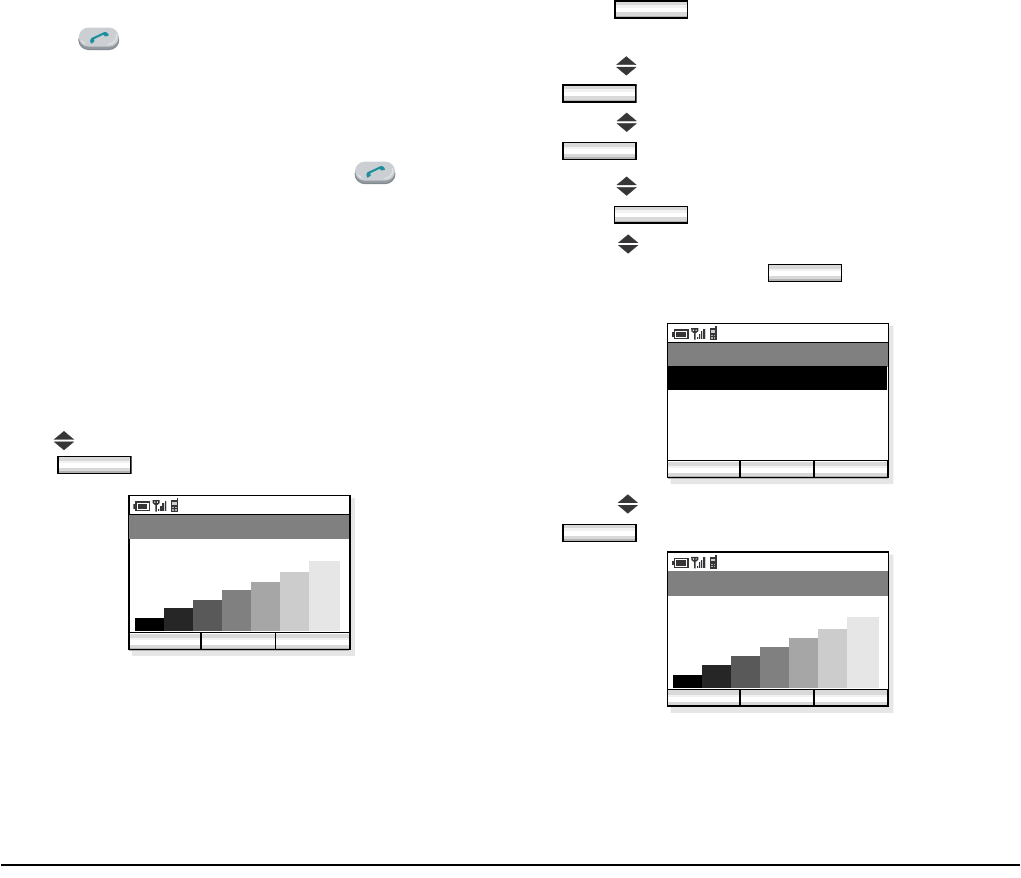
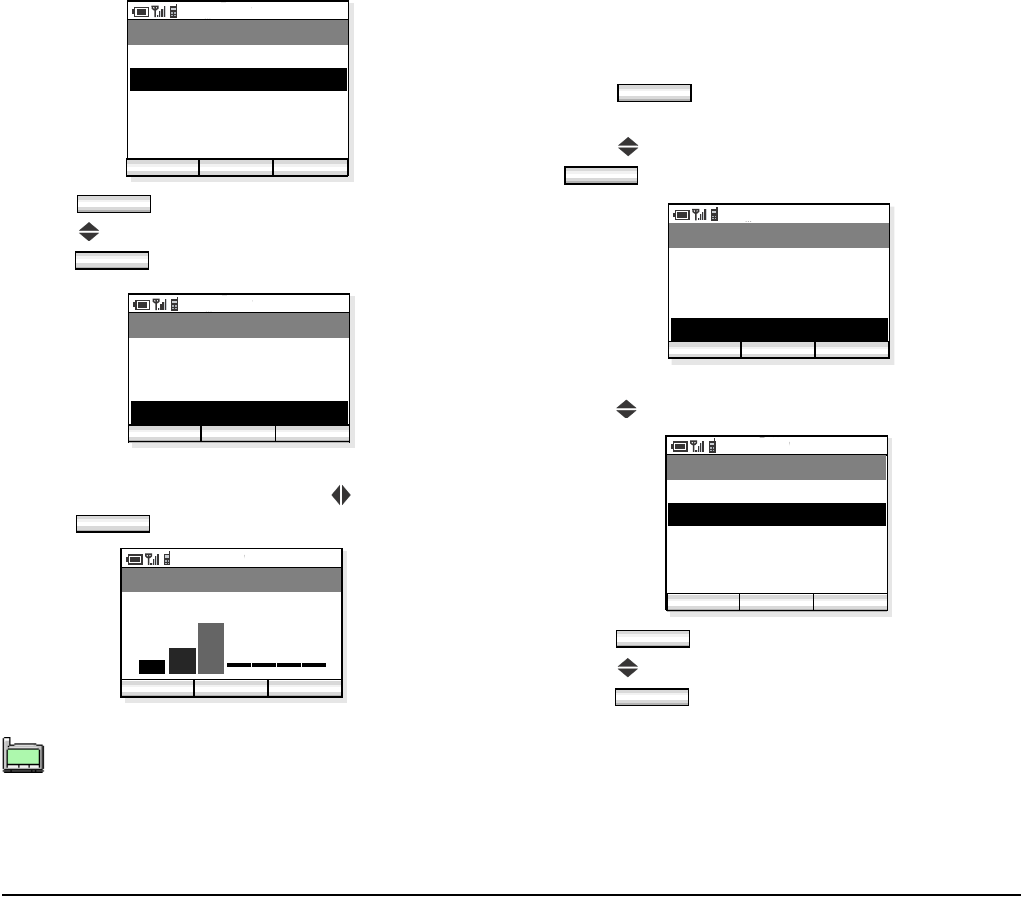
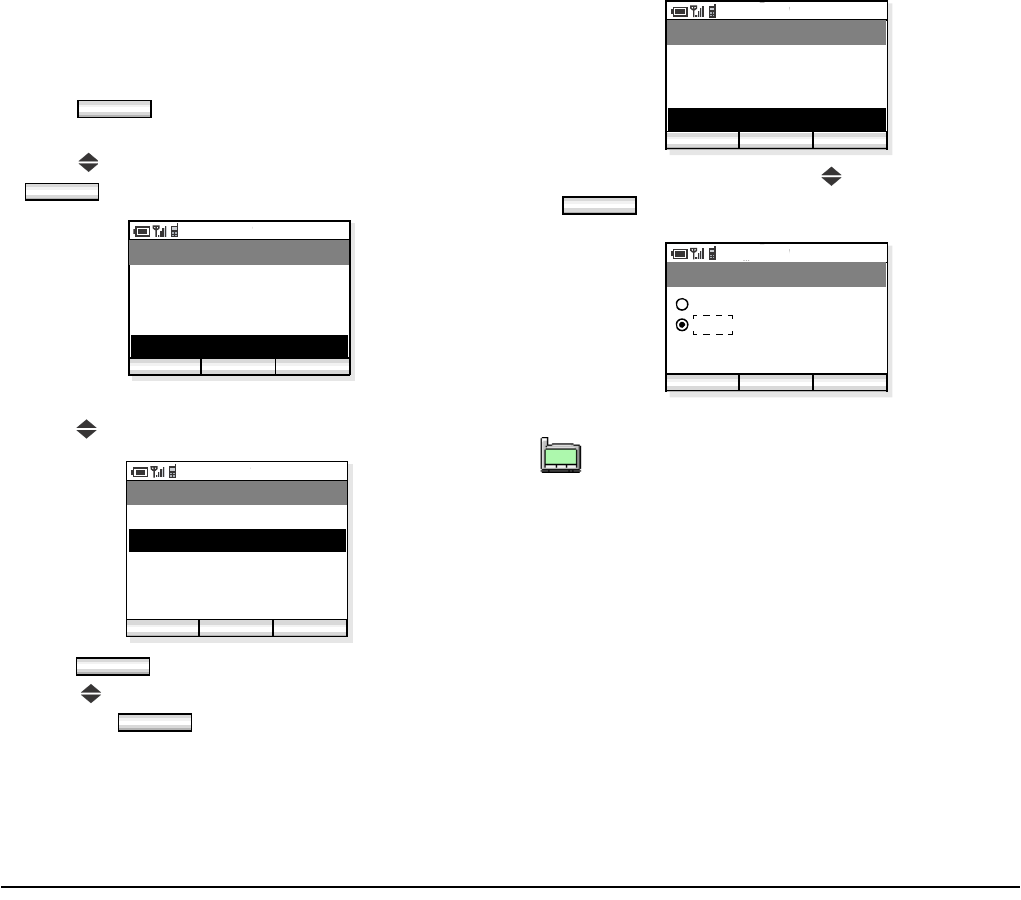
• TO ADJUST CALL VOLUME
You can increase or decrease the receiver volume in
standby mode or during a call. The volume can be set in
seven steps (Level 1[min] ↔ Level 7 [max]). The
factory value is Level 5.
During a Call:
Press key to select an appropriate volume and then
press soft key while talking on the handset.
In Standby Mode:
- Press soft key in standby mode.
The handset displays the main menu.
- Press key to select “04. Setting” and then press
soft key.
- Press key to select “02. Sounds” and then press
soft key.
- Press key to select “06. Call Volume” and then
press soft key.
- Press key to select an item you want to adjust
volume and then press soft key. In the fol-
lowing example, Handset is selected.
- Press key to adjust the volume and then press
soft key.
OK
PM 02:58
OK Back
Receive sound
Func
OK
OK
OK
OK
PM 02:58
OK Back
Call Volume
02. Headset
01. Handset
OK
PM 02:58
OK Back
Handset

17
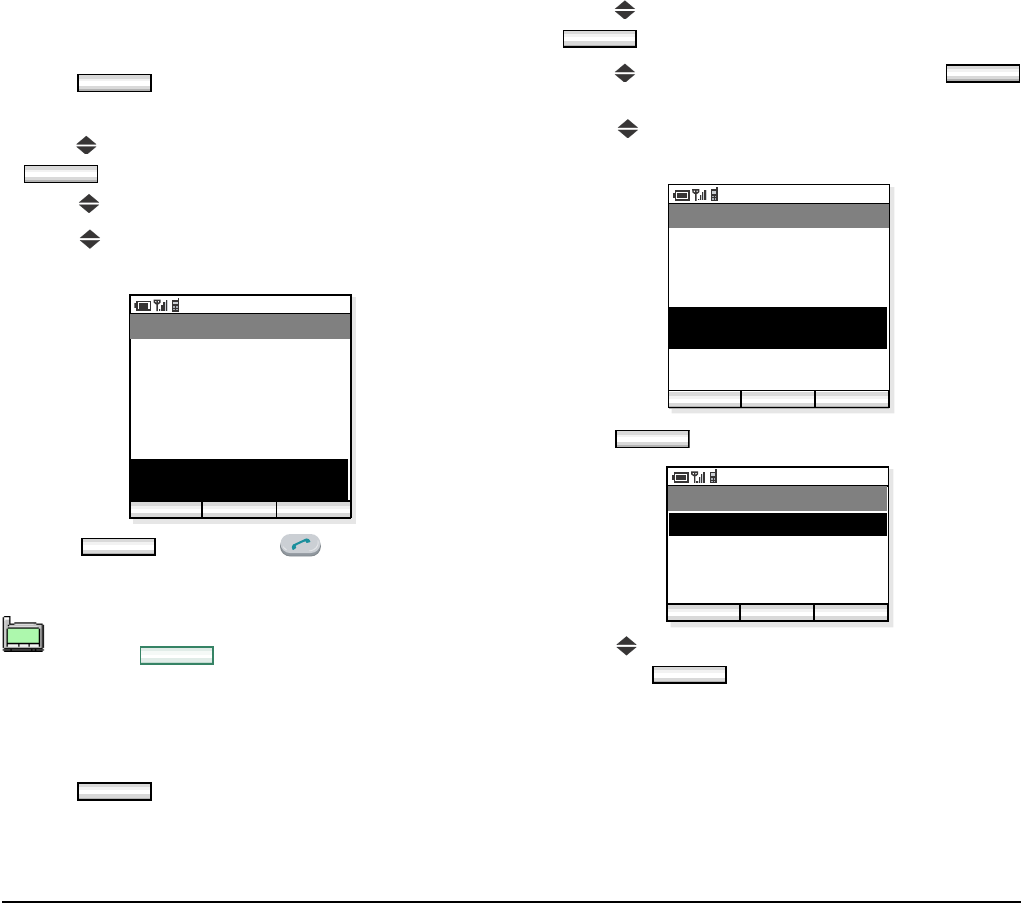
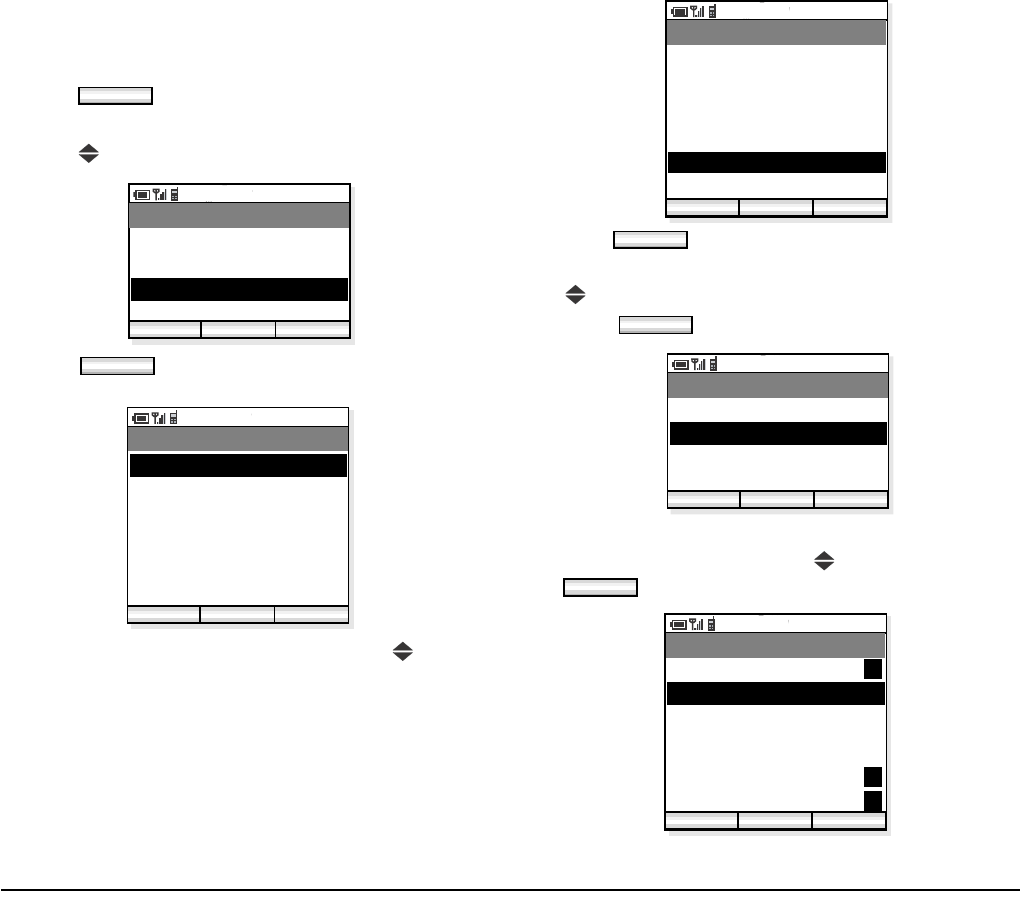
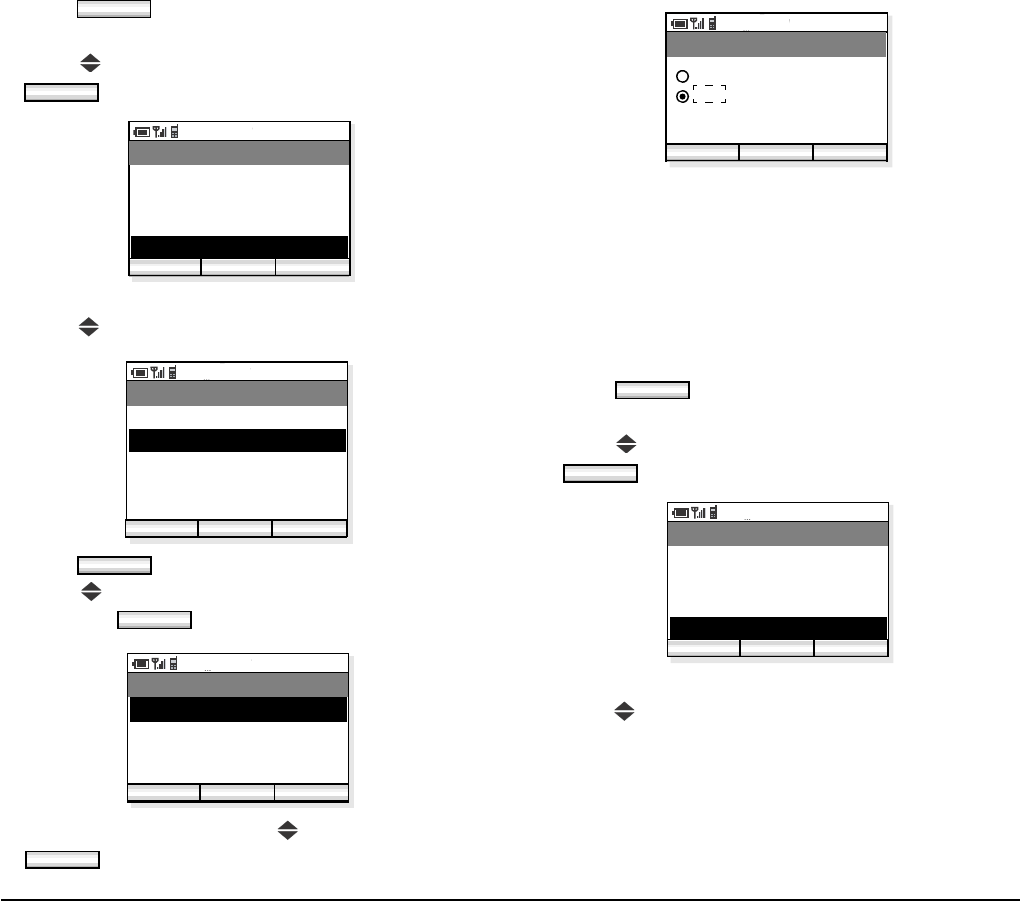
5. CALL LOG
The handset can record recent call log in the following
three lists up to 30 records for each list. You can open
each list from the main menu or by pressing the
associated key in standby mode.
• Outgoing Calls (Press key in standby mode.)
• Incoming Calls (Press key in standby mode.)
• Missed Calls (Press key in standby mode.)
Outgoing Calls show a list of Dialed Numbers and
Incoming Calls show that of Received Calls. You can
make a call from the list and also add a call log to Phone
Book as required.
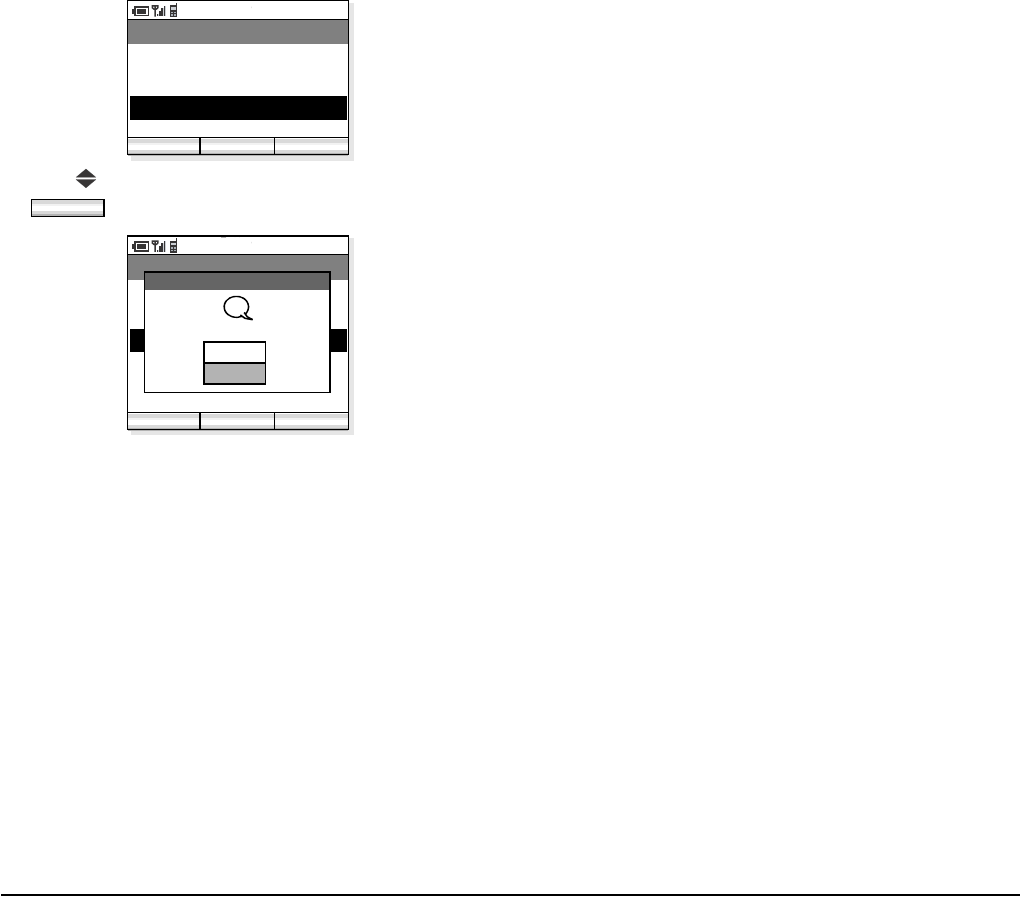
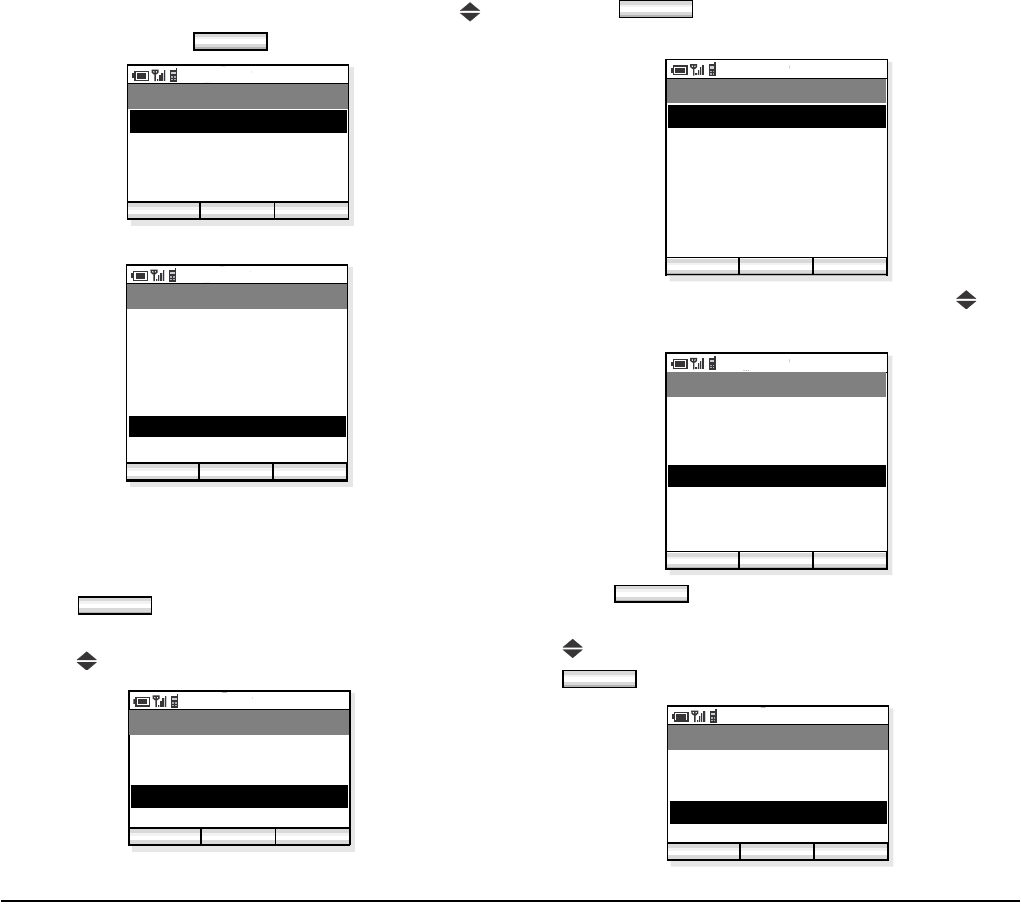
•TO VIEW CALL LOG
- Press soft key in standby mode to display
the main menu.
- Press key to select “01. Call Log” and then press
soft key. The handset displays the follow-
ing.
By pressing or key while displaying a call
log list, you can scroll the list between ‘Outgo-
ing Calls’ ‘Incoming Calls’ ‘Missed
Calls.’
CLEAR
HOLD
TRF
POWER Missed Calls
Incoming Calls
Outgoing Calls
2006
Oct 01
PM
01:34
Tokyo Office
PM 01:34
Func Profile
How to Open Call Log
TIP
01:AbcDefg
02:HigkLmn
03:OpqrStu
Incoming calls without Calling Party Number
cannot be recorded in ‘Incoming Calls’ or
‘Missed Calls’ lists.
TIP
01:AbcDefg
02:HigkLmn
03:OpqrStu
Func
PM 02:58
OK Back
Menu
02. Phone Book
03. Speed Dial
01. Call Log
04. Setting
OK
PM 02:58
OK Back
Call Log
02. Incoming Calls
03. Missed Calls
01. Outgoing Calls

18
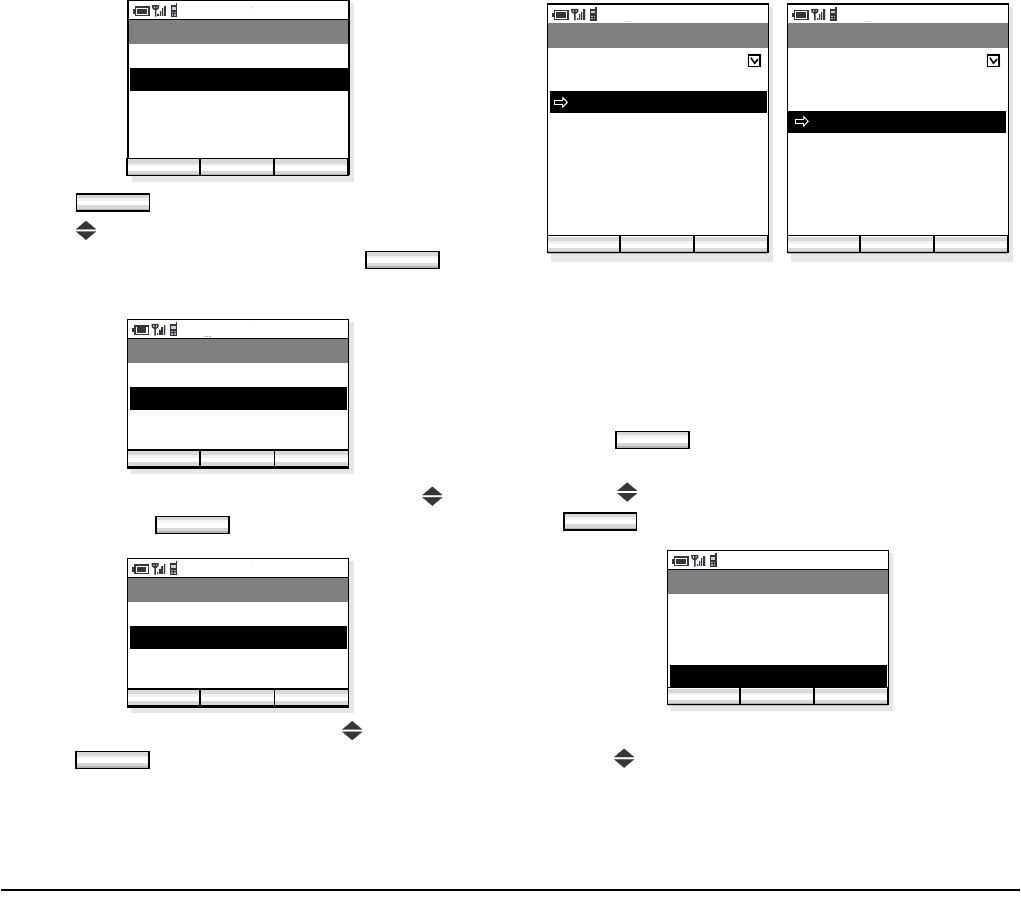
- Press key to select a log you want to view on the
list and then press soft key.
- The handset displays the following when “02.
Incoming Calls” is selected.
OK
PM 02:58
Dial Back
Incoming Calls
Oct/03 PM 11:48:52
02. Patty
01. John
Oct/02 AM 07:32:11
03. 981234452
Oct/01 PM 11:23:09
04. Mike
Oct/01 AM 10:17:42
Func
19
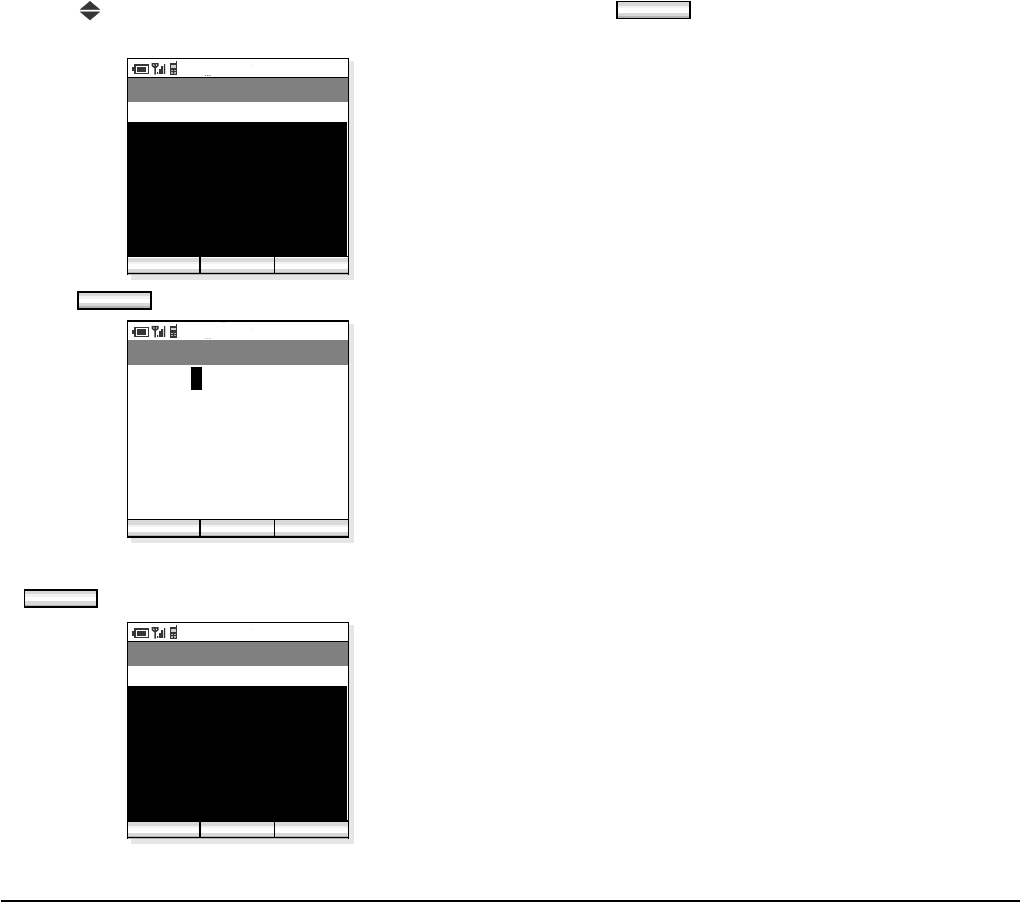
• TO MAKE A CALL FROM CALL
LOG
- Press soft key in standby mode to display
the main menu.
- Press key to select “01. Call Log” and then press
soft key.
- Press key to select a log you want to view.
- Press key to select a desired party you want to
make a call.
- Press soft key or key to make the
call.
• TO ADD PHONE NUMBER TO
PHONE BOOK
- Press soft key in standby mode to display
the main menu.
- Press key to select “01. Call Log” and then press
soft key.
- Press key to select a log and then press
soft key.
- Press key to select a party you want to make a
call.
- Press soft key.
- Press key to select “01. Phone Book Entry”
and press soft key.
If the phone number has not been registered to
the log, soft key will not be appeared.
Func
OK
PM 02:58
Dial Back
Incoming Calls
Oct/03 PM 11:48:52
02. Patty
01. John
Oct/02 AM 07:32:11
03. 981234452
Oct/01 PM 11:23:09
04. Mike
Oct/01 AM 10:17:42
Func
Dial
TIP
01:AbcDefg
02:HigkLmn
03:OpqrStu
Dial
Func
OK
OK
PM 02:58
Dial Back
Incoming Calls
Oct/03 PM11:48:52
02. Patty
01. John
Oct/02 AM 07:32:11
03. 981234452
Oct/01 PM 11:23:09
04. Mike
Oct/01 AM 10:17:42
Func
Func
PM 02:58
OK Back
Menu
02. Delete
03. Delete All
01. Phone Book Entry
OK
20
- Press key to select an item you want to edit and
then press soft key as required. In this
example, Name and Reading will be edited.
- Edit the data in edit display.
- Press soft key and then the display returns
to the previous one.
- Press soft key to save the data to Phone
Book. The display returns to the previous one.
PM 02:58
Edit Back
Phone Book
02. Reading
03. 981234452
01. Name
04. Mobile
05. Other
06. Note
07. Group 1
08. Select Presence
Save
Edit
PM 02:58
Edit Back
Phone Book
02. Reading
03. 981234452
01. Name
04. Mobile
05. Other
06. Note
07. Group 1
08. Select Presence
Save
PM 02:58
OK Func
Name
Ken
3/60
aAbB
Name information is minimum requirement to
save the data.
OK
PM 02:58
Edit Back
Phone Book
02. Ken
03. 981234452
01. Ken
04. Mobile
05. Other
06. Note
07. Group 1
08. Select Presence
Save
Save
TIP
01:AbcDefg
02:HigkLmn
03:OpqrStu
PM 02:58
Dial Back
Incoming Calls
Oct/03 PM 11:48:52
02. Patty
01. John
Oct/02 AM 07:32:11
03. Ken
Oct/01 PM 11:23:09
04. Mike
Oct/01 AM 10:17:42
Func
21
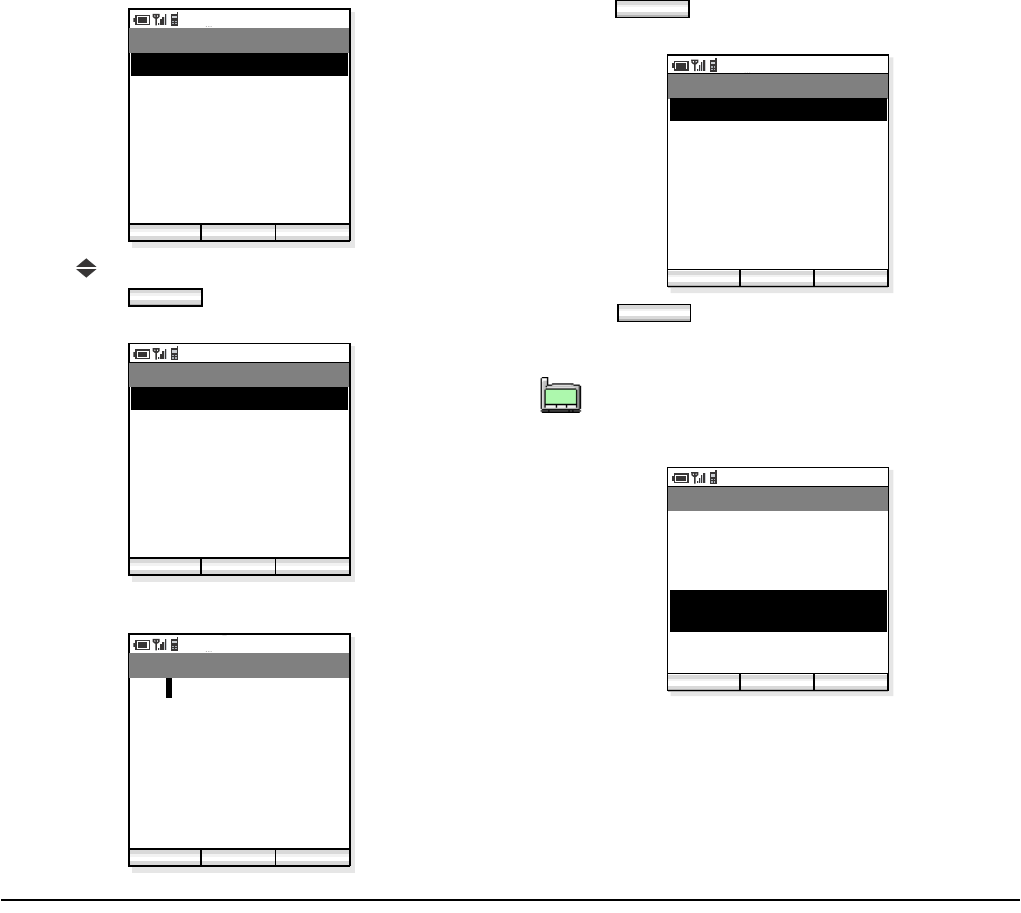
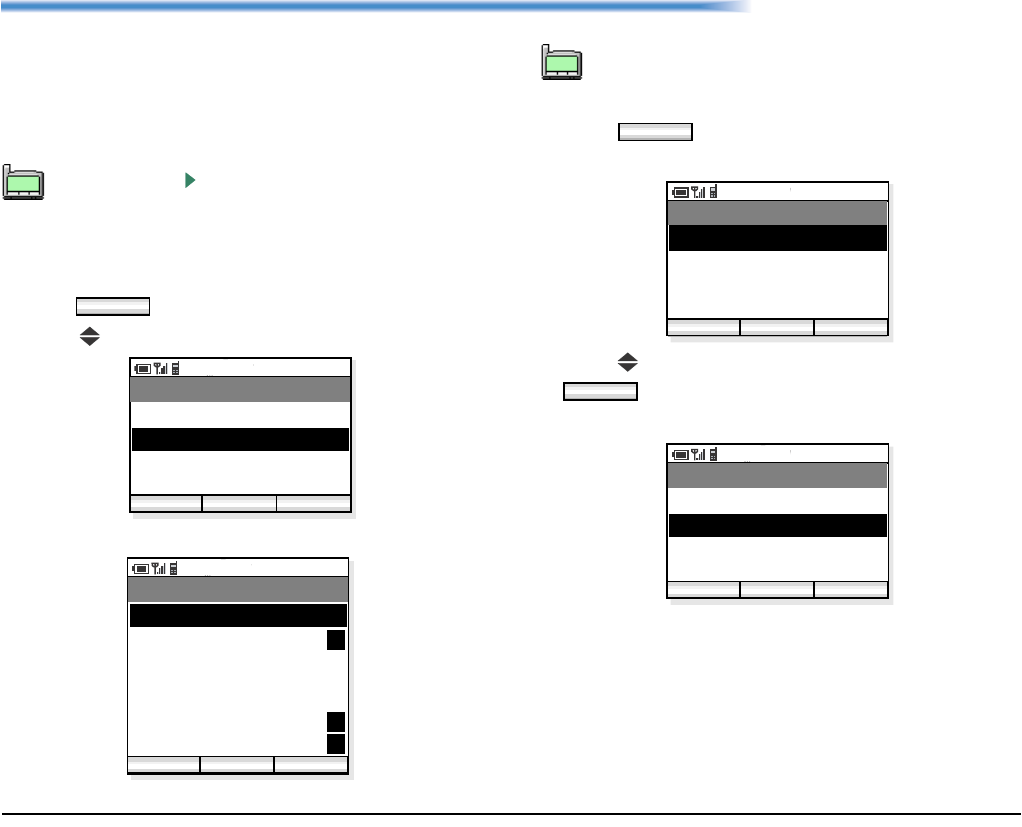
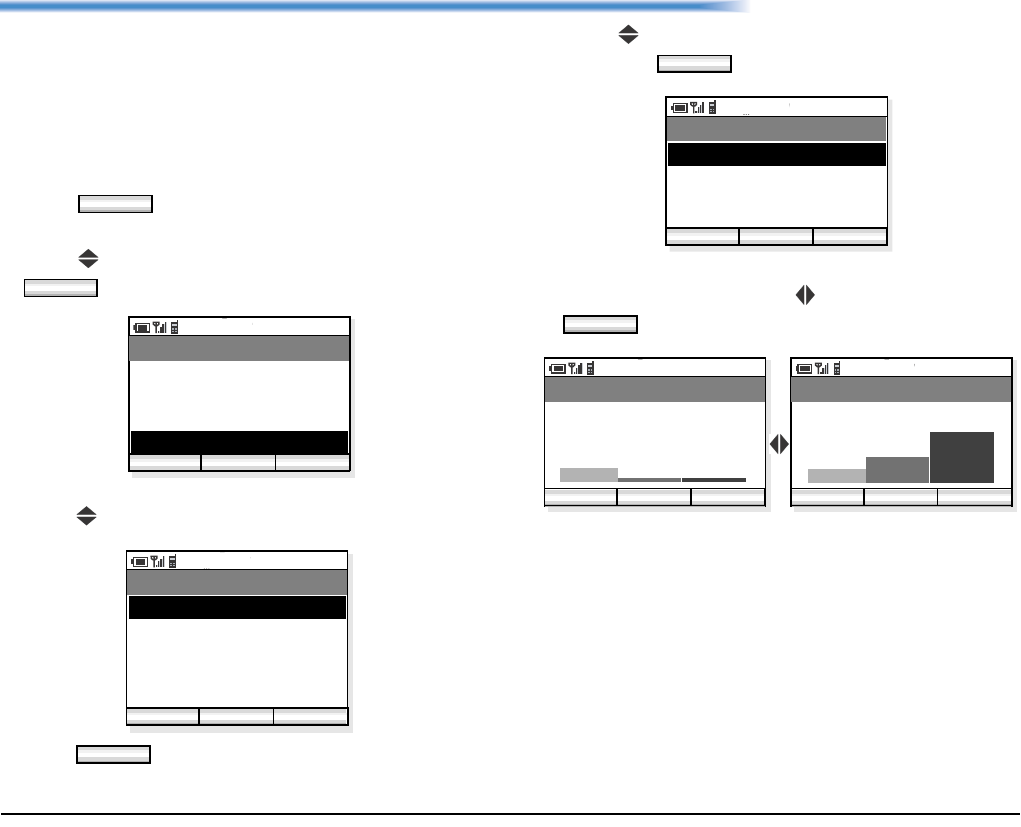
• TO DELETE A CALL LOG
- Press soft key in standby mode to display
the main menu.
- Press key to select “01. Call Log” and then press
soft key.
- Press key to select a log you want to view and
then press soft key.
- Press key to select a record you want to delete
and then press soft key.
- Press key to select “02. Delete” and then press
soft key.
- Press key to select “Yes” and then press
soft key.
• TO DELETE ALL CALL LOGS
- Press soft key in standby mode to display
the main menu.
- Press key to select “01. Call Log” and then press
soft key.
- Press key to select a log you want to delete
soft key. In this example Incoming Calls is
selected.
- Press key.
- Press key to select “03. Delete All” and then
press soft key.
Func
OK
OK
Func
PM 02:58
Dial Back
Incoming Calls
Oct/03 PM 11:48:52
02. Patty
01. John
Oct/02 AM 07:32:11
03. No ID
Oct/01 PM 11:23:09
04. Mike
Oct/01 AM 10:17:42
Func
delete
OK
PM 02:58
OK Back
Menu
02. Delete
01. Phone Book Entry
03. Delete All
OK
PM 02:58
OK Back
Menu
02. Delete
01. Phone Book Entry
03. Delete all
Delete Call Log
Delete this entry?
?
Yes
No
Func
OK
OK
PM 02:58
Dial Back
Incoming Calls
Oct/03 PM 11:48:52
02. Patty
01. John
Oct/02 AM 07:32:11
03. No ID
Oct/01 PM 11:23:09
04. Mike
Oct/01 AM 10:17:42
Func
delete all
Func
OK
22
- Press key to select “Yes” and then press
soft key to delete all.
PM 02:58
OK Back
Menu
02. Delete
01. Phone Book Entry
03. Delete All
OK
PM 02:58
OK Back
Menu
02. Delete
01. Phone Book Entry
03. Delete All
Delete Call Log
Delete all entries?
?
Yes
No
23
6. PHONE BOOK
Phone Book can register up to 500 records, 400 for
users, and 100 for administrator. The 100 records
cannot be edited by the user. The user can only view
these records. The remaining 400 entries are available
for the user to view/edit/delete.
• TO VIEW PHONE BOOK
- Press soft key in standby mode.
- Press key to select “02. Phone Book”.
- The handset displays the following.
- Press soft key. The following menu dis-
plays.
- Press key to select “01. Search” and then press
soft key. The handset displays Search
menu.
By pressing key in standby mode, you can
directly view Phone Book.
TIP
01:AbcDefg
02:HigkLmn
03:OpqrStu
Func
PM 02:58
OK Back
Menu
02. Phone Book
03. Speed Dial
01. Call Log
04. Setting
PM 02:58
OK Find
Phone Book
002. Aaron
003. Julia
001. Ben
Func
004. Paul
005. Rachel
006. James
007. Hannah
P
P
P
P
A letter P is added when the person is a target
of presence feature.
TIP
01:AbcDefg
02:HigkLmn
03:OpqrStu
Func
PM 02:58
OK Back
Menu
02. Edit Group Name
03. Add New Entry
01. Search
04. Delete
OK
PM 02:58
OK Back
Search
02. Phone Number
03. Group Name
01. Name
24
To Search by Name:
- Press key to select “01. Name” and then press
soft key.
- Enter a name or letter you want to search in the
Phone Book and then press soft key.
- Searched items will be displayed.
To Search by Phone Number
- Press key to select “02. Phone Number” and
then press soft key.
- Enter a phone number you want to search in the
Phone Book and then press soft key.
- Searched items whose phone number starts from
“98723” will be displayed.
To Search by Group Name
- Press key to select “03. Group Name” and then
press soft key.
- Press key to move between Group 1 to Group 10.
OK
OK
PM 02:58
OK Func
Name
John
4/100
aAbB
PM 02:58
OK Find
Phone Book
002. John Lennon
003. John Yamazaki
001. John Smith P
Func
P
OK
OK
PM 02:58
OK Back
Phone Number
98723
123
5/32
PM 02:58
OK Find
Phone Book
002. Jim Baker
003. Nancy Williams
001. Tom Rolsky P
Func
P
P
OK
PM 02:58
OK Find
Group 1
003. Jim Baker
004. Nancy Williams
002. Jack Hammer
001. Tom Rolsky P
PM 02:58
OK Back
Group 10
003. Antonio Lopez
004. Jose Nakano
002. Anny
001. Jeff P
Group 1 Group 10
005. Julia 005. Alan
Func Func
P
P
P
P
P
25
• TO EDIT GROUP NAME
Default Group Name such as Group 1, can be edited as
required.
- Press soft key in standby mode to display
the main menu.
- Press key to select “02. Phone Book” and then
press soft key. The handset displays the
following.
- Press soft key. The following menu
displays.
- Press key to select “02. Edit Group Name” and
then press soft key. The handset displays
Edit Group Name menu.
- Press key to select a group you want to edit and
then press soft key. The handset displays
Edit screen.
- Delete the original strings by using key, edit
the group name and then press soft key.
- The edited group name displays.
Func
OK
PM 02:58
OK Find
Phone Book
002. Aaron
003. Julia
001. Ben
Func
004. Paul
005. Rachel
006. James
007. Hannah
P
P
P
P
Func
PM 02:58
OK Back
Menu
02. Edit Group Name
03. Add New Entry
01. Search
04. Delete
OK
PM 02:58
OK Back
Edit Group Name
02. Group 2
03. Group 3
01. Group 1
04. Group 4
OK
CLEAR
OK
PM 02:58
OK Find
Edit Group Name
Personnel Dept.
aAbB
15/16
PM 02:58
OK Back
Edit Group Name
02. Group 2
03. Group 3
01. Personnel Dept.
04. Group 4

26
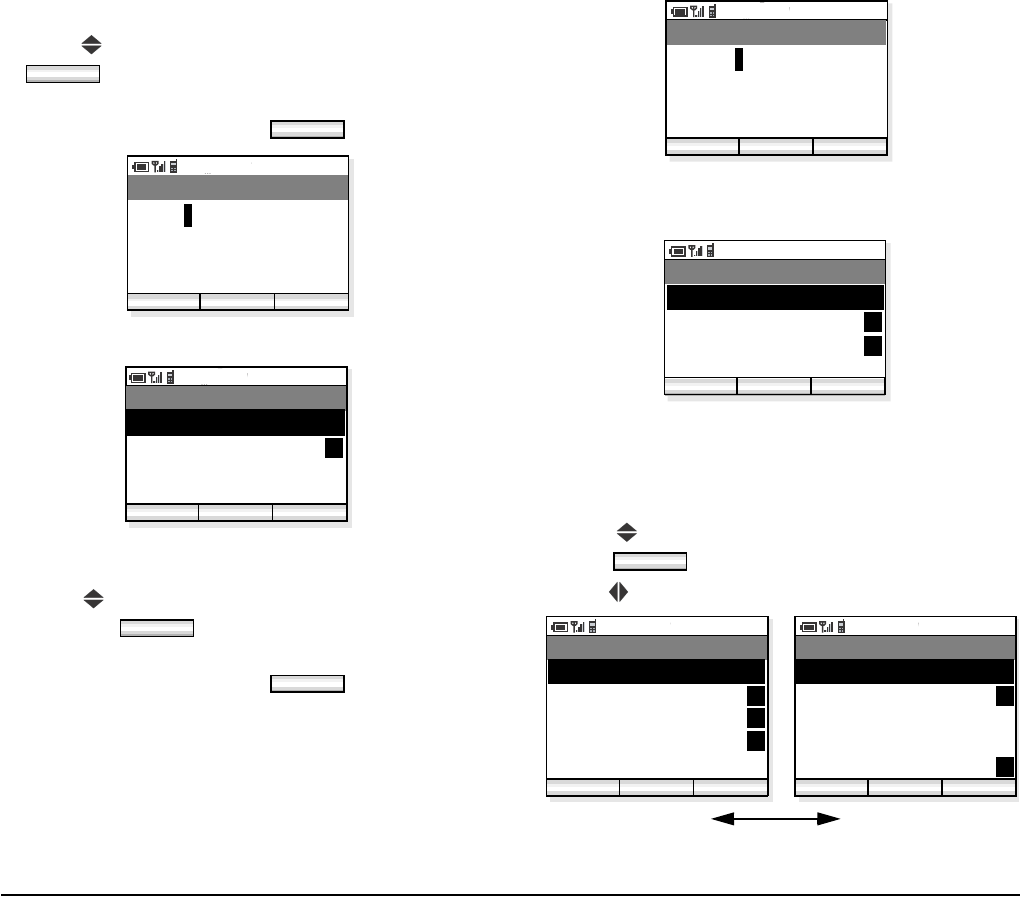
• TO ADD A NEW ENTRY
You can add new entry to the Phone Book.
- Press soft key in standby mode to display
the main menu.
- Press key to select “02. Phone Book” on the
main menu and then press soft key. The
handset displays the following.
- Press soft key to display the following
menu.
- Press key to select “03. Add New Entry” and
then press soft key. The handset displays
Edit Group Name menu.
- Press key to select an item to be edited and then
press soft key.
- Edit the selected item. In the following example,
Name data is edited.
- Press soft key to write the data. The dis-
play returns to the previous screen.
Func
OK
PM 02:58
OK Find
Phone Book
002. Aaron
003. Julia
001. Ben
Func
004. Paul
005. Rachel
006. James
007. Hannah
P
P
P
P
Func
PM 02:58
OK Back
Menu
02. Edit Group Name
03. Add New Entry
01. Search
04. Delete
Name information is minimum requirement to
save the data.
OK
PM 02:58
Edit Back
Phone Book
02. Reading
03. Work
01. Name
04. Mobile
05. Other
06. Note
07. Group 1
08. Select Presence
Save
Edit
TIP
01:AbcDefg
02:HigkLmn
03:OpqrStu
PM 02:58
OK Func
Name
Donald E.
aAbB
9/60
OK
27
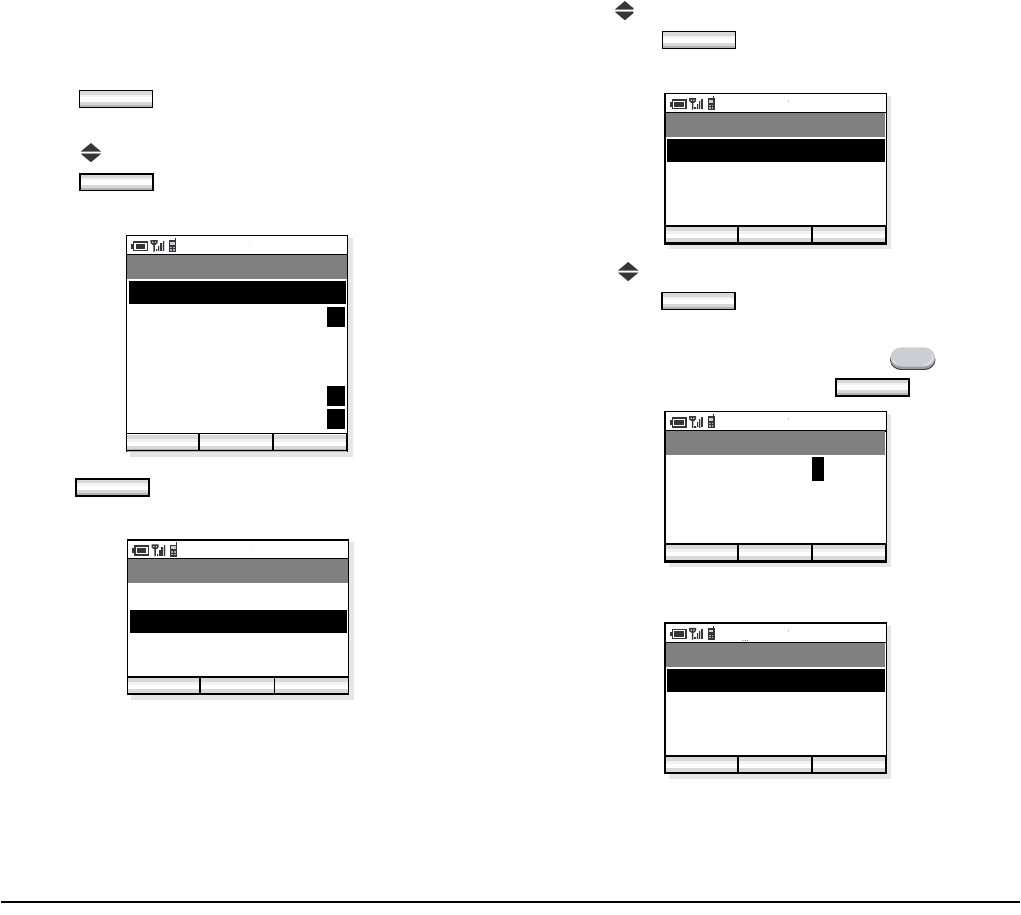
- Press key to select an item to be edited and then
press soft key.
- Edit the selected item. In the following example,
Work (TEL1) data is edited.
- Press soft key to write the data. The dis-
play returns to the previous screen.
- Repeat these steps as required for the new entry.
- When edit is completed, press soft key.
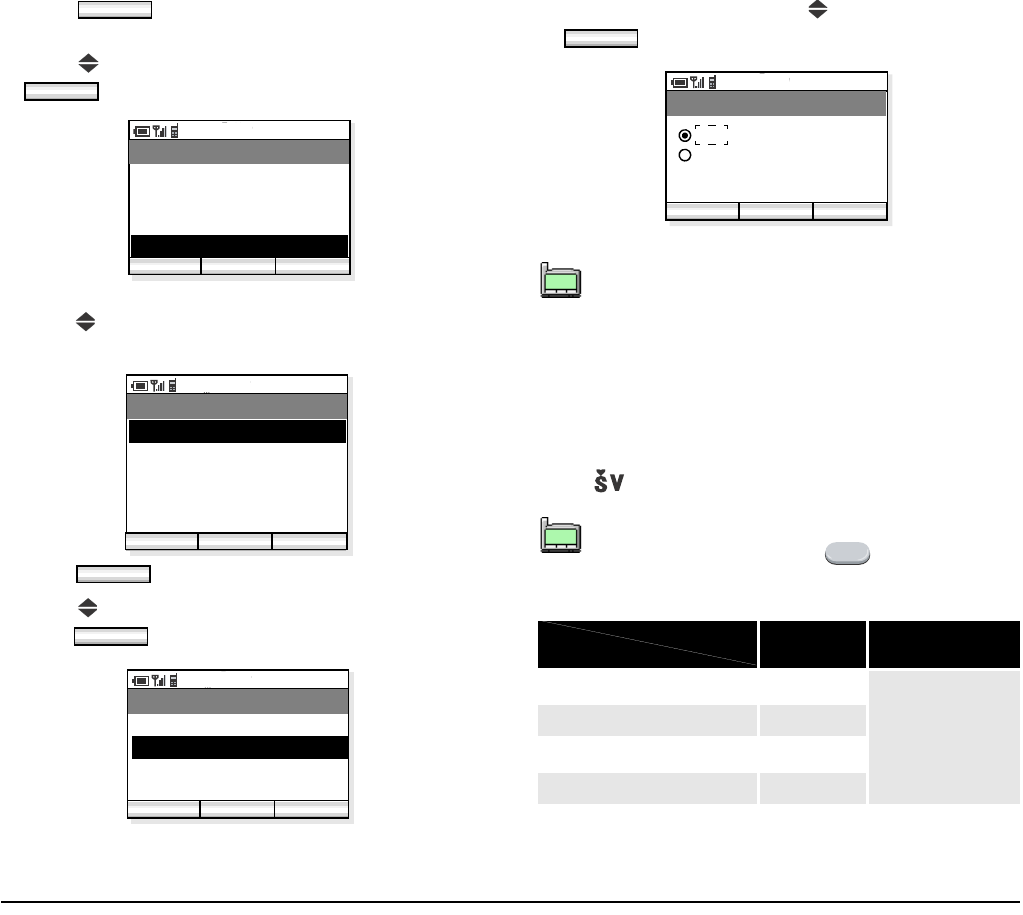
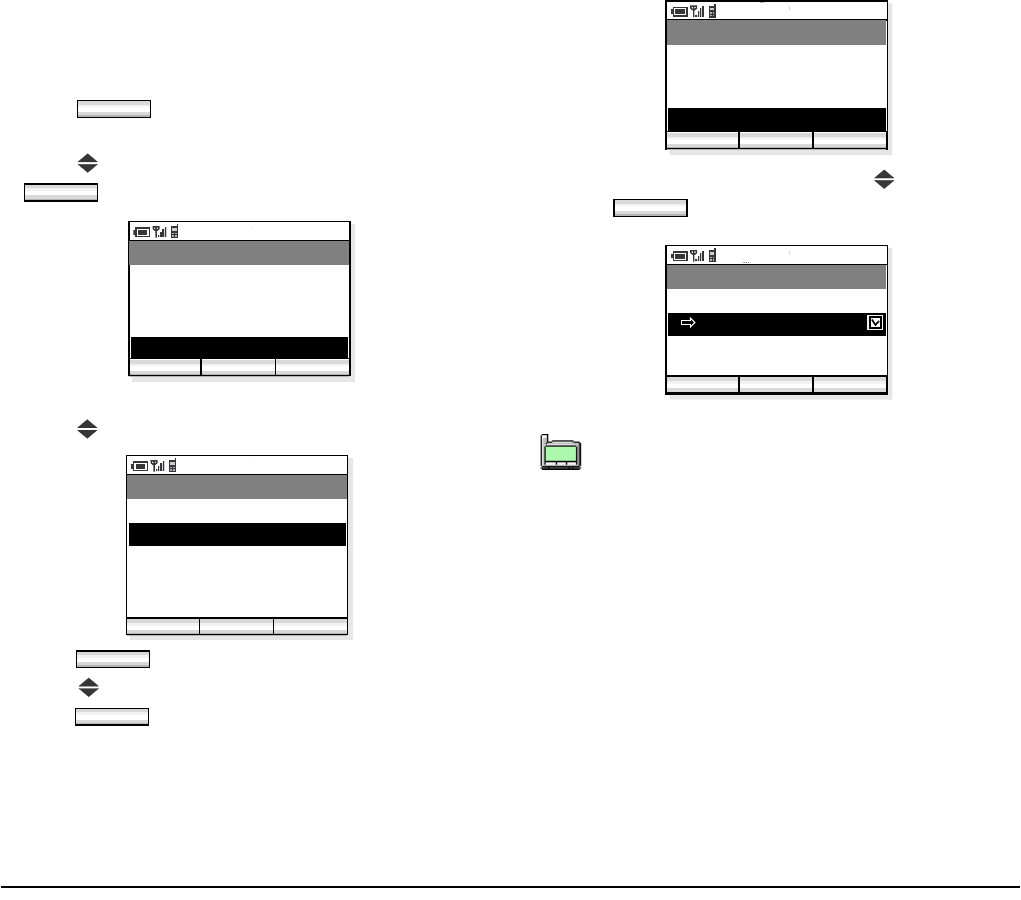
• TO DELETE A RECORD
You can delete a record from the Phone Book.
- Press soft key in standby mode to display
the main menu.
- Press key to select “02. Phone Book” and then
press soft key. The handset displays the
following.
- Press key to select a record you want to delete in
the Phone Book.
- Press soft key. The following menu
displays.
- Press key to select “04. Delete” and then press
soft key.
PM 02:58
Edit Back
Phone Book
02. Donald E.
03. Work
01. Donald E.
04. Mobile
05. Other
06. Note
07. Group 1
08. Select Presence
Save
Edit
PM 02:58
OK Back
Work
975322212
123
9/32
OK
PM 02:58
Edit Back
Phone Book
02. Donald E.
03. 975322212
01. Donald E.
04. Mobile
05. Other
06. Note
07. Group 1
08. Select Presence
Save
Save
Func
OK
PM 02:58
OK Find
Phone Book
002. Aaron
003. Julia
001. Ben
Func
004. Paul
005. Rachel
006. James
007. Hannah
P
P
P
P
Func
OK
PM 02:58
OK Back
Menu
02. Edit Group Name
03. Add New Entry
01. Search
04. Delete
28
- Press key to select “Yes” and then press
soft key.
- The selected record is deleted.
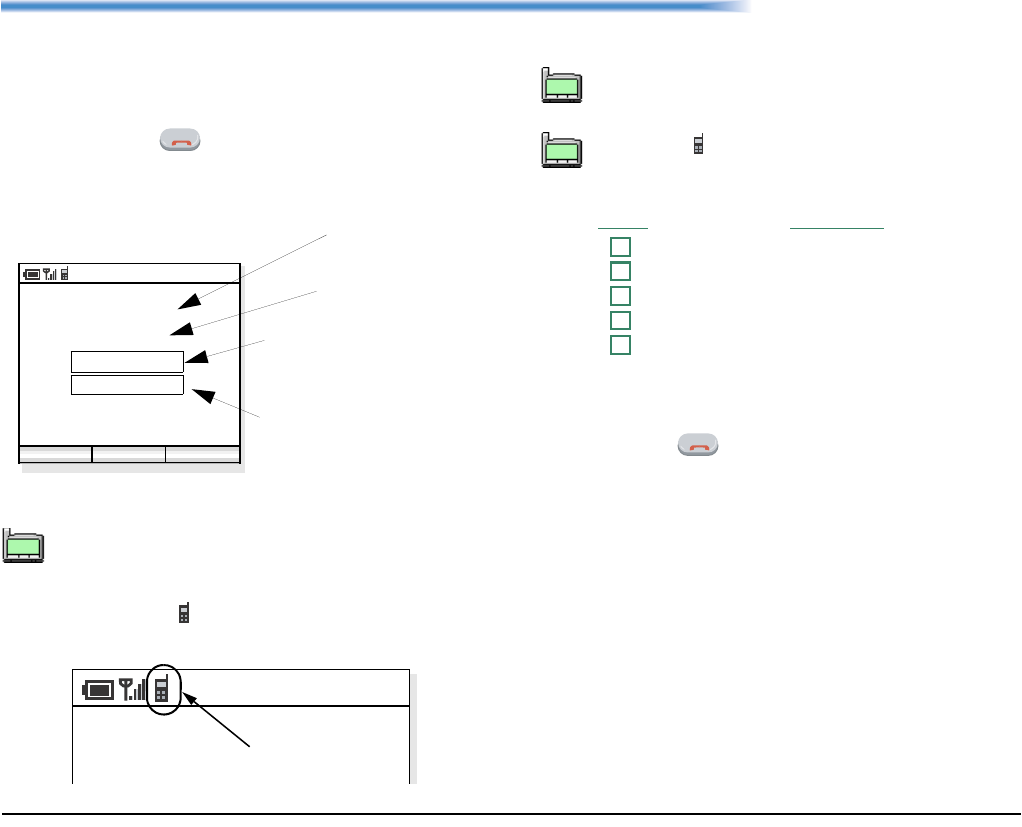
• TO MAKE A CALL
- Press soft key in standby mode to display
the main menu.
- Press key to select “02. Phone Book” and then
press soft key.
- Press key to select a party you want to make a
call.
- Press soft key and then the following
menu displays.
- Select “05. Dial” and then press soft key
on the menu.
- Press key or soft key to make the
call.
OK
PM 02:58
OK Back
Menu
02. Edit Group Name
03. Add New Entry
01. Search
04. Delete
Paul
Delete Entry
Yes
No
Delete entry?
?
PM 02:58
OK Find
Phone Book
002. Aaron
003. Julia
001. Ben
Func
004. Rachel
005. James
006. Hannah
P
P
P
P
Func
OK
PM 02:58
OK Find
Phone Book
002. Aaron
003. Julia
001. Ben
Func
004. Paul
005. Rachel
006. James
007. Hannah
P
P
P
P
Func
OK
PM 02:58
OK Back
Menu
02. Edit Group Name
03. Add New Entry
01. Search
04. Delete
05. Dial
OK
29
• TO EDIT AN ENTRY
You can edit the registered Phone Book.
- Press soft key in standby mode to display
the main menu.
- Press key to select “02. Phone Book” and then
press soft key.
- Press key to select a registration you want to
edit.
- Press soft key and then the following menu
will be displayed.
- Select “06. Edit” on the menu.
- Press soft key to edit the record.
- Press key to select an item you want to edit and
then press soft key.
- When all edit is completed, press soft key.
Func
OK
PM 02:58
OK Find
Phone Book
002. Aaron
003. Julia
001. Ben
Func
004. Paul
005. Rachel
006. James
007. Hannah
P
P
P
P
Func
PM 02:58
OK Back
Menu
02. Edit Group Name
03. Add New Entry
04. Delete
05. Dial
06. Edit
01. Search
OK
Presence data such as Meeting, Break, Out to
Lunch will be displayed in this area only when
this entry is the target of presence feature.
PM 02:58
Edit Back
Phone Book
03. 97521111
04. Mobile
02. Benjamin
01. Ben
Meeting
06. Note
07. Group 1
05. Other
08. Select Presence
Save
TIP
TIP
01:AbcDefg
02:HigkLmn
03:OpqrStu
Edit
Save
30
• TO CREATE A SHORT MESSAGE
You can create a Short Message from the Phone Book.
- Press soft key in standby mode to display
the main menu.
- Press key to select “02. Phone Book” and then
press soft key.
- Press key to select a person you want to send a
Short Message.
- Press soft key and then the following
menu displays.
- Select “07. Create Message” on the menu.
- Press soft key to create a message com-
pose.
- Press soft key to change the address.
- Press soft key when the new address is
entered.
Func
OK
PM 02:58
OK Find
Phone Book
002. Aaron
003. Julia
001. Ben
Func
004. Paul
005. Rachel
006. James
007. Hannah
P
P
P
P
Func
PM 02:58
OK Back
Menu
03. Add New Entry
04. Delete
05. Dial
06. Edit
07. Create Message
02. Edit Group Name
01. Search
OK
PM 02:58
Edit Send
Compose IM
To: 3332
Func
Edit
PM 02:58
OK Back
Edit Address
3508
123
4/32
OK
31
- Press to select the lower area to create the mes-
sage.
- Press soft key to start writing a message.
- When you finish writing the message, press
soft key.
- Press soft key to send the message to the
address.
PM 02:58
Edit Send
Compose IM
To:3508
Func
Edit
PM 02:58
OK Func
Edit Message
Hi, Jim
aAbB
7/300
OK
PM 02:58
Edit Send
Compose IM
To:3508
Func
Hi, Jim I’ve just arrived in
Tokyo! I’ll send you the report
after the conference.
Send

32
This page is for your notes.
33
7. SPEED DIAL
The phone can use Speed Dial. Up to 10 entries (0 - 9)
are available.
• TO USE SPEED DIAL
Quick Operation:
- In standby mode, press a dial pad ( ∼ ) to
select one speed dial entry that has already regis-
tered in the handset. For example, press to
make a call to “No3: 98765431” that is listed as
No.3 entry.
- Press key to make the call.
Normal Operation:
- Press soft key in standby mode to display
the main menu.
- Press key to select “03. Speed Dial”.
- Press soft key and then the handset dis-
plays a Speed Dial list.
- To make a call to “3, 98765431” for example, press
key and then press key twice.
Speed dialing digits take precedence over PBX-
programmed single-digit dialing. For instance, if
the single digit 0 was programmed in the PBX to
dial the operator, and an MH250 user’s speed
dial digit 0 was programmed to dial home, then
dialing 0 on the MH250 would dial home, not the
operator. If you desire to dial the operator, press
key first and then dial 0.
0 9
3
PM 02:58
Enter Back
Speed Dial
2. 82154112
3. 98765431
1. 54332
Func
4. 57777
5. 96745211
6.
7.
TIP
01:AbcDefg
02:HigkLmn
03:OpqrStu
Func
PM 02:58
OK Back
Menu
02. Phone Book
03. Speed Dial
01. Call Log
04. Setting
OK
PM 02:58
Enter Back
Speed Dial
2. 82154112
3. 98765431
1. 54332
Func
4. 57777
5. 96745211
6.
7.
3
34
• TO ADD NEW ENTRY/EDIT
- Press soft key in standby mode to display
the main menu.
- Press key to select “03. Speed Dial”.
- Press soft key and then the handset dis-
plays a Speed Dial list.
- Select an entry you want to add by using key. In
the following example “No7:” is selected.
- Press soft key.
- The following Speed Dial Menu is displayed. Press
key to select “01. Edit/Add” and then press
soft key.
- Enter a phone number you want to add to the list.
- Press soft key and then the new entry is
added as follows.
PM 02:58
Enter Back
Speed Dial
2. 82154112
1. 54332
Func
4. 57777
5. 96745211
6.
7.
3. 98765431
Func
PM 02:58
OK Back
Menu
02. Phone Book
03. Speed Dial
01. Call Log
04. Setting
OK
PM 02:58
Enter Back
Speed Dial
2. 82154112
3. 9876543210
1. 54332
Func
4. 57777
5. 96745211
6.
7.
PM 02:58
Enter Back
Speed Dial
2. 82154112
3. 9876543210
1. 54332
Func
4. 57777
5. 96745211
6.
7.
Func
OK
PM 02:58
OK Back
Menu
02. Search Phone Book
01. Edit/Add
PM 02:58
OK Back
Edit
977712345
123
9/32
OK

35
PM 02:58
Enter Back
Speed Dial
2. 82154112
3. 9876543210
1. 54332
Func
4. 57777
5. 96745211
6.
7. 977712345
36
• TO ADD NEW ENTRY FROM
PHONE BOOK
You can add a new entry referring to Phone Book.
- Press soft key in standby mode to display
the main menu.
- Press key to select “03. Speed Dial”.
- Press soft key and then the handset dis-
plays a Speed Dial list.
- Select an entry you wan to add by using key. In
the following example “6,” is selected.
- Press soft key.
- The following Speed Dial Menu is displayed. Press
key to select “02. Search Phone Book” and then
press soft key.
- The handset displays Phone Book. Select an entry
you want to add by using key and then press
soft key.
Func
PM 02:58
OK Exit
Speed Dial
02. Phone Book
03. Speed Dial
01. Call Log
04. Setting
OK
PM 02:58
Enter Back
Speed Dial
2. 82154112
3. 9876543210
1. 54332
Func
4. 57777
5. 96745211
6.
7.
PM 02:58
Enter Back
Speed Dial
2. 82154112
3. 9876543210
1. 54332
Func
4. 57777
5. 96745211
6.
7.
Func
OK
PM 02:58
OK Back
Menu
02. Search Phone Book
01. Edit/Add
OK
PM 02:58
OK Find
Phone Book
002. Aaron
003. Julia
001. Ben
004. Paul
005. Rachel
006. James
007. Hannah
P
P
P
P
37
- Select a phone number you want to add by using
key and then press soft key.
- The new entry is added as follows.
• TO DELETE AN ENTRY
You can delete an entry from the Speed Dial list.
- Press soft key in standby mode to display
the main menu.
- Press key to select “03. Speed Dial”.
- Press soft key and then the handset dis-
plays a Speed Dial list.
- Select an entry you want to delete by using key.
In the following example “No4” is selected.
- Press soft key.
- The following Speed Dial Menu is displayed. Press
key to select “03. Delete” and then press
soft key.
OK
PM 02:58
OK Back
Select
02. 5012
03. TEL 3
01. 987611112
PM 02:58
Edit Back
Speed Dial
2. 82154112
3. 9876543210
1. 54332
Func
4. 57777
5. 96745211
6. 987611112
7.
Func
PM 02:58
OK Back
Menu
02. Phone Book
03. Speed Dial
01. Call Log
04. Setting
OK
PM 02:58
Edit Back
Speed Dial
2. 82154112
3. 9876543210
1. 54332
Func
4. 57777
5. 96745211
6.
7.
PM 02:58
Edit Back
Speed Dial
2. 82154112
3. 9876543210
1. 54332
Func
4. 57777
5. 96745211
6.
7.
Func
OK
PM 02:58
OK Back
Menu
02. Search Phone Book
03. Delete
01. Edit/Add
38
- The following message is displayed. To delete the
entry select “Yes” and then press soft key.
When you do not want to delete the entry, select
“No” and then press soft key.
OK
OK
PM 02:58
OK Back
Menu
02. Search Phone Book
03. Delete
01. Add 57777
Delete
Yes
No
Delete entry?
?
39
8. SETTING
Various settings such as display, sounds, dates and
time, password, and language can be modified as
required on the handset.
• DISPLAY BACKLIGHT
Factory Default: 3
- Press soft key in standby mode to display
the main menu.
- Press key to select “04. Setting” and then press
soft key.
- The handset displays the Setting.
- Press key to select “01. Display”.
- Press soft key to open “Display” menu.
- Press key to select “01. Backlight Level” and
then press soft key.
- Backlight can be set in three levels (1 - 3). Select a
desired level by using key and then press
soft key.
• ALERT SETTING
Factory Default: On
The handset can flash the Info LED when one of the
following occurs:
• Missed Call
• Voice Message
• Unread Short Message
Func
OK
PM 02:58
OK Back
Menu
02. Phone Book
03. Speed Dial
01. Call Log
04. Setting
PM 02:58
OK Back
Setting
02. Sounds
03. Date & Time
01. Display
04. Password
05. 言語設定
OK
OK
PM 02:58
OK Back
Display
02. Alert Setting
01. Backlight Level
OK
PM 02:58
OK Back
Backlight Level
PM 02:58
OK Back
Backlight Level
Level 3Level 1
40
- Press soft key in standby mode to display
the main menu.
- Press key to select “04. Setting” and then press
soft key.
- The handset displays the Setting.
- Press key to select “01. Display”.
- Press soft key to open “Display” menu.
- Press key to select “02. Alert Setting” and then
press soft key.
- Select ON/OFF by using key and then press
soft key.
• COURTESY MODE
Factory Default: Off
You can set the handset in Courtesy Mode, in which the
following can be set. When the handset is placed in this
mode will be indicated on the display.
Func
OK
PM 02:58
OK Back
Menu
02. Phone Book
03. Speed Dial
01. Call Log
04. Setting
PM 02:58
Enter Back
Setting
02. Sounds
03. Date & Time
01. Display
Func
04. Password
05. 言語設定
OK
OK
PM 02:58
OK Back
Display
02. Alert Setting
01. Backlight Level
When Off is set, the Info LED will not flash.
However, the ICONS will be displayed.
You can place the handset in courtesy mode
by pressing and holding key for few sec-
onds.
ON OFF
Key Tone OFF
Depends on
each setting.
Ring OFF
Demo Sound OFF
Vibrator ON
OK
PM 02:58
OK Back
Alert Setting
Off
On
TIP
01:AbcDefg
02:HigkLmn
03:OpqrStu
TIP
01:AbcDefg
02:HigkLmn
03:OpqrStu
*
COURTESY
TONE/VIB.
41
- Press soft key in standby mode to display
the main menu.
- Press key to select “04. Setting” and then press
soft key.
- The handset displays the Setup Menu.
- Press key to select “02. Sounds”.
- Press soft key. Sounds menu appears.
- Press key to select “01. Courtesy Mode” and
then press soft key.
- Select On or Off by using key and then press
soft key.
• RING/VIBRATOR
Factory Default: [RING] External Call = Pattern1/
Internal Call = Pattern2, Private Call = Pattern3
[VIBRATOR] Off
You can set ring tone/vibrator pattern on a call kind
basis (external call/internal call/private call).
- Press soft key in standby mode to display
the main menu.
- Press key to select “04. Setting” and then press
soft key.
- The handset displays the Setup Menu.
- Press key to select “02. Sounds”.
Func
OK
PM 02:58
OK Back
Menu
02. Phone Book
03. Speed Dial
01. Call Log
04. Setting
PM 02:58
OK Back
Setting
02. Sounds
03. Date & Time
01. Display
04. Password
05. 言語設定
OK
OK
PM 02:58
OK Back
Sounds
02. External Call
03. Internal Call
01. Courtesy Mode
04. Private Call
OK
PM 02:58
OK Back
Courtesy Mode
Off
On
Func
OK
PM 02:58
OK Exit
Menu
02. Phone Book
03. Speed Dial
01. Call Log
04. Setting
42
- Press soft key. Sounds menu appears.
- Press key to select “02. External Call/03. Internal
Call/04. Private Call” and then press soft
key.
- Select “01. Ring” or “02. Vibrator” by using key
and then press soft key.
- Select a pattern or melody by using key and then
press soft key.
•RING VOLUME
Factory Default: 5
You can adjust ring tone volume.
- Press soft key in standby mode to display
the main menu.
- Press key to select “04. Setting” and then press
soft key.
- The handset displays the Setup Menu.
- Press key to select “02. Sounds”.
PM 02:58
OK Back
Setting
02. Sounds
03. Date & Time
01. Display
04. Password
05. 言語設定
OK
OK
PM 02:58
OK Back
Sounds
02. External Call
03. Internal Call
01. Courtesy Mode
04. Private Call
OK
PM 02:58
OK Back
External Call
02. Vibrator
01. Ring
OK
PM 02:58
OK Back
Ring
Pattern
Pattern
Pattern
:
Pattern
Melody
Melody
:
Melody
PM 02:58
OK Back
Vibrator
Pattern 1
Pattern 2
Pattern 3
01. Ring 02. Vibrator
Off
1
2
3
0
0
1
2
1
1
Func
OK
PM 02:58
OK Exit
Menu
02. Phone Book
03. Speed Dial
01. Call Log
04. Setting
43
- Press soft key. Sounds menu appears.
- Press key to select “05. Ring Volume” and then
press soft key.
- Ring Volume can be set in eight levels (0 - 7). Select
an appropriate volume by using key and then
press soft key.
• CALL VOLUME
Factory Default:5
You can adjust receiver volume.
- Press soft key in standby mode to display
the main menu.
- Press key to select “04. Setting” and then press
soft key.
- The handset displays the Setup Menu.
- Press key to select “02. Sounds”.
- Press soft key. Sounds menu appears.
- Press key to select “06. Call Volume” and then
press soft key.
When the handset is in courtesy mode, it will
not ring irrespective of the volume setting.
PM 02:58
Enter Back
Setting
02. Sounds
03. Date & Time
01. Display
Func
04. Password
05. 言語設定
OK
OK
PM 02:58
OK Back
Sounds
03. Internal Call
04. Private Call
02. External Call
05. Ring Volume
OK
PM 02:58
OK Back
Ring Volume
Volume (0 - 7)
TIP
01:AbcDefg
02:HigkLmn
03:OpqrStu
Func
OK
PM 02:58
OK Back
Menu
02. Phone Book
03. Speed Dial
01. Call Log
04. Setting
PM 02:58
Enter Back
Setting
02. Sounds
03. Date & Time
01. Display
Func
04. Password
05. 言語設定
OK
OK
44
- Select an item you want to set and then press
soft key.
- Call Volume can be set in eight levels (0 - 7). Select
a desired volume by using key and then press
soft key.
Ongoing call will not be affected by this setting.
PM 02:58
OK Back
Sounds
04. Private Call
05. Ring Volume
03. Internal Call
06. Call Volume
OK
PM 02:58
OK Back
Call Volume
02. Headset
01. Handset
OK
PM 02:58
OK Back
Handset
Volume (0 - 7)
TIP
01:AbcDefg
02:HigkLmn
03:OpqrStu
45
• KEY CLICK TONE
Factory Default: Off
You can sound or mute a tone that is provided when any
key is pressed on the phone.
- Press soft key in standby mode to display
the main menu.
- Press key to select “04. Setting” and then press
soft key.
- The handset displays the Setting menu.
- Press key to select “02. Sounds”.
- Press soft key. Sounds menu appears.
- Press key to select “07. Key Click Tone” and
then press soft key.
- Select ON or OFF by using key and then press
soft key.
Func
OK
PM 02:58
OK Back
Menu
02. Phone Book
03. Speed Dial
01. Call Log
04. Setting
PM 02:58
OK Back
Setting
02. Sounds
03. Date & Time
01. Display
04. Password
05. 言語設定
OK
OK
Volume adjustment or sound modification is
not available for Key Click Tone.
PM 02:58
OK Back
Sounds
05. Ring Volume
06. Call Volume
04. Private Call
07. Key Click Tone
OK
PM 02:58
OK Back
Key Click Tone
Off
On
TIP
01:AbcDefg
02:HigkLmn
03:OpqrStu
46
• MUSIC SELECT
Factory Default:Tone 1 (Minuet)
You can select music that is provided while the handset
is in hold status.
- Press soft key in standby mode to display
the main menu.
- Press key to select “04. Setting” and then press
soft key.
- The handset displays the Setup Menu.
- Press key to select “02. Sounds”.
- Press soft key. Sounds menu appears.
- Press key to select “08. MOH Select” and then
press soft key.
- Select Tone 1 or Tone 2 by using key and then
press soft key.
Func
OK
PM 02:58
OK Back
Menu
02. Phone Book
03. Speed Dial
01. Call Log
04. Setting
PM 02:58
OK Back
Setting
02. Sounds
03. Date & Time
01. Display
04. Password
05. 言語設定
OK
OK
Tone 1 is Minuet (default) and Tone 2 is “For
Elise.”
PM 02:58
OK Back
Sounds
06. Call Volume
07. Key Click Tone
05. Ring Volume
08. MOH Select
OK
PM 02:58
OK Back
MOH Select
Tone 2
Tone 1
TIP
01:AbcDefg
02:HigkLmn
03:OpqrStu
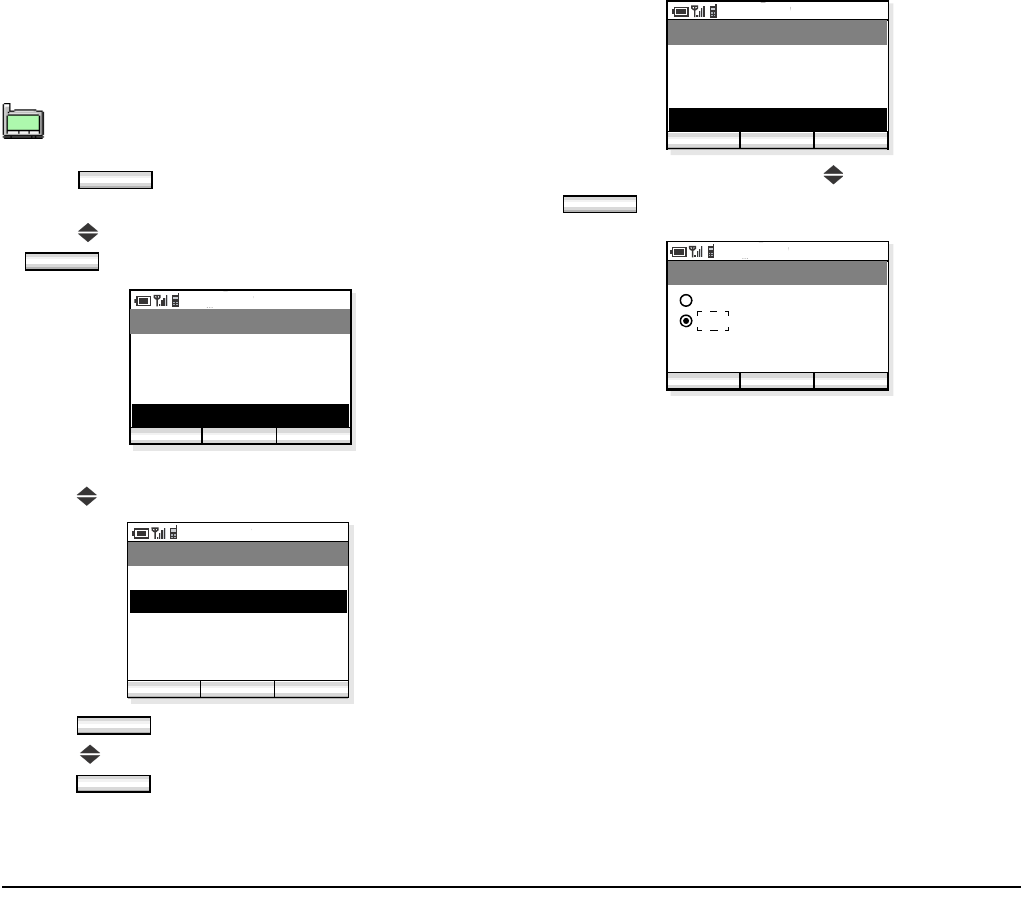
47
• RTP ALARM
Factory Default: Off
The handset can provide alarm if RTP packet loss is
suspected.
- Press soft key in standby mode to display
the main menu.
- Press key to select “04. Setting” and then press
soft key.
- The handset displays the Setup Menu.
- Press key to select “02. Sounds”.
- Press soft key. Sounds menu appears.
- Press key to select “09. RTP Alarm” and then
press soft key.
- Select ON or OFF by using key and then press
soft key.
If RTP packet loss exceeds 20% or greater,
RTP alarm is activated.
TIP
01:AbcDefg
02:HigkLmn
03:OpqrStu
Func
OK
PM 02:58
OK Back
Menu
02. Phone Book
03. Speed Dial
01. Call Log
04. Setting
PM 02:58
OK Back
Setting
02. Sounds
03. Date & Time
01. Display
04. Password
05. 言語設定
OK
OK
PM 02:58
OK Back
Sounds
07. Key Click Tone
08. MOH Select
06. Call Volume
09. RTP Alarm
OK
PM 02:58
OK Back
RTP Alarm
Off
On
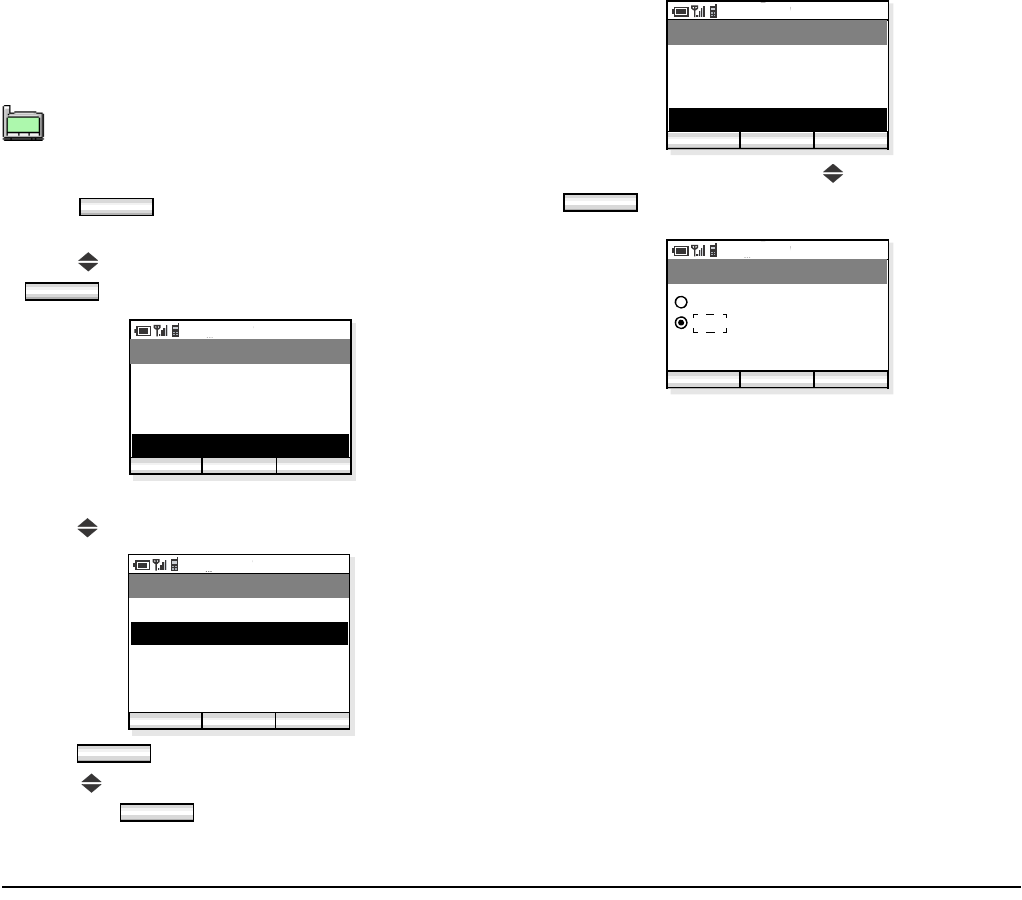
48
• HANDOVER TONE
Factory Default: Off
The handset can provide warning tone when handover
takes place.
- Press soft key in standby mode to display
the main menu.
- Press key to select “04. Setting” and then press
soft key.
- The handset displays the Setting menu.
- Press key to select “02. Sounds”.
- Press soft key. Sounds menu appears.
- Press key to select “10. Handover Tone” and
then press soft key.
- Select ON or OFF by using key and then press
soft key.
Handover is the process of transferring a wire-
less phone user from one Access Point to
another.
TIP
01:AbcDefg
02:HigkLmn
03:OpqrStu
Func
OK
PM 02:58
OK Back
Menu
02. Phone Book
03. Speed Dial
01. Call Log
04. Setting
PM 02:58
OK Back
Setting
02. Sounds
03. Date & Time
01. Display
04. Password
05. 言語設定
OK
OK
PM 02:58
OK Back
Sounds
08. MOH Select
09. RTP Alarm
07. Key Click Tone
10. Handover Tone
OK
PM 02:58
OK Back
Handover Tone
Off
On
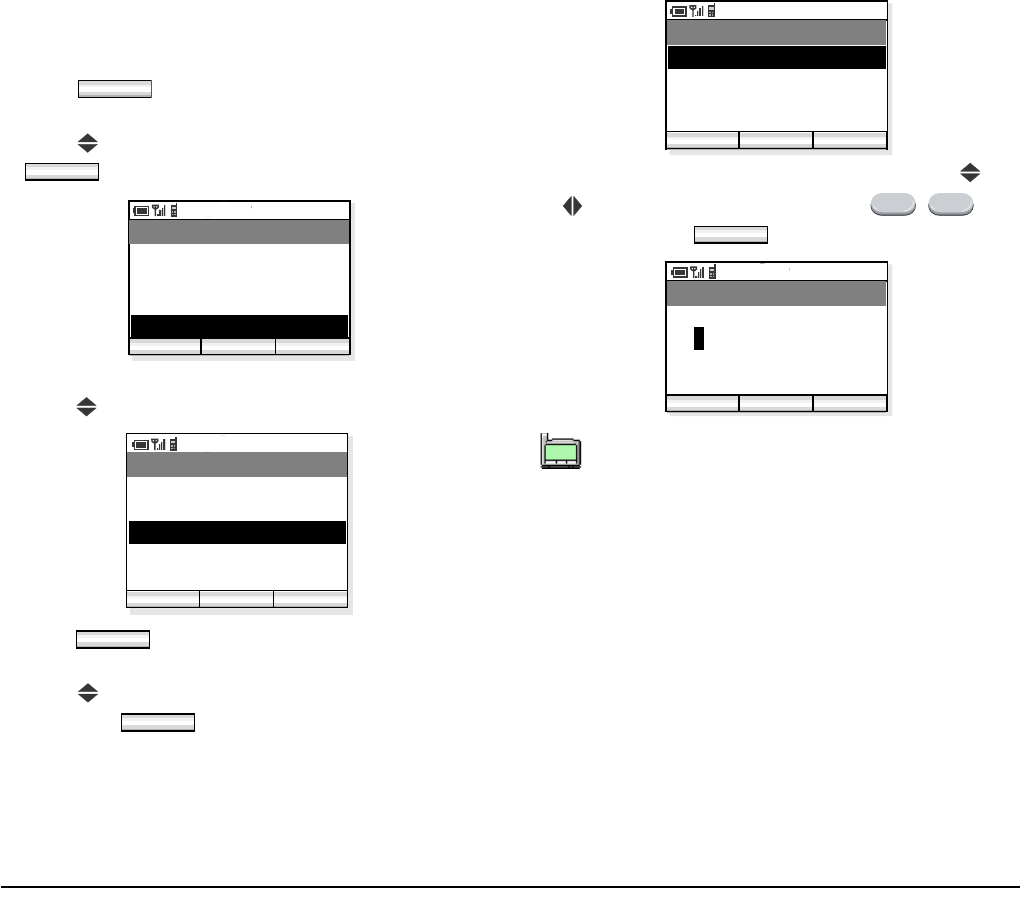
49
• DATE AND TIME ADJUSTMENT
Date and time information of the phone can be adjusted
as required.
- Press soft key in standby mode to display
the main menu.
- Press key to select “04. Setting” and then press
soft key.
- The handset displays the Setup Menu.
- Press key to select “03. Date & Time”.
- Press soft key. Date & Time menu
appears.
- Press key to select “01. AdjustDate&Time” and
then press soft key.
- Select an item you want to change by using and
keys. Change the value using - keys
and then press soft key.
Func
OK
PM 02:58
OK Back
Menu
02. Phone Book
03. Speed Dial
01. Call Log
04. Setting
PM 02:58
OK Back
Setting
02. Sounds
03. Date & Time
01. Display
04. Password
05. 言語設定
OK
OK
The last two digits (x and y) of the year infor-
mation only can be modified (20xy).
PM 02:58
OK Back
Date & Time
02. Date Format
03. Time Format
01. Adjust DATE&TIME
04. Daylight Saving
0 9
OK
PM 02:58
OK Back
AdjustDate&Time
Date (yyyy/mm/dd)
Time Set
21:46
2007/01/01
123
TIP
01:AbcDefg
02:HigkLmn
03:OpqrStu
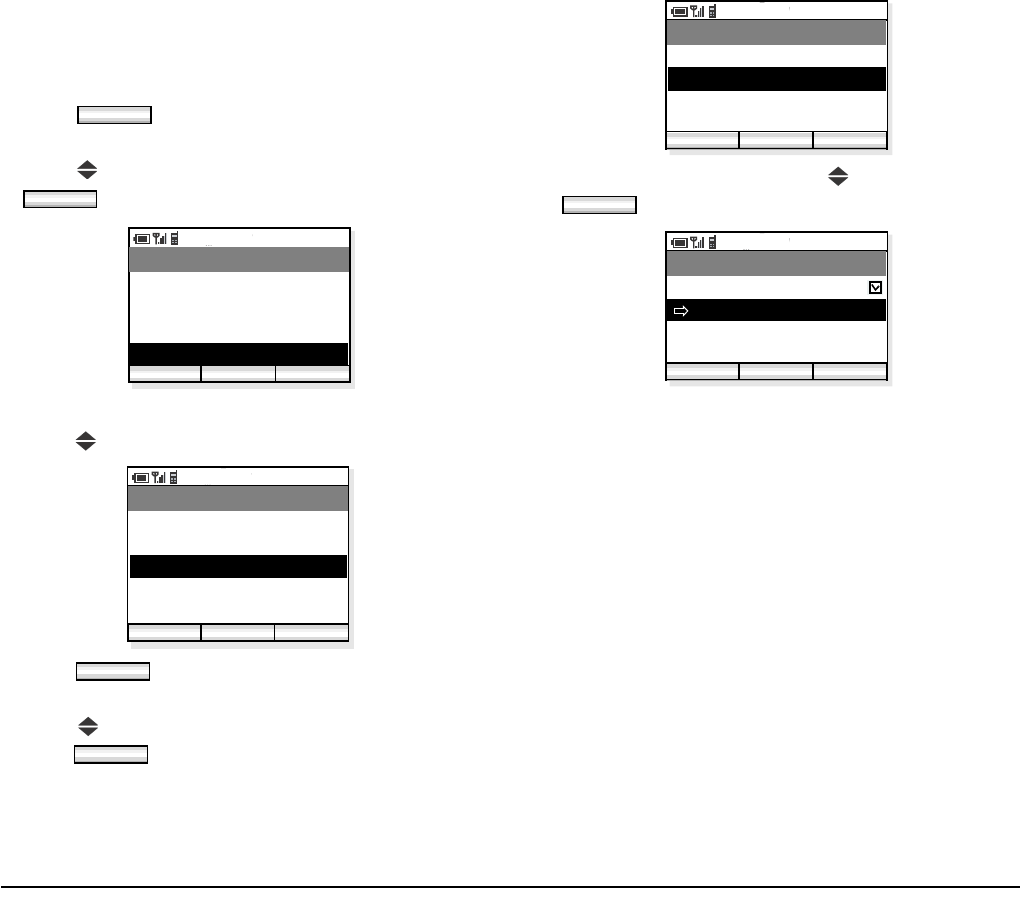
50
•DATE FORMAT
Factory Default: yyyy/mm/dd
Date format (yyyy/mm/dd, mm/dd/yy, or mm/dd) can
be changed as required.
- Press soft key in standby mode to display
the main menu.
- Press key to select “04. Setting” and then press
soft key.
- The handset displays the Setting menu.
- Press key to select “03. Date & Time”.
- Press soft key. Date & Time menu
appears.
- Press key to select “02. Date Format” and then
press soft key.
- Select a date format by using key and then press
soft key.
Func
OK
PM 02:58
OK Back
Menu
02. Phone Book
03. Speed Dial
01. Call Log
04. Setting
PM 02:58
OK Back
Setting
02. Sounds
03. Date & Time
01. Display
04. Password
05. 言語設定
OK
OK
PM 02:58
OK Back
Date & Time
02. Date Format
03. Time Format
01. AdjustDate&Time
04. Daylight Saving
OK
PM 02:58
OK Back
Date Format
yyyy/mm/dd
mm/dd
mm/dd/yy

51
•TIME FORMAT
Factory Default: 12-hour
Time format (12-hour/24-hour) can be selected as
required.
- Press soft key in standby mode to display
the main menu.
- Press key to select “04. Setting” and then press
soft key.
- The handset displays the Setting menu.
- Press key to select “03. Date & Time”.
- Press soft key. Sounds menu appears.
- Press key to select “03. Time Format” and then
press soft key.
- Select a time format by using key and then press
soft key.
Func
OK
PM 02:58
OK Back
Menu
02. Phone Book
03. Speed Dial
01. Call Log
04. Setting
PM 02:58
OK Back
Setting
02. Sounds
03. Date & Time
01. Display
04. Password
05. 言語設定
OK
OK
PM 02:58
OK Back
Date & Time
02. Date Format
03. Time Format
01. AdjustDate&Time
04. Daylight Saving
OK
PM 02:58
OK Back
Time Format
24 hour
12 hour
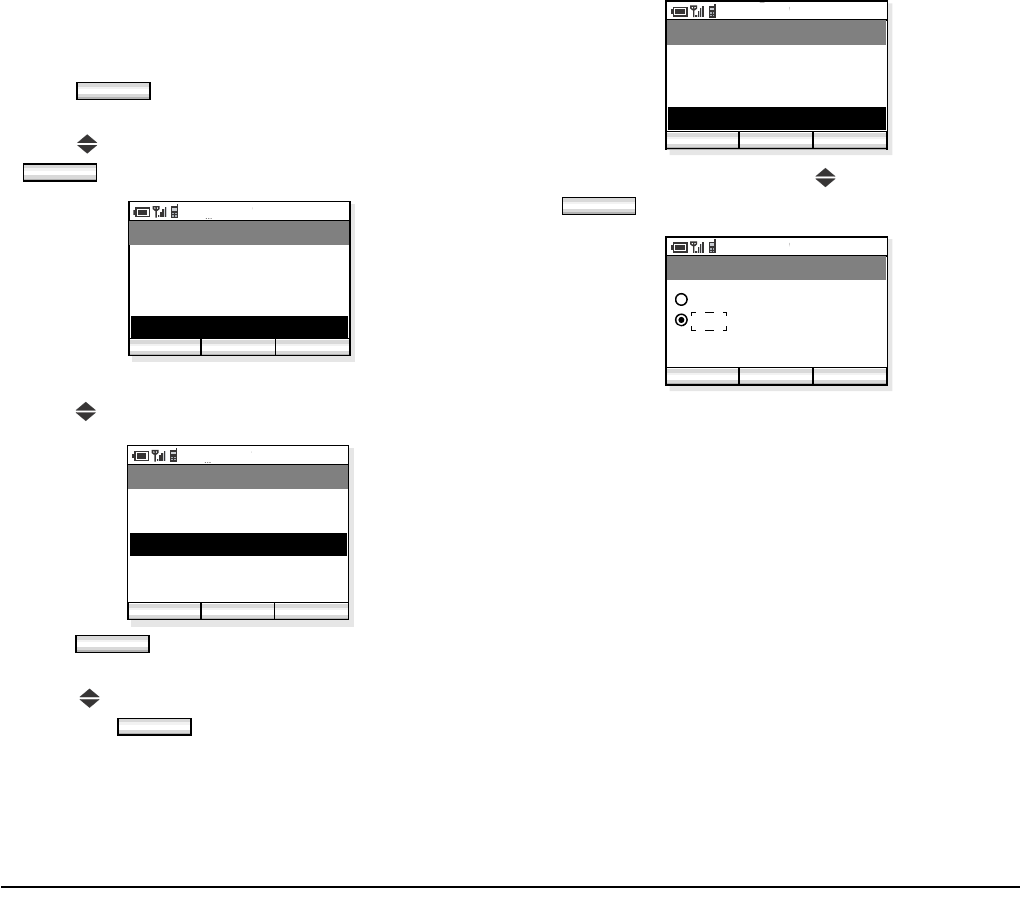
52
• DAYLIGHT SAVING
Factory Default:Off
Daylight saving can be used as required.
- Press soft key in standby mode to display
the main menu.
- Press key to select “04. Setting” and then press
soft key.
- The handset displays the Setting menu.
- Press key to select “03. Date & Time”.
- Press soft key to open Date & Time
menu.
- Press key to select “04. Daylight Saving” and
then press soft key.
- Select On or Off by using key and then press
soft key.
Func
OK
PM 02:58
OK Back
Menu
02. Phone Book
03. Speed Dial
01. Call Log
04. Setting
PM 02:58
OK Back
Setting
02. Sounds
03. Date & Time
01. Display
04. Password
05. 言語設定
OK
OK
PM 02:58
OK Back
Date & Time
02. Date Format
03. Time Format
01. AdjustDate&Time
04. Daylight Saving
OK
PM 02:58
OK Back
Daylight Saving
Off
On
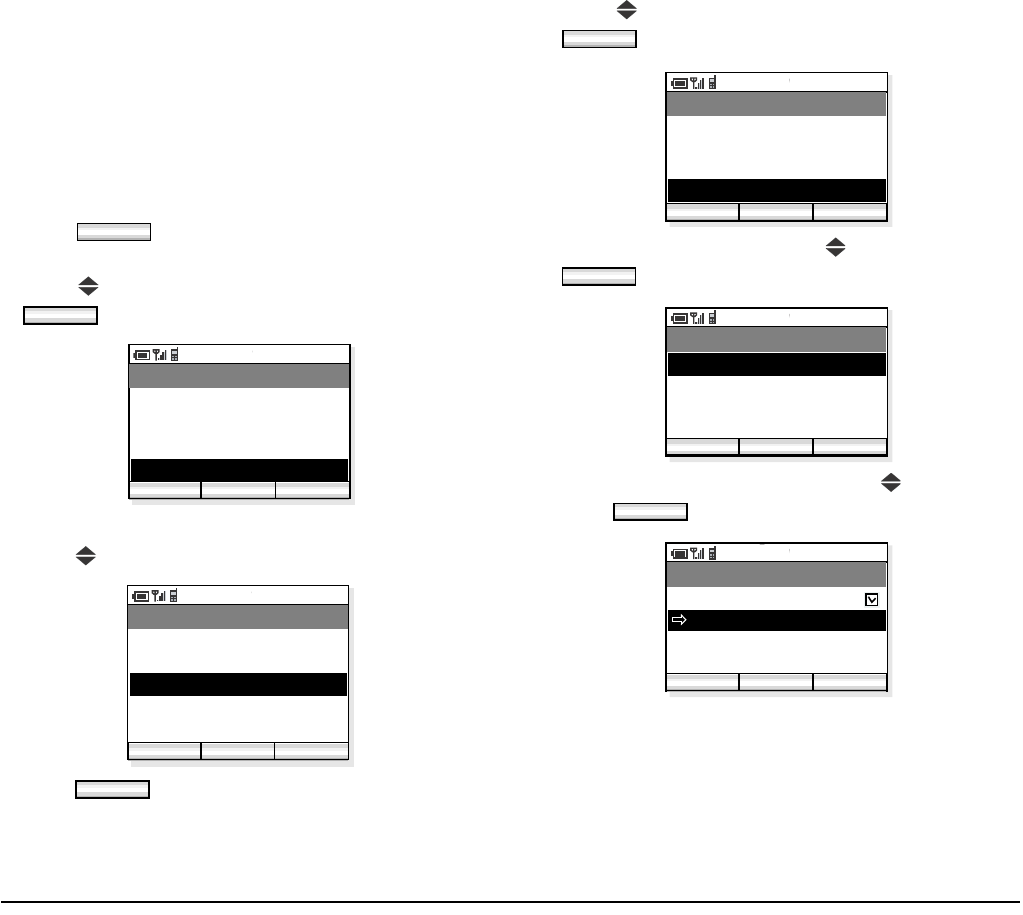
53
• TIME ADJUSTMENT MEANS
Factory Default: Real Time Clock (RTC)
The handset can use one of the following to adjust the
time information. In default, time adjustment will not
be performed.
•RTC
• SIP server
• SNTP server
- Press soft key in standby mode to display
the main menu.
- Press key to select “04. Setting” and then press
soft key.
- The handset displays the Setting menu.
- Press key to select “03. Date & Time”.
- Press soft key to open Date & Time
menu.
- Press key to select “05. Adjust” and then press
soft key.
- Select “01. Means” by using key and then press
soft key.
- Select an appropriate item by using key and then
press soft key.
Note: Time adjustment means are as follows:
Func
OK
PM 02:58
OK Exit
Menu
02. Phone Book
03. Speed Dial
01. Call Log
04. Setting
PM 02:58
OK Back
Setting
02. Sounds
03. Date & Time
01. Display
04. Password
05. 言語設定
OK
OFF
RTC: No adjustment (internal Real Time Clock is used).
From SIP: Receives time information from SIP server.
From SNTP: Receives time information from SNTP
server.
OK
PM 02:58
OK Back
Date & Time
03. Time Format
04. Daylight Saving
02. Date Format
05. Adjust
OK
PM 02:58
OK Back
Adjust
02. SNTP Adjust at
03. Time Offset
01. Means
OK
PM 02:58
OK Back
Means
From SIP
From SNTP
RTC

54
• SNTP QUERY TIME
Factory Default: 00:00:00
The handset attempts to connect the SNTP server at the
specified time to adjust the time information.
- Press soft key in standby mode to display
the main menu.
- Press key to select “04. Setting” and then press
soft key.
- The handset displays the Setting menu.
- Press key to select “03. Date & Time”.
- Press soft key to open Date & Time
menu.
- Press key to select “05. Adjust” and then press
soft key.
- Select “02. SNTP Adjust at” by using key and
then press soft key.
- Set appropriate time and then press soft
key.
Func
OK
PM 02:58
OK Back
Menu
02. Phone Book
03. Speed Dial
01. Call Log
04. Setting
PM 02:58
OK Back
Setting
02. Sounds
03. Date & Time
01. Display
04. Password
05. 言語設定
OK
OK
PM 02:58
OK Back
Date & Time
03. Time Format
04. Daylight Saving
02. Date Format
05. Adjust
OK
PM 02:58
OK Back
Adjust
02. SNTP Adjust at
03. Time Offset
01. Means
OK
PM 02:58
OK Back
SNTP Adjust at
00:00
SNTP Time Set
123
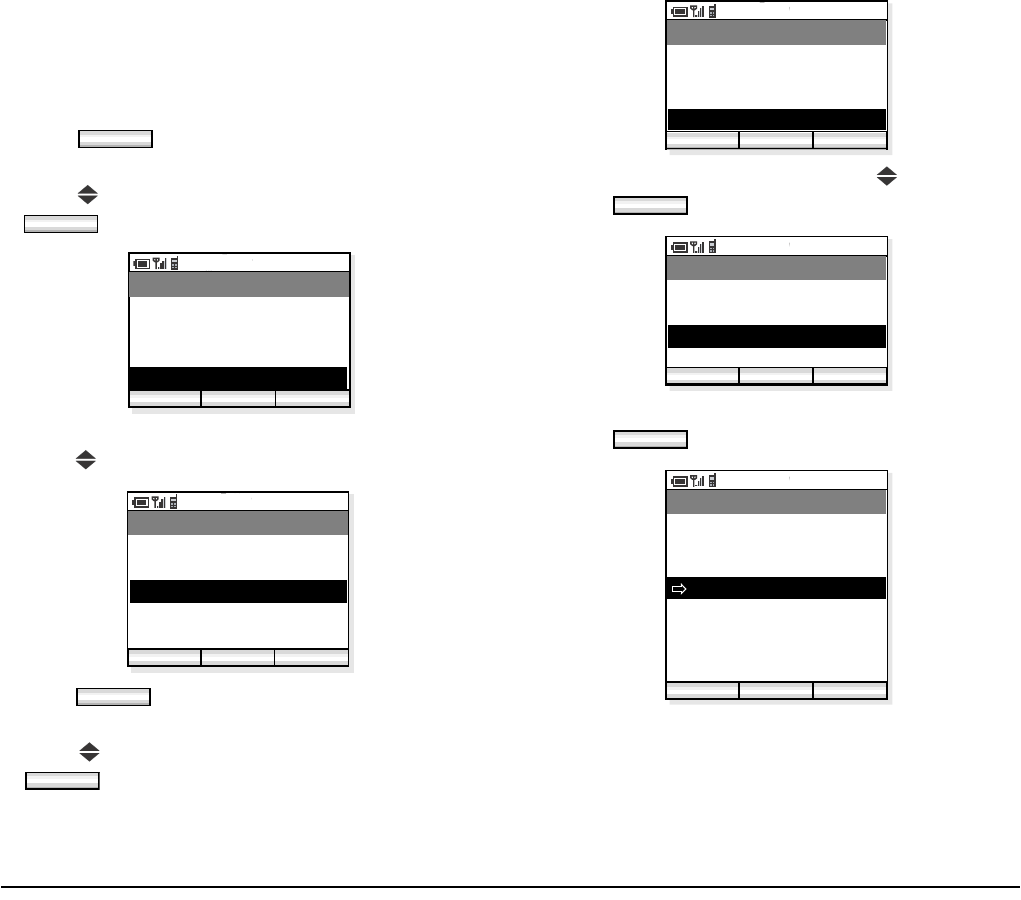
55
• TIME OFFSET
Factory Default: +9:00
The handset can set time offset in the range of -12:00 to
+ 14:00, which specifies time offset between GMT and
the user’s area.
- Press soft key in standby mode to display
the main menu.
- Press key to select “04. Setting” and then press
soft key.
- The handset displays the Setup Menu.
- Press key to select “03. Date & Time”.
- Press soft key to open Date & Time
menu.
- Press key to select “05. Adjust” and then press
soft key.
- Select “03. Time Offset” by using key and then
press soft key.
- Set an appropriate time offset from the list and then
press soft key.
Func
OK
PM 02:58
OK Back
Menu
02. Phone Book
03. Speed Dial
01. Call Log
04. Setting
PM 02:58
OK Back
Setting
02. Sounds
03. Date & Time
01. Display
04. Password
05. 言語設定
OK
OK
PM 02:58
OK Back
Date & Time
03. Time Format
04. Daylight Saving
02. Date Format
05. Adjust
OK
PM 02:58
OK Back
Adjust
02. SNTP Adjust at
03. Time Offset
01. Means
OK
PM 02:58
OK Back
Time Offset
-11:00
-12:00
:
-1:00
+0
+1:00
:
+14:00
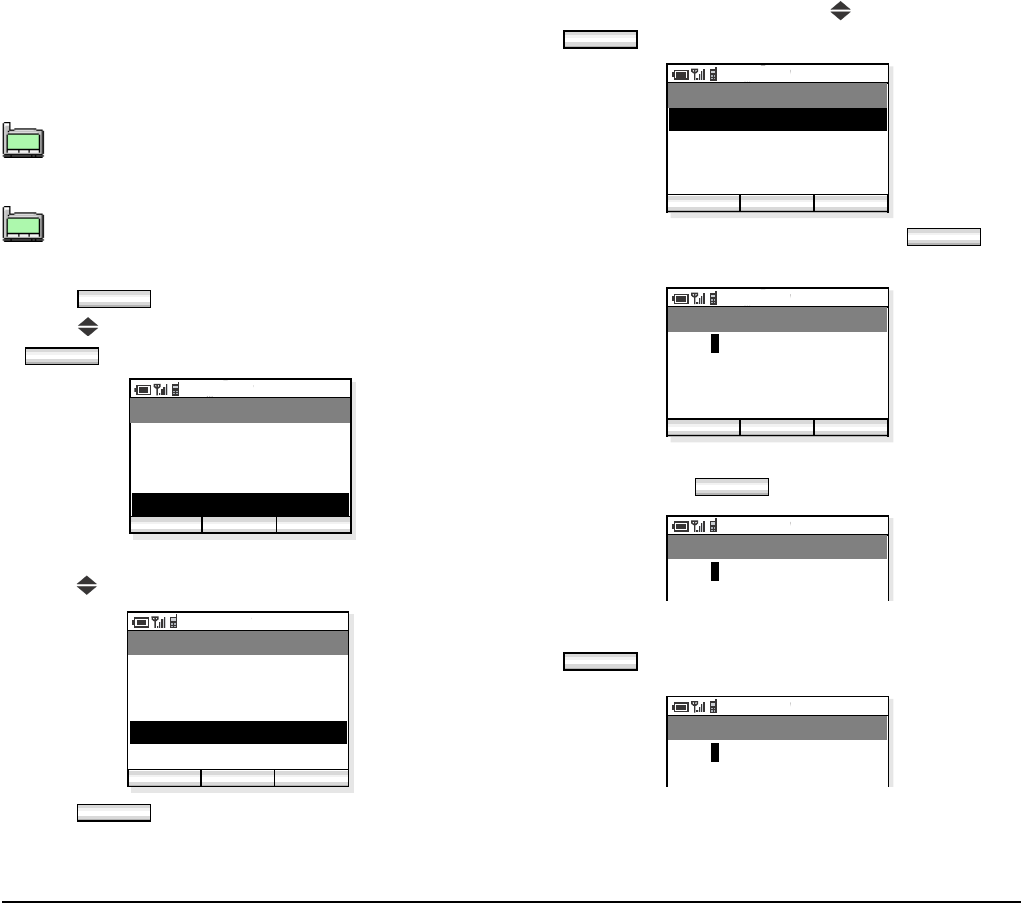
56
•PASSWORD
Factory Default: 0123 (User)
You can set a password that is used to lock/unlock the
handset.
- Press soft key in standby mode.
- Press key to select “04. Setting” and then press
soft key.
- The handset displays the Setting menu.
- Press key to select “04. Password”.
- Press soft key to open Password menu.
- Select “01. User” by pressing key and then press
soft key.
- Enter the old password and then press soft
key.
- Enter the new password (four numeric characters)
and then press soft key.
- Enter the new password again and then press
soft key.
The administrator password is used for net-
work administrator, or maintenance personnel
to set network data.
Use four numeric characters for the password.
TIP
01:AbcDefg
02:HigkLmn
03:OpqrStu
TIP
01:AbcDefg
02:HigkLmn
03:OpqrStu
Func
OK
PM 02:58
OK Back
Menu
02. Phone Book
03. Speed Dial
01. Call Log
04. Setting
PM 02:58
Enter Back
Setting
02. Sounds
03. Date & Time
01. Display
Func
04. Password
05. 言語設定
OK
OK
PM 02:58
OK Back
Password
02. Administrator
01. User
05. Adjust
OK
PM 02:58
OK Back
Old Password
****
123
4/4
OK
PM 02:58
New Password
****
OK
PM 02:58
Confirm Password
****
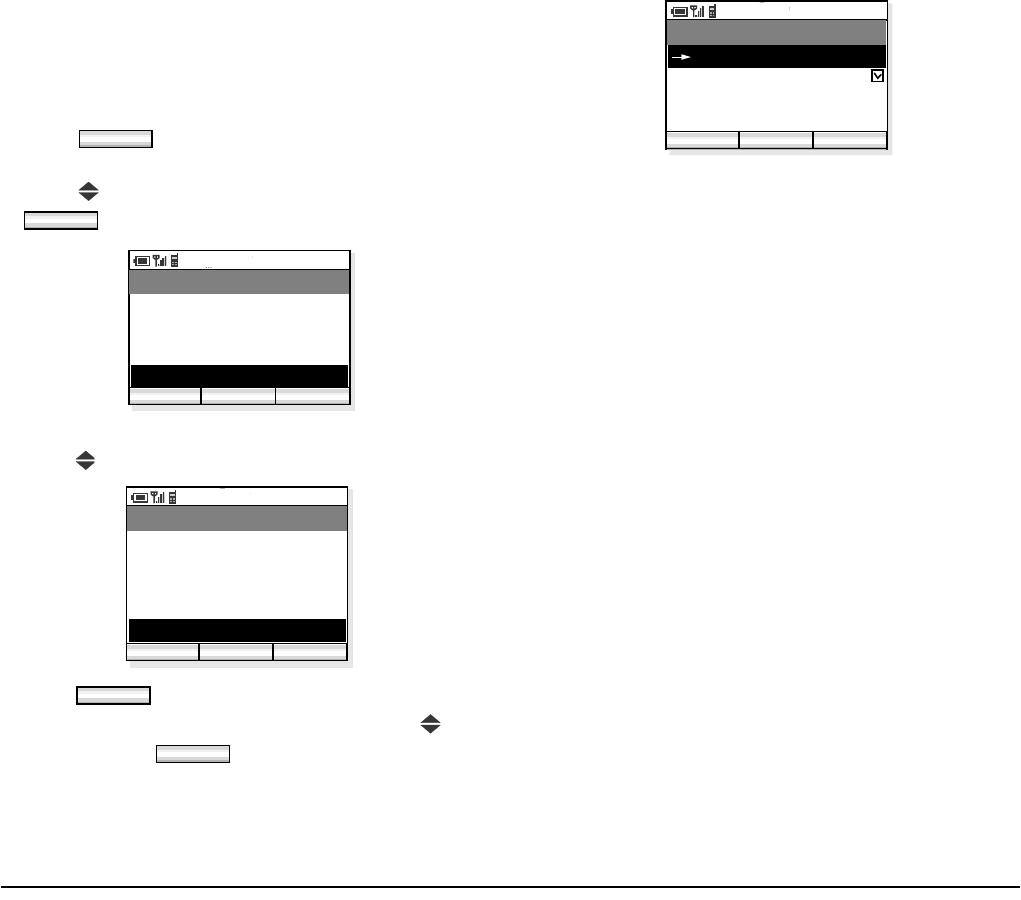
57
• LANGUAGE
Factory Default: English
The information on the LCD can be displayed in
English or Japanese. You can switch between the two
languages by the following operation.
- Press soft key in standby mode to display
the main menu.
- Press key to select “04. Setting” and then press
soft key.
- The handset displays the Setting menu.
- Press key to select “05. 言語設定 ”.
- Press soft key to open Language menu.
- Select an appropriate language by pressing key
and then press soft key.
Func
OK
PM 02:58
OK Back
Menu
02. Phone Book
03. Speed Dial
01. Call Log
04. Setting
PM 02:58
OK Back
Setting
02. Sounds
03. Date & Time
01. Display
04. Password
05. 言語設定
OK
OK
PM 02:58
OK Back
言語設定
English
日本語
05. Adjust

58
This page is for your notes.
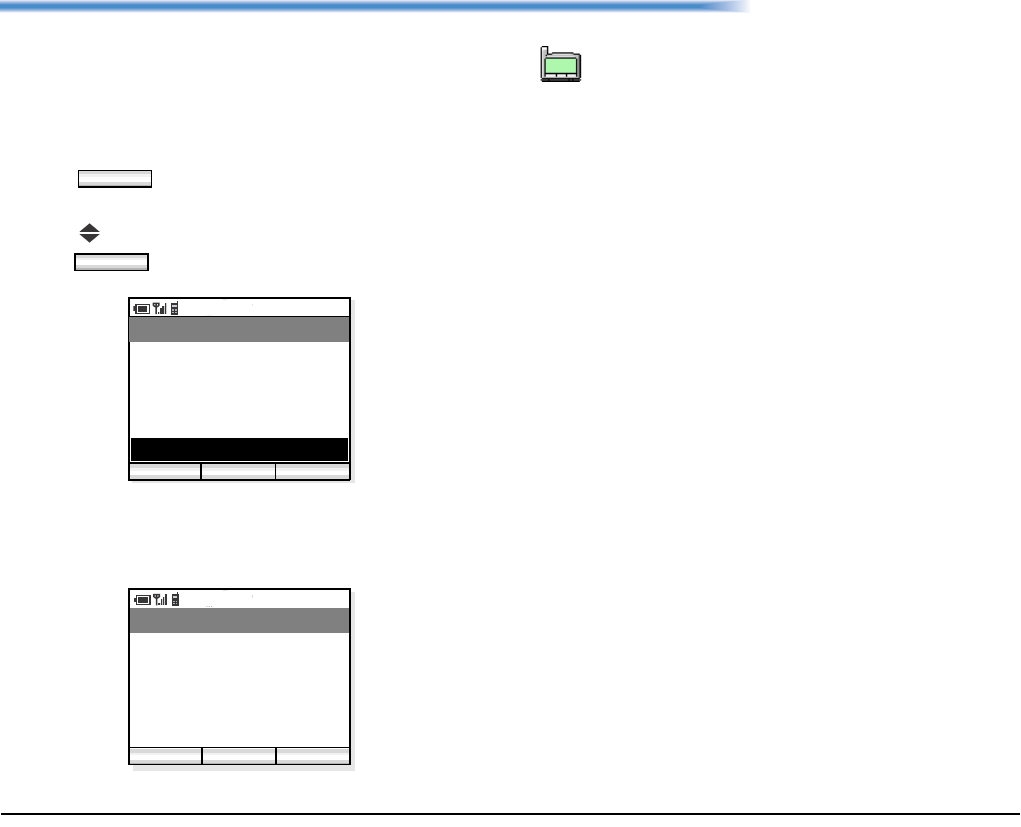
59
9. DEVICE INFO
You can see the device information of the handset such
as Phone Number, IP Address, Version, and MAC
Address.
• TO DISPLAY DEVICE INFO
- Press soft key in standby mode to display
the main menu.
- Press key to select “05. Device Info” and then
press key.
- The handset displays the following device informa-
tion (general).
Func
OK
PM 02:58
OK Back
Menu
03. Speed Dial
04. Setting
02. Phone Book
05. Device Info
01. Call Log
PM 02:58
Back
Device Info
72500
IP Address
Phone Number:
Detail
192.168.0.36
Device Information (general)
To view the Detail information, administrator
password is necessary. Please contact your
network administrator for more information.
TIP
01:AbcDefg
02:HigkLmn
03:OpqrStu

60
This page is for your notes.
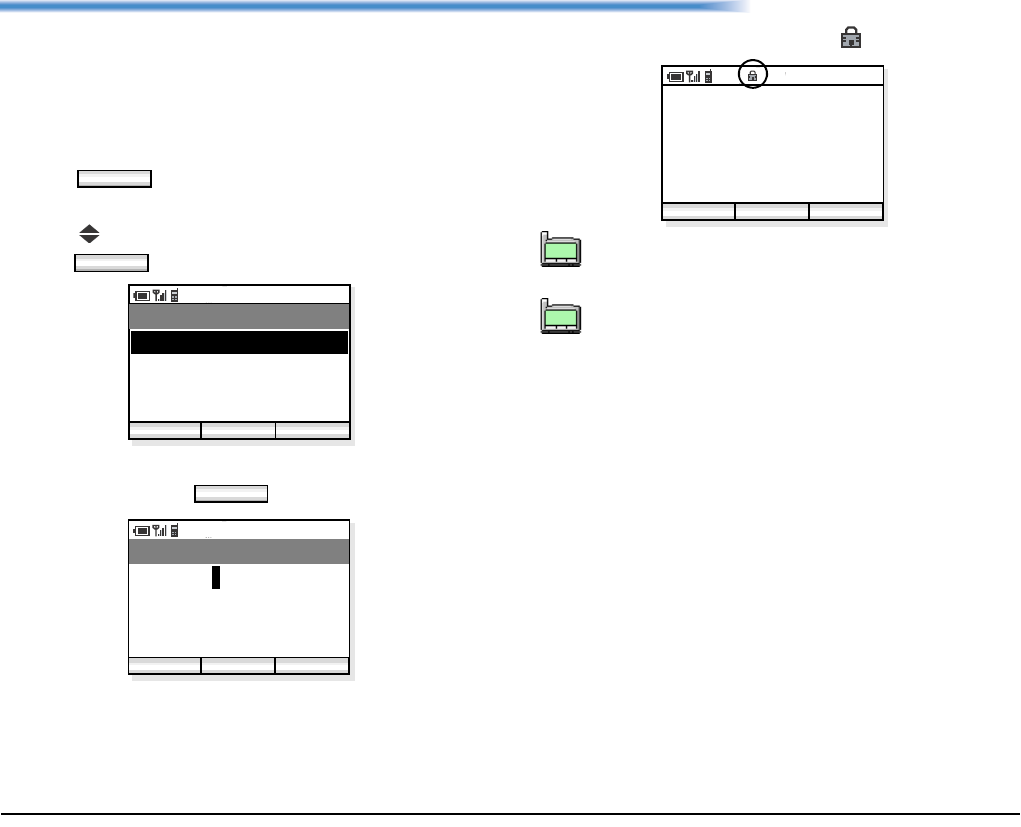
61
10. LOCK/UNLOCK
You can lock the handset against unauthorized usage.
This is also useful for guarding the handset against
inadvertent button presses.
• TO LOCK THE PHONE
- Press soft key in standby mode to display
the main menu.
- Press key to select “06. Lock/Unlock” and then
press soft key.
- Enter your User Password (4 digits) by using dial
pad and then press soft key.
- The handset is locked and lock icon appears.
Func
OK
PM 02:58
OK Back
Menu
07. Presence
08. Short Message
06. Lock/Unlock
09. Maintenance
OK
PM 02:58
OK Back
Password
* * * *
123
4/4
Each number you pressed is indicated by a *
on the phone display.
See “Page 56, PASSWORD” for more informa-
tion on the User Password.
2007 Oct 01
PM 02:58
Tokyo Office
PM 02:58
Func Profile
TIP
01:AbcDefg
02:HigkLmn
03:OpqrStu
TIP
01:AbcDefg
02:HigkLmn
03:OpqrStu
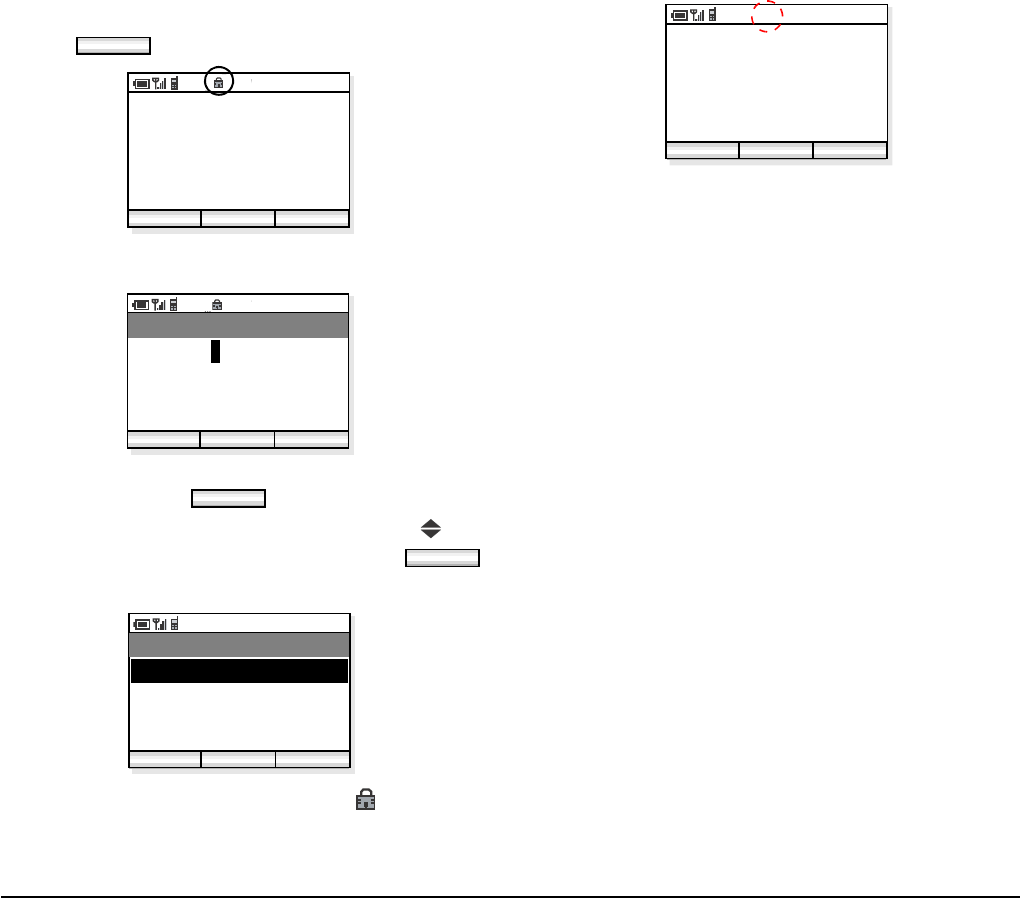
62
• TO UNLOCK THE PHONE
- Press soft key in standby mode.
- The handset displays the password entry screen.
- Enter your User Password (4 digits) by using dial
pad and then press soft key.
- The handset displays the main menu. Press key
to select “06. Lock/Unlock” and then press
soft key.
- The phone is unlocked and the lock icon disap-
pears.
Func
2007 Oct 01
PM 02:58
Tokyo Office
PM 02:58
Func Profile
PM 02:58
OK Back
Password
* * * *
123
4/4
OK
OK
PM 02:58
OK Back
Menu
07. Presence
08. Short Message
06. Lock/Unlock
09. Maintenance
2007 Oct 01
PM 02:58
Tokyo Office
PM 02:58
Func Profile
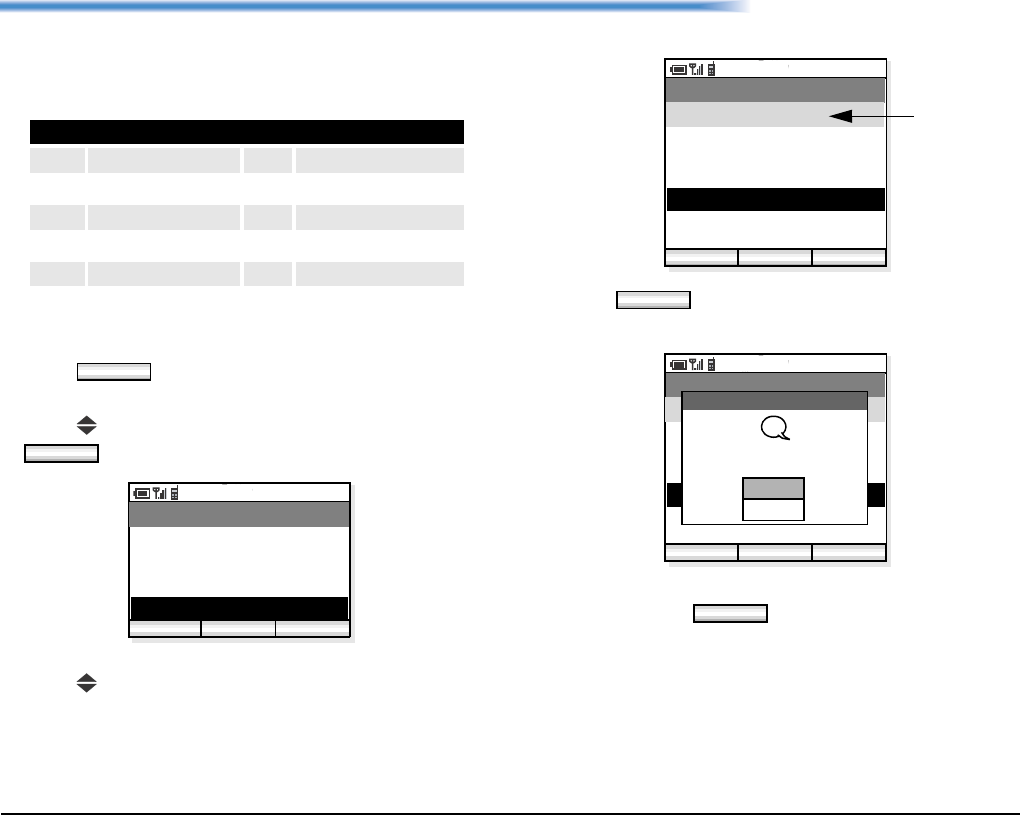
63
11. PRESENCE
You can set the current presence information on the
handset. The following presence information is
available.
• TO CHANGE PRESENCE
- Press soft key in standby mode to display
the main menu.
- Press key to select “07. Presence” and then press
soft key.
- The handset displays the Presence menu.
- Press key to select an appropriate presence.
- Press soft key to change your presence to
the selected status.
- To change the current presence status, select “Yes”
and then press soft key.
Available Presence Information
01 Online 06 Out to Lunch
02 Away from Desk 07 Gone home
03 Busy 08 Out of Office
04 Meeting 09 On Business Trip
05 Break 10 Secret
Func
OK
PM 02:58
OK Back
Menu
05. Device Info
06. Lock/Unlock
04. Setting
07. Presence
PM 02:58
OK Back
Change Presence
02. Away from Desk
03. Busy
01. Online
04. Meeting
05. Break
06. Out to Lunch
[Online] current
presence
OK
PM 02:58
OK Back
Change Presence
02. Away from Desk
03. Busy
01. Online
04. Meeting
05. Break
06. Out to Lunch
[Online]
Change
Change Presence
Yes
No
presence status?
?
OK
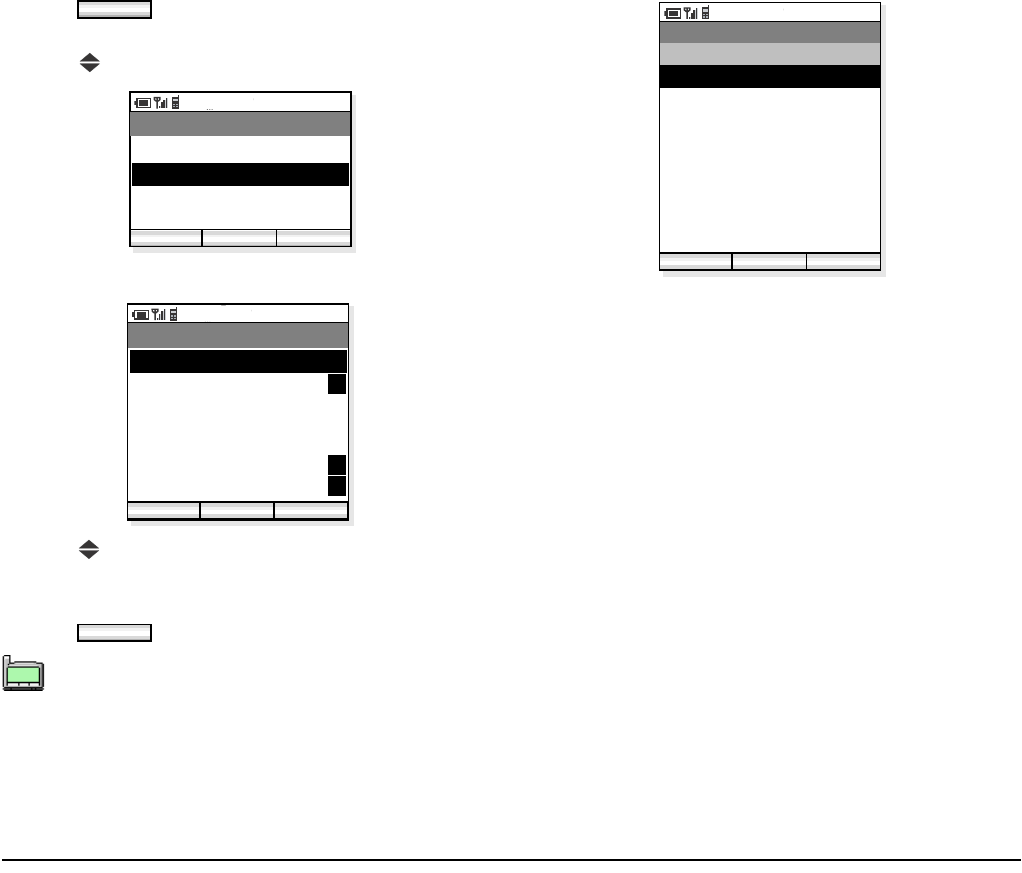
64
• TO VIEW PRESENCE
- Press soft key in standby mode to display
the main menu.
- Press key to select “02. Phone Book”.
- The handset displays the following.
- Press key to select an entry you want to see. To
view the presence status, a letter ‘P’ must be indi-
cated on the right side of the entry.
- Press soft key to view the presence.
- The information of the selected entry is displayed.
A letter P is added when the person is a target
of Presence feature.
Func
PM 02:58
OK Back
Menu
02. Phone Book
03. Speed Dial
01. Call Log
04. Setting
PM 02:58
OK Find
Phone Book
002. Aaron
003. Julia
001. Ben
Func
004. Paul
005. Rachel
006. James
007. Hannah
P
P
P
P
OK
TIP
01:AbcDefg
02:HigkLmn
03:OpqrStu
PM 02:58
Back
Phone Book
03. 97521111
04. Mobile
02. Benjamin
01. Ben
Out to Lunch
06. Note
07. Group 1
05. Other
08. Select Presence
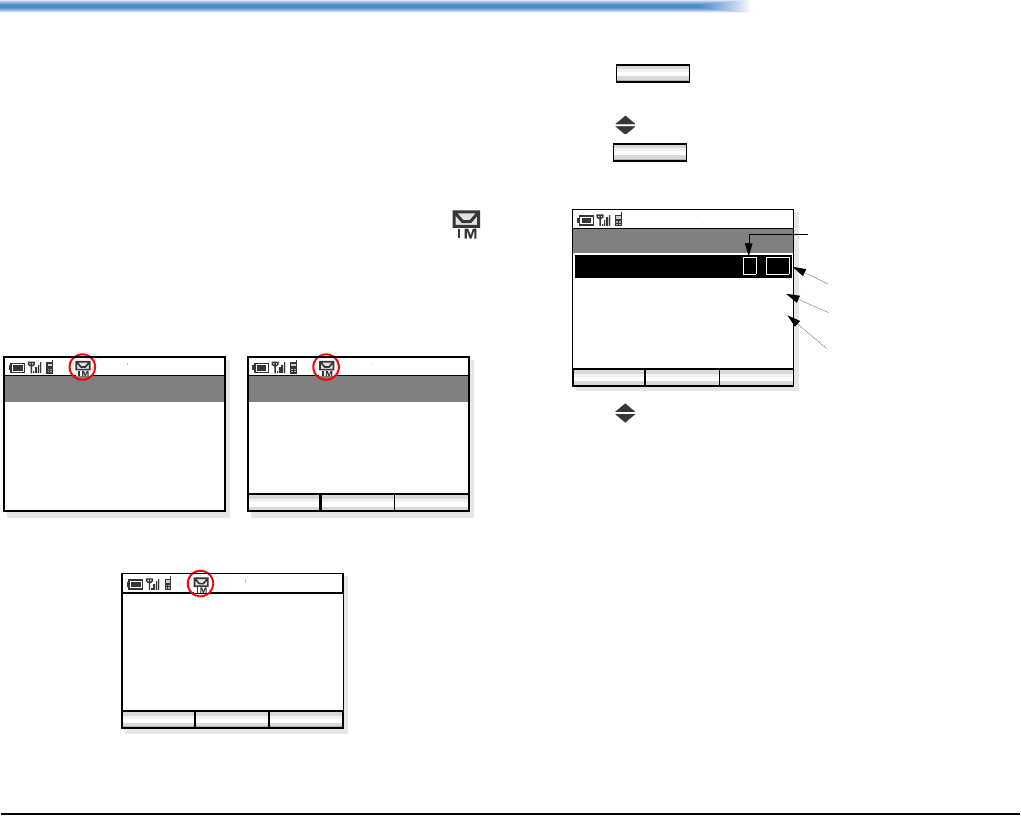
65
12. SHORT MESSAGE
The handset can send or receive short messages (instant
messages). Up to 100 messages can be stored in Inbox
and Outbox respectively and up to 10 drafts can be
stored. If you receive a call while creating a message, it
is automatically saved as a draft message.
• SHORT MESSAGE INDICATION
When you receive a message, the handset displays
icon as shown below. This is an indication that you
have received a message.
• TO VIEW SHORT MESSAGE
- Press soft key in standby mode to display
the main menu.
- Press key to select “08. Short Message” and then
press soft key.
- The handset displays the Short Message menu.
- Press key to select “01. Inbox”or “02. Outbox”.
PM 02:58
IM receiving...
Receive IM
PM 02:58
OK Back
Receiving
Receive IM
completed
PM 02:58
OK Back
2007 Oct 01
PM 02:58
Tokyo Office
1 New Message
While receiving a message Receiving is completed.
Display returns to standby mode.
Func
OK
PM 02:58
OK Back
Short Message
02. Outbox
03. Draft
01. Inbox
04. Compose IM
3 / 43
20
3
number of messages in Out box
number of unread messages
number of drafts
number of received messages
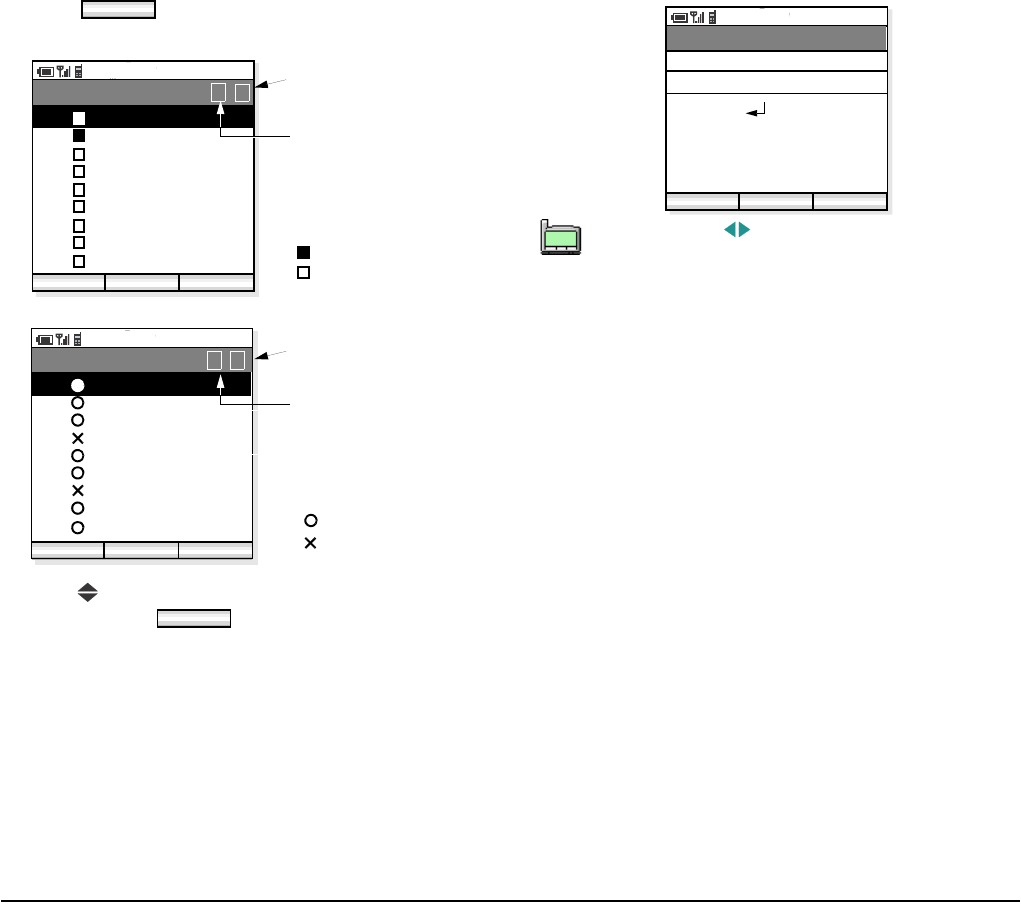
66
- Press soft key to open “Inbox/Outbox”
menu.
- Press key to select a message you want to read
and then press soft key.
- The contents of the selected message will be dis-
played.
OK
PM 02:58
OK Back
Inbox
Func
1 / 5
PM 02:58
OK Back
Outbox
Func
1 / 3
current page
total number of pages
: unread message
: already read message
current page
total number of pages
: successful sending
: failed sending
01.
02.
03.
04.
05.
06.
07.
08.
09
Jun/30 01234
Jun/30 35435
Jun/28 1243
Jun/28 35622
Jun/25 12348
Jun/23 54321
Jun/20 13683
Jun/10 43584
Jun/10 68325
Jun/30 01234
Jun/30 35435
Jun/28 1243
Jun/28 35622
Jun/25 12348
Jun/23 54321
Jun/20 13683
Jun/10 43584
Jun/10 68325
01.
02.
03.
04.
05.
06.
07.
08.
09
OK
By pressing key while displaying a mes-
sage, you can view the previous or next mes-
sage in the list.
PM 02:58
Reply
Recv. IM
I’ve just arrived in London.
Here, I will join the confe
Hi, Mike!
Func
rence you said yesterday
1/ 43
Jun/30 PM01:21
From: 01234
TIP
01:AbcDefg
02:HigkLmn
03:OpqrStu
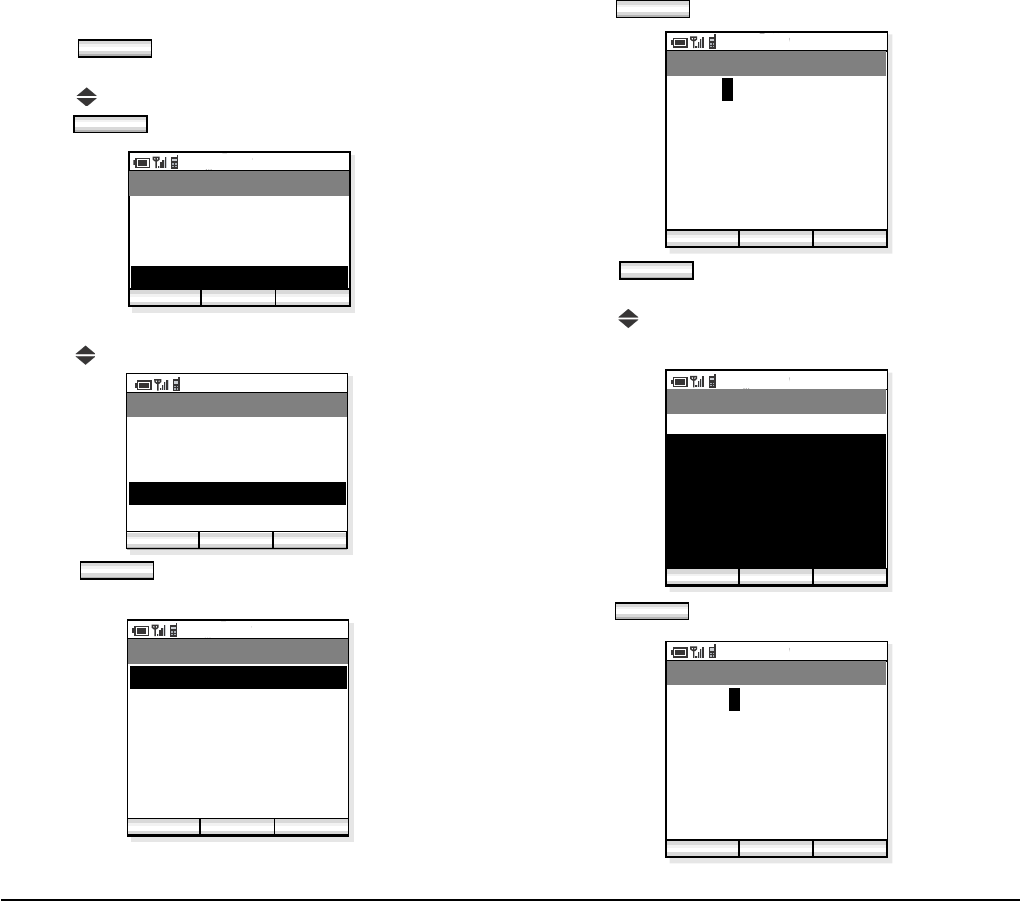
67
• TO SEND A SHORT MESSAGE
- Press soft key in standby mode to display
the main menu.
- Press key to select “08. Short Message” and then
press soft key.
- The handset displays the Short Message menu.
- Press key to select “04.Compose IM”
- Press soft key and then the handset dis-
plays a blank message.
- Press soft key to enter the address.
- Press soft key when the new address is
entered.
- Press to select the lower area to create a mes-
sage.
- Press soft key to start writing.
Func
OK
PM 02:58
OK Exit
Menu
06. Lock/Unlock
07. Presence
05. Device Info
08. Short Message
PM 02:58
OK Back
Short Message
02. Outbox
03. Draft
01. Inbox
04. Compose IM
3/43
20
3
OK
PM 02:58
Edit Send
Compose IM
To:
Func
Edit
PM 02:58
OK Back
Edit Address
3508
123
4/32
OK
PM 02:58
Edit Send
Compose IM
To:3508
Func
Edit
PM 02:58
OK Func
Edit Message
Hi, Jim
aAbB
7/300
68
- Press soft key when you finish writing the
message.
- Press soft key to send the message to the
address.
OK
PM 02:58
Edit Send
Compose IM
To:3508
Func
Hi, Jim I’ve just arrived in
Tokyo! I’ll send you the report
after the conference.
Send
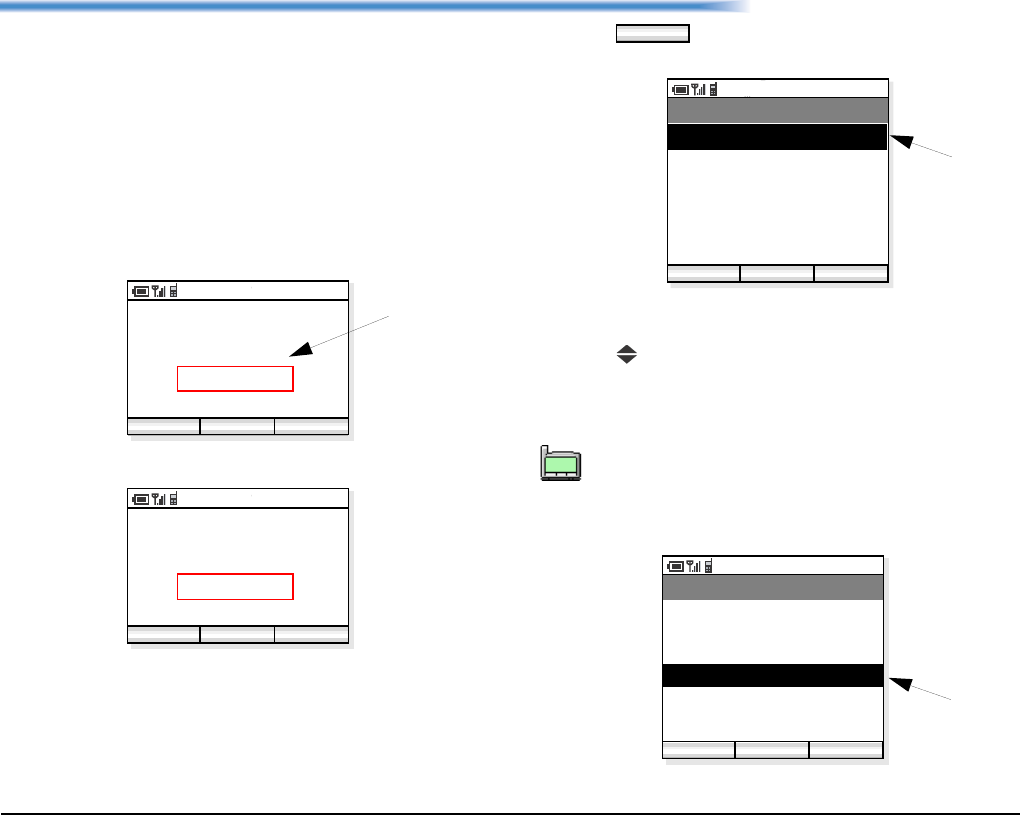
69
13. PROFILE
A profile is a named collection of configuration settings
that should be edited by the network administrator. Up
to five profiles can be used. This section explains how
to apply an already assigned profile to the phone.
• TO APPLY A PROFILE
- Currently applied profile appears in standby mode
as follows.
- Press soft key in standby mode to display
the Profile Menu.
- The currently applied profile is indicated by a *
mark.
- Press key to select an appropriate profile in the
list. As an example, “04. Sapporo Factory” is
selected.
2007 Oct 01
PM 02:58
Tokyo Office
PM 02:58
Func Profile
profile
2007 Oct 01
PM 02:58
No profile
PM 02:58
Func Profile
when a profile is applied
when no profile is applied Your network administrator usually knows
which profile should be applied. Please follow
his/her instructions when changing this data.
Profile
PM 02:58
OK Back
Profile
01. Tokyo Office
07. Presence
*
02. Yokohama Office
03. Osaka Factory
04. Sapporo Office
05. Head Office
applied profile
TIP
01:AbcDefg
02:HigkLmn
03:OpqrStu
PM 02:58
OK Back
Profile
01. Tokyo Office *
02. Yokohama Office
03. Osaka Factory
04. Sapporo Office
05. Head Office
newly selected
profile
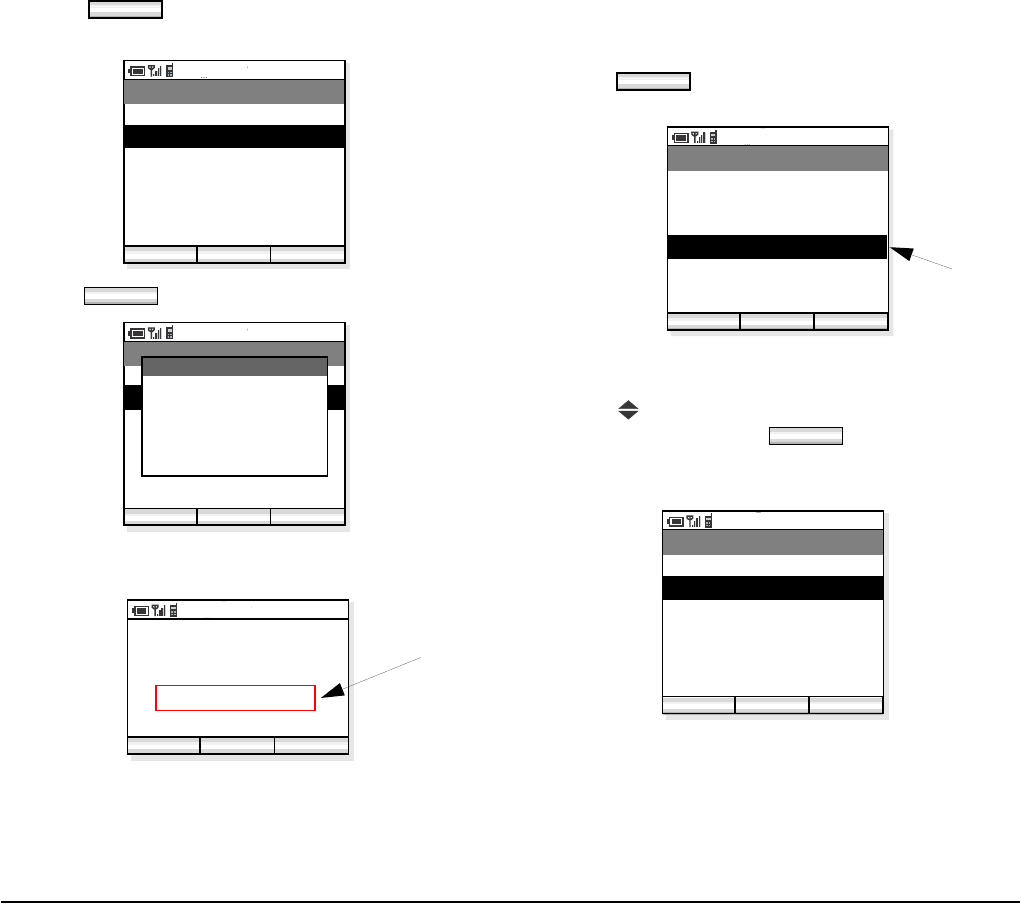
70
- Press soft key.
- Select “02. Apply” to apply the selected profile.
- Press soft key.
- The display returns to the standby mode. The newly
selected profile is applied.
• TO RELEASE THE CURRENT
PROFILE
- Press soft key in standby mode to display
the Profile Menu.
- The currently applied profile is indicated by a *
mark.
- Press key to select the current applied profile in
the list and then press soft key.
- On the displayed menu, select “02. Release” to
release the current applied profile.
OK
PM 02:58
OK Back
Profile
01. Edit
02. Apply
03. Clear
OK
PM 02:58
OK
Profile
01. Edit
02. Apply
03. Clear
Sapporo Office
Apply Profile
is applied.
2007 Oct 01
PM 02:58
Sapporo Office
PM 02:58
Func Profile
new profile
Profile
PM 02:58
OK Back
Profile
01. Tokyo Office
*
02. Yokohama Office
03. Osaka Factory
04. Sapporo Office
05. Head Office
applied profile
OK
PM 02:58
OK Back
Profile
01. Apply
02. Release
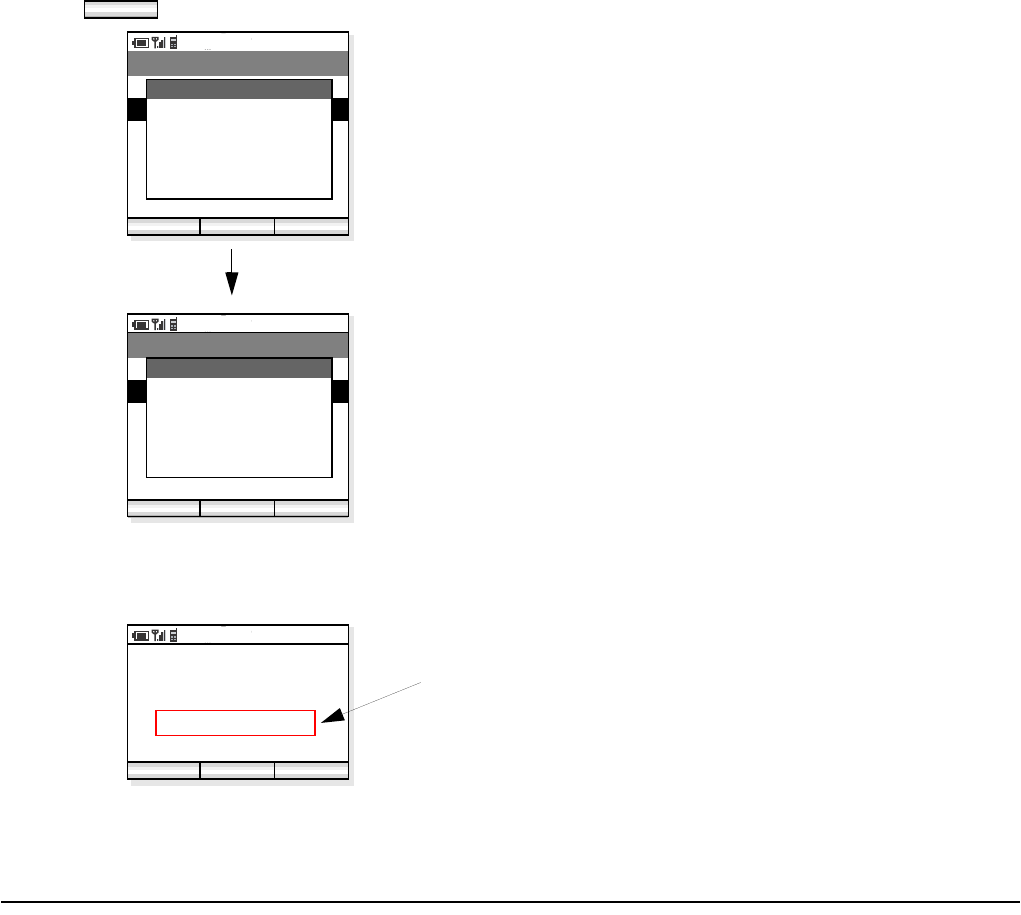
71
- Press soft key to release the profile.
- The display returns to the standby mode. “No pro-
file” indicates that the applied profile has been
cleared.
OK
PM 02:58
OK Back
Profile
01. Apply
02. Release
PM 02:58
OK Back
Profile
01. Apply
02. Release
Processing...
Profile
Sapporo Office
Release Profile
is applied.
2007 Oct 01
PM 02:58
No profile
PM 02:58
Func Profile
no profile

72
This page is for your notes.

73
14. MENU LIST
•MENU LIST
The following shows the menu list of MH250 with the default values and remarks as required.
Category Menu Default Remarks
Func (Function) Menu This is main menu of the phone.
01. Call Log
02. Phone Book
03. Speed Dial
04. Setting
05. Device Info
06. Lock/Unlock
07. Presence
08. Short Message
09. Maintenance
74
Call Log Call Log
01. Outgoing Calls
02. Incoming Calls
03. Missed Calls
Outgoing Calls Outgoing Calls up to 30 entries
No Entry found
(when no record)
Incoming Calls Incoming Calls up to 30 entries
No Entry found
(when no record)
Missed Calls Missed Calls up to 30 entries
No Entry found
(when no record)
Each Menu Menu
01. Phone Book Entry
02. Delete
03. Delete All
Call Origination Opera-
tion>Dial Phone Number
Menu
Menu
01. Phone Book
02. Call Log
03. Delete
04. Call
05. Edit
Category Menu Default Remarks
75
Phone Book
Phone Book Listing Phone Book
001.xxxxx - 500.xxxxx
Phone Book Menu
(when no entry is found)
Menu
01. Edit Group Name
02. Add New Entry
03. End
Phone Book Menu (when entry
is found)
Menu Note: These items are displayed only when Func soft key
is pressed while viewing an entry in Group Name
Search mode.
01. Search
02. Edit Group Name
03. Add New Entry
04. Delete
05. Dial
06. Edit
07. Create Message
08. Presence Gr. Entry (Note)
09. Presence Gr. Clear (Note)
10. End
Search Method Selection Search
01. Name
02. Phone Number
03. Group Name
Name Name 100 bytes
(alphanumeric characters including symbols)
Phone Number Phone Number 32 bytes
(32 digits)
Group (Group Name) Group 1 The Group name of the selected Group
is displayed.
001.xxxxx - 500.xxxxx
Category Menu Default Remarks
76
Edit Group Name List Edit Group Name
01. Group 1
02. Group 2
03. Group 3
04. Group 4
05. Group 5
06. Group 6
07. Group 7
08. Group 8
09. Group 9
10. Group 10
Edit Group Name Edit Group Name Group n*
n*:1-10
16 bytes
(alphanumeric characters including symbols)
Phone Book Phone book
01. Name
02. Reading
03. Work
04. Mobile
05. Other
06. Note
07. Group 1
08. Select Presence
Name Name blank 60 bytes
(alphanumeric characters including symbols)
Reading Reading blank 100 bytes
(alphanumeric characters including symbols)
Work Work blank 32 bytes
(32 digits)
Mobile Mobile blank 32 bytes
(32 digits)
Other Other blank 32 bytes
(32 digits)
Note Note blank 200 bytes
(alphanumeric characters including symbols)
Category Menu Default Remarks

77
Group Selection Group Group 1
Group 1
Group 2
Group 3
Group 4
Group 5
Group 6
Group 7
Group 8
Group 9
Group 10
Presence
Selection
Group Off
On
Off
Speed Dial Speed Dial blank 32 bytes
1.
2.
3.
4.
5.
6.
7.
8.
9.
0.
Speed Dial - Menu Menu
01. Edit/Add
02. Search Phone Book
03. Delete
Category Menu Default Remarks
78
Category Menu Default Remarks
Setting Setup Menu
01. Display
02. Sounds
03. Date & Time
04. Password
05. 言語設定
Display Display
01. Backlight Level
02. Alert Setting
Backlight Backlight 3
(Level 1 - 3)
Alert Setting Alert Setting On
On
Off
Sounds Sounds
01. Courtesy Mode
02. External Call
03. Internal Call
04. Private Call
05. Ring Volume
06. Call Volume
07. Key Click Tone
08. MOH Selection
09. RTP Alarm
10. Handover Tone
Courtesy Mode Courtesy Mode Off
On
Off
External Call External Call
01. Ring
02. Vibrator
79
Ring Ring Pattern 1
Pattern 1
:
:
Pattern 10
Melody 1
:
:
Melody 10
Vibrator Vibrator Off
Off
Pattern 1
Pattern 2
Pattern 3
Internal Call Internal Call
01. Ring
02. Vibrator
Ring Ring Pattern 2
Pattern 1
Pattern 2
:
Pattern 10
Melody 1
:
:
Melody 10
Vibrator Vibrator Off
Off
Pattern 1
Pattern 2
Pattern 3
Private Call Private Call
01. Ring
02. Vibrator
Category Menu Default Remarks
80
Ring Ring Pattern 3
Pattern 1
Pattern 2
Pattern 3
:
Pattern 10
Melody 1
:
:
Melody 10
Vibrator Vibrator Off
Off
Pattern 1
Pattern 2
Pattern 3
Ring Volume Ring Volume 5Range: 0-7
Call Volume Call Volume
01. Handset
02. Headset
Handset Handset 5Range: 0-7
Headset Headset 5Range: 0-7
Key Click Tone Key Click Tone Off
On
Off
MOH Select MOH Select Tone 1 1: Minuet
2: For Elise
Tone 1
Tone 2
Category Menu Default Remarks
81
RTP Alarm RTP Alarm Off On/Off: Enable/disable voice
packet loss alarm
On
Off
Handover Tone Handover Tone Off
On
Off
Date & Time Date & Time
01. AdjustDate&Time
02. Date Format
03. Time Format
04. Daylight Saving
05. Adjust
Date & Time Adjustment AdjustDate&Time 2006/01/01 (2006/01/01 - 2019/12/31)
* year "20" is fixed
Date (yyyy/mm/dd)
20yy/mm/dd
Time Set
hh:mm
hh: 00-23
mm: 00-59
Date Format AdjustDate&Time yyyy/mm/dd
yyyy/mm/dd
mm/dd/yyyy
mm/dd
Time Format Time Format 12 hour
12 hour
24 hour
Daylight Saving Daylight Saving Off
On
Off
Time Adjustment Adjust
01. Means
02. SNTP Adjust at
03. Time Offset
Category Menu Default Remarks
82
Means Means RTC No adjustment
RTC
From SIP
From SNTP
SNTP Adjust
at
SNTP Adjust at 00:00
00:00
Time Offset Time Offset +9:00 (-12 - +14)
-12:00/-11:00/-10:00/-9:00/
-8:00/-7:00/-6:00/-5:00/-4:00/-3:30/-3:00/
-2:00/-1:00/0/+1:00/+2:00/+3:00/+3:30/
+4:00/+4:30/+5:00/+5:30/+/5:45/+6:00/
+6:30/+7:00/+8:00/+9:00/+9:30/+10:00/
+11:00/+12:00/+13:00/+13:30/+14:00/
Password Password
01. User 0123
02. Administrator
Old Password Old Password blank 4 bytes
New Password New Password blank 4 bytes
Confirm Password Confirm Password blank 4 bytes
Language 言語設定 English
日本語
English
Device Information
Device Info Device Info
(without using password) Phone Number:
×××-×××-×××
IP Address:
×××.×××.×××.×××
Category Menu Default Remarks
83
Lock/Unlock
(User Password)
Password blank 4 bytes
Change Presence Change Presence Online selected self-status
[Online]
01. Online
02. Away from Desk
03. Busy
04. Meeting
05. Break
06. Out to Lunch
07. Gone home
08. Out of Office
09. On Business Trip
10. Secret
Online Select one from 10 presence
data.
Short Message Short Message number of unread/total
01.Inbox 0/ 0
02.Outbox 0 number of messages
03.Draft 0 number of drafts
04.Compose IM
Category Menu Default Remarks
84
Inbox Inbox n/n When no message
exists, you cannot
move to the next
screen.
current page/total pages
Each received message is
displayed in one line with
index, unread/read icons,
date, sending party's phone
number.
Outbox Outbox n/n When no message
exists, you cannot
move to the next
screen.
current page/total pages
Each sending message is dis-
played in one line with index,
successful/failed sending
icons, date, called party's
phone number.
Draft Draft n/n When no message
exists, you cannot
move to the next
screen.
current page/total pages
Each draft is displayed in one
line with index, called, and
calling party's phone number.
Compose IM Compose IM blank current page/total pages
To: (address area) 14 digits from the top will be
displayed.
(message area) blank Use up/down key to move
between "address" area and
"message" area.
Edit Address Edit Address blank 32 bytes
Edit Message Edit Message blank UTF-8 300 bytes
(alphanumeric characters including
symbols)
Category Menu Default Remarks
85
Maintenance Maintenance
01. Ping
02. Firmware Update
Ping Ping 0.0.0.0 0.0.0.0 ~ 255.255.255.255
(IP Address)
×××.×××.×××.×××
Reply Timer:
×××× ms
1000 1 ~ 10000
Retry Times:
××××
4 1 ~ 10000
Packet Sizes:
×× byte
32 1 ~ 65535
Firmware Update Firmware Update
Category Menu Default Remarks
86
• CHARACTER CODE LIST
The following shows character code list when the phone in edit mode.
Character Code List
1st 2nd 3rd 4th 5th 6th 7th 8th 9th
@./:~-_
abcABC
de fDEF
gh iGHI
jklJKL
mn oMNO
pqr sPQRS
tuvTUV
wxyzWXYZ
’;(),“&
¥[space]
[space]-,.!?
[CR]
1
2
3
4
5
6
7
8
9
0
*
#
HOLD

87
15. TROUBLE SHOOTING
• MESSAGE MEANINGS AND SUGGESTIONS
The following shows the meaning and suggestions of messages that may be displayed on the MH250.
MESSAGE MEANING & SUGGESTIONS
[Connection Failed]
Duplicate IP address found
The IP address of the handset is conflicting with another device. If this is displayed,
please contact your network administrator.
[Password]
Incorrect Password The entered password is not correct. Enter the correct password.
[Low Battery]
Please charge Battery charge level is low. Charge the battery.
[Phone Book]
There is no number for this entry
This message appears when attempting to make a call from an entry in Phone book, if
the Phone number has not been registered for the entry. Before making a call, register
the phone number.
[Phone Book]
Phone book is full
The number of entries reaches the maximum. To add new entry, delete some entries in
advance.
[Key Lock]
Key locked Displayed when the handset is locked.
[Key Lock]
Key unlocked Displayed when the handset is unlocked.
[Phone Book]
Cannot delete Phone book for the administrator cannot be deleted.
[Phone Book]
Cannot edit Phone book for the administrator cannot be edited.
88
• TROUBLES AND SUGGESTIONS
The following shows suggestions on how to resolve MH250 operation problems. Confirm the following before
making a call:
Is power ON?
Is battery charged?
Are VoIP and Antenna icons displayed?
SYMPTOM SUGESTIONS
Cannot turn on the phone....
- Press and hold Power button more than 2 seconds.
- Insert the battery to the phone properly.
- Charge the battery.
Cannot operate keys on the phone.... - Unlock the phone if icon is displayed.
Communication is lost, audio break-up occurs... - Check the receiving signal strength.
- Charge the battery when is indicated.
Cannot charge the battery...
- Insert the battery to the phone properly.
- Place the battery on the proper position of the cradle.
- Insert the AC adapter cable securely.
Cannot see Antenna Icon.... - When you are in area where sufficient signal cannot be obtained, move to other area.
Cannot sustain battery power...
- Insert the battery to the phone properly.
- Place the battery on the proper position of the cradle.
- Replace the battery.
Cannot see VoIP Icon.... - SIP server registration is uncompleted. If this occurs, please contact your network
administrator.
Cannot make/receive a call.... - Make sure that phone number of the MH250. To change the phone number, please
contact your network administrator.
The phone does not ring.... - When the phone is placed in courtesy mode, cancel it. Courtesy mode icon
appears when the phone is in this mode.
POWER
89
16. TECHNICAL SPECIFICATIONS
• TECHNICAL SPECIFICATIONS
The following shows the technical specifications of MH250.
ITEM SPECIFICATIONS
Wireless Interface IEEE802.11b, RCR STD-33/ARIB STD-T66
Codec G.711, G.729a, Payload Size: 20ms, 40ms
Control Protocol SIP (RFC3261) with NEC extension
Authentication MAC authentication, IEEE802.1X (EAP-TLS, MS-PEAP)
Encryption TKIP, static WEP (64-bit/128-bit), AES
LCD 65,536 colors, 176 × 220 pixels
Main Features Short Message (up to100 messages, 300 characters for each message)/Presence/Phone Book/Call
Log/Speed Dial/Courtesy Mode
Ringer - Ringer Tone : selectable from 10 kinds of music or 10 ringer patterns
- Ringer Volume : selectable from 8 levels including no tone
Battery Lithium Ion battery
Battery Life - talk time: up to 3 hours
- standby time: up to 100 hours
AC Adapter - DC 5.0 ∼ 6.0 Volt, 700mA
- Ripple Voltage: less than 100mVp-p
- DC Plug: 9.5 ± 0.3 (L) × 5.5 ± 0.1 (OD) × 2.5 (ID) ± 0.1 mm
- Polarity:
Operating Temperature 0-40°C, 32-104°F
Operating Humidity 35-90% (not condensing)
Dimension with antenna 98.0 × 47.6 × 28.2 mm
Weight 110 g (including battery)
-+

90
This page is for your notes.
Printed in Japan
0704-002