Molex CVS Dabendorf 130-02 Bluetooth handsfree car-kit User Manual UserMan Flash
Novero Dabendorf GmbH Bluetooth handsfree car-kit UserMan Flash
UserManual.wiki
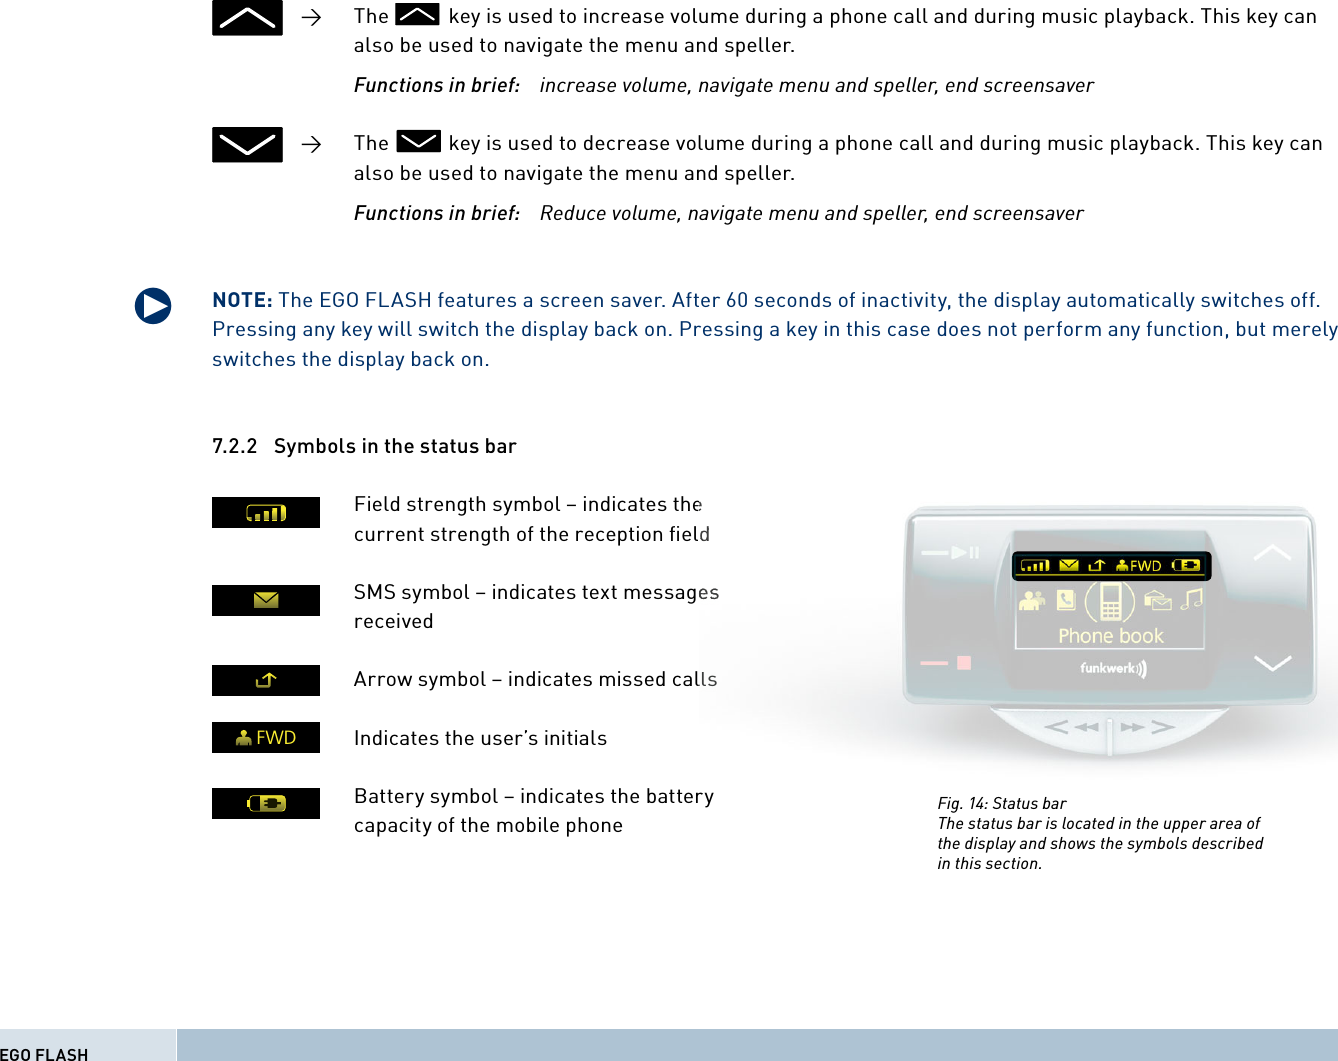
>
Molex CVS Dabendorf
>
130-02 User Manual
>
UserMan Flash
Contents
1.
UserMan Flash
2.
UserMan
UserMan Flash
Navigation menu
Upload a User Manual
Namespaces
Wiki Guide
HTML
PDF
Info
Views
User Manual
Discussion / Help
Navigation
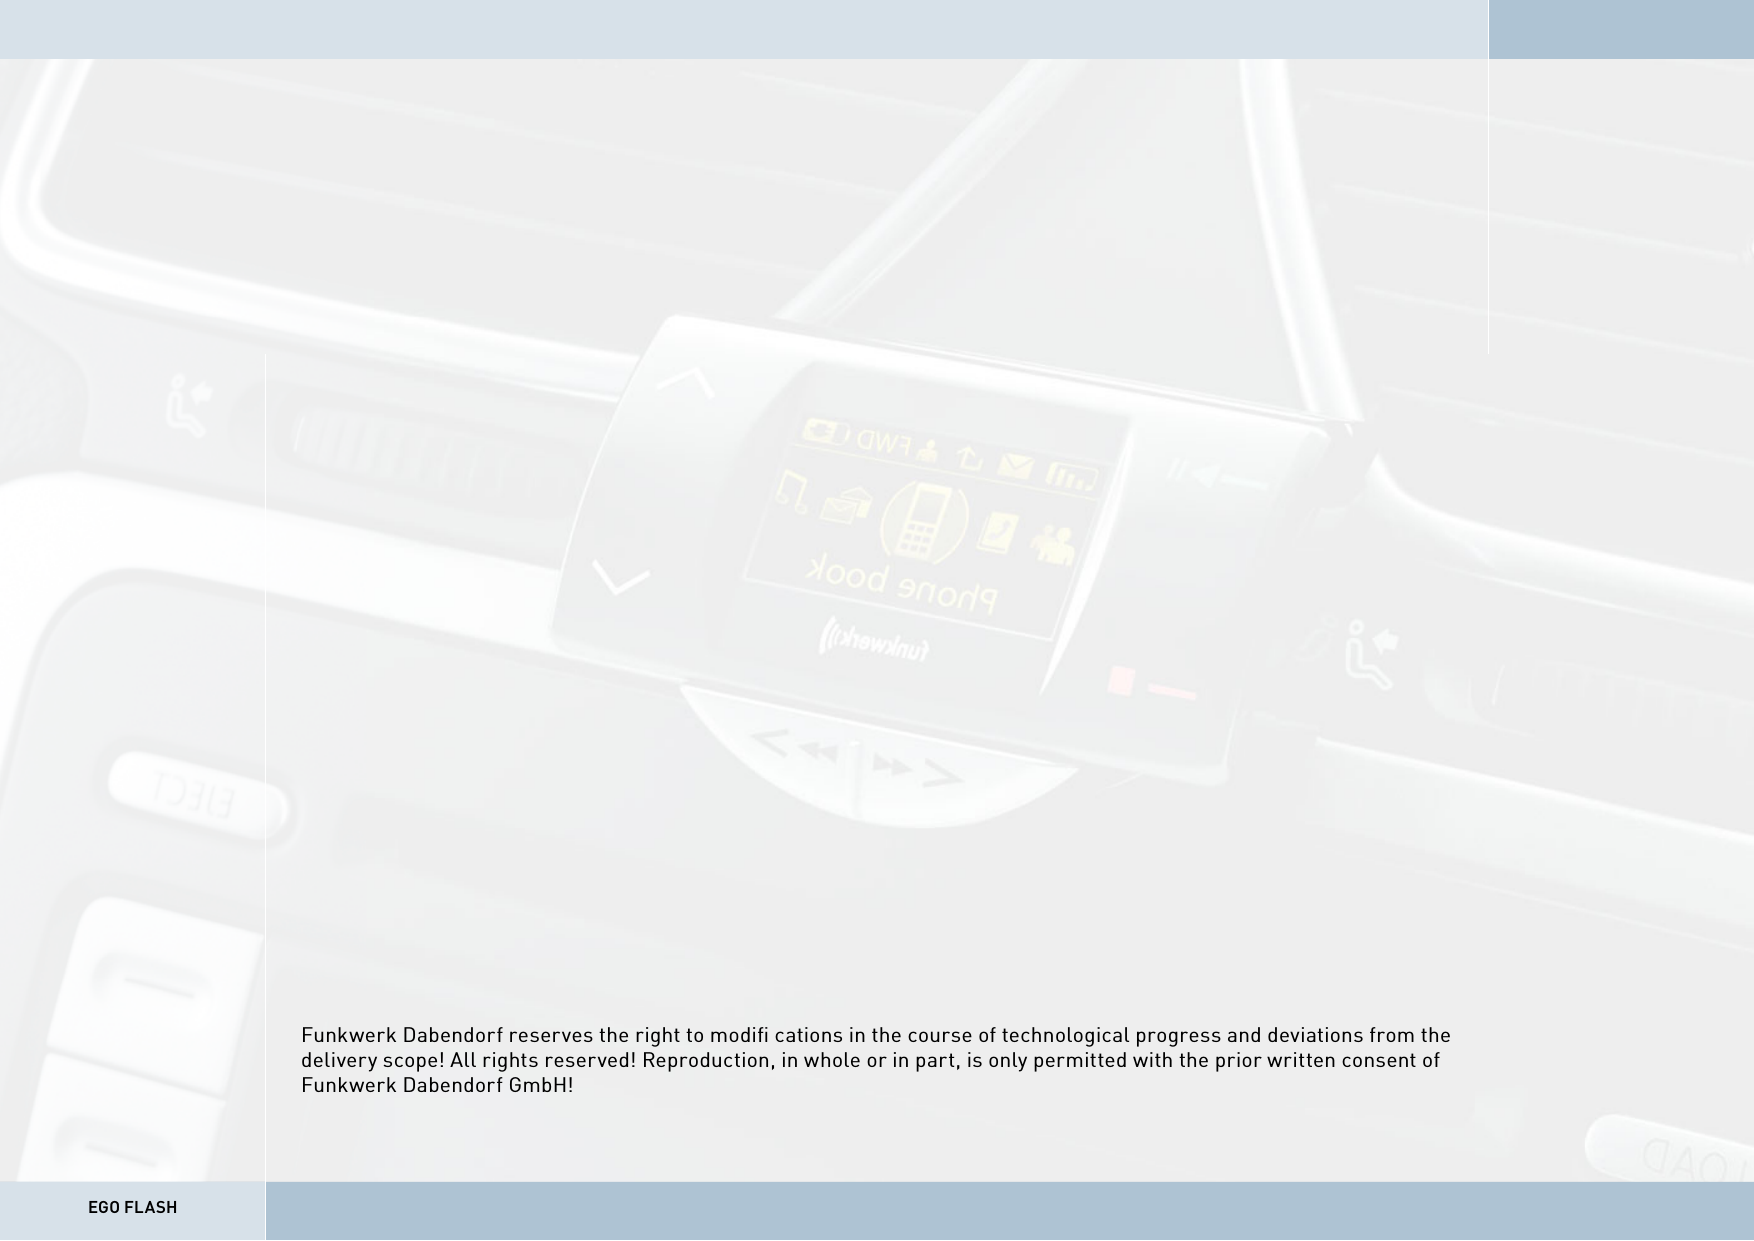
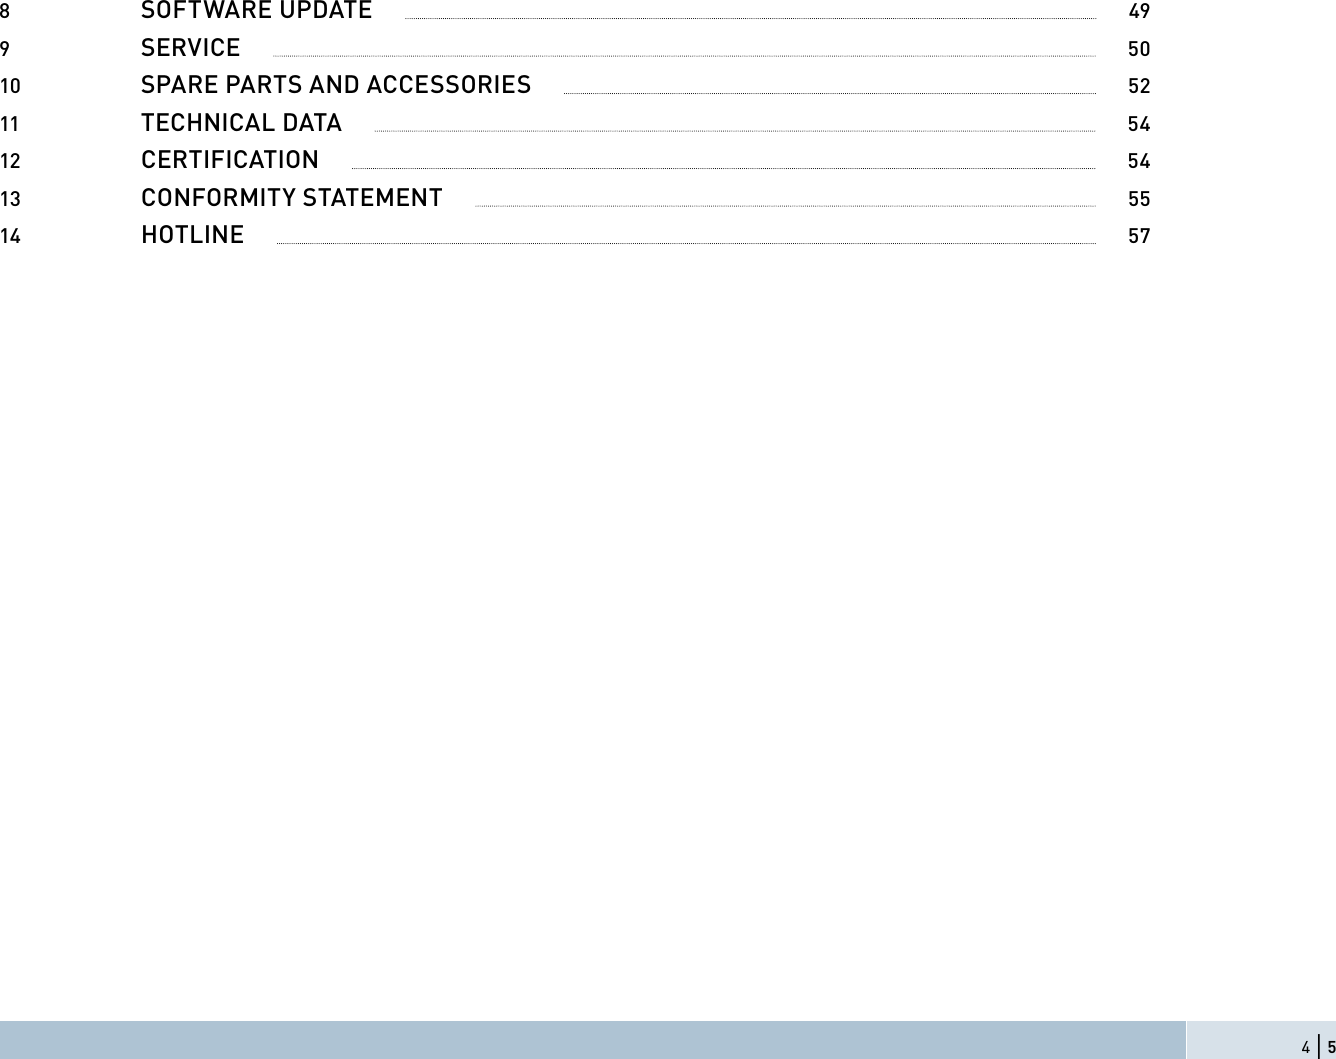
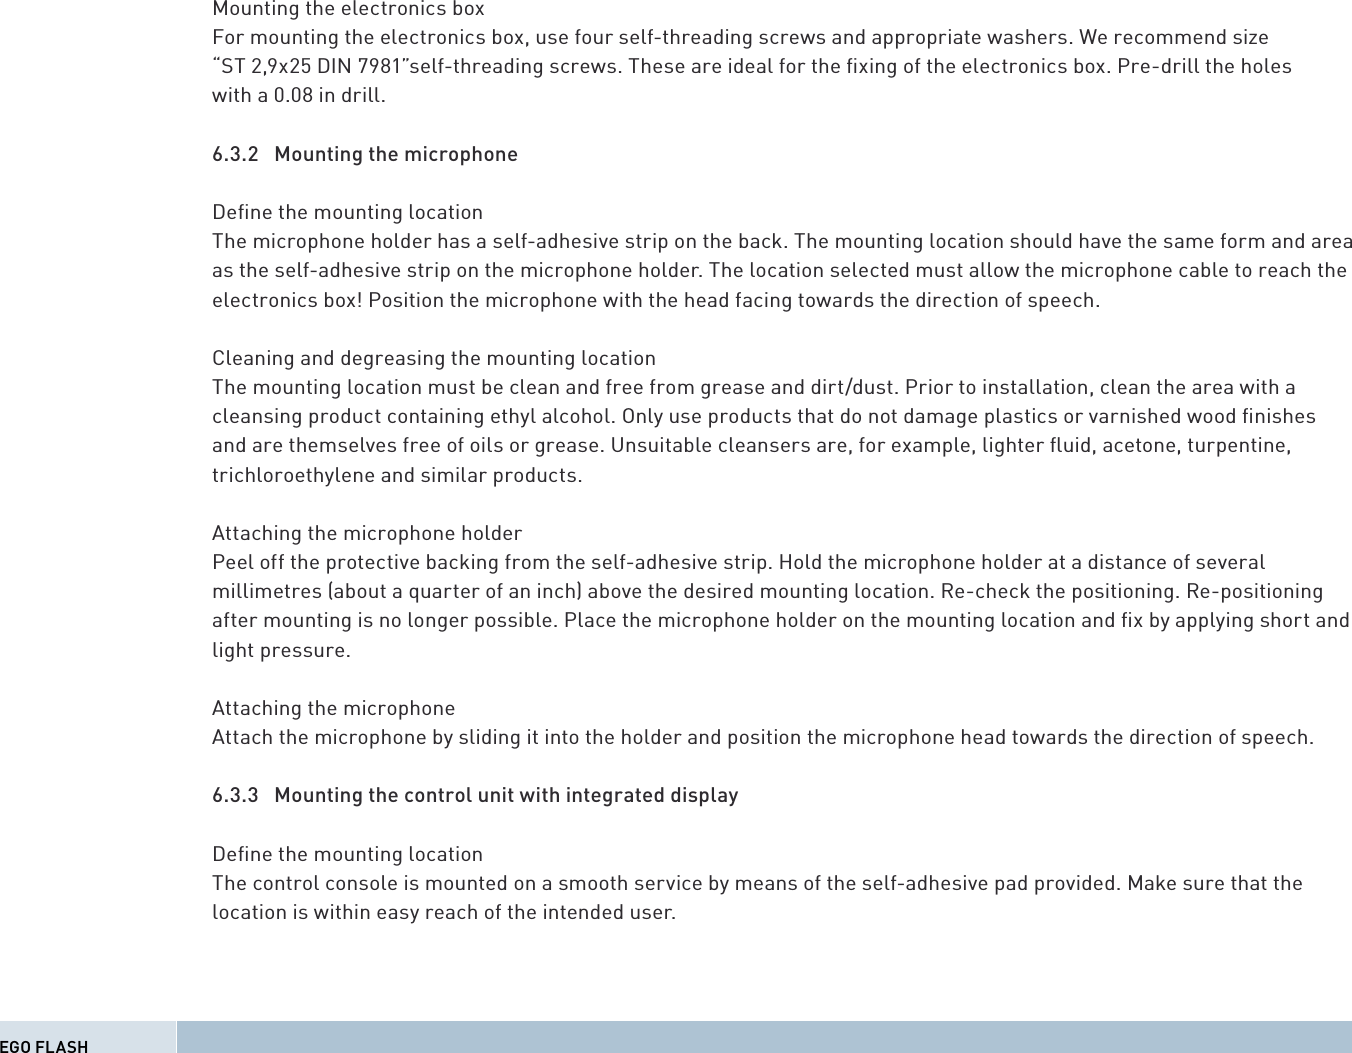
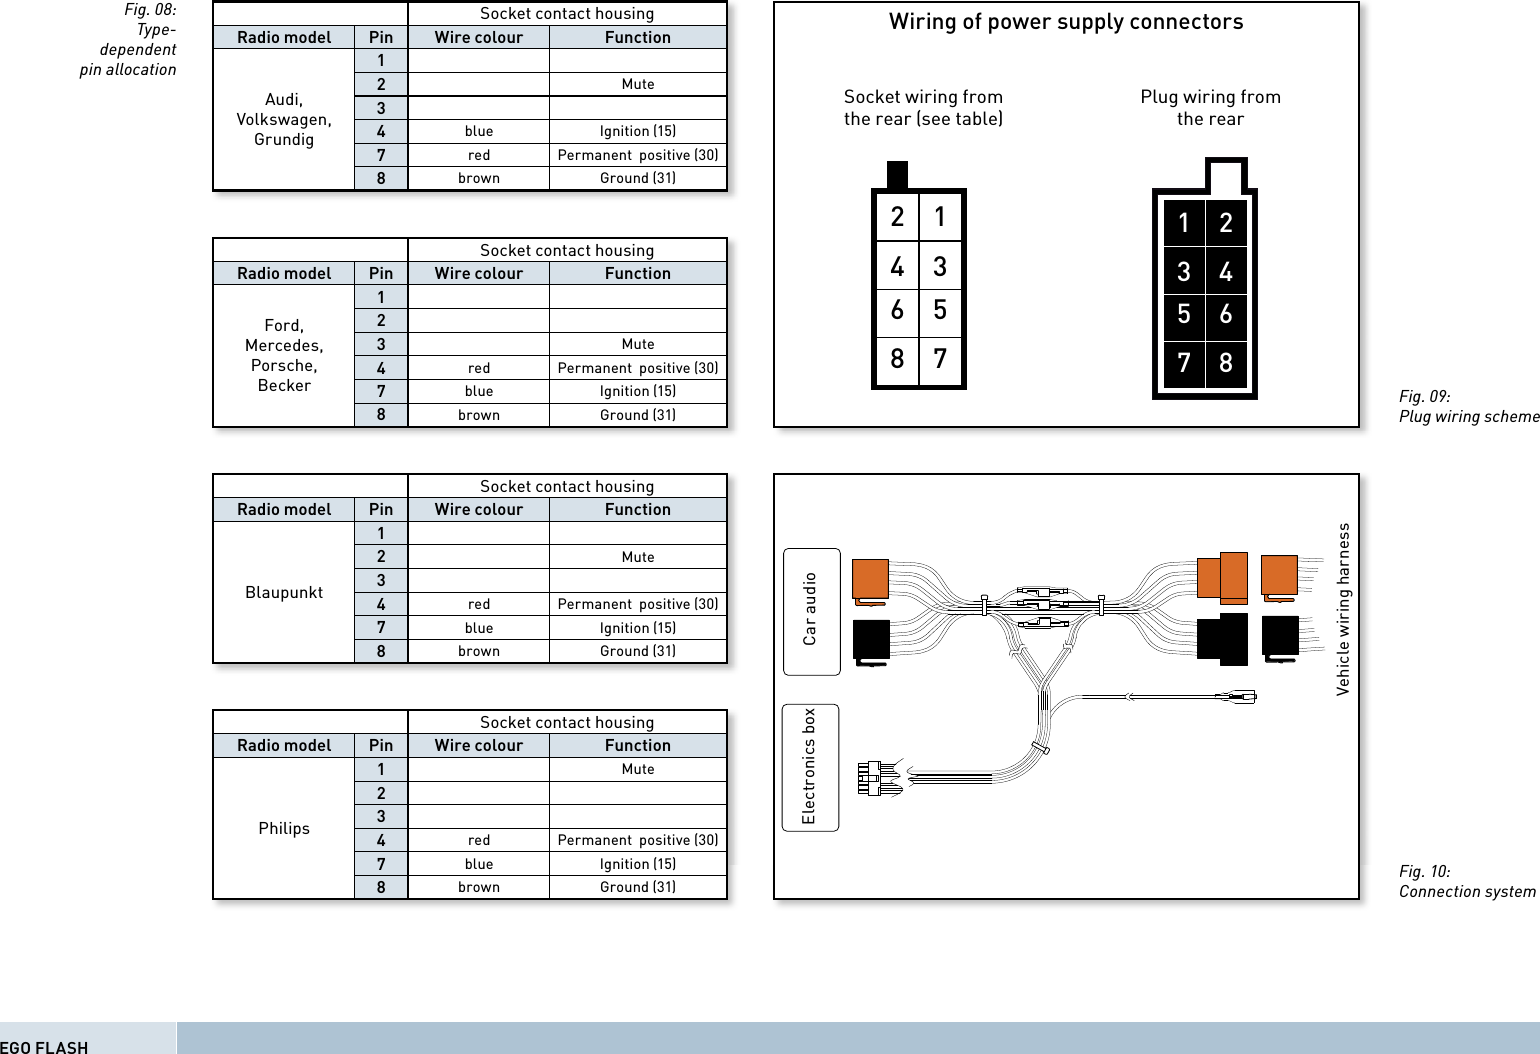
![Scope of delivery / package content[1] Electronics box[2] Control unit with integrated OLED display[3] Microphone[4] ISO-cable for connection to the car electrical system[5] Self-adhesive pad[6] Quick Guide[7] Safety manualPLEASE MAKE SURE THE CONTENT OF THE PACKAGE is complete. If any parts are missing, please don‘t hesitate to contact our service hotline team: +49 (0) 3377 - 316 233, Mon.–Thurs 7.00 a.m.–5.00 p.m., Fri. 7.00 a.m.–4.00 p.m.5q8 | 9[1][2] [3]FWDPhone bookSafety Instructions1. Improper installation – Improper installation may cause damages to the unit or to the v abilities. We therefore strongly recommend to have the installation one by a professional.2. Personal injury – Inappropriate places for the installation may cause personal injuries in “Installation”!3. Personal injury / Material damage – When you remove coverings or armature parts, sha Don’t submit the connecting cables to pressure.4. Negative eects on road safety – Ta lking whil t d i[6][7]QUICKGUIDEEGO FLASH129 8011 1.02[4]Fig. 01:Scope of Delivery[5]](https://usermanual.wiki/Molex-CVS-Dabendorf/130-02.UserMan-Flash/User-Guide-848676-Page-9.png)
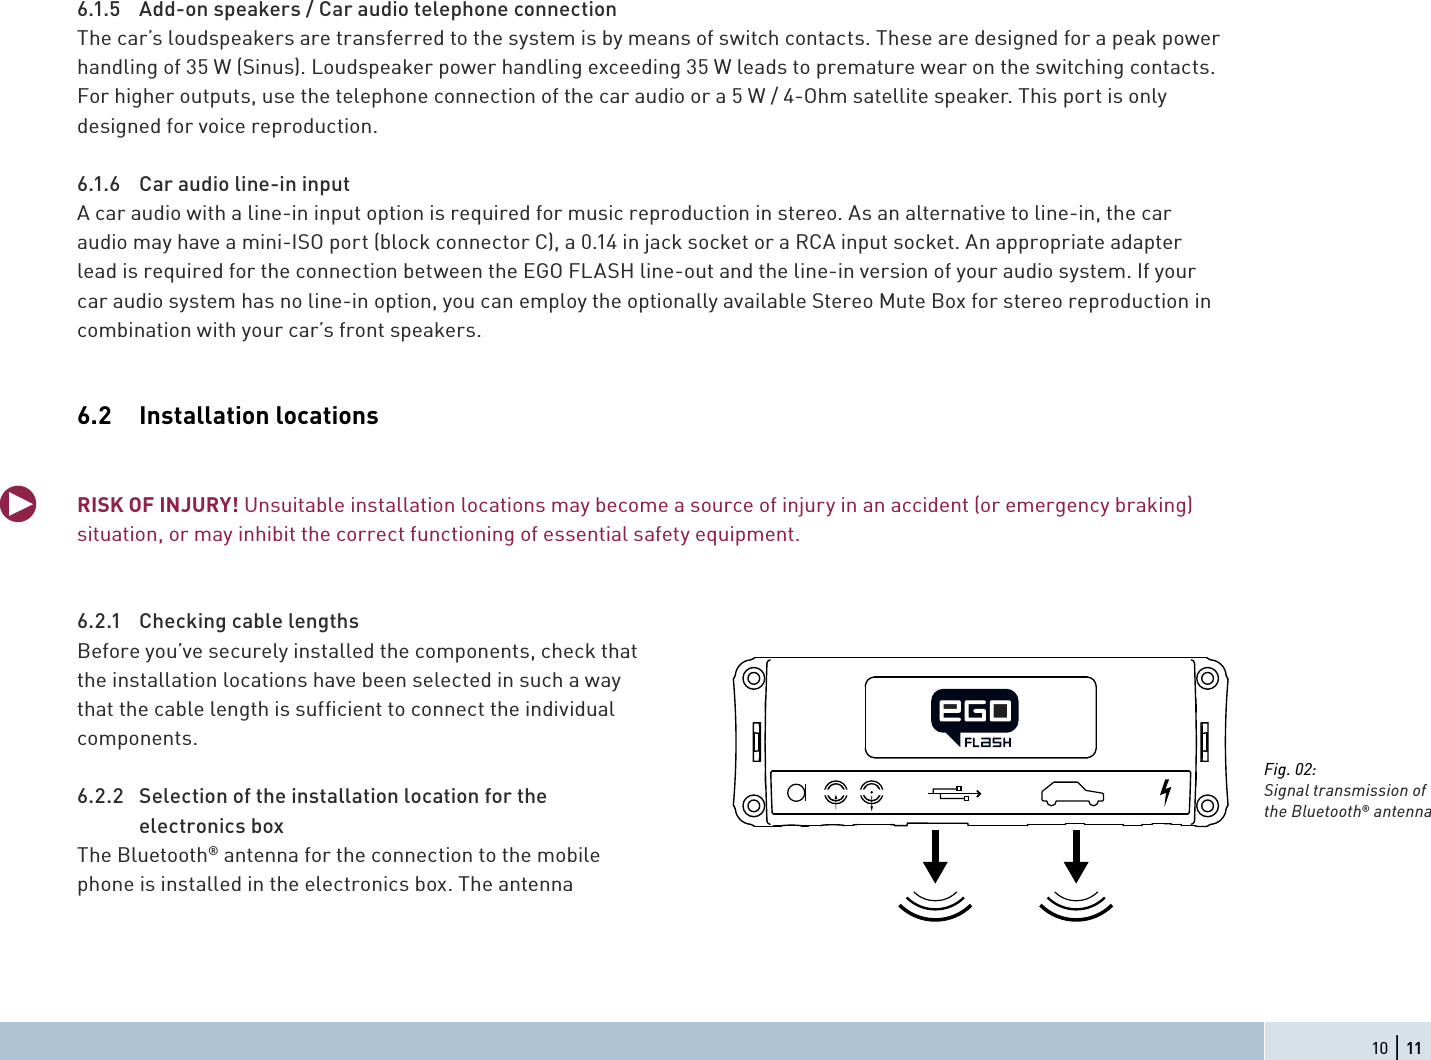
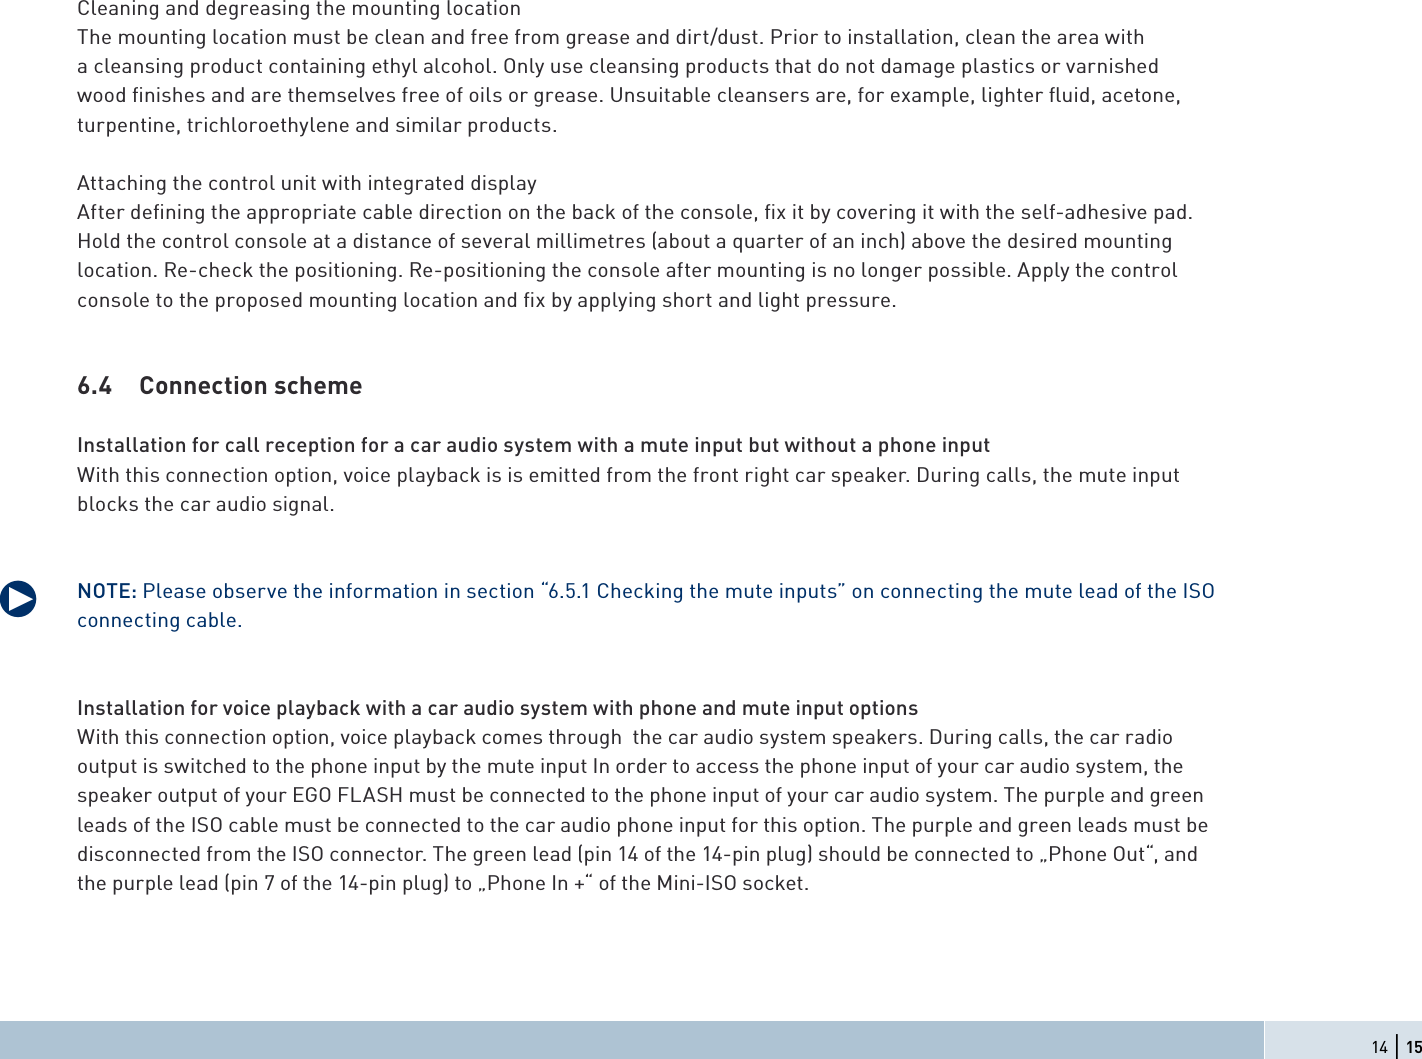
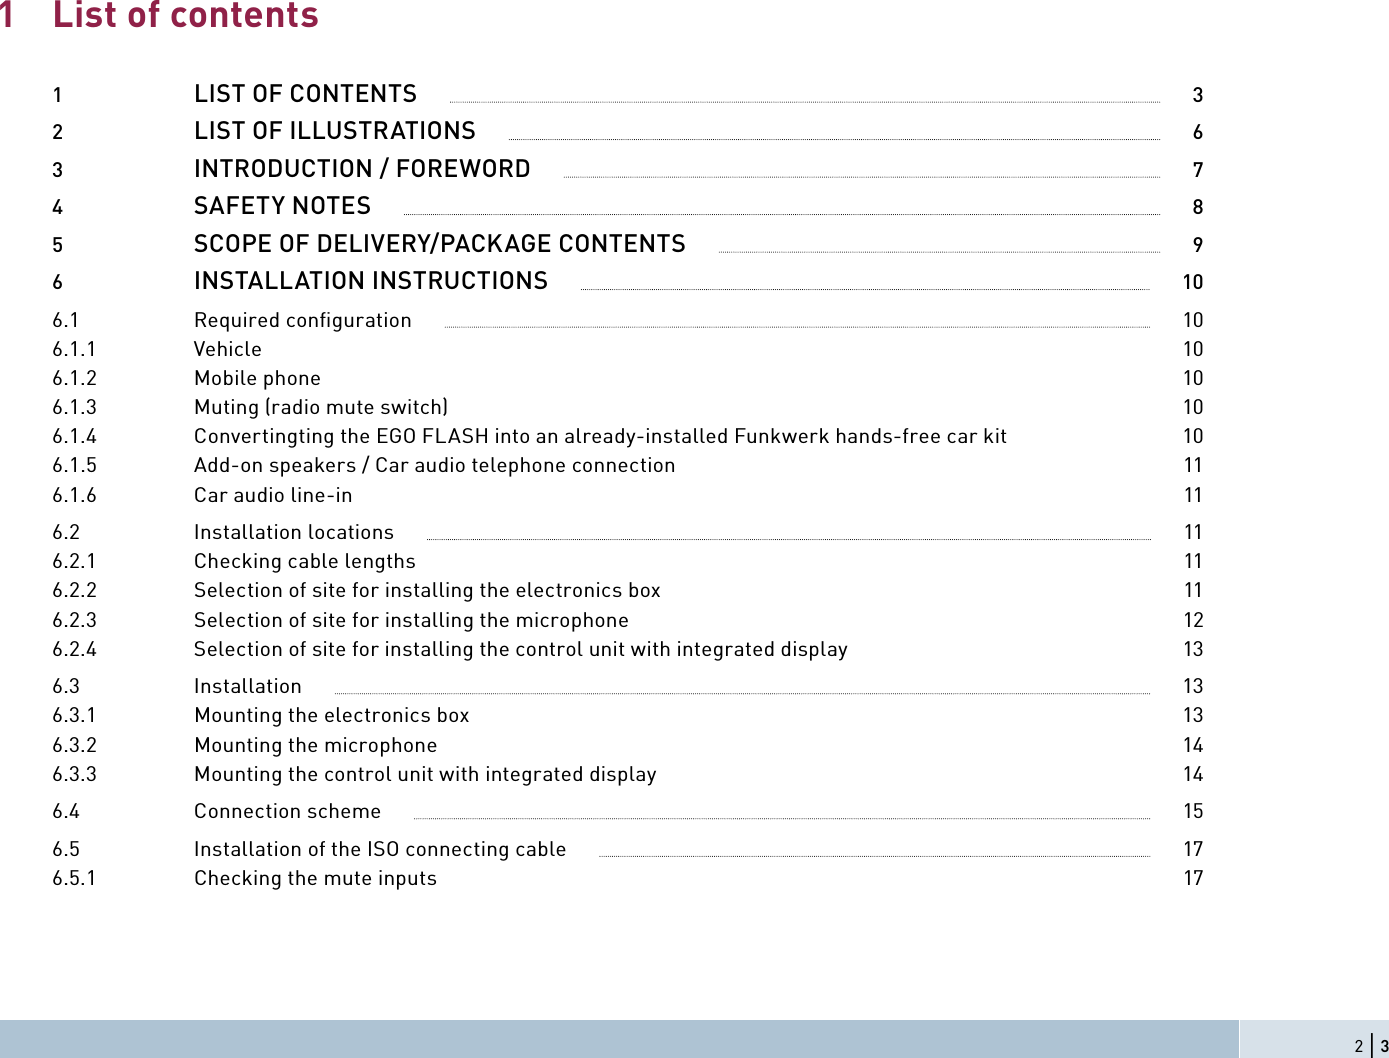
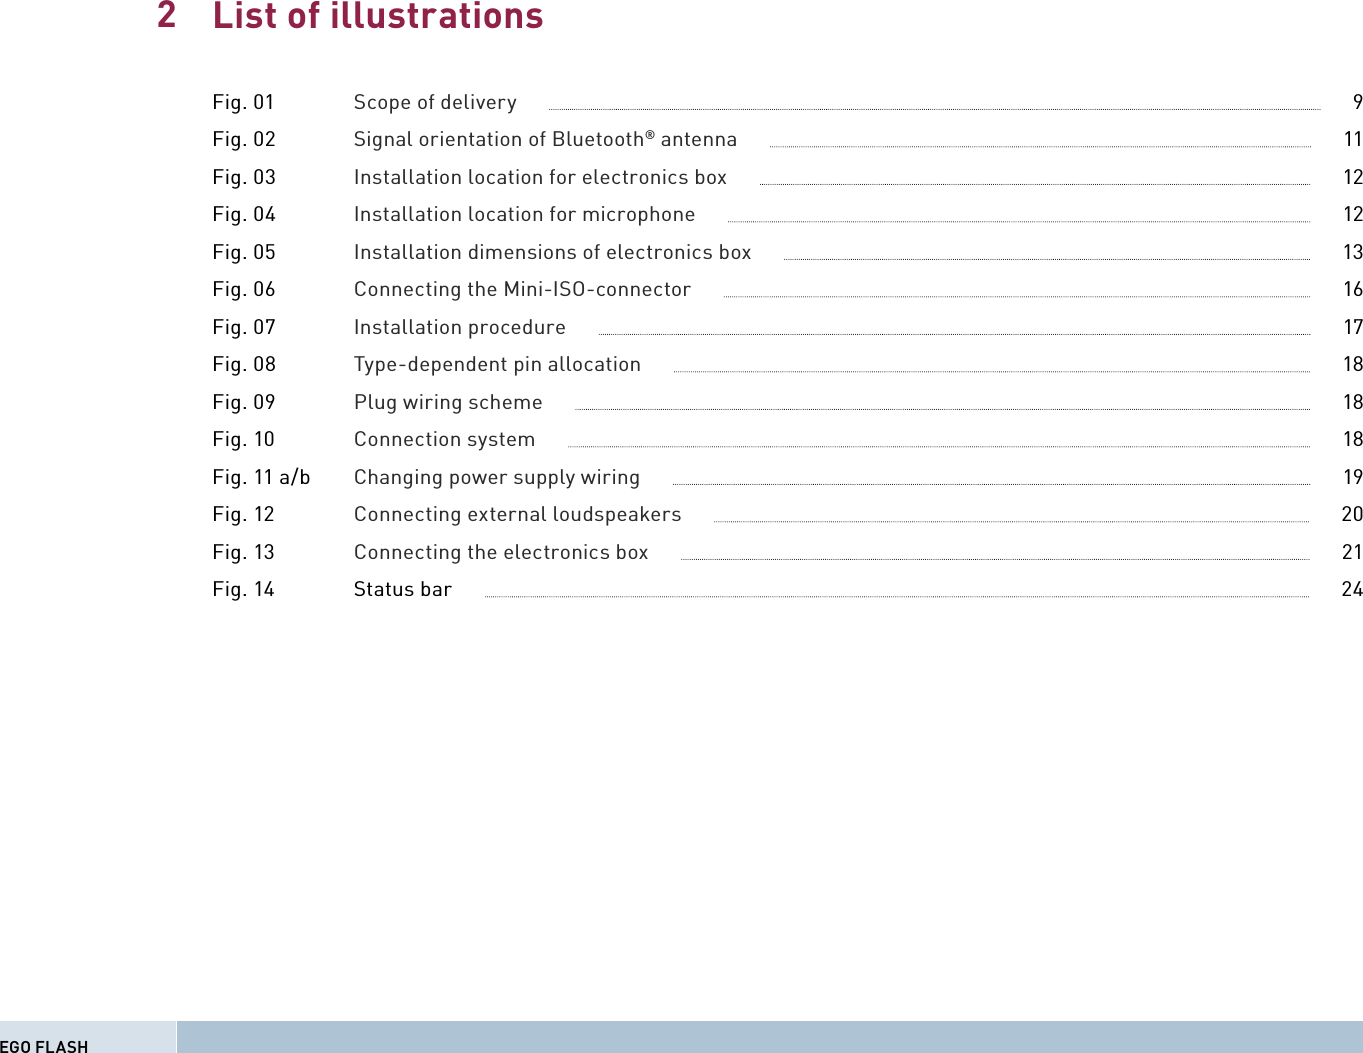
![6.6 Connecting the components to the electronics boxThe individual components are connected to the electronics box as follows:[1] Plug the microphone jack into the jack socket with the microphone symbol[2] The electronic box line-in can be used to connect an optional MP3 player with line-out. To do so, a connection cable 0.14 in stereo jack plug to 0.14 in stereo jack plug (l = 4.92 ft) is required.IMPORTANT: Only connect the device (MP3 player, iPod™, etc.) to the electronics box line-in with a jack cable when it is being powered by battery alone (without the recharger), as interfering impulses may otherwise cause damage to the electronic box line-in.Pin Colour Function View of the plug side,from which the wiring isfed in the plug housing(with pin allocation)Connection option for additional speakers on pin 7(purple lead) and pin 14 (green lead) of the 14-pin plug1Brown Ground (31)2Yellow Radio mute3456WhiteCar audio speakeroutput +(front right)7Purple Speaker lead +(front right)8Red Permanent positive (30)9Blue Ignition (15)10111213 BlackCar audio speakeroutput -(front right)14 Green Speaker lead -(front right)EGO FLASHFig. 12:Additional external loudspeakersq](https://usermanual.wiki/Molex-CVS-Dabendorf/130-02.UserMan-Flash/User-Guide-848676-Page-20.png)
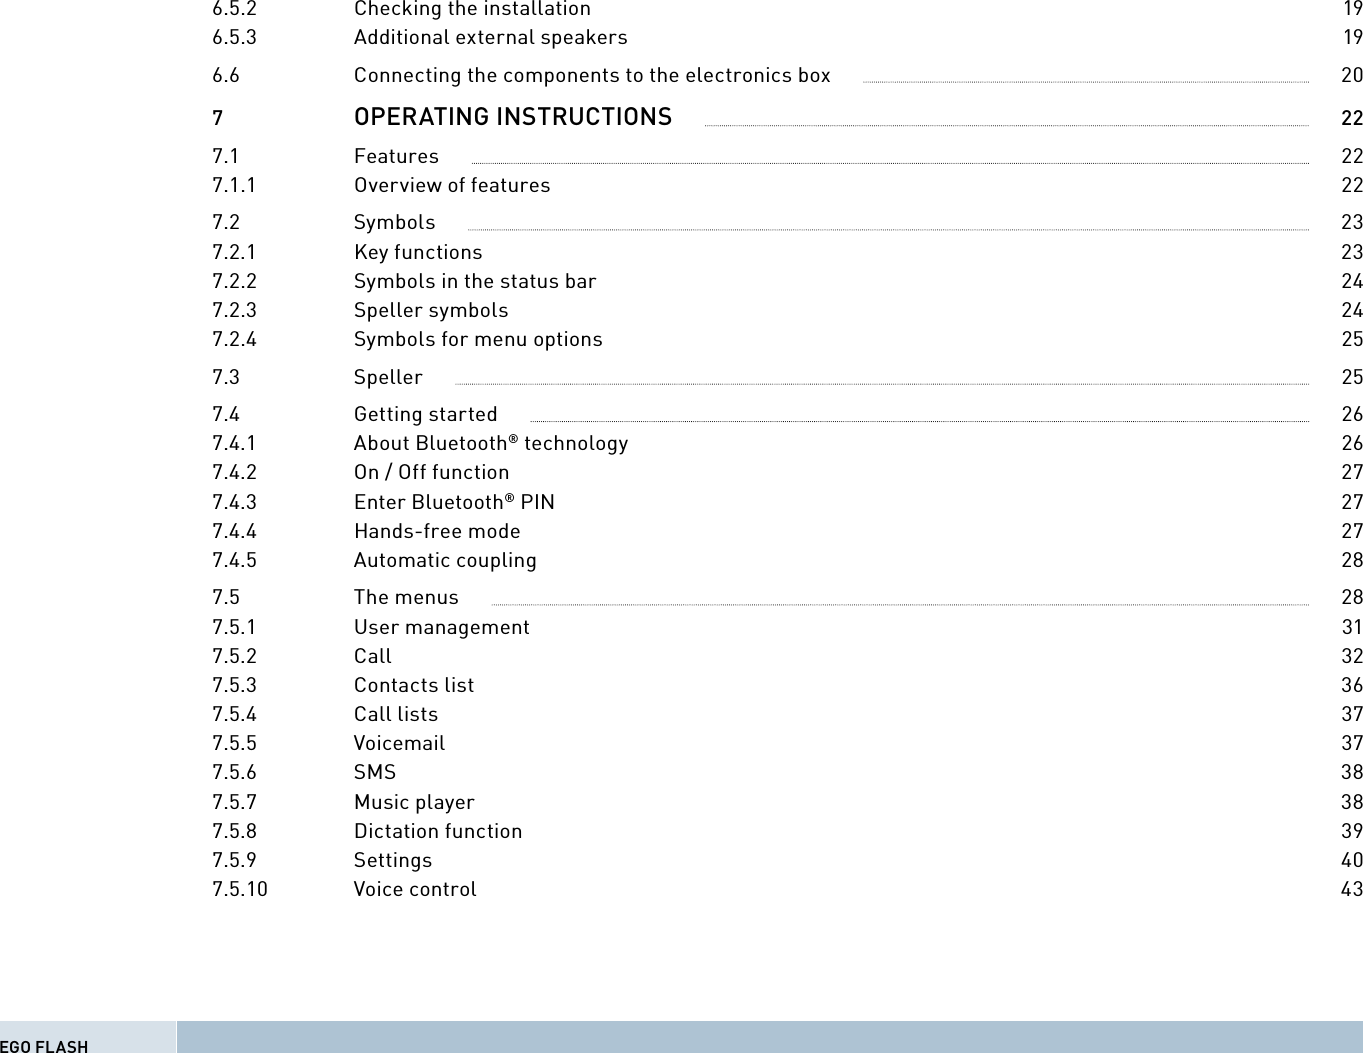
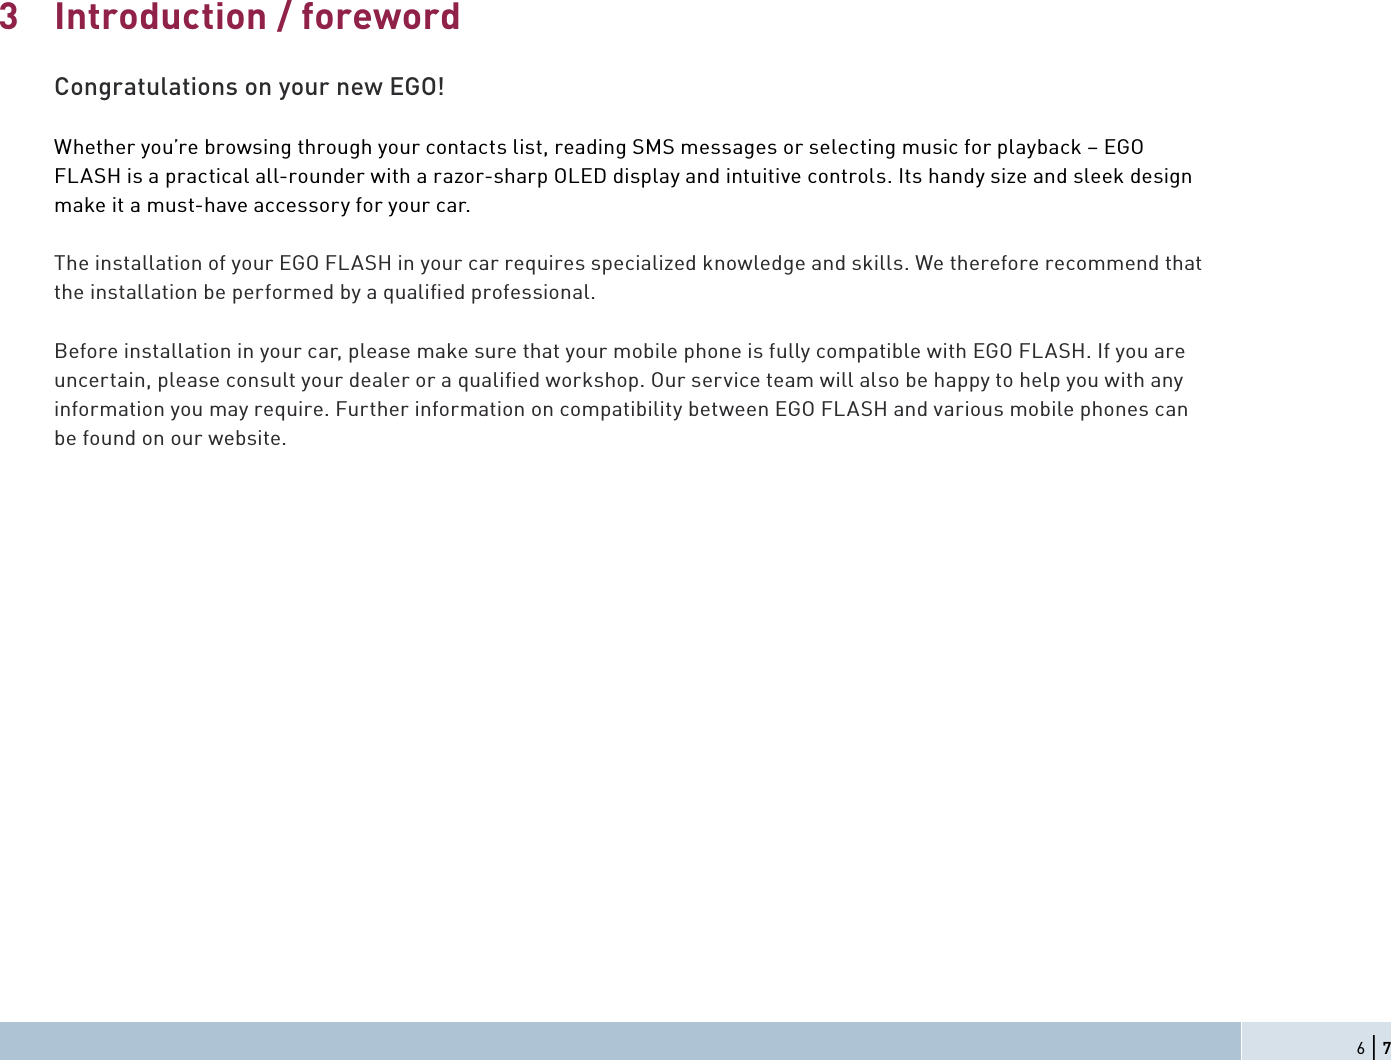
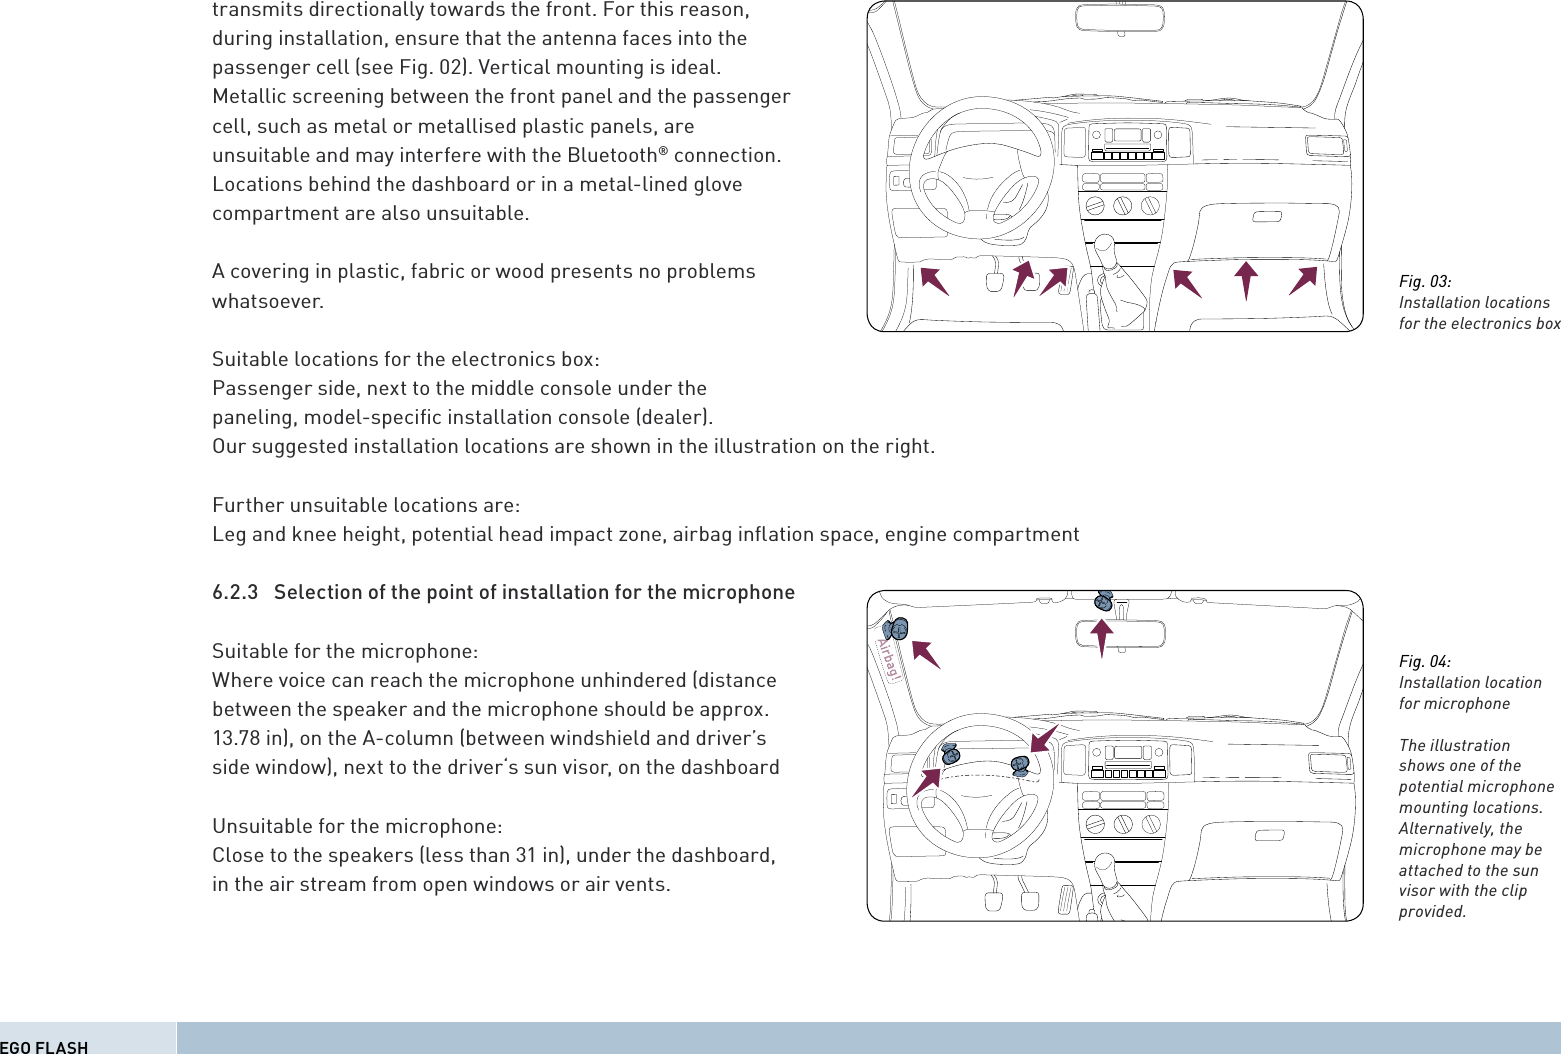
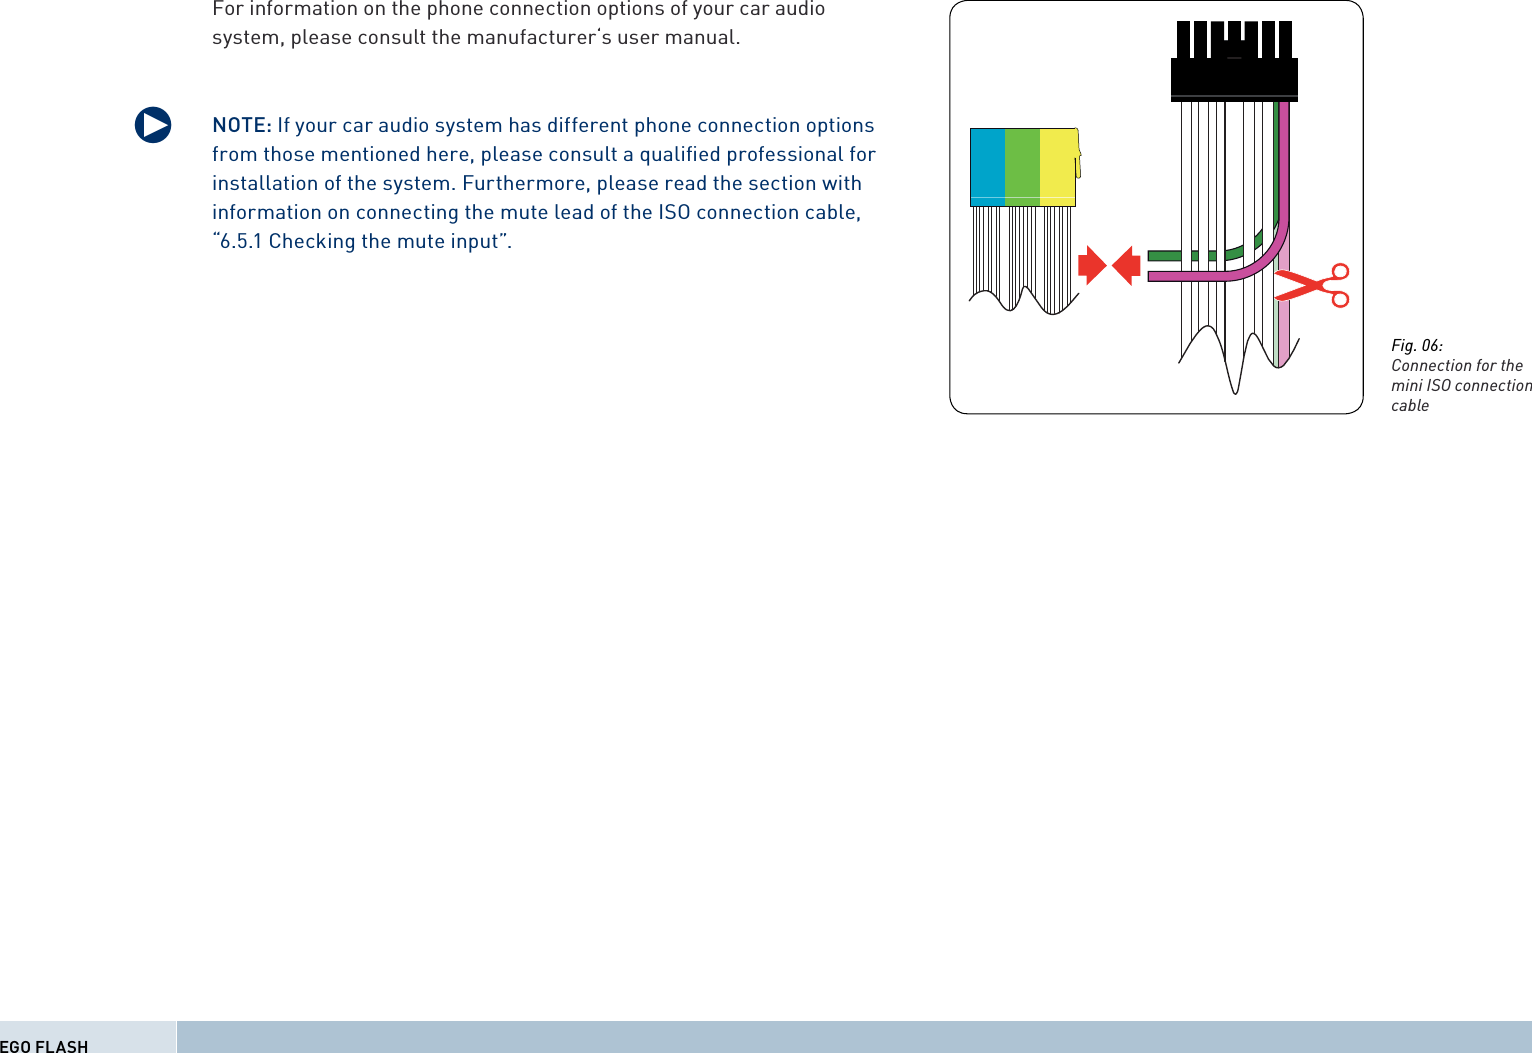
![[3] The electronics box line-out must be connected to the car audio line-in. Depending on the car audio line-in confi guration, one of the following cables is required: → Connection cable 0.14 in stereo jack to 0.14 in stereo jack (l = 4.92 ft) → Connection cable 0.14 in stereo jack to RCA plug (l = 4.92 ft) → Connection cable 0.14 in stereo jack to Mini-ISO (l = 4.92 ft)[4] The control unit with display must be connected to one of these two ports.[5] The 14-pin plug of the ISO connecting cable must be connected with the electronics box.[6] The base plate for the charging cradle may also be connected to the “charger” output socket.Fig. 13:Electronics box connection20 | 21[1][2][4][3] [5] [6]FWDPhone book](https://usermanual.wiki/Molex-CVS-Dabendorf/130-02.UserMan-Flash/User-Guide-848676-Page-21.png)

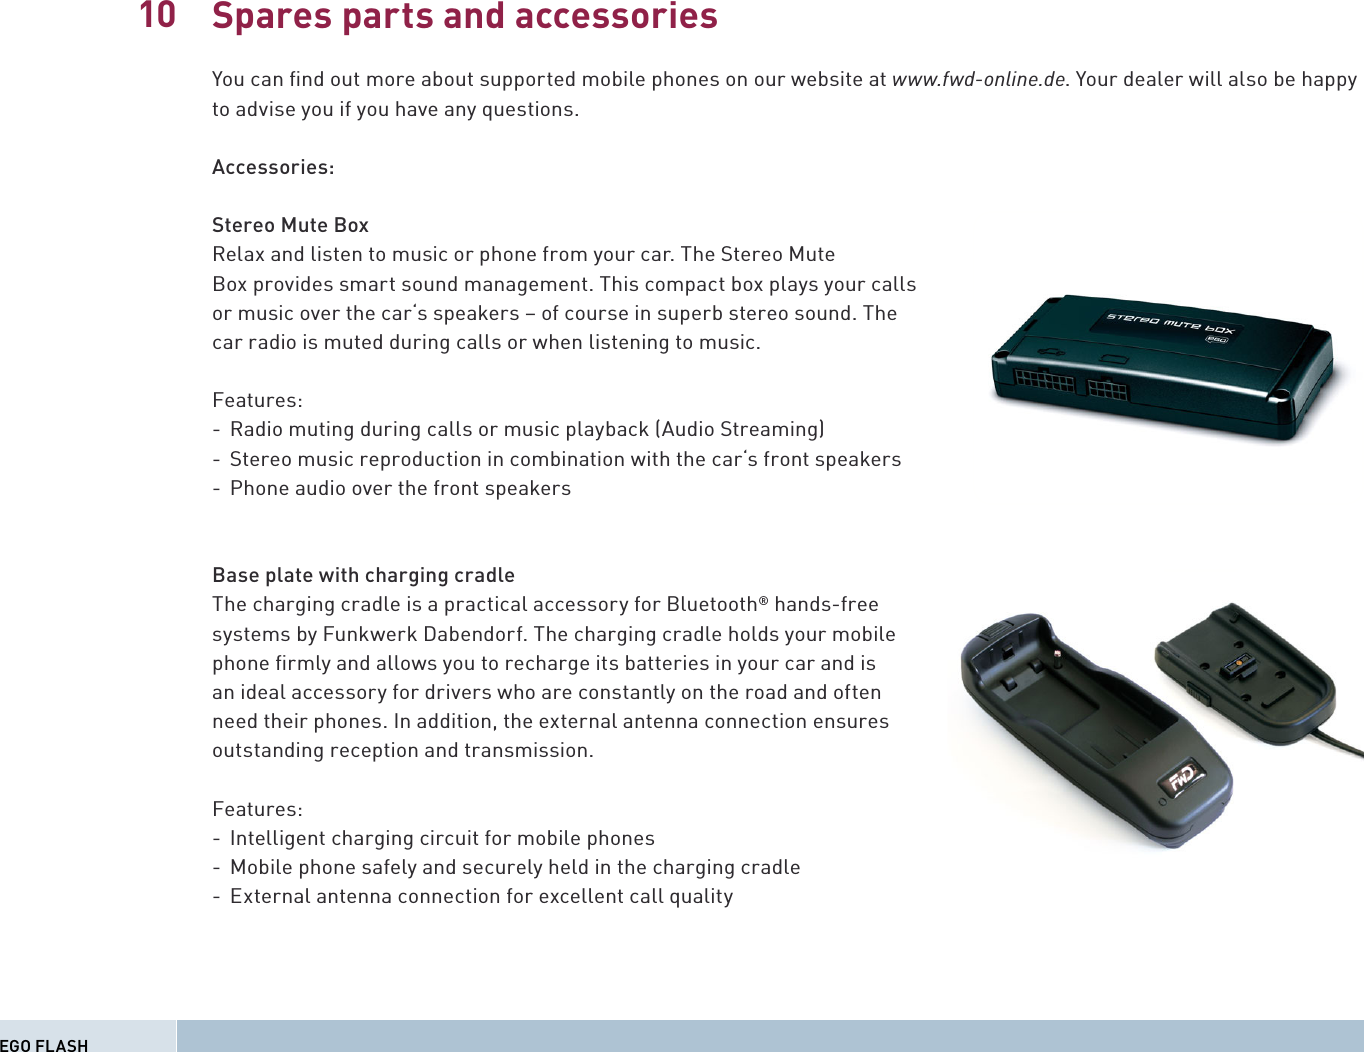
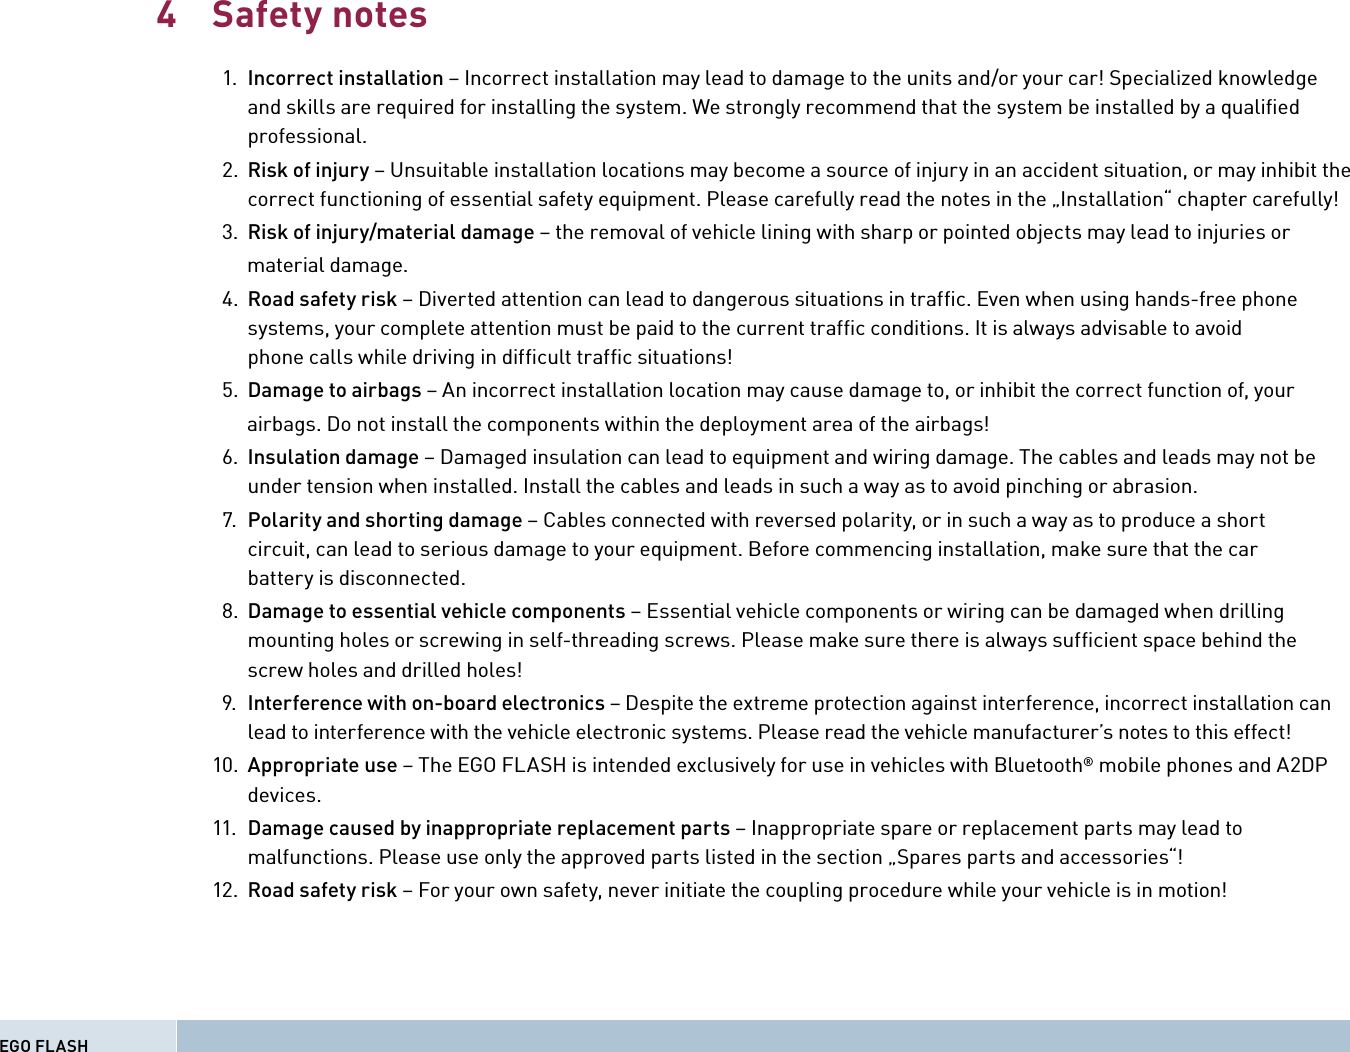
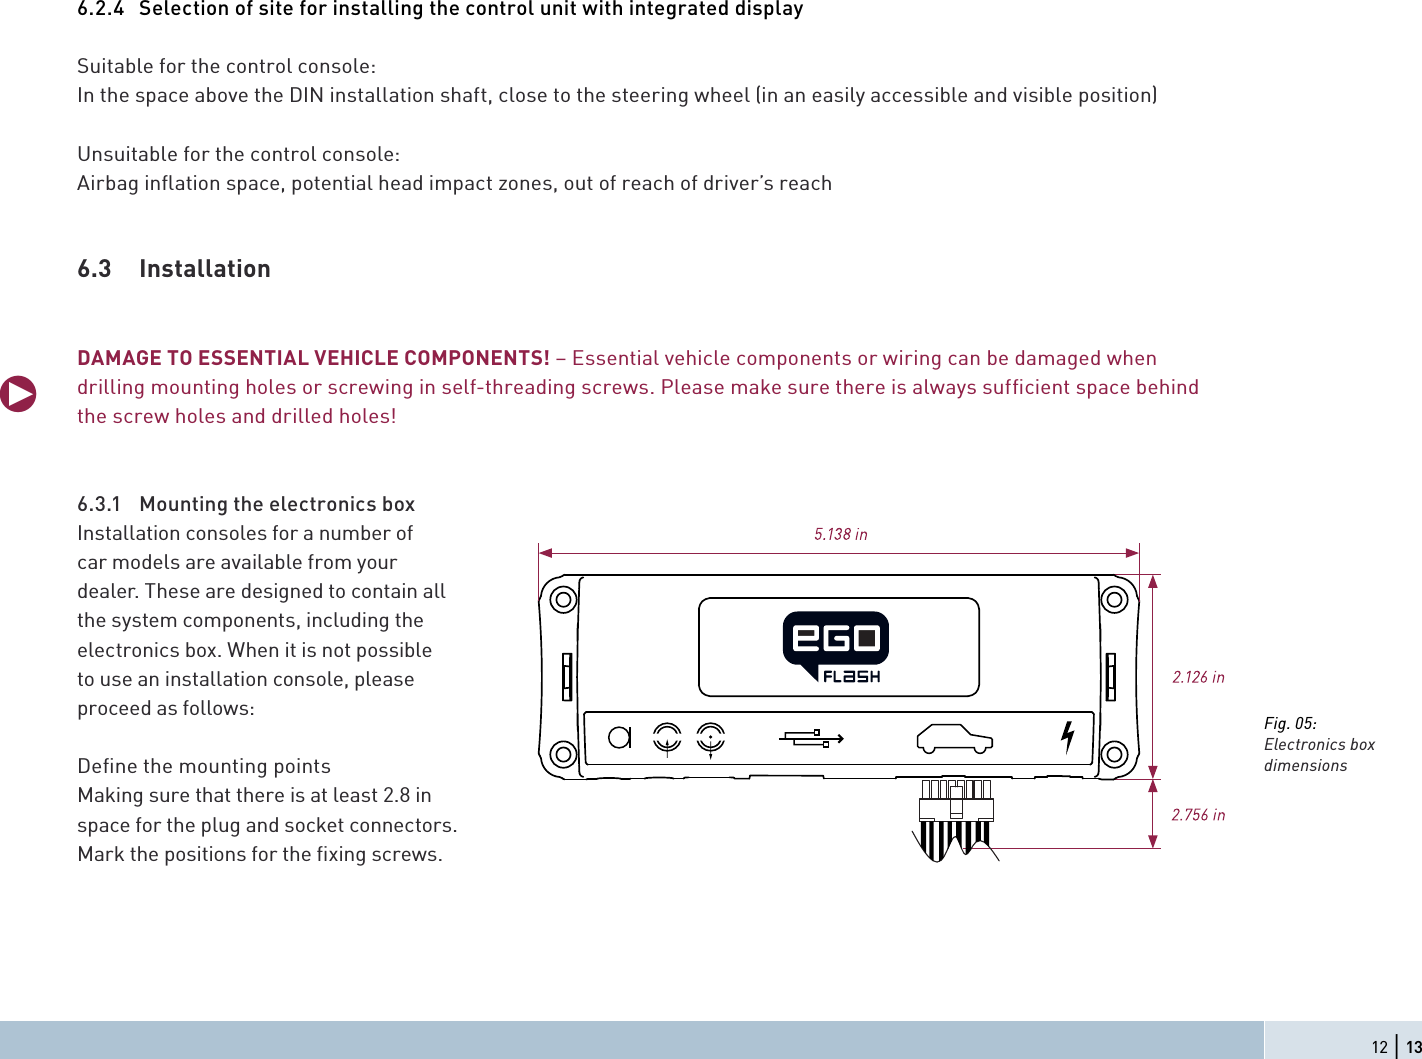
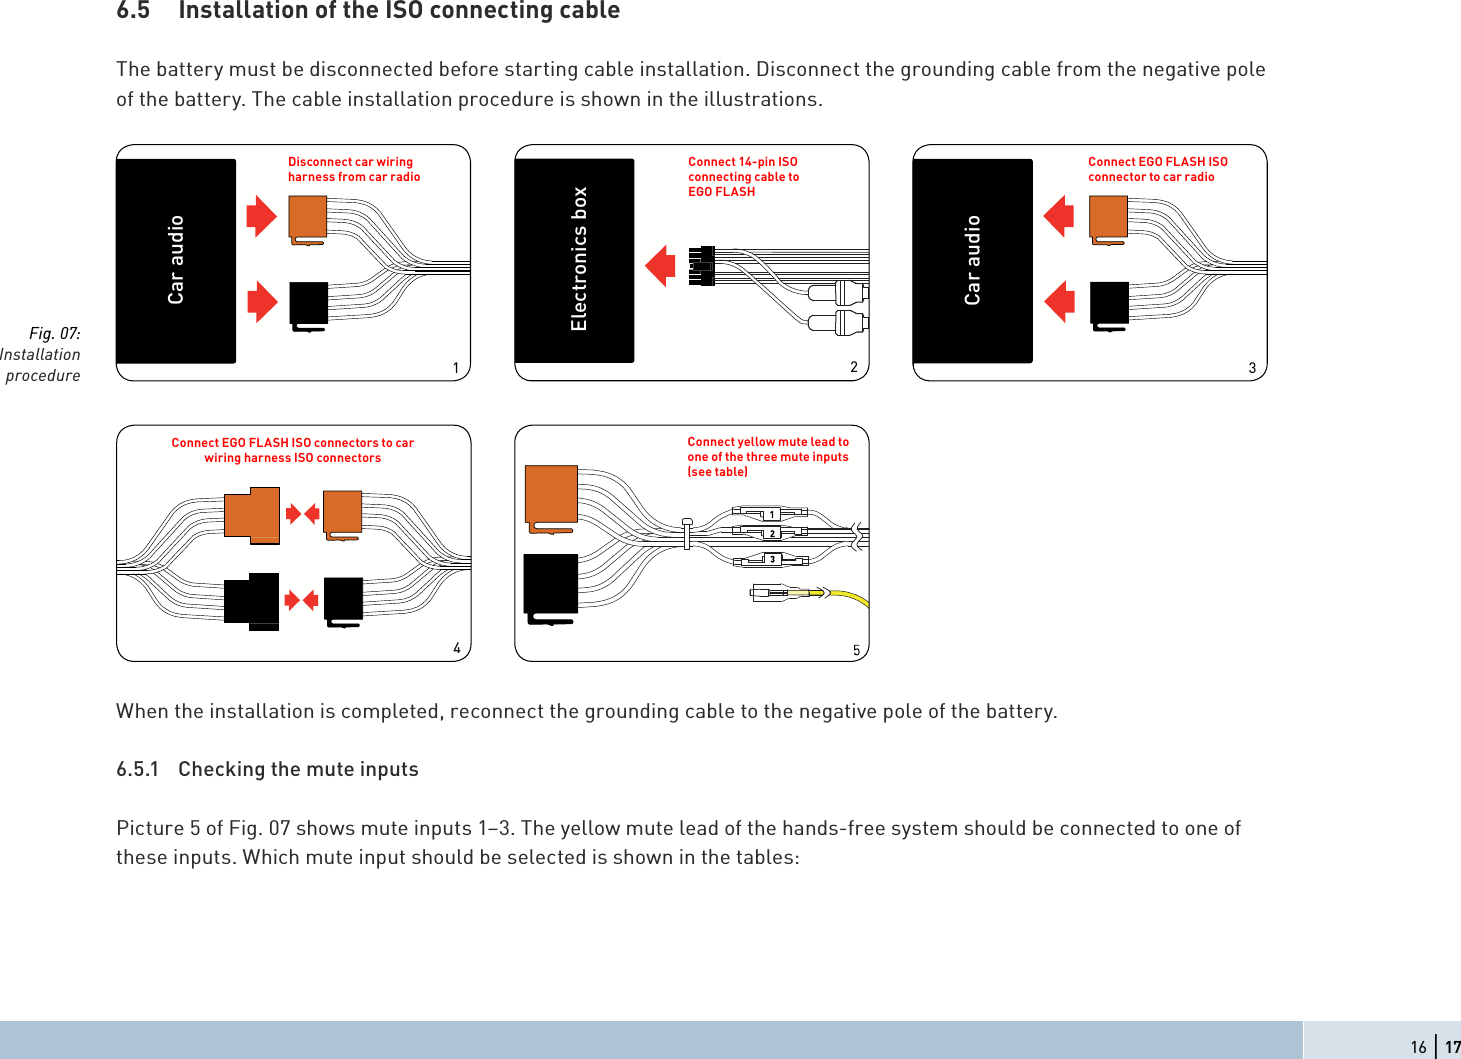
![52 | 53Replacement parts:[1] Electronics box[2] Control unit with display[3] Microphone[4] Set of connecting cables[5] Adapter cable[1] [2][3][4][5]FWDAnrufliste](https://usermanual.wiki/Molex-CVS-Dabendorf/130-02.UserMan-Flash/User-Guide-848676-Page-53.png)