Motorola Mobility T6FK1 Portable PCS GSM Transceiver with Bluetooth User Manual A732 0819
Motorola Mobility LLC Portable PCS GSM Transceiver with Bluetooth A732 0819
Contents
- 1. Exhibit 8 Users Manual 1
- 2. Exhibit 8 Users Manual 2
- 3. Exhibit 8 Users Manual 3
- 4. Exhibit 8 Users Manual 4
- 5. Exhibit 8 Users Manual 5
Exhibit 8 Users Manual 2
55
Learning to Use Your Phone
Locking and Unlocking Your
Phone
You can lock your phone manually or set your phone to
lock automatically whenever you turn it off. To use a locked
phone, you must enter the unlock code. A locked phone
still rings and/or vibrates for incoming calls/messages, but
you must unlock it to answer/read.
You can make emergency calls on your phone even
when it is locked.
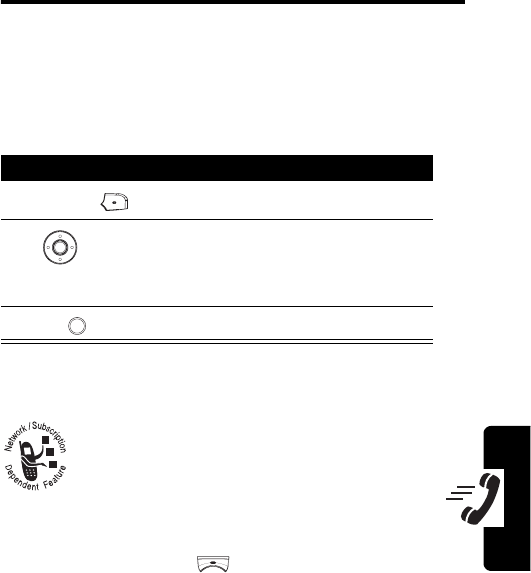
Locking Your Phone Manually
Tip:
To unlock the phone, refer to the steps above.
Find the Feature
>
Settings
>
Security
>
Code status
>
Phone lock
>
Lock now
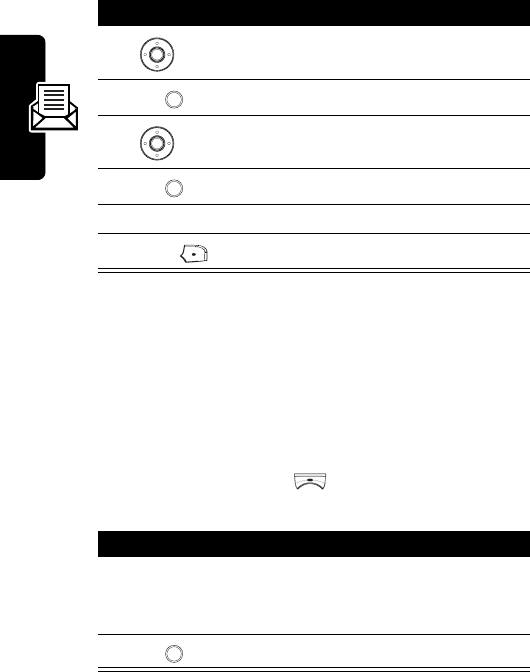
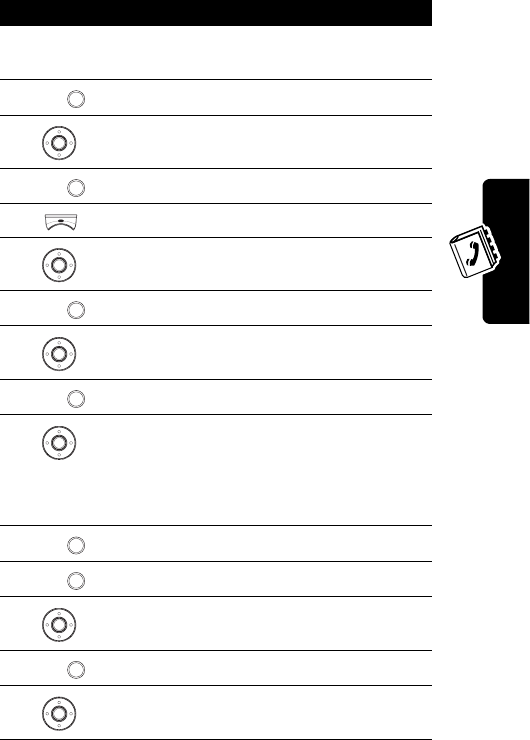
Press To
1
keypad keys enter your phone lock/unlock
code if you want to lock the
phone manually
2
OK
() lock the phone

56
Learning to Use Your Phone
Locking Your Phone Automatically
The phone will automatically be locked after you turn it off.
Enter your phone code to unlock the phone when you
power it on.
Setting and Changing Codes
You can set and change the following codes that block
other people from using your phone and data in it.
Tip:
Contact your service provider for those codes.
To set or change codes:
Find the Feature
>
Settings
>
Security
>
Code status
>
Phone lock
>
Automatic lock
>
ON
PIN code
Lock your SIM card when you turn your
phone off.
PIN2
Lock certain subscription-dependent
features every time you use them.
Phone code
Lock your phone when you turn it off.
SIM lock
Lock your phone when you insert an
unidentified SIM card.
Find the Feature
>
Settings
>
Security
>
Change code

57
Learning to Use Your Phone
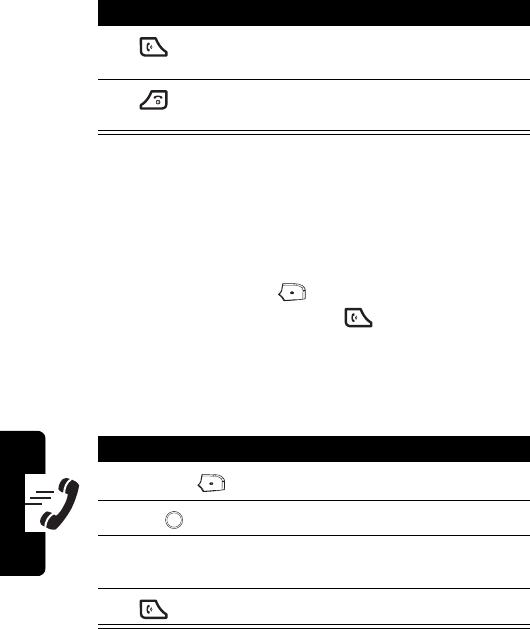
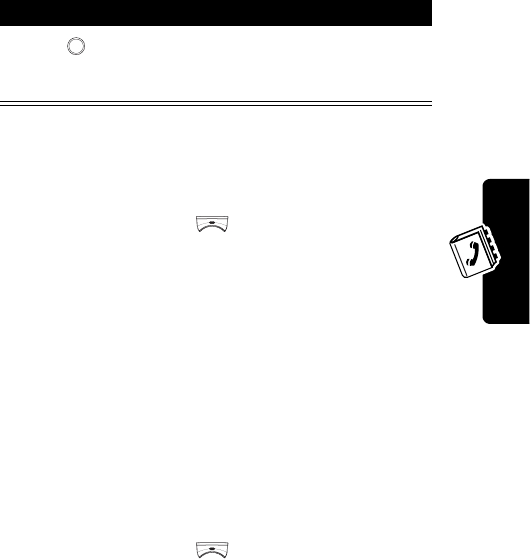
To activate/deactivate codes:
If You Forget Codes
If you forget your codes, contact your service provider.
If You Enter the Wrong PIN or
PIN2 Code 3 Times in a Row
If you enter a wrong PIN or PIN2 code 3 times in a row,
your phone prompts you to enter the PUK or PUK2 code to
unblock your SIM card. For the PUK and PUK2 codes,
contact your service provider.
Tip:
The default phone code is “1234.” Please change the
phone code after you receive your phone and keep it
safely.
Find the Feature
>
Settings
>
Security
>
Code status
58
Setting Up Your Phone
Setting Up Your Phone
Calibrating Your Finger Writing
Recognition
When you use the A668 Finger Writing Recognition (FWR)
functionality to write messages, add phonebook entries, or
quickly launch specific phone features, such as
Ringing style
,
if finding something fuzzy as the following conditions
describe, it's time to calibrate your FWR feature. The
following happen as the FWR technology is vulnerable to
the environmental temperature, humidity and electric
charge of fingers. Before you start to use this built-in
FWR technology for the 1st time, it is recommended to
calibrate it so that the FWR functionality will be able to
read your input more accurately and precisely.
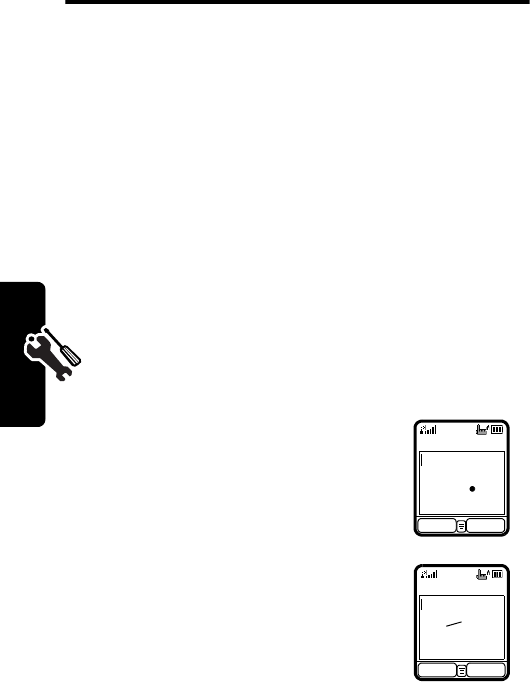
•#1
:The display shows a spot
before you touch the sensitive
keypad.
•#2
:The display shows your
input only when you heavily
write text on the keypad. Or
the display shows a short
stroke when you draw a long
stroke on the keypad.
Message: 160(1)
BACK SEND
Message: 160(1)
BACK SEND
59
Setting Up Your Phone
After you calibrate the FWR functionality and the
conditions described above remain, please contact the
local Motorola Customer Call Center personnel.
Note: Activating the FWR calibration option will not cause any
impact on placing/answering calls or receiving/sending
messages.
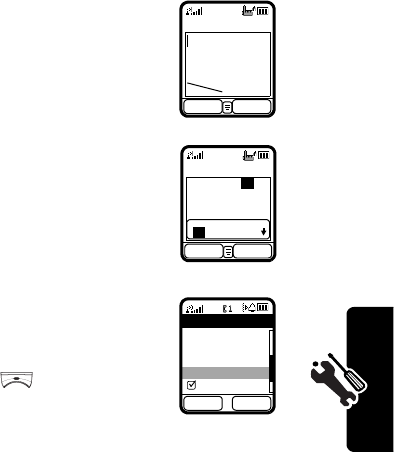
•#3
:A stroke you write on a
specific part of the keypad
appears in a different part of
the display.
•#4
:The display does not show
the letter you write on the
keypad. For example, write "y"
on the keypad and the display
shows "g."
Remedy: You have to calibrate the FWR
functionality. (To activate, keep fingers
or any objects off the keypad and in the
idle display, press >
Settings
>
Initial settings
>
Input mode
> F
inger writing
settings
>
Calibration
.)
Message: 160(1)
BACK SEND
Message: 147(1)
It is a sunn
CLEAR SELECT
1
g
2
8
3
y
4
9
5
S
6
s
g
BACK SELECT
Finger writing settings
Writing sound
Fwr movement
Ink display
Calibration
Quick access
60
Setting Up Your Phone
Adjusting the Backlight
You can set the amount of time that both the display and
the keypad backlights remain on. You may also turn
backlights off to extend battery life.
Adjusting Display Brightness
Adjusting Display Color
Find the Feature
>
Settings
>
Initial settings
>
Backlight
Find the Feature
>
Settings
>
Initial settings
>
Adjust brightness
Press To
1
left/right scroll to the desired display
brightness
2
OK
() select the display brightness
Find the Feature
>
Settings
>
Display
>
Color scheme
61
Setting Up Your Phone
Setting Date and Time
To see date and time in both idle displays, set date and
time 1st:
You can choose to turn the default 24-hour time format off:
You can also select a date format:
To see date and time in both idle displays:
Find the Feature
>
Settings
>
Initial settings
>
Clock
>
Set date/time
>
Set the date
/
Set the time
Find the Feature
>
Settings
>
Initial settings
>
Clock
>
24-hour clock
>
OFF
Find the Feature
>
Settings
>
Initial settings
>
Clock
>
Date format
Find the Feature
>
Settings
>
Initial settings
>
Clock
>
Show clock
>
ON
62
Setting Up Your Phone
You may specify a place and display the corresponding
date and time:
Setting Power-Off Time
You can let your phone turn off automatically in a specified
time.
Tip:
Press left/right to select a
Repeat type
for the
power-off time setting.
Setting a Wallpaper Image
You can set a picture or animation as a wallpaper
(background) image shown in your phone’s internal and
external displays.
Note:
When you set an animation as a wallpaper image,
only the 1st frame of the animation displays. Additionally,
using the Dynamic Wallpapers may result in reduced
battery standby times.
Find the Feature
>
Settings
>
Initial settings
>
Clock
>
Set date/time
>
Local time zone
Find the Feature
>
Settings
>
Auto power off
>
On
Find the Feature
>
Settings
>
Display
/
External display
>
Wallpaper
63
Setting Up Your Phone
Setting a Screen Saver Image
You can set a picture or animation as a screen saver
image shown in your phone’s internal and external
displays. The screen saver image plays for 3 minutes (the
default, but it depends on marketing areas) when no
activity occurs in 1 minute (the default, but it depends on
marketing areas). If you set an animation as a screen
saver image, only the last frame of that animation shows in
either display after the screen saver image has finished
playing.
Tip:
Scroll to
Off
or
Power saving
to turn
Screen saver
or the
LCM off so that you can extend your battery life.
Customizing Service Light
You can specify a service light for use when the phone is
successfully connected to your service provider, when you
receive incoming calls or the alarm clock rings, and when
you have new events.
Find the Feature
>
Settings
>
Display
/
External display
>
Screen saver
Find the Feature
>
Settings
>
Initial settings
>
Service light
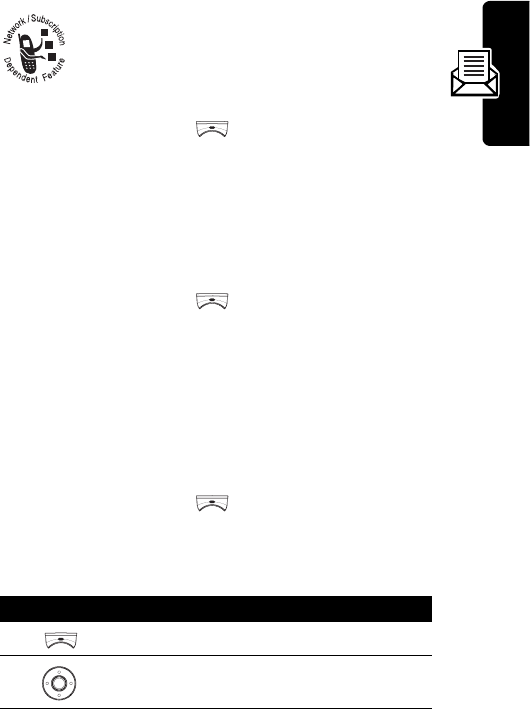
Press To
1
scroll to the desired option
64
Setting Up Your Phone
Using Ambient Light Sensor
The keypad backlight can be turned on automatically when
your surroundings are dark.
2
OK
() select the option
3
scroll to the desired service
light
4
OK
() select the service light
Find the Feature
>
Settings
>
Initial settings
>
Light sensor
>
ON
Press To
65
Calling Features
Calling Features
Putting a Call on Hold
When you are on a call, you can put the current call on
hold.
Answering a New Call
When you are on a call, you can answer a new
incoming call.
To t u r n
Call waiting
on 1st:
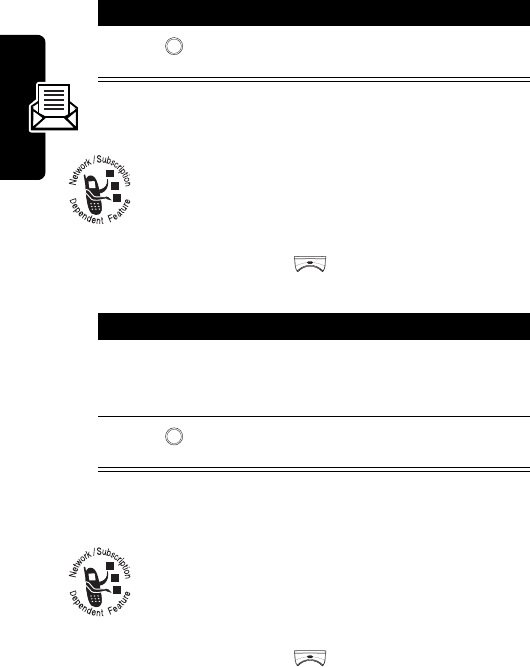
Press To
1
OPTIONS
() open the options menu
2
scroll to
Hold
Tip:
Scroll to
Activate
to answer
the call on hold.
3
OK
() put the current call on hold
Find the Feature
>
Settings
>
Call features
>
Call waiting
>
On
Calling Features
66
To answer a new incoming call:
Tip:
If you have an active call and a held call, and you want
to answer a new incoming call, you must end the active or
held call to answer the new call. Depending on your
service provider, you can also transfer current incoming
calls to another phone number when you are not available.
(To activate, press
OPTIONS
( ) > select
Deflection
> enter
the desired phone number > press .)
Making a New Call
When you are on a call, you can make a new outgoing call.
Press To
1
put the current call on hold
and answer the new call
2
end the new call and continue
with the call on hold
Press To
1
OPTIONS
() open the options menu
2
OK
() select
Dial new call
3
keypad keys enter the desired phone
number
4
dial the phone number
67
Calling Features
Making an Emergency Call
With or without the SIM card installed, you can make an
emergency call to the Emergency phone number your
service provider gave you.
Selecting a Phone Number to
Use
You can select a phone number (phone line) to
make and receive calls.
Redialing Automatically
You can immediately redial the last call you failed to make.
Press To
1
keypad keys enter the emergency phone
number
2
dial the emergency call
Find the Feature
>
Settings
>
Call features
>
Phone lines
Find the Feature
>
Settings
>
Call features
>
Auto redial
>
ON

Calling Features
68
Checking Recent Calls
You can view the recent history for the calls you missed,
received or dialed on your phone.
Tip:
If the selected recent call entry includes a phone
number, you may directly press to dial. You can also
press >
Save
to store the recent call entry in your
phonebook. To erase the recent call entry, press >
Erase
.
Clearing
Recent Call History
Find the Feature
>
Recent calls
>
Missed calls
/
Received calls
/
Dialed calls
Find the Feature
>
Recent calls
>
Erase all
69
Messages and Chat
Messages and Chat
You can write, send and receive messages, either by
Short Messaging Service (SMS) or by Multimedia
Messaging Service (MMS). You can also open a
chatroom to have an online chat.
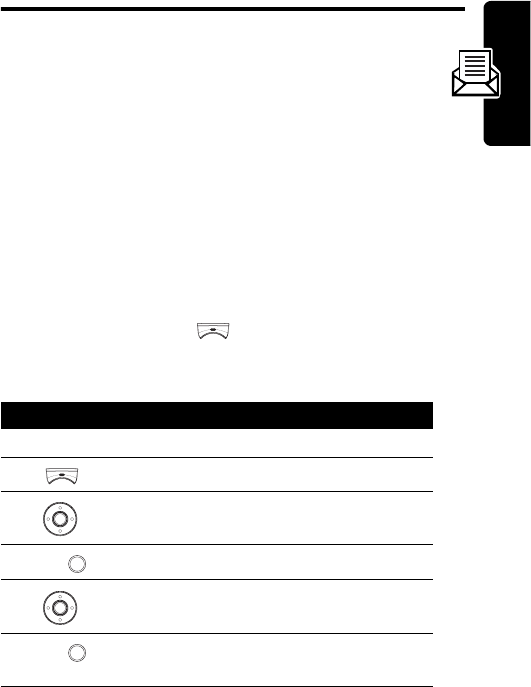
Writing an SMS Message
You can insert quick notes, phonebook entries (numbers or
names), image objects (pictures or animations), and sound
objects (sounds or melodies) when composing an SMS
message.
Find the Feature
>
Msg. center
>
Write message
>
Text messages
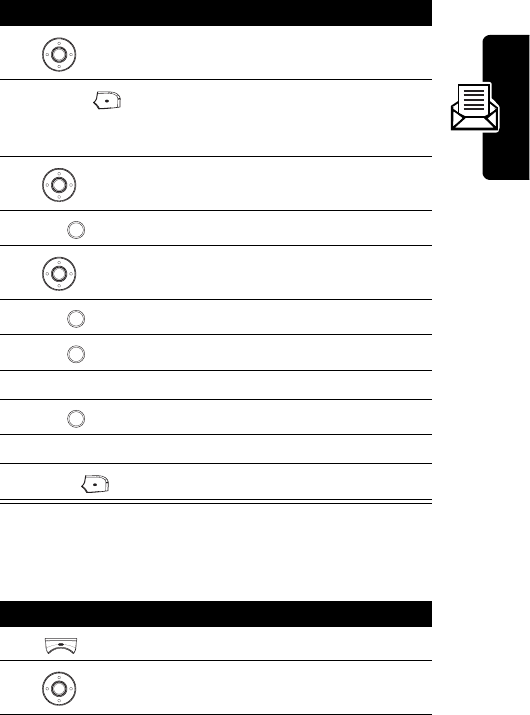
Press To
1
keypad keys enter text
2
open the options menu
3
scroll to the desired option
beginning with
Insert
4
OK
() select the option
5
scroll to the desired sub-
option, if necessary
6
OK
() select the sub-option, if
necessary
70
Messages and Chat
Sending an SMS Message
To send your SMS message right after you finish
editing it:
7
scroll to the object you want
to insert to your SMS
message
8
OK
() select the object
Tip:
Repeat steps 2-8 to insert
more objects, if necessary.
Press To
1
SEND
() select
SEND
2
P.BOOK
() open your phonebook
3
scroll to the desired entry
4
OK
() select the entry
Tip:
If the entry includes more
than 1 phone numbers,
continue the following steps;
otherwise, repeat steps 3-4 to
add other recipients or go to
steps 8-9 to send your SMS
message immediately.
Press To
71
Messages and Chat
Saving an SMS Message as a Draft
To save your SMS message in the
Drafts
folder after you
finish editing it:
5
scroll to the desired phone
number
6
OK
() select the phone number
7
OK
() return to the previous menu
Tip:
Repeat steps 3-4 to add
other recipients or continue
the following steps to send
your SMS message.
8
OK
() return to the previous menu
9
SEND
() send your SMS message
Press To
1
open the options menu
2
scroll to
Save to drafts
3
OK
() select
Save to drafts
4
P.BOOK
() select a recipient
5
scroll to the desired
phonebook entry
6
OK
() select the phonebook entry
Press To
72
Messages and Chat
Tip:
You may also save your SMS message in the
Saved Msgs
folder under
Msg. center
by selecting >
Save message
after
you finish composing it.
Activating MMS Service
To send/receive MMS messages, you must
subscribe for MMS service from your service
provider and then activate your service provider
on the phone. MMS service works via GPRS
your service provider supports. To activate your service
provider, follow the steps:
7
scroll to the desired phone
number, if necessary
8
OK
() select the phone number, if
necessary
9
SAVE
() save your SMS message
along with recipient(s) in
Msg.
center
>
Drafts
Find the Feature
>
Msg. center
>
Settings
>
Multimedia msgs.
>
Connection settings
Press To
1
scroll to the service provider
you have subscribed for using
MMS service
Press To
73
Messages and Chat
Writing an MMS Message
An MMS message may consist of several page sets. A
page set can include an image object (photo/picture/
animation/video), a sound object (melody/voice note),
and/or text objects (quick notes/phone numbers).
Note:
You can insert only 1 image object and 1 sound
object to a page set. To insert more image and sound
objects, press
YES
( ) when your phone displays:
...
existed, add to next page?
.
2
OK
() select the service provider
3
OK
() activate the service provider
Find the Feature
>
Msg. center
>
Write message
>
Multimedia msgs.
Press To
1
keypad keys enter text
2
open the options menu
3
scroll to
Insert object
4
OK
() select
Insert object
5
scroll to the desired option
Press To
74
Messages and Chat
Switching among Page Sets
You can go to a desired page set and view the objects on
it.
6
OK
() select the option
7
scroll to the desired sub-
option, if necessary
8
OK
() select the sub-option, if
necessary
Tip:
Repeat steps 7-8, if
necessary.
9
scroll to the object you want
to insert to your MMS
message
10
OK
() insert the selected object
Tip:
Repeat this step if you
select
Media center
to add
objects.
Tip:
Repeat steps 2-10 to
insert more objects, if
necessary.
Press To
1
open the options menu
2
scroll to
Go to...
Press To
75
Messages and Chat
Viewing Media Objects
You can view any media objects in the current page set.
Deleting Media Objects
You can delete any media objects from the current page
set.
3
OK
() select
Go to...
4
scroll to the desired page set
5
OK
() go to the selected page set
Press To
1
open the options menu
2
scroll to
View object
3
OK
() select
View object
4
scroll to the desired object
5
OK
() view the selected object
Press To
1
open the options menu
2
scroll to
Remove object
Press To
76
Messages and Chat
Deleting Page Sets
You can delete a page set, including all objects and a page
itself in it. If there is only 1 page set, you can only delete all
objects, not a page itself in it.
In the current page set (if it is not the only 1):
In the only 1 page set:
3
OK
() select
Remove object
4
scroll to the desired object
5
OK
() select the object
6
OK
() delete the selected object
Press To
1
open the options menu
2
scroll to
Delete page
3
OK
() delete the selected page set,
including all objects and a
page itself in it
Press To
1
open the options menu
2
scroll to
Delete page
Press To
77
Messages and Chat
Previewing an MMS Message
You can preview your created MMS message before
sending it.
Sending an MMS Message
You can send your MMS message to friends via
either their phone numbers or email addresses.
To send via a phone number:
3
OK
() delete all objects, not a page
itself in it
Press To
1
open the options menu
2
scroll to
Preview
3
OK
() select
Preview
4
preview the next/previous
page set(s)
Press To
1
SEND
() select
SEND
2
P.BOOK
() open your phonebook
Press To
78
Messages and Chat
To send via an email address:
3
scroll to the desired entry
4
OK
() select the entry
Tip:
If the entry includes more
than 1 phone numbers,
continue the following steps;
otherwise, repeat steps 3-4 to
add other recipients or go to
steps 8-9 to send your MMS
message immediately.
5
scroll to the desired phone
number
6
OK
() select the phone number
7
OK
() return to the previous menu
Tip:
Repeat steps 3-4 to add
other recipients or continue
the following steps to send
your MMS message.
8
OK
() return to the previous menu
9
SEND
() send your MMS message
Press To
1
SEND
() select
SEND
2
open the options menu
Press To
79
Messages and Chat
Configuring Sending Options for MMS
Messages
You can read delivery status reports for sent
MMS messages, specify how long MMS
messages will be stored in the message center,
select a message priority level, choose to send
MMS messages anonymously, let the message center
send you notes if recipients read the MMS messages you
sent to them, and determine when you want MMS
messages to be sent.
3
scroll to
New e-mail address
4
OK
() select
New e-mail address
5
keypad keys enter an email address
6
OK
() add the email address to the
Recipients
box
Tip:
Repeat steps 2-6 to add
other recipients.
7
SEND
() send your MMS message
Find the Feature
>
Msg. center
>
Settings
>
Multimedia msgs.
>
Sending options
Press To
80
Messages and Chat
Saving an MMS Message as a Draft
You can save your MMS message in the
Drafts
folder after
you finish editing it.
Press To
1
scroll to the desired sending
option
2
OK
() select the sending option or
check/uncheck the selected
sending option
3
scroll to the desired sub-
sending option, if necessary
4
OK
() select the sub-sending
option, if necessary
Press To
1
open the options menu
2
scroll to
Set title
3
OK
() select
Set title
4
keypad keys enter a name
5
OK
() save the name
6
open the options menu
7
scroll to
Save to drafts
8
OK
() save your MMS message in
Msg. center
>
Drafts
81
Messages and Chat
Reading a Received SMS/MMS
Message
You can open the SMS/MMS messages you received
in the
Inbox
folder.
Reading a Sent or Unsent SMS/
MMS Message
You can open the SMS/MMS messages you sent or failed
to send in the
Outbox
folder.
Find the Feature
>
Msg. center
>
Inbox
Press To
1
scroll to the desired message
2
OK
() read the selected message
Find the Feature
>
Msg. center
>
Outbox
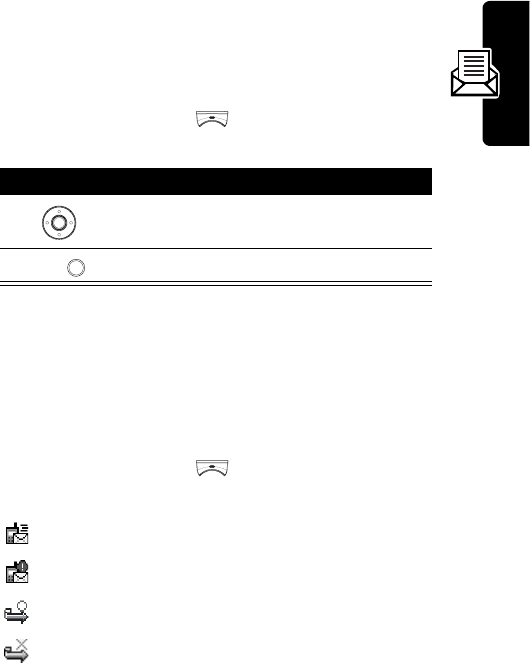
Indicates a sent SMS message.
Indicates an unsent SMS message.
Indicates a sent MMS message.
Indicates an unsent MMS message.
82
Messages and Chat
Reading a Draft Message
You can open the SMS/MMS messages you saved in the
Drafts
folder.
Reading a Saved SMS Message
You can open the SMS messages you saved in the
Saved
Msgs
folder.
Press To
1
scroll to the desired message
2
OK
() read the selected message
Find the Feature
>
Msg. center
>
Drafts
Indicates a draft SMS message.
Indicates a draft MMS message.
Press To
1
scroll to the desired message
2
OK
() read the selected message
Find the Feature
>
Msg. center
>
Saved Msgs
83
Messages and Chat
Erasing SMS/MMS Messages
You can erase SMS/MMS messages stored in the
Inbox
,
Outbox
,
Drafts
, or
Saved Msgs
folder. To delete all the messages
from a specified folder, scroll and select
Erase all
. To delete
various messages you marked from a specified folder,
scroll and select
Erase multiple
.
Managing SMS/MMS Messages
You can perform these functions on a SMS/MMS message
stored in the
Inbox
,
Outbox
,
Drafts
, or
Saved Msgs
folder:
•
Erase
(to erase the selected message)
•
Send
/
Resend
(to send/resend the selected message)
•
Move to drafts
(to move the selected message to the
Drafts
folder)
•
Reply
(to reply the selected message)
•
Forward
(to forward the selected message)
•
Edit
(to edit the selected message)
•
View
(to display objects included in the selected
message)/
Save object
(to save objects from the selected
Press To
1
scroll to the desired message
2
OK
() read the selected message
Find the Feature
>
Msg. center
>
Erase all
/
Erase multiple
84
Messages and Chat
message)/
Object info.
(to read information on objects
from the selected message)
•
Use address
(to dial/save a phone number, to connect
to a URL, or to save a URL as a bookmark from
the selected message)
•
Detail info.
(to read information on the selected
message)
•
Callback
(to call to the sender of the selected message)
•
Open chatroom
(to chat with the sender of the selected
message)
•
Save message
(to save the selected message in the
Saved
Msgs
folder)
Find the Feature
>
Msg. center
>
Inbox
/
Outbox
/
Drafts
/
Saved
Msgs
Press To
1
scroll to the desired message
2
OK
() select the message
3
OPTIONS
()
or
open the options menu
85
Messages and Chat
Editing MMS Message
Te m p l a t e s
You can edit MMS message templates and save them
in
Msg. center
>
Templates
>
MMS templates
.
Creating Quick Notes
You can create new quick notes for use in SMS messages.
Find the Feature
>
Msg. center
>
Templates
>
MMS templates
Press To
1
scroll to any entry
2
OK
() select the entry
3
scroll to
Edit template
4
OK
() select
Edit template
5
open the options menu and
select an option from it to edit
your MMS message template
6
SAVE
() save the created MMS
message template
Find the Feature
>
Msg. center
>
Templates
>
Quick notes
86
Messages and Chat
Setting a Voicemail Service
Number
Your service provider may have set a voicemail service
number before you receive your phone. If not, refer to the
following procedures.
Press To
1
scroll to any blank entry
2
OK
() select the blank entry
3
scroll to
Edit quick note
4
OK
() select
Edit quick note
5
keypad keys enter text
6
SAVE
() save the created quick note
Find the Feature
>
Msg. center
>
Voice mailbox
Press To
1
keypad keys enter the voicemail service
number your service provider
provided
2
OK
() save the setting
87
Messages and Chat
Editing Topic Messages
You can edit topic messages you want to
receive from your service provider, such as
traffic reports and today’s news.
Sorting Messages
You can classifying SMS and MMS messages by time or
by type.
Clearing Sending History
You can clear the SMS and/or MMS sending history from
your phone memory.
Find the Feature
>
Msg. center
>
Cell broadcast
Find the Feature
>
Msg. center
>
Settings
>
Message sorting
Find the Feature
>
Msg. center
>
Sending history
>
Text messages
/
Multimedia
msgs.
Press To
1
open the options menu
2
scroll to
Erase all
88
Messages and Chat
Editing Service Commands
You can edit service commands you want your
service provider to operate.
Having an Online Chat
You can open up to 4 chatrooms and have an
online chat.
3
OK
() clear the SMS/MMS sending
history
Find the Feature
>
Msg. center
>
Service command
Press To
1
keypad keys enter the service command
you want your service
provider to operate
2
OK
() send the service command to
your service provider
Find the Feature
>
Tools
>
Chatroom
Press To
89
Messages and Chat
Adding a Quick Note or Smiley to Your
Instant Message
Press To
1
scroll to any chatroom
available
2
NAMES
() select from your phonebook a
person you want to have a
chat with
3
scroll to the desired entry
4
OK
() select the entry
5
scroll to the desired phone
number
6
OK
() select the phone number
7
OK
() save the setting
8
keypad keys enter your nickname
9
OK
() save the setting
10
keypad keys enter your instant message
11
SEND
() send your instant message
Press To
1
open the options menu
2
scroll to
Insert quick note
or
Insert
smiley
90
Messages and Chat
Editing Your Nickname
Placing a Call to Chatters
3
OK
() select
Insert quick note
or
Insert
smiley
4
scroll to the desired quick
note or smiley
5
OK
() add the selected quick note
or smiley to your instant
message
Press To
1
open the options menu
2
scroll to
Nickname
3
OK
() select
Nickname
4
keypad keys edit your nickname
5
OK
() save the setting
Press To
1
open the options menu
2
scroll to
Call
3
OK
() select
Call
Press To
91
Messages and Chat
Saving Chat Numbers as Phonebook
Entries
Editing a Chatroom Phone Number
4
CALL
() make a phone call to the
chatter
Press To
1
open the options menu
2
scroll to
Save
3
OK
() select
Save
4
SAVE
() prepare to edit the
phonebook entry
5
keypad keys fill in the blanks with suitable
words
6
SAVE
() store the settings
Press To
1
open the options menu
2
scroll to
Chat Numbers
3
OK
() select
Chat Numbers
4
keypad keys edit a chatroom phone
number
Press To
92
Messages and Chat
Viewing Old Instant Messages
Clearing Instant Messages History
Configuring SMS Settings
You can select a service provider which supports SMS
service, read delivery status reports for SMS messages,
let the message center send you notes after recipients
read your sent SMS messages, and specify a wireless
5
OK
() save the setting
Press To
1
open the options menu
2
scroll to
View history
3
OK
() view old instant messages
Press To
1
open the options menu
2
scroll to
Clear history
3
OK
() delete all the old instant
messages from phone
memory
Press To

93
Messages and Chat
communication protocol for use in sending SMS
messages.
Configuring MMS Settings
You can choose to seamlessly receive MMS messages,
receive MMS messages even if you are roaming over
another network, save MMS messages you sent, reject the
message center to send you notes if recipients have read
the MMS messages you sent to them, configure and
activate MMS service, block certain MMS messages, and
set various options when you send MMS messages.
Selecting Memory for Saving
SMS Messages
You can select either SIM card memory or phone memory
to store your SMS messages.
Find the Feature
>
Msg. center
>
Settings
>
Text messages
Find the Feature
>
Msg. center
>
Settings
>
Multimedia msgs.
Find the Feature
>
Msg. center
>
Settings
>
Memory in use
>
Select SMS memory
94
Messages and Chat
Checking SIM Card or Phone
Memory Which Saves SMS
Messages
You can read the details of SIM card or phone memory
that saves your SMS messages.
Checking Phone Memory Which
Stores MMS Messages
You can view the details of phone memory that stores your
MMS messages.
Find the Feature
>
Msg. center
>
Settings
>
Memory in use
>
SMS status
Find the Feature
>
Msg. center
>
Settings
>
Memory in use
>
MMS status

95
Setting Up Your Phonebook
Setting Up Your
Phonebook
Selecting Memory for Saving
Phonebook Entries
You can select either SIM card memory or phone
memory to store your phonebook entries.
Checking SIM Card or Phone
Memory Which Stores Phone
Numbers and Notes
You can read the details of SIM card memory or phone
memory that saves your phone numbers and notes.
Find the Feature
>
Phonebook
>
Option
>
Memory
Find the Feature
>
Phonebook
>
Option
>
Memory status
96
Setting Up Your Phonebook
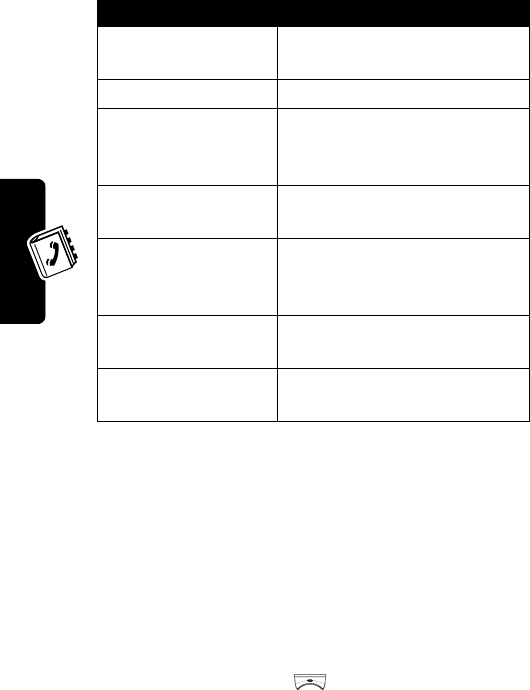
Creating Phonebook Entries
You can add phonebook entries to
Phonebook
on your phone.
X
/100
Number (X) of phone numbers in SIM
card memory. You can store up to 100
phone numbers in SIM card memory.
Note:
The capacity of SIM card memory
depends on your service provider’s
settings.
X
/300
Number (X) of phone numbers in phone
memory. You can store up to 300 phone
numbers in phone memory.
X
/100
Number (X) of notes in phone memory.
You can store up to 100 notes in phone
memory.
Find the Feature
>
Phonebook
>
Add
Option Description
Memory
specify memory for storing
phonebook entries
Name
type a name
Number type
select a phone number type
Number
type a phone number
Caller group
specify a caller group for
classifying phonebook entries
Picture *
add a photo caller ID
97
Setting Up Your Phonebook
* The option is available only for the phonebook entries
saved in phone memory, not in SIM card memory.
Tip:
Remember to press
SAVE
( ) when you finish
editing phonebook entries.
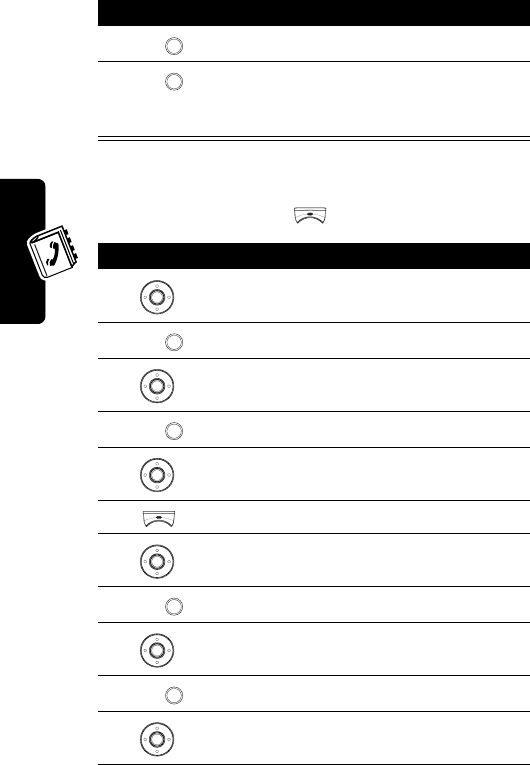
Using Phonebook Entry
Options
You can perform various functions on the selected
phonebook entry.
Note Type *
select a note type
Note *
enter text for the selected
note type
Find the Feature
>
Phonebook
>
Search
Press To
1
keypad keys enter the 1st letter(s) of a
name
2
OK
() open your phonebook
3
scroll to the desired entry
4
OK
() select the entry
Option Description
98
Setting Up Your Phonebook
5
scroll to the name, the
desired phone number/note,
or the
Personal picture
entry (if
you have added a photo
caller ID)
6
open the options menu
Option Description
Edit
edit the selected phone
number and then specify a
number type or edit the name
Add
>
Add number
add phone number(s) (up to
4)
Add
>
Add text
add note(s)
Add
>
Caller group
specify a caller group for the
selected entry
Add
>
Add picture
create a photo caller ID
Add
>
Add voice tag
record a name command and
use it to dial by voice
Remove picture
remove a photo caller ID (by
selecting
Personal picture
>)
Copy
copy/move the selected entry
saved on SIM card memory
to phone memory and vice
versa
Press To
99
Setting Up Your Phonebook
You can also use many other features for the selected
phonebook entry via a different access method.
Erase
remove the selected entry or
note
View
display the details of the
selected entry
Find the Feature
>
Phonebook
>
Search
Press To
1
keypad keys enter the 1st letter(s) of a
name
2
OK
() open your phonebook
3
scroll to the desired entry
4
open the options menu
Option Description
Detail
display the details of the
selected entry
Add
add entry(ies)
Erase
delete the selected entry
Copy
copy/move the selected entry
saved on SIM card memory
to phone memory and vice
versa
Option Description
100
Setting Up Your Phonebook
Creating a Photo Caller ID
You can add an image (photo caller ID) to a phonebook
entry. Both the internal and the external displays show that
image when the caller places a call to you.
Note:
To create photo caller IDs, save phonebook entries
on phone memory.
To create photo caller IDs from your phonebook:
Caller group
specify a caller group for the
selected entry
Speed dial
create a 1-touch dial entry
Send message
write and send an SMS
message from the selected
entry
Send business card
send the selected entry as a
business card
Set as default
set the desired phone
number to be called by
default
View mode
display your phonebook
entries as a text list or icons
Sort by
sort your phonebook entries
by the desired sorting type
Find the Feature
>
Phonebook
>
Search
Option Description
101
Setting Up Your Phonebook
Press To
1
keypad keys enter the 1st letter(s) of a
name
2
OK
() open your phonebook
3
scroll to the desired entry
4
OK
() select the entry
5
open the options menu
6
scroll to
Add
7
OK
() select
Add
8
scroll to
Add picture
9
OK
() select
Add picture
10
scroll to
Media center
Tip:
Select
Camera
to use the
picture you just took as a
photo caller ID.
11
OK
() select
Media center
12
OK
() select
Photo album
(for example)
13
scroll to the desired folder
14
OK
() select the folder
15
scroll to the desired photo
102
Setting Up Your Phonebook
To create photo caller IDs from your media center:
16
OK
() select the photo
17
OK
() set the selected photo as a
photo caller ID attached to
the phonebook entry
Find the Feature
>
Media center
Press To
1
scroll to
Photo album
(for
example)
2
OK
() select
Photo album
(for example)
3
scroll to the desired folder
4
OK
() select the folder
5
scroll to the desired photo
6
open the options menu
7
scroll to
Apply as
8
OK
() select
Apply as
9
scroll to
Personal icon
10
OK
() select
Personal icon
11
scroll to the desired
phonebook entry
Press To
103
Setting Up Your Phonebook
Sorting Phonebook Entries
You can sort phonebook entries by a desired type.
Tip:
Selecting
Location
lets you classify phonebook entries by
creation priority numbered 1, 2, 3 and so on.
Browsing Your Phonebook to
Make a Call
You can from the idle display look up your phonebook and
pick up an entry to make a call.
To t u r n
Dialing number lookup
on 1st:
12
OK
() set the photo as a photo
caller ID attached to the
selected phonebook entry
Find the Feature
>
Phonebook
>
Option
>
Sort by
Find the Feature
>
Phonebook
>
Option
>
Dialing number lookup
>
ON
Press To
104
Setting Up Your Phonebook
To pick up a phonebook entry and dial from the idle
display:
1-Touch Dialing
You can press and hold any of the keys from to to
quickly make a phone call from the idle display.
To tu r n
Speed dialing
on 1st:
To create 1-touch dial entries:
Press To
1
keypad keys enter the 1st letter(s) of a
name
2
scroll to the desired entry
3
make a phone call
Find the Feature
>
Settings
>
Call features
>
Speed dialing
>
ON
Find the Feature
>
Phonebook
>
Speed dial
Press To
1
scroll to the desired speed
dial key
2
OK
() open your phonebook
105
Setting Up Your Phonebook
Changing 1-Touch Dial Entries
3
scroll to the desired entry
4
OK
() assign the speed dial key for
the default phone number
Find the Feature
>
Phonebook
>
Speed dial
Press To
1
scroll to the desired name
2
open the options menu
3
scroll to
Change
4
OK
() open your phonebook
5
scroll to the desired entry
6
OK
() assign the speed dial key for
the default phone number of
the selected entry
Press To
106
Setting Up Your Phonebook
Customizing Ring Tone for a
Caller Group
You can select a ring tone for a caller group to use. The
ring tone plays when 1 of the caller group calls you.
Tip:
To change the names of caller groups, scroll and
select
Rename
. To display, add or delete caller group
members, select
Member
>.
Find the Feature
>
Phonebook
>
Caller group
Press To
1
scroll to the desired caller
group
2
OK
() select the caller group
3
scroll to
Ring tone
4
OK
() select
Ring tone
5
scroll to the desired ring tone
6
OK
() select the ring tone

107
Setting Up Your Phonebook
Creating a Photo Caller ID for a
Caller Group
You can select an image (photo caller ID) for a caller group
to use. The image displays when 1 of the caller group calls
you.
To t u r n
Graphic
on 1st:
To use a preset image as a photo caller ID for a caller
group:
Find the Feature
>
Phonebook
>
Caller group
Press To
1
scroll to the desired caller
group
2
OK
() select the caller group
3
scroll to
Graphic
4
OK
() select
Graphic
5
ON
() turn
Graphic
on
Press To
1
scroll to
View
2
OK
() select
View
108
Setting Up Your Phonebook
To use your own image as a photo caller ID for a caller
group:
3
scroll to the desired preset
image
4
OK
() select the preset image
Press To
1
scroll to the blank entry
2
open the options menu
3
scroll to
Media center
Tip:
Select
Camera
to use the
picture you just took as a
caller group photo caller ID.
4
OK
() select
Media center
5
scroll to the desired option
6
OK
() select the option
7
scroll to the desired folder, if
necessary
8
OK
() select the folder, if necessary
9
scroll to the desired object
10
OK
() select the object
Press To
109
Setting Up Your Phonebook
To create a photo caller ID for a caller group from your
media center:
11
OK
() set the selected object as a
photo caller ID for the caller
group
Find the Feature
>
Media center
Press To
1
scroll to
Photo album
(for
example)
2
OK
() select
Photo album
(for example)
3
scroll to the desired folder
4
OK
() select the folder
5
scroll to the desired photo
6
open the options menu
7
scroll to
Apply as
8
OK
() select
Apply as
9
scroll to
Group icon
10
OK
() select
Group icon
11
scroll to the desired caller
group
Press To