Motorola Mobility T6FL1 PCS GSM Transceiver PCMCIA Card User Manual M2501 Electra E M2501 00 0Hyo2 E
Motorola Mobility LLC PCS GSM Transceiver PCMCIA Card M2501 Electra E M2501 00 0Hyo2 E
Contents
- 1. Exhibit 8 Users Manual 1
- 2. Exhibit 8 Users Manual 2
Exhibit 8 Users Manual 1
APPLICANT: MOTOROLA, INC. FCC ID: IHDT6FL1
INSTRUCTION MANUAL
• A preliminary draft copy of the User’s Manual follows this cover page.
• The User’s Manual will have the following text added to it:
"NOTE: This equipment has been tested and found to comply with the limits for a Class B
digital device, pursuant to Part 15 of the FCC Rules. These limits are designed to provide
reasonable protection against harmful interference in a residential installation. This equipment
generates, uses and can radiate radio frequency energy and, if not installed and used in
accordance with the instructions, may cause harmful interference to radio communications.
However, there is no guarantee that interference will not occur in a particular installation. If
this equipment does cause harmful interference to radio or television reception, which can be
determined by turning the equipment off and on, the user is encouraged to try to correct the
interference by one or more of the following measures:
. Reorient or relocate the receiving antenna.
. Increase the separation between the equipment and receiver.
. Connect the equipment into an outlet on a circuit different from that to which the receiver is
connected.
. Consult the dealer or an experienced radio/TV technician for help."
NOTE: Text from FCC Part 15.19(a) will be included in the production version of the user's manual.
EXHIBIT 8

DoCoMo W-CDMA and GSM/GPRS Systems
Thank You for Purchasing the “FOMA M2501 HIGH-
SPEED”.
Before or while using the FOMA M2501 HIGH-SPEED, be sure to thoroughly read this manual to
ensure its correct use. For further information, contact the “DoCoMo Information Center” on the
back page of this manual.
Treated with care, your FOMA M2501 HIGH-SPEED will be your able partner.
Before Using the FOMA M2501 HIGH-SPEED
・Because the FOMA terminal uses radio waves, it may not function in locations where it is
difficult for radio waves to penetrate, such as tunnels, underground passages and some
buildings; in areas where radio wave signals are weak; or out of the service area. Even when
you are on a higher floor of a tall building or condominium and nothing blocks your view outside,
the FOMA M2501 HIGH-SPEED may not be able to receive or transmit signals. Also,
communication may be interrupted even when the signal reception level on the FOMA M2501
HIGH-SPEED is strong in a fixed location.
・Use the FOMA M2501 HIGH-SPEED in ways that do not disturb others in public places,
crowded locations, or quiet.
・Because the FOMA M2501 HIGH-SPEED uses radio waves to communicate, there is a
possibility that a third party intercepts communications. However, the W-CDMA and GSM/
GPRS systems automatically support encoding for all calls, so even if a third party intercepts a
call, the third party hears only noise.
・The FOMA terminal encodes voice communication on to digital signals and communicates via
wireless. When you use the FOMA M2501 HIGH-SPEED at a location with weak radio wave
signals, the transmitted digital signals may not be correctly decoded and the decoded voice
may sound different from the original one.
・It is recommended that you make separate notes of the information stored in your PC and keep
such notes in a safe place. DoCoMo cannot be held responsible in any way for loss of data
stored in your PC.
・The FOMA M2501 HIGH-SPEED supports FOMA Plus-Area.
・The FOMA terminal can be used only via the FOMA network provided by DoCoMo and
DoCoMo’s roaming area.
・This FOMA terminal does not support i-mode functions (i-mode mail, connection to official
i-mode sites or i-appli, etc.).
・This FOMA terminal cannot receive SMS (Short Message Service). Therefore, it is
recommended that you set to reject receiving all SMS messages. For details on setting to reject
all SMS, refer to “ネットワークサービス操作ガイド (Network Service Operation Guide)”.
For Those Who Use the FOMA Terminal for the First Time
If this is the first time for you to use the FOMA terminal, it is recommended that you read this
manual in the following order to learn basic operations.
1. Learning names of parts and functions of the FOMA terminal........................................... P16
2. Connecting the FOMA terminal and a PC ........................................................................... P21
3. Having the FOMA terminal recognized by your PC............................................................. P24
4. Setting up the FOMA terminal for communication...................................................... P24, P29
The latest version of this manual can be downloaded from the DoCoMo Web site.
・Download the “Instruction Manual (PDF File)”
(http://www.nttdocomo.co.jp/english/support/manual/index.html)
* The URL and the information contained in the manual are subject to change without prior notice.
1
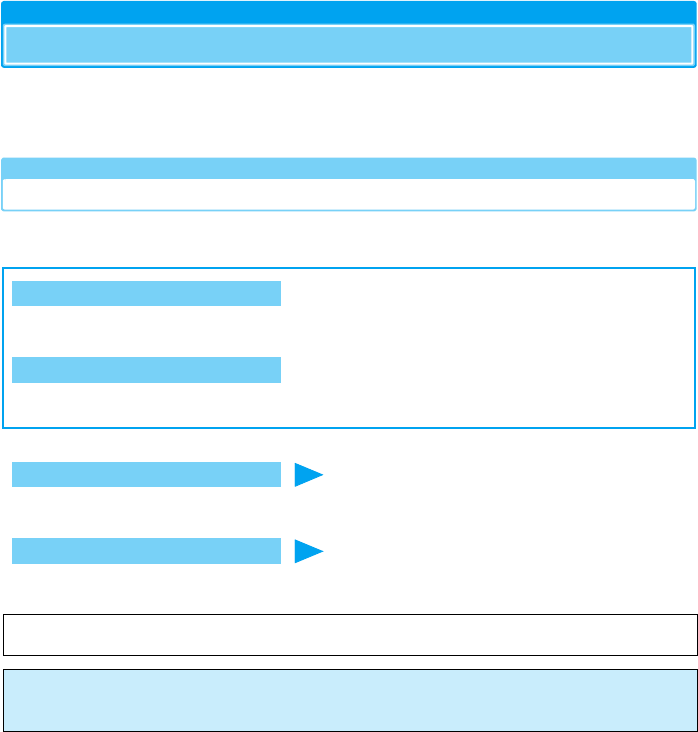
How to Read/Refer to This Manual
In this manual, illustrations and symbols are used in the explanations so that you can
easily understand how to use the FOMA terminal correctly.
• This manual describes operations mainly using a mouse to click on an item.
How to Refer to This Manual
By the following search methods, you can find pages where functions and services are
described:
■Overseas Use
See “Overseas Use” when using the terminal overseas. →P77
• This manual refers to the “FOMA M2501 HIGH-SPEED” as the “FOMA terminal”.
• Reprinting all or parts of this manual without approval of NTT DoCoMo is prohibited.
• Information contained in this manual is subject to change without prior notice.
From the Index
Search from the index when you know the names of functions or services.
From the Tabs on the Front Cover
Search from the tabs printed on the front cover.
From the Contents P4
Search from the contents that categorize functions.
From Features P5
Search from the features when you want to use specific functions.
See the next page for details.
2
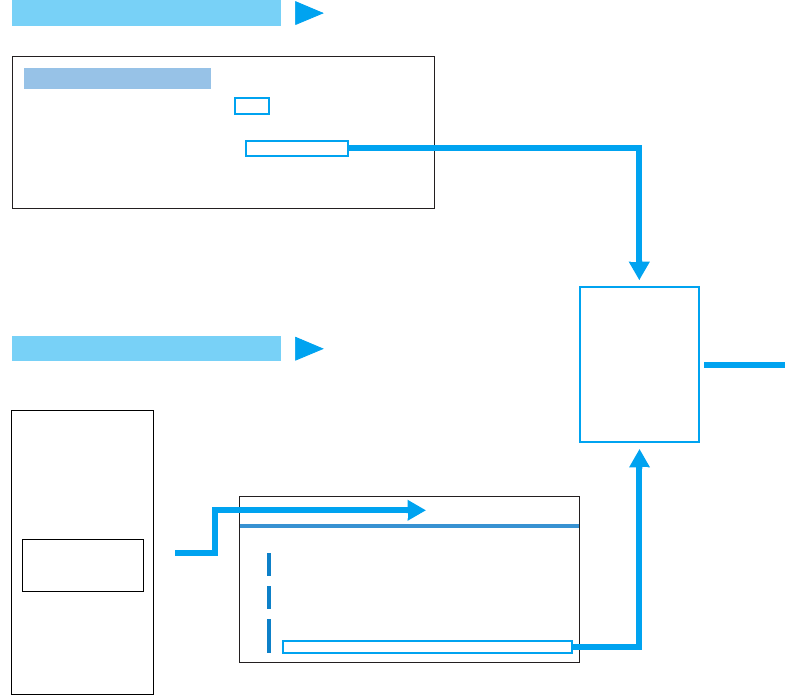
From the Index P95
Search for a function name or a service name as shown below.
From the Tabs on the Front Cover Front cover
Search for the function you want to set in the order of “Front cover” → “Chapter title page”
→ “Description page” as shown below.
Operating Environments
Communication Configuration
File (Driver) . . . . . . . . . . 24
FirstPass PC Software. . . . 39
FOMA PC Configuration
Software . . . . . . . . . . . . 24
Utility. . . . . . . . . . . . . . . . . 52
Using an Earphone Microphone
. . . . . . . . . . . . . . . . . . . . . 86
Utility . . . . . . . . . . . . . . . . 51, 52
Card Settings . . . . . . . . . . . 64
Help . . . . . . . . . . . . . . . . . . 56
Launching/Exiting . . . . . . . . 55
Making/Receiving a Voice Call
. . . . . . . . . . . . . . . . . 56, 58
Network Service Settings. . . 65
O
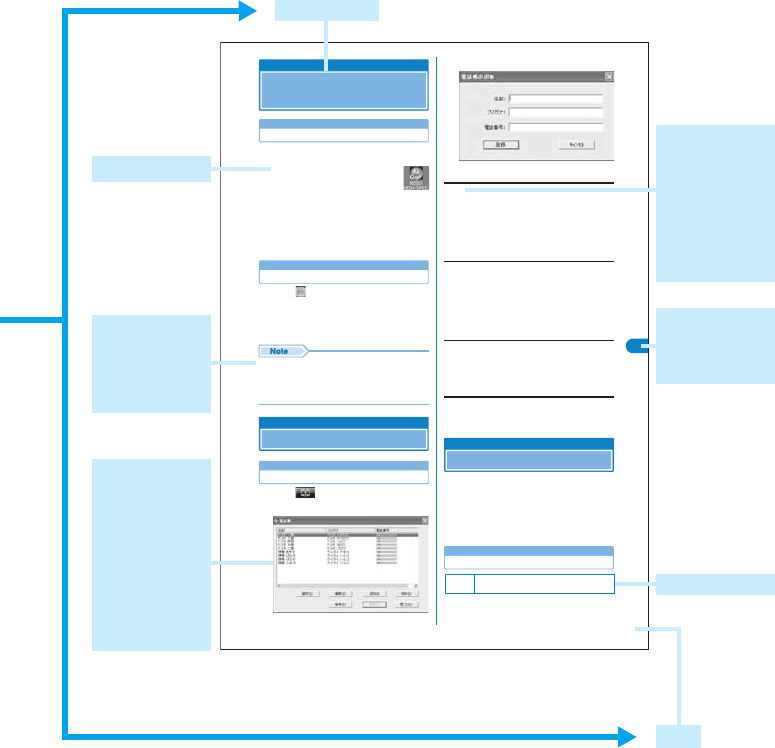
Utility Software
What can be done by Utility
M2501 HIGH-SPEED Utility . . . . . . . . . . . . . . . . . . . . . . . . . . . . . . . . . . . . . . . . 52
Installing
Installing the FOMA M2501 HIGH-SPEED Utility. . . . . . . . . . . . . . . . . . . . . . . 52
Launching/Exiting
Main Screen Components. . . . . . . . . . . . . . . . . . . . . . . . . . . . . . . . . . . . . . . . . 54
Launching/Exiting the FOMA M2501 HIGH-SPEED Utility . . . . . . . . . . . . . . . 55
Inserted on the
next proof
See P55.
Go to the page
about
“Launching/
Exiting the
FOMA M2501
HIGH-SPEED
Utility”
3
55
erawtfoS ytilitU
Launching/Exiting
Launching/Exiting the FOMA
M2501 HIGH-SPEED Utility
Launching
• Log into a user account with the Administrator or PC
supervisor privileges.
aDouble click the “M2501 HIGH-
SPEED Utility” icon on the
Desktop
The Main screen (P54) opens.
■If the icon is not displayed
Click “スタート (Start)” y “すべてのプログラ
ム (All Programs)” / “プログラム (Programs)” y
“M2501 HIGH-SPEED” y “M2501 HIGH-
SPEED Utility”
Exiting
aClick (Orange) on the Main screen
(P54)
The exiting confirmation screen appears.
bClick [OK]
• You cannot exit the utility under the following
circumstances : (checking the specifications)
- While dialing or receiving/performing a call
- While the Redial/Received Calls/Phonebook screen
is open
Phonebook
Using Phonebook
Adding
Saving Entries in Phonebook
aClick (電話帳 (Phonebook)) on the
Main screen (P54)
bClick [追加 (Add)]
cPerform the following steps
Name
Enter using Kanji, Hiragana, Katakana, alphanumeric or
symbols.
yEnter a name
• Enter characters using the keyboard of the PC.
• Up to 16 double-byte or 32 single-byte characters can be
entered.
• An entry cannot be saved to the Phonebook until this field is
filled in.
Reading
Enter using double-byte katakana, single-byte alphanumeric, or
single-byte symbols.
yEnter a reading
• Enter characters using the keyboard of the PC.
• A reading is entered automatically when “名前 (Name)” is
entered.
• Up to 16 double-byte or 32 single-byte characters can be
entered.
Phone number
Enter using single-byte alphanumeric characters.
yEnter a phone number
• Enter characters using the keyboard of the PC.
• Up to 26 characters from 0 to 9 (including #, *, and +) and up
to five - (hyphens) can be entered.
dClick [登録 (Add)]
• To save Phonebook to the PC after adding a contact,
click [更新 (Refresh)] → [OK] on the Contacts screen.
Security Settings
Setting UIM PIN
You can set the PIN1 code for the UIM.
• Insert the FOMA terminal into the PC card slot before
performing these steps.
• While the Security Settings screen is displayed, no
operations can be performed from the Main screen. If a call
arrives during the operation, the call can be answered after
[閉じる (Close)] is clicked, however, the options being set
will be canceled.
Entering a PIN1 Code/Changing the PIN1 Code
You can require the PIN1 code entry each time
the M2501 HIGH-SPEED Utility is launched. You
can also change the PIN1 code.
Phonebook Screen
Default 起動時PINコード照合 (PIN Code Verification at
Start-up): 無 (No)
NI
P
MIU/koo
benohP/g
nitix
E/gnihcnuaL
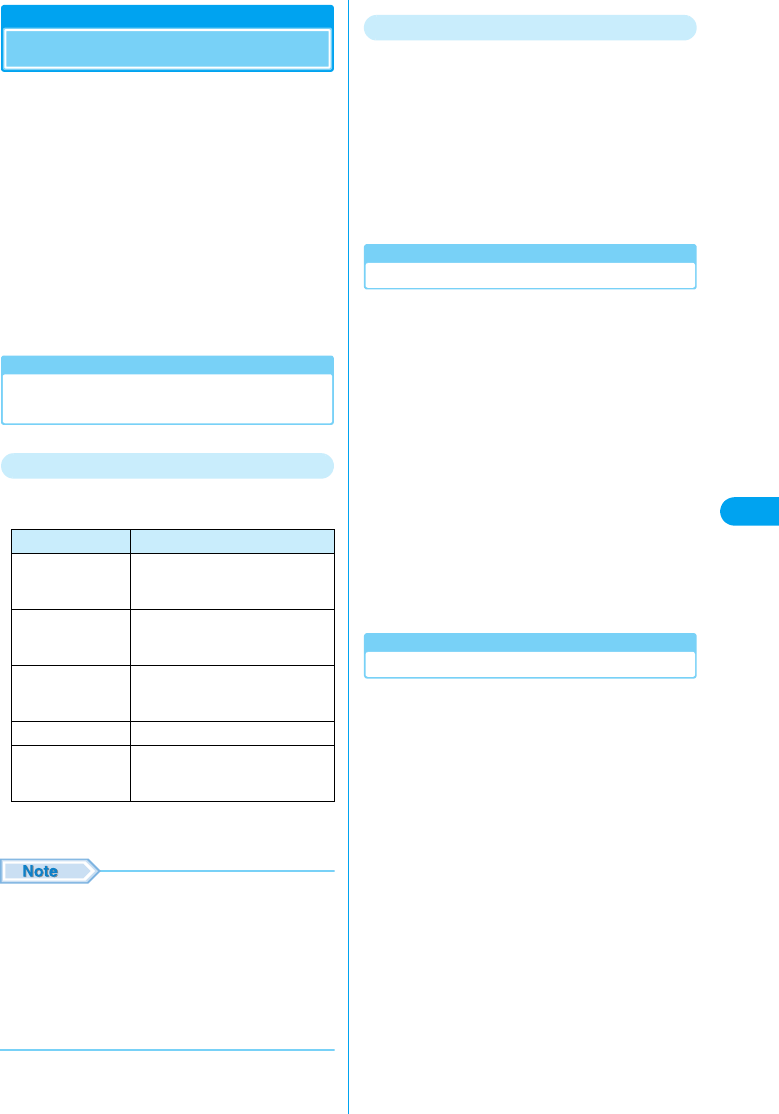
Default settings
An item name
actually shown
on the screen.
Some functions
cannot be
performed
depending on
operations.
Chapter index
tab with
function name
or title.
* The above page is an example.
* Screen images and illustrations contained in this manual are for
reference only. They may differ from those seen for the actual
product.
Page
A section title
Operation steps
Useful
information or
suggestions
relating to an
operation
Key screen for a
function. This is
an image of a
screen seen on
the PC.
Numbers,
settings or
characters
entered are for
reference only.
Contents
4
Contents/Safety Instructions
How to Read/Refer to This Manual ......................................................................................................................... 1
Features of the FOMA M2501 HIGH-SPEED ......................................................................................................... 5
Safety Instructions (ALWAYS FOLLOW THESE DIRECTIONS)............................................................................. 6
Handling and Care ................................................................................................................................................ 11
Intellectual Property Rights................................................................................................................................... 13
Purchased Product and Accessories .................................................................................................................... 14
Names of Parts and Functions, UIM (FOMA Card), Available Communications,
Connecting the FOMA Terminal and a PC
Setting Up, Installing the Driver, Configuring Communication Using the FOMA PC Configuration Software,
FOMA PC Configuration Software, Installing the FOMA PC Configuration Software,
Configuring Communication Settings, Start Communicating,
Uninstalling the FOMA PC Configuration Software, W-TCP Settings, Configuring Access Point (APN),
Dial-up Network Settings, Connecting Using Dial-up, Using FirstPass PC Software, AT Commands,
AT Command List
M2501 HIGH-SPEED Utility, Installing the FOMA M2501 HIGH-SPEED Utility, Main Screen Components,
Launching/Exiting the FOMA M2501 HIGH-SPEED Utility, Finding Help on How to Operate,
Sending Caller ID, Viewing Your Own Number, Making/Receiving Voice Calls, Using Phonebook,
Network Settings (Overseas Use), Setting UIM PIN, Sound/Other Settings, Network Service Settings
Available Network Services, Caller ID Notification Service, Voice Mail Service, Call Forwarding Service,
Caller ID Display Request Service, Call Waiting Service, Dual Network Service,
English Voice Prompt Service, Nuisance Call Barring Service, Setting Remote Control,
Public Mode (Power Off)
International Roaming Service, Services Available Overseas, Before Using in Overseas,
Making a Call in Oversea, Receiving a Call in Overseas, Searching for Available Networks in Overseas,
Rejecting Incoming while Roaming, Enabling Voice Prompts while Roaming,
Using Network Services during Roaming
Combinations of Multiaccess Operations, Optional and Related Devices, CD-ROM, Troubleshooting,
Error Messages, Glossary, Warranty and After-Sales Service, Specific Absorption Rate of Mobile Phones,
Export Controls of the Product and Accessories, Main Specifications, Index
Before Using the FOMA Terminal...............................................15
Setting Up.....................................................................................23
Utility Software.............................................................................51
Network Services.........................................................................71
Overseas Use...............................................................................77
Appendix ......................................................................................85
Contents
ñ⁄éü

5
Contents/Safety Instructions
Features of the FOMA M2501 HIGH-SPEED
FOMA (Freedom Of Mobile multimedia Access) is the name of a service provided
by DoCoMo based on the W-CDMA system, which is certified as one of the
global standards of 3rd generation mobile communication systems (IMT-2000).
Extensive Network Services
High-speed communication
has a maximum of 3.6 Mbps
You can enjoy high-speed packet
communication with a maximum of 3.6 Mbps
for receiving and 384 Kbps for sending.
・The actual communication speed varies
depending on the signal strength or
surrounding communication conditions.
・DoCoMo’s Internet connection service
“mopera U (fee-based)” is also offered.
International Roaming
Calls or communications are available from
a PC even in foreign countries that have
adapted the W-CDMA network or GSM/
GPRS network systems. →P79
・A separate subscription is required for
WORLD WING, DoCoMo’s international
roaming service.
* If you initially subscribed to the FOMA
service before August 31, 2005 and have not
subscribed to “WORLD WING”, an initial
subscription is required.
FOMA Plus-Area Coverage
Calls or communications are available in the
FOMA Plus-Area in addition to the FOMA
service areas.
・The same services are available for the
FOMA service area and the FOMA plus
service area.
Voice Calls/Video Calls
Voice calls or video calls can be made from
a PC using the “M2501 HIGH-SPEED
Utility” (for voice calls) or “DoCoMo Video
Calls 2005” (for video calls) contained in the
included CD-ROM. →P51
UIM Interchangeability
The same UIM can be used in more than
one FOMA terminal. →P17
・Monthly basic charges and
communication charges apply to the
contract number of the inserted UIM.
Multiaccess
Packet communication and voice calls can
be made simultaneously. →P66
Voicemail Service
(charges apply)
●A separate subscription is required. →P72
Call Forwarding Service
(free of charge)
●A separate subscription is required. →P73
Call Waiting Service
(charges apply)
●A separate subscription is required. →P73
Dual Network Service
(charges apply)
●A separate subscription is required. →P74
Nuisance Call Barring Service
(charges apply)
●A separate subscription is required. →P75
Features of the FOMA M2501 HIGH-SPEED
6
Contents/Safety Instructions
Safety Instructions (ALWAYS FOLLOW THESE
DIRECTIONS)
●Before using your FOMA terminal, read these safety instructions carefully so that you can use it
correctly. After reading the safety instructions, keep them in a safe place for later reference.
●These precautions are intended to protect you and others around you. Read and follow them
carefully to avoid injury, damage to the product or damage to property.
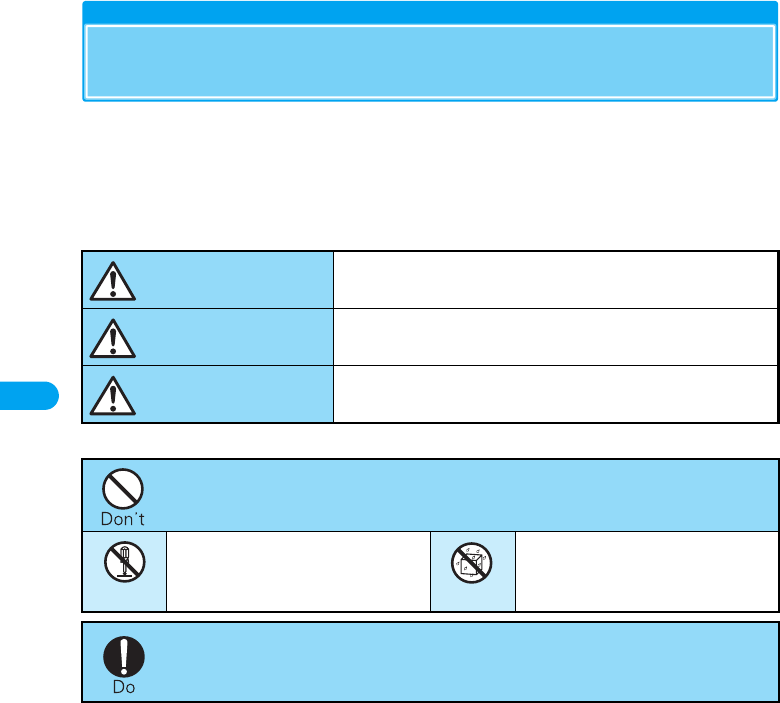
■The signs below indicate the levels of danger or damage that may occur if the particular
precautions are not observed.
■The following symbols indicate special warnings regarding product usage.
■“Safety Instructions” are divided into the following four sections:
General Precautions for the FOMA Terminal and UIM............................................................... P7
Precautions for FOMA Terminal ................................................................................................. P8
Precautions for UIM.................................................................................................................... P9
Notes on Using near Electronic Medical Equipment ................................................................ P10
This sign indicates that incorrect handling will almost
certainly cause death or serious injury.
This sign indicates that incorrect handling poses a risk
of causing death or serious injury.
This sign indicates that incorrect handling poses a risk
of causing injury or damage to the product or property.
Denotes things not to do. (prohibition)
Denotes not to disassemble. Denotes not to use where it
could get wet.
Denotes mandatory instructions (matter that must be complied with).
DANGER
WARNING
CAUTION
Do not disassemble
Avoid water
Safety Instructions
7
Contents/Safety Instructions
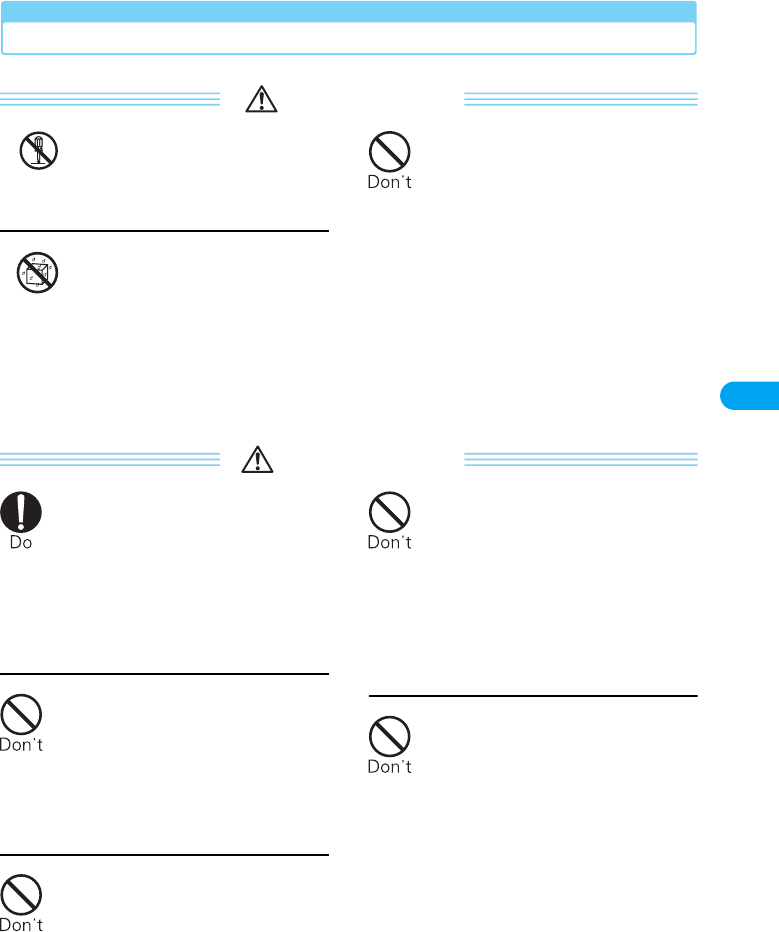
General Precautions for the FOMA Terminal and UIM
DANGER
Do not disassemble or remodel
the terminal and UIM.
●Fire, injury, electric shock or
malfunction may result.
Do not let FOMA terminal and
UIM get wet.
●Contact with water or other
liquids may cause heating,
electric shock, fire or
malfunction. Take care not to use
the terminal and UIM in areas
where they could get wet.
Do not use or leave the FOMA
terminal and UIM in places with
a high temperature such as
near fire or heater, or places
exposed to direct sunlight or in
cars under the blazing sun.
●Deformation, malfunction,
heating or the deterioration of
performance may result. Also,
part of the case could get
heated, causing bare skin burns.
WARNING
If odor, overheat, discoloration,
or deformation is detected
during use, immediately
remove the FOMA terminal
from card slot.
●If use the FOMA terminal as they
are, overheat, burst or catching
fire may result.
Do not use near places such as
gas stations where there is
danger of fire or explosion.
●If used in dusty places or where
there are flammable gases such
as propane or gasoline,
explosions or fire may result.
Do not throw the FOMA
terminal or UIM, or subject
them to severe shocks.
●Malfunction or fire may result.
Be careful not to let electro
conductive materials (metal
pieces, pencil leads etc.)
contact with the connector
terminal. Also, make sure that
these are not entered into the
inside of the FOMA terminal.
●Fire or other malfunctions may
result from a short circuit.
Do not put the FOMA terminal
or UIM in microwave ovens or
other heating appliances or
high pressure containers.
●The FOMA terminal or UIM may
overheat, smoke or catch fire, or
its circuit parts may burst.
Do not disassemble
Avoid water
Safety Instructions
8
Contents/Safety Instructions
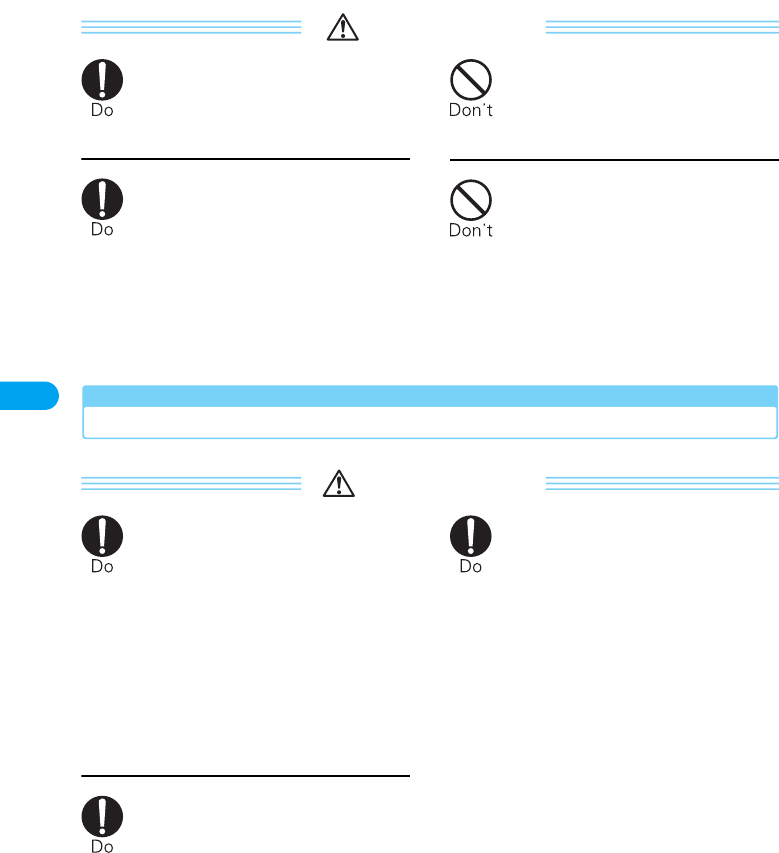
CAUTION
Keep out of reach of babies
and infants.
●Accidental swallowing or injury
may result.
If children use the FOMA
terminal or UIM, a guardian
should explain the safety
instructions and correct
operations. The guardian
should also make sure that the
instructions are followed
during use.
●Injury may result.
Do not store the FOMA
terminal or UIM in humid or
dusty places, or in hot areas.
●Malfunction may result.
Do not place the FOMA
terminal or UIM on unstable
locations such as wobbly
tables or slanted locations.
●The FOMA terminal or UIM may
fall, resulting in injury or
malfunction.
Precautions for FOMA Terminal
WARNING
Turn off the FOMA terminal in
places where use is prohibited
such as airplanes or hospitals.
●Electronic and electronic medical
appliances may be adversely
affected.
For use inside medical facilities,
make sure that you comply with
their regulations.
You may be punished for using
the FOMA terminal in airplanes,
which is prohibited by law.
If lightning strikes while using
the terminal outside, remove
the FOMA terminal from the PC
card slot immediately, and
move to a safe location.
●Lightning strike and electric
shock may result.
Remove the FOMA terminal
from the PC card slot near
high-precision electronic
devices or devices using weak
electronic signals.
●The FOMA terminal may possibly
cause these devices to
malfunction.
* Electronic devices that may be
affected:
Hearing aids, implanted cardiac
pacemakers, implanted
defibrillators, other medical
electronic devices, fire alarms,
automatic doors and other
automatically controlled
devices.
If you are using an implanted
cardiac pacemaker, implanted
defibrillator or any other
electronic medical device,
consult the manufacturer or
retailer of the device for advice
regarding possible effects from
the radio waves.
Safety Instructions
9
Contents/Safety Instructions
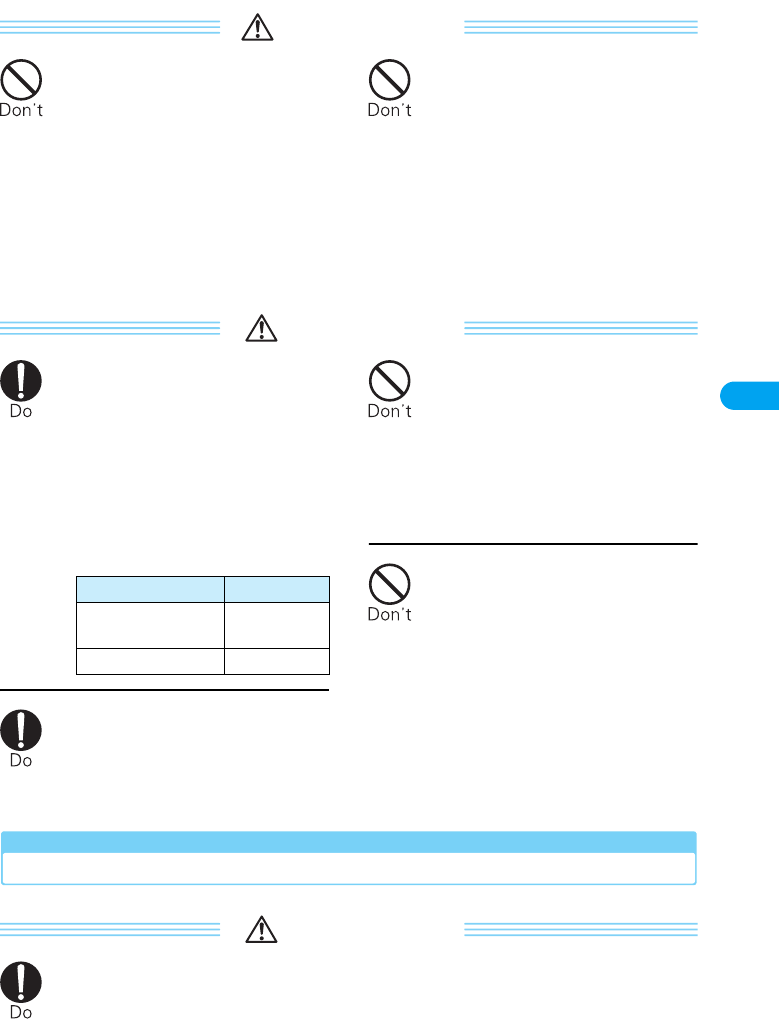
WARNING
Do not use the terminal while
driving a vehicle.
●In accordance with the revision of
the Road Traffic Law, you will be
penalized for using a mobile
phone during drive from
November 1, 2004. Park the car
in a safety place before using.
Set the FOMA terminal to Public
Mode or set Voice Mail Service
active.
Do not put the FOMA terminal
in the place where it could be
affected by an expanded
airbag, e.g. on the dashboard.
●If the airbag expands, the FOMA
terminal could hit you and others,
causing accidents such as injury
and the FOMA terminal could
become damaged.
CAUTION
Itching, rash or eczema may be
caused depending on your
physical conditions or
predisposition. If an
abnormality occurs, stop using
the FOMA terminal
immediately, and then seek
medical attention.
●Metal parts are used for the
following:
Electronic devices in some
types of cars can be affected
by use of the FOMA terminal.
●For safety’s sake, do not use the
FOMA terminal inside such cars.
Do not allow liquids such as
water, or foreign materials
such as metal pieces or
flammable materials to get into
the UIM tray on the FOMA
terminal.
●Fire, electronic shock or
malfunction may result.
Do not place magnetic cards or
the like near the FOMA
terminal.
●Information on magnetic cards
such as cash cards, credit cards,
telephone cards and floppy disks
may be deleted.
Precautions for UIM
CAUTION
Be careful when removing the
UIM (IC portion).
●Hands or fingers may be injured.
Part Material
Silver colored area on
the front and back
Stainless steel
Screw on the back Steel
Safety Instructions
10
Contents/Safety Instructions
Notes on Using near Electronic Medical Equipment
■The description below meets “Guideline on the Use of Radio-communication Equipment
such as Cellular Telephones - Safeguards for Electronic Medical Equipment” by the
Electromagnetic Compatibility Conference Japan.
WARNING
Remove the FOMA terminal from PC card slot when in crowded trains or
other public places where implanted cardiac pacemaker or defibrillator
wearers could be nearby.
●Signals from the FOMA terminal may affect the operation of implanted cardiac
pacemakers or defibrillators.
Be sure to adhere to the following regulations inside medical facilities:
●Do not bring the FOMA terminal into operating rooms (ORs), intensive care units
(ICUs) or coronary care units (CCUs).
●Remove FOMA terminal from the PC card slot in hospital wards.
●Remove FOMA terminal from the PC card slot in hospital lobbies and corridors if
electronic medical equipment could be nearby.
●If medical facility has specific zones where use or possession of mobile terminals is
prohibited, follow those regulations.
If you use an implanted cardiac pacemaker or implanted defibrillator, use the
mobile terminal 22 cm or more away from an implanted cardiac pacemaker or
implanted defibrillator.
●Operation of an implanted cardiac pacemaker or implanted defibrillator may be
affected by radio waves.
Patients using electronic medical equipment other than implanted cardiac
pacemakers or implanted defibrillators (outside medical establishments for
treatment at home, etc.) should check the influence of radio waves upon the
equipment by consulting its manufacturer.
●Operation of electronic medical equipment may be affected by radio waves.
Safety Instructions
11
Contents/Safety Instructions
Handling and Care
General Usage Guidelines
■Keep the FOMA terminal away from water.
The FOMA terminal and UIM are not waterproof. Do not use the terminal in places with high
humidity such as a bath or where rain may get it wet. If you carry the card close to your body,
moisture from sweat may corrode the internal parts causing a malfunction. When carrying the
FOMA terminal in a pocket of your clothes, sweat may corrode the inner components, causing
malfunction. Note that malfunctions deemed to be caused by water are not covered by the
warranty, and may be impossible to repair. Since these malfunctions are not under warranty, even
when repair is possible, it will be done at the user’s expense.
■Clean the FOMA terminal with a soft, dry cloth (Glasses cloth).
If the FOMA terminal is wiped with alcohol, paint thinner, benzine or detergent, the printing may
disappear or color may fade.
■Do not place the FOMA terminal near air conditioner outlets.
Rapid changes in humidity can cause condensation, leading to internal corrosion and
malfunction.
■Do not place the FOMA terminal where excessive force will be applied to it.
If FOMA terminal is inserted to a full bag, or placed in a pocket and sat on, its internal PCBs may
be damaged or malfunction. Such damage is not covered by warranty.
FOMA Terminal
■Avoid using in extremely high or low temperatures.
The FOMA terminal should be used within a temperature range of 5 °C to 35 °C and a humidity
range of ●●% to ●●%.
■FOMA terminal may affect fixed phones, televisions or radios in use nearby. Use as far as
possible from such appliances.
■Do not sit down when the FOMA terminal is in the back pocket of your pants. Also, do not
place it at the bottom of a full bag, or where it will encounter excessive force.
Malfunction or damage may result.
■It is normal for the FOMA terminal to become warm during use or charging. You can
continue to use it even when it is warm.
■Do not touch the pin on the connector or use excessive force.
Malfunction may result.
■Remove the FOMA terminal from a PC when moving the FOMA terminal.
Malfunction may result by applying excessive force to the connector.
■Put the FOMA terminal into the exclusive card case for the FOMA terminal when carrying.
■Take care not to drop the FOMA terminal when removing the FOMA terminal from the
exclusive FOMA HIGH-SPEED terminal card case.
■When it is not in use, keep the FOMA M2501 in its case to keep the connector contacts
clean.
Dirty contacts can result in intermittent connections.
Handling and Care

12
Contents/Safety Instructions
UIM
■Do not use excessive force to remove the UIM.
■Do not put excessive force on the card when inserting it into the terminal.
■It is normal for the UIM to become warm during use. You can continue to use it even when
it is warm.
■Note that NTT DoCoMo will not be liable for malfunctions occurring as the result of
inserting and using a UIM with unrecommended IC card reader/writer.
■Always keep IC portion of the UIM clean.
■Clean the UIM with a soft, dry cloth (Glasses cloth).
■To protect the environment, please bring the old UIM to a DoCoMo sales outlet.
■Avoid extreme temperature.
■Do not scratch, touch carefully or short circuit the IC portion.
Data loss or malfunction may result.
■Do not drop or give shock to the UIM.
Malfunction may result.
■Do not bend or put heavy things on the UIM.
Malfunction may result.
Handling and Care

13
Contents/Safety Instructions
Intellectual Property Rights
Copyrights and Rights of Portrait
Without permission of the copyright owner duplicate, you may not modify, transmit over public
communication lines, etc. any document, image, music, software, or other content owned by a
third party that you have used this product to photograph or download from an Internet
homepage, etc., except for private uses such as duplication and indexing that are allowed by
copyright law. With regard to performance, recital, exhibition, etc., please take care as even if for
private use, photography and audio recording are restricted.
Trademarks
・The “FOMA”, “mova”, “mopera”, “mopera U”, “WORLD CALL”, “WORLD WING”, “Dual Network”, “DoCoMo
Video Phone Software”, “FirstPass”, “Public Mode”, “My DoCoMo”, and “FOMA” logo are trademarks or
registered trademarks of NTT DoCoMo.
・“Catch Phone” is a registered trademark of the Nippon Telegraph and Telephone Corp.
・The “Free Dial Service” name and its logo are trademarks of NTT Communications.
・MOTOROLA and the “M Logo” are registered in the US Patent & Trademark Office.(C)Motorola, Inc. 2006.
・Adobe and Reader are trademarks or registered trademarks of Adobe Systems Incorporated in the United
States and other countries.
・Microsoft, MS, and Windows are in the U.S. and other countries registered trademarks of U.S. based
Microsoft Corporation.
・Windows XP is an abbreviation of Microsoft® Windows® XP Professional operating system, or of Microsoft®
Windows® XP Home Edition operating system.
・Windows 2000 is an abbreviation of Microsoft® Windows® 2000 Professional operating system.
・OS may be written abbreviated such as Windows XP, 2000.
・PCMCIA is the registered trademark of Personal Computer Memory Card International Association (United
States).
・Other company names or product names mentioned in this work are the trademarks or registered trademarks
of their respective owners.
Other Notices
・Licensed by QUALCOMM Incorporated under one or more of the following United States Patents and/or their
counterparts in other nations; (Checking the specifications)
4,901,307 5,600,754 5,267,261 5,506,865 5,710,784 5,504,773 5,416,797
5,568,483 5,228,054 5,778,338 5,109,390 5,490,165 5,414,796 5,544,196
5,535,239 5,101,501 5,659,569 5,337,338 5,267,262 5,511,073 5,056,109
5,657,420
Intellectual Property Rights
14
Contents/Safety Instructions
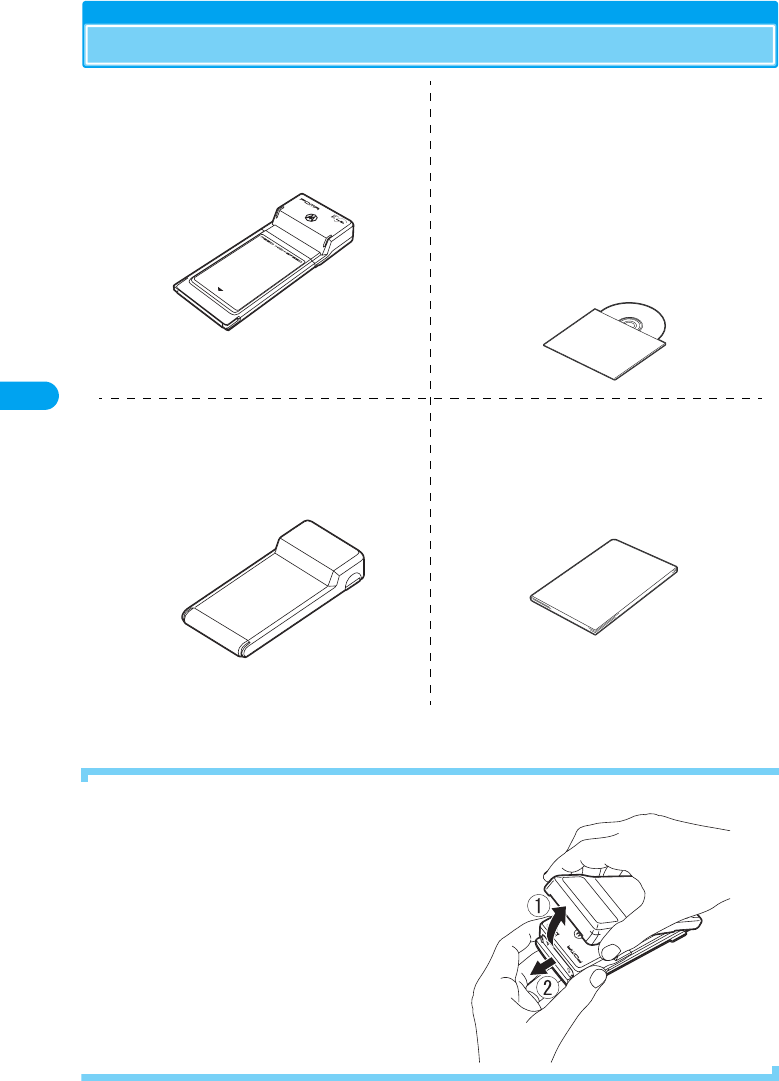
Purchased Product and Accessories
• Optional and Related Devices →P87
■Removing the FOMA M2501 Terminal from its Case
■FOMA M2501 HIGH-SPEED
(With Warranty)
■FOMA M2501 HIGH-SPEED CD-ROM
• M2501 HIGH-SPEED通信設定ファイル (M2501 HIGH-
SPEED Communication Configuration File)
•FOMA PC設定ソフト (FOMA PC Configuration
Software)
• FirstPass PCソフト (FirstPass PC Software)
• M2501 HIGH-SPEEDユーティリティ (M2501 HIGH-
SPEED Utility)
•ドコモテレビ電話ソフト 2005 (DoCoMo Video Call
Software 2005)
•FOMA パケットバイトカウンタ (FOMA Packet Byte
Counter)
• FOMA M2501 HIGH-SPEED取扱説明書 (PDF形式)
(Manual for FOMA M2501 HIGH-SPEED (PDF format))
■FOMA M2501 HIGH-SPEED Terminal
Card Case
■Manual for FOMA M2501 HIGH-SPEED
(Connection Guide) (Tentative name)
ANT
MODE
INSERT
ANT
MODE
INSERT
Hold the case as indicated in the figure on the right, open the
case in the direction of a, and pull out the terminal in the
direction of b. Do not hold the case upside down as the
terminal may accidentally fall out.
Purchased Product and Accessories

15
Before Using the FOMA Terminal
Names of Parts and Functions . . . . . . . . . . . . . . . . . . . . . . . . . . . . . . . . . . . . . . . . . 16
UIM (FOMA Card) . . . . . . . . . . . . . . . . . . . . . . . . . . . . . . . . . . . . . . . . . . . . . . . . . . . . 17
Available Communications . . . . . . . . . . . . . . . . . . . . . . . . . . . . . . . . . . . . . . . . . . . . 18
Connecting the FOMA Terminal and a PC . . . . . . . . . . . . . . . . . . . . . . . . . . . . . . . . 21
16
Before Using the FOMA Terminal Names of Parts and Functions
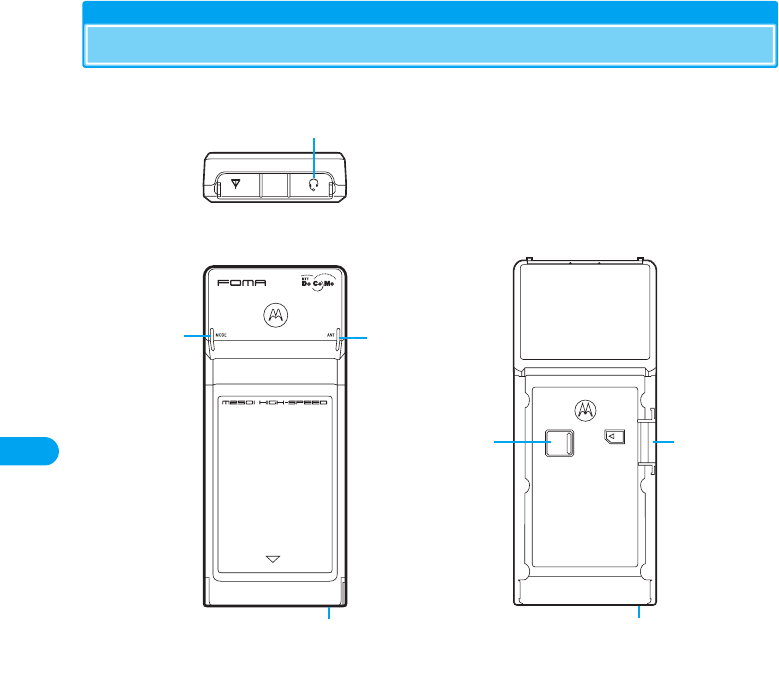
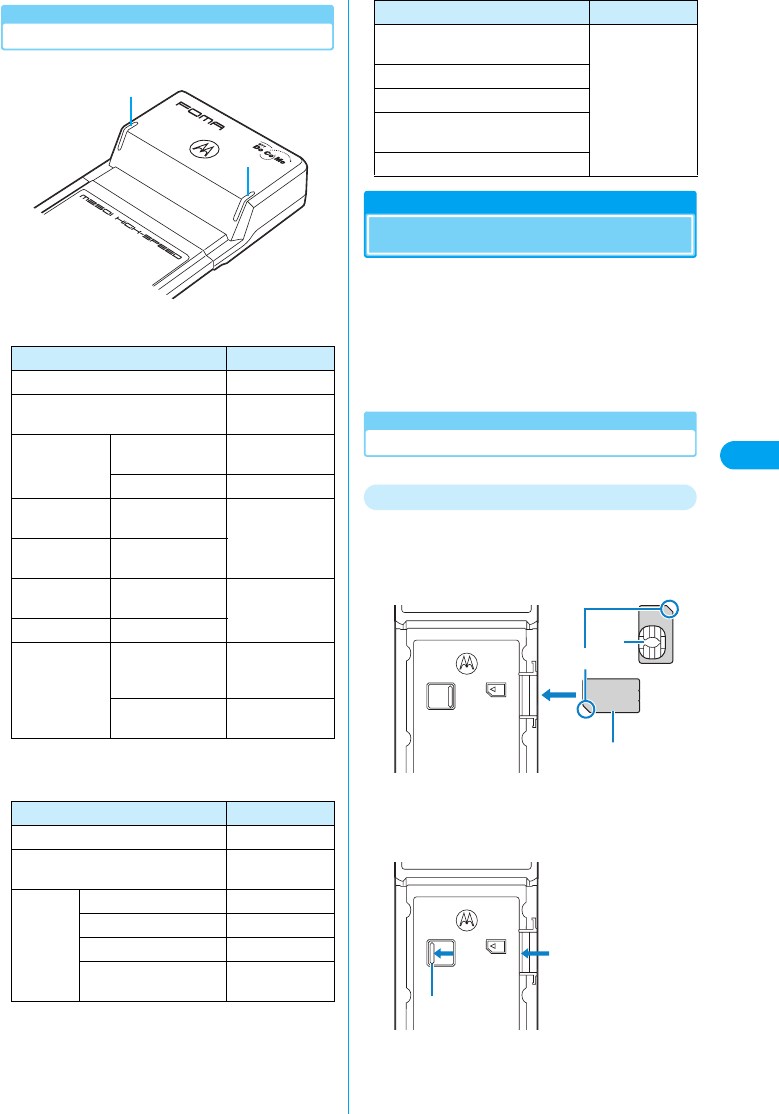
Names of Parts and Functions
aMode Lamp
• Indicates the FOMA terminal status →P17
bAntenna Lamp
• Indicates signal conditions →P17
cPC Card Connector
• Contacts with a PC
dRelease Lever
• Removes the UIM →P18
eFOMA Card Slot
• Inserts/removes the UIM →P17
fEarphone Microphone Jack
• Connects an earphone microphone, sold separately, for calls →P86
INSERT
f
de
a
cc
b
Top View
Front
・The antenna of the FOMA terminal is
embedded in the main unit.
Rear
17
Before Using the FOMA Terminal UIM (FOMA Card)
Lamp
aMode Lamp
*: Approximate flashing times in about two seconds
bAntenna Lamp
UIM (FOMA Card)
The UIM is an IC card that stores personal
information such as your phone number.
Without the UIM inserted in the FOMA terminal,
you cannot make voice calls, video calls or data
communications.
For details on the UIM, refer to the instruction
manual for the UIM.
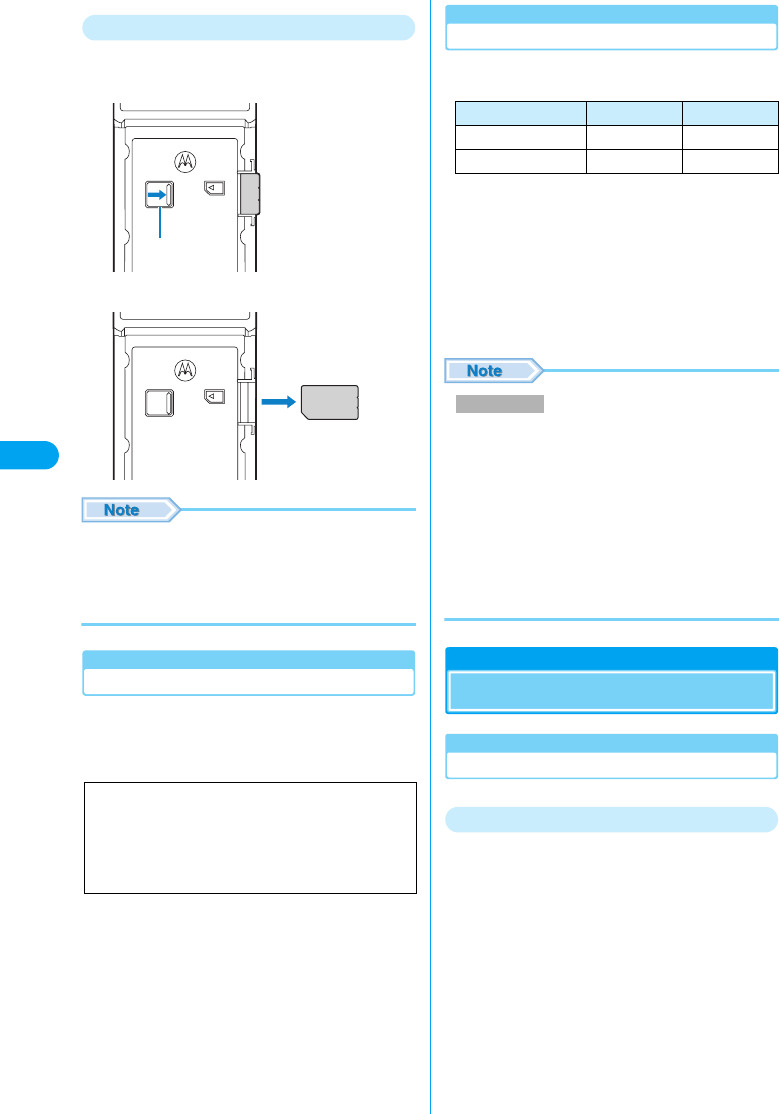
Inserting/Removing the UIM
Inserting
aInsert the UIM in the direction shown
below into the card slot on the back of
the FOMA terminal
bInsert the UIM until the release lever
slides in place
• Push the terminal in until the release lever reaches the
above position.
FOMA Terminal Status Mode Lamp
Power off/Standby Off
Waiting to connect to the FOMA
network Lights green
Packet
communication
Sending or
receiving Flashes orange
Communicating Lights orange
64K data
communication
Sending or
receiving
Flashes green
Voice/video call Outgoing or
incoming
64K data
communication Communicating
Lights green
Voice/video call During a call
Multiaccess
Sending or
receiving/Outgoing
or incoming
Flashes orange/
green (4 times*)
Communicating/
Calling
Flashes orange/
green (1 time*)
FOMA Terminal Status Antenna Lamp
Power off Off
Waiting to connect to the FOMA
network Lights green
Signal
reception
level
Three bars Lights green
Two bars Flashes green
One bar Flashes orange
圏外 (Out of the service
area) Lights red
ANT
MODE
a
b
The FOMA HIGH-SPEED terminal
failed
Lights red
An invalid UIM is inserted
UIM not inserted/not recognized
A PIN Code/PUK Code must be
entered
The PIN code block is on
FOMA Terminal Status Antenna Lamp
IC
Notch
Hold the card with the
gold color IC portion
side down
Release Lever
18
Before Using the FOMA Terminal Available Communications
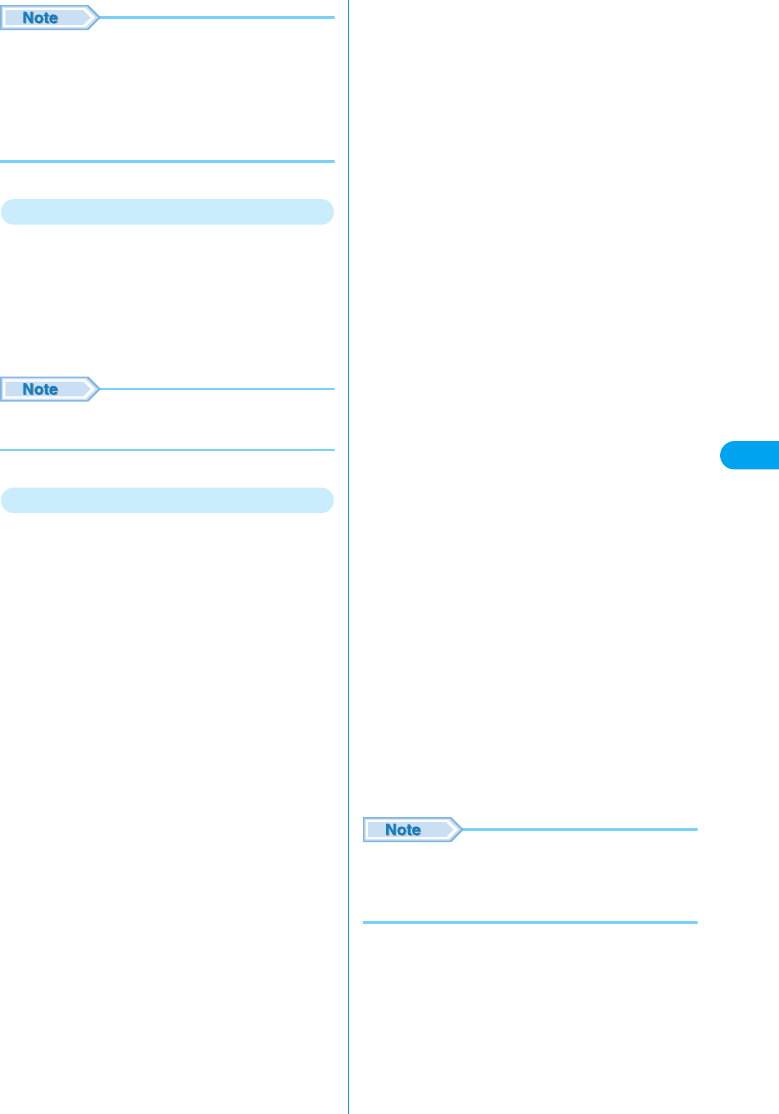
Removing
aSlide the release lever in the direction of
the arrow
bRemove the UIM from the card slot
• Hold the UIM with your fingers and follow the steps to
insert/remove the card. Do not use excessive force to
insert the UIM to avoid damaging the card.
• Do not touch or damage the IC portion.
• Do not misplace the UIM.
UIM PINs
You can assign two PINs to the UIM, a PIN1 code
and a PIN2 code. →P63
However, this FOMA terminal does not require
the PIN2 code.
UIM Versions
There are two versions of the UIM.
The following table describes the differences:
*: This FOMA terminal cannot acquire the user
authentication required for FirstPass directly. After
submitting the application form, downloading the user
authentication or changing the PIN2 code by inserting your
UIM into another FirstPass compatible FOMA terminal, re-
insert the UIM into the FOMA terminal to start using it. For
submitting the application form and downloading the user
authentication or changing the PIN2 code, refer to the
instruction manual of the FirstPass compatible FOMA
terminal you use for this purpose.
• WORLD WING is DoCoMo’s international roaming
service that provides telephone and other types of
communications using the same mobile phone number
overseas by replacing the green UIM in a FOMA
terminal or a mobile phone designed for overseas
(W-CDMA or GSM systems).
No subscription is required for WORLD WING.
- If you subscribed to FOMA services after August 31,
2005 and have not subscribed to WORLD WING, a
separate subscription is required for WORLD WING.
- Some billing plans may not be applied to WORLD
WING.
Available Communications
Packet/64K Data Communication
Packet Communication
Charges for this communication method are
based on the amount of exchanged data.
You can perform data communications with a
maximum of 3.6Mbps for receiving and 384Kbps
for sending by using a connection that allows
FOMA packet communications such as mopera
U/mopera, DoCoMo’s Internet connection
service.
• Depending on the access point that supports W-CDMA
and GSM/GPR systems in international roaming, the
communication speed varies.
• The “FOMA Packet Byte Counter” contained in the
included CD-ROM is available as an application.
If PIN1 code is required to be verified at start
up, packet communication/64K data
communication cannot be performed. Set “PIN
Code Verification at Start up” to “No” under
“Security Settings” (P63) of the M2501 HIGH-
SPEED Utility.
Release Lever
Function UIM (Green) UIM (Blue)
FirstPass Available* Not Available
WORLD WING Available* Not Available
WORLD WING
19
Before Using the FOMA Terminal Available Communications
• Communication charges become high when performing
communications with large data such as browsing Web
sites with many graphics or downloading data.
• The “FOMA Packet Byte Counter” can be downloaded
from the DoCoMo application download Web site.
http://www.nttdocomo.co.jp/support/download/index.
html
64K Data Communication
Charges for this communication method are
based on the duration of the connection.
This method uses a connection that allows
FOMA 64K data communication such as mopera
U/mopera, DoCoMo’s Internet connection
service or allows ISDN connection supporting
synchronized 64Kbps.
• Communication charges become high when connecting
for a long time. Digital communication charges apply.
Usage Notes
■Internet Service Provider Fees
Fees to an Internet service provider may be
required to connect to the Internet. These fees
are added to the FOMA service fees and are paid
to your Internet service provider directly. For
details on connection fees, contact your Internet
service provider.
You can subscribe to mopera U/mopera,
DoCoMo’s Internet connection service.
To use mopera U, a separate subscription is
required (charges apply). To use mopera, no
subscription is required and no monthly usage
fees apply.
■Setting the Internet Connection
Packet communication and 64K data
communication use different access points. For
packet communication, use an access point
compatible with packet communication, and for
64K data communication, use the FOMA 64K
data communication or use an access point
compatible with ISDN-synchronized 64K.
• DoPa access points cannot be connected.
• Access points for PHS 64K/32K data communication
for PIAFS, etc. cannot be connected.
■User Authentication to Access Networks
Depending on the access point, user
authentication (ID and password) may be
required to connect. If required, enter the ID and
password from the dial-up network. The ID and
password will be provided by the network
administrator of your Internet service provider or
the access point. For details, contact your
provider or access point network administrator.
■Access Authentication for Browsing
FirstPass (user certificate*) is required for access
authentications to browse FirstPass sites. Install
the FirstPass PC Software from the included CD-
ROM and configure the settings.
For details, refer to “FirstPass Manual” (PDF
format) contained in the included CD-ROM.
Adobe Reader (version 6.0 or later is
recommended) is required to view the file.
The latest version of Adobe Reader can be
downloaded from the Adobe System’s Web site
(separate communication charges apply).
For details, refer to the Adobe System’s Web site.
*: This FOMA terminal cannot acquire the user
authentication required for FirstPass directly.
After submitting the application form, downloading the
user authentication or changing the PIN2 code by
inserting your UIM into another FirstPass compatible
FOMA terminal, re-insert the UIM into the FOMA
terminal to start using it. For submitting the application
form and downloading the user authentication or
changing the PIN2 code, refer to the instruction manual
of the FirstPass-compatible FOMA terminal you use for
this purpose.
■Requirements for Packet and 64K Data
Communications
The following conditions must be met to perform
communications using the FOMA terminal.
However, a connection may not be established if
traffic is heavy at the base station or if radio
signals are weak.
• The FOMA terminal must be in a FOMA service area.
• The access point must support FOMA packet
communication for packet communication.
• The access point must support FOMA 64K data
communication or ISDN connection supporting
synchronized 64K communication.
• The “FirstPass PC Software” can be downloaded from
the DoCoMo application download Web site.
http://www.nttdocomo.co.jp/support/download/index.
html
20
Before Using the FOMA Terminal
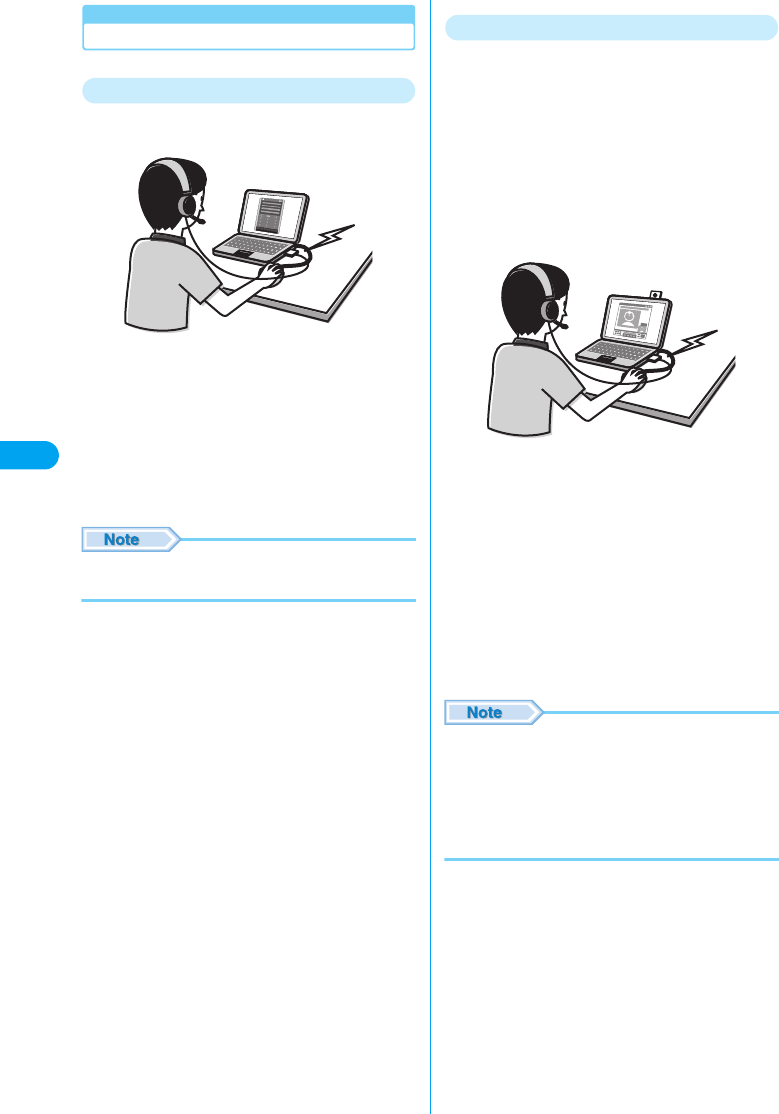
Voice Calls/Video Calls
Voice Calls
Charges for this communication method are
based on the connection time.
• A connection cannot be established if the other party is out
of service area or has the device powered off.
• “M2501 HIGH-SPEED Utility” contained in the included
CD-ROM is available as an application.
• An audio device such as an earphone-microphone
(commercially available) is required in addition to the
application software in order to make voice calls. An
earphone microphone with switch P001/P002 (optional)
and stereo earphone microphone set P001 (optional) can
be used as an audio device. →P86
• For details on using applications or devices, refer to their
respective instruction manuals.
Video Calls
Charges for this communication method are
based on the connection time.
Video calls are available between terminals
compatible with DoCoMo’s video calls (comply
with “3G-324M*1 standardized by 3GPP*2,
international standard”).
*1: 3G-324M is an international standard for 3rd generation
mobile video calls.
*2: 3GPP (3rd Generation Partnership Project) is a regional
standardizing organization founded to develop common
technology specifications for 3rd generation mobile
communication systems (IMT-2000).
• Connection cannot be established if the other party’s
handset does not handle DoCoMo video calls or even if it
does, when the handset is out of a service area or the
handset power is turned off.
• This FOMA terminal does not support 32Kbps video calls.
• You can use the “DoCoMo Video Call Software 2005”
contained in the included CD-ROM as an application.
• An audio device such as an earphone-microphone
(commercially available) is required in addition to the
software application in order to make video calls.
An earphone microphone with switch P001/P002
(optional) and stereo earphone microphone set P001
(optional) can be used as the audio device. “Manual for
FOMA M2501 HIGH-SPEED” →P86
• Digital communication charges apply for video calls.
• For details on using applications or devices, refer to their
respective instruction manuals.
• “DoCoMo Video Call Software 2005” can be
downloaded from the DoCoMo Video Call Software
support Web site.
http://videophonesoft.nttdocomo.co.jp/
Available Communications

21
Before Using the FOMA Terminal
Connecting the FOMA
Terminal and a PC
Inserting
Before using the FOMA terminal for the first
time, you must install the M2501 HIGH-SPEED
driver following the steps in “Communication
Configuration File (Driver)” (P24).
• Install the UIM to the FOMA terminal before using. →P17
aTurn on the PC
bHold the FOMA terminal with the label
side up and slide straight into the PC
card slot
• The location of a PC card slot and the way the card is
inserted vary depending on the PC.
• Insert the card all the way in the PC card slot securely.
cDouble-click the card icon in the task
tray on the Desktop
• If “FOMA M2501 USB Host Controller” appears, the
FOMA terminal is correctly installed.
• If the above name does not appear after a while, turn off
your PC, verify the connection and try again.
• Remove the FOMA terminal from the PC when you move
the PC. Keep the FOMA M2501 terminal in its case when
you carry it.
• Do not apply force to the exposed portion of the card and
do not use the section as a handle while the card is
inserted in the PC. Doing so may cause injury, failure or
damage.
• Be aware of the remaining battery level when using a PC
on its battery. The FOMA terminal operation may become
unstable when the remaining battery level is low.
▼
Connecting the FOMA Terminal and a PC
22
Before Using the FOMA Terminal
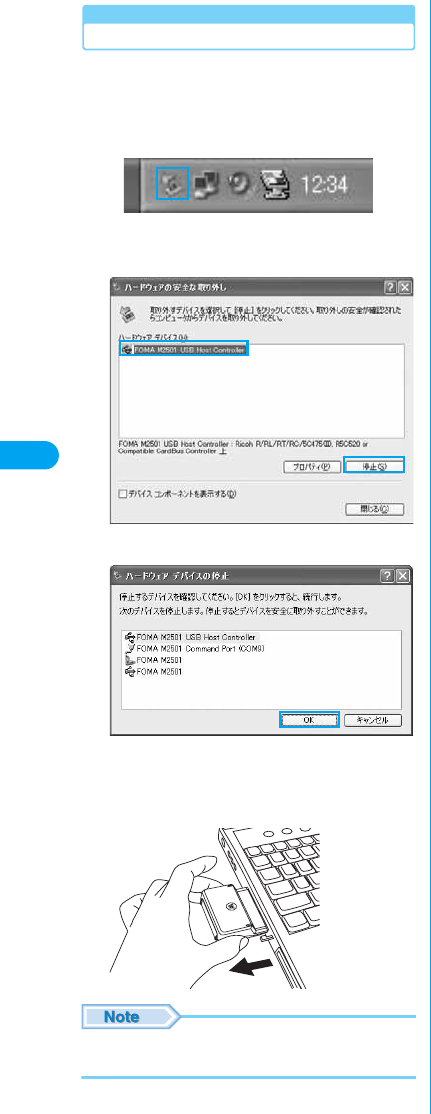
Removing
Disconnect the line when communicating, and
remove the FOMA terminal.
aDouble-click the card icon in the task
tray
bSelect “FOMA M2501 USB Host
Controller”, and click [停止 (Exit)]
cClick [OK]
dWhen a message indicating that the PC
card can be removed safely, remove the
FOMA terminal from PC
• Always store the removed FOMA terminal in the FOMA
M2501 HIGH-SPEED terminal card case.
Connecting the FOMA Terminal and a PC

23
Setting Up
Before Setting Up
Setting Up. . . . . . . . . . . . . . . . . . . . . . . . . . . . . . . . . . . . . . . . . . . . . . . . . . . . . . 24
Communication Configuration File (Driver)
Communication Configuration File (Driver) . . . . . . . . . . . . . . . . . . . . . . . . . . 24
FOMA PC Configuration Software
Configuring Communication Using the FOMA PC Configuration Software
. . . . . . . . . . . . . . . . . . . . . . . . . . . . . . . . . . . . . . . . . . . . . . . . . . . . . . . . . . . . . . . 29
FOMA PC Configuration Software . . . . . . . . . . . . . . . . . . . . . . . . . . . . . . . . . . 30
Installing the FOMA PC Configuration Software . . . . . . . . . . . . . . . . . . . . . . 31
Configuring Communication Settings . . . . . . . . . . . . . . . . . . . . . . . . . . . . . . . 32
Start Communicating . . . . . . . . . . . . . . . . . . . . . . . . . . . . . . . . . . . . . . . . . . . . 33
Uninstalling the FOMA PC Configuration Software . . . . . . . . . . . . . . . . . . . . 34
W-TCP Settings . . . . . . . . . . . . . . . . . . . . . . . . . . . . . . . . . . . . . . . . . . . . . . . . . 35
Configuring Access Points (APN) . . . . . . . . . . . . . . . . . . . . . . . . . . . . . . . . . . 36
Setting Up without Using FOMA PC Configuration Software
Dial-up Network Settings . . . . . . . . . . . . . . . . . . . . . . . . . . . . . . . . . . . . . . . . . 37
Connecting Using Dial-up. . . . . . . . . . . . . . . . . . . . . . . . . . . . . . . . . . . . . . . . . 38
Using FirstPass PC Software
Using FirstPass PC . . . . . . . . . . . . . . . . . . . . . . . . . . . . . . . . . . . . . . . . . . . . . . 39
AT Commands
AT Commands . . . . . . . . . . . . . . . . . . . . . . . . . . . . . . . . . . . . . . . . . . . . . . . . . . 40
AT Command List . . . . . . . . . . . . . . . . . . . . . . . . . . . . . . . . . . . . . . . . . . . . . . . 41
24
Setting Up
Setting Up
Install the following software from the included CD-
ROM for the FOMA M2501 HIGH-SPEED terminal.
Operating Environments
Use the Communication Configuration File
(driver) and the FOMA PC Configuration
Software under the following operational
environments:
*1: Japanese Version Service Pack 4 or later
*2: Japanese Version Service Pack 1 or later
• Required memory or available hard disk space may vary
depending on the system environment.
• Depending on the operating environment, the software
may not work. DoCoMo does not respond to any
inquiries about the use, guarantee proper operation, nor
is responsible for proper operation under operating
environments other than the above.
• DoCoMo does not guarantee the operation under the
supported OS if the OS is changed through upgrade.
Communication
Configuration File (Driver)
The Communication Configuration Files
(drivers) are required to connect to the PC for
the first time.
Installing
• Remove the FOMA terminal from the PC before starting
the software installation.
• Log into a user account with the Administrator or PC
supervisor privileges. An error will occur during installation
if you log into an account without these privileges. For
details on setting up Administrator or PC supervisor
privileges, contact your computer manufacturer or
Microsoft Corporation.
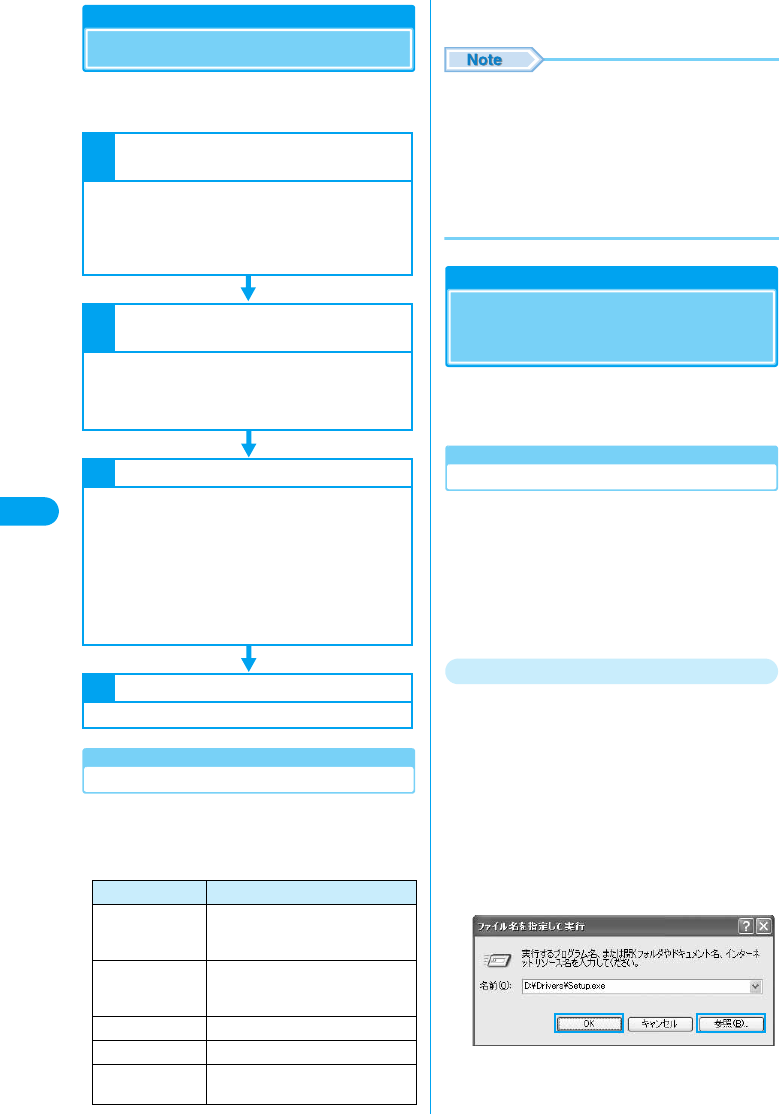
For Windows XP
aStart Windows and insert the FOMA
M2501 HIGH-SPEED CD-ROM to the PC
bClick [スタート (Start)] y “ファイル名を指
定して実行 (Select file name and run)”
cClick [参照 (Browse)] to specify the file
setup.exe, then click [OK]
• Specify the file “<CD-ROM drive letter>:/Drivers/setup.
exe” (the CD-ROM drive letter varies depending on the
configuration of your PC).
Item Requirement
PC Main Unit PC-AT compatible
The PC must have a PC card slot of
PCMCIA TYPE II.
OS Windows 2000 Professional*1,
Windows XP Professional/Home
Edition*2
Required Memory 128Mbytes or more
Hard Disk Space 50Mbytes or more available space
Display 800 x 600 pixels or more
recommended
1Installing the Communication
Configuration Files
The communication configuration software
(drivers) makes communication possible using
the FOMA terminal.
• Windows XP →P24
• Windows 2000 →P26
2Installing the FOMA PC Configuration
Software
The FOMA PC configuration software allows you
set up packet communication/64K data
communication using simple steps.
• Steps in Common for Windows →P31
3Configuring Communication Settings
Configure settings to establish a connection
with packet communication/64K data
communication.
• Setting up Packet Communication Using the Easy Settings
of the PC Configuration Software →P32
• Setting up 64K Data Communication Using the Easy
Settings of the PC Configuration Software →P32
• Setting up Communication without Using the PC
Configuration Software →P37
4Establishing a Connection
Connect to the Internet.
Setting Up/Installing the Driver
25
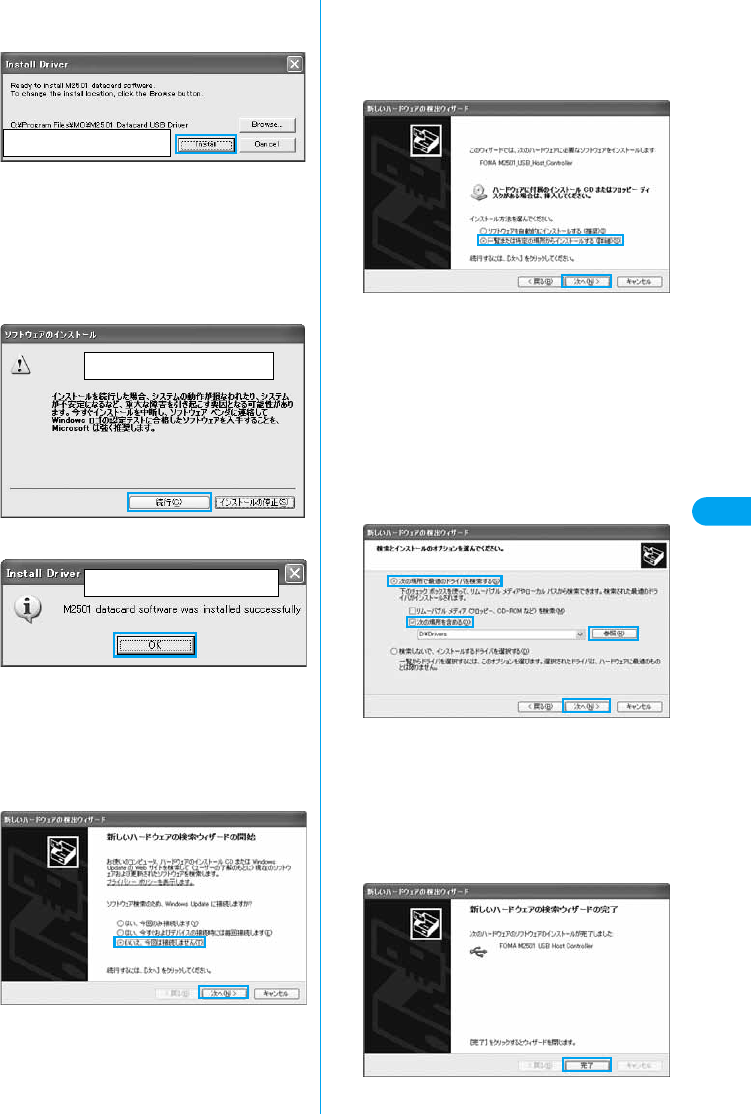
Setting Up
dVerify the destination folder and click
[Install]
• [Browse] : You can change the destination folder.
However, you can only specify folders on a local hard
disk. Other folders (on a network drive or removable
media) cannot be specified.
eClick [続行 (Continue)]
• This software behaves in the same way as Windows
logo certified software. Click [続行 (Continue)]. This
screen opens three times.
fClick [OK]
gInsert the FOMA terminal into the PC
card slot (P21)
hSelect “いいえ、今回は接続しません (No,
not this time)” and click [次へ (Next)]
• Depending on your PC, this screen may not appear.
iSelect “一覧または特定の場所からインス
トールする (詳細) (Install from a list or a
specific location (Advanced))” and click
[次へ (Next)]
jSelect “次の場所で最適のドライバを検索
する (Search for the most suitable driver
in the following place)”, check “次の場所
を含める (Include the following)”, click
[参照 (Browse)], specify the folder, and
click [次へ (Next)]
• Specify the file “<CD-ROM drive letter>:/Drivers” (the
CD-ROM drive letter varies depending on the
configuration of your PC).
Installation starts.
■If a message appears indicating that this
software has not passed the Windows Logo
Test to certify the compatibility with
Windows XP
• This software behaves in the same way as
Windows logo certified software. Click [続行
(Continue)].
kClick [完了 (Done)]
Screen to be replaced
Screen to be replaced
Screen to be replaced
Installing the Driver
26
Setting Up
lInstall the other three drivers
Install all three drivers referring to Steps 8-11.
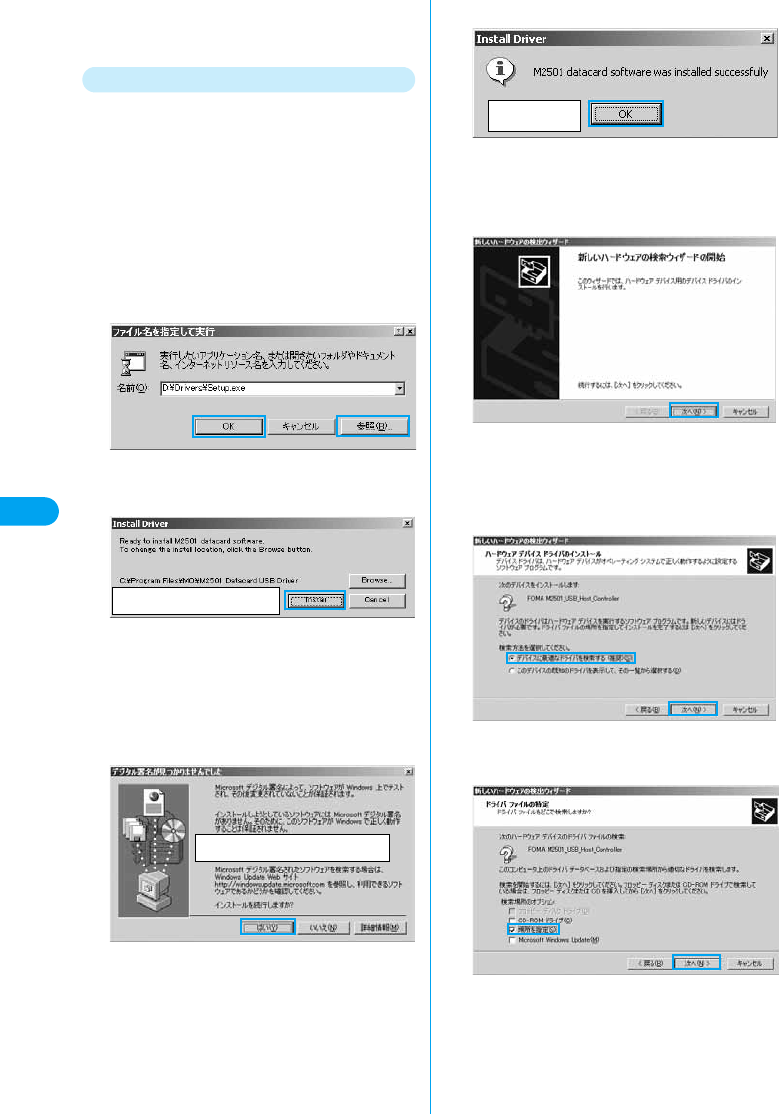
For Windows 2000
aStart Windows and insert the FOMA
M2501 HIGH-SPEED CD-ROM to the PC
bClick [スタート (Start)] y “ファイル名を指
定して実行 (Select file name and run)”
cClick [参照 (Browse)] to specify the file
setup.exe, then click [OK]
• Specify the file “<CD-ROM drive letter>:/Drivers/setup.
exe” (the CD-ROM drive letter varies depending on the
configuration of your PC).
dVerify the destination folder and click
[Install]
• [Browse] : You can change the destination folder.
However, you can specify only folders on the local hard
disk. Other folders (on a network drive or removable
media) cannot be specified.
eClick [Yes]
• Click [はい (Yes)] because this software behaves in the
same way as a software with a digital signature.
fClick [OK]
gInsert the FOMA terminal into the PC
card slot (P21)
hClick [次へ (Next)]
iSelect “デバイスに最適なドライバを検索
する (推奨) (Search for the most suitable
driver) (Recommended))” and click [次へ
(Next)]
jCheck “場所を指定 (Find in)” and click
[次へ (Next)]
Screen to be replaced
Screen to be replaced
Screen to be
replaced
Installing the Driver
27
Setting Up
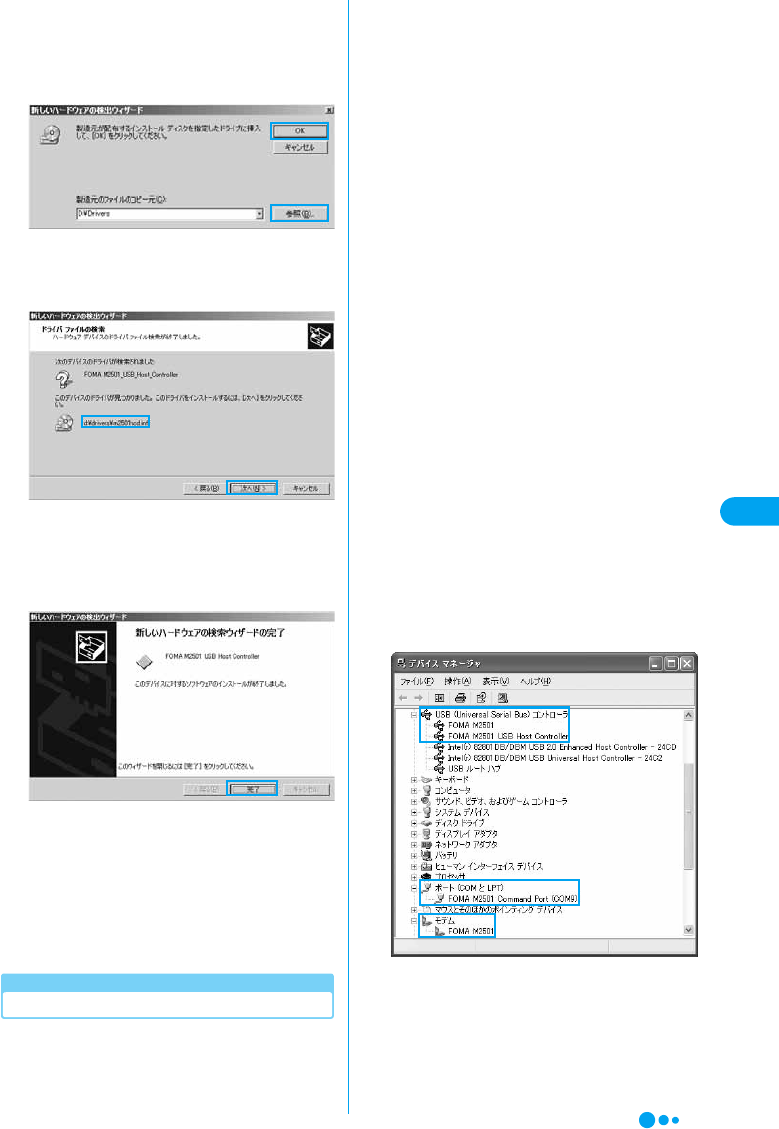
kClick [参照 (Browse)] to specify the file,
then click [OK]
• Specify the file “<CD-ROM drive letter>:/Drivers” (the
CD-ROM drive letter varies depending on the
configuration of your PC).
lVerify the driver name “m2501hcd.inf”
and click [次へ (Next)]
Installation starts.
■If a message appears indicating that the
software does not have a digital signature
• Click [はい (Yes)] because this software behaves in
the same way as a software with a digital signature.
mClick [完了 (Done)]
n“新しいハードウェアが見つかりました
(New hardware found)” is displayed and
the other three drivers will be installed
automatically
• The installation is completed when “新しいハードウェ
アが見つかりました (New hardware found)” message
disappears.
Checking the Installed Driver
Verify that the M2501 Communication
Configuration Files have been installed
correctly.
aOpen the Windows Control Panel
■For Windows XP
Click [スタート (Start)] y “コントロールパネル
(Control Panel)”
■For Windows 2000
Click [スタート (Start)] y [設定 (Settings)] y
“コントロールパネル (Control Panel)”
bOpen “システム (System)” in “コント
ロールパネル (Control Panel)”
■ For Windows XP
Click the “システム (System)” icon from “パ
フォーマンスとメンテナンス (Performance
and Maintenance)”
■For Windows 2000
If the “システム (System)” icon does not
appear on the “コントロールパネル (Control
Panel)”, click “すべてのコントロールパネルの
オプションを表示する (Show all Control Panel
options)”.
cOpen the Device Manager
■For Windows XP
Click the “ハードウェア (Hardware)” tab and
click [デバイスマネージャ (Device Manager)]
■For Windows 2000
Click the [デバイスマネージャ (Device
Manager)] tab
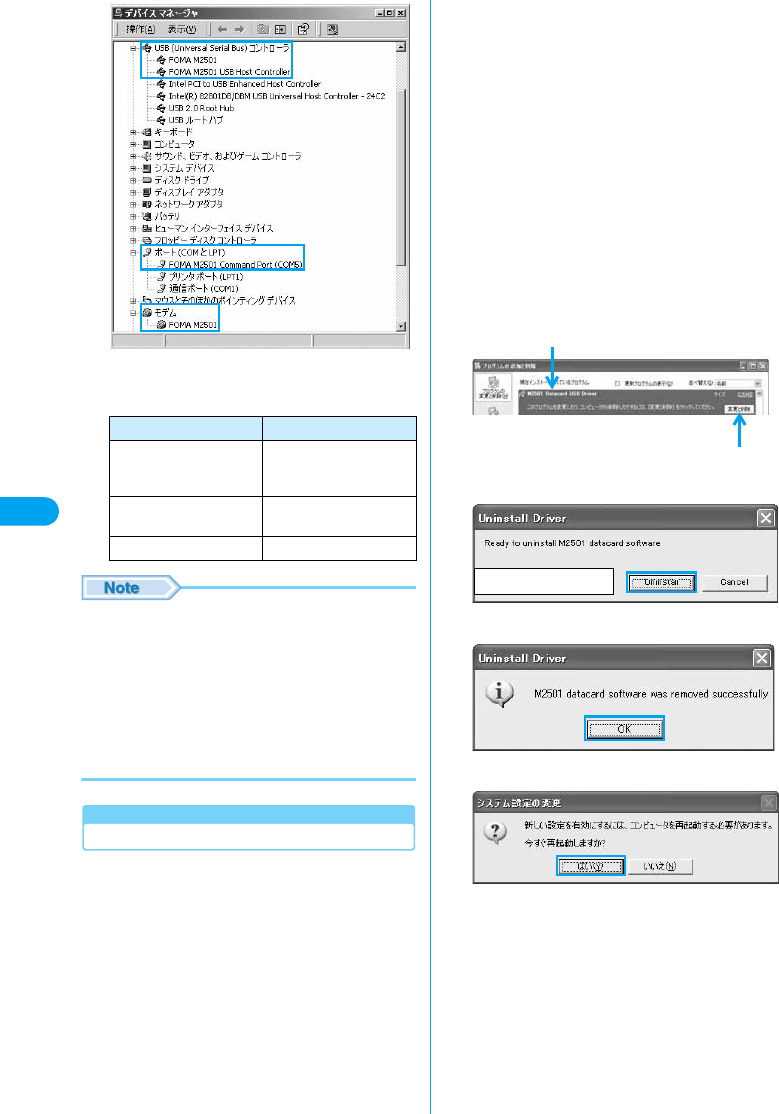
dClick “モデム (Modem)” to view the
installed driver name
Verify that the driver name appears under “モデム
(Modem)”, “ポート (Port)”, “USB コントローラー
(Universal Serial Bus) controller”.
For Windows XP
Installing the Driver
Continued on the next page
28
Setting Up
* The COM port number varies depending on the
PC.
• To configure the access point, continue with the
following.
Configuring the Access Point using the FOMA PC
Configuration Software →P29
Configuring the Access Point without using the FOMA
PC Configuration Software →P37
• If the driver name does not appear after performing
steps to verify the driver name, follow the instructions of
“Uninstalling” to delete the M2501 Communication
Configuration files and re-install them.
Uninstalling
To uninstall the Communication Configuration
files (drivers), perform the following steps:
• Remove the FOMA terminal from the PC before starting
the software uninstallation.
• Log into a user account with the Administrator or PC
supervisor privileges. An error will occur during
uninstallation if you log into an account without these
privileges. For details on setting up Administrator or PC
supervisor privileges, contact your computer manufacturer
or Microsoft Corporation.
aStart “プログラム (アプリケーション)の
追加と削除 (Add or Remove Programs
(Applications))” from Windows
■For Windows XP
Click [スタート (Start)] y “コントロールパネル
(Control Panel)” y “プログラムの追加と削除
(Add or Remove Programs)” icon
■For Windows 2000
Click [スタート (Start)] y “設定 (Settings)” y
“コントロールパネル (Control Panel)” y “アプ
リケーションの追加と削除 (Add or Remove
Applications)” icon
bSelect “M2501 Datacard USB Driver
(Tentative Name)” and click [変更と削除
(Change/Remove)]
cClick [Uninstall]
dClick [OK]
eClick [はい (Yes)] to restart Windows
Device Name Driver Name
Universal Serial Bus
Controller/USB (Universal
Serial Bus)
FOMA M2501,
FOMA M2501 USB
Host Controller
ポート (Port (COM/LPT)) FOMA M2501
Command Port
モデム (Modem) FOMA M2501
For Windows 2000
Select “M2501 Datacard USB Driver”
Click here
Screen to be replaced
Installing the Driver

29
Setting Up
Configuring Communication
Using the FOMA PC
Configuration Software
Configuring Communication Using the FOMA PC Configuration Software

30
Setting Up
FOMA PC Configuration
Software
FOMA PC Configuration Software
31
Setting Up
Installing the FOMA PC
Configuration Software
Verifying that the FOMA terminal is
Recognized Correctly by the PC
Installing
Installing the FOMA PC Configuration Software

32
Setting Up
Configuring
Communication Settings
Specifying the Communication Port
Selecting “Packet Communication”
from Easy Settings
Using “mopera U” or “mopera” as an access
point
Using another provider as an access point
Selecting “64K Data Communication”
from Easy Settings
Using “mopera U” or “mopera” as an access
point
Using another provider as an access point
Configuring Communication Settings

33
Setting Up
Start Communicating
Disconnecting
Start Communicating

34
Setting Up
Uninstalling the FOMA PC
Configuration Software
Before Uninstalling
Uninstalling
Uninstalling the FOMA PC Configuration Software
35
Setting Up
W-TCP Settings
Role of W-TCP Software
Setting and Deleting Optimization
For Windows XP
For Windows 2000
W-TCP Settings

36
Setting Up
Configuring Access Points
(APN)
Adding/Editing/Deleting Access Points
Saving to a File
Reading from a File
Reading Access Point (APN) Information
from the FOMA Terminal
Writing Access Point (APN) to the FOMA
Terminal
Creating a Dial-up Connection
Configuring Access Points (APN)
37
Setting Up
Dial-up Network Settings
Setting Packet Communication
Verifying the COM Port Number
For Windows XP
For Windows 2000
Configuring Access Points (APN)
Setting Display/Hide Caller ID
Configuring a Dial-up Network in
Windows XP
Configuring a Dial-up Network in
Windows 2000
Setting 64K Data Communication
Dial-up Network Settings

38
Setting Up
Connecting Using Dial-up
Disconnecting
Connecting Using Dial-up
39
Setting Up
Using FirstPass PC
The FirstPass PC Software allows you to access
to sites supporting FirstPass from the Web
browser on a PC by using the user
authentication obtained from another FOMA
terminal that supports FirstPass.
• This FOMA terminal cannot directly obtain the user
authentication required for FirstPass. After submitting the
application form, downloading the user authentication or
changing the PIN2 code by inserting your UIM into another
FirstPass compatible FOMA terminal, re-insert the UIM
into the FOMA terminal to start using it. For submitting the
application form and downloading the user authentication
or changing the PIN2 code, refer to the instruction manual
of the FirstPass compatible FOMA terminal you use for this
purpose.
Note When Installing FirstPass PC
Software
Operating Environments
Use the FirstPass PC software in the following
operating environments:
*1: Japanese Version Service Pack 4 or later
*2: Japanese Version Service Pack 1 or later
• Required memory or available hard disk space may vary
depending on your system.
• Depending on the operating environment, the software
may not work. DoCoMo does not respond to any
inquiries about the use, guarantee proper operation, nor
is responsible for proper operation under operating
environments other than the above.
• DoCoMo does not guarantee the operation under the
supported OS if the OS is changed through upgrade.
Before Installing
Before installing the FirstPass PC Configuration
software, read the “FirstPass Manual” (in PDF
format) in the “FirstPass PC Soft” folder
contained in the included CD-ROM. Adobe
Reader (version 6.0 or later is recommended) is
required to view the file. The latest version of
Adobe Reader can be downloaded from the
Adobe System’s Web site (separate
communication charges apply).
For details, visit the Adobe System’s Web site.
Installing
aStart Windows and insert the FOMA
M2501 HIGH-SPEED CD-ROM to the PC
bClick [スタート (Start)] y “ファイル名を指
定して実行 (Select file name and run)”
cClick [参照 (Browse)], specify “< CD-
ROMドライブ名> CD-ROM drive letter>:
¥FirstPassPCSoft¥FirstPassPCSetup.
exe”, and click [OK]
Continue the installation following the instructions
in the “FirstPass Manual” (in PDF format) in the
“FirstPass PC Soft” folder contained in the
included CD-ROM.
• The CD-ROM drive letter varies depending on the
configuration of your PC.
Uninstalling
aStart “プログラム (アプリケーション)の
追加と削除 (Add or Remove Programs
Applications)” from Windows
■For Windows XP
Click [スタート (Start)] y “コントロールパネル
(Control Panel)” y “プログラムの追加と削除
(Add or Remove Programs)” icon
■For Windows 2000
Click [スタート (Start)] y “コントロールパネル
(Control Panel)” y “アプリケーションの追加と
削除 (Add or Remove Applications)” icon
bSelect “FirstPass PC Soft” and click [変
更と削除 (Change/Remove)]
Continue the uninstallation following the
instructions in the “FirstPassManual” (in PDF
format) in the “FirstPass PC Soft” folder contained
in the included CD-ROM.
Item Requirement
PC Main Unit PC-AT Compatible
The PC must have a PC card slot of
PCMCIA TYPE II.
OS Windows 2000 Professional*1,
Windows XP Professional/Home
Edition*2
Required Memory Windows 2000 Professional :
Required 32M ups
Windows XP*2 : Required 128M ups
Hard Disk Space 10Mbyte or More Available Space
Browser Internet Explore 5.5 ups
Internet Explorer 6.0 for Windows
XP or higher
Using FirstPass PC
40
Setting Up
AT Commands
AT commands are used to check the FOMA
terminal function settings or status using a PC.
Usually, the communication software issues AT
commands so that you do not need to be
concerned about them. Use AT commands if you
want to control the FOMA terminal in your own
way.
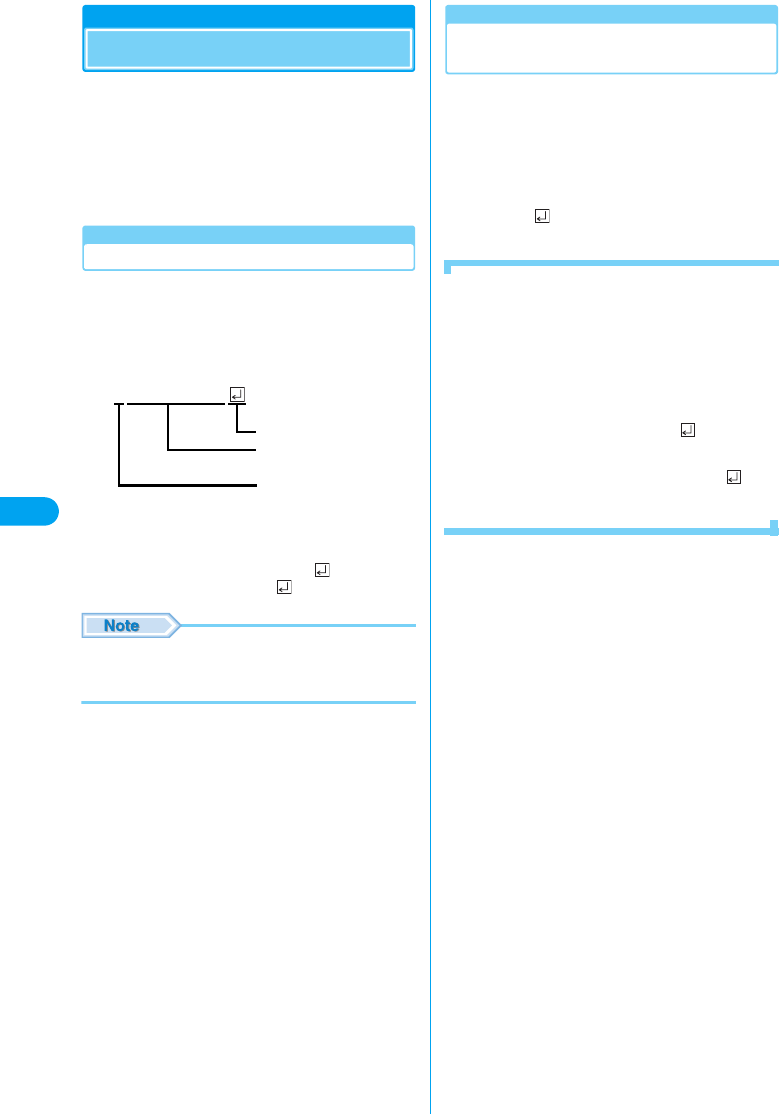
Format of AT Commands
AT commands should be entered on the
Terminal Mode screen of the communication
software. Use only single-byte alphanumeric
characters.
<Example>
• An AT command must be entered on a single line including
parameters (numbers and symbols) following the
command. On the Terminal Mode screen of the
communication software, one line is from the first
character to the previous character of . Up to XX
characters (including “AT” and ) can be entered.
• In the Terminal mode, a PC functions as a communication
terminal. Characters entered from the keyboard are sent
to a line connected to a communication port.
Switching between On-line Data Mode
and On-line Command Mode
Following two methods are available to switch
between on-line data mode and on-line
command mode on the FOMA terminal:
• Enter the “+++” command or the code set to “S2” register.
→See the right column
• When “AT&D1” is set, set the ER signal of the serial (COM)
port to OFF
Enter “ATO ” to switch from the on-line
command mode to the on-line data mode.
■Saving the Settings
Settings by AT commands are initialized when the
FOMA terminal power is turned off and turned on again
except: APN settings set by the AT+CGDCONT
command, QoS settings by AT+CGEQMIN/AT+
CGEQREQ command, setting to show or hide the
packet communication number by AT*DGPIR
command, and settings to restrict notifying the Caller ID
by AT+CLIR command. Settings set by commands with
[&W] can be saved by entering [AT&W ] after
configuring the settings. Any other values set by other
commands with [&W] are also saved at the same time.
These values can be restored by entering “ATZ ”
even after the FOMA terminal power was turned off and
turned on again.
ATD*99***1#
Hard Return
Parameter : Content of the
command
Command Name
AT Commands
41
Setting Up
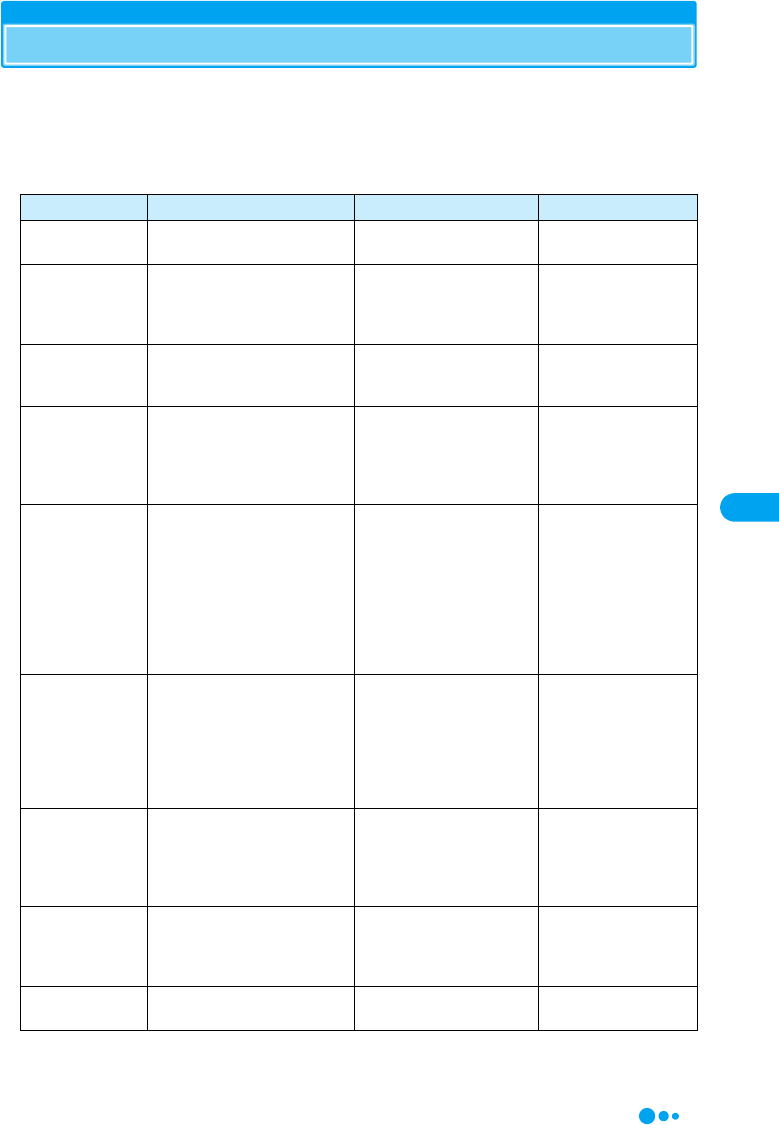
AT Command List
The following AT commands can be used on the FOMA M2501 HIGH-SPEED.
• [&F] : A command to initialize settings used as AT&F command.
• [&W] : A command to save settings used as AT&W command. ATZ command can restore set values.
• [?] [=?] : The current settings appear when adding “?” at the end of the command, and the effective range
of the current settings appear when adding “=?” at the end of the command.
AT Command Overview Parameters/Description Command Examples
AT¥S Show the command settings and
S register. ーAT¥S
OK
AT¥V<n> Select whether to use the
extended result code at
connection.
n=0 (default) : The extended
result code is not used.
n=1 : The extended result
code is used.
AT¥V0
OK
AT%V Display the version of the FOMA
terminal. ー
AT%V
Ver1.00
OK
AT&C<n>
[&F] [&W]
Set the operating conditions of
the circuit CD for DTE.
n=0 : Always keeps line CD
signal ON.
n=1 (default) : CD changes
depending on the other
party’s modem status.
AT&C1
OK
AT&D<n>
[&F] [&W]
Set the operation performed
when circuit
ER signal received from DTE is
switched from ON to OFF.
n=0 : Ignore ER signals
(Always regard as ON)
n=1 : On-line command
mode starts when ER
signals change from ON to
OFF.
n=2 (default) : Off-line mode
starts when ER signals
change from ON to OFF.
AT&D1
OK
AT&E<n>
[&F] [&W]
Select the specification to show
the connection speed.
n=0 : Show the
communication speed for
wireless segment.
n=1 (default) : Show the
communication speed
between the PC and FOMA
terminal.
AT&E0
OK
AT&F<n> Reset the FOMA terminal AT
command set values to factory
defaults. If executed during a
communication, the line is
disconnected.
Only n=0 can be set
(skippable)
ー
AT&S<n>
[&] [&W]
Set the control of DR (data set
ready) signals output by the
FOMA terminal.
n=0 (default) : Set DR
signals always to ON.
n=1 : Set DR signals to ON
when the line is connected.
AT&S0
OK
AT&W<n> Write the current setting values
to the FOMA terminal.
Only n=0 can be specified
(can be skipped) ー
AT Command List
Continued on the next page

42
Setting Up
AT*DANTE Show the signal strength at the
FOMA terminal.
=0 : Out of service area
=1 : One antenna bar
=2 : Two antenna bars
=3 : Three antenna bars
AT*DANTE
*DANTE : 3
OK
AT*DANTE=?
*DANTE : (0-3)
OK
(Show the range of
values that can be
displayed)
AT*DGPIR=<n>
[?] [=?]
The setting of this command
becomes valid when a call is
dialed. 184/186 can also be
added to the APN number even
for the setting in a dial-up
network.
n=0 (default) : Use APN as it
is.
n=1 : Add “184” to APN
(always hide).
n=2 : Add “186” to APN
(always show).
AT*DGPIR=0
OK
AT*DRPW Show an indicator of the
received radio signal power at
the FOMA terminal.
(0 : lowest - 75 : highest value)
ー
AT*DRPW
*DRPW : 0
OK
+++ Switch the FOMA terminal from
the on-line data mode to on-line
command mode.
This command is not
applicable to the connection
using packet
communication.
(Online Data Mode)
+++ (Unable to see the
display)
OK
AT+CBST
[&F] [&W]
[?] [=?]
Set the bearer (communication
type) service.
AT+CBST=<speed>,
<name>,<ce>
speed=116 : 64K data
communication.
speed=134 : Video calls 64K
name=1 : data circuit
synchronous.
ce=0 : transparent.
AT+CBST=11
6, 1, 0
AT+CEER Display the reason for
disconnection of the previous
connection.
“Reasons for Disconnection”
→P50
AT+CEER
+CEER : ●●
OK
AT+CGDCONT
[?] [=?]
Set APN when sending Packet
communication.
→P49 →P49
AT+CGEQMIN
[?] [=?]
Register criteria value for
determining if QoS (Quality of
Service) sent from network
when Packet communication is
established, is acceptable or
not.
AT+CGEQMIN=
[Parameters] →P49
→P49
AT+CGEQREQ
[?] [=?]
Set QoS (Quality of Service) to
request for the network when
Packet communication is
established.
AT+CGEQREQ=
[Parameters] →P49
→P49
AT+CGMR Display the version of the FOMA
terminal (16-digit number). ー
AT+CGMR
1234512345
123456
OK
AT Command Overview Parameters/Description Command Examples
AT Command List

43
Setting Up
AT+CGREG=<n>
[&F] [&W]
[?] [=?]
Set whether to be notified of the
network registration status.
n=0 (default) : Do not notify.
n=1 : Notify when outside
and inside the service area is
changed.
Execute “AT+CGREG?”
then appears as “+CGREG :
<n>,<start>”.
n : Setting value.
start=0 : Outside the packet
service area.
start=1 : Inside the packet
service area.
start=4 : Unknown.
start=5 : Inside the packet
service area (while
roaming).
AT+CGREG=1
OK
AT+CGSN Display the serial number of the
FOMA terminal (15-digit
number). ー
AT+CGSN
1234567890
12345
OK
AT+CLCK Lock applications (checking the
specifications).
(checking the specifications) (checking the
specifications)
AT+CLIP=n
[&F] [&W]
[?] [=?]
When a phone number with sub-
address is received, the call is
rejected.
(checking the specifications) AT+CLIP=0
OK
AT+CLIR=<n>
[?] [=?]
Set whether to send the Caller
ID when making 64K data
communication/video calls.
n=0 : In accord with the CLIR
service subscription.
n=1 : Do not send.
n=2 (default) : Send.
When “AT+CLIR?” is
executed appear in the
format of “+CLIR : <n>,<m>”.
m=0 : CLIR is not running.
(Always send).
m=1 : CLIR is running.
(Always hide).
m=2 : Unknown.
m=3 : CLIR temporary mode
(Default for hide).
m=4 : CLIR temporary mode
(Default for show).
AT+CLIR=0
OK
AT+CMEE=<n>
[&F] [&W]
[?] [=?]
Set the error report format of the
FOMA terminal.
n=0 (default) : Display
“ERROR”.
n=1 : Display in the format of
“+CMEE ERROR : xxxx”
(where xxxx are numbers).
n=2 : Display in the format of
“+CMEE ERROR : xxxx”
(where xxxx are text).
AT+CMEE=0
OK
AT Command Overview Parameters/Description Command Examples
AT Command List
Continued on the next page

44
Setting Up
AT+CNUM Display the own number of the
FOMA terminal.
Executing “AT+CNUM”
displays in the format of
“+CNUM : <number>,
<type>”
number : phone number
type=129 : Excluding the
international access code+
type=145 : Including the
international access code+
AT+CNUM
+CNUM;,+819
012345678”,
145
OK
AT+CPAS
[?] [=?]
Display FOMA terminal state. Executing “AT+CPAS?”
displays in the format of
“+CPAS : <n>”.
n=0 : Available to set AT
commands.
n=1 : Unavailable to set AT
commands.
n=2 : Unknown (Response
to AT commands is not
guaranteed).
n=3 : Available to set AT
commands even during
incoming.
n=4 : Available to set AT
commands even during a
call.
AT+CPAS?
+CPAS : 0
OK
AT+CPAS=?
+CPAS : (0,2,3,4)
OK
AT+CPIN=“pin”/
AT+CPIN=“puk”,
“pin”
[?]
Command to enter the PIN1
code or PUK code for UIM.
Enter the PIN1 code or PUK
code for “pin”.
Execute “AT+CPIN?” then
“+CPIN : <n>” is displayed.
n=READY : Authenticated.
n=SIM PIN : Waiting for
input.
n=SIM PUK : Waiting for
PUK code entry.
n=ERROR : Locked.
(+CPIN : SIM PIN
status)
AT+CPIN=“1234”
OK
(+CPIN : SIM PUK
status)
AT+CPIN=“12345678”,
“1234”
OK
AT+CPWD Change the UIM password.
(checking the specifications)
(checking the specifications) (checking the
specifications)
AT+CR=<n>
[&F] [&W]
[?] [=?]
Set whether to display the
bearer (communication type)
before “CONNECT” is displayed
when 64K data communication
or GSM dial up data
communication is connected.
n=0 (default) : Hide.
n=1 : Display in the format of
“+CR : <serv>”.
serv=GPRS : Packet
communication.
serv=SYNC : 64K data
communication.
serv=AV64K : Video calls.
AT+CR=1
OK
ATD*99***1#
+CR : GPRS
CONNECT
AT+CRC=<n>
[&F] [&W]
[?] [=?]
Set to use extend result code for
incoming connection.
n=0 (default) : Not to use
+CRING.
n=1 : Use +CRING, <type>
Executing “AT+CRC?”
displays in the format of
“+CRING : <type>”.
+CRING : GPRS“PPP”,,,
<APN> (When PPP packets
are sent or received)
AT+CRC=0
OK
AT Command Overview Parameters/Description Command Examples
AT Command List
45
Setting Up
AT+CREG=<n>
[&F] [&W]
[?] [=?]
Set whether to show Out of
service area or in the service
area.
n=0 (default) : Hide
n=1 : Show
Enter “AT+CREG?” then it is
shown in the format of
“+CERG : <n>, <start>”
start=0 : Out of the service
area of 64K data.
communication/video calls
start=1 : Inside of the service
area of 64K data.
communication/video calls
start=4 : Unknown.
start=5 : Inside of the service
area of 64K data
communication/video calls
(while roaming).
AT+CREG=1
OK
AT+GMI Display the manufacturer of the
FOMA terminal.
ー
AT+GMI
+GMI :
“Motorola CE, Copyright
2006”
OK (checking the
specifications)
AT+GMM Display the name of the FOMA
terminal.
ー
AT+GMM
+GMM :
“GSM900”,“GSM1800”,
“GSM1900”,
“WCDMA”,“MODEL=
M2501 HIGH-SPEED”
OK (checking the
specifications)
AT+GMR Display FOMA terminal’s
version.
ー
AT+GMR
+GMR :
“M2501 HIGH-SPEED_
12_34.56.78”
OK
AT+IFC=<n>,
<m>
[&F] [&W]
[?] [=?]
Set the local flow control method
between the PC and the FOMA
terminal.
n : DCE by DTE control
n=0 : No flow control.
n=1 : XON/XOFF control.
n=2 (default) : RS/CS (RTS/
CTS) flow control.
m : DTE by DCE control.
m=0 : No flow control.
m=1 : XON/XOFF control.
m=2 (default) : RS/CS (RTS/
CTS) flow control.
AT+IFC=2,2
OK
AT+WS46=<n>
[&F] [&W]
[?] [=?]
Set the wireless network to be
used by the FOMA terminal
when dialing.
n=12 : GSM
n=22 : 3G (WCDMA)
n=25 : Auto switch
AT+WS46?
25
OK
ATA The FOMA terminal processes
the incoming according to the
receiving mode.
ー
RING
ATA
CONNECT
A/ Retry a command just before
performing. ーA/
OK
AT Command Overview Parameters/Description Command Examples
AT Command List
Continued on the next page

46
Setting Up
ATD Start packet communication or
64K data communication.
Packet communication :
ATD*99***<cid>#
<cid> X to X : +CGDCONT
64K data communication :
ATD <phone number>
Packet communication :
ATD*99***1#
CONNECT
64K data
communication : ATD
XXXXXXXXXX
CONNECT
ATE <n>
[&F] [&W]
Set whether to echo back the
text sent from a PC.
n=0 : Not to echo back.
n=1 (default) : Echo back.
ATE1
OK
ATH <n> Disconnect packet
communication or 64K data
communication.
n=0 : Disconnect line (can be
skipped).
(In communication)
+++
ATH
OK
ATI <n> Display the confirmation
code.
n=0 : Display “NTT
DoCoMo”.
n=1 : Display the name of
the FOMA terminal (same as
+GMN).
n=2 : Display the FOMA
terminal version (same as
+GMR).
n=3 : Display “OK”.
n=4 : Display the details of a
function, that can be
controlled by DTE, in 0 - 15.
→P48
ATI0
NTT DoCoMo
OK
ATM Set the monitor speaker mode.
(checking the specifications)
(checking the specifications) ATMO
OK
ATO Switch from On-line command
mode to Off-line command
mode during communication.
ー
ATO
CONNECT
ATQ <n>
[&F] [&W]
Set whether to display the result
code on a PC.
n=0 (default) : Show result
codes.
n=1 : Hide result codes.
ATQ0
OK
ATQ1
(OK is not displayed)
ATS0=<n>
[&F] [&W]
[?]
Set number of rings until FOMA
terminal receives connection
automatically.
n=0 (default) : No auto
receive is performed.
n=1 to 255 : Number of rings.
ATS0=0
OK
ATS2=<n>
[&F] [?]
Set the escape character. n=0 to 127 (default n=43) :
If set to n=127, the escape
process becomes invalid.
ATS2=43
OK
ATS3=<n>
[&F] [?]
Set the return character (CR) to
recognize the end of AT
command text string.
n=13 (default) : only n=13
can be specified.
ATS3=13
OK
ATS4=<n>
[&F] [?]
Set the line feed character. It is
positioned next to the return
character (CR) if displaying the
result code in alphanumeric
characters.
Only n=10 (default) can be
specified.
ATS4=10
OK
ATS5=<n>
[&F] [?]
Set the back space character
(BS) to delete the last character
in the input buffer while AT
commands are entered.
Only n=8 (default) can be
specified.
ATS5=8
OK
AT Command Overview Parameters/Description Command Examples
AT Command List
47
Setting Up
ATS6=<n>
[&F] [?]
Set the pause time (in seconds)
until dialing. When this
command is used, the register is
set but does not operate.
n=2 to 10 (Default n=5) ATS6=5
OK
ATS7=<n>
[&F] [&W]
[?]
Set the maximum waiting time
(in seconds) from the starting of
packet communication or 64K
data communication until the
connection is established.
n=1 to 255 (default n=60) :
However, the values
between 121 to 255 are
regarded as 120.
ATS7=60
OK
ATS8=<n>
[&F] [?]
Set the pause time (in seconds)
until comma dialing. When this
command is used, the register is
set, but the pause time remains
3 seconds.
n=0 : Does not pause
n=1 to 255 (default n=3) :
ATS8=3
OK
ATS10=<n>
[&F] [&W]
[?]
Set the delay time (1/10
seconds) of auto disconnect.
When this command is used, the
register is set, but does not
operate.
n=1 to 255 (Default n=1) ATS10=1
OK
ATS30=<n>
[&F] [?]
Set the timeout (in minutes)
before communication is
disconnected if there is no data
exchange during 64K data
communication.
n=0 (Default) : Does not
disconnect.
n=1 to 255 : Time (in
minutes) before
disconnection.
ATS30=0
OK
ATS103=<n>
[&F] [?]
In 64K data communication, set
the delimiter when dialing with a
destination sub-address.
n=0 : *(Asterisk).
n=1 (Default) : / (Slash).
n=2 : ¥ or back slash.
ATS103=0
OK
ATS104=<n>
[&F] [?]
In 64K data communication, set
the delimiter when dialing with
an originating sub-address.
n=0 : # (Sharp).
n=1 (Default) : % (Percent).
n=2 : & (and).
ATS104=0
OK
ATV<n>
[&F] [&W]
Set the display method of the
result code.
n=0 : Display in numeric
characters.
n=1 (Default) : Display in
text.
ATV1
OK
ATX<n>
[&F] [&W]
Set to detect the busy tone and
dial tone, and to display the
communication speed.
n=0 : Not to detect busy
tones, not to detect dial
tones, not to display speed.
n=1 : Not to detect busy
tones, not to detect dial
tones, display speed.
n=2 : Not to detect busy
tones, detect dial tones, not
to display speed.
n=3 : Detect busy tones, not
to detect dial tones, display
speed.
n=4 (Default) : Detect busy
tones, detect dial tones,
display speed.
ATX1
OK
AT Command Overview Parameters/Description Command Examples
AT Command List
Continued on the next page