Motorola Solutions 89FT5815 User Manual i85s
Motorola Solutions, Inc. i85s
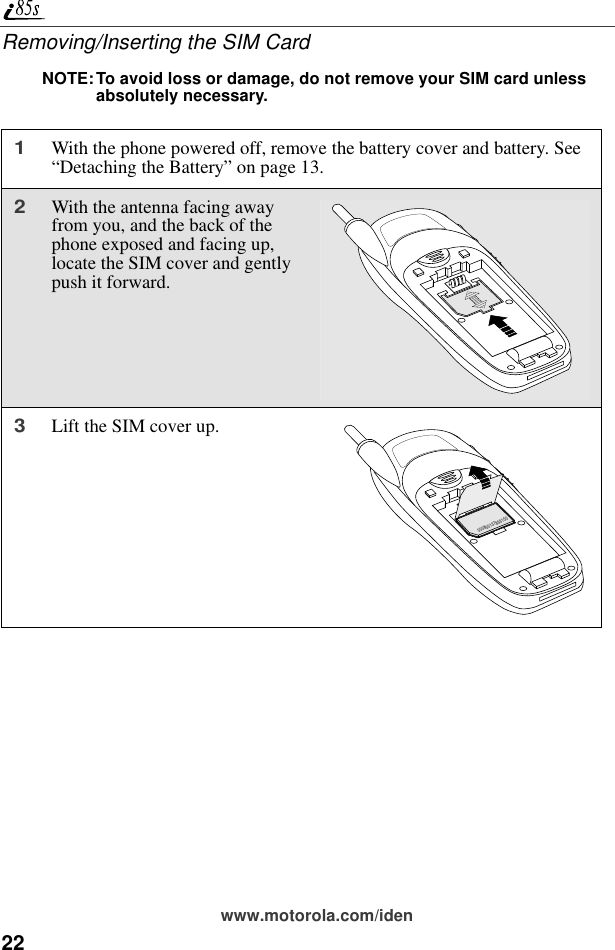
UserManual.wiki
>
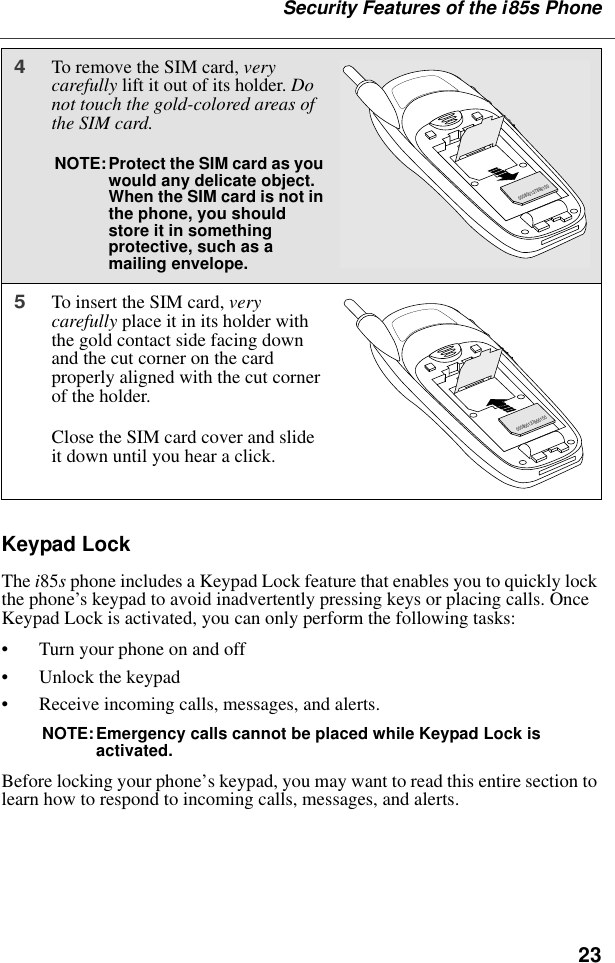
Motorola Solutions
>
89FT5815 User Manual
>
Users Manual
Contents
1.
Users Manual
2.
Ex8 User Manual 1 of 2 i58sr
3.
Ex8 User Manual 2of 2 i58sr
4.
Ex8 User Manual i88s
5.
MANUAL 2
6.
users manual
Users Manual
Navigation menu
Upload a User Manual
Namespaces
Wiki Guide
HTML
PDF
Info
Views
User Manual
Discussion / Help
Navigation


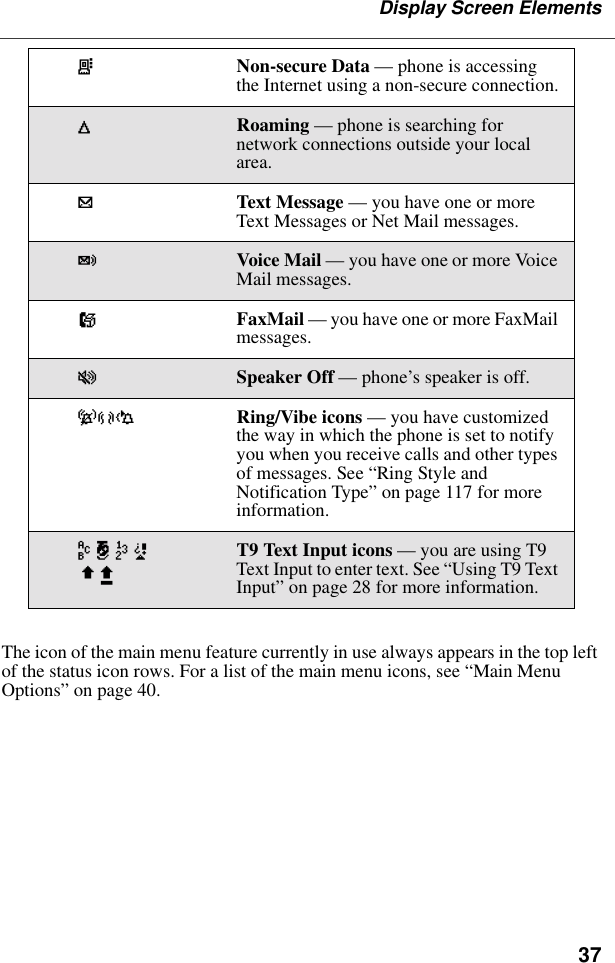
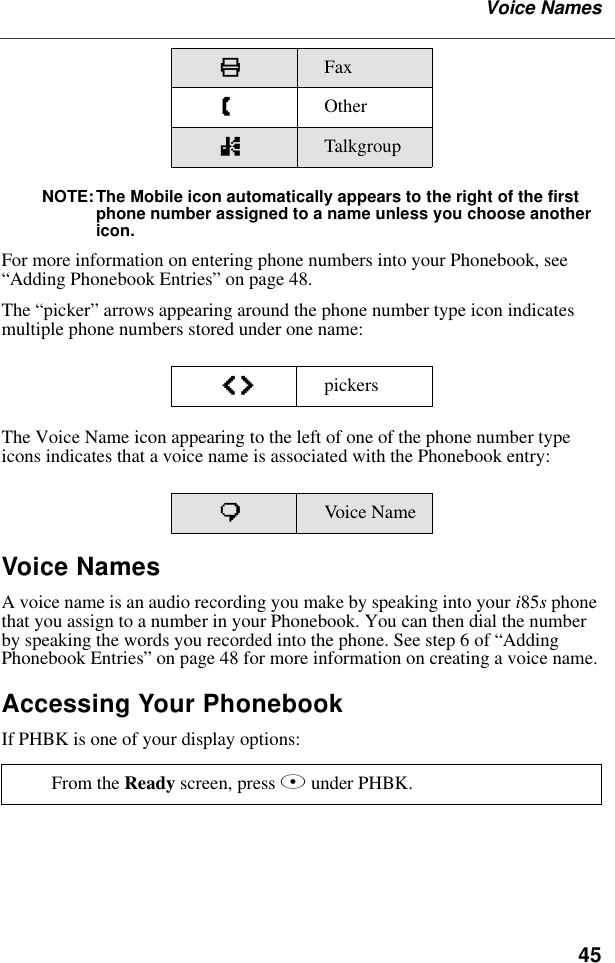
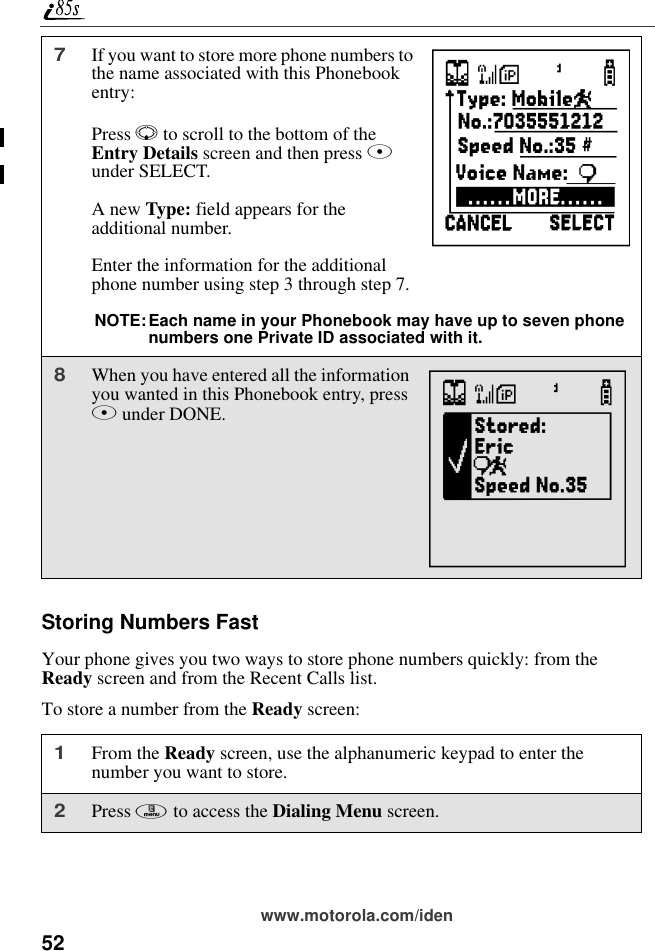
![36www.motorola.com/idenStatus icons appear in the two rows at the top of the display screen. Some appear at all times. Others appear only when your phone is engaged in certain activities or when you have activated certain features.Icon Indicates...3456 Battery Strength icons — remaining battery charge. More bars on the battery indicate a greater charge. See the table on page 15 for detailed information about the meaning of each battery strength icon.opqrs Signal Strength icons — strength of the network signal. More bars next to the antenna indicate a stronger signal.01 Active Line icons — currently active phone line; 0 indicates Line 1 is active; 1 indicates Line 2 is active.GHIJKL Call Forward icons — phone is set to forward calls. See “Call Forwarding” on page 72 for more information.cPhone In Use — phone is connected on an active call.hPrivate In Use — number being called is a Private ID.%Talkgroup In Use — phone is active on a talkgroup call.YPacket Data Ready — phone is ready to receive data through a data cable.ZPacket Data Activity — phone is transmitting data.]Mobile IP — phone is ready to access the Internet.{Secure Data — phone is accessing the Internet using a secure connection.](https://usermanual.wiki/Motorola-Solutions/89FT5815.Users-Manual/User-Guide-171353-Page-38.png)


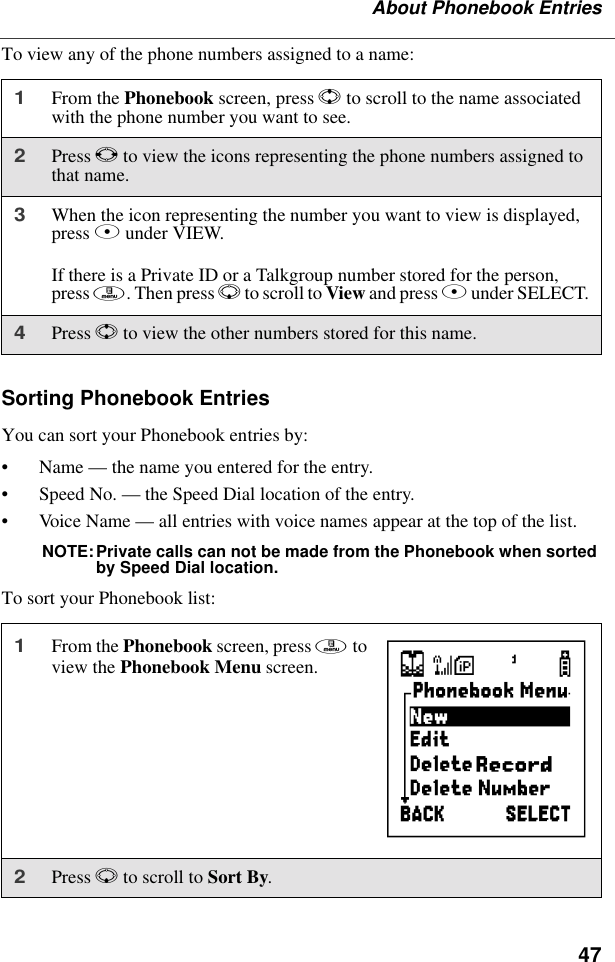

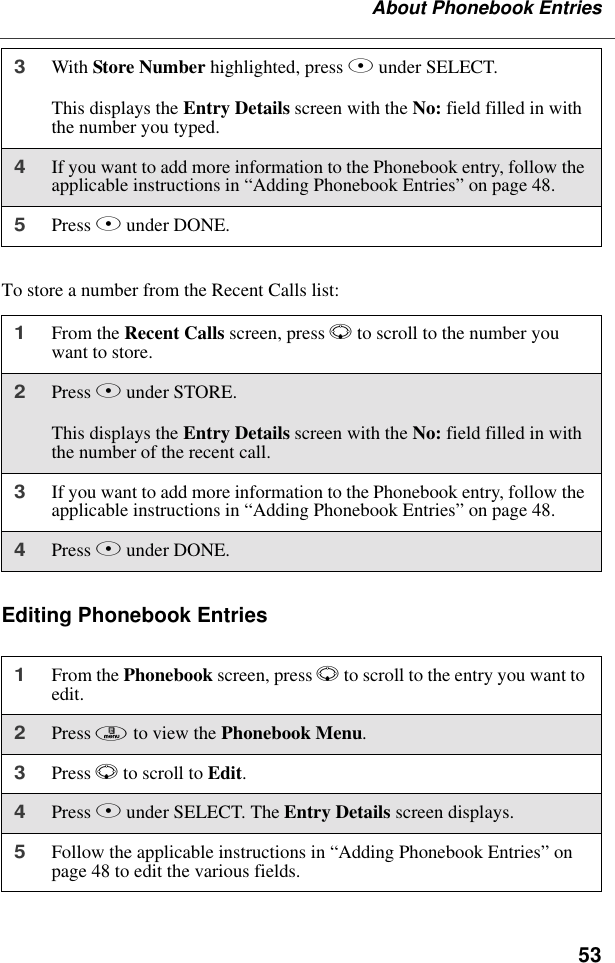
![49About Phonebook EntriesTo add a Phonebook entry:1Access the Entry Details screen:From the Phonebook screen, press S to scroll to [New Entry] and press B under SELECT.Or,From the Phonebook screen, press m. Then press R to scroll to New and press B under SELECT.2If you want to assign a name to your Phonebook entry: With the Name: field highlighted, press B under CHANGE.From the Name: screen, enter the name using the alphanumeric keypad.See “Using T9 Text Input” on page 28 for information about entering text into this field.When you are finished, press B under OK.The Entry Details screen returns with the Type: field highlighted.HI](https://usermanual.wiki/Motorola-Solutions/89FT5815.Users-Manual/User-Guide-171353-Page-51.png)
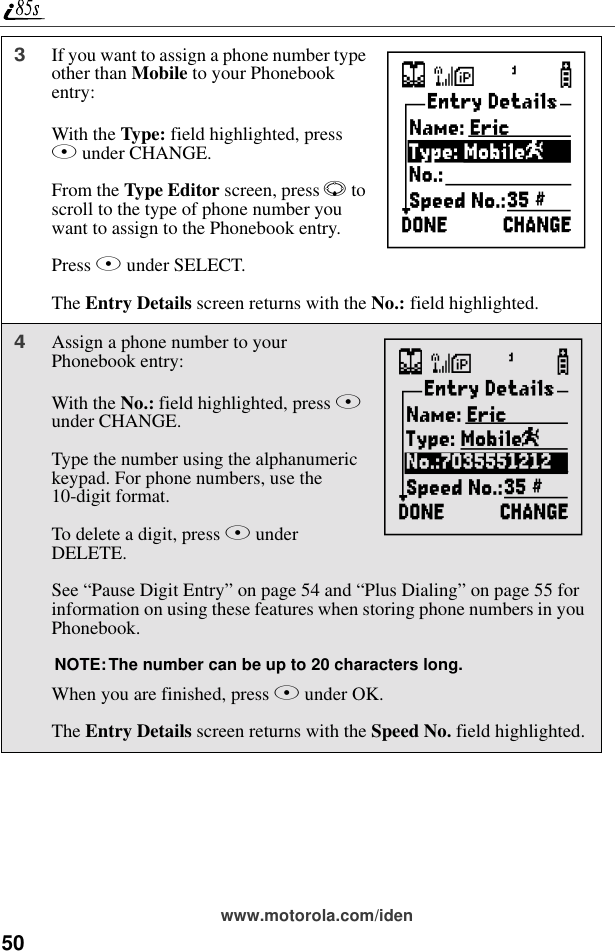
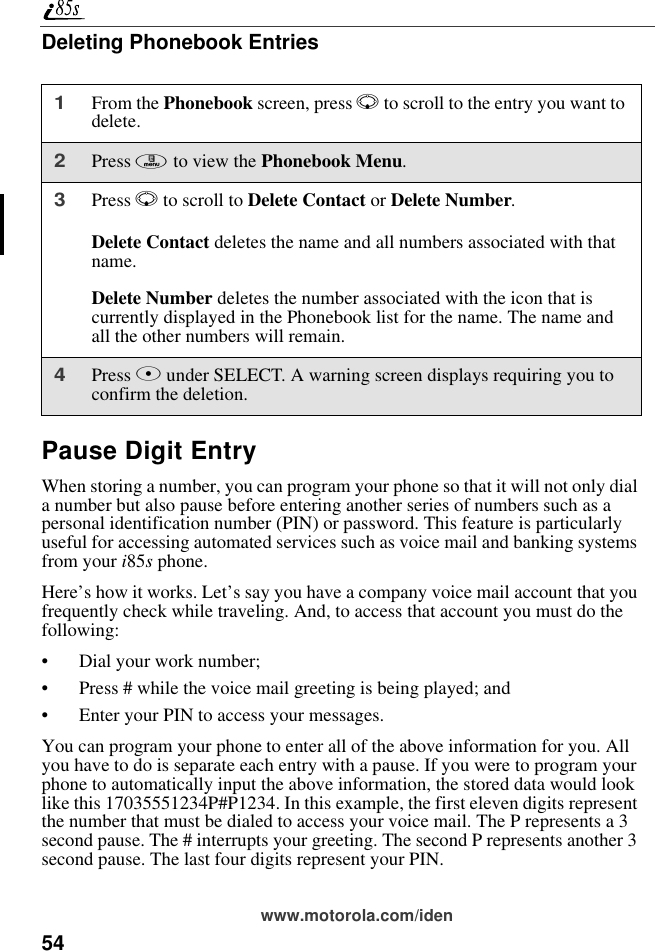


![106www.motorola.com/idenRecording a Voice NoteNOTE:Recording of phone calls is subject to varying State and Federal laws regarding privacy and recording of phone conversations.To record a personal message as a Voice Note:To record the incoming portion of a call as a Voice Note:Playing a Voice Note1From the VoiceNotes screen, press R to scroll to [New VoiceNote].2Press B under RECORD and speak the message you want to record into the microphone.3When you are finished recording your Voice Note, press B under STOP.1While on an active call, press m.2Press R to scroll to VoiceNotes.3Press B under SELECT to record the incoming portion of the call. Your own voice will not be recorded.4When you are finished recording your Voice Note, press B under STOP.1From the VoiceNotes screen, press R to scroll to the Voice Note you want to play.2Press B under PLAY. 3To stop the Voice Note while it is playing, press A under BACK.](https://usermanual.wiki/Motorola-Solutions/89FT5815.Users-Manual/User-Guide-171353-Page-108.png)

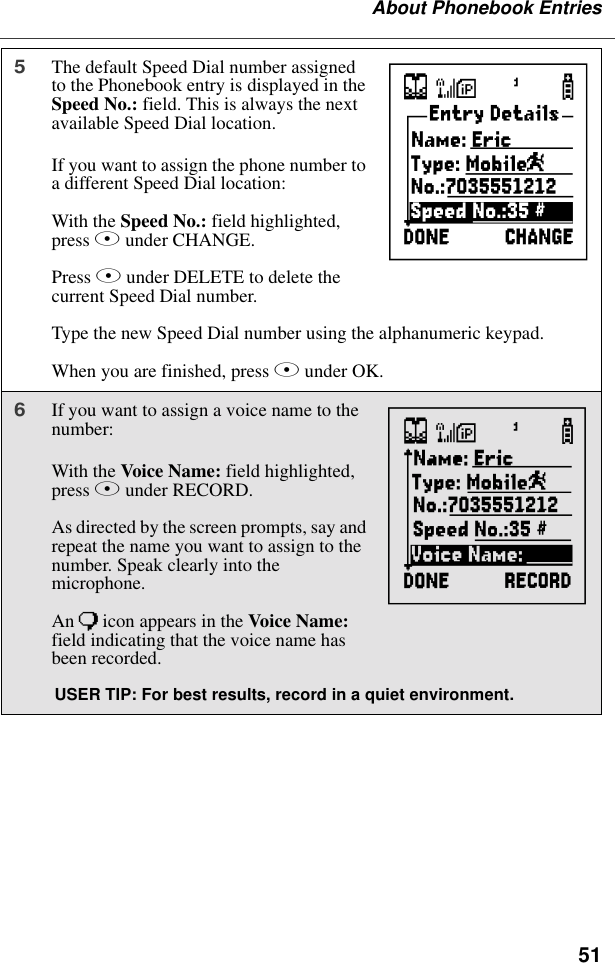
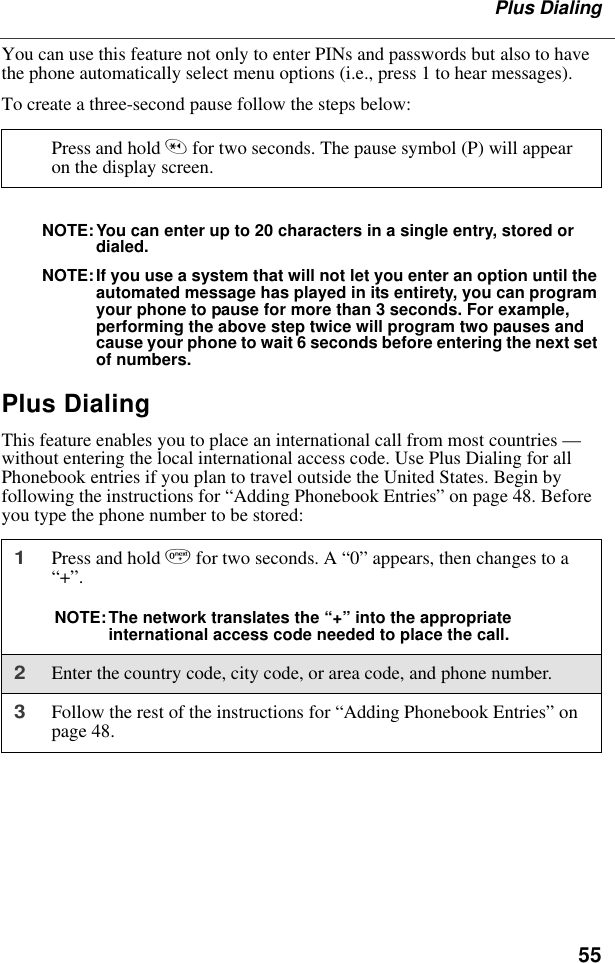
![130www.motorola.com/idenCreating a StyleWhen you create a style, you give it a name and set the features of that style. The name of the style then appears on the Styles Menu.To create a style:Editing a StyleTo change the settings of a style:1From the Styles Menu screen, press R to scroll to [New Style]. 2Press B under SELECT.3Assign a name to the style you are creating:In the Name: screen, use the alphanumeric keypad to enter the name you want to give the style.As you type, you can delete a letter by pressing A under DELETE. To create a space, press P once.Press B under OK.4In the New screen, press R to scroll through the settings for each style option.5To change any style option:Press R to highlight the option.Press B under CHANGE or SELECT.Use the screens that appear to make your changes.6When all the style options have the settings you want, press A under DONE.1From the Styles Menu screen, press R to scroll to the name of the style you want to edit. 2Press m to access the Styles Action menu.](https://usermanual.wiki/Motorola-Solutions/89FT5815.Users-Manual/User-Guide-171353-Page-132.png)