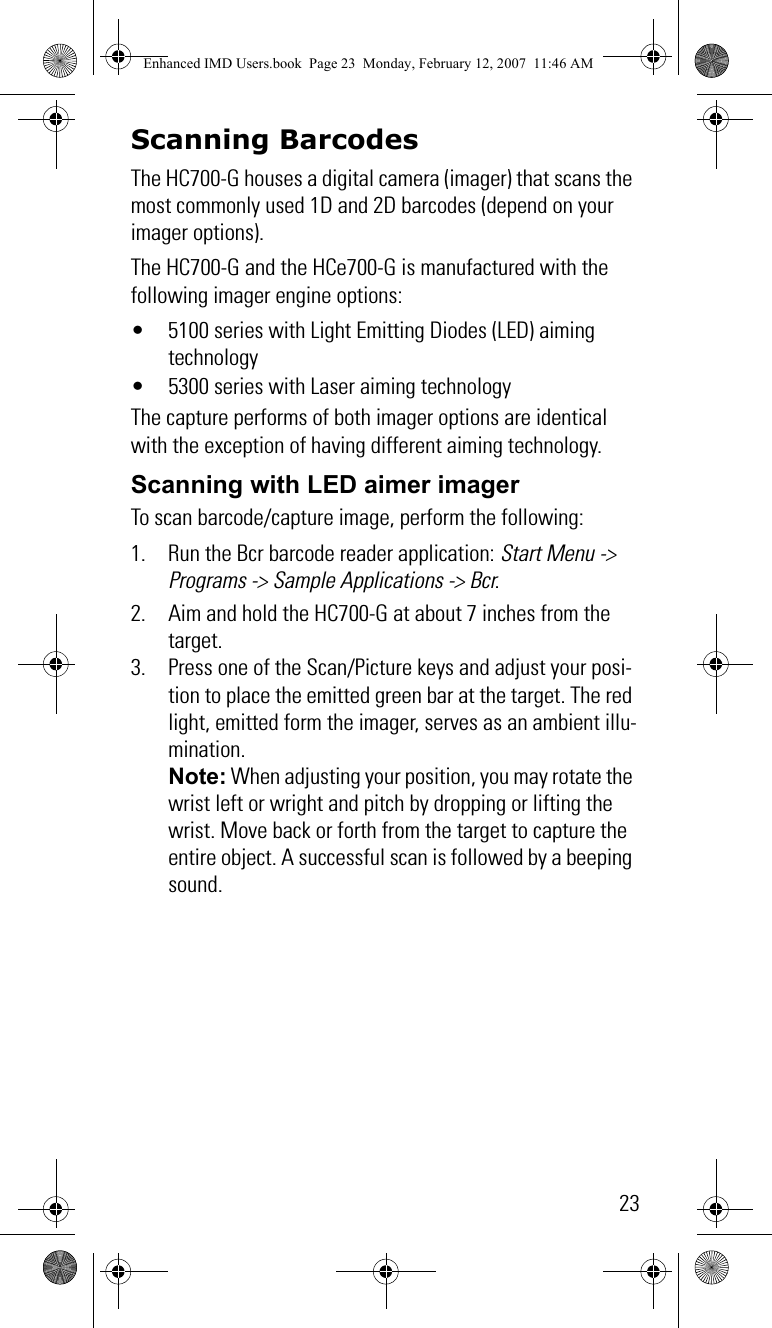
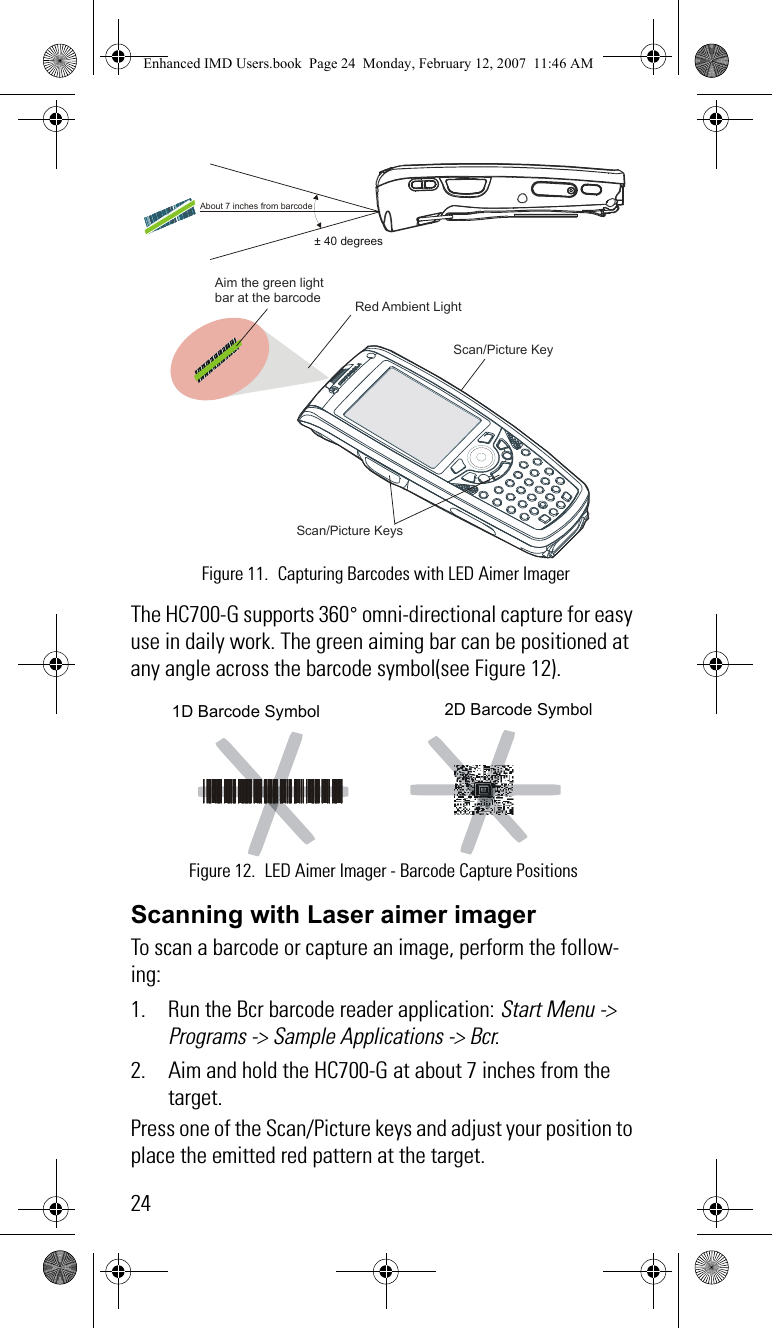
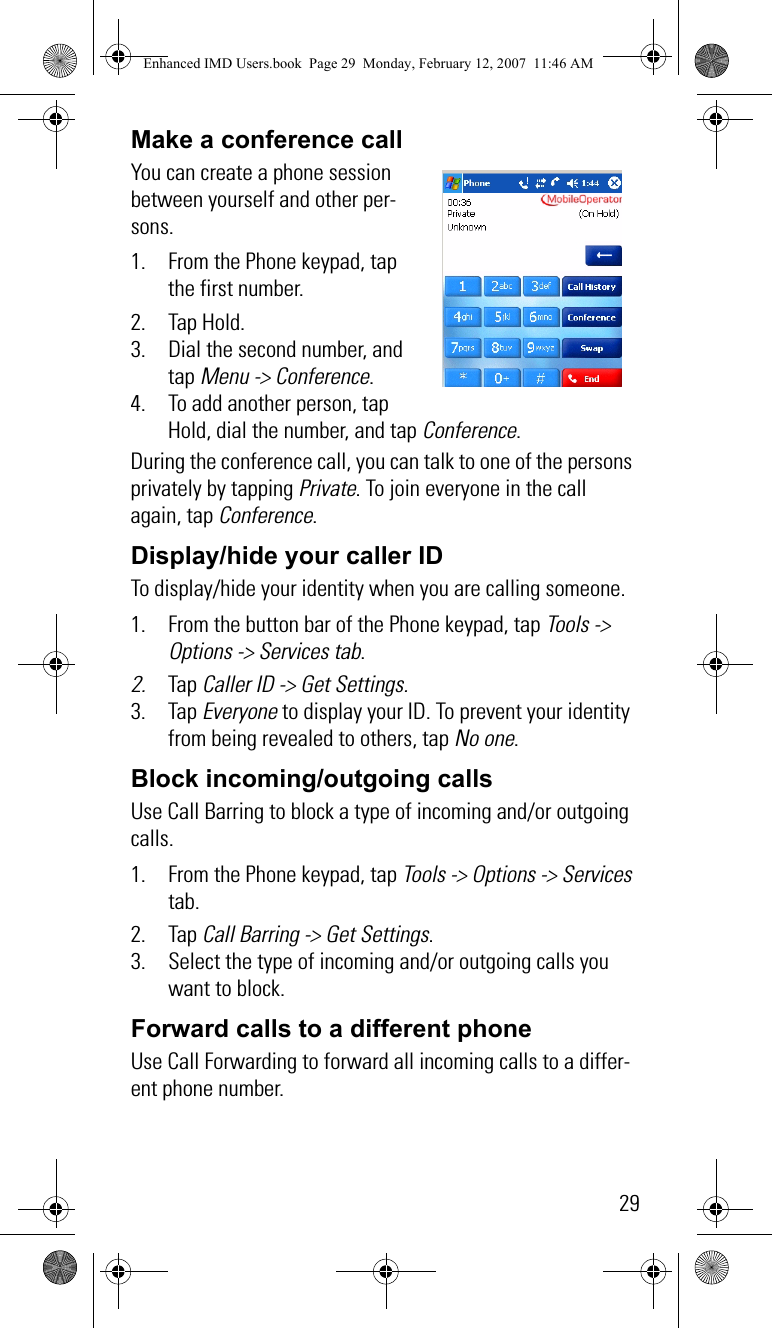
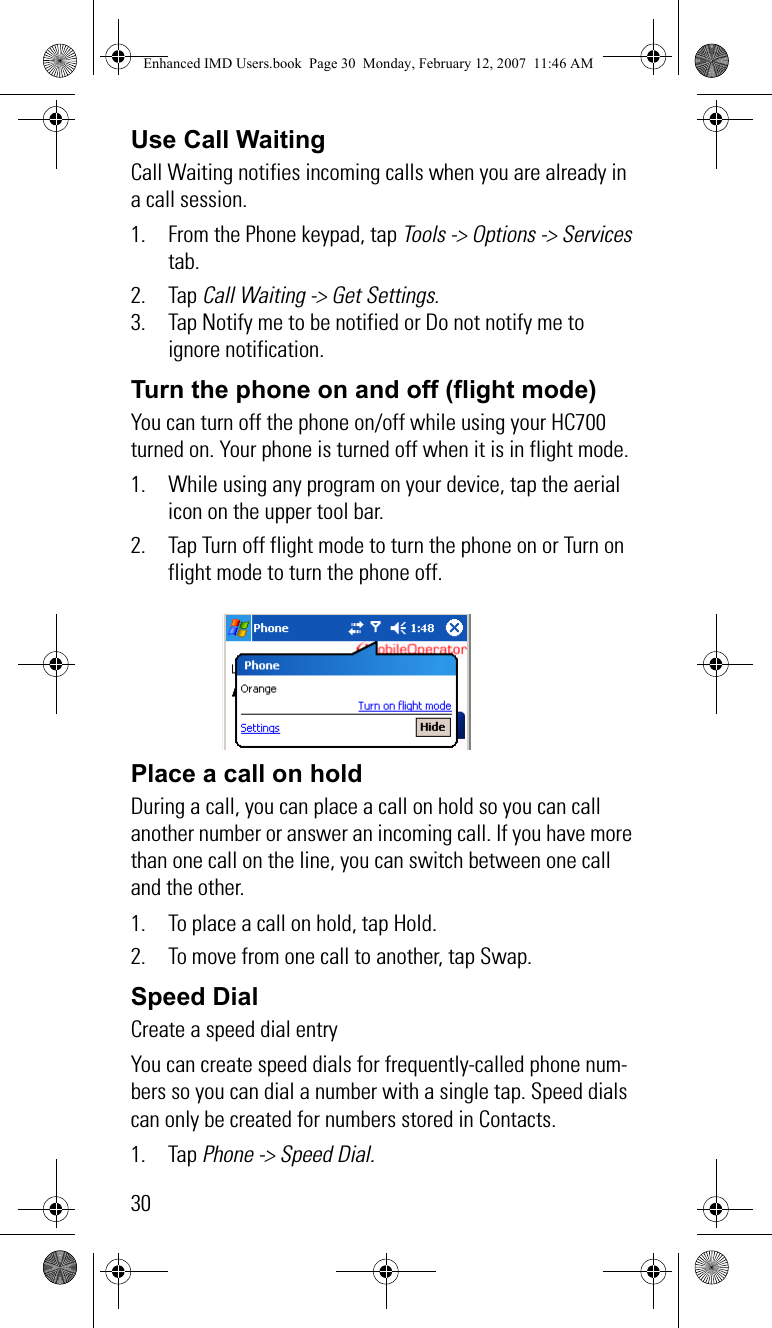
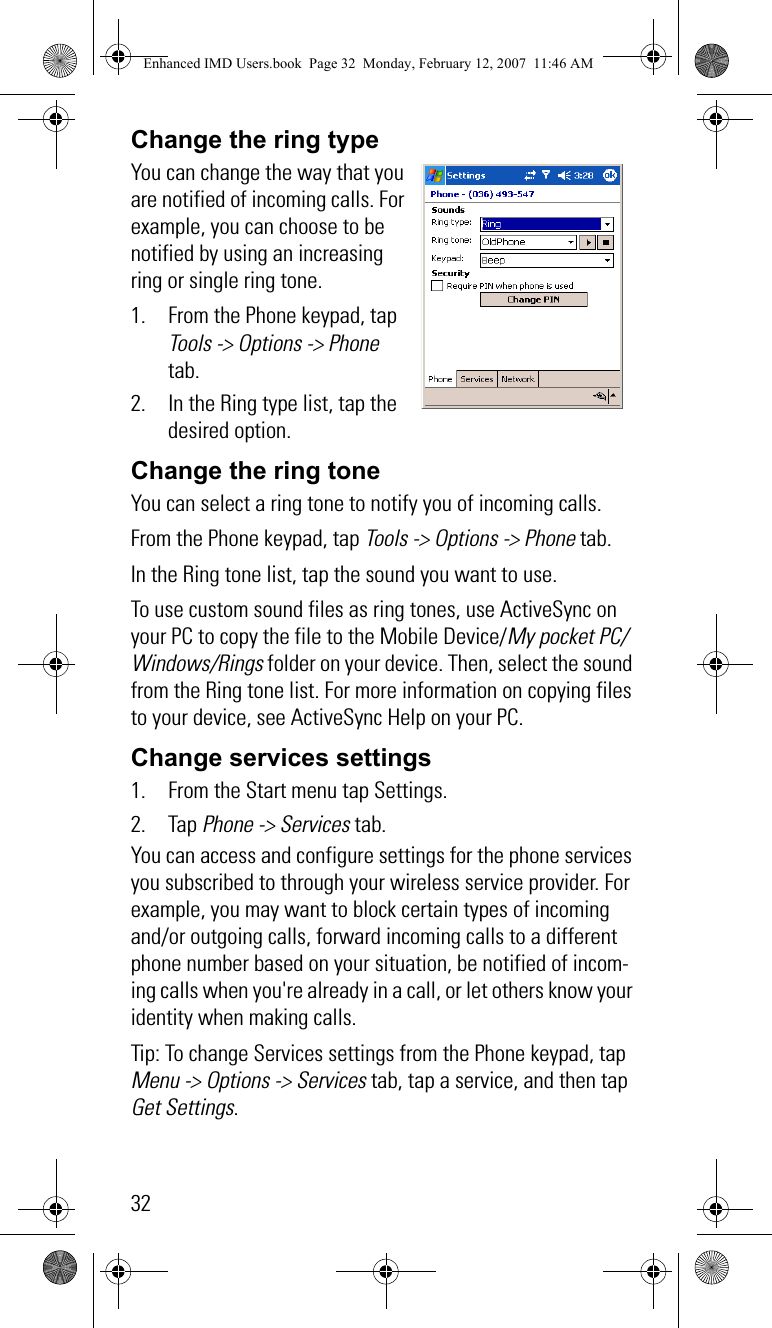
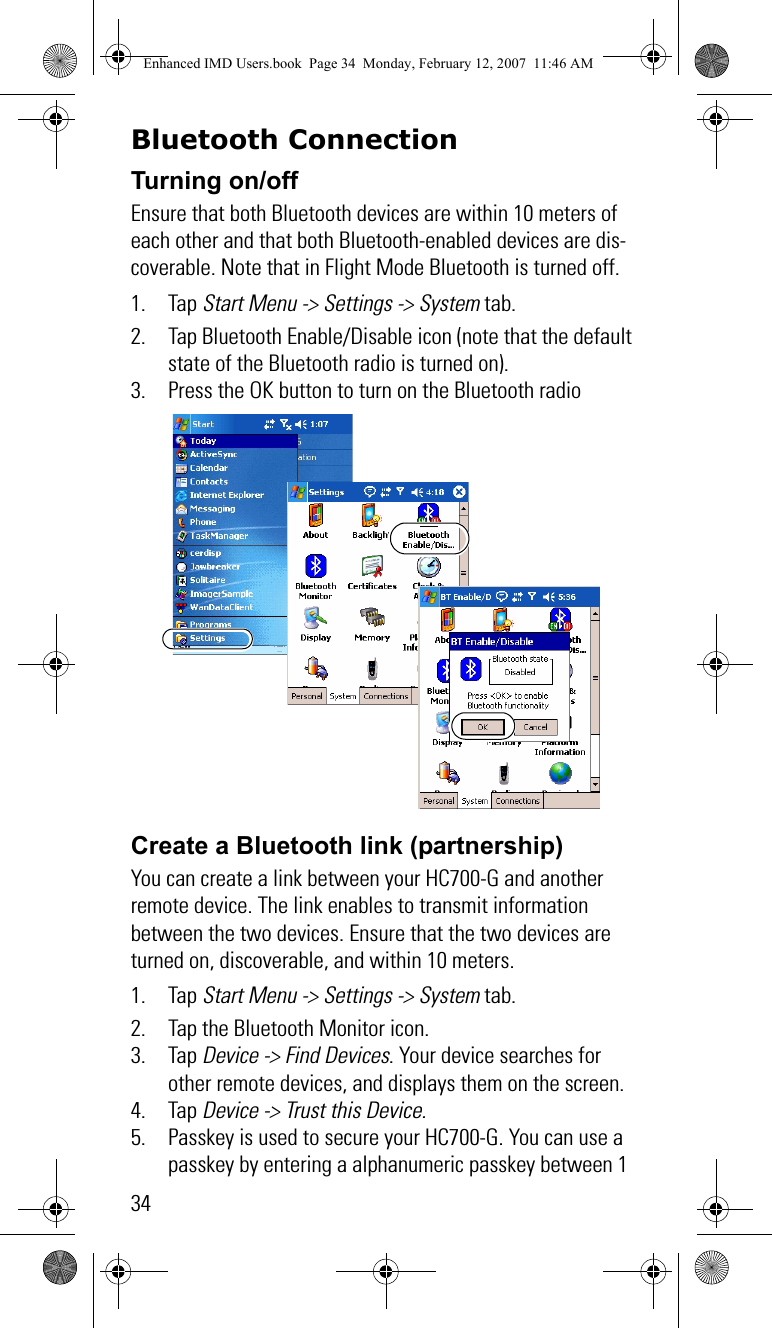
Motorola Solutions 89FT7027 Handheld Computer w/ Dual-Band GPRS, WLAN & BT User Manual Enhanced IMD Users
Motorola Solutions, Inc. Handheld Computer w/ Dual-Band GPRS, WLAN & BT Enhanced IMD Users
Contents
- 1. Exhibit 8a Supplemental Users Manual
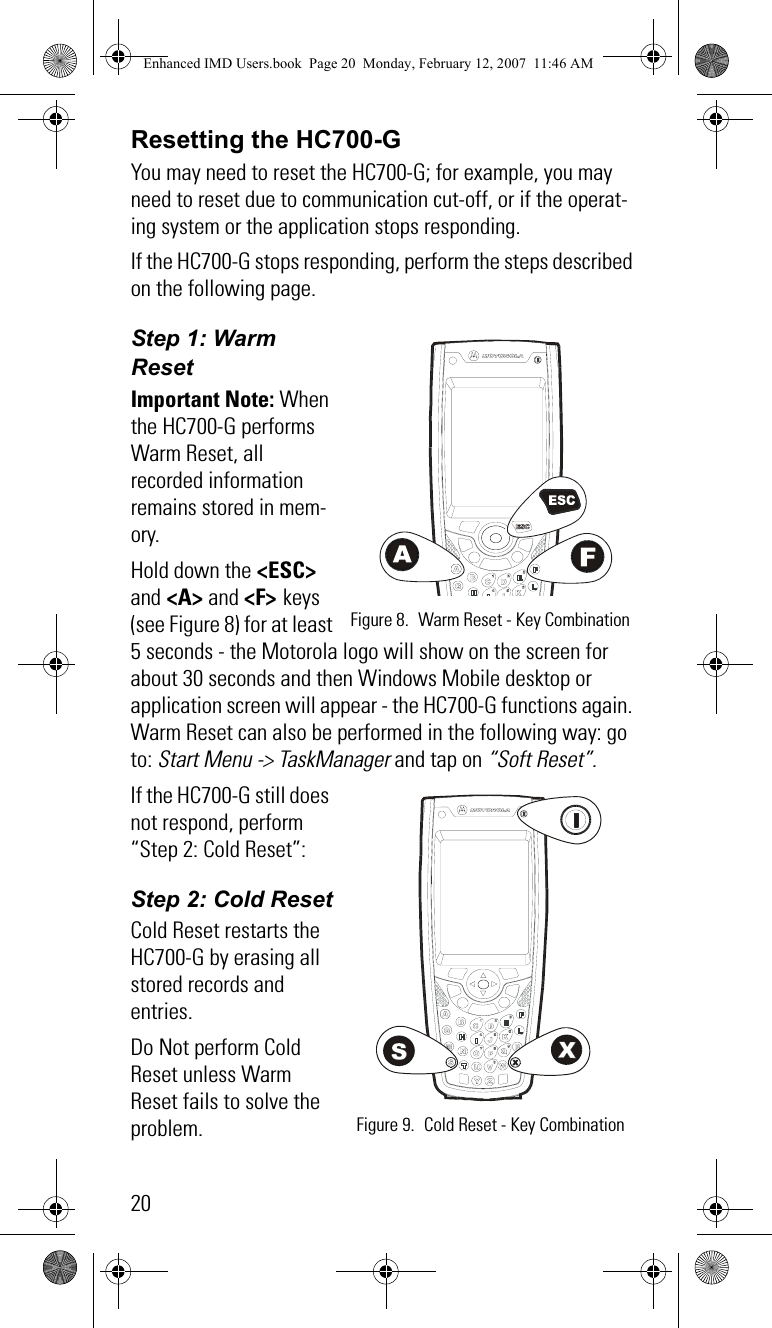
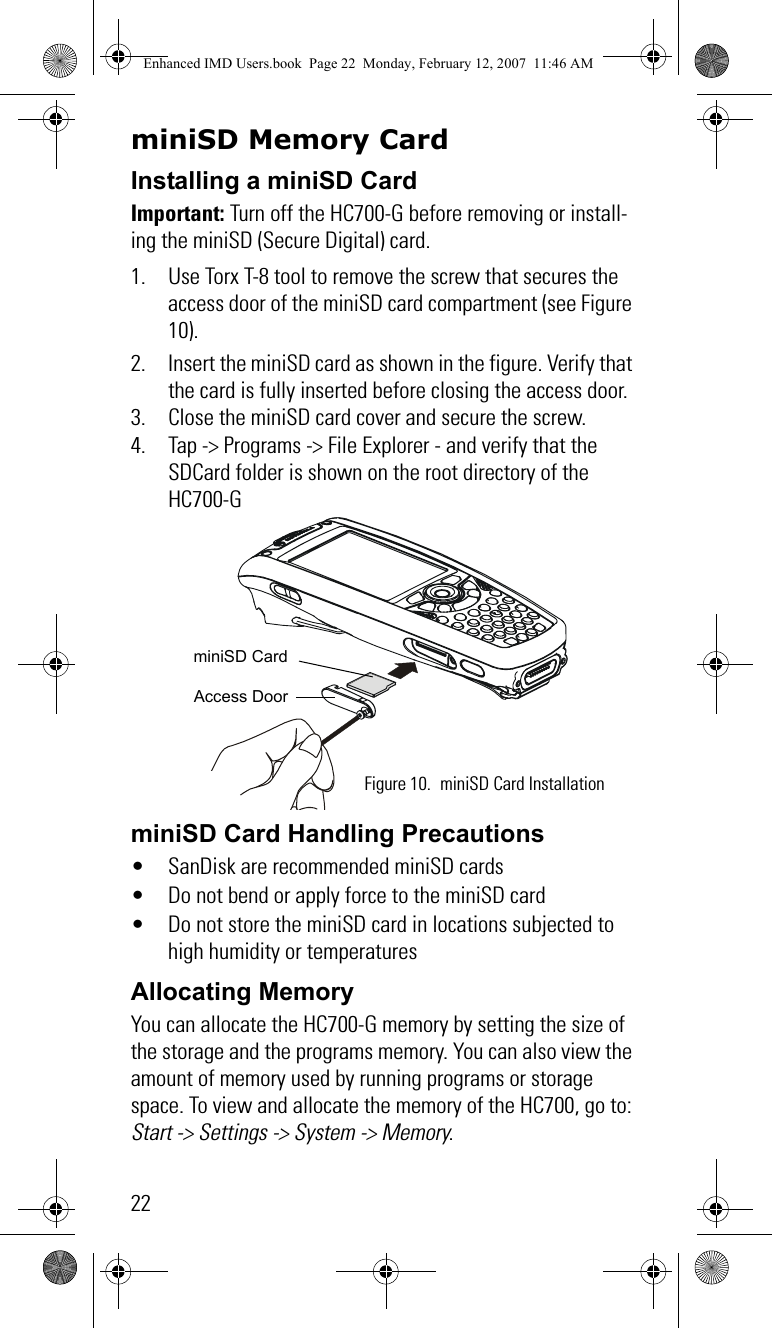
- 2. Exhibit 8 Users Manual 1
- 3. Exhibit 8 Users Manual 2
Exhibit 8 Users Manual 2