Motorola Solutions 89FT7606 ML900 Notebook PC w/ Wireless Radio Modem User Manual ML900 0
Motorola Solutions, Inc. ML900 Notebook PC w/ Wireless Radio Modem ML900 0
Contents
- 1. Users Manual Part 1
- 2. Users Manual Part 2
- 3. Users Manual Part 3
Users Manual Part 3
Installing Software Drivers 6-5
PCI-952 Shows you the instructions on installing the driver that
allows you to use the optional wireless modem and
GPS features to transmit information wirelessly.
Upon clicking “Next Page,” the following screen appears:
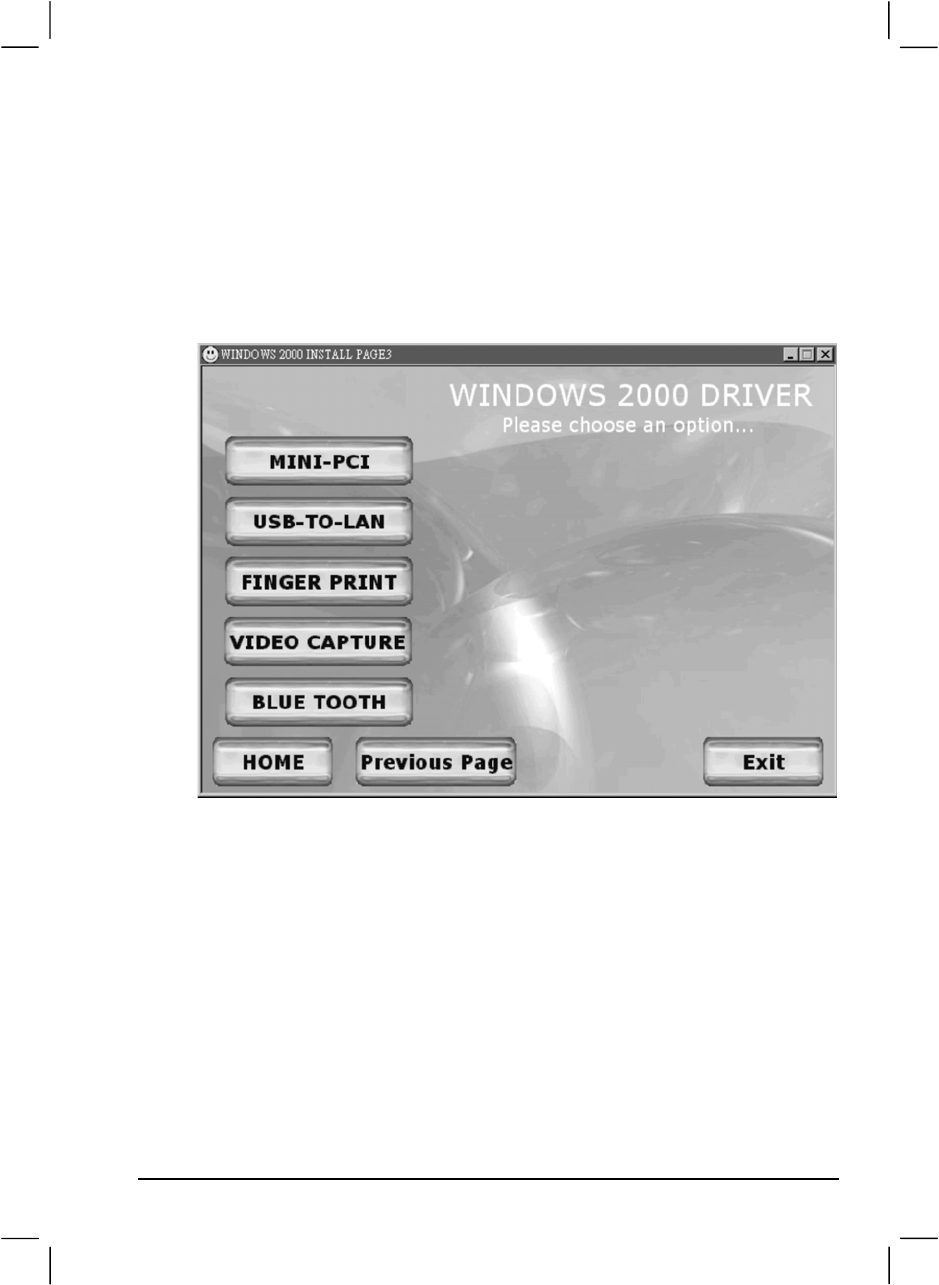
Drivers on the Third Page
Mini-PCI Shows you the instructions on installing the WLAN
driver that allows you to use the internal Mini PCI
WLAN card.
USB-to-LAN Allows you to use the network function of the
computer when the optional docking station is
connected.
Fingerprint Shows you the instructions on installing the driver that
allows you to use the fingerprint recognition system
and its application software.

6-6Installing Software Drivers
Video Capture Shows you the instructions on installing the driver that
allows you to connect a video capture device through
the AV input port.
Bluetooth Allows you to use the bluetooth port to connect to
bluetooth-compliant devices.
Touchscreen Driver
To install the touch screen driver, perform the following:
1. Insert the driver CD into the drive.
2. Click on “Windows 2K”, then “Touchscreen” and follow the
onscreen instructions to continue.
3. When finished installing, select “Yes” to reboot your system. The
driver should now be loaded.
4. After the system has finished rebooting, click on the “PenMount
Monitor” icon located on the taskbar to bring up the “PenMount
Control Panel”.
5. Select the “Standard Calibration” folder and click on “OK.”
6. Click on “Advanced Calibration” button.
7. Click on the four sides (points) and the plus-sign “+” on the screen to
calibrate your touchscreen for use on the computer.
Installing Software Drivers 6-7
Installing Drivers for Windows XP
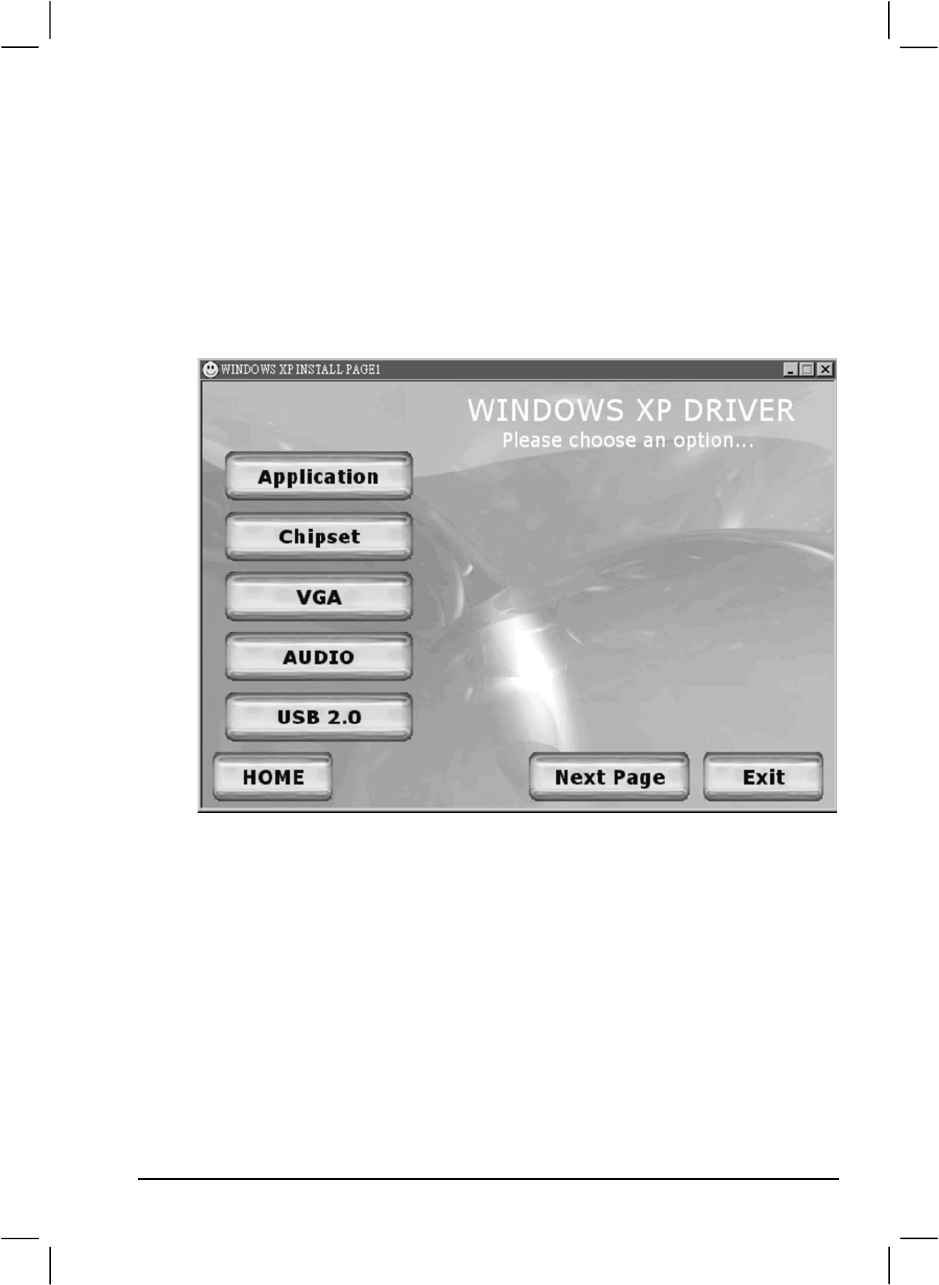
To set up the necessary drivers for Windows XP, click on “Windows XP”
on the initial screen. The following screen appears:
Drivers on the First Page
To install the necessary driver, just click on the particular option and
follow the onscreen instructions to continue and complete installation.
Application Installs the Intel® Application Accelerator to improve
performance of the storage sub-system and overall
system performance. This software delivers improved
performance through several ingredient technologies
(components).
Chipset Ensures the full function of the following drivers.
Install this main chipset driver before installing the
device drivers.
6-8 Installing Software Drivers
VGA Allows you to select high-resolution displays with
richer colors. It can drive LCD displays as well as
CRT displays.
Audio Allows you to take full advantage of the audio
subsystem.
USB 2.0 Allows your system to connect to USB 2.0 devices.
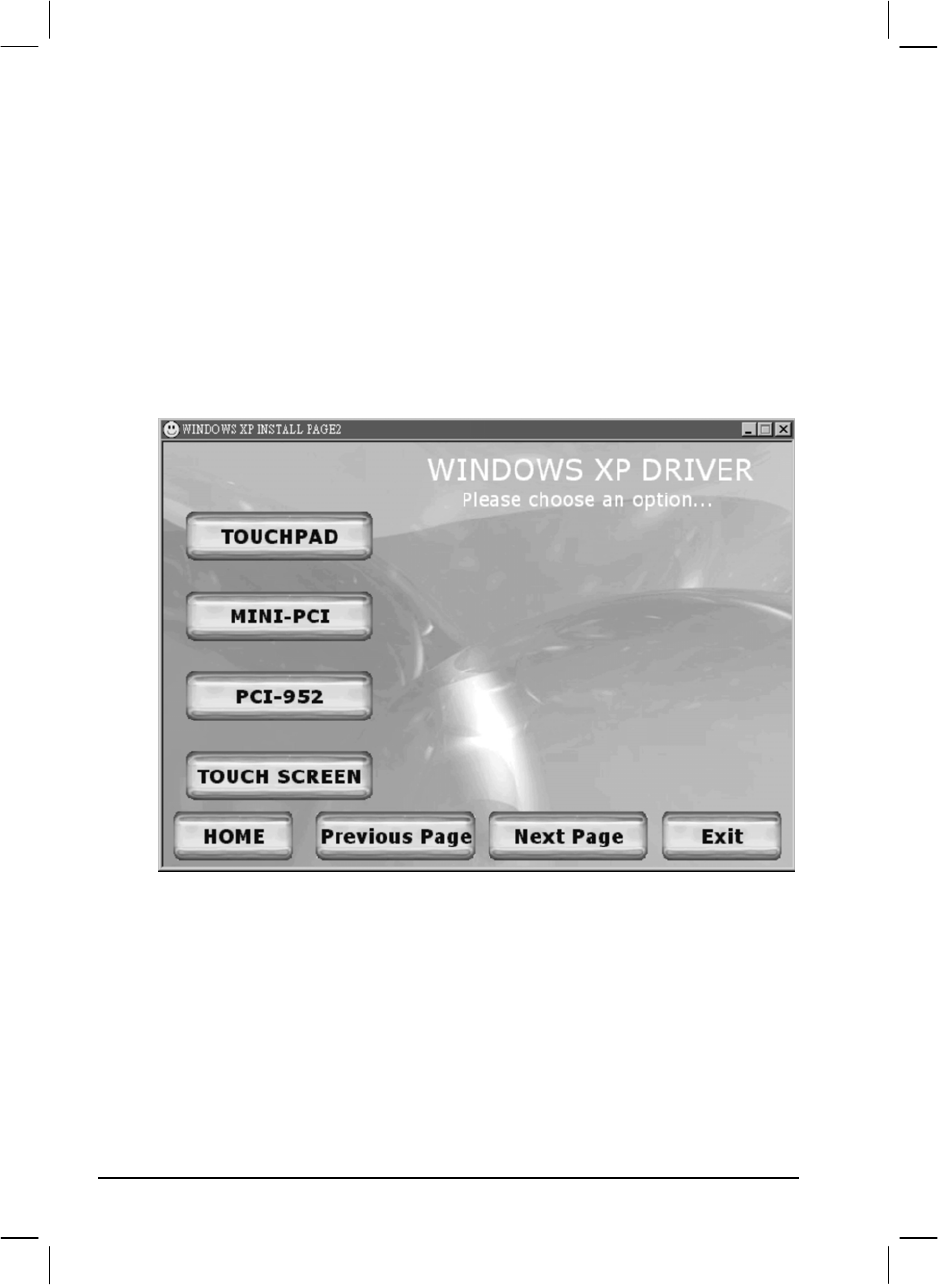
Upon clicking “Next Page,” the following screen appears:
Drivers on the Second Page
Touchpad Allows you to take full advantage of the touchpad and
the scroll button features.
Mini-PCI Shows you the instructions on installing the WLAN
driver that allows you to use the internal Mini PCI
WLAN card.
PCI-952 Shows you the instructions on installing the driver that
allows you to use the optional wireless modem and
GPS features to transmit information wirelessly.
Installing Software Drivers 6-9
Touchscreen Allows you to use your fingers as a pointing device on
the LCD screen (refer to the next section for further
instructions).
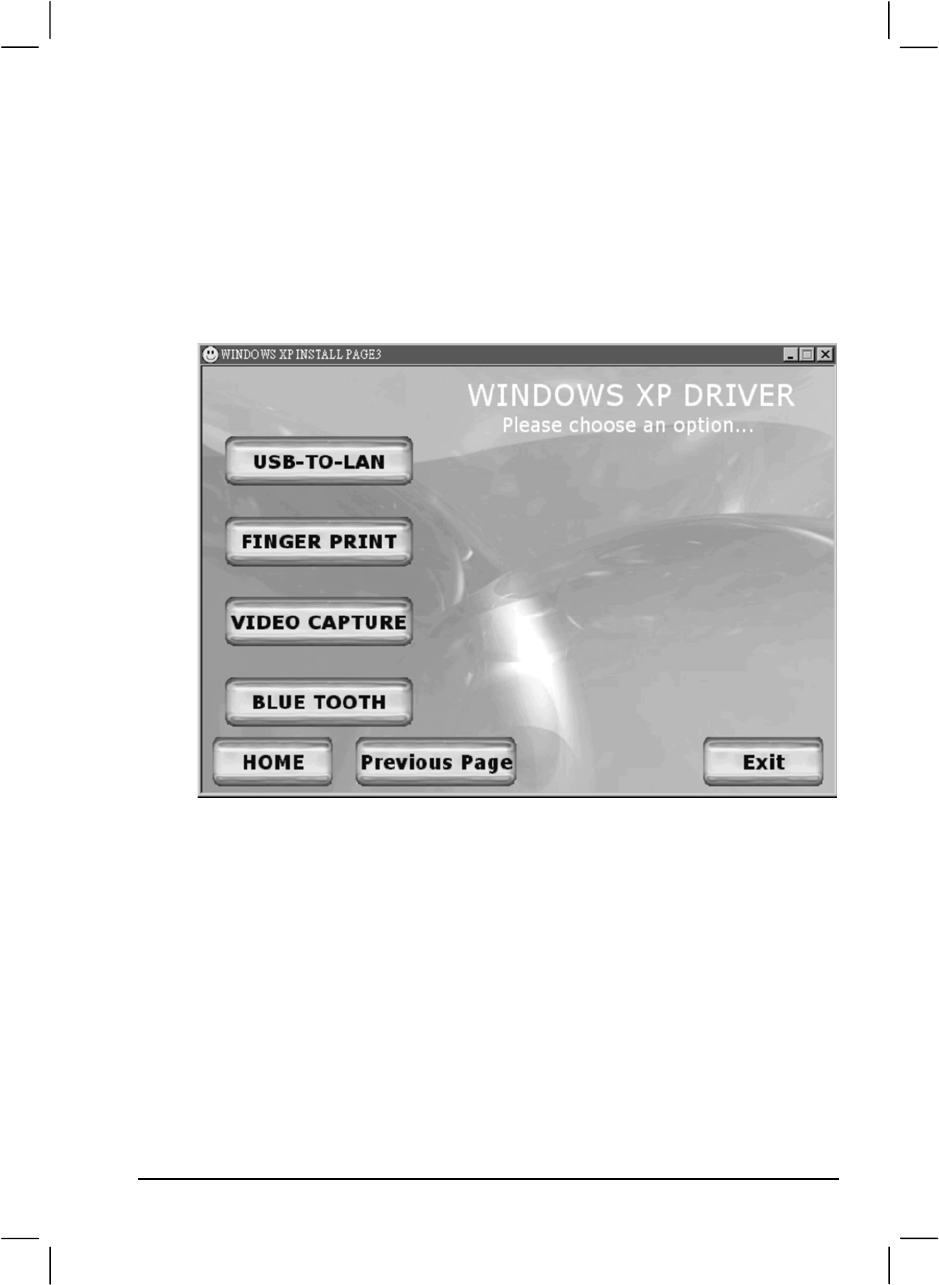
Upon clicking “Next Page,” the following screen appears:
Drivers on the Third Page
USB-to-LAN Allows you to use the network function of the
computer when the optional docking station is
connected.
Fingerprint Shows you the instructions on installing the driver that
allows you to use the fingerprint recognition system
and its application software.
Video Capture Shows you the instructions on installing the driver that
allows you to connect a video capture device through
the AV input port.
Bluetooth Allows you to use the bluetooth port to connect to
bluetooth-compliant devices.
6-10 Installing Software Drivers
Touchscreen Driver
To install the touchscreen driver, perform the following:
1. Insert the driver CD into the drive.
2. Click on “Windows XP”, then “Touchscreen” and follow the
onscreen instructions to continue.
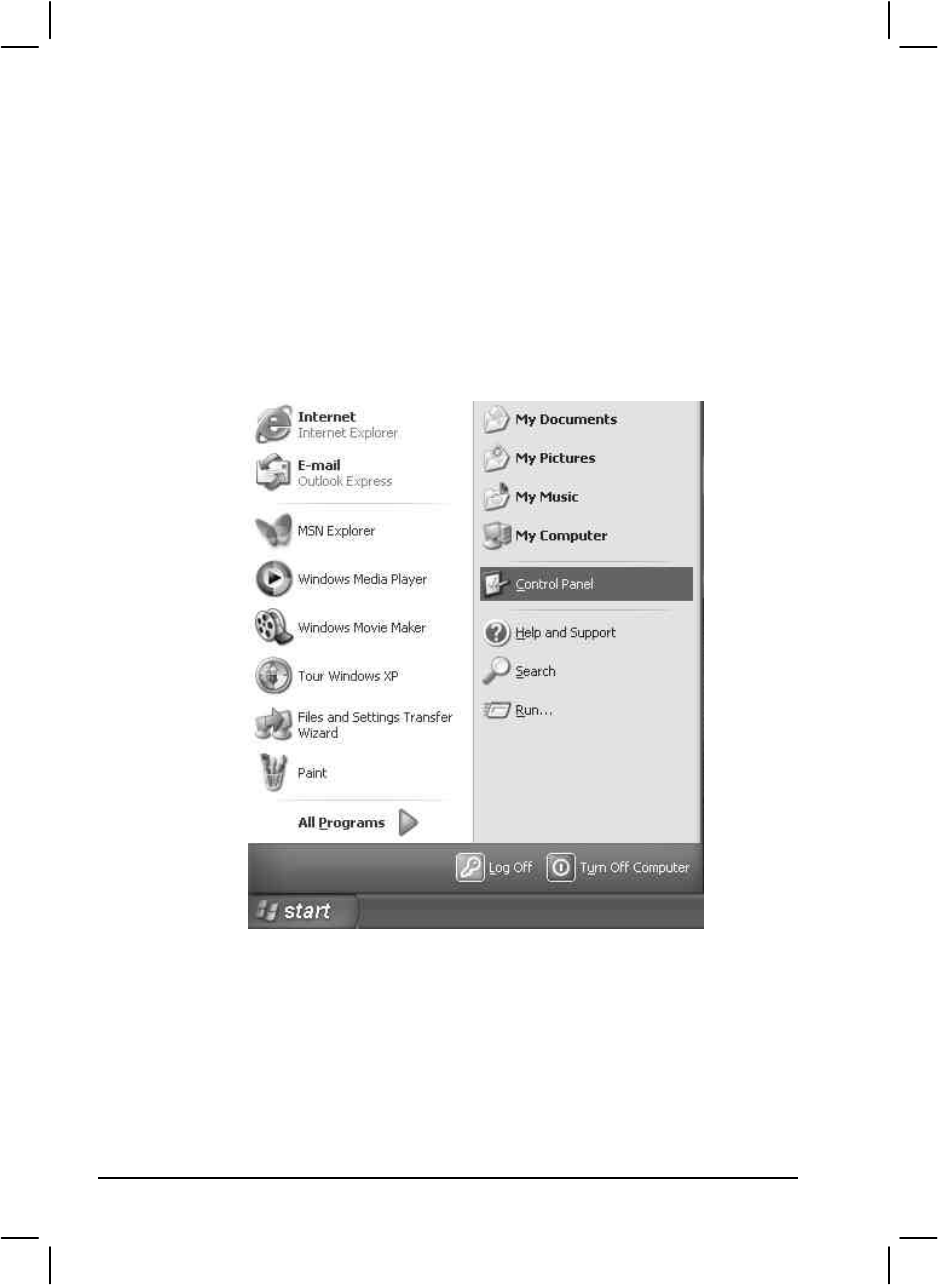
3. Click on ”Start,” then “Control Panel.”
Installing Software Drivers 6-11
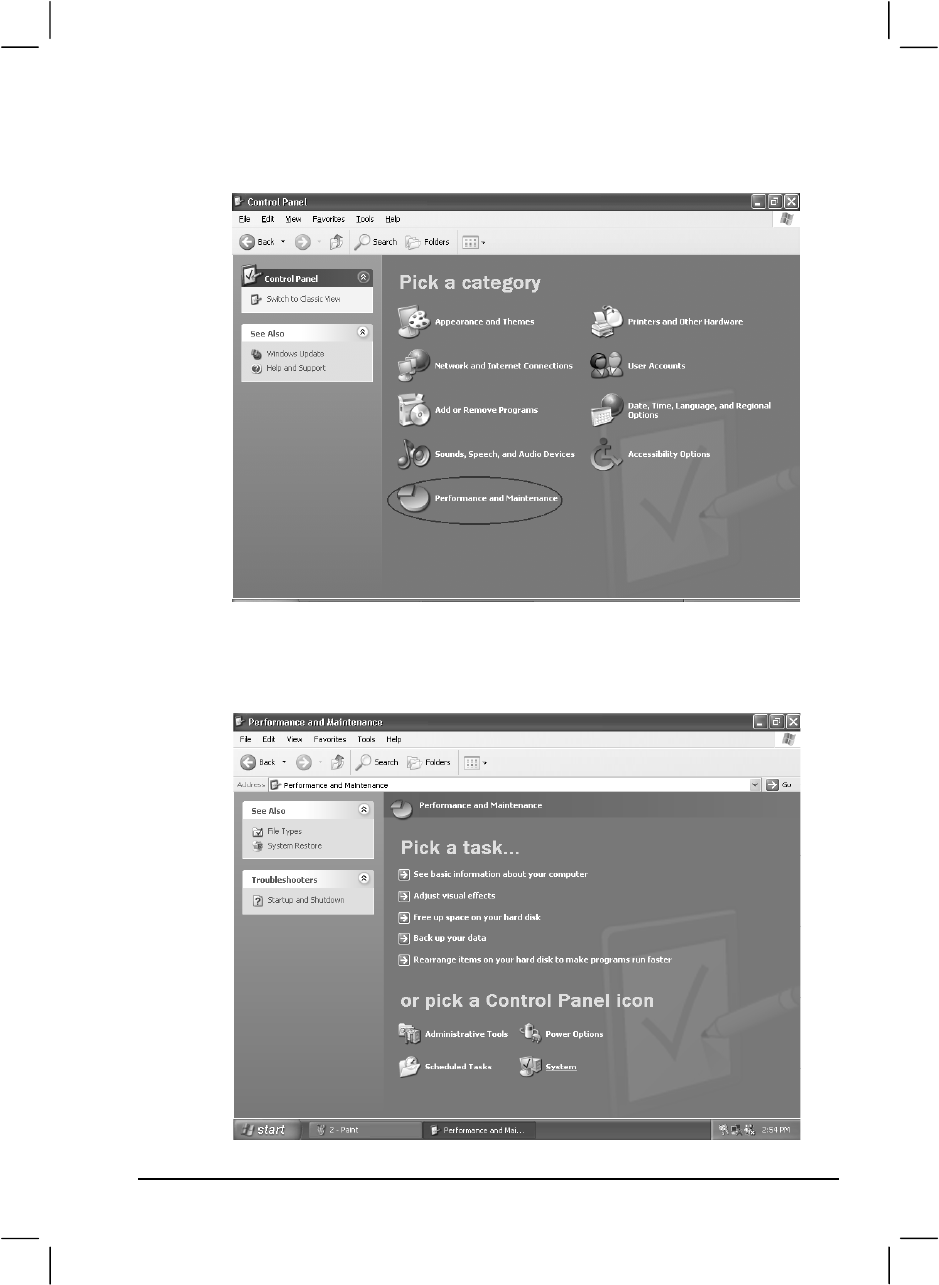
4. Click on the “Performance and Maintenance” category.
5. Click on “System.”
6-12 Installing Software Drivers
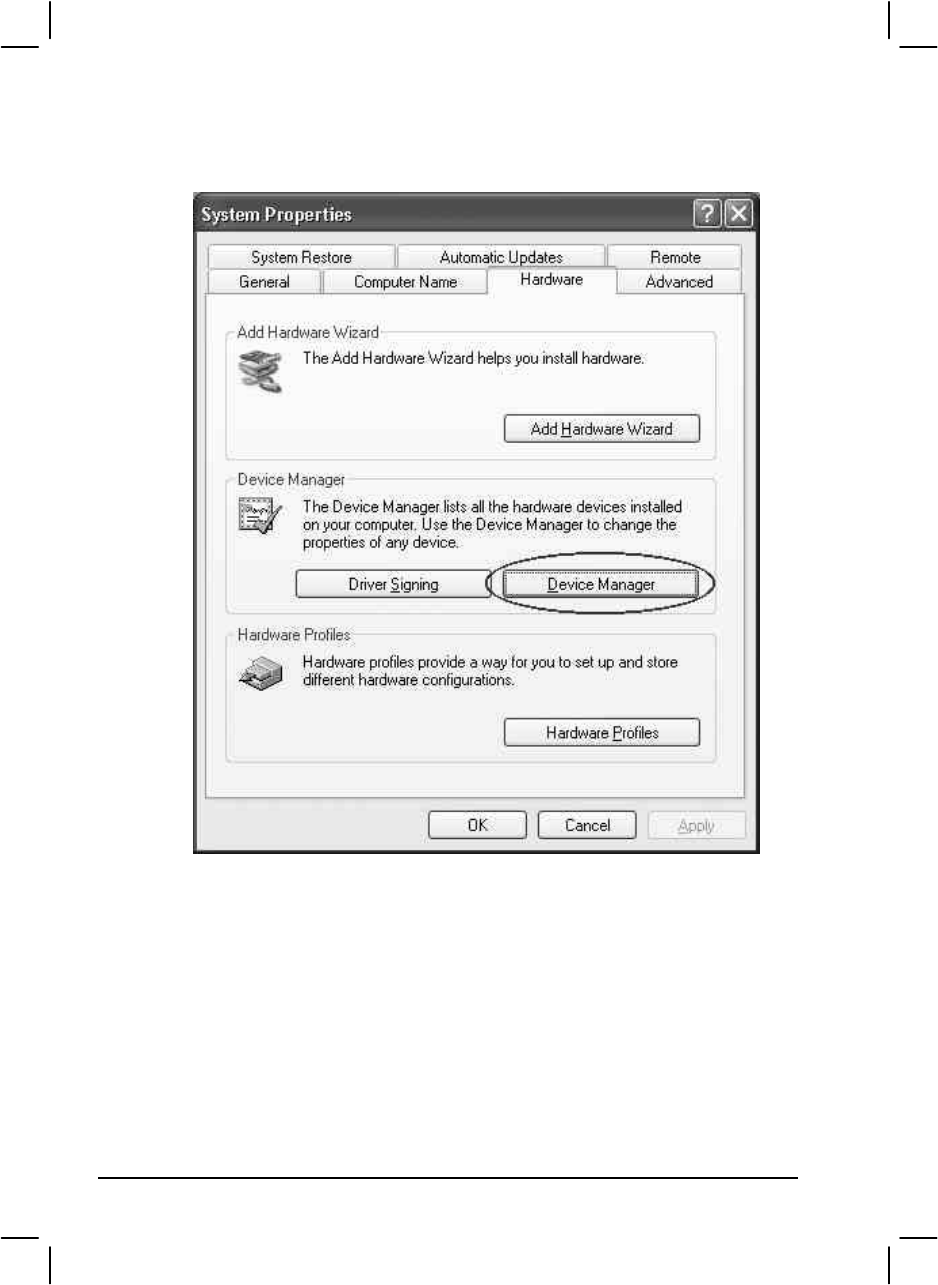
6. Click on “Hardware” folder, then click on “Device Manager.”

Installing Software Drivers 6-13
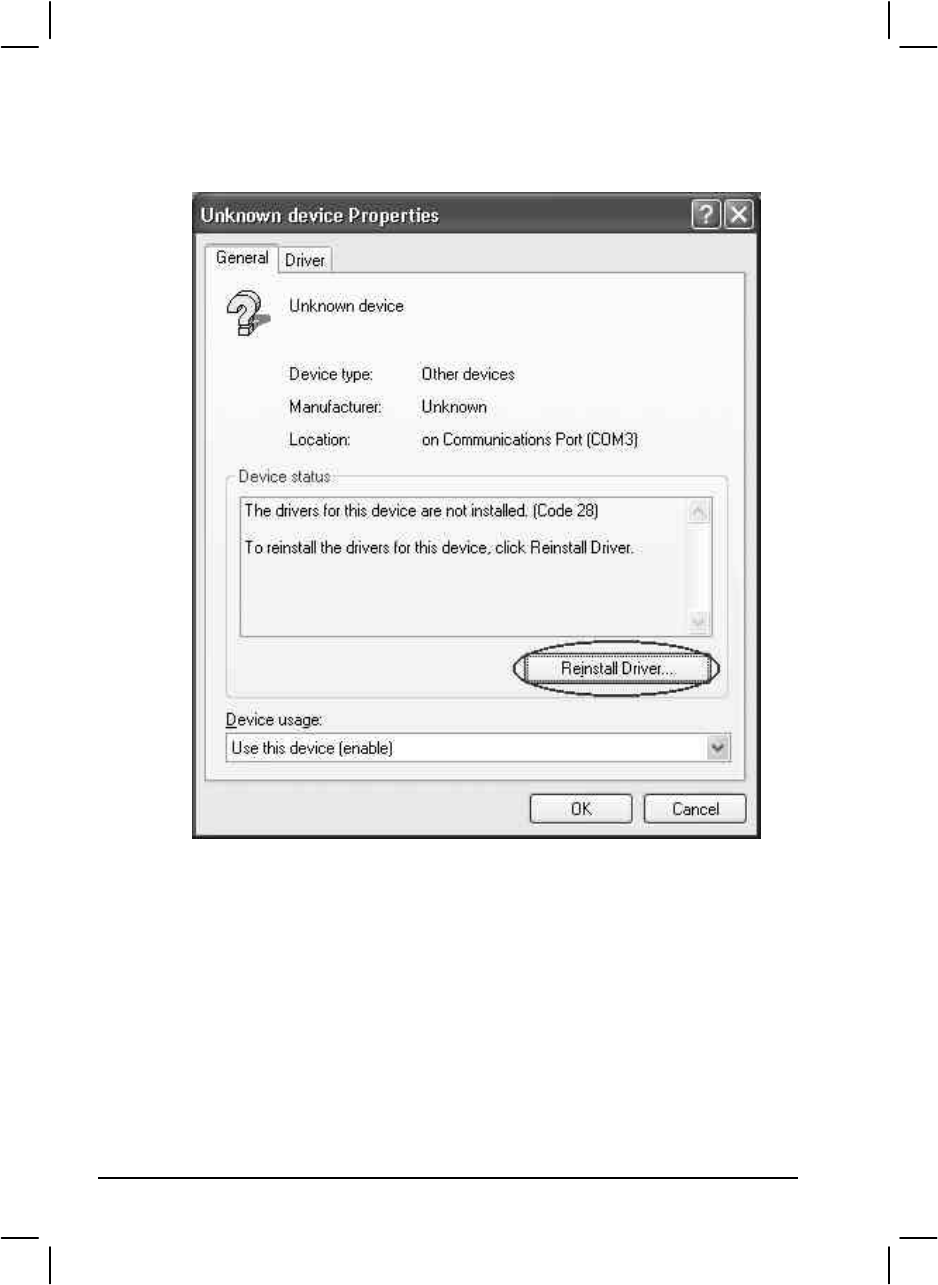
7. Click on “? Unknown device,” then click on the “Properties” icon.
6-14 Installing Software Drivers
8. Click on “Reinstall Driver.”
9. When the “Hardware Update Wizard” appears, select “Install the
software automatically [Recommended],” then click on “Next.”
Installing Software Drivers 6-15
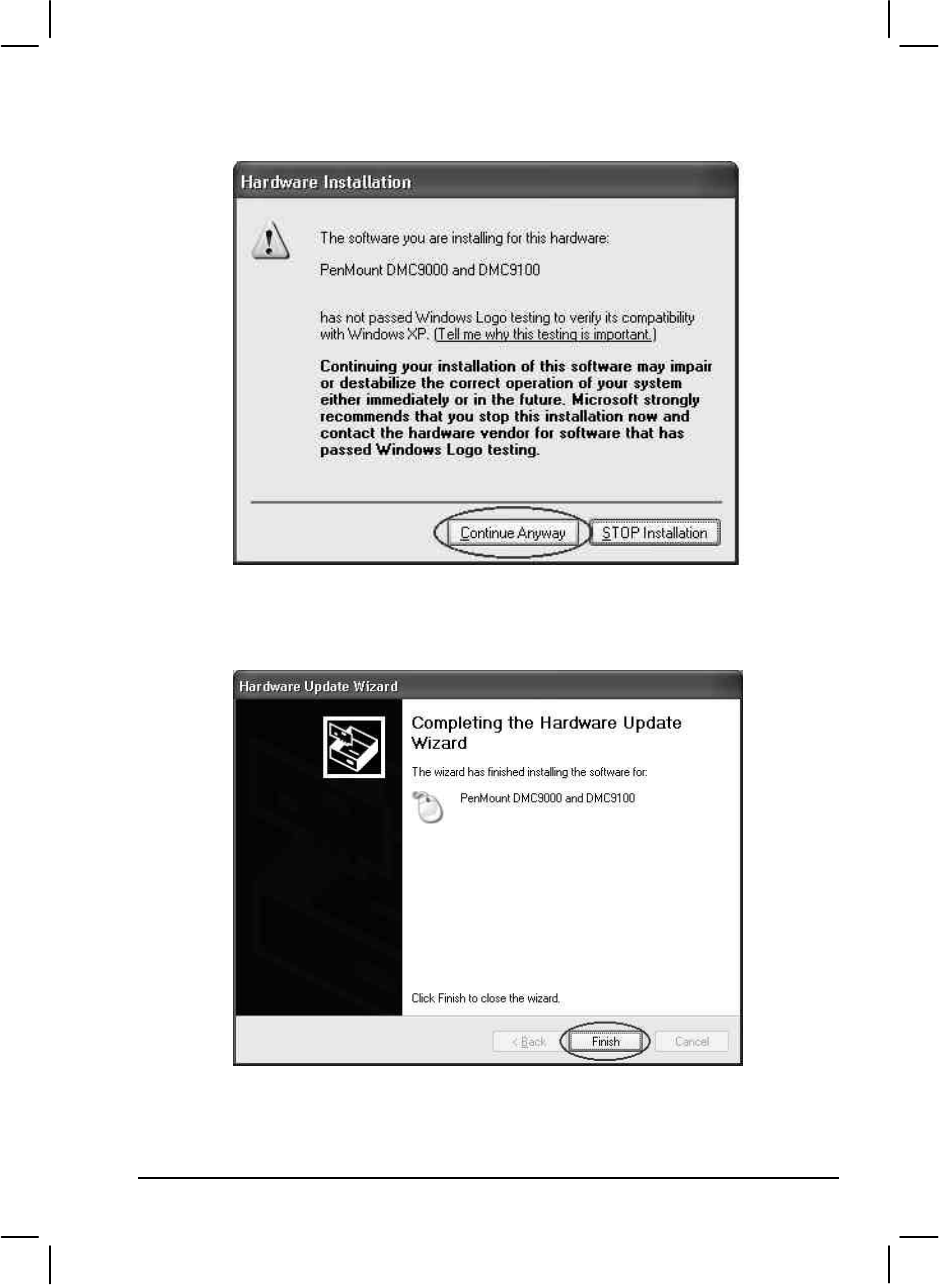
10. Click on “Continue Anyway.”
11. Click on “Finish.”
6-16 Installing Software Drivers
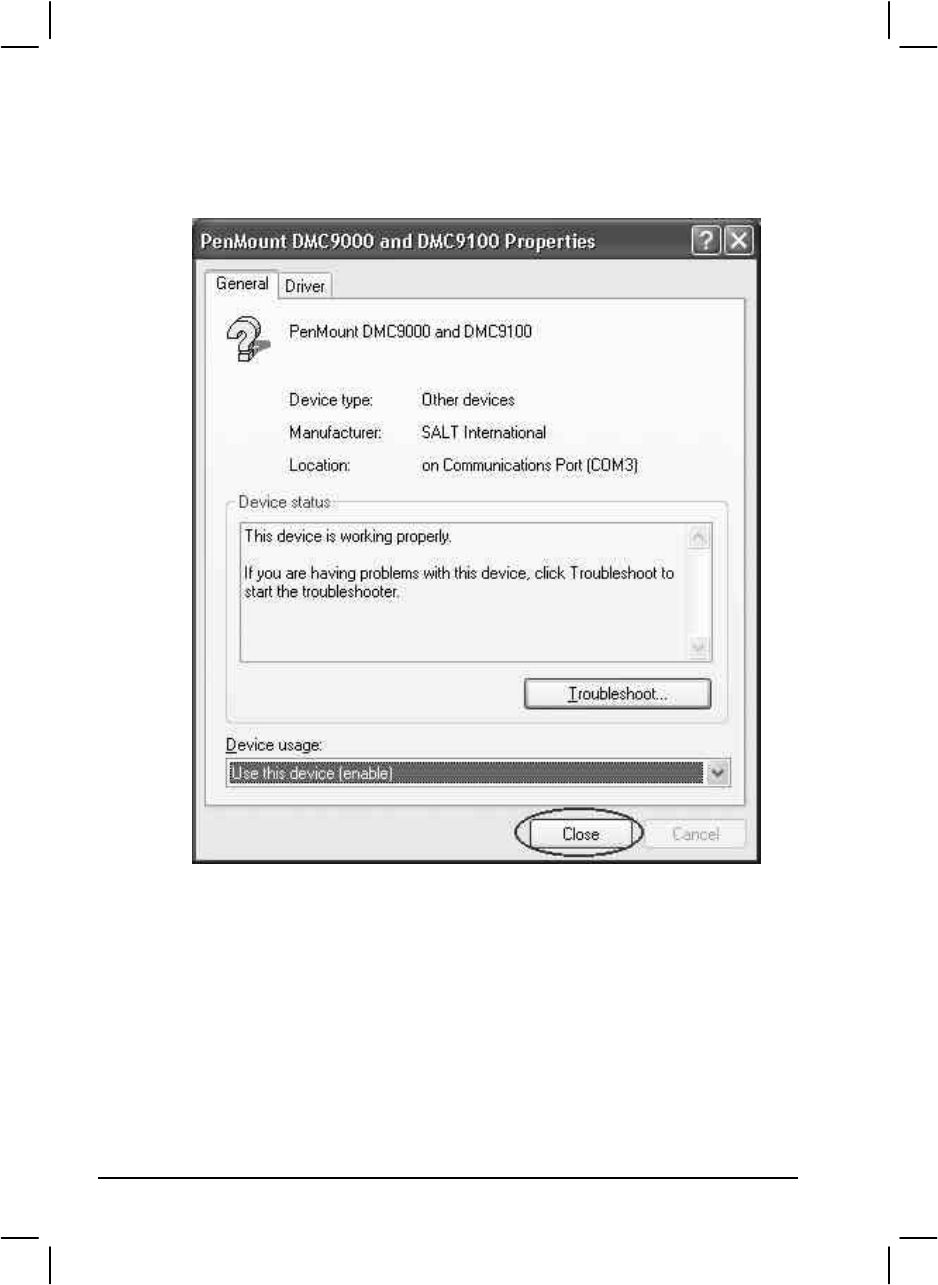
12. When the “PenMount DMC9000 and DMC9100 Properties” screen
appears, click on “Close” to exit the driver installation.
Touchscreen Utility
To install the touchscreen utility, perform the following:
1. Insert the driver CD into the drive.
Installing Software Drivers 6-17
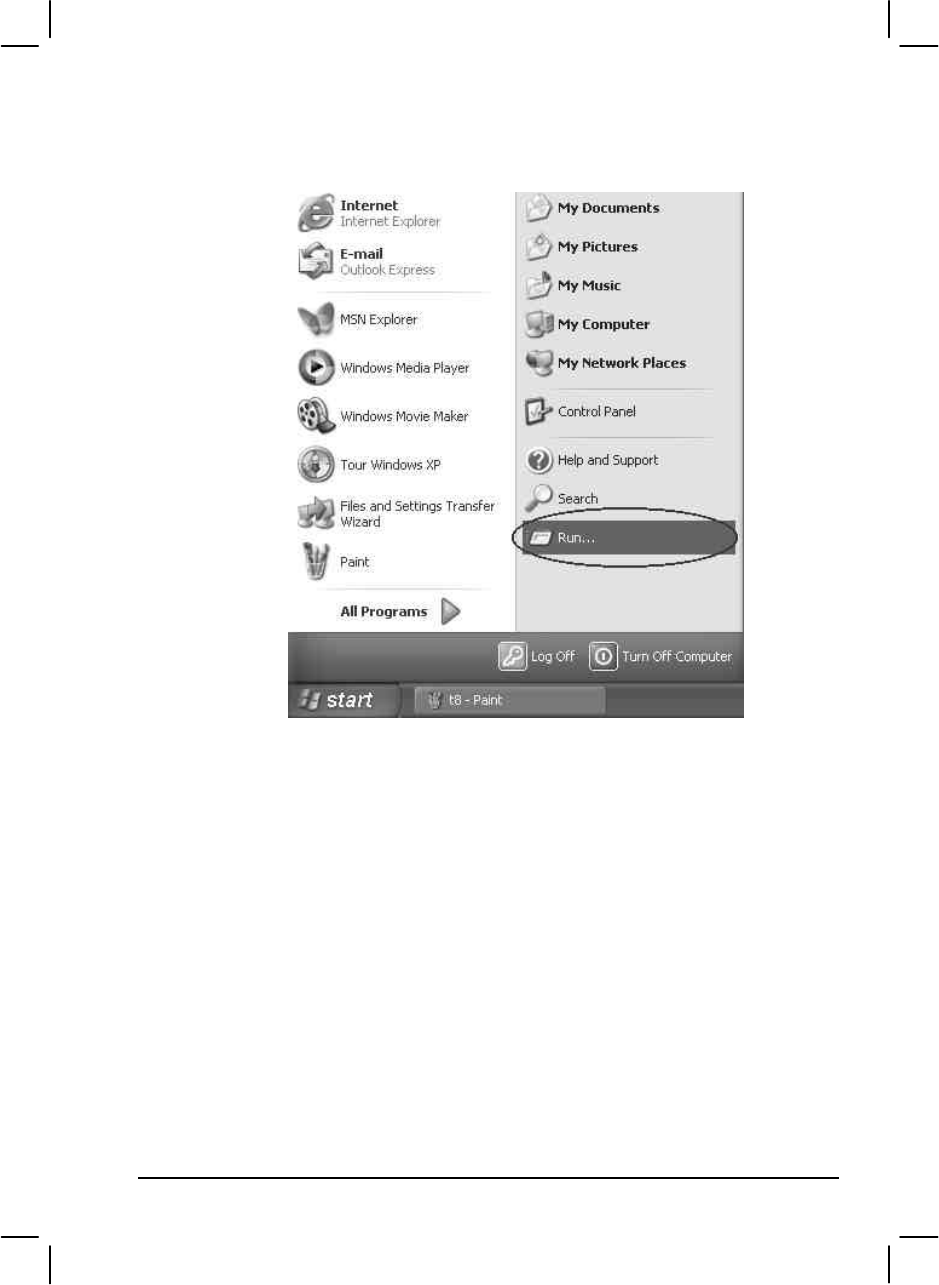
2. Click on “Start”, then “Run.”
3. Enter the following directory on the driver CD:
\TSRC\Setup.exe, then click on “OK.”
4. Select “Yes” to the question if this is the first time to run this setup.
5. When the “InstallShield Wizard” appears, click on “Next” to
continue.
6. Select “I accept the terms in the license agreement,” then click on
“Next.”
7. When the “Ready to Install the Program” screen appears, click on
“Next” to continue.
8. Reboot the system.

6-18 Installing Software Drivers

CHAPTER 7
Caring for the Computer
Taking good care of your computer will ensure a trouble-free operation
and reduce the risk of damage to your computer.
This chapter gives you guidelines covering these areas of maintenance:
l How to protect the computer
l What to note when using and storing the computer
l How to clean the computer
l What to note when using the battery pack
l What to note when traveling with the computer

7-2 Caring for the Computer
Protecting the Computer
To safeguard the integrity of your computer data as well as the computer
itself, you can protect the computer in several ways as described in this
section.
Using the Password
The power-on password protects your computer against unauthorized
use. If the password is set, the prompt requesting for the password
appears on the screen whenever the computer is turned on.
The password is set via the SCU program. See “Startup Menu” in Chapter
5 for instructions.
Using an Anti-Virus Strategy
New viruses are always being developed nowadays and they are attacking
computers even more easily with emails so commonly used worldwide.
The Security feature of the SCU program protects the boot sector of the
hard disk. To enable the function, see “Disks Menu” in Chapter 5 for
instructions.
You can also install a virus-detecting program to monitor potential
viruses that could damage your files.

Caring for the Computer 7-3
Taking Care of the Computer
Location Guidelines
l Use the computer where the temperature is between 0 °C (32 °F) and
50 °C (122 °F).
l Avoid placing the computer in a location subject to high humidity,
extreme temperatures, mechanical vibration, direct sunlight, or heavy
dust.
l Do not cover or block any ventilation openings on the computer. For
example, do not place the computer on a bed, sofa, rug, or other
similar surface. Otherwise, overheating may occur that results in
damage to the computer.
l Keep the computer at least 13 cm (5 inches) away from electrical
appliances that can generate a strong magnetic field such as a TV,
refrigerator, motor, or a large audio speaker.
l Do not move the computer abruptly from a cold to a warm place. A
temperature difference of more than 10 °C (18 °F) will cause
condensation inside the unit, which may damage the storage media.
l Do not place the computer on an unsteady surface.
General Guidelines
l Do not place heavy objects on top of the computer as this may
damage the display.
l The screen surface is easily scratched. Do not use paper towels to
clean the display. Avoid touching it with a ballpoint pen or pencil.
l To maximize the life of the backlight in the display, allow the
backlight to automatically turn off as a result of power management.
Avoid using a screen saver or other software that prevents the power
management from working.

7-4 Caring for the Computer
Cleaning Guidelines
l Never clean the computer with its power on.
l Use a soft cloth moistened with water or a non-alkaline detergent to
wipe the exterior of the computer.
l Gently wipe the display with a soft, lint-free cloth. Do not use alcohol
or detergent on the display.
l Dust on the IR/Bluetooth port can interfere with data transfer. Wipe
the port with a soft, dry cloth.
l Dust or grease on the touchscreen can affect its sensitivity. Clean the
touchscreen by using adhesive tape to remove the dust and grease on
its surface.
Battery Pack Guidelines
l Recharge the battery pack when it is nearly discharged. When
recharging, make sure the battery pack is fully charged. Doing so
may avoid harm to the battery pack.
l Operate the computer with the battery pack installed even when using
external power. This ensures that the battery is fully charged.
l If you will not be using the computer for a long period of time (more
than two weeks), remove the battery pack from the computer.
l If you remove the battery pack, make sure the battery terminals do
not contact any conductors such as metal objects or water. Otherwise,
the battery may become unusable as a result of a short circuit.
l If you need to store the battery pack, store it in a cool, dry place.
Never allow the temperature to exceed 70 °C (158 °F).
l Do not leave the battery pack in storage for more than 3 months
without recharging it.

Caring for the Computer 7-5
When Traveling
l Before traveling with your computer, make a backup of your hard
disk data into floppy disks or other storage devices. As an added
precaution, bring along an extra copy of your important data.
l Make sure the battery pack is fully charged.
l Make sure the computer is turned off.
l Do not leave objects that will press onto the display.
l Disconnect the AC adapter from the computer and take it with you.
Use the AC adapter as the power source and as a battery-charger.
l Hand-carry the computer. Do not check it in as luggage.
l Allow extra time for airport security. Many airports inspect
electronic devices carefully.
l If you need to leave the computer in the car, put it in the trunk of the
car to avoid exposing the computer to excessive heat.
l When going through airport security, it is recommended that you
send the computer and floppy disks through the X-ray machine (the
device you set your bags on). Avoid the magnetic detector (the device
you walk through) or the magnetic wand (the hand-held device used
by security personnel).
l If you plan to travel abroad with your computer, consult your dealer
for the appropriate AC power cord for use in your country of
destination.

7-6 Caring for the Computer

CHAPTER 8
Troubleshooting
Hardware, software, or a combination of both can cause computer
problems. When you encounter any problem, it might be a typical
problem that can easily be solved.
This chapter tells you what actions to take when solving common
computer problems. It is divided into three sections:
l Preliminary checklist
l Solving common problems
l Resetting the computer

8-2 Troubleshooting
Preliminary Checklist
Here are helpful hints to follow before you take further actions when you
encounter any problem:
l Try to isolate which part of the computer is causing the problem.
l Make sure that you turn on all peripheral devices before turning on
the computer.
l If an external device has a problem, make sure that the cable
connections are correct and secure.
l Make sure that the configuration information is properly set in the
SCU program.
l Make sure that all the device drivers are correctly installed.
l Make notes of your observations. Are there any messages on the
screen? Do any indicators light? Do you hear any beeps? Detailed
descriptions are useful to the service personnel when you need to
consult one for assistance.
If any problem persists after you follow the instructions in this chapter,
contact an authorized dealer for help.

Troubleshooting 8-3
Solving Common Problems
For easy reference, the problems are divided into these categories.
Problem Type Go to
Battery Problems P. 8-4
CD/DVD/Combo Drive Problems P. 8-4
Display Problems P. 8-5
Fingerprint Recognition Problems P. 8-7
Hardware Device Problems P. 8-7
Hard Disk Drive Problems P. 8-7
Infrared Problems P. 8-8
Keyboard, Mouse and Touchpad Problems P. 8-8
LAN Problems P. 8-9
WLAN Problems P. 8-9
Modem Problems P. 8-9
Power Management Problems (for Windows) P. 8-11
Printer Problems P. 8-12
Software Problems P. 8-12
Sound Problems P. 8-13
Startup Problems P. 8-14
Other Problems P. 8-15

8-4 Troubleshooting
Battery Problems
The battery does not charge (Battery Charge indicator does not light
amber).
l Make sure that the AC adapter is properly connected.
l Make sure that the battery is not too hot or cold. Allow time for the
battery pack to return to room temperature.
l Make sure that the battery pack is installed correctly.
l Make sure that the battery terminals are clean.
The operating time of a fully charged battery becomes shorter.
l If you often partially recharge and discharge, the battery might not be
charged to its full potential. Initialize the battery to solve the problem.
(See “Initializing the Battery Pack” in Chapter 3 for instructions.)
The battery operating time indicated by the battery meter does not
match the actual operating time.
l The actual operating time can be different from the estimated time,
depending on how you are using the computer. If the actual operating
time is much less than the estimated time, initialize the battery. (See
“Initializing the Battery Pack” in Chapter 3 for instructions.)
CD/DVD/Combo Drive Problems
The CD/DVD/Combo drive cannot read a disc.
l Make sure that the disc is correctly seated in the tray, with the label
facing up.
l Make sure that the disc is not dirty. Clean the disc with a disc cleaning
kit, available in most computer stores.
l Make sure that the CD/DVD/Combo drive driver is installed
correctly.
l Make sure that the computer supports the disc or the files contained.
Troubleshooting 8-5
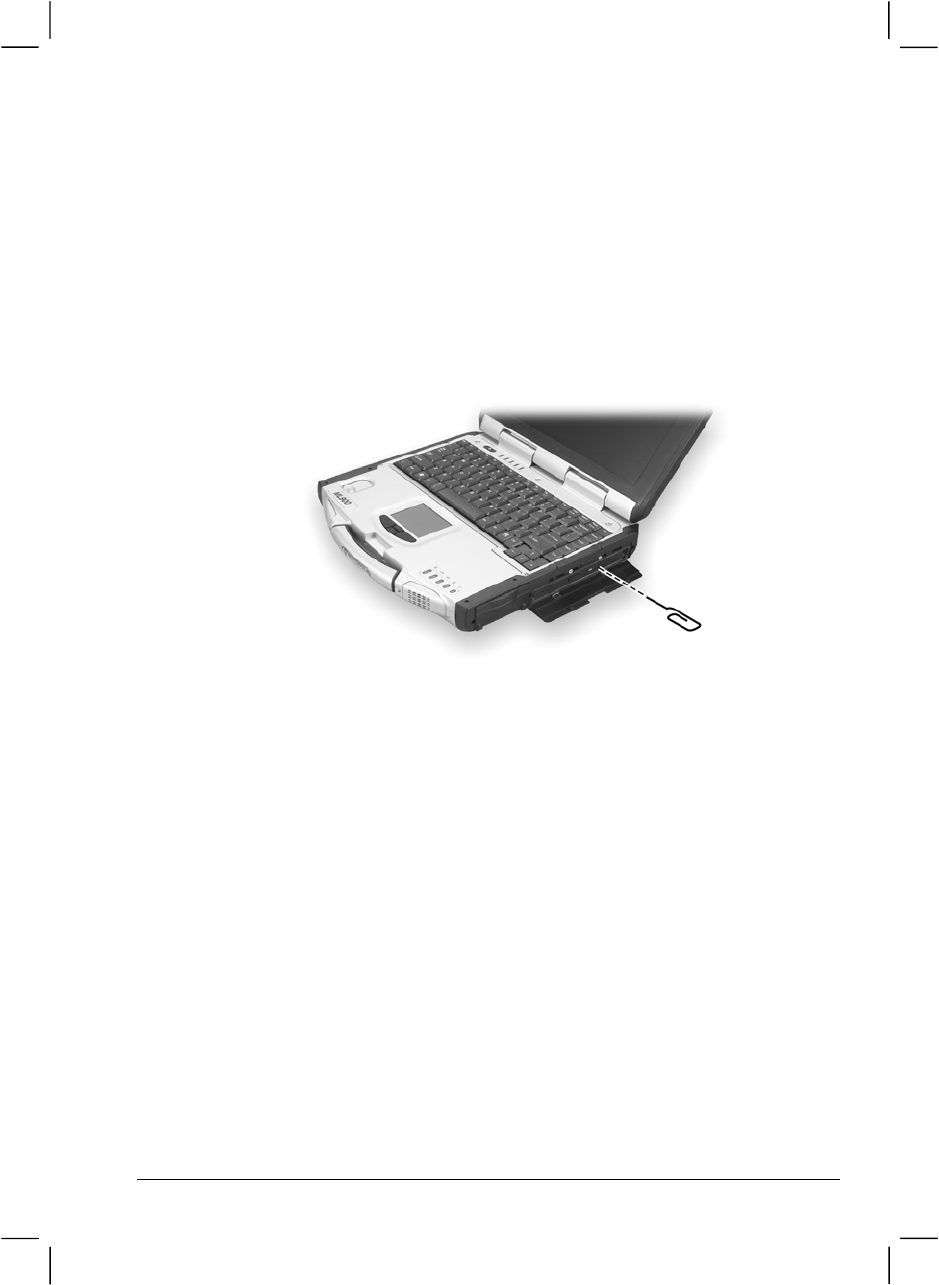
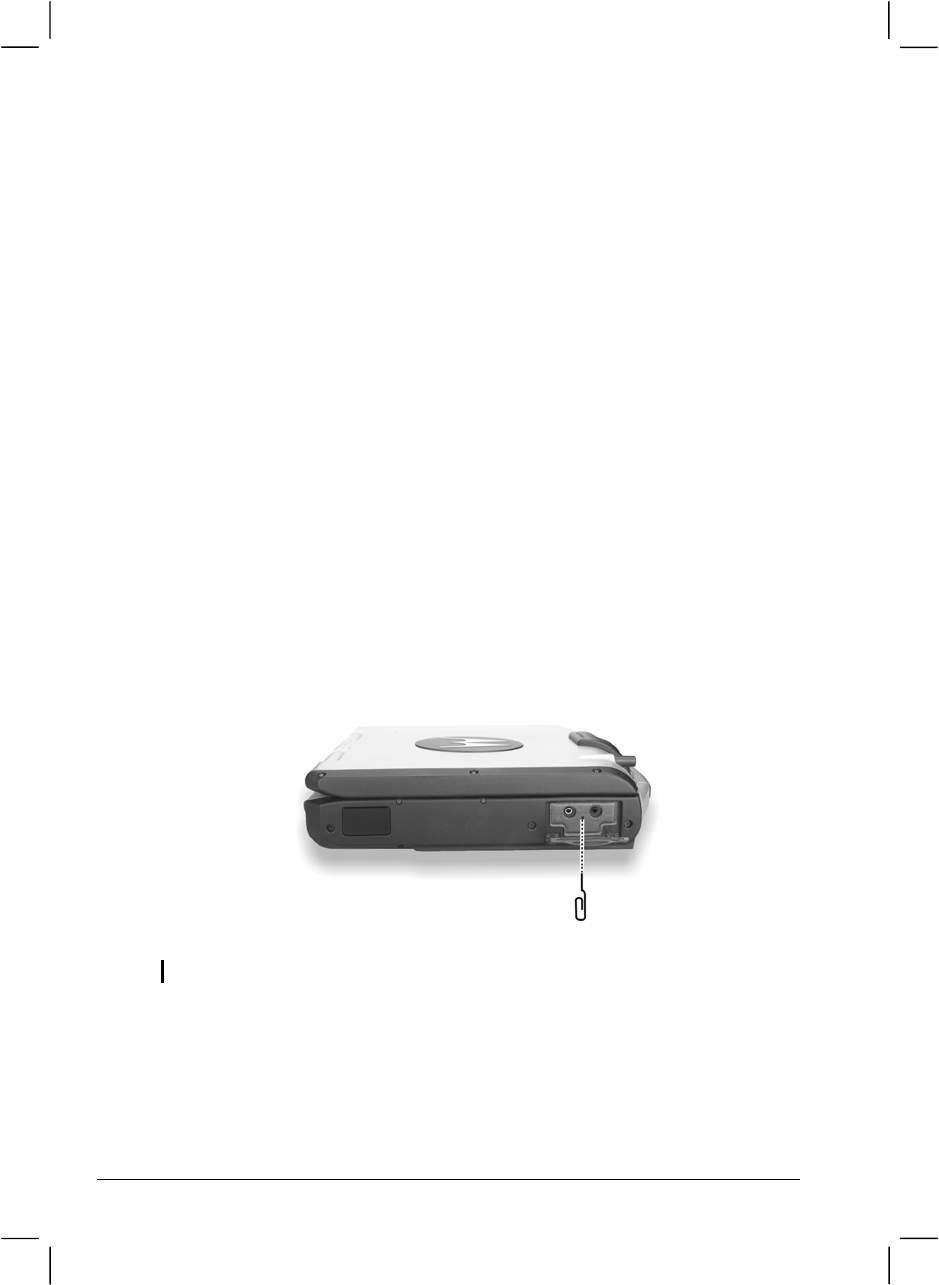
You cannot eject a disc.
z The disc is not properly seated in the drive. Manually release the disc
following the method described next:
1. Turn off the system.
2. Insert a small rod, such as a straightened paperclip, into the drive’s
manual eject hole and push firmly to release the tray.
3. Pull the tray out until fully extended, and then remove the disc.
Display Problems
Nothing appears on the screen.
z If the power-on indicator is not on, check the electrical outlet, the
plugs and power cords.
z If the power button does not respond to a light touch, press the button
firmly.
z If you are using battery power, make sure that it has a charge
remaining and that it is installed correctly.
z During operation, the screen may automatically turn off as a result of
power management. Press any key to see if the screen comes back.
z The brightness level might be too low. Increase brightness by pressing
Fn+F6.

8-6 Troubleshooting
l The display output might be set to an external device. To switch the
display back to the LCD, press Fn+F9, or change the display through
the settings in Display Properties.
l Reset the computer by pressing the keyboard BIOS reset switch on
the left side of the computer or by pressing Ctrl+Alt+Del keys.
l Try turning the computer off, wait for a few seconds, then turn it back
on.
The characters on the screen are dim.
l Adjust the brightness and/or contrast.
Bad dots appear on the display at all times.
l A small number of missing, discolored, or bright dots on the screen
are an intrinsic characteristic of TFT LCD technology. It is not
regarded as a LCD defect. The Inspection Standard generally agreed
in the LCD industry allows a maximum of 8 bad dots on a unit.
Resolution cannot be adjusted to desired setting.
l Make sure that the video driver is installed correctly.
The external monitor displays nothing.
l Make sure that the monitor is turned on.
l Make sure that the monitor’s signal cable is properly connected.
l Switch the display to the monitor by pressing Fn+F9, or change the
display through the settings in Display Properties.
Simultaneous display/multi-display does not work.
l Make sure that you turn on the external monitor before turning on the
computer.
l Press Fn+F9 to toggle through the display options or change the
settings in Display Properties in Windows.

Troubleshooting 8-7
Fingerprint Recognition Problems
The fingerprint recognition application does not work.
l Make sure that the necessary driver is correctly installed.
l Make sure that your finger is properly placed on the surface of the
sensor.
Hardware Device Problems
The computer does not recognize a newly installed device.
l The device may not be correctly configured in the SCU program. Run
the SCU program to identify the new type.
l Make sure if any device driver needs to be installed. (Refer to the
documentation that came with the device.)
l Make sure if the device needs any jumper or switch settings. (Refer to
the documentation that came with the device.)
l Check the cables or power cords for correct connections.
l For an external device that has its own power switch, make sure that
the power is turned on.
Hard Disk Drive Problems
The hard disk drive error message appears on the screen.
l Insert a bootable diskette and check the integrity of your hard drive.
l The hard disk drive has defects. Ask your dealer for help.
The hard disk drive operations seem slow.
l The data files stored on the hard disk drive may be fragmented. Use a
tool such as Window’s Disk Defragmenter to defragment the files.

8-8 Troubleshooting
The hard disk drive in-use indicator glows without blinking.
l The data files stored on the hard disk drive may be fragmented. Use a
tool such as Window’s Disk Defragmenter to defragment the files.
Infrared Problems
The IR port does not work.
l Make sure that the IR ports of the two device face each other within a
±15-degrees angle and 1 meter (3 feet) distance and there are no
obstructions in between.
l Make sure that the device connected is using an equivalent speed.
l Make sure that the IrDA Fast Infrared Port is set to HP HSDL-
2300/3600.
l Make sure that the IR port is set correctly in the SCU program.
l If you are printing to an infrared printer, make sure that the
appropriate driver is installed.
l If you are using any file transfer functions, make sure that both the
computer and the IR device have the appropriate software running.
l Make sure that there is no device radiating infrared rays, such as
remote-controlled devices or wireless headphones, near the computer
or device.
l Make sure that no direct sunlight or fluorescent lamps are near the
computer or device.
l Make sure that the IR ports are clean.
Keyboard, Mouse and Touchpad Problems
The keyboard does not respond.
l Try connecting an external keyboard. If it works, contact an
authorized dealer, as the internal keyboard cable might be loose.

Troubleshooting 8-9
The numeric keypad is disabled.
l Make sure that the Num Lk is switched on. (Check if the Num Lock
Indicator glows or not.)
The external keyboard does not work.
l Make sure that the keyboard cable is properly connected.
The USB mouse does not work.
l Make sure that the mouse cable is properly connected.
The touchpad does not work, or the pointer is difficult to control
with the touchpad.
l Make sure that the touchpad is clean.
LAN Problems
I cannot access the network.
l Make sure that the LAN driver is correctly installed.
l Make sure that the LAN cable is properly connected to the RJ-45
connector and the network hub.
l Make sure that the network configuration is appropriate.
l Make sure that the user name or password is correct.
WLAN Problems
I cannot use the WLAN feature.
l Make sure that the Mini PCI WLAN card is correctly installed.
l Make sure that the necessary driver(s) is correctly installed.
l Make sure that the WLAN feature is turned on.

8-10 Troubleshooting
Transmission quality is poor.
l Your computer may be in an out-of-range situation. Move your
computer closer to the Access Point or another WLAN device it is
associated with.
l Check if there is high interference around the environment and solve
the problem as described next.
Radio interference exists.
l Move your computer away from the device causing the radio
interference such as microwave oven and large metal objects.
l Plug your computer into an outlet on a different branch circuit from
that used by the affecting device.
l Consult your dealer or an experienced radio technician for help.
I cannot connect to another WLAN device.
l Make sure that the WLAN feature is turned on.
l Make sure that the SSID setting is the same for every WLAN device
in the network.
l Your computer is not recognizing changes. Restart the computer.
l Make sure that the IP address or subnet mask setting is correct.
I cannot communicate with the computer in the network when
Infrastructure mode is configured.
l Make sure that the Access Point your computer is associated with is
powered on and all the LEDs are working properly.
l If the operating radio channel is in poor quality, change the Access
Point and all the wireless station(s) within the BSSID to another radio
channel.
l Your computer may be in an out-of-range situation. Move your
computer closer to the Access Point it is associated with.
l Make sure that your computer is configured with the same security
option (encryption) to the Access Point.

Troubleshooting 8-11
l Use the Web Manager/Telnet of the Access Point to check whether it
is connected to the network.
l Reconfigure and reset the Access Point.
I cannot access the network.
l Make sure that the necessary driver(s) is correctly installed.
l Make sure that the network configuration is appropriate.
l Make sure that the user name or password is correct.
l You have moved out of range of the network.
l Turn off power management.
Modem Problems
The modem does not work.
l Make sure that the modem driver is correctly installed.
l Make sure that the COM port in the communication software is
correctly set.
l Turn off power management.
Power Management Problems (for Windows)
The computer does not enter Standby or Hibernation mode
automatically.
l If you have a connection to another computer, the computer does not
enter Standby or Hibernation mode if the connection is actively in
use.
l Make sure that the Standby or Hibernation time-out is enabled.
The computer does not enter Standby or Hibernation mode
immediately.
l If the computer is performing an operation, it normally waits for the
operation to finish.

8-12 Troubleshooting
The computer does not resume from Standby or Hibernation mode.
l The computer automatically enters Standby or Hibernation mode
when the battery pack is empty. Do any one of the following:
− Connect the AC adapter to the computer.
− Replace the empty battery pack with a fully charged one.
The computer does not enter Hibernation mode with the Fn+F10 hot
keys.
l Make sure that the Hibernation function is specified for the sleep
button.
Printer Problems
The printer does not work.
l Make sure that the printer is turned on (if it comes with an
independent power source) and is online (ready to use).
l Make sure that the printer’s signal cable is properly connected.
l Make sure that the printer driver is correctly installed.
l Make sure that you have assigned the printer port correctly in your
operating system or application program.
l Make sure that the printer port is enabled in the SCU program.
The printer prints garbled information.
l Make sure that the printer driver is correctly installed.
l Make sure that the printer cable is properly connected.
Software Problems
An application program does not work correctly.
l Make sure that the software is correctly installed.
l If an error message appears on the screen, consult the software
program’s documentation for further information.

Troubleshooting 8-13
l If you are sure the operation has stop, reset the computer. (See
“Resetting the Computer” later in this chapter.)
Sound Problems
No sound is produced.
l Make sure that the volume control is not set too low.
l Make sure that the audio driver is correctly installed.
l Make sure that the computer is not in Standby mode.
l If using an external speaker, make sure that the speaker is properly
connected.
Distorted sound is produced.
l Make sure that the volume control is not set too high or too low. In
most cases, a high setting can cause the audio electronics to distort the
sound.
The sound system does not record.
l Adjust the playback or recording sound levels.
The external microphone or audio device does not work.
l Make sure that the microphone is connected to the proper connector
on the computer.
l Make sure that your computer is equipped with the driver needed.
l Click the speaker symbol on the taskbar and check the Windows
volume control.
l Check the volume control of your computer.

8-14 Troubleshooting
Startup Problems
When you turn on the computer, it does not respond and the Power
Indicator does not light green.
l If you are using an external AC power, make sure that the AC adapter
is correctly and securely connected. If so, make sure that the electrical
outlet works properly.
l If you are using the battery power, make sure that the battery is not
discharged.
When you turn on the computer, it stops after POST.
l Restart your computer.
The message “Operating system not found” appears on the screen
after you turn on the computer.
l Make sure that there is no floppy disk in the floppy disk drive. If there
is, remove it and restart the system.
l If this message appears when you are booting from the hard disk,
insert a bootable disk in the floppy disk drive and check the condition
of the hard disk.
l Make sure that the hard disk is set correctly in the SCU program.
The message “Invalid system disk” or “Disk error” appears on the
screen after you turn on the computer.
l If you are deliberately trying to boot from a floppy disk, replace the
disk with a bootable one and press any key to continue booting.
l If you are booting from the hard disk, make sure that there is no
floppy disk in the floppy disk drive. If there is, remove it and restart
the system.
l If this message appears when you are booting from the hard disk,
insert a bootable disk in the floppy disk drive and check the condition
of the hard disk.
l Make sure that the hard disk is set correctly in the SCU program.

Troubleshooting 8-15
Other Problems
The date/time is incorrect.
l Correct the date and time via the operating system or SCU program.
l After you have performed everything as described above and still
have the incorrect date and time every time you turn on the computer,
the RTC (Real-Time Clock) battery is at the end of its life. Call an
authorized dealer to replace the RTC battery.
8-16 Troubleshooting
Resetting the Computer
You may have to reset (reboot) your computer on some occasions when
an error occurs and the program you are using hangs up.
If the system operation seems to hang up, first wait. It is possible that the
system is processing data. Periodically check the hard disk drive in-use
indicator, if it flashes irregularly, the program may be accessing data and
preventing you from using the keyboard. If you are sure the operation has
stopped and you cannot use the “restart” function of the operating system,
reset the computer.
Reset the computer by any one of these methods:
z Press Ctrl+Alt+Del.
z If the above action does not work, turn off the system. Wait for at least
five seconds and turn it on again.
z If the above does not work, insert a small rod, such as a straightened
paper clip, into the keyboard BIOS reset switch on the left side of the
computer and press firmly. The system will shut down. Wait for at
least five seconds and turn it on again.
CAUTION: Resetting will cause any unsaved data to be lost.
APPENDIX A
Specifications
NOTE: Specifications are subject to change without any prior notices.
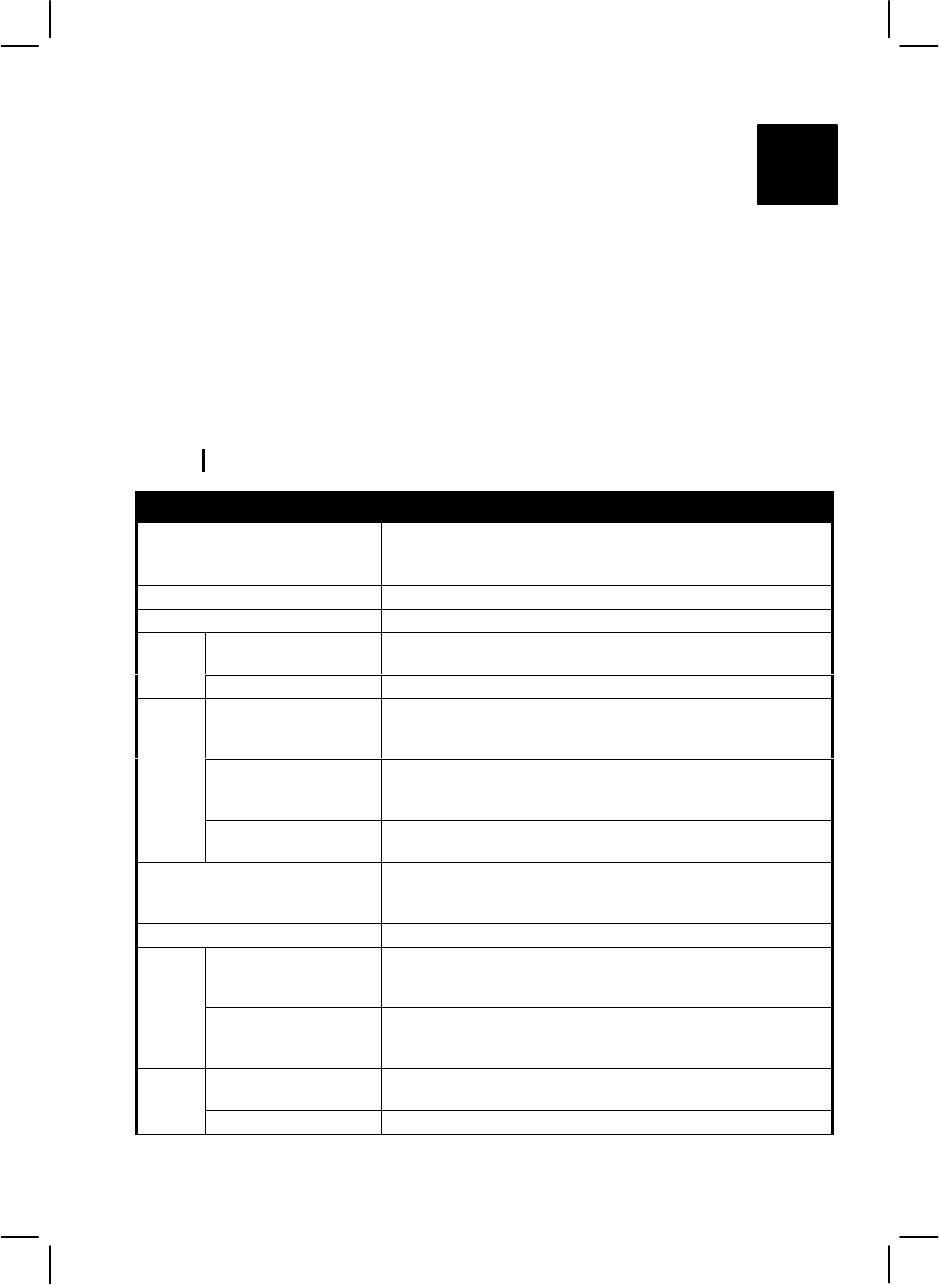
Parts Specifications
CPU Intel Mobile Pentium 4 Processor-M series microprocessor,
µ-FCPGA package, 1.7 GHz; Front Side Bus (FSB) 400 MHz with
SpeedStep function
Cache Memory L2 512 KB on-die
ROM BIOS 512 KB Flash EEPROM, PC2001-compliant
System Two 200-pin PC2100 DDR SO-DIMM sockets,
maximum 1 GB (standard 256 MB)
RAM
Video 64 MB (integrated DDR memory)
Panel 12.1/13.3-inch TFT XGA LCD, resolution up to 1024×768,
Touchscreen (option),
Sunlight Readable display (option)
Video controller ATI M9-CSP64, 64 MB integrated into DDR memory,
supports DirectX® 8.1 and OpenGL® 1.3, AGP 4X,
dual view function, LCD/CRT simultaneous display capability
Display
Video port DVI-I port (TMDS/RGB), AV input (Conexant 878A PCI; BNC-
type)
Keyboard Waterproof with membrane cover, standard keys, numeric keypad,
12 function keys, and Windows keys,
rubber keyboard and backlight feature (option)
Pointing device Four buttons touchpad with Microsoft Windows mouse function
Hard disk drive 2.5-inch (9.5 mm height), IDE, Ultra DMA support, damper
protection,
built-in system heater for low temperature function (option)
Storage
device
CD/DVD drive Slim-type CD drive
DVD drive
Combo drive
Audio controller Realtek ALC202, AC97 codec Rev.2.2 support, two built-in 2-watts
stereo speakers, Microsoft Windows Sound compatibility
Audio
Audio port Two audio ports for Mic-in / Line-out (supports S/P-DIF)
A-2 Specifications
Parts Specifications
On left side IR port, Bluetooth port (option), Mic-in, Line-out
On right side IEEE 1394 port, two USB ports, RJ-45 port
On rear side DVI-I port, serial port, docking port for Port Replicator / car mount,
two USB ports, AV input port, AC-in
I/O ports
On keyboard panel Fingerprint recognition system
LAN 10/100Base-T
Wireless LAN Mini PCI (option)
Wireless Modem GSM/GPRS, DataTAC, CDMA (option)
GPS Easily removable M-Loc MPM (Trimble solution) – option
AC adapter Input: 100∼240 V AC, 50∼60 Hz auto-switching
Output: 19 V DC / 120 W
Power
Battery Smart Li-ion battery, 11.1 V / 6000 mAH, 9 cells
Dimension (W×D×H) 11.8×9.5×2.3 inch (300×241×58 mm)
Weight 9.9 lbs (4.5 kg)
Temperature Operating: 0 °C (32 °F) to 50 °C (122 °F)
Storage: –40 °C (–40 °F) to 70 °C (158 °F)
Environment
Humidity Operating: 5 % to 95 % RH, non-condensing

APPENDIX B
Fingerprint Recognition System
Your system features a fingerprint recognition system designed for
computer security. It provides a high level of user convenience and gives
you a set of powerful tools for securing your computer and protecting
your private data. The system can:
• display fingerprint images derived from the sensor IC
• enroll new users
• extract fingerprint templates from raw images, and store them in a
local database
• match live-scan fingerprints against the local database
B-2 Fingerprint Recognition System
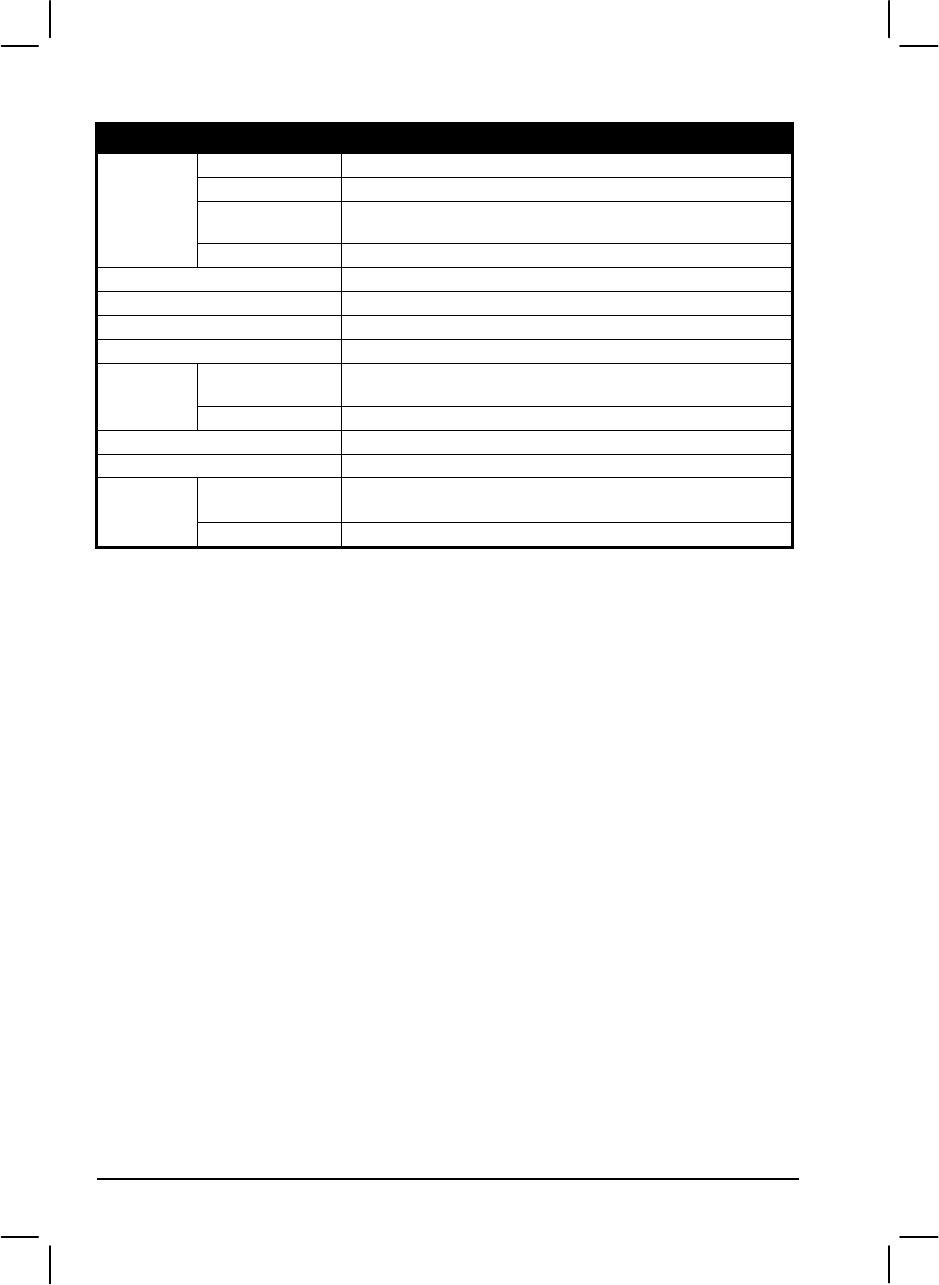
Finger Placement
When placing a finger to be enrolled or identified, slide the cover to
expose the sensor matrix surface, then use a light, but firm and steady
pressure.
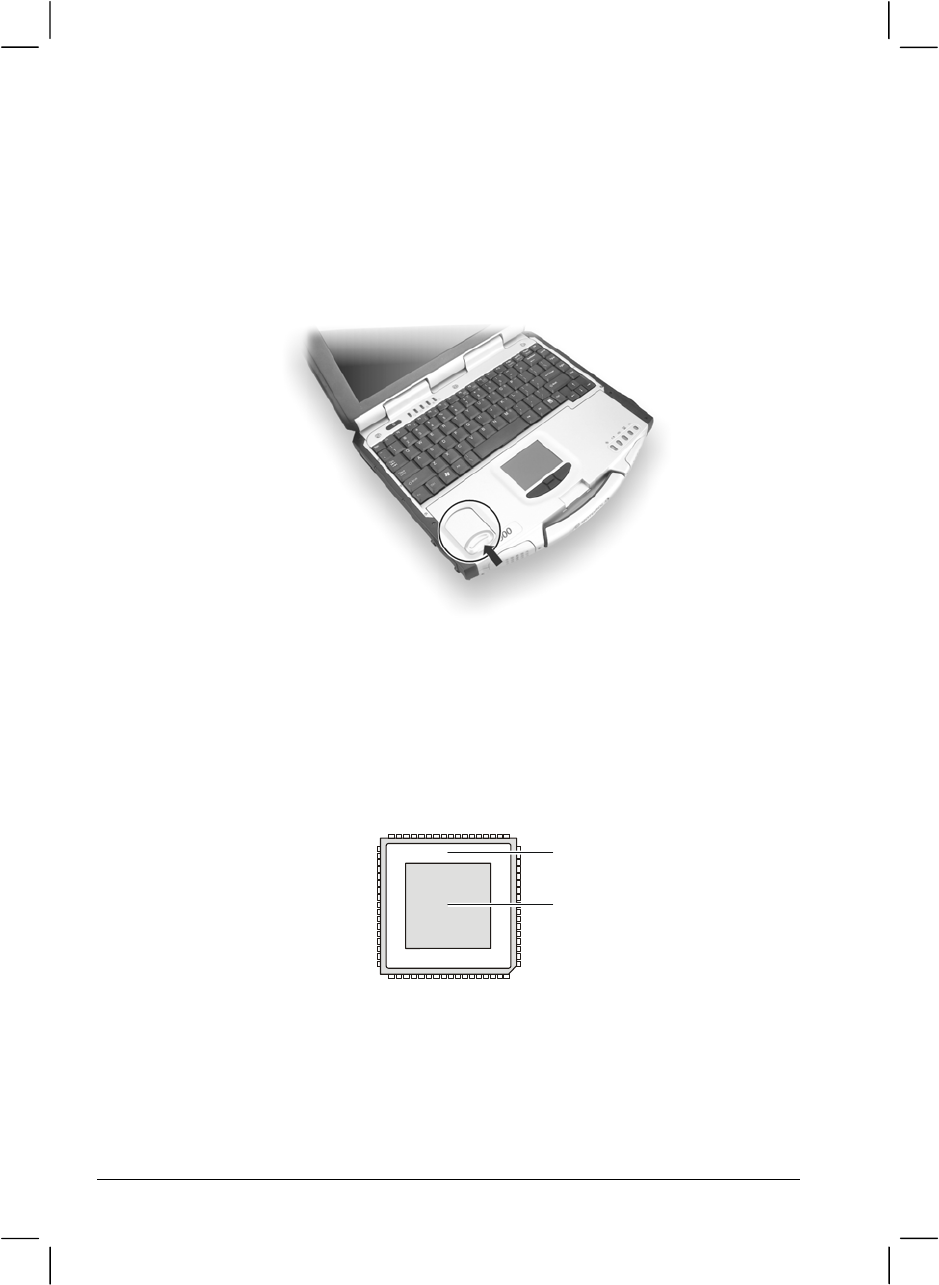
Avoid moving your finger during the scan, and be sure that you are
making contact with the “sensor matrix” and with the surrounding drive
ring (the light-colored surface surrounding the matrix). The system works
best when it has a “core” image (the center of your fingerprint, which is
approximately opposite the line of the cuticle of your fingernail).
Drive ring
Sensor
matrix

Fingerprint Recognition System B-3
Using the Fingerprint Recognition System
Utility
NOTE: To take advantage of the fingerprint recognition system, the driver and utility
supplied with your computer must be installed (see chapter 6 for details).
Double-click on the icon located on your Windows’ system tray. The
main menu appears.
The following program options are available:
• Enroll – allows the sensor IC to acquire fingerprint images, process it
into the essential template data, and then insert it into the database
together with an associated User ID and other optional information.
• Identify – is used to compare the finger presented to the sensor
against all of the other fingerprints currently entered in the database
(known as one-to-many search).
• Validate ID – is used to perform a one-to-one verification to
ascertain if the person whose finger is placed on the sensor is in fact
the same as the person enrolled under a particular User ID.
• Data Capture – a viewing facility that is used to display (or capture)
a continuous series of real-time images of a fingerprint.
• Database – is used to review, delete, and otherwise manage the
contents of the database.
NOTE: For an online Help information on using the application, click on “Help” located
on the menu bar, then “Aware User’s Guide.”
A Readme.txt file is also located on your driver CD for late-breaking news, known
bugs, work-arounds, and other additions, deletions, or discrepancies in the application
program.