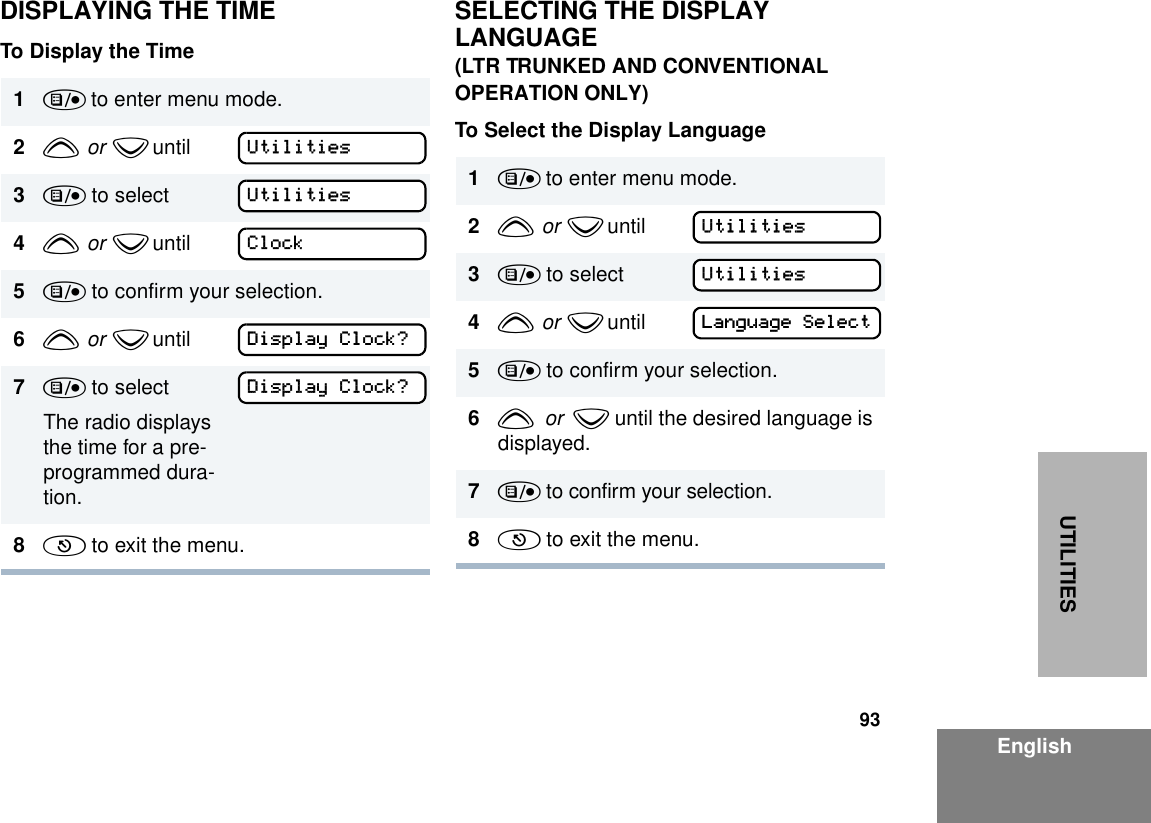
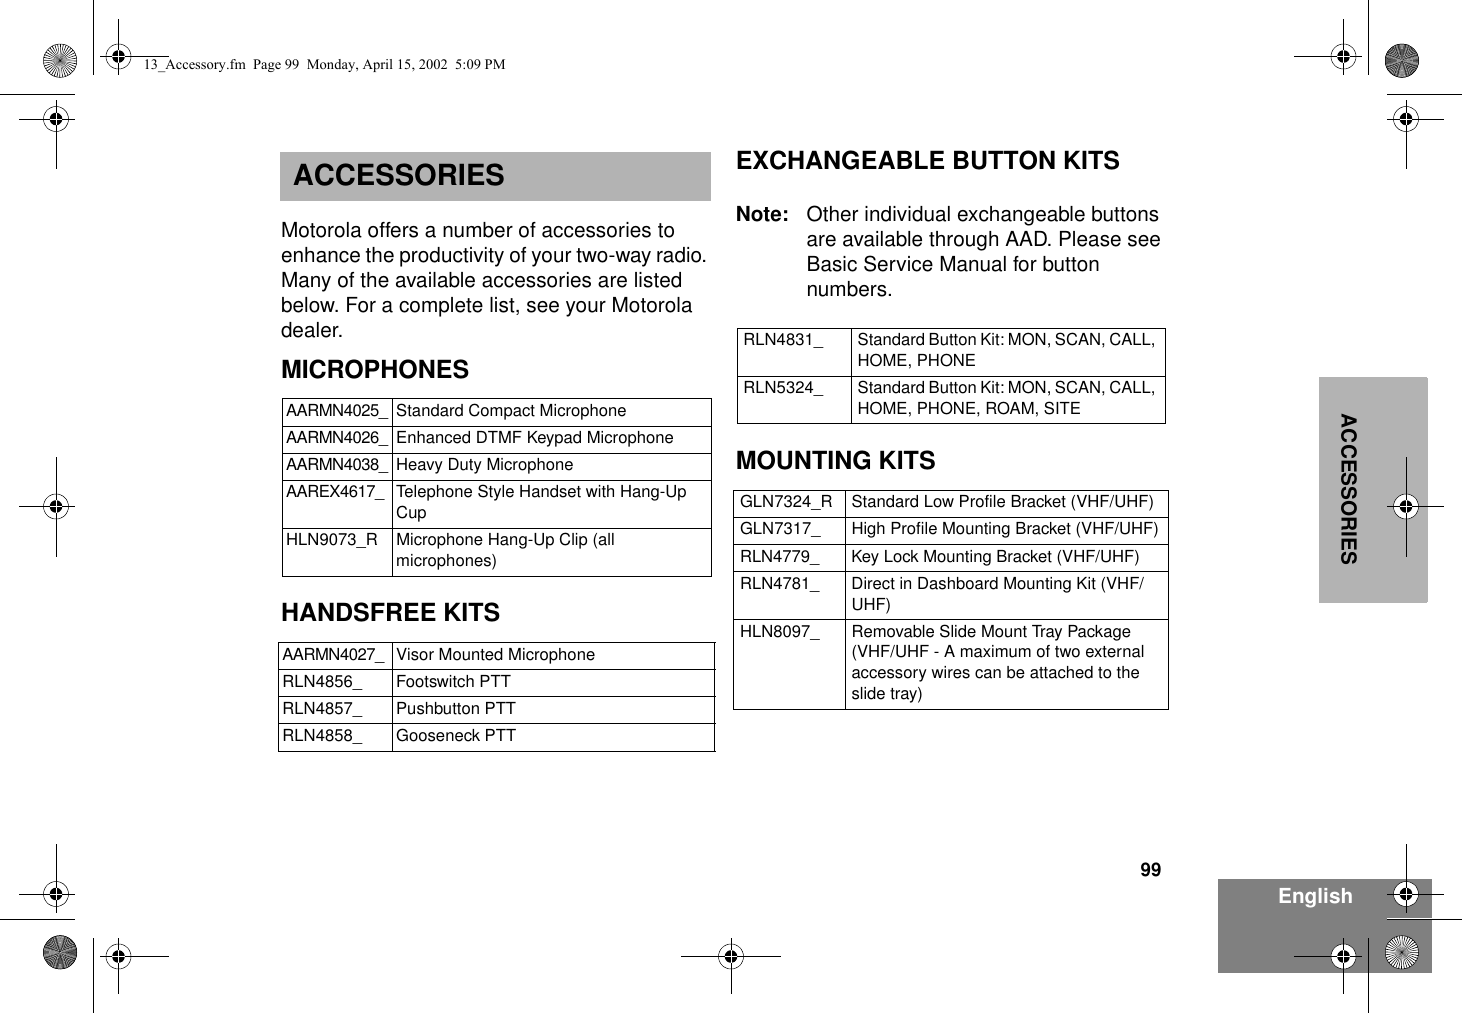
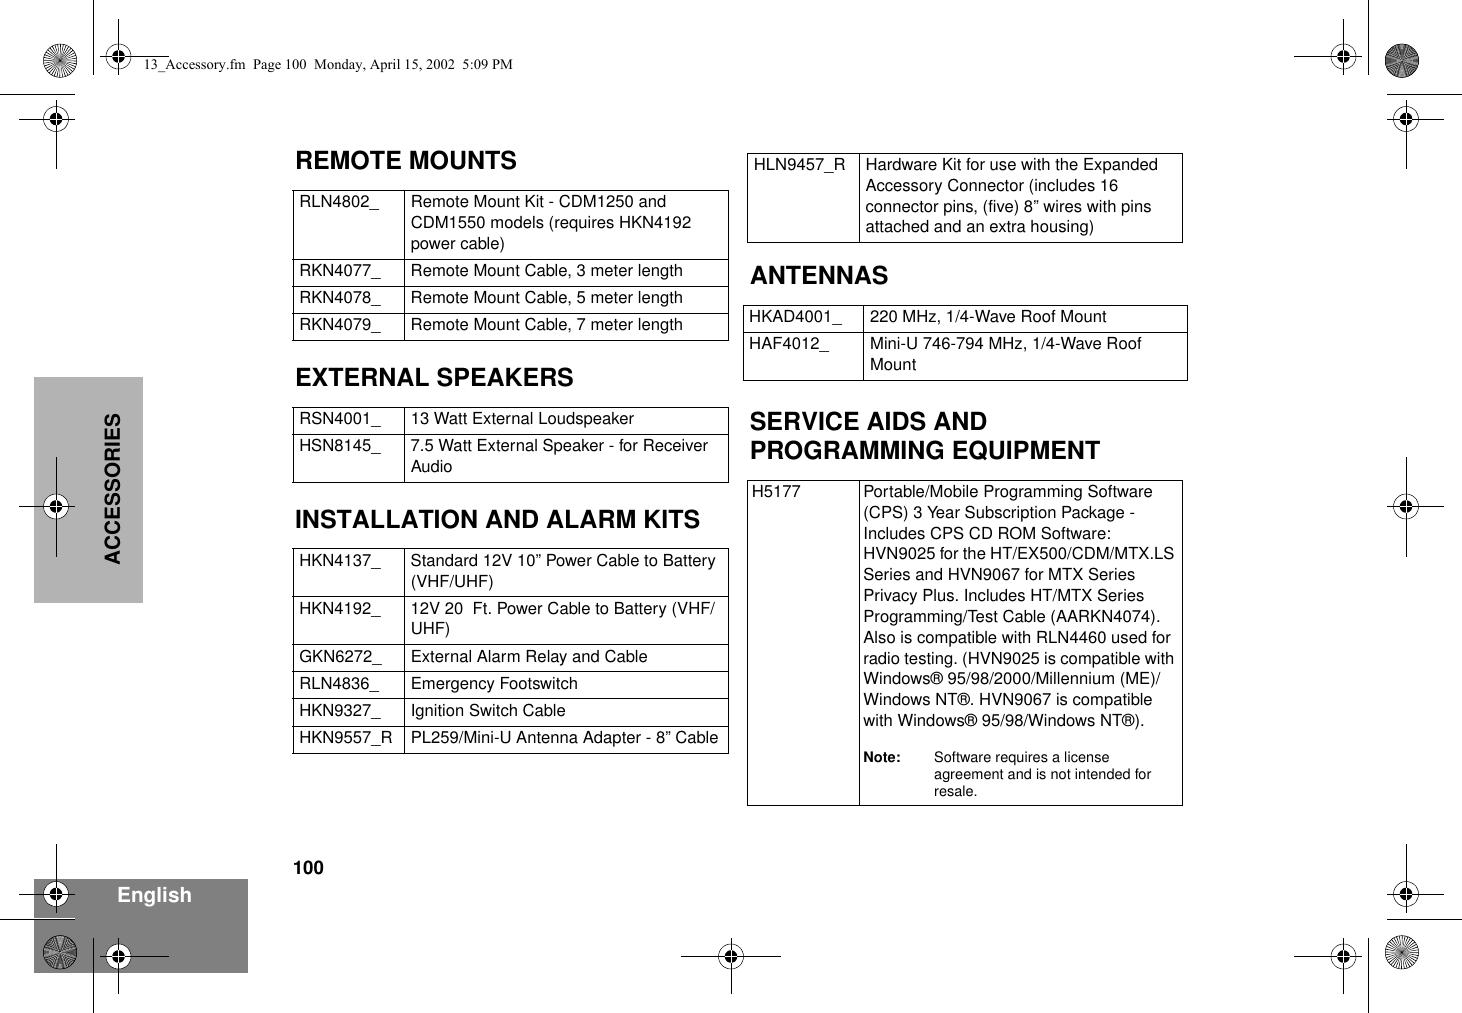
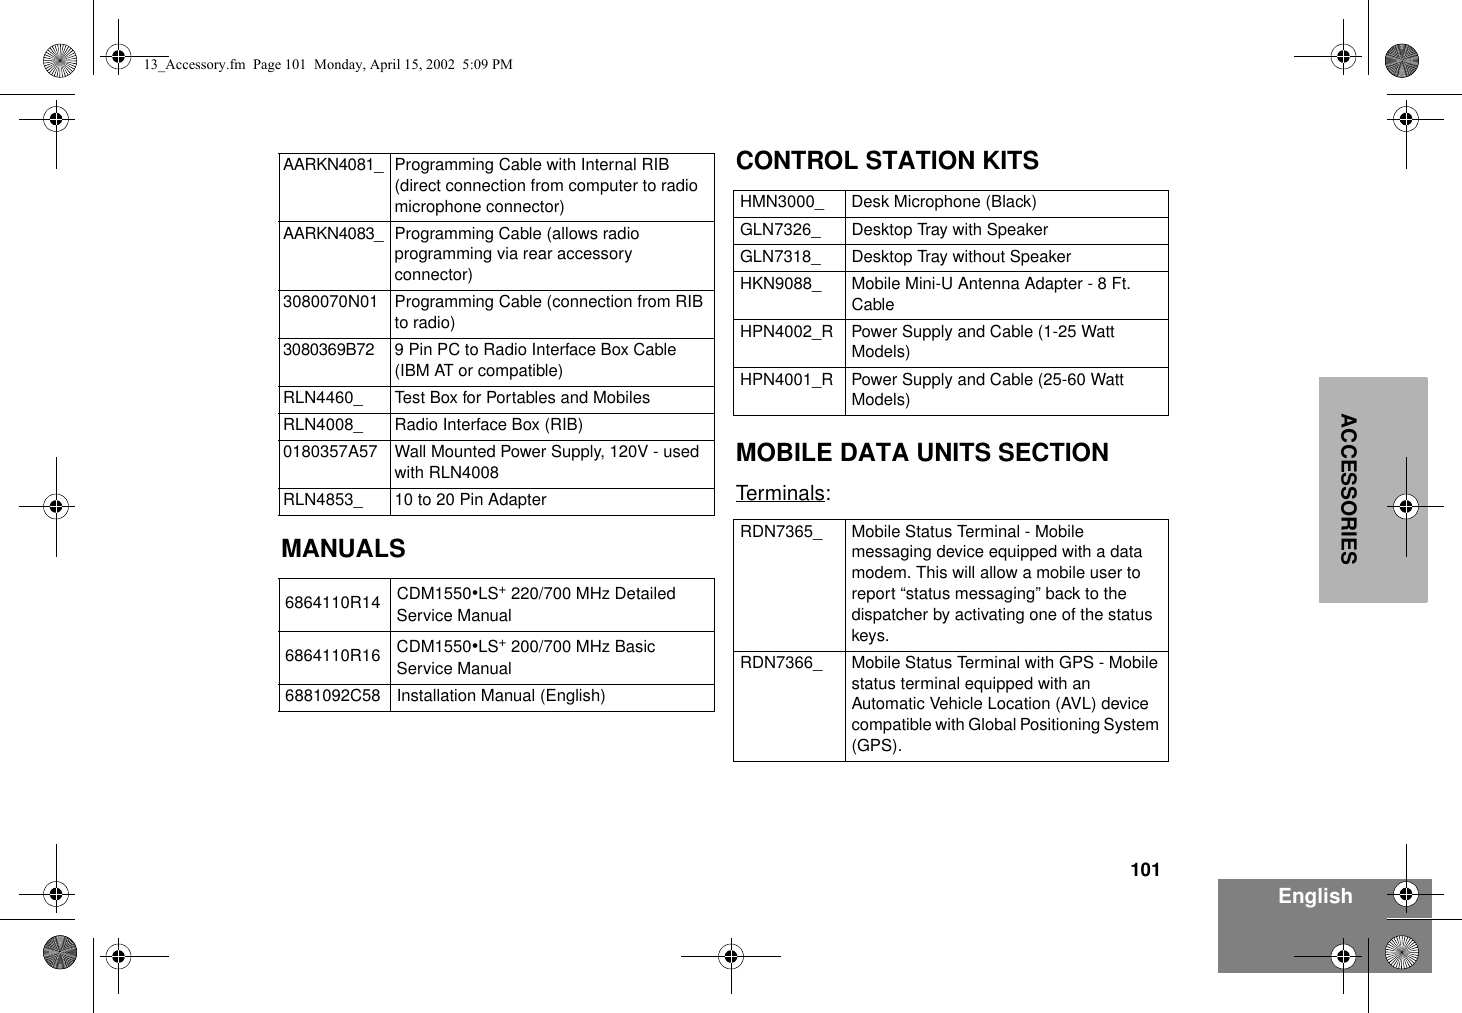
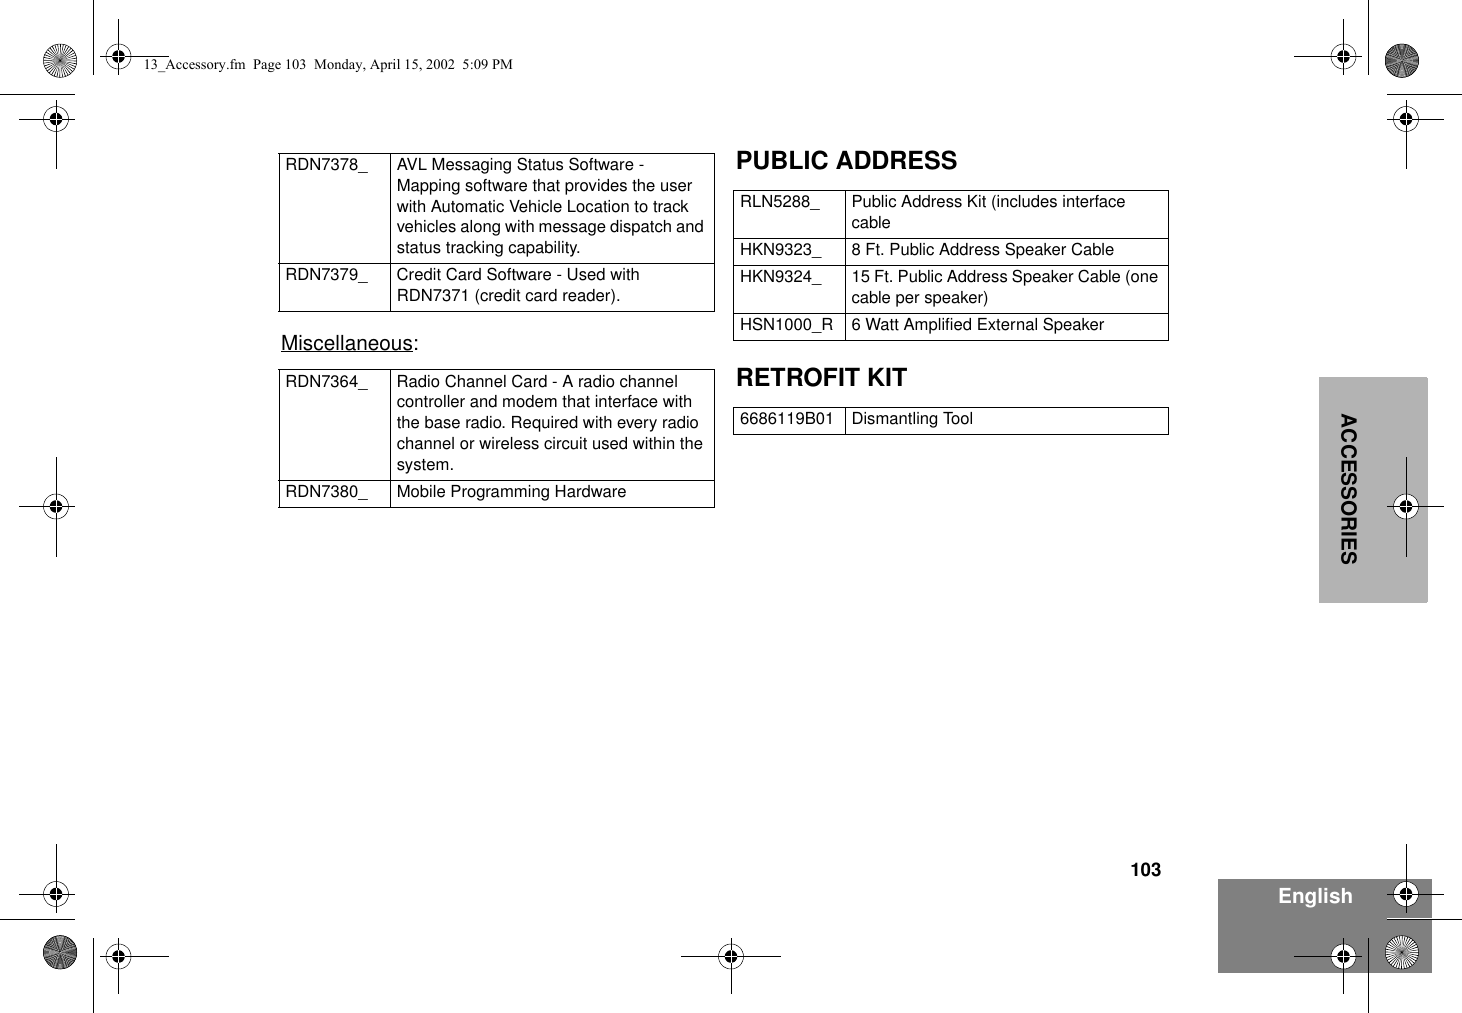
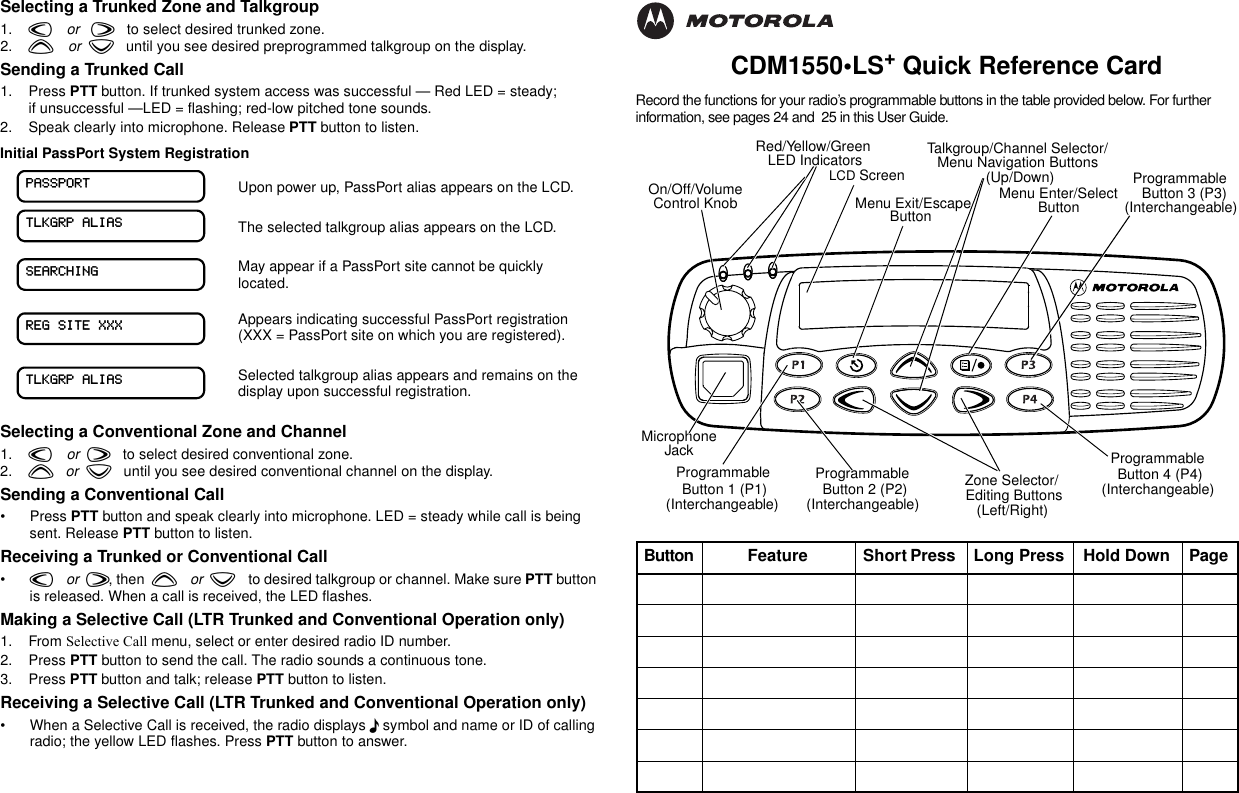
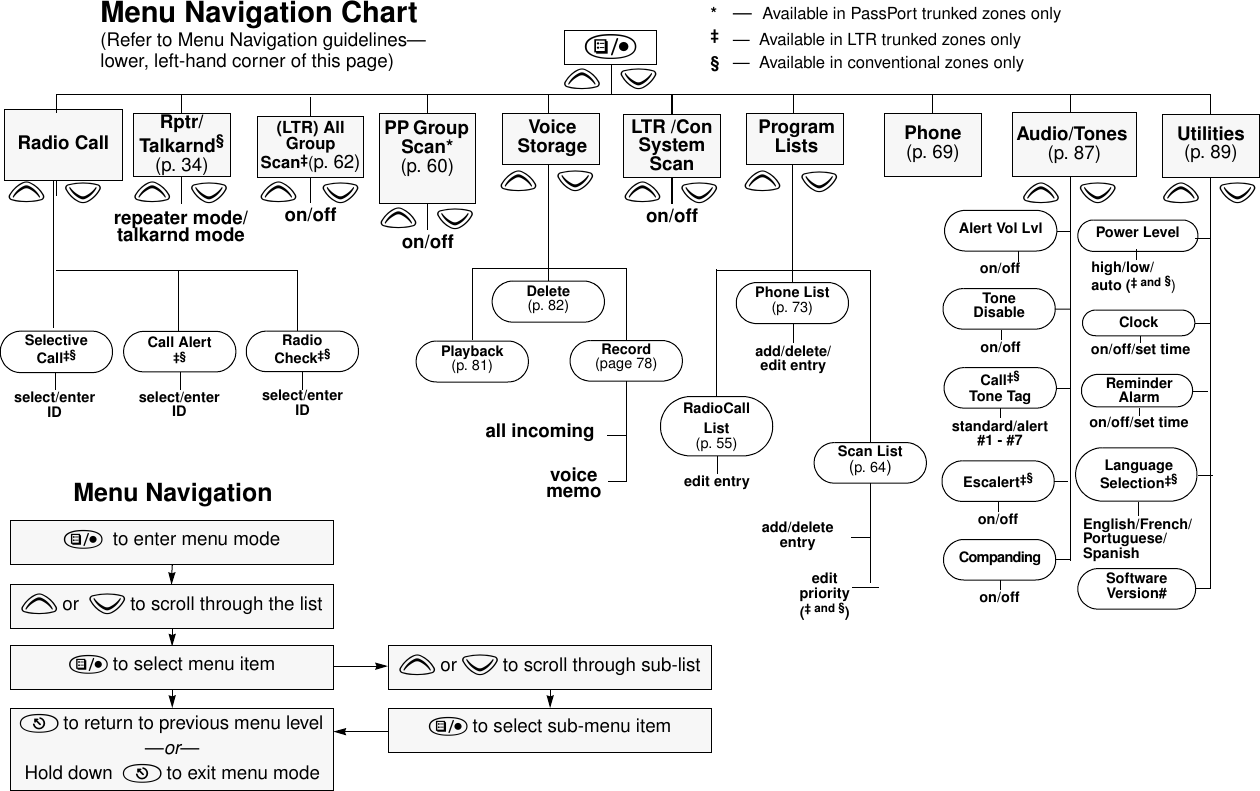
Motorola Solutions 99FT3081 CDM1550LS+ 220MHz Mobile Radio User Manual 6864110R13 O cvr
Motorola Solutions, Inc. CDM1550LS+ 220MHz Mobile Radio 6864110R13 O cvr
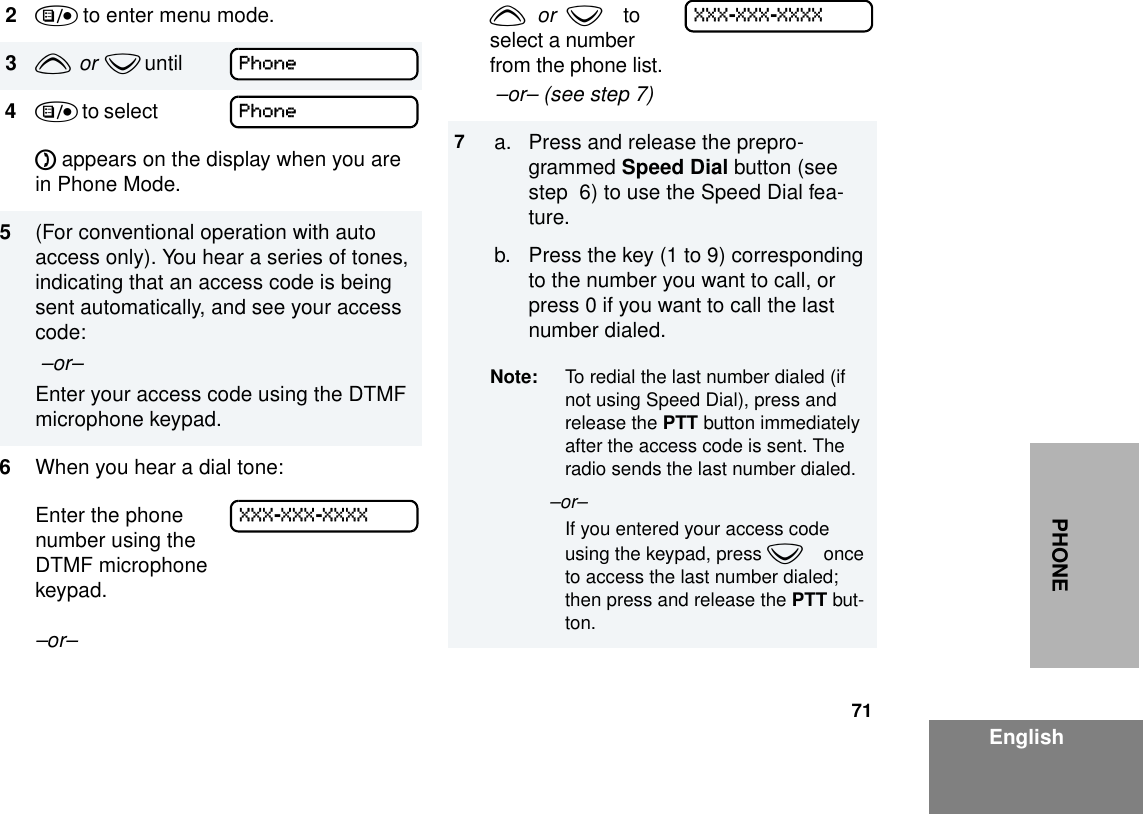
UserManual.wiki
>
Motorola Solutions
>
99FT3081 User Manual
>
Ex 8 Users Manual
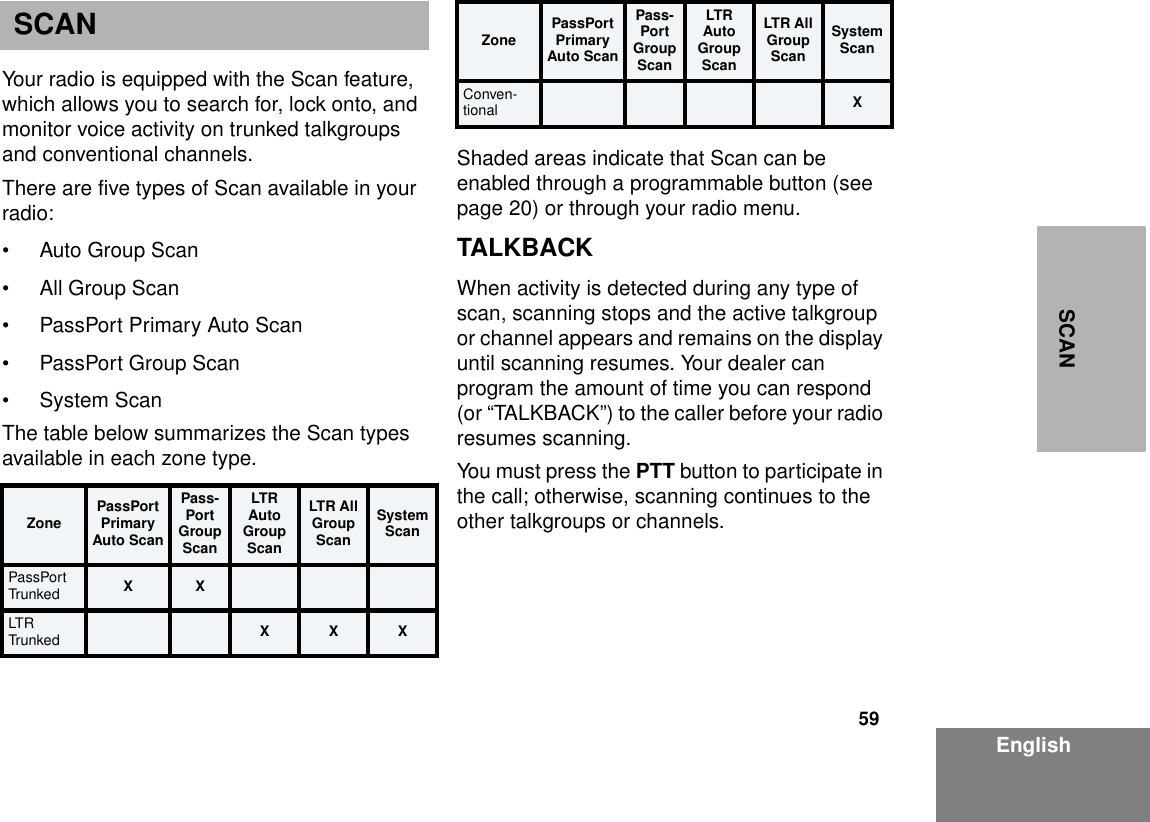
Contents
1.
Ex 8 Users Manual
2.
Antenna Manual
3.
Antenna Manual RESEND
4.
Corrected Users Manual
5.
Mobile Install Manual
6.
RF Safety Booklet
Ex 8 Users Manual
Navigation menu
Upload a User Manual
Namespaces
Wiki Guide
HTML
PDF
Info
Views
User Manual
Discussion / Help
Navigation