Nedap N V XQMK2 Anti-Pilferage Device User Manual Manual XQ MK2 2010 1 indd
N. V. Nederlandsche Apparatenfabriek NEDAP Anti-Pilferage Device Manual XQ MK2 2010 1 indd
Contents
- 1. Advertising literature
- 2. User manual
- 3. Installation manual
- 4. Product literature
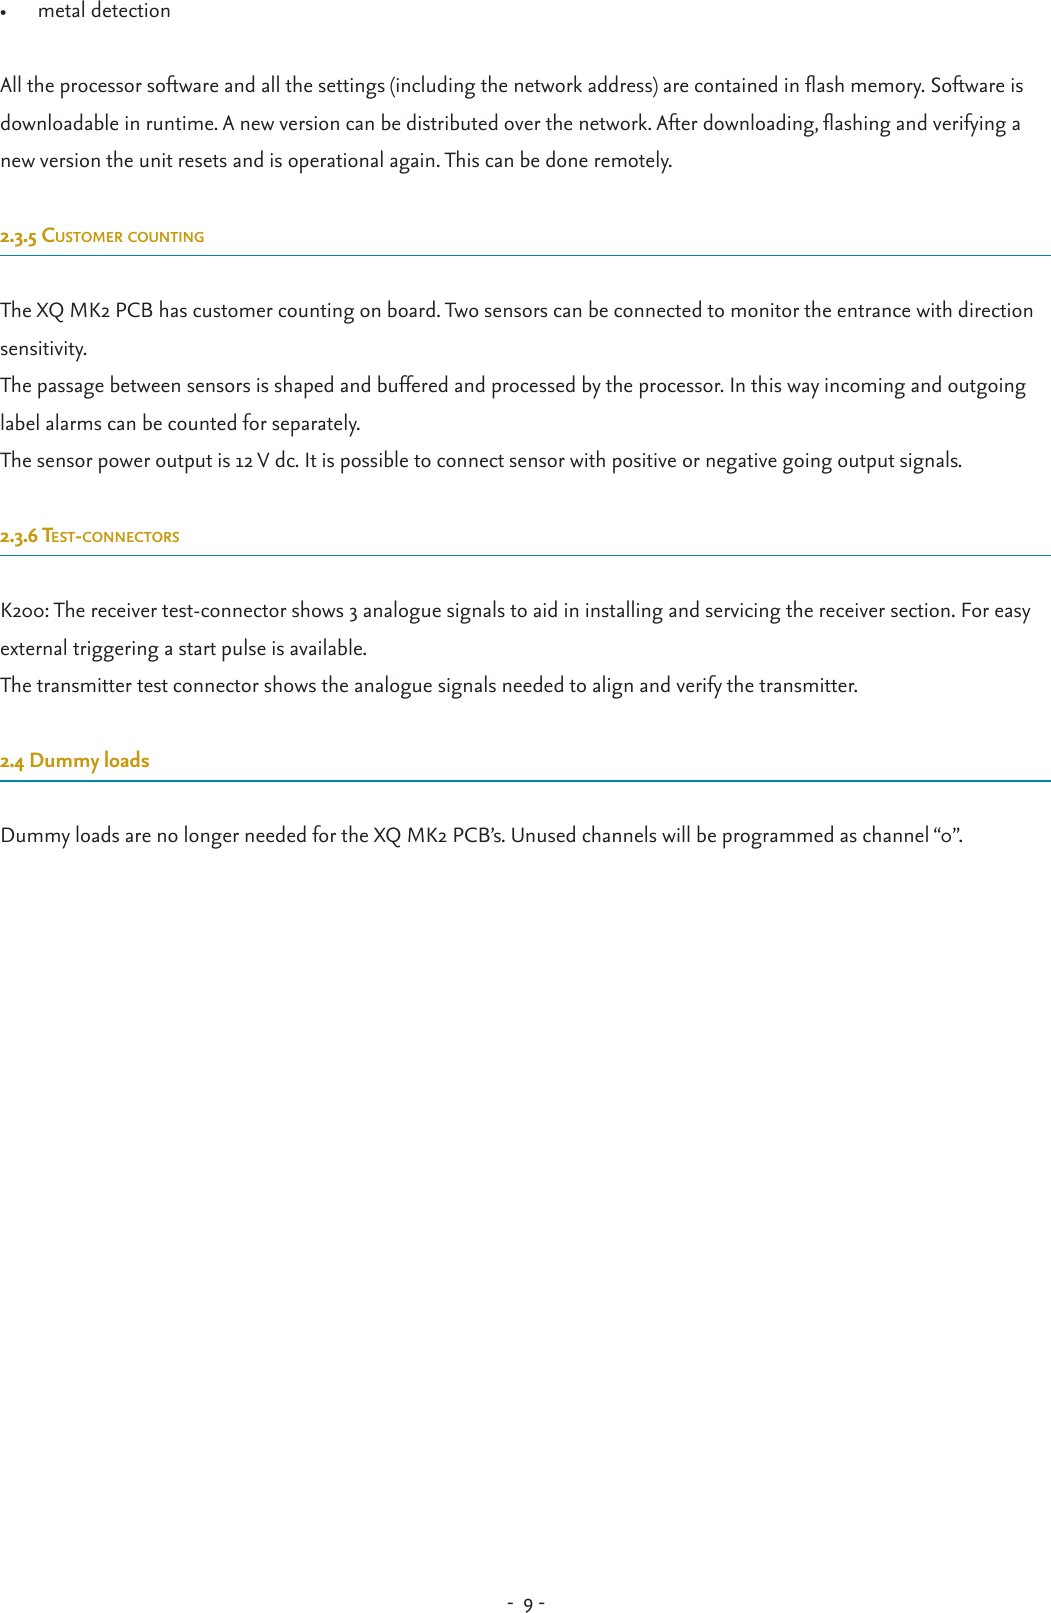
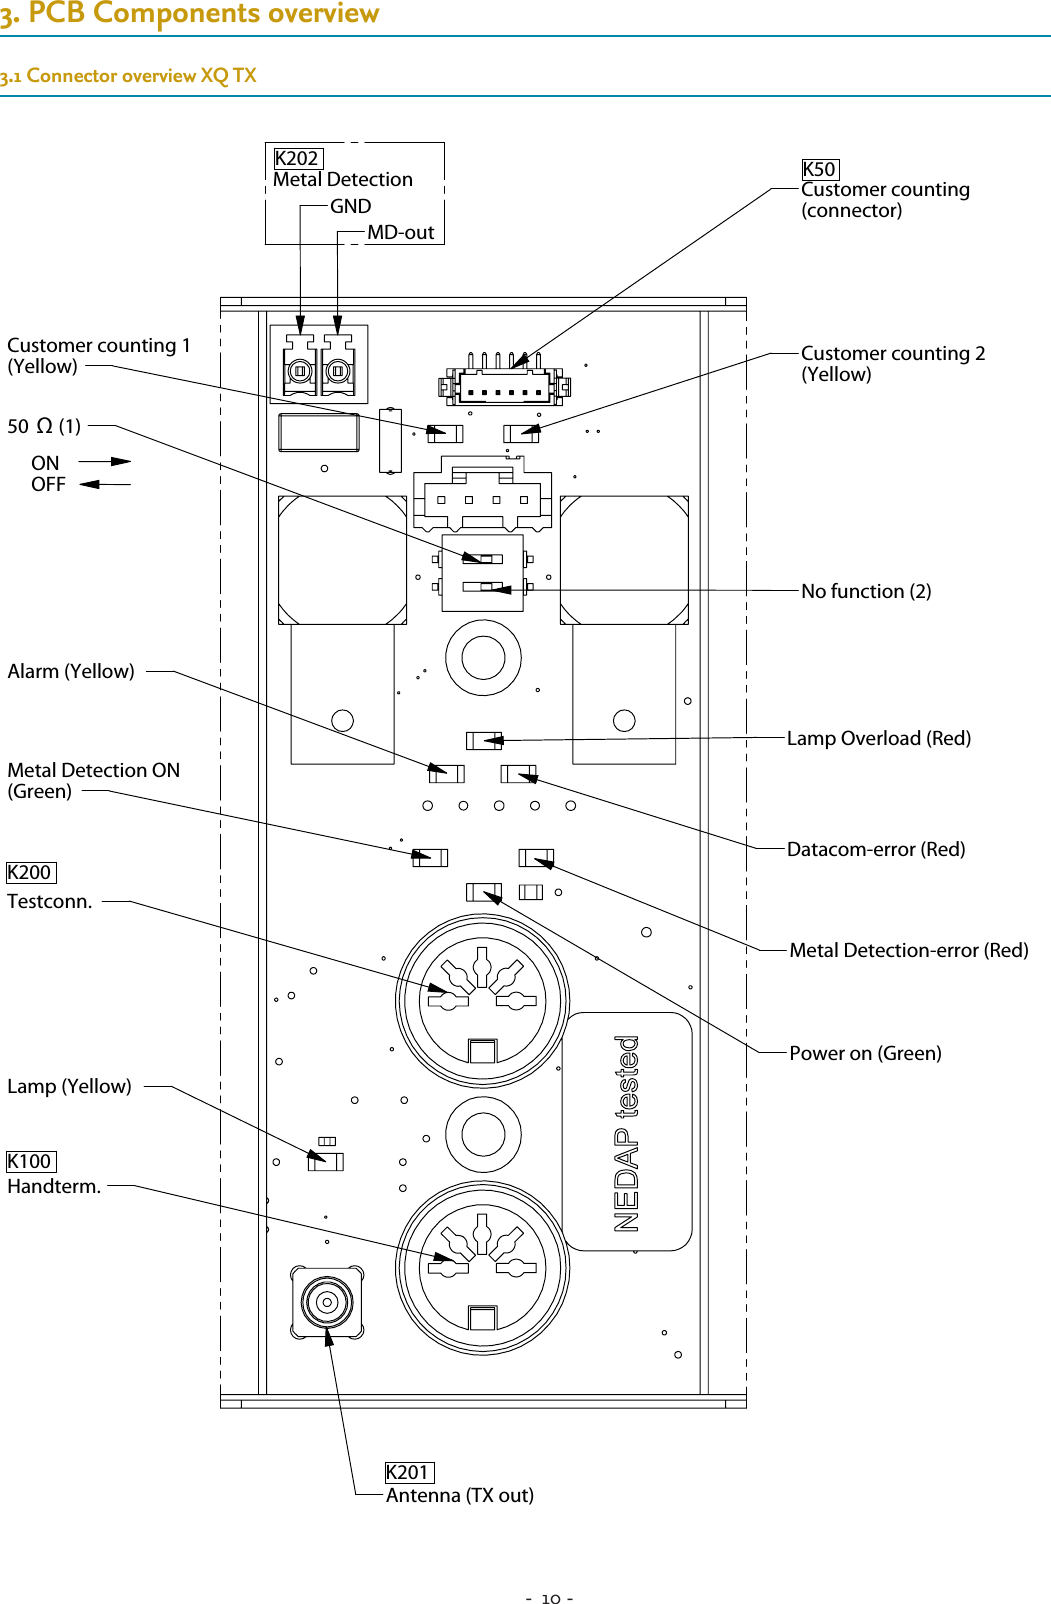
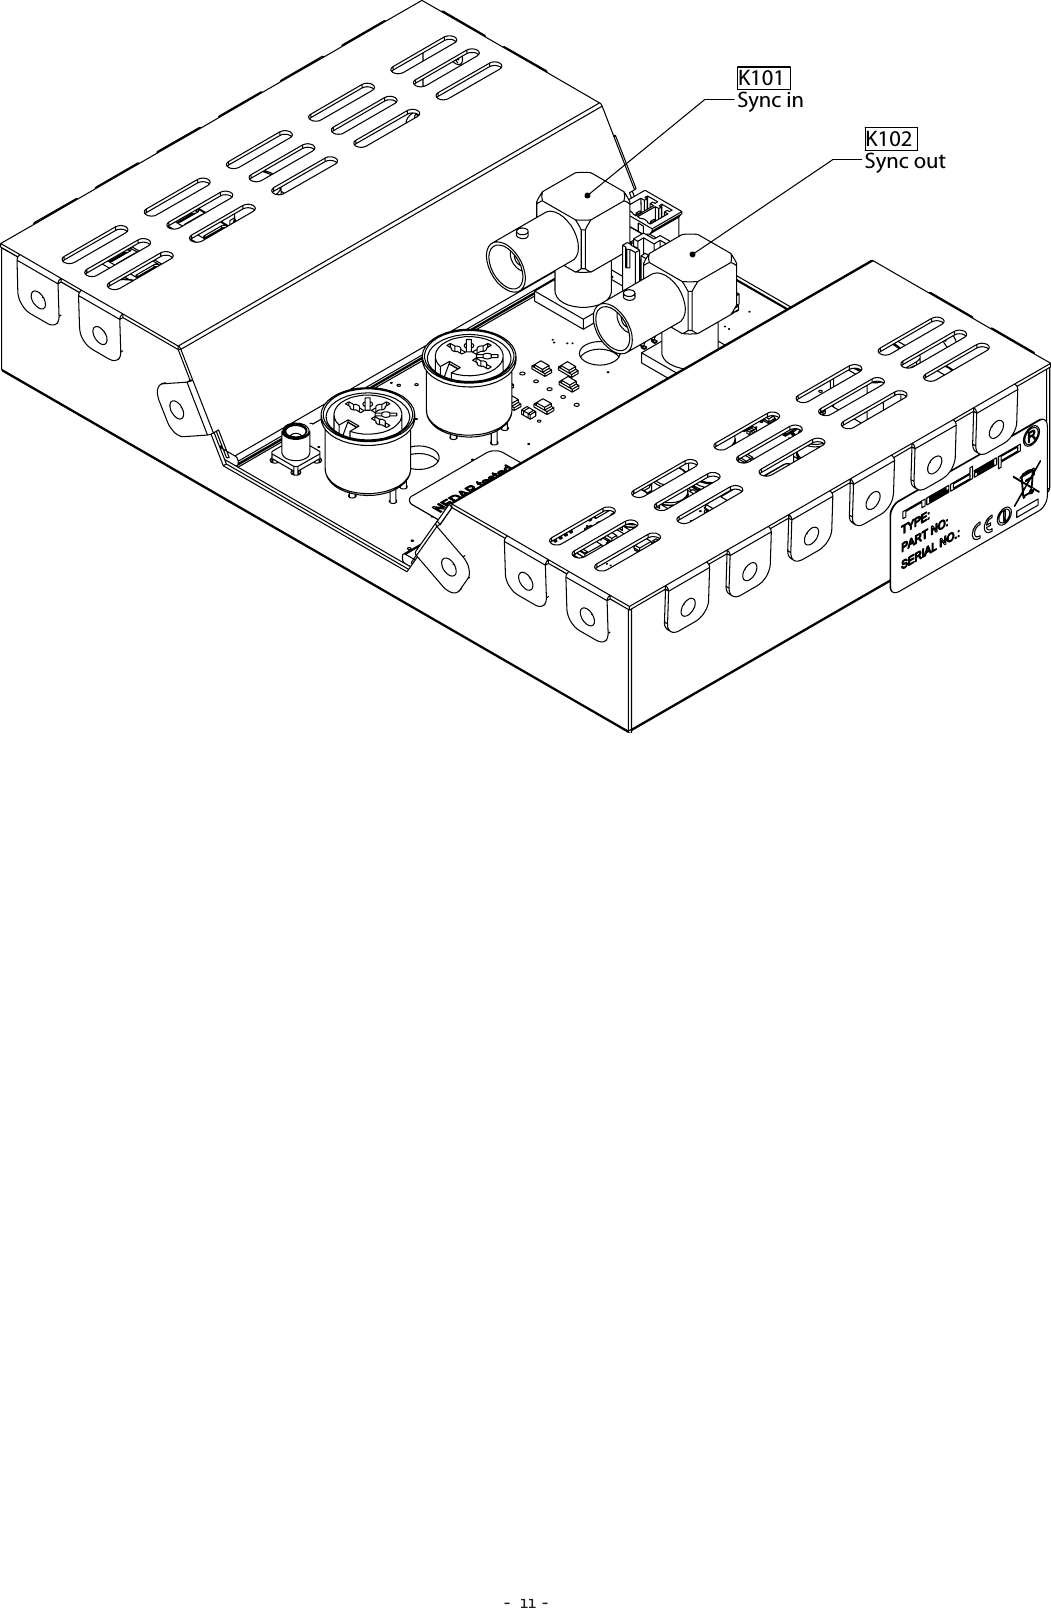
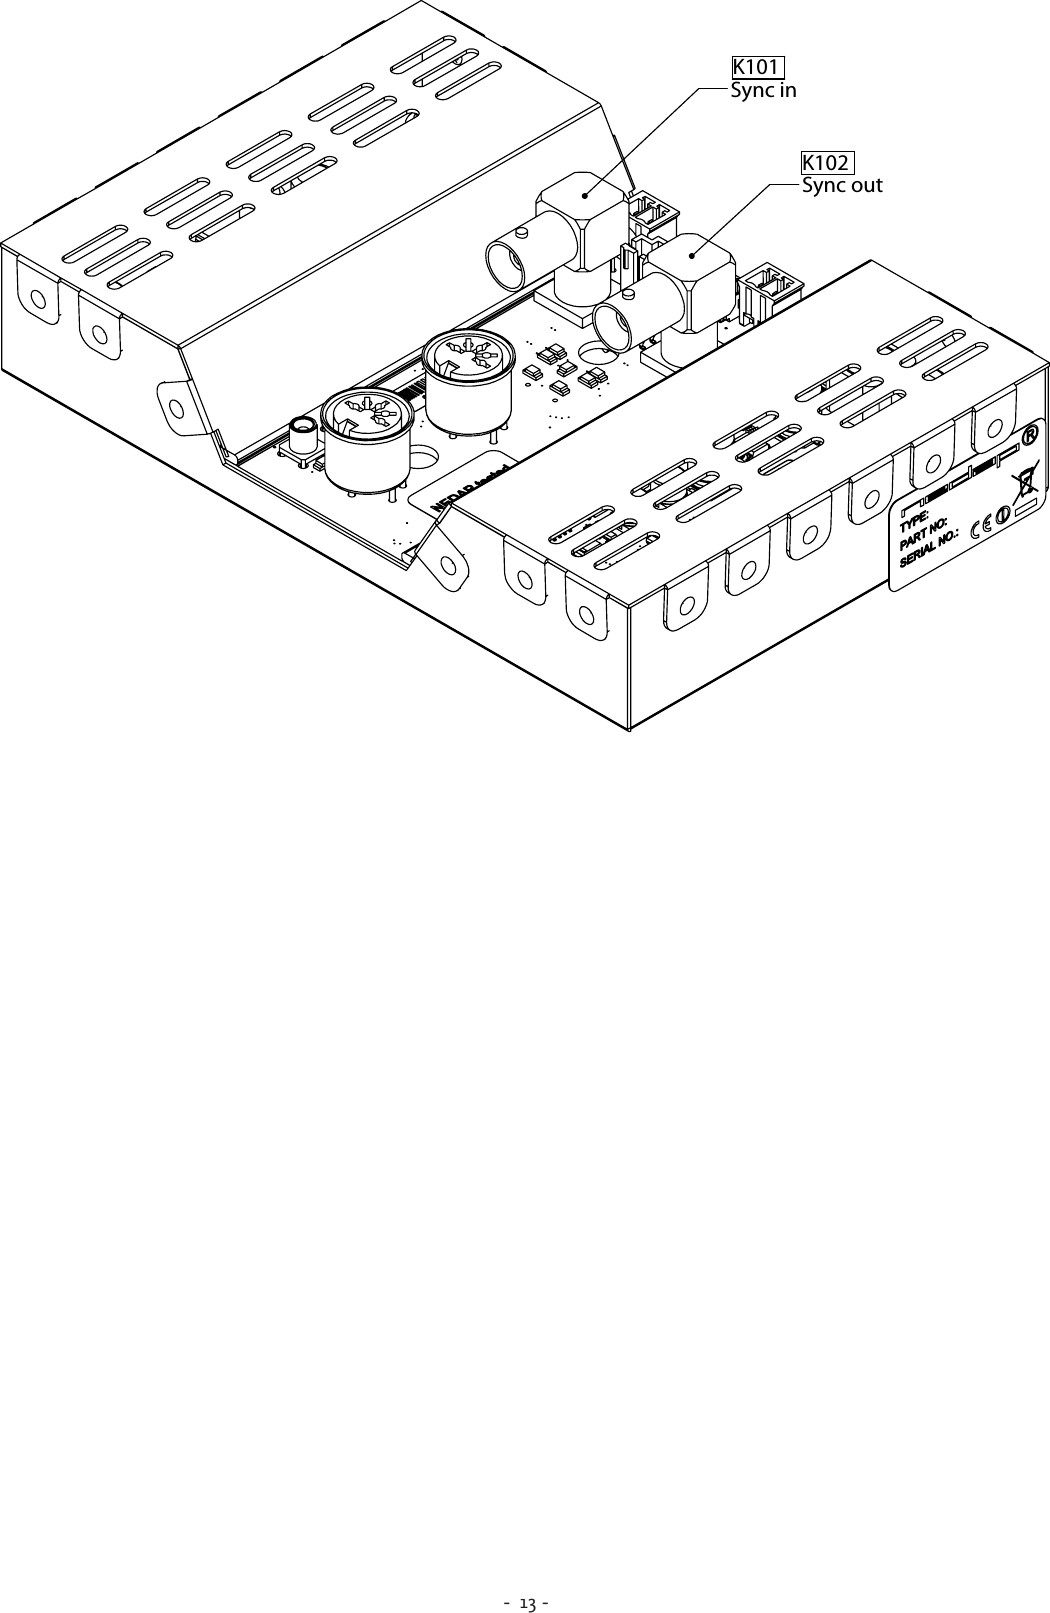
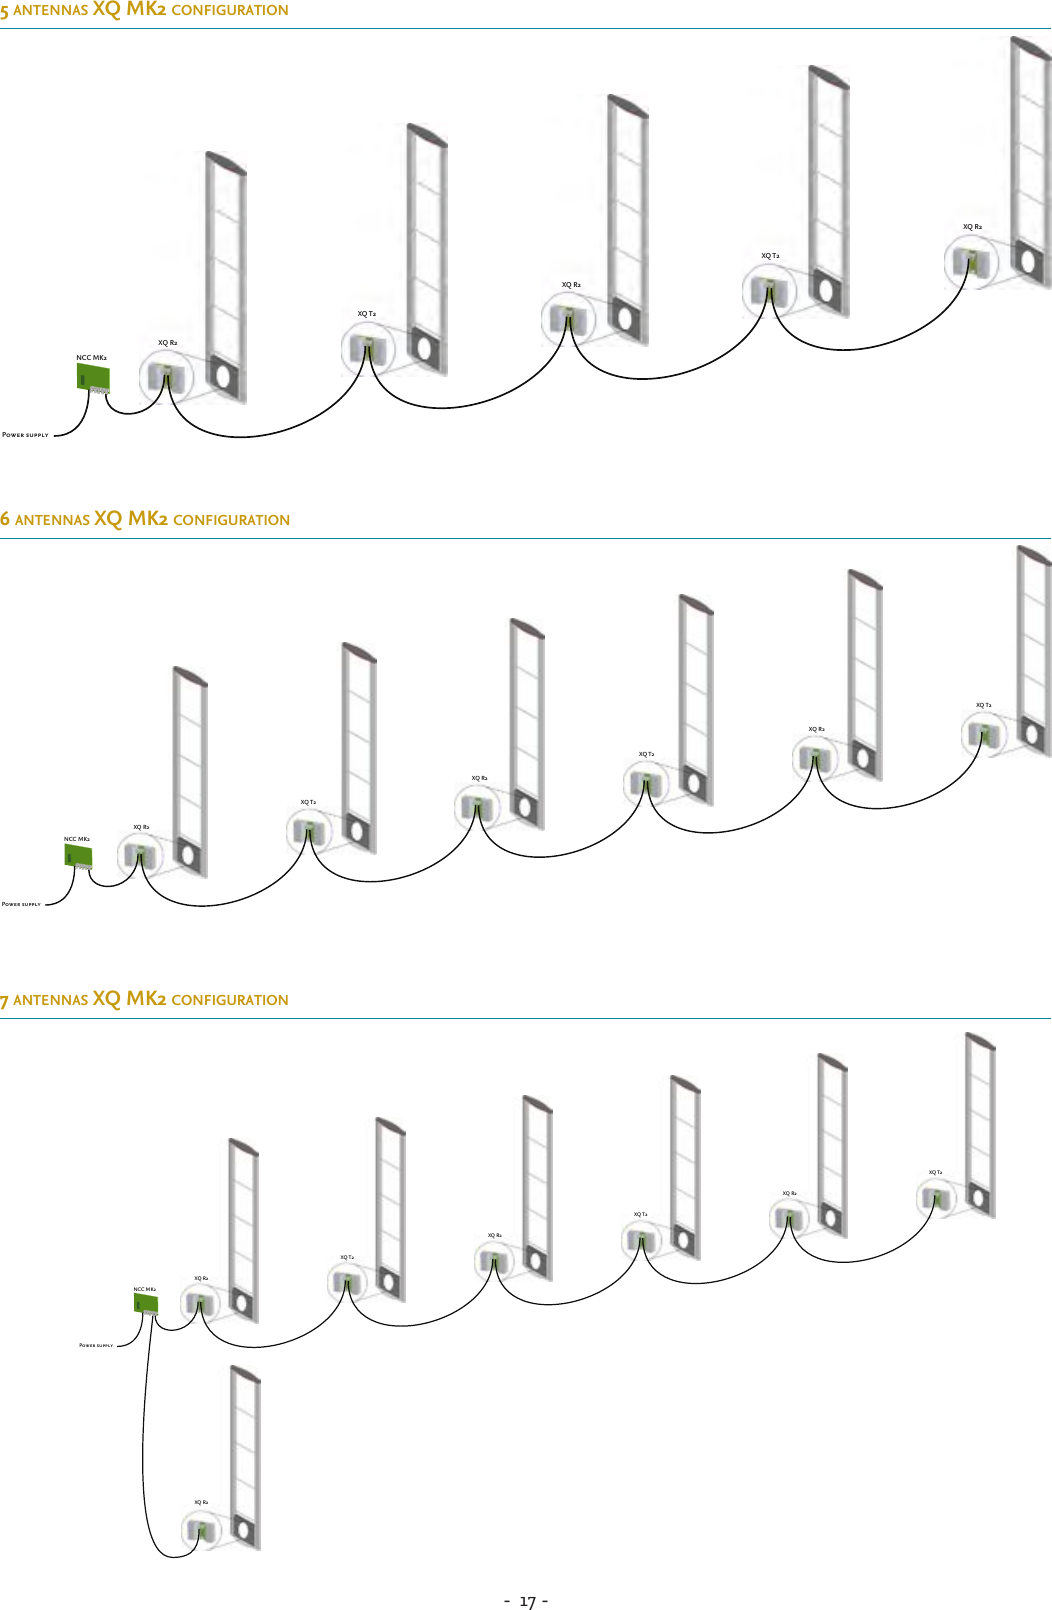
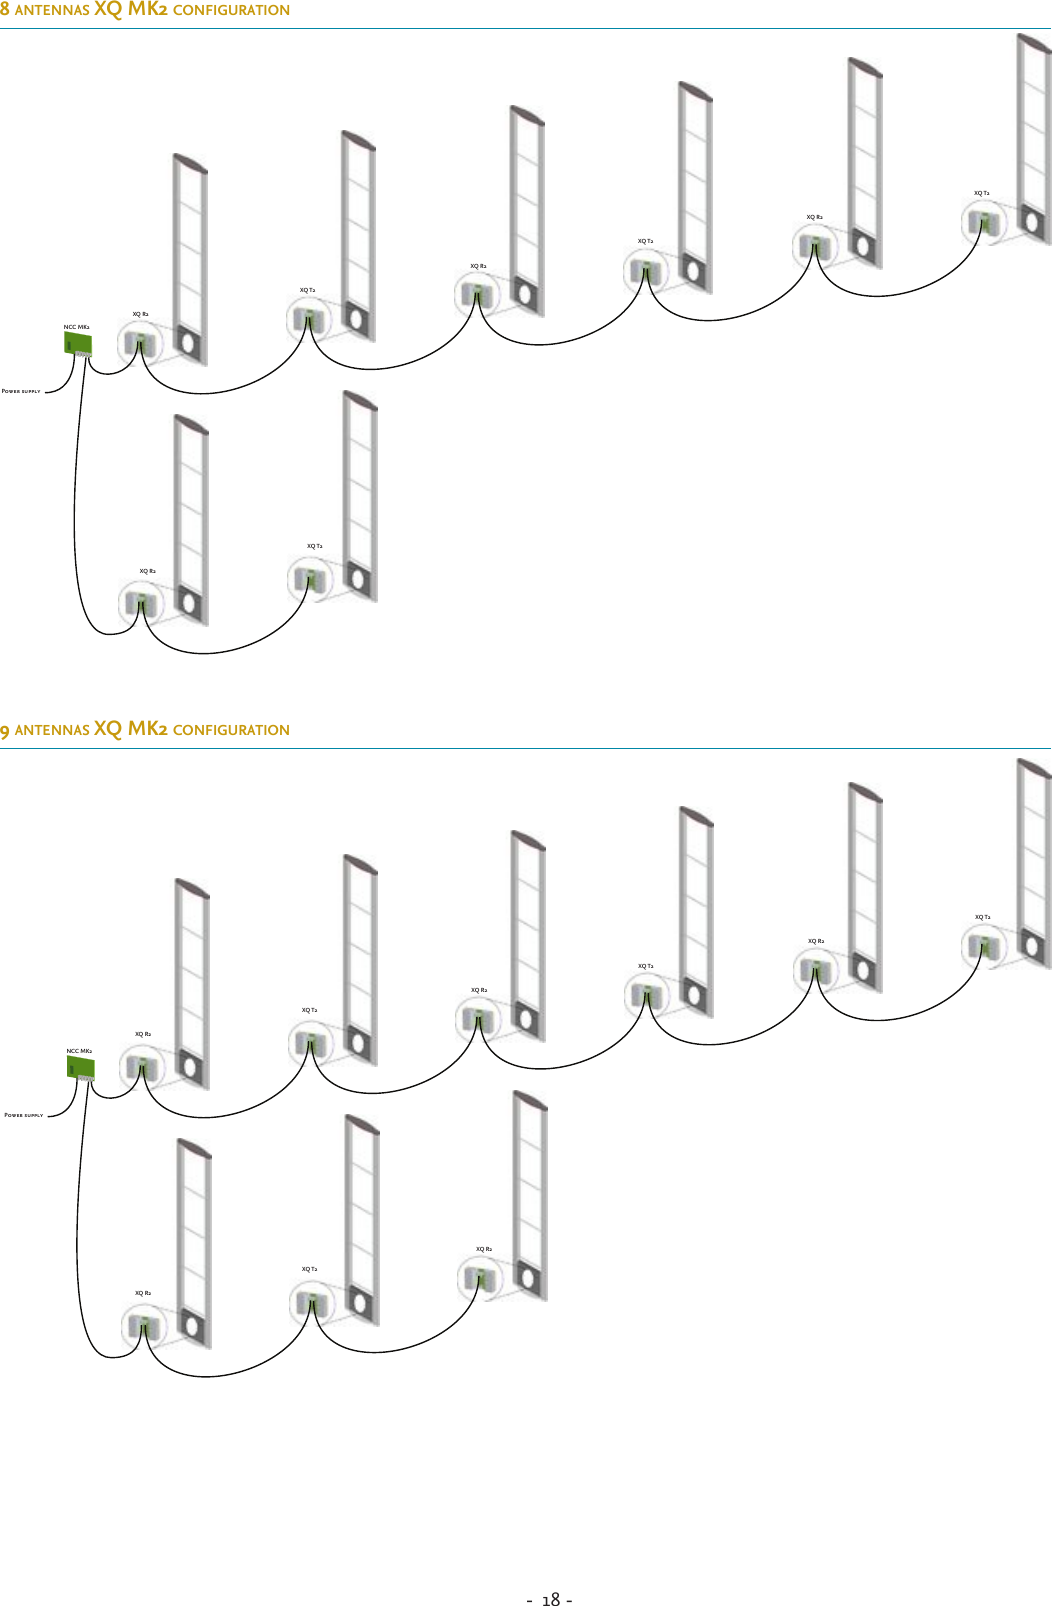
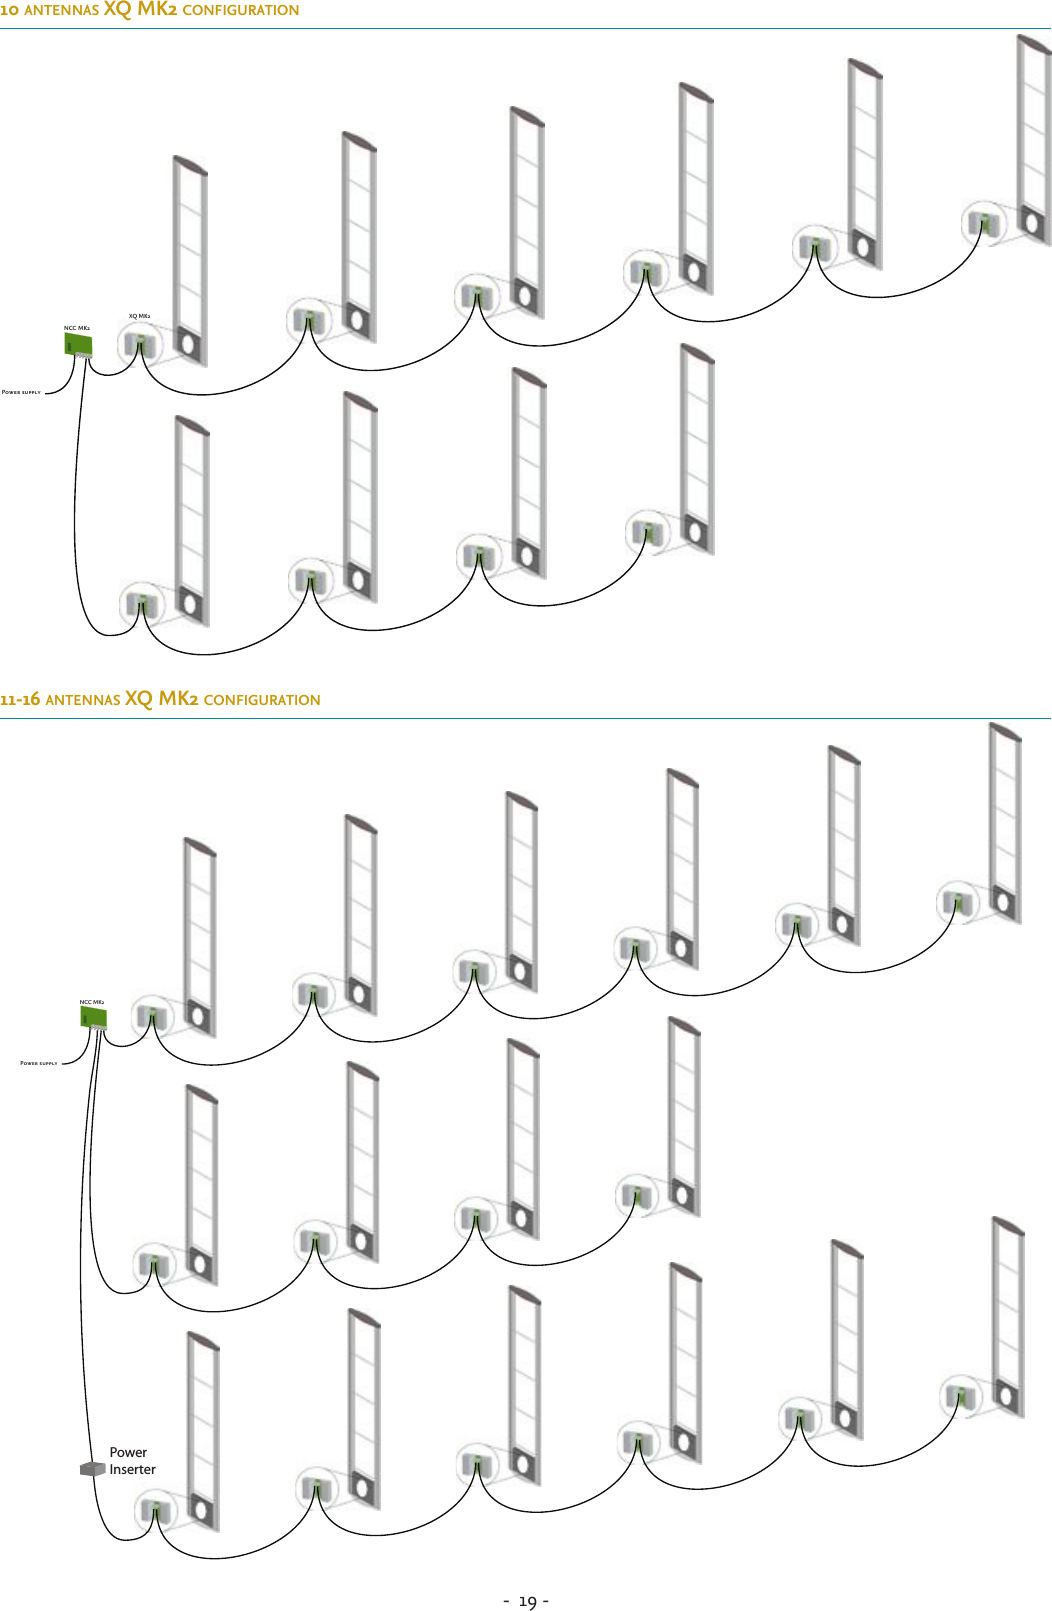
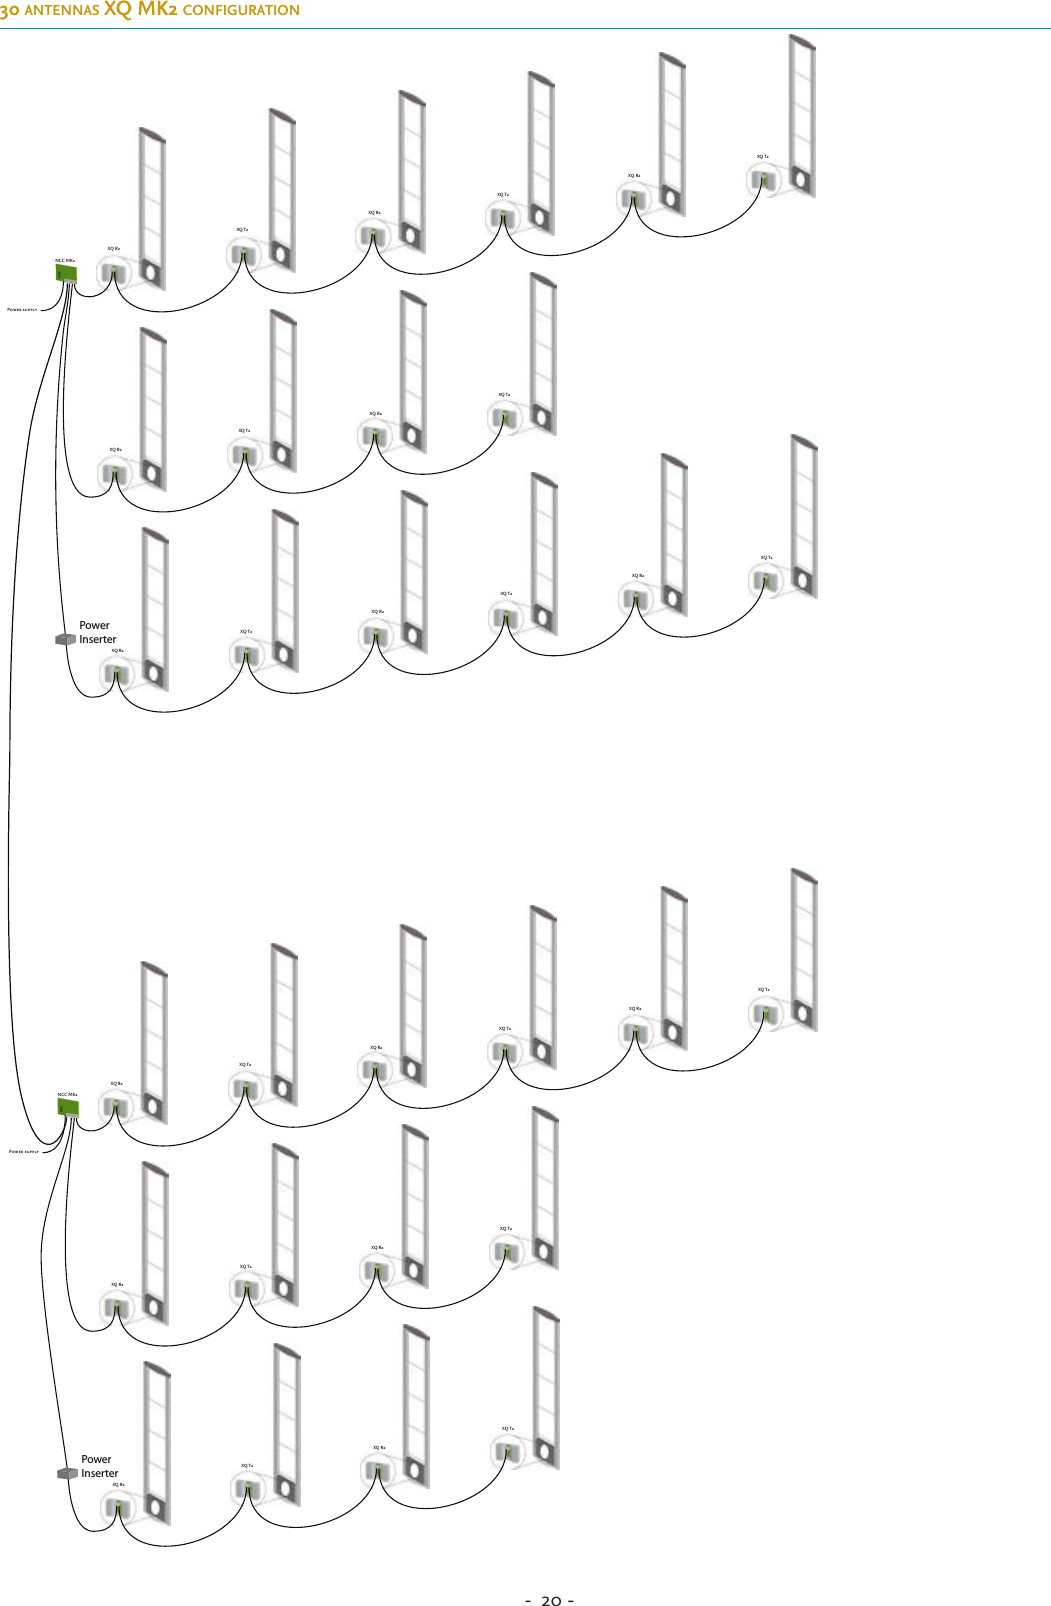
Installation manual