Nikon CXP1 Digital camera with 802.11b/g transmitter User Manual 3 of 3
Nikon Corporation Digital camera with 802.11b/g transmitter 3 of 3
Nikon >
Contents
- 1. User Manual 1 of 3
- 2. User Manual 2 of 3
- 3. User Manual 3 of 3
User Manual 3 of 3
99
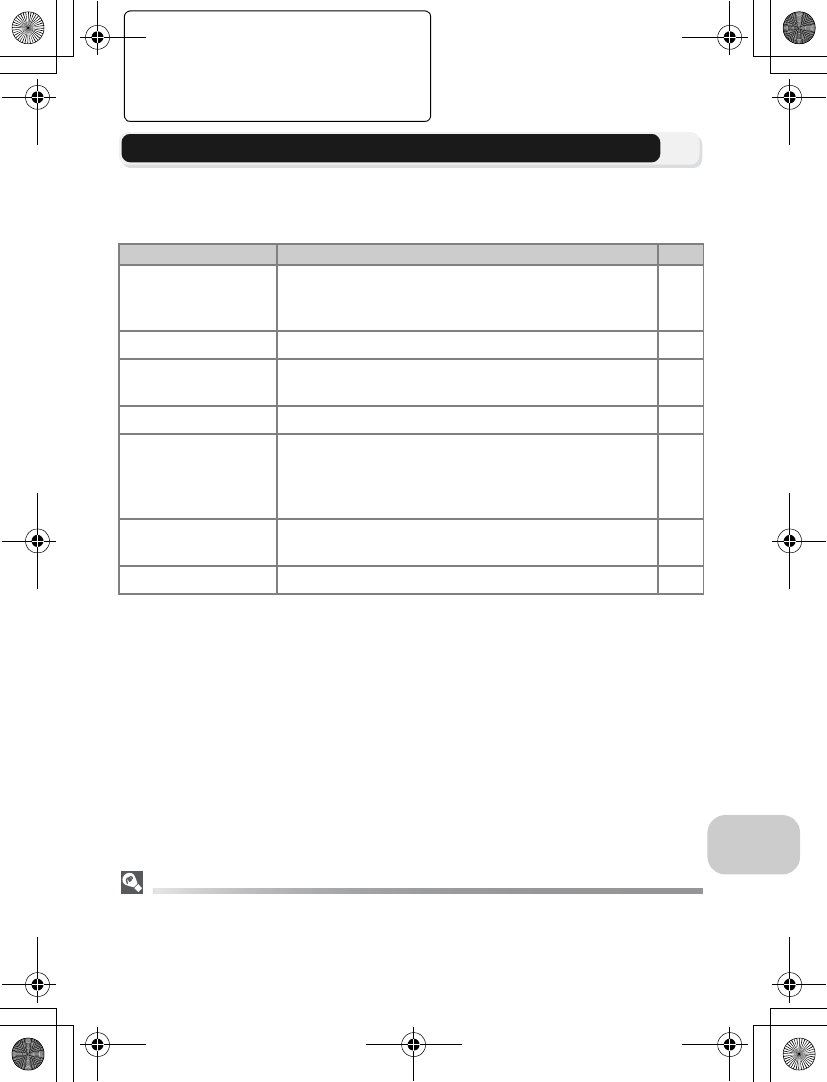
The Shooting Menu
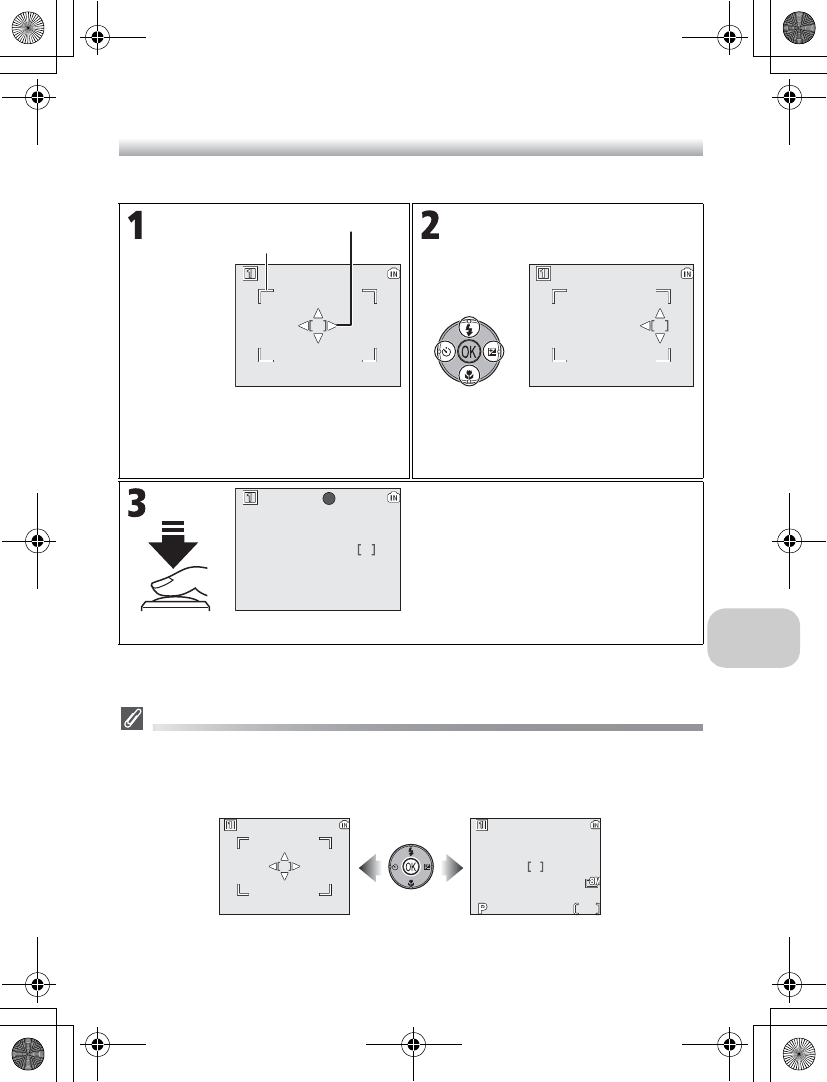
Using m Manual Option
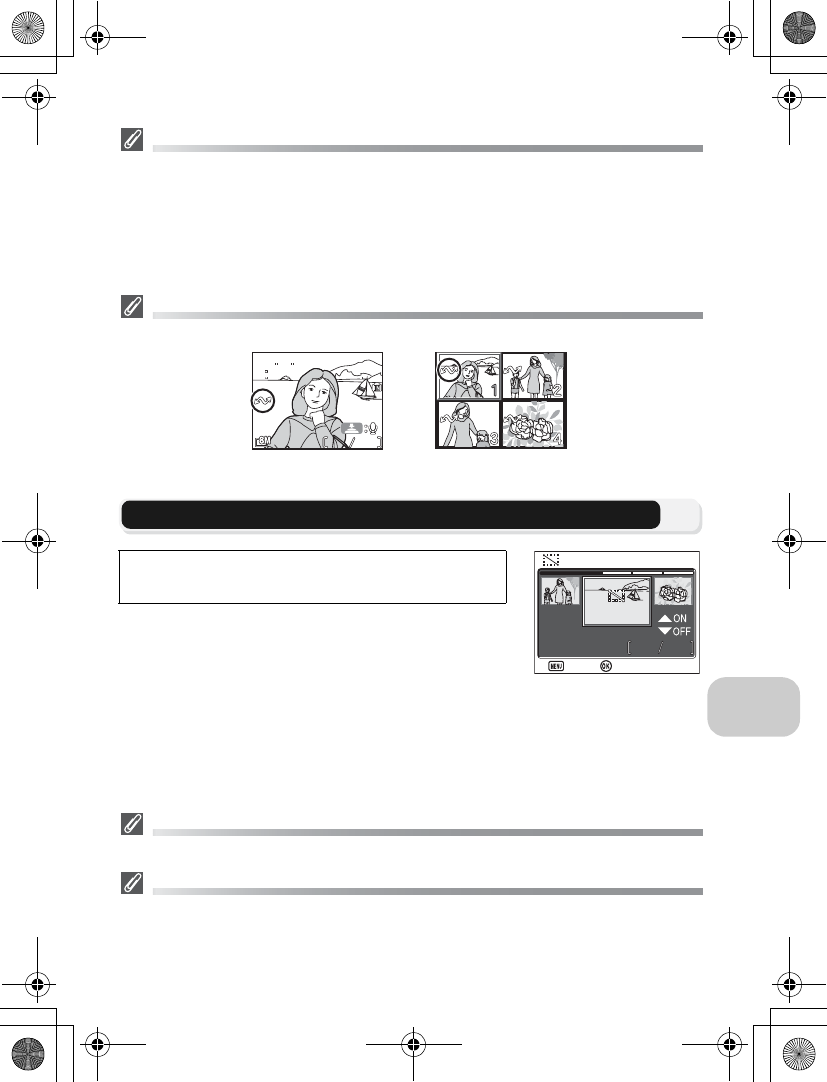
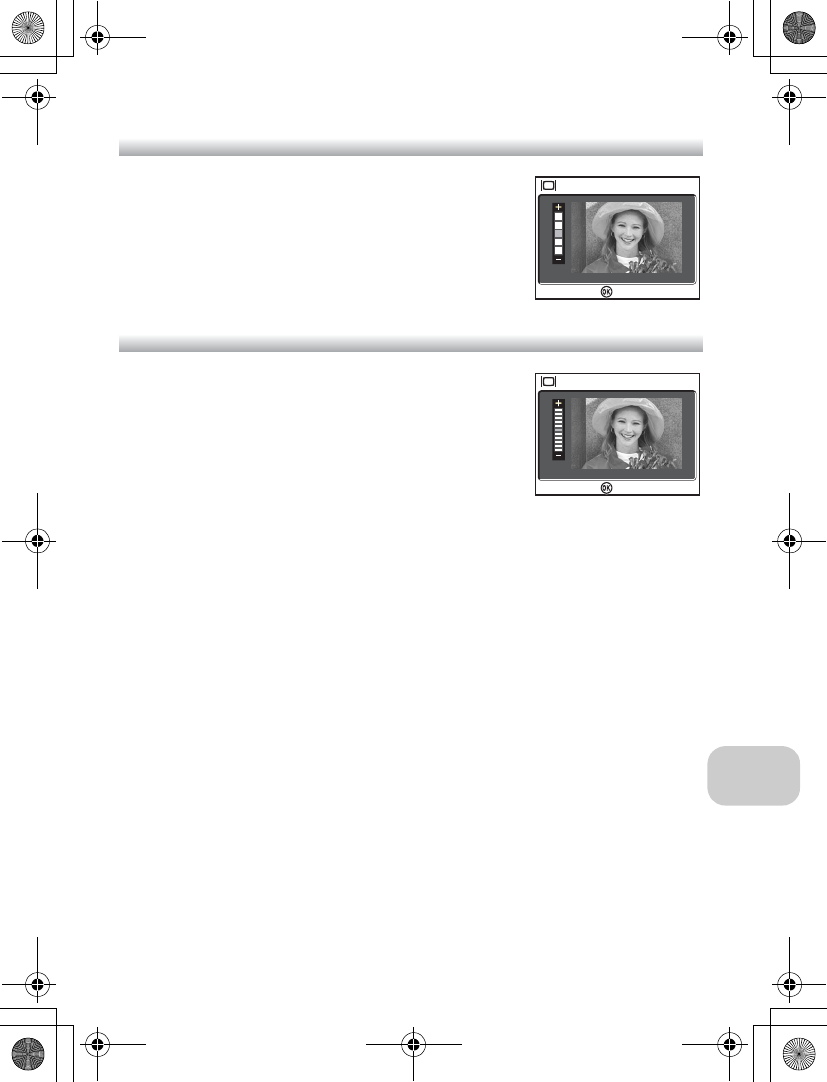
Focus area can be specified from the selectable area in the screen.
Notes on Shooting in m Manual
Flash mode (c27), Exposure comp. (c33), Focus mode (c31), and Self-timer mode (c30)
cannot be set while the focus area selection guide and selectable area are displayed. Press
d to hide the focus area selection guide before adjusting these settings. To change focus
area, press d again after making setting for them.
Select Manual in AF area mode.
Focus area selection guide and selectable
area are displayed.
Move focus area so that your subject is
positioned in it in your composition.
•You can move focus area to the direc-
tions displayed.
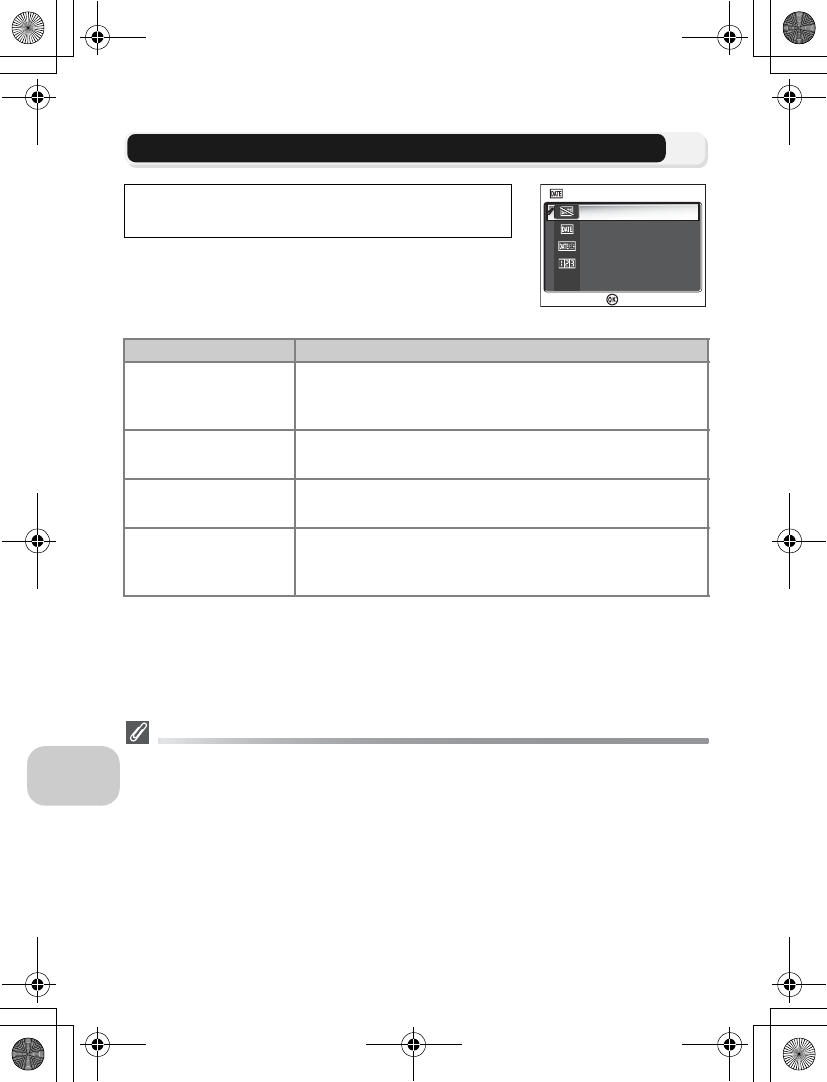
Press shutter-release button halfway.
When subject is in focus, focus area is dis-
played in green. Press shutter-release
button the rest of the way down to
shoot.
•To move the focus area after shooting,
press d to display the focus area
selection guide.
Selectable area
Focus area selection
guide
AF
AF
15
15
NORM
NORM
When the guide and select-
able area are displayed
When the guide and select-
able area are hidden
en_q3175.book Page 99 Thursday, June 16, 2005 10:54 AM

100
The Shooting Menu
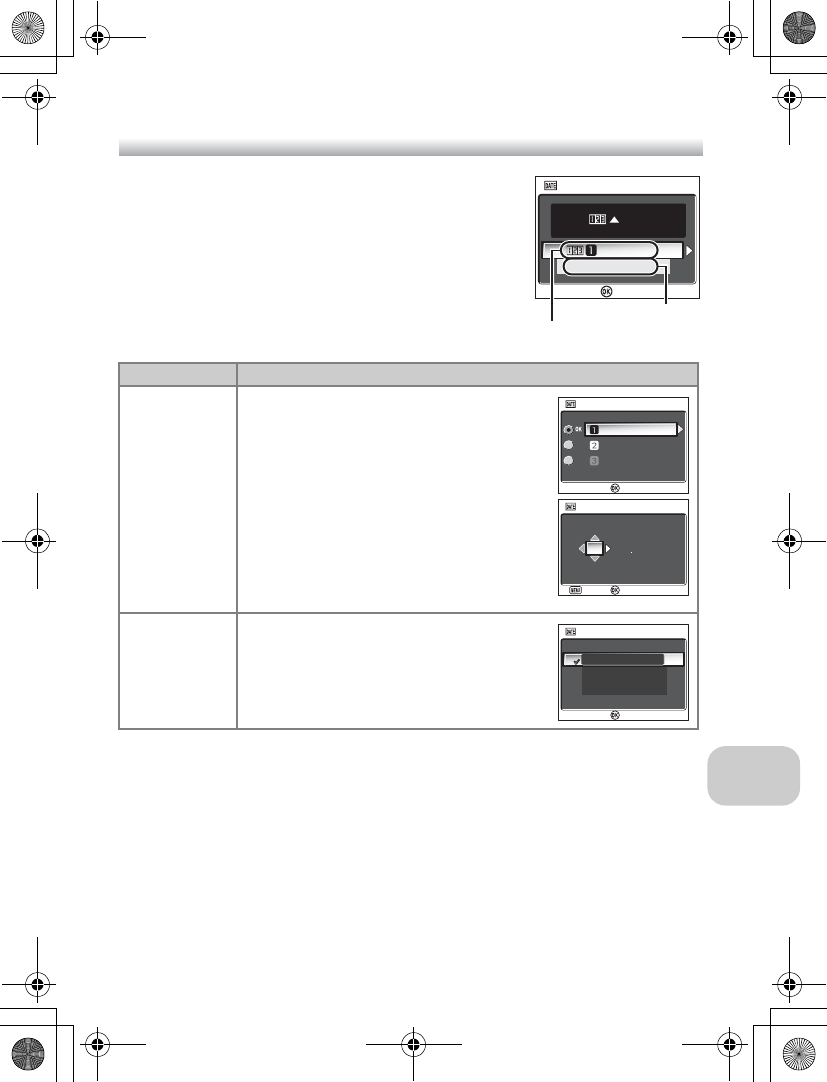
Y Auto-focus Mode
This option is used to determine how the camera fo-
cuses when shooting still pictures.
Confirming Focus
Regardless of the option chosen, pictures can be taken even when the camera is not in focus;
check the focus area or focus indicator before shooting.
Fixed Aperture
This option is used to control whether aperture varies
with zoom position.
Rotate the mode dial to P or A and press the m but-
ton to select Auto-focus mode, and then press d.
Option Description
Z
Single AF
(default setting)
Camera focuses only when shutter-release button is pressed
halfway.
a
Continuous AF
Camera adjusts focus continuously until shutter-release
button is pressed halfway, minimizing time needed to focus
before picture is taken.
Rotate the mode dial to A and press the m button
to select Fixed aperture, and then press d.
Option Description
Off
(default setting) Aperture changes with zoom position.
On
In A mode, aperture is kept as close as possible to selected
f/-number. To prevent selected f/-number from exceeding
exposure range at new zoom position, choose aperture of
around f/5 to f/7.3.
Continuous AF
AUTO-FOCUS MODE
AUTO-FOCUS MODE
Single AF
Confirm
Exit
Off
On
FIXED APERTURE
FIXED APERTURE
Confirm
Exit
en_q3175.book Page 100 Thursday, June 16, 2005 10:54 AM
101
The Shooting Menu
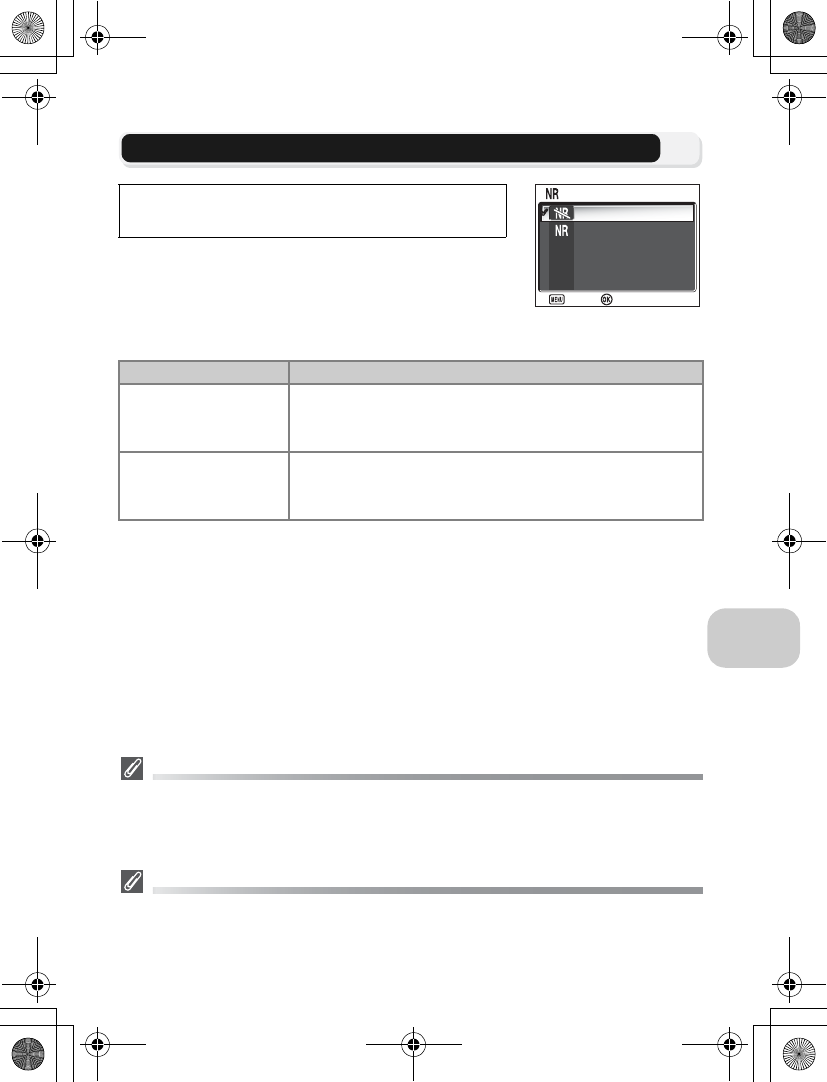
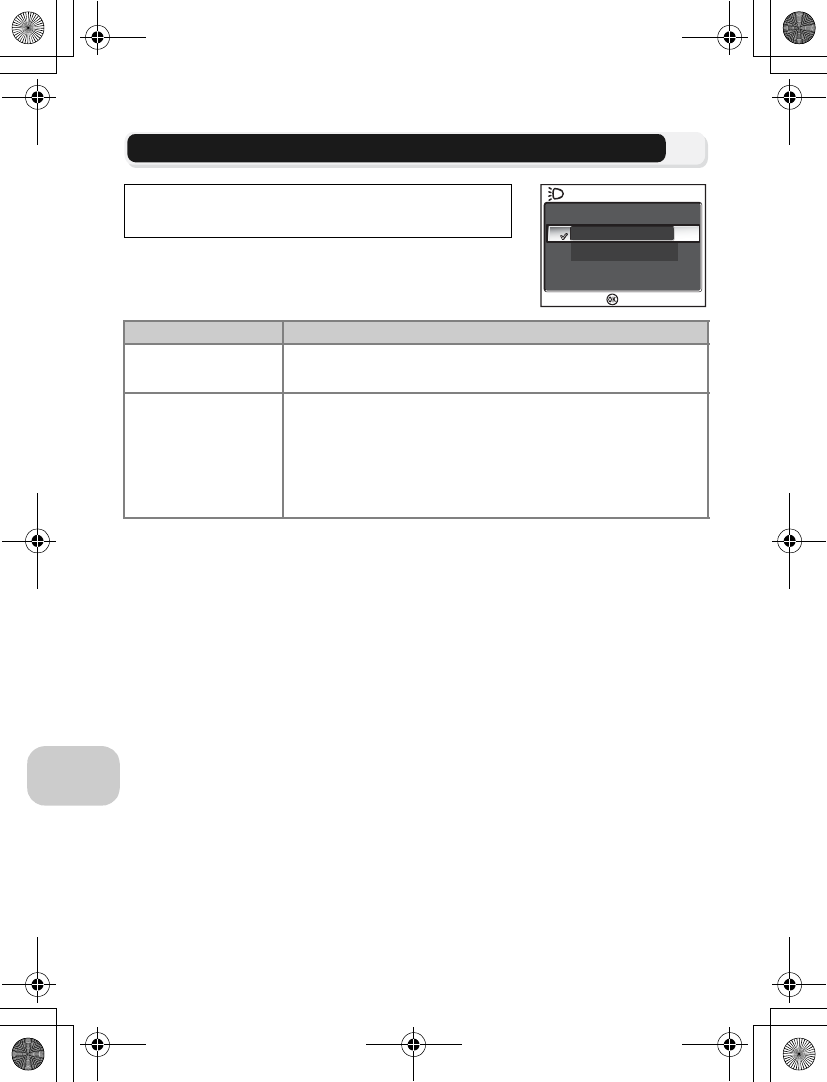
o Noise Reduction
At shutter speeds slower than 1/4 second, “noise” in
the form of randomly-spaced, brightly-colored pixels
may appear in pictures, particularly in shadows. When
you take pictures in dark places, this option is used to
reduce noise at slow shutter speeds.
Restrictions on Noise Reduction
When shooting pictures using the following options, Noise reduction has no effect:
•BSS (c92) is On.
•Auto bracketing is set to CAuto bracketing or xWB bracketing (c93).
•Continuous setting is other than rSingle (c89).
Sensitivity (ISO Equivalency)
When raising sensitivity (c50), “noise” may appear in a picture.
In this case, noise in pictures taken at slow shutter speeds will be reduced automatically when
Noise reduction is On.
Rotate the mode dial to P or A and press the m but-
ton to select Noise reduction, and then press d.
Option Description
p
Off
(default setting)
Noise reduction off; camera functions normally.
o
On
Noise reduction takes effect at slow shutter speeds which
cause “noise.” Time required to save pictures in the mem-
ory or on the memory card more than usual.
Off
On
NOISE REDUCTION
NOISE REDUCTION
Confirm
Exit
en_q3175.book Page 101 Thursday, June 16, 2005 10:54 AM
102
The Shooting Menu
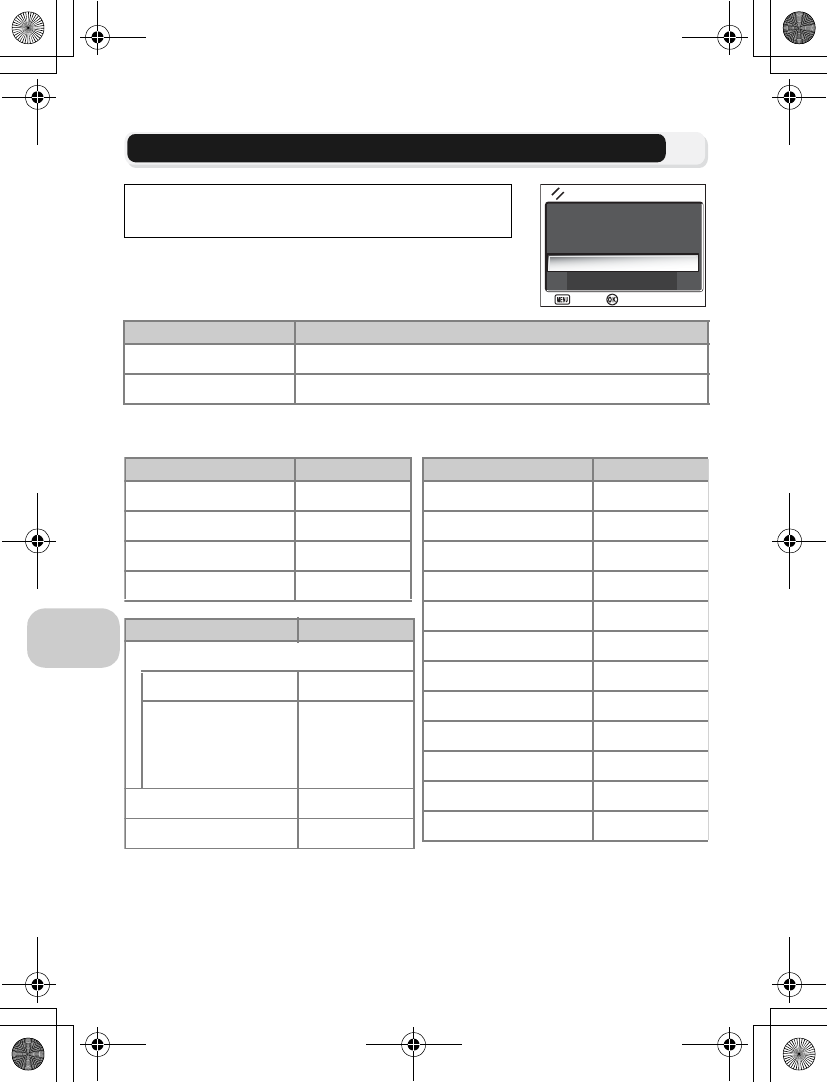
q Reset
This option is used to restore settings for the current
User setting bank (c103) to their original state.
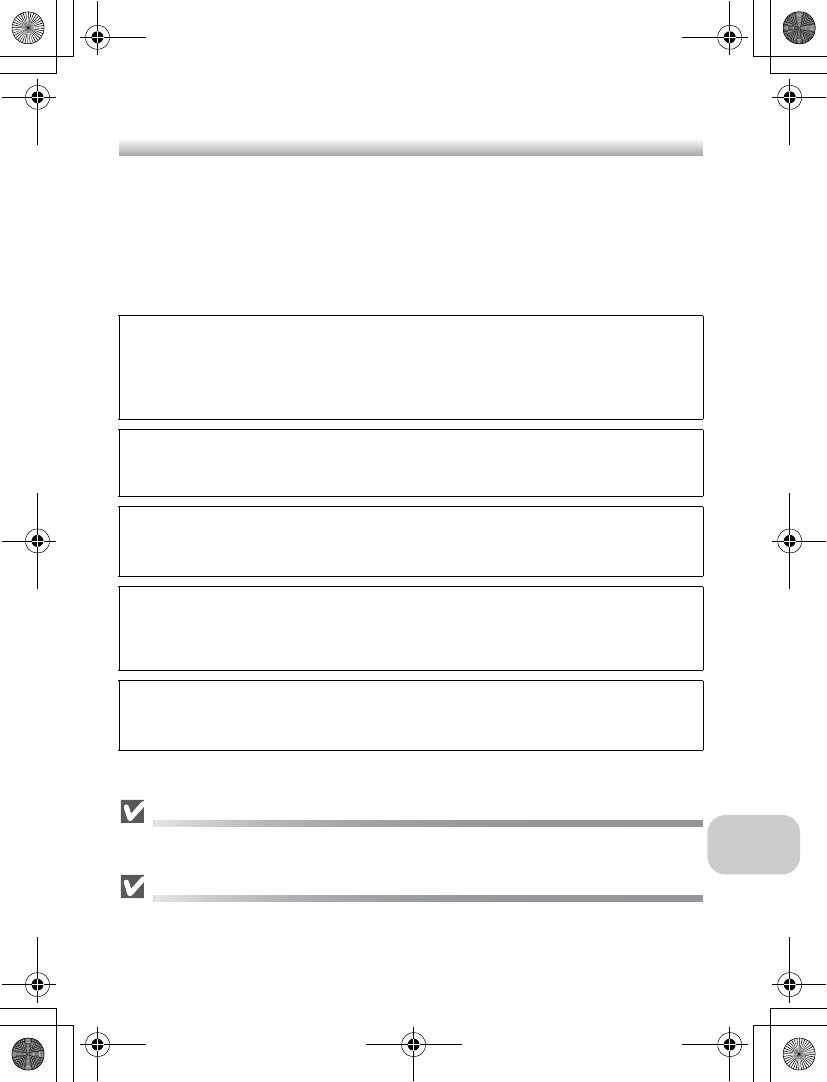
Choosing Reset restores the following options for the current User setting bank
to their default values. Settings in the other bank are unaffected.
Rotate the mode dial to P or A and press the m but-
ton to select Reset, and then press d.
Option Description
No Exit menu, leaving settings unchanged.
Reset Restore settings to default values.
No
Reset
RESET
RESET
Confirm reset of
user settings 1
to default values.
Confirm reset of
user settings 1
to default values.
Confirm
Exit
*1Settings are restored regardless of User set-
ting.
*2Slightly adjusted values are also reset.
Basic settings Default
Flash mode Auto
Exposure comp. ±0
Focus mode Autofocus
Self-timer Off
Mode dial settings Default
Image Mode*1
Image quality NORMAL
Image size
c
(for P1)
d
(for P2)
Sensitivity Auto
White balance*2 Auto
Menu options Default
Metering Matrix
Continuous Single
BSS Off
Auto bracketing Off
Flash exp. comp. ±0
Image adjustment Auto
Image sharpening Auto
Saturation control Normal
AF area mode Auto
Auto-focus mode Single AF
Fixed aperture Off
Noise reduction Off
en_q3175.book Page 102 Thursday, June 16, 2005 10:54 AM
103
The Shooting Menu
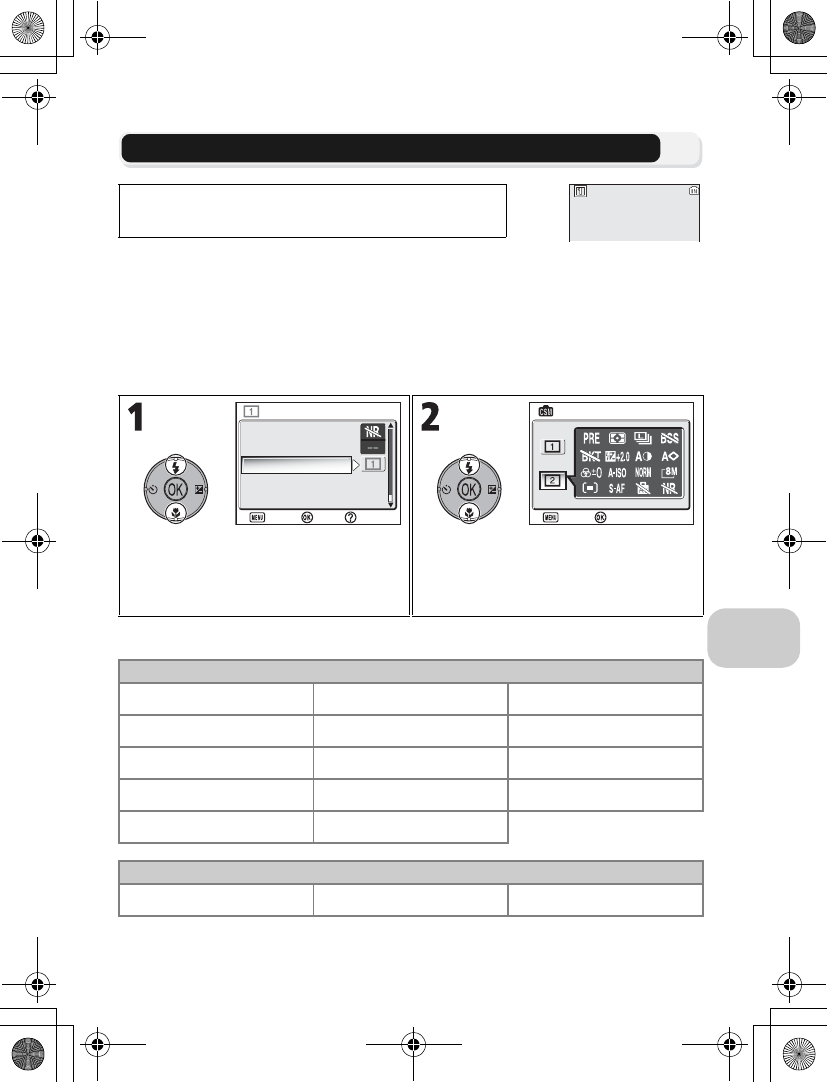
r User Setting
Camera settings can be stored in two separate
“banks,” Bank 1 and Bank 2. By default, changes to camera settings are stored in
Bank 1. To store another combination of frequently-used settings, select Bank 2
and adjust settings as desired. To switch from one combination of settings to the
other, select the desired bank in the User setting menu.
To select a User settings bank:
User settings banks store the following settings:
* Any changes to preset white balance apply to both banks, regardless of the bank currently se-
lected.
Rotate the mode dial to P or A and press the m but-
ton to select User setting, and then press d.
Highlight User setting and press d. Highlight bank and press d to select
bank and return to shooting menu.
•Store items using button and Shooting
menu.
Shooting menu options
White balance*Flash exp. comp. AF area mode
Metering Image adjustment Auto-focus mode
Continuous Image sharpening Fixed aperture
BSS Saturation control Noise reduction
Auto bracketing Sensitivity
Other settings
C (Flash mode) I
(Exposure compensation)
F (Focus mode)
Noise reduction
Reset
User setting
SHOOTING MENU 4/4
SHOOTING MENU 4/4
Confirm
Exit Help
USER SETTING
USER SETTING
Confirm
Exit
en_q3175.book Page 103 Thursday, June 16, 2005 10:54 AM
104
The Playback Menu
The Playback Menu
Using the Playback Menu
The Playback menu contains the following options:
To display the Playback menu:
Option Description c
List by Date Group pictures by date of recording. Perform five
kinds of operations. 107
D-Lighting Adjust the tone (brightness) of a picture and save a
copy. 78
Print set
Select pictures for printing on a DPOF-compatible
device; specify number of copies and information to
be included on prints.
66
Slide show View pictures in an automatic slide show. 109
Delete Delete all or selected pictures. 111
Protect Protect selected pictures from accidental deletion. 112
Transfer marking Change transfer setting of the recorded pictures. 112
Hide Image Hide selected pictures when creating a slide show or
showing pictures to an audience. 113
Small pic. Create small copies of current picture. 79
Copy Copy pictures from the memory to the memory
card, or vice versa. 114
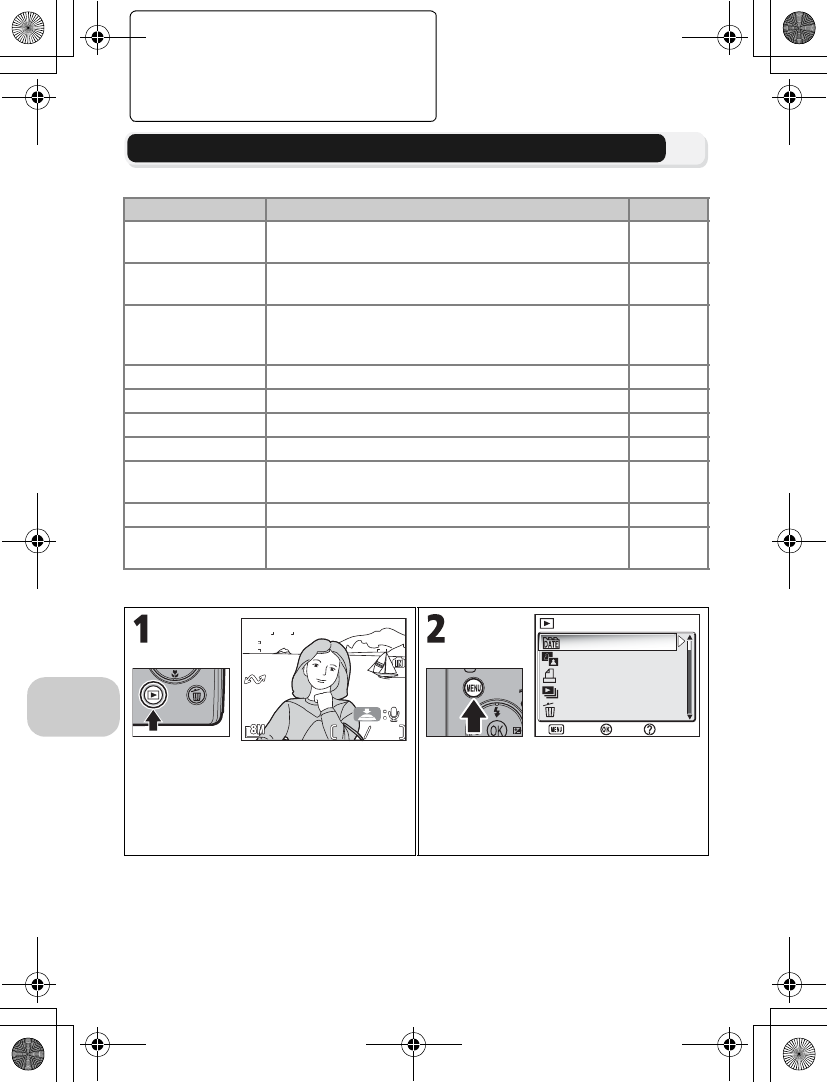
Press the i button.
•Playback screen is displayed.
Press the m button to display the Play-
back menu.
•Highlight menu option and press d.
•Press m to exit and return to Play-
back screen.
1
1
1
1
100NIKON
100NIKON
JPG
JPG
2005
2005
12
12
12
12
00
00
01
01
0008
0008
NORM
NORM
List by date
D-Lighting
Print set
PLAYBACK MENU 1/2
PLAYBACK MENU 1/2
Slide show
Delete
Confirm
Exit Help
en_q3175.book Page 104 Thursday, June 16, 2005 10:54 AM
105
The Playback Menu
Some options in the Playback menu contain the Picture selection screen and
Choose date screen.
See “Navigating the Picture Selection Screen” (c105), “Navigating the Choose
Date Screen” (c106), and the descriptions of the various menus starting from
P. 107 for more information.
Navigating the Picture Selection Screen
When Print set (c66), Delete (c111), Protect
(c112), Transfer marking (c112), Hide image
(c113) or Copy (c114) is used to select a picture, a
Picture selection screen, such as the screen on the right,
is displayed.
See “To use w Print set:” (c66) for more information
on Print set.
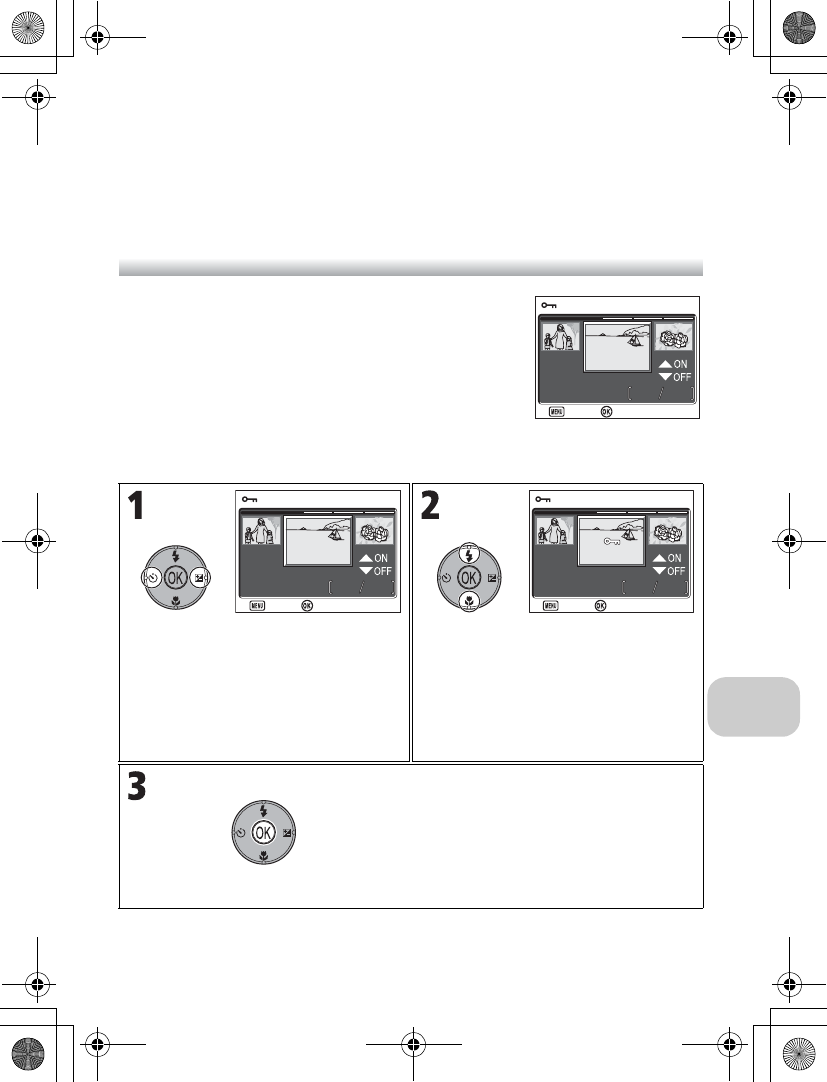
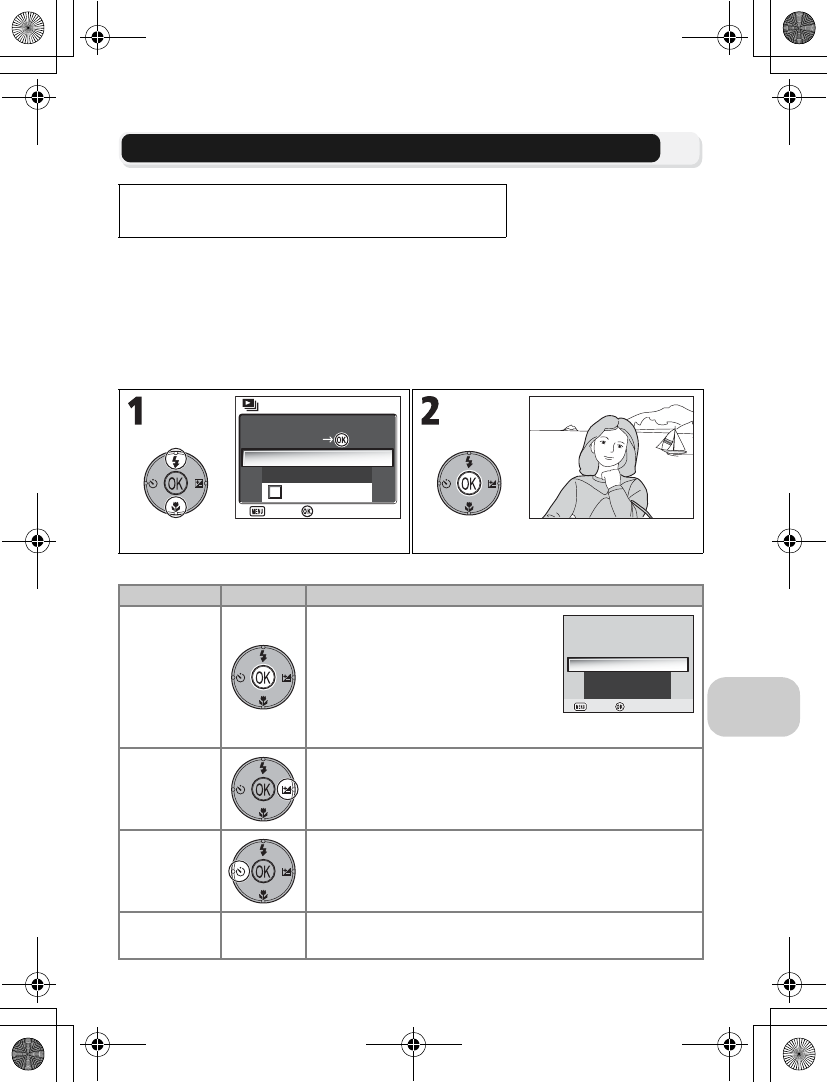
To select pictures:
Highlight picture.
•Selected picture appears in the center.
•To cancel, press m.
Set picture. An icon corresponding to the
function appears.
•Repeat steps 1 and 2 for all pictures to
select.
•To cancel option, highlight pictures
and press down on multi selector to
remove icon.
End selection and switch screens.
•For Protect, Transfer marking, and
Hide, no further operations are
required.
•For Delete and Copy, a confirmation
dialog is displayed. Select Yes and
press d to delete or copy.
PROTECT
PROTECT
5
5
4
4
12:00
12:00
2005 .12 .01
2005 .12 .01
Back
Back
Confirm
PROTECT
PROTECT
5
5
4
4
12:00
12:00
2005 .12 .01
2005 .12 .01
Back
Back
Confirm
5
5
4
4
12:00
12:00
2005 .12 .01
2005 .12 .01
PROTECT
PROTECT
Back
Back
Confirm
en_q3175.book Page 105 Thursday, June 16, 2005 10:54 AM
106
The Playback Menu
Navigating the Choose Date Screen
When Choose date is selected in Print set (c66), De-
lete (c111) or Transfer marking (c112), CHOOSE
DATE screen, such as the screen on the right, is dis-
played. The same menu operation can be performed on
all pictures recorded on the same date.
See “Setting Print Order by Day” (c68) for more infor-
mation on Print set.
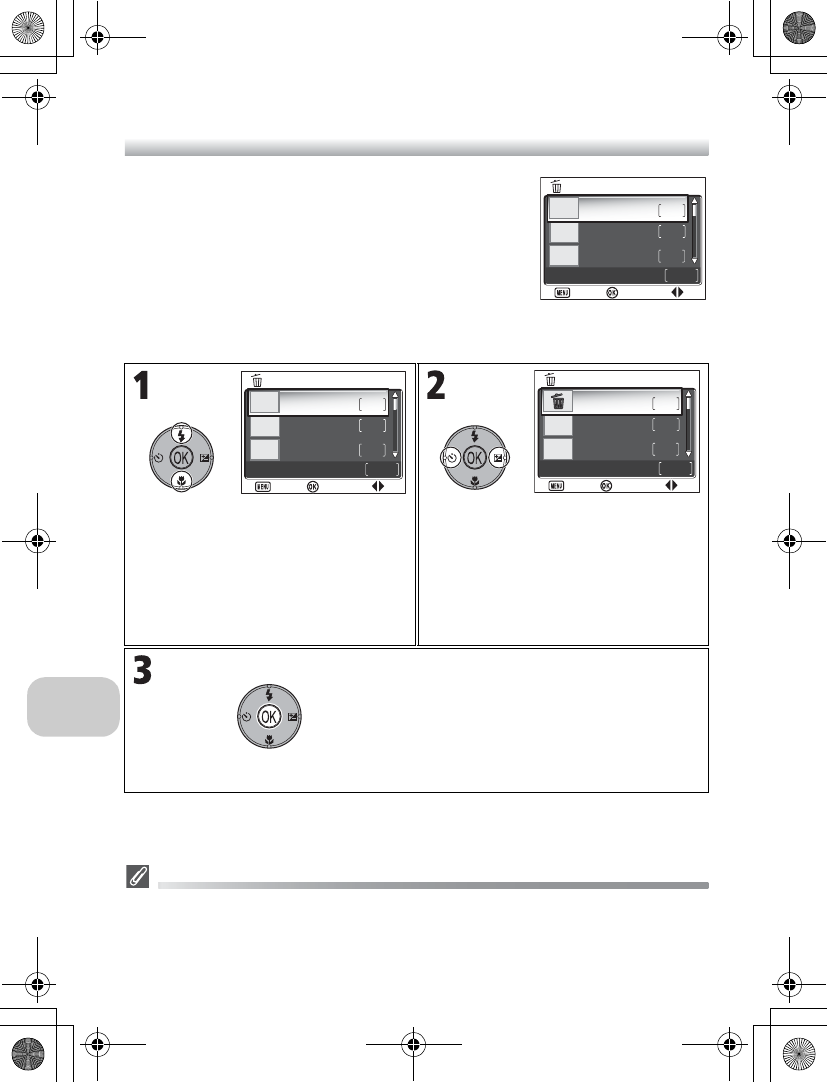
To select date of recording:
Pictures Displayed as ####
In the screen in step 1, pictures are grouped up to 30 days from the newest date of recording.
Older pictures are grouped in the last item as #### and are treated as having the same date
of recording.
Highlight dates. Set date. An icon corresponding to the
function appears.
•Repeat steps 1 and 2 when setting
other dates.
•To cancel option, highlight dates and
press left on the multi selector to
remove icon.
End selection and switch screens.
•For Transfer marking, all pictures for
selected date are set for transfer.
•For Delete, a delete confirmation dia-
log is displayed. Select Yes and press
d to delete all pictures for selected
date of recording.
2005 .12 .01
2005 .11 .01
2005 .10 .01
3
4
8
0
copies
CHOOSE DATE
ON
ON
OFF
OFF
Back
Back
Confirm
2005 .12 .01
2005 .11 .01
2005 .10 .01
3
4
8
0
copies
CHOOSE DATE
ON
ON
OFF
OFF
Back
Back
Confirm
2005 .12 .01
2005 .11 .01
2005 .10 .01
3
4
8
8
images total
CHOOSE DATE
ON
ON
OFF
OFF
Confirm
Back
Back
en_q3175.book Page 106 Thursday, June 16, 2005 10:54 AM
107
The Playback Menu
List by Date
This option is used to sort pictures in the memory or memory card by date of re-
cording.
The following five options are available:
D-Lighting, Print set, Delete, Transfer marking, and Small pic.
To select pictures by date and activate the Playback menu:
Pictures Displayed as ####
In the screen in step 1, pictures are grouped up to 30 days from the newest date of recording.
Older pictures are grouped in the last item as #### and are treated as having the same date
of recording.
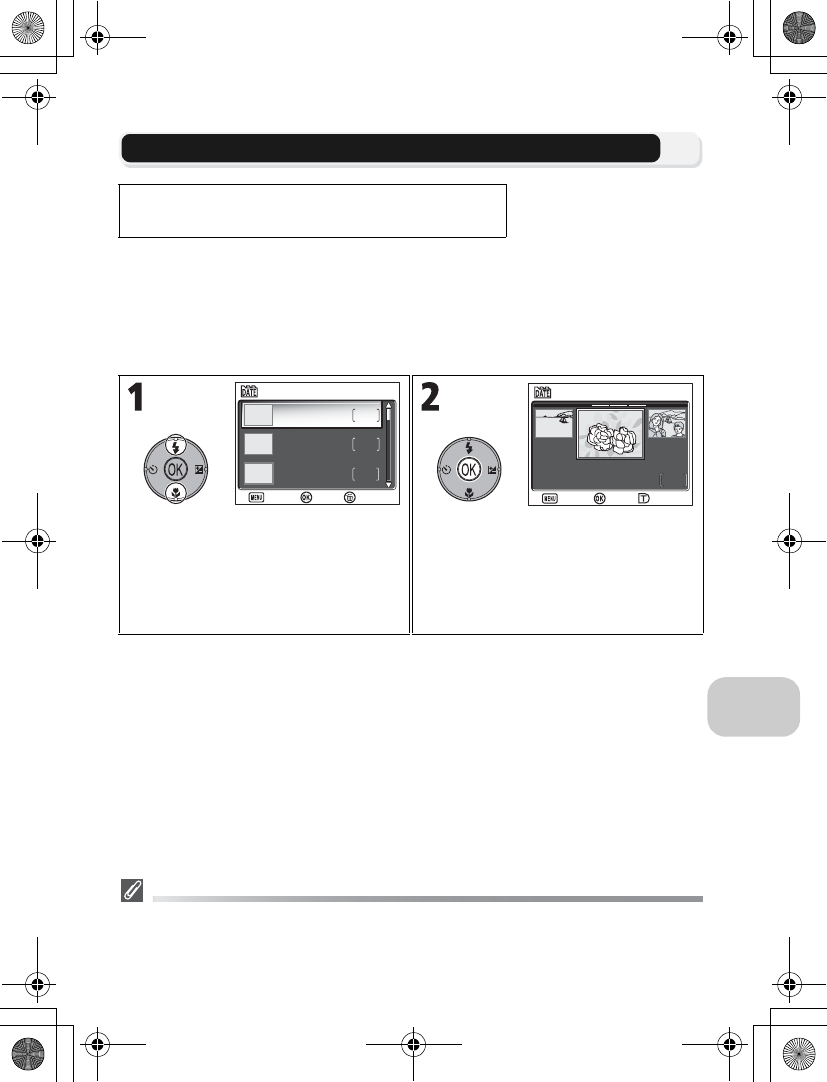
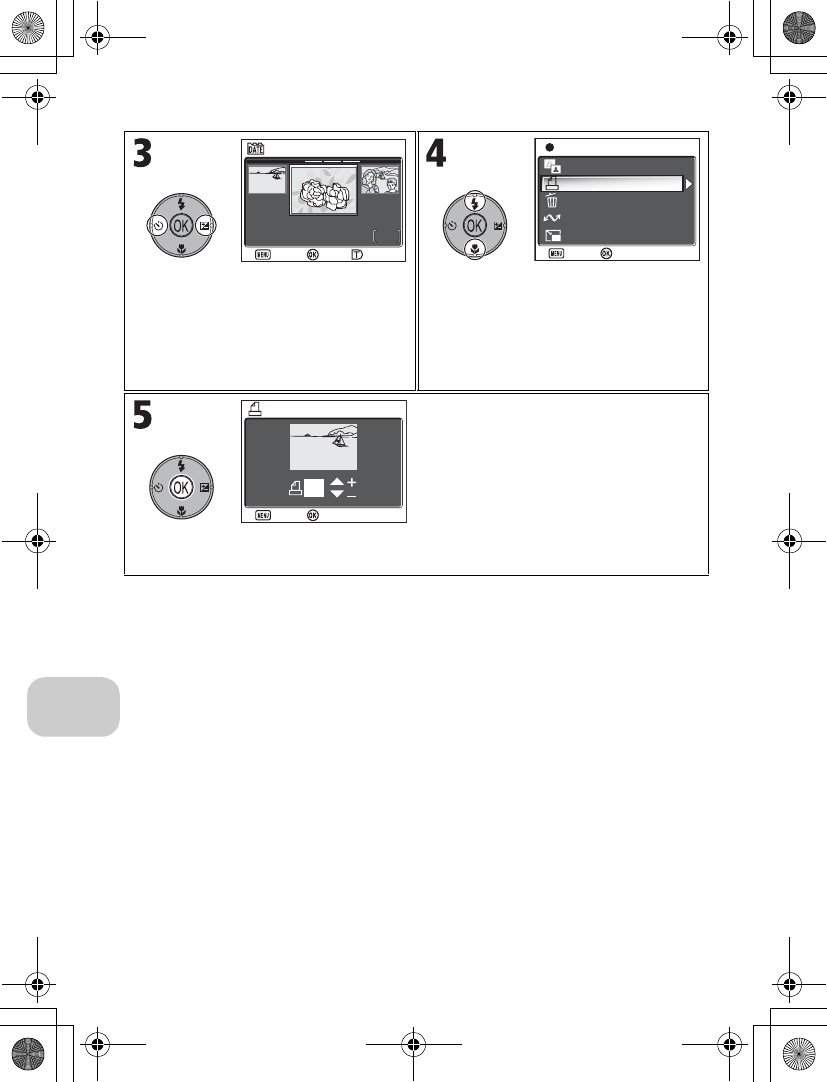
Press the m button in Playback mode to select List
by Date, and then press d.
Highlight dates.
•A thumbnail image of the first shot,
the date of recording, and the number
of images for that date are displayed.
•Pressing A deletes all of the pictures
from that date.
Display confirmation dialog.
•Confirm pictures for that date.
•Pressing k (T) switches to Full-screen
playback mode. Pressing j (W)
returns to the confirmation dialog.
LIST BY DATE
LIST BY DATE
2005 .12 .01
2005 .11 .01
2005 .10 .01
3
4
8
Delete
Delete
Confirm
Back
Back
5/8
5/8
12:00
12:00
2005 .12 .01
2005 .12 .01
Confirm
SELECTED IMAGES
SELECTED IMAGES
Zoom in
Zoom in
Back
Back
en_q3175.book Page 107 Thursday, June 16, 2005 10:54 AM
108
The Playback Menu
Scroll through pictures and press d.
•Select operation for picture.
•
After switching to Full-screen playback
mode in step 2, selecting a picture and
pressing
d
displays the OPTIONS
screen.
Highlight menu option.
Display settings screen for the selected
menu.
•For more information on further oper-
ations, see “Enhancing Contrast: D-
Lighting” (c78), “w Print Set”
(c66), “A Delete” (c111), “E
Transfer Marking” (c112), and “H
Creating a Smaller Picture: Small Pic”
(c79).
5/8
5/8
12:00
12:00
2005 .12 .01
2005 .12 .01
Confirm
SELECTED IMAGES
SELECTED IMAGES
Zoom in
Zoom in
Back
Back
OPTIONS
OPTIONS
D-Lighting
Print set
Delete
Transfer marking
Small pic.
Confirm
Exit
PRINT SET
PRINT SET
Back
Back
3
Confirm
en_q3175.book Page 108 Thursday, June 16, 2005 10:54 AM
109
The Playback Menu
z Slide Show
This option is used to play pictures back in an automated “slide show” with two
seconds between each picture. Hidden pictures are not played back.
To change the display interval, highlight Frame intvl and press d to display the
FRAME INTVL screen (c110).
•Pictures are played back in the order they were recorded (smallest file number
to largest file number).
•The maximum playback time for a slide show is 30 minutes.
The following operations can be performed during the show:
Press the m button in Playback mode to select
Slide show, and then press d.
Highlight Start. Begin slide show.
To Press Description
Pause
Pause slide show and menu will be
displayed. Highlight Restart and
press d to resume show. Highlight
Frame intvl to change the display
interval. The default setting is 3s.
Highlight End and press d to end
show.
Skip to next
frame
Skip to next slide. Hold it down to fast forward through
show.
Return to
previous
frame
Return to previous slide. Hold it down to rewind through
show.
End slide
show mEnd slide show and return to Full-screen playback mode.
SLIDE SHOW
SLIDE SHOW
Start
Frame intvl
Loop
Pause
Confirm
Exit
Frame intvl
Pause
Pause
Confirm
Confirm
Exit
Exit
Restart
End
en_q3175.book Page 109 Thursday, June 16, 2005 10:54 AM

110
The Playback Menu
Images in the Memory
The pictures in the memory and on the memory card cannot be displayed simultaneously. To
display pictures in the memory, select either of the following:
•Remove the memory card from the camera (c13), and display pictures.
•Copy pictures stored in the memory to a memory card (c114), and display the pictures.
“Loop”
If Loop is selected in the starting screen, the slide show will repeat
automatically. To select or deselect the loop option, highlight Loop
and press d. A check mark next to Loop indicates that the loop op-
tion is selected.
Notes on the Slide Show
•If no operations are performed for 30 minutes after the slide show is started, the monitor
will turn off with Auto off, and the camera will turn off after three minutes.
•Movies are displayed as still images showing the movie’s first frame.
Changing the Display Interval
The Slide show menu on the previous page and the
pause dialog shown above contain a Frame intvl option
for choosing how long each picture will be displayed. To
change the display interval, highlight Frame intvl and
press d. The menu of interval settings shown at right
will be displayed; highlight the desired setting and press
d.
Frame Interval
Due to differences in file size and the speed at which pictures can be read from the memory
card, the actual interval may differ from the value selected.
Frame intvl
SLIDE SHOW
SLIDE SHOW
Start
Loop
Pause
Confirm
Exit
1
2s
3s
FRAME INTVL
FRAME INTVL
10s
5s
Confirm
Exit
en_q3175.book Page 110 Thursday, June 16, 2005 10:54 AM
111
The Playback Menu
A Delete
This option is used to delete selected pictures or all pic-
tures stored in the memory or on the memory card.
•When the memory card is not inserted in the camera,
pictures stored in the memory are deleted.
•When the memory card is inserted in the camera, pictures stored on the mem-
ory card are deleted.
Notes on Voice Memo
Voice memo can be deleted with Delete in the Playback menu. To delete only the voice
memo recorded to the picture, press A in Full-screen playback mode, Thumbnail playback
mode, or Playback zoom mode (c58).
Notes on Deletion
•Once deleted, pictures cannot be recovered. If desired, transfer images to a computer
before deletion.
•Pictures marked with a D icon are protected and cannot be deleted (c112).
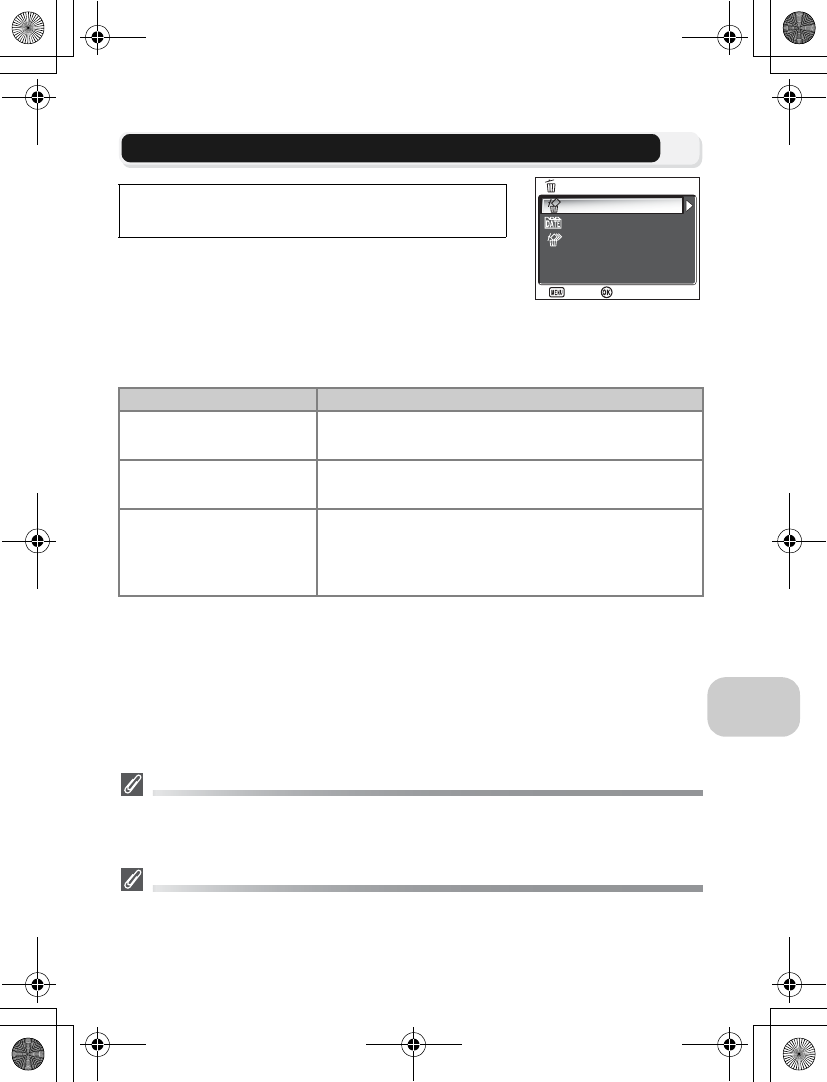
Press the m button in Playback mode to select De-
lete, and then press d.
Option Description
B
Erase selected images
Delete recorded pictures in the Picture selection screen
(c105).
XXX
Choose date
Delete selected pictures from same date of recording in
CHOOSE DATE screen (c106).
C
Erase all images
Delete all pictures stored in the memory or on the mem-
ory card.
•In the delete confirmation dialog, highlight Yes and
press d to delete picture.
DELETE
DELETE
Erase selected images
Choose date
Erase all images
Confirm
Exit
en_q3175.book Page 111 Thursday, June 16, 2005 10:54 AM
112
The Playback Menu
D Protect
This option is used to protect pictures from accidental
deletion.
Notes on Protecting Pictures
Protected pictures cannot be deleted using the A button or the Delete menu. However, all
pictures, including protected files, will be deleted when the memory or the memory card is
formatted (c128).
E Transfer Marking
This option is used to mark stored pictures for transfer
to a computer.
When you connect the camera to a computer via the
UC-E6 USB cable or wireless LAN and press d (the cen-
ter of the multi selector), only pictures marked with a E icon will be transferred
(cXXX).
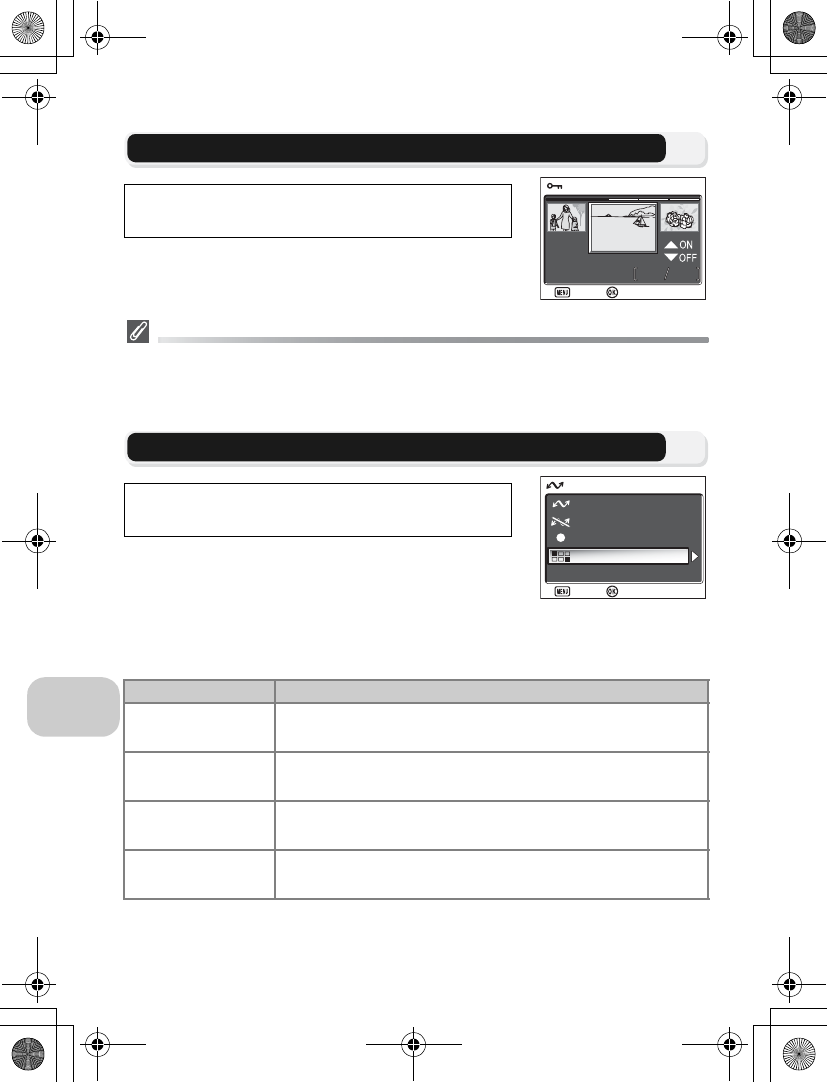
Press the m button in Playback mode to select Pro-
tect, and then press d.
Press the m button in Playback mode to select
Transfer marking, and then press d.
Option Description
E
All on
Mark all pictures in the memory or on the memory card for
transfer.
F
All off
Remove transfer marking from all pictures in the memory or on
the memory card.
XXX
Choose date
Add or remove the E icon to all pictures from same date of
recording in CHOOSE DATE screen (c106).
P
Select image(s)
Add or remove the E icon to pictures in the Picture selection
screen (c105).
PROTECT
PROTECT
5
5
4
4
12:00
12:00
2005 .12 .01
2005 .12 .01
Back
Back
Confirm
All on
All off
Choose date
TRANSFER MARKING
TRANSFER MARKING
Select image(s)
Confirm
Exit
en_q3175.book Page 112 Thursday, June 16, 2005 10:54 AM
113
The Playback Menu
Notes on Transfer Marking
•No more than 999 pictures can be marked for transfer. If the memory or the memory card
contains more than 999 pictures, transfer all pictures using PictureProject. See the Picture-
Project Reference Manual (on CD) for details.
•The COOLPIX P1/P2 cannot be used to transfer images selected for transfer with another
model of Nikon digital camera. Use COOLPIX P1/P2 to reselect the pictures.
•As the default setting of the Auto Transfer option is On (c130), all pictures taken are
set to be transferred and the E icon is added when displayed.
The E Icon
The selected pictures are indicated by a E icon in Playback mode.
G Hide Image
When creating a slide show or showing pictures to an
audience, this option is used to hide selected pictures
(c105).
Formatting Memory or Memory Cards
Hidden pictures will be deleted if memory or memory card is formatted.
“ALL IMAGES ARE HIDDEN“
If all pictures in the current folder are hidden, the message “ALL IMAGES ARE HIDDEN“ will
be displayed in review and full-screen playback. Use Hide image to reveal some of the pic-
tures in the current folder.
Press the m button in Playback mode to select Hide
Image, and then press d.
1
1
1
1
100NIKON
100NIKON
JPG
JPG
2005
2005
12
12
12
12
00
00
01
01
0008
0008
NORM
NORM
Full-screen playback Thumbnail playback
5
5
4
4
12:00
12:00
2005 .12 .01
2005 .12 .01
Back
Back
Confirm
HIDE IMAGE
HIDE IMAGE
en_q3175.book Page 113 Thursday, June 16, 2005 10:54 AM
114
The Playback Menu
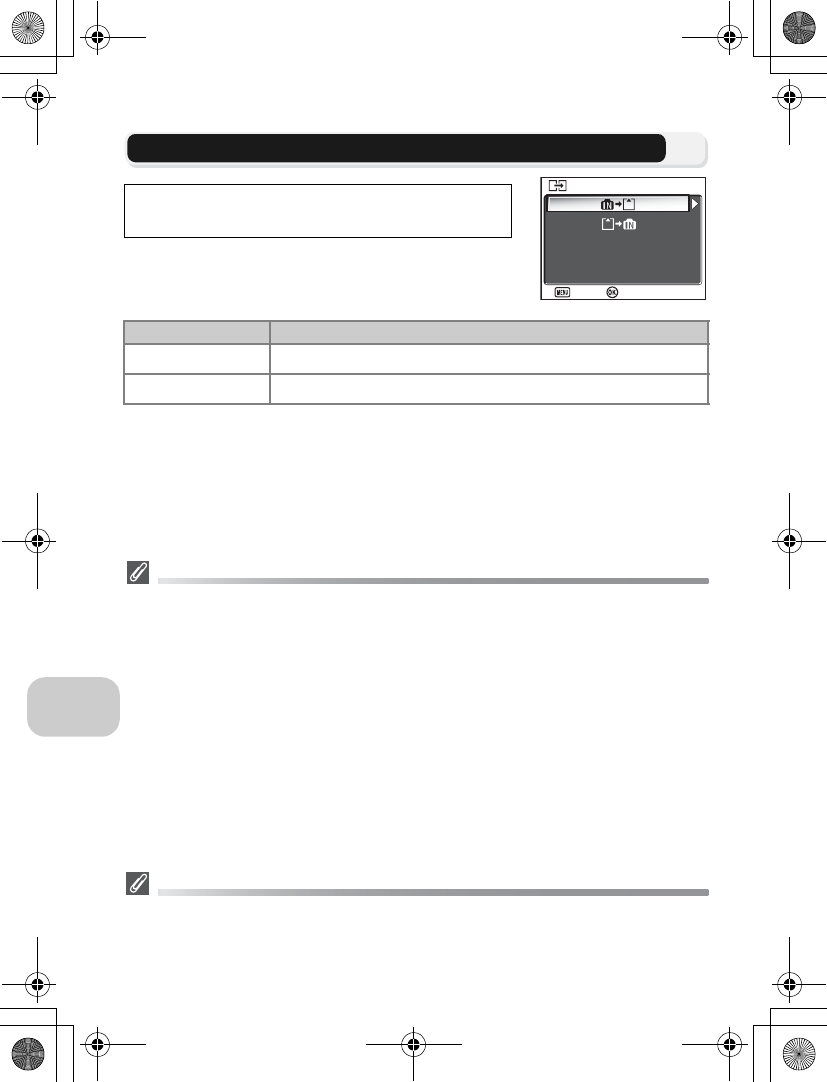
L Copy
Copy stored pictures from the internal memory to the
memory card, or vice versa. You can either choose pic-
tures to copy, or copy all pictures.
Image Copy
•When Selected images is selected, the newly copied pictures are numbered consecutive-
ly from the largest number existing between the two memory sources.
Ex: When the last number in the source memory is 32 (DSCN0032.JPG) and the last num-
ber in the destination memory is 15 (DSCN0015.JPG), the copied pictures are assigned
numbers starting from DSCN0033.
•When All images is selected, all folders in the memory or on the memory card are copied.
The folder name has a new folder number assigned automatically by the camera (one is
added to the maximum folder number in the destination memory). If a new folder is not
created, an error message will be displayed and the copying is not executed.
•If the space in the destination memory is not enough for the copy, copying is canceled and
an error message is displayed.
•The available file formats for copy are JPEG, MOV and WAV. You cannot copy an image
file in other than these file formats.
•Copying of pictures taken with another make of camera or retouched on a computer is
not guaranteed by Nikon.
Print Set, Transfer Marking, and Protect
If pictures set with Print set (c66) or Transfer marking (c112) are copied, settings are
not copied. However, if pictures set with Protect (c112) are copied, protect setting is cop-
ied and copied picture is protected.
Press the m button in Playback mode to select
Copy, and then press d.
Option Description
MNO Copy stored pictures from the memory to the memory card.
ONM Copy stored pictures from the memory card to the memory.
COPY
COPY
Confirm
Exit
en_q3175.book Page 114 Thursday, June 16, 2005 10:54 AM
115
The Set-up Menu
The Set-up Menu
Using the Set-up Menu
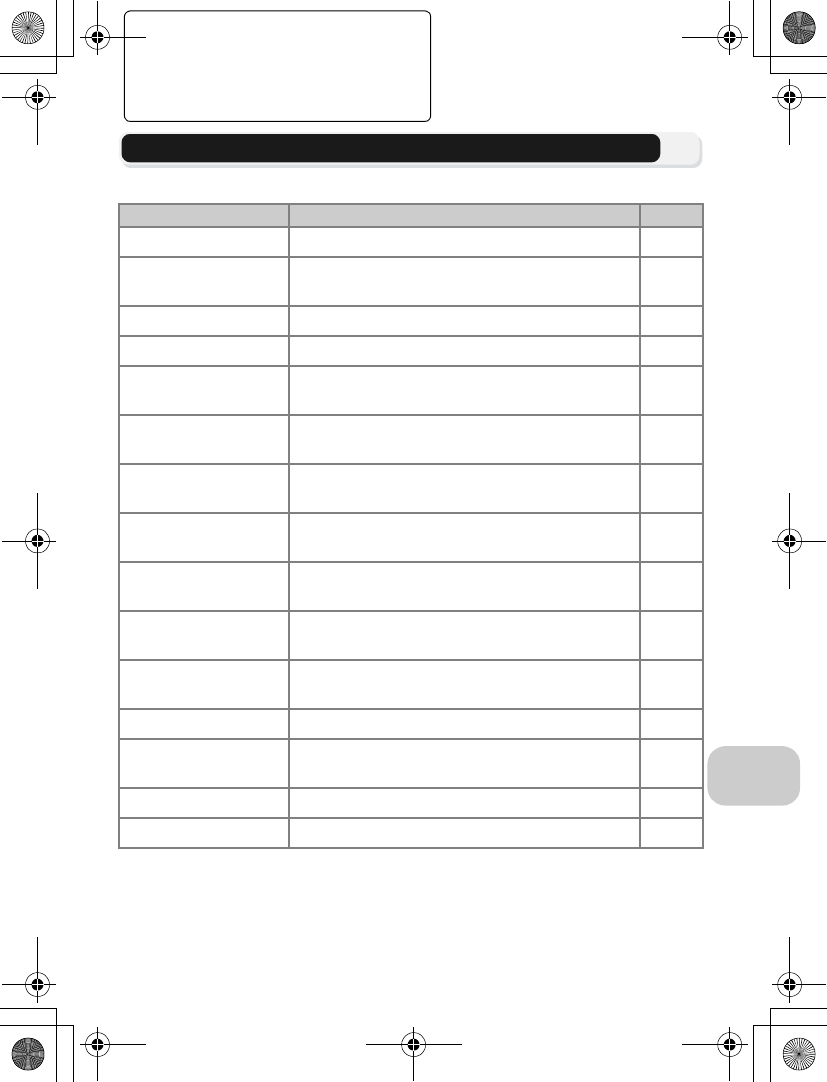
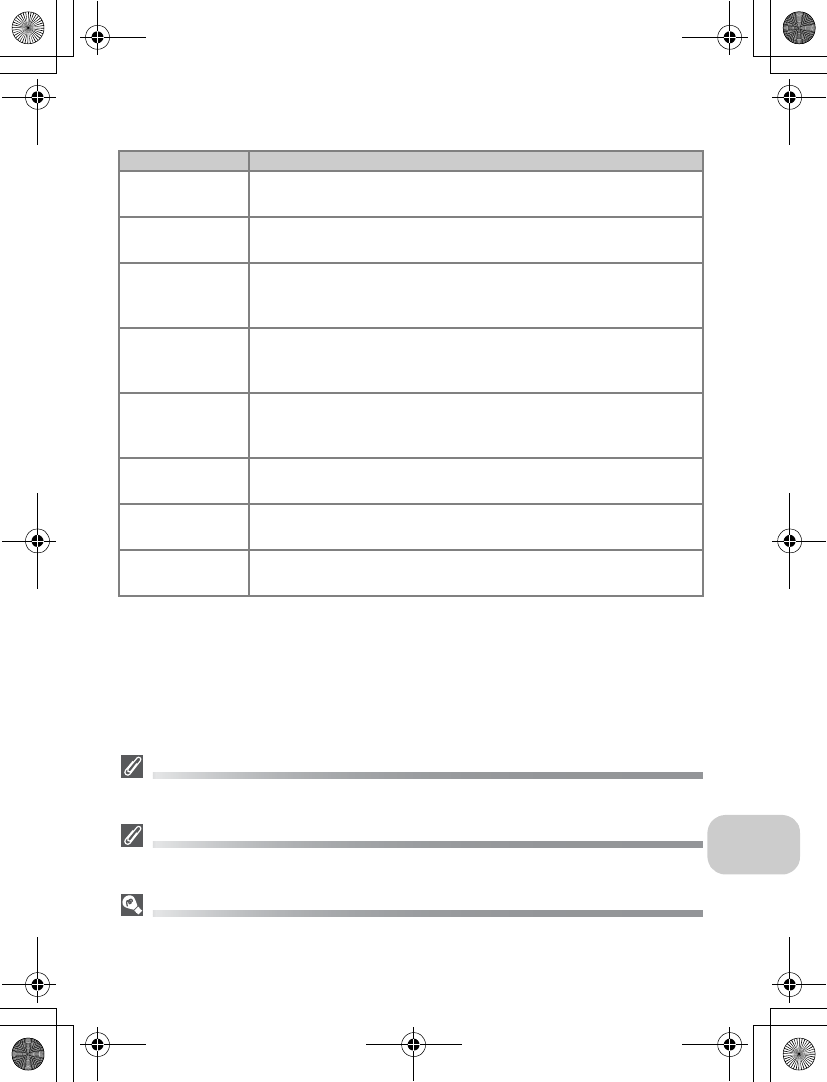
The Set-up menu contains the following options:
Option Description c
Menus Choose a type of the camera menu. 116
Welcome screen Choose the welcome screen to be displayed when
the camera is turned on. 117
Date Set the camera clock. 118
Monitor settings Set display, brightness and hue of the monitor. 120
Date imprint Choose whether the self-timer lamp lights after
shooting. 122
Shot confirmation If On is selected for this option, the self-timer lamp
will light after shooting. 124
AF assist Choose whether the AF-assist illuminator lights
when the subject is poorly lit. 125
Sound settings Set button sound and adjust volume of shutter
and start-up sounds. 126
Auto off Choose how long the monitor will remain on
before turning off automatically to save power. 127
Format memory/card Format the memory or the memory card for use in
the camera. 128
Language Choose a language for camera menus and mes-
sages. 129
Interface Set USB mode or the video mode. 129
Auto transfer Choose whether or not to set Transfer marking
option to the picture taken. 130
Reset all Restore camera settings to their default settings. 131
Firmware version Display the current camera firmware version. 132
en_q3175.book Page 115 Thursday, June 16, 2005 10:54 AM
116
The Set-up Menu
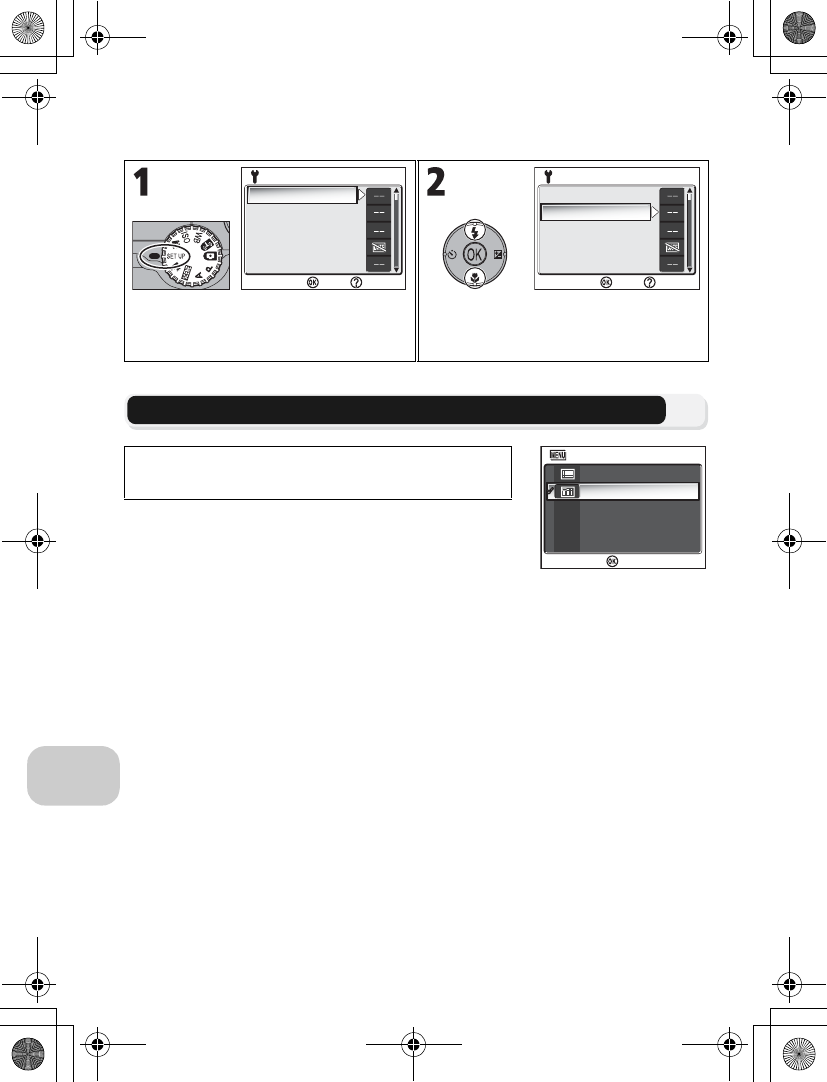
To display the Set-up menu:
R Menus
This option is used to switch the menu display of the
Shooting menu, Movie menu, Playback menu, or Set-
up menu to SText or UIcons.
Rotate the mode dial to a.
•Set-up menu is displayed.
Highlight menu option and press d.
•To exit, rotate the mode dial to a dif-
ferent setting or press i.
Rotate the mode dial to a to select Menus, and
then press d.
SET-UP 1/3
SET-UP 1/3
Menus
Welcome screen
Date
Monitor settings
Date imprint
Confirm
Help
SET-UP 1/3
SET-UP 1/3
Menus
Welcome screen
Date
Monitor settings
Date imprint
Confirm
Help
Text
Icons
MENUS
MENUS
Confirm
en_q3175.book Page 116 Thursday, June 16, 2005 10:54 AM
117
The Set-up Menu
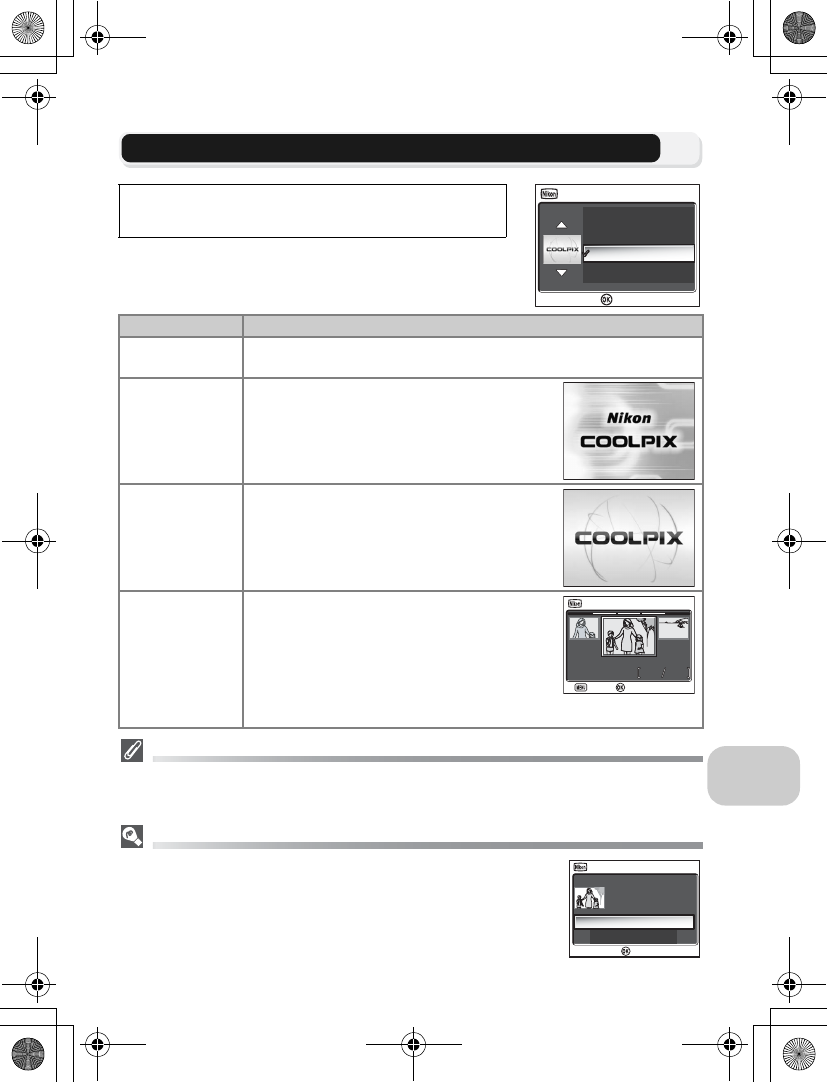
V Welcome Screen
This option is used to choose the welcome screen dis-
played when the camera is turned on.
Small Pictures and Cropped Copies
Resized copies created with the small picture (c79) and cropping options (c77) can only
be selected for the welcome screen if they are 640 × 480 pixels or larger (640 × 480 only for
small picture).
“Select an Image”
When Select an image is selected, the chosen picture will appear at
startup even when the memory card containing the image is removed
from the camera. If you select Select an image after choosing a cus-
tom welcome screen, the confirmation dialog shown at right will be
displayed. Select Yes to choose a new picture for the welcome
screen, No to exit leaving the welcome screen unchanged.
Rotate the mode dial to a to select Welcome
screen, and then press d.
Option Description
Disable
welcome No welcome screen is displayed when camera is turned on.
Nikon Image shown at right is displayed when
camera is turned on.
Animation
(default setting)
Short animation is displayed when camera is
turned on.
Select an
image
You can choose the welcome screen from
pictures stored in the memory or on the
memory card.
1 SELECT IMAGE screen is displayed. High-
light a picture using the multi selector.
2 Press d.
To select a picture stored in the camera
memory, remove the memory card.
Disable welcome
Nikon
Animation
Select an image
WELCOME IMAGE SELECT
WELCOME IMAGE SELECT
Confirm
SELECT IMAGE
SELECT IMAGE
Back
Back
5
5
3
3
12:00
12:00
2005 .12 .01
2005 .12 .01
Confirm
No
Yes
WELCOME IMAGE SELECT
WELCOME IMAGE SELECT
Replace current image?
Replace current image?
Confirm
en_q3175.book Page 117 Thursday, June 16, 2005 10:54 AM
118
The Set-up Menu
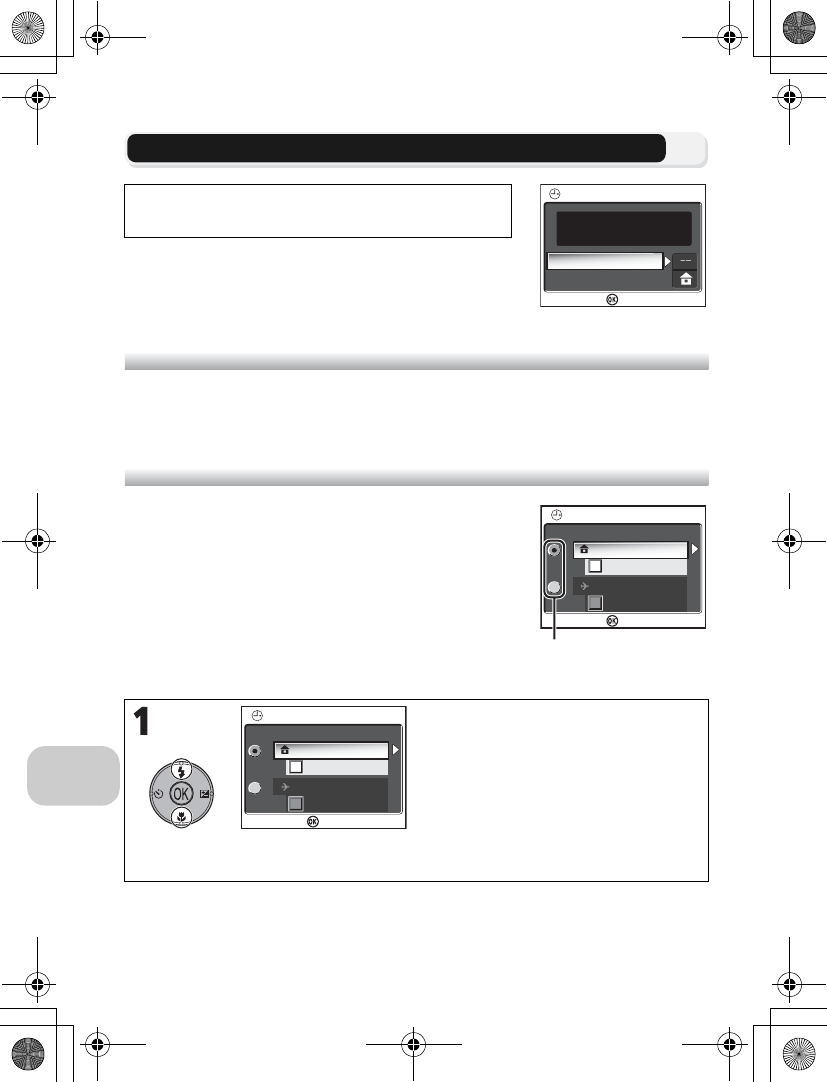
W Date
This option is used to set the camera clock and to
choose home time zone and new city time zone (travel
destination time zone).
Date
Date is used to set the camera clock to the current date and time. See “Basic Set-
up” (c16).
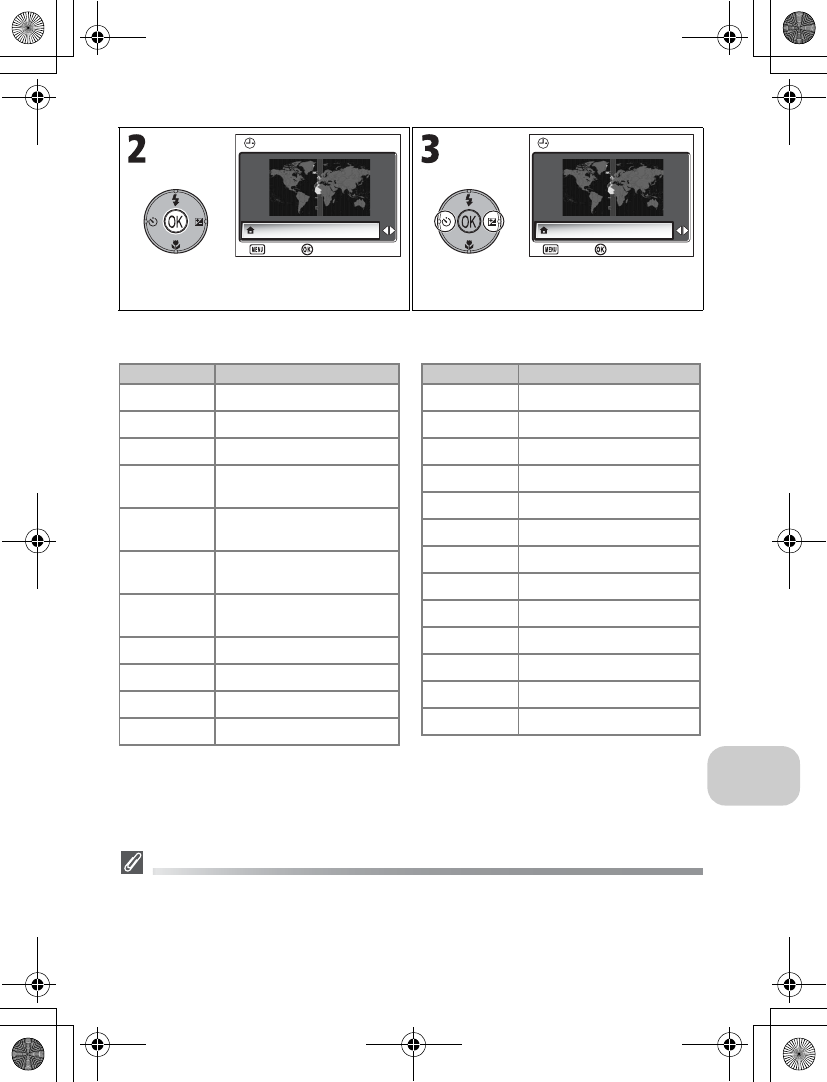
Time Zone
Select the time zone. The normal time zone setting is
X (home time zone). If you select Y (new city time
zone), the time difference is automatically calculated
and the date and time in the selected region are dis-
played.
Rotate the mode dial to a to select Date, and
then press d.
Select home time zone or new city time
zone.
•To set the clock to the home time
zone, highlight X and press d.
•To set the clock to the new city time
zone, highlight Y and press d.
•To turn daylight saving time on, high-
light DaylightSaving and press d.
The y icon is displayed in r.
Date
Time zone
DATE
DATE
2005. 1 2. 0 1 13 : 00
Confirm
2005.12.01. 13:00
TIME ZONE
DaylightSaving
OK
DaylightSaving
London, Casabulanca
Confirm
London, Casablanca
Dot marks selected
option
2005.12.01. 13:00
TIME ZONE
DaylightSaving
OK
DaylightSaving
London, Casabulanca
Confirm
London, Casablanca
en_q3175.book Page 118 Thursday, June 16, 2005 10:54 AM
119
The Set-up Menu
The camera supports the following time zones:
Time Zones
Time zone increments of less than one hour are not supported. When traveling to or from
destinations at half- or quarter-hour increments from Greenwich Mean Time (GMT), such as
Afghanistan, Central Australia, India, Iran, Nepal, or Newfoundland, set the camera clock to
local time (c16, 118).
Selected time zone is displayed. Choose time zone and press d.
Time zone is set.
Back
Back
HOME TIME ZONE
HOME TIME ZONE
London, Casablanca
Confirm
Back
Back
HOME TIME ZONE
HOME TIME ZONE
London, Casablanca
Confirm
* When daylight saving time is turned on.
GMT +/– Location
GMT –11 Midway, Samoa
GMT –10 Hawaii, Tahiti
GMT –9 Alaska, Anchorage
GMT –8 PST (PDT*): Los Angeles,
Seattle, Vancouver
GMT –7 MST (MDT*): Denver,
Phoenix, La Paz
GMT –6 CST (CDT*): Chicago,
Houston, Mexico City
GMT –5 EST (EDT*): New York,
Toronto, Lima
GMT –4 Caracas, Manaus
GMT –3 Buenos Aires, Sao Paulo
GMT –2 Fernando de Noronha
GMT –1 Azores
GMT +/– Location
GMT London, Casablanca
GMT +1 Madrid, Paris, Berlin
GMT +2 Athens, Helsinki
GMT +3 Moscow, Nairobi
GMT +4 Abu Dhabi, Dubai
GMT +5 Islamabad, Karachi
GMT +6 Colombo, Dhaka
GMT +7 Bangkok, Jakarta
GMT +8 Beijing, HK, Singapore
GMT +9 Tokyo, Seoul
GMT +10 Sydney, Guam
GMT +11 New Caledonia
GMT +12 Auckland, Fiji
en_q3175.book Page 119 Thursday, June 16, 2005 10:54 AM
120
The Set-up Menu
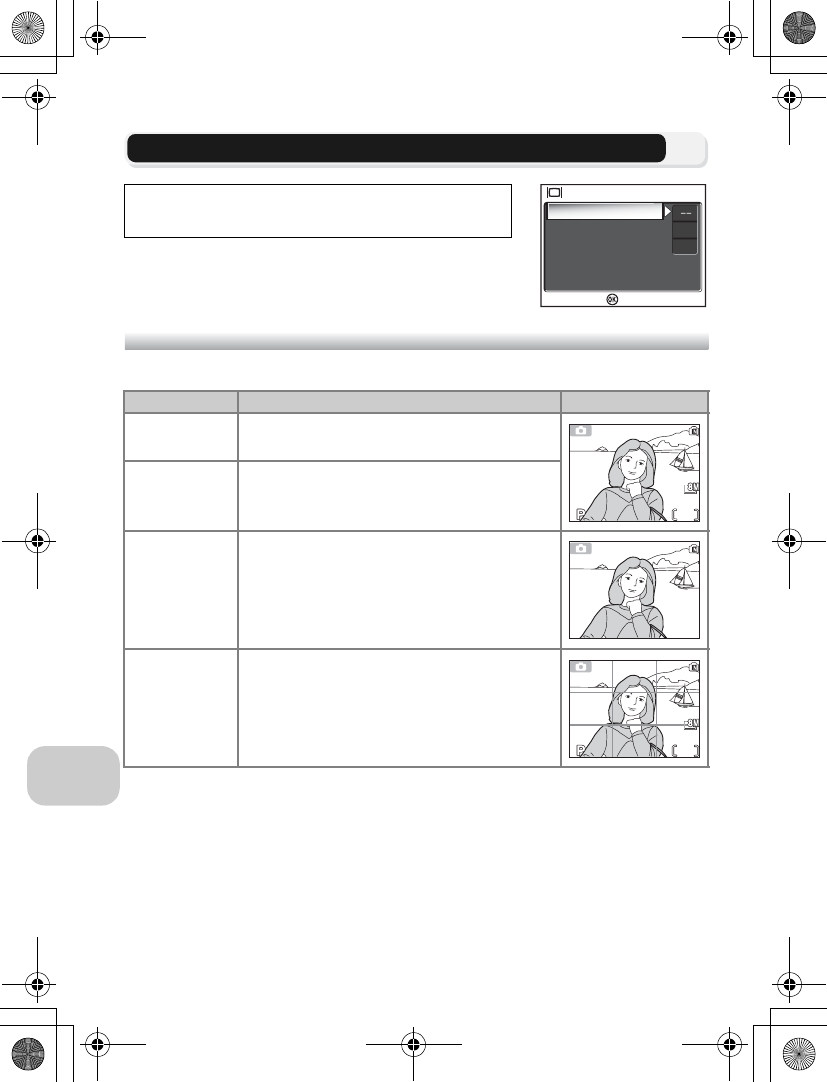
Z Monitor Settings
This option is used to set the display’s appearance,
brightness and hue.
Photo Info
Select this option to hide or display the monitor indicators.
Rotate the Mode Dial to a to select Monitor
settings, and then press d.
Option Description Monitor
Show info Display current settings or operation guide in
monitor when taking or viewing pictures.
Auto info Display current settings or operation guide in
the monitor for five seconds.
Hide info Hide current settings or operation guide.
Framing grid
Display a framing grid in the monitor in X
(Auto) mode. Current settings or operation
guide are displayed in monitor (for five sec-
onds in the Shooting mode).
Photo info
Brightness
MONITOR SETTINGS
MONITOR SETTINGS
3
0
Hue
Confirm
NORM
NORM
15
15
1/60
1/60
F2.7
F2.7
NORM
NORM
15
15
1/60
1/60
F2.7
F2.7
en_q3175.book Page 120 Thursday, June 16, 2005 10:54 AM
121
The Set-up Menu
Brightness
This option is used to adjust the monitor brightness to
one of five grades.
Select Brightness and press d to display the brightness
adjustment screen.
Select brightness by using the picture on the screen as a
gauge and press d.
Hue
This option is used to control monitor hue (tone).
Select Hue and press d to display the hue adjustment
screen.
Select hue by using the picture on the screen as a gauge
and press d.
BRIGHTNESS
BRIGHTNESS
Confirm
HUE
HUE
Confirm
en_q3175.book Page 121 Thursday, June 16, 2005 10:54 AM
122
The Set-up Menu
b Date Imprint
This option is used to imprint the date or the date and
time of recording on pictures as they are recorded to
the memory or memory card. It cannot be used to im-
print a date stamp on pictures after recording.
Restrictions on Date Imprint
•Imprinted date cannot be deleted.
•Date imprint cannot be selected if the camera clock has not been set (c16, 118).
•When shooting with the following, Date imprint is automatically canceled: sContinuous
H (c89), y5 shot buffer (c89), xMulti-shot 16 (c89), FPANORAMA ASSIST
(c38), PSPORTS and Movie mode (c80).
•Date imprinted at an Image size (c47) setting of i640 × 480 may be difficult to read.
We recommend that image size is h1024 × 768 or larger when using the Date imprint
option.
•The date is recorded in the order selected in Date (c16, 118).
•Imprinted data forms a permanent part of the image and will appear whenever the image
is printed, regardless of whether the Date option is chosen in the Print set menu (c66).
Rotate the mode dial to a to select Date im-
print, and then press d.
Option Description
a
Off
(default setting)
Time and date do not appear on pictures.
b
Date
Date is imprinted at bottom right corner of all pictures taken
while this option is in effect.
c
Date and time
Date and time are imprinted at bottom right corner of all
pictures taken while this option is in effect.
d
Date counter
Number of days from stored date until date of recording is
imprinted at bottom right corner of all pictures taken while
this option is in effect.
DATE IMPRINT
DATE IMPRINT
Off
Date
Date and time
Date counter
Confirm
en_q3175.book Page 122 Thursday, June 16, 2005 10:54 AM
123
The Set-up Menu
Date Counter
This option is used to store the date and imprint the
number of days from that date until the date of re-
cording on pictures.
If the stored date is earlier than the date of recording,
the number of days that have elapsed is imprinted on
pictures.
If the stored date is later than the date of recording,
e followed by the number of days until the date of
storage is imprinted on pictures.
Option Description
Stored dates
In the Date counter menu, select Stored
dates, and display the STORED DATES menu.
Up to three dates can be stored. Highlight
option, then press d.
Enter date. Follow steps described in Basic
Setup (c16).
Dates between 1 January 1910 and 31
December 2037 can be stored.
Select a stored date number and press d,
the date will be imprinted.
Display
options
In the Date counter menu, select Display
options, and display the DISPLAY OPTIONS
menu.
The type of display can be selected.
Highlight option, then press d.
01.09.2005
Number of days
0212
DATE COUNTER
DATE COUNTER
Confirm
Stored dates
Display options
STORED DATES
STORED DATES
01.08.2005
20.10.2005
----
.
--
.
--
Confirm
DATE
DATE
Back
Back
Confirm
MDY
1 2
0 1
2005
DISPLAY OPTIONS
DISPLAY OPTIONS
Number of days
Years and days
Yrs, mnths, days
Confirm
en_q3175.book Page 123 Thursday, June 16, 2005 10:54 AM
124
The Set-up Menu
Shot Confirmation
This option is used to light the self-timer lamp after
shooting.
Rotate the mode dial to a to select Shot confir-
mation, and then press d.
Option Description
Off
(default)
If Off is selected, the self-timer lamp will not light after shoot-
ing.
On
If On is selected for this option, the self-timer lamp will light
after shooting to confirm that the shutter has been released.
When wMulti-shot 16 or y5 shot buffer is selected for
Continuous, the lamp will light after all pictures in the series
have been taken. The lamp will not light at a setting of
xUltra HS or if the flash fired when the picture was taken.
SHOT CONFIRMATION
SHOT CONFIRMATION
Off
On
Confirm
en_q3175.book Page 124 Thursday, June 16, 2005 10:54 AM
125
The Set-up Menu
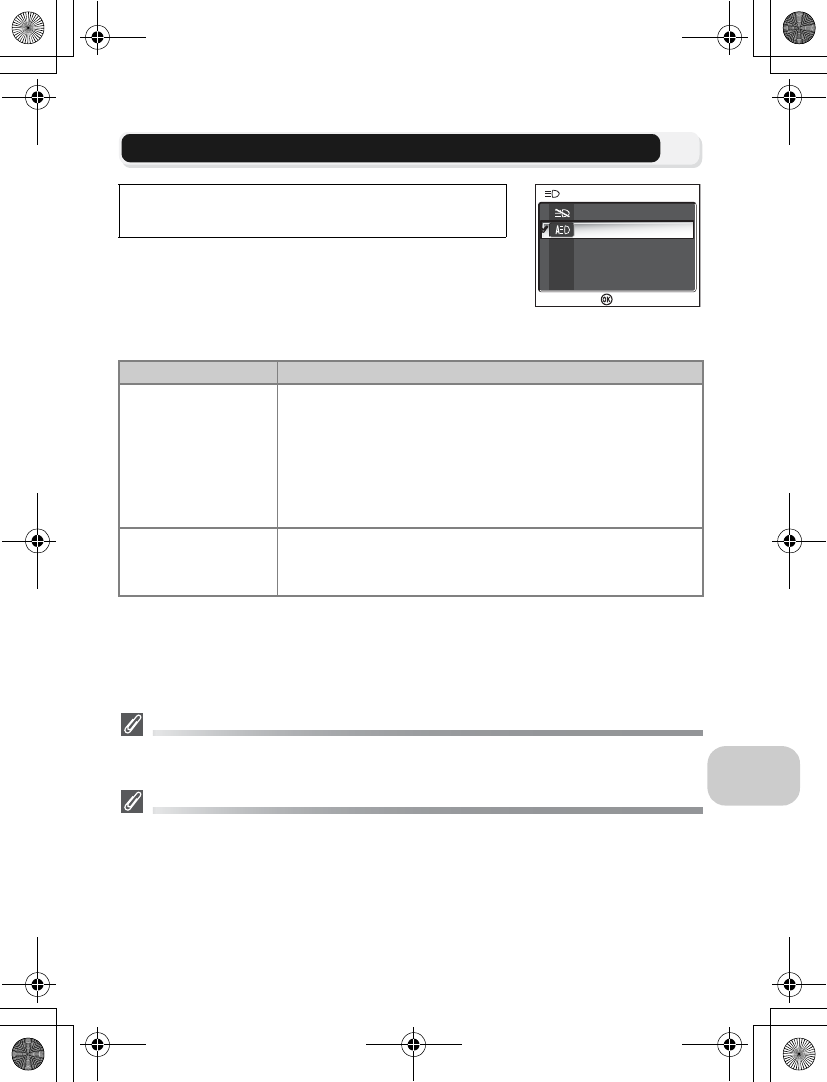
u AF Assist
The COOLPIX P1/P2 is equipped with an AF-assist illu-
minator. If lighting is poor, the built-in AF-assist illumi-
nator will light when the shutter-release button is
pressed halfway, allowing the camera to focus even
when the subject is poorly lit.
AF-Assist Illuminator Provides the Following Range
•Zoom out: a range of approx. XXX - XXX m (XXX - XXX)
•Zoom in: a range of approx. XXX - XXX m (XXX - XXX)
AF-Assist Illuminator
When the AF-assist option is set to Auto, the AF-assist illuminator will light in the following
cases:
•AF area mode is set to lAuto or nOff in the shooting menu, or the focus area in
the center of the frame is selected when AF area mode is set to mManual.
•Shooting in the scene mode such as CPARTY/INDOOR, HBEACH/SNOW,
ISUNSET, OCOPY, LBACK LIGHT, or FPANORAMA ASSIST.
•Focus area in the center of the frame is selected and scene mode is BPORTRAIT,
DNIGHT PORTRAIT, or MCLOSE UP.
Rotate the mode dial to a to select AF assist,
and then press d.
Option Description
f
Off
The AF-assist illuminator does not light.
The AF-assist illuminator can be turned off for shooting in sit-
uations in which the AF-assist illuminator is too bright for
human subjects or in which flash photography is prohibited.
When the AF-assist illuminator is turned off, it will not light
even when the subject is poorly lit. Under these conditions,
however, the camera may not be able to focus accurately.
g
Auto
(default setting)
If lighting is poor, the AF-assist illuminator lights when the
shutter-release button is pressed halfway, allowing the cam-
era to focus the subject (c23).
Off
Auto
AF ASSIST
AF ASSIST
Confirm
en_q3175.book Page 125 Thursday, June 16, 2005 10:54 AM
126
The Set-up Menu
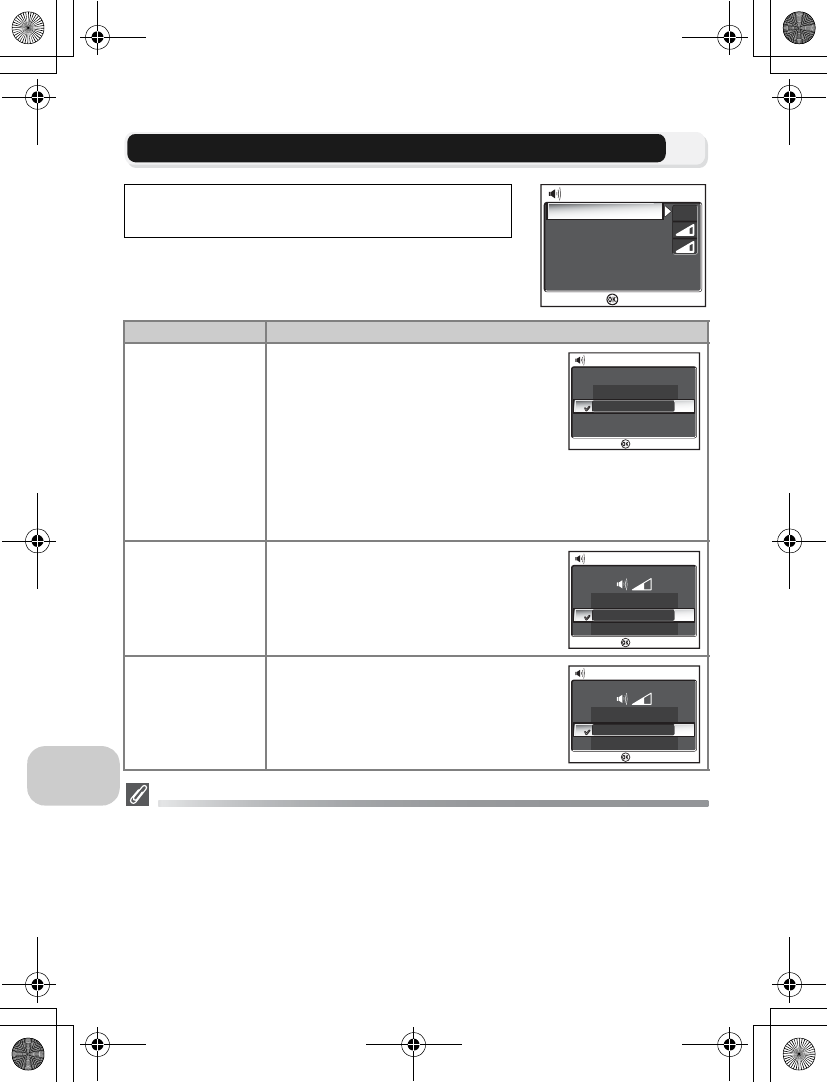
h Sound Settings
The option is used to control the sound settings listed
below.
Shutter Sound
Shutter sound is not produced in the following cases:
•Shooting in Movie mode (c80).
•Shooting in P SPORTS mode (c41).
•Continuous is set to sContinuous H, uContinuous L, wMulti-shot 16,
xUltra HS, or y5 shot buffer (c89).
•BSS is set to On (c92).
•Auto Bracketing is set to C Auto Bracketing (c93).
Rotate the mode dial to a to select Sound set-
tings, and then press d.
Option Description
Button sound
Control the sound played when buttons
are pressed. The button sound is played in
the following cases:
•
Rotating the mode dial to another mode.
•Pressing i to displayed shooting or
playback mode.
•Pressing d to select option or menu.
•Battery is low.
•You cannot take pictures because of the memory or memory
card status.
•An error occurs.
Shutter sound
Adjust volume of shutter sound.
Start-up sound
Adjust volume of sound played when
camera is turned on.
Button sound
Shutter sound
SOUND SETTINGS
SOUND SETTINGS
Start-up sound
ON
Confirm
BUTTON SOUND
BUTTON SOUND
Off
On
Confirm
SHUTTER SOUND
SHUTTER SOUND
Loud
Normal
Off
Confirm
START-UP SOUND
START-UP SOUND
Loud
Normal
Off
Confirm
en_q3175.book Page 126 Thursday, June 16, 2005 10:54 AM
127
The Set-up Menu
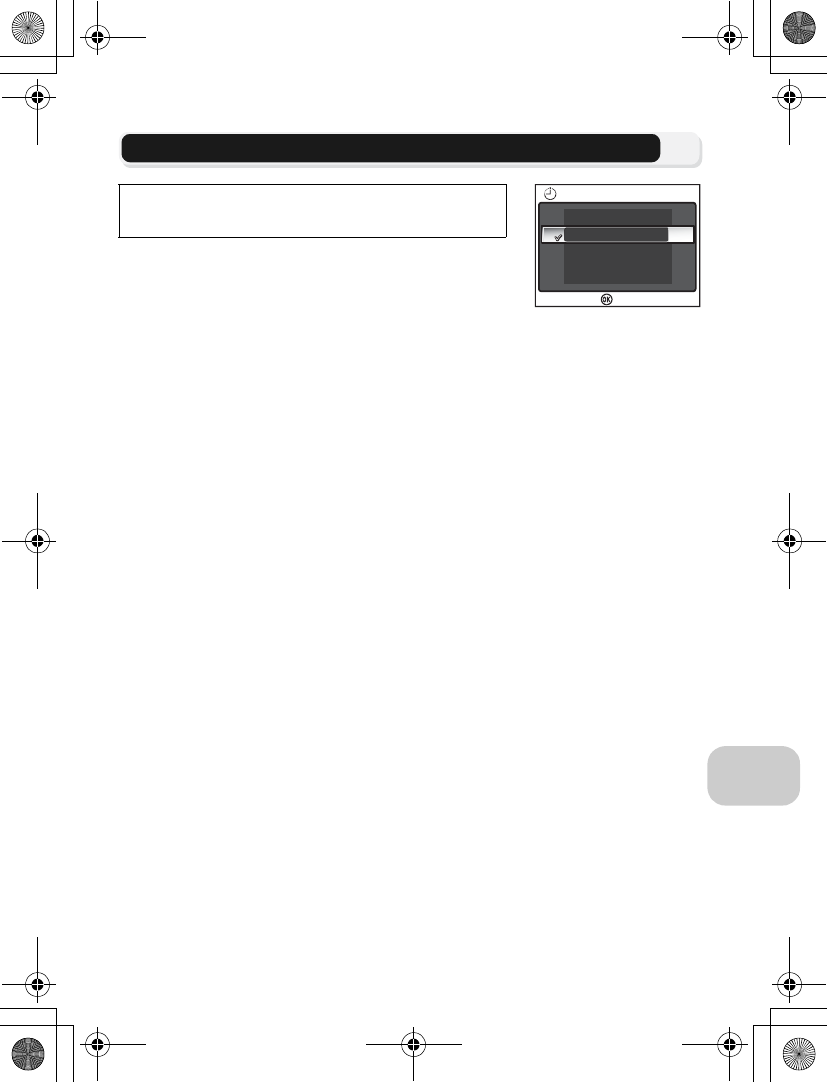
i Auto Off
To save battery power, the camera will enter Standby
mode if no operations are performed for a preset
length of time.
Choose how long monitor will remain on before turn-
ing off automatically from thirty seconds (30s), one minute (1m, default setting),
five minutes (5m) and thirty minutes (30m). For more details on Auto off, see
page 15.
Rotate the mode dial to a to select Auto off,
and then press d.
AUTO OFF
AUTO OFF
5m
30m
30s
1m
Confirm
en_q3175.book Page 127 Thursday, June 16, 2005 10:54 AM
128
The Set-up Menu
M/O Format Memory/Card
This option is used to allow the memory or the mem-
ory card to be formatted for use in the camera.
•Before formatting the memory, remove the memory
card from the camera. Format memory is dis-
played in the Set-up menu.
•When the memory card is inserted in the camera, the memory card will be for-
matted. Format card is displayed in the Set-up menu.
Notes on Formatting Memory/Card
•During formatting, the message “FORMATTING” appears. While the message is displayed,
do not turn the camera off or remove the battery or memory card.
•Formatting the memory or the memory card permanently deletes all data they contain, in-
cluding protected pictures and any other data that may be in the memory or on the mem-
ory card. Before formatting, be sure to transfer any valued pictures to a computer (c61).
Notes on Formatting Memory Card
•Before using a new memory card immediately following purchase, format memory card.
•Repeatedly shooting and deleting pictures reduces the performance of memory cards
leading to a decline in camera performance. Using Format regularly for memory cards is
recommended to maintain memory card performance.
•Format is not available when w (c14) is displayed.
Rotate the mode dial to a to select Format
memory or Format card, and then press d.
Options Descriptions
Quick
format Only the data recorded on the memory card is formatted.
Format The entire memory card is formatted including areas with no data.
Format takes relatively more time than Quick format.
MEMORY CARD FORMAT
MEMORY CARD FORMAT
Quick formatQuick format
Format
Confirm
en_q3175.book Page 128 Thursday, June 16, 2005 10:54 AM
129
The Set-up Menu
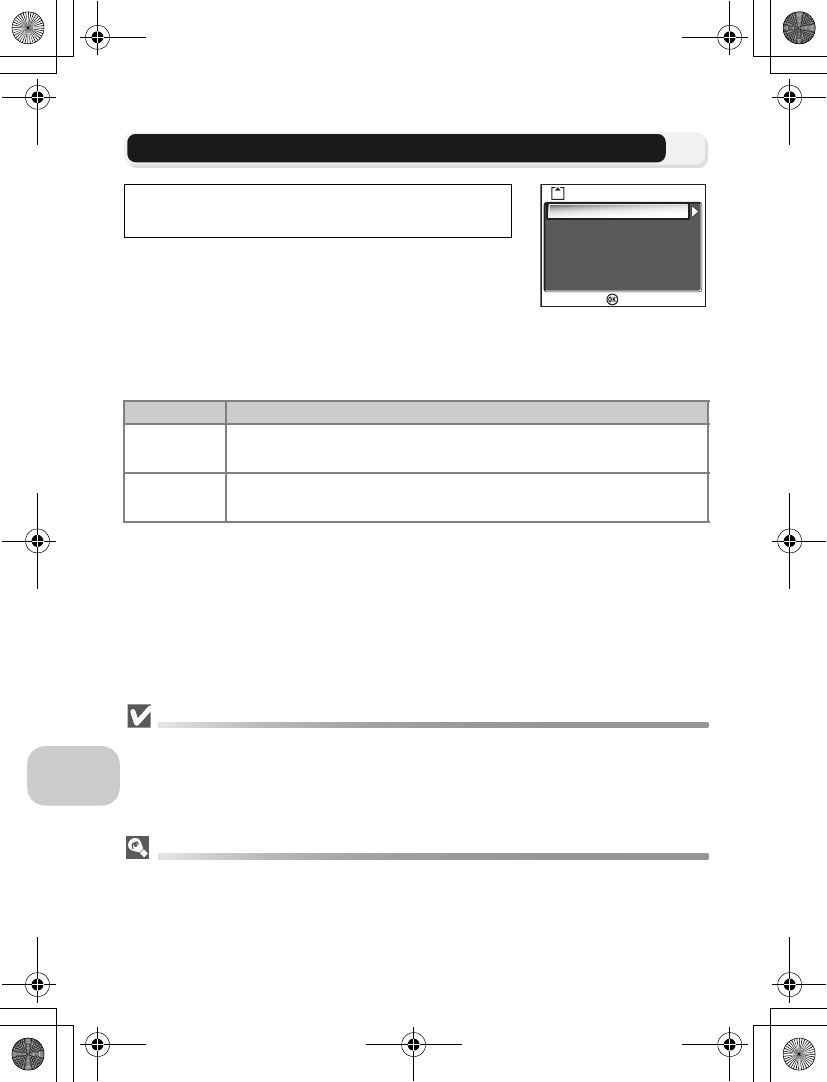
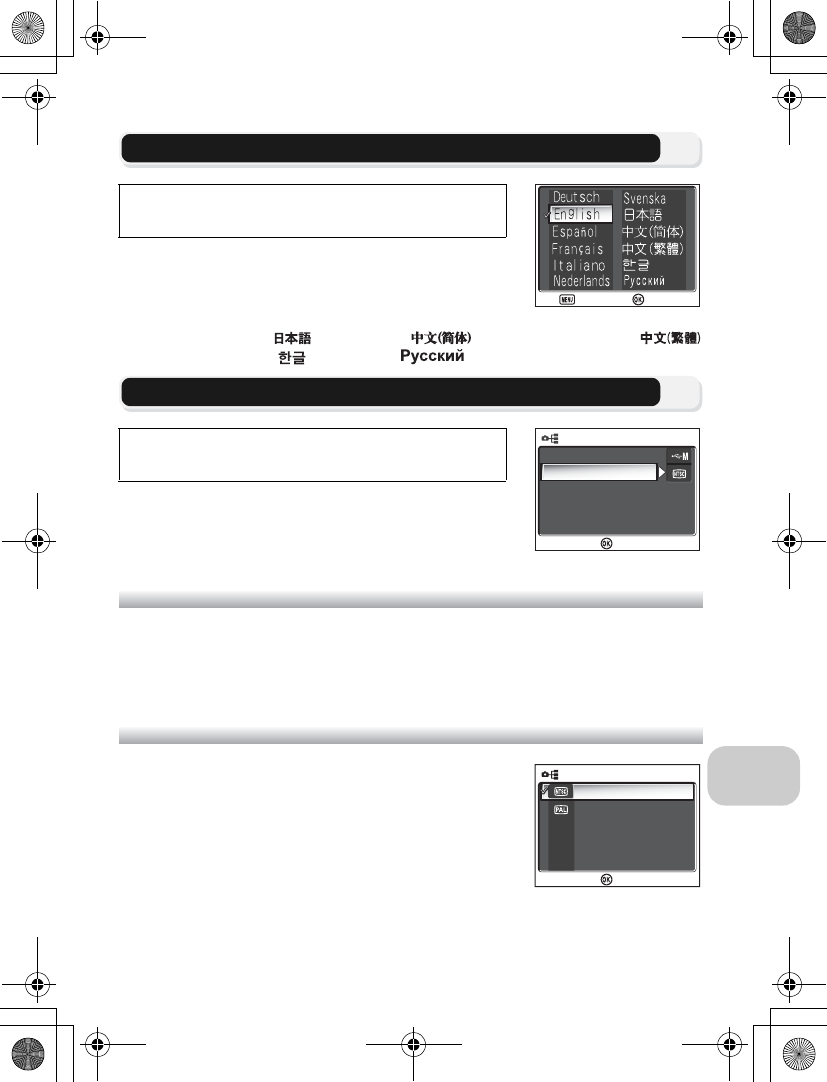
j Language
This option is used to choose the language for menus
and messages displayed in the monitor from Deutsch
(German), English, Español (Spanish), Français
(French), Italiano (Italian), Nederlands (Dutch),
Svenska (Swedish), (Japanese), (Simplified Chinese),
(Traditional Chinese), (Korean) or (Russian).
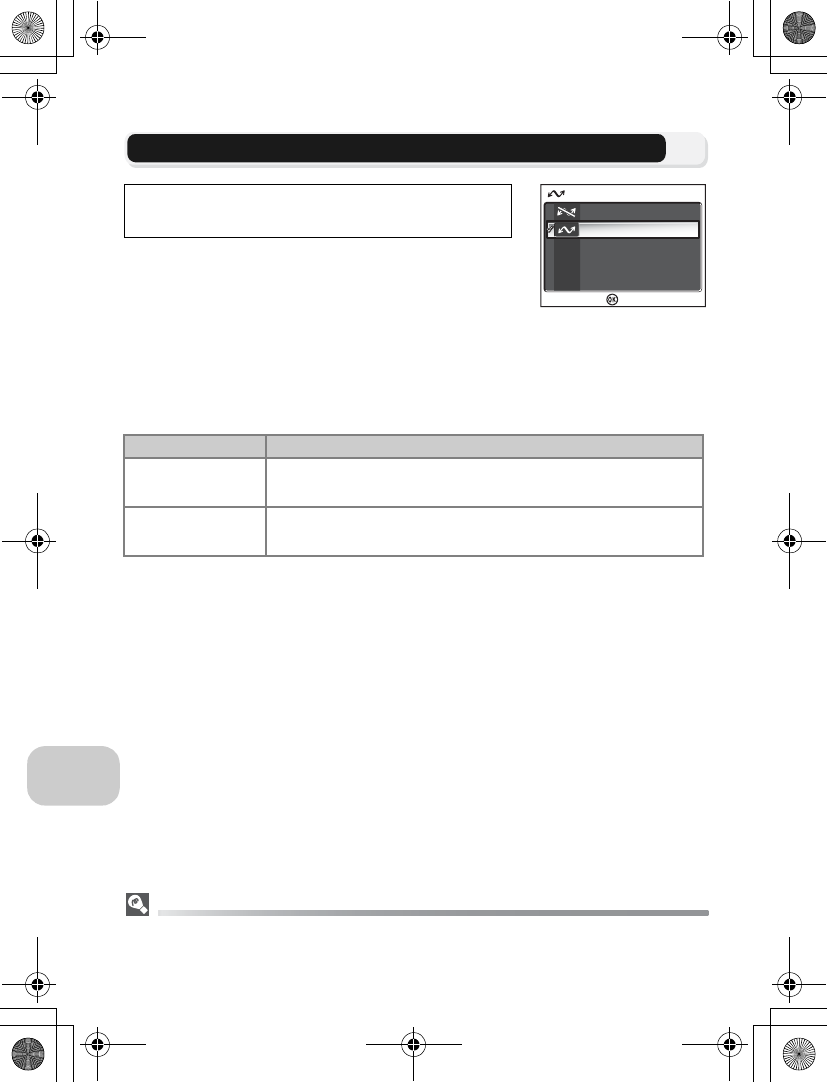
k Interface (USB/Video mode)
USB
Select the USB option used when transferring images on a computer or when con-
necting the camera to a printer supporting PictBridge. Choose USB, and select the
USB option (c61).
Video Mode
Before connecting your camera to a video device such
as a television or VCR (c60), choose a video mode
that matches the video standard used in the device.
Choose Video mode, select the video mode item,
and press d.
Your Nikon digital camera supports lNTSC and
mPAL standards.
Rotate the mode dial to a to select Language,
and then press d.
Rotate the mode dial to a to select Interface,
and then press d.
Confirm
Confirm
Cancel
Cancel
USB
Video mode
INTERFACE
INTERFACE
Confirm
NTSC
PAL
VIDEO MODE
VIDEO MODE
Confirm
en_q3175.book Page 129 Thursday, June 16, 2005 10:54 AM
130
The Set-up Menu
E Auto Transfer
This option is used to choose whether or not to add
the E (transfer) icon when pictures are taken.
When you connect the camera to a computer with
PictureProject installed via the UC-E6 USB cable and
press d (the center of the multi selector), only pictures marked with a E icon
will be transferred (c61).
When you connect the camera to a computer with a wireless LAN and press d,
only pictures marked with a E icon will be transferred (c141).
Set a E Icon to Stored Pictures
The E icon can be added or removed from stored pictures using the Transfer marking
option (c112) in the Playback menu.
Rotate the mode dial to a to select Auto Trans-
fer, and then press d.
Option Description
On
(default)
Select this option to set pictures or movies to be transferred
automatically when they are taken or recorded.
Off Select this option to set pictures or movies to not be transferred
automatically when they are taken or recorded.
AUTO TRANSFER
AUTO TRANSFER
On
Confirm
Off
en_q3175.book Page 130 Thursday, June 16, 2005 10:54 AM
131
The Set-up Menu
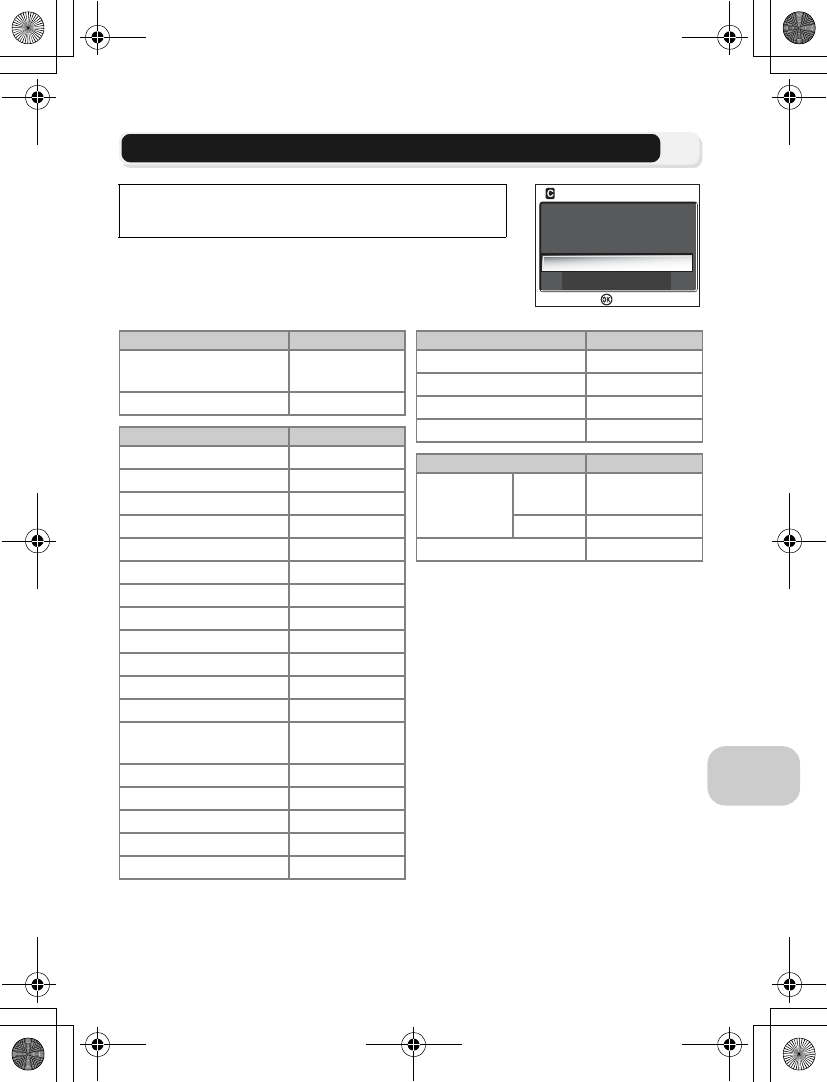
n Reset All
This option is used to restore the settings listed below
to their original state.
The following settings are affected:
Rotate the mode dial to a to select Reset all,
and then press d.
No
Reset
RESET ALL
RESET ALL
Reset all settings to default
values
Confirm
Scene menu Default
bPORTRAIT
(FACE AF)
Advanced options Normal
Shooting menu Default
White balance Auto
Metering Matrix
Continuous Single
Time-lapse movie 30 s
BSS Off
Auto bracketing Off
Flash exp. comp. ±0
Image adjustment Auto
Image sharpening Auto
Saturation control Normal
ISO Sensitivity Auto
Image quality Normal
Image size c (for P1)
d (for P2)
AF area mode Auto
Auto-focus mode Single AF
Fixed aperture Off
Noise reduction Off
User setting 1
Movie menu Default
Movie options Small size 320
#### 30 s
Auto-focus mode Single AF
Electronic VR Off
Playback menu Default
Slide show
Frame
intvl 3 seconds
Loop Off
Small pic 640 × 480
en_q3175.book Page 131 Thursday, June 16, 2005 10:54 AM
132
The Set-up Menu
Resetting File Numbering to 0001
To reset file numbering (c25) to 0001, select Reset all after either deleting all pictures
(c111) or formatting the memory or memory card (c128).
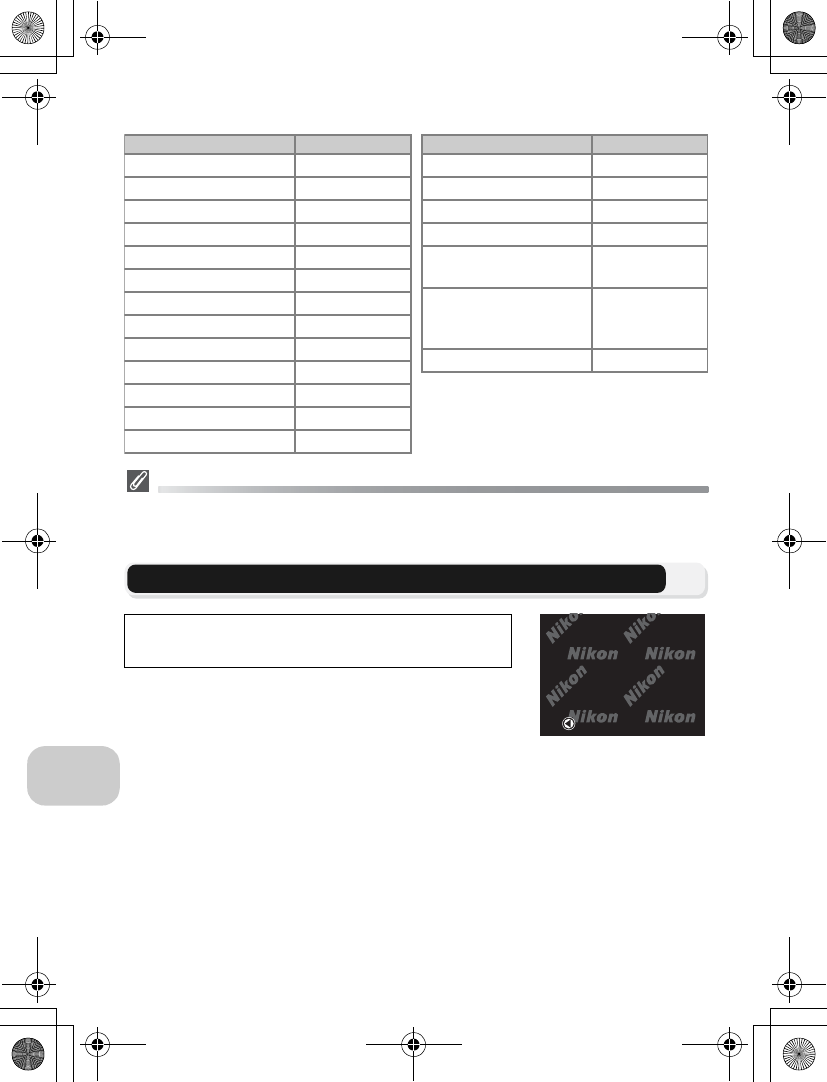
B Firmware Version
This option is used to check a firmware version for
your camera. The 12-digit number below is the cam-
era's MAC address.
To return to the Set-up menu, press multi selector left.
Rotate the Mode Dial to a to select Firmware Ver-
sion, and then press d.
Set-up menu Default
Menus Icons
Welcome screen Animation
Photo info Show info
Brightness 3
Hue 6
Date imprint Off
Shot confirmation Off
AF assist AUTO
Button sound On
Shutter sound Normal
Start-up sound Normal
Auto off 1 m
Auto transfer On
Button setting Default
Flash z
Exposure compensation
0
Self-timer Off
Focus mode Autofocus
Aperture for A (aperture-
priority auto) mode F2.7
Flexible program value
for P (programmed auto)
mode
0
Digital zoom × 1
Back
COOLPIX P1 Ver.XX
MAC
ͺΡτΑ
XX-XX-XX-XX-XX-XX
en_q3175.book Page 132 Thursday, June 16, 2005 10:54 AM
133
Wireless Transfer Mode
Wireless Transfer Mode
Functions of the Wireless Transfer Mode
The COOLPIX P1/P2 has a wireless communication feature based on the
IEEE802.11b/g standards. Wirelessly connect the camera to a computer or printer
and save the images to the computer or print them using the functions below.
See pages 134 to 139 for more information on setting up Wireless transfer mode.
See page 141 and later for steps on transferring images.
Optional Wireless Printer Adaptor
Using the optional XXXX wireless printer adaptor (c150), wirelessly transfer images directly
from the camera to a printer (via USB interface) and print.
Option Description c
Easy Transfer
Compare the images in the memory or memory card
with the images stored in a computer and transfer only
those images not already stored in the computer.
143
Shooting Date Transfer images by a specific recording date. 144
Marked Images Transfer only those images with the transfer mark
(E) (c112). 145
Selected Images Transfer only selected images. 146
Shoot & Transfer
Immediately send recorded images. You can check the
recorded images and send only the images necessary,
and you can also save them to the memory or memory
card at the same time.
147
PC Mode Transfer images using a computer. PictureProject
Transfer can be used for transferring images. 148
Wireless Printing Print images from a printer connected to a computer. 149
en_q3175.book Page 133 Thursday, June 16, 2005 10:54 AM
134
Wireless Transfer Mode
Using the Wireless Transfer Mode
The following conditions and preparations are required to use the Wireless trans-
fer mode (c135).
Requirements for Using the Wireless Transfer Mode
Wireless LAN Environment (IEEE802.11b/g Compatible)
Set up the following devices or environment.
•When making a peer-to-peer connection between the camera and computer
(Ad-hoc mode):
Set up a computer with an internal or external wireless LAN adapter.
•When making a connection via an access point (Infrastructure mode):
Set up a wireless LAN environment using a wireless LAN access point. Check
that the computer which will receive the images is connected to the wireless
LAN network.
Operating Systems that Support Wireless Transfer Mode
Operations of the Wireless transfer mode are confirmed for the following operat-
ing systems:
•Windows XP Professional/Home Edition (SP1 or later; SP2 is recommended)
•Mac OS X (10.3 or later)
Software for Setting up Profile Information in the Camera
•Wireless Camera Setup Utility (hereafter referred to as the Setup Utility)
The Setup Utility sets the profiles and wireless LAN environment information in
the camera. The “Wireless Camera Setup Utility/PictureProject Software CD-
ROM“ (hereafter referred to as the CD-ROM) supplied with the camera is
required for installation.
Wireless LAN environment
For further information about wireless LAN environment, contact the manufacturer of the
wireless LAN adapter or the access point for the wireless LAN, or refer to the commercial
guidebook.
Operating Systems
The latest information on supported operating systems is available on the Nikon Web site list-
ed in Life-Long Learning (c1).
en_q3175.book Page 134 Thursday, June 16, 2005 10:54 AM
135
Wireless Transfer Mode
Before Using the Wireless Transfer Mode
To use Wireless transfer mode, use the Setup Utility to set the profiles in the cam-
era of the computers and printers that will connect to the camera. This is neces-
sary so that the camera can recognize the profile devices.
The procedure is outlined below. For more information, refer to the page for each
operation.
Steps to make up the wireless connection
Camera Batteries
Profiles cannot be set if the camera turns off while setting. Check in advance that the bat-
teries are charged enough.
Setting Profiles
A profile must be set using the Setup Utility (steps 1 to 5 above) for each computer connect-
ing to the camera. Additionally, the Setup Utility controls image transfer from the camera.
Install the Setup Utility in all computers that will be set as profile devices.
1Check the wireless LAN settings of the computer (c136-
137)
Keep a note of the necessary items (see chart on pages 136 and 137) when set-
ting up profile information using the Setup Utility to complete set-up more eas-
ily.
2Set the camera’s USB mode to PTP (c61)
You must set the USB option to PTP (default setting) in the Interface menu of
the camera’s Set-up menu.
3Connect the camera to the computer using the supplied
UC-E6 USB cable (c62)
Confirm that the mode dial is set to a.
4Start the Setup Utility on the computer (c138)
Start the Setup Utility if it is already installed on the computer. If the Setup Utility
is not installed, install using the CD-ROM provided with the camera. After the
Setup Utility is installed, the software starts.
5Follow the instructions in the Setup Utility windows.
(c139)
To cancel setting up a profile, click the Cancel button in a window.
en_q3175.book Page 135 Thursday, June 16, 2005 10:54 AM

136
Wireless Transfer Mode
Checking the Wireless LAN Settings of a Computer
Check the wireless LAN settings of the computer before starting the Setup Utility
and entering profile information. Check the following items while referring to the
manual and other reference materials of your computer and wireless LAN device.
When Ad-hoc is selected for Type:
Item Description
Network Name
(SSID) Enter the network ID belonging to the computer (required).
Type
Select Ad-hoc or Infrastructure (required).
Select Ad-hoc when making a peer-to-peer connection between
the camera and computer, and Infrastructure when making a
connection via an access point.
The items below differ depending on what is selected for Type.
Item Description
Channel Select the same number (1 to 11) that is set for the channel num-
ber in the computer (required).
Authentication Select #### or #### (select the same method that is set in the
computer).
Encryption Select ####, WEP64 or WEP128 (select the same method that is
set in the computer).
Security Key
Format
When WEP64 or WEP128 is selected for Encryption, select the
same setting as the computer (unnecessary when #### is selected
for Encryption).
Security Key Enter the security key set in the computer (unnecessary when ####
is selected for Encryption).
Key Index
When WEP64 or WEP128 is selected for Encryption, select the
same setting as the access point (unnecessary when #### is
selected for Encryption). Default setting is 1.
Configure Select Auto or Manual for the method of setting the camera IP
address.
IP Address When Manual is selected for Configure, enter the camera IP
address.
Subnet Mask When Manual is selected for Configure, enter the subnet mask
of the network to which the camera is connected.
en_q3175.book Page 136 Thursday, June 16, 2005 10:54 AM
137
Wireless Transfer Mode
When Infrastructure is selected for Type:
When Values are Automatically Displayed
When setting profiles using the Setup Utility, use the values that are automatically displayed
for each item.
MAC Address Filtering
When MAC Address filtering is set for a wireless LAN that the camera is connected to, the
camera MAC address is needed. Confirm the camera MAC address (c132).
HELP
A HELP button is available for each window in the Setup Utility. Click the button to read the
help topic for the operation.
Item Description
Authentication Select ####, #### or WPA-PSK (select the same setting as the
access point).
Encryption Select ####, WEP64, WEP128 or TKIP (select the same setting as
the access point).
Security Key
Format
When WEP64 or WEP128 is selected for Encryption, select the
same setting as the access point (unnecessary when #### is
selected for Encryption).
Security Key
Enter the security key set in the access point. When TKIP is
selected for Encryption, enter #### (unnecessary when #### is
selected for Encryption).
Key Index
When WEP64 or WEP128 is selected for Encryption, select the
same setting as the access point (unnecessary when #### is
selected for Encryption). Default setting is 1.
Configure Select Auto or Manual for the method of setting the camera IP
address.
IP Address When Manual is selected for Configure, enter the camera IP
address.
Subnet Mask When Manual is selected for Configure, enter the subnet mask
of the network to which the camera is connected.
en_q3175.book Page 137 Thursday, June 16, 2005 10:54 AM
138
Wireless Transfer Mode
Starting the Setup Utility on a Computer
When the Setup Utility is installed on a computer connecting to the camera.
• Windows : Select Start → All Programs → Nikon → Wireless Camera Setup Utility.
• Macintosh: Applications folder → open the Wireless Camera Setup Utility fold-
er in the Nikon Software folder, and double click the Wireless Camera Setup
Utility icon (XX).
When the language selection window is displayed, se-
lect the language for the Setup Utility.
After this, the operation to set a profile for the com-
puter starts.
A window with three tabs (Get Started, Profiles or
Wireless Printing) appears. Select Get Started, click
Next and start the setting.
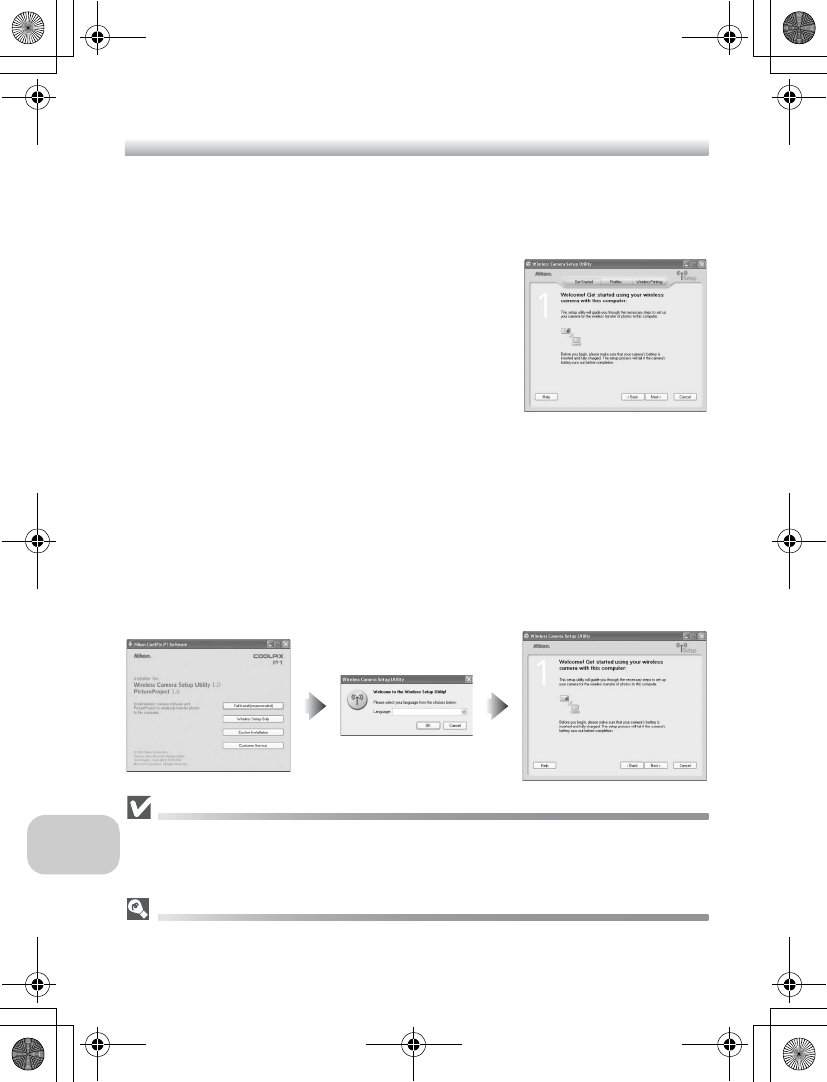
When the Setup Utility is not installed on a computer connecting to the camera.
Install the software using the CD-ROM supplied with the camera. Select
Full Install
(recommended)
in the
Welcome
window of the installation wizard. The Setup Utility
is installed after PictureProject is installed.
Select
Wireless Setup Only
on the
Welcome
window to install only the Setup Utility.
After the Setup Utility is installed, the software starts automatically.
Select the display language for the Setup Utility on the language selection window. The
utility then takes you to the settings to create a profile for the computer.
When the program starts automatically after installation, a setting window with no
tabs is displayed.
Before Running the Setup Utility
Check the following settings.
•PTP is set for the camera USB mode.
•The camera is connected to the computer using a USB cable.
•The mode dial is set to a.
Installation
See the Quick Start Guide or PictureProject Reference Manual (on CD) for further information
on installation.
en_q3175.book Page 138 Thursday, June 16, 2005 10:54 AM
139
Wireless Transfer Mode
Setting a Profile
After the Setup Utility starts, follow the instructions in the window and enter the
appropriate data. The main steps are as follows.
Selecting a Printer Later
If a printer is not selected in step 2, select a printer connected to the computer from the ####
in the Setup Utility to print wirelessly.
When a Printer is Not Connected to the Computer
•Even when a profile is selected for wireless printing with the camera, a connection will not
occur. Make sure to select a profile for the computer.
•When a profile for wireless printing is unnecessary, use the Setup Utility to delete the pro-
file (c140).
Number of Profiles
You can create a maximum of nine profiles (computers, printers connected to a computer,
XXXX wireless printer adaptors) in the camera. If nine profiles have already been created and
you want to add a new profile, delete an unneeded profile first (c140). When setting the
tenth profile, delete unneeded profiles using the Setup Utility.
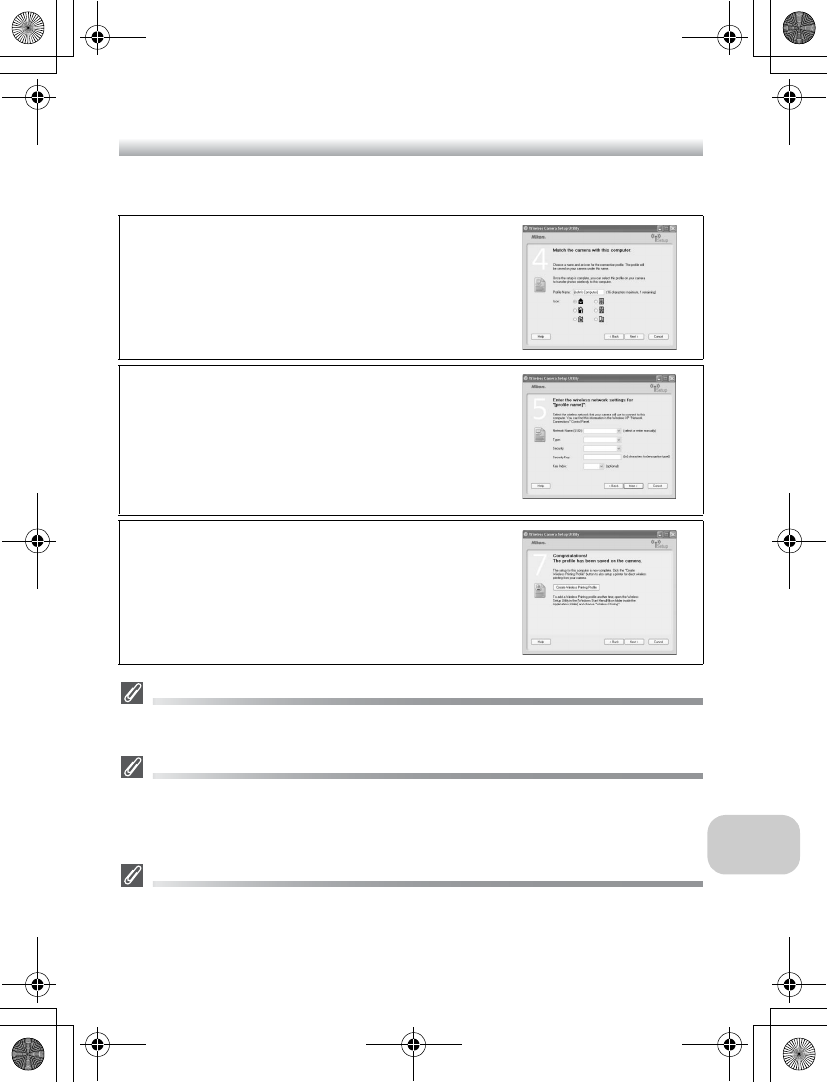
1Select a profile name and icon
Enter the profile name (up to 16 single-byte
alphanumerics) that appears in the camera mon-
itor and select the icon.
When you are finished, click Next.
2
Follow the instructions on the screen
and enter the network settings
See the table on P.136-137 for required items.
•
If multiple printers are connected to a computer,
select the printer using wireless printing (
c
149).
If no printers are connected to the computer,
click
Next
without selecting a printer.
3Complete the profile setting
A window appears informing that settings are
complete. Click Close.
•Two profiles (one for the computer and one
for wireless printing) are set in the camera.
en_q3175.book Page 139 Thursday, June 16, 2005 10:54 AM
140
Wireless Transfer Mode
Managing Profile Information
You can use the Setup Utility to view or delete profile information saved in the
camera or edit a profile name.
Before starting the Setup Utility, set the camera’s USB mode to PTP. Use the UC-
E6 USB cable (provided with your camera) to connect the camera and computer
which has the Setup Utility installed.
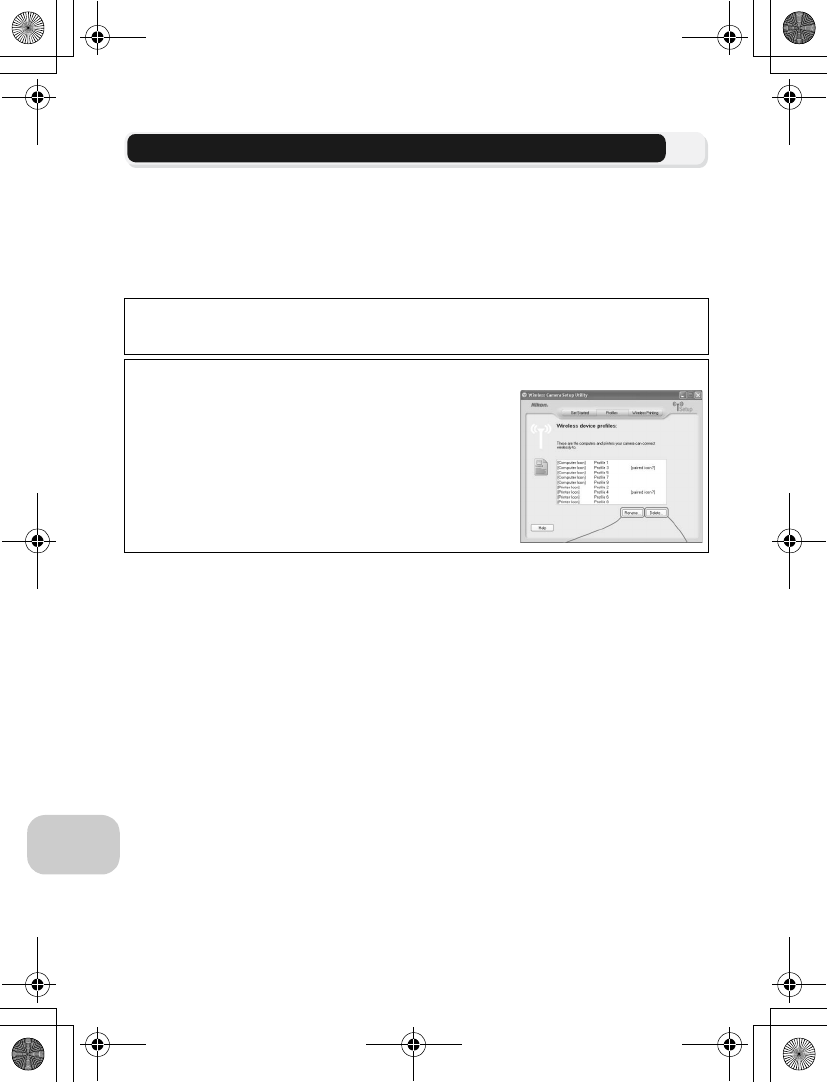
1Start the Setup Utility
2Select the Profiles tab
Select the desired profile name from the list. To
check a profile, click View Details. To edit a pro-
file name, click Rename. To delete a profile, click
Delete.
en_q3175.book Page 140 Thursday, June 16, 2005 10:54 AM
141
Wireless Transfer Mode
Transferring Images to a Computer
To display the WIRELESS TRANSFER menu:
Mode Dial Operation in the Wireless Connection
Rotating the mode dial while the camera is wirelessly connected disconnects the wireless
connection and stops the transfer of images.
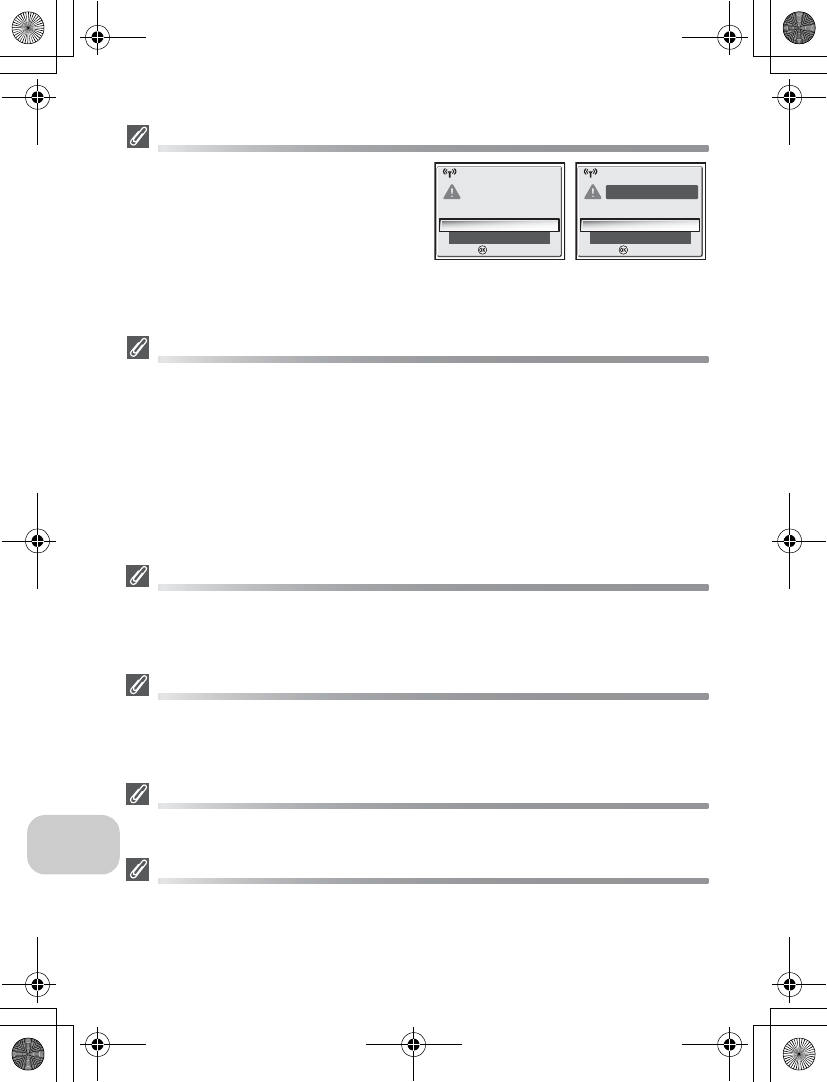
About the Signal Indicator
The strength of the wireless LAN signal is displayed on the monitor with a five-level indicator.
When the camera is out of range of the wireless LAN, the antenna is displayed in red. If the
signal strength is weak, remove any obstacles between the camera’s antenna and computer.
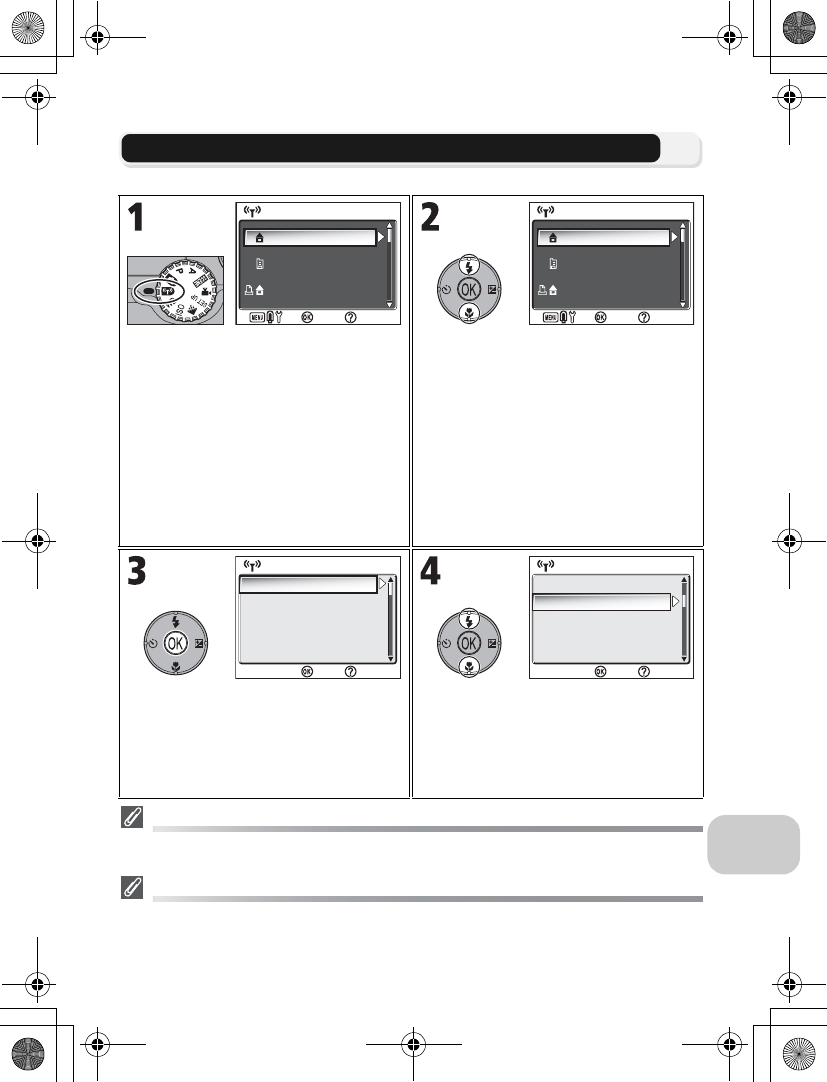
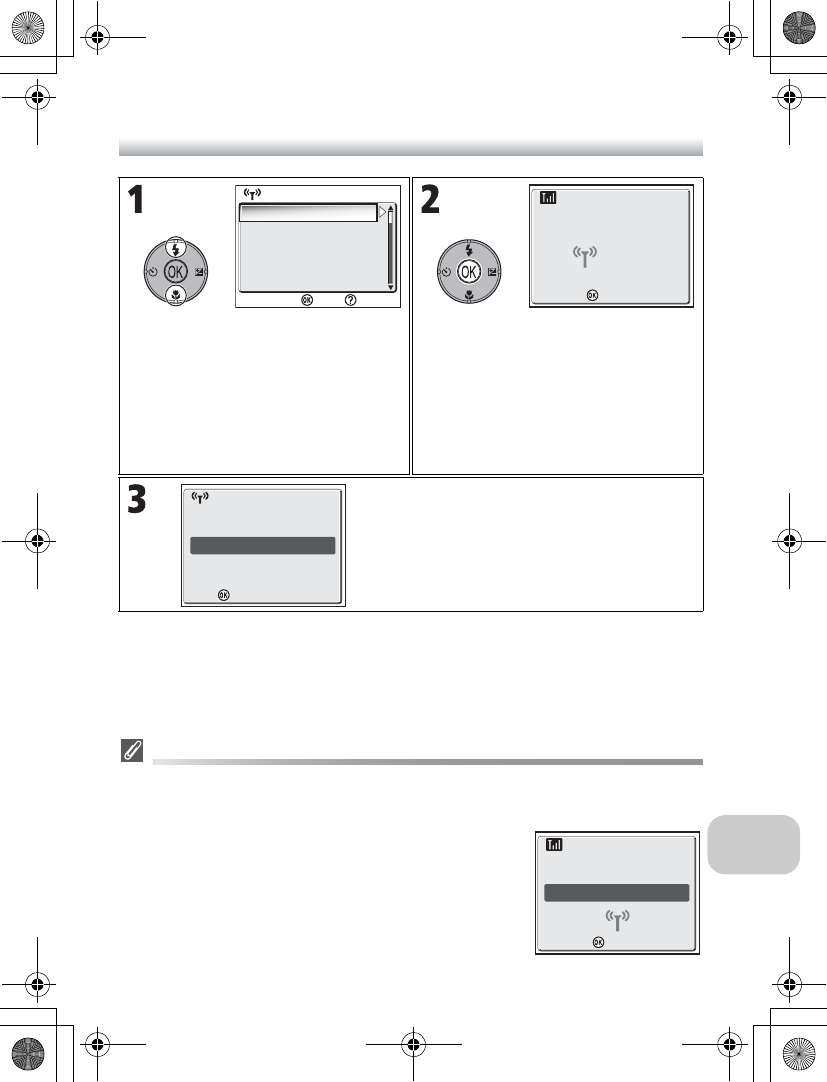
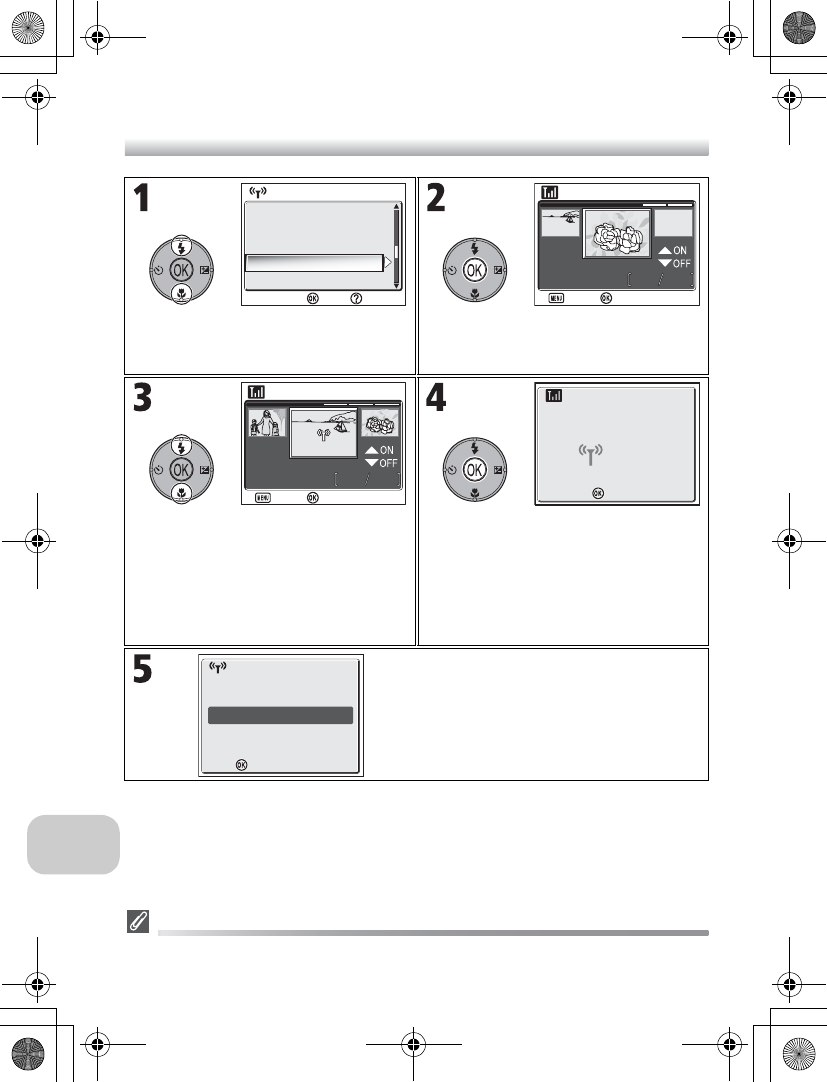
Rotate the mode dial to Y and turn the
camera on. The CHOOSE PROFILE screen
is displayed.
•Profiles are displayed in order from the
most recently used profile.
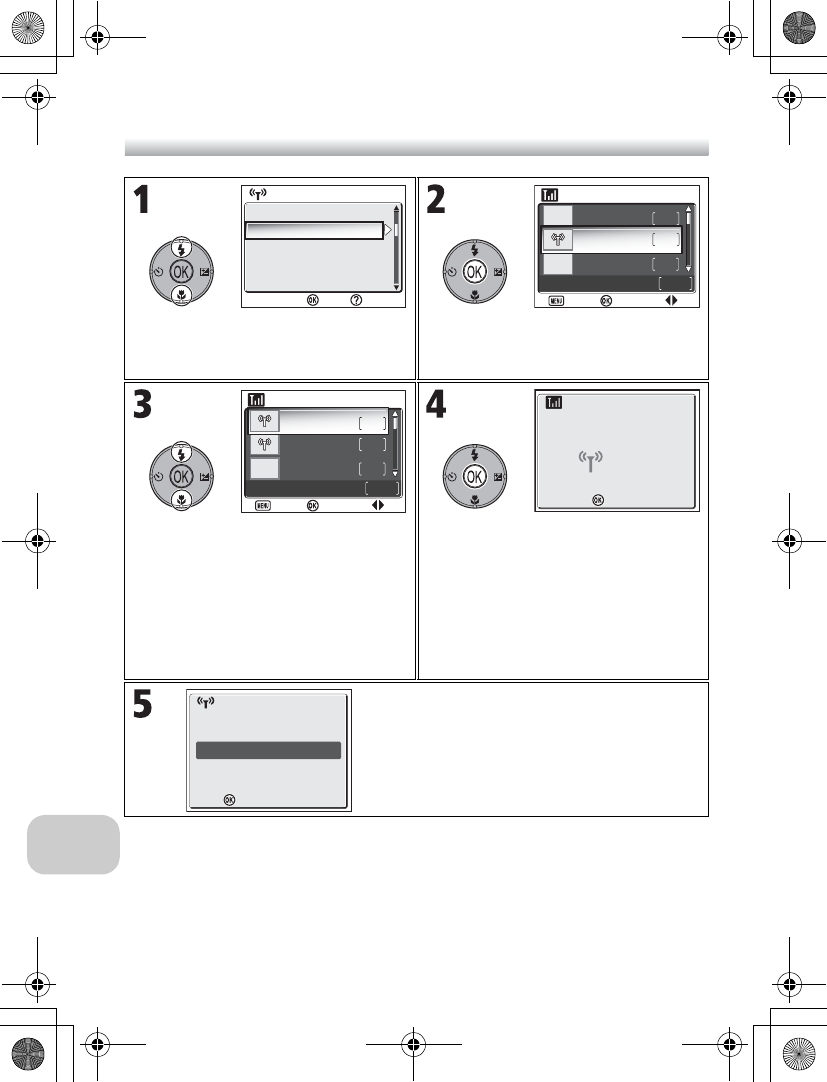
Highlight the profile to which to connect.
•
Press
l
(Help) on the CHOOSE PROFILE
screen to the SSID, whether it is a com-
puter or printer, and other information
are displayed. If the camera cannot con-
nect to the profile device, you can
check whether the profile settings and
the settings saved in the camera match.
•
If the last transfer is ended without con-
firmation and the same profile is selected
in this step, a termination message
appears for 2 seconds when connected.
The WIRELESS TRANSFER menu is dis-
played in the monitor of the camera
when a connection to the wireless LAN is
made and transmission starts.
•Press d before transmission starts to
return to the CHOOSE PROFILE screen.
Highlight option for transferring images.
See page 143 and later for more informa-
tion on each menu item.
CHOOSE PROFILE 1/3
CHOOSE PROFILE 1/3
Profile-A
Profile-B
Profile-C
Confirm
Help
CHOOSE PROFILE 1/3
CHOOSE PROFILE 1/3
Profile-A
Profile-B
Profile-C
Confirm
Help
Easy Transfer
Shooting Date
Marked Images
Selected Images
Shoot & Transfer
WIRELESS TRANSFER 1/2
WIRELESS TRANSFER 1/2
Confirm
Help
Confirm
Help
Shooting Date
Marked Images
Selected Images
Shoot & Transfer
WIRELESS TRANSFER 1/2
WIRELESS TRANSFER 1/2
Easy Transfer
en_q3175.book Page 141 Thursday, June 16, 2005 10:54 AM
142
Wireless Transfer Mode
If an Error Message Appears
When a profile cannot be selected (when
transmission has not started), NETWORK
CONNECTION FAILED is displayed. After
WIRELESS TRANSFER menu is selected and
camera cannot connect to profile device,
###### is displayed. Check the selected com-
puter and fix the cause of the error. Highlight
Try Again and press d to reconnect. Select Choose Profile to cancel the connection and
return to the CHOOSE PROFILE screen. If Try again cannot be selected due to the source of
the error, select Choose Profile.
Save Location of Transferred Images
•Images transferred to the computer using the Wireless transfer mode are saved to the fol-
lowing location.
Windows XP : PictureProject folder in My Pictures folder
Macintosh : PictureProject folder in Picture folder
•When images are transferred with a computer that has PictureProject installed using a
Wireless transfer mode other than PC mode (c143 to 147), PictureProject automatically
starts and displays a save location.The save location can be changed.
•For computers without PictureProject installed, Explorer (for Windows) or Finder (for Mac-
intosh) starts and displays the save location. The save location cannot be changed.
•If a camera in PC mode (c148) is connected to a computer without PictureProject in-
stalled, drag and drop images from the mounted camera to the desired save location.
Resuming Cancelled Transfer Operations
If the transferring of images by wireless LAN connection is interrupted due to a weak signal
or low battery, the images can be resent. Select Yes when the message “Resume interrupted
transfer?” is displayed while Wireless transfer mode is enabled. Transferring is resumed for
those images that could not be transferred. Select No to cancel transfer operations.
d Button
In Wireless transfer mode, the d button on the camera is used only to perform menu oper-
ations. When using PictureProject via a USB connection (c61), pressing d does not transfer
images with E (transfer mark) and other such operations. See the procedures on pages
141 to 148 for more information on transferring images using Wireless transfer mode.
Memory Card Write Protection
When the memory card switch is in the “lock“ position, images cannot be transferred. Slide
the switch to the “write“ position before transferring images.
Printer Connection Configuration
Press the m button on the CHOOSE PROFILE screen to change the connection configura-
tion of the optional XXXX wireless printer adaptor. See the manual of the wireless printer
adaptor for details on the wireless printer adaptor.
NETWORK CONNECTION FAILED
Choose Profile
Try Again
Confirm
Confirm
Failed connection to
Profile-A
Choose Profile
Try Again
Confirm
Confirm
en_q3175.book Page 142 Thursday, June 16, 2005 10:54 AM
143
Wireless Transfer Mode
Transferring Images Not in a Computer – Easy Transfer
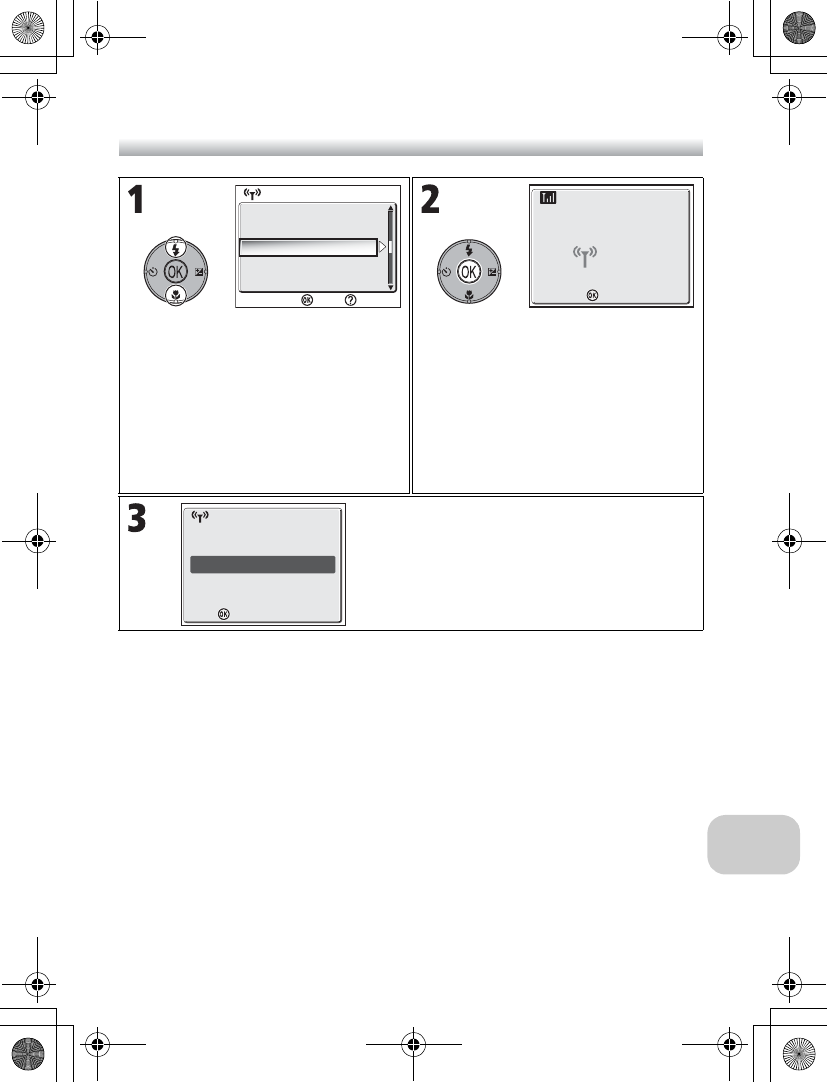
Checking Connection with Profile Device
In WIRELESS TRANSFER mode, highlight and item and press d to display the screen to check
the connection with the profile device. After this screen is displayed, the operations of the
different transfer modes can be performed.
•Press d while this screen is displayed to return to the
CHOOSE PROFILE screen.
Highlight Easy Transfer on the WIRE-
LESS TRANSFER menu.
Press d to transfer images not yet stored
in the computer.
The following items are displayed during
transfer.
•Number of transferred images/total
images
•Signal status (five-level indicator)
•Transfer rate
A message is displayed when transfer is
complete. Press d to return to the
CHOOSE PROFILE screen.
•When you are finished with the Wire-
less transfer mode, turn off the cam-
era.
Easy Transfer
Shooting Date
Marked Images
Selected Images
Shoot & Transfer
WIRELESS TRANSFER 1/2
WIRELESS TRANSFER 1/2
Confirm
Help
Transferring images to computerTransferring images to computer
Cancel
Cancel
3.5 Mbps
002 / 006
Choose Profile
Choose Profile
Profile-A
Connection terminated.Connection terminated.
Transfer completed.Transfer completed.
Profile-A
Connecting toConnecting to
Cancel
Cancel
en_q3175.book Page 143 Thursday, June 16, 2005 10:54 AM
144
Wireless Transfer Mode
Transferring Images by Specific Recording Date – Shooting Date
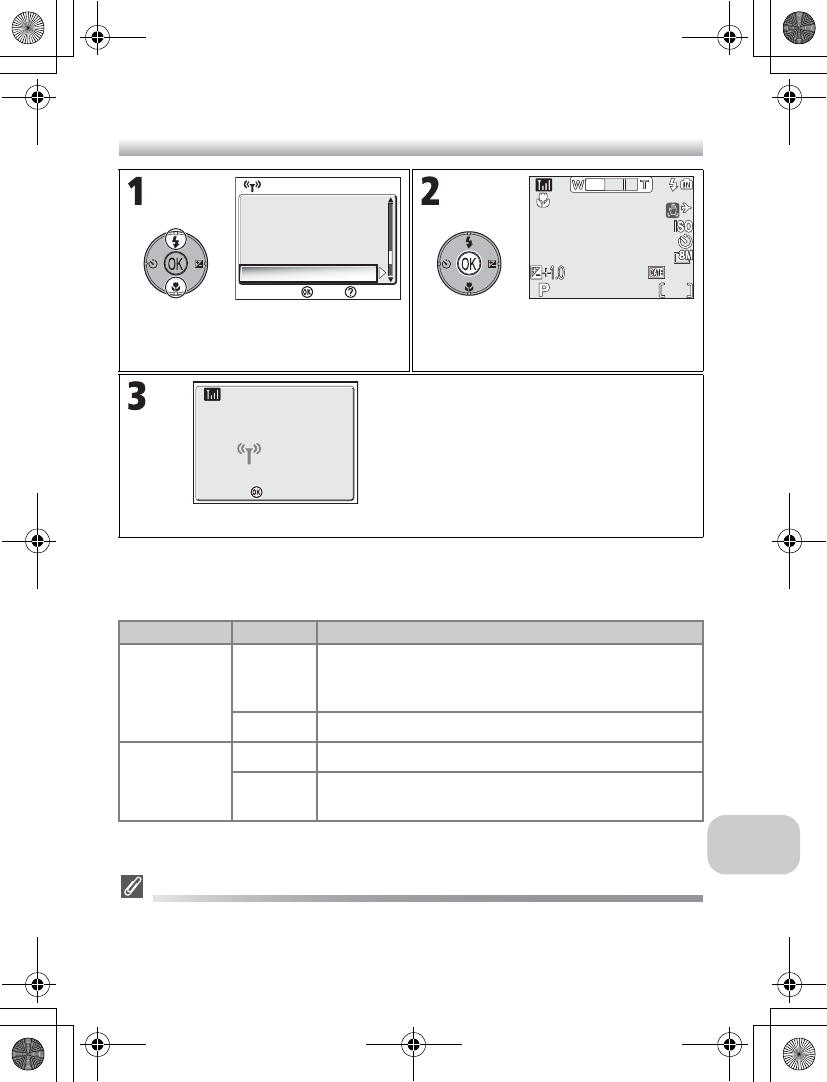
Highlight Shooting Date on the WIRE-
LESS TRANSFER menu.
The SHOOTING DATE screen is displayed
after connection confirmation dialog is
displayed.
Highlight the shooting date of the
images to be transferred.
•Select all recording dates for images to
be transferred.
•Press multi selector left to cancel the
setting.
Press d to transfer all images with the
specified recording date.
The following items are displayed during
transfer.
•Number of transferred images/total
images
•Signal status (five-level indicator)
•Transfer rate
A message is displayed when transfer is
complete. Press d to return to the
CHOOSE PROFILE screen.
•When you are finished with the Wire-
less transfer mode, turn off the cam-
era.
Confirm
Help
Shooting Date
Marked Images
Selected Images
Shoot & Transfer
WIRELESS TRANSFER 1/2
WIRELESS TRANSFER 1/2
Easy Transfer
SHOOTING DATE
SHOOTING DATE
2005 .12 .01
2005 .11 .01
2005 .10 .01
99
9
999
ON
ON
OFF
OFF
9999
images total
Confirm
Back
2005 .11 .01 99
ON
ON
OFF
OFF
9999
9
2005 .10 .01
2005 .12 .01 999
SHOOTING DATE
SHOOTING DATE
images total
Confirm
Back
Transferring images to computerTransferring images to computer
Cancel
Cancel
3.5 Mbps
002 / 006
Choose Profile
Choose Profile
Profile-A
Connection terminated.Connection terminated.
Transfer completed.Transfer completed.
en_q3175.book Page 144 Thursday, June 16, 2005 10:54 AM
145
Wireless Transfer Mode
Transferring Images with Transfer Mark – Marked Images
Highlight Marked Images on the WIRE-
LESS TRANSFER menu.
Press d to transfer all images with the
transfer mark (E).
The following items are displayed after
connection confirmation dialog is dis-
played.
•Number of transferred images/total
images
•Signal status (five-level indicator)
•Transfer rate
A message is displayed when transfer is
complete. Press d to return to the
CHOOSE PROFILE screen.
•When you are finished with the Wire-
less transfer mode, turn off the cam-
era.
Shooting Date
Marked Images
Selected Images
Shoot & Transfer
WIRELESS TRANSFER 1/2
WIRELESS TRANSFER 1/2
Confirm
Help
Easy Transfer
Transferring images to computerTransferring images to computer
Cancel
Cancel
3.5 Mbps
002 / 006
Choose Profile
Choose Profile
Profile-A
Connection terminated.Connection terminated.
Transfer completed.Transfer completed.
en_q3175.book Page 145 Thursday, June 16, 2005 10:54 AM
146
Wireless Transfer Mode
Selecting and Transferring Images – Selected Images
About the Transfer Mark
The n (Wireless transfer) mark disappears after transfer.
Highlight Selected Images on the WIRE-
LESS TRANSFER menu.
The SELECTED IMAGES screen is dis-
played after connection confirmation dia-
log is displayed.
Set the selected image for transfer. The
n(Wireless transfer) mark appears on
the selected image.
•Select all images to be transferred.
•Press multi selector left to cancel the
setting.
Press d to transfer the selected images.
The following items are displayed during
transfer.
•Number of transferred images/total
images
•Signal status (five-level indicator)
•Transfer rate
A message is displayed when transfer is
complete. Press d to return to the
CHOOSE PROFILE screen.
•When you are finished with the Wire-
less transfer mode, turn off the cam-
era.
Shooting Date
Marked Images
Selected Images
Shoot & Transfer
WIRELESS TRANSFER 1/2
WIRELESS TRANSFER 1/2
Confirm
Help
Easy Transfer
12:00
12:00
2005 .12 .01
2005 .12 .01
6
6
6
6
SELECTED IMAGES
SELECTED IMAGES
Confirm
Exit
12:00
12:00
2005 .12 .01
2005 .12 .01
6
6
5
5
Confirm
Exit
SELECTED IMAGES
SELECTED IMAGES
Transferring images to computerTransferring images to computer
Cancel
Cancel
3.5 Mbps
002 / 006
Choose Profile
Choose Profile
Profile-A
Connection terminated.Connection terminated.
Transfer completed.Transfer completed.
en_q3175.book Page 146 Thursday, June 16, 2005 10:54 AM
147
Wireless Transfer Mode
Immediately Transferring Recorded Images – Shoot & Transfer
Changing the Settings
Press the m button while the camera is in Standby mode to display the SHOOT
& TRANSFER screen and make the following changes.
If Safety Copy is set to Off and an error occurs during Shoot & Transfer oper-
ation, picture is not saved. Saving important pictures is recommended.
Function Available for Shooting
When Shoot & Transfer is enabled, X (Auto) mode (c18) is enabled. If the mode dial is
rotated while in Wireless transfer mode, the connection will be interrupted, so set Image
mode (c47) before starting Shoot & Transfer.
Highlight Shoot & Tranfer on the WIRE-
LESS TRANSFER menu.
The camera switches to the Shooting
screen after connection confirmation dia-
log is displayed.
When a picture is taken, the image is
transferred to the computer. After the
image is transferred, the camera returns
to the Shooting screen in step 2 above.
•If a transfer confirmation dialog is dis-
played, select Yes. Select No to cancel
transferring the recorded image to the
computer.
Menu item Option Description
Confirm
Transfer
On
Displays a confirmation dialog prompting whether to
transfer the recorded image to the computer each time
a picture is taken.
Off Immediately transfers recorded image to the computer.
Safety Copy
On Saves the recorded image to the memory or memory card.
Off Saves the recorded image only to the computer and not
to the memory or memory card.
Shooting Date
Marked Images
Selected Images
Shoot & Transfer
WIRELESS TRANSFER 1/2
WIRELESS TRANSFER 1/2
Confirm
Help
Easy Transfer
999
999
1/60
1/60
F2.7
F2.7
NORM
NORM
10
10
Transferring images to computerTransferring images to computer
Cancel
Cancel
3.5 Mbps
002 / 006
en_q3175.book Page 147 Thursday, June 16, 2005 10:54 AM
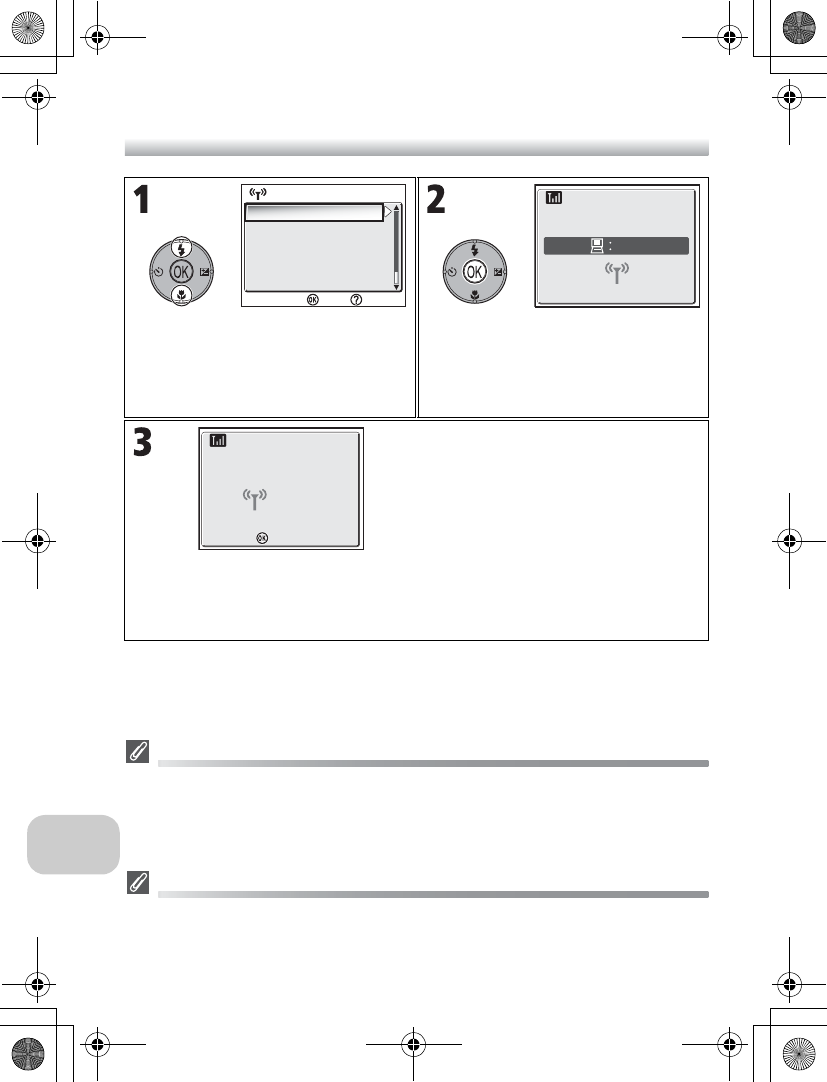
148
Wireless Transfer Mode
Transferring Images Using a Computer – PC Mode
When Multiple Computers Share the Same SSID
If the camera has multiple profiles set with the same SSID as a profile device specified in the
CHOOSE PROFILE screen, and if multiple computers with those profiles are on, the camera
attempts to connect to as many of the computers as possible (the camera is mounted to all
the computers it can connect with). When the camera is connected to multiple computers,
make sure that images are not transferred from multiple computers simultaneously.
PC Mode Precautions
Be sure to perform all transfer operations from the computer.
•Use PictureProject Transfer when using PictureProject.
•If PictureProject is not being used, drag and drop the image from the mounted camera.
Highlight PC Mode on the WIRELESS
TRANSFER menu.
Display the Profile name and number of
connected computers.
•The SSID that is the same as the profile
is set and the camera connects to all
computers that are turned on.
The PictureProject Transfer screen is dis-
played on the computer screen.
Click Transfer to transfer images.
The following items are displayed during
transfer.
•Signal status (five-level indicator)
•Transfer rate
•When you are finished with the Wire-
less transfer mode, make sure that the
number of connected devices is 0
before turning off the camera.
WIRELESS TRANSFER 2/2
WIRELESS TRANSFER 2/2
PC Mode
Confirm
Help
9
Connecting to Connecting to
Transferring images to computerTransferring images to computer
Cancel
Cancel
3.5 Mbps
002 / 006
en_q3175.book Page 148 Thursday, June 16, 2005 10:54 AM

149
Wireless Transfer Mode
Printing Images from a Printer Connected to a Computer - Wireless Printing
Printing via the Wireless LAN
When connecting the camera to the computer on the wireless LAN via an access point, only
the printer on the same network with the computer can be used. Printers on another net-
work that is connected via a router (a network with a different access point) cannot be used.
When Multiple Printers are Connected to a Computer
Start the Setup Utility on the computer with the printers con-
nected. Select Wireless Printing and select the printer. How-
ever, profiles for the computer and the printer connected to
it must be set in advance (c139).
Rotate the mode dial to Y and turn the
camera on. The CHOOSE PROFILE screen
is displayed.
•Profiles are displayed in order from the
most recently used profile.
Highlight the profile to which to connect.
•Press l (Help) on the CHOOSE PROFILE
screen to display the SSID of the
selected profile and whether it is a com-
puter or printer. If the camera cannot
connect to the profile device, you can
check whether the profile settings and
the settings saved in the camera match.
•
If the last transfer is ended without con-
firmation and the same profile is selected
in this step, a termination message
appears for 2 seconds when connected.
After the Wireless transfer connection screen is displayed, the picture selection screen is displayed.
Pictures can be selected and printed in the same manner as steps 4 (c71) and after
in “Printing via Direct USB Connection” (c70-74).
CHOOSE PROFILE 1/3
CHOOSE PROFILE 1/3
Profile-A
Profile-B
Profile-C
Confirm
Help
CHOOSE PROFILE 1/3
CHOOSE PROFILE 1/3
Profile-A
Profile-B
Profile-C
Confirm
Help
Print selection
Print all images
DPOF printing
Paper size
Cancel
Confirm
WIRELESS PRINTING
en_q3175.book Page 149 Thursday, June 16, 2005 10:54 AM
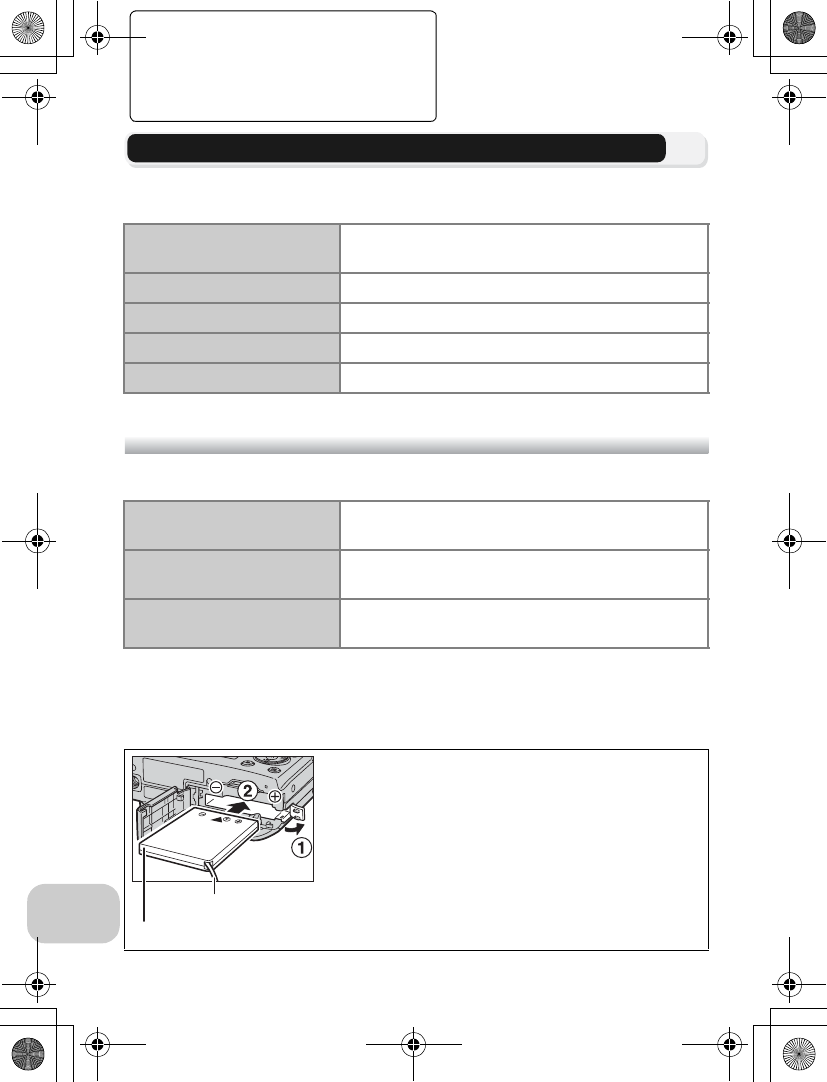
150
Technical Notes
Technical Notes
Optional Accessories
The following optional accessories are available for your Nikon digital camera.
Contact your local retailer.
Approved Memory Cards
The following cards have been tested and approved for use:
* High speed type of 10MB/s.
EH-62C AC Adapter Kit
To power the camera continuously for extended periods, use an optional EH-62C
AC adapter. Confirm that the camera is off before attaching the AC adapter.
Rechargeable battery Additional EN-EL8 Li-ion batteries are available from
your retailer or local Nikon representative.
Battery charger MH-62 battery charger for EN-EL8 batteries
AC adapter EH-62C AC adapter kit
Carrying case SC-CP18 soft case
Dongle XXX
SanDisk 16MB, 32MB, 64MB, 128MB, 256MB, 256MB*,
512MB, 512MB*, 1GB
Toshiba 16MB, 32MB, 64MB, 128MB, 128MB*, 256MB,
256MB*, 512MB
Panasonic 16MB, 32MB, 64MB, 128MB, 256MB*, 512MB*,
1GB*
1Open the battery-chamber/memory
card slot cover and power connector
cover (1) and insert the EP-62C
power connector (2)
Make sure the positive “+” and negative “-” ter-
minals of the EP-62C power connector are in the
correct orientation. The battery latch is pushed
aside as the battery is inserted.
Power connector cord
EP-62C power connector
en_q3175.book Page 150 Thursday, June 16, 2005 10:54 AM
151
Technical Notes
For more information on using the EH-62C AC adapter kit, see the EH-62C AC
adapter manual.
Disconnecting the AC Adapter Kit
Before disconnecting the AC adapter kit, turn the camera off and remove the wall plug
from the power outlet. Open the battery-chamber/memory card slot cover and push
the battery latch and remove the EP-62C from the camera.
2The battery latch is secured over the
power connector
The latch will close when the power connector is
fully inserted (3).
3Close the battery-chamber/memory
card slot cover
Making sure the EP-62C power connector cord
goes through the power connector cover (4),
close the cover (5) and slide it back into place
(6).
en_q3175.book Page 151 Thursday, June 16, 2005 10:54 AM
152
Technical Notes
Caring for Your Camera
To ensure continued enjoyment of your Nikon product, observe the following pre-
cautions when storing or using the device:
Keep dry
The device will be damaged if immersed in
water or subjected to high levels of mois-
ture.
Handle the lens and all mov-
ing parts with care
Do not apply force to the lens, monitor, or to
the connector, card slot, or battery chamber
covers. These parts are especially susceptible
to damage.
Do not point the lens at
strong light sources for ex-
tended periods
Avoid pointing the lens at the sun or other
strong light sources for extended periods
when using or storing the camera.
Intense light may cause deterioration in the
CCD image sensor, producing a white blur
effect in photographs.
Turn the product off before
removing or disconnecting
the power source
Do not unplug the product or remove the
batteries while the product is on, or while
images are being recorded or deleted. Forc-
ibly cutting power in these circumstances
could result in loss of data or in damage to
product memory or internal circuitry. To pre-
vent an accidental interruption of power,
avoid carrying the product from one place to
another while the AC adapter (available sep-
arately) is connected.
Do not drop
The product may malfunction if subjected to
strong shocks or vibration.
Keep away from strong mag-
netic fields
Do not use or store this device in the vicinity
of equipment that generates strong electro-
magnetic radiation or magnetic fields.
Strong static charges or the magnetic fields
produced by equipment such as radio trans-
mitters could interfere with the monitor,
damage data stored on the memory card, or
affect the product’s internal circuitry.
Avoid sudden changes in tem-
perature
Sudden changes in temperature, such as oc-
cur when entering or leaving a heated build-
ing on a cold day, can cause condensation
inside the device.
To prevent condensation, place the device in
a carrying case or a plastic bag before expos-
ing it to sudden changes in temperature.
AF-Assist Illuminator
The light-emitting diode (LED) used in the
AF-assist illuminator (c125) conforms to
the following IEC standard:
en_q3175.book Page 152 Thursday, June 16, 2005 10:54 AM
153
Technical Notes
Cleaning
Lens
One key to cleaning the lens is to not touch it with your fingers. Remove dust or
lint with a blower (typically a small device with a rubber bulb attached to one end
that you pump to produce a stream of air out the other). To remove fingerprints
or other stains that cannot be removed with a blower, wipe the lens with a soft
cloth, using a spiral motion that starts in the center of the lens and works out to
the edges.
Monitor
Remove dust or lint with a blower. To remove fingerprints and other stains, clean
the monitor with a soft, dry cloth, being careful not to apply pressure.
Body
Use a blower to remove dust, dirt or sand then wipe gently with a soft, dry cloth.
After using the camera at the beach or seaside, wipe off any sand or salt with a
dry cloth lightly dampened with fresh water, then dry thoroughly.
The camera may be damaged if foreign matter gets inside the camera body. Nikon
cannot accept liability for damage caused by dirt or sand.
Do not use alcohol, thinner, or other volatile chemicals.
Avoid contact with liquid crystal
Should the monitor break, care should be taken to avoid injury due to broken glass and to
prevent the liquid crystal from the monitor touching the skin or entering the eyes or mouth.
Notes on the Monitor
•The monitor may contain a few pixels that are always lit or that do not light. This is a char-
acteristic common to all TFT LCD monitors, and does not indicate a malfunction. Images
recorded using the product will not be affected.
•When you frame bright subjects, vertical comet-like streaks that whiten toward either end
may appear in the monitor. This phenomenon, known as “smear,” does not appear in the
final photograph and does not indicate a malfunction. Some smear may appear in movies.
•Images in the monitor may be difficult to see in a bright light.
•The monitor is lit by an LED backlit. Should the monitor begin to dim or flicker, contact
your Nikon service representative.
en_q3175.book Page 153 Thursday, June 16, 2005 10:54 AM
154
Technical Notes
Storage
Turn the camera off when not in use and check that the power-on lamp is off be-
fore putting the camera away. To prevent mold or mildew, store the camera in a
dry, well-ventilated area. If you will not be using the product for long periods, re-
move the battery to prevent leakage and store the camera in a plastic bag con-
taining a desiccant. Do not store the camera case (available separately) in a plastic
bag, as this may cause the material to deteriorate. Note that desiccant gradually
loses its capacity to absorb moisture and should be replaced at regular intervals.
Do not store your camera with naphtha or camphor moth balls or in locations
that:
•are poorly ventilated or damp
•are next to equipment that produces strong electromagnetic fields, such as tele-
visions or radios
•are exposed to temperatures below –10°C (14°F) or above 50°C (122°F; for
example near a space heater or in a closed vehicle on a sunny day)
•are subject to humidities of over 60%
To prevent mold or mildew, take the camera out of storage at least once a month.
Turn the camera on and release the shutter a few times before putting the camera
away again.
When the battery is not in use, replace the terminal cover and store the battery in
a cool, dry place. The battery should be recharged at least once a year; run the
battery flat before returning it to storage.
Batteries
•Check the battery level when taking the camera out and charge the battery if necessary
(c8). Do not continue charging once the battery is fully charged, as this will result in re-
duced battery performance. If possible, carry a spare EN-EL8 battery when taking pictures
on important occasions.
•On cold days, the capacity of batteries tends to decrease. Be sure that the battery is fully
charged before heading outside to take pictures in cold weather. Keep spare batteries in
a warm place and exchange as necessary. Once warmed, a cold battery may recover some
of its charge.
•Dirt on the battery terminals can prevent the camera from functioning.
•Used batteries are a valuable resource. Please recycle used batteries in accordance with lo-
cal regulations.
en_q3175.book Page 154 Thursday, June 16, 2005 10:54 AM

155
Technical Notes
Error Messages
The following table lists the error messages and other warnings that appear in the
monitor and how to deal with them.
Display Problem Solution c
s
(blinks) Clock not set. Set clock to current date
and time. 16
WARNING!!
BATTERY
EXHAUSTED
w
Battery exhausted. Turn camera off and
replace battery. 10
[ ]
p
(flashes red)
Camera cannot focus.
Use AF lock to focus on
another subject at same
distance, then recompose
picture.
98
JSlow shutter speed. Pic-
tures may be blurred.
Use flash, or steady cam-
era using tripod, by plac-
ing camera on level
surface, or by holding
camera in both hands
with elbows against
torso.
20,
27,
44
Please wait
y•Camera turned off.
•The i button pressed
during recording pic-
tures.
•The mode dial rotated
to another mode dur-
ing recording.
Message clears from dis-
play automatically when
recording is complete.
23
WARNING!!
PLEASE WAIT FOR THE
CAMERA TO FINISH
RECORDING
y
MEMORY CARD IS
WRITE PROTECTED
O
Write-protect switch of
the memory card is in
“lock” position.
Slide write-protect switch
to “write” position. 13
en_q3175.book Page 155 Thursday, June 16, 2005 10:54 AM
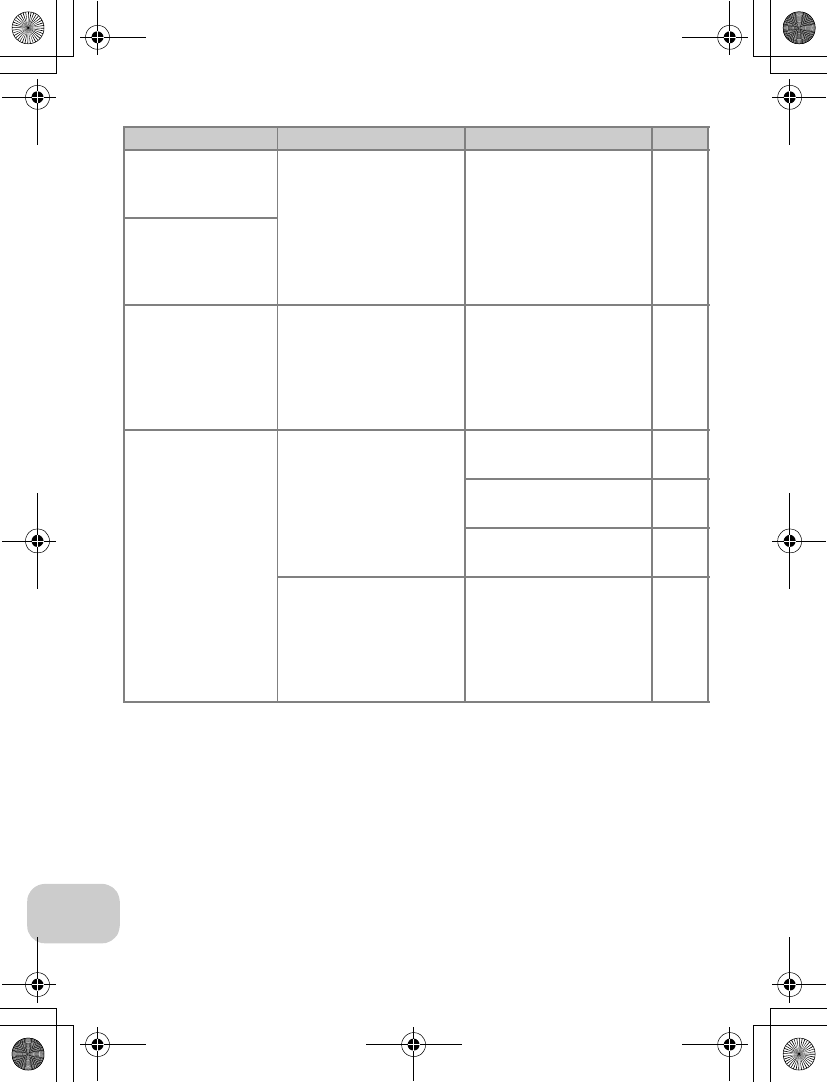
156
Technical Notes
THIS CARD CANNOT
BE USED
x
Error accessing memory
card.
•Use approved card.
•Check that connectors
are clean.
•
Turn the camera off and
make sure the memory
card is inserted correctly.
150
12
WARNING!!
THIS CARD CANNOT
BE READ
O
CARD IS NOT FOR-
MATTED
O
FORMAT
NO h
Memory card has not
been formatted for use in
camera.
Press multi selector up to
highlight FORMAT and
press d to format card,
or turn camera off and
replace card.
13,
128
OUT OF MEMORY
O or M
Camera in the shooting
mode: Insufficient mem-
ory to record pictures at
current settings.
•Choose lower image
quality/ size. 47
•Delete unwanted pic-
tures.
24,
111
•Insert new memory
card. 12
Camera connected to com-
puter and the
d
(Transfer
E
) Button pressed:
Not
enough space on memory
to record information
needed for transfer.
Disconnect camera, delete
unwanted pictures, and try
again.
111
Display Problem Solution c
en_q3175.book Page 156 Thursday, June 16, 2005 10:54 AM
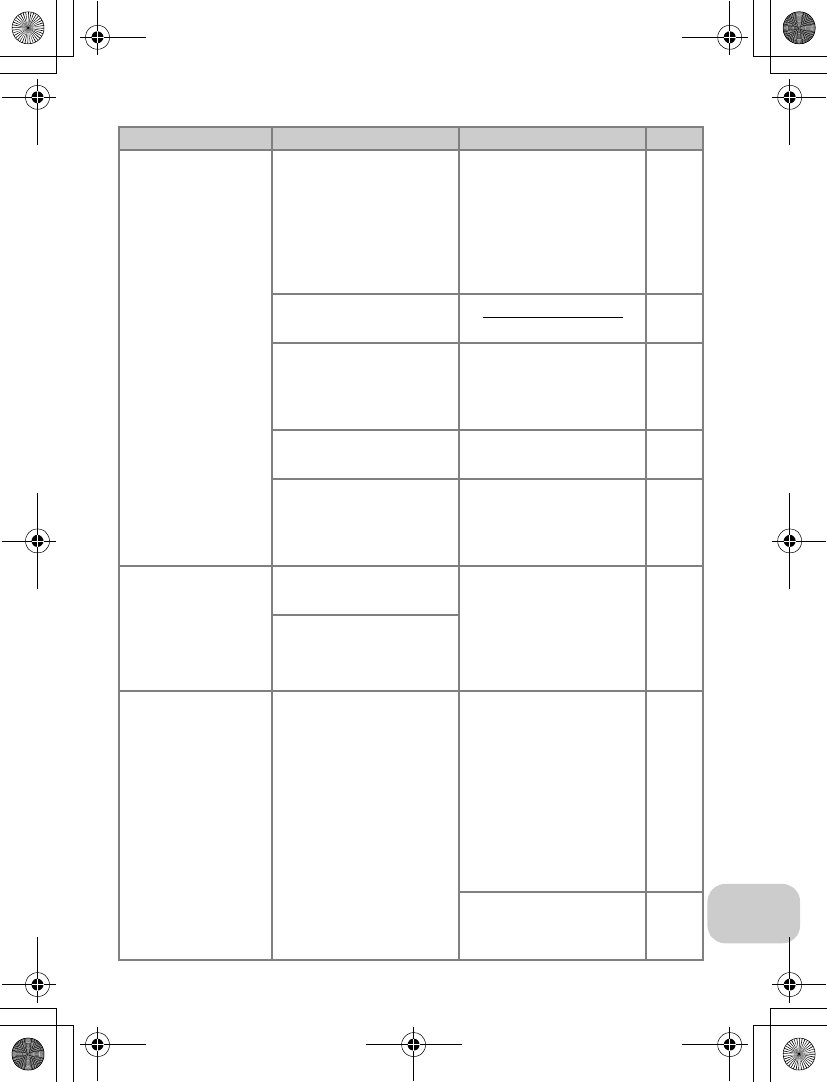
157
Technical Notes
IMAGE CANNOT BE
SAVED
M or O
(lit)
The destination is out of
memory for copying pic-
ture.
•Format destination
memory (the memory
or memory card).
•
Insert new memory card
or delete unwanted pic-
tures from the memory
or memory card.
12,
24,
111,
128
Error occurred while sav-
ing picture. –
Camera has run out of file
numbers.
Insert new memory card
or delete unwanted pic-
tures from the memory or
the memory card.
12,
24,
111
Invalid picture chosen for
creating cropped picture.
Check types of images
that can be cropped. 76
Invalid picture chosen for
welcome screen.
Small pictures created in
sizes of 320 × 240 pixels or
smaller, or cropped copies
cannot be selected.
117
CANNOT RECORD
MOVIE
O
Error occurred while sav-
ing movie.
•Format memory card
using Format option in
the format menu.
•Insert memory card
with faster processing
speed.
128
12, 81
Takes long time to save
movie on memory card.
CARD CONTAINS
NO IMAGES
r
No pictures in the mem-
ory or the memory card.
•
When this message is
displayed although pic-
tures are taken, turn the
camera off and turn it
on again. If error per-
sists, contact retailer or
Nikon representative.
•Press i button to
return to the shooting
mode.
14
15
•To show pictures in the
memory, remove mem-
ory card from camera.
13
Display Problem Solution c
en_q3175.book Page 157 Thursday, June 16, 2005 10:54 AM
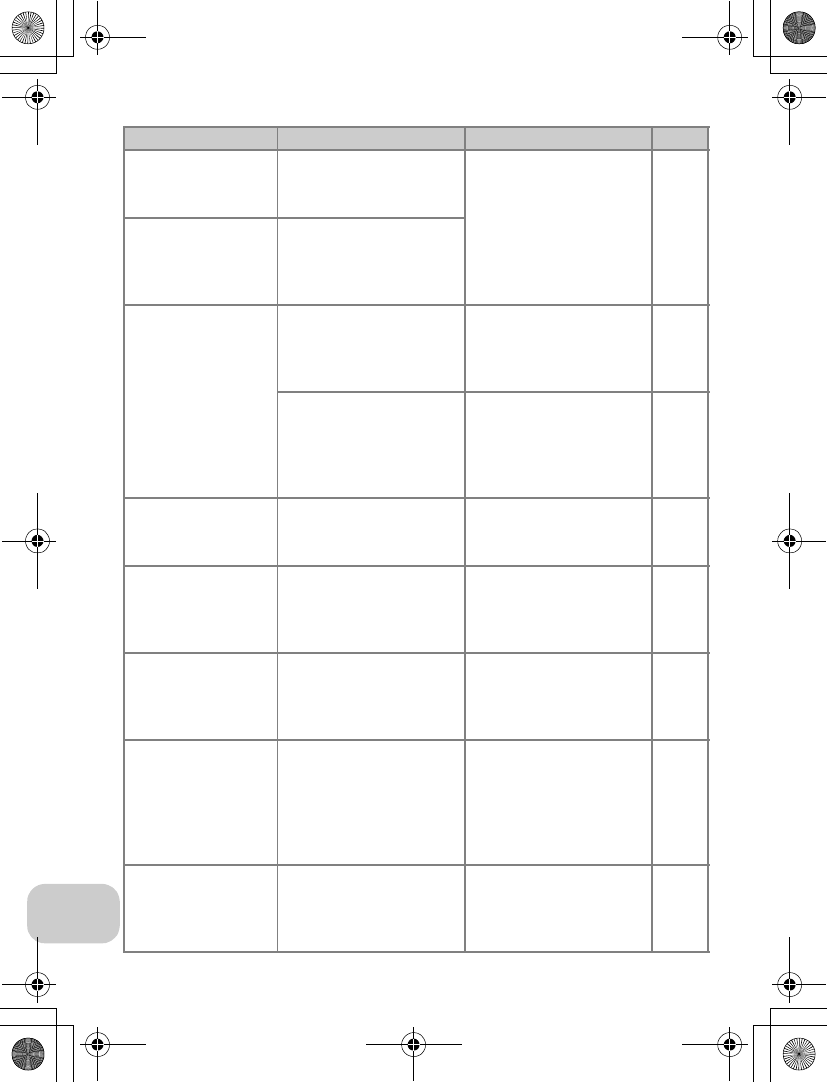
158
Technical Notes
FILE CONTAINS
NO IMAGE DATA
r
File created by computer
or different make of cam-
era. View file on computer or
correct make of camera. –
ALL IMAGES ARE
HIDDEN
r
No pictures in the mem-
ory or on the memory
card that can be viewed
on COOLPIX P1/P2.
MONITOR OFF
u
Internal circuit protection
has activated because the
camera was used for a
long period of time.
Turn camera off and do
not use for a while. 22
Surrounding tempera-
ture exceeds specified
temperature range for
battery.
Use only in specified tem-
perature range (0 to 40°C).
Let battery cool down
before using camera if bat-
tery is hot.
9
THIS IMAGE CANNOT
BE DELETED
r
Attempt to delete pro-
tected picture.
Remove protection before
deleting picture.
112
NEW CITY IS IN THE
CURRENT TIME ZONE
u
Travel destination is in
same time zone as home
location.
No need to specify new
time zone if travel desti-
nation is in same time
zone as home location.
118
WARNING!
MODE DIAL IS NOT IN
THE PROPER POSITION
u
Mode dial is positioned
between two modes.
Adjust mode dial to select
desired mode correctly. 6
WARNING!
NO MENU IN AUTO
MODE
PLEASE USE
ANOTHER MODE
u
The m button was
pressed during X (Auto
shooting) mode.
When the Mode Dial is set
to X (Auto shooting),
menu cannot be dis-
played.
–
LENS ERROR
u
Error has occurred during
lens operation.
Turn camera off and then
on again. If error persists,
contact retailer or Nikon
representative.
15
Display Problem Solution c
en_q3175.book Page 158 Thursday, June 16, 2005 10:54 AM
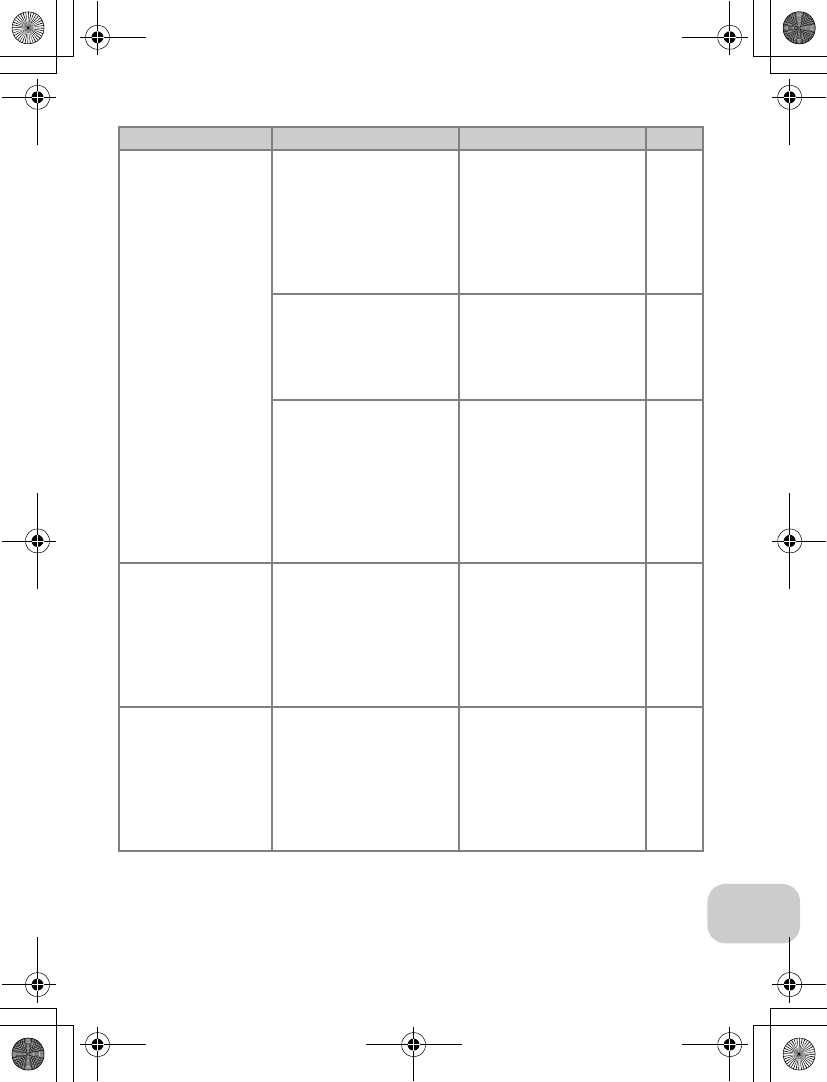
159
Technical Notes
COMMUNICATIONS
ERROR
E
USB cable disconnected
or memory card removed
while images are being
transferred to computer.
If error appears on com-
puter monitor, click OK to
exit PictureProject. Turn
camera off, reconnect
cable or replace memory
card, then turn camera on
and transfer images.
12 -
62
A computer is executing
some form of processing.
If error appears on com-
puter monitor, click OK
and transfer images after
the processing has com-
pleted.
–
USB option set incorrectly
to transfer
images
using
camera’s
d
(Transfer
E
)
button.
Turn camera off and dis-
connect cable, then choose
new USB setting in the
camera Set-up menu and
reconnect camera. If error
persists, use transfer but-
ton in PictureProject to
transfer images.
61,
62, 64
NO IMAGES ARE
MARKED FOR
TRANSFER
s
No pictures selected for
transfer when d (Trans-
fer E) button pressed
to transfer images to
computer.
•Disconnect camera and
select at least one pic-
ture for transfer, then
begin transfer again.
•Use Transfer button in
PictureProject to trans-
fer images.
62,
63,
64,
112
TRANSFER ERROR
E
Error occurred when
images were transferred
to computer.
•Check that camera is
connected and that
battery is fully charged.
•Check that optional
EH-62C AC adapter is
firmly connected to the
camera.
14
–
Display Problem Solution c
en_q3175.book Page 159 Thursday, June 16, 2005 10:54 AM
160
Technical Notes
SYSTEM ERROR
u
Error has occurred in cam-
era’s internal circuitry.
Turn camera off, unplug
optional AC adapter (if
using), remove and rein-
sert batteries, and turn
camera on. If error per-
sists, contact retailer or
Nikon representative.
10
PRINTER ERROR
u
CHECK PRINTER
STATUS
Printer error occurs on
your printer.
Read printer manual and
solve the problem. –
Display Problem Solution c
en_q3175.book Page 160 Thursday, June 16, 2005 10:54 AM
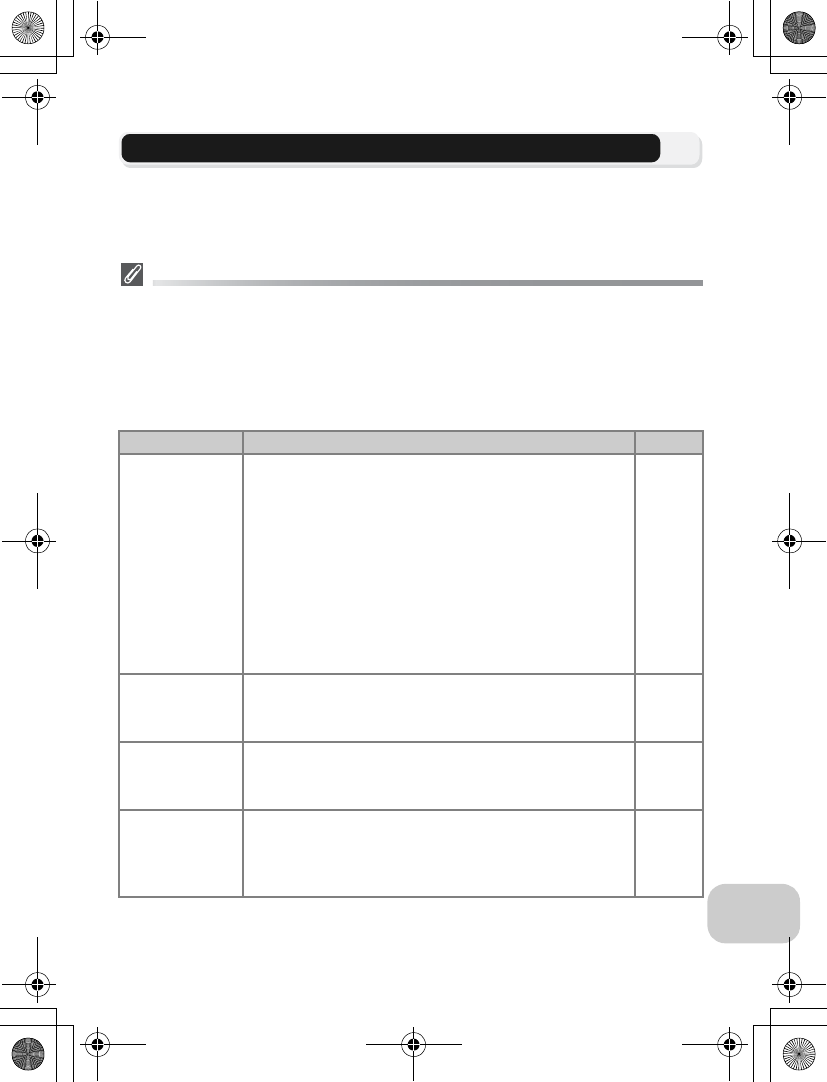
161
Technical Notes
Troubleshooting
If your camera fails to function as expected, check the list of common problems
below before consulting your retailer or Nikon representative. Refer to the page
numbers listed in the right-most column for information on solving the problems
listed here.
Electronically-Controlled Cameras
In extremely rare instances, unusual characters may appear in the monitor and the camera
may stop functioning. In most cases, this phenomenon is caused by a strong external static
charge. Turn the camera off, remove and replace the battery, and turn the camera on again,
or, if you are using an AC adapter (optional), disconnect and reconnect the adapter, and turn
the camera on again. Note that disconnecting the power source as described above may re-
sult in the loss of any data not recorded to the memory or memory card at the time the prob-
lem occurred. Data already recorded to the memory or memory card will not be affected.
Problem Possible cause c
Monitor is blank
•Camera is off.
•Monitor is off.
•Battery is not correctly inserted or battery-chamber/
memory card slot cover is not properly latched.
•Battery is exhausted.
•Optional EH-62C AC adapter kit is not properly con-
nected.
•Camera is in Standby mode. Press shutter-release but-
ton halfway.
•USB cable is connected.
•Audio/video cable is connected.
14
5
10
14
–
15
–
–
Camera turns
off without
warning
•Battery is low.
•Battery is cold.
14
154
No indicators
appear in
monitor
•Indicators may be hidden. Select the setting other
than Hide info for Photo info option in the monitor
settings menu.
120
Monitor is hard
to read
•Ambient lighting is too bright: move to a darker loca-
tion.
•Monitor brightness needs adjustment.
•Monitor is dirty: clean monitor.
153
121
153
en_q3175.book Page 161 Thursday, June 16, 2005 10:54 AM
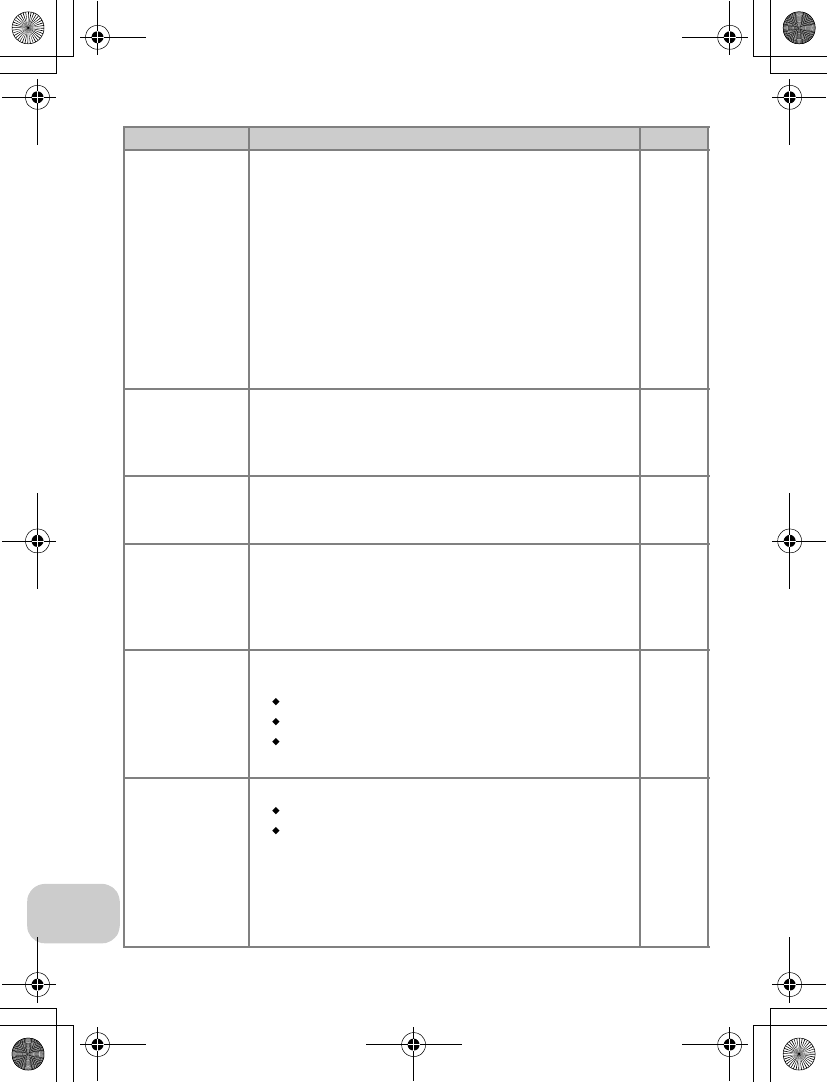
162
Technical Notes
No picture is
taken when
shutter-release
button is
pressed
•Camera is in Playback mode.
•Battery is exhausted.
•Focus indicator flickers: camera unable to focus.
•Red (C) lamp blinks: flash is charging.
•Message “CARD IS NOT FORMATTED” appears in
monitor: memory card is not formatted for use in
camera.
•Message “MEMORY CARD IS WRITE PROTECTED”
appears in monitor: memory card is locked.
•Message “OUT OF MEMORY” appears in monitor:
insufficient memory to record picture at current
Image quality/size setting.
18
14
22
22
13, 128
13
156
Pictures are
too dark
(underexposed)
•Flash is off.
•Flash window is blocked.
•Subject is outside range of flash.
•Exposure compensation is too low.
27
20
29
33
Pictures are
too bright
(overexposed)
•Exposure compensation is too high. 33
Pictures are out
of focus
•Subject was not in focus area when shutter-release
button was pressed halfway.
•Green (AF) lamp flashes: camera unable to focus.
•AF-assist illuminator does not light when the lighting
is poor. Select On in the AF assist option.
98
23
125
Pictures are
blurred
•Camera shook during shot. Blurring caused by camera
shake can be reduced by:
Using the flash
Using the Best Shot Selector (BSS)
Using the self-timer with a tripod
•When recording movies, set Electronic VR to On.
27
92
30
84
Randomly-
spaced bright
pixels (“noise”)
appear in image
•Shutter speed too slow. Noise can be reduced by:
Using the flash
Selecting or selecting b (scene) mode and choos-
ing DNIGHT PORTRAIT, GNIGHT LANDSCAPE
or JDUSK/DAWN (In these modes, Noise reduc-
tion works automatically when shutter speed is low.
Select an appropriate mode according to your
shooting condition.)
27
34
39
Problem Possible cause c
en_q3175.book Page 162 Thursday, June 16, 2005 10:54 AM
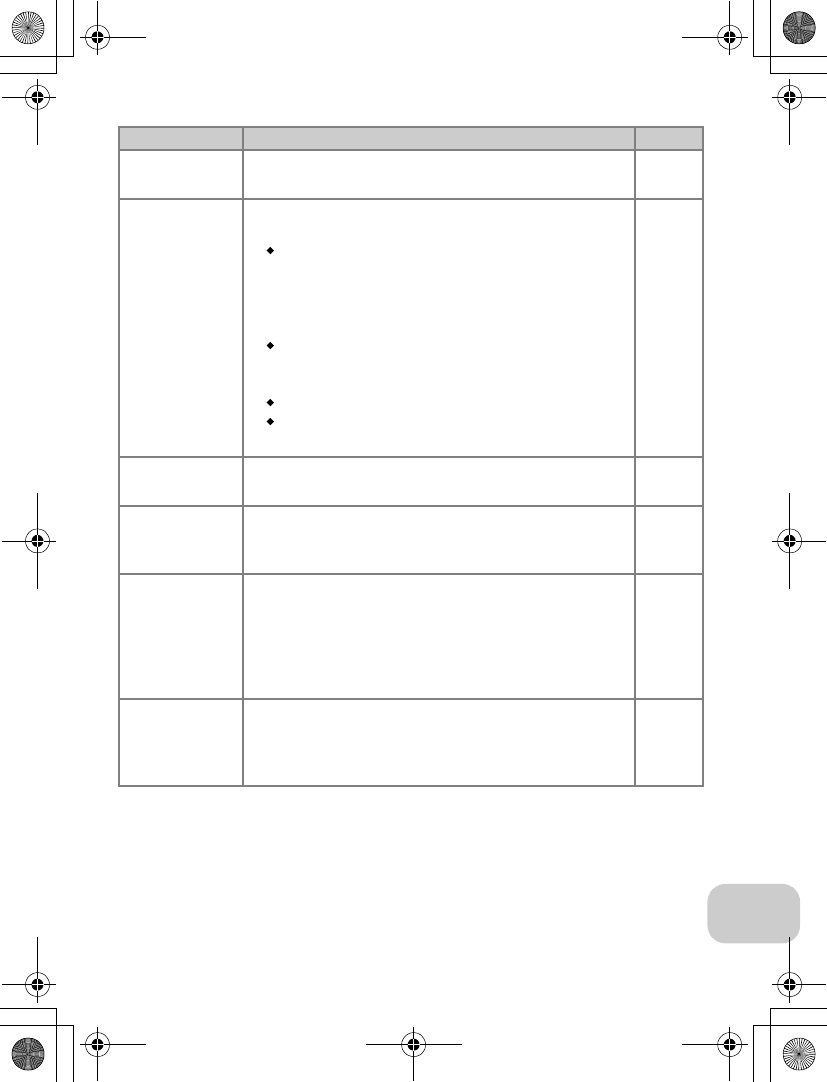
163
Technical Notes
Bright specks in
picture
•Flash is reflecting from particles in air. Turn flash off or
zoom in. 20, 27
Flash does not
fire
•Flash is off. Note that flash turns off automatically
when:
The mode dial is set to S (movie), or b (scene)
mode with any of ELANDSCAPE, ISUNSET,
JDUSK/DAWN, GNIGHT LANDSCAPE,
NMUSEUM, KFIREWORKS SHOW or
PSPORTS selected in the scene menu
Continuous (c89) is set to sContinuous H,
sContinuous L, xMulti-shot 16, xUltra
HS, or y5 shot buffer in P or A mode.
BSS is On
Auto Bracketing is set to CAuto Bracketing or
x WB bracketing in P or A mode.
27
34, 80
89
92
93
Colors are
unnatural •White balance does not match light source. 52
Picture or voice
memo cannot
be played back
•Picture or voice memo has been overwritten or
renamed by computer or by another make of camera. –
Copy cannot be
created using
small picture,
crop, or
D-Lighting
•Picture is a movie. Retouched copy can be created
only for still pictures.
•Picture is a retouched copy.
•There is not enough free space in the memory or on
the memory card to store new copy. Delete unwanted
pictures from the memory to make free space.
76
76
111
Cannot zoom in
on picture
•Picture is a movie.
•Picture was created with Small pic. option.
•Picture has been cropped to sizes of 320×240 pixels
or smaller.
56
79
77
Problem Possible cause c
en_q3175.book Page 163 Thursday, June 16, 2005 10:54 AM
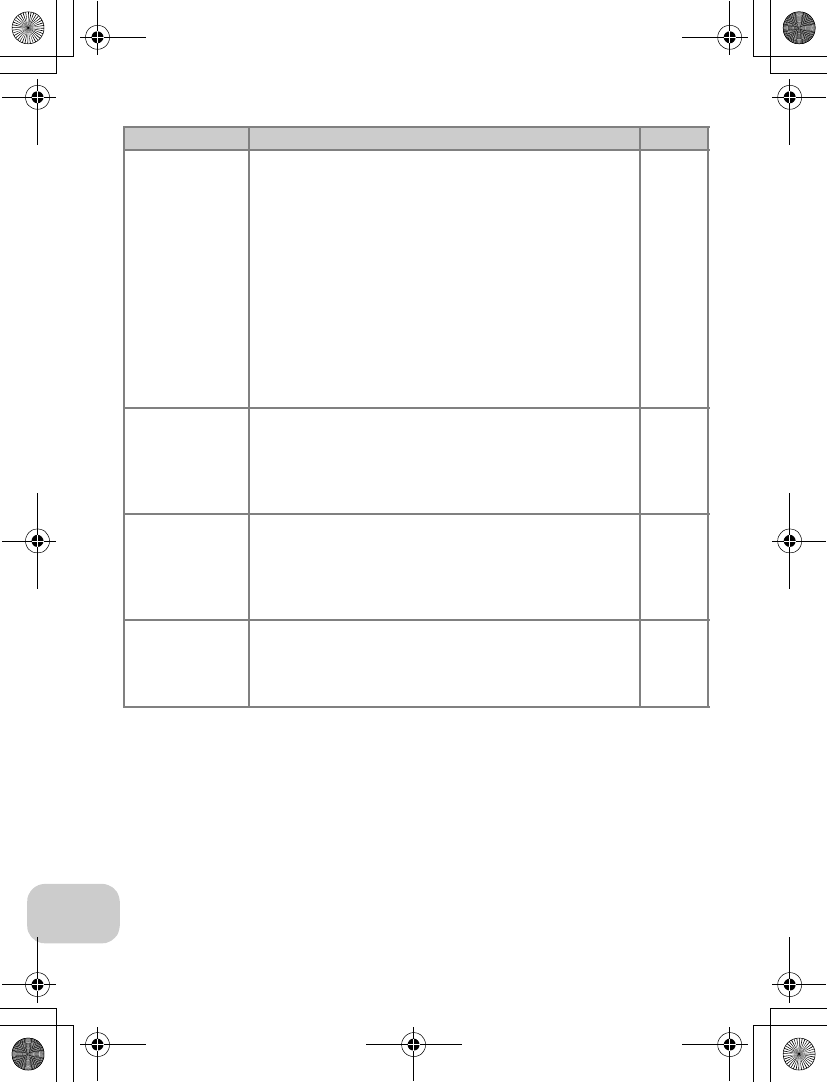
164
Technical Notes
PictureProject
does not start
when camera is
connected or
memory card
inserted in card
reader or card
slot
•Camera is off.
•EH-62C AC adapter kit (optional) is not properly con-
nected, or battery is exhausted.
•UC-E6 USB cable is not correctly connected, or card
not properly inserted in card reader or card slot.
•USB in the Interface menu set to PTP when camera
connected to computer running Windows 2000 Pro-
fessional, Windows Millennium Edition (Me), or Win-
dows 98 Second Edition (SE).
•Camera is not registered in Device Manager (Win-
dows only).
See PictureProject Reference Manual (on CD) for further
information.
14
14
62
61
–
CHOOSE PRO-
FILE screen does
not appear in
Wireless transfer
mode
•Set the USB option to PTP in the Interface menu of
the setup menu. 61
Signal is weak
•Set host.
•Move closer to the access point.
•Remove any obstacles between the camera antenna
and computer.
•Change camera facing.
XXX
–
Signal was
interrupted and
picture could
not be sent
•Turn the camera off and then turn it on again. XXX
Problem Possible cause c
en_q3175.book Page 164 Thursday, June 16, 2005 10:54 AM
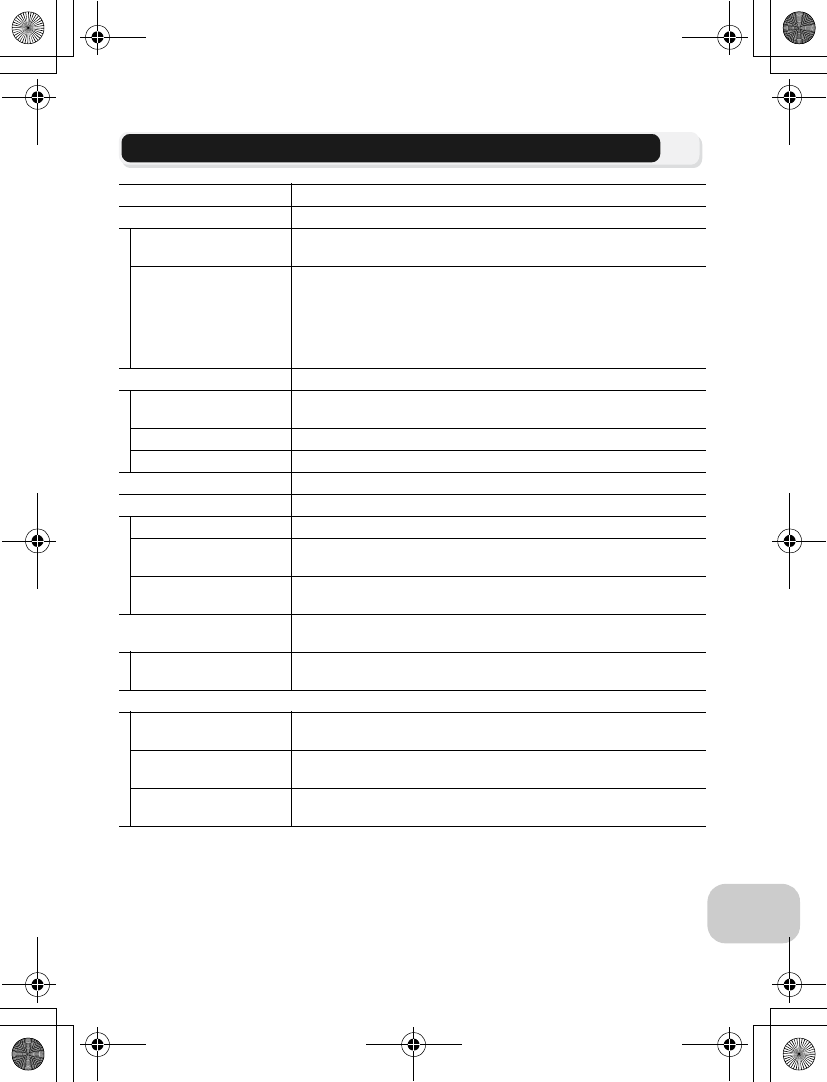
165
Technical Notes
Specifications
Type COOLPIX P1/P2 digital camera
Effective pixels 8.0 million (for COOLPIX P1)/5.1 million (for COOLPIX P2)
CCD 1/1.8" high-density CCD; total pixels: 8.31 million (for COOLPIX P1)/
5.26 million (for COOLPIX P2)
Image size (pixels)
•3,264×2,448 [8M] (for only COOLPIX P1)
•2,592×1,944 [5M] • 2,048×1,536 [3M]
•1,600×1,200 [2M] • 1,280×960 [1M]
•1,024×768 [PC] • 640×480 [TV]
•3,264×2,176 [3:2] (for COOLPIX P1)
•2,592×1,728 [3:2] (for COOLPIX P2)
Lens 3.5 × Zoom-Nikkor ED lens
Focal length F=7.5 - 26.3 mm (35-mm [135] camera-format equivalent: 36 - 126
mm)
f/-number f/2.7 - f/5.2
Construction Seven elements in six groups
Digital zoom Up to 4× (35-mm [135] camera-format equivalent: 504 mm)
Autofocus (AF) Contrast-detect through-the-lens (TTL) AF, AF-assist illuminator
Focus range 50 cm (1') - ∞; macro mode 4 cm/1.6" (W) - ∞
Focus area selection Auto (nine-area automatic selection), Manual (99-area manual selec-
tion), Off (center focus area selection)
AF-assist illuminator
CLASS 1 LED PRODUCT (IEC60825-1 Edition 1.2-2001)
Maximum output: 1900µW
Monitor 2.5", 110,000-dot, amorphous silicon TFT transflective LCD with
brightness adjustment
Frame coverage
(shooting mode) Approximately 100% horizontal and 97% vertical
Storage
Media Internal memory (approximately 32 MB for COOLPIX P1/16 MB for
COOLPIX P2)/SD (Secure Digital) Memory cards
File system Compliant with Design Rule for Camera File System (DCF), Exif 2.2,
and Digital Print Order Format (DPOF)
File formats Compressed: JPEG-baseline-compliant (1:4, 1:8, 1:16)
Movies: QuickTime Sound files: WAV
en_q3175.book Page 165 Thursday, June 16, 2005 10:54 AM
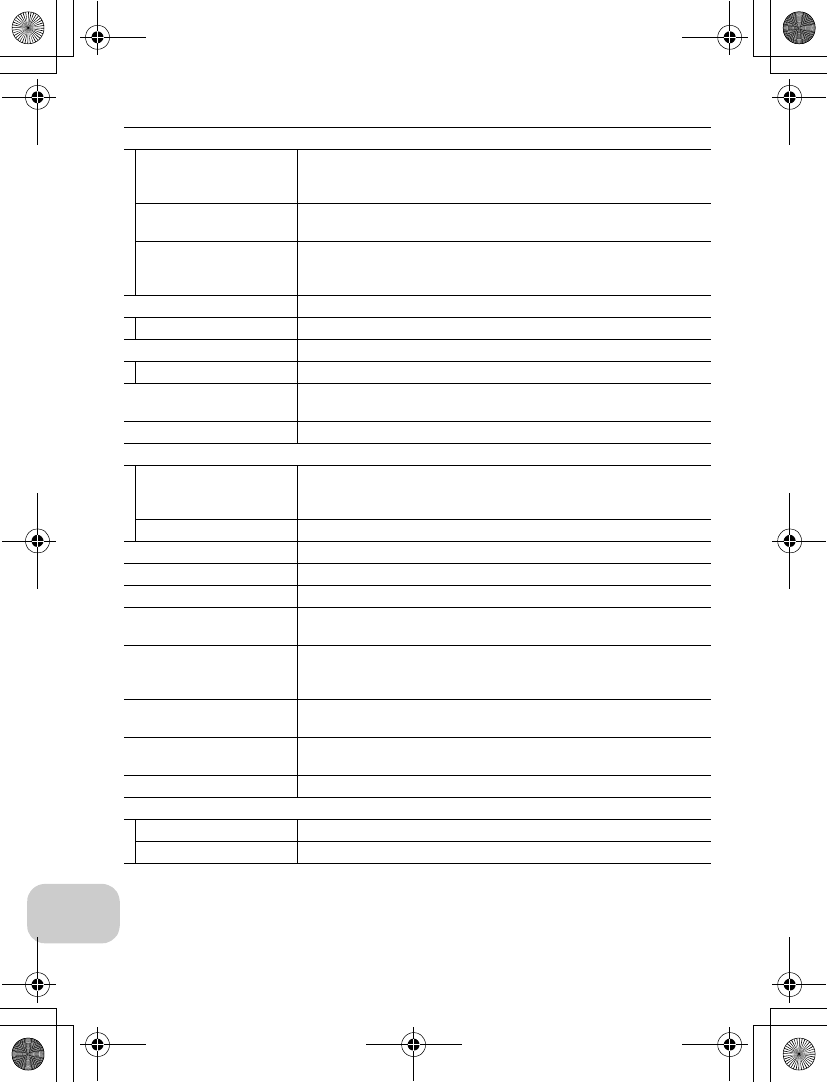
166
Technical Notes
* Industry standard for measuring life of camera batteries. Measured at 25°C (77°F); zoom
adjusted with each shot, built-in flash fired with every other shot, image mode set to
NORM/c (for COOLPIX P1) or NORM/d (for COOLPIX P2).
Exposure
Metering
Four mode through-the-lens (TTL) metering;
•256-segment matrix •Spot
•Center-weighted •Spot AF area
Exposure control Programmed auto, Aperture-priority auto, Exposure compensation
(-2.0 - +2.0 EV in steps of 1/3 EV), Auto bracketing
Range
W: -1.0 - +19.0 EV
T: +0.5 - +19.0 EV
(Sensitivity: Auto)
Shutter Mechanical and charge-coupled electronic shutter
Speed 8 - 1/2,000 s
Aperture Three-blade hexagonal iris diaphragm
Range 10 (in steps of 1/3 EV)
Sensitivity Approximately equivalent to ISO 50 (for COOLPIX P1), ISO 64 (for
COOLPIX P2), 100, 200, 400; Auto (auto gain to ISO 200 equivalent)
Self-timer Ten-second, three-second duration
Built-in Flash
Range (approx.)
W: 0.5 - 2.6 m/1'8" - 8'6"
T: 0.5 - 1.3 m/1'8" - 4'3"
(Sensitivity: 100)
Flash control Sensor flash system
Interface Hi-Speed USB 2.0, IEEE802.11/b11g
Video output Can be selected from NTSC and PAL
I/O terminals DC in; Digital I/O (audio-visual out and USB)
Supported language Chinese (Simplified and Traditional), Dutch, English, French, Ger-
man, Italian, Japanese, Korean, Russian, Spanish, Swedish
Power sources
•One rechargeable Nikon EN-EL8 rechargeable lithium-ion battery
(supplied)
•EH-62C AC adapter kit (available separately)
Approximate battery
life
Approximately 180 shots for COOLPIX P1/200 shots for COOLPIX P2
Based on CIPA standard*
Dimensions (W×H×D) Approximately 91 × 60 × 39 mm/3.6" × 2.4" × 1.5"
(excluding projection parts)
Approximate weight 170 g (6.0 oz) without battery or memory card
Operating environment
Temperature 0 - 40°C (32 - 104°F)
Humidity Less than 85% (no condensation)
en_q3175.book Page 166 Thursday, June 16, 2005 10:54 AM
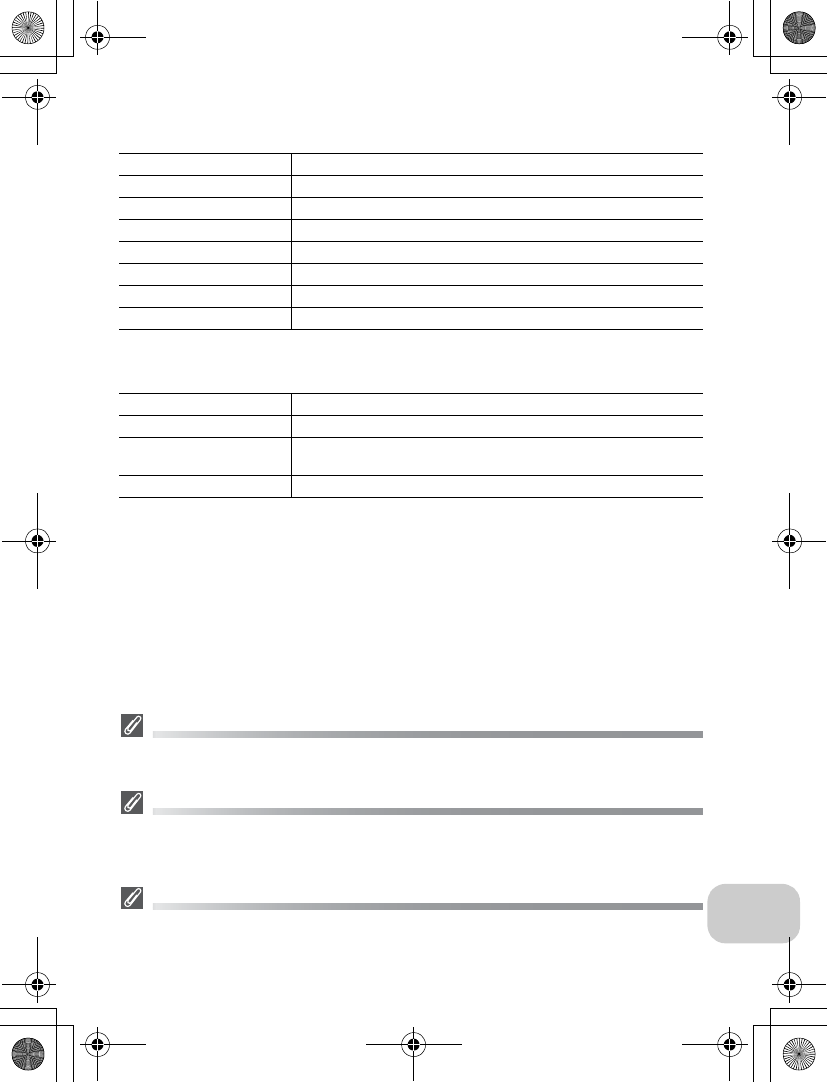
167
Technical Notes
MH-62 Battery Charger
EN-EL8 Rechargeable Li-ion Battery
Design Rule for Camera File System (DCF)
Your camera conforms to the Design Rule for Camera File System (DCF), a standard widely
used in the digital camera industry to ensure compatibility among different makes of camera.
Exif Version 2.2
Your camera supports Exif (Exchangeable Image File Format for Digital Still Cameras) version
2.2, a standard that allows information stored with pictures to be used for optimal color re-
production when images are output on Exif-compliant printers.
Specifications
Nikon will not be held liable for any errors this manual may contain. The appearance and
specifications are subject to change without notice.
Rated input AC 100 - 240 V, 50/60 Hz, 0.12 - 0.08 A
Charging output DC 4.2 V/950 mA
Compatible batteries
Nikon EN-EL8 rechargeable Li-ion batteries
Charging time Approximately 2.0 hrs when no charge remains
Operating temperature
0 - 40°C (+32 - 104°F)
Dimensions Approximately 67 × 26 × 67 mm/2.6" × 1.0" × 2.6" (W×H×D)
Length of cord Approximately 1,800 mm (70.9")
Weight Approximately 70 g (2.5 oz), excluding power cable
Type Rechargeable lithium-ion battery
Rated capacity 3.7 V/730 mAh
Dimensions Approximately 35 × 47 × 5 mm/1.4" × 1.9" × 0.2" (W×H×D,
excluding projections)
Weight Approximately 17 g (0.6 oz), excluding terminal cover
en_q3175.book Page 167 Thursday, June 16, 2005 10:54 AM
168
Technical Notes
Symbols
X (auto shooting) mode, 18 -
23
A (Delete) Button, 3, 55, 56,
58, 85
l (help) Button, 3
S (movie) mode, 6
E (transfer) Button, 61, 63
I Exposure compensation, 3,
33
C Flash, 3, 27
C Lamp, see Lamp, red (C)
F Focus mode, 3, 31
m MENU Button, 3
i Play Button, 3, 15, 24
H Self-timer, 3, 30
Numerics
5 shot buffer, 90
A
A (Aperture-priority auto), 6,
46
AC adapter kit, ii, iii, 1, 70,
150, 166
Advanced options, 34
AF area mode k, 86, 97
AF assist u, 115, 125
AF lock, 97, 98
p, 4, 22, 155
AF-assist illuminator, 2, 23
Antenna, 2
Audio/video (A/V) cable (EG-
CP14), 60
Audio/video (A/V) out connec-
tor, 3
Auto bracketing C, 86, 93
Auto off i, 15, 115, 127
Auto power off, 15
Auto transfer E, 115, 130
Autofocus, 31
Auto-focus mode, 84, 86,
100
Continuous AF, 84, 100
Single AF, 84, 100
B
BACK LIGHT L, 40
Backlit, 153
Backlit subject, 27, 40
Battery, ii, iii, 1, 8, 10 - 11, 14,
154, 166
Battery-chamber/Memory
card slot cover, 3, 10
charging, 8, 10
EN-EL8, iii, 10, 150, 166
latch, 3, 10
Battery level, 14
BEACH/SNOW H, 38
Best Shot Selector A, 40,
86, 92, 162
Blur, 28, 30, 36, 92, 162
BSS, see Best Shot Selector
C
Camera shake, 36
Camera strap, 2
Clock battery, 17
Clock, see Date
CLOSE UP M, 40
Close-ups, 29
Cloudy, 52
Computer, 61
Continuous q, 86, 89
5 shot buffer, 90
Continuous H, 89
Continuous L, 89
Interval timer shooting, 90,
91
Multi-shot, 89
Single, 89
Ultra HS, 89
Contrast, 94
Copy L, 104, 114
COPY O, 41
Cropping pictures, 56
D
Date imprint b, 69, 115,
122
Date counter, 123
Date W, 16 - 17, 115, 118 -
119, 122
correct time and date, 16
Daylight, 52
DaylightSaving, 16
DCF, see Design rule for Cam-
era File System
Delete A, 104
Deleting pictures, 55, 111
during shooting, 24
selected pictures, 111
Design rule for Camera File
System, 165, 167
Digital Print Order Format, 65,
69, 165
Digital zoom, 20, 21
D-Lightingu, 78
DPOF, see Digital Print Order
Format
DSCN, 25
DUSK/DAWN J, 39, 162
E
EH-62C, see AC adapter kit
Electronic VR b, 84
E-mail, 47, 79
Error messages, 155 - 160
Exif 2.2, 165, 167
Exposure compensation, 33
Exposure Modes, 45
Extension, 25
F
File name, 25
File numbering, 25, 132
Fill flash, 27
FIREWORKS SHOW K, 39,
163
Firmware version B, 115,
132
Fixed aperture, 86, 100
Flash, iii, 2, 27 - 29, 162, 166
Flash exp. comp., 86, 94
Flash mode, 18, 27, 28
anytime flash, 27
Auto, 27
auto with red-eye reduc-
tion, 27
flash cancel, 27
Rear-curtain sync, 27
slow sync, 27
Flexible Program, 45
Fluorescent, 52
Focus, 22 - 23, 162
Focus area, 22
Autofocus, 97
Index
en_q3175.book Page 168 Thursday, June 16, 2005 10:54 AM
169
Technical Notes
Focus mode, 31
infinity, 31
Macro close-up, 31
Folder name, 25
Format, 13, 115
internal memory M, 128
memory card O, 128
Quick format, 128
Format memory/card M/O,
115, 128
see Format
Framing pictures, 20 - 21
FSCN, 25
Full-screen playback, 24
H
Hide image, 104, 113
Histogram, 33, 45, 57
I
Identifier, 25, 76
Image adjustment F, 86, 94
Image mode Z, 47
Image quality, 18, 47
Image size, 18, 47
Image sharpening M, 86,
95
In-Camera Red-Eye Fix, 29
Incandescent, 52
Interface k, 115, 129
connector cover, 3
USB, 70, 129
Video mode, 129
Internal memory icon M, 18
ISO, 29, 50
J
JPEG, 25, 165
L
Lamp, red (C), 14, 22, 162
LANDSCAPE E, 37
Language j, 14, 16, 115,
129
language, choosing, 16
Lens, 2, 152, 153, 165
Lens cover, 2
M
Macro mode, 31 - 32
Memory card, iii, 12 - 13, 150,
165
approved, 150
capacity of, 18, 81
formatting, 13, 128
insertion and remove of, 12
- 13
O icon, 18
slot cover, 12
Menus R, 115, 116
icons, 116
text, 116
Metering m, 86, 88
Center-weighted, 88
Matrix, 88
Spot, 88
Spot AF area, 88
Microphone, 2
Mode dial, 2, 6
Monitor, iii, 3, 4, 5, 20, 153,
161, 165
indicators in, 4 - 5, 161
turning on and off, 5
Monitor brightness, 121
Monitor settings Z, 5, 115,
120
Brightness, 121
Hue, 121
Photo info, 5, 120
MOV, see Movies
Movie menu
Auto-focus mode, 84
Electronic VR, 84
Movie options, 81
Movie options, 81
B/W movie, 81
Sepia movie, 81
Small size, 81
Smaller size, 81
Time-lapse movie, 81, 83
TV movie, 81
Movies, ?? - 85, 165
recording, 80
viewing, 85
Multi Selector, 3
Multi-shot 16, 89
MUSEUM N, 40, 163
N
NIGHT LANDSCAPE G, 38,
162
NIGHT PORTRAIT D, 37
Noise reduction o, 86, 101
NTSC, see Video mode
Number of exposures remain-
ing, 18, 19, 49
O
On/off, see Power switch
P
P (Programmed auto), 6, 45
PAL, see Video mode
PANORAMA ASSIST F, 38,
43
Paper size, 71, 72
PARTY/INDOOR C, 37
PictBridge, 70
DPOF printing, 71, 75
Paper size, 71, 72
Print all images, 71, 73
Print selection, 71, 73
PictureProject, 17, 61, 65
Playback menu, the, 104 - 114
Playing back, 24, 55 - 59
full-screen, 24
movies, 85
on TV, 60
thumbnail, 55
zoom, 56
PORTRAIT B, 36
PORTRAIT (FACE AF) A, 36,
42
Power connector cover, 3
Power switch, 2, 14 - 15
Power-on Lamp, 2, 14 - 15, 18
Print, 71
Print set w, 66 - 69, 75, 104
Printer, 70
Printing pictures, 65 - 75
see also Date imprint, Dig-
ital Print Order Format
Profile
creating, 139
managing, 140
Protect D, 104, 112
Protected pictures, 111
Q
Quality, see Image mode
Quick format, 128
Quick Playback Zoom, 57
QuickTime, see Movies
R
Reset, 86, 102
Reset all n, 115, 131
en_q3175.book Page 169 Thursday, June 16, 2005 10:54 AM
170
Technical Notes
Resizing pictures, 117, 163
RSCN, 25
S
Saturation, 96
Saturation control P, 86, 96
Scene b mode, 34 - 44
Secure Digital (SD), see Memo-
ry card
Self-portraits, 30
Self-timer, 30, 166
Self-timer lamp, 2, 30
Sensitivity W, 29, 50
Setup menu, the, 115 - 132
a (setup) mode, 115 -
132
Shade, 52
Shooting menu, the, 86 - 103
Shot confirmation, 115, 124
Shutter-release button, 2
Shutter-release delay, see Self-
timer
Single, 89
Size, see Image mode
Slide show z, 104, 109 -
110
Small pic., see Small picture
Small picture H, 79, 104
Smear, 153
Sound
button sound, 126
settings, 126
shutter sound, 126
start-up sound, 126
Sound settings h, 58, 115,
126
Speaker, 2
Speedlight, see Flash
SPORTS P, 41
SSCN, 25
Standby mode, 15, 127
Strap, camera, ii, 2
SUNSET I, 39
Support information, 1
T
T button, see Zoom buttons
Television, 60, 129
connecting to, 60
taking pictures for display
on, 81
Thumbnail playback, 55
Time zone, 118
Transfer
marking pictures for, 112,
130
Transfer marking E, 104,
112
Tripod, 3, 36, 155
U
USB, 3, 115
cable (UC-E6), 62, 70
Connector, 3
Mass storage, 61
PTP, 61
User setting, 86, 103
V
VCR, 60, 129
Video cable (EG-CP14), 60
Video mode, 60, 115, 129
Video output, 166
Voice memo, 58
Voice memo N:O, 58
Volume, 58, 85, 126
W
W button, see Zoom buttons
WAV, 25
Welcome screen V, 115,
117
White balance d, 52, 86
auto, 52
cloudy, 52
daylight, 52
fluorescent, 52
incandescent, 52
preset, 54
shade, 52
speedlight, 52
Wide angle, see Zoom
Wireless printing, 149
Wireless transfer, 141
Easy transfer, 133, 143
Marked images, 133, 145
PC mode, 133, 148
Selected images, 133, 146
Shoot & transfer, 133, 147
Shooting date, 133, 144
Wireless transfer LED, 2
Wireless Transfer Mode, 133 -
147
Z
Zoom
digital, 20 - 21, 165
optical, 20 - 21
playback, 56, 163
Zoom buttons
j (W) button, 3, 20, 55,
56
k (T) button, 3, 20, 56
en_q3175.book Page 170 Thursday, June 16, 2005 10:54 AM