Norav Medical 1200WR WIRELESS ECG RECORDING SYSTEM User Manual PCECG1200WR Revised UserMan
Norav Medical Ltd. WIRELESS ECG RECORDING SYSTEM PCECG1200WR Revised UserMan
Contents
- 1. USERS MANUAL 1
- 2. USERS MANUAL 2
- 3. USERS MANUAL 3
USERS MANUAL 3
Measurements/ Interpretation
NV-54/PCECG1200W
89
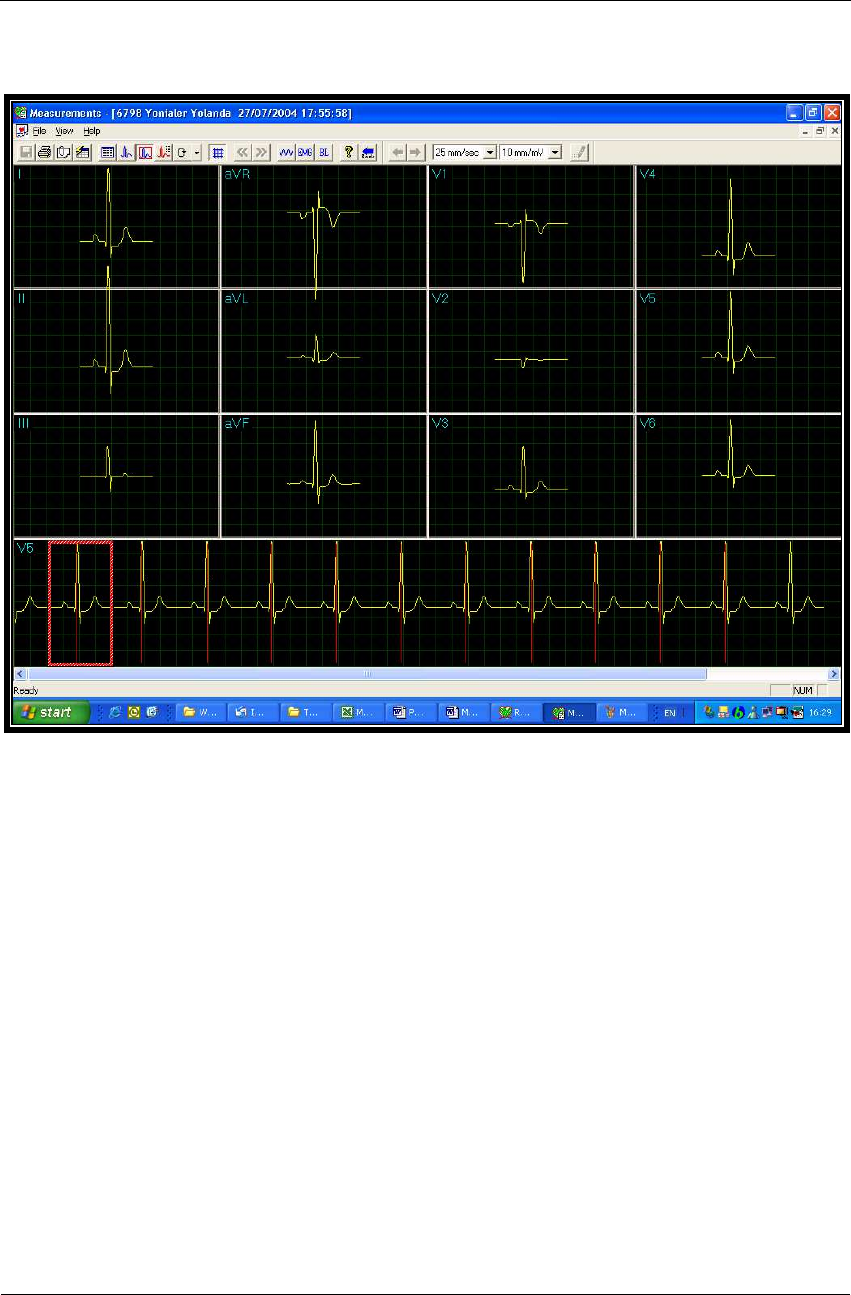
QRS Display
Figure 22: Measurements—QRS display
The QRS screen displays the QRS in each of the leads and a strip lead of a default
lead (defined in the setup of the application from which Measurements was accessed).
The QRS displayed in each of the leads is marked by a red rectangle in the strip lead.
To view a different QRS in all the leads, drag and drop the square by to a different
QRS. The QRS markers can be moved to the left and right (between the previous and
the next marker). Changes in marker positions are recalculated and displayed in the
tabular screen and the Averages screen.
Instructions for Use and Technical Description
Norav Medical Ltd.
90
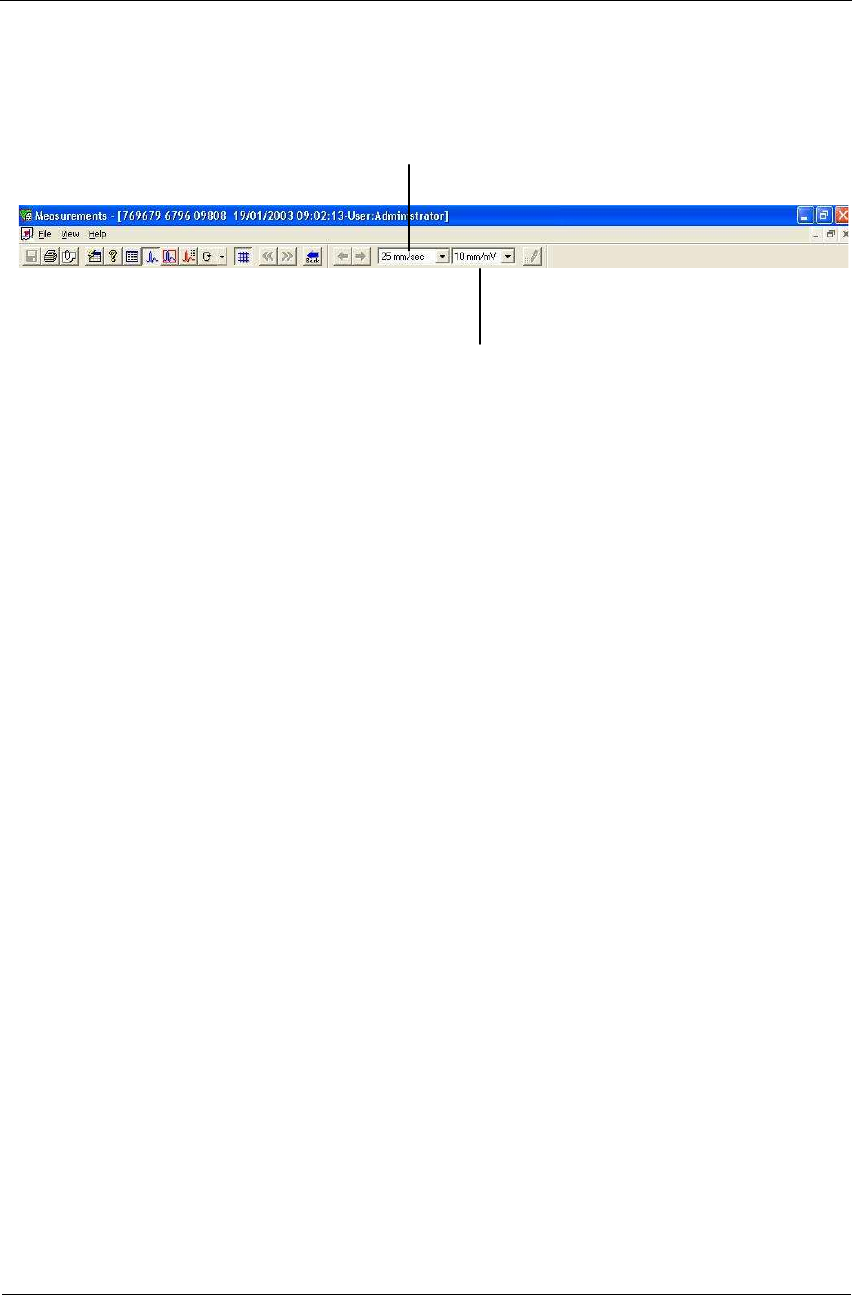
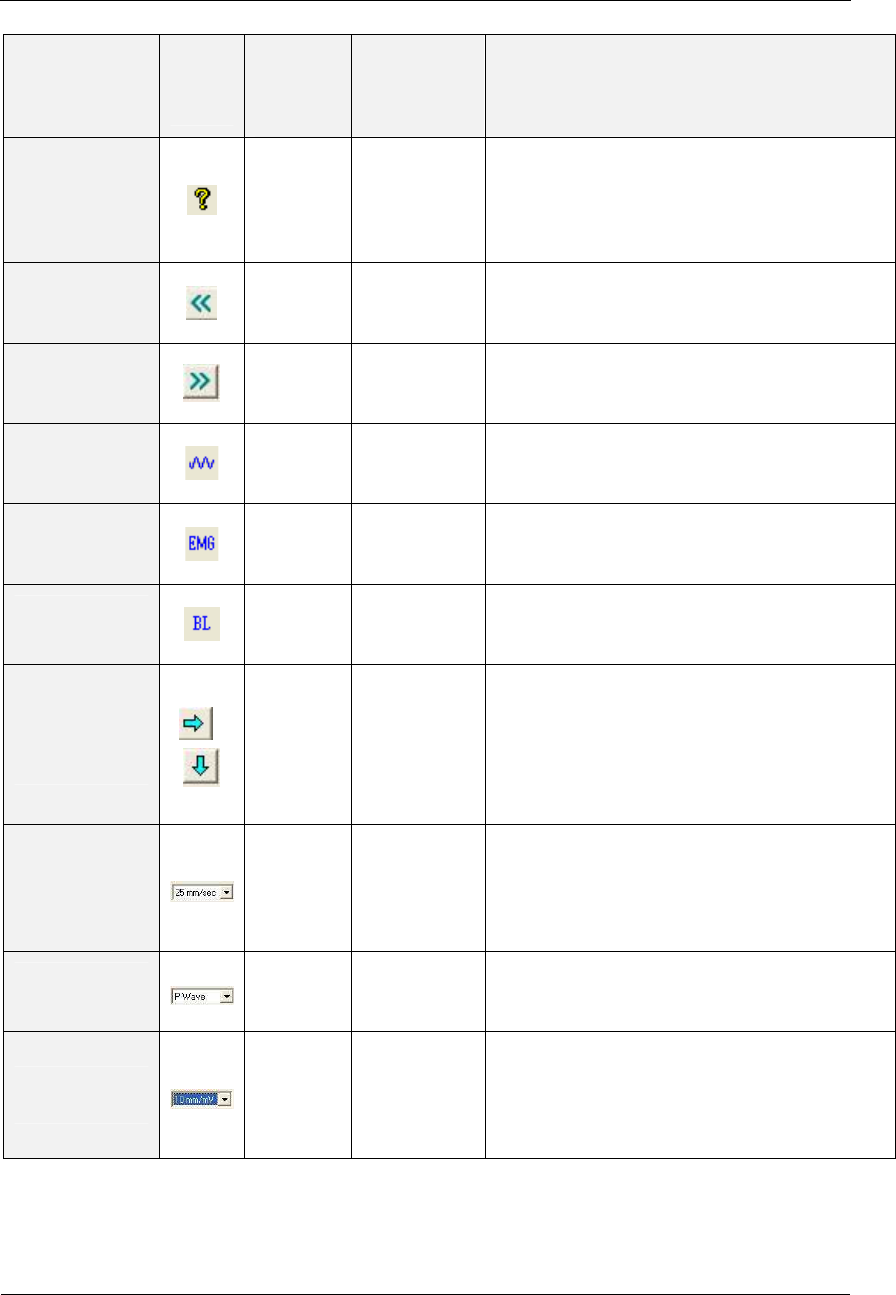
Toolbar of Averages/QRS Displays
Figure 23: Toolbar of Averages/QRS
Horizontal
Scale
Vertical Scale
Measurements/ Interpretation
NV-54/PCECG1200W
91
Caliper Display
Figure 24: Measurements—Caliper
Toolbar of Caliper Display
Figure 25: Toolbar of Caliper
Print Average
Save Table
Reset
measurement
Caliper
Grid
Next
QRS
About Add/remove
marke
r
Right/down
marke
r
RemarksQRS
Next strip
Previous
QRS
Filters
Back
Left/up
marke
r
Wave type
Marker time
Instructions for Use and Technical Description
Norav Medical Ltd.
92
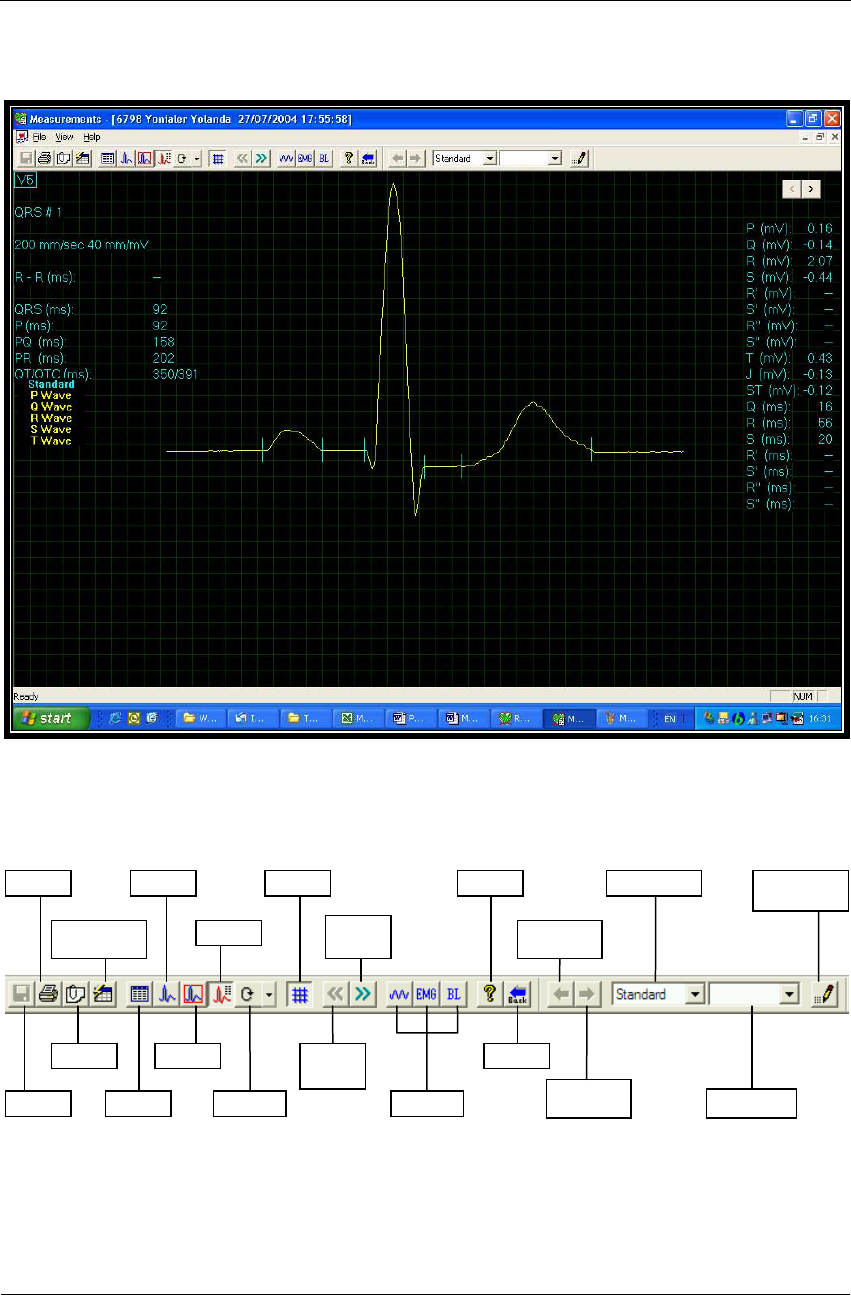
The Caliper screen (above) is opened via the menu, the toolbar, or by double clicking
a lead in the QRS or Averages screens. It displays one QRS with its values. The user
can edit locations of wave markers, display different QRS in the same lead, or navigate
through leads and display QRS in different leads. Changes in wave marker positions
are recalculated and displayed in the tabular screen.
Toolbar and Menus
To do this
Click
this
icon
Or use
this
short-cut
key
Or select this
menu Description
Save
Measurements Ctrl+S File > Save Saves measurements to test file on disk.
Print ECG
F6 File > Print
ECG
Off line printing. The ECG is printed in
miniature format.
Horizontal: 6.25 mm/sec, vertical: 2.5 mm/mV.
Add/View
Remarks
Alt+V+R View >
Remarks
Lets you enter free text during or after the ECG
recording. This is printed and saved together with
ECG traces.
Reset
Measurements
Alt+F+M File > Reset
Measurements
Reset measurements to those calculated by the
application. This option will eliminate all the
modification performed manually in the
measurements.
To Open
Measurements
in Table
Format
View > View
Format >
Measurements
table
Displays the measurements in a table format.
To Display
QRS Averages
View > View
Format >
Averages
Displays the QRS averages on screen.
To Display
QRSs in All the
Channels
View > View
Format >
QRS
Displays the QRSs in all the channels on screen .
Display Caliper
View > View
Format >
Caliper
Displays the Caliper.
Display the
Next Leads
Ctrl+0
View > View
Format >
Next strip
Lets you scroll through all leads in the 3X1
display.
Display/Hide
the Grid
View > Grid Optional display of 5mm raster.
Measurements/ Interpretation
NV-54/PCECG1200W
93
To do this
Click
this
icon
Or use
this
short-cut
key
Or select this
menu Description
To Display
Information
Help >
About…
Displays software version number. Quote this for
any software inquiry. Also shows memory size
and free disk space. The HASP ID number is the
ID of existing software keys. This ID number is
used for adding software options.
Previous QRS
View > View
Format >
Previous QRS
Moves to previous QRS on the same channel.
Next QRS
View > View
Format >
Next QRS
Moves to next QRS on the same channel.
Set 50/60 Hz
Filter
ECG >
Filters >
50/60 Hz
ON/OFF for line interference filter. Set
OPTIONS for 50 or 60 Hz prior to operation.
Set EMG Filter
ECG >
Filters >
EMG
ON/OFF for muscle noise filter.
Set Base Line
Filter
ECG >
Filters >
BaseLine
ON/OFF for baseline filter on ECG data.
Move Marker
to
Right/Bottom
/
------------
Enabled in Caliper screen when a wave type and
marker name are selected. Click to move the
marker right or down (according to the marker
selected).
Disabled when no wave marker is selected or the
Caliper screen is not displayed.
Horizontal
Resolution ---------------
(Averages and QRS screens)
Lets you choose between horizontal displays of
12.5, 25, 50, and 100 mm/sec.
(Default: 25 mm/sec)
Select QRS
Wave Type -------------
In Caliper, lets you select the QRS wave type
from the list to view its markers. After selecting
the wave type, select a marker name to move it.
Vertical
Resolution -------------
(Averages and QRS screens)
Lets you choose between vertical displays of 5,
10, 20, and 40 mm/mV.
(Default: 10 mm/mV)

Instructions for Use and Technical Description
Norav Medical Ltd.
94
To do this
Click
this
icon
Or use
this
short-cut
key
Or select this
menu Description
Select Name of
QRS Marker ------------- In Caliper, lets you select the name of a marker to
edit it (move it up/down/left/right).
Add/Remove
ECG Wave
Marker
File >
Add/Remove
ECG Wave
Marker
(Caliper screen only)
Opens a dialog box and lets you check/clear the
wave markers to be displayed and calculated.
Print Reports
------
File > Print
Reports
Lets you choose the report to be printed from the
sub-menu: Single QRS/QT Report, Multiple QRS
Report, or All Reports.
Table 26: Measurements Toolbar and Menus
DATABASE APPLICATION
NV-54/PCECG1200W
95
CHAPTER 13: DATABASE APPLICATION
(This option is available with the D1\D2 license)
Database application is an optional package requiring a D1 or D2 permission license.
Install Database from the PC-ECG1200 package.
Keep and manage ECG studies in a catalog organized according to patient name or
ID. In a network, users can share the database (save it in the server). Data acquisition
for all applications can be initiated either in the application itself or from the database
main screen.
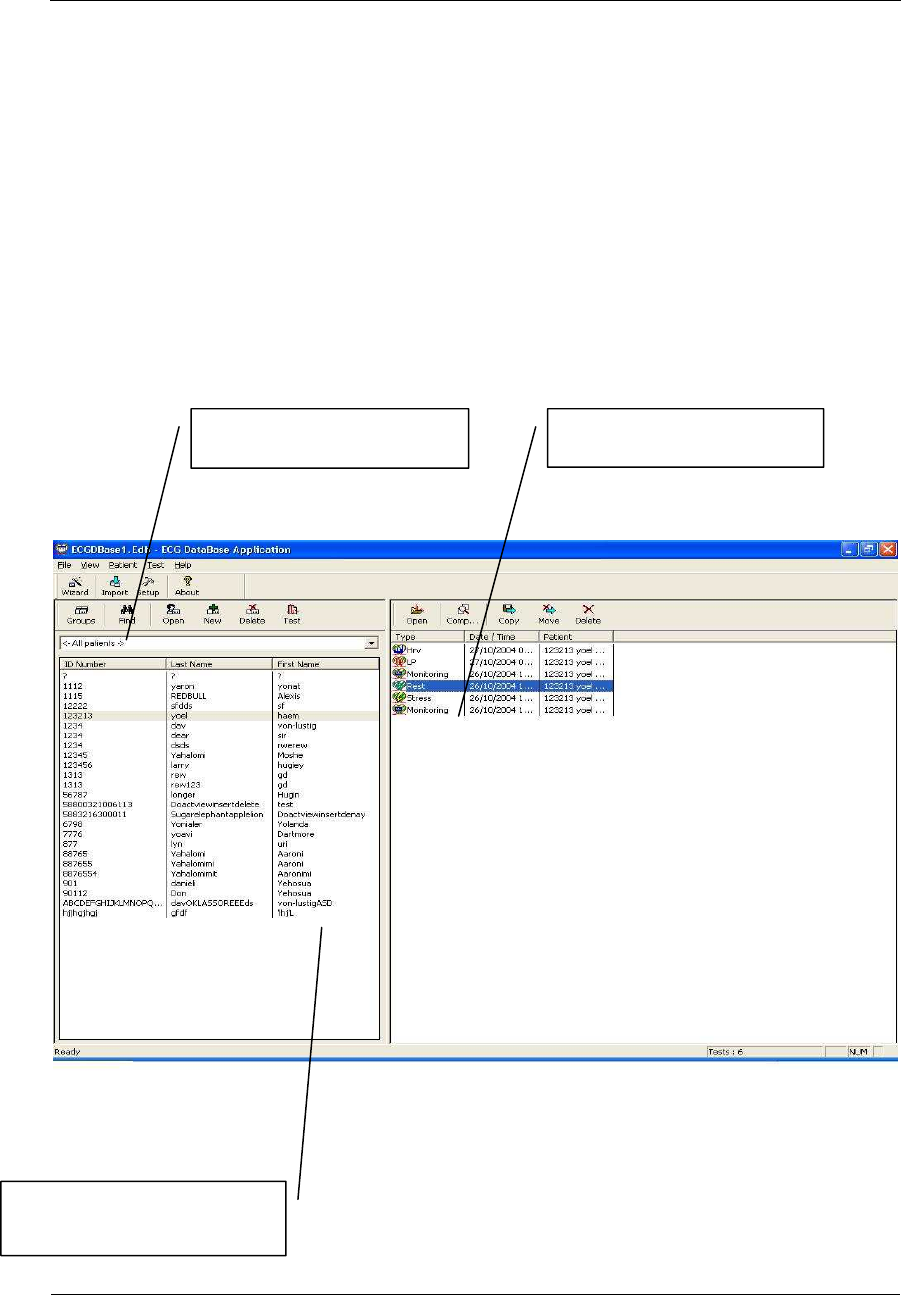
Figure 26: Database Main Screen
Select group field values for query
of displayed list of patients
List of tests referring to selected
patient (selected test highlighted)
List of patients in database (or in
selected group)
Instructions for Use and Technical Description
Norav Medical Ltd.
96
First Time Use
When you first start Database application, you are prompted to confirm the location
of the database.
• Choose New if no database exists
• Choose Open to work with an existing database
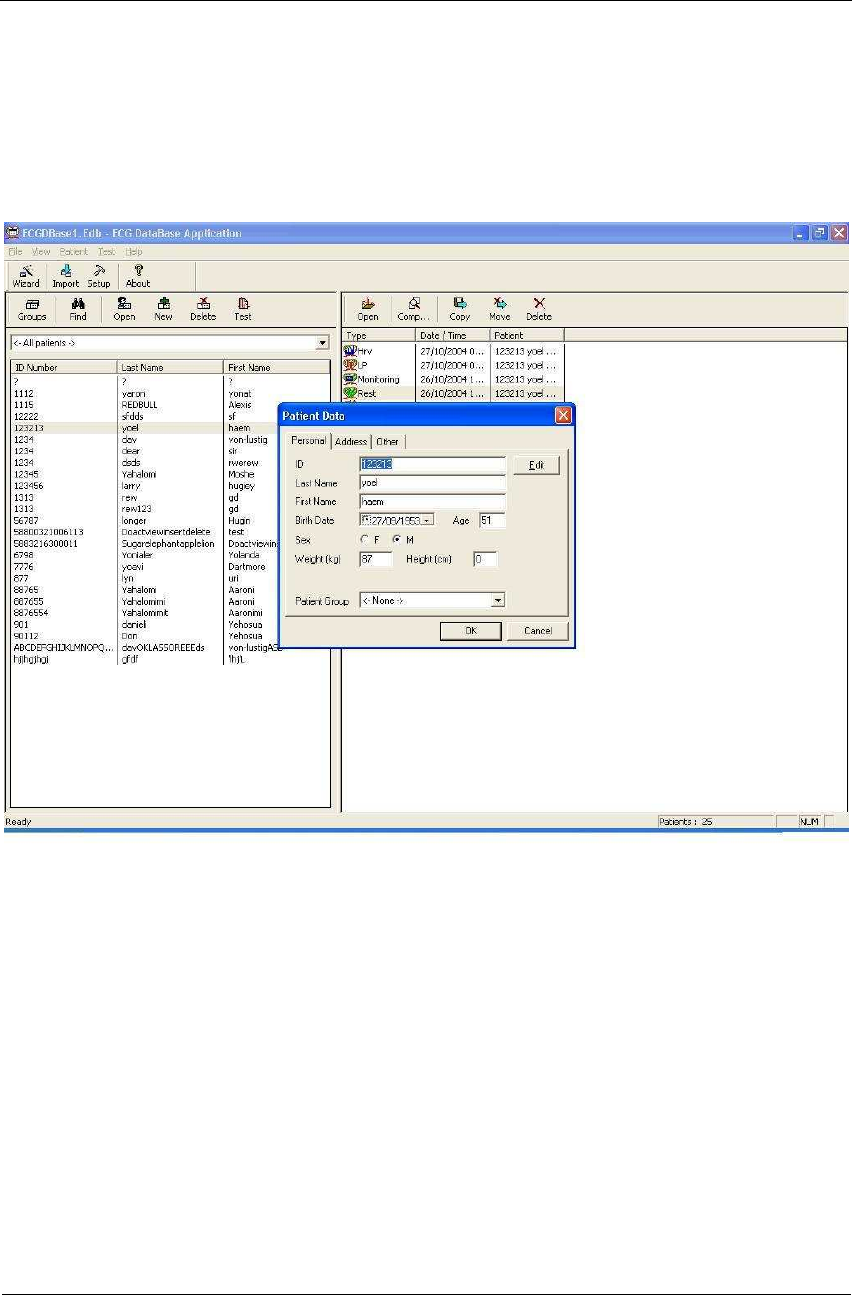
Figure 27: Database Patient Query
DATABASE APPLICATION
NV-54/PCECG1200W
97
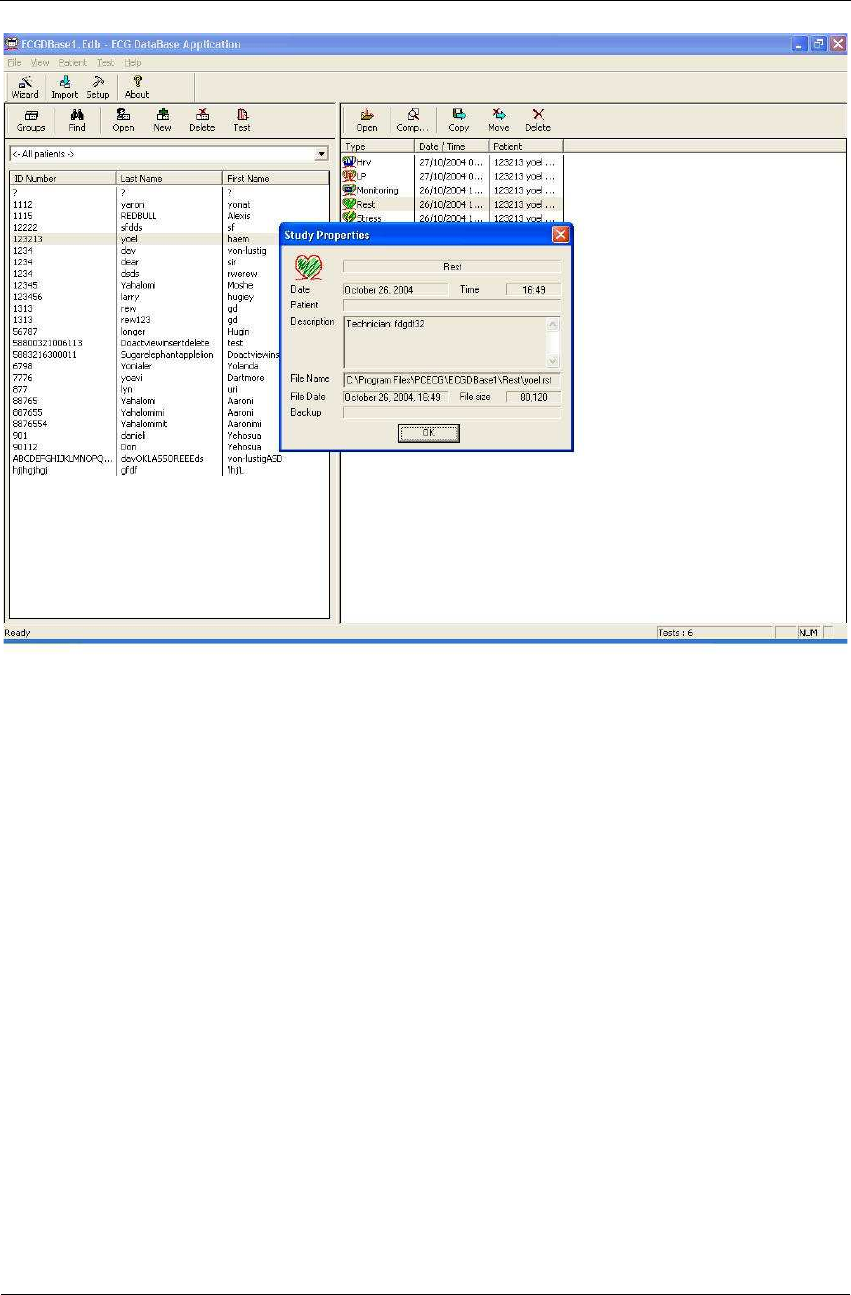
Figure 28: Database Properties of Selected test
Comparing Rest Tests
Database application allows the user to compare rest tests on 1 or 12 channels.
To Compare Rest Tests
1. Select two or more Rest tests from the Database interface
2. Click Compare
Instructions for Use and Technical Description
Norav Medical Ltd.
98
Database Setup
Click Setup on the Toolbar to access the following parameters:
Tab Description
Default
Workspace Select the default workspace.
Choose Data
Directory Input data directory (with browsing option).
External
Patient Data
file
Input the location of the external patient data file (with browsing option for
PatientFile.INI file).
Delete with
Password Check this option to require a password for DELETE (default: unchecked).
Table 27: Database Setup Options
Toolbar and Menus
To do this Click this
icon
Or use
this short-
cut key
Or select this
menu Description
Main Toolbar
Connect to
Database
Ctrl+W File >
Database
Connection
Wizard
Creates a new database or retrieve
path for an existing one.
Import tests to
database
Ctrl+I File > Import
ECG Data File
Adds studies recorded and saved
outside the database.
To select all patient data files within
a directory, press CTRL + A and
verify that all files are checked.
Define
Workspace
Preferences
Ctrl+T View > Setup Defines the location of default
workspace, patient identification,
and a special file called External
File. This file (Windows.INI
format) allows the user to prepare a
list of patients that can be read by
PC-ECG 1200 applications.
Note: This feature does not require
the D3 software key.
Edit Groups File > Groups Defines different patient groups,
such as Private, HMO, Military, etc.
DATABASE APPLICATION
NV-54/PCECG1200W
99
To do this Click this
icon
Or use
this short-
cut key
Or select this
menu Description
View
Application
Information
Help > About Displays version number,
communication and web
information, and disk and RAM
memory size. The HASP ID
number is used for identification of
the software key for adding
software options.
Patient
Toolbar
Find a Patient Patient > Find Allows the user to find a patient by
entering a string in any or all of ID,
Last Name, and First Name fields.
Open Patient
Detail
Patient >
Open Patient
Allows the user to check for patient
information before performing a
study on a patient.
Add New
Patient to
Database
Patient > New
Patient
Inserts a new patient. You are
prompted to enter partial or
complete patient details. Enter ID,
Last, and First Name at least.
If patient details match an existing
one you cannot add this patient to
the list. The existing patient
matching the details will be checked
to allow the user to add a study.
Delete a Patient
Patient >
Delete Patient
Deletes an entry. If the entry is not
empty of studies, you will be asked
to confirm deletion.
Perform a New
Test
Patient > New
Test Starts the application and starts
recording.
Test Toolbar
Open a Test
Test > Open
Test
Allows the user to view a study.
You must first select a study to
activate OPEN.
Instructions for Use and Technical Description
Norav Medical Ltd.
100
To do this Click this
icon
Or use
this short-
cut key
Or select this
menu Description
Compare Rest
tests
Test >
Compare
Select two or more Rest tests from
the Database interface and click
Compare. This option is only
available when you check Setup >
ECG Recording > Use ECG
Database.
Click Compare again to end
Compare mode and display the Rest
test.
Copy a Test
Test > Copy
Test Copies a study.
Move a Test
Test > Move
Test
Moves a study and deletes it from
the database. The default option is
to leave the study’s properties in the
database: upon completion of the
operation. The study remains in the
list with an X sign.
You can choose to remove the
entire study instead.
Delete a Test
Test > Delete
Test
Deletes a study from the database.
The default option is to leave the
study’s property in the database:
upon completion of the operation,
the study remains in the list with an
X sign.
You can choose to delete the entire
study instead.
Update
Database File > Update
Database
Updates the database.
Print Setup File > Print
Setup
Opens the Print Setup dialog box
to set printing preferences.
View Test
Properties Test > Test
Properties Displays study properties.
Table 28: Database Toolbar and Menus

Interfacing with Information Systems
NV-54/PCECG1200W
101
APPENDIX A: INTERFACING WITH
INFORMATION SYSTEMS
There are several ways to exchange information between PC-ECG 1200 and Hospital
Information System (HIS). These are described below:
Demographic Data
Information System Prepares Patient Demographic Data for PC-ECG
1200:
This uses a text file called PatientFile.ini. The location is defined in Database setup.
File Name: PatientFile.ini
File Format:
[PATIENTDATAXXX]
ID=
LastName=
FirstName=
BirthDay=
BirthMonth=
BirthYear=
Sex=
Weight=
Height=
Address=
Phone1=
Phone2=
Fax=
E-Mail=
Medications=
Other=
[PatientDataXXX]—Section name. XXX—number from 000 to 200.
At least one of the keys ID, LastName, or FirstName must be completed. If all
these keys are empty, section of this patient will be ignored.
The keys Height, Address, Phone1, Phone2, Fax, Email, Medications and Other
appear only with Database.

Instructions for Use and Technical Description
Norav Medical Ltd.
102
Example:
[PatientData001]
ID=1234567890
LastName=Smith
FirstName=Worker
BirthDay=11
BirthMonth=6
BirthYear=1959
Sex=1
Weight=59
Height=170
Address=523 Main st. Tacoma Mexico
Phone1=702-8765643
Phone2=702-8743031
Fax=702-8743032
E-Mail=nkir@sympo.ca
Medications=none
Other=none
[PatientData003]
ID=123456789
LastName=Smith
FirstName=Worker3

Interfacing with Information Systems
NV-54/PCECG1200W
103
HL7 Format File
PC-ECG Prepares HL7 Format File with Stress Test Results
This file is created upon demand in the study review screen.
The file of Stress test in Format HL7 includes:
1. Patient Information:
Name: John
Last Name: Smith
Id Number: 12345678
Birth Date: 24/1/1955
Sex: M
Weight: 80 kg
2. Hospital and Physician Information:
Hospital Name: General Hospital
Hospital Address: Megapolis
Physician Name: Dr. Stern
3. Test Date and Time:
Test Date: 18/09/1999
Test Time: 12:41:51
4. Test Results:
Protocol: Bruce
Target HR: 183
Max HR: 175 (95%)
Max. SBP: 200
Max. DBP: 100
Max. METS: 8.8
Max. VO2: 30.9
ST = J+60

Instructions for Use and Technical Description
Norav Medical Ltd.
104
5. Results of Blood Pressure, HR, Double Product (HRXBP sys.), ST
level (mm) and ST Slope (mV/sec) for the Most Important Stages
of Stress Test:
Rest: BP: 150/100, HR: 79, Product: 11850, ST Level (mm), Slope (mV/sec) (-
1.2/0.7, 0.2/1.8, 1.9/-0.5, -2.0/0.4, -2.9/3.3, -1.1/2.6, -1.4/2.2, -1.6/1.8, -1.3/6.1,
-1.8/2.5, -1.7/1.5)
Max HR: Time: 7:05, BP: 200/100, HR: 175, Product: 35000, ST Level (mm),
Slope (mV/sec) (-1.2/0.7, 0.2/1.5, 1.9/-0.5, -2.0/01, -2.9/3.3, -2.1/2.6, -1.4/2.2, -
1.4/1.8, -1.7/6.1, -1.2/2.4, -1.7/1.5)
Worst ST: Lead aVF:-1.2 mm, Time:4:15, BP:200/100, HR:137, Product: 27400,
ST Level (mm), Slope (mV/sec) (-1.3/0.4, 0.2/1.5, 1.2/-0.5, -2.0/01, -2.5/3.3, -
2.1/2.6, -1.7/2.2, -1.4/1.8, -1.3/2.1, -1.2/2.4, -1.7/1.5)
Recovery: Time: 10:59, BP: 170/80, HR: 127, Product: 21590, ST Level (mm), Slope
(mV/sec) (-1.3/0.4, 0.6/1.5, 1.3/-0.5, -2.0/01, -1.5/3.3, -2.1/2.6, -1.5/2.2, -
1.4/1.9, -1.3/2.1, -1.2/2.3, -1.7/1.5)
6. Physician Remarks and Conclusions:
Reason for Test: Chest pressure
Reason for Ending Test: Fatigue
Conclusions: Normal blood pressure

Interfacing with Information Systems
NV-54/PCECG1200W
105
GDT/BDT Type Communication
PC-ECG and HIS (Hospital Information System) Maintain Bi-Directional
GDT/BDT Type Communication
1. Import demographic data from HIS to PC-ECG
a. In setup, select GDT/BDT.
b. Check Import from GDT/BDT.
c. Define the GDT/BDT directory (in which the HIS file will be
ready).
d. Define the first four characters of the “Token for PC-ECG”
file.
This file always contains the last patient data.
2. Export the GDT/BDT file from PC-ECG to HIS.
a. In setup, select GDT/BDT.
b. Check Save Test in GDT/BDT.
c. Define the GDT/BDT directory (in which PC-ECG file will be
ready). It can be the same as in 1.
d. Define the first four characters of the “Token for Practice
EDP” file.
This file always contains the last patient data.
Instructions for Use and Technical Description
Norav Medical Ltd.
106
Saving the Stress Test as a RAW Data (“native binary”)
Format File
1. Record a stress study
2. Under File menu, create a RAW Data File.
A file with extension RDT is created, with the following structure:
(low byte, high byte) x 12 Leads x n samples (1sec = 500 samples).
Leads sentence -
I, II, III, AVR, AVL, AVF, V1, V2, V3, V4, V5, V6.
Byte Number Byte Type Lead Number Sample
Number
Second
Number
1 Lb
2 Hb
I
3 Lb
4 Hb
II
… …
…
21 Lb
22 Hb
V5
23 Lb
24 Hb
V6
1
25 Lb
26 Hb
I
27 Lb
28 Hb
II
… …
…
45 Lb
46 Hb
V5
47 Lb
48 Hb
V6
2
1
… …
…
… …
1+(n-1)*24 Lb
2+(n-1)*24 Hb
I
3+(n-1)*24 Lb
4+(n-1)*24 Hb
II
… …
…
21+(n-1)*24 Lb
22+(n-1)*24 Hb
V5
23+(n-1)*24 Lb
n * 24 Hb
V6
n n/500
Table 29: Stress Raw Data File Format
Interfacing with Information Systems
NV-54/PCECG1200W
107
Saving the Monitor Test as a Raw Data (“Native
Binary”) Format File
1. Record a Monitor study.
2. Under File menu, create a RAW Data File.
A file with extension RDT is created, with the following structure:
Number Leads (low byte, high byte) + Sample Rate (low byte, high
byte) + (low byte, high byte) x Number Leads x n samples (1sec =
(sample rate)).
Byte Number Byte Type Lead Number Sample
Number
Second
Number
1 Lb
2 Hb
1
3 Lb
4 Hb
2
… …
…
2N -1 Lb
2N Hb
N
1
2N +1 Lb
2N +2 Hb
1
2N +3 Lb
2N +4 Hb
2
…
…
…
2N*2-1 Lb
2N*2 Hb
N
2
1
… … … … …
1+(n-1)*2N Lb
2+(n-1)*2N Hb
1
3+(n-1)*2N Lb
4+(n-1)*2N Hb
2
… …
…
2N*n-1 Lb
2N*n Hb
N
n
n/
(
sample
rate)
Table 30: Monitor Raw Data file format
Instructions for Use and Technical Description
Norav Medical Ltd.
108
APPENDIX B: TECHNICAL SPECIFICATIONS
1200W (Transmitter)
ECG
Patient Leads Detachable 10 lead wires conform to AAMI
Lead Standards AHA or IEC
Defibrillator Protection: Protected against 360 J discharge
Patient Leakage current <10 µA
Input Impedance >100 Mohm
CMRR >100 db
DC max. input +/- 300 mv
Frequency Range (-3db) 0.05 –150 Hz
Signal dynamic range 20 mV
Battery 4 - AA alkaline or NIMH rechargeable
Operation Time Up to 40 hours with 4 AA alkaline battery
A2D
A2D resolution 16 bit, 2‘ complement
Full scale range +/- 10 mV
LSB weight 0.3 µV
Full scale + +10 mV (Digital value = 7FFF hex )
Midscal 0 mV (Digital value = 0000 hex )
Midscale – LSB -0.3 µV (Digital value = FFFF hex )
Full scale - -10 mV (Digital value = 8000 hex )
Sample Rate 500
Communication
Frequency Range 2400-2483.5 Mhz
Output Power 0.4mW, conform to FCC part 15.249
Mechanical
Weight [g] 350
Size [mm] 160x100x45
Environmental
Operating Temperature Range 0°C to 50°C
Storage Temperature Range: -40°C to 70°C
Relative Humidity 0-85% non-condensing
Regulatory
Safety Standards
IEC60601-1; IEC60601-2-25; IEC60601-2-
27; IEC60601-2-51; EN301 489-1; EN301
489-3; EN300 440
Device Classification Type CF, battery operated
Technical Specifications
NV-54/PCECG1200W
109
Instructions for Use and Technical Description
Norav Medical Ltd.
110
1200WR (Receiver)
Communication
Frequency Range 2400-2483.5 Mhz
Output Power 0.4mW, conform to FCC part 15.249
USB 2.0 compliant, Full Speed Device Control, Isochronous Transfer Types
Power In 5v, 40mA
Mechanical
Weight[g] 50
Size [mm] 103x30x30
Environmental
Operating Temperature Range 0°C to 50°C
Storage Temperature Range: -40°C to 70°C
Relative Humidity 0-85% non-condensing
Report Samples
NV-54/PCECG1200W
111
APPENDIX C: REPORT SAMPLES
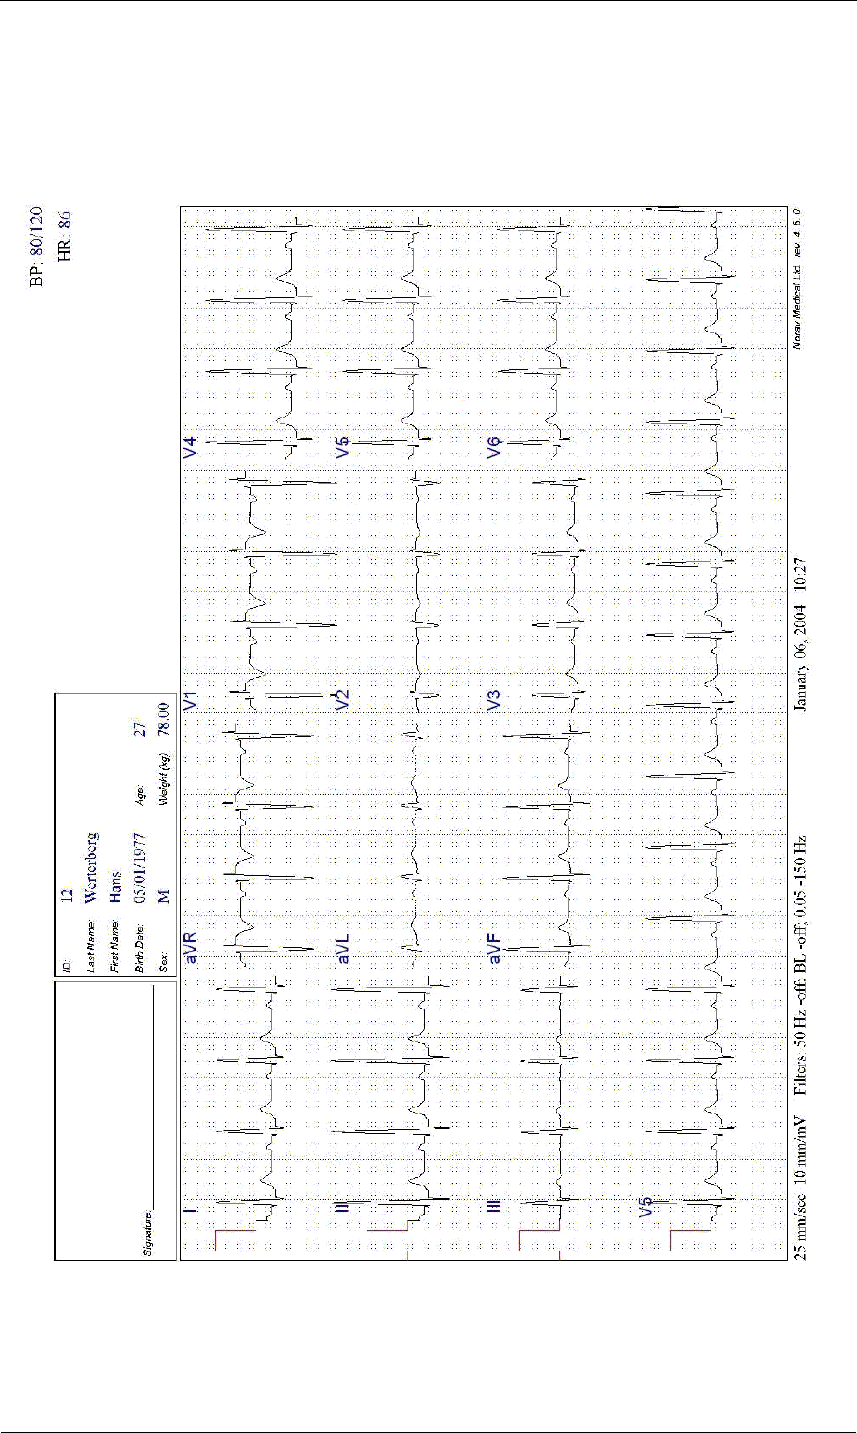
Figure 29: Rest Report
Instructions for Use and Technical Description
Norav Medical Ltd.
112
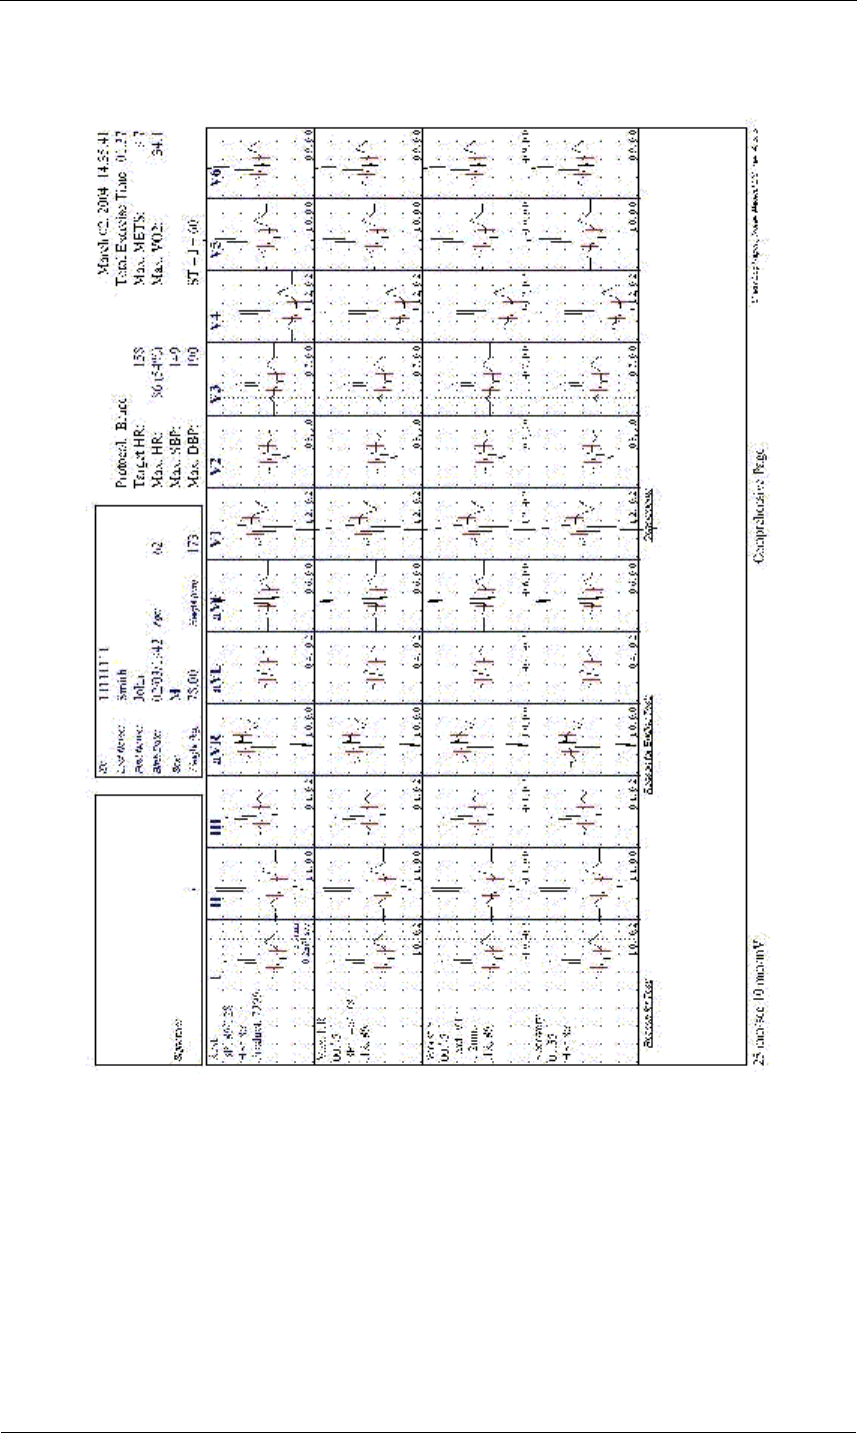
Figure 30: Stress Applications - Comprehensive Report

Report Samples
NV-54/PCECG1200W
113
Figure 31: ECG Monitoring Report
Instructions for Use and Technical Description
Norav Medical Ltd.
114
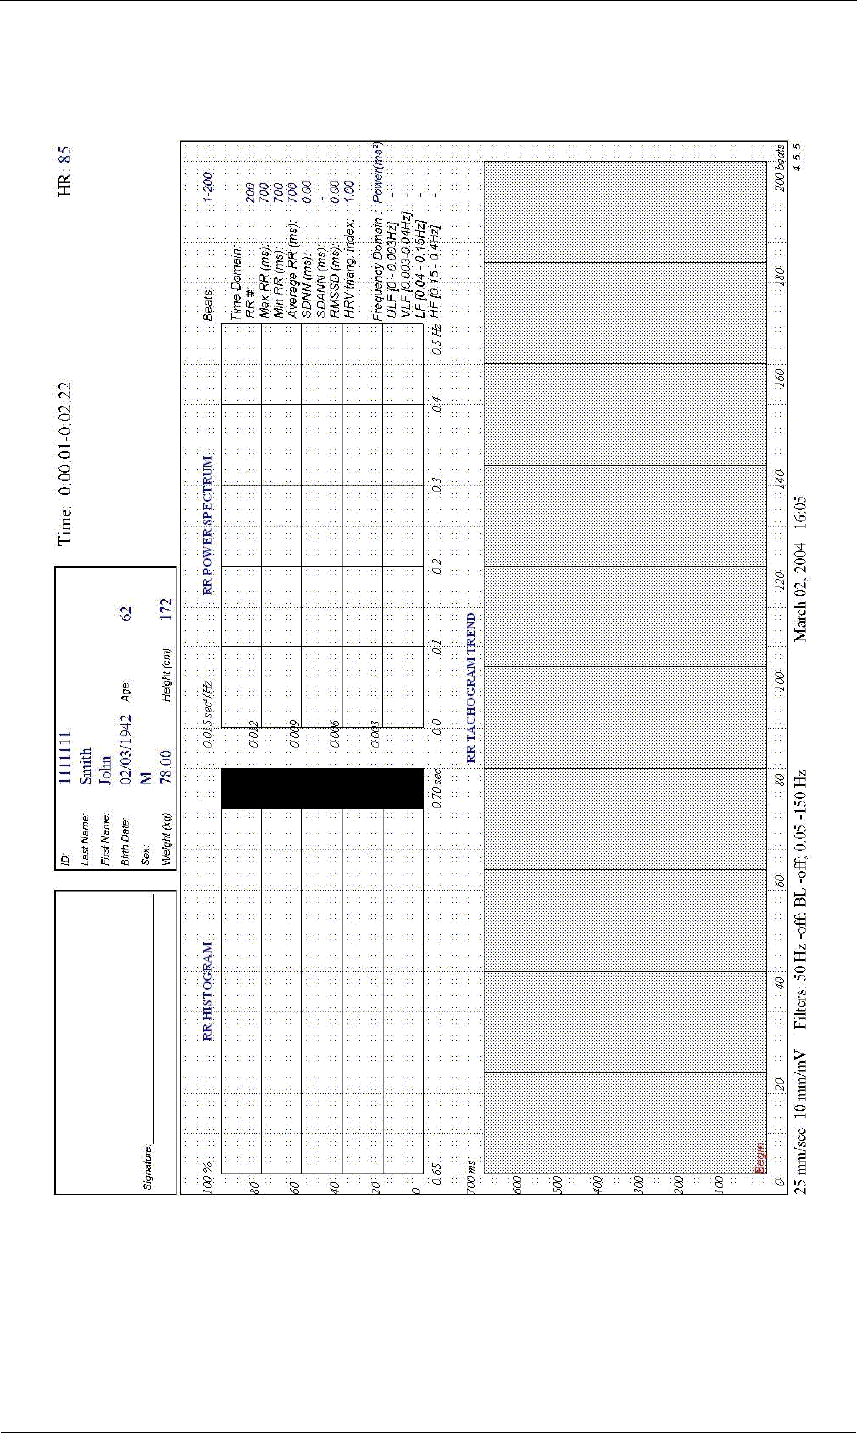
Figure 32: Heart Rate Variability Report
Report Samples
NV-54/PCECG1200W
115
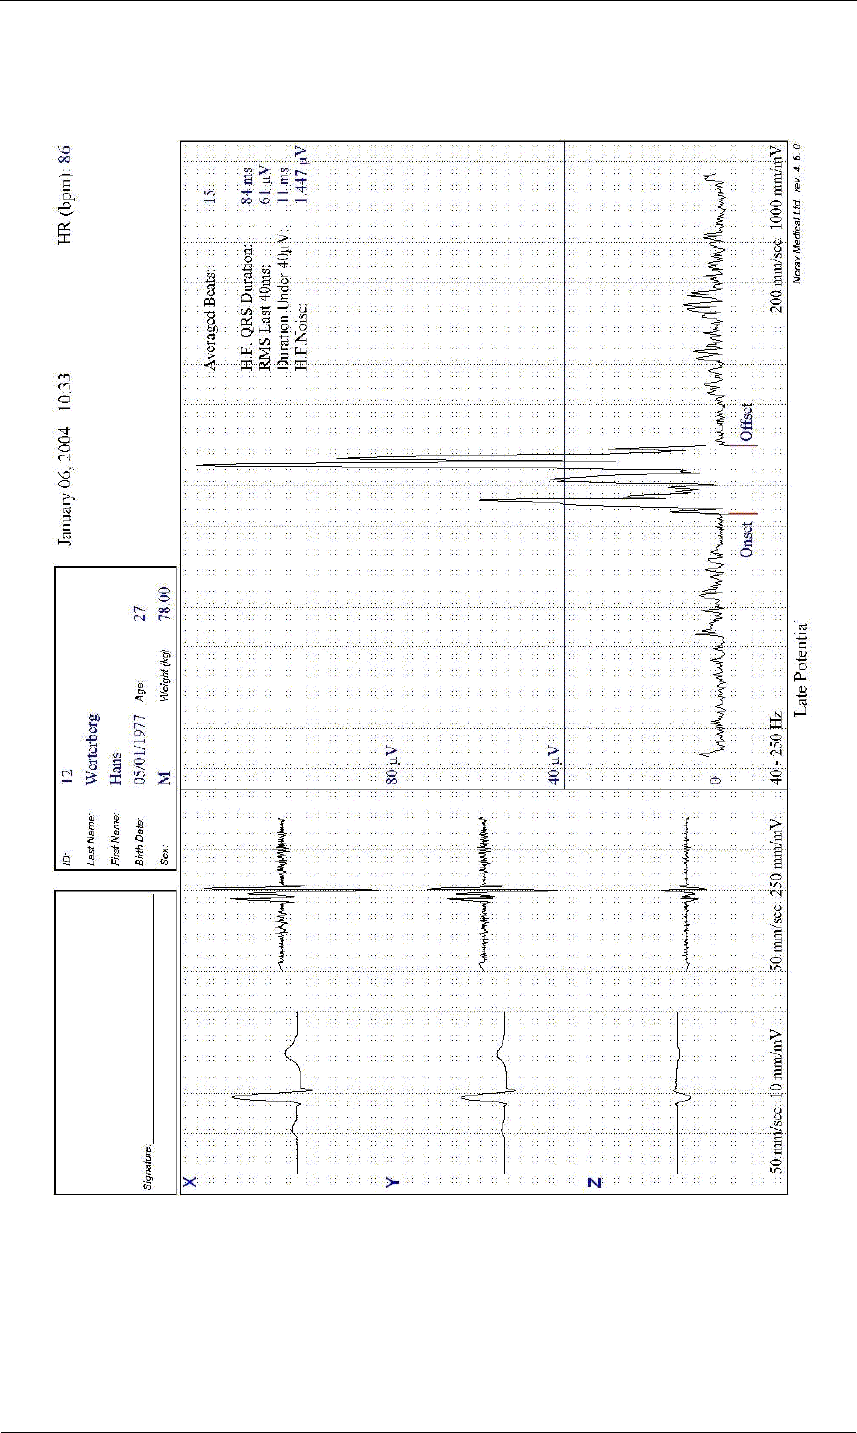
Figure 33: Late Potential Report

Instructions for Use and Technical Description
Norav Medical Ltd.
116
APPENDIX D: TROUBLESHOOTING
USB Driver is not Installed Properly on Windows XP
During PC-ECG Installation
Problem
If you connect the device to the PC via the USB before installing PC-ECG 1200
(including the USB driver), the USB driver is not installed. The Windows operating
system identifies new hardware and starts the hardware installation wizard. If you
complete the wizard, the driver is not found and the hardware is defined in the Device
Manager as “USB device” with an icon ‘?’ indicating that the driver is not correctly
installed.
If the USB cable is left connected while trying to install the driver from the PC-
ECG1200 installation CD—a message regarding Win XP signature does not appear
and the driver is not installed.
Solution
1. Disconnect the USB cable.
2. Install the PCECG software from the CD-ROM.
During installation a message should appear about the Windows XP
signature. If the message does not appear during the installation of PC-
ECG, then the driver is not installed. If working under Windows XP
press “Continue anyway” on message regarding the digital signature.
3. Check if the driver is now installed correctly (there is no question mark
icon next to the USB driver in the device manager and the LED on the
USB adaptor is on).
If the device is still not correctly installed, then complete the following steps:
4. uninstall the unidentified USB driver as follows:
a. While still connected to the USB, right click My Computer.
b. Select Properties from the pop-up menu.
c. Click Device Manager on the Hardware tab.
d. Double click the USB Device with the
?
icon in the list of
devices.
e. Select Driver tab.
f. Click Uninstall and then OK.
5. After the driver is deleted, disconnect the USB cable from the PC.
6. Install the PC-ECG software and continue to the next step.
7. Reconnect the USB cable to the computer connector.
Windows XP identifies the new hardware automatically and the new
hardware wizard opens.
8. Follow the instructions on screen. If working under Windows XP press
“Continue anyway” on message regarding the digital signature. After the
driver is installed make sure the green light is illuminated on the 1200
USB adaptor

Troubleshooting
NV-54/PCECG1200W
117
Recovering ECG Data after Unexpected Shutdown of
the Stress Application
Problem
If the application terminates unexpectedly before the ECG test is completed and
saved, it may be possible to recover the ECG data of the (exhausted [??]) patient.
Solution
Stress ECG application stores native ECG data in the temporary file. You can convert
this data into Monitoring ECG application file format as follows:
1. Start the Stress ECG application.
2. Click Recovery File to Monitoring Format… in the File main menu.
The Choose files for conversion… dialog box is displayed.
3. Select the Windows\Temp folder.
4. Select strXX.tmp last created temporary file and click Open.
5. Select the Monitoring ECG files folder.
6. Insert monitoring ECG file name according to patient ID or last name
and click Save.
7. Close the Stress ECG application.
8. Open the Monitoring ECG files folder and double click on the last
stored file.
The monitoring ECG application opens.
9. Click the Patient main menu button and insert patient data.
10. Save the updated Monitoring ECG file.
You can now inspect and print ECG strip from the Monitoring ECG
application.
Working in AutoSave Mode Without Saving
Modifications
If you perform modifications (adds/edit remarks, measurements, recalculations, etc…)
while in AutoSave mode, but do not wish to save the modifications, do the following:
1. Click Setup.
2. Uncheck the Auto Save option and click OK.
3. Close the application (or the file) with the X button.
A dialog box is displayed requesting acknowledgement for the save.
4. Click No.
5. Reopen the application and the file.
6. Check that the modifications were not saved.
7. It is now safe to re-enable the Auto Save mode (if required).

Instructions for Use and Technical Description
Norav Medical Ltd.
118
A Thick Straight Line is Displayed For All Leads
Problem
A thick straight line appears on screen for all leads when the connection to the
acquisition box fails.
Solution
When using USB connection, check that the led on the 1200USB adapter is
illuminated.
If the led on USB adapter is not illuminated, check connections to the USB port and
to the adapter.
If the led on the USB adapter is illuminated or if connected through RS232, check the
connection to the acquisition box and make sure the box is switched on.
Noisy ECG Signal on Leads
Problem
A noisy ECG signal on one or more of the leads may be caused due to poor
connection of the appropriate electrodes or leads on the patient.
Solution
Check the connection of the appropriate leads on the patient Make sure the electrodes
are applied OK on the patient.

Troubleshooting
NV-54/PCECG1200W
119
Missing data after a thick line
Problem
On the screen and in printouts of the ECG, appears for a few seconds a thick strait
line and after that there is missing data for a period of time. The ECG traces resume
after this random period of time. This problem may be caused due sleep mode or
hibernation mode the PC entered while the ECG test was running.
Solution
Any settings related to the power management should be disabled: no standby, no
stop HD, no hibernation, etc... on the laptop during the Stress test.
To set the power management do the following:
1. right click on the desktop.
2. select PROPERTIES form the pop-up menu.
3. Select SCREENSAVER tab.
4. Press on POWER button in the Monitor Power frame.
5. Select Power Schemes as either PRESENTATION or
HOME\OFFICE DESK.
6. Set NEVER to "Turn off Hard Disk", "System Standby" and
"System Hibernates".
7. Press OK to apply this configuration.