Norav Medical 1200WR WIRELESS ECG RECORDING SYSTEM User Manual PCECG1200WR Revised UserMan
Norav Medical Ltd. WIRELESS ECG RECORDING SYSTEM PCECG1200WR Revised UserMan
UserManual.wiki
>
Norav Medical
>
1200WR User Manual
>
USERS MANUAL 3
Contents
1.
USERS MANUAL 1
2.
USERS MANUAL 2
3.
USERS MANUAL 3
USERS MANUAL 3
Navigation menu
Upload a User Manual
Namespaces
Wiki Guide
HTML
PDF
Info
Views
User Manual
Discussion / Help
Navigation

![Interfacing with Information Systems NV-54/PCECG1200W 101APPENDIX A: INTERFACING WITH INFORMATION SYSTEMS There are several ways to exchange information between PC-ECG 1200 and Hospital Information System (HIS). These are described below: Demographic Data Information System Prepares Patient Demographic Data for PC-ECG 1200: This uses a text file called PatientFile.ini. The location is defined in Database setup. File Name: PatientFile.ini File Format: [PATIENTDATAXXX] ID= LastName= FirstName= BirthDay= BirthMonth= BirthYear= Sex= Weight= Height= Address= Phone1= Phone2= Fax= E-Mail= Medications= Other= [PatientDataXXX]—Section name. XXX—number from 000 to 200. At least one of the keys ID, LastName, or FirstName must be completed. If all these keys are empty, section of this patient will be ignored. The keys Height, Address, Phone1, Phone2, Fax, Email, Medications and Other appear only with Database.](https://usermanual.wiki/Norav-Medical/1200WR.USERS-MANUAL-3/User-Guide-918323-Page-13.png)
![Instructions for Use and Technical Description Norav Medical Ltd. 102Example: [PatientData001] ID=1234567890 LastName=Smith FirstName=Worker BirthDay=11 BirthMonth=6 BirthYear=1959 Sex=1 Weight=59 Height=170 Address=523 Main st. Tacoma Mexico Phone1=702-8765643 Phone2=702-8743031 Fax=702-8743032 E-Mail=nkir@sympo.ca Medications=none Other=none [PatientData003] ID=123456789 LastName=Smith FirstName=Worker3](https://usermanual.wiki/Norav-Medical/1200WR.USERS-MANUAL-3/User-Guide-918323-Page-14.png)

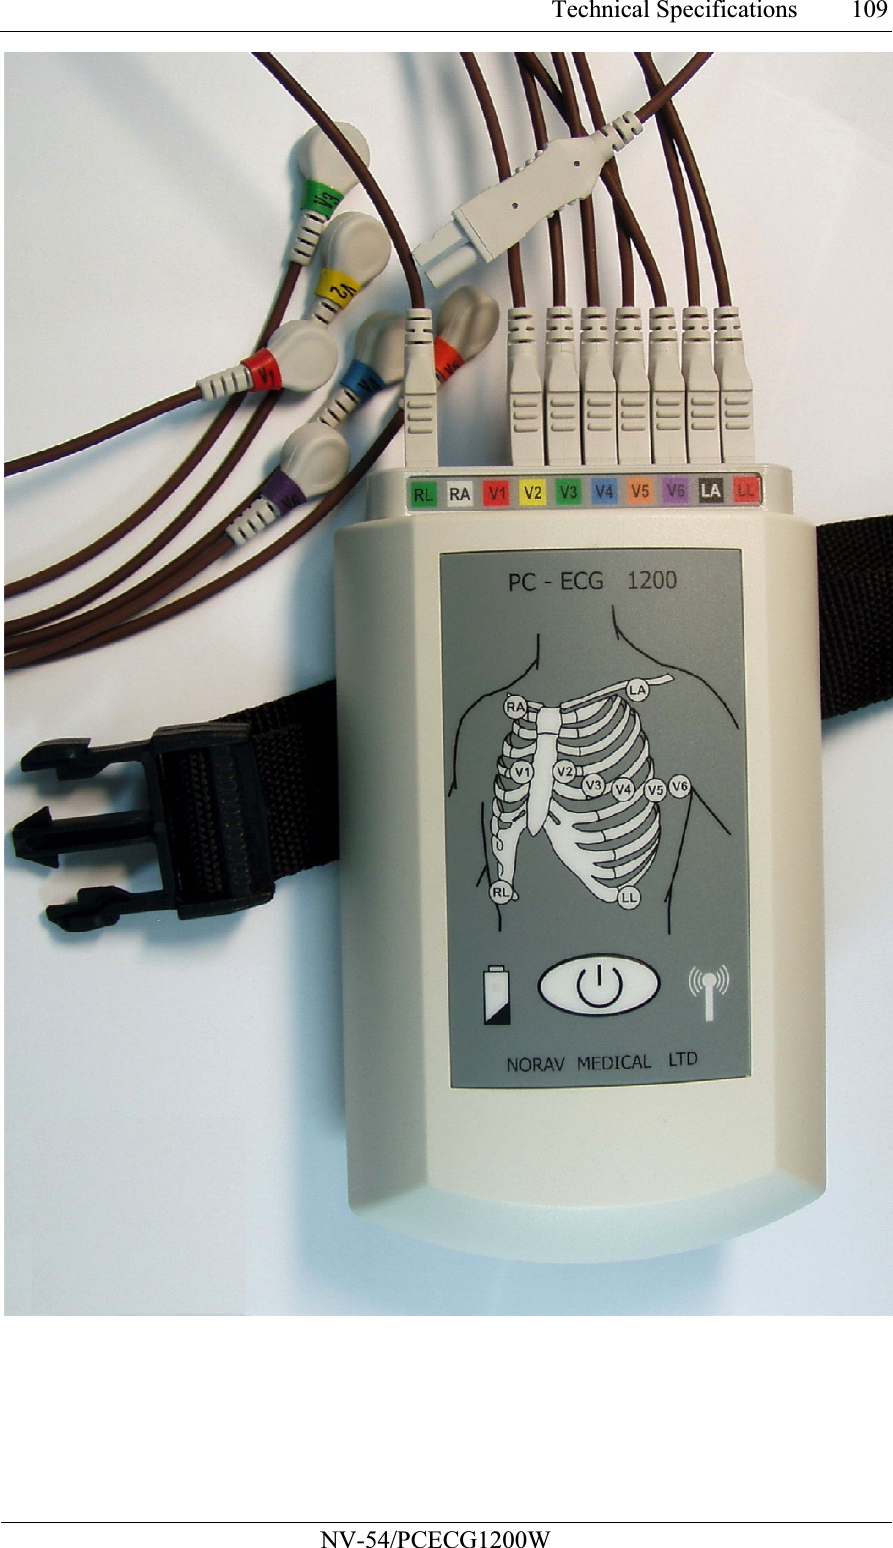
![Instructions for Use and Technical Description Norav Medical Ltd. 108APPENDIX B: TECHNICAL SPECIFICATIONS 1200W (Transmitter) ECG Patient Leads Detachable 10 lead wires conform to AAMI Lead Standards AHA or IEC Defibrillator Protection: Protected against 360 J discharge Patient Leakage current <10 µA Input Impedance >100 Mohm CMRR >100 db DC max. input +/- 300 mv Frequency Range (-3db) 0.05 –150 Hz Signal dynamic range 20 mV Battery 4 - AA alkaline or NIMH rechargeable Operation Time Up to 40 hours with 4 AA alkaline battery A2D A2D resolution 16 bit, 2‘ complement Full scale range +/- 10 mV LSB weight 0.3 µV Full scale + +10 mV (Digital value = 7FFF hex ) Midscal 0 mV (Digital value = 0000 hex ) Midscale – LSB -0.3 µV (Digital value = FFFF hex ) Full scale - -10 mV (Digital value = 8000 hex ) Sample Rate 500 Communication Frequency Range 2400-2483.5 Mhz Output Power 0.4mW, conform to FCC part 15.249 Mechanical Weight [g] 350 Size [mm] 160x100x45 Environmental Operating Temperature Range 0°C to 50°C Storage Temperature Range: -40°C to 70°C Relative Humidity 0-85% non-condensing Regulatory Safety Standards IEC60601-1; IEC60601-2-25; IEC60601-2-27; IEC60601-2-51; EN301 489-1; EN301 489-3; EN300 440 Device Classification Type CF, battery operated](https://usermanual.wiki/Norav-Medical/1200WR.USERS-MANUAL-3/User-Guide-918323-Page-20.png)
![Instructions for Use and Technical Description Norav Medical Ltd. 1101200WR (Receiver) Communication Frequency Range 2400-2483.5 Mhz Output Power 0.4mW, conform to FCC part 15.249 USB 2.0 compliant, Full Speed Device Control, Isochronous Transfer Types Power In 5v, 40mA Mechanical Weight[g] 50 Size [mm] 103x30x30 Environmental Operating Temperature Range 0°C to 50°C Storage Temperature Range: -40°C to 70°C Relative Humidity 0-85% non-condensing](https://usermanual.wiki/Norav-Medical/1200WR.USERS-MANUAL-3/User-Guide-918323-Page-22.png)
![Troubleshooting NV-54/PCECG1200W 117Recovering ECG Data after Unexpected Shutdown of the Stress Application Problem If the application terminates unexpectedly before the ECG test is completed and saved, it may be possible to recover the ECG data of the (exhausted [??]) patient. Solution Stress ECG application stores native ECG data in the temporary file. You can convert this data into Monitoring ECG application file format as follows: 1. Start the Stress ECG application. 2. Click Recovery File to Monitoring Format… in the File main menu. The Choose files for conversion… dialog box is displayed. 3. Select the Windows\Temp folder. 4. Select strXX.tmp last created temporary file and click Open. 5. Select the Monitoring ECG files folder. 6. Insert monitoring ECG file name according to patient ID or last name and click Save. 7. Close the Stress ECG application. 8. Open the Monitoring ECG files folder and double click on the last stored file. The monitoring ECG application opens. 9. Click the Patient main menu button and insert patient data. 10. Save the updated Monitoring ECG file. You can now inspect and print ECG strip from the Monitoring ECG application. Working in AutoSave Mode Without Saving Modifications If you perform modifications (adds/edit remarks, measurements, recalculations, etc…) while in AutoSave mode, but do not wish to save the modifications, do the following: 1. Click Setup. 2. Uncheck the Auto Save option and click OK. 3. Close the application (or the file) with the X button. A dialog box is displayed requesting acknowledgement for the save. 4. Click No. 5. Reopen the application and the file. 6. Check that the modifications were not saved. 7. It is now safe to re-enable the Auto Save mode (if required).](https://usermanual.wiki/Norav-Medical/1200WR.USERS-MANUAL-3/User-Guide-918323-Page-29.png)