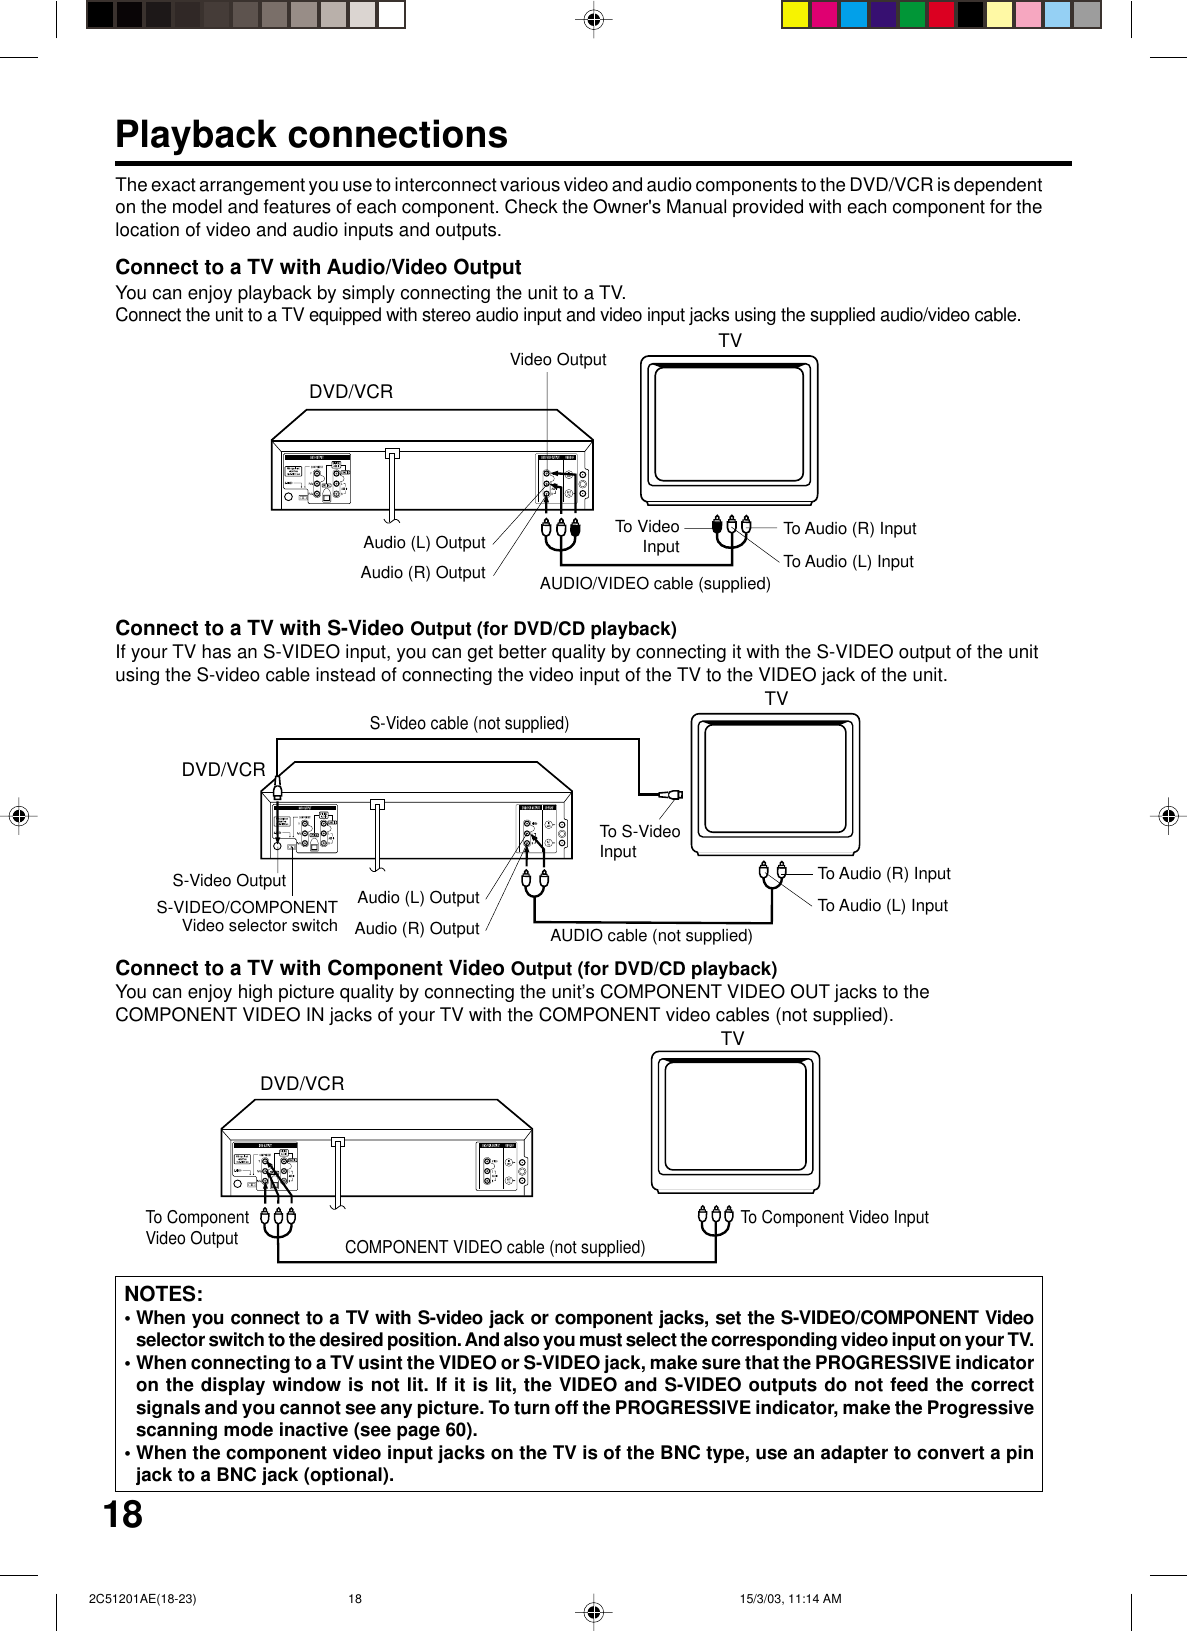
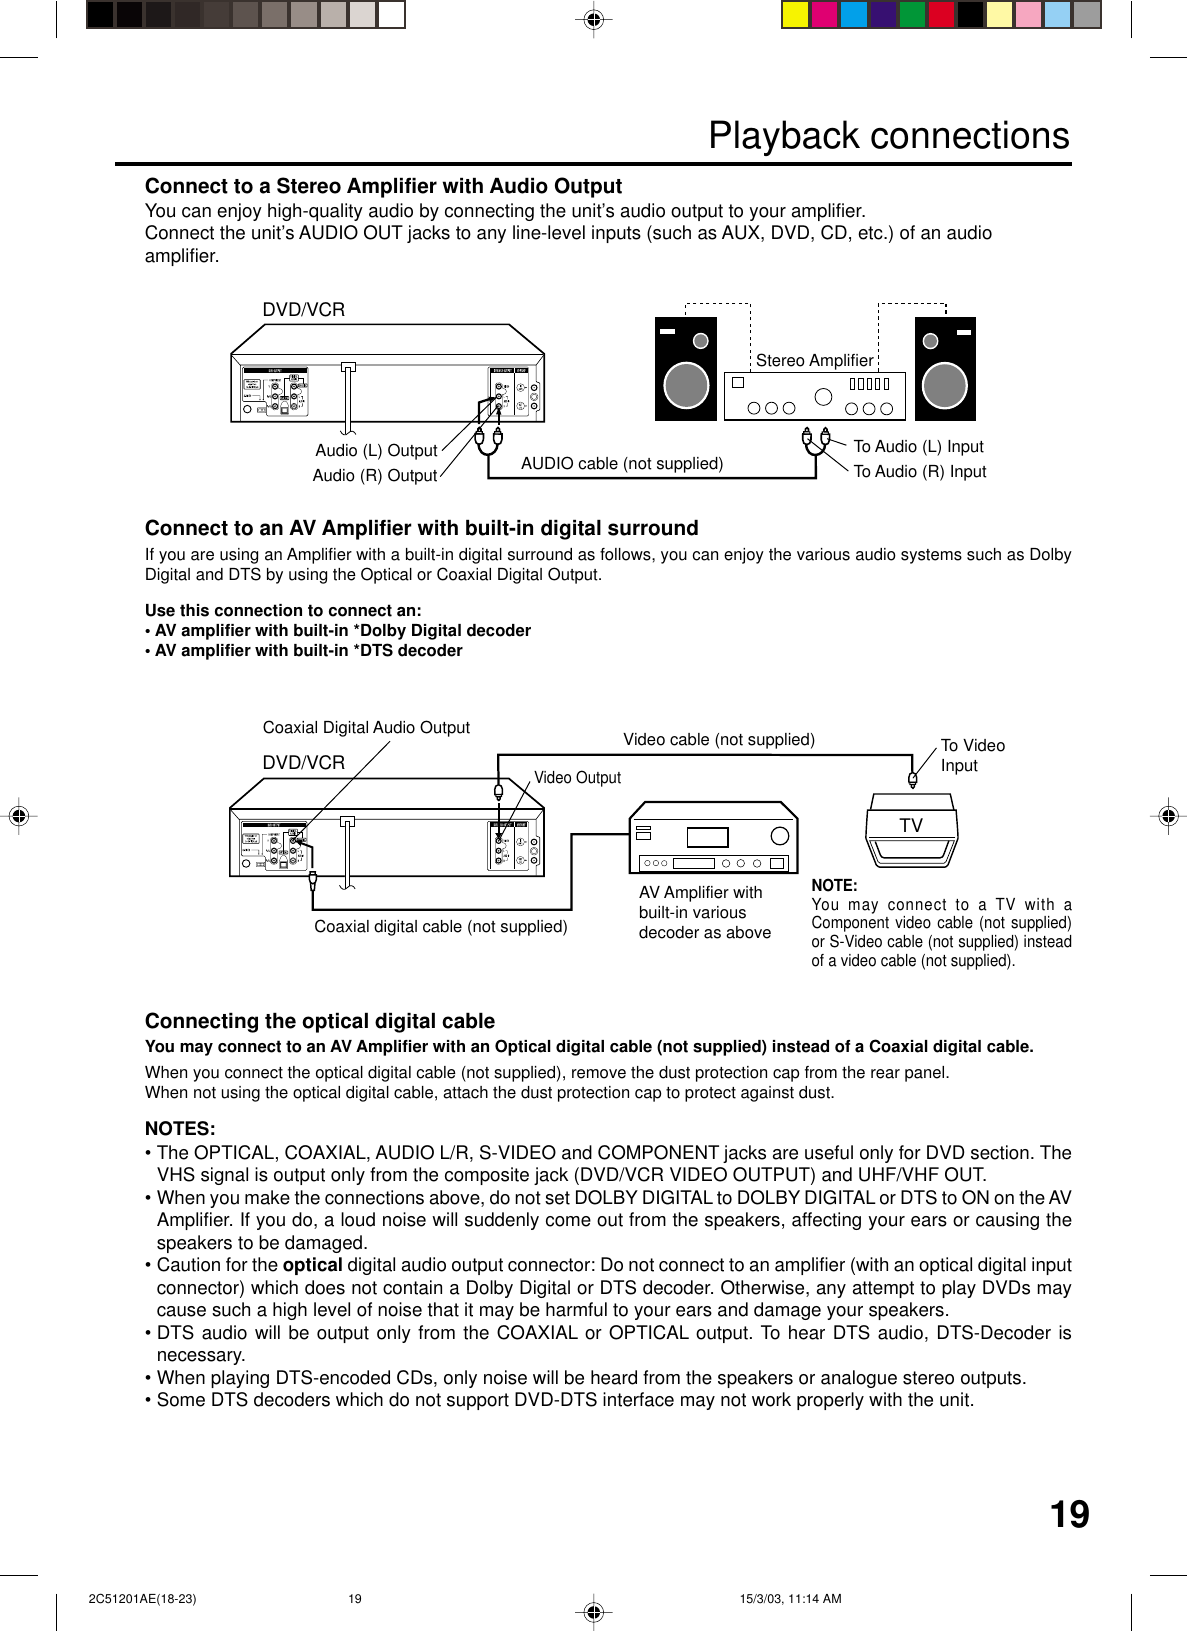
ORION ELECTRIC M2C5A TV Interface Device User Manual 1
ORION ELECTRIC CO., LTD. TV Interface Device Users Manual 1
UserManual.wiki
>
ORION ELECTRIC
>
M2C5A User Manual
>
Users Manual 1
Contents
1.
Users Manual 1
2.
Users Manual 2
Users Manual 1
Navigation menu
Upload a User Manual
Namespaces
Wiki Guide
HTML
PDF
Info
Views
User Manual
Discussion / Help
Navigation

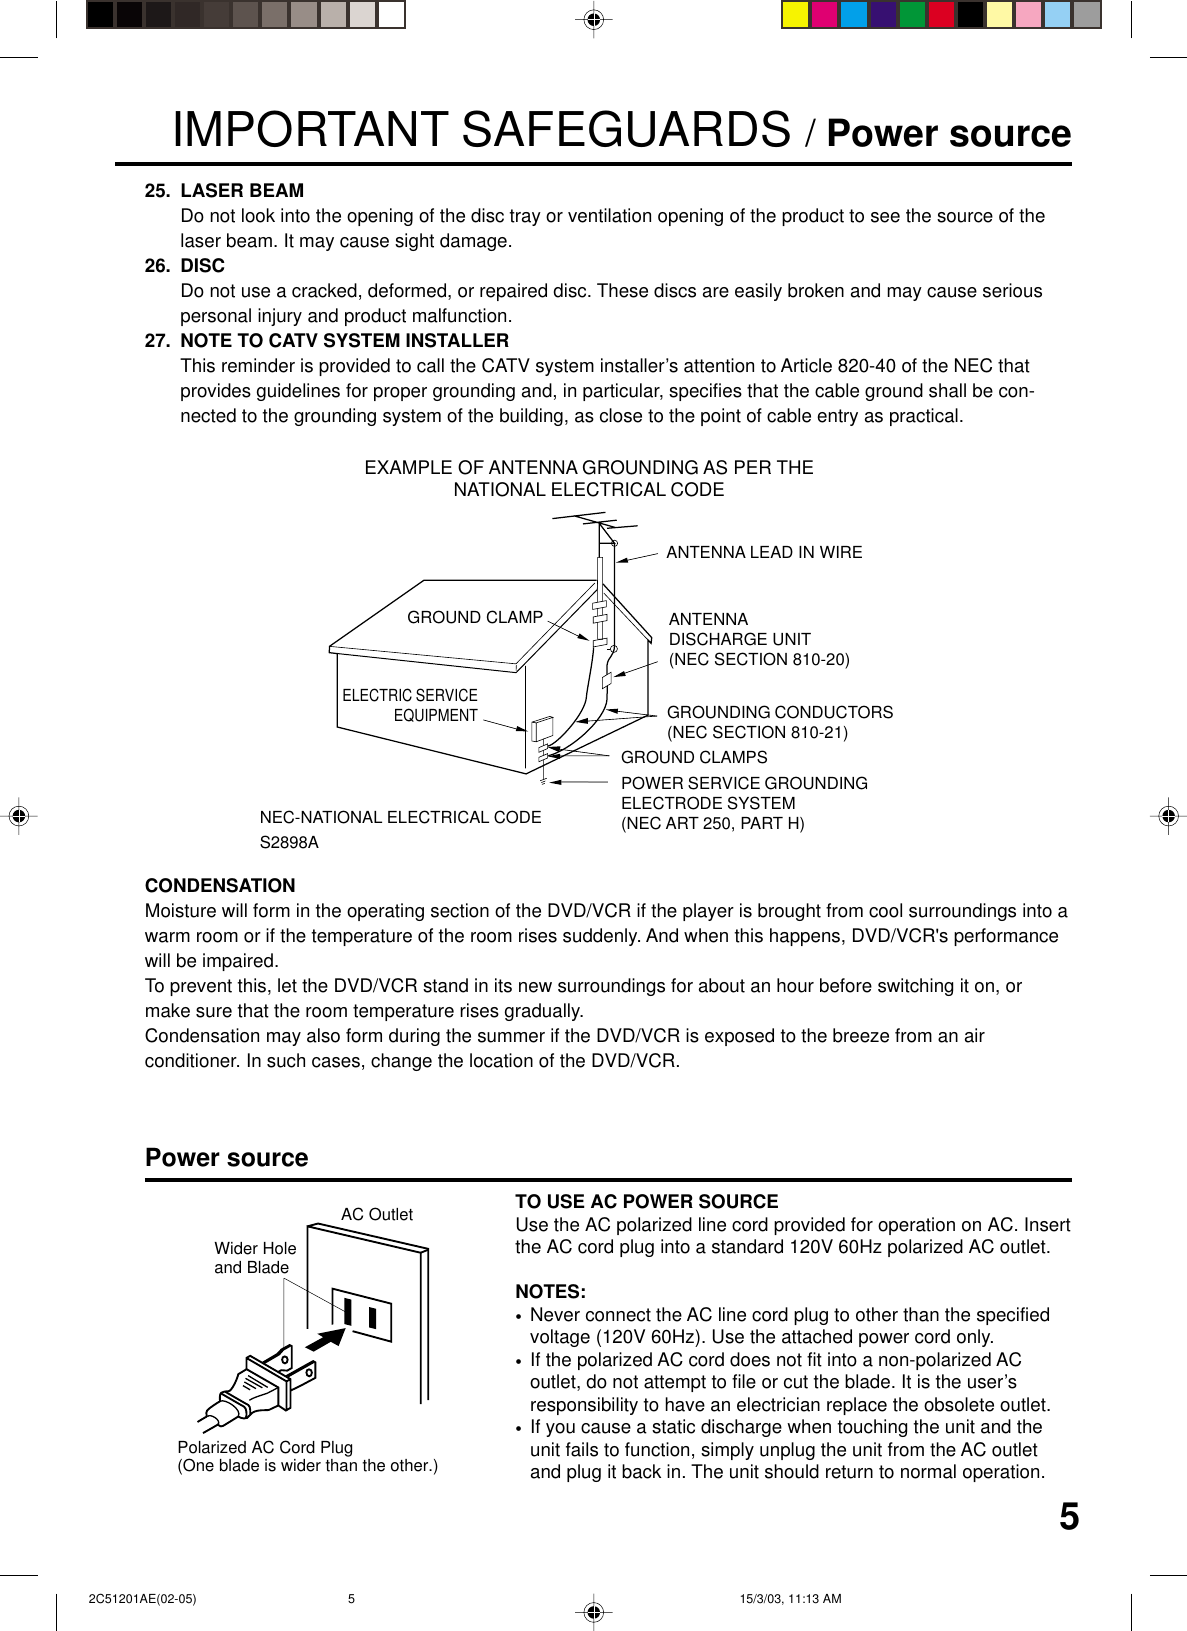
![9No. Display DescriptionVCR mode12345671 2 34765Display9101112VCRDVDCDPM10 : 0001 : 002C036LTRKRECCH02Playback (lights) / Auto resume (flashes)Still pictureDVD disc is inserted.CD is inserted.Display for afternoon (lights out in the morning)Clock display (colon [ : ] flashes)Counter display by hour/minute at VCR/DVD / by minute/second at CDTrack number display for CDTV channel display for VCRCATV channel displayExternal input displayTimer recording displayVideo tape is in the unitTrack display for CDNormal recording display (flashes during Instant Timer Recording - ITR)101112Display windowErr Error displayPbc Playback Control (Video CD)9 8PlaybackStopStill pictureFrame advanced playbackForward slowmotionFast Forward playbackReview playbackSkip chapter to forward directionSkip chapter to reverse directionOpen or Close the trayAuto resumeDirection button’s markProgressiveA-B repeatSubtitle languageSoundtrack languageOutput sound for Video-CDKaraoke vocal settingAngleZoomParental level lockedParental level unlockedScreen size: Letter boxScreen size: Pan scanScreen size: WideShows prohibited actABExplanation for On-Screen-Symbol (DVD):NOTE:Some discs may be displayed wrong or e.g. chapter number, playback time, etc. may not be displayed.8Progressive scanning modeOn 2C51201AE(06-11) 15/3/03, 11:14 AM9](https://usermanual.wiki/ORION-ELECTRIC/M2C5A.Users-Manual-1/User-Guide-312957-Page-9.png)