ORION ELECTRIC M2D3A DVD-RW/VCR TV Interface Device User Manual hyoushi
ORION ELECTRIC CO., LTD. DVD-RW/VCR TV Interface Device hyoushi
Contents
- 1. Users Manual 1
- 2. Users Manual 2
Users Manual 2
44
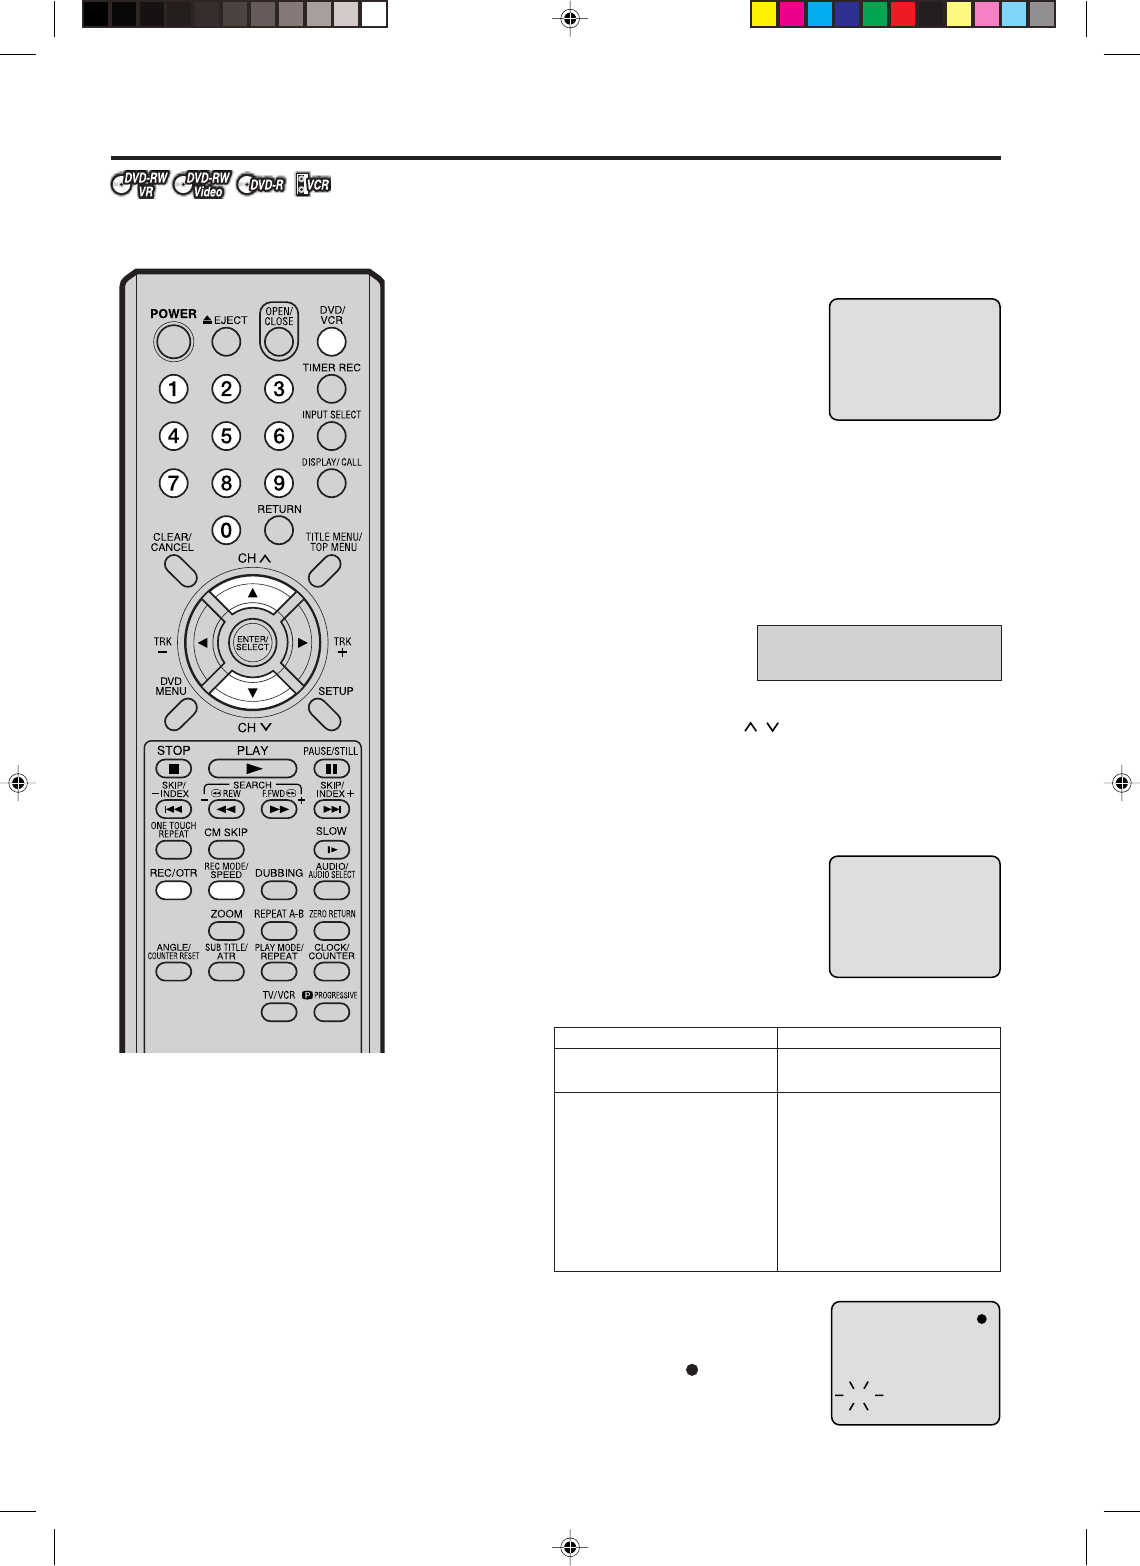
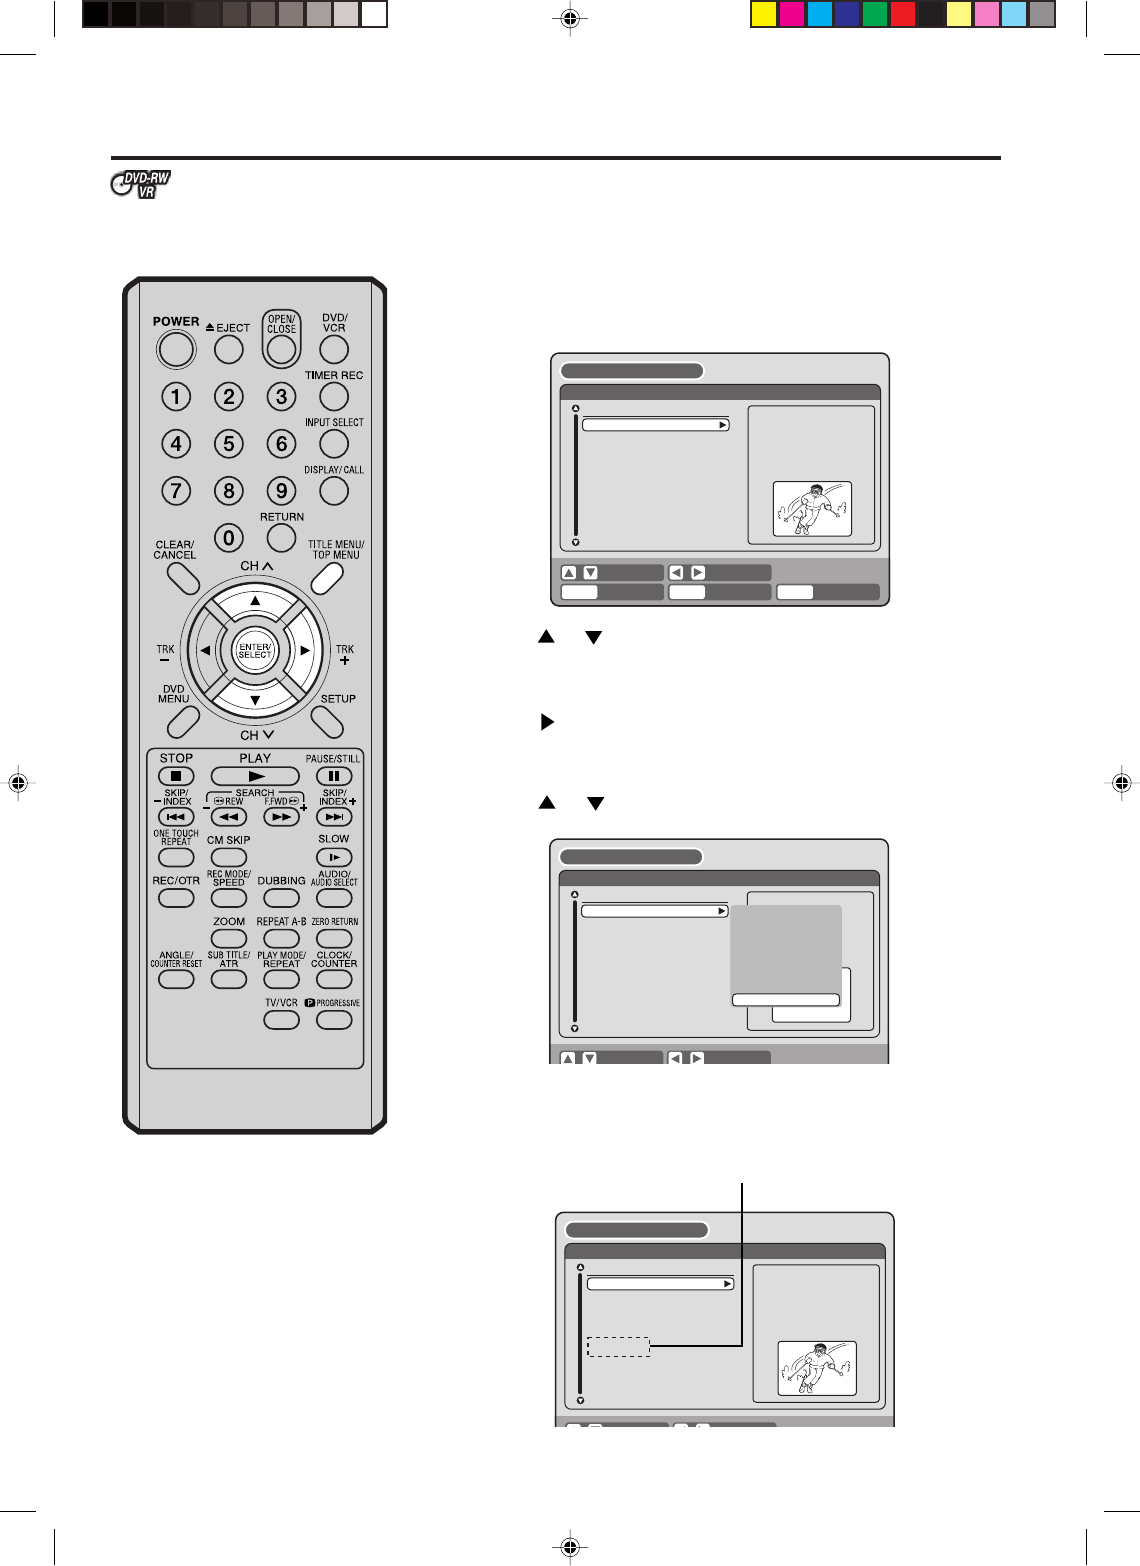
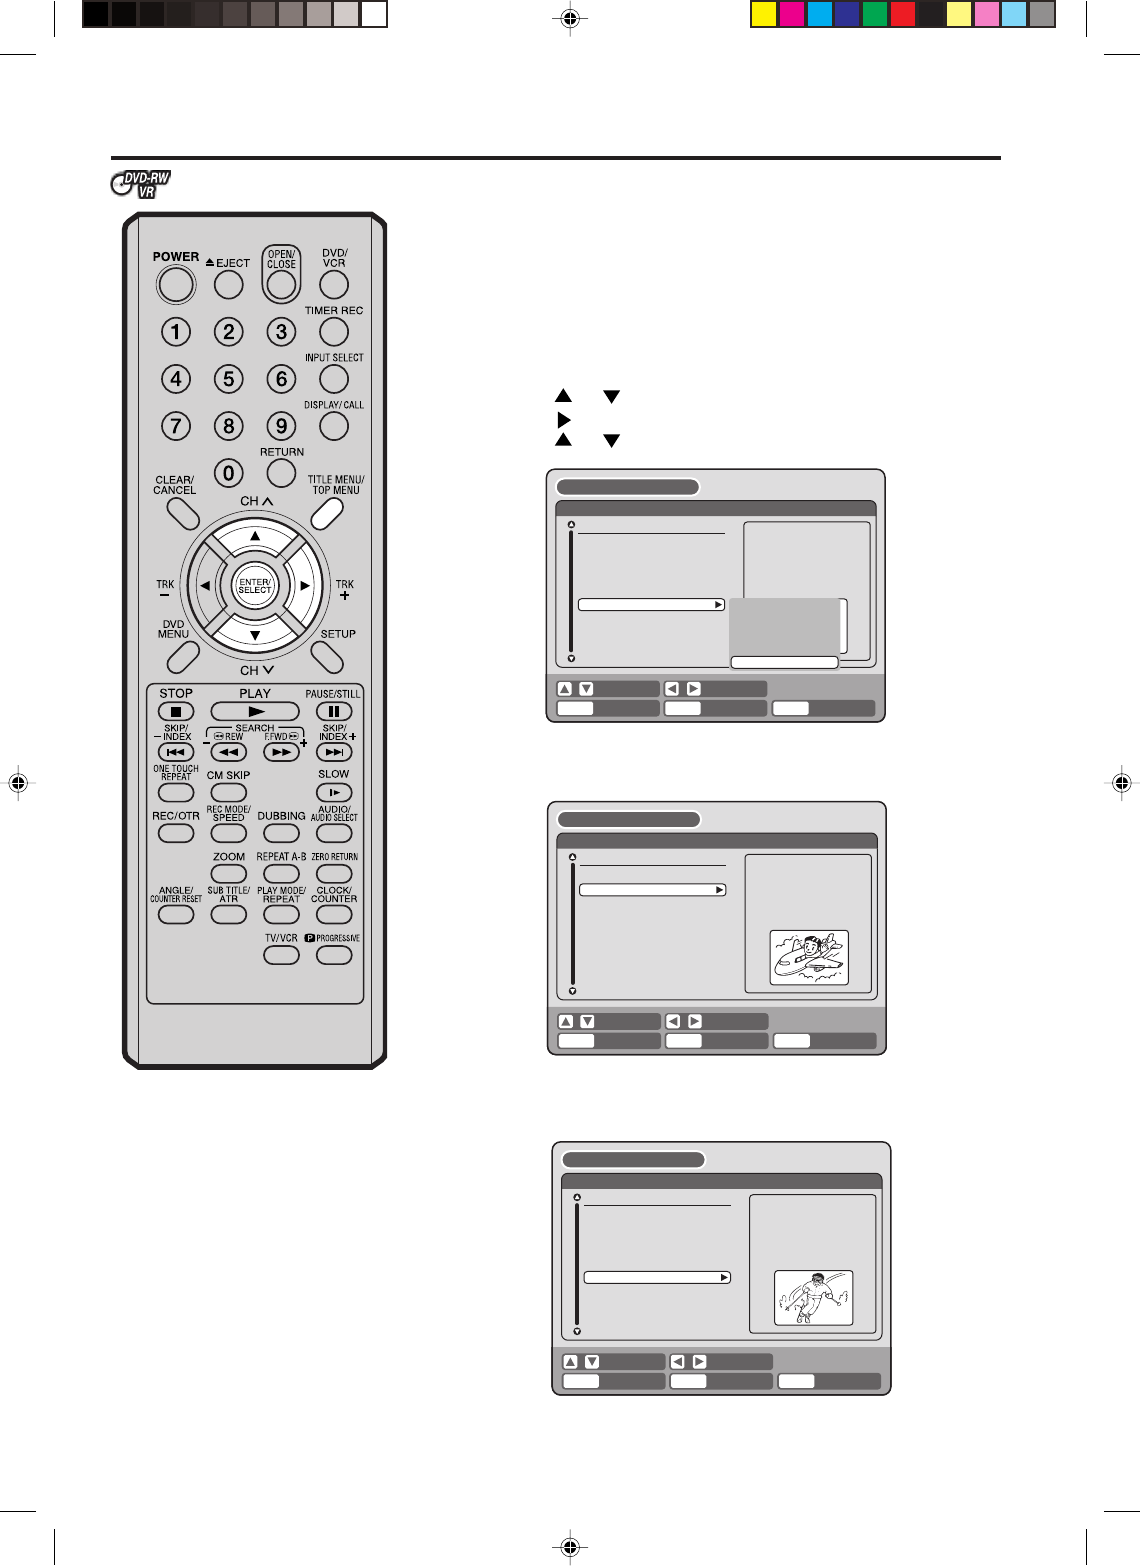
Recording a TV program
Preparation:
•Turn ON the TV and set it to the video input mode.
•Load a recordable DVD or video tape into the unit.
•Press DVD/VCR to select the appropriate mode.
1Press REC MODE/SPEED and set the re-
cording mode.
The recording mode will appear on the TV
monitor and change every time REC
MODE/SPEED is pressed.
Video recording modes: SP/SLP
DVD recording modes: XP/SP/LP/SLP
SP is the normal recording mode for video tapes. SLP offers 3
times the recording time as SP. For more information on DVD re-
cording modes, see page 42.
2Set the TV/CATV option to the appropriate position (page78).
3Press the numeric keys or CH / to select the channel to be
recorded.
1-9 Press 0 twice and then 1-9 as required.
Example: To select 2, Press “002”.
10-12 Press 0 first and then the remaining 2 digits in order
from left to right.
Example: Press 012 for “12”.
13-99 Press 2 digits in order.
Example: Press 22 for “22”.
100-125 Press the 3 digits in order.
Example: Press 110 for “110”.
VHF/UHF/CATV CHANNELS
4Press REC/OTR.
When recording starts, “ ” appears on
the screen for about 4 seconds.
NOTES:
•When record on a DVD, it takes
some time from when you press
REC/OTR until recording actually
starts. (With a DVD-RW it takes
about 2 seconds, while with a
DVD-R it takes about 10 seconds.)
Press REC/OTR a little before your
preferred starting point.
With a video tape, recording starts
almost at the same time you press
REC/OTR.
•If the erase prevention tab of video
tapes is removed, the tape will
eject when REC/OTR is pressed
for recording.
You can record programs you watch
on TV onto video tapes or DVDs.
TV
VHF
2-13
UHF
14-69
CATV
VHF
2-13
STD/HRC/IRC
14-36 (A) (W)
37-59 (AA) (WW)
60-85 (AAA) (ZZZ)
86-94 (86) (94)
95-99 (A-5) (A-1)
100-125 (100)(125)
01 (5A)
TV - VHF/UHF channels
CATV - CABLE TV channels
00 : 00 : 00 SP
CH 110
CH 110
INDEX
VRDVD4005_P37-P50 03.8.21, 1:19 AM44
45
Recording a TV program
To stop recording
Press STOP to stop recording.
“ ” will appear on the screen for about 4
seconds.
To stop recording temporarily
Press PAUSE/STILL to avoid recording
unwanted material.
“ ” will appear on screen for about 4 sec-
onds.
Press again to resume recording.
NOTES:
•The pause function will be released after 5 minutes to prevent dam-
age to the tape or the VCR. The VCR will change to the STOP mode.
•You can select a recording channel in the recording pause mode.
Recording one program while watching another
While the unit is recording, press TV/VCR to select the TV position.
The “VCR” will go off and recording will continue.
Select the TV channel you want to watch by using the TV channel
selector.
NOTE:
Some CATV hookups do not permit viewing one channel while record-
ing another. See pages 18, 19.
Auto Rewind feature
This VCR will automatically rewind
the tape when the tape has ended
(except during OTR and TIMER
REC). It will also eject the tape.
VRDVD4005_P37-P50 03.8.21, 1:19 AM45
46
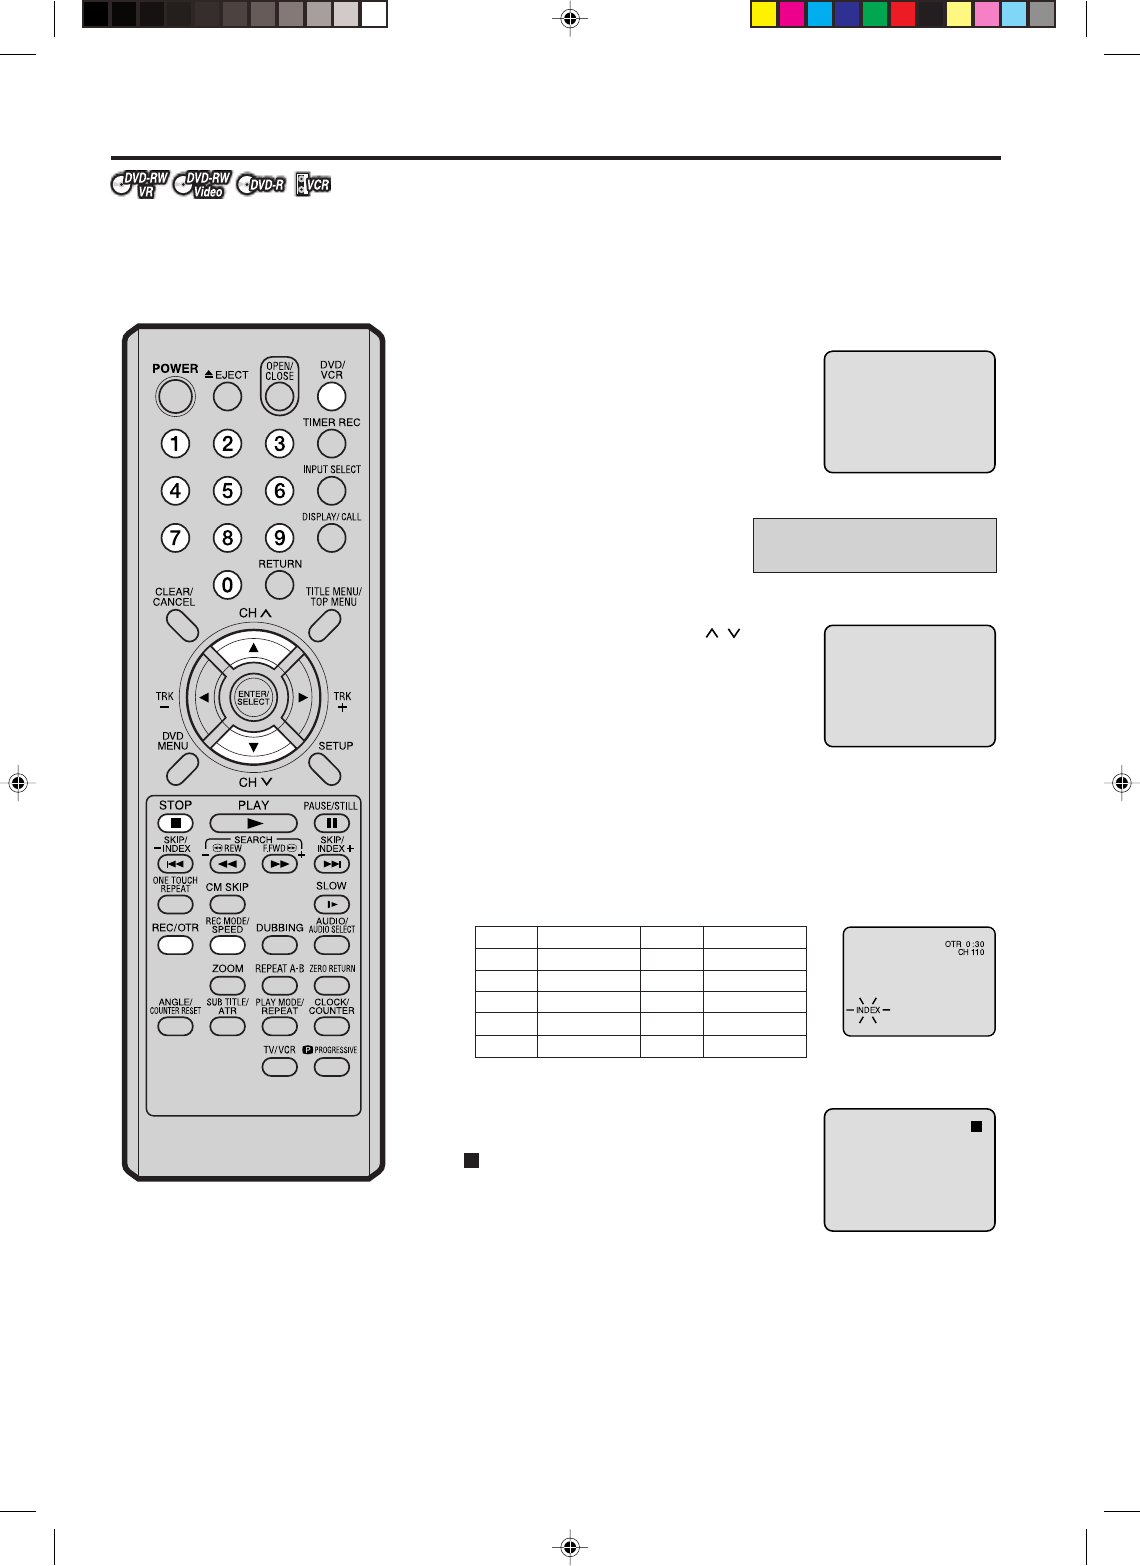
One-touch Timer Recording (OTR)
The One-touch Timer Recording
feature provides a simple and con-
venient way to make a timed re-
cording.
00 : 00 : 00 SP
CH 110
Preparation:
•Turn ON the TV and set to the video input mode.
•Load a recordable DVD or video tape into the unit.
•Press DVD/VCR to select the appropriate mode.
Example: One-touch Timer Recording for 30 minutes.
1Press REC MODE/SPEED to select the
recording mode.
For the recording mode, see the step 1 on
page 44.
2Set the TV/CATV option to the
appropriate position (See page
78).
3Press numeric keys or CH / to select
the channel to be recorded.
4Press REC/OTR. Press the button again to stop recording after 30
minutes. Each additional press of REC/OTR will increase record-
ing time as shown in the chart below, up to a maximum of 6 hours.
The OTR and recording time will appear on the screen for about 4
seconds.
To cancel OTR
Press STOP or turn off the power.
“ ” will appear on screen for about 4 sec-
onds.
TV - VHF/UHF channels
CATV - CABLE TV channels
Press
once
twice
3 times
4 times
5 times
NORMAL REC
0:30
1:00
1:30
2:00
3:00
4:00
5:00
6:00
NORMAL REC
Recording time Press
6 times
7 times
8 times
9 times
10 times
Recording time
NOTE:
If you wish to watch the DVD play-
back during the OTR, press DVD/
VCR to change to DVD mode and
perform the DVD playback (see page
35).
VRDVD4005_P37-P50 03.8.21, 1:19 AM46
47
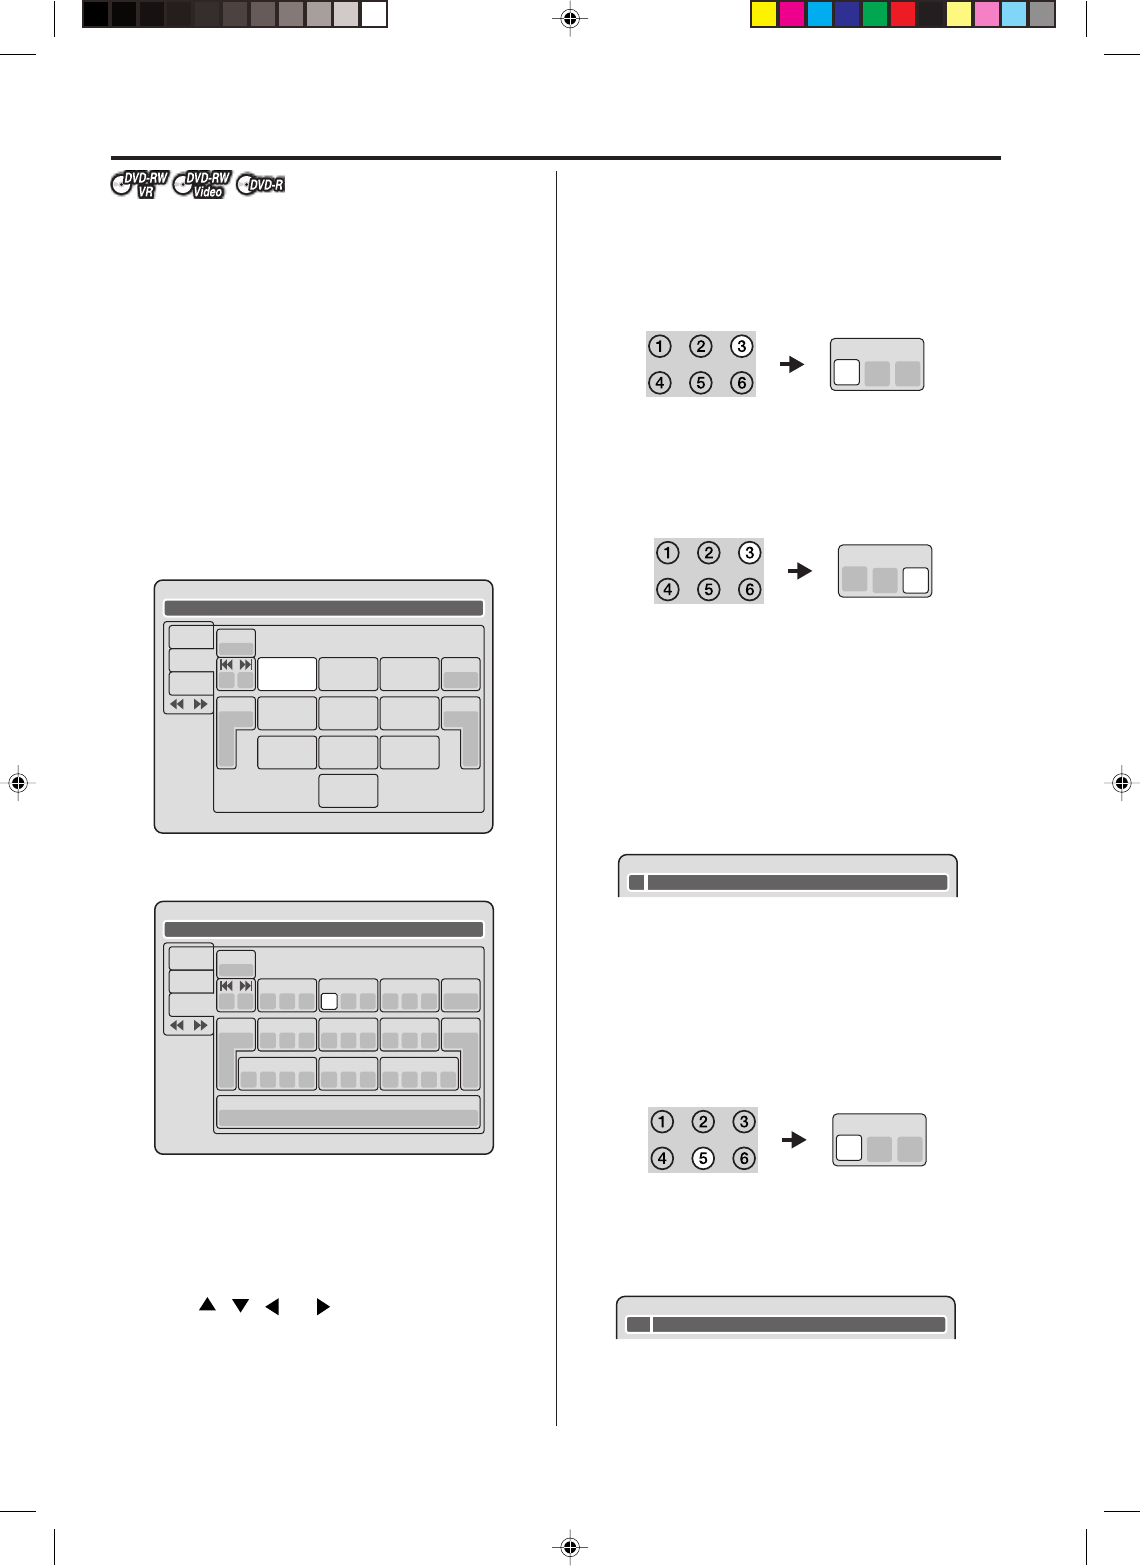
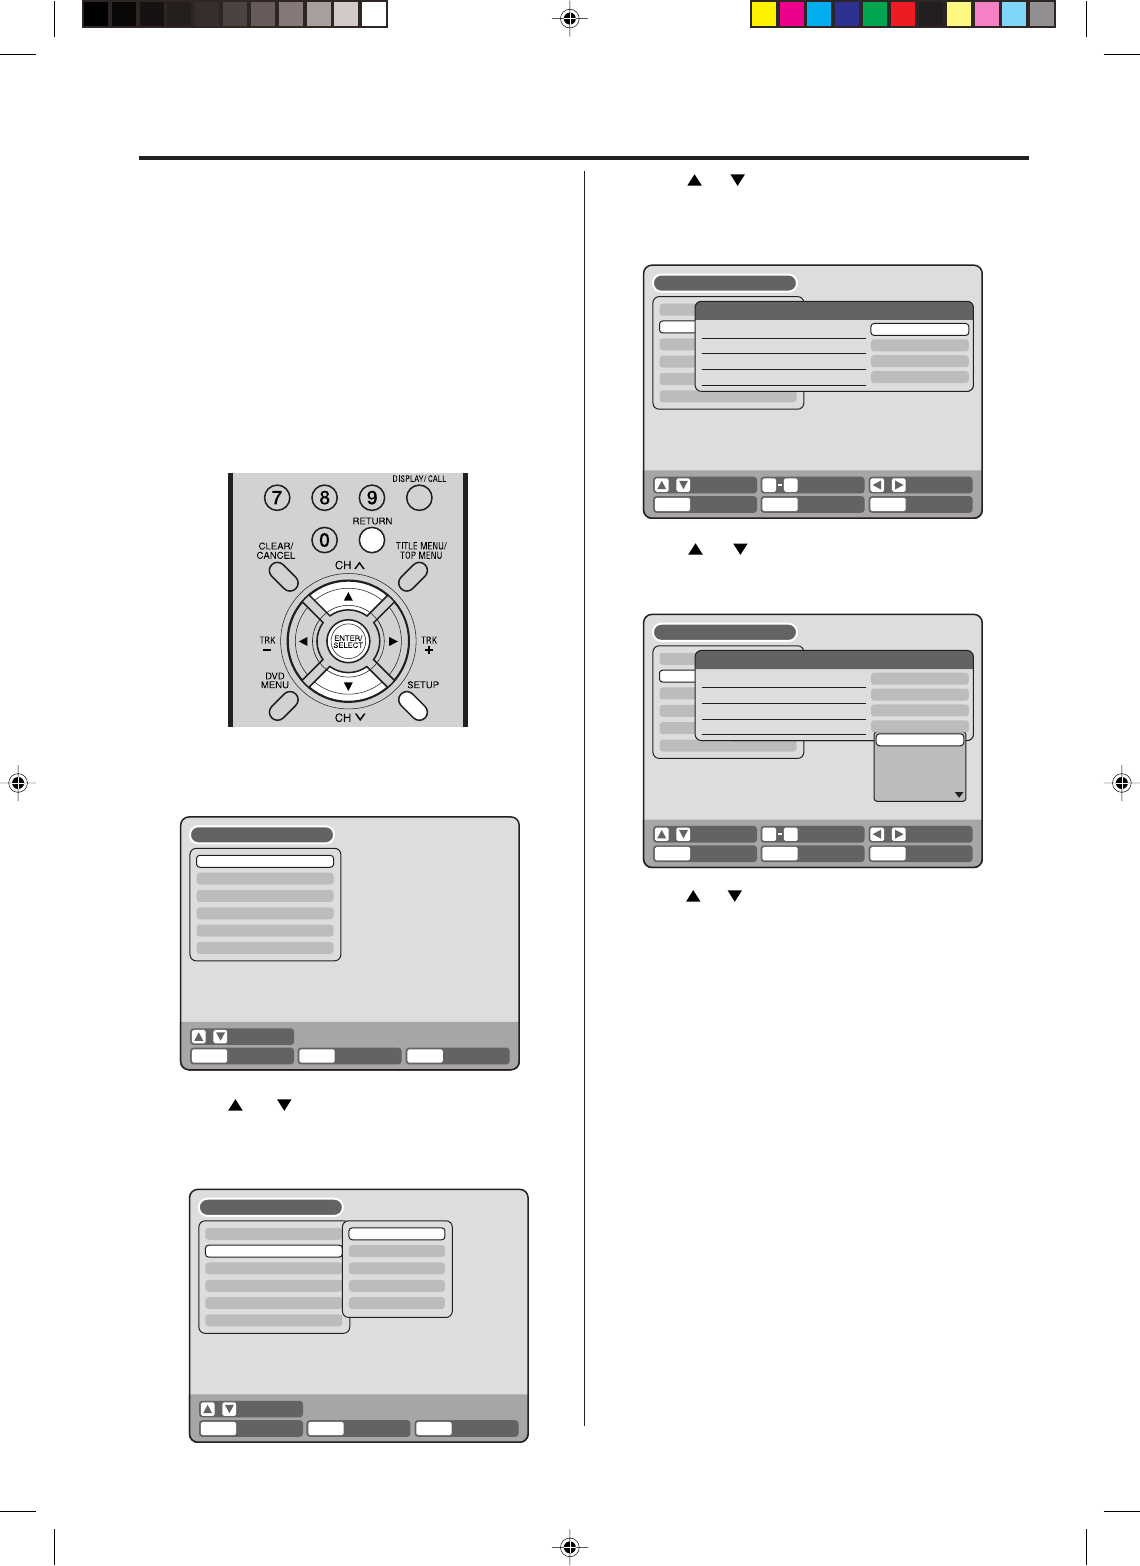
Timer recording
The timer recording system allows
you to select the date, time and
channel and record the desired pro-
grams. Up to 8 timer programs
within a month can be stored in this
unista
Setting timer recording
Preparation:
•Turn ON the TV and set to the video input mode.
•Load a recordable DVD or video tape.
•Press DVD/VCR to select the appropriate mode.
•Confirm that the clock is indicating the correct time.
Example: Set the recording mode to LP; the TV program is on channel
6 starting at 8:00 PM and stopping at 9:30 PM on a date of 20th.
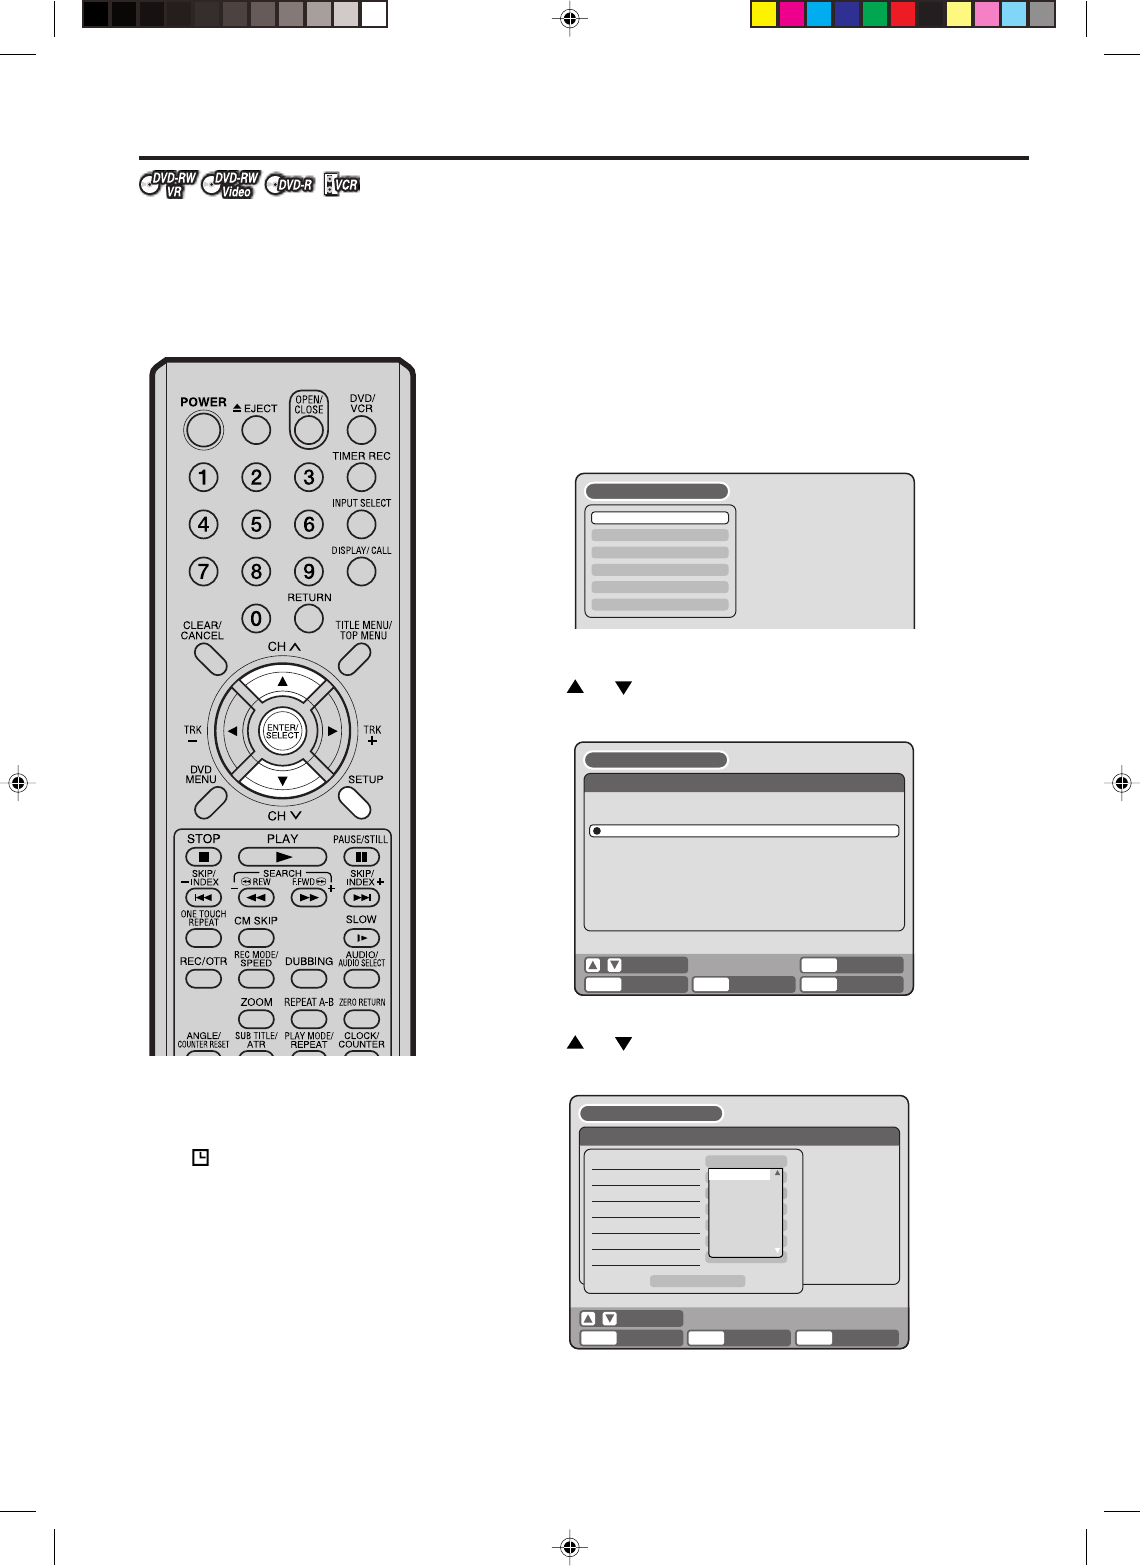
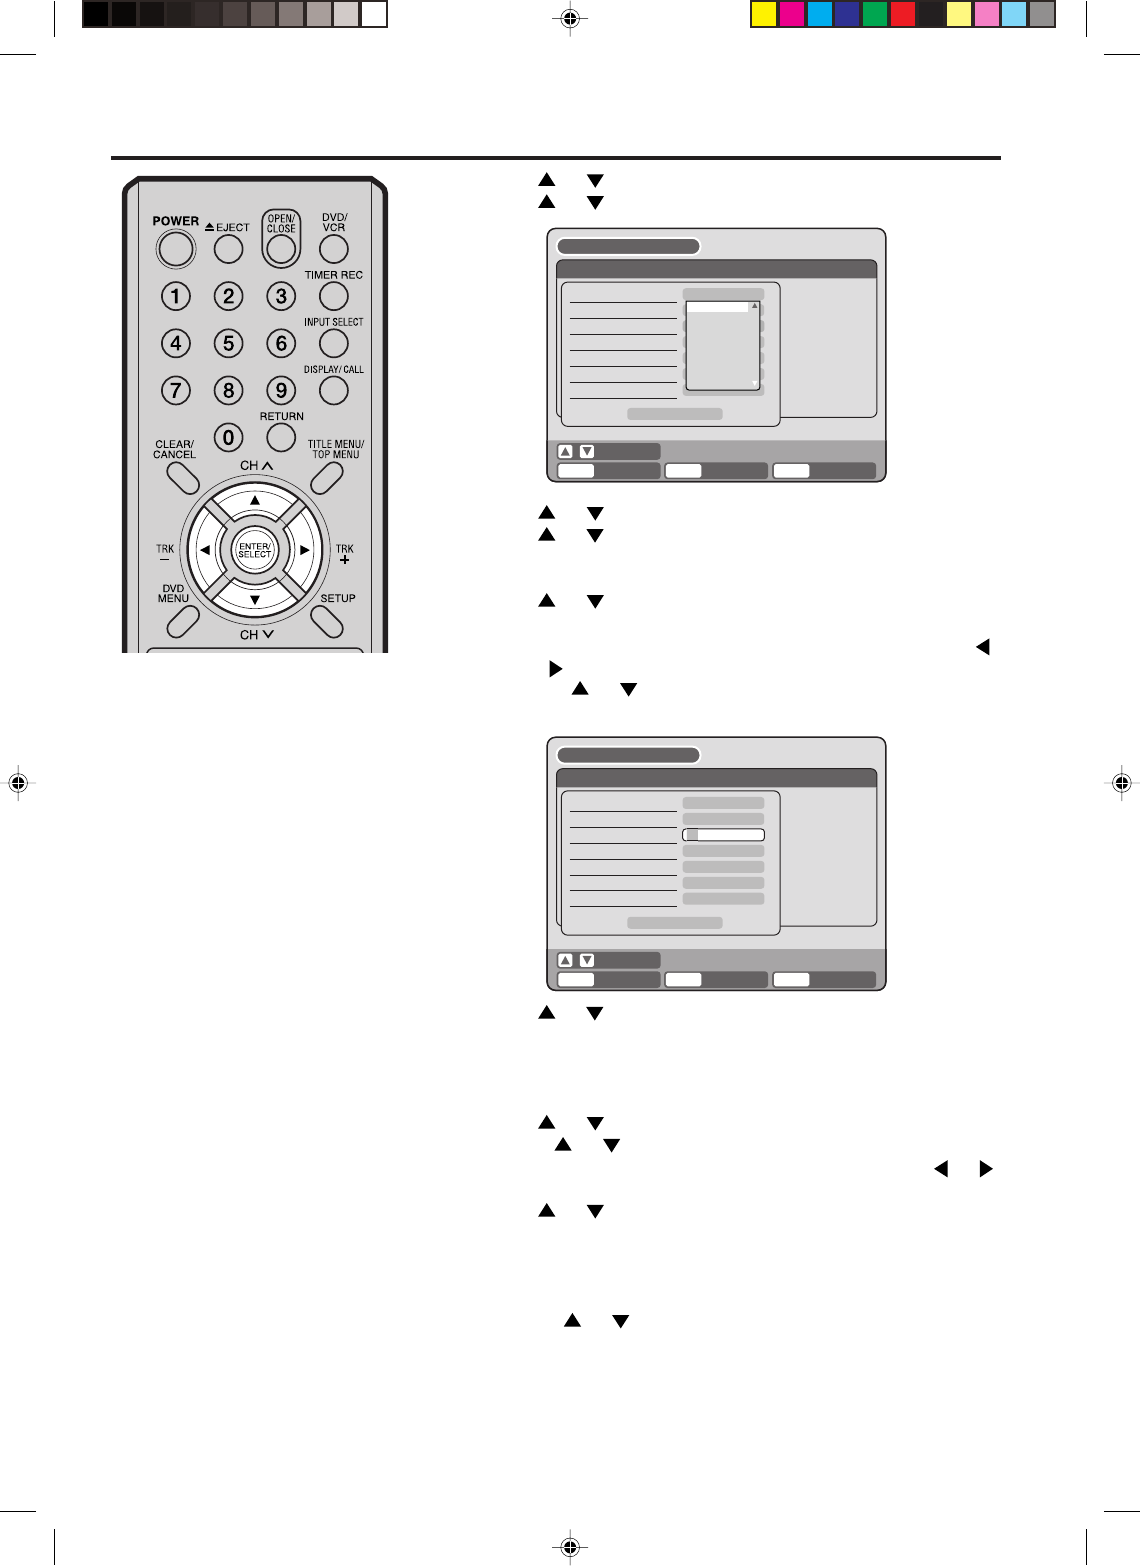
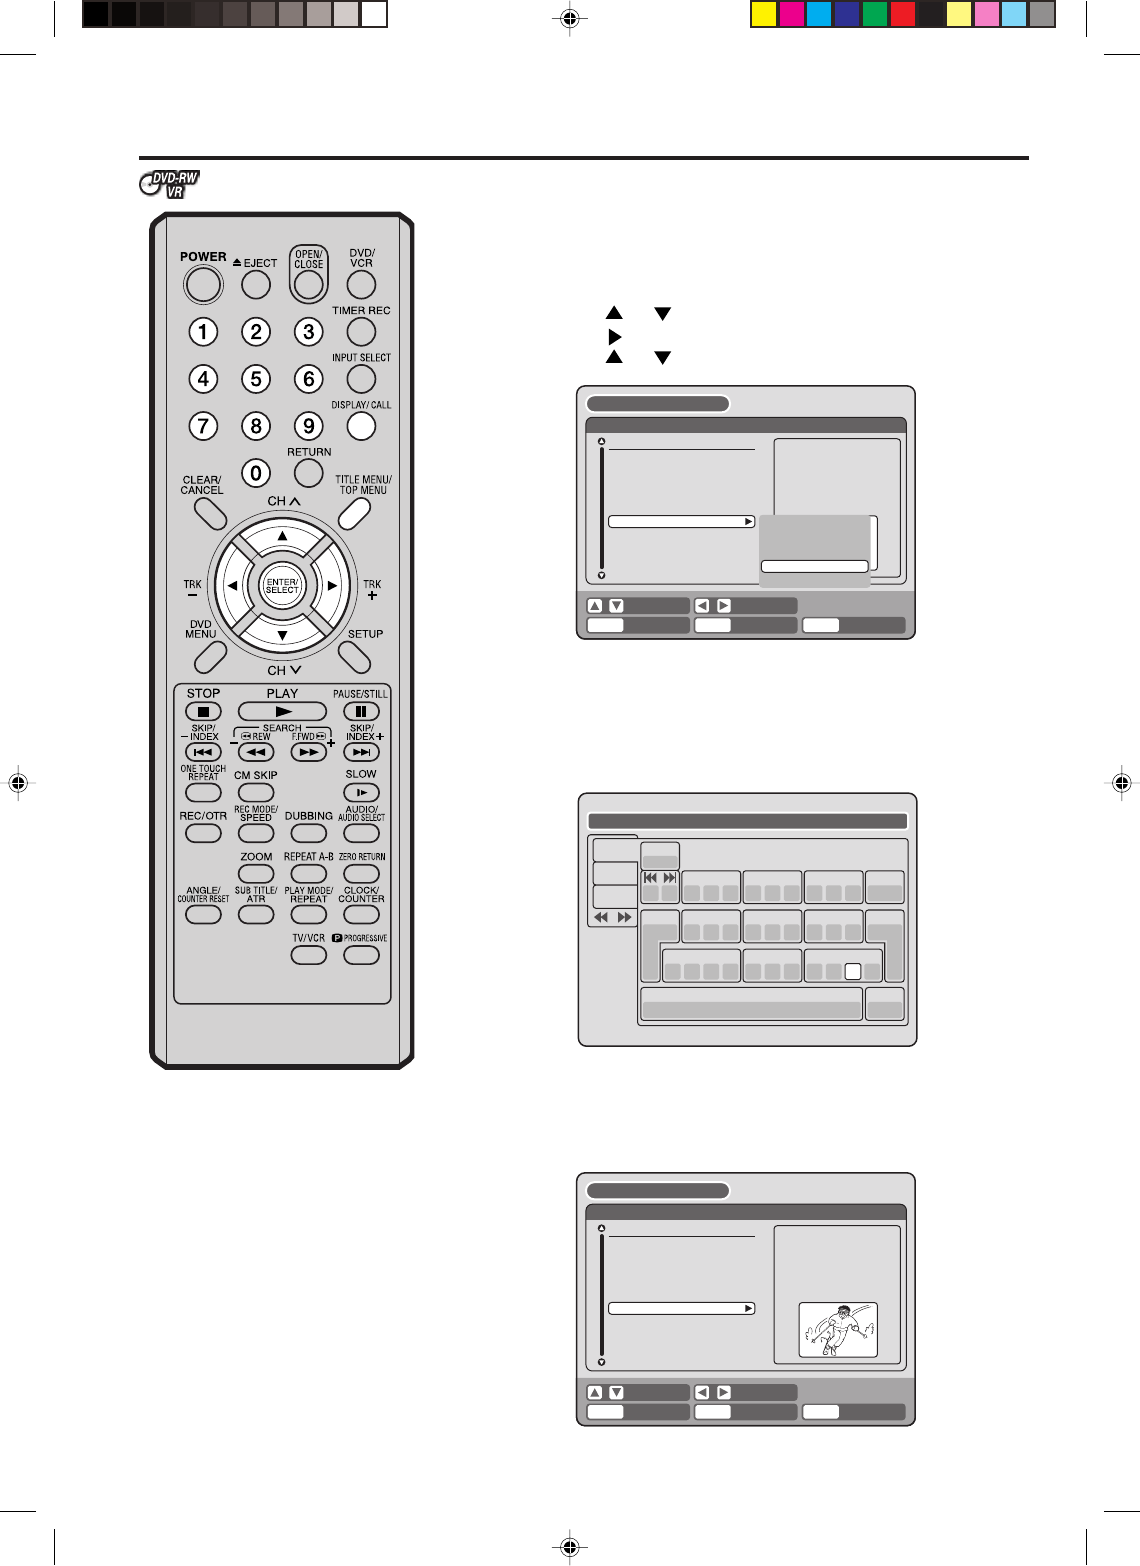
1Press SETUP.
The SETUP MENU screen appears.
NOTES:
•
If a tape is unavailable or no disc
space is available, the timer indica-
tor ( ) flashes. Replace it with an
available one.
•
If no disc is loaded in the recorder
for 30 minutes or more, all the set-
tings for timer recording will be
erased. In such a case, adjust the
clock and select the timer recording
again.
•
When 8 programs have already se-
lected for timer recording, “NEW”
doesn’t appear on the TIMER REC
SET screen.
2Press or to select “TIMER REC SET” and press ENTER.
The TIMER REC SET screen will appear.
3Press or to select “NEW” and press ENTER.
The program screen will appear.
ENTER/
SELECT
CLEAR/
CANCEL
RETURN BACK END
SELECT
SETUP
CANCEL
ENTER
TIMER REC SET
REC REC
TO MORECHENDSTARTDATETYPE
NEW
SETUP MENU
TIMER REC SET
SYSTEM SETUP
AV SETUP
REC SETUP
CH SETUP
OTHER
SETUP MENU
ENTER/
SELECT
RETURN BACK END
SELECT
SETUP
ENTER
TIMER REC SET
REC REC
TO MORE
TYPE
DATE
START
END
CH
REC TO
REC MODE
EVERY SUN
000
DVD
XP
OK
11,08,03(--)
02:17
03:17
SETUP MENU
ONCE
EVERY SUN
EVERY MON
EVERY TUE
EVERY WED
EVERY THU
EVERY FRI
MON-FRI
VRDVD4005_P37-P50 03.8.21, 1:20 AM47
48
Timer recording
NOTES:
•
If you select timer recording on a
specified date only one time, select
“ONCE” in the “TYPE” for record-
ing. You can record same days of
every week or from Monday to Fri-
day using the item “TYPE”. The
items you can select are as follows:
ONCE: Recording on the selected
“DATE”
EVERY SUN: Recording every Sun.
EVERY MON: Recording every
Mon.
EVERY TUE: Recording every Tue.
EVERY WED: Recording every
Wed.
EVERY THU: Recording every Thu.
EVERY FRI: Recording every Fri.
EVERY SAT: Recording every Sat.
MON-FRI: Recording from Mon. to
Fri.
MON-SAT: Recording from Mon. to
Sat.
SUN-SAT: Recording everyday from
Mon to Sat.
•
The starting and stopping times for
the recording are displayed on the
12-hour (am/pm) clock. Twelve
o’clock midnight is displayed as “AM
12:00”, whereas twelve o’clock noon
is displayed as “PM12:00”.
•
The initial setting of “REC TO” and
“REC MODE” can be changed us-
ing “REC SETUP” (See page 77)
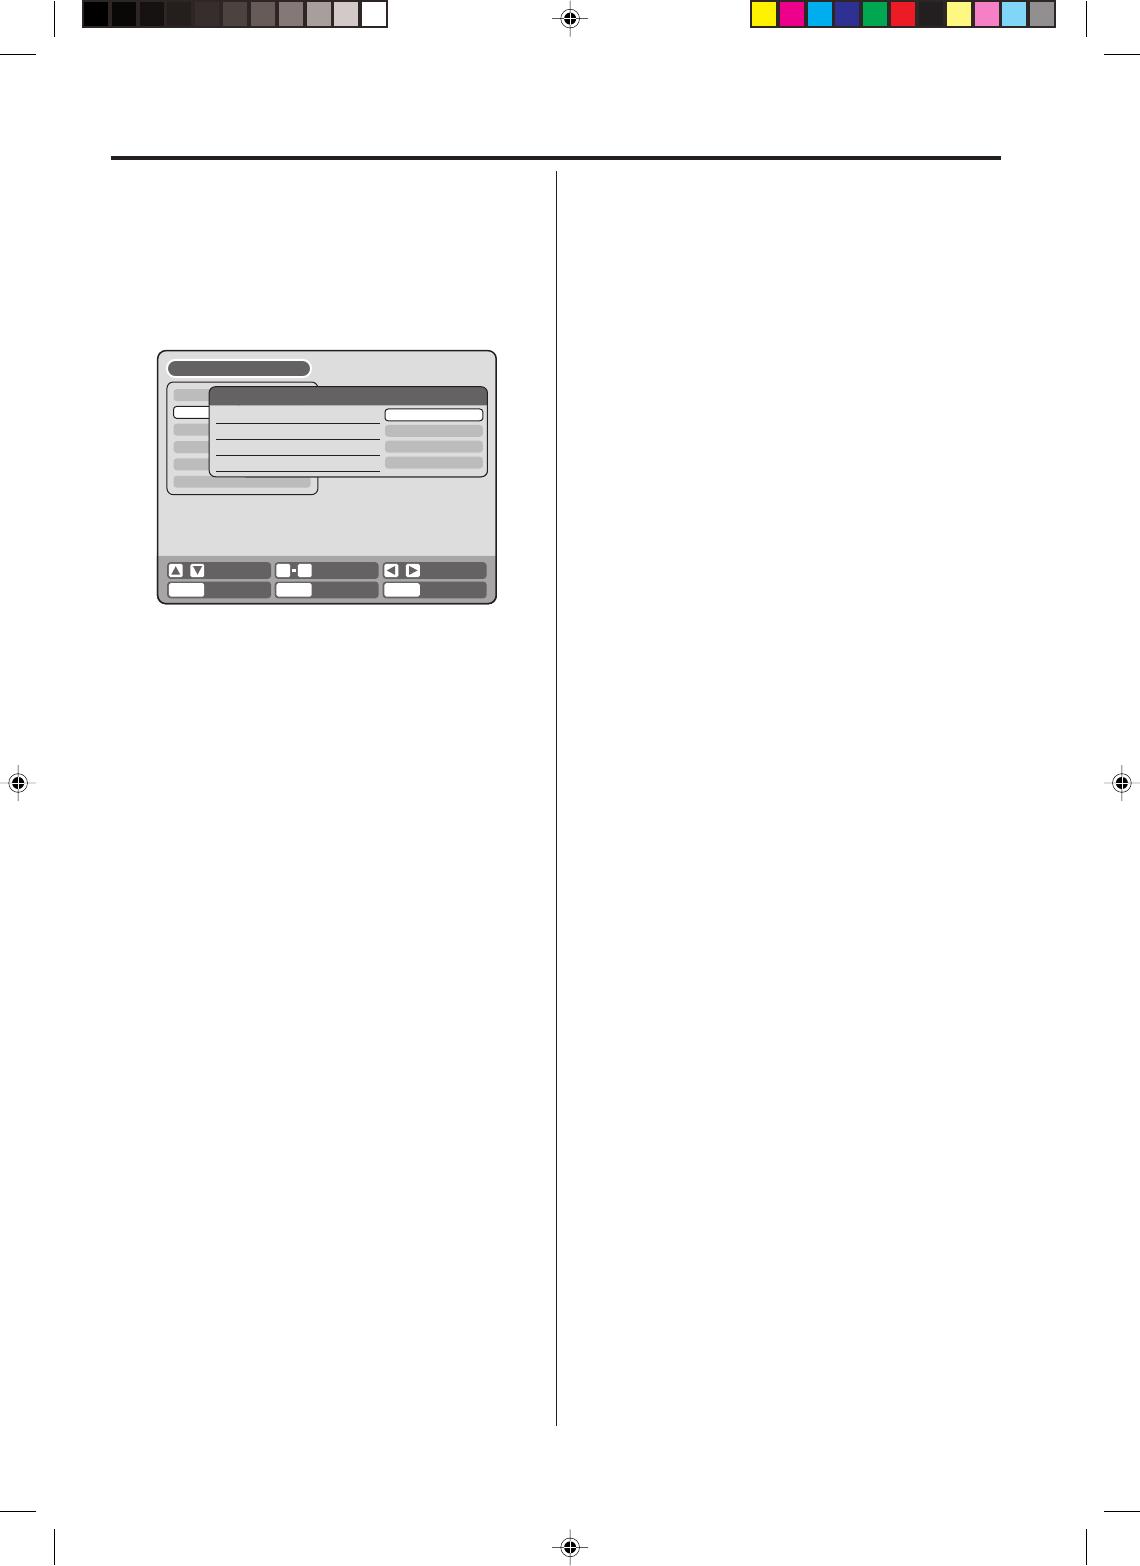
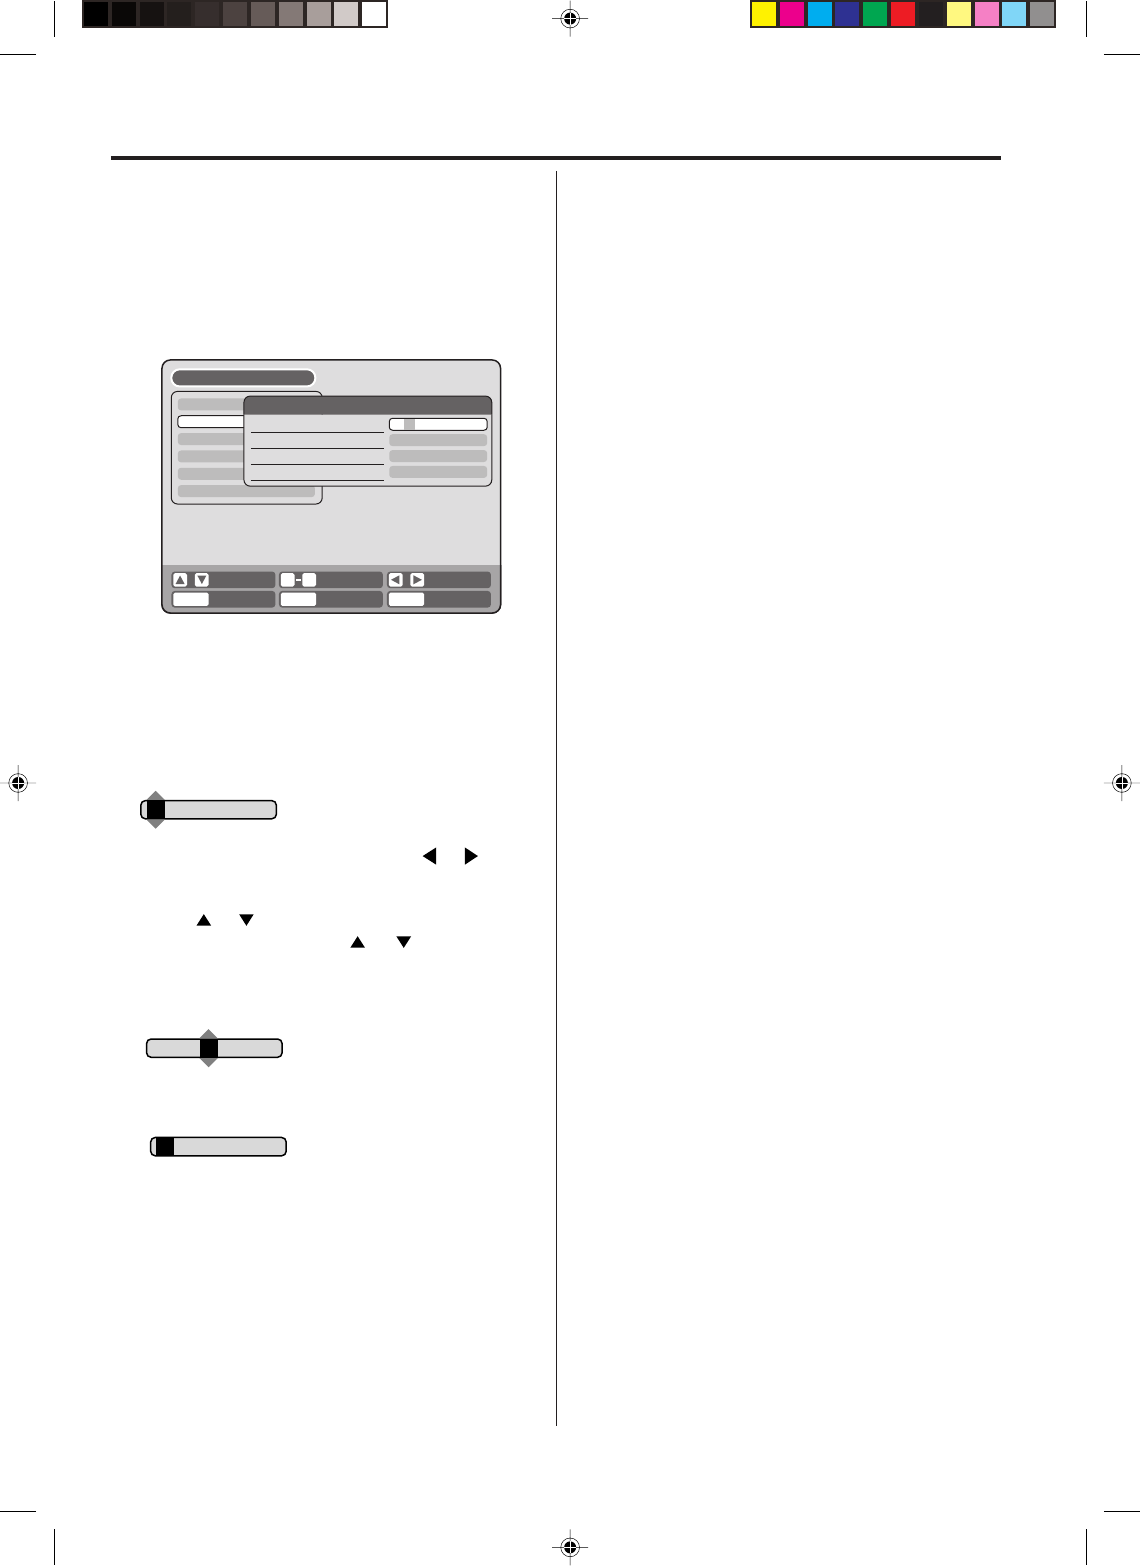
4Press or to select “TYPE” and press ENTER.
Press or to select “ONCE” from the list and press ENTER.
5Press or to select “DATE” and press ENTER.
Press or to select the date to be recorded from the list and
press ENTER.
6Press or to select “START” and press ENTER.
Set the time when the recording is started.
•To switch over the selection item (hour or minute), press
or , then press ENTER.
• Press or to adjust the time.
• After setting the time, press ENTER.
7Press or to select “END” and press ENTER.
Set the stopping time in the same manner for setting the starting
time of timer recording.
8Press or to select “CH” and press ENTER.
• Press or to select the channel to be recorded.
• You can select the external input (L1 or L2) by pressing or .
9Press or to select “REC TO” and press ENTER.
Select the media (DVD or VCR) to be recorded from the list and
press ENTER.
10 Press or to select “REC MODE” and press ENTER.
The recording modes for the media selected in “REC TO” item
are listed up.
Select the recording mode and press ENTER.
For the recording modes in VCR, see page 38, and for the re-
cording modes in DVD, see page 42.
ENTER/
SELECT
RETURN BACK END
SELECT
SETUP
ENTER
TIMER REC SET
REC REC
TO MORE
TYPE
DATE
START
END
CH
REC TO
REC MODE
ONCE
000
DVD
XP
OK
20,08,03(--)
20:17
03:17
SETUP MENU
ENTER/
SELECT
RETURN BACK END
SELECT
SETUP
ENTER
TIMER REC SET
REC REC
TO MORE
TYPE
DATE
START
END
CH
REC TO
REC MODE
EVERY SUN
000
DVD
XP
OK
11,08,03(--)
02:17
03:17
SETUP MENU
ONCE
EVERY SUN
EVERY MON
EVERY TUE
EVERY WED
EVERY THU
EVERY FRI
MON-FRI
VRDVD4005_P37-P50 03.8.21, 1:20 AM48
49
8 : 00 11 : 00
9 : 00 10 : 00
Program 1
Prog.1
Deleted Parts
Non Recorded Portion Parts
Prog.2 Prog.3
Program 2
Program 3
Recording
Control Settings
Timer recording
NOTES:
•
Recording starts 5 seconds before
the preset starting time.
•
The total recording time for one time
is max. 23 hours and 59 minutes.
•
You cannot use the timer recording
for the both DVD and VCR at the
same time.
•
When the start time for timer record-
ing comes in using the function of
REC/OTR explained in “Recording
a TV program” and “One touch
Timer Recording (OTR)”, the record-
ing with REC/OTR is forcedly can-
celled and the timer recording starts.
•
You can playback the DVD during
the VCR timer recording, whereas
you can playback the VCR during
the DVD timer recording.
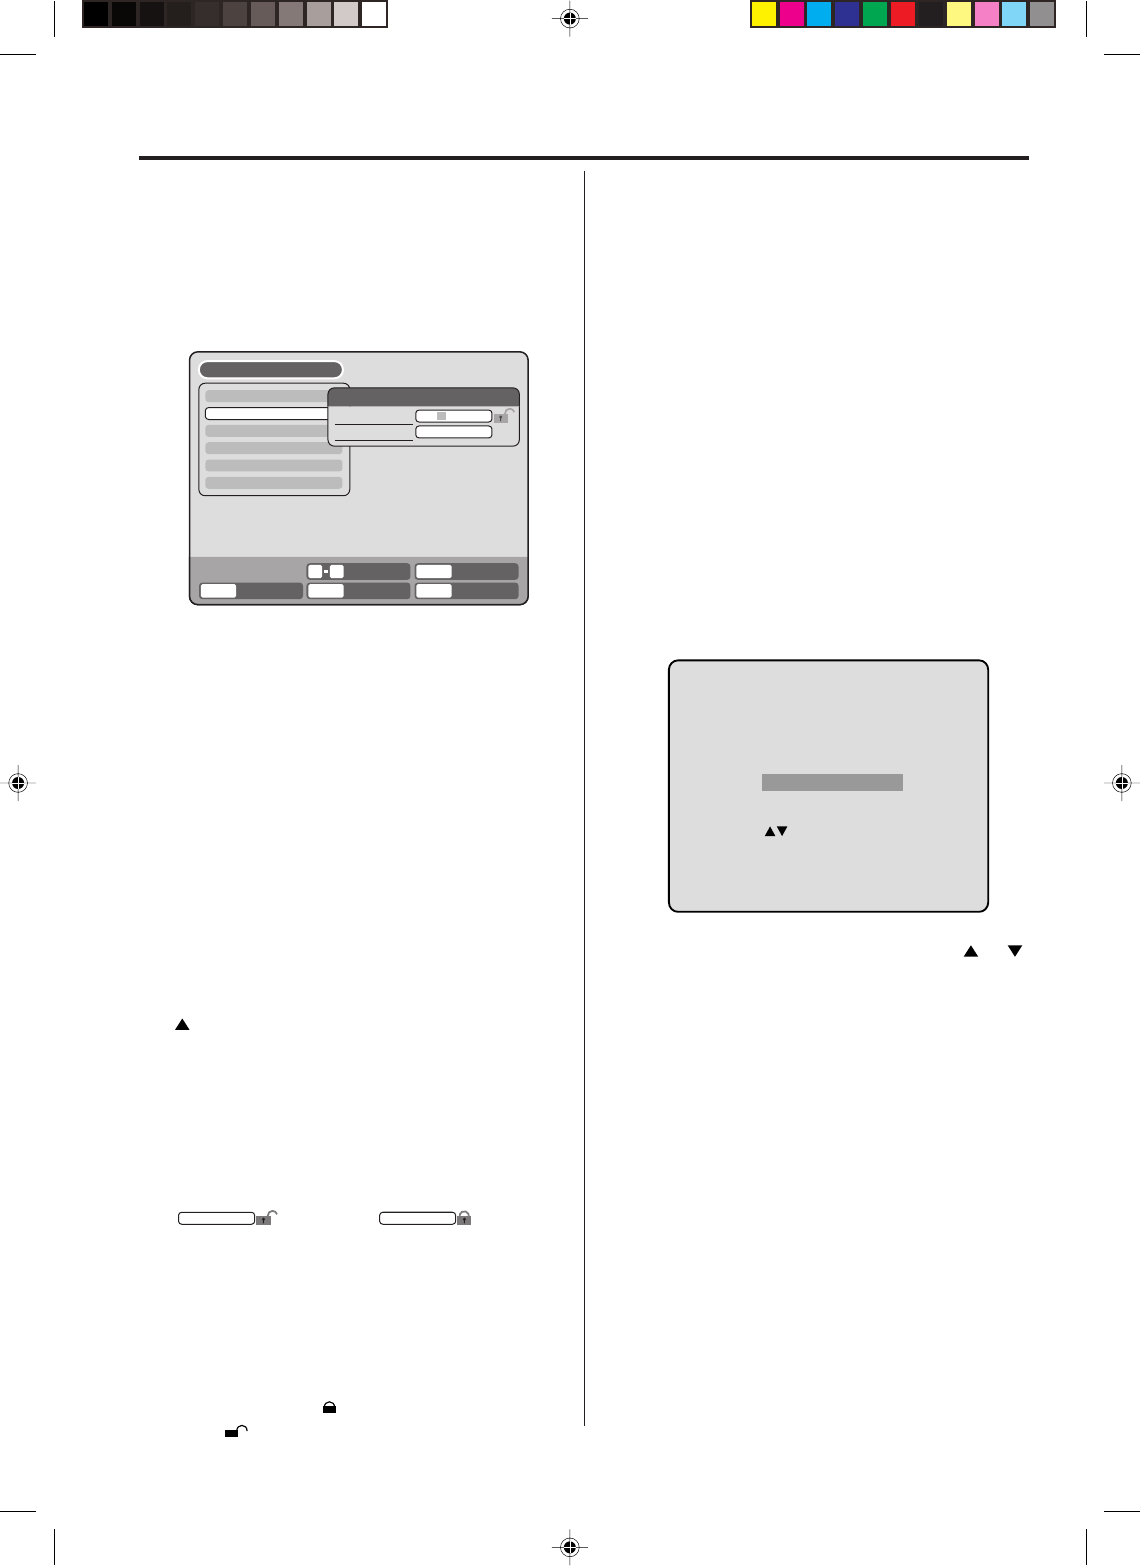
11 Select “OK” and press ENTER.
The timer program is determined and the TIMER REC SET
screen appears again.
12 When you enter the other program for the timer recording, re-
peat the steps 3 to 11.
13 Press SETUP.
The TIMER REC SET screen disappears and the display will
return to the normal screen.
14 Press TIMER REC. The timer indication (
) will appear on the
display and the unit stands by for recording.
•If the program is DVD recording only, the unit will change to
VCR mode automatically. (The DVD mode cannot be selected.)
•If the program is VCR recording only, the unit will change to
DVD mode automatically. (The VCR mode cannot be selected.)
•If the programs are DVD and VCR recording, the unit will turn
off. If you want to use the unit, press TIMER REC again to
deactivate the timer.
Checking or changing the timer recording
When you want to check the selected timer recording, follow the steps 1
& 2 of “Setting timer recording” and display the TIMER REC SET screen.
To change the timer recording, select the program to be changed and
press ENTER. The changing method is the same as that for the re-
cording a program for the first time.
Canceling the timer recording
Display the TIMER REC SET screen.
Select the program you want to cancel and press CLEAR/CANCEL,
then the selected program will be erased from the timer recording list.
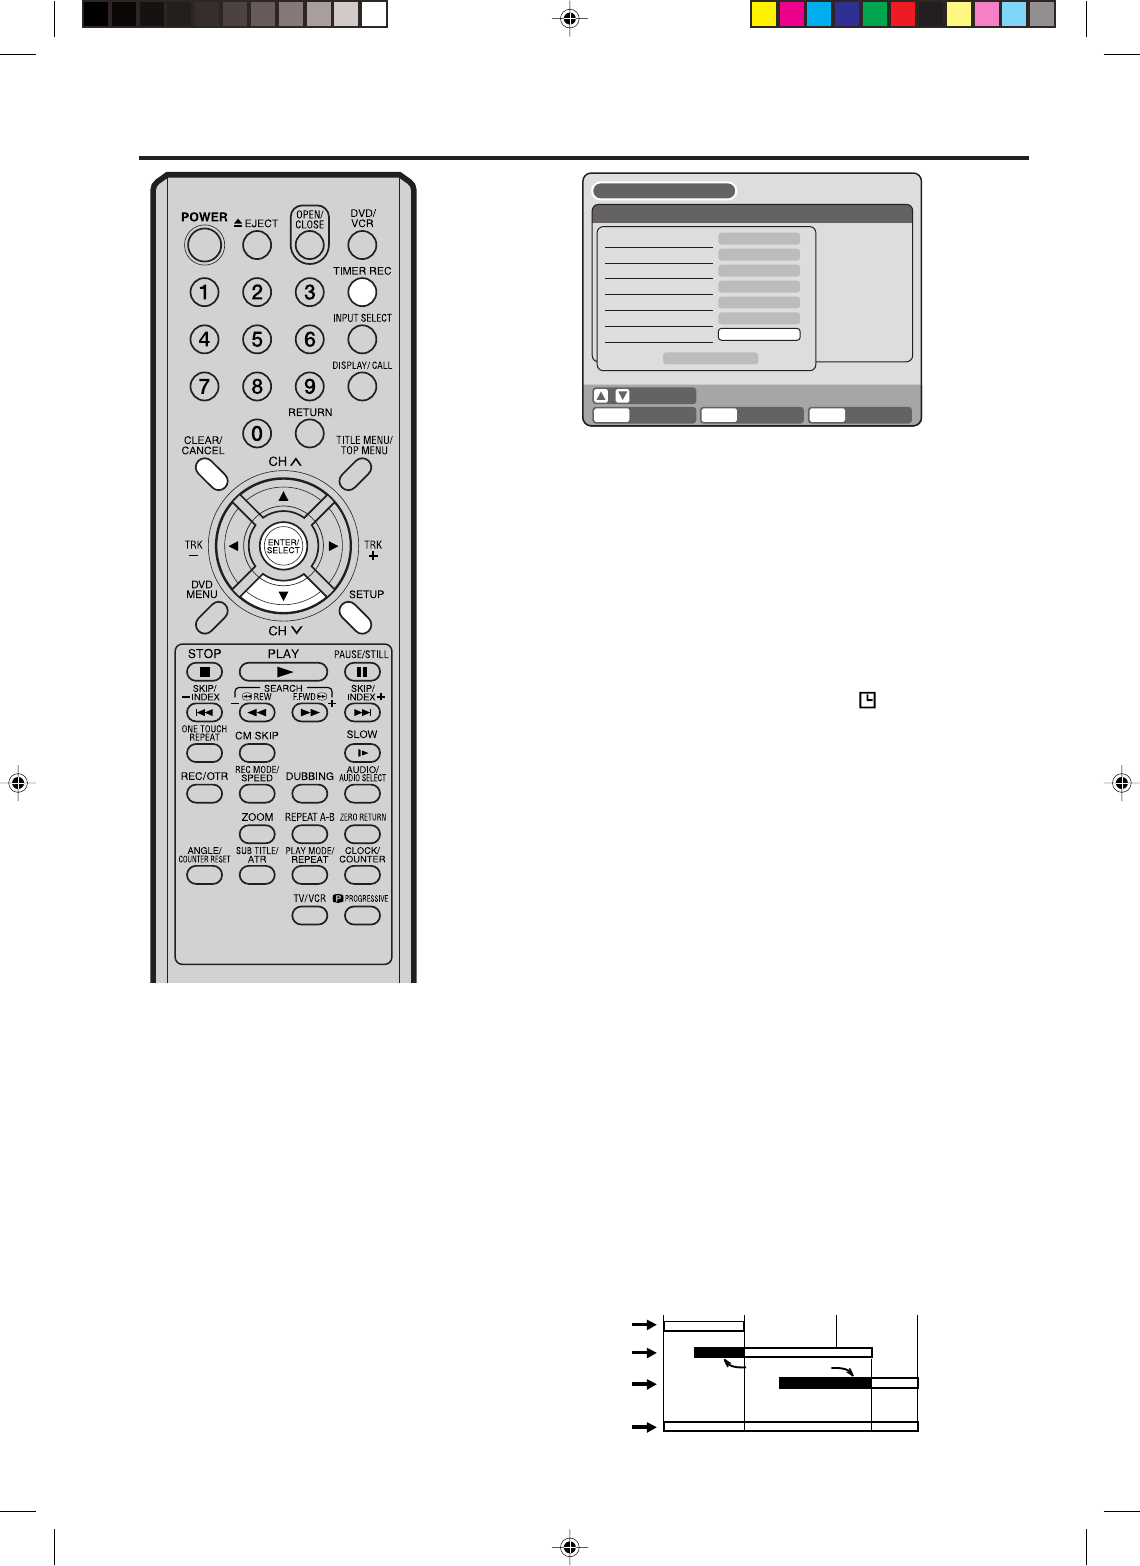
In case Timer programs-overlap
Do not overlap timer programs as portions of the conflicting programs
will be lost. The first recording time has priority over the next recording
time as shown in the diagram below.
ENTER/
SELECT
RETURN BACK END
SELECT
SETUP
ENTER
TIMER REC SET
REC REC
TO MORE
TYPE
DATE
START
END
CH
REC TO
REC MODE
ONCE
06
DVD
LP
OK
20,08,03(--)
20:00
21:30
SETUP MENU
VRDVD4005_P37-P50 03.8.21, 1:20 AM49
50
Stereo recording and playback
The VHS Hi-Fi audio system per-
mits high fidelity recording of MTS
STEREO TV broadcasts.
STEREO
OUTPUT
SELECTION
STEREO
L ch
R ch
MONO
SOUND HEARD ON BOTH
SPEAKERS
STEREO
LEFT CHANNEL AUDIO
RIGHT CHANNEL AUDIO
MONO
NOTES:
•When playing back a tape that is
not recorded in Hi-Fi stereo mode,
the audio will automatically be
monaural.
•When listening to a VHS Hi-Fi
video tape or MTS broadcast
through the RF OUT (UHF/VHF)
jack (Audio/Video cord not con-
nected), the sound will be monau-
ral.
When a MTS STEREO broadcast is re-
ceived, the word “STEREO” will appear on
the screen and the program can be viewed
or recorded in stereo.
The Hi-Fi STEREO recording procedure is
the same as for normal recordings.
NOTE:
When using a CATV system, stereo TV programs may be transmitted
over a mono cable channel. In this case the word “STEREO” will not
appear and the sound will be in mono.
Output selection
When viewing an MTS STEREO TV program, or playing a prerecorded
VHS Hi-Fi STEREO videotape, press AUDIO SELECT to select how
the audio will be heard through the speakers. Normally set to the Hi-Fi
STEREO position, this button can be set to the MONO position if the
stereo broadcast or videotape audio is of poor quality. The “R” and “L”
positions allow the audio from the Right or Left Hi-Fi channel to be
heard over both TV speakers. This button has no effect when viewing
a MONO videotape or TV program. Each time when you press the
button, OUTPUT SELECTION display appears on the screen for sev-
eral seconds. Refer to the chart below.
VRDVD4005_P37-P50 03.8.21, 1:20 AM50
51
Editing the disc
This section explains how to edit the
recorded DVD. Editing the disc
means editing the title menu. How-
ever, the items that you can edit vary
with the recording formats. In VR
mode, you can edit various title
menus, whereas in video mode, you
can edit only a few items.
Title menu
When you record a video first time on the DVD (in VR mode) where
nothing is recorded, the recorded content is automatically set to Title1.
Then, the second recorded content is set to Title2, and so on. There-
fore, the title is numbered according to the recording order. The title
number will be created max. **.
The title menu lists up these title numbers.
The title menu can be used when you play back the disc, display the
menu you want to watch and play it back (see page 24), or when you
check the contents recorded on the disc.
Original title
The titles explained above are called original title, which will be added
every recording and can be edited later. You can do various editing
operations i.e., you can name the titles, or add and erase the chapter
marks. In addition, you can erase the unnecessary titles to increase
the disc space.
Play list title
You can create the play list based on the original title.
You can combine the titles or erase the unnecessary scenes.
The play list is created in regardless of the original titles and the list
won’t affect the original title. If you erase the play list, the original titles
remain. It is recommended to create and edit the play list to prevent
the important titles from being erased accidentally.
If you create the play list, both the original title and play list will be
displayed on the title menu.
Editable items
The items that can be edited are different between original title and
play list. For the disc in video mode, only the program name can be
edited and the play list cannot be created.
The items can be edited in each are as follows:
NOTES:
• This unit cannot record or edit the
disc which was recorded or edited
using the other DVD recorder and
has chapter marks of *** or more.
• You cannot edit or record the disc
on which disc protection is set. In
such a case, be sure to cancel the
disc protection (see page 74) be-
fore starting the operation.
• When a scene was erased, the
selected position for erasing may
be a little different from the actual
erased position.
• The disc which was fully recorded
using the other DVD recorder may
not be edited by this unit.
If you finalize the disc in video mode, the title list will be created and
you cannot use the title menu.
Editing items VR mode Video mode
Original
Playback
Adding chapter mark
Combining chapters
Erasing scenes
Erasing titles
Renaming title program
Creating play list
Combining titles
Original Play list
O
O
O
O
O
O
O
X
O
X
X
O
O
O
X
O
O
X
X
X
X
X
X
X
VRDVD4005_P51-P68 03.8.20, 11:25 PM51
52
Creating and editing a play list
You can create and edit the play
list based on the original title.
NOTE:
The play list can be created only in
the DVD-RW (VR). The DVD-RW
(Video) and the DVD-R cannot cre-
ate a play list.
Preparation:
• Turn ON the TV and set to the video input mode.
• Load the recorded DVD-RW (VR).
Creating a play list
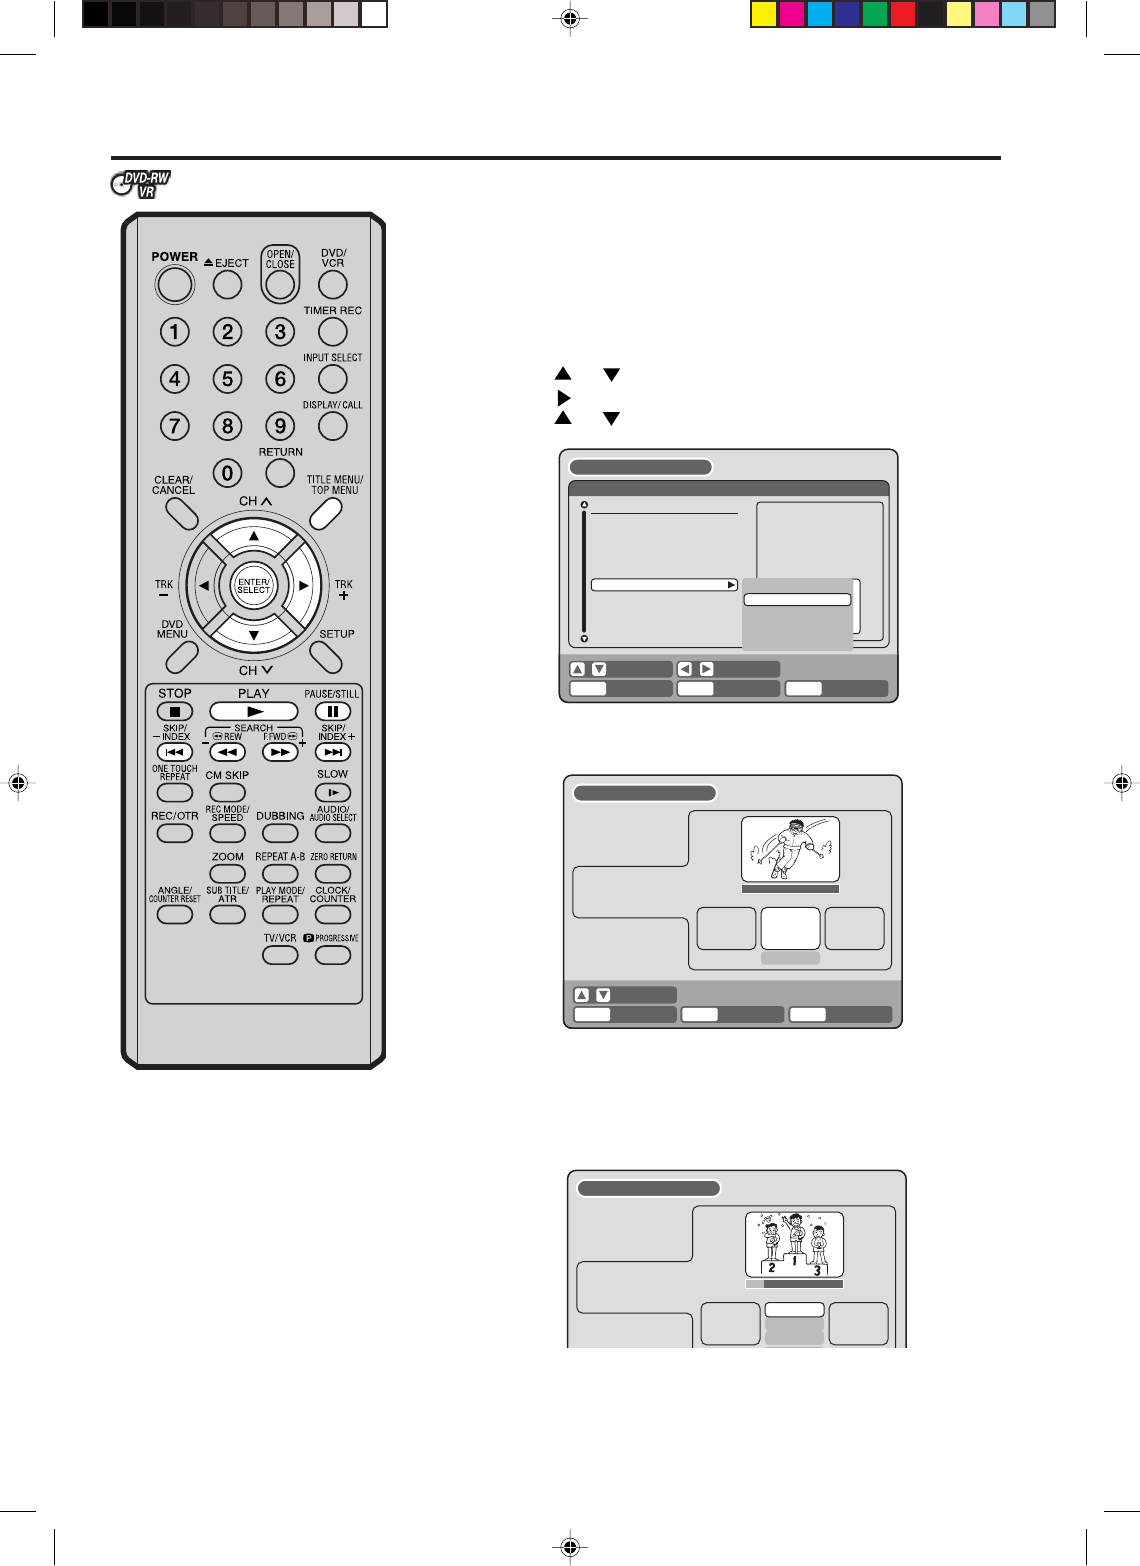
1Press TITLE MENU.
The title menu will appear.
2Press or to select the original title which will be used as the
base of a play list.
3Press .
The original title editing menu will appear.
4Press or to select “NEW PLAYLIST”.
5Press ENTER.
The editing menu closes and the created play list appears at the
bottom of the original title.
ENTER/
SELECT
RETURNENTER BACK
SET
END
SELECT
TITLE
MENU
DISC NAME:
Title 1
Title 2
Title 3
08/11/2003 06:52AM -- XP
Title 1
REC DATE :08/11/2003
TIME :08:61AM
LENGTH :00:30:17
CHANNEL :06
REC MODE :EP
TITLE MENU
SET
SELECT
DISC NAME:
Title 1
Title 2
Title 3
08/11/2003 06:52AM -- XP
Title 1
REC DATE :08/11/2003
TIME : 08:61AM
LENGTH : 00:01:17
TITLE MENU
PLAY
ADD CHAPTER MARK
COMBINE CHAPTERS
EDIT PROGRAM
DELETE PROGRAM
RENAME PROGRAM
NEW PLAYLIST
NEW PLAYLIST
DISC NAME:
Title 1
Title 2
Title 3
08/11/2003 06:52AM -- XP
Title 1 PL
Title 1
REC DATE :08/11/2003
TIME :06:42AM
LLENGTH :00:30:17
CHANNEL :06
REC MODE :EP
TITLE MENU
Created play list
VRDVD4005_P51-P68 03.8.20, 11:25 PM52
53
Creating and editing a play list
NOTES:
• The number of the characters
which can be used for the program
name is max. **.
• For using the keyboard screen,
see “Renaming the disc name”
(page 64).
• If the program name adopted in the
other DVD recorder has a charac-
ter which cannot be displayed in
this unit, “*******” appears.
Renaming the title menu
1Press TITLE MENU to display the title menu.
2Select the play list where you want to rename the program name.
• Press or to select the play list.
• Press to display the editing menu of the play list.
• Press or to select “RENAME PROG”.
3Press ENTER.
The keyboard screen will appear.
4Use the keyboard screen to enter the program name.
5Press DISPLAY/CALL.
The entered title is selected and then the display will return to the
title menu.
ENTER/
SELECT
RETURNENTER BACK
SET
END
SELECT
TITLE
MENU
DISC NAME:
Title 1
Title 2
Title 3
08/11/2003 06:52AM -- XP
Title 1 PL
Title 1 PL
REC DATE :08/11/2003
TIME :03:12AM
LLENGTH :00:30:17
CHANNEL :06
REC MODE :EP
TITLE MENU
PLAY
EDIT PROGRAM
DELETE PROGRAM
RENAME PROGRAM
TITLE COMBINE
RENAME PROGRAM
ENTER/
SELECT
RETURNENTER BACK
SET
END
SELECT
TITLE
MENU
DISC NAME:
Title 1
Title 2
Title 3
08/11/2003 06:52AM -- XP
Title 1 PL
Family
REC DATE :08/11/2003
TIME :03:12AM
LLENGTH :00:30:17
CHANNEL :06
REC MODE :EP
TITLE MENU
Family
1
( .< > #
2
abc
3
d e f
Clear
Back
Return
Exit
stop
Caps
0
space bar
4
g h i
5
jkl
6
m n o
7
qp r s
8
t u v
9
w x y z
Display
OK
Display
OK
Numbers
Signs
Letters
VRDVD4005_P51-P68 03.8.20, 11:48 PM53
54
Creating and editing a play list
NOTES:
• You can erase the scenes up to **
times for one title.
• The first and last * seconds of a
chapter mark cannot be selected
as part erasing (start or end)
points.
• The scene lasting less than * sec-
onds cannot be erased.
Erasing scenes (Edit program)
You can erase an unnecessary scene from the created play list.
When you erase the scene from the play list, the scene is not erased
from the original title.
1Press TITLE MENU to display the title menu.
2Select the play list where a scene you want to erase is included.
• Press or to select the play list.
• Press to display the editing menu of the play list.
• Press or to select “EDIT PROGRAM”.
3Press ENTER.
The EDIT PROGRAM screen appears.
ENTER/
SELECT
RETURNENTER BACK
SET
END
SELECT
TITLE
MENU
DISC NAME:
Title 1
Title 2
Title 3
08/11/2003 06:52AM -- XP
Title 1 PL
Family
REC DATE :08/11/2003
TIME :03:12AM
LLENGTH :00:30:17
CHANNEL :06
REC MODE :EP
TITLE MENU
PLAY
EDIT PROGRAM
DELETE PROGRAM
RENAME PROGRAM
TITLE COMBINE
EDIT PROGRAM
4Press ENTER to play back the play list on the EDIT PROGRAM
screen.
• Use each operation button (F.FWD, REW, INDEX +, INDEX -,
PLAY, PAUSES/STEILL) for the playback to search the starting
point of the scene you want to erase.
SELECT
ENTER/
SELECT
RETURNENTER BACK END
TITLE
MENU
EDIT PROGRAM
NAME Family
CHAPTER 1/3
LENGTH 00/00:30:17 00:00:00
00:00:00 00:00:00
Preview
Press
SELECT
to start
5Select “SET START” at the start point of the scene that you want
to erase and press ENTER. (To select the start point easily, search
the start point while “SET START” is selected)
The still image at the start point appears at the left small screen.
EDIT PROGRAM
NAME Family
CHAPTER 1/3
LENGTH 00/00:30:17 00:10:20
SET START
SET END
Finish
VRDVD4005_P51-P68 03.8.20, 11:25 PM54
55
Creating and editing a play list
NOTE:
It is no problem to omit the proce-
dures for confirming the scene or
adjusting sot and end points.
6Select “SET END” at the end point of the scene you want to erase
and press ENTER.
The still image at the end point appears at the right small screen.
SELECT
ENTER/
SELECT
RETURNENTER BACK END
TITLE
MENU
EDIT PROGRAM
NAME Family
CHAPTER 2/3
LENGTH 00/00:30:17 00:11:42
00:08:28 00:30:17
Preview
Adjust start
SET END
Finish
SELECT
ENTER/
SELECT
RETURNENTER BACK END
TITLE
MENU
EDIT PROGRAM
NAME Family
CHAPTER 2/3
LENGTH 00/00:30:17 00:15:58
00:08:28 00:15:58
Preview
Adjust start
SET END
Finish
7Check the erased scenes.
• Select “Preview” and press ENTER. Then the video where the
scenes between the start and end points are erased is played
back.
• Each operation button (F.FWD, REW, INDEX +, INDEX -, PLAY,
PAUSES/STEILL) for playback also can be used.
8Adjust the start and end points.
• To adjust the start point, select “Adjust start” and press ENTER.
You can change the start point every one second by pressing
or .
• To adjust the end point, select “Adjust end” and press ENTER.
You can change the end point in the same way as the start point.
9If you determine the scene to be erased, select “Finish” and press
ENTER.
VRDVD4005_P51-P68 03.8.20, 11:25 PM55
56
Creating and editing a play list
Combining the title
You can create a play list by combining the several original titles.
To combine the titles, it is necessary to create a play list at first. By
combining the original titles in the play list, a play list where several
titles are combined is created.
1Press TITLE MENU to display the title menu.
2Select the play list where you want to combine the titles.
• Press or to select the play list.
• Press to display the editing menu of the play list.
• Press or to select “TITLE COMBINE”.
ENTER/
SELECT
RETURNENTER BACK
SET
END
SELECT
TITLE
MENU
DISC NAME:
Title 1
Title 2
Title 3
08/11/2003 06:52AM -- XP
Title 1 PL
Family
REC DATE :08/11/2003
TIME :03:29AM
LENGTH :00:01:50
CHANNEL :XP
REC MODE :--
TITLE MENU
PLAY
EDIT PROGRAM
DELETE PROGRAM
RENAME PROGRAM
TITLE COMBINE
TITLE COMBINE
3Select the original titles that you want to combine from the title
menu.
ENTER/
SELECT
RETURNENTER BACK
SET
END
SELECT
TITLE
MENU
DISC NAME:
Title 1
Title 2
Title 3
08/11/2003 06:52AM -- XP
Family
Title 2
REC DATE :08/11/2003
TIME :06:44AM
LENGTH :00:06:40
CHANNEL :--
REC MODE :EP
TITLE MENU
4Press ENTER.
Following the play list, the original titles are combined.
ENTER/
SELECT
RETURNENTER BACK
SET
END
SELECT
TITLE
MENU
DISC NAME:
Title 1
Title 2
Title 3
08/11/2003 06:52AM -- XP
Title 1 PL
Family
REC DATE :08/11/2003
TIME :03:29AM
LENGTH :00:36:40
CHANNEL :06
REC MODE :EP
TITLE MENU
The several titles were combined so that the total recording time is
displayed.
VRDVD4005_P51-P68 03.8.20, 11:25 PM56
57
Creating and editing a play list
Erasing a play list
You can erase the created play list. Even if you erase the play list, the
original title will not be erased.
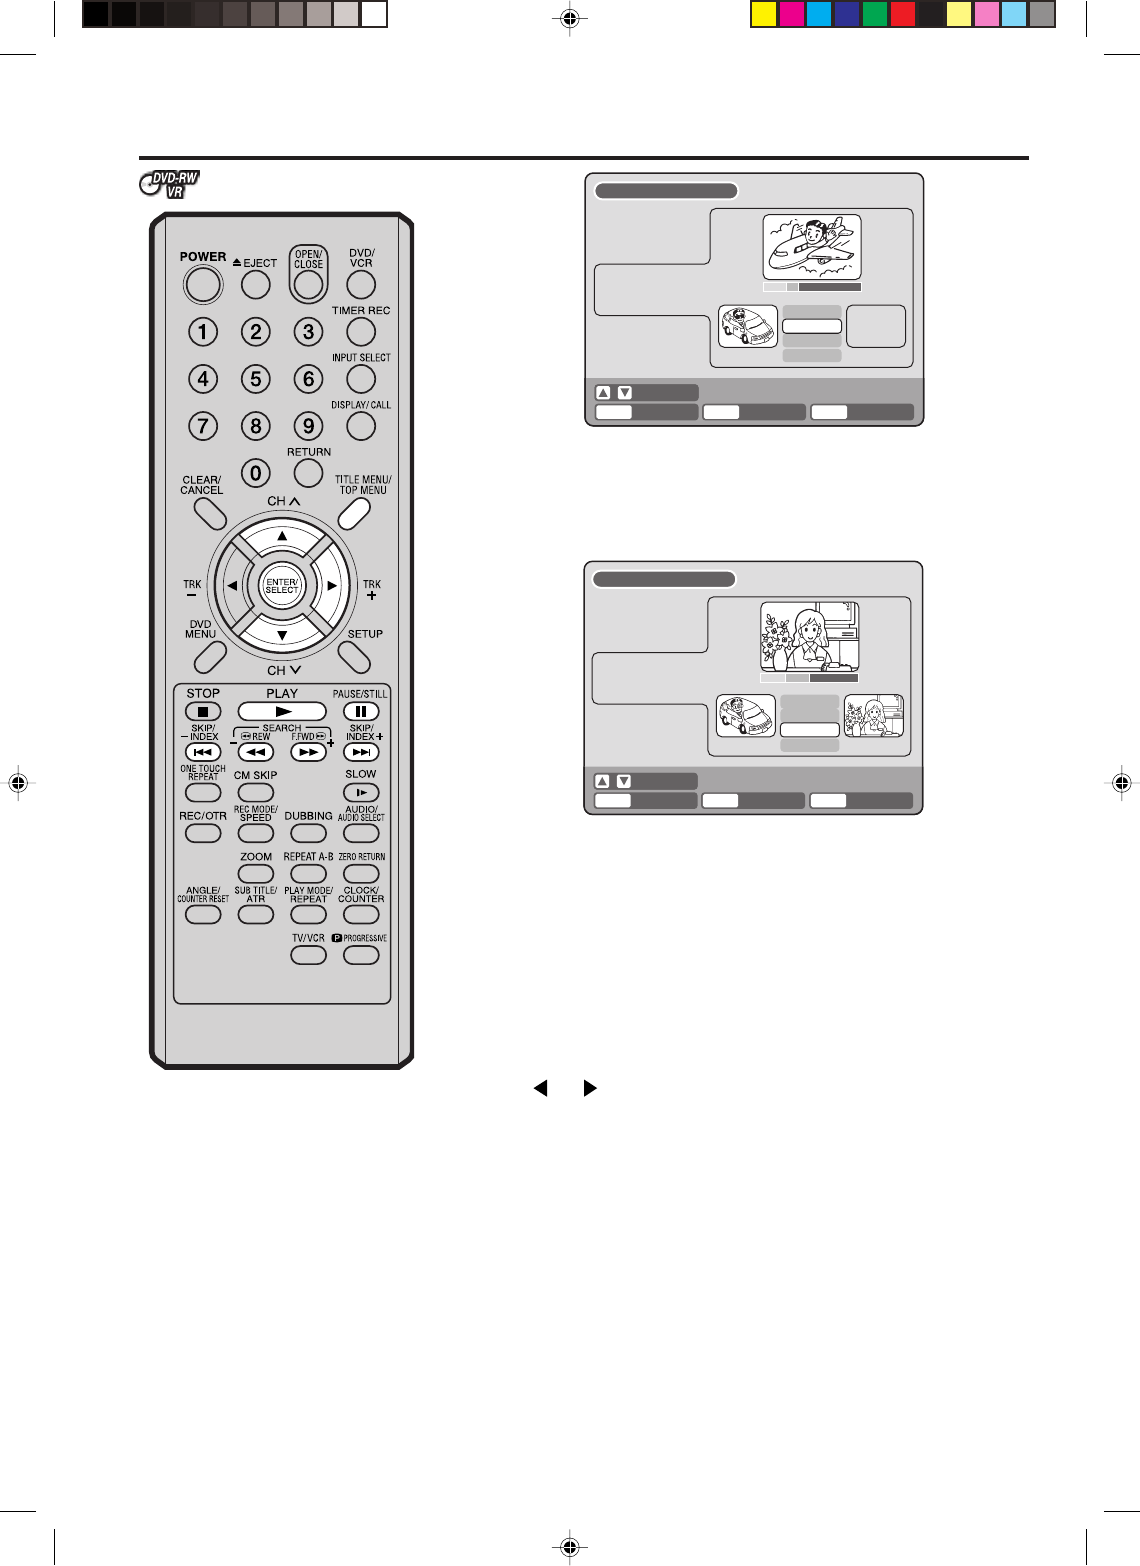
1Press TITLE MENU to display the title menu.
2Select the play list that you want to erase.
• Press or to select the play list.
• Press to display the editing menu of the play list.
• Press or to select select “DELETE PROGRAM”.
ENTER/
SELECT
RETURNENTER BACK
SET
END
SELECT
TITLE
MENU
DISC NAME:
Title 1
Title 2
Title 3
08/11/2003 06:52AM -- XP
Title 1 PL
Title 1 PL
REC DATE :08/11/2003
TIME :03:29AM
LENGTH :00:08:31
CHANNEL :XP
REC MODE :--
TITLE MENU
PLAY
EDIT PROGRAM
DELETE PROGRAM
RENAME PROGRAM
TITLE COMBINE
DELETE PROGRAM
3Press ENTER.
The following confirmation message will appear.
Yes
Cancel
No
Question
Are you sure you want to delete
this title? if playlists exlst,
they will be deleted
4Selecting “YES” and press ENTER, then the play list will be erased.
• Selecting “NO”, and then erasing the play list will be cancelled.
ENTER/
SELECT
RETURNENTER BACK
SET
END
SELECT
TITLE
MENU
DISC NAME:
Title 1
Title 2
Title 3
08/11/2003 06:52AM -- XP
08/11/2003 06:52AM -- XP
REC DATE :08/11/2003
TIME :06:52AM
LENGTH :00:03:07
CHANNEL :XP
REC MODE :--
TITLE MENU
VRDVD4005_P51-P68 03.8.20, 11:25 PM57
58
Editing original
The original titles can be edited
only in the DVD-RW (VR).
NOTES:
• Set an interval of 5 seconds be-
tween the existing chapter mark
and the chapter mark to be added.
• You can automatically add a chap-
ter mark in recording. For more in-
formation, see page 77.
Adding a chapter mark
You can add a chapter mark to the original title. You can add up to 999
chapter marks to one title.
1Press TITLE MENU to display the title menu.
2Select the original title where a chapter mark is added.
• Press or to select the original title.
• Press to display the editing menu of the original.
• Press or to select “ADD CHAPTER MARK”.
ENTER/
SELECT
RETURNENTER BACK
SET
END
SELECT
TITLE
MENU
DISC NAME:
Title 1
Title 3
08/11/2003 06:52AM -- XP
Title 1 PL
Title 2 PL
Title 2
REC DATE :08/11/2003
TIME :08:44AM
: :40
PLAY
COMBINE CHAPTERS
EDIT PROGRAM
DELETE PROGRAM
RENAME PROGRAM
NEW PLAYLIST
ADD CHAPTER MARK
TITLE MENU
3Press ENTER.
The ADD CHAPTER MARK screen will appear.
ENTER/
SELECT
RETURNENTER BACK END
TITLE
MENU
ADD CHAPTER MARK
NAME Title 2
CHAPTER 1/4
LENGTH 00/00:45:10
4Search a scene where you want to play back the title and add the
chapter mark.
• Search the scene by using each operation button (F.FWD, REW,
INDEX +, INDEX -, PLAY, PAUSES/STEILL, ONE TOUCH RE-
PEAT, CM SKIP) for the playback.
ENTER/
SELECT
RETURNENTER BACK END
TITLE
MENU
ADD CHAPTER MARK
NAME Title 2
CHAPTER 1/4
LENGTH 03/00:45:10
7%
VRDVD4005_P51-P68 03.8.20, 11:25 PM58
59
Recording a TV program
5When the scene you want to add a chapter mark, press ENTER.
The playback is temporally stopped and the position of the added
chapter mark appears yellow.
ADD CHAPTER MARK
NAME Title 2
CHAPTER 2/4
LENGTH 08/00:45:10
17%
The added chapter mark
6If you continue to add a chapter mark, carry out the steps 4 & 5.
7Adding chapter marks is finished.
• To display the title menu, press RETURN.
• To return to the normal screen, press TITLE MENU.
Combining chapters
By erasing the added chapter marks, the chapters can be combined.
1Press TITLE MENU to display the title menu.
2Select the original titles where you want to combine the chapters.
• Press or to select the original title.
• Press to display the original editing menu.
• Press or to select “COMBINE CHAPTERS”.
ENTER/
SELECT RETURNENTER BACK
SET
END
SELECT
TITLE
MENU
DISC NAME:
Title 2
Title 3
08/11/2003 06:52AM -- XP
Title 1 PL
Title 2 PL
Title 1
REC DATE :08/11/2003
TIME : 08:44AM
: :60
TITLE MENU
PLAY
ADD CHAPTER MARK
EDIT PROGRAM
DELETE PROGRAM
RENAME PROGRAM
NEW PLAYLIST
COMBINE CHAPTERS
3Press ENTER.
The COMBINE CHAPTERS screen will appear. At the beginning,
the top still image in the chapter 1 is displayed.
VRDVD4005_P51-P68 03.8.20, 11:25 PM59
60
Editing original
4Press INDEX + or INDEX - to select the chapter marks to be erased.
5Press ENTER.
The chapter marks are erased and 2 chapters are combined into 1
chapter.
6To continue erasing the chapter marks, carry out the steps 4 & 5.
7The chapter combination will be completed.
• To display the title menu, press RETURN.
• To return to the normal screen, press TITLE MENU.
Renaming program name
You can erase an unnecessary scene from the original program.
Erase the scene after checking the program items. You cannot repro-
duce the erased scene.
1Press TITLE MENU to display the title menu.
2Select the original program that you want to rename.
• Press or to select the original program.
• Press to display the original editing menu.
• Press or to select “RENAME PROGRAM”.
ENTER/
SELECT
RETURNENTER BACK END
TITLE
MENU
COMBINE CHAPTERS
NAME Title 1
CHAPTER 2/3
LENGTH 08/00:01:50
6:41
ENTER/
SELECT
RETURNENTER BACK
SET
END
SELECT
TITLE
MENU
DISC NAME:
Title 1
Title 2
Title 3
08/11/2003 06:52AM -- XP
Title 1 PL
Title 2 PL
Title 1
REC DATE :08/11/2003
TIME : 08:61AM
LENGTH : 00:01:60
TITLE MENU
PLAY
ADD CHAPTER MARK
COMBINE CHAPTERS
EDIT PROGRAM
DELETE PROGRAM
RENAME TITLE
NEW PLAYLIST
RENAME PROGRAM
3Press ENTER.
The keyboard screen appears.
The entering method of the program name is the same as for the
play list. See the steps 4 & 5 of “Renaming the program name” in
“Editing a play list” and enter the program name.
VRDVD4005_P51-P68 03.8.20, 11:25 PM60
61
Editing original
Erasing a scene (Edit program)
You can erase an unnecessary scene from the original title.
Erase the scene after checking the title items. You cannot reproduce
the erased scene.
1Press TITLE MENU to display the title menu.
2Select the original program that you want to rename.
• Press or to select the original program.
• Press to display the original editing menu.
• Press or to select “EDIT PROGRAM”.
ENTER/
SELECT
RETURNENTER BACK
SET
END
SELECT
TITLE
MENU
DISC NAME:
Title 1
Title 2
Title 3
08/11/2003 06:52AM -- XP
Title 1 PL
Title 2 PL
Title 1
REC DATE :08/11/2003
TIME :08:61AM
LENGTH :00:01:17
TITLE MENU
PLAY
ADD CHAPTER MARK
COMBINE CHAPTERS
EDIT PROGRAM
DELETE PROGRAM
RENAME PROGRAM
NEW PLAYLIST
EDIT PROGRAM
3By pressing ENTER, the following message screen will appear.
Yes
Cancel
No
Question
Are you sure you want to delete
this title? if playlists exlst,
they will be deleted
4Select “YES” and press ENTER, then the EDIT PROGRAM screen
will appear.
• By selecting “NO”, the title menu appears.
5The method for erasing a scene is the same as for the play list.
See the steps 4 to 10 of “Erasing a scene (Edit program)” in “Edit-
ing a play list”.
VRDVD4005_P51-P68 03.8.20, 11:26 PM61
62
Editing original
NOTE:
By erasing the original program, the
same program will also be erased
from the play list.
Erasing the original program
You can erase the original program.
Erase the original program after checking its items. The erased pro-
gram cannot be reproduced.
When you erase the programs, you can increase the disc space.
1Press TITLE MENU to display the title menu.
2Select the original title you want to erase.
• Press or to select the program.
• Press to display the original editing menu.
• Press or to select “DELETE PROGRAM”.
3The following message screen appears by pressing ENTER.
ENTER/
SELECT
RETURNENTER BACK
SET
END
SELECT
TITLE
MENU
DISC NAME:
Title 1
Title 2
Title 3
08/11/2003 06:52AM -- XP
Title 1 PL
Title 2 PL
Title 3
REC DATE :08/11/2003
TIME :08:61AM
LENGTH :00:01:17
TITLE MENU
PLAY
ADD CHAPTER MARK
COMBINE CHAPTERS
EDIT PROGRAM
DELETE TITLE
RENAME PROGRAM
NEW PLAYLIST
DELETE PROGRAM
4Select “YES” and press ENTER, then the program will be erased.
• Erasing the title will be cancelled by selecting “NO”.
Yes
Cancel
No
Question
Are you sure you want to delete
this title? if playlists exlst,
they will be deleted
VRDVD4005_P51-P68 03.8.20, 11:26 PM62
63
Renaming a disc name
You can rename a disc name from
the title menu. In addition, to ini-
tialize a disc, the disc name can
be entered.
Preparation:
• Turn ON the TV and set to the video input mode.
• Load the recorded disc.
Renaming a disc name
1By pressing TITLE MENU, display the title menu.
2• Press or to select “DISC NAME”.
• Press to display the editing menu.
• Press or to select “RENAME DISC”.
NOTES:
•
The number of the characters which
can be used for the disc name is
max. **.
•
For using the keyboard screen, see
“Using the keyboard screen” (page
64).
•
If the disc name adopted in the other
DVD recorder has a character which
cannot be displayed in this unit,
“*******” appears.
Title 1
Title 2
Title 3
08/11/2003 06:52AM -- XP
Title 1 PL
Title 2 PL
DISC NAME PLAY
LENGTH :
CHANNEL :
REC MODE :
RENAME DISC
TITLE MENU
ENTER/
SELECT
RETURNENTER BACK
SET
END
SELECT
TITLE
MENU
3Press ENTER.
The keyboard screen will appear.
4Use the keyboard screen to enter the program name.
Drama_Family
Numbers
Signs
Letters
1
( -< > #
2
a b c
3
d e f
Clear
Back
Return
Exit
stop
Caps
0
space bar
4
g h i
5
j k l
6
m n o
7
qp r s
8
t u v
9
w x y z
Display
OK
Display
OK
5Press DISPLAY/CALL.
The entered program name is determined to display the title menu.
Title 1
Title 2
Title 3
08/11/2003 06:52AM -- XP
Title 1 PL
Title 2 PL
DISC NAME:Drama_Family REC DATE :
TIME :
LENGTH :
CHANNEL :
REC MODE :
TITLE MENU
ENTER/
SELECT
RETURNENTER BACK
SET
END
SELECT
TITLE
MENU
VRDVD4005_P51-P68 03.8.20, 11:26 PM63
64
Renaming a disc name
Using the keyboard screen
This section explains the function of the keyboard
screen and how to input characters. The disc name ant
the program name can be renamed using the keyboard
screen.
Keyboard screen types
The keyboard screen has three types of “Letters”, “Num-
bers” and Signs”. The type can be switched over by
pressing REW or F.FWD.
Letters: This is mainly used for inputting alphabeti-
cal letters.
For the keyboard screen of Letters, see the
previous page.
Numbers: This is used for inputting numbers.
Live Show
Numbers
Signs
Letters
1
< > 2 3
Clear
Back
Return
Exit
4 5 6
7 8
0
9
Display
Done
Display
Done
Signs: This is used for inputting symbols.
Live Show
Numbers
Signs
Letters
1
) !< > ,
2
? @ #
3
& % ^
Clear
Back
Return
Exit
0
space bar
4
. * _
5
· + =
6
[]:
7
¨; \ ‘
8
< > $
9
:·) :·( :·{ :·}
Display
Done
Display
Done
Inputting characters
There are two methods for inputting characters.
Character input 1
1Press , , or to select the character to
be input.
2Press ENTER.
The selected character will be input.
Character input 2
Example: Explain here the procedure when you input
“F” and “J”.
1Press the numerical keys where a character you
want to input is assigned.
3
de f
2Press the numerical keys continuously and select
the character to be input.
To input F, press 3 twice.
3
de f
NOTE:
When the interval between the pressing numerical keys
is 2 seconds or more in selecting the input character,
the then selected character will automatically be input.
3Stop the key operation when you select the char-
acter to be input.
The selected character will automatically be input.
F
NOTE:
After input one character, another character will not be
input automatically until another character is selected.
4Press the numerical keys where the following char-
acter is assigned.
5
jk l
5When the character to be input is selected, stop
the key operation.
The selected character is automatically input.
FJ
VRDVD4005_P51-P68 03.8.20, 11:26 PM64

65
Renaming a disc name
Erasing a character
You can erase the input character.
Erasing method 1
1Press , , or and select “Back”.
2Press ENTER.
The last input character will be erased.
3To erase the characters continuously, press ENTER.
The input characters will be erased from the last to
the top one by one.
Erasing method 2
1Press CLEAR.
The last input character is erased.
2To erase the characters continuously, press
CLEAR.
The input characters will be erased from the last to
the top one by one.
Erasing method 3
Use the cursor to select the character and erase it.
1Press INDEX - or INDEX + to move the cursor af-
ter the character you want to erase.
2Press CLEAR.
Erase the character before the cursor position.
Selecting between uppercase and lowercase
letters
You can select the alphabets between uppercase and
lowercase letters, which can be input on the keyboard
screen of Letters.
1Press STOP.
Select “•” or “Caps” and press ENTER.
Live Show
1
( -< > #
2
abc
3
d e f
Clear
Back
Return
Exit
stop
Caps
0
space bar
4
g h i
5
jkl
6
m n o
7
qp r s
8
t u v
9
w x y z
Display
OK
Display
OK
Numbers
Signs
Letters
UPPER
LOWER
AUTO CAPS
2Select one among the following items in the list
and press ENTER.
Auto Caps: Determines uppercase and lowercase au-
tomatically.
Upper: Inputs all with uppercase letters.
Lower: Inputs all with lowercase letters.
Determining a name
To determine the entered disc name and program name,
press DISPLAY/CALL.
Or select “Ok” and press ENTER.
The keyboard screen disappears and the display will
return to the title menu.
The entered disc name and program are displayed in
the title menu.
Canceling character input
When you want to cancel the input and changed char-
acters, press RETURN.
Or select “Exit” and press ENTER.
The input and changed characters are cancelled and
the title menu will appear.
VRDVD4005_P51-P68 03.8.20, 11:26 PM65
66
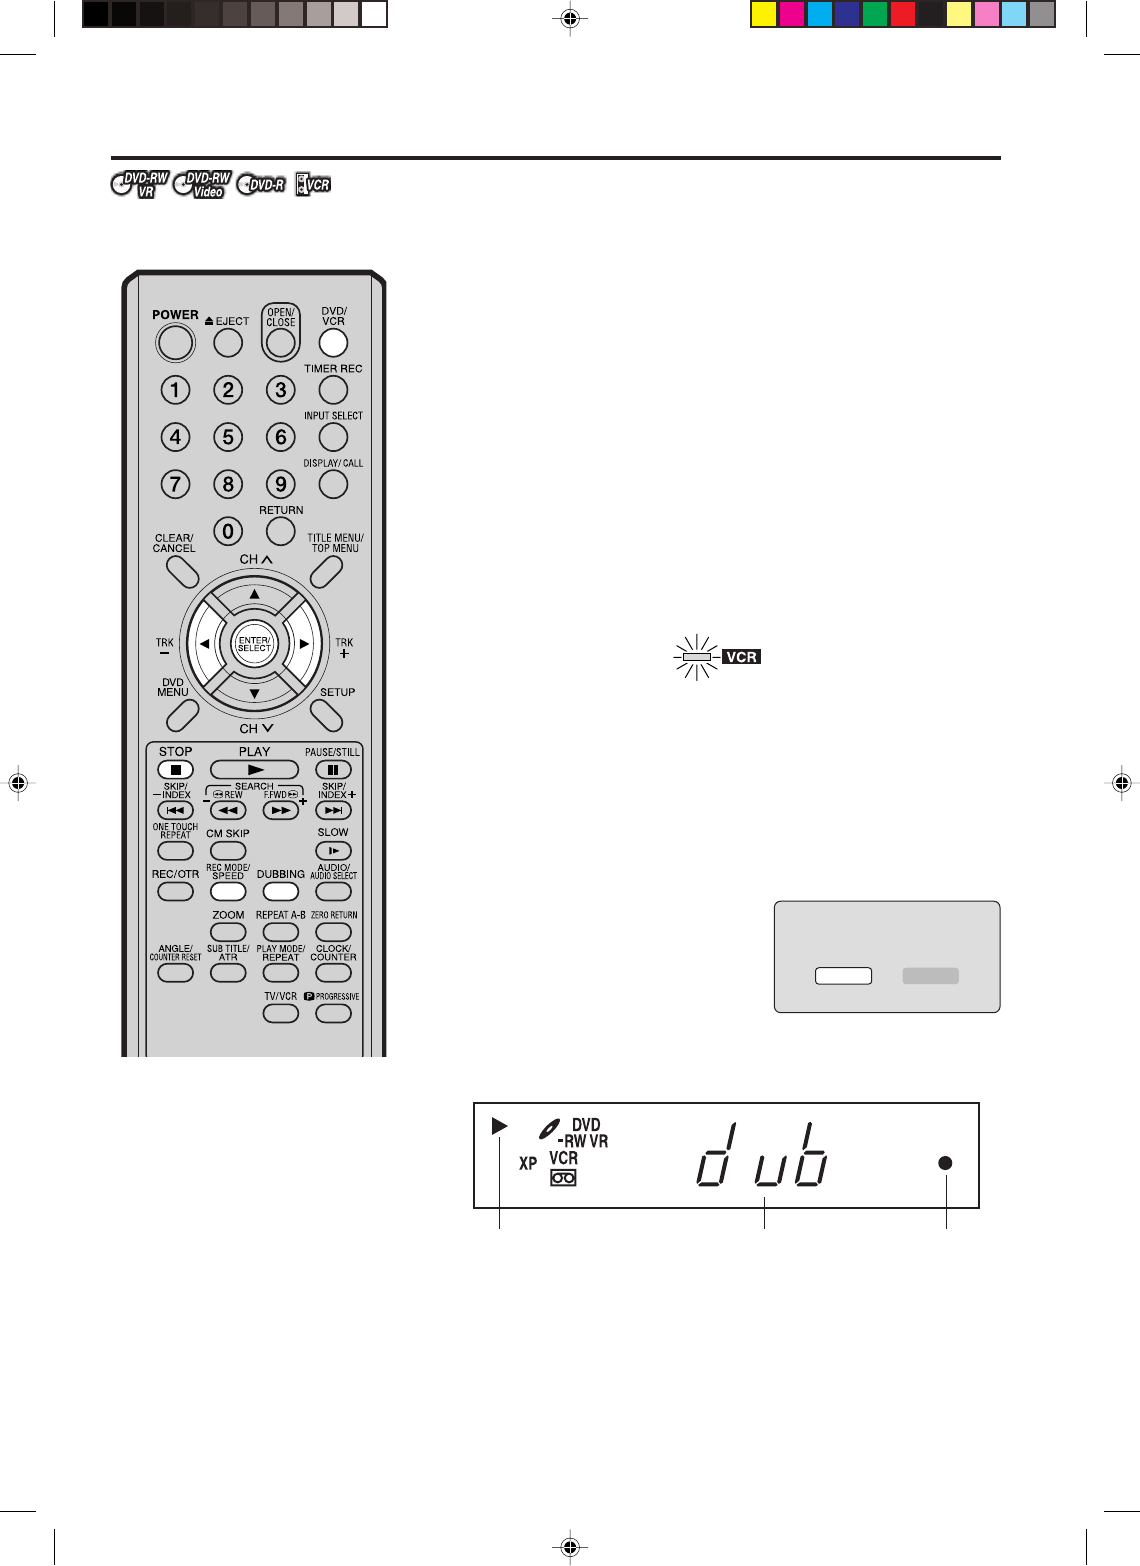
Dubbing a tape onto a disc
You can record video or audio on
a video tape onto a disc.
NOTES:
Dubbing cannot be carried out when
• the copy guard supporting tape is
used.
• disc protection is set.
• disc has no recording space.
Dubbing stops when
• the video tape is played back to
the end and stops.
• recording space becomes full.
Copyright
• The videos recorded from the TV
programs or movies can be used
only for your personal enjoyment
without permission of the copyright
holder.
Preparation:
• Turn ON the TV and set to the video input mode.
• Load a source video tape and a disc for recording.
• Set the erase-protection tab of the source video tape to prevent the
data from accidentally being erased.
• Confirm the disc space before operation.
1Press DVD/VCR to set this unit to DVD mode.
The DVD mode lamp comes on.
2Press REC MODE and select the recording mode.
• When REC MODE is pressed each time, “SP”, “LP”, “SLP” or
“XP” is selected in this order.
• The recording mode is indicated on both the TV screen and the
display window.
• For the details of the recording mode, see page 42.
3Press DVD/VCR and set the unit to VCR mode.
NOTE:
Confirm that the VCR mode lamp stays on.
4Press DUBBING.
• By pressing DUBBING, the DVD mode is selected.
• The VCR is waiting for playback and the DVD is waiting for re-
cording. Then the following message will appear.
5Select “YES” and press ENTER.
Dubbing starts.
• To stop dubbing, select “NO” and
press ENTER.
6In recording, VCR playback, DVD recording and “dub” (dubbing)
appear on the display window.
Video playback Dub DVD recording
TO CONFIRM DUBBING VCR -> DVD
YES NO
7To stop dubbing, press STOP.
VRDVD4005_P51-P68 03.8.20, 11:26 PM66
67
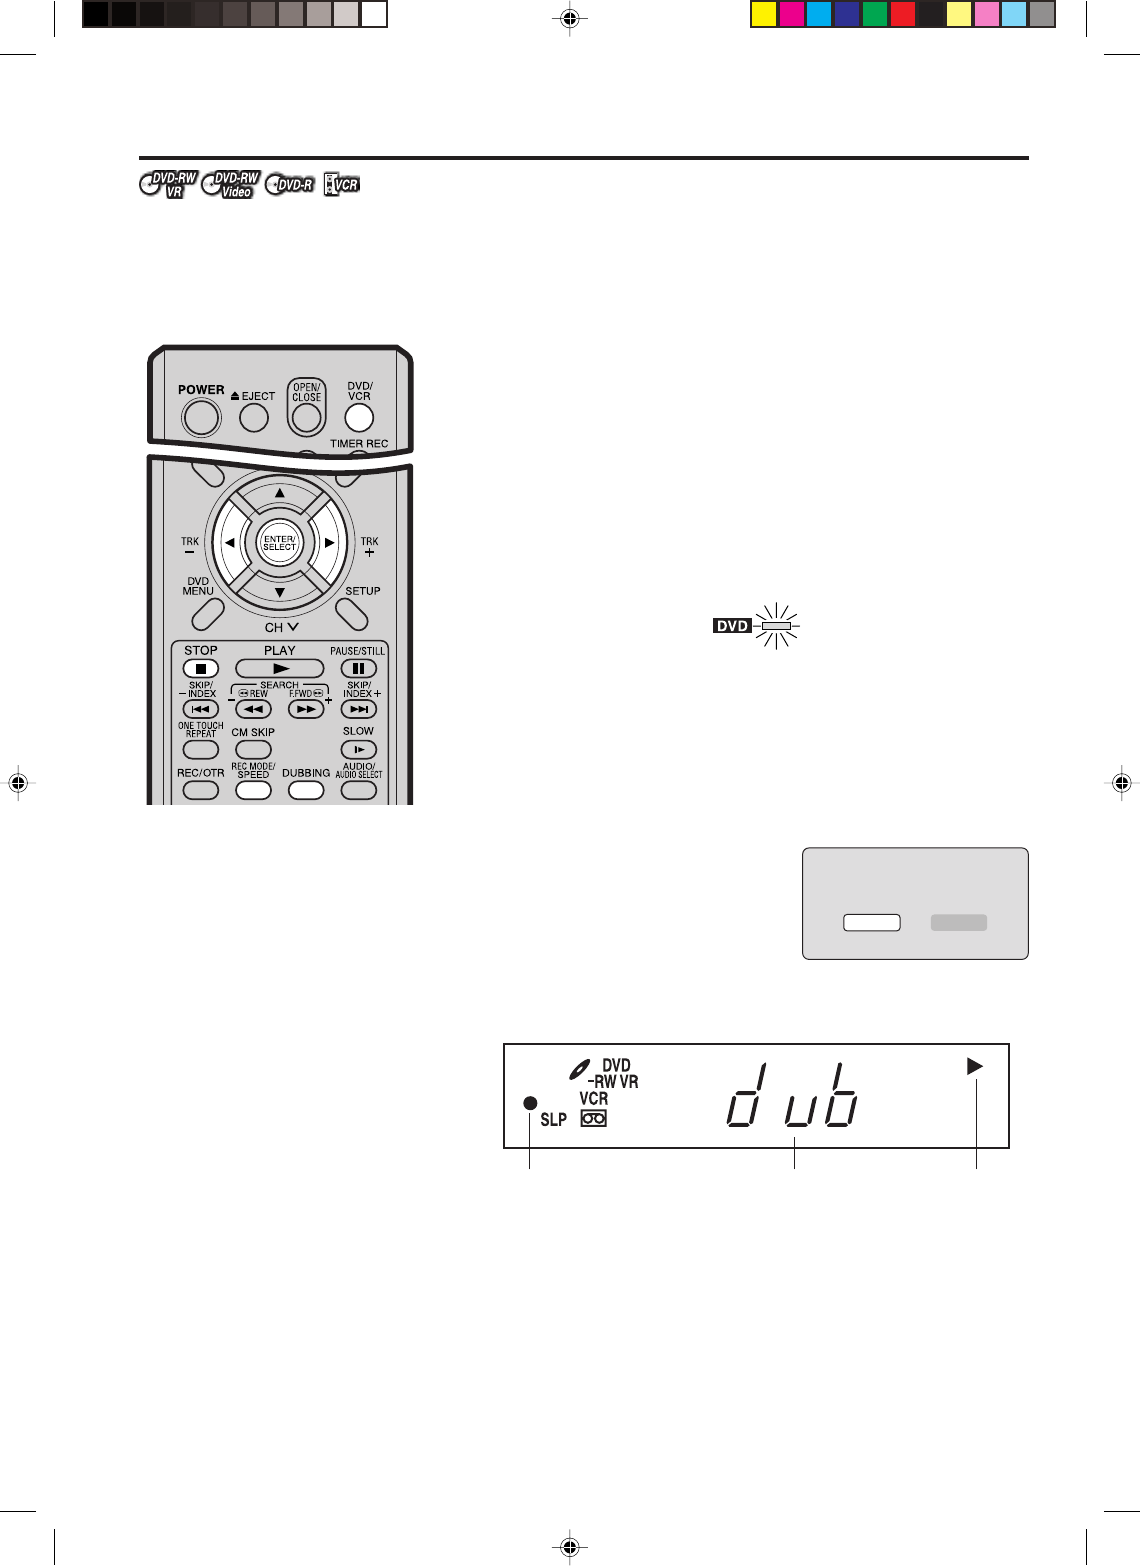
Dubbing a disc onto a tape
You can record video or audio on
a disc onto a video tape. When the
disc with a copy guard function
is used, a disordered image is re-
corded on the video tape.
NOTES:
Dubbing cannot be carried out when
• the copy guard supporting tape is
used.
Dubbing stops when
• the disc is played back to the end
and stops
• no recording space in vide tape
becomes remained.
Copyright
• The videos recorded from the TV
programs or movies can be used
only for your personal enjoyment
without permission of the copyright
holder.
Preparation:
• Turn ON the TV and set to the video input mode.
• Load a source disc and a video tape for recording.
• Confirm the remaining tape for recording before operation.
1Press DVD/VCR to set this unit to VCR mode.
The VCR mode lamp comes on.
2Press REC MODE/SPEED and select the recording mode.
• When REC MODE is pressed each time, “SP” or “SLP” is se-
lected.
• The recording mode is indicated on both the TV screen and the
display window.
• For the details of the recording mode, see page 38.
3Press DVD/VCR and set the unit to DVD mode.
NOTE:
Confirm that the DVD mode lamp stays on.
4Press DUBBING.
• The DVD is waiting for playback and the VCR is waiting for re-
cording. Then the following message appears.
5Select “YES” and press ENTER.
Dubbing starts.
• To stop dubbing, select “NO” and
press ENTER.
6In recording, DVD playback, VCR recording and “dub” (dubbing)
appear on the display window.
Video recording Dub DVD playback
TO CONFIRM DUBBING DVD->VCR
YES NO
7To stop dubbing, press STOP.
When DVD is played back, “ ” mark is displayed by the auto re-
sume function. By pressing STOP once more or removing the disc
from the unit, the auto resume condition is cancelled.
Dubbing only the special programs or the play list
When you want to dub only the special programs or the play list recorded on the disc, play back the program or the
play list you want to dub using the title menu, and immediately press one of DUBBING, STOP or PAUSE/STILL.
When you press DUBBING, proceed the steps 5 and after above, and when you press STOP or PAUSE/STILL,
proceed the steps 4 and after above. However, a few seconds at the first part of the video may not be recorded.
When playback of the program or the play list selected is completed, the dubbing stops.
VRDVD4005_P51-P68 03.8.20, 11:26 PM67
68
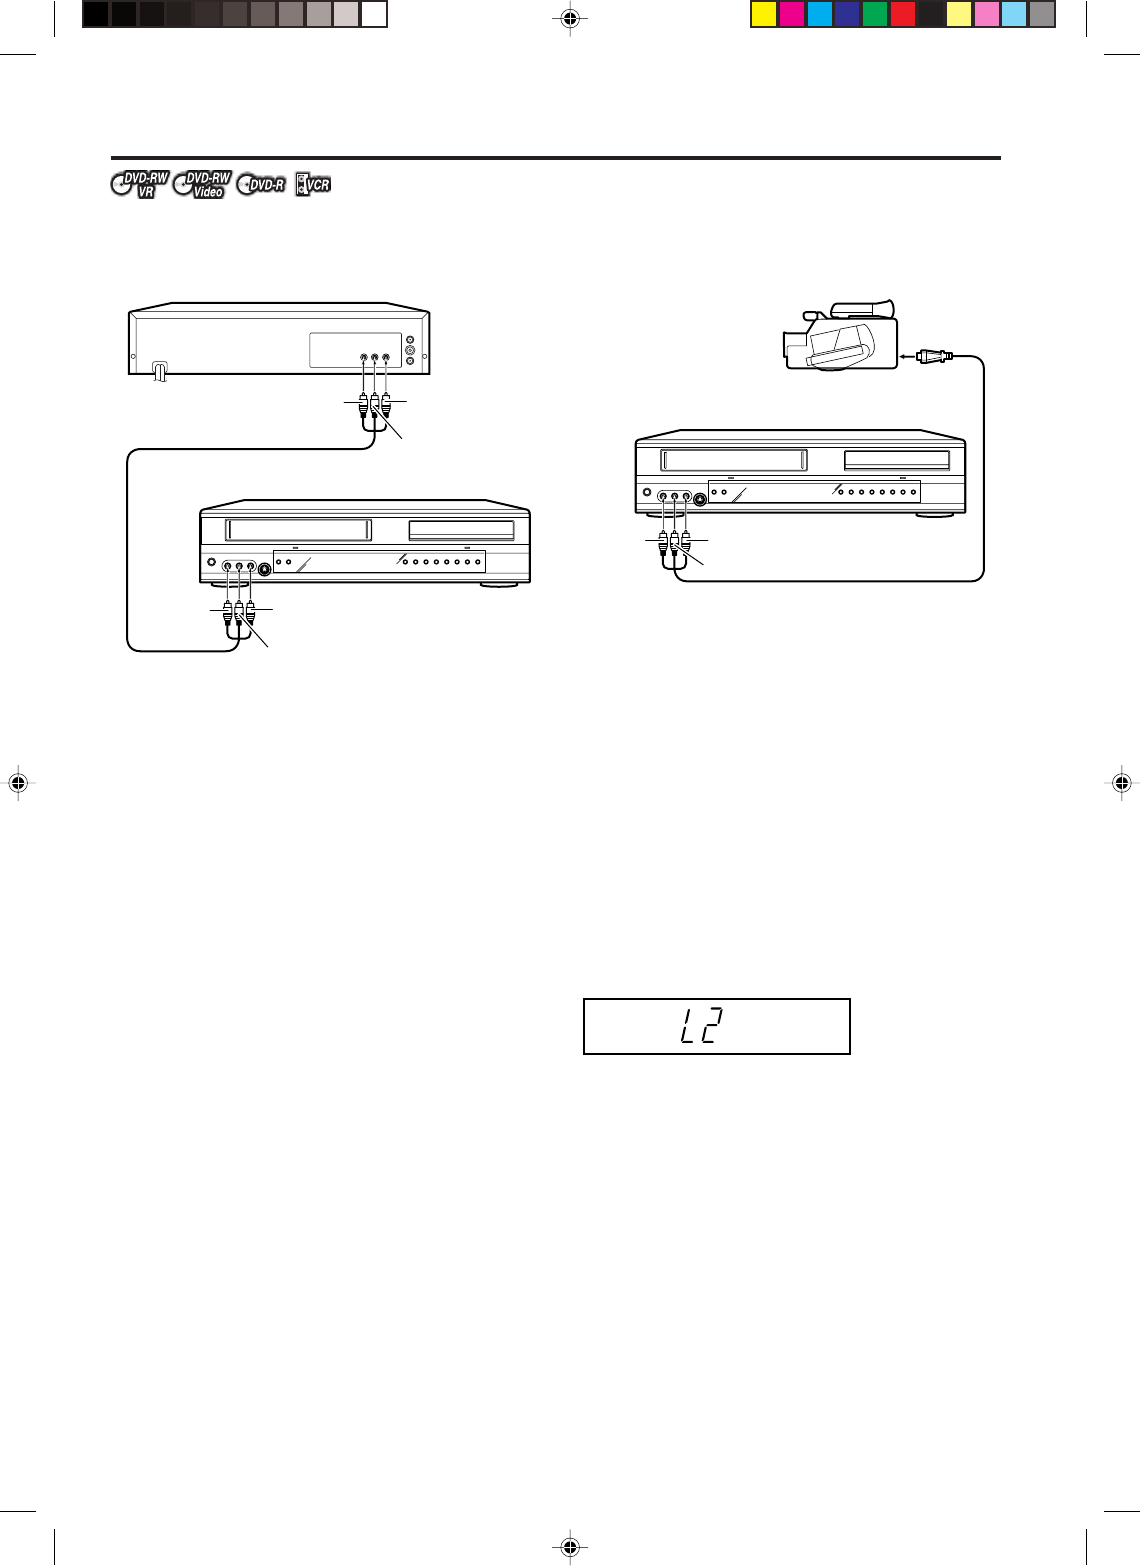
Dubbing video or audio by connecting other equipment
You can connect the other VCR or comcorder to dub video or audio.
Typical connection: When using this unit as a recording device
You can connect to the audio/video input jack (L1) at the rear side of
this unit. In addition, each S video input jack at the front and rear sides
and an S video output jack is at the rear side of the unit so that they
can be used for recording on the disc.
To Audio (R) IN
Recording VCR
Playback VCR
To Audio (L) IN
To Video IN
To Audio (R) OUT
To Audio (L) OUT
To Video OUT
AUDIO/VIDEO Cord (supplied)
To Audio (R) IN
AUDIO/VIDEO Cord (not supplied)
Recording VCR
Playback Camcorder
To Audio (L) IN
To Video IN
To AV Jack
NOTES:
• When this unit is used as a play-
back device, a mark or a charac-
ter displayed on the screen is also
dubbed as an image. When the
screen display is set to OFF, see
“Selecting the screen display” on
page 74.
• The videos recorded from the TV
programs or movies can be used
only for your personal enjoyment
without permission of the copyright
holder.
• The copy guard supporting tape
cannot be used for dubbing.
When a video is recorded using this unit
Preparation:
• Turn ON the TV and set the unit to the video input mode.
• Load a video tape where the erase-protection tab is not activated or
a disc with enough recording space.
• To record onto a video tape, set the unit to VCR mode, whereas to
record onto a disc, set it to DVD mode.
1Press INPUT SELECT and set the channel to L2 (or L1).
Confirm that L2 (or L1) appears on the display window.
2Press REC MODE/SPEED and select the recording mode.
VCR: SP or SLP (See page 38)
DVD: SP, LP, SLP or XP (See page 42)
3Press REC/OTR on the recording VCR, then press PAUSE/STILL.
4Press the PLAY button on the playback VCR or CAMCORDER,
then press the PAUSE/STILL button.
5Release the recording pause and the playback still simultaneously
to begin the duplicating process.
6To stop dubbing, press STOP.
VRDVD4005_P51-P68 03.8.20, 11:26 PM68
69
SETUP MENU
The SETUP MENU consists of several menus where
you can make various settings concerning lan-
guage, audio functions, and images. In addition, this
menu includes a clock, channel and other things
that require setting just after purchase.
For details of each menu, see the corresponding
section in this chapter.
Using the SETUP MENU
The following example shows the basic setting proce-
dure of the SETUP MENU. The remote control keys
that can be operated in the SETUP MENU mode is dis-
played at the bottom of the screen.
1Press SETUP while the DVD or video tape is
stopped.
The SETUP MENU screen will appear.
2Press or to choose the menu you want to
select and press ENTER.
The submenu screen of the selected menu will ap-
pear.
3Press or to choose the submenu you want to
select and press ENTER.
The setting screen of the selected submenu will
appear.
4Press or to choose the item you want to se-
lect and press ENTER.
Selectable items will be listed.
5Press or to choose the desired item and press
ENTER.
This completes the setting procedure.
•To return to the previous screen, press RETURN.
•To close the SETUP MENU, press SETUP.
NOTE:
For items that require different operations from the ba-
sic setting procedure, the setting procedure is described
in each individual section.
TIMER REC SET
SYSTEM SETUP
AV SETUP
REC SETUP
CH SETUP
OTHER
SETUP MENU
ENTER/
SELECT
RETURN SETUPENTER BACK END
SELECT
TIMER REC SET
SYSTEM SETUP
AV SETUP
REC SETUP
CH SETUP
OTHER
LANGUAGE
PARENTAL
CLOCK
DISC SETUP
OTHER
SETUP MENU
ENTER/
SELECT
RETURN SETUPENTER BACK END
SELECT
TIMER REC SET
SYSTEM SETUP
AV SETUP
REC SETUP
CH SETUP
OTHER
LANGUAGE
OSD LANGUAGE
DVD MENU
AUDIO
SUBTITLE
SETUP MENU
ENTER/
SELECT
RETURN SETUPENTER BACK END
INPUT A NUMBBER
SELECT
09
ENGLISH
ENGLISH
ENGLISH
ENGLISH
SET
TIMER REC SET
SYSTEM SETUP
AV SETUP
REC SETUP
CH SETUP
OTHER
LANGUAGE
OSD LANGUAGE
DVD MENU
AUDIO
SUBTITLE
SETUP MENU
ENTER/
SELECT
RETURN SETUPENTER BACK END
INPUT A NUMBBER
SELECT
09
ENGLISH
FRANCAIS
ESPANOL
OTHER
AUTOMATIC
OFF
ENGLISH
ENGLISH
ENGLISH
ENGLISH
SET
VRDVD4005_P69-P86 03.8.20, 11:27 PM69
70
Setting the language
You can choose the language of the menu screen,
DVD menu, DVD audio and subtitles.
Preparation:
• Turn ON the TV and set it to the video input mode.
• Select “LANGUAGE” from “SYSTEM SETUP”. For
the procedure, see steps 1 to 3 in “Using the SETUP
MENU”.
Selectable languages:
ENGLISH, FRANCAIS, ESPANOL
The language you have selected will play if it is re-
corded on the disc.
ORIGINAL
The unit will select the first priority language of each
disc.
OTHER
If you want to select another language, enter the lan-
guage code (see the Language code list on page ***).
NOTE:
If the selected language is not recorded on the disc,
the first-priority language is selected.
Subtitle
When several subtitles languages are recorded on DVD,
you can select the language to be used for the sub-
titles. The selected language remains effective after the
power is turned off or the disc is replaced.
Select “SUBTITLE” and select the menu language from
the list below.
Selectable languages:
ENGLISH, FRANCAIS, ESPANOL
The subtitle is displayed with the selected language
if it is recorded on the disc.
OTHER
If you want to select another language, enter the lan-
guage code (see the Language code list on page ***).
AUTO
• The unit will automatically select the same lan-
guage in the AUDIO setting.
• When the unit selects the same language as the
AUDIO setting, the subtitles will not appear dur-
ing playback.
• When you do not use the same language as the
AUDIO setting, the subtitles will appear during
playback.
OFF
Subtitles do not appear.
NOTE:
If the selected language is not recorded on the disc,
the first-priority language is selected.
OSD language
You can set the language for on screen display.
Select “OSD LANGUAGE” and select the language from
the list below.
Selectable languages:
ENGLISH, FRANCAIS, ESPANOL
DVD menu
When several menu languages are recorded on a DVD,
you can select the language to be used for the DVD
menu.
Select “DVD MENU” and select the language from the
list below.
Selectable languages:
ENGLISH, FRANCAIS, ESPANOL
The selected language is the first priority menu lan-
guage.
OTHER
Other languages can be selected (see the Language
code list on page ***).
Audio
When several audio languages are recorded on a DVD,
you can select the audio language to be played back.
The selected language remains effective after the power
is turned off or the disc is replaced.
Select “AUDIO” and select the audio language from the
list below.
TIMER REC SET
SYSTEM SETUP
AV SETUP
REC SETUP
CH SETUP
OTHER
LANGUAGE
OSD LANGUAGE
DVD MENU
AUDIO
SUBTITLE
SETUP MENU
ENTER/
SELECT
RETURN SETUPENTER BACK END
INPUT A NUMBBER
SELECT
09
ENGLISH
ENGLISH
ENGLISH
ENGLISH
SET
VRDVD4005_P69-P86 03.8.20, 11:27 PM70
71
Selecting and cancelling of parental control
Some discs are specified as not suitable for chil-
dren. This unit can prevent playback of such discs.
Preparation:
• Turn ON the TV and set it to the video input mode.
• Select “PARENTAL” from “SYSTEM SETUP”. For the
procedure, see steps 1 to 3 in “Using the SETUP
MENU”.
NOTE:
• The selected level will apply to operations executed
after this.
• The unit cannot restrict playback of some discs.
• Some discs may not be encoded with specific rating
level information though its disc jacket says “adult”.
Parental control will not work with those discs.
• Do not forget the password. If you forget the pass-
word, contact customer service.
Temporarily canceling parental control
Parental control can temporarily be cancelled with some
DVDs.
1Playback a DVD. (See page 23.)
2If the DVD disc has been designed to temporarily
cancel the rating level, the screen that follows the
“READING” screen will change. If you select “YES”
with the ENTER, the message “Your disc exceeds
parental control level 1.”(e.g.) will then appear.
3If you wish to cancel the set rating level tempo-
rarily, select “Parental Control Level” with or ,
then press ENTER. If the password has been se-
lected, the password input screen will appear.
Alternatively, if the password has not been set, play-
back will commence. If you don’t know (or have for-
gotten) the password, select “Cancel Picture”.
The setting screen will disappear. Press OPEN/
CLOSE to remove the disc.
4Use the numeric keys to input the password.
• To interrupt the input process, press RETURN.
5Press ENTER.
6Playback will commence if the entered password
was correct.
NOTE:
This temporary cancellation of the rating level will re-
main active until the disc is ejected.
When the disc is ejected, the original rating level will be
set again automatically.
Selecting parental control
Select PARENTAL and select the parental control level
from the list below.
Level Off: Parental control is turned off.
Level 1: DVD expressly for children can be
played back.
Level 2 to 7: DVD for general/children can be
played back.(DVDs with mature con-
tent are prohibited.)
Level 8: All DVD software can be played back.
Select from level 1 to level 8.
On a scale of 1- 8, “1” is the most restrictive.
To lock the selected parental control level
1To lock the selected parental control level, press
and choose “PASSWORD”.
2Use the numeric keys to input the 4-digit pass-
word.
• If you input a wrong number, press CANCEL.
• Be sure to remember this number!
3Press ENTER.
To cancel the locked parental control level
1Select “PASSWORD” shown in step 1 of the above
section and use the numeric keys to input the
password.
2Press ENTER.
The locked mark “ ” will change to an unlocked
mark “ ”.
Then, you can change the parental control level.
TIMER REC SET
SYSTEM SETUP
AV SETUP
REC SETUP
CH SETUP
OTHER
PARENTAL
PASSWORD
PARENTAL
SETUP MENU
ENTER/
SELECT
RETURN SETUPENTER BACK END
DELETE
8
- - - -
INPUT A NUMBBER
09
CLLAR/
CANCEL
----
change to
1234
Your disc exceeds
the parental control level 1.
Parental Control Level
Cancel Picture
/Enter/Return
VRDVD4005_P69-P86 03.8.20, 11:28 PM71
72
Setting the clock
The clock is set to the correct time automatically,
but it can also be set manually. The clock can be set
for daylight saving time and time zone.
Preparation:
• Turn ON the TV and set it to the video input mode.
• Select “Clock” from “SYSTEM SETUP”. For the pro-
cedure, see steps 1 to 3 in “Using the SETUP MENU”.
CLOCK SET (manually)
You can manually set the present time, date and year
with the remote control.
Ex. :Setting the clock to “10:20” September, 15th, 2003.
1Select “CLOCK SET” and press ENTER.
2Select the desired items using or (hour,
minute, date, month and year).
3Press or to set the value of the selected item.
• For the minutes, press or once to set the
time minute by minute, or hold down either of
buttons for several seconds to set the time in 10-
minute intervals.
4Repeat steps 2 and 3 to set the present time, date
and year, and press ENTER.
This completes clock time setting.
AUTO CLOCK
You can automatically set the clock by turning “ON” the
AUTO CLOCK function. The default setting is “ON” so
that the clock is automatically set as described in “Auto
clock setting” (See page**)
When you want to set the AUTO CLOCK function to
“OFF”, select “AUTO CLOCK”, press ENTER and se-
lect “OFF” from the list.
:01 01 / 09 / 0301
:01 01 / 09 / 0301 15
:20 15 / 09 / 0310
NOTE:
• If power is lost or the power plug is disconnected for
30 minutes or longer, the built-in clock is reset. In such
case, set the clock manually or set the AUTO CLOCK
function to “ON” and set the clock automatically.
STANDARD TIME (Time zone)
In the rare event that you live within the broadcast range
of two stations in two different time zones, the DVD/
VCR may recognize the wrong station for the Auto Clock
set. To correct the situation:
Select “STANDARD TIME” and select the time zone from
the list below.
Selectable time zones and correction times
ATLANTIC: GMT – 4 hours
(GMT: Greenwich Mean Time)
EASTERN: GMT – 5 hours
CENTRAL: GMT – 6 hours
MOUNTAIN:GMT – 7 hours
PACIFIC: GMT – 8 hours
ALASKA: GMT – 9 hours
HAWAII: GMT – 10 hours
AUTO: AUTO SET
NOTES:
• When shipped from the factory, the “TIME ZONE”
option is set to “AUTO”.
• After making the auto clock setting, in some cases
the clock may display another time zone. You can cor-
rect the clock by selecting your time zone setting
above.
• When the clock is not set or you set the clock manu-
ally, the time zone setting is not available.
DAYLIGHT SAVING TIME
You can set the clock to daylight saving time.
To select daylight saving time, select “DAYLIGHT SAV-
ING TIME” and select “ON”, while to cancel the day-
light saving time, select “OFF”.
ON: Forward one hour
OFF: Back one hour
NOTES:
• When you want to set daylight saving time, on the
first unday in April you set it to “ON”, and on the last
Sunday in October you set it to “OFF”.
• When shipped from the factory, the “DAYLIGHT SAV-
ING TIME” option is set to “OFF”.
• When the clock is not set, the daylight saving time
setting is not available.
• When there is no daylight saving time in your area,
always select “OFF”.
TIMER REC SET
SYSTEM SETUP
AV SETUP
REC SETUP
CH SETUP
OTHER
CLOCK
CLOCK SET
AUTO CLOCK
STANDARD TIME
DAYLIGHT SAVING TIME
ON
HAWAII
ON
02:24 11/08/03
SETUP MENU
ENTER/
SELECT
RETURN SETUPENTER BACK END
SET SELECT
09
INPUT A NUMBER
VRDVD4005_P69-P86 03.8.20, 11:28 PM72
73
Disc setup and operation
You can format, protect or finalize the disc.
Preparation:
• Turn ON the TV and set it to the video input mode.
• Select “DISC SETUP” from “SYSTEM SETUP”. For
the procedure, see steps 1 to 3 in “Using the SETUP
MENU”.
REFORMAT
You can format a recorded DVD-RW.
Check the content of the disc before format. If you for-
mat the disc, the recorded content of the disc will be
erased.
To format a DVD in the video mode, select “REFOR-
MAT AS DVD VIDEO”, and to format it in the VR mode,
select “REFORMAT AS DVD VR”.
The screen below will appear.
• When you select “Format” and press ENTER, format
will start.
• When you select “Cancel” and press ENTER, the DISC
SETUP screen will appear.
• If you want to name the disc, select “Edit label” and
press ENTER. The disc name input screen will ap-
pear.
For disc name input, see page**.
NOTES:
•You cannot format Ver. 1.0 DVD-RW and DVD-R.
•You cannot format a protected disc.
•You cannot watch video screen images during for-
mat.
NEW DISC FORMAT
If you insert a blank DVD-RW, the disc is automatically
format.
Select “NEW DISC FORMAT” and select the mode to
be used for automatic format from the list below.
VR: format the DVD in the VR mode.
Video: format the DVD in the video mode.
NOTE:
The automatic format is effective only for Ver. 1.1 or
later DVD-RW.
FINALIZE
When you finalize the disc recorded or edited by this
unit, you can playback the disc on other DVD players.
When “FINALIZE” is selected, the screen below will ap-
pear.
NOTES:
•The finalization time is between a few minutes and
about an hour. The required time varies according to
disc type or the amount of free space on the disc.
•You can record or edit a DVD-RW (in VR mode) final-
ized by this unit in the usual fashion, but you cannot
do these operations with a DVD-RW (in video mode)
or DVD-R.
•For a DVD-RW (in VR mode) which was finalized by
another unit, you can record or edit on this unit by
canceling the finalization.
•You cannot playback a disk recorded on VR mode on
a unit that does not support DVD-RW.
•Even if you finalize a disc in the video mode, the disc
cannot be played back in some DVD players.
•You cannot watch video screen images during final-
ization.
TIMER REC SET
SYSTEM SETUP
AV SETUP
REC SETUP
CH SETUP
OTHER
DISC SETUP
REFORMAT DVD VIDEO
REFORMAT DVD VR
BLANK FORMAT
FINALIZE
PROTECT DISC
UNDO FINALIZE
PROCEED
VR
PROCEED
PROCEED
PROCEED
PROCEED
SETUP MENU
ENTER/
SELECT
RETURN SETUPENTER BACK END
SELECT
Edit labe CancelFormat
default name
Format
Label
VRDVD4005_P69-P86 03.8.20, 11:28 PM73
74
Disc setup and operation / other (SYSTEM SETUP)
PROTECT DISC
You can protect a disc to prevent the content recorded
on it from being erased, edited or re-recorded.
Only DVD-RW (in VR mode) can be protected.
Select “PROTECT DISC” and select “ON” to protect the
disc.
To cancel the disc protection, select “OFF”.
NOTES:
• Some discs may require about 2 minutes for the pro-
tection process.
• You cannot format a disc where the disc protection is
“ON”.
UNDO FINALIZE
You can cancel the finalization of a DVD-RW (in video
mode) finalized by this unit and a DVD-RW (in VR mode)
finalized by another unit.
You cannot cancel the finalization for discs other than
above. You can record or edit on a disc whose finaliza-
tion has been cancelled.
Select “UNDO FINALIZE”, and the screen below will
appear.
• When you choose No and press “ENTER”, the previ-
ous screen will appear.
• When you choose Yes and press “ENTER”, the final-
ization will be cancelled.
NOTES:
• Some discs may require about ** minutes for the can-
celing finalization process.
• When the disc’s finalization cannot be cancelled, you
cannot choose “UNDO FINALIZE”.
You can turn the display window and screen dis-
play “ON” or “OFF”.
Preparation:
• Turn ON the TV and set it to the video input mode.
• Select “OTHER” from “SYSTEM SETUP”. For the pro-
cedure, see steps 1 to 3 in “Using the SETUP MENU”.
DIMMER (Turning the display window
“ON” or “OFF”)
Set the brightness of the display window from the front
panel of this unit.
Select “DIMMER” and select the display window status
from the list below.
AUTOMATIC: The window appears bright. When no
operation is carried out for a while, the
window will become dark to reduce
power consumption.
DIM: The window always appears dark.
OFF: The window display is turned OFF.
DISPLAY / CALL (Selecting the
screen display)
You can turn off the screen display of the clock or counter
that is output to the TV screen by this unit. Select “DIS-
PLAY/CALL”, and select “ON” or “OFF”.
ON: The screen display can appear.
OFF: Nothing but the SETUP MENU and error mes-
sages can be displayed.
Finalizing
19%
TIMER REC SET
SYSTEM SETUP
AV SETUP
REC SETUP
CH SETUP
OTHER
LANGUAGE
PARENTAL
CLOCK
DISC SETUP
OTHER
SETUP MENU
ENTER/
SELECT
RETURN SETUPENTER BACK END
SELECT
OTHER
DIMMER
DISPLAY/CALL
AUTOMATIC
ON
VRDVD4005_P69-P86 03.8.20, 11:28 PM74
75
Turning on the screen display
This section describes settings about movie play-
back.
Preparation:
•Turn ON the TV and set it to the video input mode.
•Select “AV SETUP 1” from “AV SETUP”. For the pro-
cedure, see steps 1 to 3 in “Using the SETUP MENU”.
TV SCREEN
You can select the TV screen size to suit the screen
image.
Select “TV SCREEN” and select screen size from the
list below.
4:3 Letter Box
Select this mode when connecting to a conventional
TV. When playing back a wide screen DVD disc, it
displays a wide picture with black bands at the top
and bottom of screen.
4:3 Pan Scan
It displays a wide picture across the whole screen
with left and right edges automatically cut off.
16:9 Wide
Select this mode when connecting to a wide-screen
TV.
A wide-screen picture is displayed in full size.
NOTE:
If the DVD disc is not formatted in the pan scan format,
it displays a 4:3 aspect ratio.
STILL MODE
You can set the type of image displayed on the TV
screen when the playback of the DVD is paused.
Select “STILL MODE” and select the image to be dis-
played from the list below.
AUTOMATIC
When the pause is maintained for a long time, the
image display will turn off. When you cancel the pause,
the movie plays back as usual.
STILL BY FRAME
An image is displayed on the screen from when the
unit is paused.
NOTE:
When the pause is maintained for a long time and the
same image has been displayed, the TV screen may
be fatally damaged. It is recommended to use the de-
fault setting (AUTOMATIC) as it is for the STILL MODE.
NO NOISE BACKGROUND
When you select a channel where the broadcast has
finished or no broadcast is set, the TV screen will auto-
matically appear blue.
The function above works when you select “NO NOISE
BACKGROUND” and select “ON” from the list. If you
don’t want to use this blue background function, select
“OFF”.
The default setting is “ON”.
EXTERNAL VIDEO INPUT
This unit comes with an S-video input terminal and pin
plug type (COMPOSITE) terminal as video input termi-
nals. If both terminals are used, the priority terminal
can be selected.
Select “EXTERNAL VIDEO INPUT” and select the mode
from the following list.
AUTOMATIC
The S-video input terminal has priority. This is the
default setting.
COMPOSITE VIDEO
The composite video input has priority.
TIMER REC SET
SYSTEM SETUP
AV SETUP
REC SETUP
CH SETUP
OTHER
AV SETUP 1
TV SCREEN
STILL MODE
NO NOISE BACKGROUND
EXTERNAL VIDEO INPUT
SETUP MENU
ENTER/
SELECT
RETURN SETUPENTER BACK END
4:3 Pan Sean
AUTOMATIC
ON
AUTOMATIC
SELECT
VRDVD4005_P69-P86 03.8.20, 11:28 PM75
76
This section describes image quality settings.
Preparation:
• Turn ON the TV and set it to the video input mode.
• Select “AV SETUP 2” in “AV SETUP”. For the proce-
dure, see steps 1 to 3 in “Using the SETUP MENU”.
BRIGHTNESS
You can control the brightness level of the image.
Select “BRIGHTNESS” and select the level from the
list below.
MAX:The image becomes brighter.
STD: The image is of standard brightness.
MIN: The image becomes darker.
DNR
You can adjust the digital noise reduction function that
reduces screen noise during playback.
Select “DNR” and select the level from the list below.
MAX: Uses the max. DNR effect.
STD: Uses a DNR effect at the middle level between
MAX and MIN.
MIN: Uses the min. DNR effect.
OFF: Default setting. DNR is not used.
Adjusting audio
This section describes audio settings.
Preparation:
•Turn ON the TV and set it to the video input mode.
•Select “AUDIO” from “AV SETUP”. For the procedure,
see steps 1 to 3 in “Using the SETUP MENU”.
DRC
DRC (Dynamic Range Control) enables you to control
the dynamic range so as to achieve a suitable sound
for your equipment.
Select “DRC” and select the level from the list below.
MAX: Full dynamic range is increased.
STD: Full dynamic range is maintained.
MIN: Dynamic range is reduced.
NOTES:
•This function works only during playback of Dolby
Digital recorded discs.
•The level of Dynamic Range Reduction may differ
depending on the DVD.
VIRTUAL SURROUND (Spatializer N-
2-2TM)
Sound that is not recorded in the surround mode will
be changed to artificial surround sound and output.
Select “VIRTUAL SURROUND” and select “ON” from
the list to activate the virtual surround function. To not
use the virtual surround, select “OFF”.
The default setting is “OFF”.
EXTERNAL AUDIO INPUT
The audio mode for the audio input terminal can be
selected between stereo or monaural.
Select “EXTERNAL AUDIO INPUT” and select from the
list below.
STEREO: The sound is treated as stereo sound
L CH: The sound is treated as the monaural
sound of the left channel.
R CH: The sound is treated as the monaural
sound of the right channel.
TIMER REC SET
SYSTEM SETUP
AV SETUP
REC SETUP
CH SETUP
OTHER
AUDIO
DRC
VIRTUAL SURROUND
EXTERNAL AUDIO INPUT
SAP
MAX
ON
STEREO
OFF
SETUP MENU
ENTER/
SELECT
RETURNENTER BACK END
SELECT
SETUP
TIMER REC SET
SYSTEM SETUP
AV SETUP
REC SETUP
CH SETUP
OTHER
AV SETUP 2
BRIGHTNESS
DNR
SETUP MENU
ENTER/
SELECT
RETURN SETUPENTER BACK END
STD
MIN
SELECT
VRDVD4005_P69-P86 03.8.20, 11:28 PM76

77
Turning on image quality control / recording
This section describes image quality settings.
Preparation:
•Turn ON the TV and set it to the video input mode.
•Select “REC SETUP”. For the procedure, see steps
1 to 3 in “Using the SETUP MENU”.
INITIALIZING REC TO
You can select the medium for recording that is first
displayed in the item “REC TO” on the advance timer
recording screen. The initial setting is “DVD”.
Select “FORMAT REC TO” and select the medium for
recording from the following list.
DVD: DVD is displayed in “REC TO”.
VCR: VCR is displayed in “REC TO”.
INITIALIZING REC MODE
You can select the recording mode that is first displayed
in the item “REC MODE” on the advance timer record-
ing screen. The initial setting is “SP”.
Select “INITIALIZING REC MODE” and select the re-
cording mode from the following list.
DVD: XP/SP/LP/SLP
VCR: SP/SLP
NOTE:
For the DVD recording mode, see page **. And for the
VCR recording mode, see page **.
AUTO CHAPTER
You can automatically make chapter marks on the DVD
to be recorded.
Select “AUTO CHAPTER” and select the interval be-
tween chapter marks from the list below.
OFF: The automatic chapter is not used.
5 MIN: The interval is set to 5 minutes
10 MIN: The interval is set to 10 minutes
15 MIN: The interval is set to 15 minutes.
30 MIN: The interval is set to 30 minutes.
SAP (Second Audio Program)
This unit is fitted with an SAP broadcast system that
enables you to switch to a second audio program while
viewing a selected channel.
This function applies only when the program is broad-
cast in multiple languages through the SAP broadcast
system.
Select “SAP” and select “ON” to use SAP, and to not
use it, select “OFF”.
Listening to SAP
When the unit is turned on or a channel selection is
made, make certain the letters “SAP” appear on the
screen. This means that “Second Audio Program” broad-
casting is available.
TIMER REC SET
SYSTEM SETUP
AV SETUP
REC SETUP
CH SETUP
OTHER
REC SETUP
INITIALIZE REC TO
INITIALIZE REC MODE
AUTO CHAPTER
SETUP MENU
ENTER/
SELECT
RETURN SETUPENTER BACK END
DVD
SP
OFF
SELECT
VRDVD4005_P69-P86 03.8.20, 11:28 PM77
78
Selecting reception channel / other
This DVD/VCR is equipped with a channel memory
feature that allows you to skip channels up or down
to the next channel set in memory, hence skip over
unwanted channels.
Before selecting channels, they must be pro-
grammed into the DVD/VCR’s memory. In addition
to normal VHF and UHF channels, this DVD/ VCR
can receive up to 113 Cable TV channels. To use
this DVD/VCR with an antenna, set the TV/CATV
menu option to the TV mode. When shipped from
the factory, this menu option is in the CATV mode.
Preparation:
•Turn ON the TV and set it to the video input mode.
•Select “CH SETUP”. For the procedure, see steps 1
to 3 in “Using the SETUP MENU”.
TV/CATV SELECT
Select “TV/CATV SELECT” and select “TV” or “CATV”.
TV: VHF/UHF channels
CATV: CABLE TV channels
AUTO CH MEMORY
The VCR can receive a maximum of 181 channels by
presetting the channels into memory.
When you select “AUTO CH MEMORY” and press EN-
TER.
The AUTO CH MEMORY function will be activated.
The channel display will count up and, when finished,
the screen returns to normal.
ADD/DELETE (channels)
You can add the channels you want or delete the chan-
nels you do not want manually.
Select “ADD/DELETE” and select “ADD” or “DELETE”
for each channel.
•Press or to select the channel.
The numeric keys can also be used for selection.
•When you want to delete the selected channel, use +
or – to select “DELETE” and press ENTER.
•When you want to use the selected channel, use + or
– to select “ADD” and press ENTER.
You can set the switching interval between played
back images in the slide show mode.
Preparation:
•Turn ON the TV and set it to the video input mode.
•Select “OTHER”. For the procedure, see steps 1 to 3
in “Using the SETUP MENU”.
JPEG INTERVAL
You can select the interval time for JPEG slide show.
Select “JPEG INTERVAL” and select the switching in-
terval between images from the list below.
OFF: The slide show mode is not used.
5 SEC: The interval is set to 5 seconds.
10 SEC: The interval is set to 10 seconds.
15 SEC: The interval is set to 15 seconds.
TIMER REC SET
SYSTEM SETUP
AV SETUP
REC SETUP
CH SETUP
OTHER
CH SETUP
TV/CATV SELECT
AUTO CH MEMORY
ADD/DELETE
CATV
EXECUTE
EXECUTE
SETUP MENU
ENTER/
SELECT
RETURNENTER BACK END
SELECT
SETUP
TIMER REC SET
SYSTEM SETUP
AV SETUP
REC SETUP
CH SETUP
OTHER
OTHER
JPEG INTERVAL
SETUP MENU
ENTER/
SELECT
RETURN SETUPENTER BACK END
OFF
SELECT
VRDVD4005_P69-P86 03.8.20, 11:28 PM78

79
Glossary
auto chapter
Feature that automatically makes chapter marks on
a DVD disk during recording.
auto clock
Feature that automatically sets the internal clock.
blue background
Feature that automatically changes unpleasant noise
images to a blue screen when a channel without a
broadcast or a channel on which the broadcast has
ended has been selected.
CATV
Acronym for Community Antenna Television
chapter
A section within a title is called a “chapter”.
CM Skip
When pressed during playback, playback jumps 30
sec ahead and resumes.
copy guard
Copyright protection signal. Software and broadcasts
that contain this signal cannot be recorded.
DNR
Acronym for Digital Noise Reduction. Technology that
reduces screen noise and flickering to produce clear
images.
DVD menu
Menu recorded on a DVD video that enables the user
to select subtitle language, dubbing, etc.
finalize
Operation that enables disks recorded or edited with
this player to be played back on other DVD players.
Interlaced scanning
Technology that alternately displays odd-numbered
scanning lines and even-numbered scanning lines.
Also called “525I”, “I” meaning “interlace”.
letter box
Feature that displays black bands above and below
the playback images during playback of a disk re-
corded in wide (16:9) format on a 4:3 TV connected
to this player.
pan scan
Feature that cuts the left and right edges of playback
images to a 4:3 size during playback of a disk re-
corded in wide (16:9) format on a 4:3 TV connected
to this player.
parental control
Some discs control viewing according to the age of
the viewer. A control level can be set for those types
of disks.
General parental control settings
Level 1: Adult disks and general disks (R-rated
disks included) cannot be played back.
Level 2 to 3: Adult disks and R-rated disks cannot
be played back.
Level 4 to 7: Adult disks cannot be played back.
(Level 4 to 7 disks contain content chil-
dren age 15 and younger may not see.)
Level 8: All disks can be played back without re-
striction.
play list
User-created list of titles based on each program.
Progressive scanning
Technology that simultaneously displays odd-num-
bered scanning lines and even-numbered scanning
lines from top to bottom. Also called “525P”, “P” mean-
ing “progressive”.
SETUP MENU
Menu that contains settings for various features of
this DVD player, such as recording and playback.
Timer-triggered recording is also set from the SETUP
MENU.
slideshow
Technique for flipping through and viewing many im-
ages (JPEG files).
subtitle language
Language used for subtitles of movies, etc. A DVD
can record subtitles in up to 32 languages. Viewers
can watch in a language of their choosing.
title
A program recorded on a disk is called a “title”.
title menu
Menu that lists titles and tracks recorded on the disk.
It is used for playback and disk editing.
top menu
Menu on a DVD video for selecting chapters for play-
back, subtitle language, etc. Some DVD videos call
this top menu “Title”.
track
A song on a music CD is called a “track”.
virtual surround
Technology that converts audio that is not recorded
in surround sound into audio that assimilates surround
sound.
VRDVD4005_P69-P86 03.8.20, 11:28 PM79

80
Discs
A-B Repeat Playback
Playback that repeats between two set points, A and
B.
One touch repeat
If ONE TOUCH REPEAT is pressed during playback,
playback returns to a point 10 sec earlier and re-
sumes.
region number
There is software that enables DVD playback in dif-
fering countries. The number of that kind of disk is
called the “region number”.
edit program
Feature that deletes unnecessary scenes of a title
recorded on a disk.
BROWSER screen
Screen that appears when TITLE MENU is pressed
during MP3, WMA or JPEG playback.
TRACK DATA screen
Screen that appears when TITLE MENU is pressed
during playback of a music CD.
VRDVD4005_P69-P86 03.8.20, 11:28 PM80
81
Enter the appropriate code number for the initial settings “DVD MENU”, “AUDIO” and/or “SUBTITLE” (see page 73).
Abkhazian 1112 Fiji 1620 Lingala 2224 Singhalese 2919
Afar 1111 Finnish 1619 Lithuanian 2230 Slovak 2921
Afrikaans 1116 French 1628 Macedonian 2321 Slovenian 2922
Albanian 2927 Frisian 1635 Malagasy 2317 Somali 2925
Amharic 1123 Galician 1722 Malay 2329 Spanish 1529
Arabic 1128 Georgian 2111 Malayalam 2322 Sundanese 2931
Armenian 1835 German 1415 Maltese 2330 Swahili 2933
Assamese 1129 Greek 1522 Maori 2319 Swedish 2932
Aymara 1135 Greenlandic 2122 Marathi 2328 Tagalog 3022
Azerbaijani 1136 Guarani 1724 Moldavian 2325 Tajik 3017
Bashkir 1211 Gujarati 1731 Mongolian 2324 Tamil 3011
Basque 1531 Hausa 1811 Nauru 2411 Tatar 3030
Bengali; Bangla 1224 Hebrew 1933 Nepali 2415 Telugu 3015
Bhutani 1436 Hindi 1819 Norwegian 2425 Thai 3018
Bihari 1218 Hungarian 1831 Oriya 2528 Tibetan 1225
Breton 1228 Icelandic 1929 Panjabi 2611 Tigrinya 3019
Bulgarian 1217 Indonesian 1924 Pashto, Pushto 2629 Tonga 3025
Burmese 2335 Interlingua 1911 Persian 1611 Turkish 3028
Byelorussian 1215 Irish 1711 Polish 2622 Turkmen 3021
Cambodian 2123 Italian 1930 Portuguese 2630 Twi 3033
Catalan 1311 Japanese 2011 Quechua 2731 Ukrainian 3121
Chinese 3618 Javanese 2033 Rhaeto-Romance2823 Urdu 3128
Corsican 1325 Kannada 2124 Romanian 2825 Uzbek 3136
Croatian 1828 Kashmiri 2129 Russian 2831 Vietnamese 3219
Czech 1329 Kazakh 2121 Samoan 2923 Volapük 3225
Danish 1411 Kirghiz 2135 Sanskrit 2911 Welsh 1335
Dutch 2422 Korean 2125 Scots Gaelic 1714 Wolof 3325
English 1524 Kurdish 2131 Serbian 2928 Xhosa 3418
Esperanto 1525 Laothian 2225 Serbo-Croatian 2918 Yiddish 2019
Estonian 1530 Latin 2211 Shona 2924 Yoruba 3525
Faroese 1625 Latvian, Lettish 2232 Sindhi 2914 Zulu 3631
Language Name Code Language Name Code Language Name Code Language Name Code
Language code list
VRDVD4005_P69-P86 03.8.20, 11:28 PM81

82
VRDVD4005_P69-P86 03.8.20, 11:28 PM82

83
SYMPTOMS POSSIBLE SOLUTIONS
•Make sure the power cord is plugged in.
•Try another AC outlet.
•Power is off, check fuse or circuit breaker.
•Unplug unit, then plug it back in.
•Select the DVD or VCR mode before operating.
•Antenna connection is not correct or antenna cable is discon-
nected.
•The video channel is not in the correct position or the TV is not
set to the video channel 3 or 4.
•Check the unit is connected correctly.
•The video input selector of the TV is not set to VIDEO. Set to
VIDEO (or equivalent).
•Channel is set to the external mode.
•Check the unit is connected correctly.
•Check the input selector of the amplifier is set properly.
•The unit is in the Special playback mode.
•Aim at the remote control at the remote sensor.
•Operate within Approx. 5 Meters or reduce the light in the room.
•Clear the path of the beam.
•The batteries are weak. Replace the batteries.
•Check the batteries are inserted correctly.
•Check all CATV connections.
•Station or CATV system problems, try another station.
DVD/VCR does not operate.
No picture.
No sound.
The remote control does not func-
tion.
No CATV reception
Problems and troubleshooting
Use the following check list for troubleshooting when you have problems with your unit. Consult your local dealer or
service outlet if problems persist.
Be sure all connections are properly made when using with other units.
DVD/VCR
PAGE
5
–
–
5
18,34
12~15
18
12~17
–
–
12~17
–
24,36
11
14,15
DVD
•Select proper language in the menu options.
•No disc is inserted.
•The disc may be dirty. Clean up the disc.
•The unit cannot play DVD-ROMs, etc.
•Some discs may not do some of the functions.
Display is not shown in your lan-
guage.
Playback doesn’t start.
Stopping playback, search, slow-
motion play, repeat play, or program
play, etc. cannot be performed.
VCR
•The erase prevention tab of the video cassette is broken off.
•The unit is in the external input mode.
•The time is not set correctly.
•The recording start/end time is not set correctly.
•TIMER REC has not been pressed ( is not lit).
•Tracking adjustment beyond range of automatic tracking circuit.
Try Manual tracking adjustment.
•Video heads are dirty.
•The tape is worn or damaged.
TV recording does not work.
Timer recording does not work.
Noise bars on screen.
22,26
19
29
29
24
55
–
34
35
33
33
–
VRDVD4005_P69-P86 03.8.20, 11:28 PM83
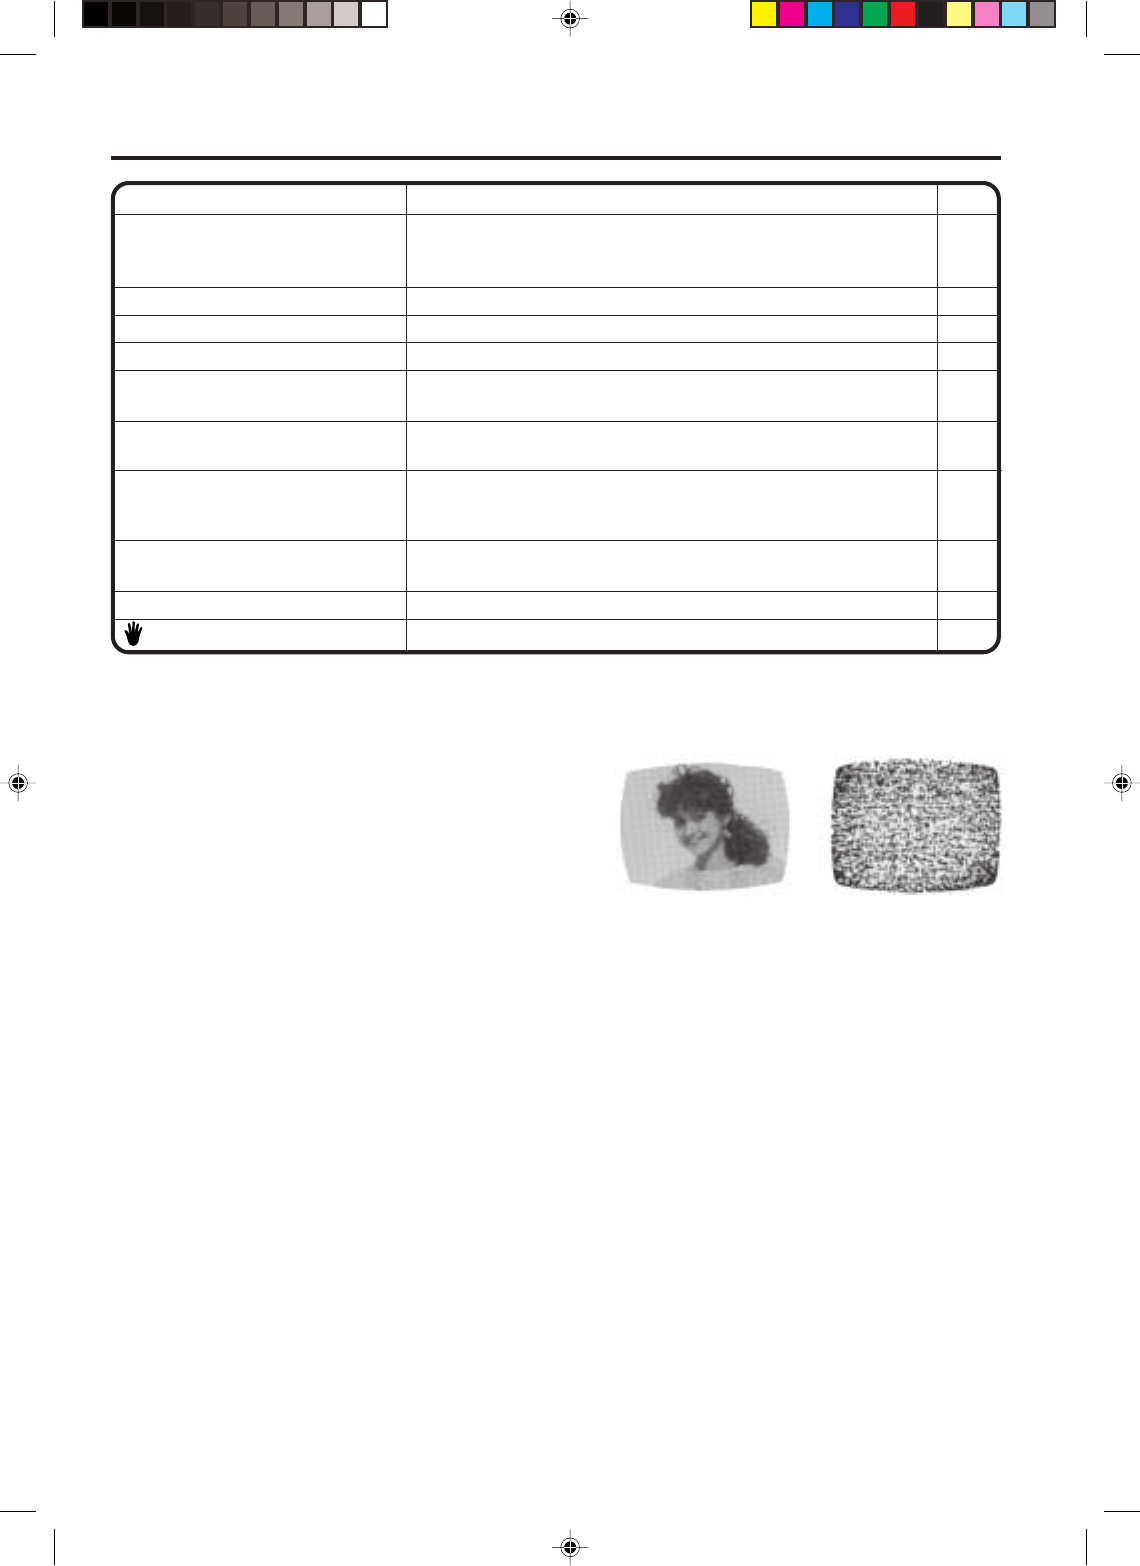
84
Problems and troubleshooting / Video head cleaning
Video head cleaning
Video head clogging
The video heads are the means by which the DVD/VCR reads
the picture from the tape during playback. In the unlikely event
that the heads become dirty enough to be clogged, no picture
will be played back. This can easily be determined if, during
playback of a known good tape, there is good sound, but no
picture (picture is extremely snowy). If this is the case, have the
DVD/VCR checked by qualified service personnel.
NOTES: •DO NOT ATTEMPT TO CLEAN THE VIDEO HEADS OR SERVICE THE UNIT BY REMOVING THE
REAR COVER.
•Video heads may eventually wear out and should be replaced when they fail to produce clear pictures.
•To help prevent video head clogging, use only good quality VHS tapes. Discard worn out tapes.
SYMPTOMS POSSIBLE SOLUTIONS PAGE
No picture, or the screen is blurred
or divided into two parts.
No 4:3 (16:9) picture
No on-screen display
No surround sound
The unit or remote operation key is
not functioning.
Playback does not start when the
title is selected.
Audio soundtrack and/or subtitle
language is not changed when you
play back a DVD.
No subtitle
Angle cannot be changed.
appears on the screen.
•The S-VIDEO/COMPONENT selecter is not set correctly.
•The progressive scanning mode is active through the unit is
connected to a TV via the VIDEO OUT jack.
•The setup does not match your TV.
•Select Display On.
•The setup does not match your stereo system.
•Turn off the unit and unplug the AC power cord for several min-
utes, then replug it.
•Check the Parental setup.
•Multilingual language is not recorded on the DVD disc.
•Some discs have no subtitles.
•Subtitles are cleared. Press SUB TITLE.
•Multi-angles are not recorded on the DVD disc.
•The function is prohibited with the unit or the disc.
16
52
49
50
17
–
44
47,48
42,47
43
–
Snowy PictureGood Picture
VRDVD4005_P69-P86 03.8.20, 11:28 PM84

Æ Registered Trademark /
TM
Trademark /
SM
Service Mark of Sears, Roebuck and Co.
Æ Marca Registrada /
TM
Marca de F·bri ca /
SM
Marca de Servicio de Sears, Roebuck and Co.
MC
Marque de commerce /
MD
Marque dÈposÈe de Sears, Roebuck and Co. © Sears, Roebuck and Co.
Get it fixed, at your home or ours!
Your Home
For repair
–
in your home
–of all major brand appliances,
lawn and garden equipment, or heating and cooling systems,
no matter who made it, no matter who sold it!
For the replacement parts, accessories and
owner’s manuals that you need to do-it-yourself.
For Sears professional installation of home appliances
and items like garage door openers and water heaters.
1-800-4-MY-HOME
®
(1-800-469-4663)
Call anytime, day or night
(U.S.A. and Canada)
www.sears.com www.sears.ca
Our Home
For repair of carry-in items like vacuums, lawn equipment,
and electronics, call or go on-line for the location of your nearest
Sears Parts & Repair Center.
1-800-488-1222
Call anytime, day or night (U.S.A. only)
www.sears.com
To purchase a protection agreement (U.S.A.)
or maintenance agreement (Canada) on a product serviced by Sears:
1-800-827-6655
(U.S.A.)
1-800-361-6665
(Canada)
Para pedir servicio de reparación
a domicilio, y para ordenar piezas:
1-888-SU-HOGARSM
(1-888-784-6427)
Au Canada pour service en français:
1-800-LE-FOYER
MC
(1-800-533-6937)
www.sears.ca
03/09
Printed in Thailand
K
VRDVD4005_P69-P86 03.8.20, 11:28 PM86