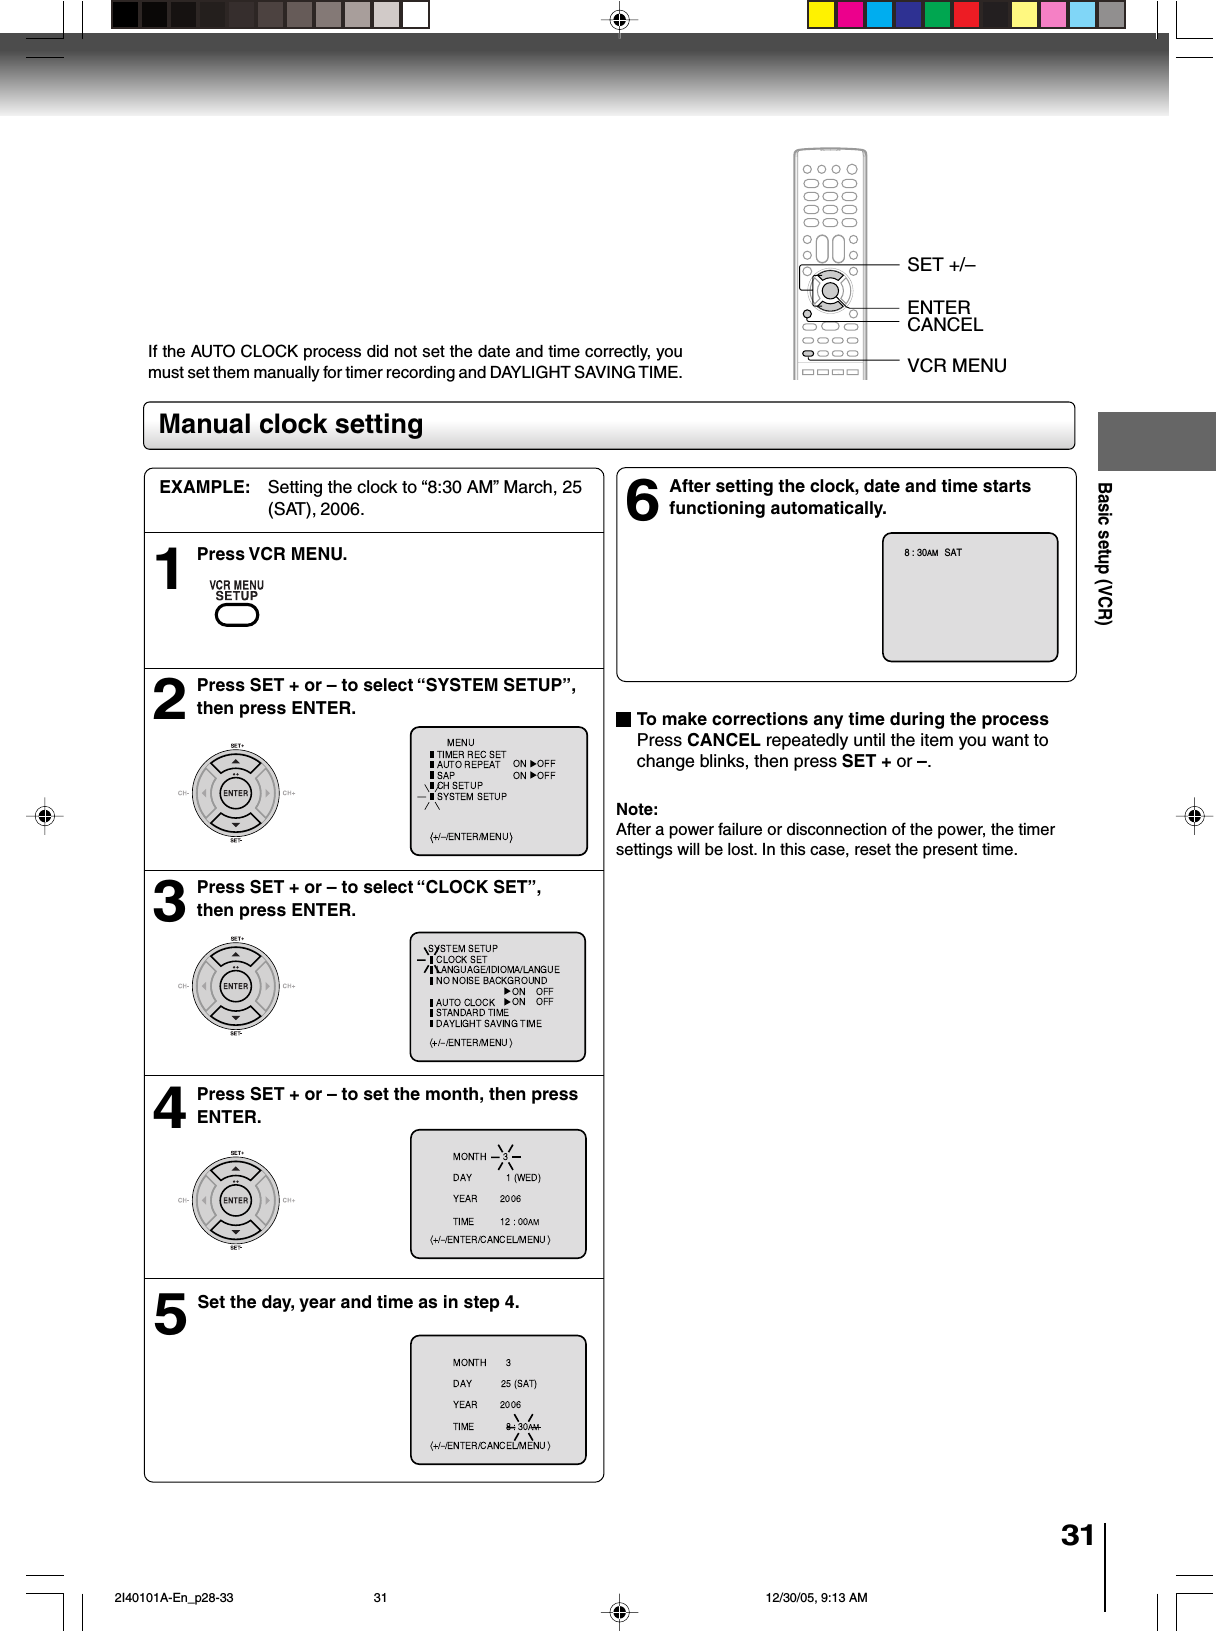
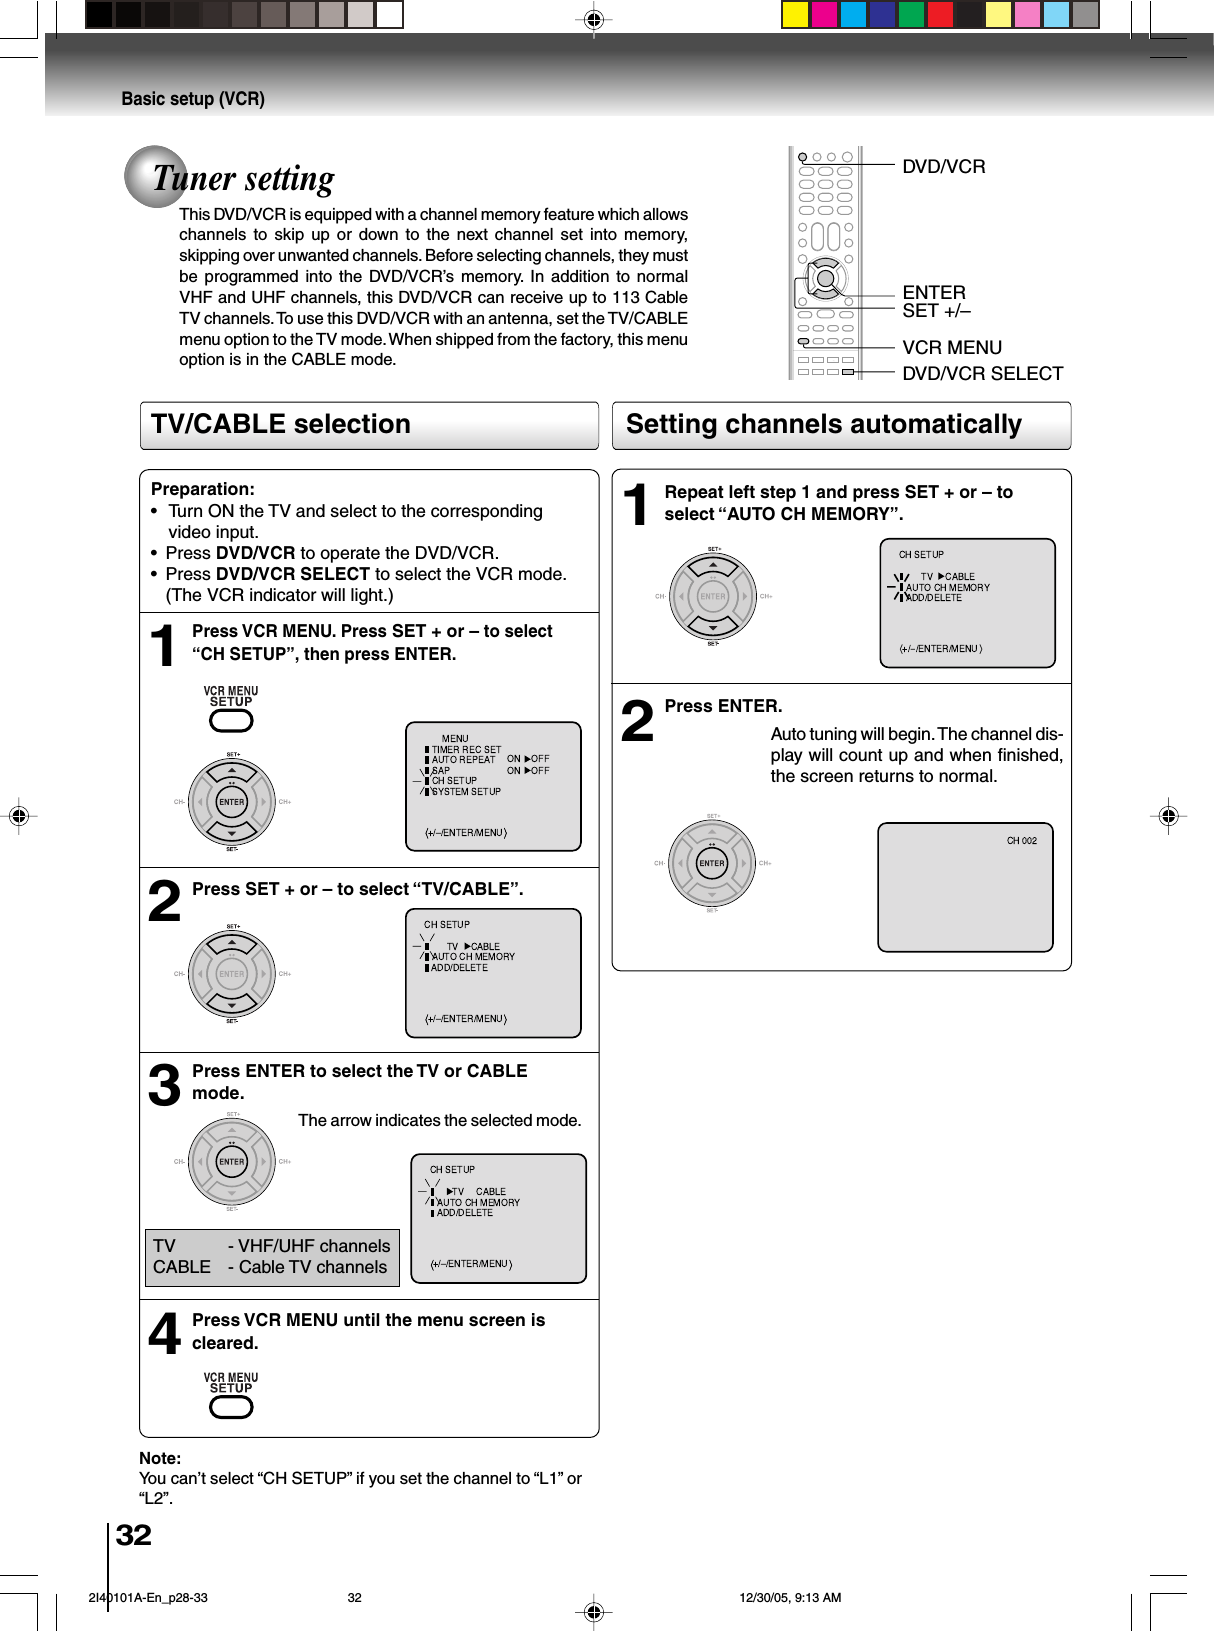
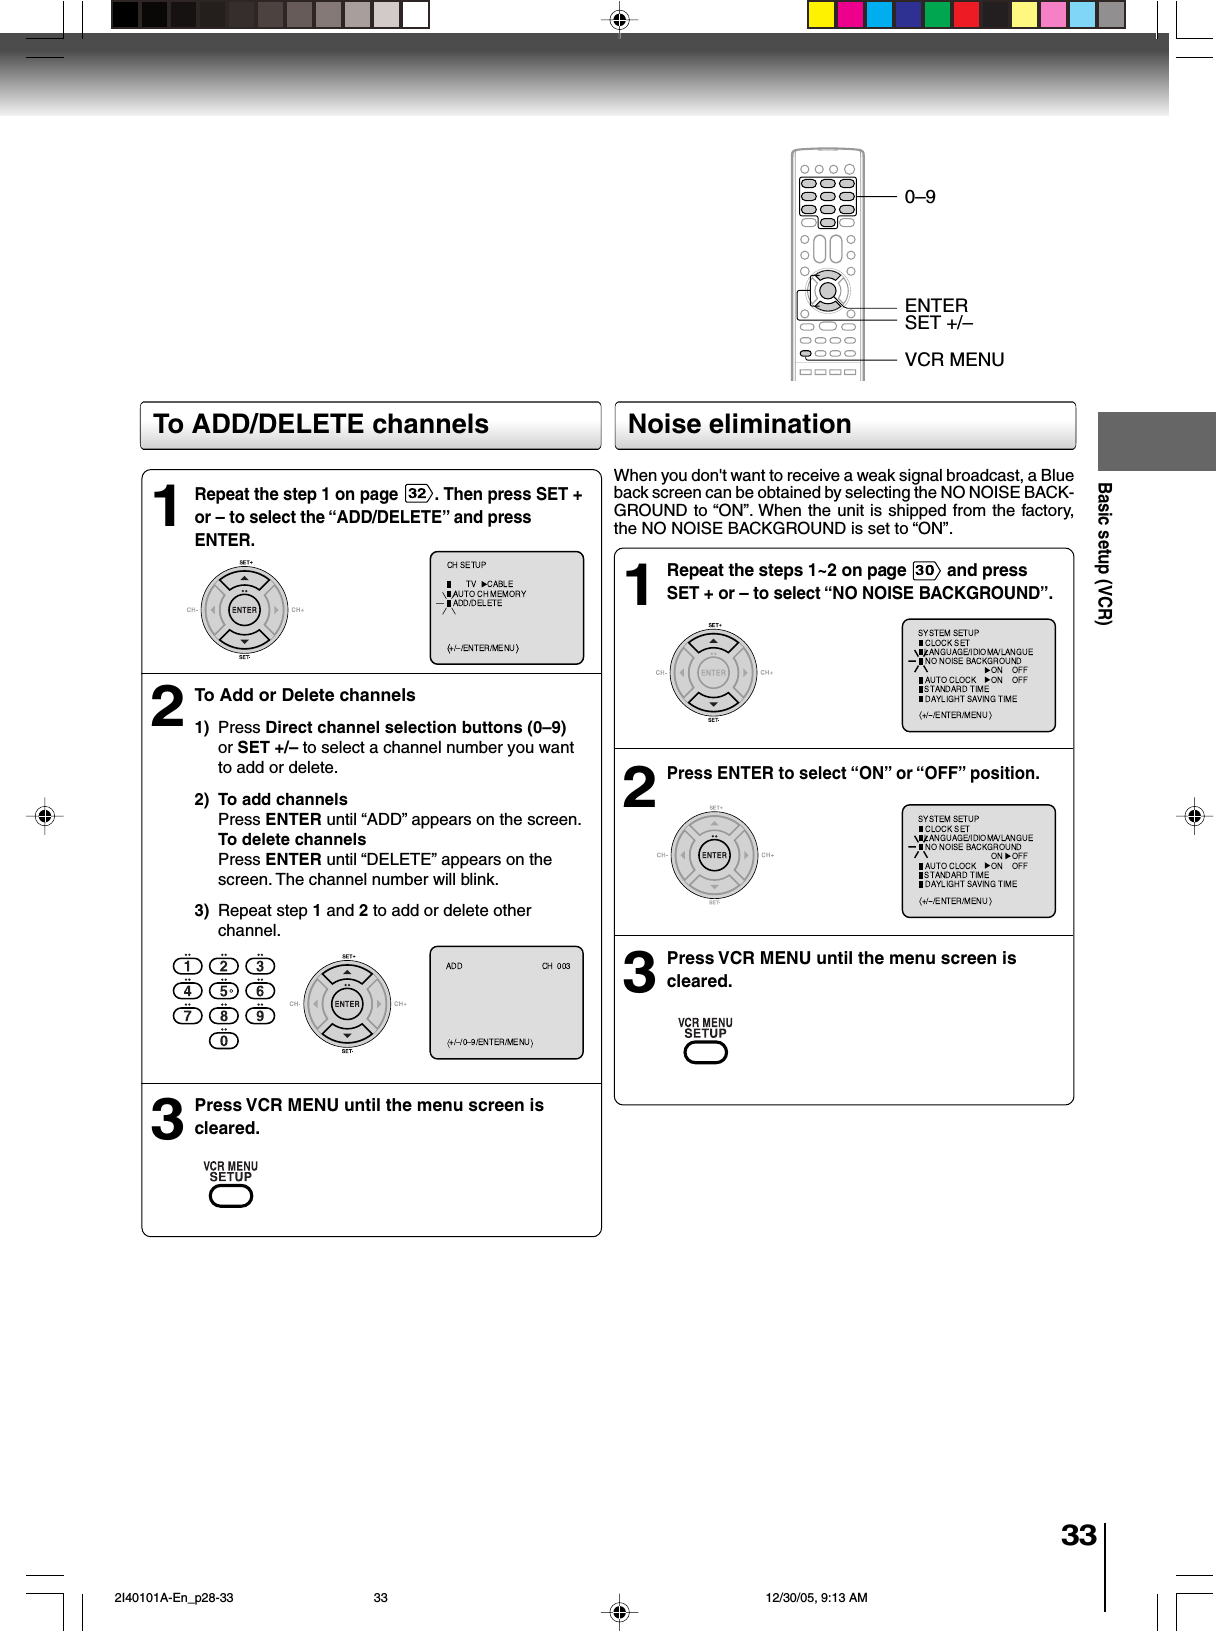
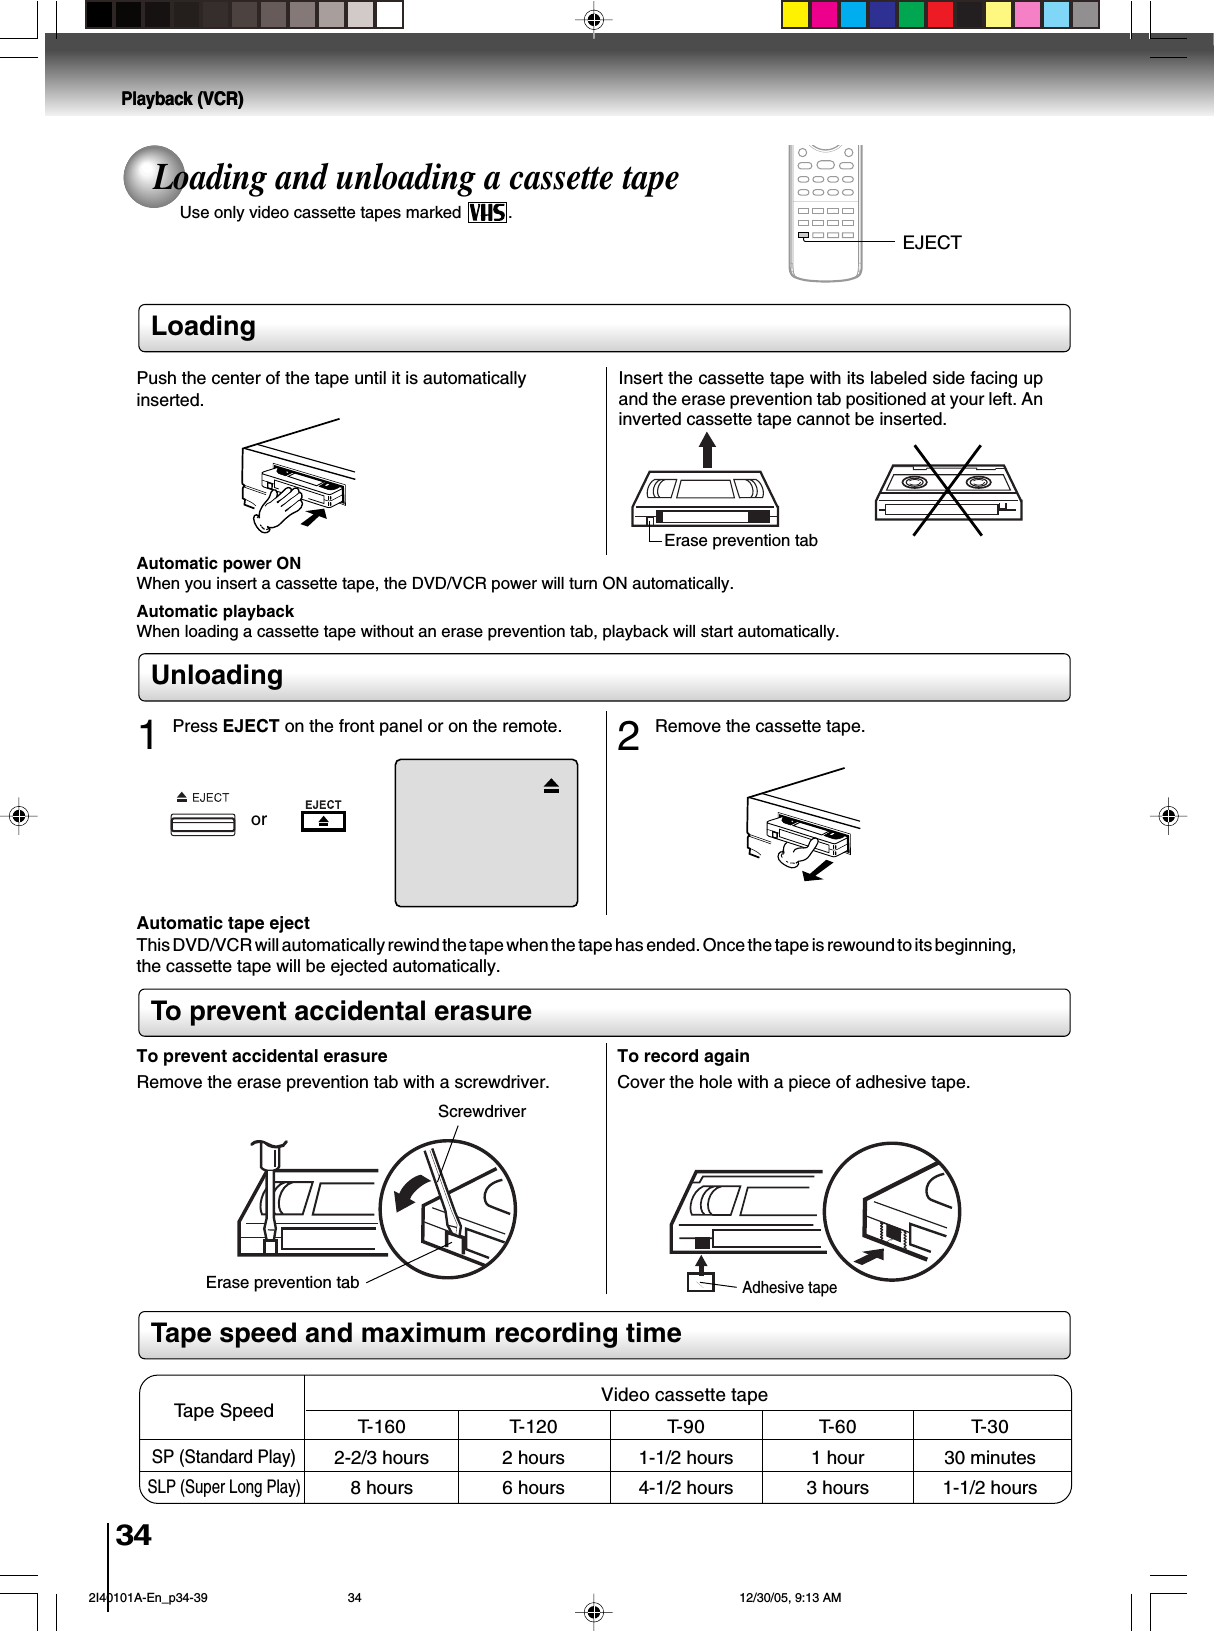
ORION ELECTRIC M2I4A DVD / VCR TV Interface Device User Manual 2I40101A En cov
ORION ELECTRIC CO., LTD. DVD / VCR TV Interface Device 2I40101A En cov
UserManual.wiki
>
ORION ELECTRIC
>
M2I4A User Manual
>
User Manual 1
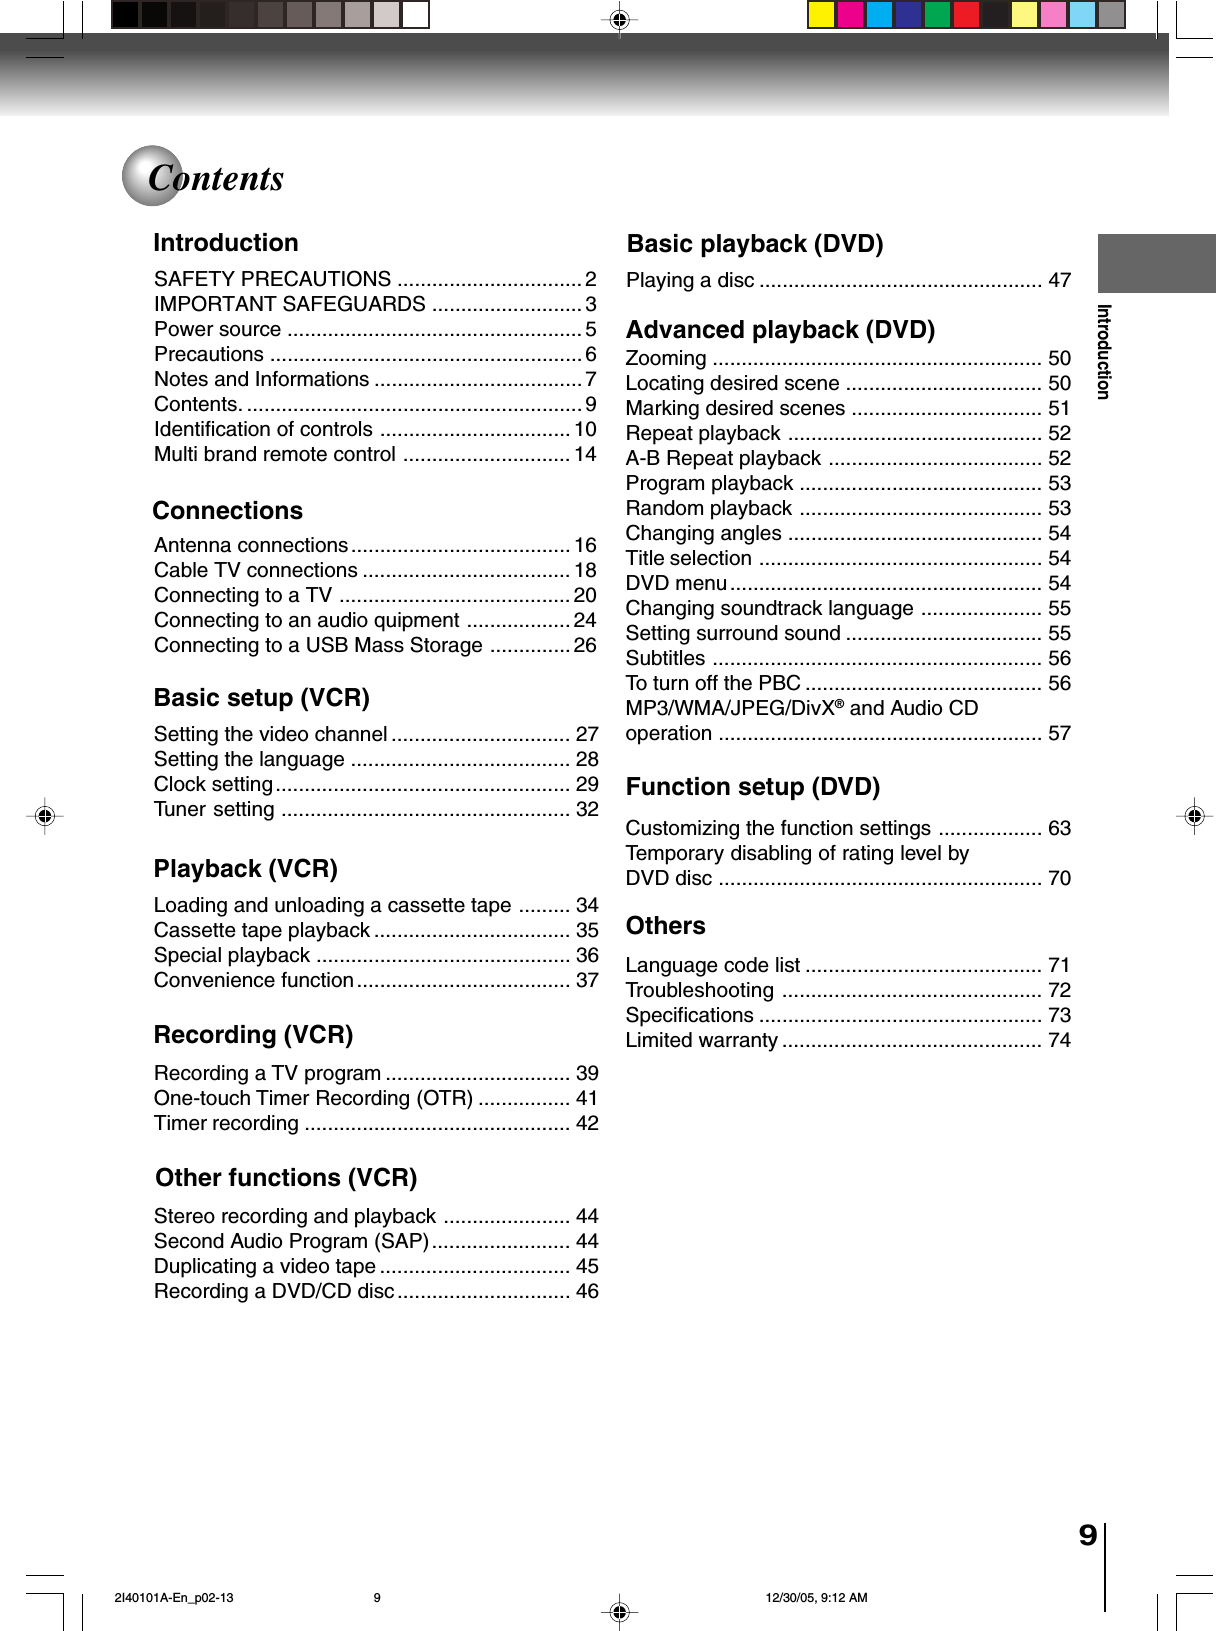
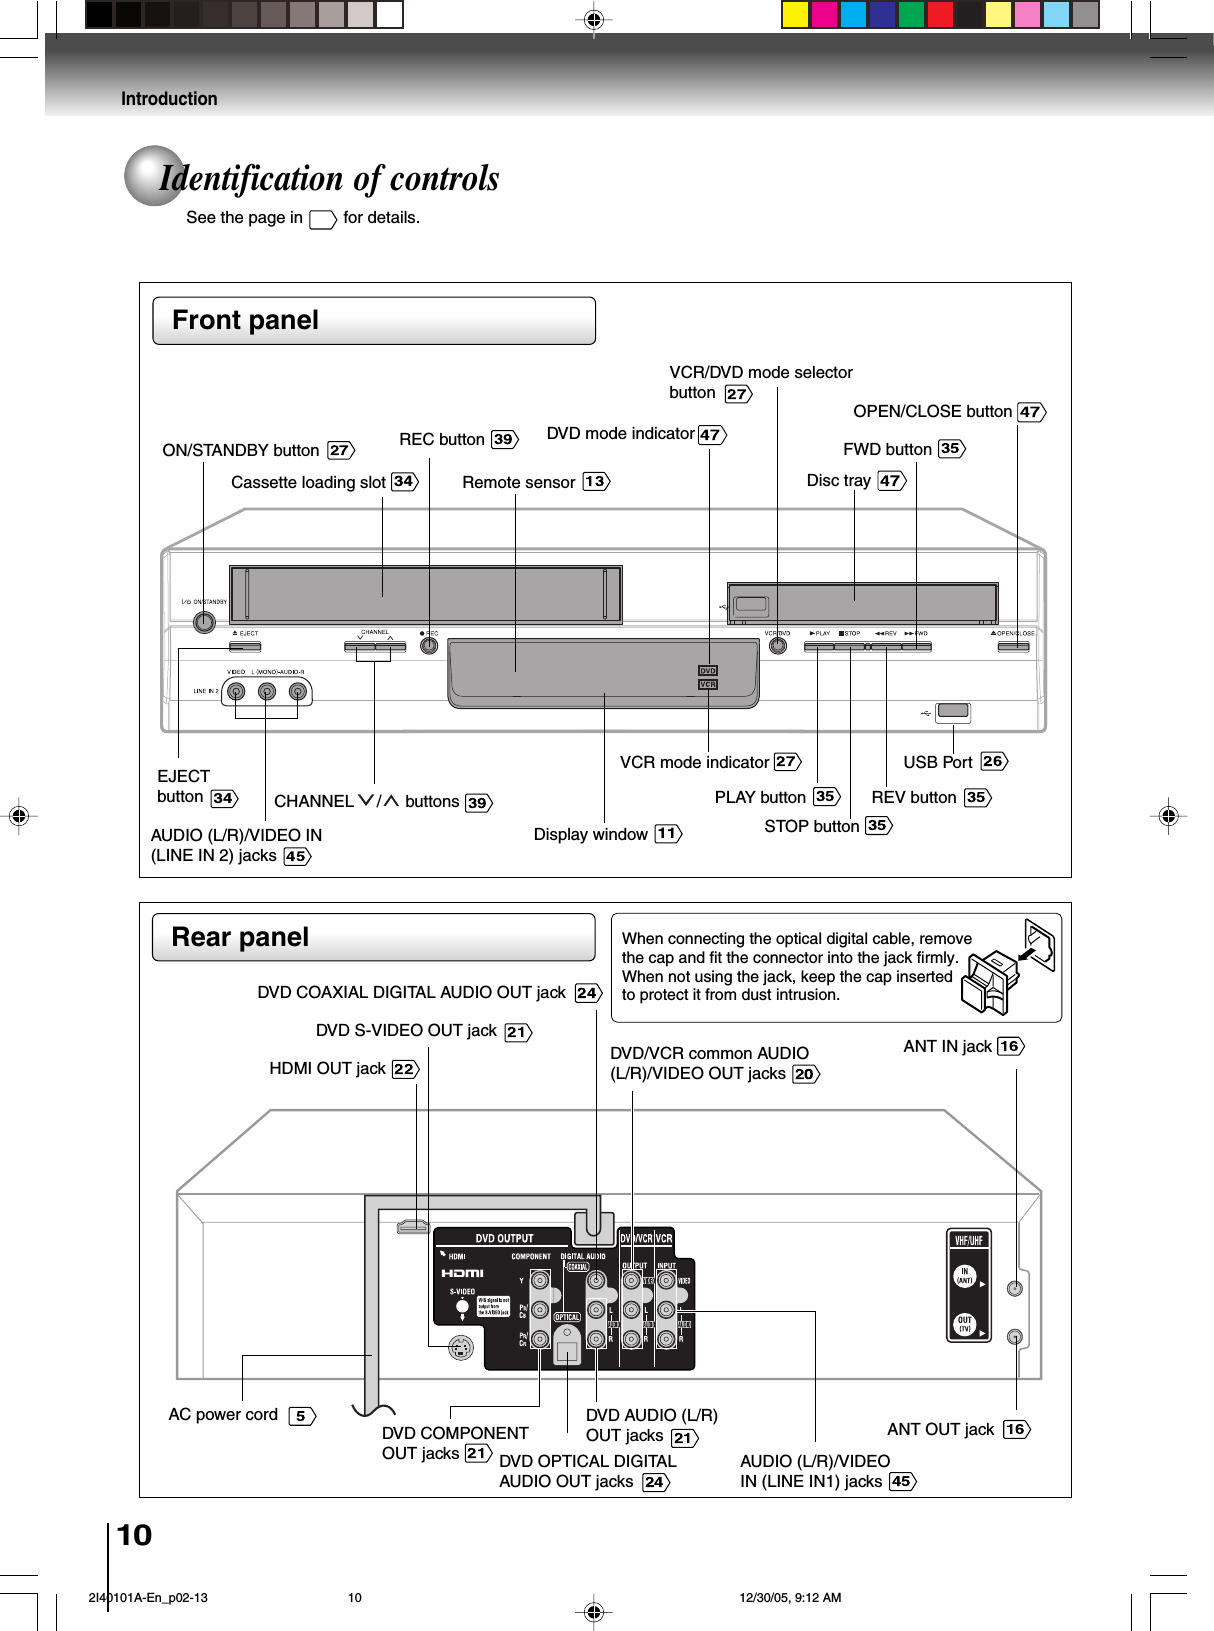
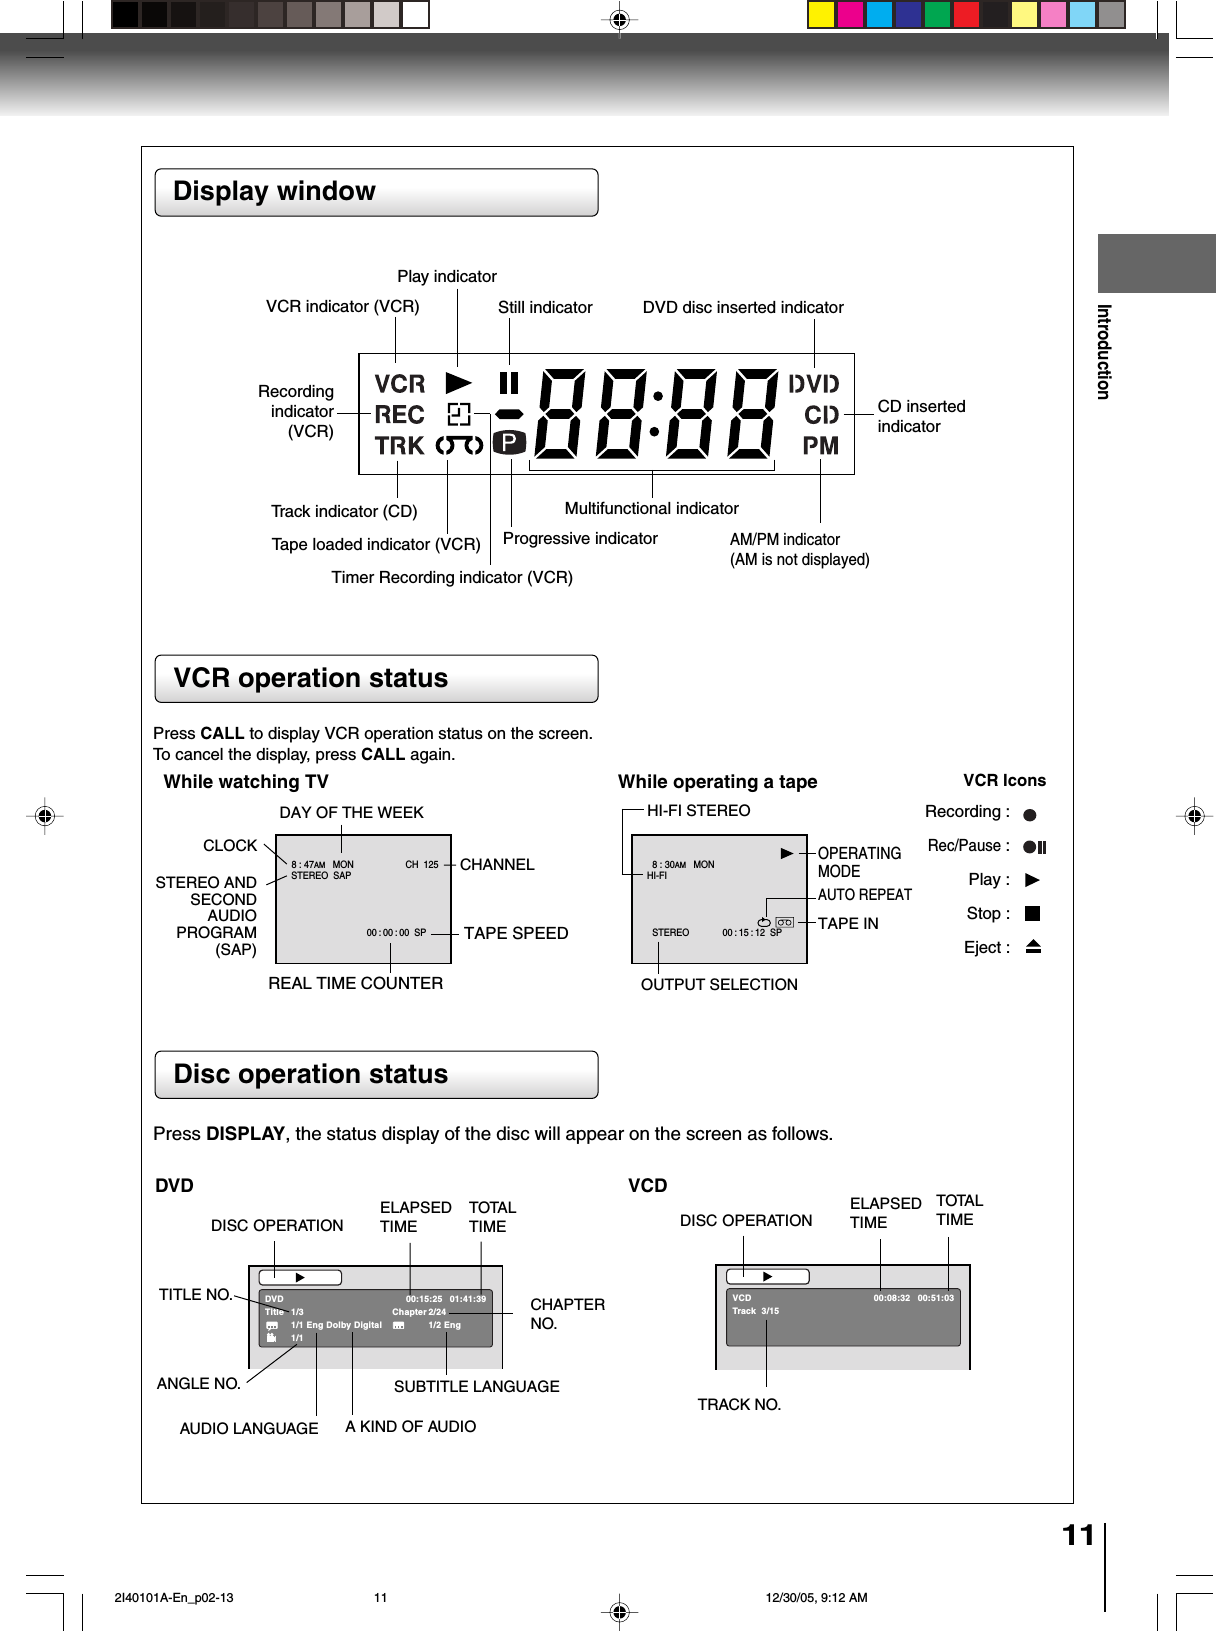
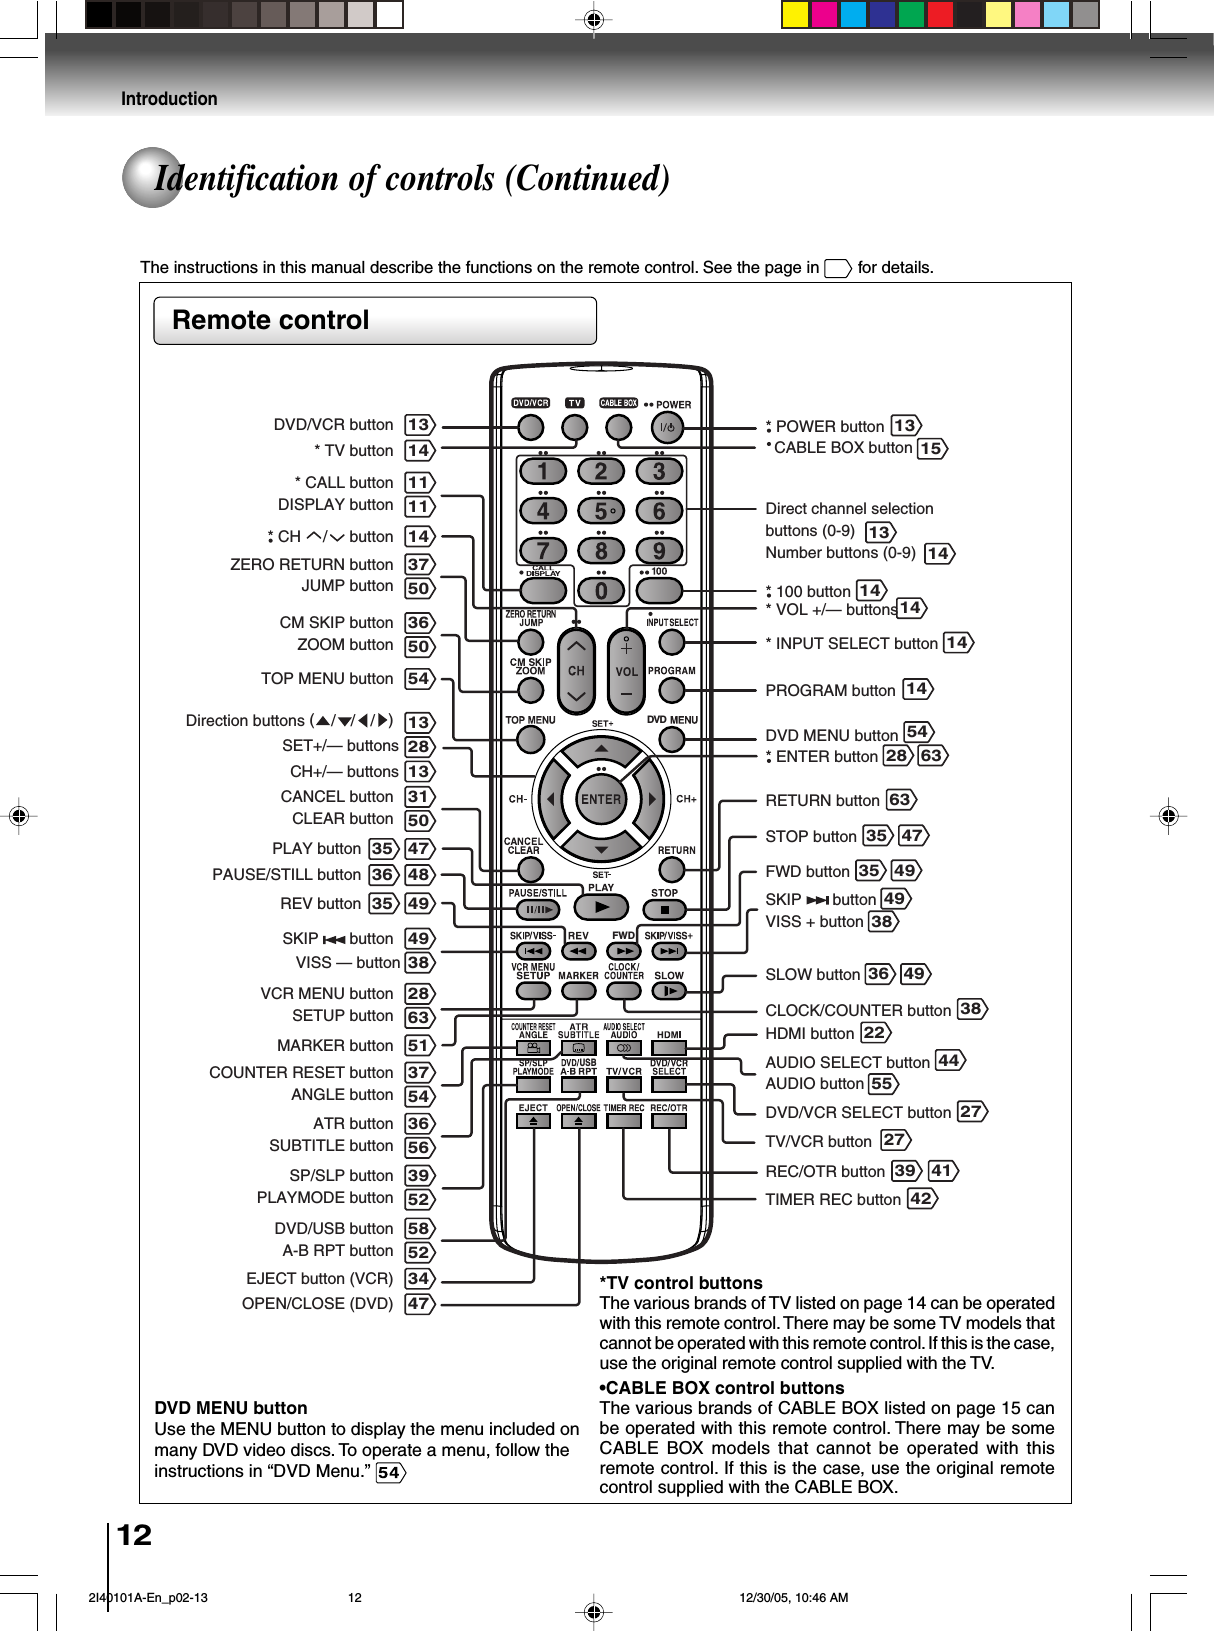
Contents
1.
User Manual 1
2.
User Manual 2
User Manual 1
Navigation menu
Upload a User Manual
Namespaces
Wiki Guide
HTML
PDF
Info
Views
User Manual
Discussion / Help
Navigation