ORION ELECTRIC M2I4A DVD / VCR TV Interface Device User Manual 2I40101A En cov
ORION ELECTRIC CO., LTD. DVD / VCR TV Interface Device 2I40101A En cov
UserManual.wiki
>
ORION ELECTRIC
>
M2I4A User Manual
>
User Manual 2
Contents
1.
User Manual 1
2.
User Manual 2
User Manual 2
Navigation menu
Upload a User Manual
Namespaces
Wiki Guide
HTML
PDF
Info
Views
User Manual
Discussion / Help
Navigation
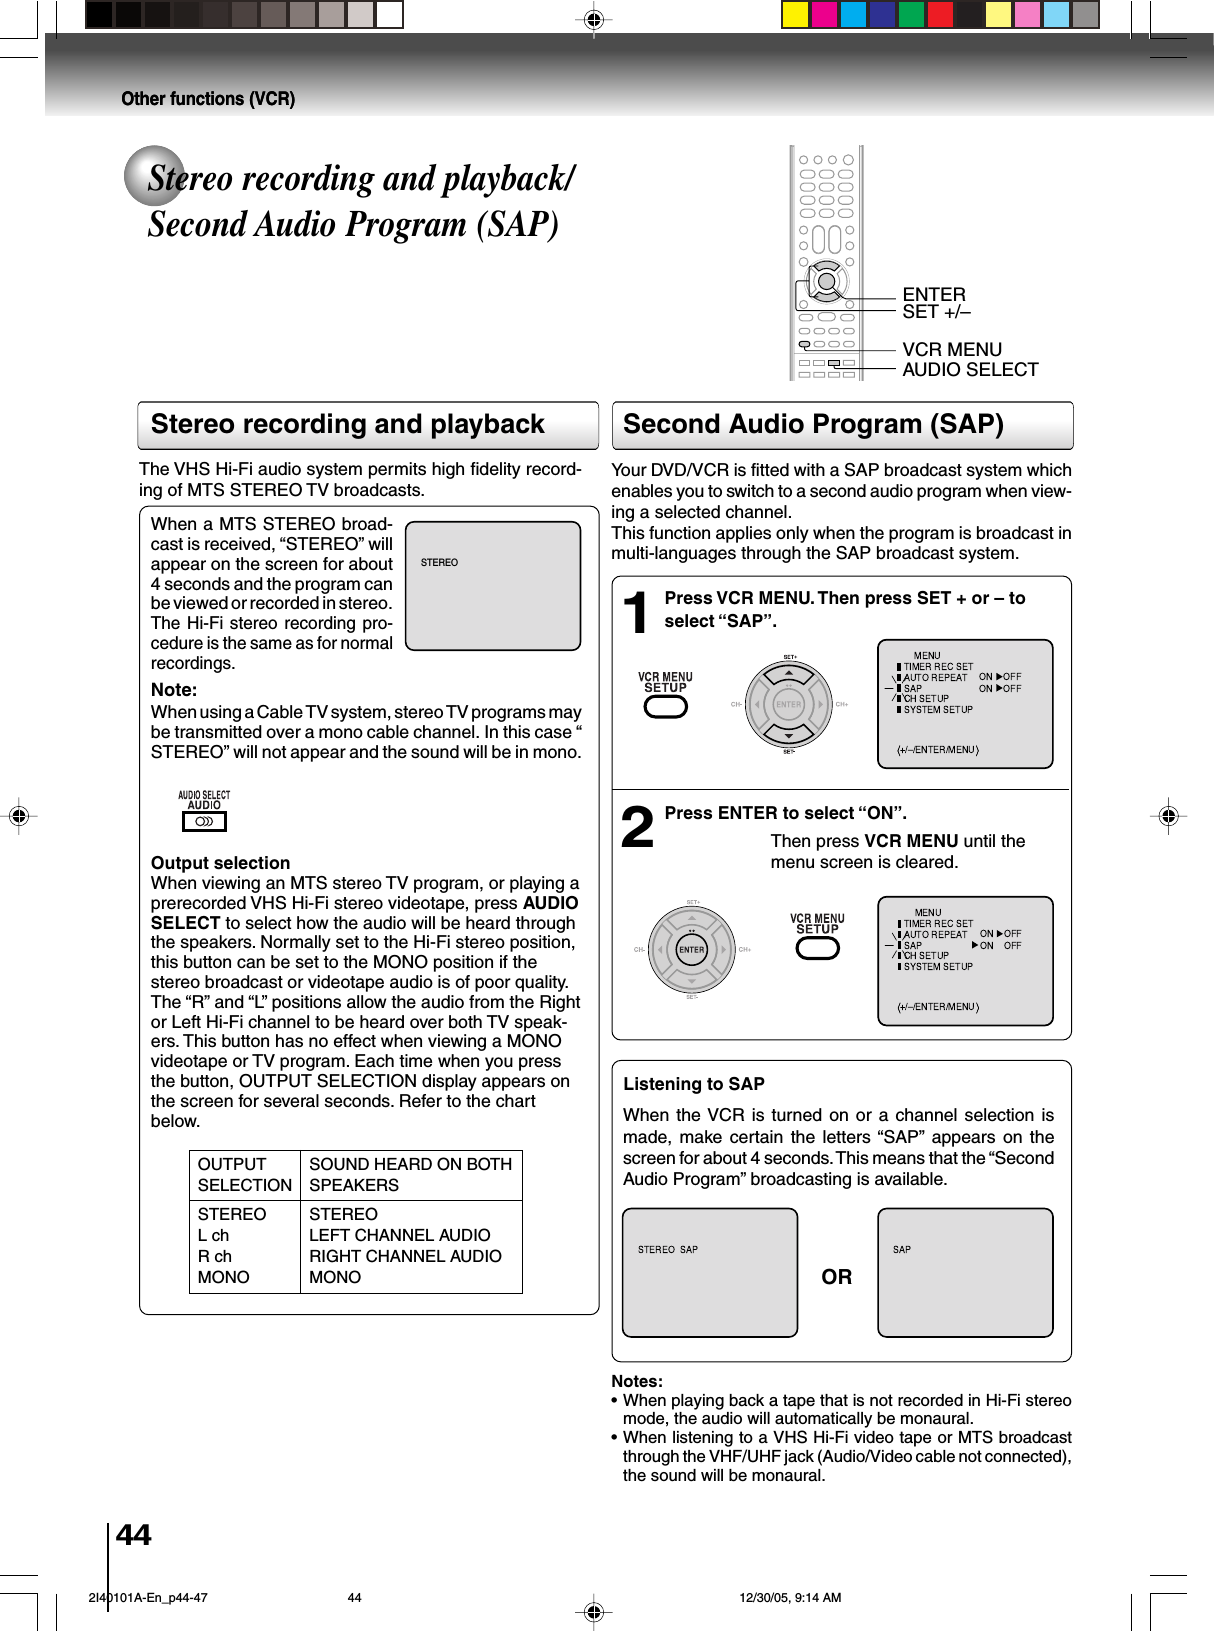
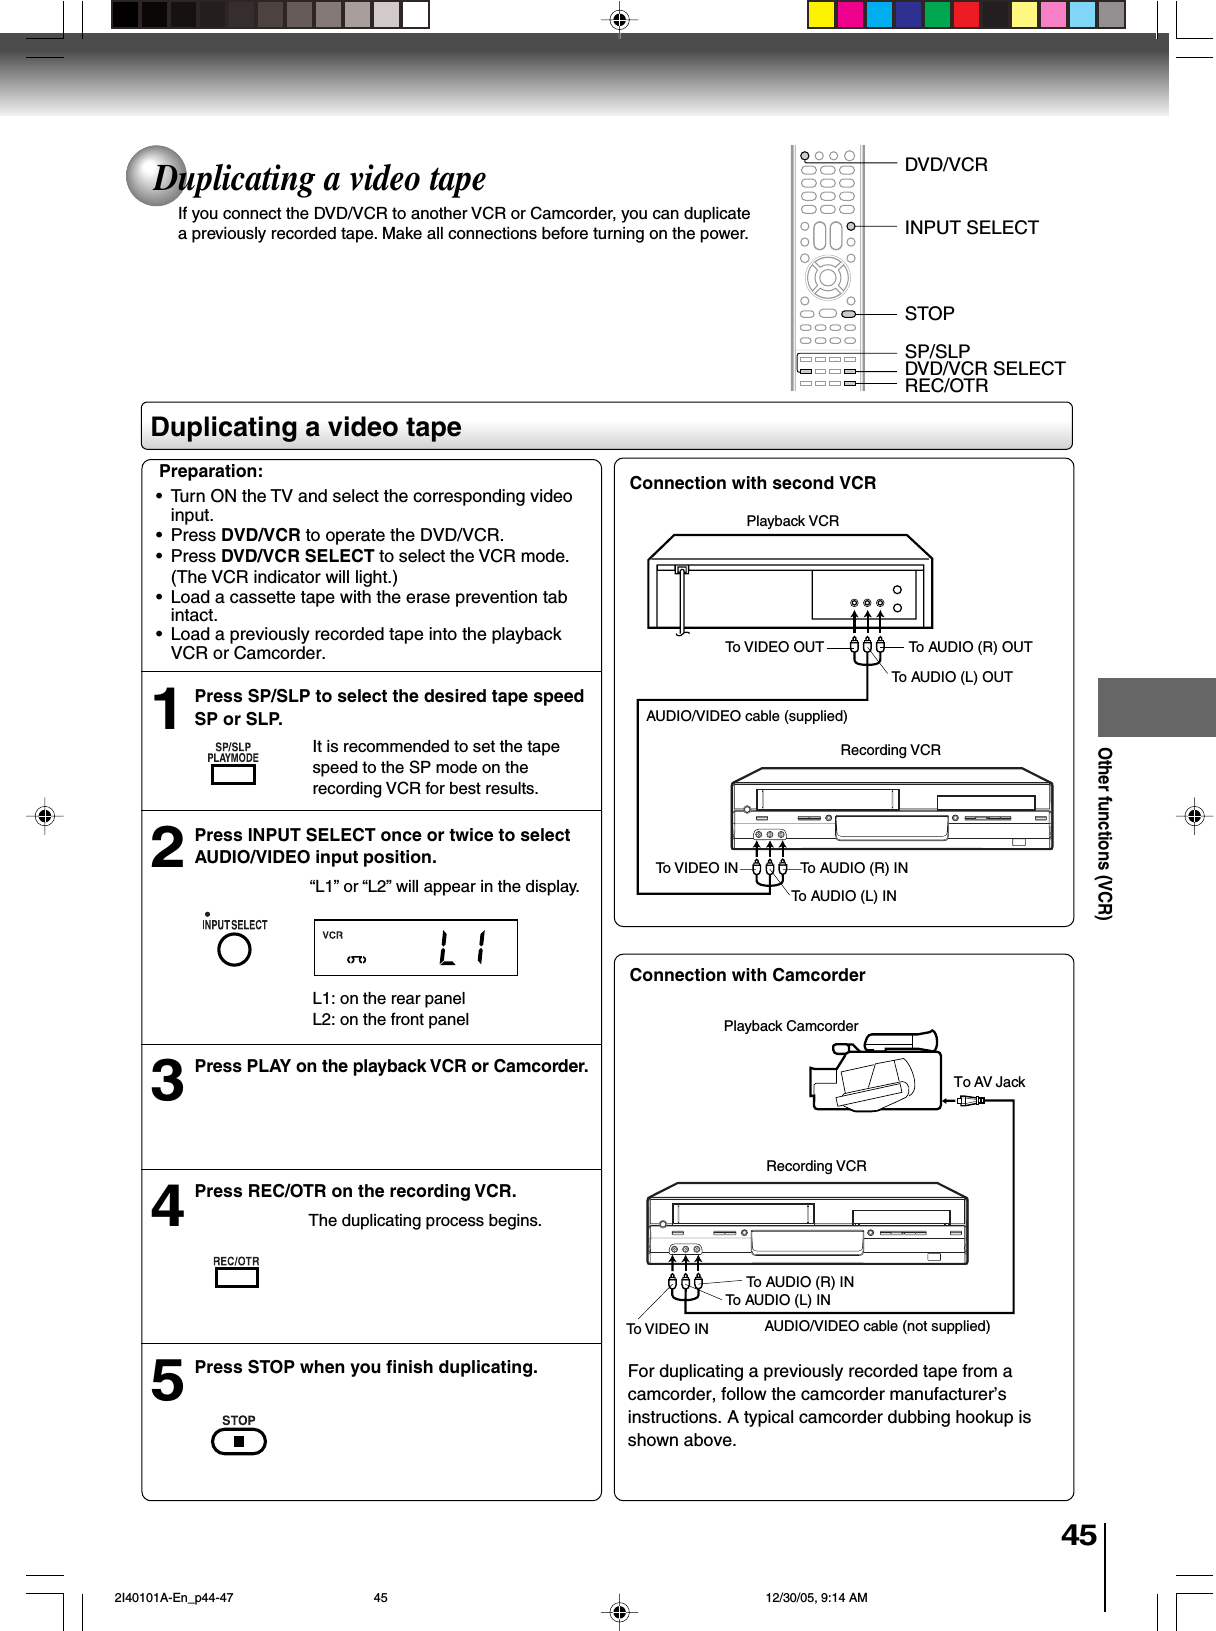
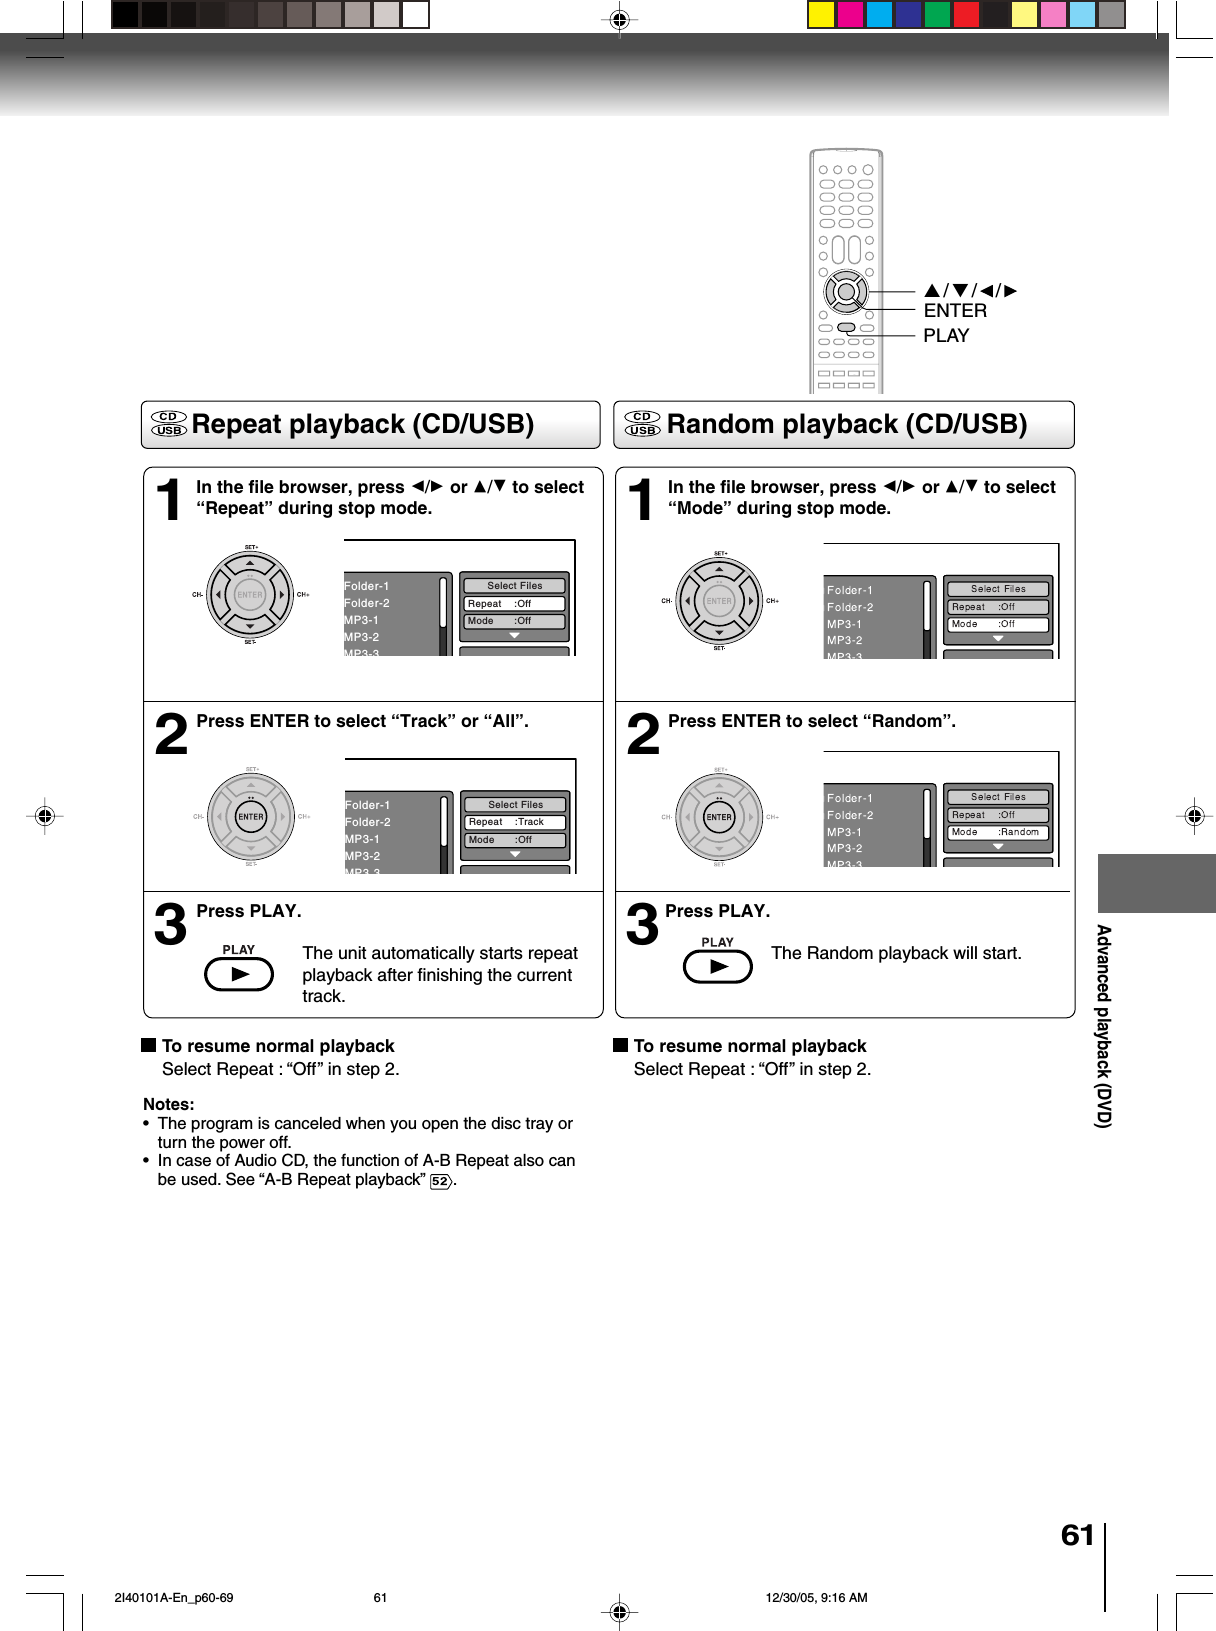
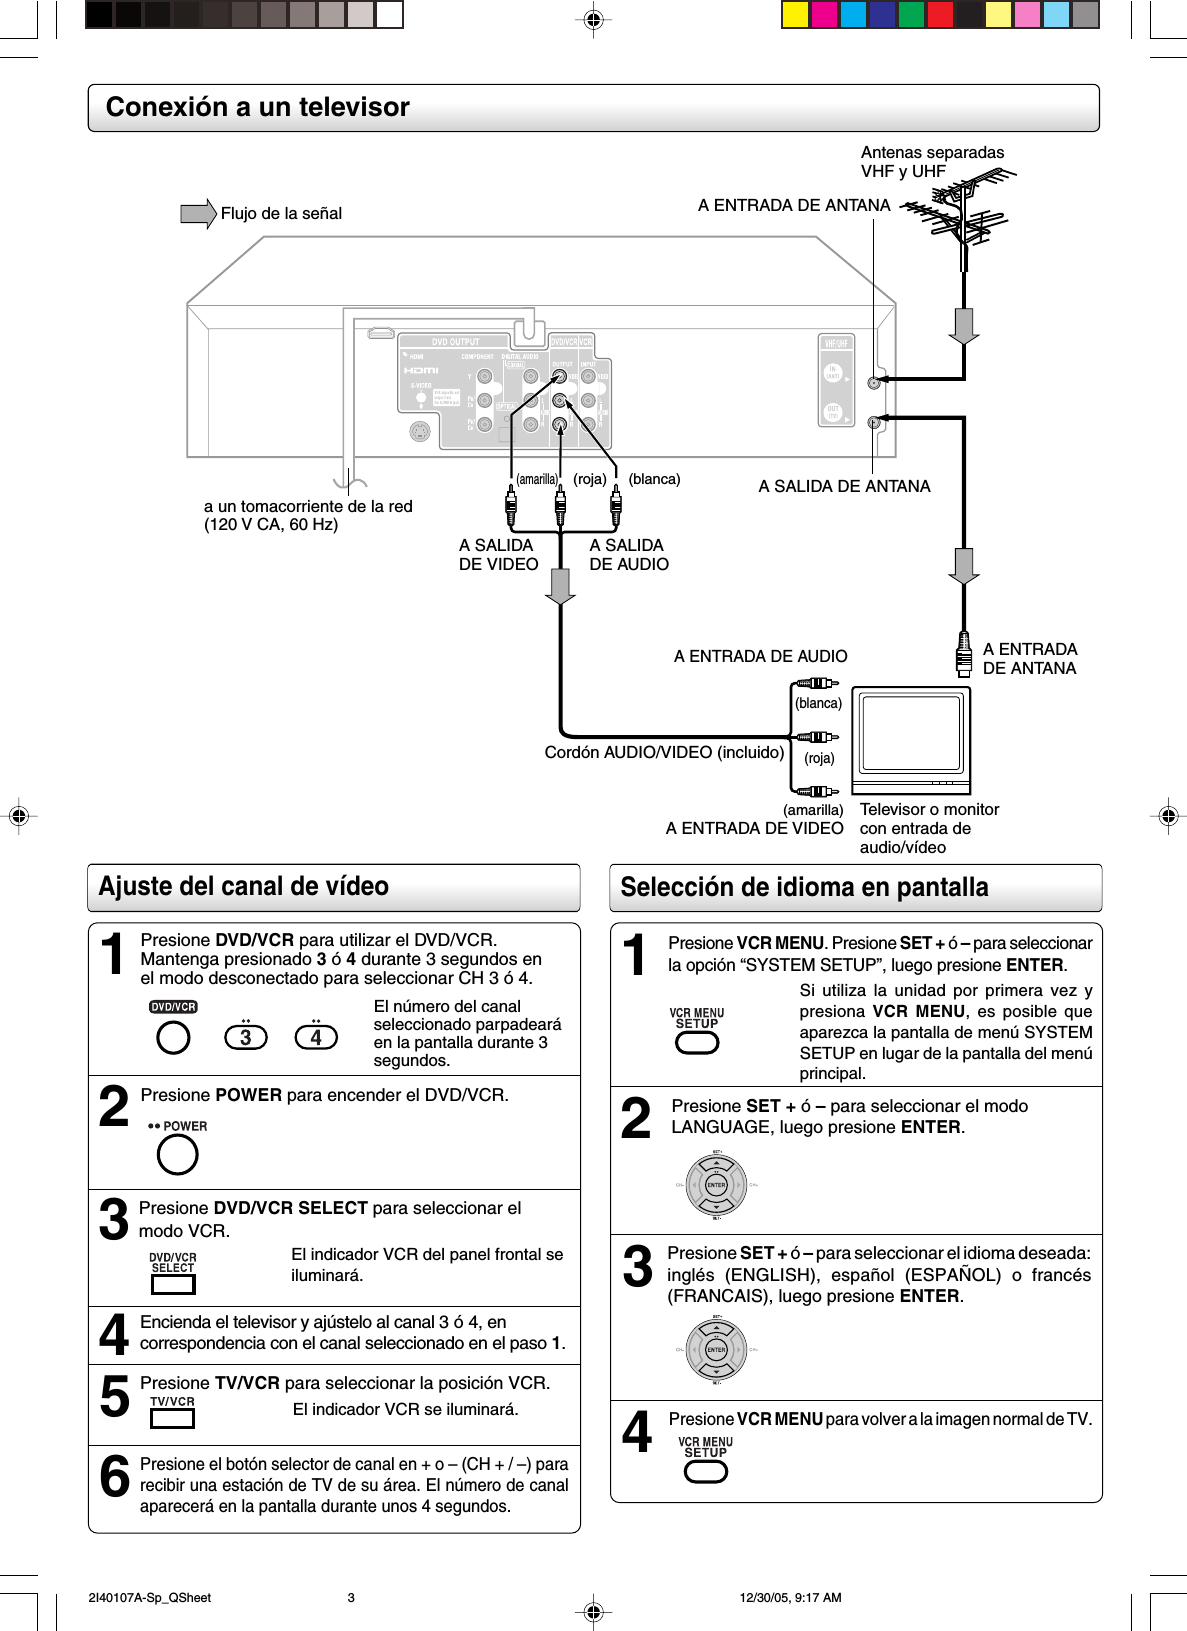
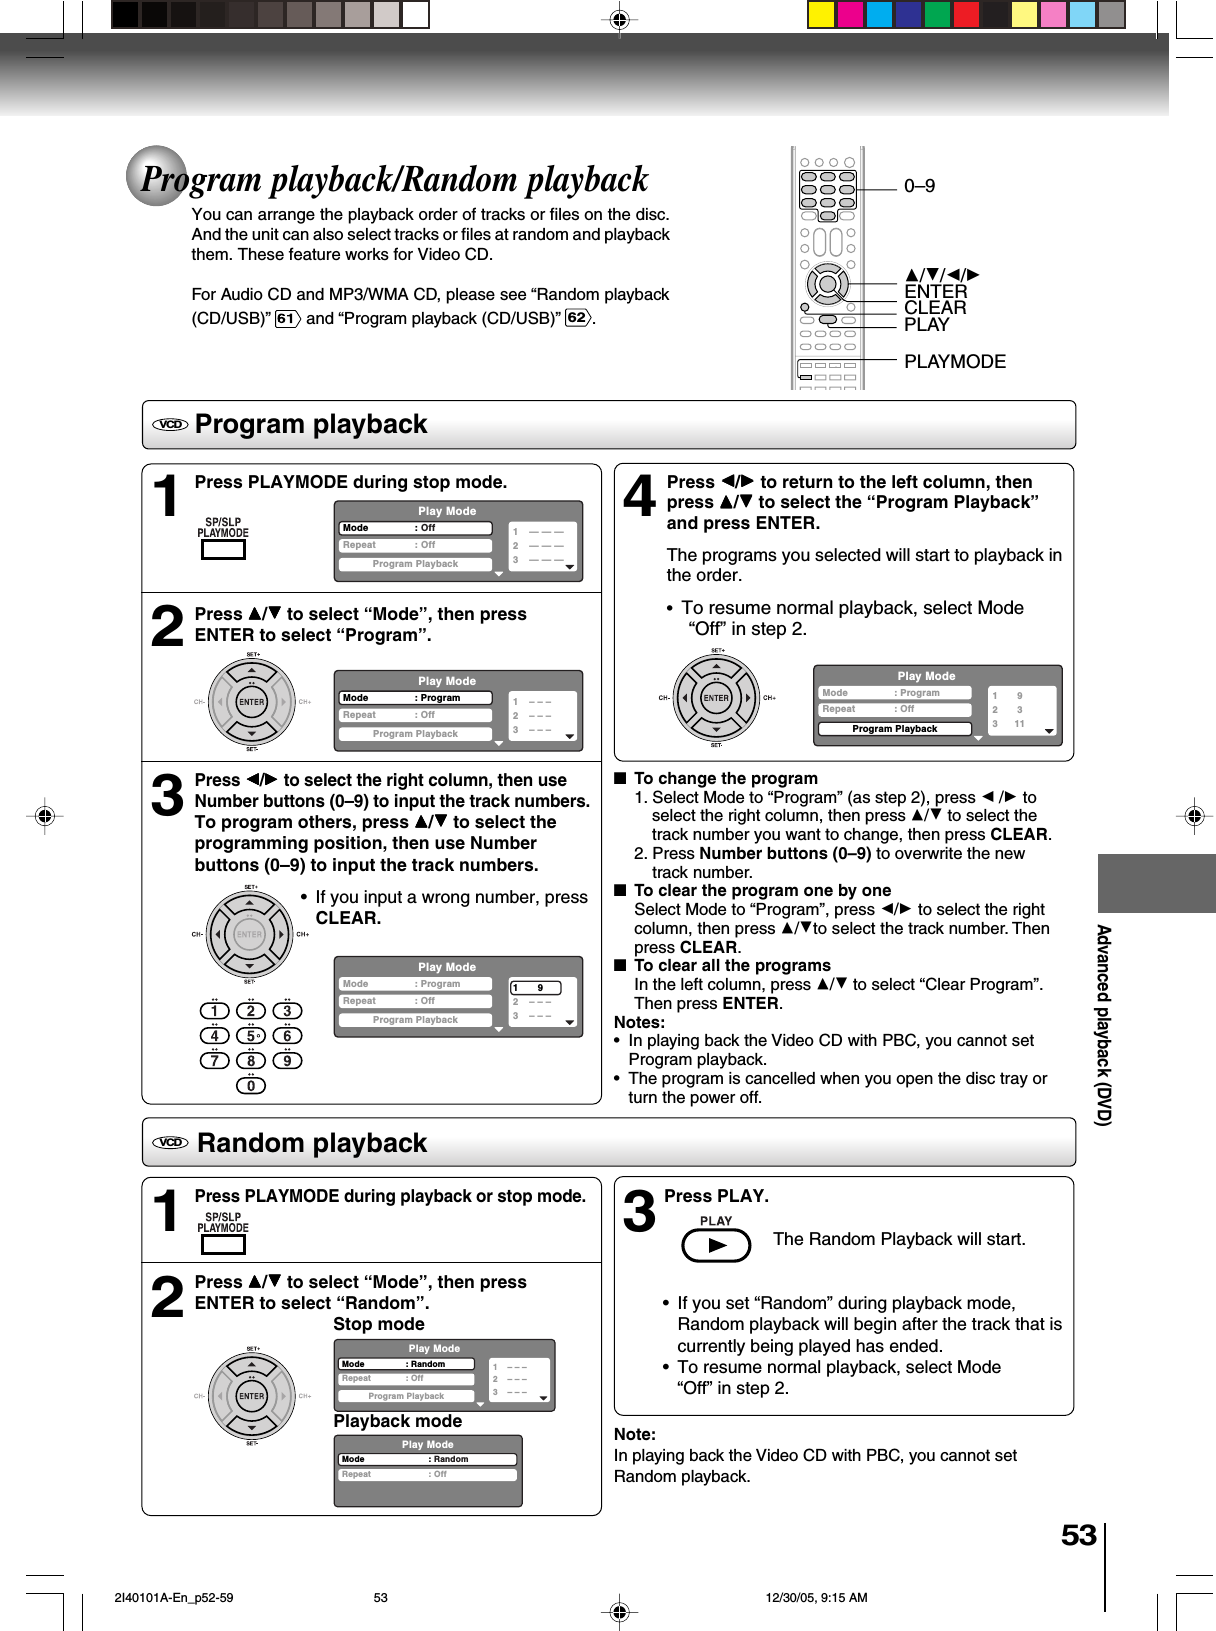
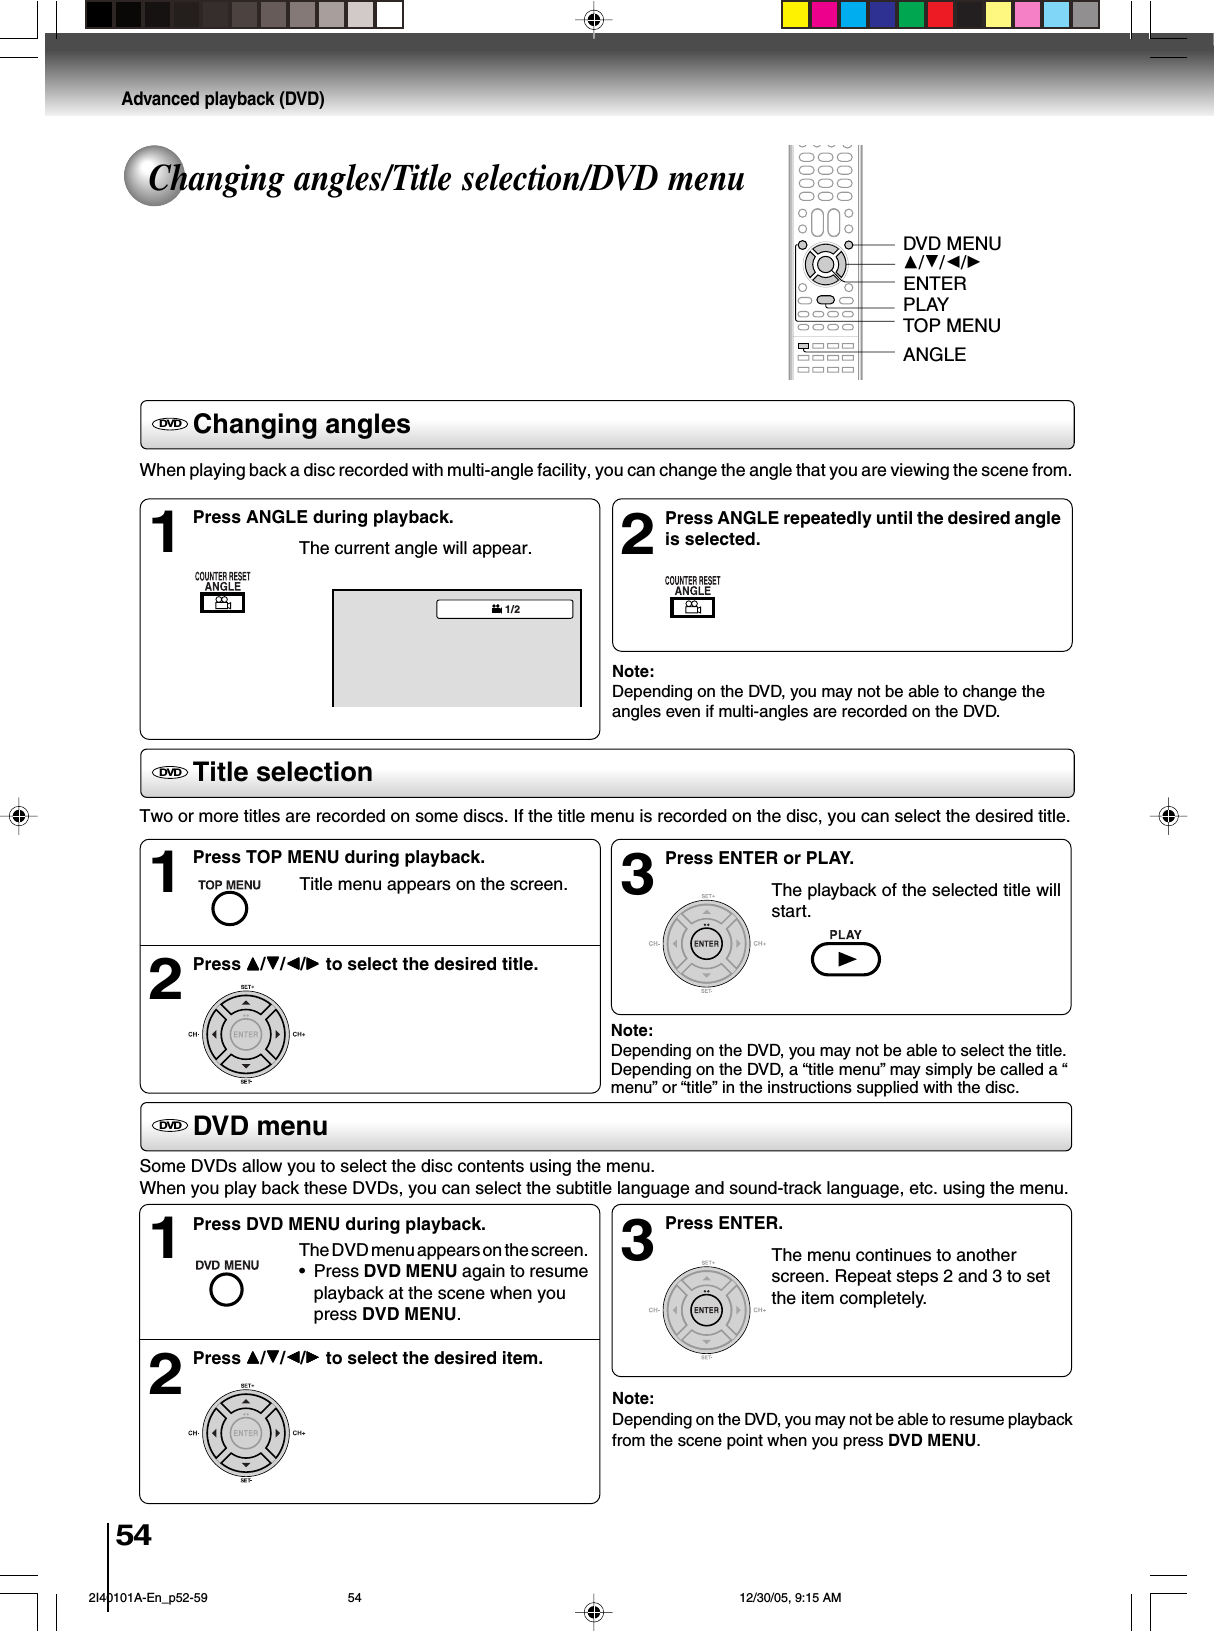
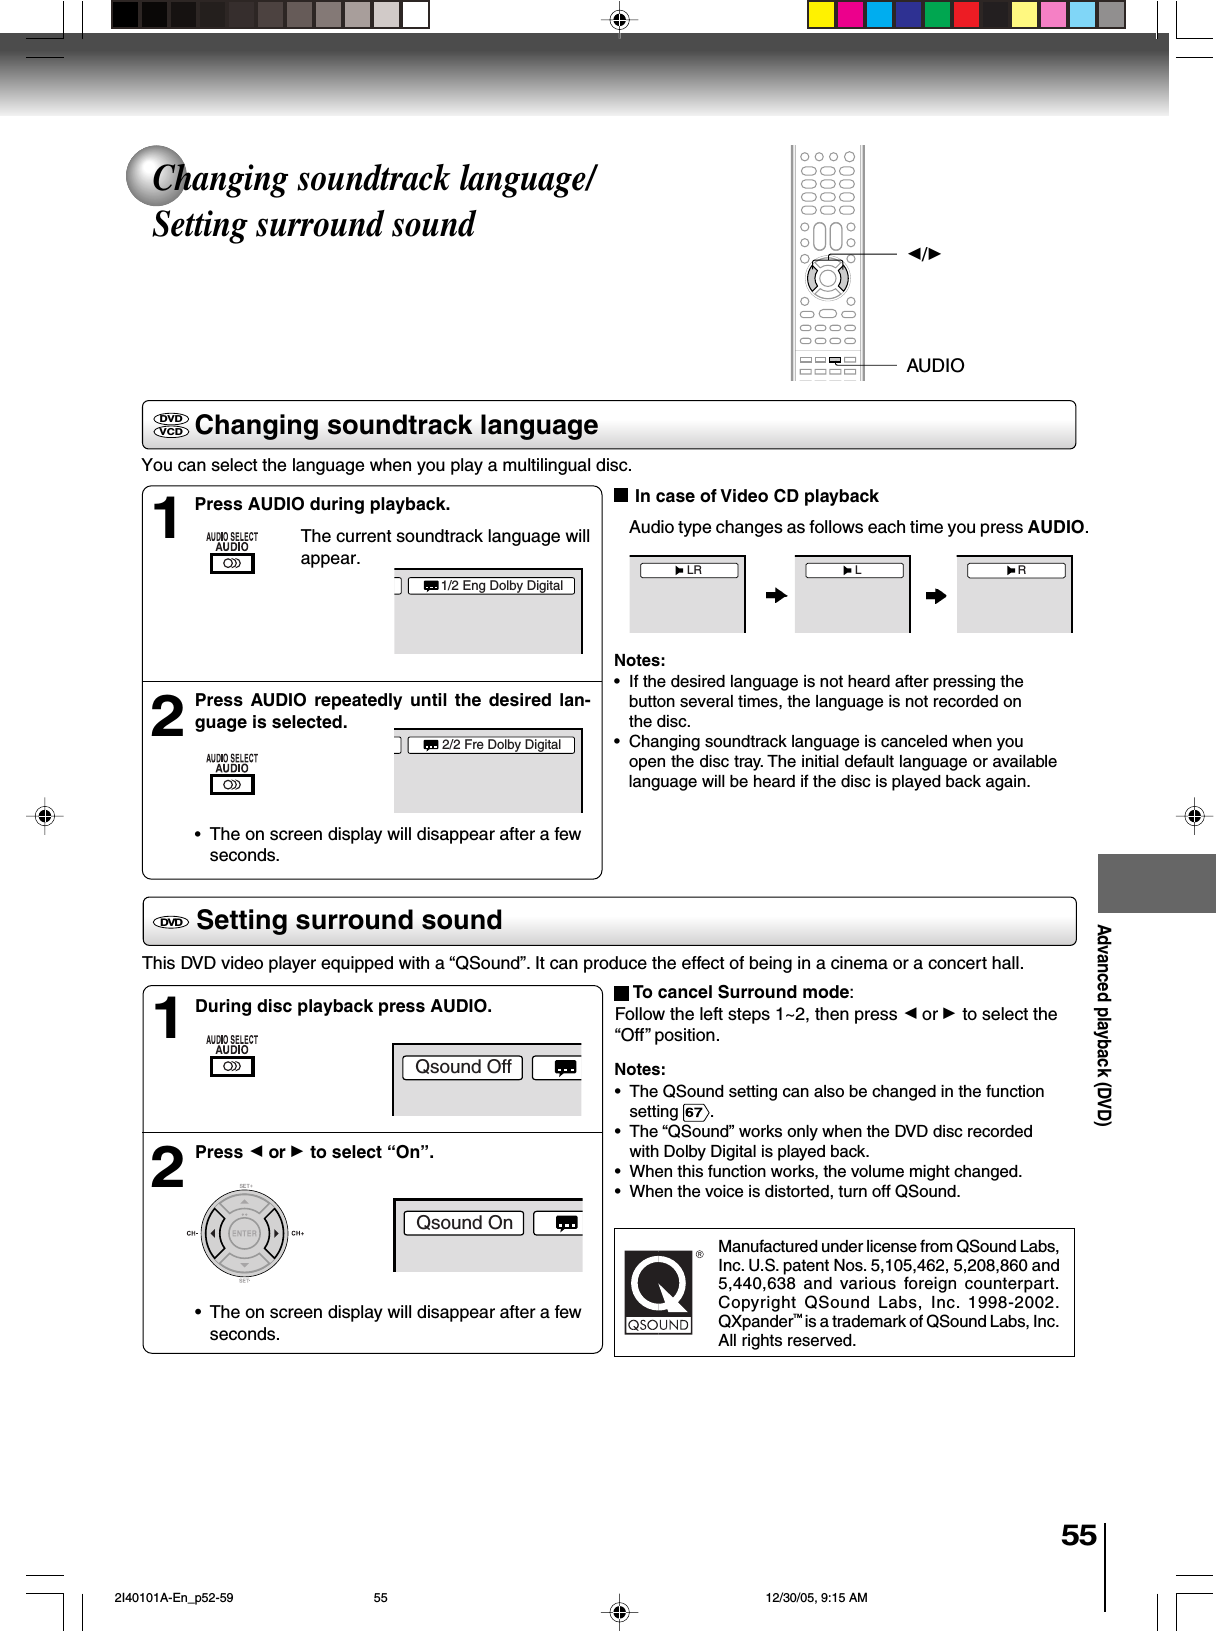
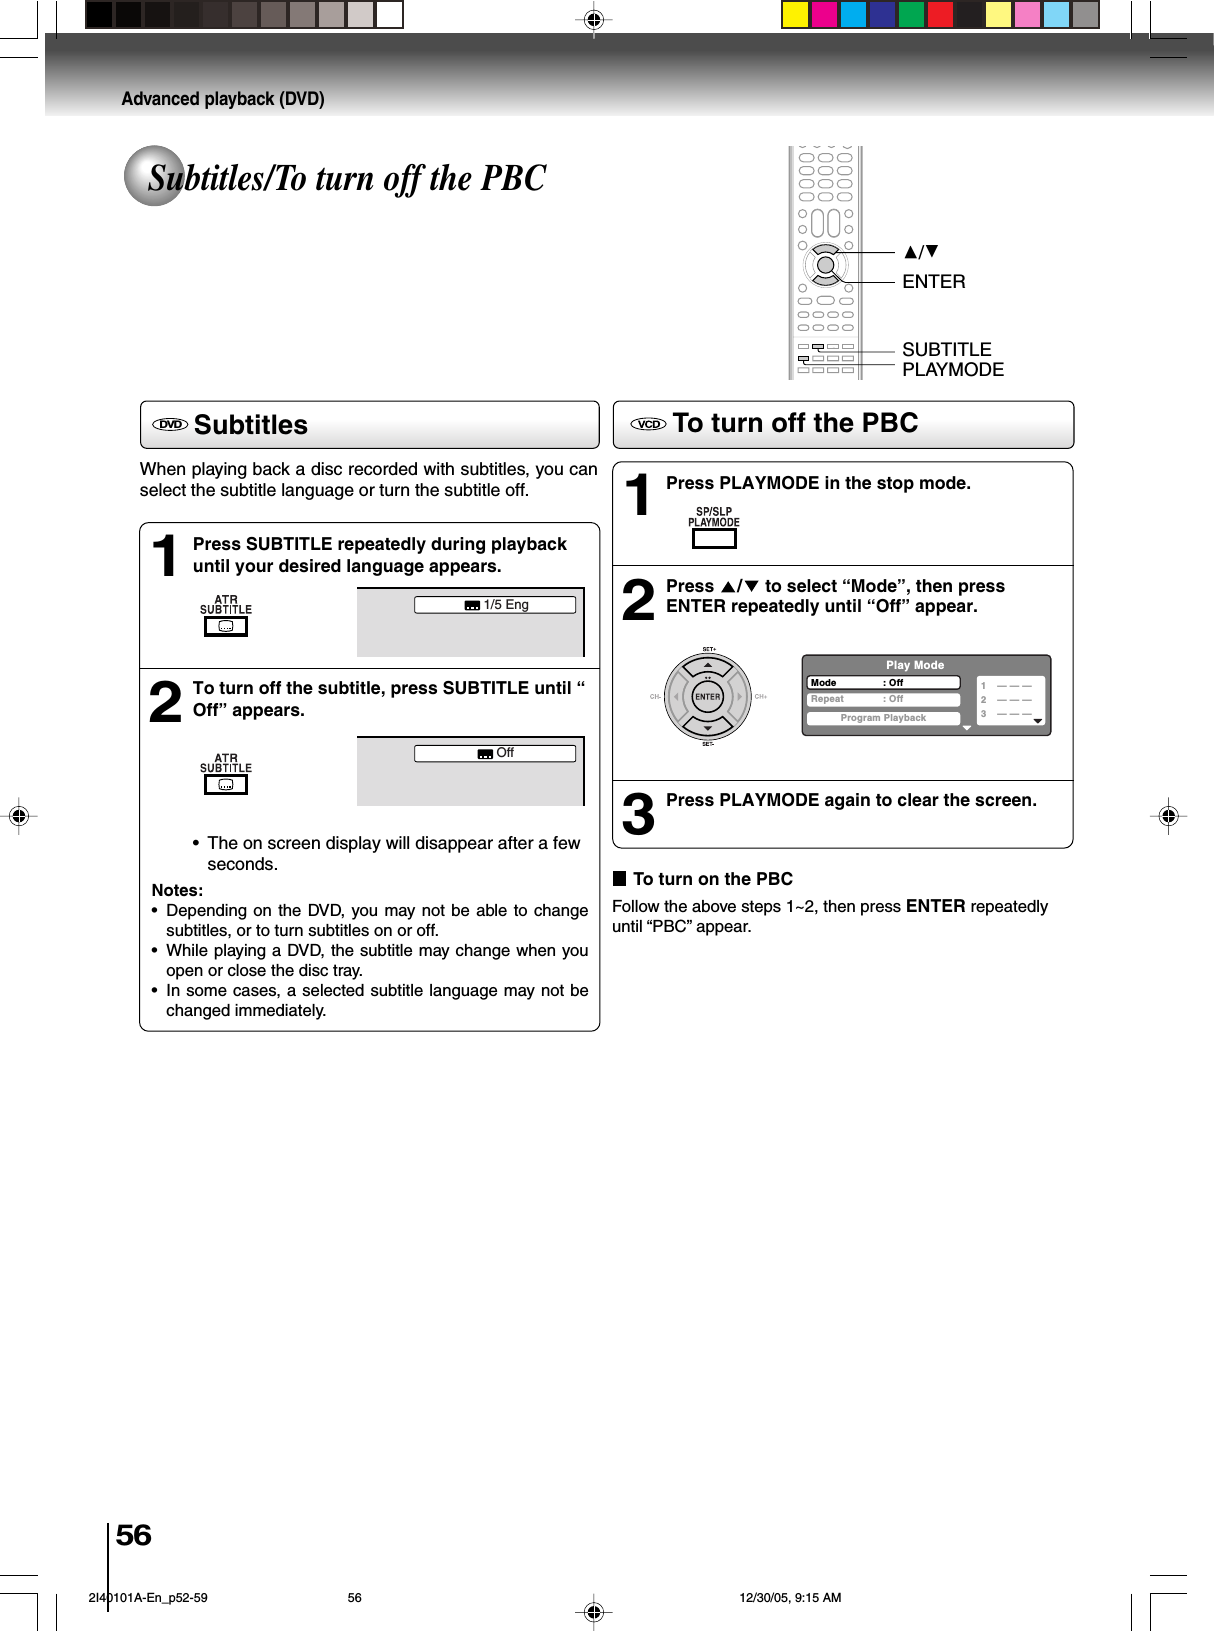
![52Advanced playback (DVD)Repeat playback1Press PLAYMODE during playback or stop mode.Repeat playback/A-B Repeat playbackPress PLAYMODE again to clear the screen.3A-B Repeat playback1Press A-B RPT during playback.The start point is selected.A-B repeat playback allows you to repeat material betweentwo selected points.22ANotes:•In A-B Repeat mode, subtitles near the A or B locations maynot be displayed.•You cannot set the A-B Repeat for the scenes that includemultiple angles.•A-B Repeat playback does not work when Repeat playback isactivated.•You may not be able to set A-B Repeat, during certain scenesof the DVD.•A-B Repeat does not work with an interactive DVD, MP3/WMA/JPEG/DivX® CD.•A-B Repeat is prohibited when PBC is on.To resume normal playbackPress A-B RPT again.“Off” appears on the screen.Notes:•Some discs may not work with the repeat operation.•In case of Video CD with PBC, repeat functions are prohib-ited during playback.[DVD]Press ENTER to select “Single (Chapter)” or “All(Title)”.The unit automatically starts repeatplayback after finishing the current ti-tle or chapter.[Video CD]Press DDDDD to select “Repeat”.Press ENTER to select “Single (Track)” or “All”.The unit automatically starts repeatplayback after finishing the currenttrack.•If you set the repeat mode during stop mode,press PLAY to start Repeat playback.[Audio CD and MP3/WMA CD]Please see “Repeat playback (CD/USB)” .Press A-B RPT again.The end point is selected. Playbackstarts at the point that you selected.Playback stops at the end point, re-turns to Point A automatically, thenstarts again.To resume normal playbackSelect Repeat : “Off” in step 2.ENTERDVDVCDCDPlay ModeRepeat : OffABDVDVCDDPLAYMODEA-B RPTPLAY 2I40101A-En_p52-59 12/30/05, 9:15 AM52](https://usermanual.wiki/ORION-ELECTRIC/M2I4A.User-Manual-2/User-Guide-623971-Page-12.png)
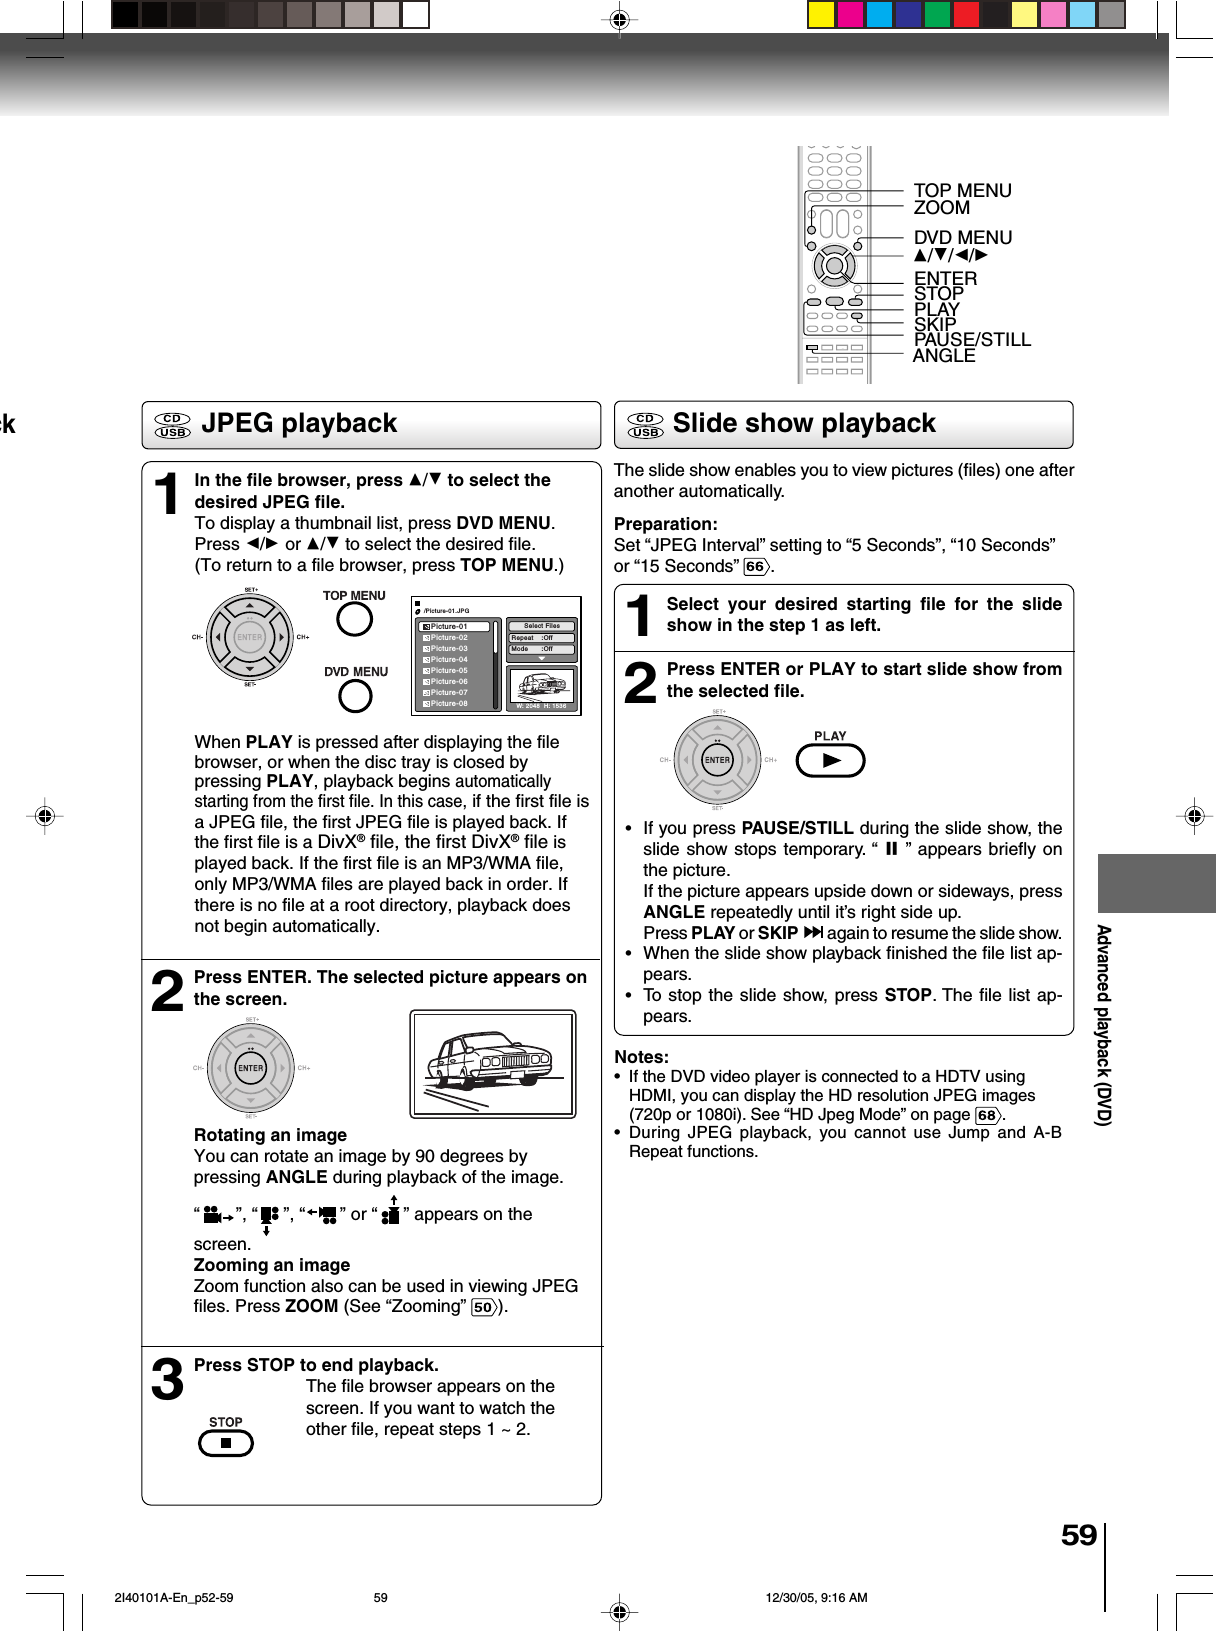
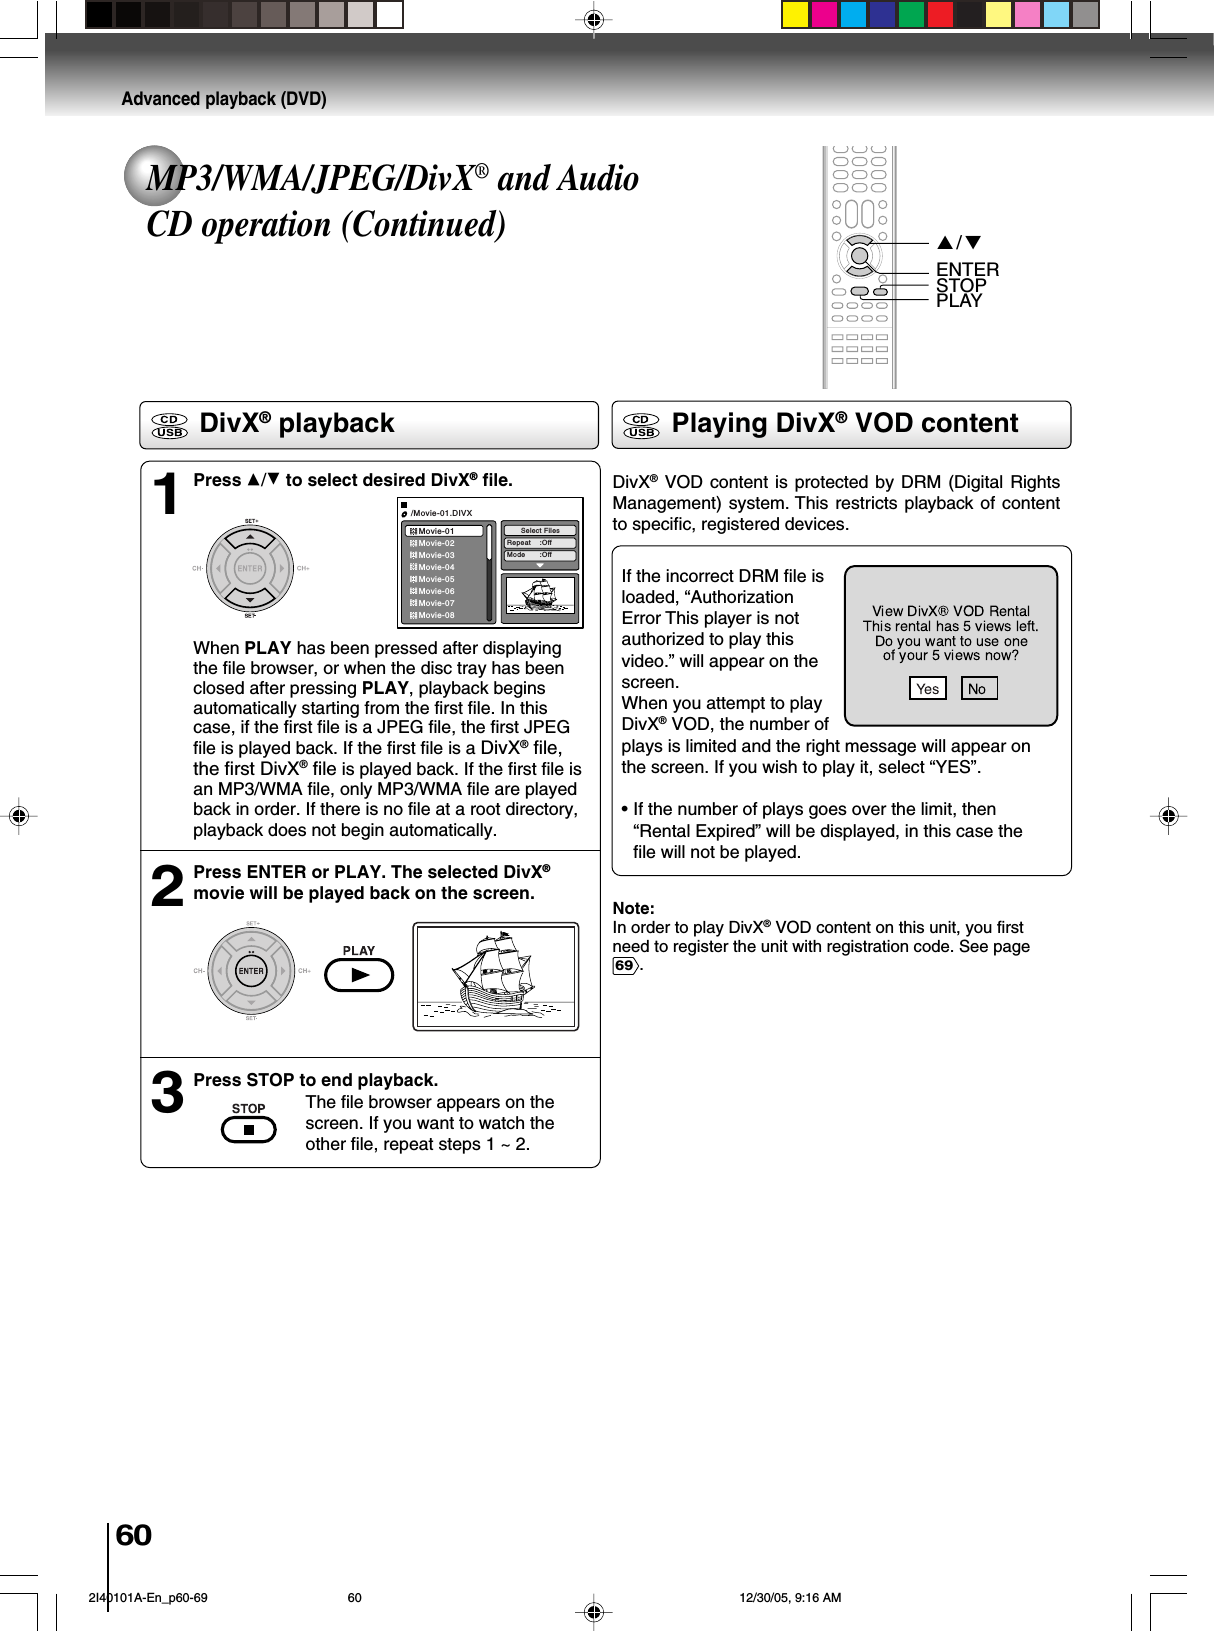
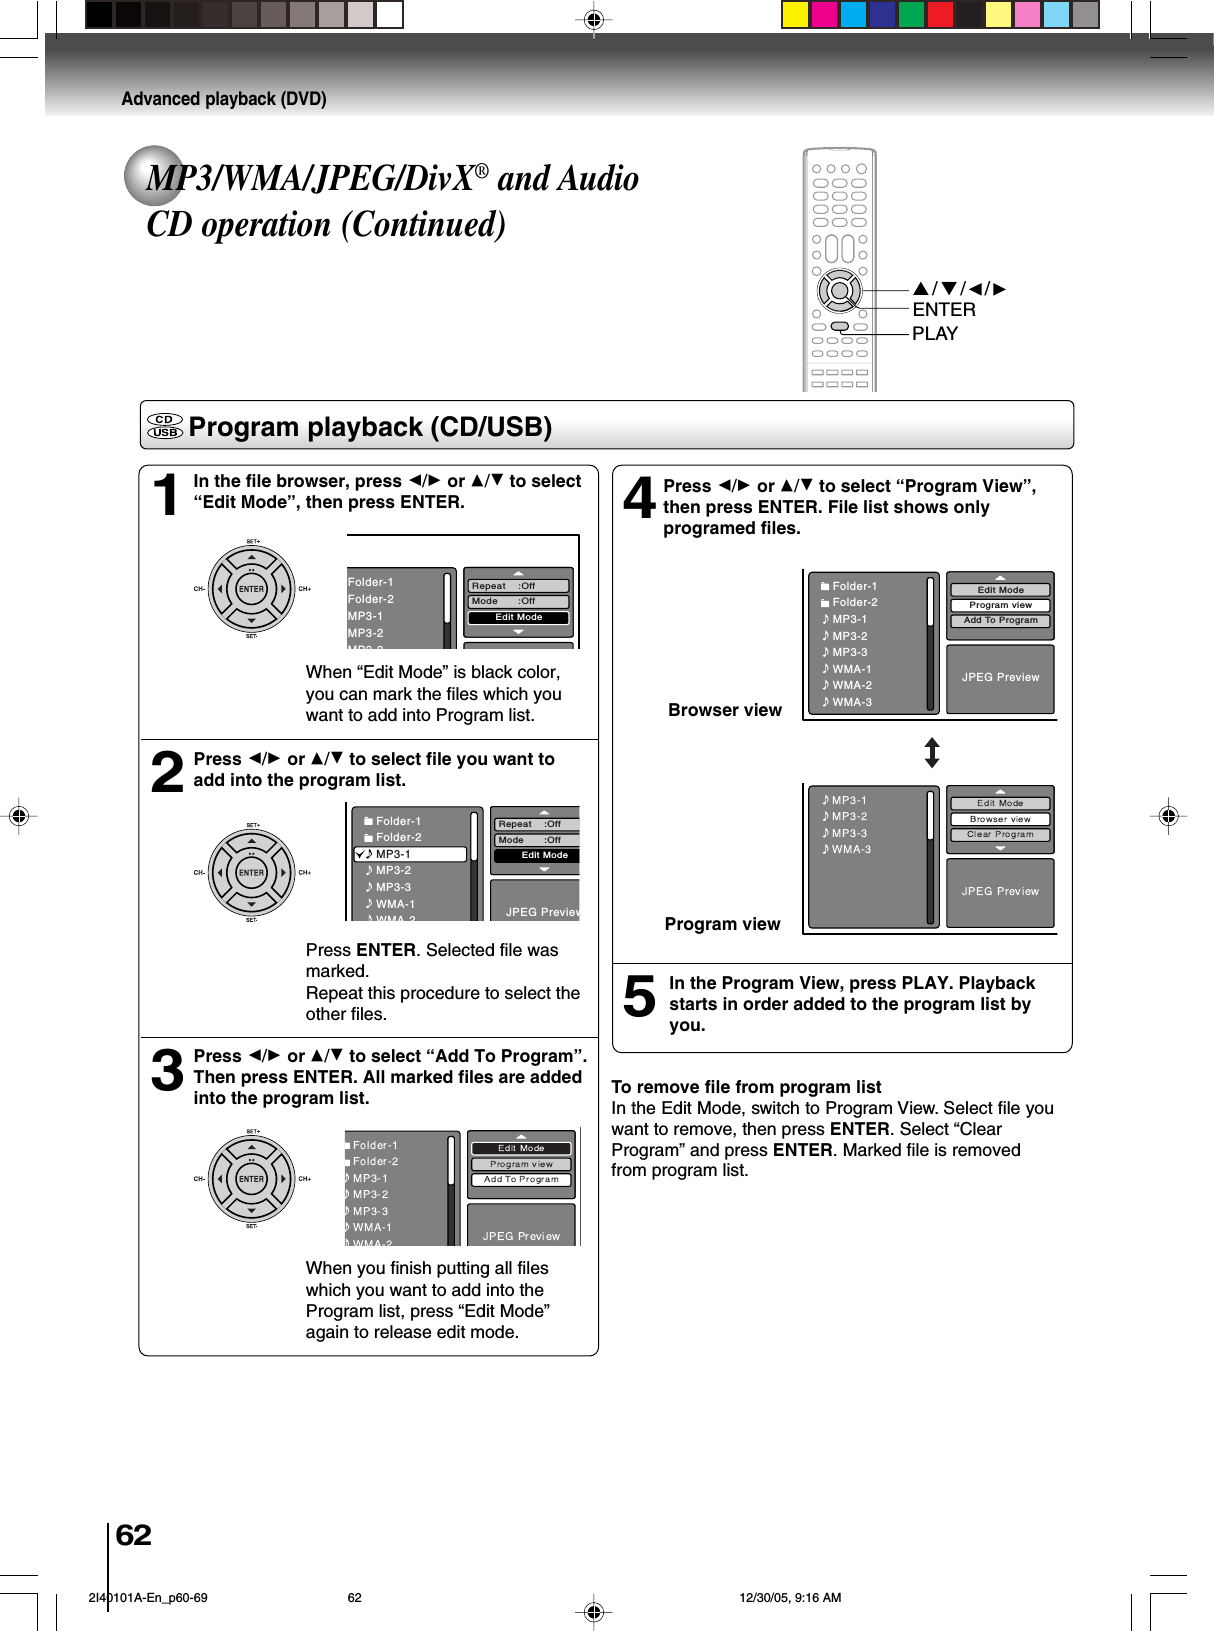
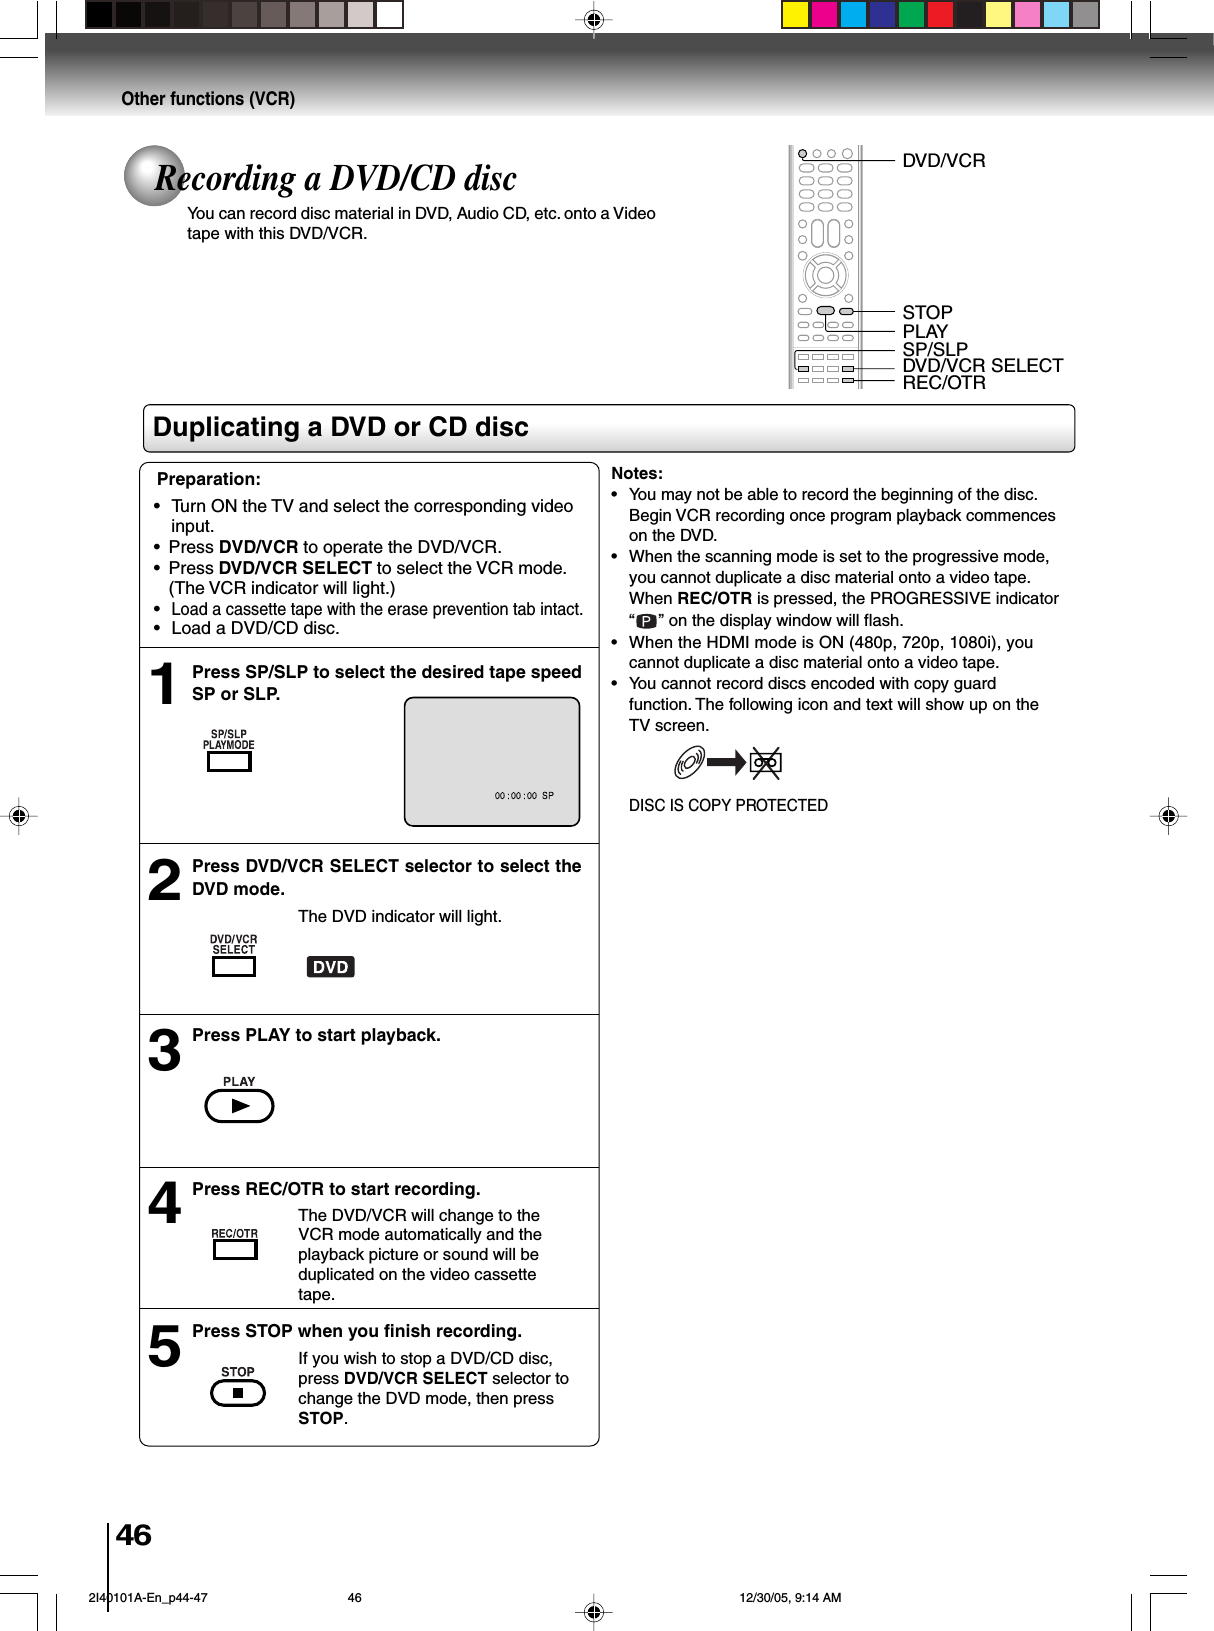
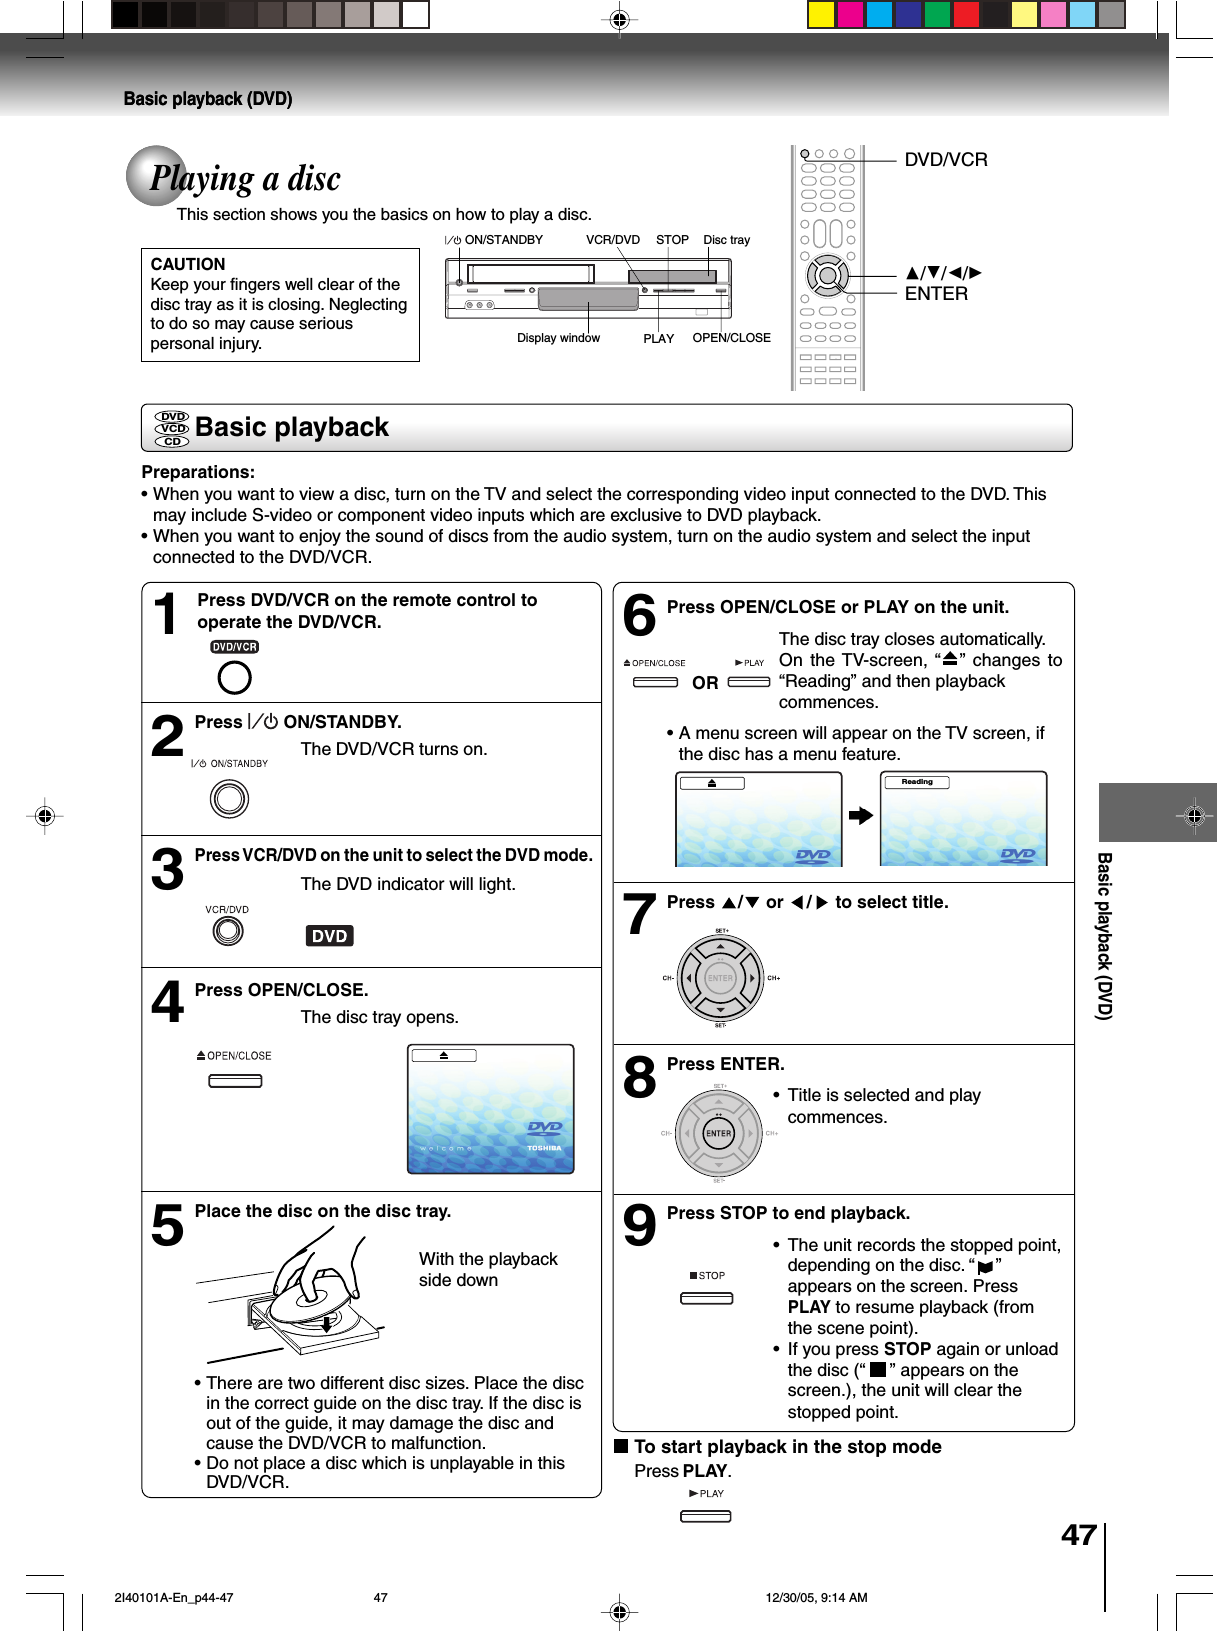
![58Advanced playback (DVD)MP3/WMA/JPEG/DivX® and AudioCD operation (Continued)A file browser screen will be appear on thescreen.•In case the current directory includes 9 files or more,press or to scroll in the file list.•To see contents in folder, select the folder and thenpress ENTER. To return to the upstairs directory, select“ Go Up ...” then press ENTER.•In case of a CD/USB Mass Storage containing a mixtureof MP3, WMA, JPEG and DivX® files, the files are playedback by selecting them from the file browser.Loading mediaENTER▲/▼//STOPNotes:•MP3 or WMA file on the Kodak Picture CD is not recognizedon this unit.•During MP3/WMA/JPEG/DivX®-Playback, you cannot useJUMP and A-B Repeat functions.•You can use Repeat (Track or All), Random functions andProgram playback for MP3/WMA/JPEG/DivX® CD Playback, 62.[MP3/WMA/JPEG/DivX® CD, Audio CD]Place a MP3/WMA/JPEG/DivX® CD or an AudioCD onto the disc tray, then press OPEN/CLOSE.[USB Mass Storage]Connect USB Mass Storage to the USB port onthe front of the unit (see page ).123PLAYSelect FilesThe file type to make it display in the file browser can be chosen.1. Press B or A to highlight “Select Files” at right columnin the file browser.2. Press ENTER, then press or to select file typefrom the list (Music, Picture or Movie).3. Press ENTER to add/remove check mark. Checked filetype will be displayed in the file browser.4. Press RETURN to save the setting.OPEN/CLOSEMP3-5MP3-6WMA-11WMA-12Picture-1Picture-2Movie-1Movie-2JPEG PreviewSelect FilesRepeat :OffMode :Off/MP3-5.MP31/15 00:00:00Made by TaroFile numberOperation status Elapsed time Selected file nameTool kitwindowPreview windowCursorFile listMedia type: Indicates Music file (Audio/MP3/WMA): Indicates Picture file (JPEG): Indicates Movie file (DivX video): CD-R/RW or Audio CD: USB Mass StorageMedia typeFile typePress DVD/USB to display the media selectionwindow. Press B or A to select the DVD (CD)mode or the, then press ENTER.You cannot select the mode ifDVD (CD)/USB media not in-sertedMP3/WMA and Audio CD playbackIn the file browser, press / to select thedesired file.When PLAY is pressed after displaying file browser, orwhen the disc tray is closed by pressing PLAY, playbackbegins automatically starting from the first file. In this case,if the first file is an MP3/WMA file, only MP3/WMA files areplayed back in order. If the first file is a JPEG file, the firstJPEG file is played back. If the first file is a DivX® file, thefirst DivX® file is played back. If there is no file at a rootdirectory, playback does not begin automatically.1Press ENTER.The selected file starts playingback.2Press STOP to end playback.•The unit records the stopped point. “ ” appears on thescreen. Press PLAY to resume playback (from the scenepoint).•If you press STOP again or unload the disc, the unit willclear the stopped point.3DVD/USBRETURNDISC USB 2I40101A-En_p52-59 12/30/05, 10:48 AM58](https://usermanual.wiki/ORION-ELECTRIC/M2I4A.User-Manual-2/User-Guide-623971-Page-18.png)