Olympus Medical Systems GN4215 Endoscope Reprocessor with RFID User Manual Manual P115 P244
Olympus Medical Systems Corp. Endoscope Reprocessor with RFID Manual P115 P244
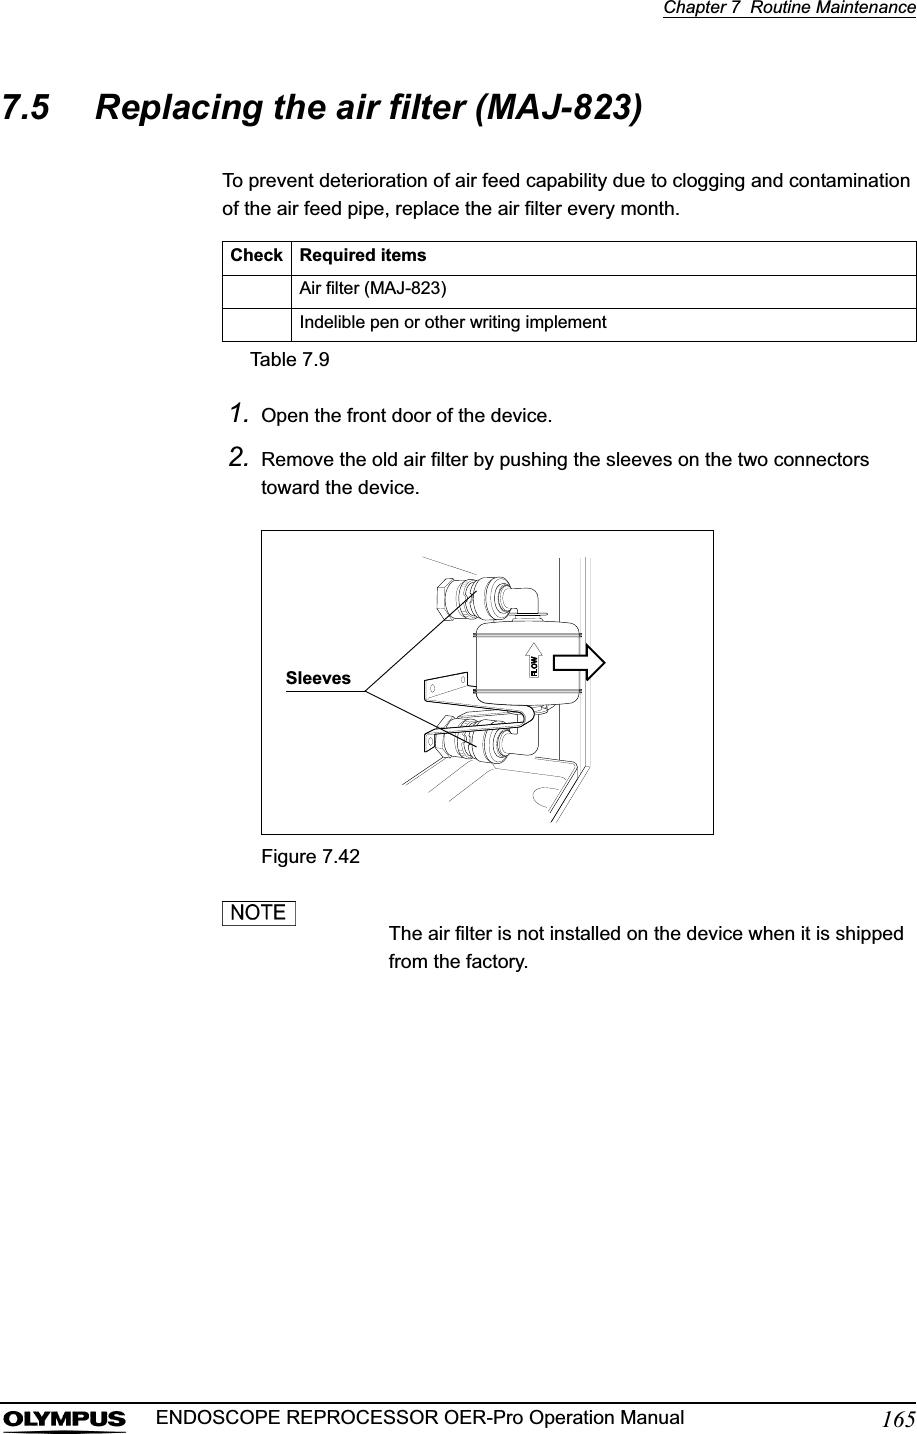
Contents
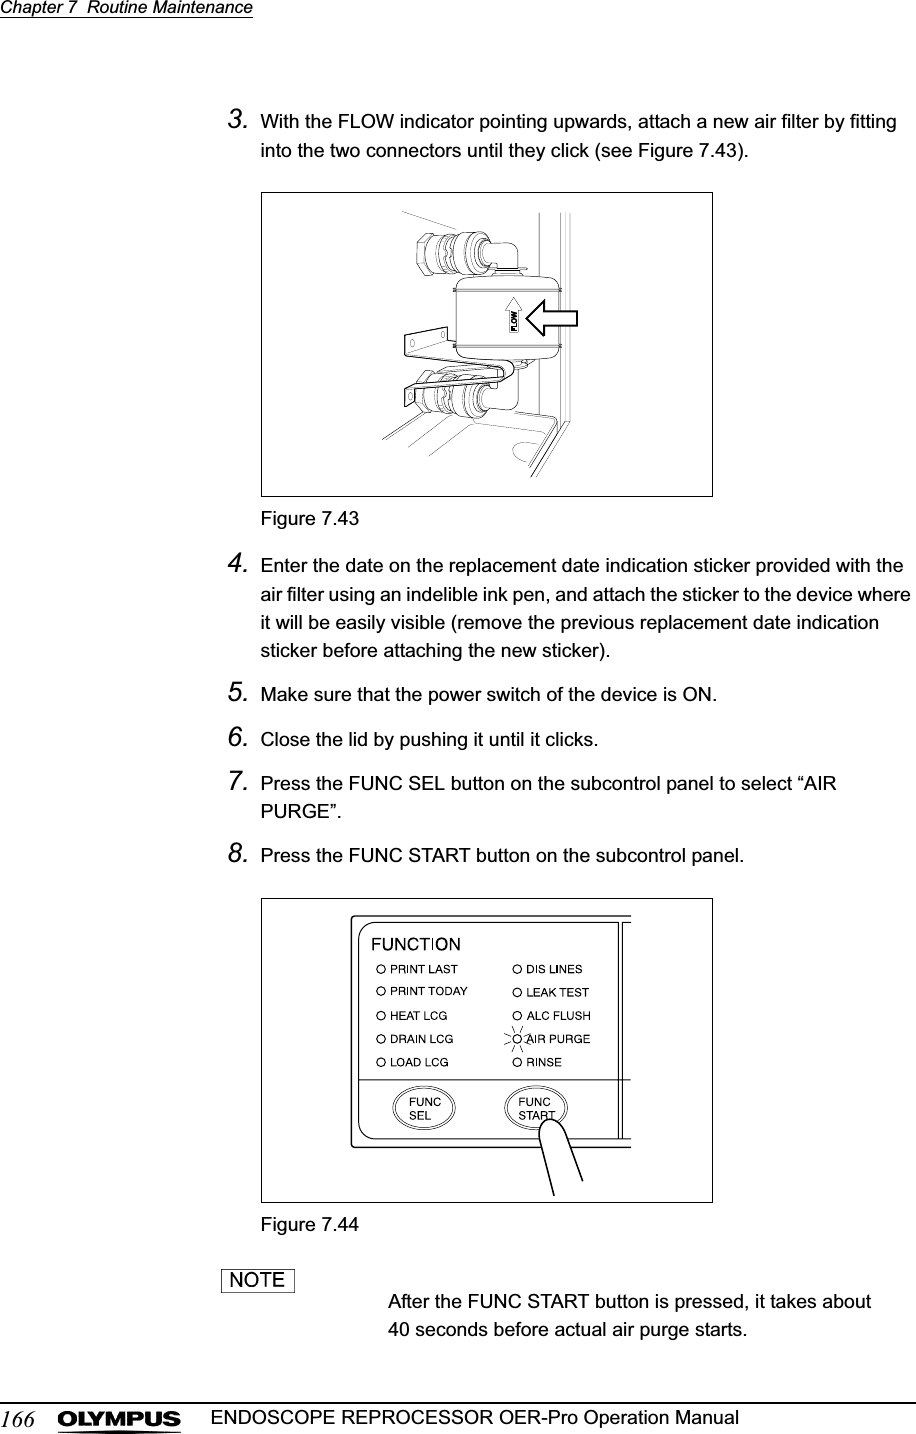
- 1. Users Manual 1
- 2. Users Manual 2
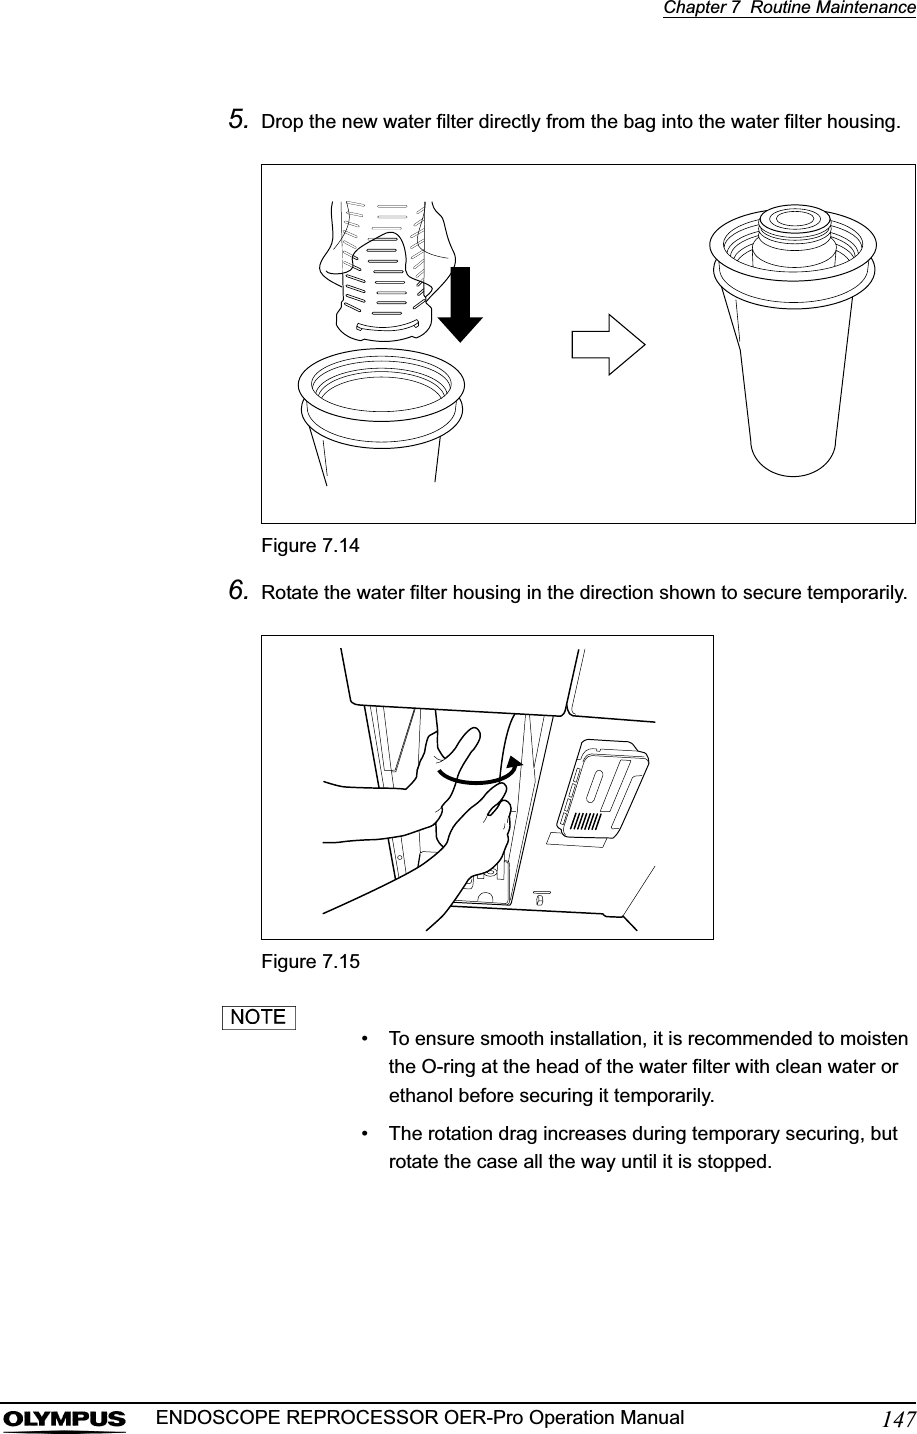
- 3. Users Manual 3
- 4. Users Manual 4
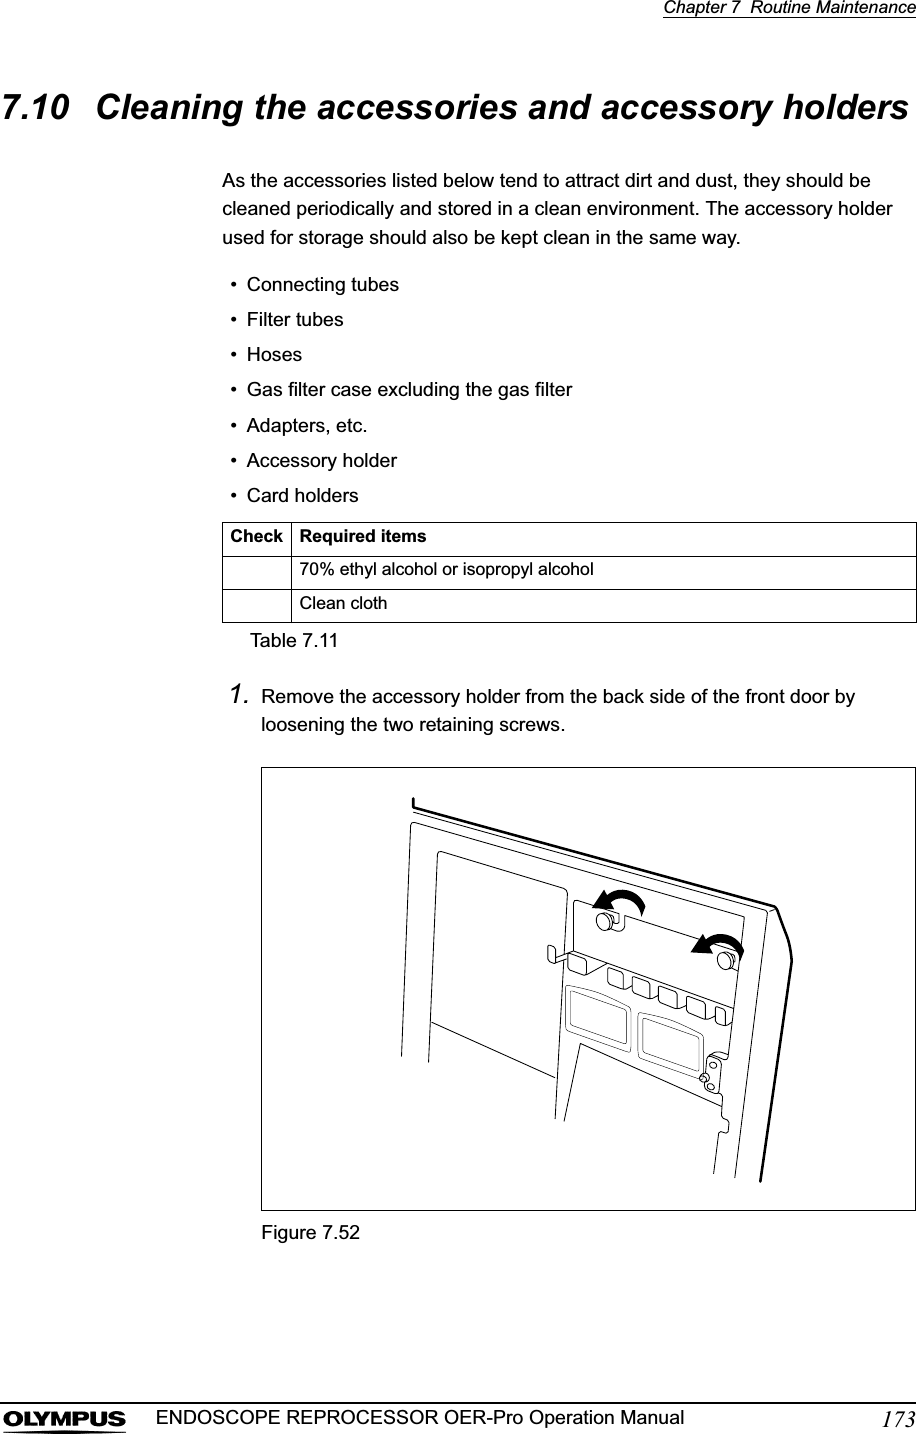
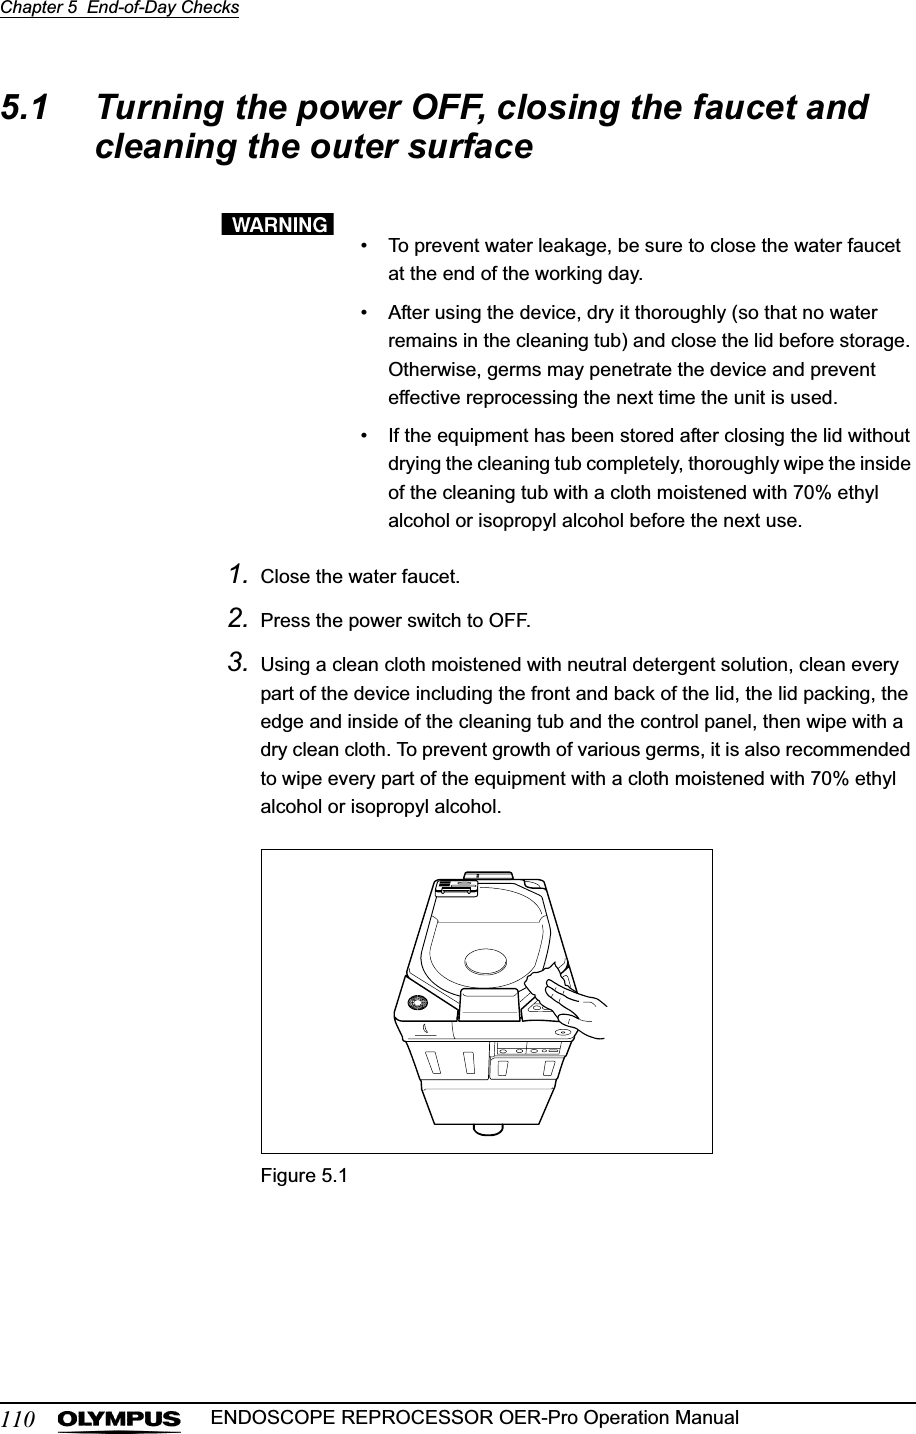
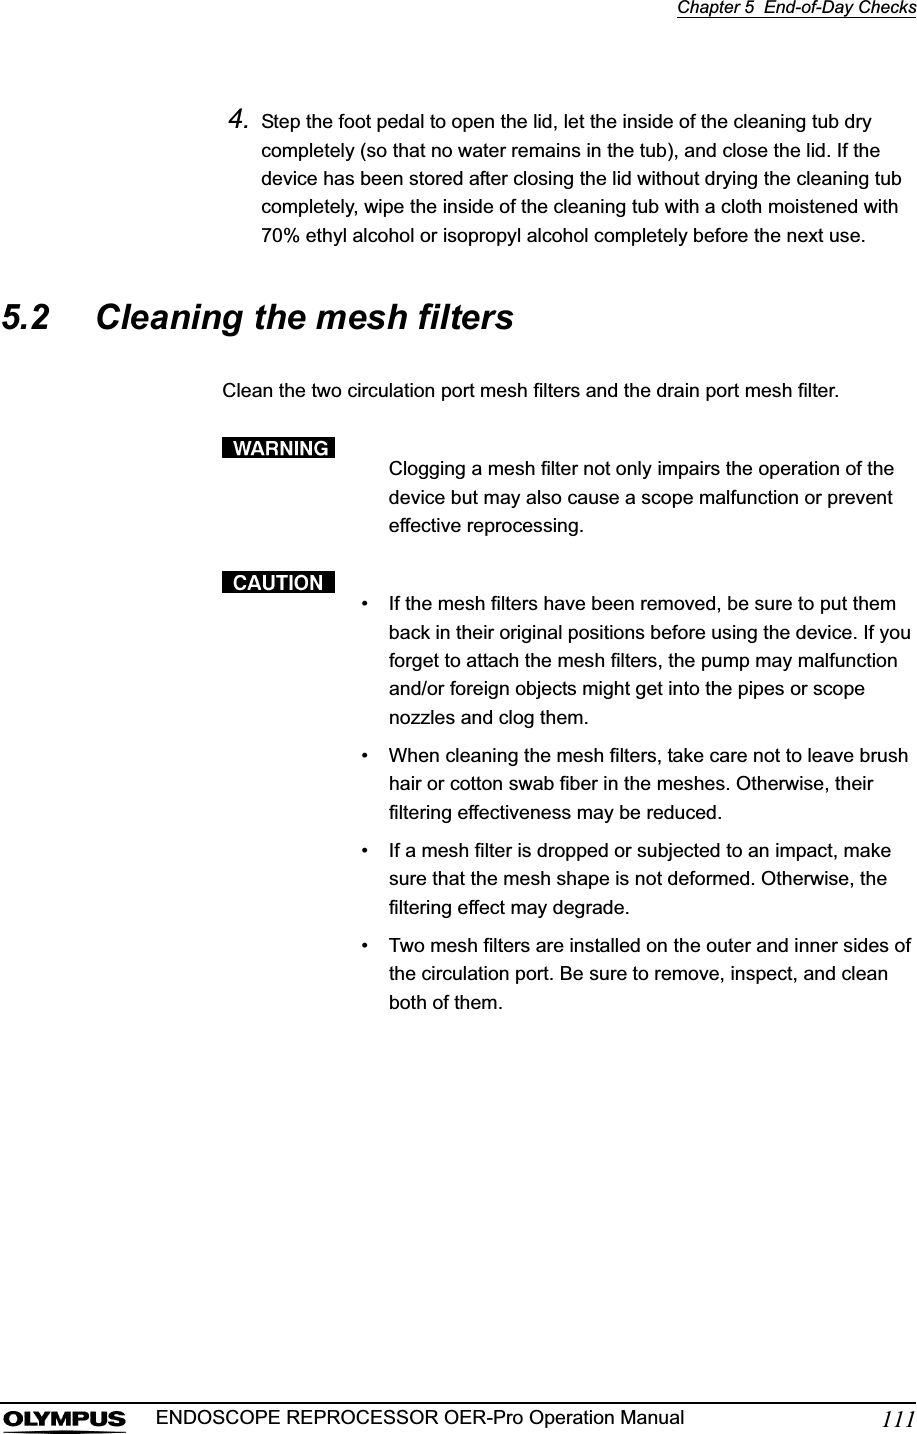
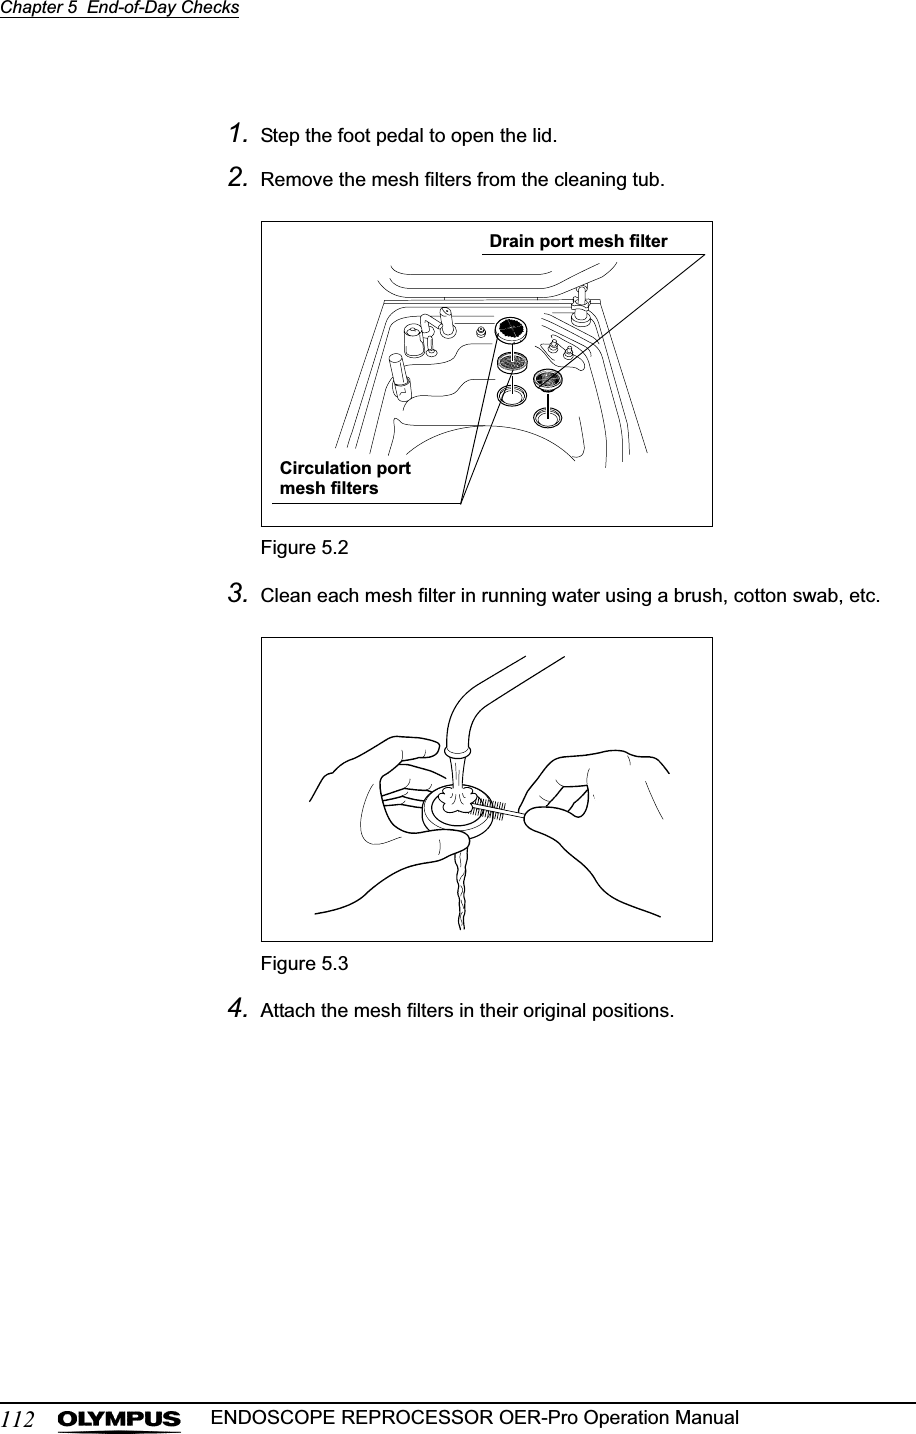
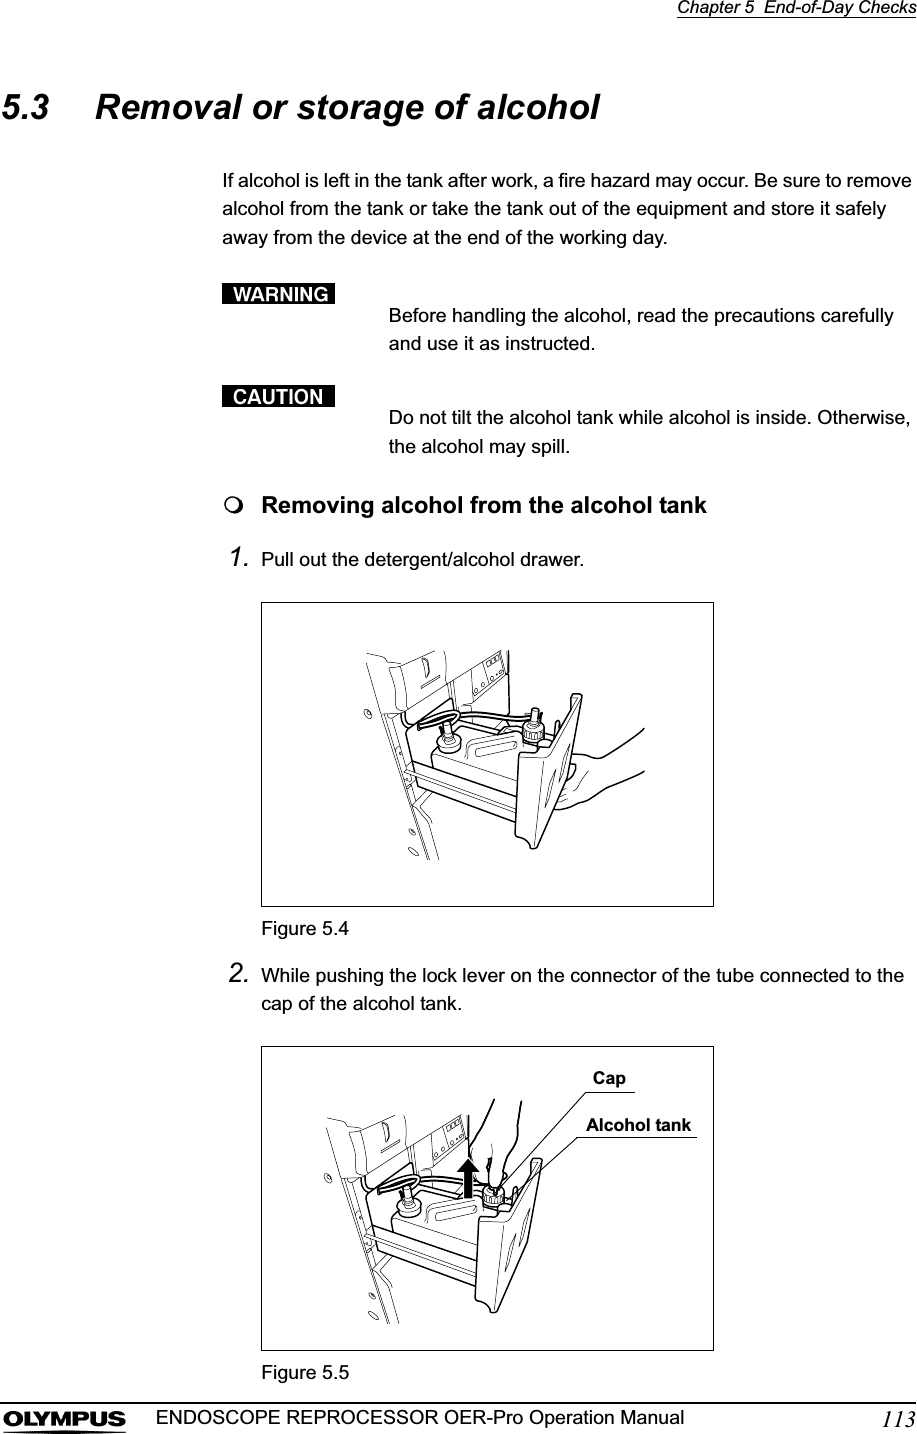
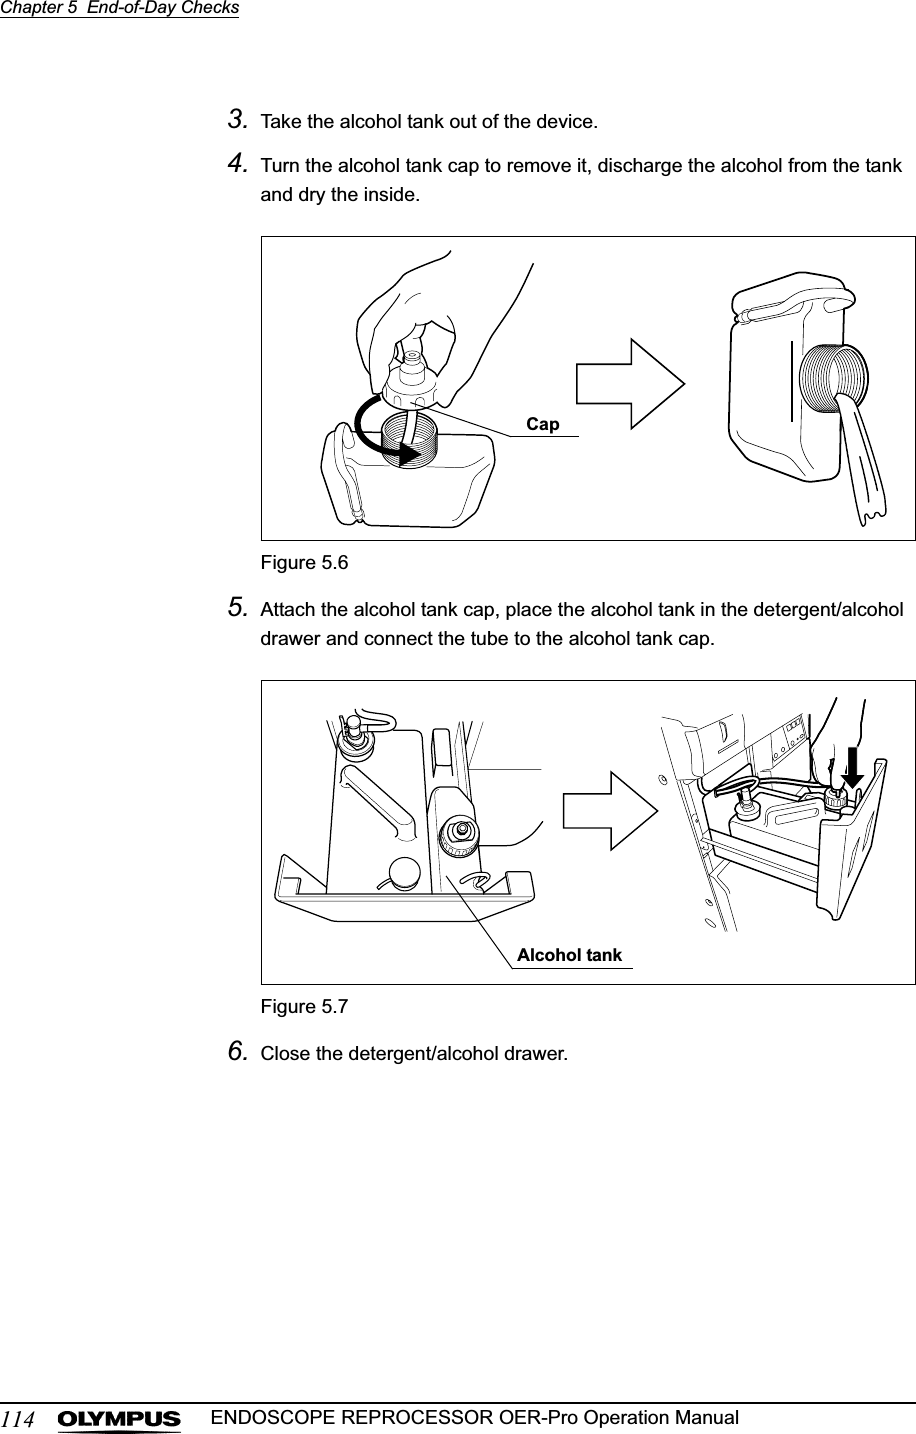
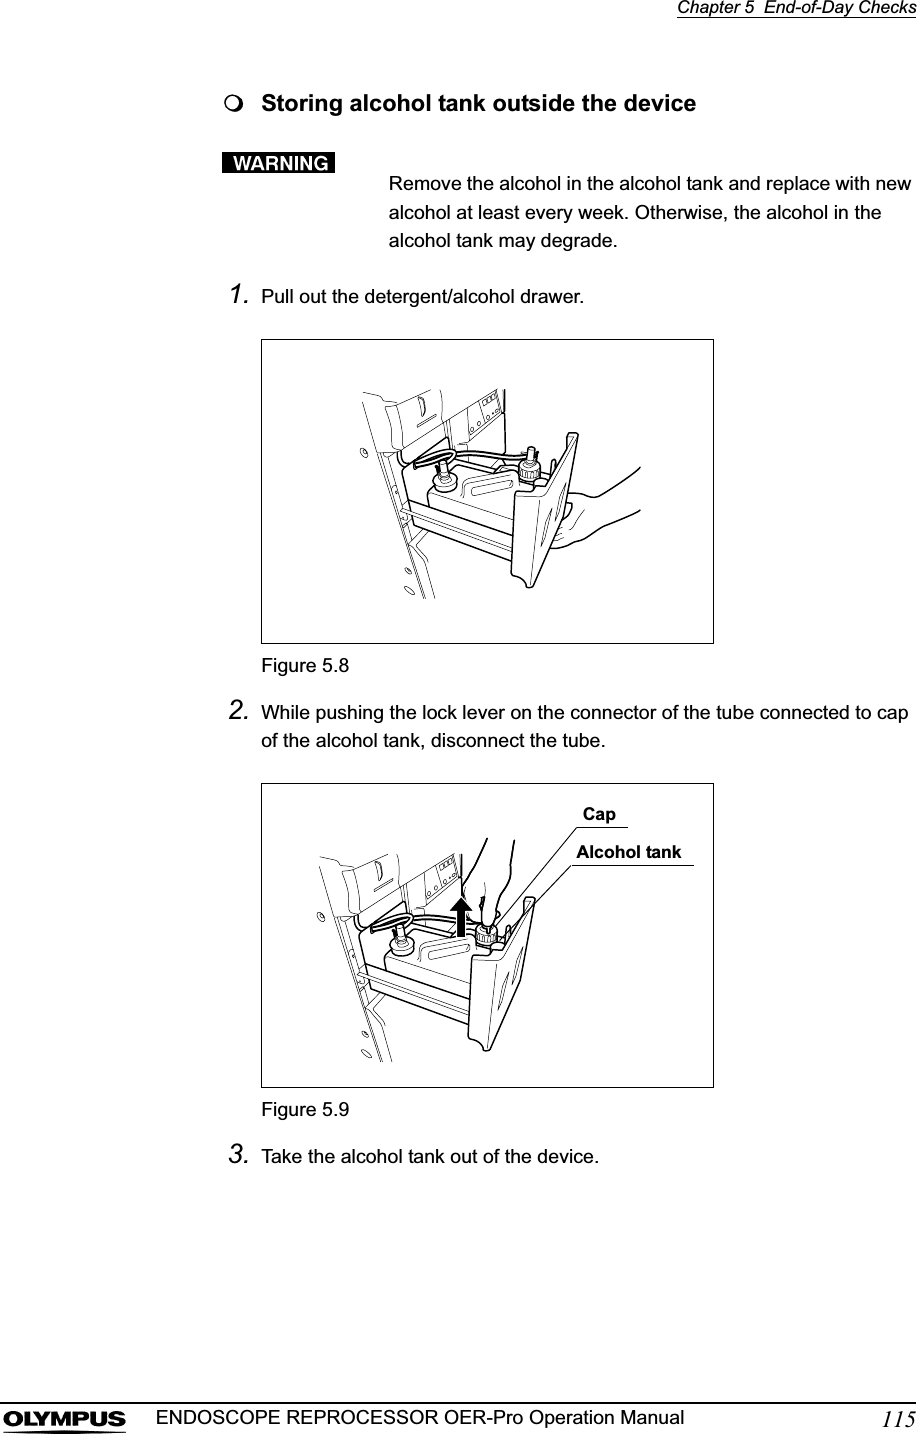
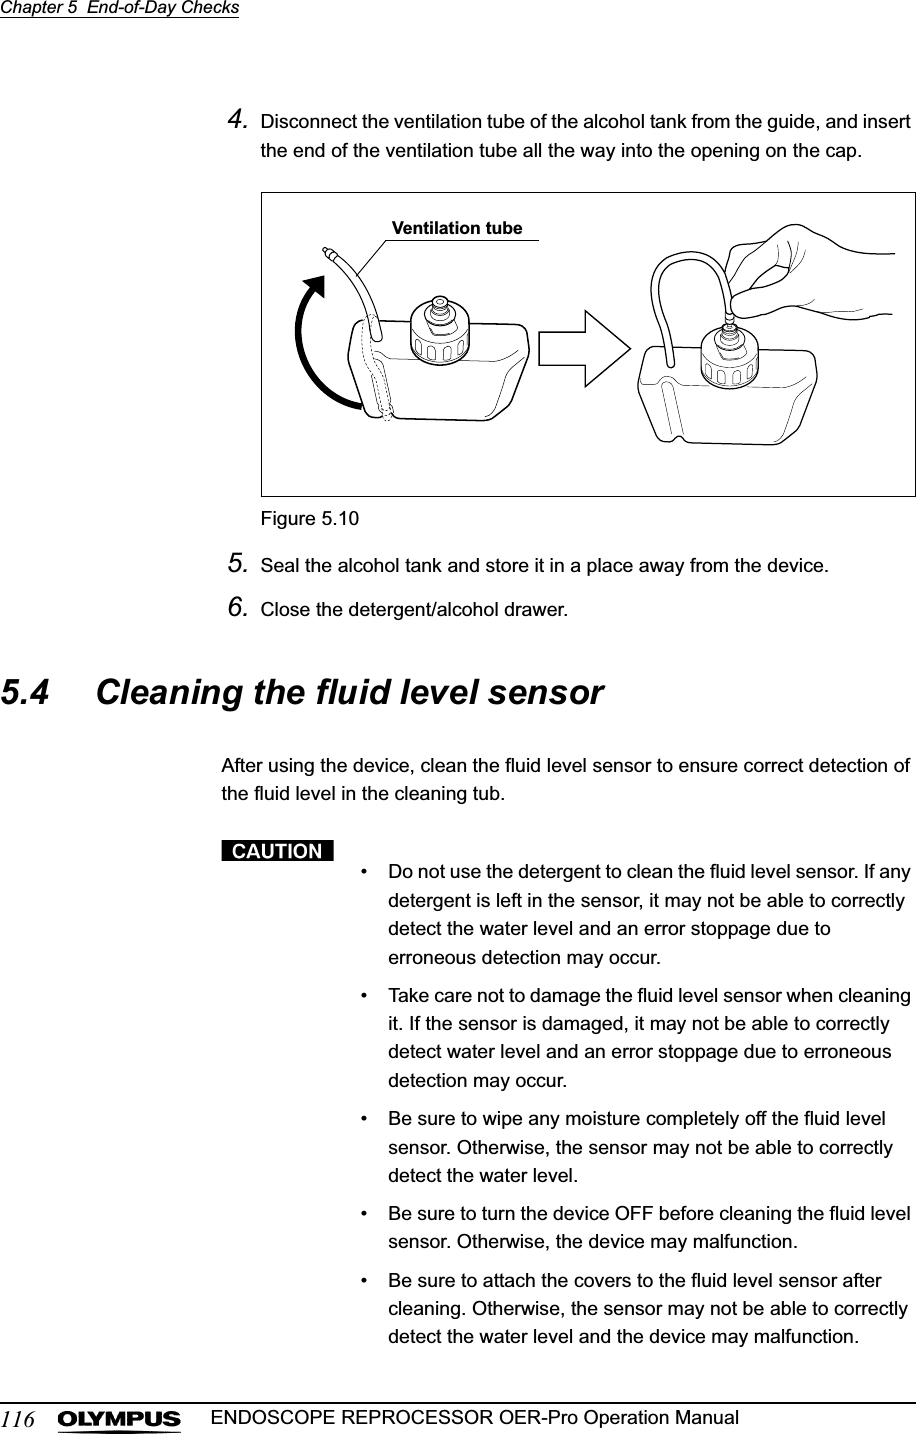
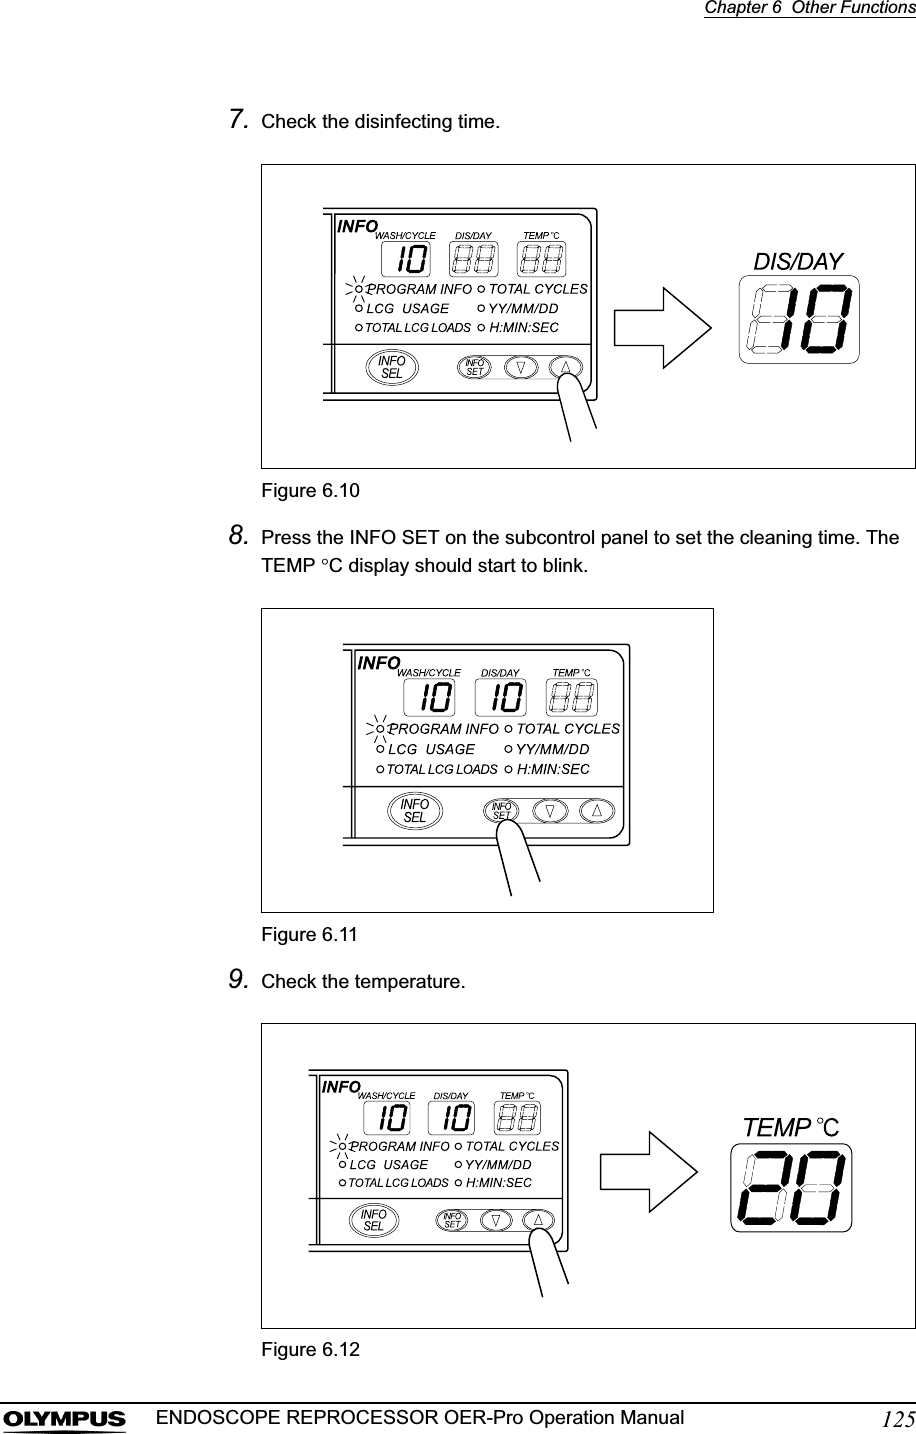
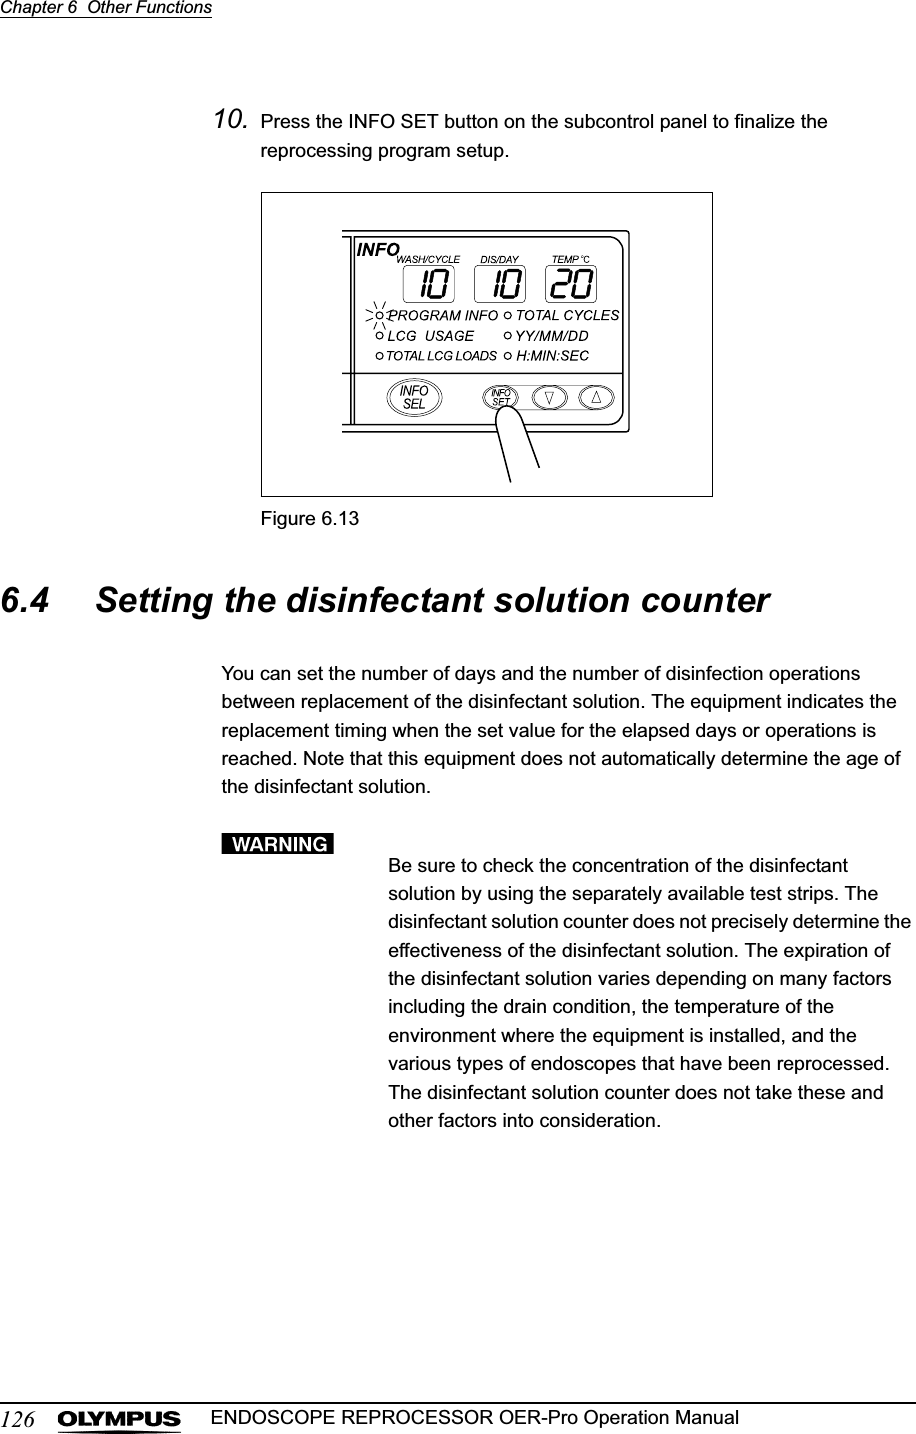
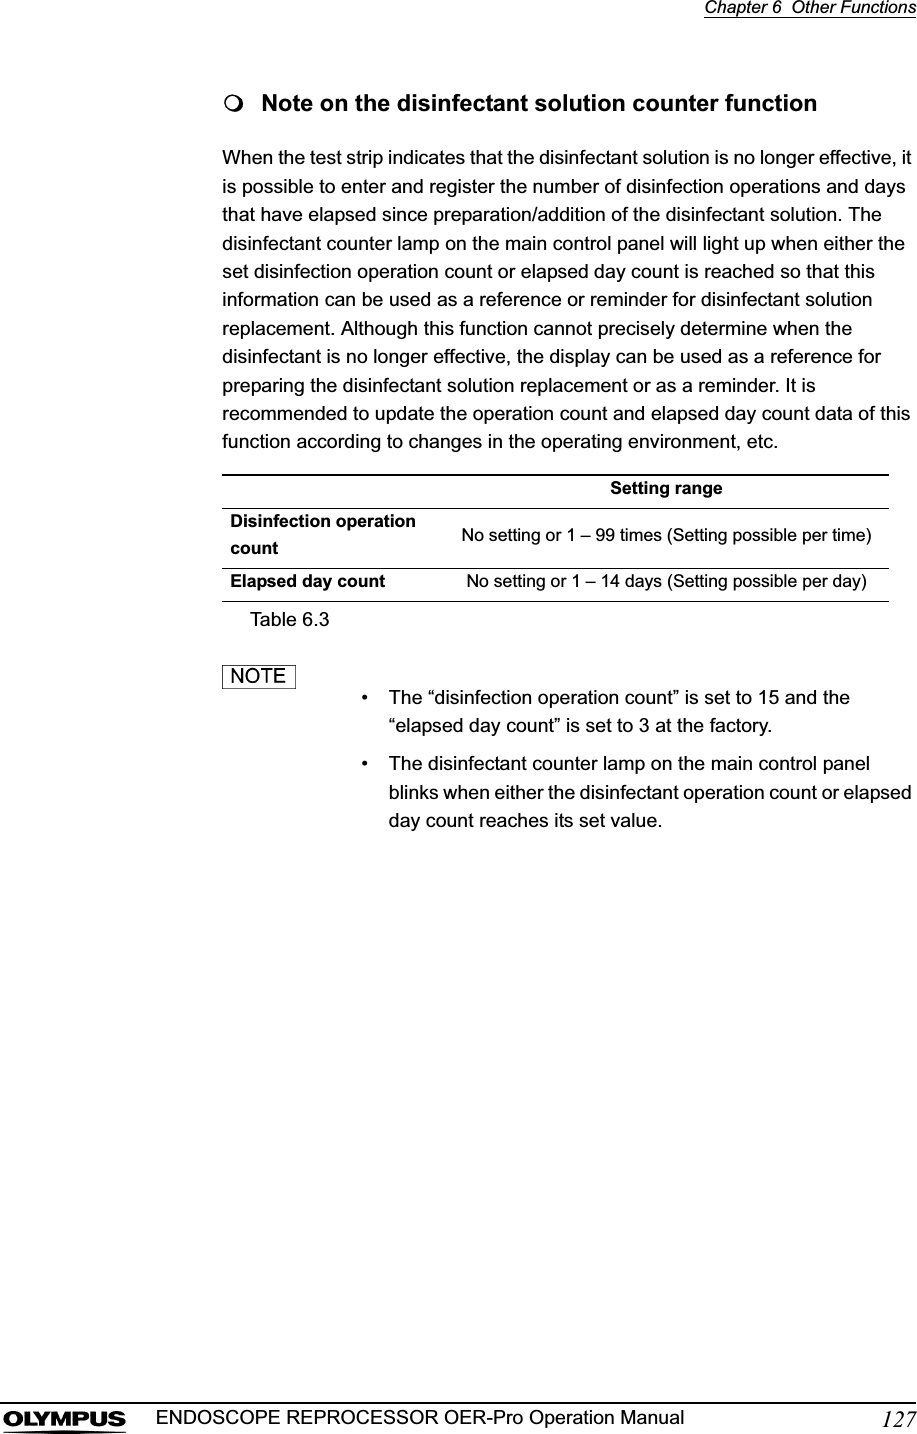
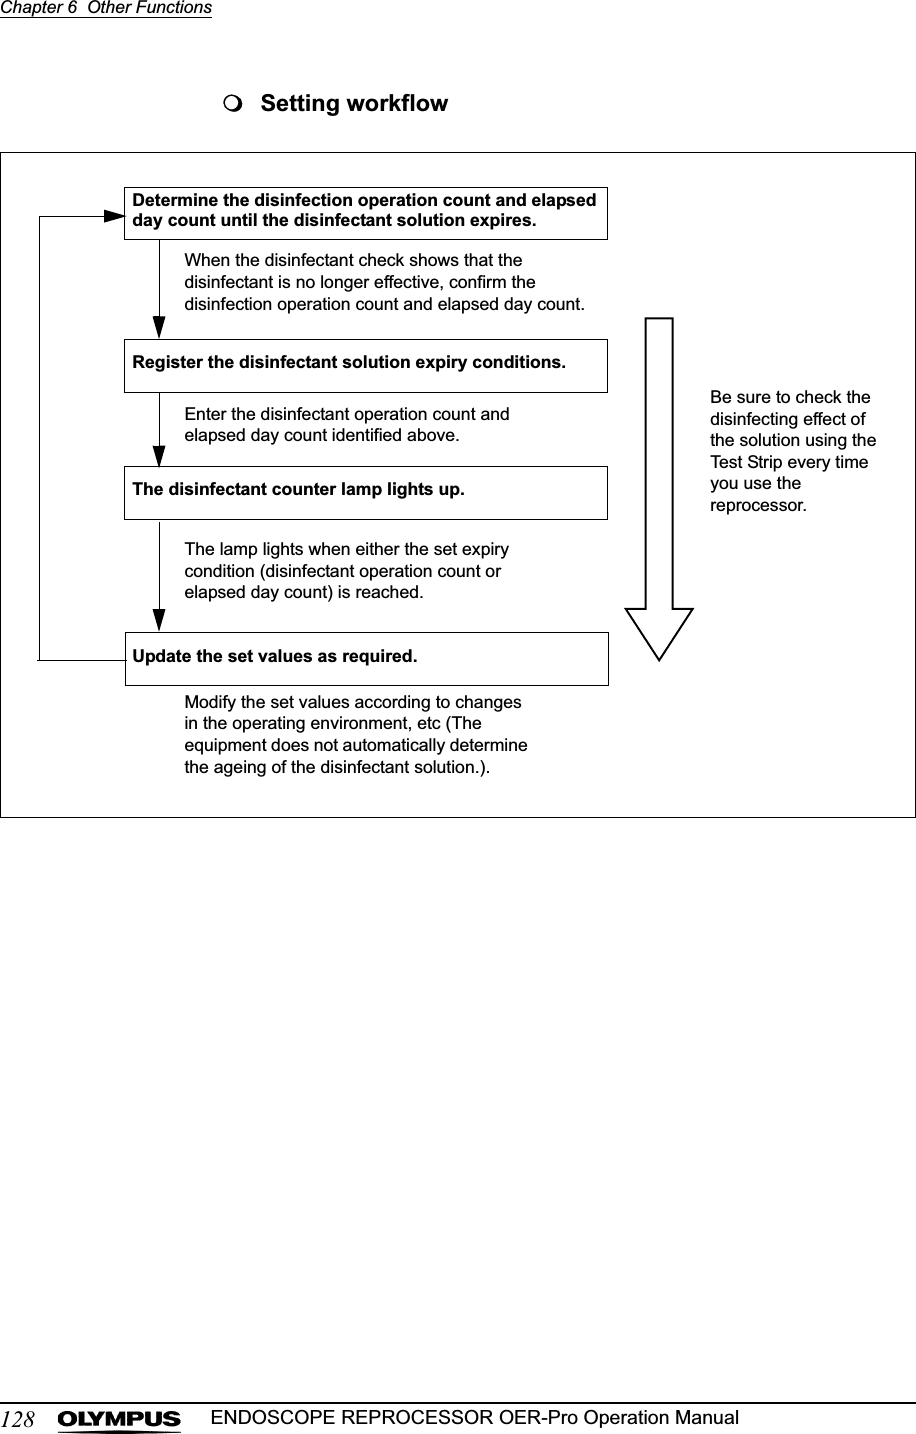
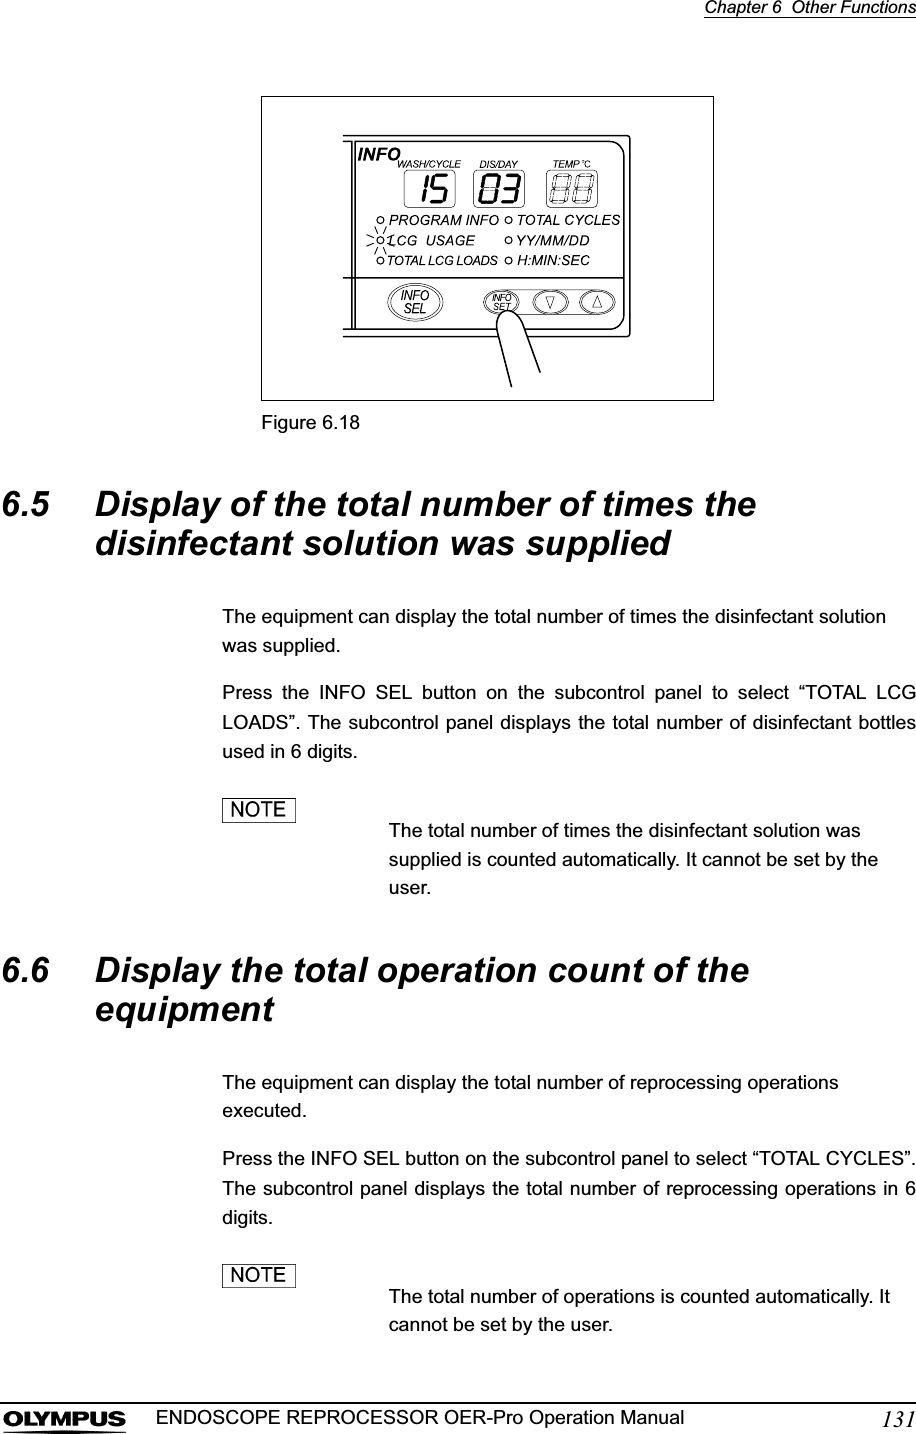
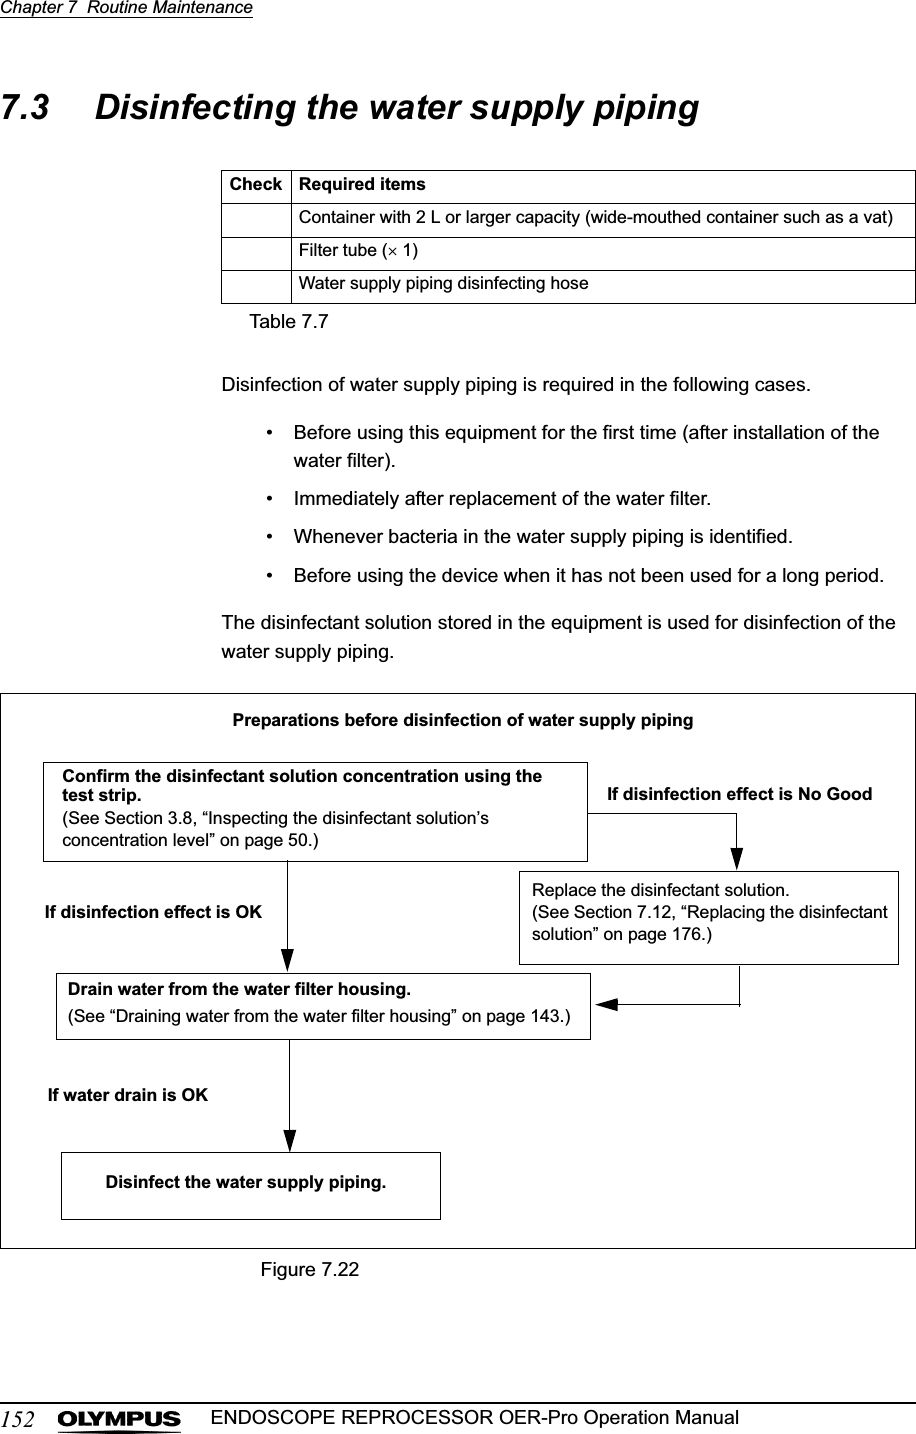
Users Manual 3


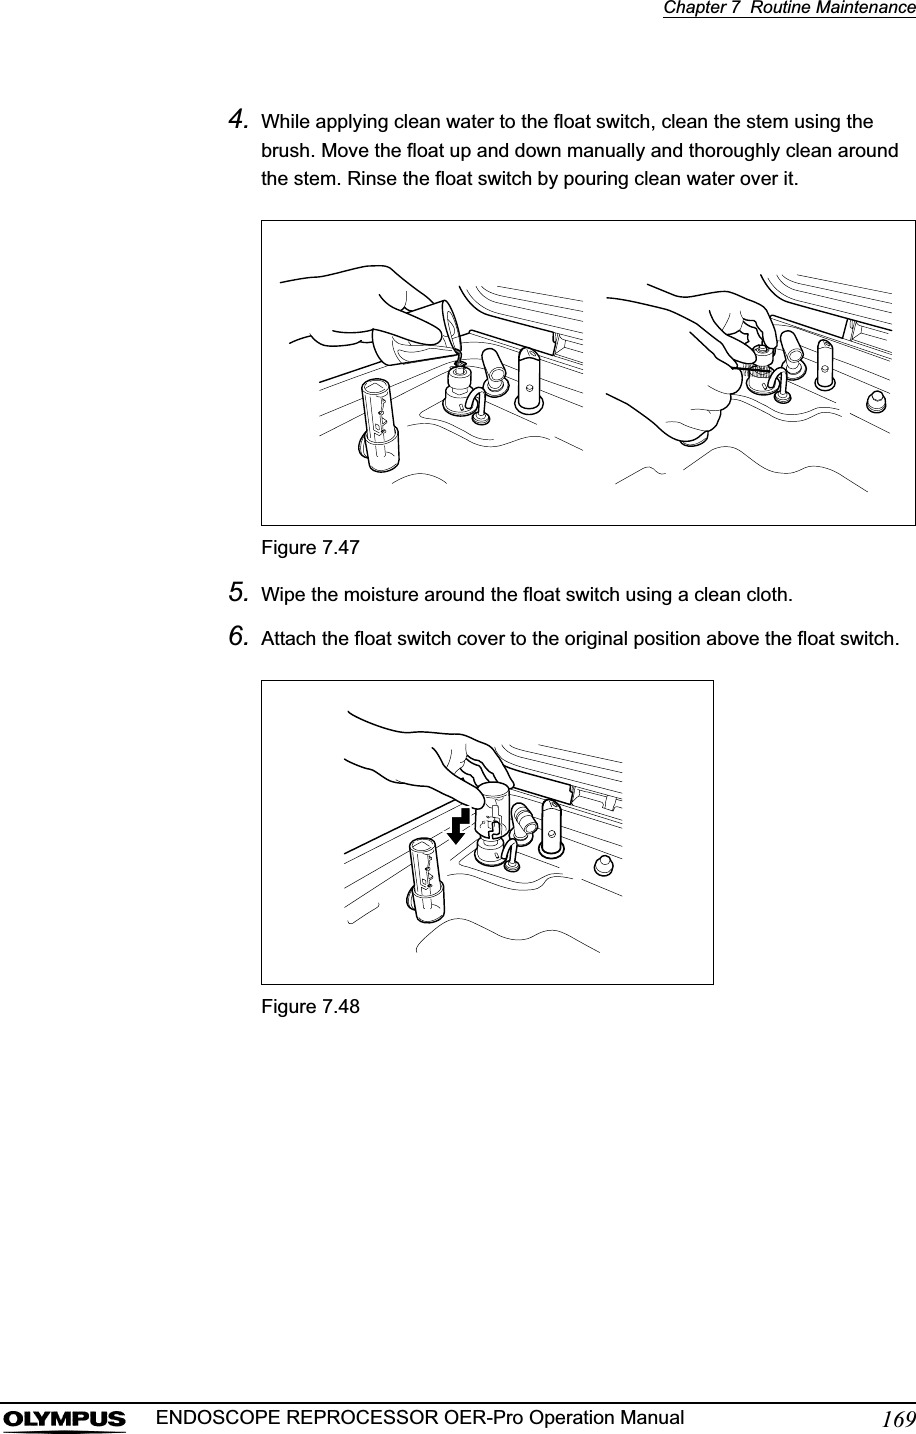
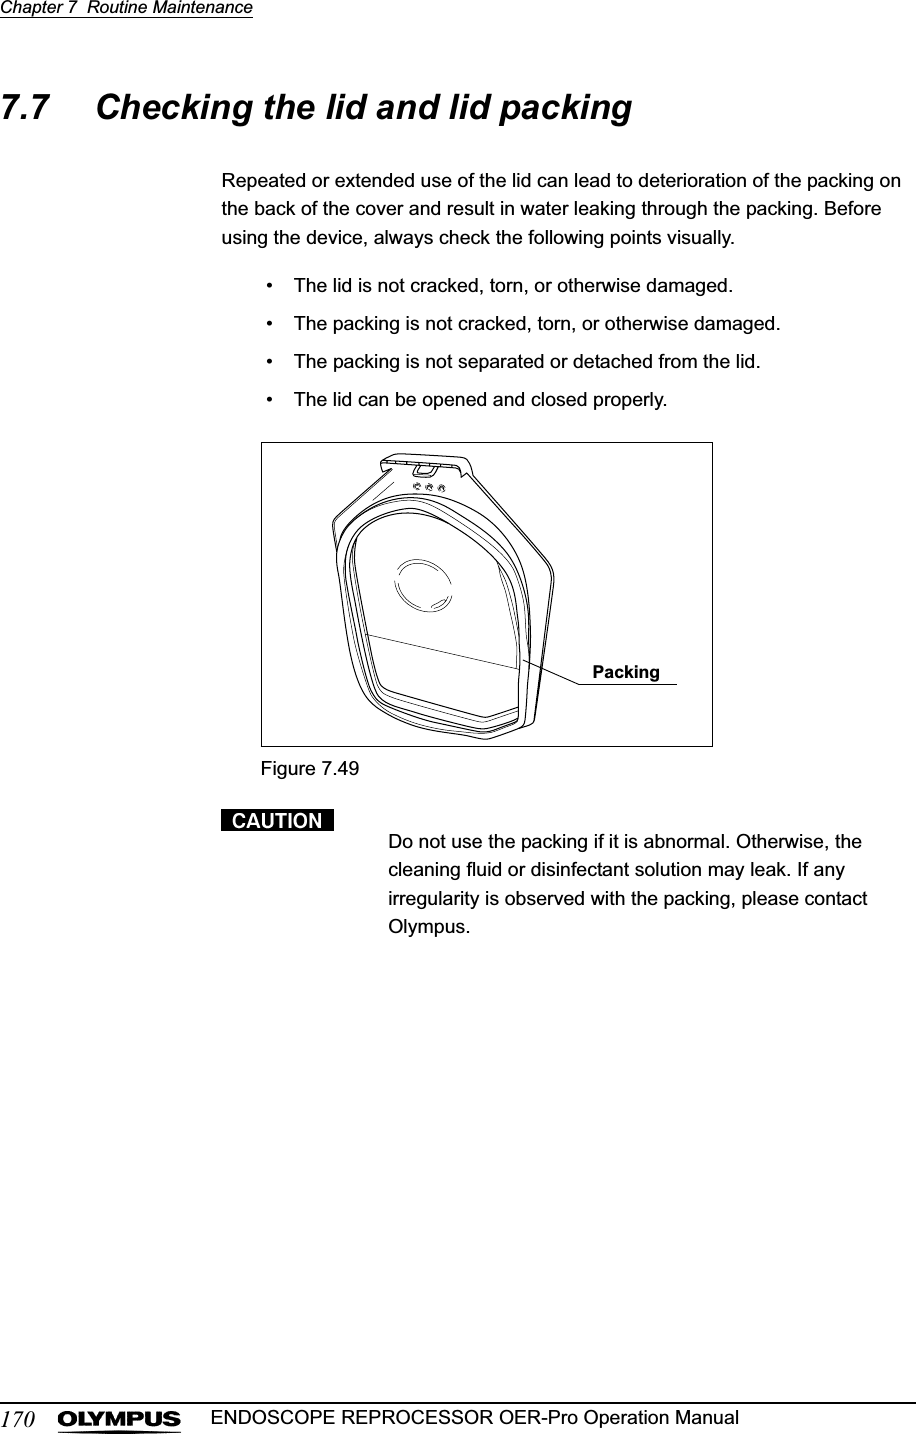
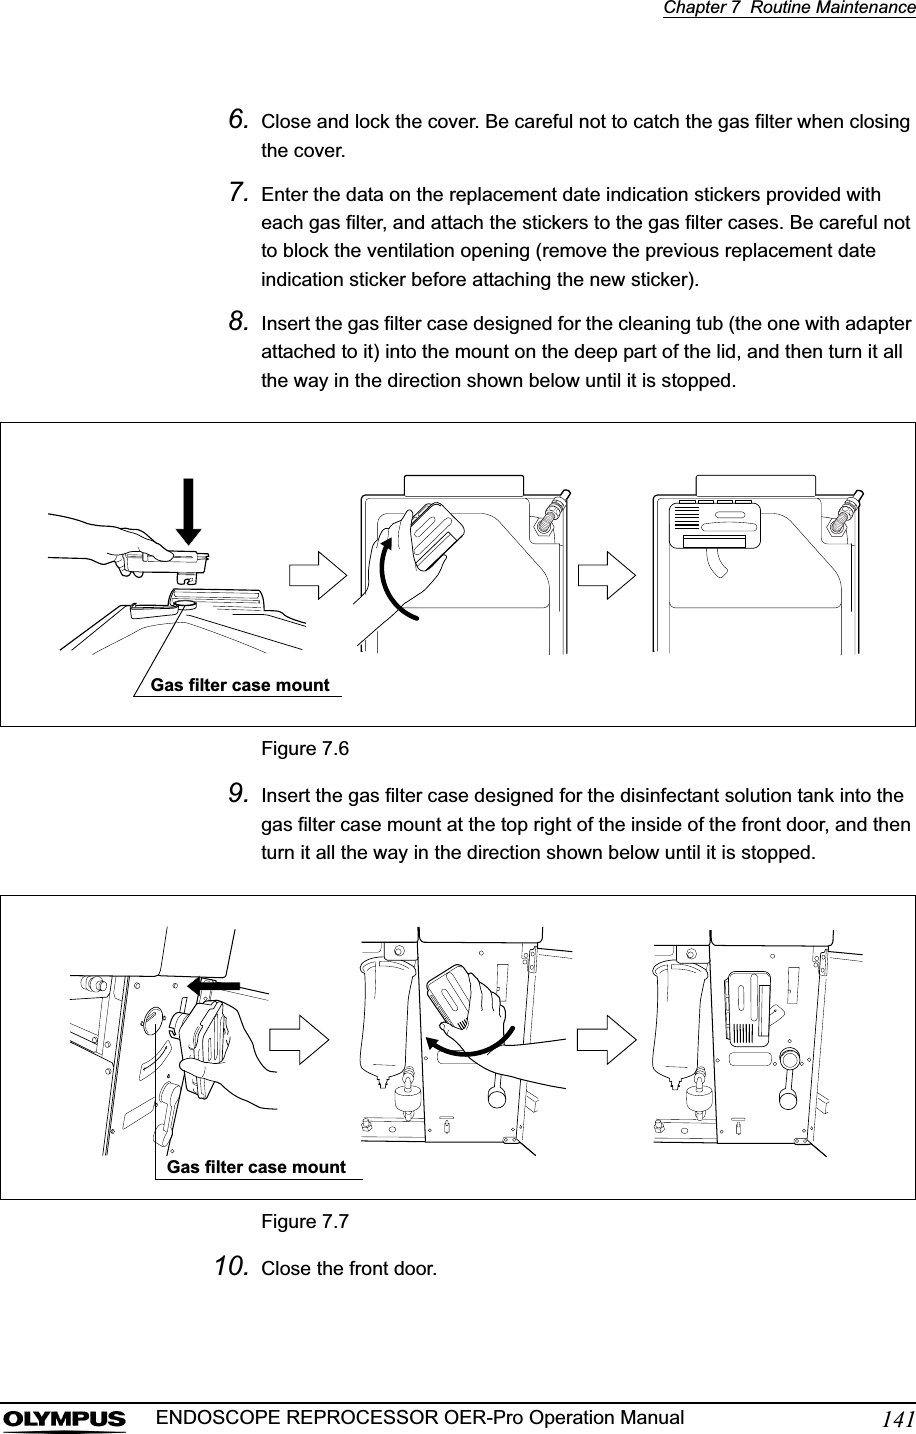
![Chapter 6 Other Functions121ENDOSCOPE REPROCESSOR OER-Pro Operation Manual3. Press the FUNC START button on the subcontrol panel. The heat disinfectant indicator will light to indicate that the operation is in progress and the TIME/CODE display on the main control panel shows a spinning [ ] mark as shown below. Disinfectant solution is then poured into the cleaning tub and the heating process starts.Figure 6.3• The disinfectant solution temperature takes about 4 minutes to be increased by 1qC.• The disinfectant solution is heated to slightly above 20qC(68qF) to compensate for the decrease in temperature inside the equipment.4. When the disinfectant solution temperature reaches the specified level, the disinfectant solution is automatically collected and the cleaning tub is rinsed.5. When heating of the disinfectant solution is completed, the buzzer should beep and the TIME/CODE display on the main control panel should show[- -] indicating the end of the process.Figure 6.4](https://usermanual.wiki/Olympus-Medical-Systems/GN4215.Users-Manual-3/User-Guide-870329-Page-13.png)
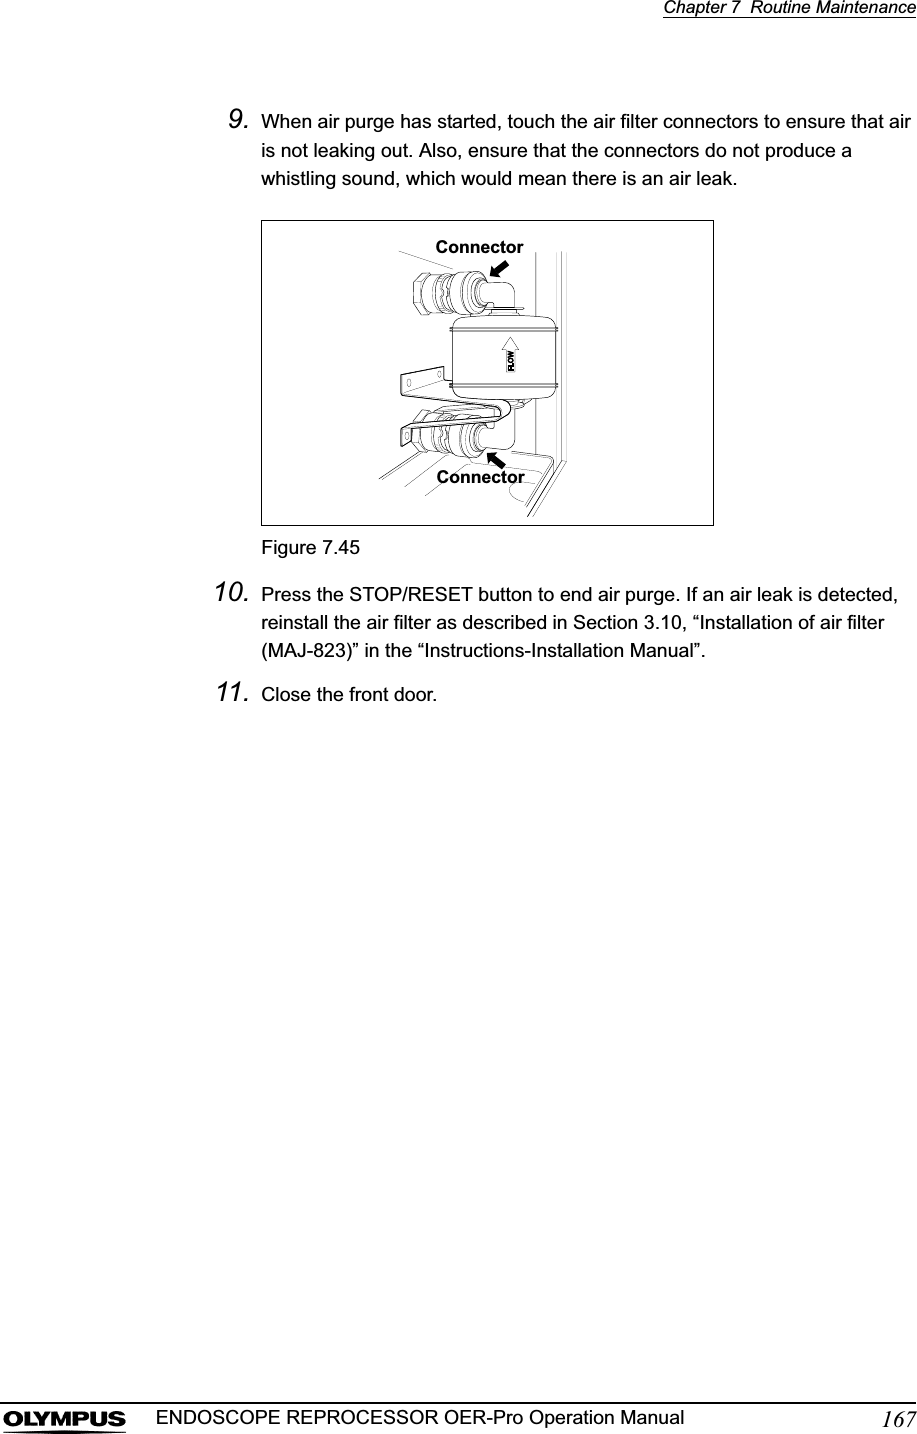
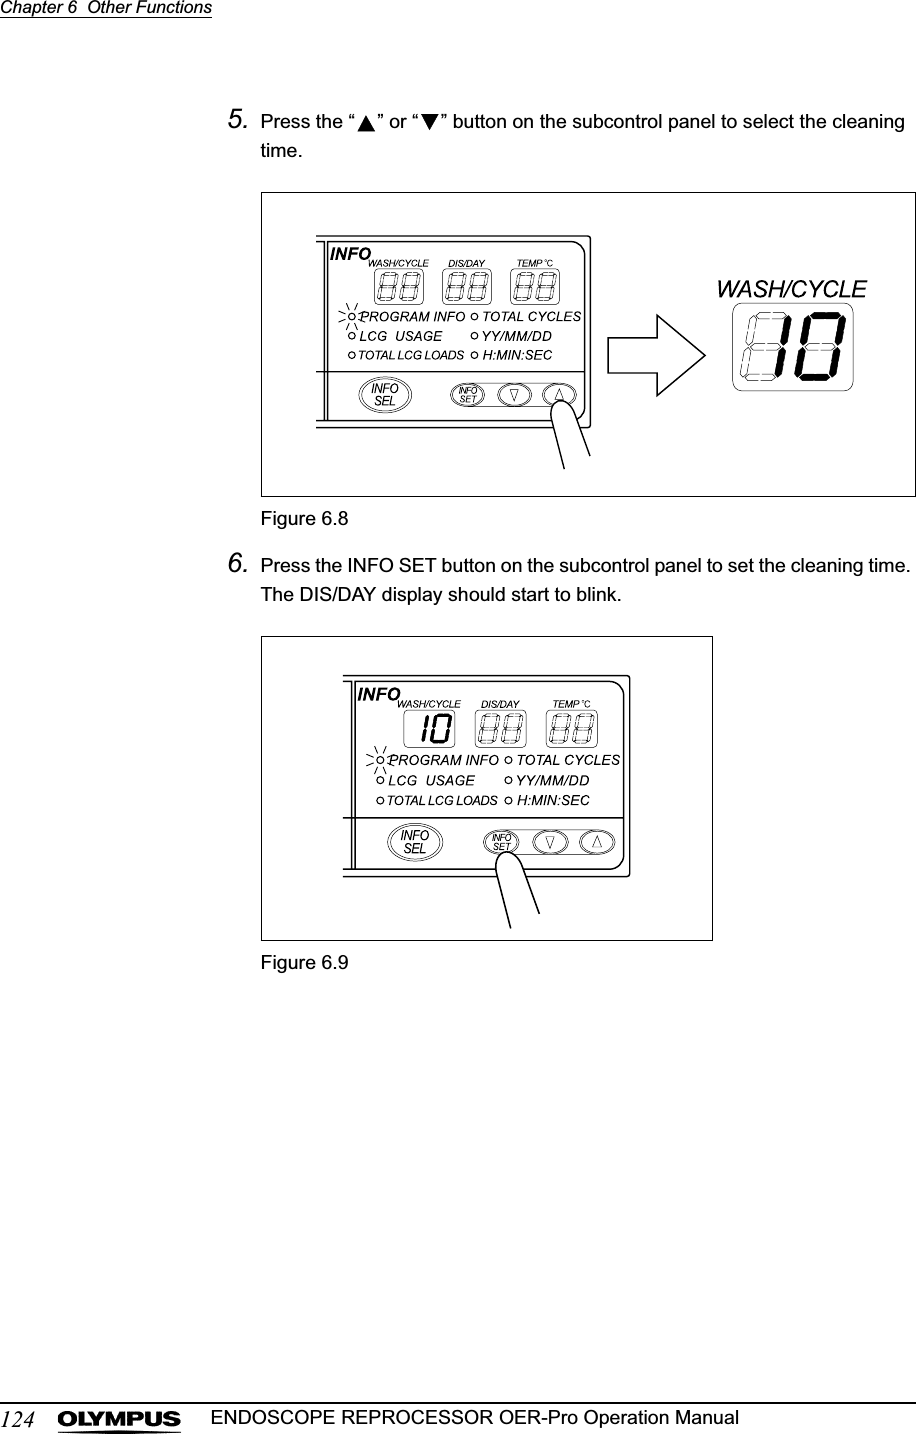
![122Chapter 6 Other FunctionsENDOSCOPE REPROCESSOR OER-Pro Operation Manual6.3 Setting the reprocessing programsCleaning time can be set in reprocessing programs [2] and [3]. If the temperature of the disinfectant solution in the cleaning tub is below 20qC (68qF), it will be heated to 20qC (68qF) before the disinfection process starts.• Program [1] is preset to the values (cleaning time, disinfecting time and disinfectant solution heating) that Olympus has confirmed provide effective reprocessing. The settings of this program cannot be altered.• The disinfectant solution temperature takes about 4 minutes to be increased by 1qC.1. Set the power switch to ON.2. Press the PROG button on the main control panel to select the program to be set.Figure 6.5Program [1] setup Program [2] and [3] setting rangesCleaning time 2 min 2 – 10 min. (in 1 min. steps)Disinfecting time 10 minDisinfectant solution heating 20qC (68qF)Table 6.2](https://usermanual.wiki/Olympus-Medical-Systems/GN4215.Users-Manual-3/User-Guide-870329-Page-14.png)
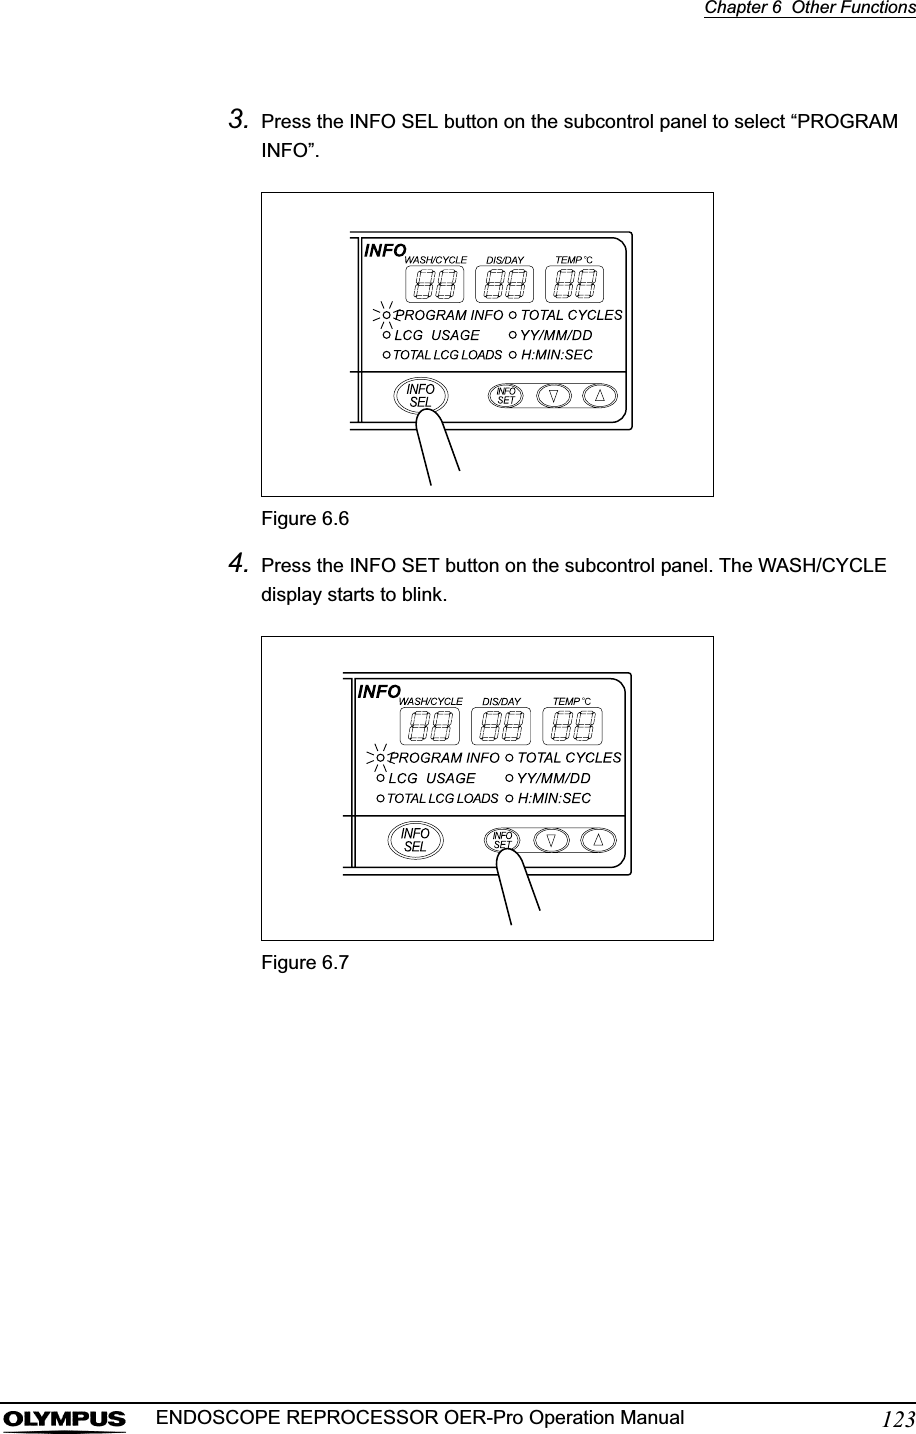
![Chapter 6 Other Functions129ENDOSCOPE REPROCESSOR OER-Pro Operation ManualSetting the disinfection operation count and elapsed day count1. Check the effectiveness of the disinfectant solution every time before reprocessing scopes using the test strip (see Section 3.8, “Inspecting the disinfectant solution’s concentration level” on page 50).2. When the disinfectant has been identified as no longer effective, press the INFO SEL button on the subcontrol panel to select “LCG USAGE”, and then press the INFO SET button. The WASH/CYCLE display starts to blink.Figure 6.143. Press the “ ” or “ ” button on the subcontrol panel to set the disinfection operation count.Set [- -] if you do not want to set the disinfection operation count.Figure 6.15](https://usermanual.wiki/Olympus-Medical-Systems/GN4215.Users-Manual-3/User-Guide-870329-Page-21.png)
![130Chapter 6 Other FunctionsENDOSCOPE REPROCESSOR OER-Pro Operation Manual4. Press the INFO SET button on the subcontrol panel. The DIS/DAY display should start to blink.Figure 6.165. Press the “ ” or “ ” button on the subcontrol panel to set the elapsed day count.Set [- -] if you do not want to set the elapsed day count.Figure 6.176. Press the INFO SET button on the subcontrol panel to finish the setting.](https://usermanual.wiki/Olympus-Medical-Systems/GN4215.Users-Manual-3/User-Guide-870329-Page-22.png)
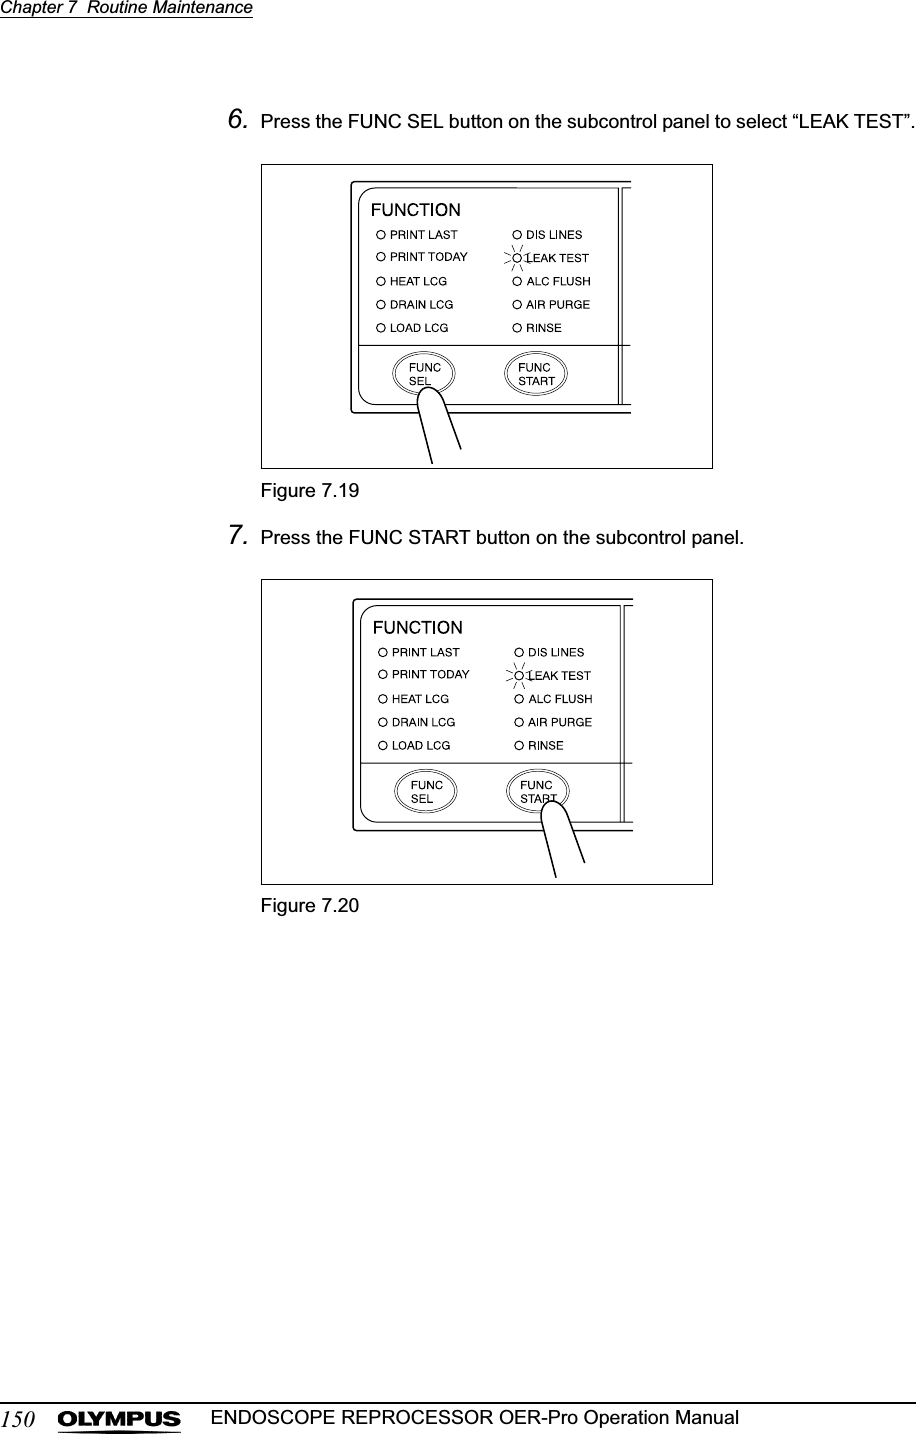
![132Chapter 6 Other FunctionsENDOSCOPE REPROCESSOR OER-Pro Operation Manual6.7 Air purgeAir purge is performed to drain the remaining cleaning fluid and disinfectant solution from the tub after an irregularity occurs, or if the process is stopped before it completes. Air purge also eliminates residual fluid from the endoscope channels.1. Close the lid.2. Press the FUNC SEL button on the subcontrol panel to select “AIR PURGE”.Figure 6.193. Press the FUNC START button on the subcontrol panel to start air purge. The TIME/CODE display on the main control panel shows [10], which indicates 10 minutes. The elapsed time displayed on the main control panel counts down every minute.4. The buzzer beeps and air purge is completed in 10 minutes. The main control panel displays [- -] to indicate the end of air purge.To stop the air purge process midway, press the STOP/RESET button on the main control panel.](https://usermanual.wiki/Olympus-Medical-Systems/GN4215.Users-Manual-3/User-Guide-870329-Page-24.png)
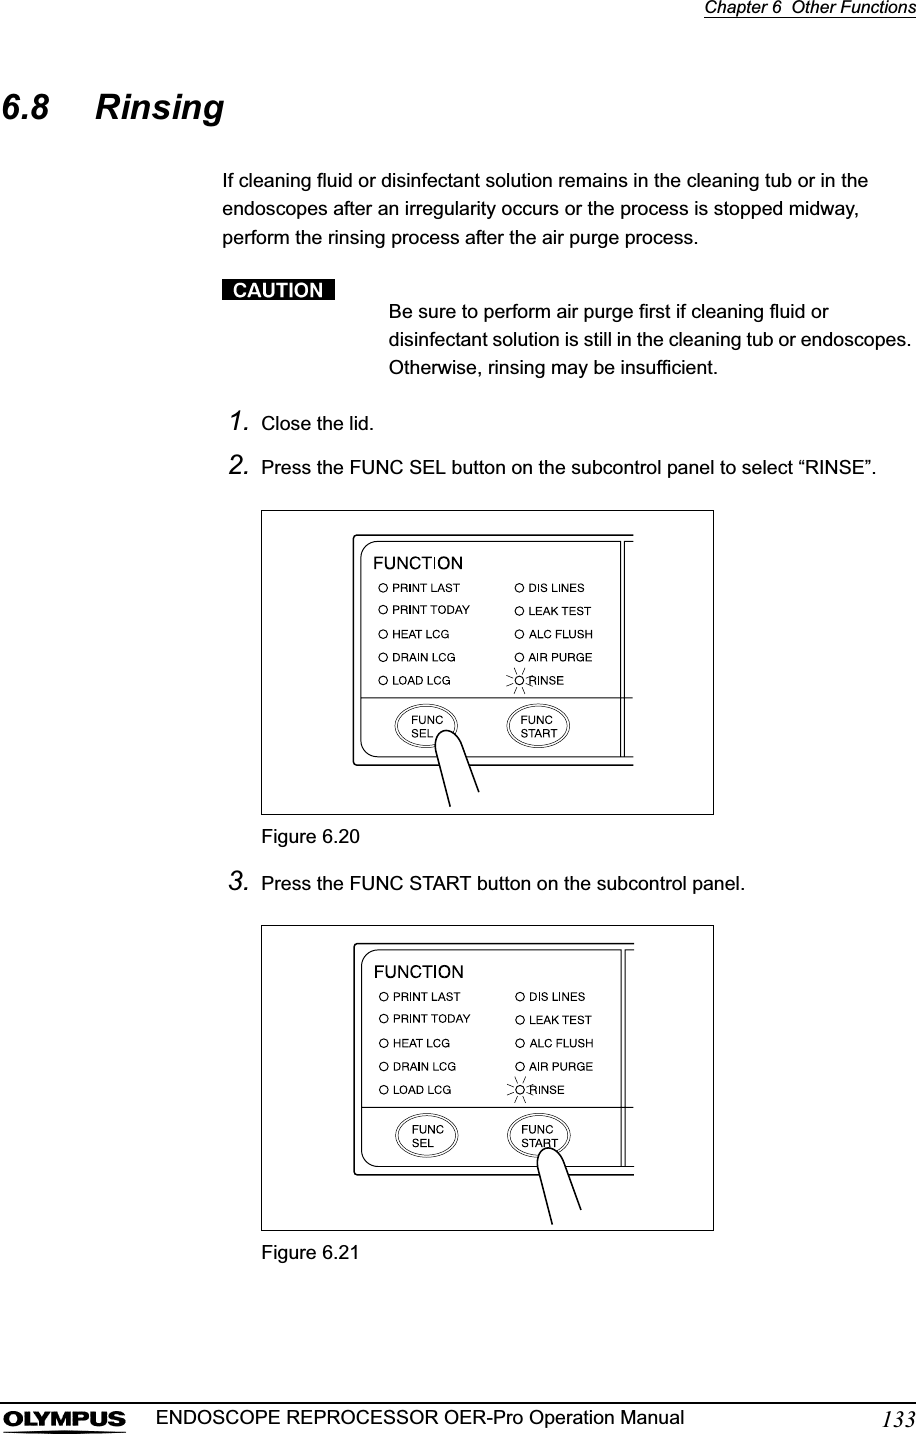
![134Chapter 6 Other FunctionsENDOSCOPE REPROCESSOR OER-Pro Operation Manual4. When rinsing is finished, the buzzer beeps to indicate the end of the process. At this time, the TIME/CODE display on the main control panel shows [- -].6.9 Emergency stop and automatic processing after stoppingThe equipment can be stopped at any time during operation by pressing the STOP/RESET button on the main control panel. The main control panel will display error code [E00] at this time. When the equipment is stopped, it identifies the situation in which it was stopped and automatically performs the required processing operations (including draining of the cleaning tub), after which it stops completely.• When a process is interrupted, be sure to execute it again from the beginning. Otherwise, the scope reprocessing may be insufficient.• If the process is stopped because of a problem with the equipment, contact Olympus.• Do not set the power switch to OFF to stop the equipment during operation. Otherwise, the fluid will remain in the cleaning tub and the equipment may malfunction.• Do not set the power switch to OFF during automatic processing. Otherwise, the fluid will remain in the cleaning tub without automatic processing, and the equipment may malfunction.There are cases in which automatic processing can be interrupted in the middle and those in which it cannot. Whether or not automatic processing can be interrupted should be determined according to the displayed error code.• When the displayed error code remains litPressing the STOP/RESET can interrupt the automatic processing.• When the displayed error code is blinkingAutomatic Processing cannot be interrupted.](https://usermanual.wiki/Olympus-Medical-Systems/GN4215.Users-Manual-3/User-Guide-870329-Page-26.png)
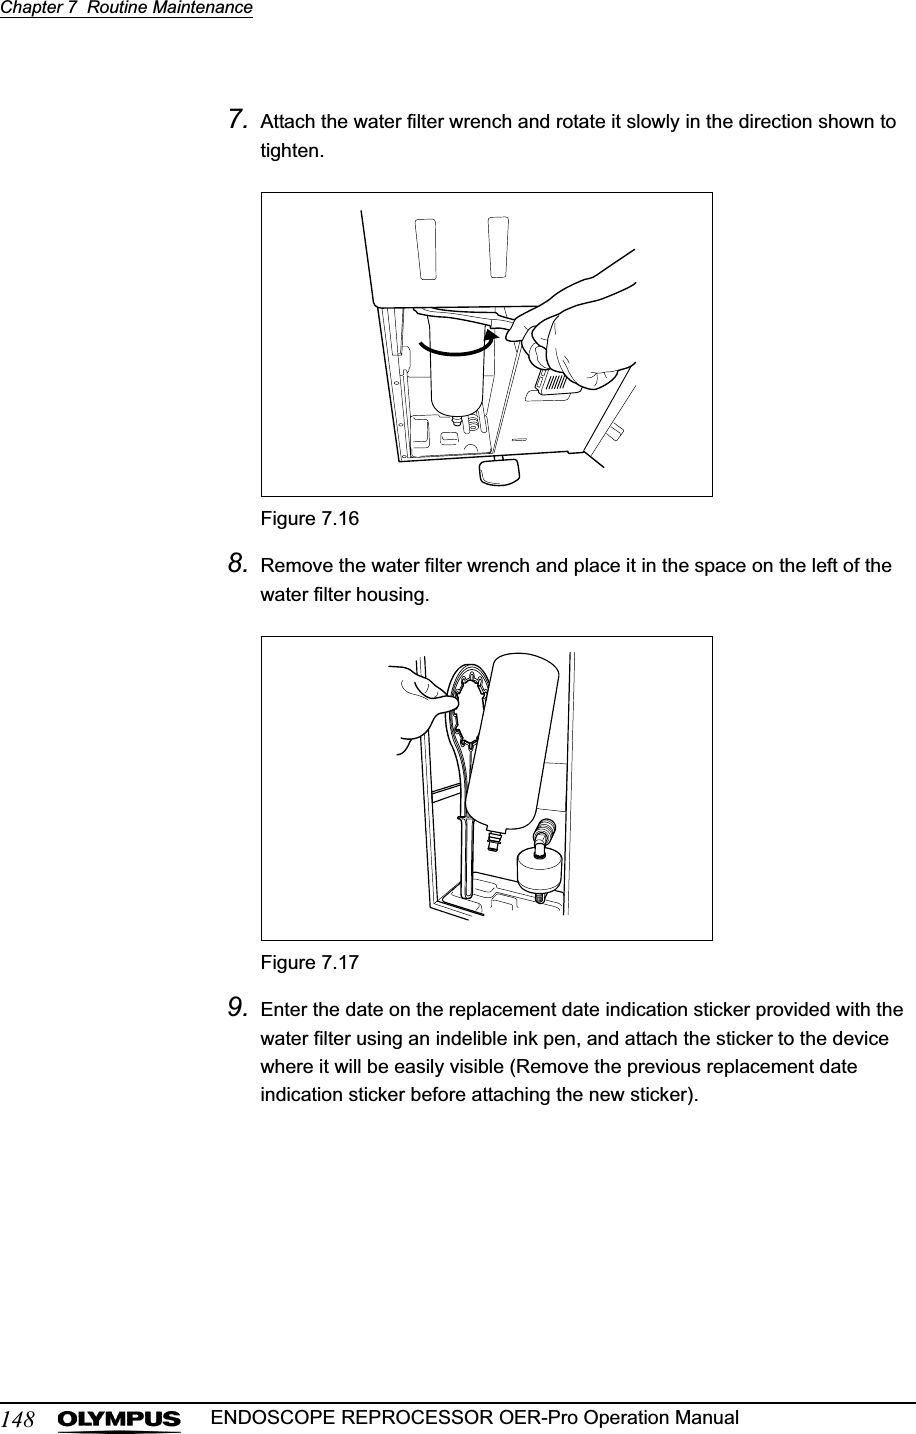
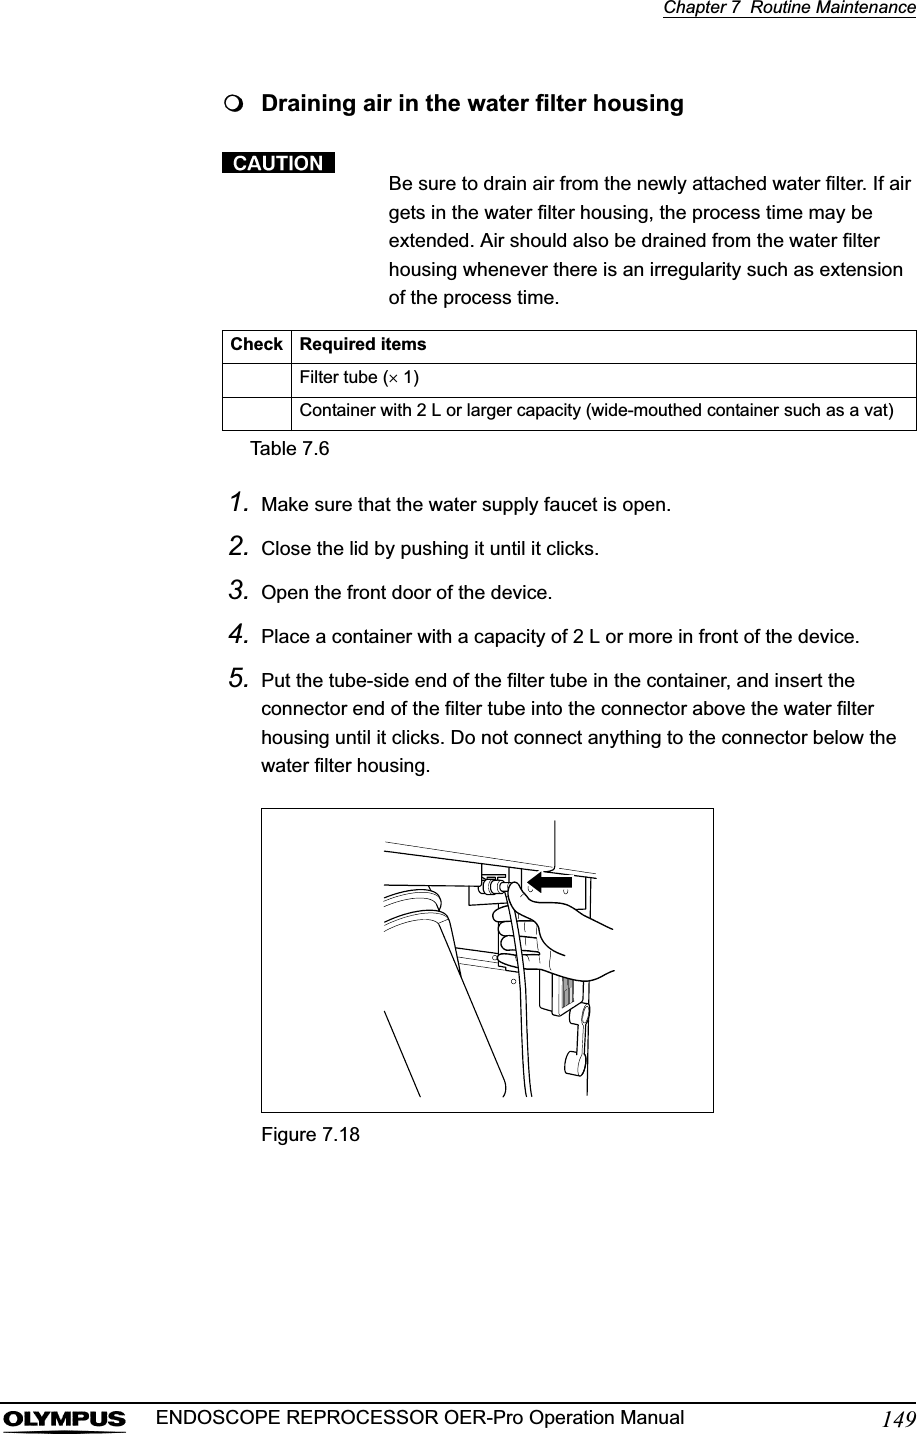
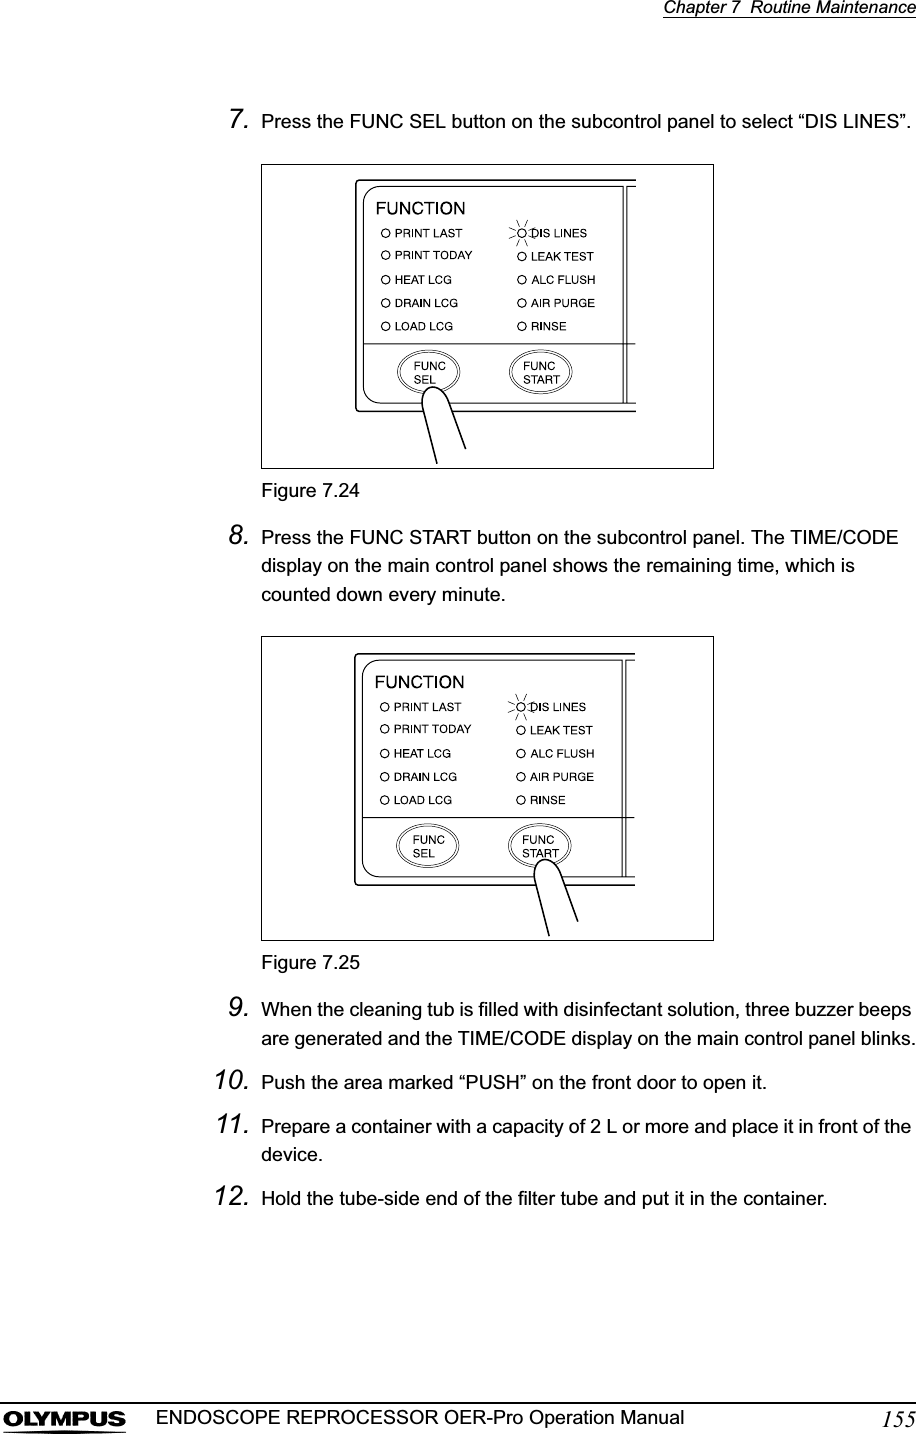
![142Chapter 7 Routine MaintenanceENDOSCOPE REPROCESSOR OER-Pro Operation Manual7.2 Replacing the water filter (MAJ-824)Replace the water filter at least once a month to prevent contamination of the rinse water. The water filter should also be replaced whenever an error code indicating water supply insufficiency [E01] is displayed. The water filter should be replaced by following the flow shown below.Using a commercially available prefilter can extend the life of the water filter. For information on the prefilter, contact Olympus.• Replace the water filter in a clean environment. Do not touch the inner side of the water filter or allow dust to get in it.• After replacing the water filter, be sure to perform the operation described in Section 7.3, “Disinfecting the water supply piping” on page 152 to prevent multiplication of miscellaneous germs and staining inside the water supply pipes. Failure to perform this operation could result in contamination of the device piping and/or the scope, preventing effective reprocessing.Check Required itemsWater filter (MAJ-824)Water filter wrenchWater filter tubes (u 2)Container with 2 L or larger capacity (wide-mouthed container such as a vat)Indelible pen or other writing implementTable 7.5Replace the water filterDrain water from the water filter housingDisinfect the water supply pipingDrain air in the water filter housing](https://usermanual.wiki/Olympus-Medical-Systems/GN4215.Users-Manual-3/User-Guide-870329-Page-34.png)


![Chapter 7 Routine Maintenance157ENDOSCOPE REPROCESSOR OER-Pro Operation Manual15. Disconnect the filter tube as soon as water starts to flow from it continuously.Figure 7.28If the temperature of the disinfectant solution is below 20qC(68qF), it is heated to 20qC (68qF). During heating, the TIME/CODE display blinks without counting down. It restarts countdown after completion of heating.16. When the remaining time displayed on the main control panel reaches [00], the buzzer beeps and the TIME/CODE display shows a [ ] mark rotating as shown below.Figure 7.29](https://usermanual.wiki/Olympus-Medical-Systems/GN4215.Users-Manual-3/User-Guide-870329-Page-49.png)
![Chapter 7 Routine Maintenance159ENDOSCOPE REPROCESSOR OER-Pro Operation Manual19. Water flows continuously from the filter tube. In about 15 seconds, the buzzer beeps indicating the end of process (the CODE/TIME display on the main control panel shows [- -]).Figure 7.3220. Disconnect the filter tube by pushing its lock lever.21. Close the front door.22. Step the foot pedal to open the lid.When disconnecting the water supply piping disinfection hose from the connector, cover the end of the hose with a hand wearing a waterproof glove so that the water inside the hose does not splash.23. Disconnect the water supply piping disinfection hose and close the lid.Figure 7.33Water supply piping disinfection hose connectorWashing case mountTemperature sensorAir/water/instrument channel connector](https://usermanual.wiki/Olympus-Medical-Systems/GN4215.Users-Manual-3/User-Guide-870329-Page-51.png)
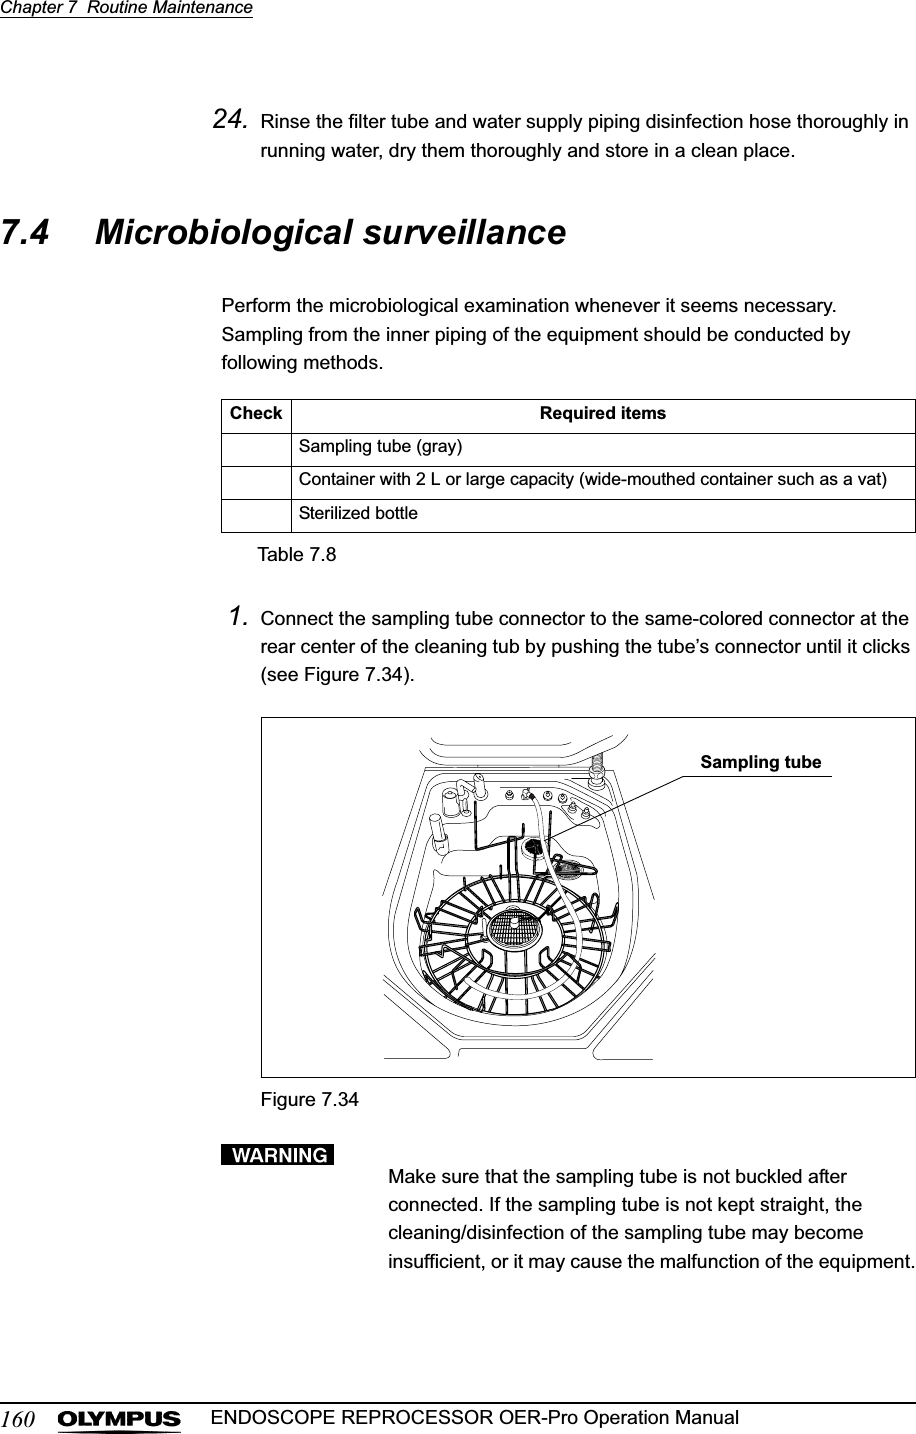
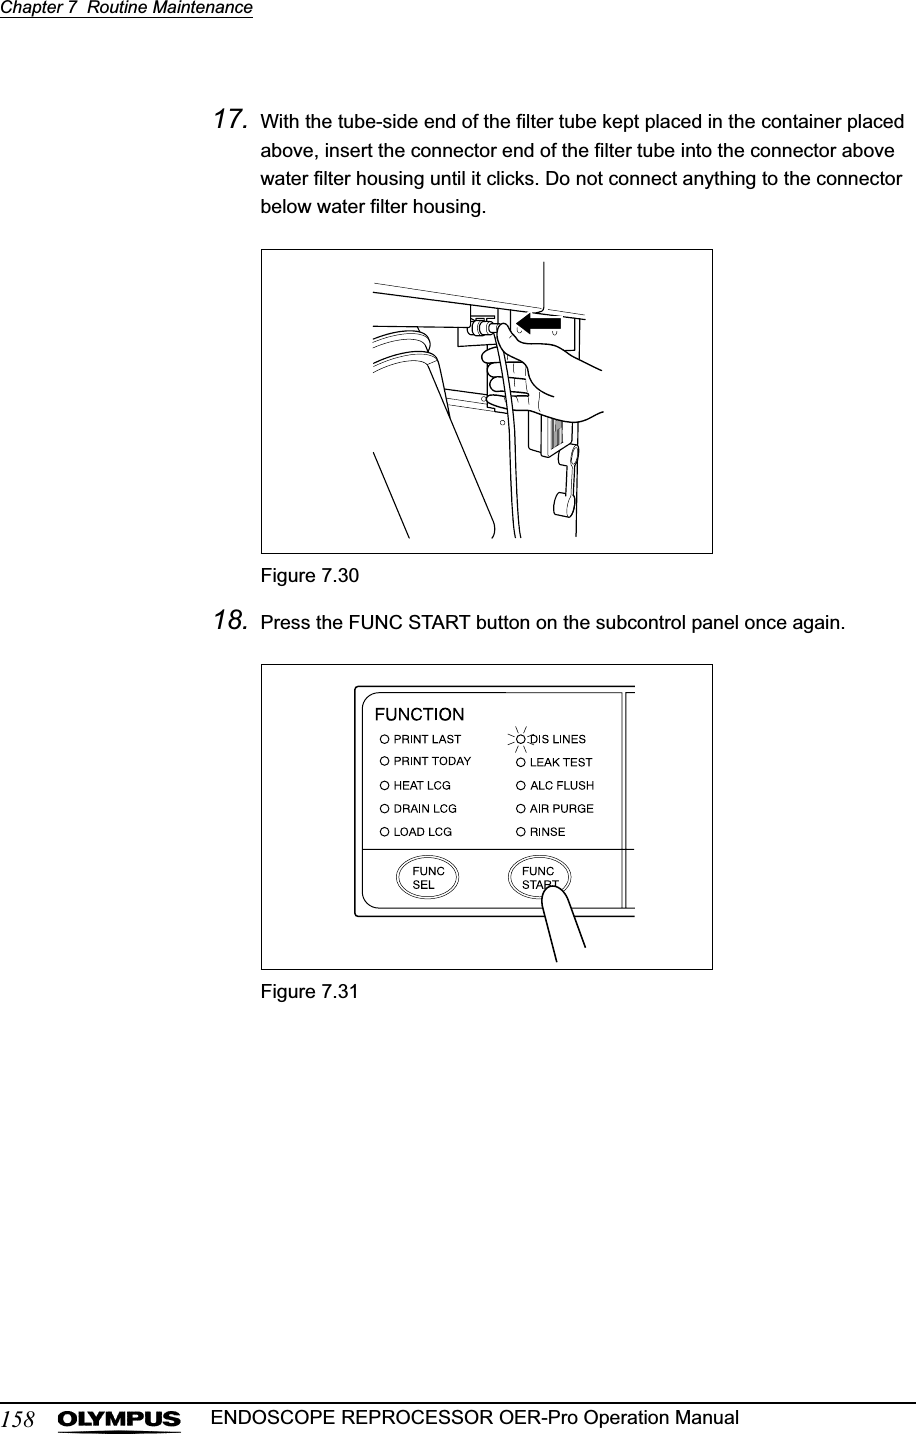
![Chapter 7 Routine Maintenance161ENDOSCOPE REPROCESSOR OER-Pro Operation Manual2. Close the lid.3. Press the PROG button on the main control panel to select a program [1] to [3] (see Figure 7.35).Figure 7.35The sampling tube is disinfected first.4. Press the START button on the main panel. In about 10 seconds, the water supply starts and the TIME/CODE display shows the remaining reprocessing time.Figure 7.36](https://usermanual.wiki/Olympus-Medical-Systems/GN4215.Users-Manual-3/User-Guide-870329-Page-53.png)
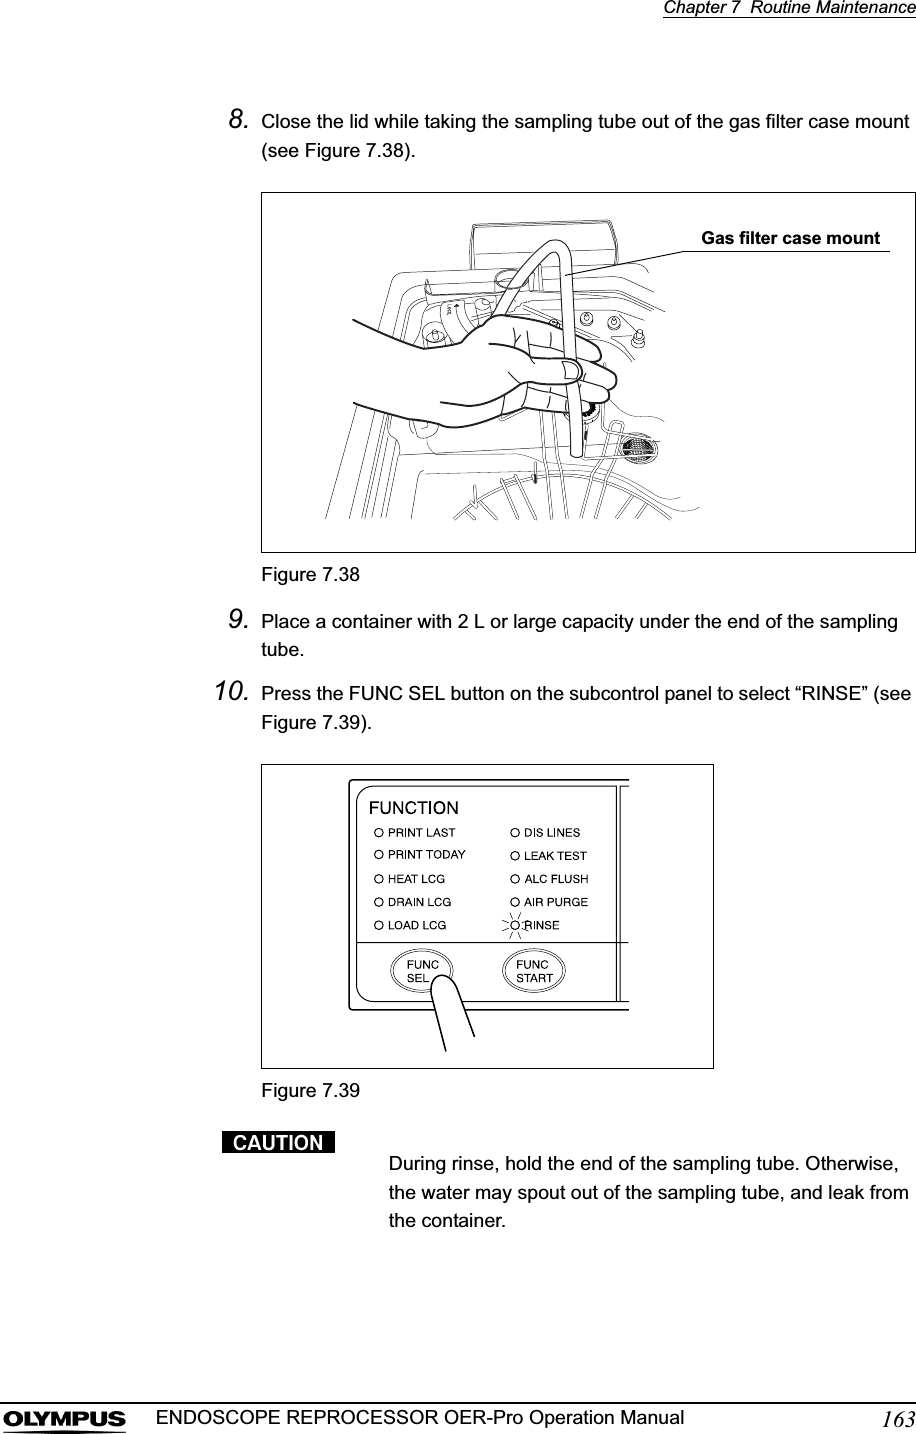
![162Chapter 7 Routine MaintenanceENDOSCOPE REPROCESSOR OER-Pro Operation Manual5. When reprocessing is finished, the buzzer beeps and the TIME/CODE display shows [- -] indicating that the process has ended.Figure 7.376. Step the foot pedal to open the lid.7. Remove the gas filter case from the deep part of the lid.• Be sure to wear sterilized gloves when touching the cleaned/disinfected sampling tube in order to prevent contamination. Do not touch the lid, the cleaning tub, the container or any area wearing sterilized gloves. Otherwise, collected water may be contaminated by the bacterium.• Make sure that the end of the sampling tube does not come into contact with the lid, the cleaning tub, the container, or any area. Otherwise, collected water is contaminated by the bacterium.](https://usermanual.wiki/Olympus-Medical-Systems/GN4215.Users-Manual-3/User-Guide-870329-Page-54.png)
![164Chapter 7 Routine MaintenanceENDOSCOPE REPROCESSOR OER-Pro Operation Manual11. Press the FUNC START button on the subcontrol panel (see Figure).Figure 7.4012. Make sure that water comes out from the end of the sampling tube and the sampling tube is filled with water (see Figure).Figure 7.4113. Put the end of sampling tube in the sterilized bottle. Collect the certain amount of water required for the microbiological examination.14. After collection, press the STOP button and wait during the automatic processing (As the TIME/CODE display on the main control panel will show [E00], while automatic processing).](https://usermanual.wiki/Olympus-Medical-Systems/GN4215.Users-Manual-3/User-Guide-870329-Page-56.png)