Palm 728 SmartPhone User Manual Hobbit LepROWchaun User Guide
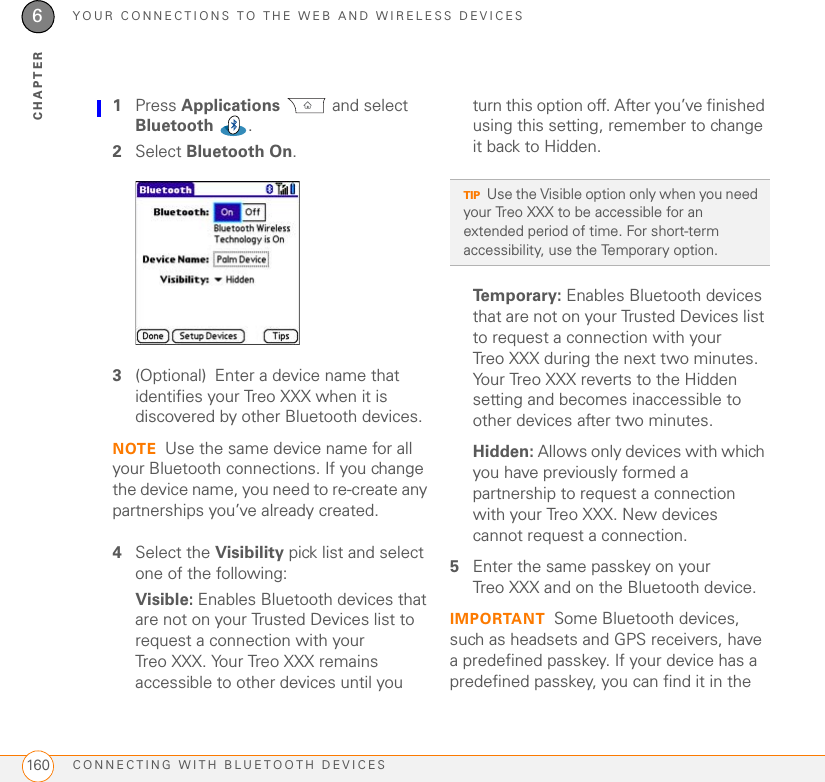
Palm Inc SmartPhone Hobbit LepROWchaun User Guide
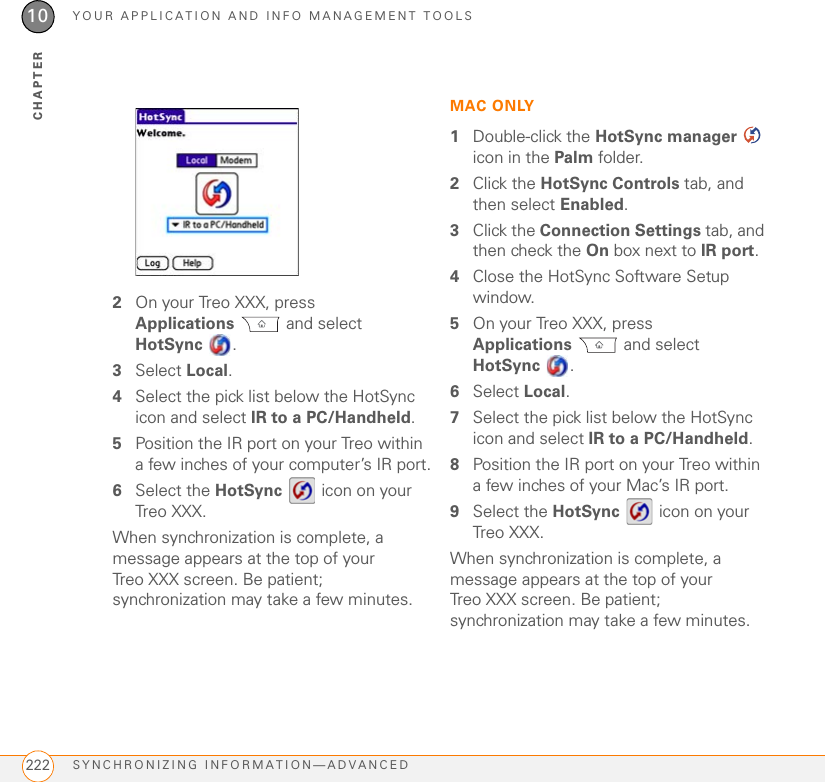
UserManual.wiki
>
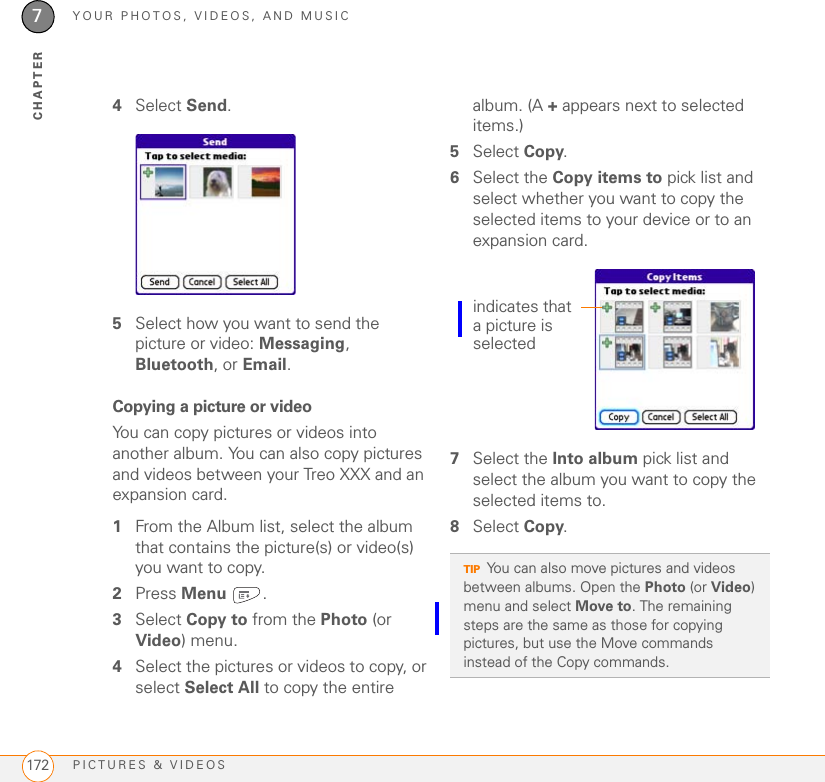
Palm
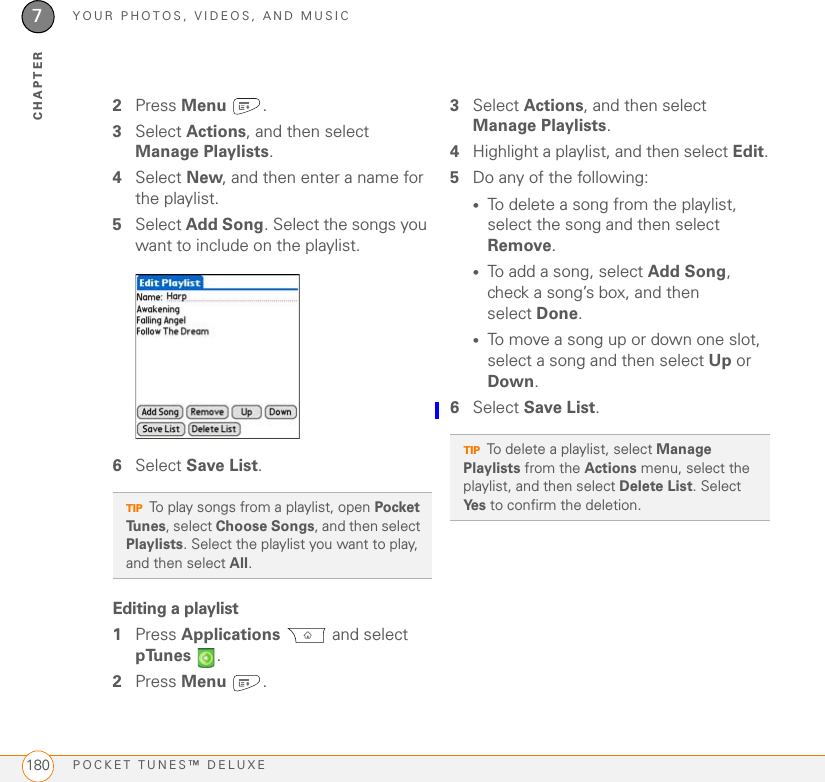
>
728 User Manual
>
User Manual 2 of 3
Contents
1.
User Manual 1 of 3
2.
User Manual 2 of 3
3.
User Manual 3 of 3
User Manual 2 of 3
Navigation menu
Upload a User Manual
Namespaces
Wiki Guide
HTML
PDF
Info
Views
User Manual
Discussion / Help
Navigation


![YOUR EMAIL AND OTHER MESSAGESINSTANT MESSAGING (IM)1204CHAPTER2Select an IM community.Signing onIf you are signing on to your existing IM account on your Treo, sign on to the community using your existing username or email address, whichever your provider requires, and password. NOTE Some service providers allow you to sign on to multiple devices at the same time; for example, both your Treo and your computer. On other providers, signing on to an existing IM account on your Treo may automatically sign you out of another currently running IM session.[TBD--need to see sign on working to give exact steps. ]Sending a Message[TBD: need to see this working.]Receiving a Message[TBD: need to see this working.]Leaving IMYou can either exit an IM community or sign out. •When you select Exit, you can go to other applications and return without signing in again. Conversations remain active.•When you select Sign Out, you will be asked to confirm that you want to terminate the session and end all active conversations. When you confirm, you officially sign out, and your contacts will see you as unavailable. To resume instant messaging, you must sign in again to the community.](https://usermanual.wiki/Palm/728.User-Manual-2-of-3/User-Guide-904150-Page-16.png)


![YOUR PHOTOS, VIDEOS, AND MUSICPICTURES & VIDEOS 1717CHAPTER4Hold down Right or Left to seek within the current video, or press Right or Left to scroll to the next item in the album.5Press Center to return to Thumbnail View.Viewing a slide show1Press Applications and select Pics&Videos .2Select the album you want to view.3Press Menu , select Options, and then select Auto-hide Toolbar Off if you want to see the toolbar.4Press Space to start the slide show.5Press Center to return to the previous view.Sending pictures or videosYou can send pictures or videos to an email address or to other devices that support picture and video messaging. 1From the Album list, select the album that contains the picture(s) or video(s) you want to send. 2Select Send .3Select the pictures or videos to send, or select Select All to send the entire album. (A plus sign [+] appears next to selected items.)DID YOU KNOW?If you pause video playback and then close the video, the video starts where you left off the next time you play it.TIPTo set slide show options such as background music and transitions, open the Options menu and select Slideshow Setting. Keep in mind that background music overrides audio captions when you’re running a slide show. Background music for a slide show also overrides any music that might be playing using the Pocket Tunes™ application on your Treo XXX.DID YOU KNOW?You cannot send copyrighted pictures or videos that appear with a Lock icon in Thumbnail View or in the Picture list.](https://usermanual.wiki/Palm/728.User-Manual-2-of-3/User-Guide-904150-Page-67.png)