Palm 728 SmartPhone User Manual Hobbit LepROWchaun User Guide
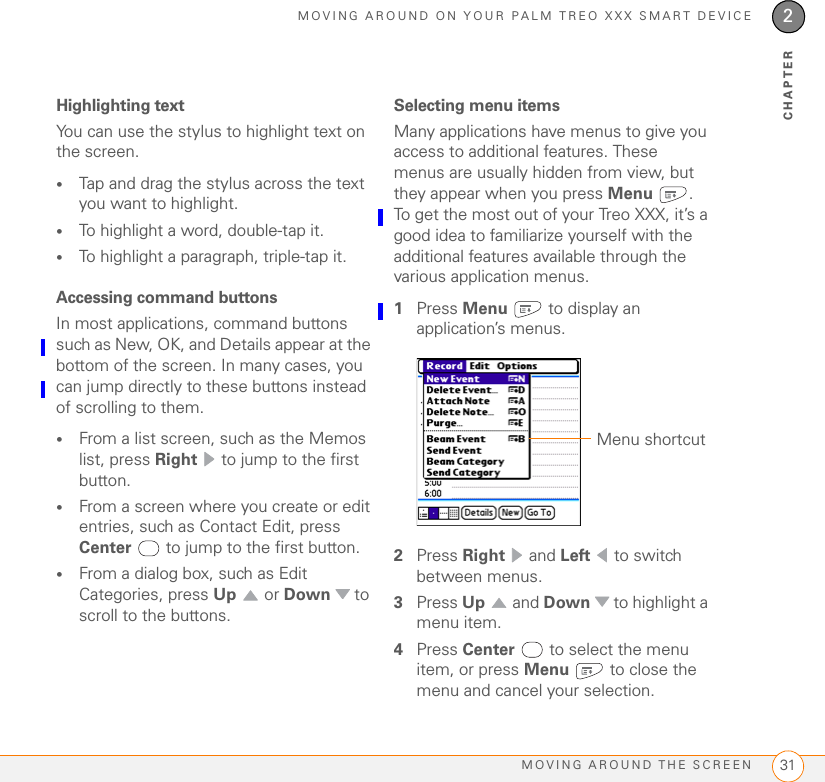
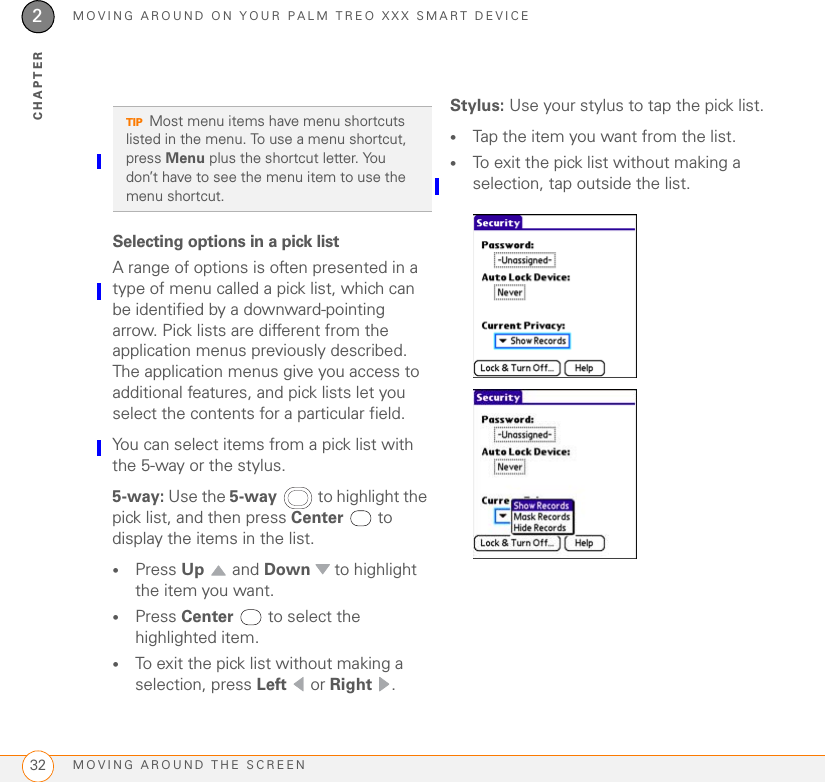
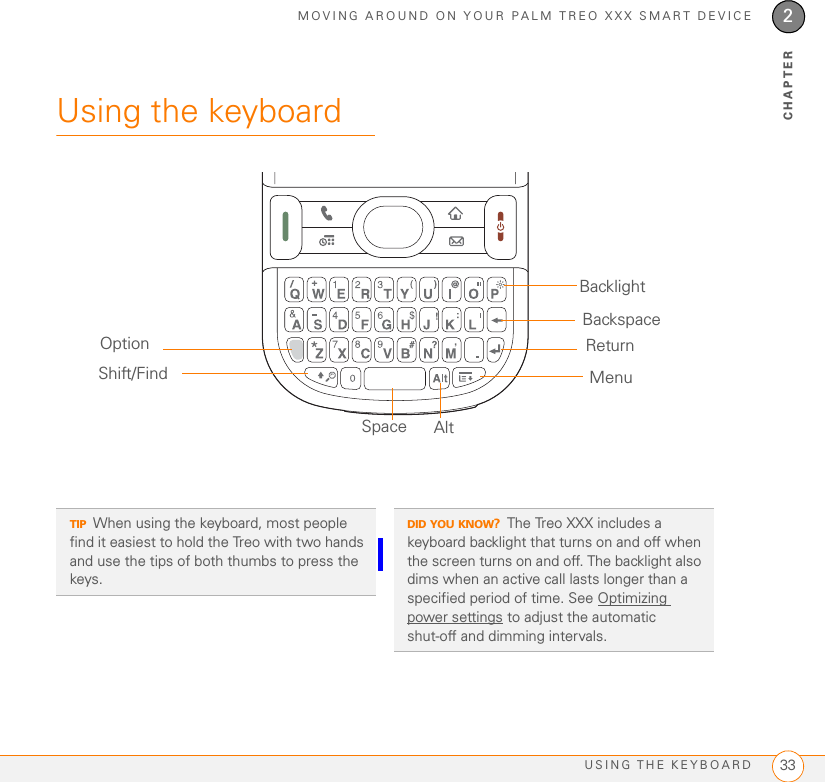
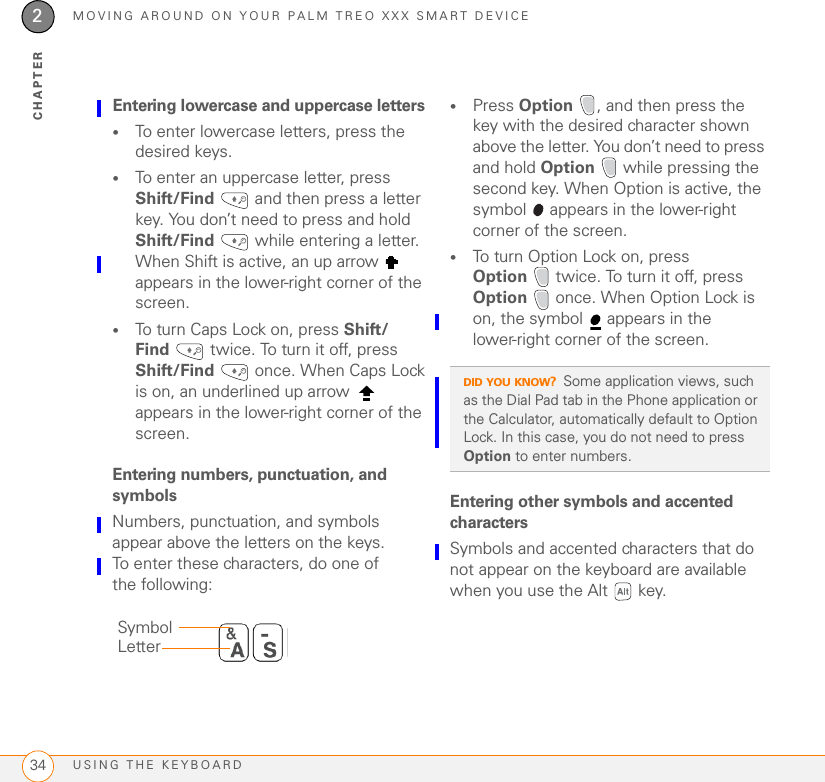
Palm Inc SmartPhone Hobbit LepROWchaun User Guide
UserManual.wiki
>
Palm
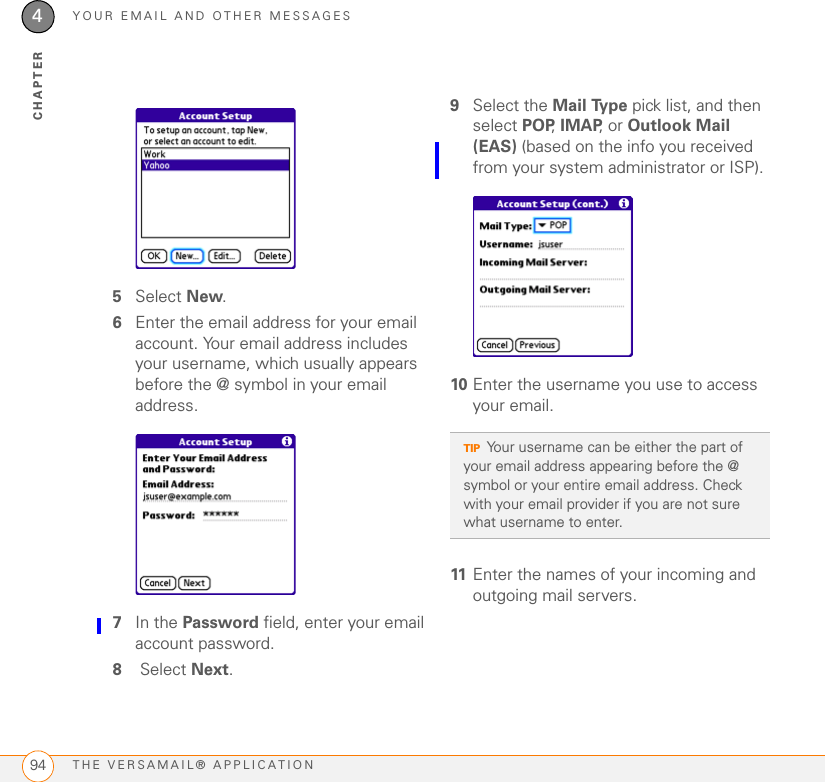
>
728 User Manual
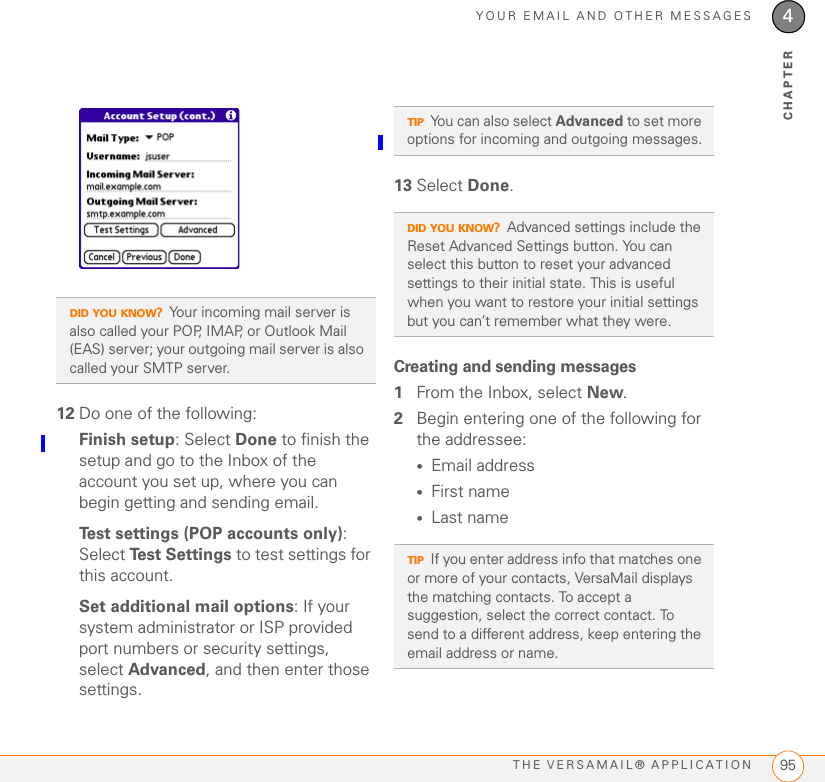
>
User Manual 1 of 3
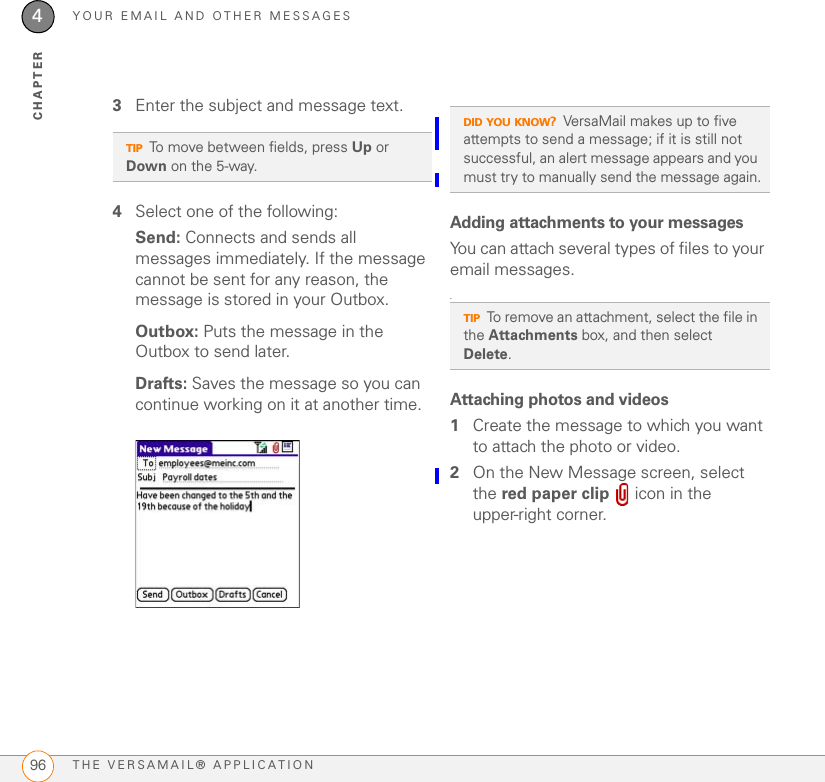
Contents
1.
User Manual 1 of 3
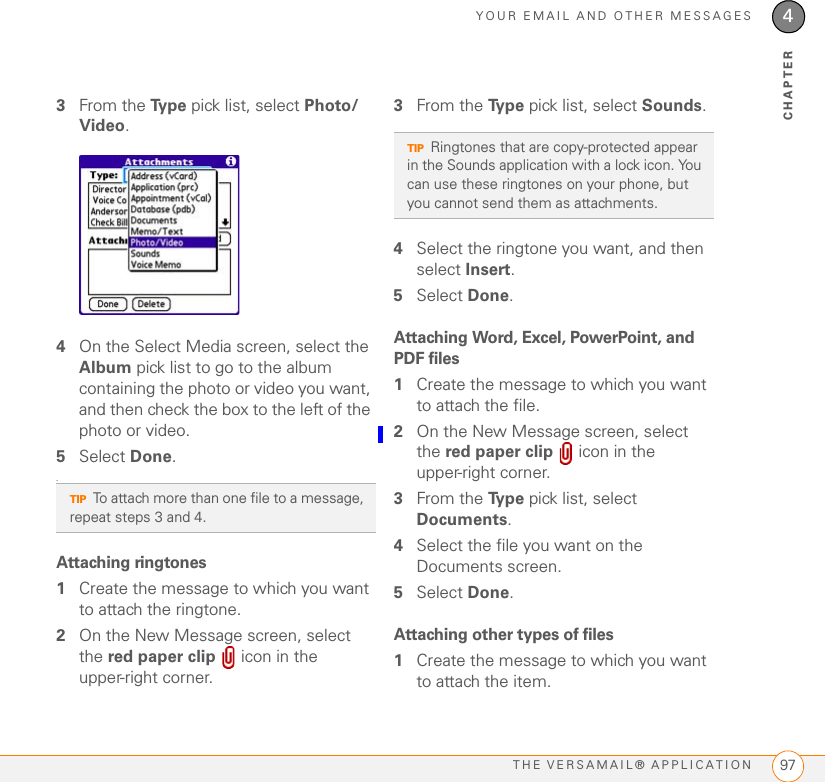
2.
User Manual 2 of 3
3.
User Manual 3 of 3
User Manual 1 of 3
Navigation menu
Upload a User Manual
Namespaces
Wiki Guide
HTML
PDF
Info
Views
User Manual
Discussion / Help
Navigation

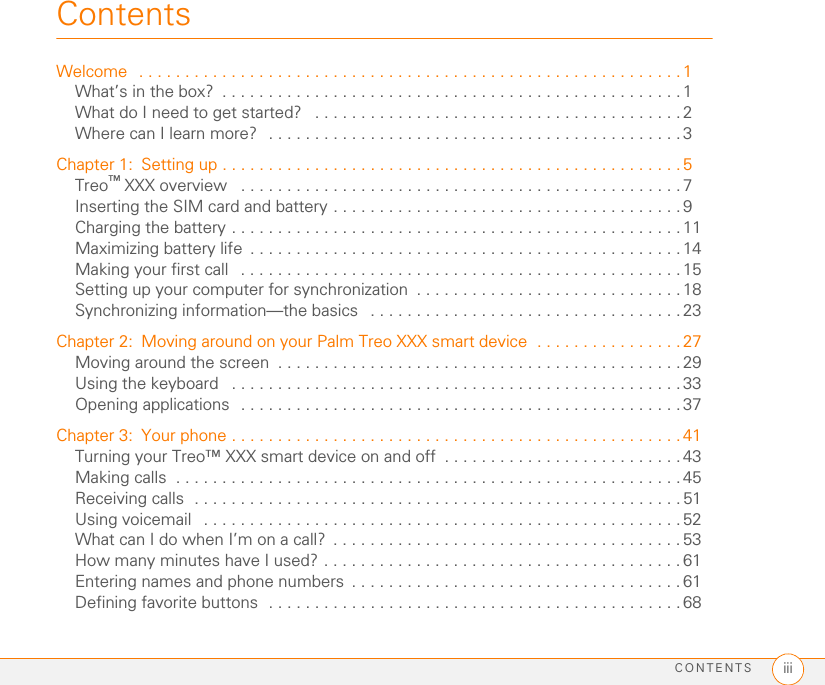
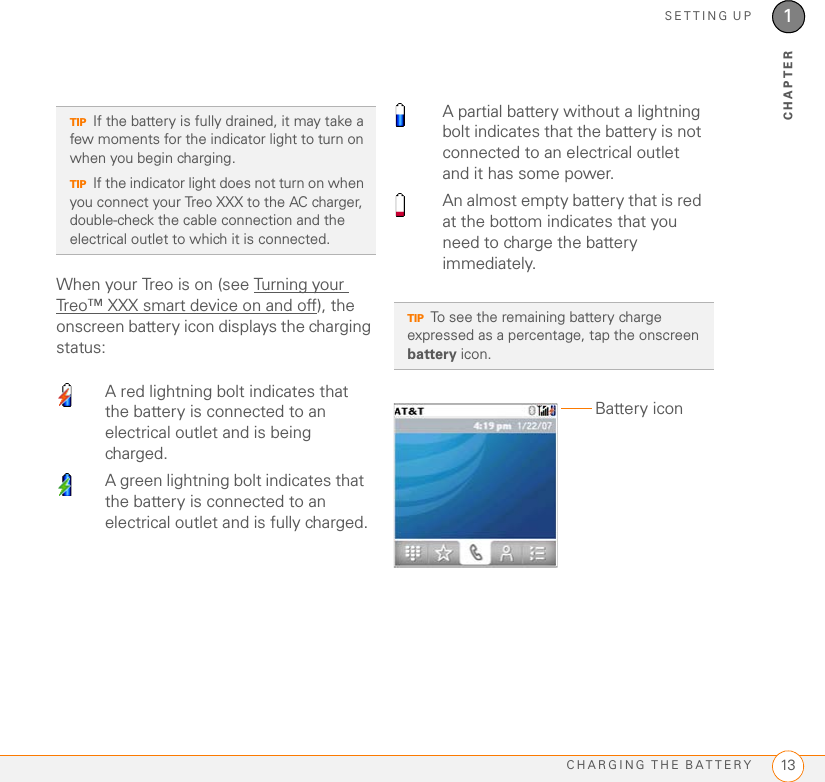
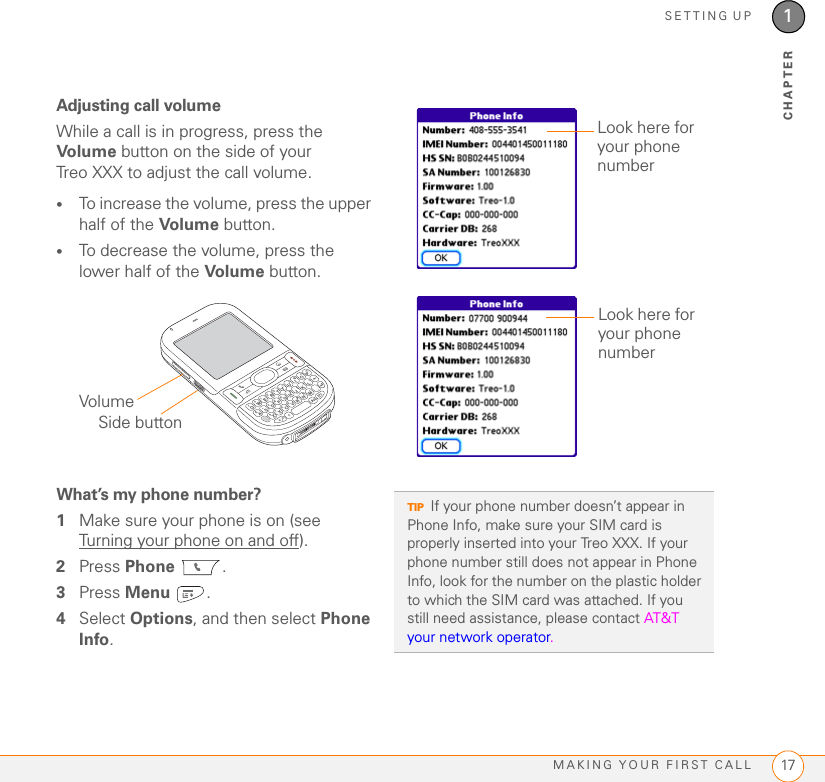


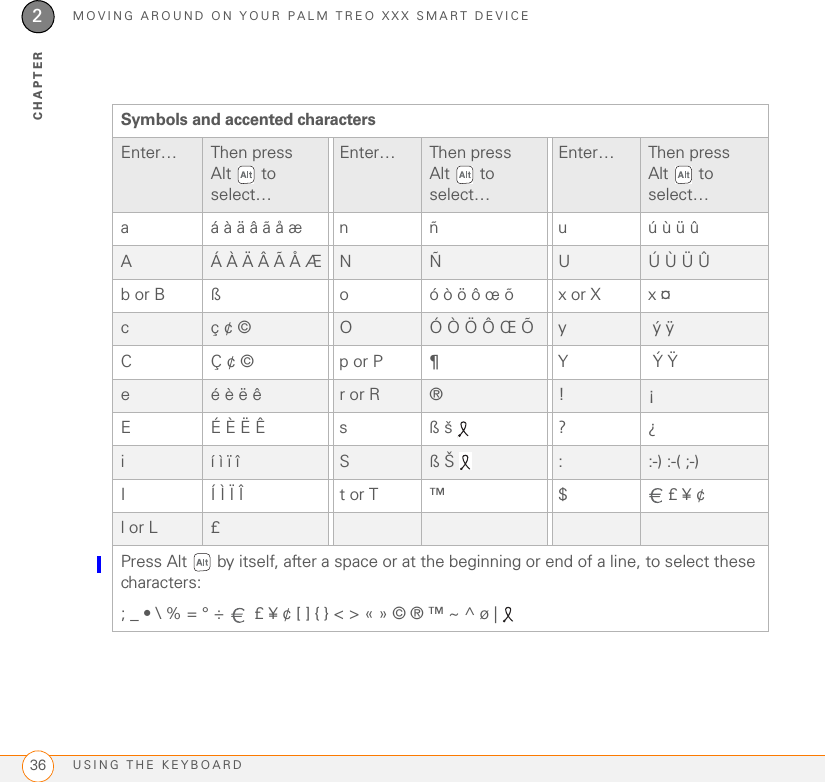

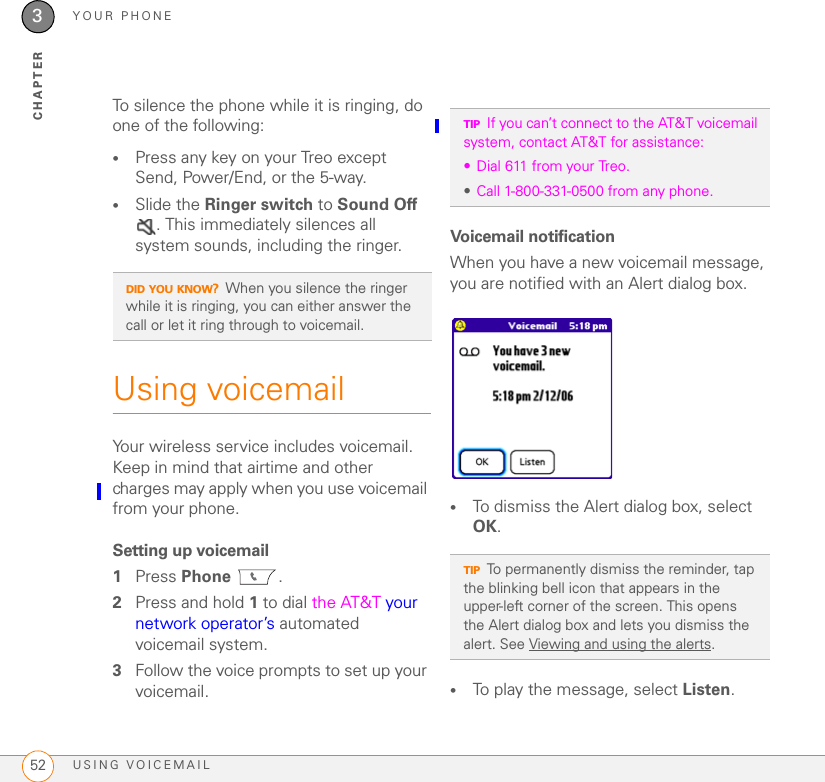
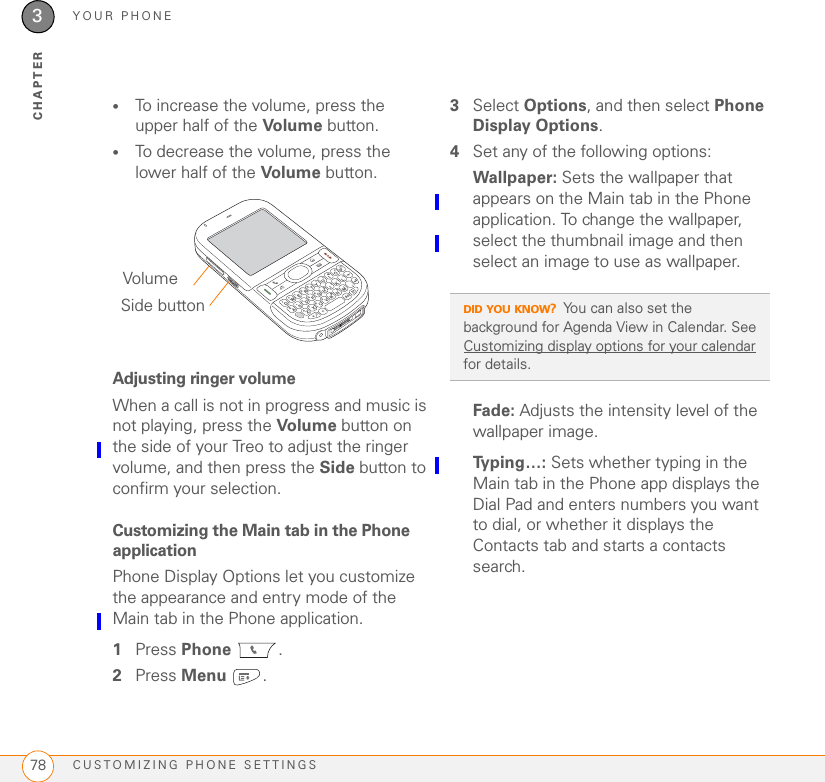
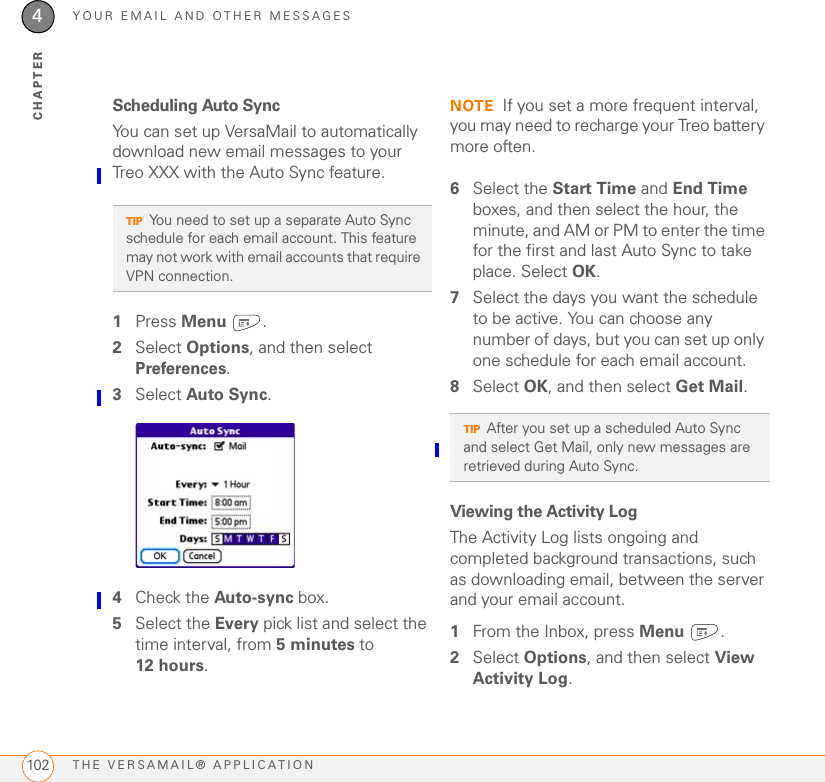
![MOVING AROUND ON YOUR PALM TREO XXX SMART DEVICEUSING THE KEYBOARD362CHAPTER0Symbols and accented characters Enter… Then press Alt to select…Enter… Then press Alt to select…Enter… Then press Alt to select…a á à ä â ã å æ n ñ u ú ù ü ûAÁ À Ä Â Ã Å Æ NÑ UÚ Ù Ü Ûb or B ß o ó ò ö ô œ õ x or X x ¤cç ¢ © OÓ Ò Ö Ô Œ Õ y ý ÿ C Ç ¢ © p or P ¶ Y Ý Ÿeé è ë ê r or R ® ! ¡E É È Ë Ê s ß š ? ¿ií ì ï î Sß Š ::-) :-( ;-)I Í Ì Ï Î t or T ™ $ £ ¥ ¢l or L £Press Alt by itself, after a space or at the beginning or end of a line, to select these characters:; _ • \ % = ° ÷ £ ¥ ¢ [ ] { } < > « » © ® ™ ~ ^ ø |](https://usermanual.wiki/Palm/728.User-Manual-1-of-3/User-Guide-904149-Page-53.png)