Palm LON CDMA Communicator User Manual Sprint Start
Palm Inc CDMA Communicator Sprint Start
UserManual.wiki
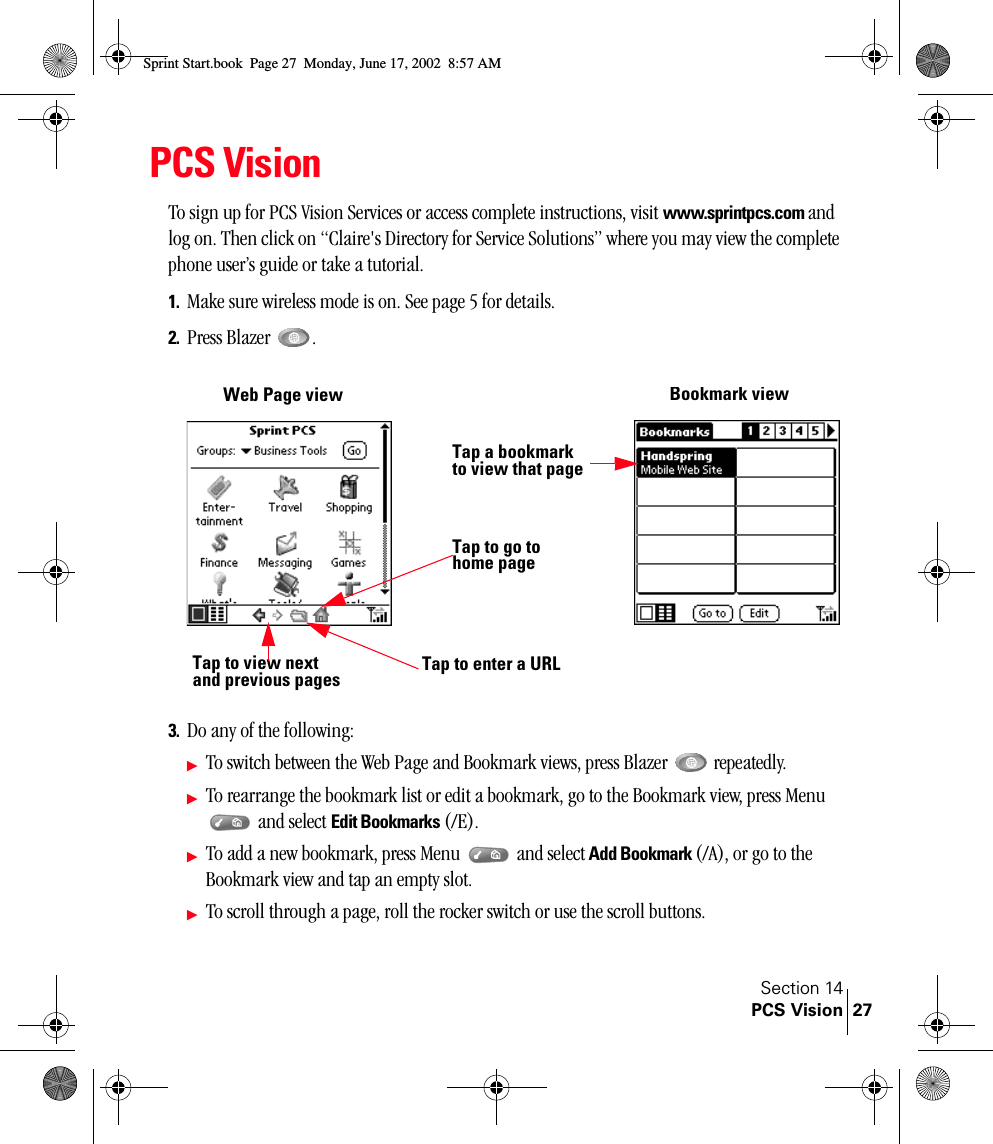
>
Palm
>
LON User Manual
>
Users Manual Part 1
Contents
1.
Users Manual
2.
Users Manual Page
3.
Letter Regarding Manual Page Provided
4.
Users Manual Part 1
5.
Users Manual Part 2
Users Manual Part 1
Navigation menu
Upload a User Manual
Namespaces
Wiki Guide
HTML
PDF
Info
Views
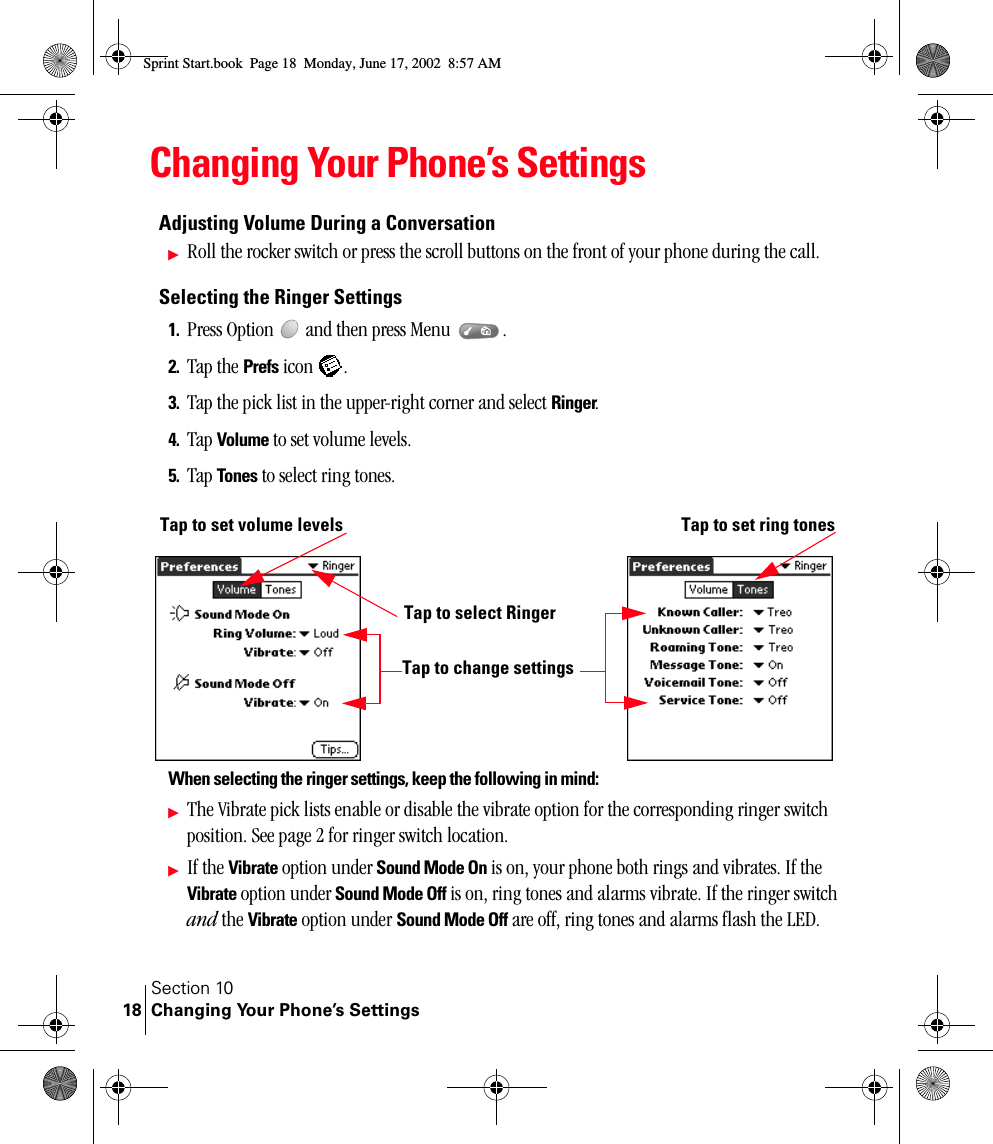
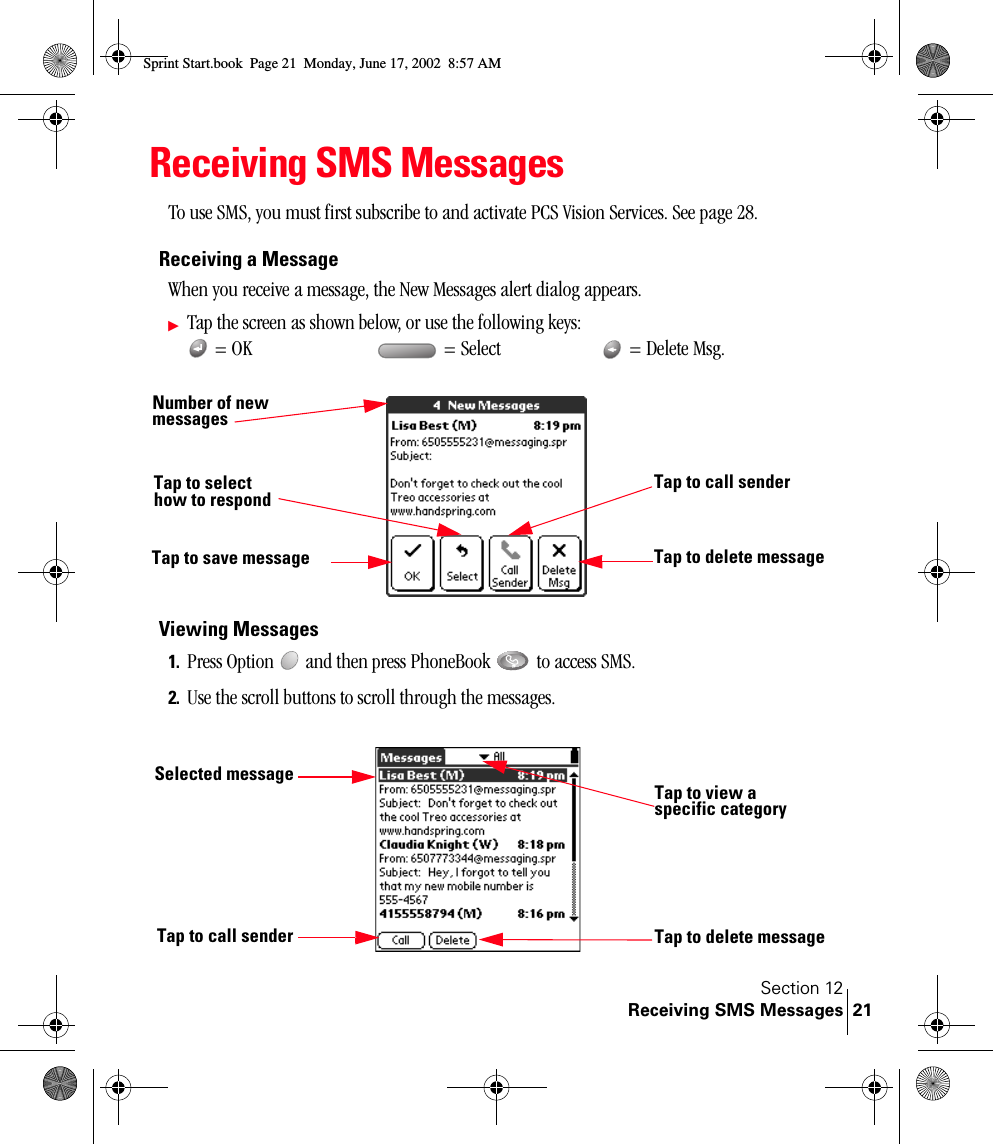
User Manual
Discussion / Help
Navigation
![[cover]Sprint Start.book Page a Monday, June 17, 2002 8:57 AM](https://usermanual.wiki/Palm/LON.Users-Manual-Part-1/User-Guide-272985-Page-1.png)