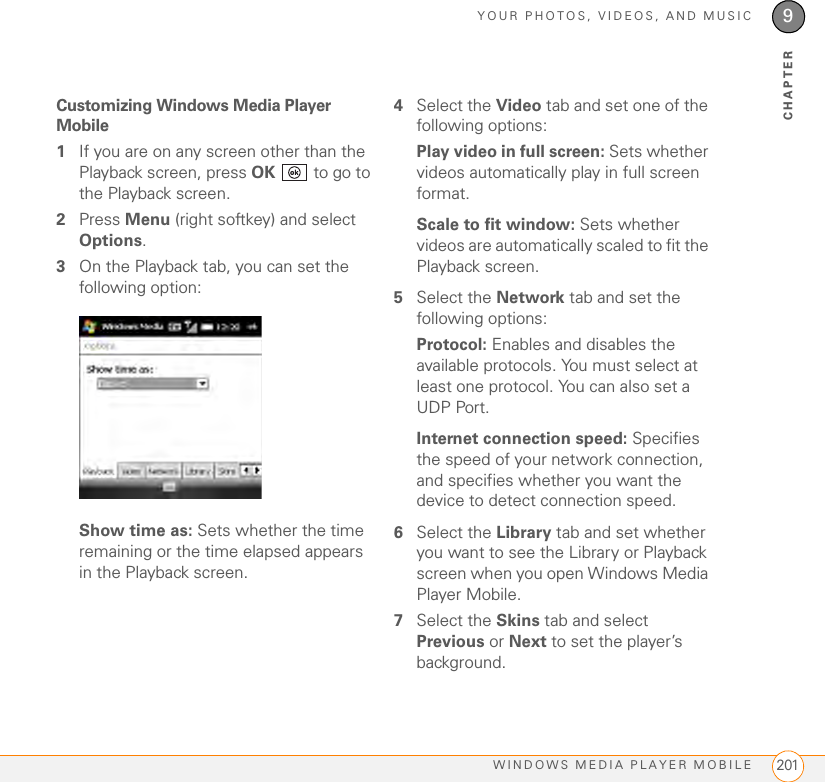
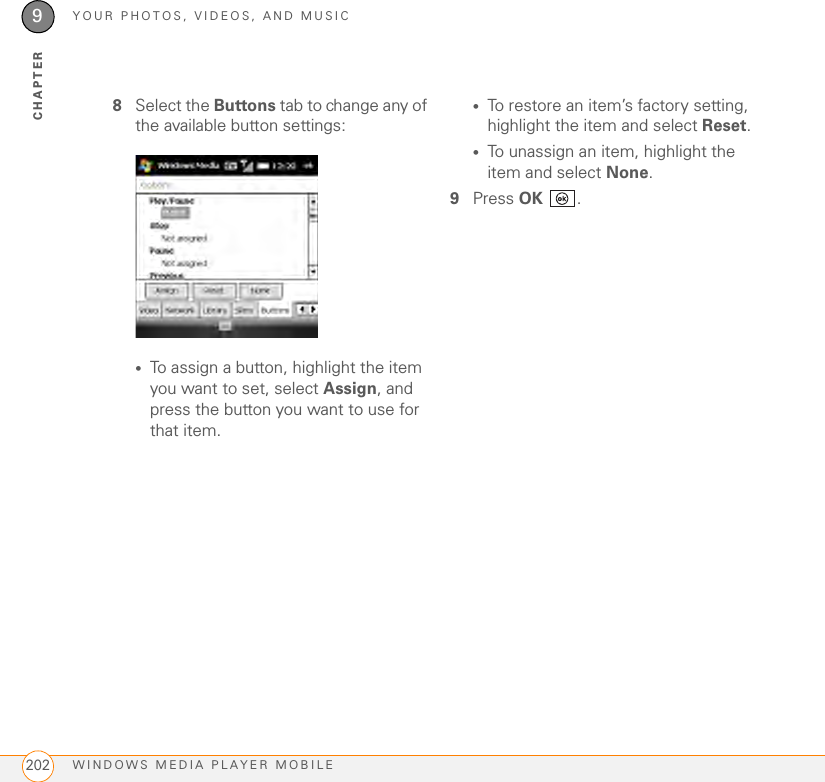
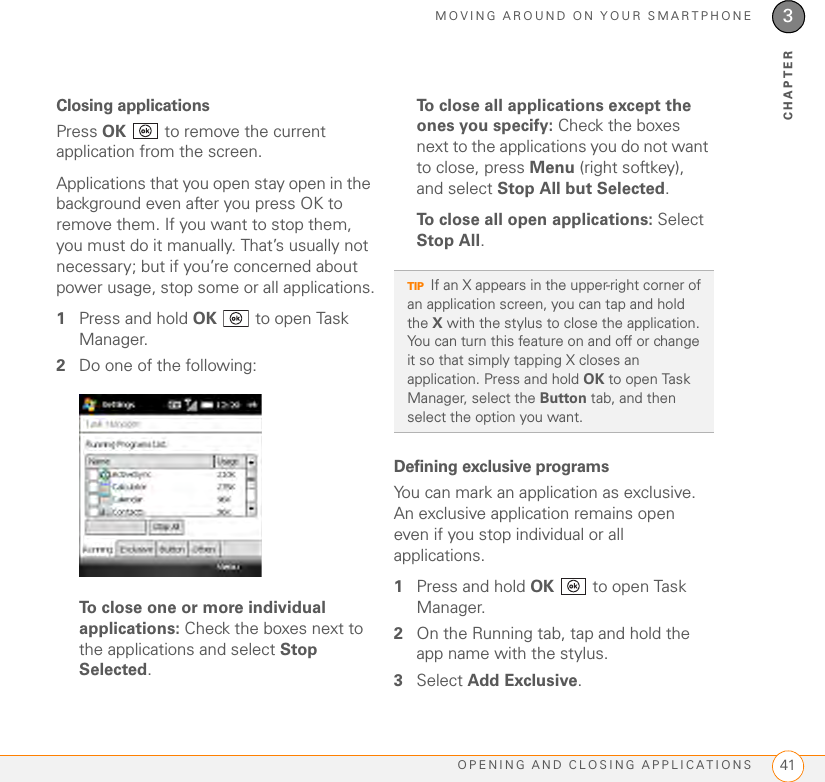
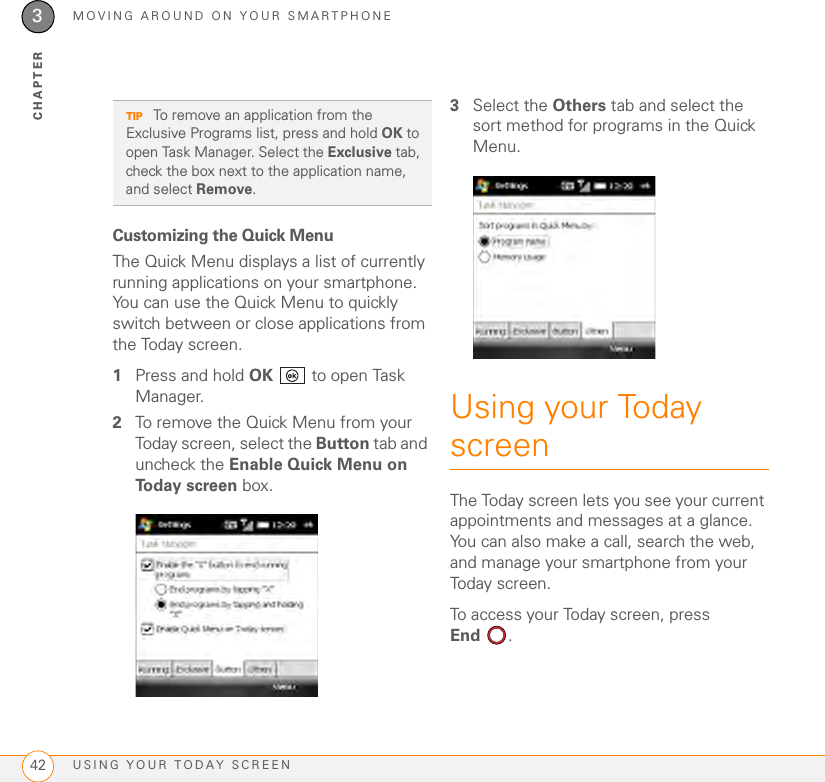
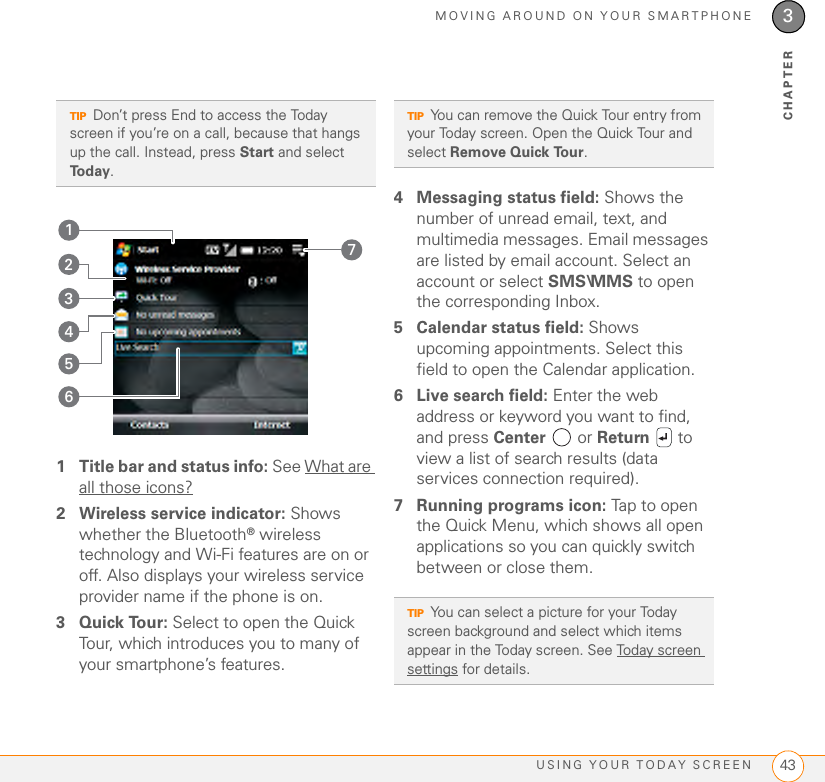
Palm SKYC Smart Phone User Manual Treo Pro Smartphone by Palm User Guide
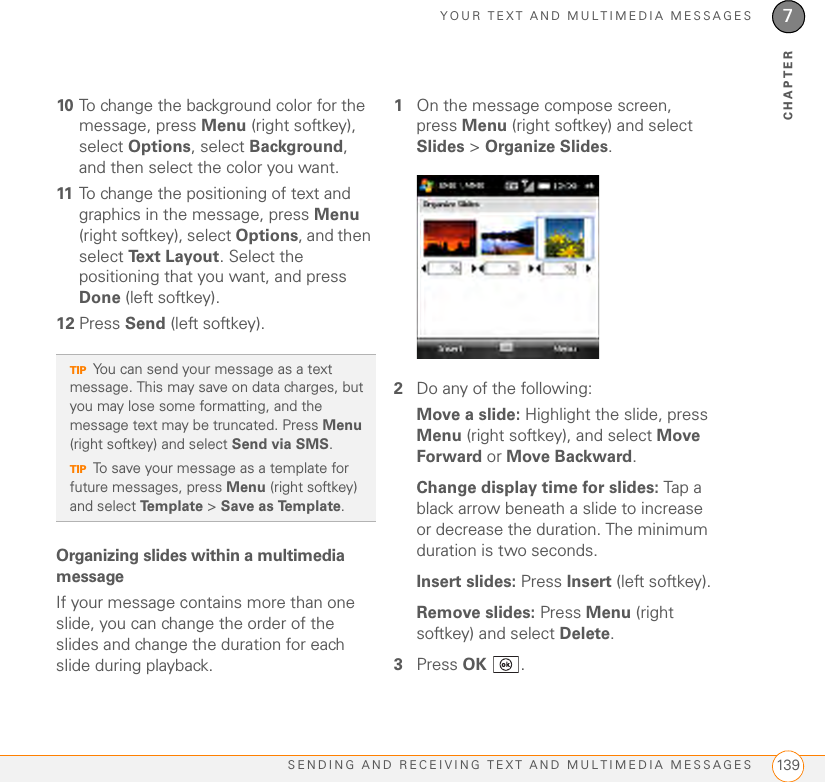
Palm Inc Smart Phone Treo Pro Smartphone by Palm User Guide
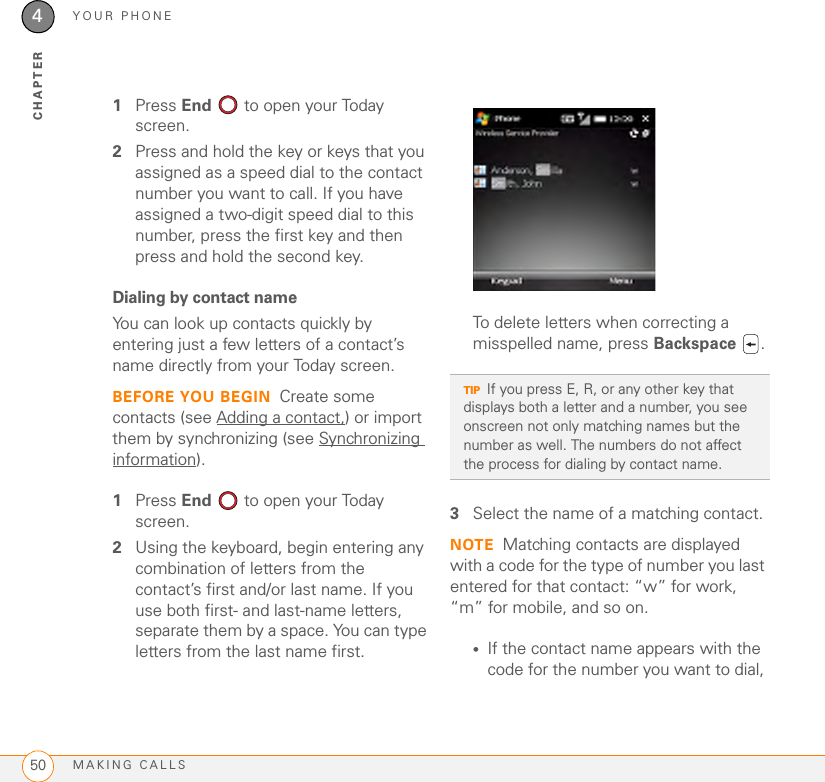
Palm >
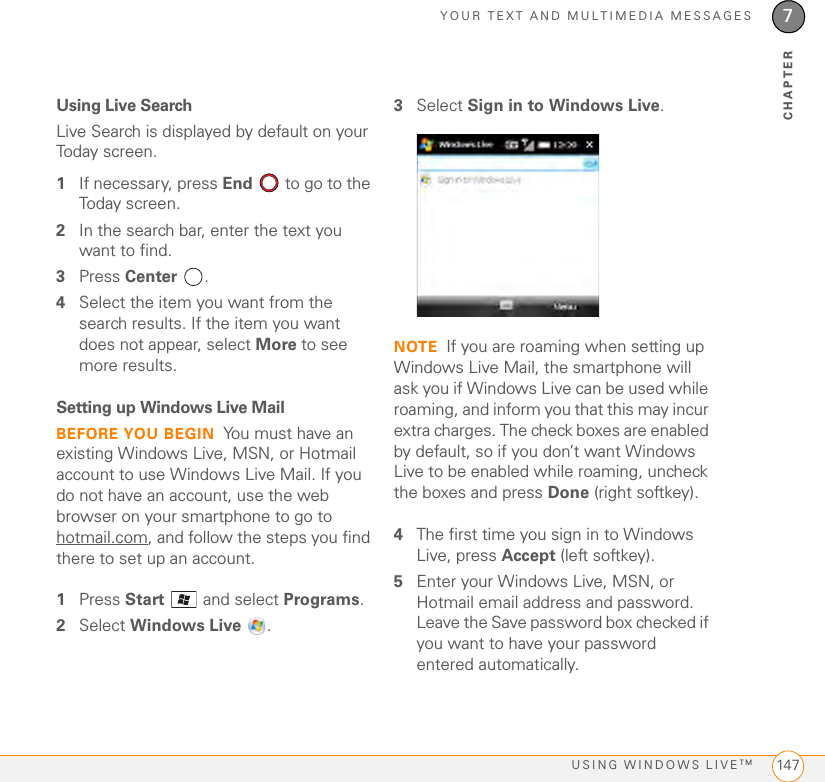
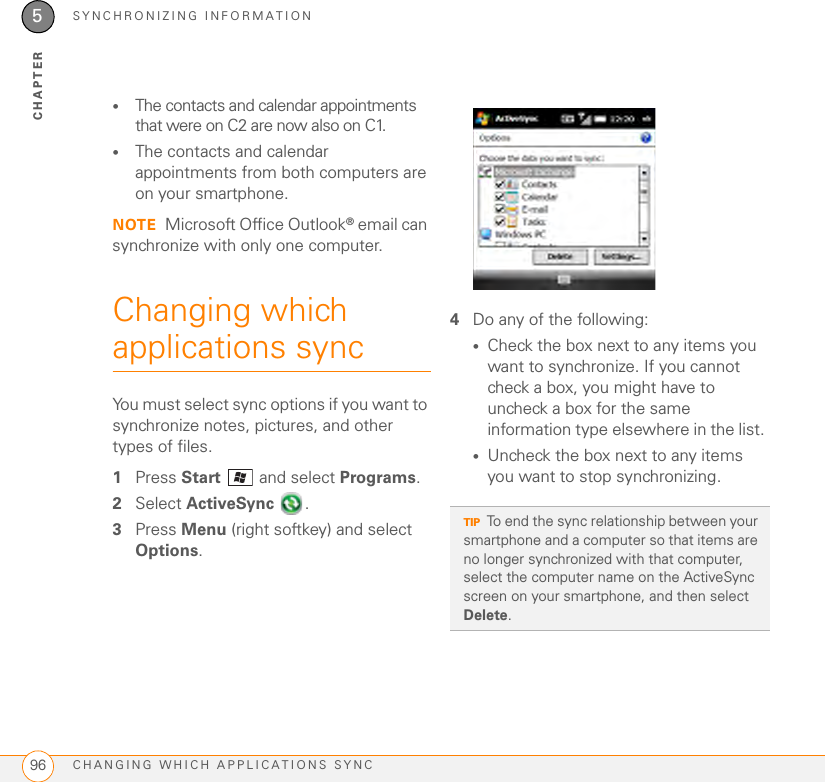
Contents
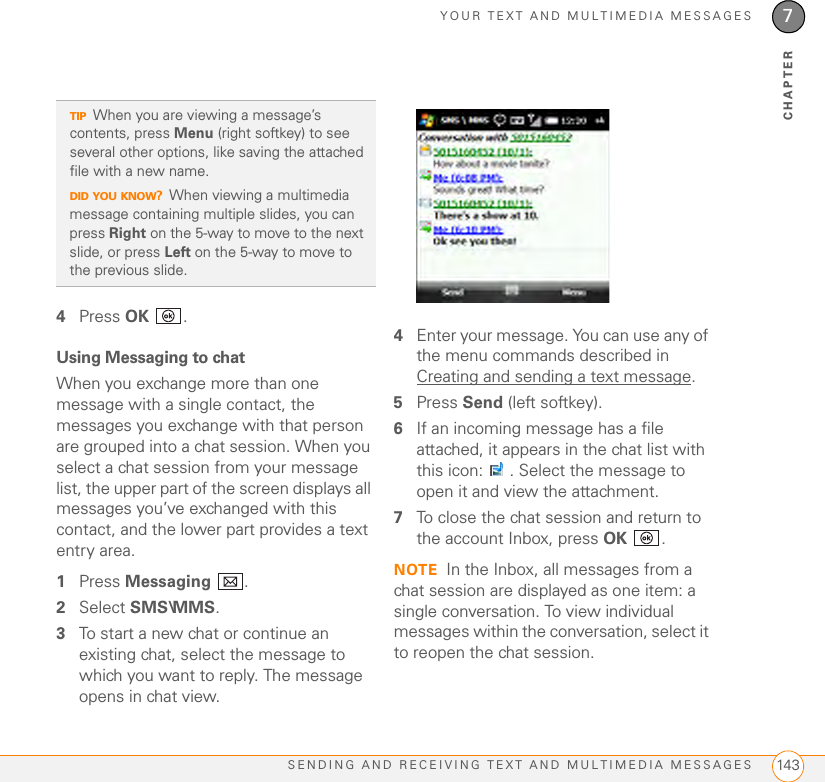
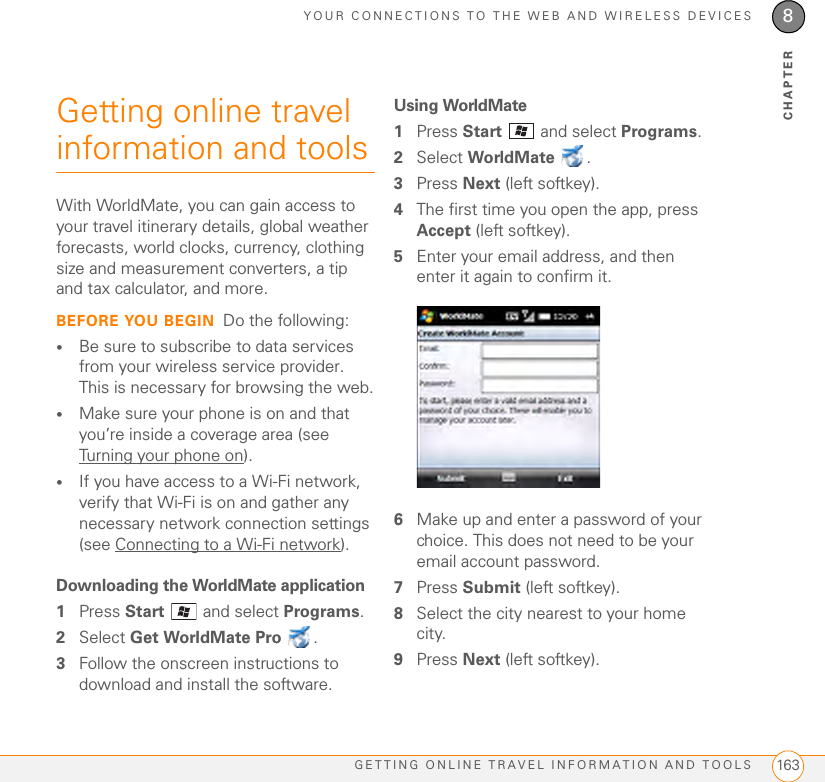
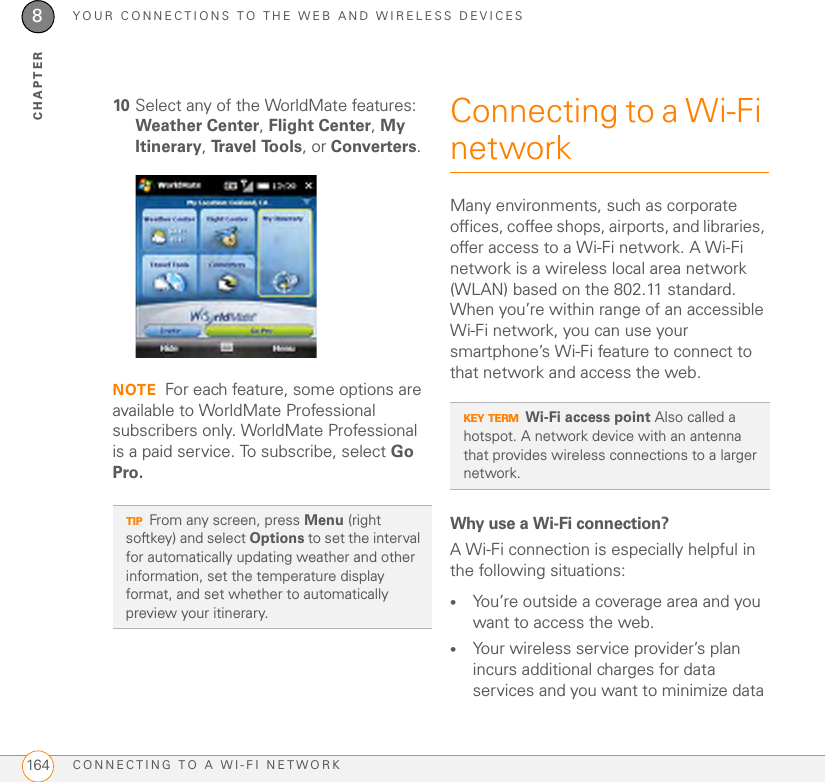
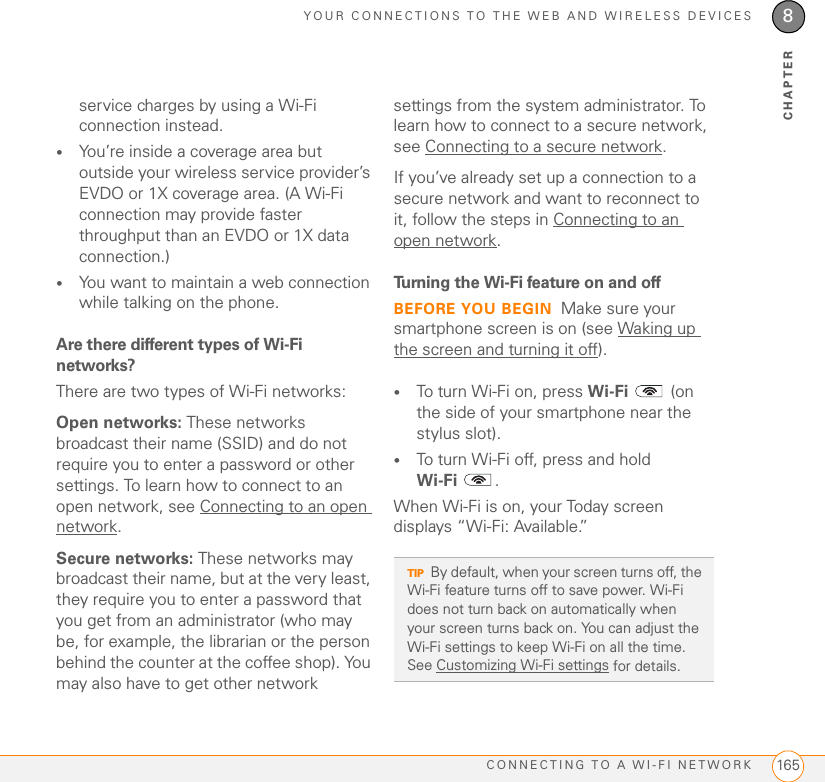
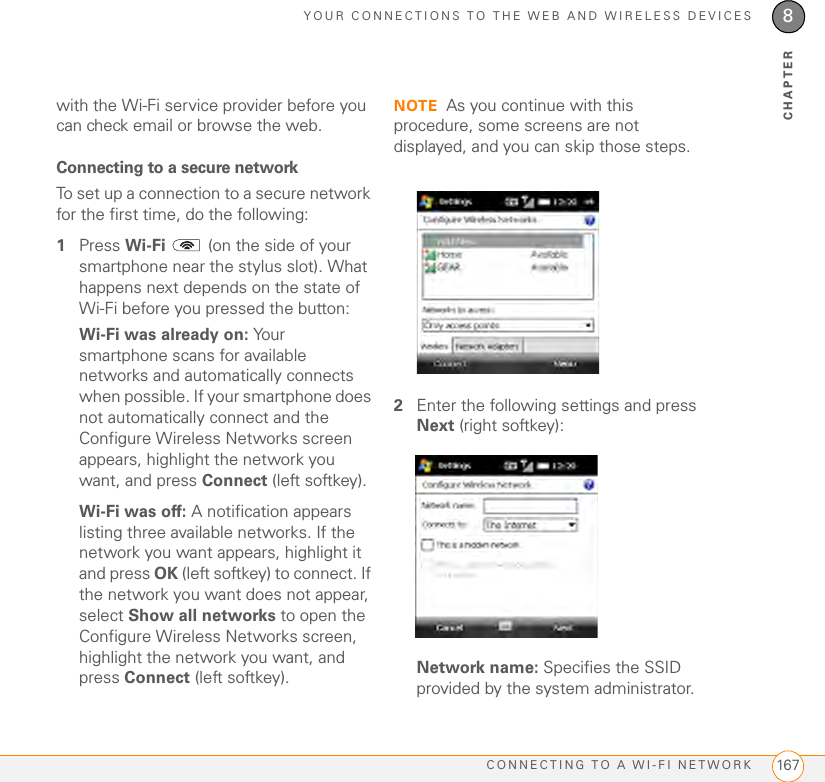
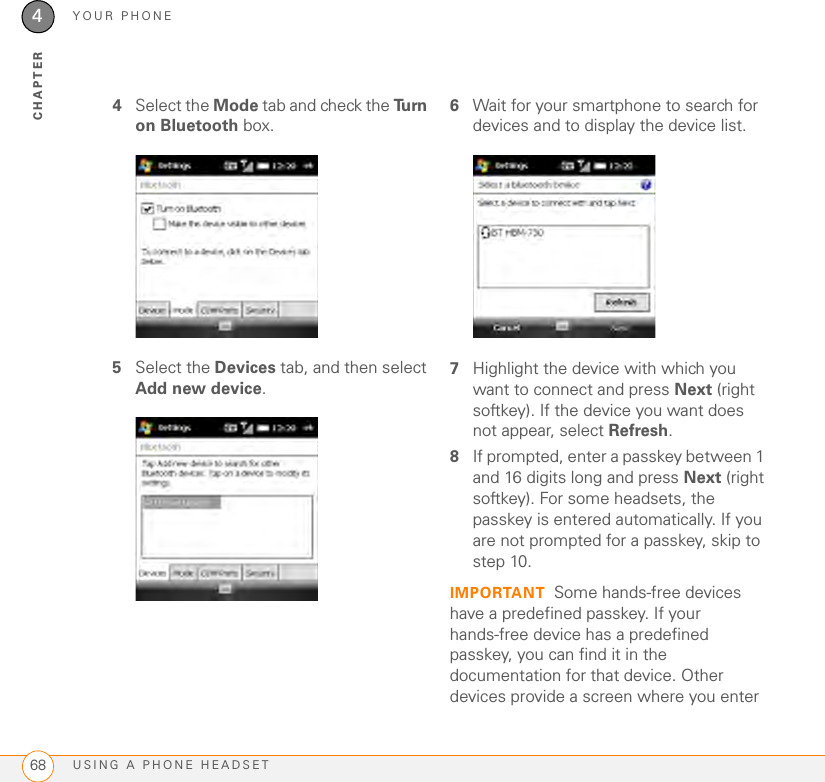
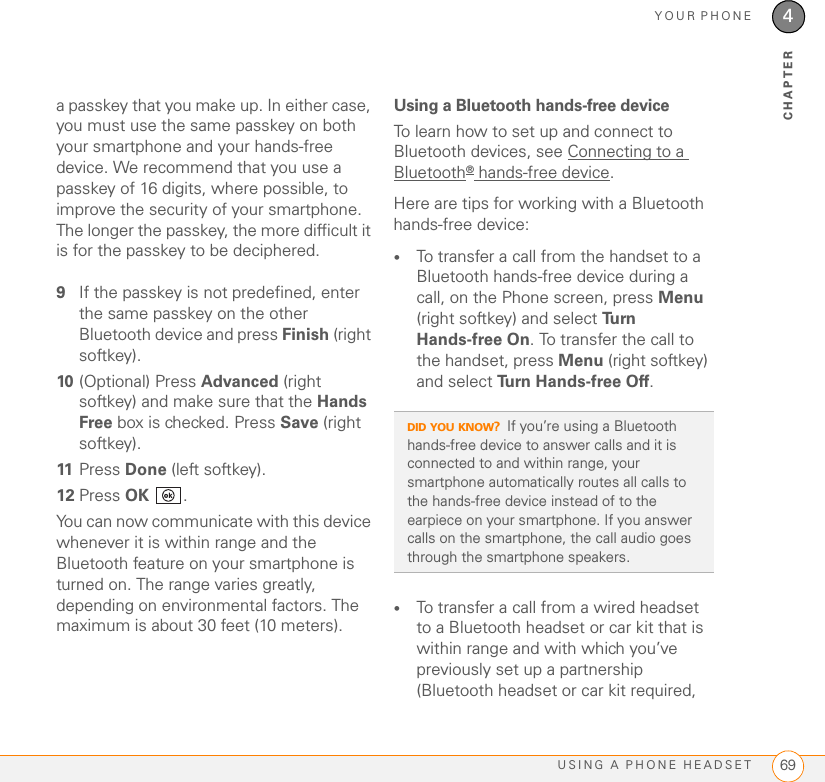
- 1. User manual revised 1 of 2
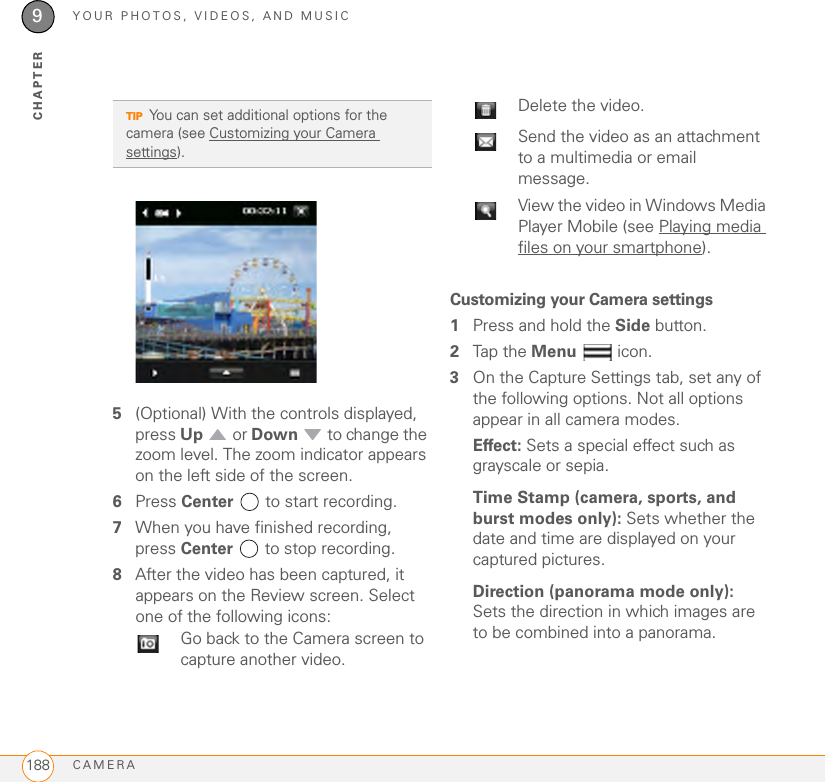
- 2. User manual revised 2 of 2
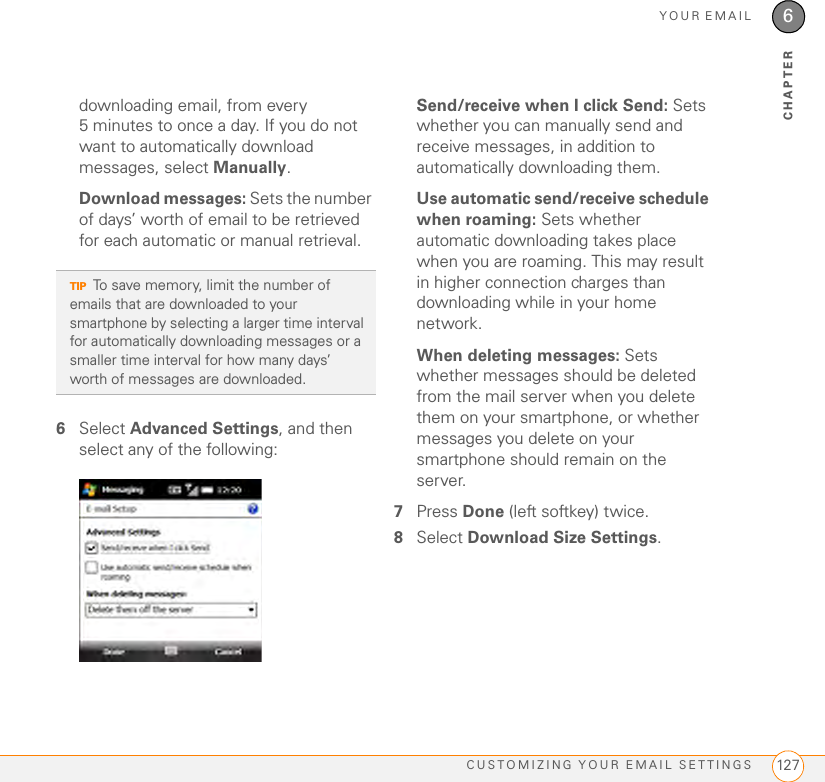
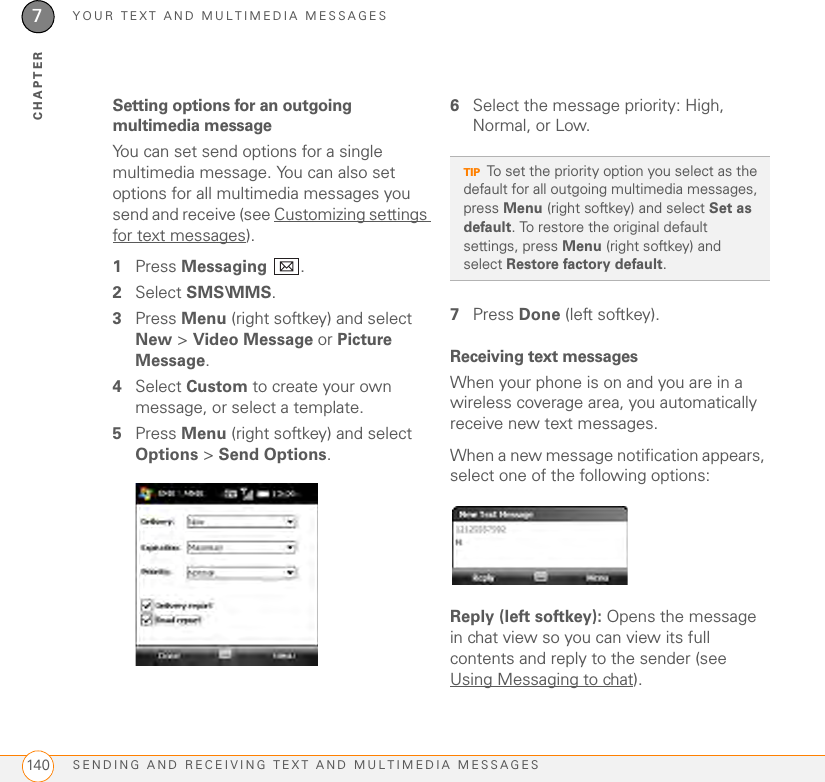
User manual revised 1 of 2

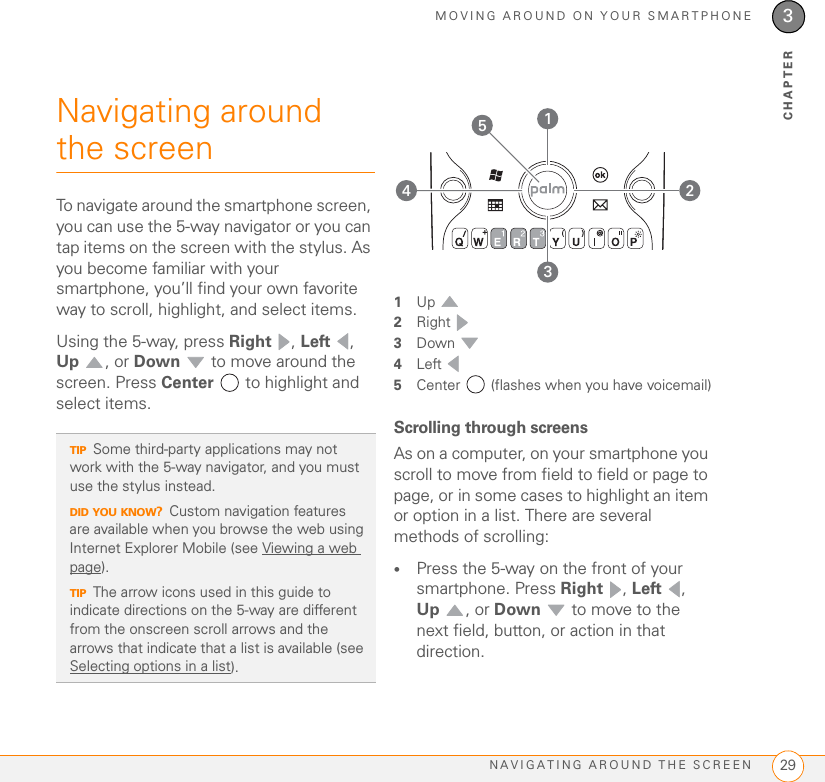
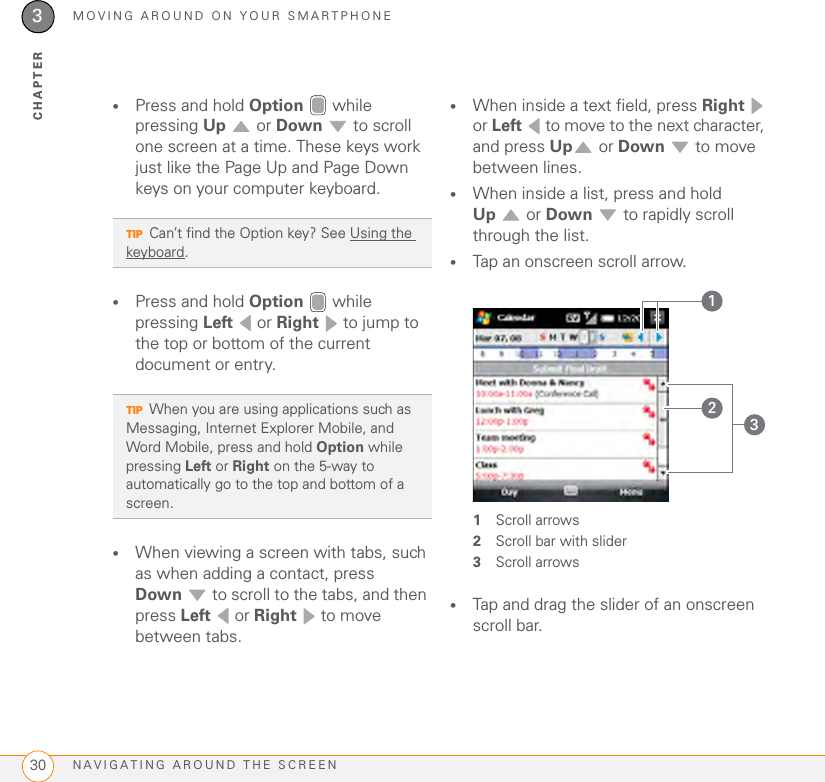

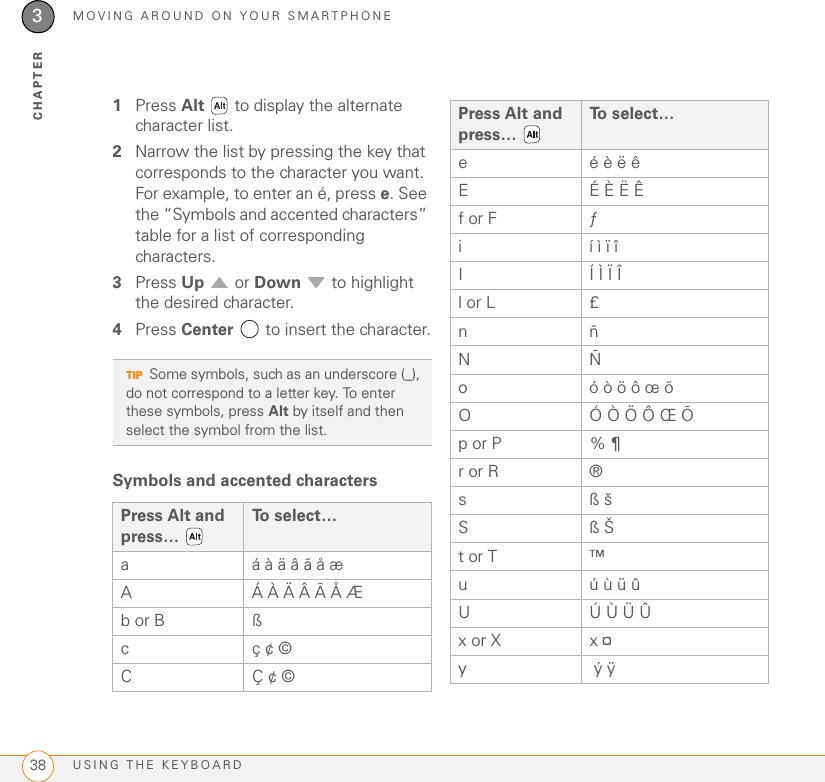
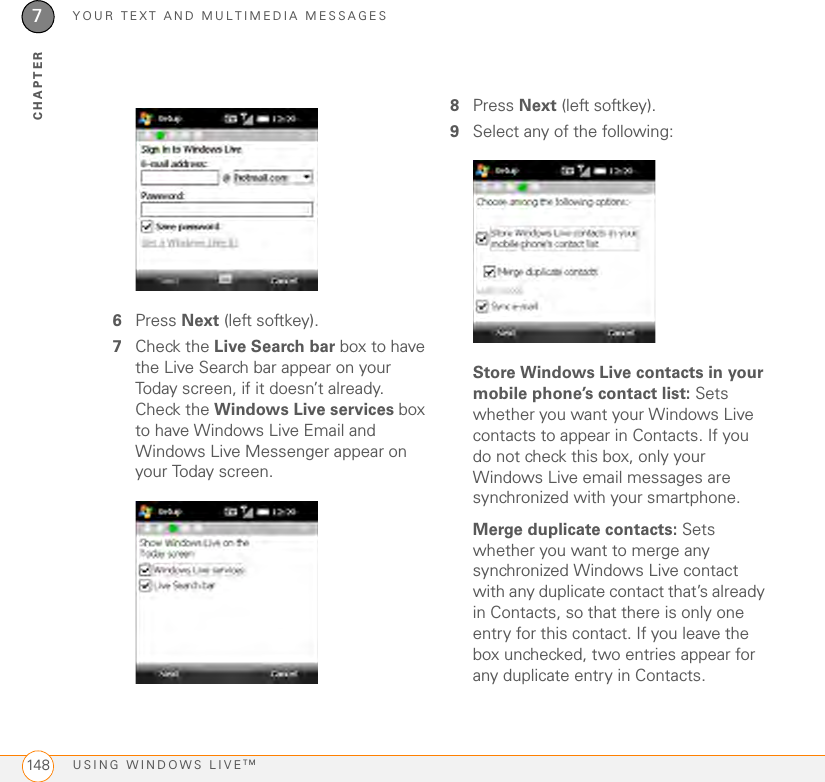
![MOVING AROUND ON YOUR SMARTPHONEOPENING AND CLOSING APPLICATIONS 393CHAPTERPress Alt by itself to select these characters:: & _ • % = ÷ ^ $ £ ¥ ¢ [ ] { } < > « » © ® ° ~ \ Ø µ |Opening and closing applicationsOpening applications on the Start menu1Press Start to open the Start menu.2Use the 5-way navigator to highlight the application you want to use. To open a recently used application, highlight its icon at the top of the Start menu.3Press Center to open the highlighted application.Y Ý Ÿ0°1 ( + E) 1 ¼ ½2 ( + R) 2 23 ( + T) 3 3 ¾! ( + J) ¡$ ( + H) £ ¥ ¢; ( + K) : :-) :-( ;-)? ( + N) ¿Press Alt and press… To s e l e c t …](https://usermanual.wiki/Palm/SKYC.User-manual-revised-1-of-2/User-Guide-1036630-Page-39.png)


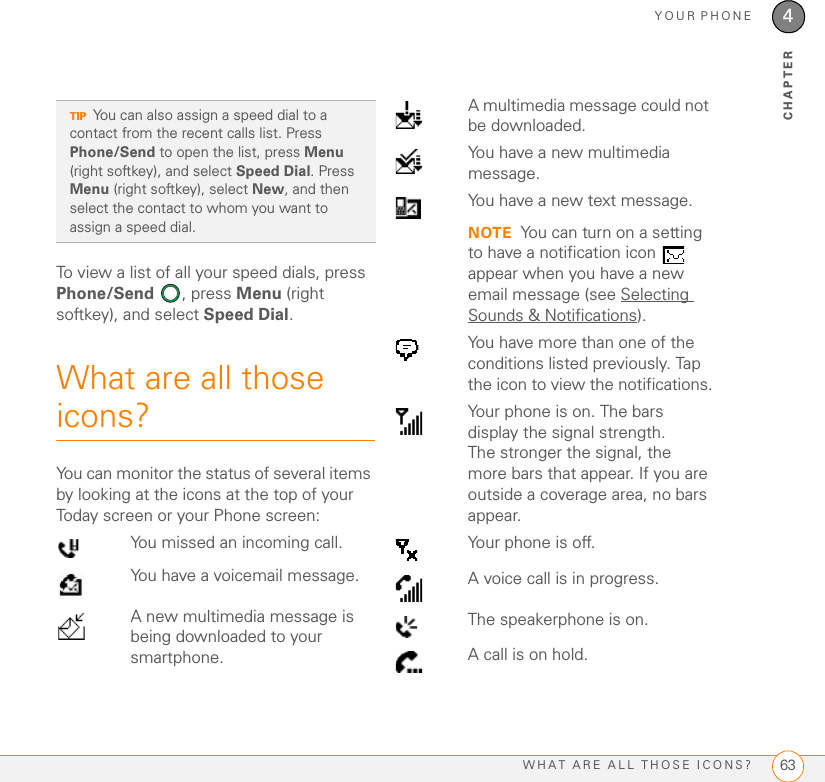
![YOUR PHONEWHAT ARE ALL THOSE ICONS? 654CHAPTERYou are in an area that supports mobile broadband (EVDO) data services. EVDO (Evolution Data Optimized) is a wireless broadband technology that is designed for very high-speed data transfer, with average download speeds of 400 to 600Kbps. It is capable of reaching download speeds up to 3.1Mbps and upload speeds up to 1.8Mbps.Your phone is on, and a mobile broadband data connection is active. You can still make or answer calls. When you make or answer a call, the data transmission is automatically interrupted.Your phone is on and is connected to a mobile broadband network, but you are not actively transmitting data. You can still make and answer calls.You are in an area that supports 1xRTT data services. The 1xRTT (single-carrier [1x] radio transmission technology) wireless technology can provide fast data transfer and Internet access with average speeds of 60 to 80Kbps and bursts up to 144Kbps.Your phone is on, and an 1xRTT data connection is active. When you make or receive a call, the data transmission is automatically interrupted.Your phone is on and is connected to a 1xRTT network, but you are not actively transmitting data. You can still make and answer calls.](https://usermanual.wiki/Palm/SKYC.User-manual-revised-1-of-2/User-Guide-1036630-Page-65.png)


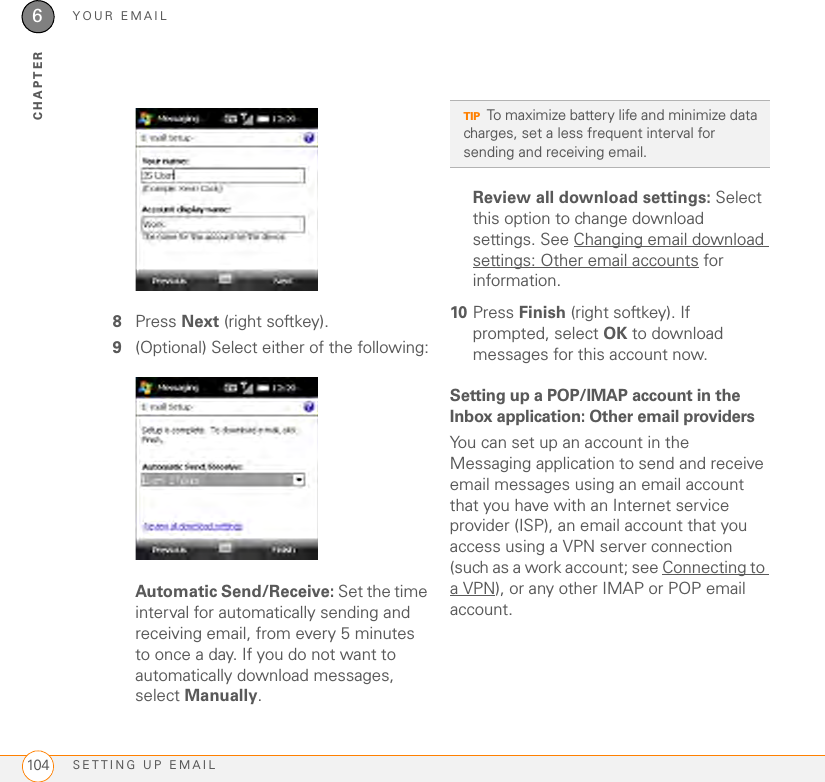

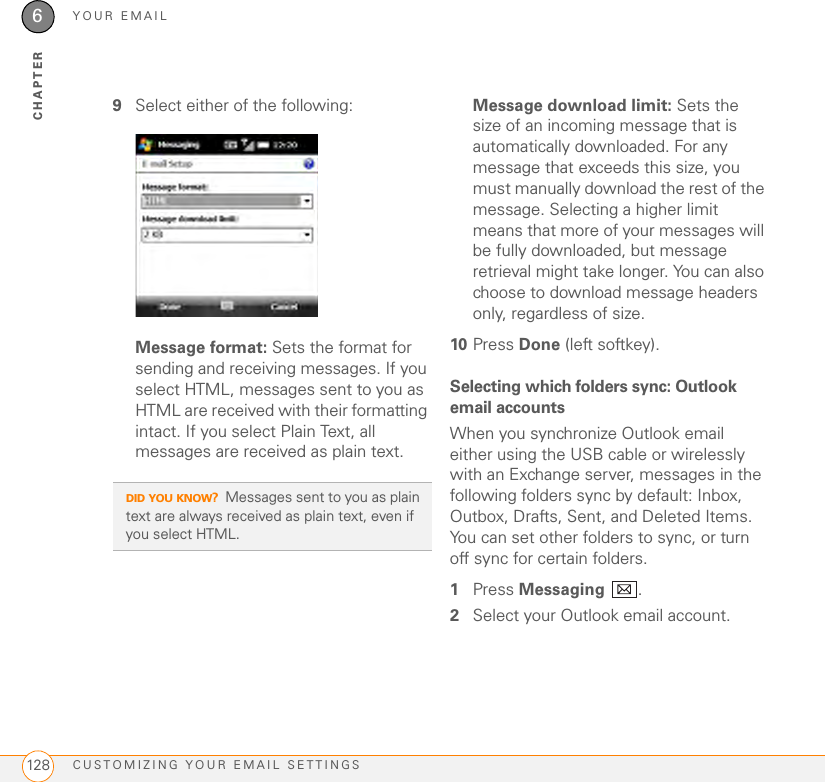
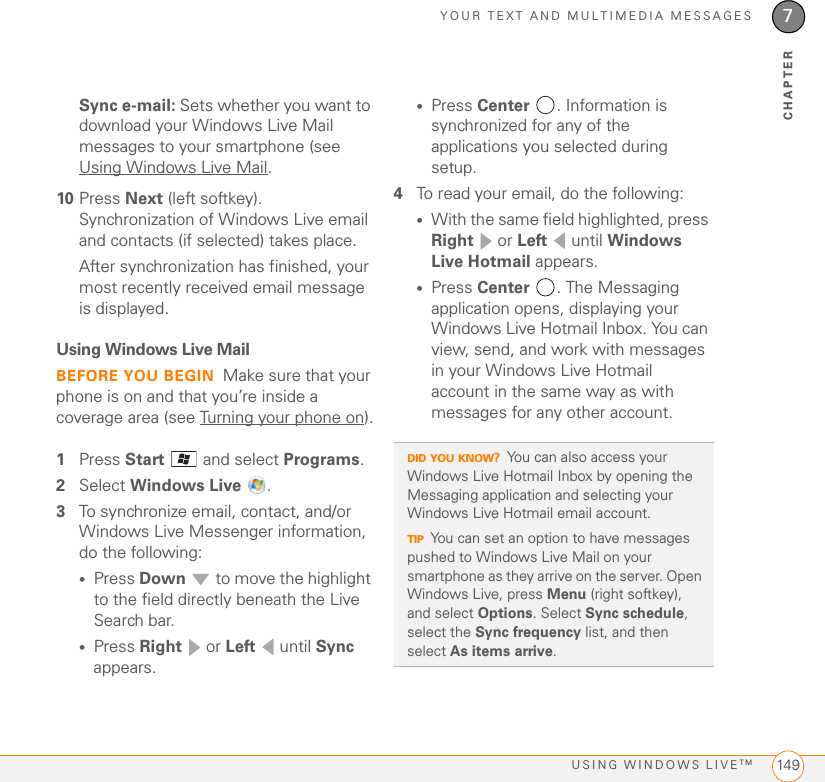
![YOUR EMAILWORKING WITH EMAIL MESSAGES 1196CHAPTERForwarding a message1Open the message you want to forward.2Press Menu (right softkey) and select Reply > Forward.3Address the message and enter any text you want to add.4(Optional) Select Edit sender’s message to edit the original sender’s message text that you include in your reply.5Press Send (left softkey).Deleting messagesYou can delete a message you are reading, or you can delete one or more messages from the message list.To delete a message you are reading:•Press Menu (right softkey) and select Delete.To delete messages from the message list:1Highlight the message(s) you want to delete. To highlight multiple consecutive messages, tap and drag the stylus across the messages in the list.2Press Delete (left softkey).3Select Ye s to confirm the deletion.To delete all messages at once:1Press Menu (left softkey) and select To o l s > Clear “[account name].”2Select Ye s to confirm the deletion.Messages you delete are moved to the Deleted Items folder. To remove these items from your smartphone completely, press Menu (right softkey) and select To o l s > Empty Deleted Items.Sorting your messagesYou can sort the messages in any folder. 1Go to the Inbox or other folder you want to sort.2Press Menu (right softkey) and select To o l s > S o r t B y .](https://usermanual.wiki/Palm/SKYC.User-manual-revised-1-of-2/User-Guide-1036630-Page-119.png)