Panasonic Mobile Communications Development of USA 23C002A GSM Cellular Mobile Radio with Bluetooth User Manual VS7 AAA
Panasonic Mobile Communications Development Corporation of USA GSM Cellular Mobile Radio with Bluetooth VS7 AAA
Contents
User Guide 2
![51ContactsDisplaying the Contacts list sorted by last name/first nameYou can choose to sort the Contacts list by contact’s last name or first name.d Main menu > Contacts > Advanced > Display by1. Select First name or Last nameMemory statusYou can see the amount of memory available in the Contacts list.d Main menu > Contacts > Advanced > Memory statusCopying contactsYou can copy all the contacts from SIM card to phone, or from phone to SIM card.Copying all the contacts from SIM card to phoned Main menu > Contacts > Advanced > Copy all from SIM1. “Copy?” 7 [0]9[5] (Yes)Copying all the contacts from phone to SIM cardd Main menu > Contacts > Advanced > Copy all to SIM1. “Only Name and Number fields can be copied. Continue?” 7 [0]9[5] (Yes)Note: The amount of memory for SIM storage depends on your SIM card.To decrease the amount of phone memory used, delete unwanted data or store data on your PC (see “CD-ROM” on page 152).VS7_AAA.book Page 51 Wednesday, August 3, 2005 5:10 PM](https://usermanual.wiki/Panasonic-Mobile-Communications-Development-of-USA/23C002A.User-Guide-2/User-Guide-570820-Page-1.png)
![52ContactsDeleting Phone ContactsYou can delete all the contacts stored in your phone.d Main menu > Contacts > Advanced > Delete all1. “Delete all contacts in phone?” 7 [5] (Yes)2. “Are you Sure?” 7 [5] (Yes)Service numbersIf your SIM card includes SDN (Service Dialling Number), you can call a service number by selecting from the list.SDN enables you to access special services provided by your network operator, such as customer support, emergency services, etc.d Main menu > Contacts > Service numbers1. [192] to scroll to the required item 7 [0]9[5] (Call)VS7_AAA.book Page 52 Wednesday, August 3, 2005 5:10 PM](https://usermanual.wiki/Panasonic-Mobile-Communications-Development-of-USA/23C002A.User-Guide-2/User-Guide-570820-Page-2.png)
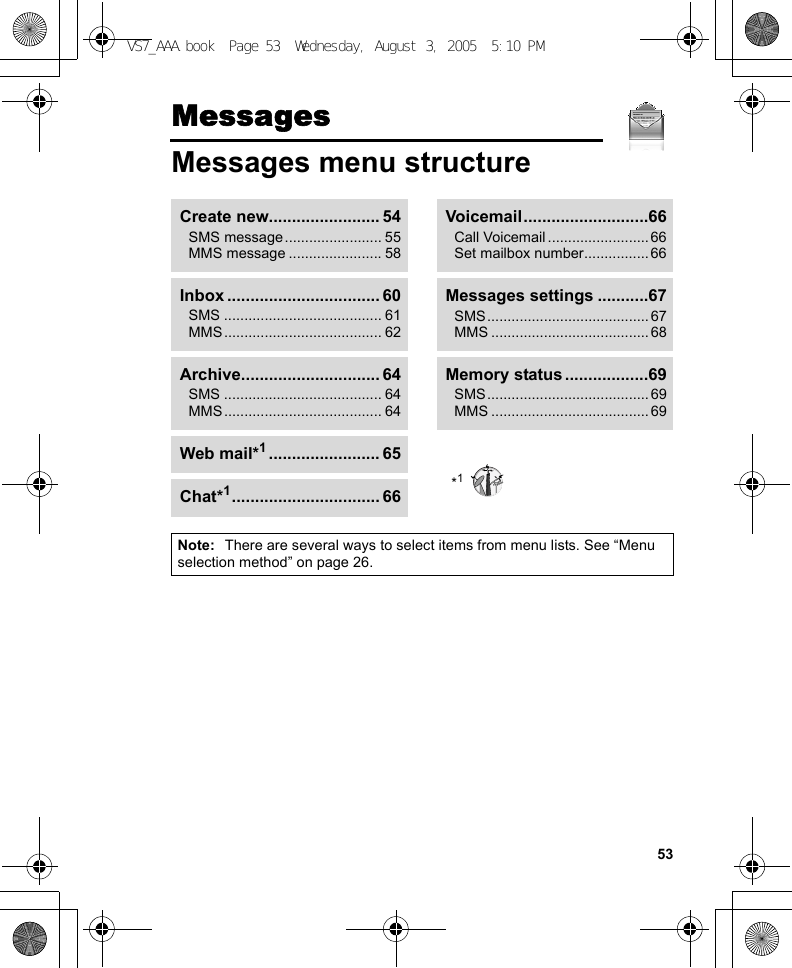
![55MessagesCreating an SMS messaged Main menu > Messages > Create new > SMS message1. Create text message 7 [0]See “Text entry” on page 36 for entering text.2. To enter recipient’s phone number directly: Enter numberTo select recipient’s phone number from Contacts: [0] 7 Highlight the required contact 7 [5] (Select) 7 If the card has several phone numbers stored, [192] to scroll to the required number 7 [0]9[5] (Select)3. [0] to send the messageCreating an Illumination message with emoticonsWith the Illumination feature, you can express special feelings in a message. The Indicator/Illumination Light responds to the pictographs in an Illumination message and light in combinations of colours and light patterns when you receive and view an Illumination message.d Main menu > Messages > Create new > SMS message1. Create text message2. [5] (Options) 7 Select Templates3. Select Illumination templates4. Select the required emoticonSee “Emoticon list” on page 56.To preview the Illumination of the messages you create:[5] (Options) 7 Select Preview illuminationNote: Only recipients who have an Illumination message capable phone can view messages with Illumination.VS7_AAA.book Page 55 Wednesday, August 3, 2005 5:10 PM](https://usermanual.wiki/Panasonic-Mobile-Communications-Development-of-USA/23C002A.User-Guide-2/User-Guide-570820-Page-5.png)
![56MessagesEmoticon list• Pattern A: [Firefly] flickers slowly for about 4 seconds.• Pattern B: [Flash] flickers fast for about 3 seconds.• Pattern C: [Beam] lights for about 3 seconds.Emoticon Indicator ColourLight Pattern Emoticon Indicator ColourLight Pattern:-)Colour 3A\^o^/Colour 3A:-D (^_^)>:-<B\(>o<)/B:-|| (>-<#):eColour 6^3^Colour 60:-) A(o^-^o) A:-P C(e~o~e):'( Colour 1 B(;_;) Colour 1 B:-( A(T_T) A:-/Colour 5(?_?)Colour 5:-S B(>_<) B:-[ C(-_-; C:-> Colour 2 A(^w^) Colour 2 A8-)B^&^B=:-)Colour 4(@_@)Colour 4:-0 (eoe):() Cp(^-^)p A:-IColour 7 (-_-) Colour 7 CI-( A(_ _)Zzz A;-) Colour 8 (^_~)" Colour 8VS7_AAA.book Page 56 Wednesday, August 3, 2005 5:10 PM](https://usermanual.wiki/Panasonic-Mobile-Communications-Development-of-USA/23C002A.User-Guide-2/User-Guide-570820-Page-6.png)
![57MessagesOptionsWhen creating a text message, the following options are available by pressing [5] (Options).Send Send the text as an SMS message.Send to many Send the text to more than one recipients.Preview illumination Preview illumination message.TemplatesSelect Illumination templates to create an illumination message or User templates to use the stored text templates.Count messageThe long message may be divided into several messages. You can check the concatenated message number.Save Save the message in Unsent folder.Use contacts Access Contacts menu to use Contacts data.Copy/Cut/Paste Copy, cut or paste the text.Add symbol Show the Symbol list from which you can select any symbol available on your phone.Input method Select the input method.T9 on/off Turn On or Off the predictive dictionary.Input language Select a language you wish to write in.My dictionary Add words to the internal dictionary.Exit Exit the text edit mode.VS7_AAA.book Page 57 Wednesday, August 3, 2005 5:10 PM](https://usermanual.wiki/Panasonic-Mobile-Communications-Development-of-USA/23C002A.User-Guide-2/User-Guide-570820-Page-7.png)
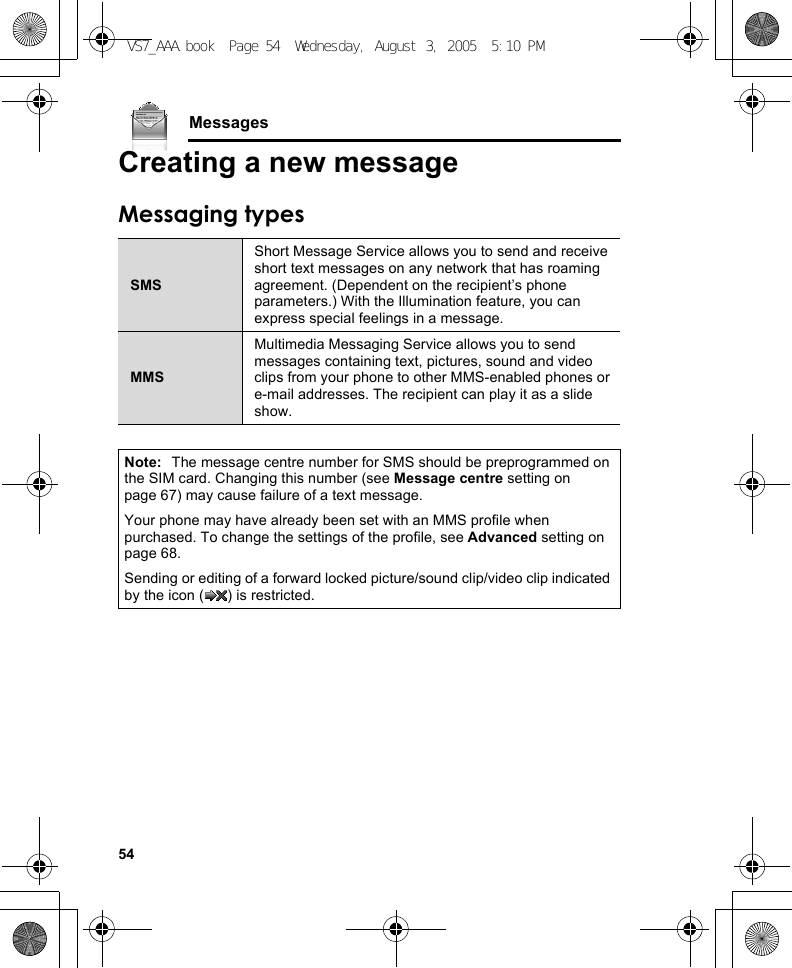
![58MessagesCreating an MMS messaged Main menu > Messages > Create new > MMS message1. Select Add picture, Add text, Add sound or Add video2. If Add text is selected: Create text message 7 [0]See “Text entry” on page 36 for entering text.If Add picture/Add sound/Add video is selected: Select the required item stored to My Media 7 [5] (Select)You can also download new files, take new pictures, record new sound or video clips for the MMS message.3. To add more than one picture, text, sound or video clip, [192] to scroll to Slides 7 [0] 7 [0]9[5] (Yes)4. Repeat steps 1-3 if requiredTo send the message:5. [5] (Options) 7 Select Send6. [192] to scroll to Add subject 7 [0]7. Enter subject 7 [0]8. [192] to scroll to Add recipient 7 [0]9. Select From contacts, Enter number or Enter email address10. If From contacts is selected: Highlight the required contact 7 [5] (Select) 7 If the card has several numbers stored, [192] to scroll to the required number 7 [0]9[5] (Select)If Enter number/Enter email address is selected: Enter number/email address 7 [0]11. [192] to scroll to Send 7 [0]Note: When you select Add video and record a new video clip in step 2, the recording time is fixed to For MMS sending.You cannot attach a video clip together with a picture file or sound clip to one slide.For downloading contents, visit http://box.panasonic.com/VS7_AAA.book Page 58 Wednesday, August 3, 2005 5:10 PM](https://usermanual.wiki/Panasonic-Mobile-Communications-Development-of-USA/23C002A.User-Guide-2/User-Guide-570820-Page-8.png)
![59MessagesSlide optionsWhen Slides is highlighted, the following options are available by pressing [5] (Options).Receiving messagesReceiving SMS messagesWhen you receive a new SMS message, the message icon ( ) is displayed along with a tone, illumination, and/or vibration. The SMS notification also appears on the standby screen. When One push SMS setting is set to On (see page 67), new SMS messages can be displayed by opening the flip. You can also check received SMS messages on the Front display.Reading SMS messagesWhen an SMS notification is displayed on the standby screen:1. [0]9[5] (View)If there is more than one notification, [192] to scroll to New SMS before step 1.If there is one SMS message, the message is automatically displayed.2. If there is more than one SMS message, [192] to scroll to the required message header in SMS Inbox 7 [0]3. When the message is displayed, [0] to show the message details (sender’s number, date, message centre’s number) if requiredAdd new Add a new slide.Send Send the MMS message after entering subject and recipient number or address.Slide duration Specify duration of the slide.Remove slide Remove the slide from the MMS message.Preview slide Preview the MMS message as a slide.VS7_AAA.book Page 59 Wednesday, August 3, 2005 5:10 PM](https://usermanual.wiki/Panasonic-Mobile-Communications-Development-of-USA/23C002A.User-Guide-2/User-Guide-570820-Page-9.png)
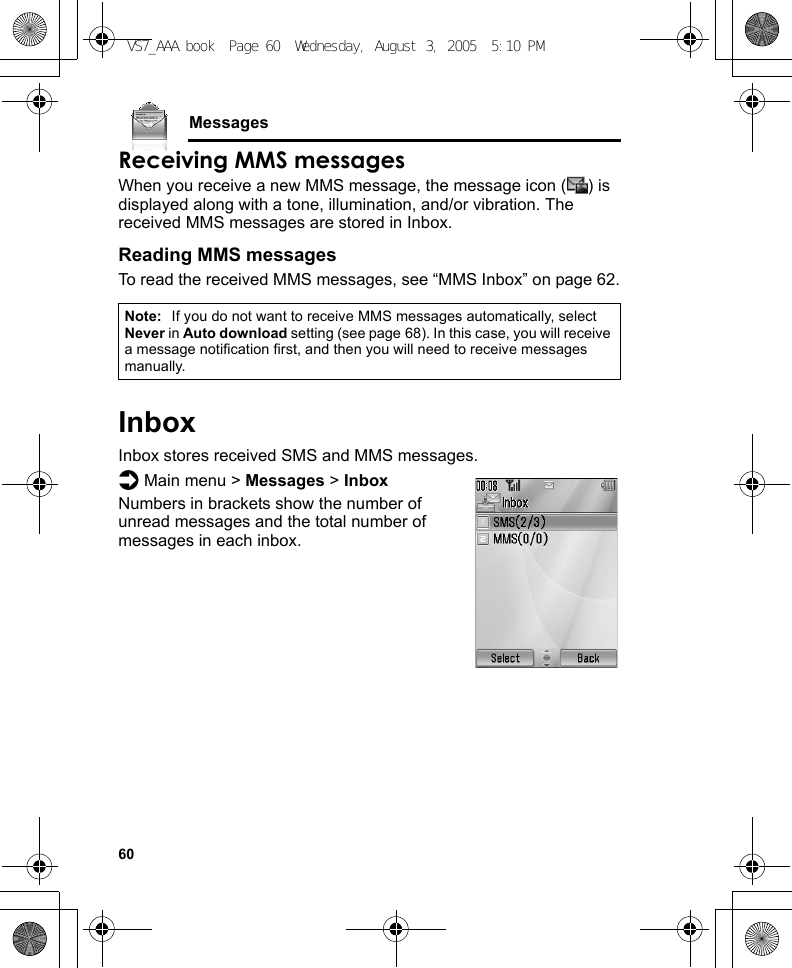
![61MessagesSMS InboxSMS message iconsReading SMS messagesd Main menu > Messages > Inbox > SMS1. [192] to scroll to the required message header 7 [0]2. [0] to show the message details (sender’s number, date, message centre’s number) if requiredOptionsWhen viewing the list of messages or the selected message, the following options are available by pressing [5] (Options).*1Available only when viewing the selected message.*2Available only when viewing the list of messages.Unread message Read messageReply Create reply message in SMS or MMS.Forward Forward the selected message.Call Call the sender’s number.Add to contacts Store the sender’s number to Contacts.Use detail*1Use phone number, e-mail or web address in the selected message to call, create message, add to Contacts, etc.Delete Delete the selected message.Delete all*2Delete all the SMS messages.View illumination*1Check the illumination of the message.VS7_AAA.book Page 61 Wednesday, August 3, 2005 5:10 PM](https://usermanual.wiki/Panasonic-Mobile-Communications-Development-of-USA/23C002A.User-Guide-2/User-Guide-570820-Page-11.png)
![62MessagesMMS InboxMMS message iconsReading MMS messagesd Main menu > Messages > Inbox > MMS1. [192] to scroll to the required message header 7 [0]Options in the message listWhen viewing the list of messages, the following options are available by pressing [5] (Options).Unread message MMS notificationRead messageReply Create reply message by SMS or MMS.Reply to all Create reply message to all recipients.Forward Forward the selected message.Call Call the sender’s number.Add to contacts Store the sender’s number or e-mail address to Contacts.Delete Delete the selected message.Delete all Delete all the MMS messages and notifications.Protect/Unprotect Protect or unprotect the selected message.Details Show details for the selected message.Note: Sending or editing of a forward locked file indicated by the icon ( ) is restricted.VS7_AAA.book Page 62 Wednesday, August 3, 2005 5:10 PM](https://usermanual.wiki/Panasonic-Mobile-Communications-Development-of-USA/23C002A.User-Guide-2/User-Guide-570820-Page-12.png)
![63MessagesOptions while viewing messagesWhen viewing the message, the following options are available by pressing [5] (Options).*1Options for notificationWhen the notification is highlighted, the following options are available by pressing [5] (Options).Reply Create a reply message by SMS or MMS.Reply to all Create a reply message to all the recipients.Play again Play the selected message.Message font size*1Select the required font size.Save picture Save the attached picture to My Media.Save sound Save the attached sound clip to My Media.Save video Save the attached video clip to My Media.Use detailUse the phone number, e-mail or web address in the selected message to call, create message, add to Contacts, etc.Attached files Show the attached files.Receive Receive new messages.Forward Forward the message.Reject Delete the notification from the message list and the message from the server.Call Call the sender’s number.Delete all Delete all the MMS messages and notifications.Protect/Unprotect Protect or unprotect the message.Details Show details for the selected message.VS7_AAA.book Page 63 Wednesday, August 3, 2005 5:10 PM](https://usermanual.wiki/Panasonic-Mobile-Communications-Development-of-USA/23C002A.User-Guide-2/User-Guide-570820-Page-13.png)
![64MessagesArchiveArchive stores SMS and MMS messages that are sent or waiting to be sent.Viewing messagesd Main menu > Messages > Archive > SMS or MMS1. Select the required folder2. [192] to scroll to the required message 7 [0]Options for SMSIn Sent and Unsent folders, the following options are available by pressing [5] (Options).*1Available only when viewing the selected message.*2Available only when viewing the list of messages.SMSSent Store sent SMS messages.Unsent Store undelivered and unfinished SMS messages.MMSSent Store sent MMS messages.Outbox Store undelivered MMS messages.Drafts Store unfinished MMS messages.Send Send the selected message.Call Call the sender’s number.Use detail*1Use phone number, e-mail or web address in the selected message to call, create message, add to Contacts, etc.Delete Delete the selected message.Delete all*2Delete all the SMS messages in the folder.View illumination*1Check the illumination of the message.VS7_AAA.book Page 64 Wednesday, August 3, 2005 5:10 PM](https://usermanual.wiki/Panasonic-Mobile-Communications-Development-of-USA/23C002A.User-Guide-2/User-Guide-570820-Page-14.png)
![65MessagesOptions for MMSIn Sent, Outbox and Drafts folders, the following options are available by pressing [5] (Options).*1Available only in Sent folder.*2Available only in Outbox and Drafts folder.Web mailWeb mail is an innovative service that lets you stay up-to-date with all of your messages. You need to subscribe to this service. For further information, contact your service provider.Connecting to internet maild Main menu > Messages > Web mailYour phone is connected to the Internet via a WAP connection to retrieve e-mail messages.1. Follow the screen contentsEdit Edit the selected message.Forward*1Forward the selected message.Send*2Send the selected message.Delete Delete the selected message.Delete all Delete all the messages in the folder.Protect/Unprotect Protect or unprotect the selected message.Details Show details for the selected message.VS7_AAA.book Page 65 Wednesday, August 3, 2005 5:10 PM](https://usermanual.wiki/Panasonic-Mobile-Communications-Development-of-USA/23C002A.User-Guide-2/User-Guide-570820-Page-15.png)
![66MessagesChatChat lets you enjoy the fun of instant messaging wherever you are. It’s the fun way to chat on-line. For further information, contact your service provider.d Main menu > Messages > Chat1. Follow the screen contentsVoicemailVoicemail is a network service which allows callers, who could not reach you, to leave voice messages. You may need to subscribe to this service. For further information, contact your service provider.Retrieving stored voice messagesWhen a new voice message is stored, an alert sounds and ( ) appears on the display, and you receive an SMS notification.When an SMS notification is displayed on standby screen:1. [0]9[5] (Call)2. Follow the recorded instructionsORd Main menu > Messages > Voicemail > Call Voicemail1. Follow the recorded instructionsChanging the voice mailbox numberd Main menu > Messages > Voicemail > Set mailbox number1. Enter new voice mailbox number 7 [0]9[5] (Ok)Shortcut: You can also press and hold [A] in standby mode to call your voice mailbox.VS7_AAA.book Page 66 Wednesday, August 3, 2005 5:10 PM](https://usermanual.wiki/Panasonic-Mobile-Communications-Development-of-USA/23C002A.User-Guide-2/User-Guide-570820-Page-16.png)
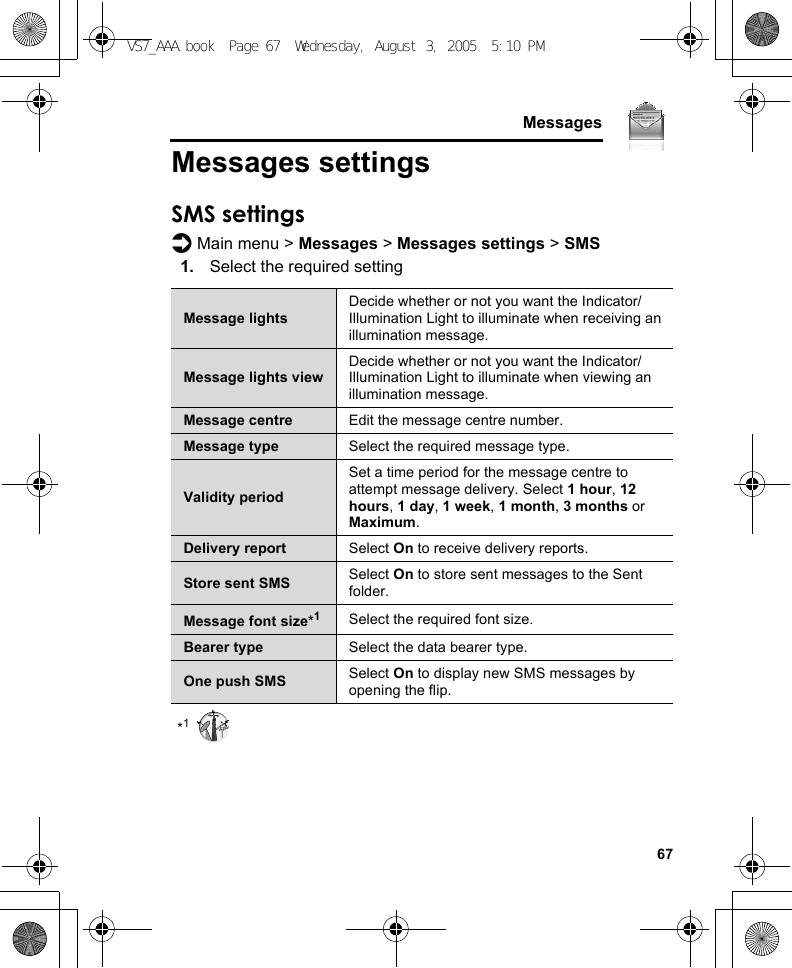
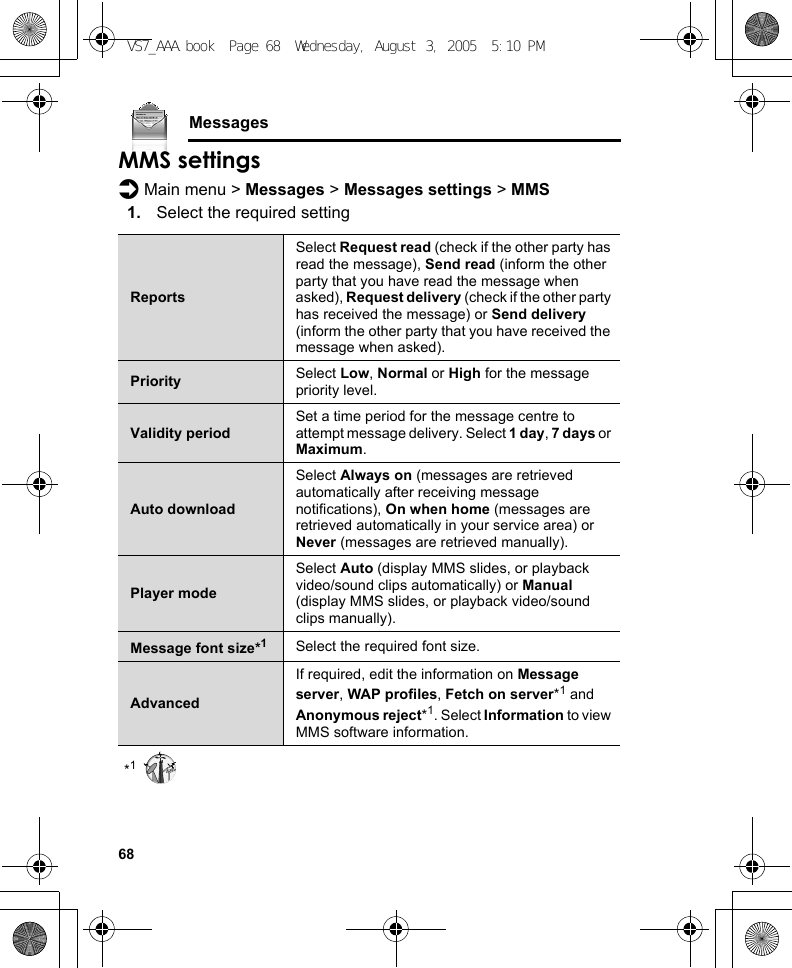
![72CameraTaking a pictured Main menu > Camera > Picture1. The display acts as a viewfinder. Move the phone around to frame your subject2. [0]9[U] to capture the imageOperations after taking a pictureTo save the image to My Media: [5] (Save)9[U]You can save the image by pressing [U] whether the flip is open or closed.To return to the preview screen without storing the image: [6] (Delete)To send the captured image via MMS: [0] 7 See “Creating an MMS message” on page 58Taking a self-portraitYou can take your self-portrait using Front display.d Main menu > Camera > Picture1. Close the flip. Look at yourself in Front display2. [U] on the side of the phone3. The image appears on both the Main display and the Front display. For further operation, see “Operations after taking a picture” on page 72Shortcut: To directly open the picture preview screen, press and hold [U] in standby mode.Caution: To avoid impairing camera performance, DO NOT leave the phone with the camera facing direct sunlight.VS7_AAA.book Page 72 Wednesday, August 3, 2005 5:10 PM](https://usermanual.wiki/Panasonic-Mobile-Communications-Development-of-USA/23C002A.User-Guide-2/User-Guide-570820-Page-22.png)
![73CameraZoom[1]9[O] to zoom in one level[2]9[P] to zoom out one levelYou can also press and hold the keys to quickly reach the required zoom level.Adjusting the brightness levelThe picture brightness indicator shows the current brightness level.[4] to increase the brightness level[3] to decrease the brightness levelTaking close-up picturesYou can take sharp pictures from a close distance by using Macro Mode. (Macro focus range: 10 cm)Slide the Macro Mode Switch to ( ) before taking close-up pictures.Note: To send a picture via infrared or Bluetooth, or use as wallpaper, save the image once, and then go to My Media. (See “Pictures” on page 132.)If the camera is left in certain conditions including the preview screen and capture screen for 3 minutes, the phone automatically exits Picture mode. If left in the preview screen, but with the options menu displayed, the phone remains in this state.If certain situations such as receiving calls occur during camera operation, the phone exits Camera mode. If a captured image is on the screen, it is saved to My Media.Note: Zoom function may not be available when the picture size is set to Ultra large 1600x1200.VS7_AAA.book Page 73 Wednesday, August 3, 2005 5:10 PM](https://usermanual.wiki/Panasonic-Mobile-Communications-Development-of-USA/23C002A.User-Guide-2/User-Guide-570820-Page-23.png)
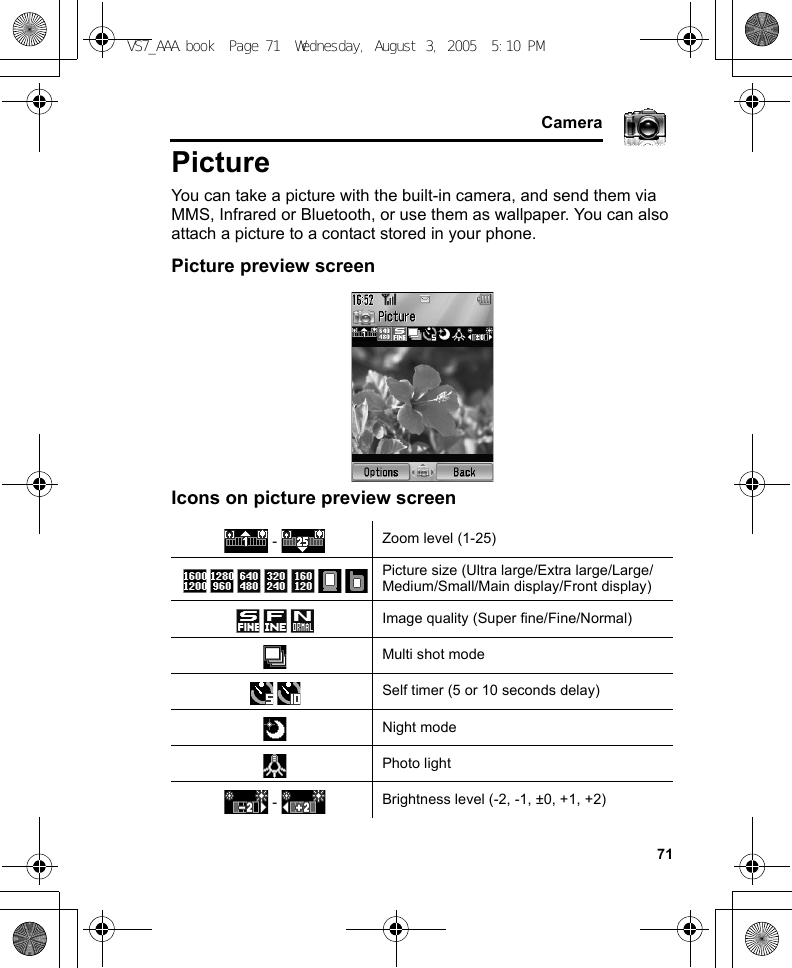
![74CameraViewing picturesPictures taken with the built-in camera are saved to My Media. To view the saved pictures, see “Viewing pictures” on page 132.Picture settingsIn the preview screen, the following options are available by pressing [5] (Options).Picture sizeSelect the required size from Ultra large 1600x1200, Extra large 1280x960, Large 640x480, Medium 320x240, Small 160x120, Main display 240x320 or Front display 96x64.Image quality Select the required quality from Super fine, Fine or Normal.Photo light Select On to light up your subject before snapping a picture.Night mode Select On to take a picture in low light conditions.Multi shot mode 15 continuous shots is available. See “Continuous shooting” on page 76.Effect Select the required colour from Normal, Sepia, Monochrome or Negative.Self timer Select the amount of time delay you require for shooting from Off, 5 seconds or 10 seconds.Shutter sound Select the required sound from Pattern 1-5.Switch to video Switch from Picture mode to Video mode.Available spaceShow the number of files which can be saved in the current picture size and image quality. You can see the number of files which can be saved in other image qualities by pressing [5] (Quality), and in other picture sizes by pressing [192].Set to default Reset the current picture settings to default.Help Show direct key operation in the preview screen.VS7_AAA.book Page 74 Wednesday, August 3, 2005 5:10 PM](https://usermanual.wiki/Panasonic-Mobile-Communications-Development-of-USA/23C002A.User-Guide-2/User-Guide-570820-Page-24.png)
![75CameraDirect key operationYou can change the picture settings by pressing one of the numeric keys which correspond to the functions as follows. Some functions are depicted by the icon. See “Icons on picture preview screen” on page 71.[A]: Switch to video[S]: Picture size[D]: Image quality[F]: Multi shot mode[G]: Self timer[H]: Night mode[I]: Effect[L]: Help[r]: Photo lightAdding a picture to Contacts cardIf a picture is attached to a Contact card, it appears on the screen when the contact calls you.To attach a picture to a contact, save the image once, and then go to Contacts. See “Adding contacts” on page 44.VS7_AAA.book Page 75 Wednesday, August 3, 2005 5:10 PM](https://usermanual.wiki/Panasonic-Mobile-Communications-Development-of-USA/23C002A.User-Guide-2/User-Guide-570820-Page-25.png)
![76CameraContinuous shootingIn Multi shot mode, you can capture a succession of 15 images with just one press. When you set Multi shot mode on, the picture size is fixed to Medium 320x240 and Night mode off.d Main menu > Camera > Picture1. [5] (Options) 7 Select Multi shot mode2. Select On3. [0]9[U] to shootThe captured images are displayed as thumbnails.To view the captured images:[1929394] to scroll to the required thumbnail 7 [0]You can view the next image by pressing [4] or [2], and the previous image by pressing [3] or [1].To save a captured image:1. When the required thumbnail is highlighted or the required image is displayed on the screen, [5] (Options) 7 Select Save this one onlyThe picture is stored to My Media.To save all the captured images:1. In thumbnail screen or when one of the images is displayed on the screen, [5] (Options) 7 Select Save all picturesORWhen one of the images is displayed on the screen, [0]All the pictures are stored to My Media.Note: You cannot take pictures in Multi shot mode when the phone is closed. Once you close the phone, Multi shot mode is switched off.Note: All the captured images are also saved by pressing [U] on thumbnail screen or when one of the images is displayed on the screen.VS7_AAA.book Page 76 Wednesday, August 3, 2005 5:10 PM](https://usermanual.wiki/Panasonic-Mobile-Communications-Development-of-USA/23C002A.User-Guide-2/User-Guide-570820-Page-26.png)
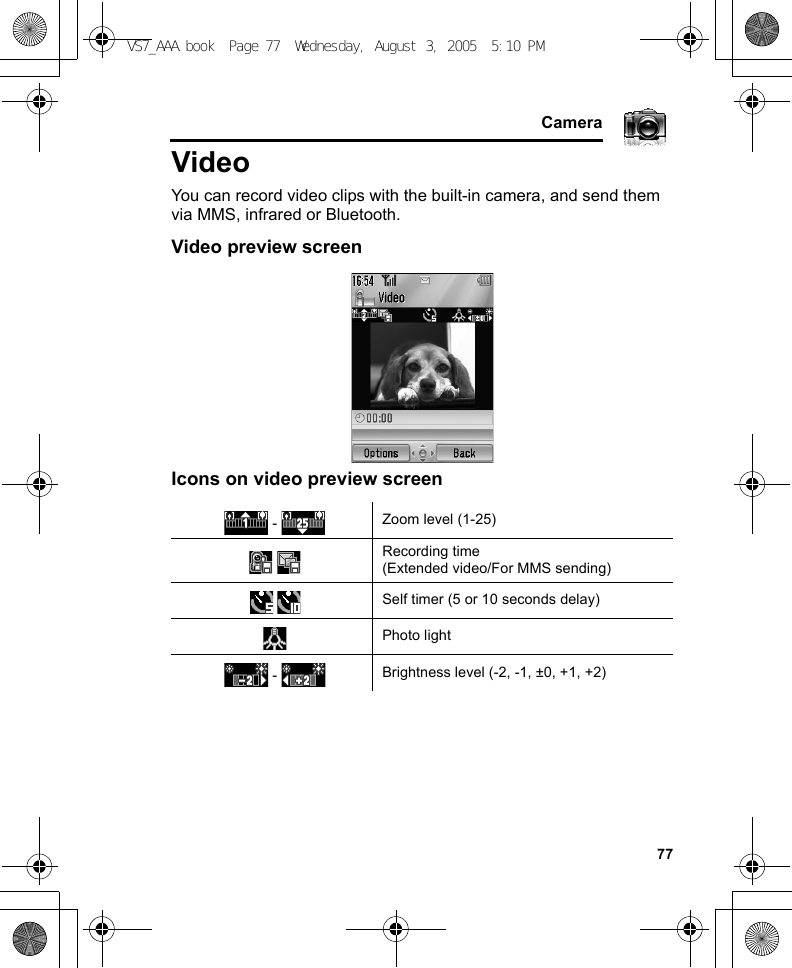
![78CameraRecording a video clipd Main menu > Camera > Video1. Main display acts as a viewfinder. Move the phone around to frame your subject2. [0]9[U] to start recording3. Video recorder records until reaching the clip size limit or until you press [0]9[U]9[5] (Stop)4. Select the required actionPlayback Playback the recorded video clip.Save to My Media Save the recorded video clip to My Media.Send as MMSAttach the recorded video clip to an MMS message. See “Creating an MMS message” on page 58.Caution: To avoid impairing camera performance, DO NOT leave the phone with the camera facing direct sunlight.Note: To send a video clip via infrared or Bluetooth, save the video clip once, and then go to My Media. (See “Videos” on page 139.)If the video is left in the preview screen or a recorded video clip is displayed for 3 minutes, the phone automatically exits Video mode. If left in preview screen, but with the options menu displayed, the phone remains in this state.If certain situations such as receiving calls occur during camera operation, the phone exits Camera mode. The recording ends automatically, and the already recorded video clip is saved to My Media.VS7_AAA.book Page 78 Wednesday, August 3, 2005 5:10 PM](https://usermanual.wiki/Panasonic-Mobile-Communications-Development-of-USA/23C002A.User-Guide-2/User-Guide-570820-Page-28.png)
![79CameraZoom[1]9[O] to zoom in one level[2]9[P] to zoom out one levelYou can also press and hold the keys to quickly reach the required zoom level.Adjusting the brightness levelThe video clip brightness indicator shows the current brightness level.[4] to increase the brightness level[3] to decrease the brightness levelPlaying video clipsRecorded video clips are saved to My Media. To play the saved video clips, see “Playing video clips” on page 139.Note: You cannot change the zoom level while recording.Note: You cannot change the brightness level while recording.VS7_AAA.book Page 79 Wednesday, August 3, 2005 5:10 PM](https://usermanual.wiki/Panasonic-Mobile-Communications-Development-of-USA/23C002A.User-Guide-2/User-Guide-570820-Page-29.png)
![80CameraVideo settingsIn the preview screen, the following options are available by pressing [5] (Options).Direct key operationYou can change the video settings by pressing one of the numeric keys which correspond to the functions as follows. Some functions are depicted by the icon. See “Icons on video preview screen” on page 77.[A]: Switch to picture[S]: Recording time[G]: Self timer[I]: Effect[L]: Help[r]: Photo lightRecording time Select the video recording time from Extended video or For MMS sending.Photo light Select On to light up your subject before recording a video clip.Effect Select the required colour from Normal, Sepia, Monochrome or Negative.Self timer Select the amount of time delay you require for recording from Off, 5 seconds or 10 seconds.Switch to picture Switch from Video mode to Picture mode.Available spaceShow the number of files which can be saved in the current recording time. You can see the number of files which can be saved in other recording time by pressing [5] (RecTime).Help Show direct key operation in the preview screen.VS7_AAA.book Page 80 Wednesday, August 3, 2005 5:10 PM](https://usermanual.wiki/Panasonic-Mobile-Communications-Development-of-USA/23C002A.User-Guide-2/User-Guide-570820-Page-30.png)
![82BrowserViewing the contentsOpening Browserd Main menu > BrowserThe off-line menu is displayed. You will not be connected until you choose a menu.1. [192] to scroll to the required menu 7 [0]The phone is connected to the web site.Online status iconsClosing Browser1. [5] (Options) 7 Select Exit browserShortcut: You can directly access Browser by pressing [6] ( ) in standby mode.Non-secure CSD connectionNon-secure GPRS connectionSecure CSD connection Secure GPRS connectionVS7_AAA.book Page 82 Wednesday, August 3, 2005 5:10 PM](https://usermanual.wiki/Panasonic-Mobile-Communications-Development-of-USA/23C002A.User-Guide-2/User-Guide-570820-Page-32.png)
![83BrowserBrowser optionsWhile Browser is on-line or off-line, the following options are available.d Main menu > Browser [Off-line]ORd Main menu > Browser > Required menu [On-line]1. [5] (Options) 7 Select the required option*1Available only when the web page is displayed.*2Available only when the web page has the image, melody or video contents.Select Select the required item.Bookmarks Go to the bookmark list.Enter address Go to URL entry.Save media*1*2The image in contents is saved to My Media.Set as bookmark*1The displayed URL is saved to the bookmark list.Service Inbox Open Service Inbox.Reload page*1Reload this page.AdvancedGo to homepage, clear the cache, view or send the current URL, or view the current WAP information.Settings Edit WAP profiles/Push access settings or view the security information.Exit browser*1Terminate the browser.VS7_AAA.book Page 83 Wednesday, August 3, 2005 5:10 PM](https://usermanual.wiki/Panasonic-Mobile-Communications-Development-of-USA/23C002A.User-Guide-2/User-Guide-570820-Page-33.png)
![84BrowserBookmarksOnce you bookmark your favourite page or a frequently accessed page, you can jump to the page quickly. You can also categorise the bookmarked pages into 10 folders and rename each folder.While off-line or on-line:1. [5] (Options) 7 Select Bookmarks2. [192] to scroll to the required bookmark folder 7 [0]3. [192] to scroll to the required bookmark4. To load the URL: [0]To select the required option: [5] (Options)Renaming a bookmark folder[192] to scroll to the required bookmark folder 7 [5] (Options) 7 Select Rename 7 Enter a new folder name 7 [0]Deleting all bookmarksIn the bookmark list:[5] (Options) 7 Select Delete all 7 [5] (Yes)All the saved bookmarks are deleted, and the folder names return to the default.Go to page Jump to the web page.Add bookmark Add to the bookmark list.Edit Edit the selected bookmark name and URL.Move to Move the selected bookmark to another folder.Delete Delete the selected bookmark.Send bookmark Send the bookmarked URL via SMS or MMS.Delete all in folder Delete all the bookmarks in the folder.VS7_AAA.book Page 84 Wednesday, August 3, 2005 5:10 PM](https://usermanual.wiki/Panasonic-Mobile-Communications-Development-of-USA/23C002A.User-Guide-2/User-Guide-570820-Page-34.png)
![85BrowserEnter addressYou can directly go to the required web page by entering the URL.While off-line or on-line:1. [5] (Options) 7 Select Enter address2. Enter URL 7 [0]Save mediaImages, melodies or videos on the web page can be saved to My Media.When the web page is displayed:1. [5] (Options) 7 Select Save media2. [0]9[5] (Select) to saveSet as bookmarkYou can save the URLs of your favourite pages in Bookmarks.When the web page is displayed:1. [5] (Options) 7 Select Set as bookmark2. Enter title 7 [0]3. [192] to scroll to the required folder 7 [0]9[5] (Save)Note: Panasonic is not responsible for the performance of downloaded contents or possible corruption of phone software.VS7_AAA.book Page 85 Wednesday, August 3, 2005 5:10 PM](https://usermanual.wiki/Panasonic-Mobile-Communications-Development-of-USA/23C002A.User-Guide-2/User-Guide-570820-Page-35.png)
![86BrowserService InboxView WAP Push message and go to URL.While off-line or on-line:1. [5] (Options) 7 Select Service Inbox2. To load the URL: [0]To select the required option: [5] (Options)*1Available only when text and URL are delivered from your service provider.Reload pageCurrent page can be reloaded.When the web page is displayed:1. [5] (Options) 7 Select Reload pageGo to page Jump to the web page.View message*1View the message.Delete Delete the message.VS7_AAA.book Page 86 Wednesday, August 3, 2005 5:10 PM](https://usermanual.wiki/Panasonic-Mobile-Communications-Development-of-USA/23C002A.User-Guide-2/User-Guide-570820-Page-36.png)
![87BrowserAdvancedWhile off-line or on-line:1. [5] (Options) 7 Select Advanced2. Select the required option*1Available only when the web page is displayed.SettingsWAP profilesIf no settings are present, contact your service provider.You can check or edit the current WAP profile settings, or add new WAP profile settings.d Main menu > Browser [Off-line]1. [5] (Options) 7 Select Settings2. Select WAP profiles3. [192] to scroll to the required profile4. [5] (Options) 7 Select Activate, Edit or Delete5. If Edit is selected, you can edit the following information: Profile name, Homepage, Proxy IP, Proxy port, Use proxy and Data connectionsHome Jump to the set-up homepage.Clear cache Delete the contents stored in the cache.View current URL*1View the URL of the current page.Send current URL*1Send the URL of the current page via SMS or MMS.WAP information View WAP browser information.Note: You need to configure GPRS or CSD before configuring the WAP profile settings. See “Data connections” on page 116.VS7_AAA.book Page 87 Wednesday, August 3, 2005 5:10 PM](https://usermanual.wiki/Panasonic-Mobile-Communications-Development-of-USA/23C002A.User-Guide-2/User-Guide-570820-Page-37.png)
![88BrowserPush accessSet up Push access to receive WAP messages.While off-line or on-line:1. [5] (Options) 7 Select Settings2. Select Push access3. Select Service indication, Service loading or Other messages4. Select On or OffSecurityView security information.While off-line or on-line:1. [5] (Options) 7 Select Settings2. Select Security3. Select the required item*1Available only while secure connection.Certificates Select Certificate 1-20.Current certificate*1View the current certificate.Session info*1View session information.VS7_AAA.book Page 88 Wednesday, August 3, 2005 5:10 PM](https://usermanual.wiki/Panasonic-Mobile-Communications-Development-of-USA/23C002A.User-Guide-2/User-Guide-570820-Page-38.png)
![90SettingsPhone settingsProfilesYou can switch among different profiles in your phone, each with a distinct combination of alert method, ringtone, etc. Profiles are set up for use in the following environments:Activating a profiled Main menu > Settings > Phone settings > Profiles1. [192] to scroll to the required profile2. [0]OR[5] (Options) 7 Select ActivateSetting a profileYou can personalise the individual settings within a profile. For further details about the individual settings, see “Sounds & alerts” on page 99.d Main menu > Settings > Phone settings > Profiles1. [192] to scroll to the required profile2. [5] (Options) 7 Select Edit3. Select the required item4. Select the required settingNormal For everyday settings.Silent For formal occasions.Meeting For meetings.Outdoor For noisy environments.Car For driving occasions.VS7_AAA.book Page 90 Wednesday, August 3, 2005 5:10 PM](https://usermanual.wiki/Panasonic-Mobile-Communications-Development-of-USA/23C002A.User-Guide-2/User-Guide-570820-Page-40.png)
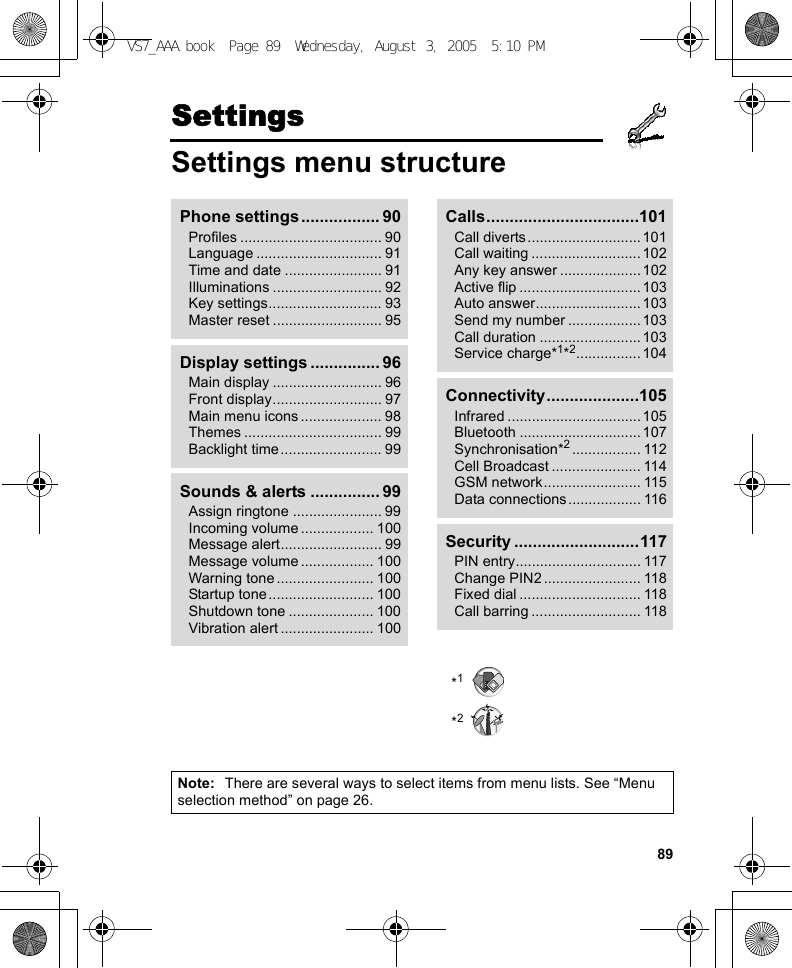
![91SettingsLanguageYou can change the language used for display messages and/or text entry. Automatic uses the language dictated by the country/region code of the SIM card.d Main menu > Settings > Phone settings > Language > Display language or Input language1. Select Automatic or the required languageTime and dateYou can set your Home clock and Away clock.Home clockYou can set the current time and date on your phone.d Main menu > Settings > Phone settings > Time and date > Home clock1. Select the required settingAway clockYou can set Away clock to display the time in the area you choose.d Main menu > Settings > Phone settings > Time and date > Away clock1. Select the required settingSet date & time Enter the time 7 [2] 7 Enter the dateHome area Select your home area.Summer time Select On to activate the summer time mode.Set time zone Select the required area.Summer time Select On to activate the summer time mode.VS7_AAA.book Page 91 Wednesday, August 3, 2005 5:10 PM](https://usermanual.wiki/Panasonic-Mobile-Communications-Development-of-USA/23C002A.User-Guide-2/User-Guide-570820-Page-41.png)
![92SettingsChoosing clockYou can choose either Home clock or Away clock to be displayed on your phone.d Main menu > Settings > Phone settings > Time and date > Select clock > Home clock or Away clockDisplay formatYou can select the required display format for the date and time.d Main menu > Settings > Phone settings > Time and date > Display format > Time or Date1. To set Time format: Select 24 hour or 12 hourTo set Date format: Select the required format (DD=date, MM=month, YY=year)IlluminationsThe Indicator/Illumination Light flashes or beams when you receive calls/messages, have a conversation, the flip is closed, the battery is charging or data is transferred.d Main menu > Settings > Phone settings > Illuminations1. Select the required eventIncomingSelect the required colour or Off.MessageIn conversationFlip closeCharging Select On or Off.Data transferNote: You can check the Flip close illumination by pressing [O9P] while the phone is in standby mode with the flip closed.VS7_AAA.book Page 92 Wednesday, August 3, 2005 5:10 PM](https://usermanual.wiki/Panasonic-Mobile-Communications-Development-of-USA/23C002A.User-Guide-2/User-Guide-570820-Page-42.png)
![93SettingsKey settingsKey toneYou can change the key tone.d Main menu > Settings > Phone settings > Key settings > Key tone1. Select the required toneKey volumeYou can change the key tone volume.d Main menu > Settings > Phone settings > Key settings > Key volume1. [1929394] to scroll to the required volume 7 [0]9[5] (Select)Key backlightIf you set the key backlight to off, you can maintain longer battery life.d Main menu > Settings > Phone settings > Key settings > Key backlight1. Select On or OffVS7_AAA.book Page 93 Wednesday, August 3, 2005 5:10 PM](https://usermanual.wiki/Panasonic-Mobile-Communications-Development-of-USA/23C002A.User-Guide-2/User-Guide-570820-Page-43.png)
![94SettingsKeyguardKeyguard prevents any keys from being accidentally pressed e.g. when the phone is being carried. When Keyguard is enabled, the Keyguard icon ( ) appears on the display. When a call is received, Keyguard is temporarily disabled and you can answer the call.To enable Keyguard:d Main menu > Settings > Phone settings > Key settings > Keyguard1. “Would you like to lock keypad?” 7 [0]9[5] (Yes)ORIn standby mode:1. Press and hold [0]2. “Would you like to lock keypad?” 7 [0]9[5] (Yes)To disable Keyguard:When () appears on the display:1. [0] 7 “Would you like to unlock?” 7 [0]9[5] (Yes)Shortcut keysNavigation key [1929394] can be used as a Shortcut key. It is possible to assign a specific menu to Navigation key so that you can access the menu directly from standby mode.d Main menu > Settings > Phone settings > Key settings > Shortcut keys1. Select Navigation up, Navigation right, Navigation down or Navigation left2. Select the required menuNote: Emergency calls can still be made with the Keyguard enabled but there is no indication that you are dialling the number.VS7_AAA.book Page 94 Wednesday, August 3, 2005 5:10 PM](https://usermanual.wiki/Panasonic-Mobile-Communications-Development-of-USA/23C002A.User-Guide-2/User-Guide-570820-Page-44.png)
![95SettingsMaster resetYou can reset your phone to the factory settings, except for the settings for Language, Time and date, and Calendar. User data such as contacts, messages, call logs and data stored in My Media remains on the phone.Password is required for master reset. The factory set password is 0000.Resettingd Main menu > Settings > Phone settings > Master reset > Reset settings1. “Would you like to reset all phone settings?” 7 [0]9[5] (Yes)2. Enter the password 7 [0]9[5] (Ok)Changing the passwordd Main menu > Settings > Phone settings > Master reset > Password setting1. Enter the current password 7 [0]9[5] (Ok)2. Enter a new password 7 [0]9[5] (Ok)3. Enter the new password again 7 [0]9[5] (Ok)VS7_AAA.book Page 95 Wednesday, August 3, 2005 5:10 PM](https://usermanual.wiki/Panasonic-Mobile-Communications-Development-of-USA/23C002A.User-Guide-2/User-Guide-570820-Page-45.png)
![96SettingsDisplay settingsMain displayYou can change the wallpaper, brightness and position of the operator name on the Main display.WallpaperYou can change the wallpaper on the standby screen.d Main menu > Settings > Display settings > Main display > Wallpaper1. Select My Media or Download*12. [1929394] to scroll to the required wallpaper3. To set: [5] (Select)To view and set: [0] 7 [0]9[5] (Select)BrightnessYou can adjust the brightness of the display.d Main menu > Settings > Display settings > Main display > Brightness1. [192] to adjust the brightness level 7 [0]9[5] (Select)Operator nameYou can change the position of your operator name on the standby screen.d Main menu > Settings > Display settings > Main display > Operator name1. Select Default, Upper left or Lower left*1VS7_AAA.book Page 96 Wednesday, August 3, 2005 5:10 PM](https://usermanual.wiki/Panasonic-Mobile-Communications-Development-of-USA/23C002A.User-Guide-2/User-Guide-570820-Page-46.png)
![97SettingsFront displayYou can change the wallpaper, contrast and clock display on the Front display.External wallpaperYou can change the wallpaper on the Front display.d Main menu > Settings > Display settings > Front display > External wallpaper1. Follow the procedures of Wallpaper in Main display on page 96.ContrastYou can adjust the contrast of the Front display.d Main menu > Settings > Display settings > Front display > Contrast1. [192] to adjust the contrast 7 [0]9[5] (Select)Clock displayYou can change the clock display style.d Main menu > Settings > Display settings > Front display > Clock display1. Select Clock and Date or DigitalVS7_AAA.book Page 97 Wednesday, August 3, 2005 5:10 PM](https://usermanual.wiki/Panasonic-Mobile-Communications-Development-of-USA/23C002A.User-Guide-2/User-Guide-570820-Page-47.png)
![98SettingsMain menu iconsYou can change menu icons or the background on Main menu screen.Changing iconsTo change menu icons:d Main menu > Settings > Display settings > Main menu icons1. [1929394] to scroll to the required menu icon 7 [0]2. Select My Media or Download*13. [1929394] to scroll to the required image4. To set: [5] (Select)To view and set: [0] 7 [0]9[5] (Select)To change the background:d Main menu > Settings > Display settings > Main menu icons1. [5] (Options) 7 Select Attach full image2. Repeat steps 2-4 in “To change menu icons:” on page 98*1Setting back to defaultd Main menu > Settings > Display settings > Main menu icons1. [5] (Options) 7 Select Set to default2. “Would you like to set default?” 7 [0]9[5] (Yes)Note: For downloading contents, visit http://box.panasonic.com/VS7_AAA.book Page 98 Wednesday, August 3, 2005 5:10 PM](https://usermanual.wiki/Panasonic-Mobile-Communications-Development-of-USA/23C002A.User-Guide-2/User-Guide-570820-Page-48.png)
![99SettingsThemesYou can change the colour theme of the display.d Main menu > Settings > Display settings > Themes1. Select the required colour themeBacklight timeYou can set the length of time the display is illuminated by the backlight.d Main menu > Settings > Display settings > Backlight time1. Select 10 seconds, 30 seconds or 60 secondsSounds & alertsRingtone/Message alertYou can change the tone and/or the volume of the ringtone for incoming calls and the Message alert for incoming messages.Changing the ringtone/Message alertd Main menu > Settings > Sounds & alerts > Assign ringtone or Message alert1. Select My Media or Download*12. [192] to scroll to the required tone3. [0] to listen to the tone 7 [6] (Cancel) to stop the tone and return to the previous screen4. [5] (Select)*1Note: For downloading contents, visit http://box.panasonic.com/VS7_AAA.book Page 99 Wednesday, August 3, 2005 5:10 PM](https://usermanual.wiki/Panasonic-Mobile-Communications-Development-of-USA/23C002A.User-Guide-2/User-Guide-570820-Page-49.png)
![100SettingsChanging the ringtone/Message alert volumed Main menu > Settings > Sounds & alerts > Incoming volume or Message volume1. [1929394] to adjust the volume (Volume 0-4, Step tone) 7 [0]9[5] (Select)Warning toneThe Warning tone informs you of low battery.d Main menu > Settings > Sounds & alerts > Warning tone1. Select On or OffStartup tone/Shutdown toneThe Startup tone sounds after switching on the phone, while the Shutdown tone sounds after switching off the phone.d Main menu > Settings > Sounds & alerts > Startup tone or Shutdown tone1. Select On or OffVibration alertThe phone does not ring but vibrates to inform you of incoming calls and messages if you switch on vibration alert.d Main menu > Settings > Sounds & alerts > Vibration alert1. Select On or OffVS7_AAA.book Page 100 Wednesday, August 3, 2005 5:10 PM](https://usermanual.wiki/Panasonic-Mobile-Communications-Development-of-USA/23C002A.User-Guide-2/User-Guide-570820-Page-50.png)
![101SettingsCallsCall divertsVoice, fax and data calls can be diverted to different numbers in different situations. For example, you can divert calls to your voice mailbox when you are out of reach.Voice calls can be diverted in the following situations:d Main menu > Settings > Calls > Call diverts1. Select Divert voice, Divert all fax or Divert all data(If Divert all fax or Divert all data is selected, go to step 3.)2. Select the divert situation3. Select Direct input or From contacts4. If Direct input is selected: Enter the phone number to divert to 7 [0]If From contacts is selected: Highlight the required contact 7 [5] (Select) 7 If the card has several phone numbers stored, [192] to scroll to the required number 7 [0]9[5] (Select)When the setting is enabled, the divert icon () is displayed on the standby screen.All calls Divert all incoming voice calls.When busy Divert incoming voice calls when a call is in progress.When no reply Divert incoming voice calls if call is not answered.When unreachable Divert incoming voice calls when phone is not in a coverage area.VS7_AAA.book Page 101 Wednesday, August 3, 2005 5:10 PM](https://usermanual.wiki/Panasonic-Mobile-Communications-Development-of-USA/23C002A.User-Guide-2/User-Guide-570820-Page-51.png)
![102SettingsTo cancel each setting/check each status:d Main menu > Settings > Calls > Call diverts1. Select Divert voice 7 [192] to scroll to the required divert situationOR[192] to scroll to Divert all fax or Divert all data2. [5] (Options) 7 Select Off or StatusTo cancel all the settings/check all the statuses:d Main menu > Settings > Calls > Call diverts1. Select Cancel all or Status allCall waitingIf Call waiting is switched on, another call can be received while on a call and multiple calls can be made.d Main menu > Settings > Calls > Call waitingThe current status is displayed.To accept the current status:1. [0]To change the setting:1. [5] (Options) 7 Select Activate or DeactivateThe current status is displayed.2. [0] to accept the current statusAny key answerCalls can be answered by pressing any key except [Y], [0], [6] (Cancel), [U], [O] and [P].When Any key answer is off, calls can only be answered by pressing [q] or [5] (Accept).d Main menu > Settings > Calls > Any key answer1. Select On or OffVS7_AAA.book Page 102 Wednesday, August 3, 2005 5:10 PM](https://usermanual.wiki/Panasonic-Mobile-Communications-Development-of-USA/23C002A.User-Guide-2/User-Guide-570820-Page-52.png)
![103SettingsActive flipYou can answer a call by opening the phone and end a call by closing the phone.When Active flip is off, you need to press the appropriate key to answer or end the call. When you are using a headset, you can continue your conversation even while the phone is closed.d Main menu > Settings > Calls > Active flip1. Select On or OffAuto answerWhen you use the optional Personal Handsfree earpiece, you can answer a call automatically.d Main menu > Settings > Calls > Auto answer1. Select On or OffSend my numberYou can choose whether or not to show your name and/or number to another phone. You can comply with your network’s own setting if you select Network set.d Main menu > Settings > Calls > Send my number1. Select Network set, On or OffCall durationYou can check the duration of incoming or outgoing calls.d Main menu > Settings > Calls > Call duration1. Select Incoming or Outgoing2. To reset the counter, [0]9[5] (Reset)3. “Reset?” 7 [0]9[5] (Yes)VS7_AAA.book Page 103 Wednesday, August 3, 2005 5:10 PM](https://usermanual.wiki/Panasonic-Mobile-Communications-Development-of-USA/23C002A.User-Guide-2/User-Guide-570820-Page-53.png)
![104SettingsService chargeCost leftYou can check the remaining call units available if Max cost is set.d Main menu > Settings > Calls > Service charge > Cost leftCall meterYou can check the total costs of calls made.d Main menu > Settings > Calls > Service charge > Call meterTo reset the counter:1. [0]9[5] (Reset) 7 “Reset total cost?” 7 [0]9[5] (Yes)2. Enter the PIN2 code 7 [0]9[5] (Ok)Price/unitYou can set your personal rate of the cost that the service provider charges for one unit of call time.d Main menu > Settings > Calls > Service charge > Price/unit1. [0]9[5] (Edit) 7 Enter the PIN2 code 7 [0]9[5] (Ok)2. Enter the currency 7 [0]3. Enter the value 7 [0]9[5] (Ok)To enter a decimal point: [r]Max costYou can set the maximum cost of calls allowed.d Main menu > Settings > Calls > Service charge > Max cost1. [0] 7 Enter the PIN2 code 7 [0]9[5] (Ok)2. Enter the credit limit 7 [0]9[5] (Ok)To disable the Max cost:In step 1, [5] (Options) 7 Select Disable 7 [0]9[5] (Yes) 7 Enter the PIN 2 code 7 [0]9[5] (Ok)VS7_AAA.book Page 104 Wednesday, August 3, 2005 5:10 PM](https://usermanual.wiki/Panasonic-Mobile-Communications-Development-of-USA/23C002A.User-Guide-2/User-Guide-570820-Page-54.png)
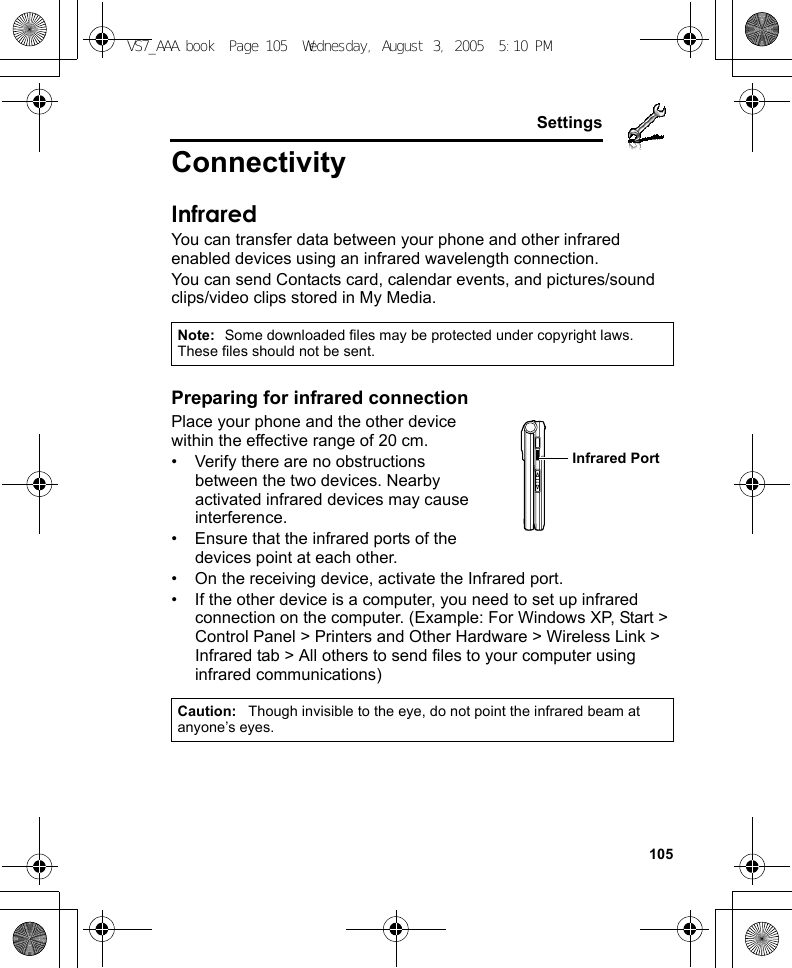
![106SettingsSending data via infraredPrepare for infrared connection as described in “Preparing for infrared connection” on page 105.1. Select the item you wish to send2. [5] (Options) 7 Select Send via3. Select InfraredThe phone automatically begins infrared connection.A confirmation message is displayed when complete.Receiving data via infraredPrepare for infrared connection as described in “Preparing for infrared connection” on page 105.To activate infrared:You need to activate the infrared function before receiving data.When infrared is set to on, the infrared icon ( ) appears on the display. If infrared is unused for 10 minutes or the phone is once switched off, it is automatically set to off and ( ) disappears.d Main menu > Settings > Connectivity > Infrared1. Select OnTo receive data via infrared:When ( ) is displayed, sender can begin transfer of data.1. When transfer is started, “Would you like to receive data?” 7 [0]9[5] (Yes) to receive the data2. When transfer is complete, “Data received” 7 Return to standby screen 7 Received file name is displayed 7 [0]9[5] (Save) to save the dataThe received data is stored in respective menus or files.VS7_AAA.book Page 106 Thursday, August 4, 2005 11:55 AM](https://usermanual.wiki/Panasonic-Mobile-Communications-Development-of-USA/23C002A.User-Guide-2/User-Guide-570820-Page-56.png)
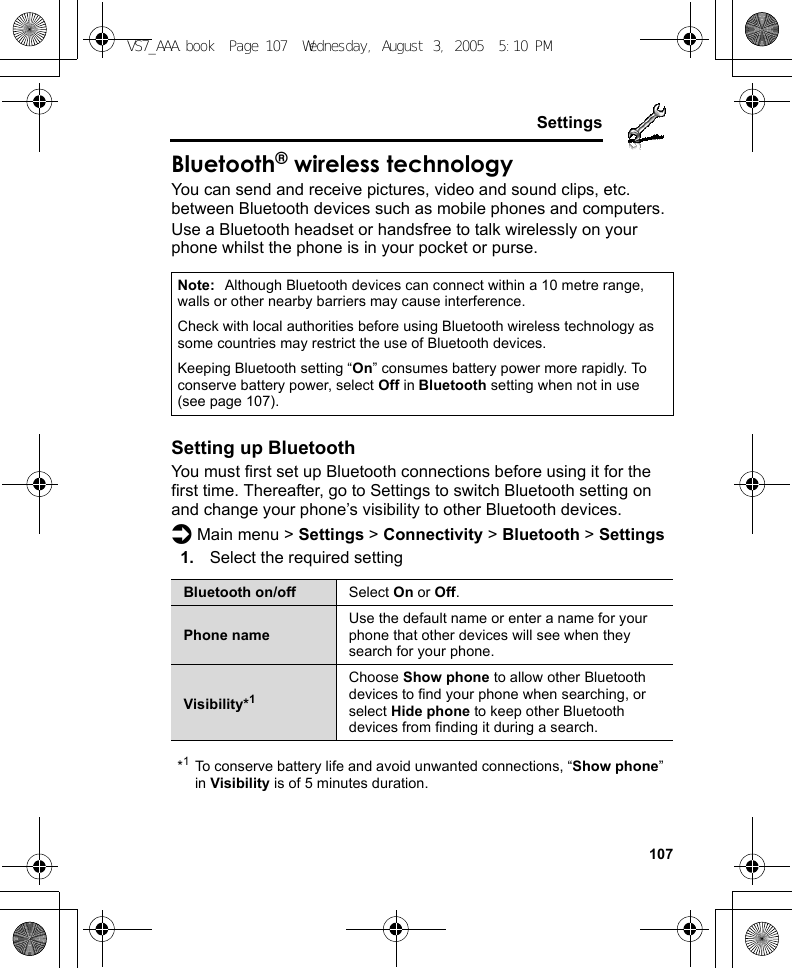
![108SettingsPairing with other devicesBefore you can transfer information between two Bluetooth devices, they need to find each other and set up a connection. This is referred to as “pairing”.Ensure that the device in which you want to pair is switched on, and its Bluetooth setting is activated.If the other device is a computer, you need to set up Bluetooth connection on the computer. (Example: For Windows XP, Start > Control Panel > Printers and Other Hardware > Wireless Link > Bluetooth tab > All others to send files to your computer using Bluetooth communications)d Main menu > Settings > Connectivity > Bluetooth > Paired devices1. “No paired device add new device?” 7 [5] (Ok)The phone begins searching for devices and notifies you when it finds the other device2. [192] to scroll to the required device3. [5] (Options) 7 Select Pair device4. Enter the Pass key, if requested 7 [5] (Ok)You may need to enter Pass keys on the both sides of connecting devices5. “Make device trusted?” 7 [5] (Yes)Note: The Pass key may be between 1 and 16 digits except where stated in the connecting device (normally headset) instructions when a 4 digit Pass key is specified.Making the device “trusted” on step 5 can cause future connections to occur without notice. This may enable trusted devices to access your Contacts list and data folders without prompting. You are advised to “trust” only your own devices to avoid being prompted each time a call is received.VS7_AAA.book Page 108 Wednesday, August 3, 2005 5:10 PM](https://usermanual.wiki/Panasonic-Mobile-Communications-Development-of-USA/23C002A.User-Guide-2/User-Guide-570820-Page-58.png)
![109SettingsSetting up the Bluetooth headsetThe Bluetooth headset gives you wireless, handsfree operation. Before you can use the headset you need to pair the headset and the phone.After switching on Bluetooth on the phone the Bluetooth icon ( ) appears on the screen. You now need to set up the headset.1. Switch on the headsetSee the headset instructions.2. Make the headset discoverableSee the headset instructions.3. On the phone, follow the instructions “Pairing with other devices” on page 1084. To receive calls on a Bluetooth headset: Highlight the device name 7 [5] (Options) 7 Select ConnectORPress the button on the headset() appears on the screen when the headset is connected.See the headset instructions.Once the headset and phone are connected, you can answer calls using the headset. If the headset is on when you receive a call, the headset rings. For information on how to answer a call with the headset, see the headset instructions. To make a call with the headset, also see the headset instructions.VS7_AAA.book Page 109 Wednesday, August 3, 2005 5:10 PM](https://usermanual.wiki/Panasonic-Mobile-Communications-Development-of-USA/23C002A.User-Guide-2/User-Guide-570820-Page-59.png)
![110SettingsSending/receiving data via BluetoothYou can send and receive Contacts cards as business cards, Calendar events, pictures, video and sound clips via Bluetooth.To send data via Bluetooth:1. Ensure that the receiving device is made visible2. Highlight the item you wish to send3. [5] (Options) 7 Select Send via4. Select BluetoothIf the phone has already searched for devices, it shows the list of discovered devices.If the phone has not yet searched, the phone automatically searches for Bluetooth devices nearby, and displays the list of discovered devices. [6] (Cancel) to stop search.5. [192] to scroll to the intended device in the list 7 [5] (Options)6. Select SelectConnecting message appears, then when other device accepts, a confirmation message displays when transfer is complete.If the other device cannot receive data, an error message appears.To receive data via Bluetooth:1. Ensure that your phone’s Bluetooth is on and made visible2. When transfer starts, “Would you like to receive data?” 7 [0]9[5] (Yes) to receive the data3. When transfer is complete, “Data received” 7 [0]9[5] (Save) to save the dataThe received data is stored in respective menus or files.Note: The phone may not allow you to copy, modify, transfer or forward some copyrighted images, ringtones or other contents.Note: Confirmation is required first if the paired device is not set as authorised.VS7_AAA.book Page 110 Wednesday, August 3, 2005 5:10 PM](https://usermanual.wiki/Panasonic-Mobile-Communications-Development-of-USA/23C002A.User-Guide-2/User-Guide-570820-Page-60.png)