Panasonic of North America 9TAWX-CT2020 Order Taker for Wireless Communication System User Manual 3TR001747AAA SAMPLE
Panasonic Corporation of North America Order Taker for Wireless Communication System 3TR001747AAA SAMPLE
UserManual.wiki
>
Panasonic of North America
>
9TAWX CT2020 User Manual
User Manual
Navigation menu
Upload a User Manual
Namespaces
Wiki Guide
HTML
PDF
Info
Views
User Manual
Discussion / Help
Navigation

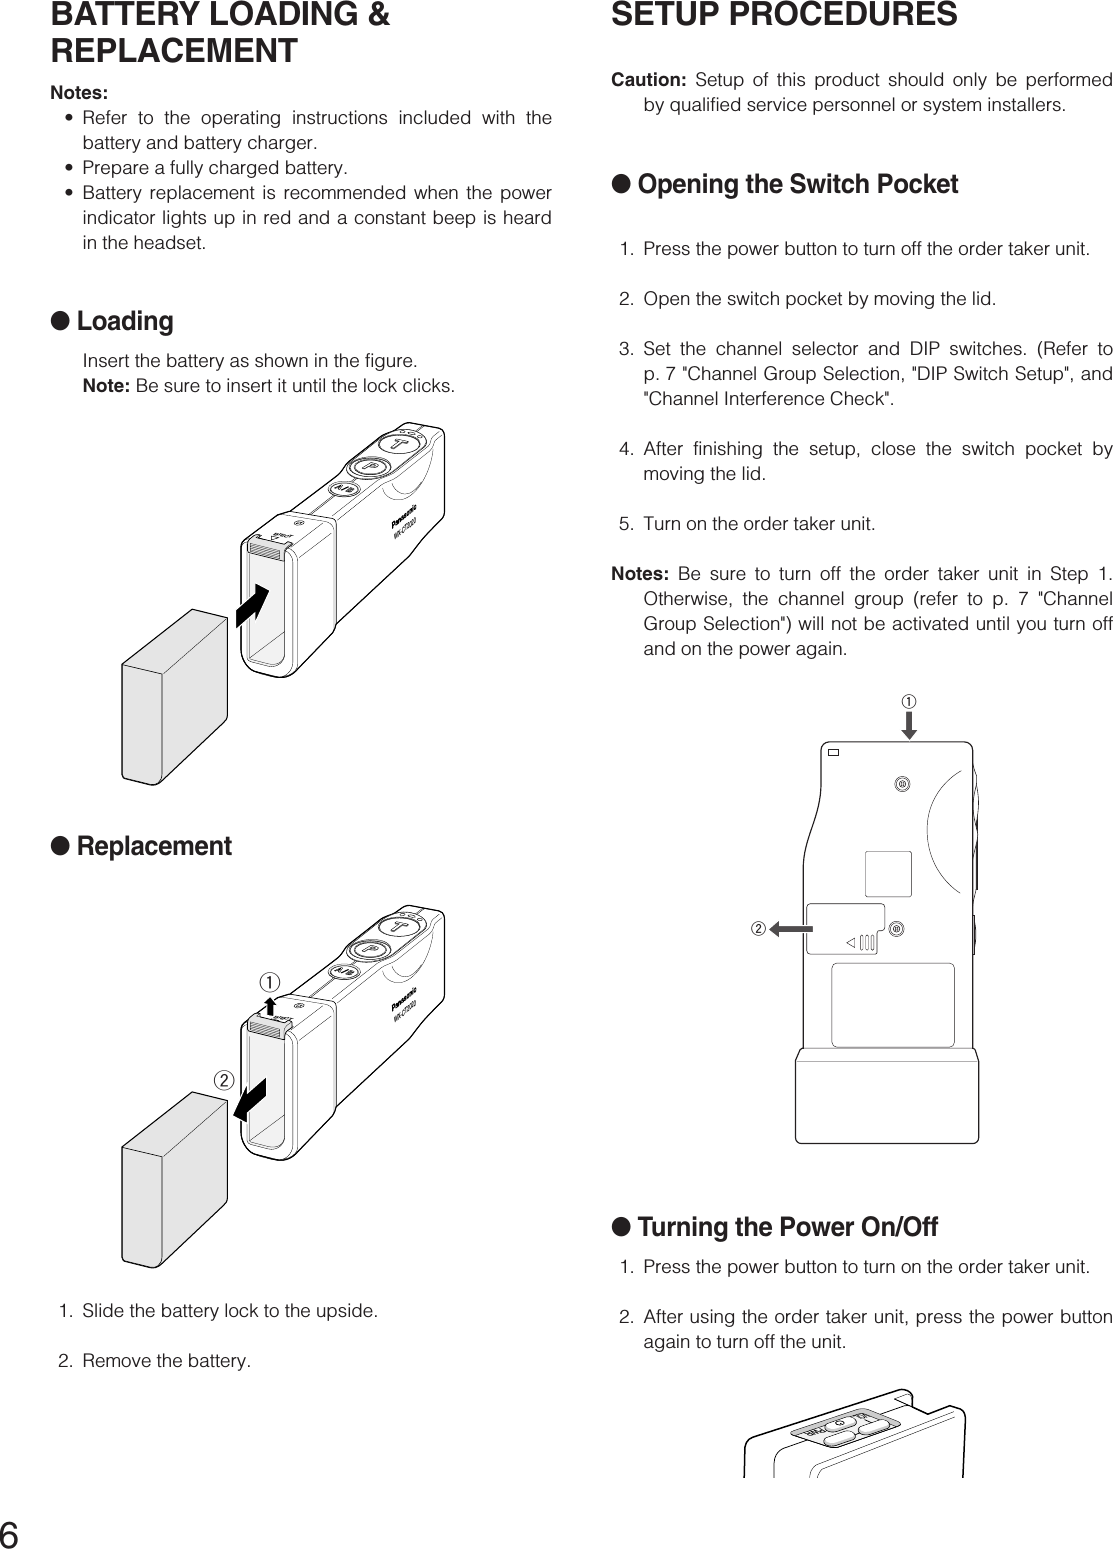
![5qBattery Lock [EJECT]When removing the battery, slide out the lock.When loading a new battery, insert the battery until thelock clicks.wA/B Channel Selection Button [A/B]This button switches frequencies from Channel A to Band vice versa. The channel indicator y displays theselected channel in red (A) or green (B).ePage Button [P]This button controls communications with store person-nel.While the button is held down in the Page PTT mode,you can speak to store personnel. When the button ispressed in the Page Lock mode, you can speak to thestore personnel until you press a button a second time.When the button is released, you can hear the commu-nication among store personnel.rTalk Button [T]This button controls communications with the customer.While the button is held down in the Talk PTT mode, youcan speak to the customer who is at the menu board.When the button is pressed in the Talk Lock mode, youcan speak to the customer until you press the button asecond time.When the button is released, you can hear the cus-tomer.tPower IndicatorThe indicator shows the status as follows.Green ON: Power is supplied, and the unit is oper-ating.Red ON: The battery requires recharging.Red Blink: The channel selector (refer to p. 7) is setto a wrong position.yChannel IndicatorWhile lighting in red or green, this indicator showswhich channel is in operation.Red lighting: Channel A is selected.Green lighting: Channel B is selected.Red blinking: Channel A is being selected, and eitherthe Talk or Page mode is activated.Green blinking: Channel B is being selected, andeither the Talk or Page mode is activated.uVolume Control Buttons [VOL ▲▼]Pressing the respective buttons will increase ordecrease the sound level.iPower ButtonPressing this button for one second will turn the ordertaker unit on or off.oEarphone Input JackThis jack is used for connection with WX-C1027AHeadset.!0 Microphone Input JackThis jack is used for connection with WX-C1027AHeadset.!1 Switch PocketDo not open the lid of this pocket. Should be openedonly by qualified service personnel or system installers.!2 Battery (Optional accessory)Refer to p. 3 PRECAUTIONS.](https://usermanual.wiki/Panasonic-of-North-America/9TAWX-CT2020/User-Guide-364895-Page-5.png)
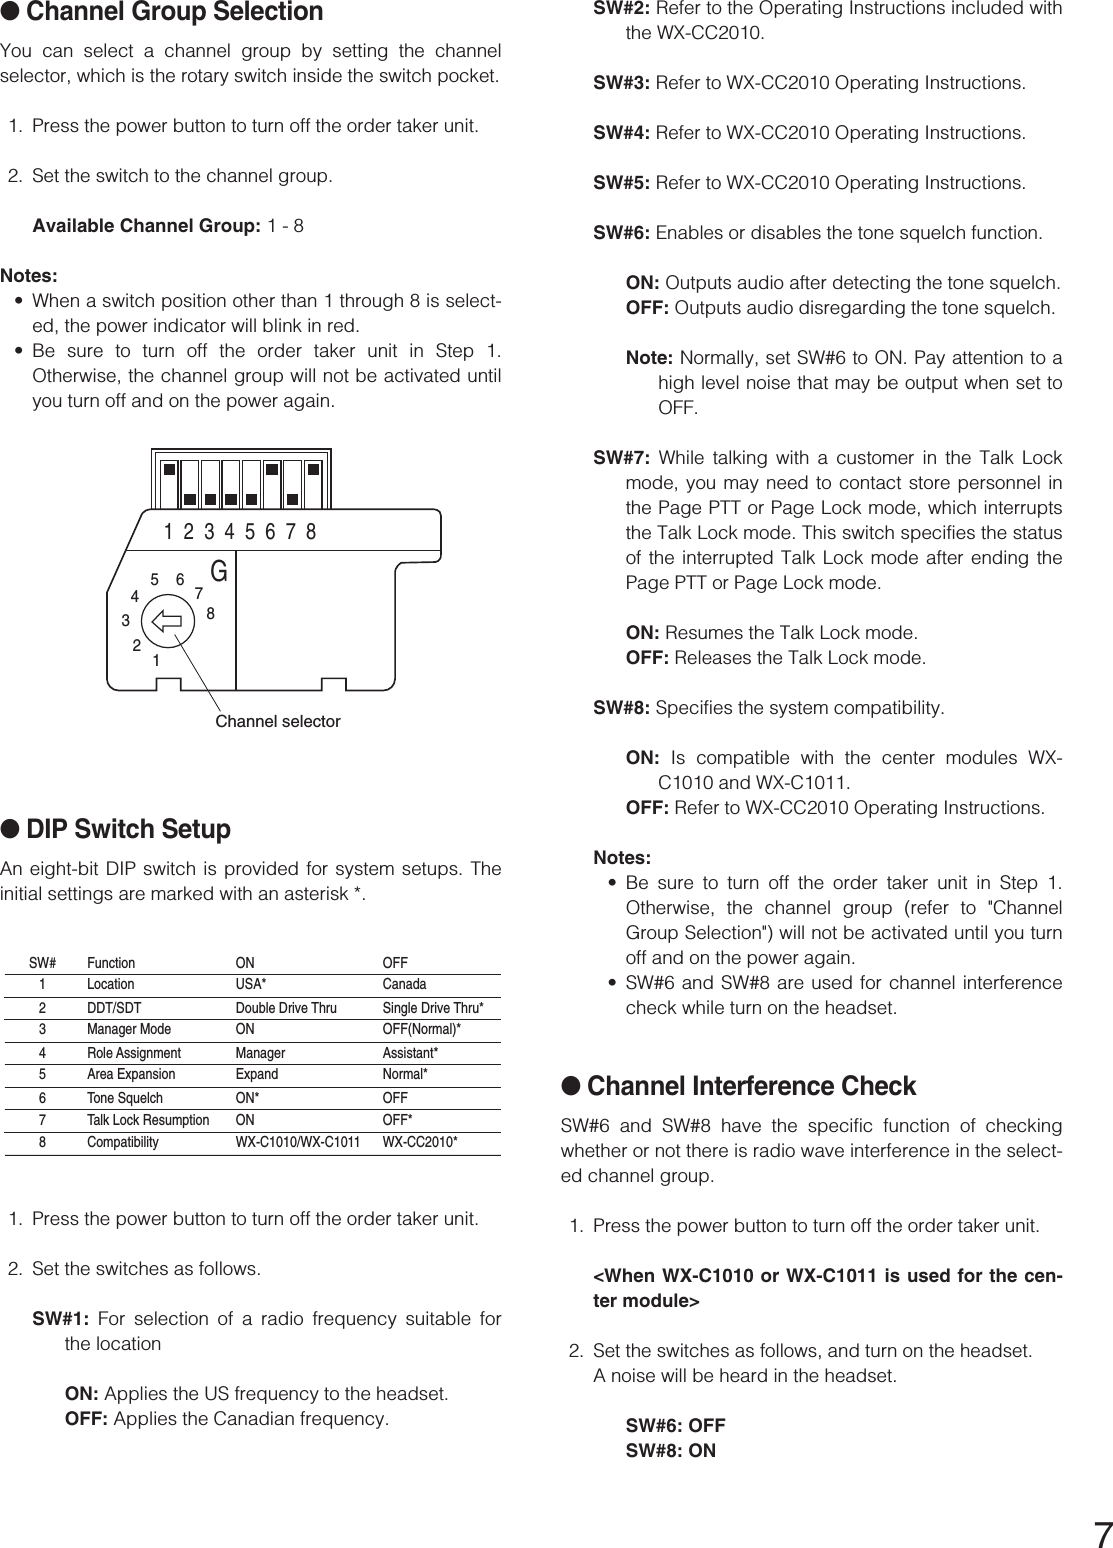
![83. Listen to the sound while repeatedly pressing the [A/B]button.Only random noise will be heard if there is no interfer-ence. The presence of any sound other than noise indi-cates that there is interference.<When WX-CC2010 is used for the center module>2. Set the switches as follows, and turn on the headset.A noise will be heard in the headset.SW#6: OFFSW#8: OFF3. Listen to the sound.(Refer to the operating instructions of the center mod-ule.)4. Reselect the channel groups if there is any interference.Note: Be sure to turn off the order taker unit in Step 1.Otherwise, the channel group (refer to p. 7 "ChannelGroup Selection") will not be activated until you turnoff and on the power again.](https://usermanual.wiki/Panasonic-of-North-America/9TAWX-CT2020/User-Guide-364895-Page-8.png)