Panasonic of North America 9TGBT11B Bluetooth Module (POWER CLASS II) User Manual CPE02386ZA CF D1mk1 XP7 OI M indb
Panasonic Corporation of North America Bluetooth Module (POWER CLASS II) CPE02386ZA CF D1mk1 XP7 OI M indb
Contents
- 1. User Manual
- 2. OPERATING INSTRUCTIONS
OPERATING INSTRUCTIONS

![2Getting StartedIntroductionThank you for purchasing this Panasonic product. For optimum performance and safety, please read these instruc-tions carefully. Terms and illustrations in these instructionsCAUTION : Conditions that may result in minor or moderate injury.NOTE : Useful and helpful information. (Start) - [All Programs] : Click (Start), and then click [All Programs]. You may need to double-click in some cases.[start] - [Run] : Click [start], and then click [Run]. You may need to double-click in some cases. : Page in these Operating Instructions or in the Reference Manual. : Reference to the on-screen manuals.<Only when using software keyboard>Enter : Click [Enter] key.Fn + F5 : Click [Fn] key, and then click [F5] key.<Only when using an external keyboard>Enter : Press [Enter] key.Fn + F5 : Press and hold [Fn] key, and then press [F5] key. The display of the key may be different from this manual according to the keyboard used. (e.g. “Delete” instead of “Del”) indicates Genuine Windows® 7 Professional Operating System. indicates Genuine Microsoft® Windows® XP Professional Operating System. Some illustrations are simplifi ed to help your understanding and may look different from the actual unit. If you do not log on as an administrator, you cannot use some functions or cannot display some screens. Refer for the latest information about optional products to the catalogs, etc. In these instructions, the names and terms are referred as follows. “Genuine Windows® 7 Professional 32-bit Service Pack 1” and “Genuine Windows® 7 Professional 64-bit Service Pack 1” as “Windows” or “Windows 7” “Genuine Microsoft® Windows® XP Professional Service Pack 3” as “Windows”, “Windows XP” or “Windows XP Professional” Circular media including DVD-ROM and CD-ROM as “discs” DisclaimerComputer specifi cations and manuals are subject to change without notice. Panasonic Corporation assumes no li-ability for damage incurred directly or indirectly from errors, omissions or discrepancies between the computer and the manuals. TrademarksMicrosoft®, Windows®, the Windows logo, and IntelliMouse are registered trademarks of Microsoft Corporation of the United States and/or other countries.Intel, Core, Centrino and PROSet are either registered trademarks or trademarks of Intel Corporation.SDXC Logo is a trademark of SD-3C, LLC. Adobe, the Adobe logo and Adobe Reader are either registered trademarks or trademarks of Adobe Systems Incorpo-rated in the United States and/or other countries.Bluetooth™ is a trademark owned by Bluetooth SIG, Inc., U.S.A. and licensed to Panasonic Corporation.Names of products, brands, etc., appearing in this manual are trademarks or registered trademarks of their respective own companies.](https://usermanual.wiki/Panasonic-of-North-America/9TGBT11B.OPERATING-INSTRUCTIONS/User-Guide-1505387-Page-2.png)
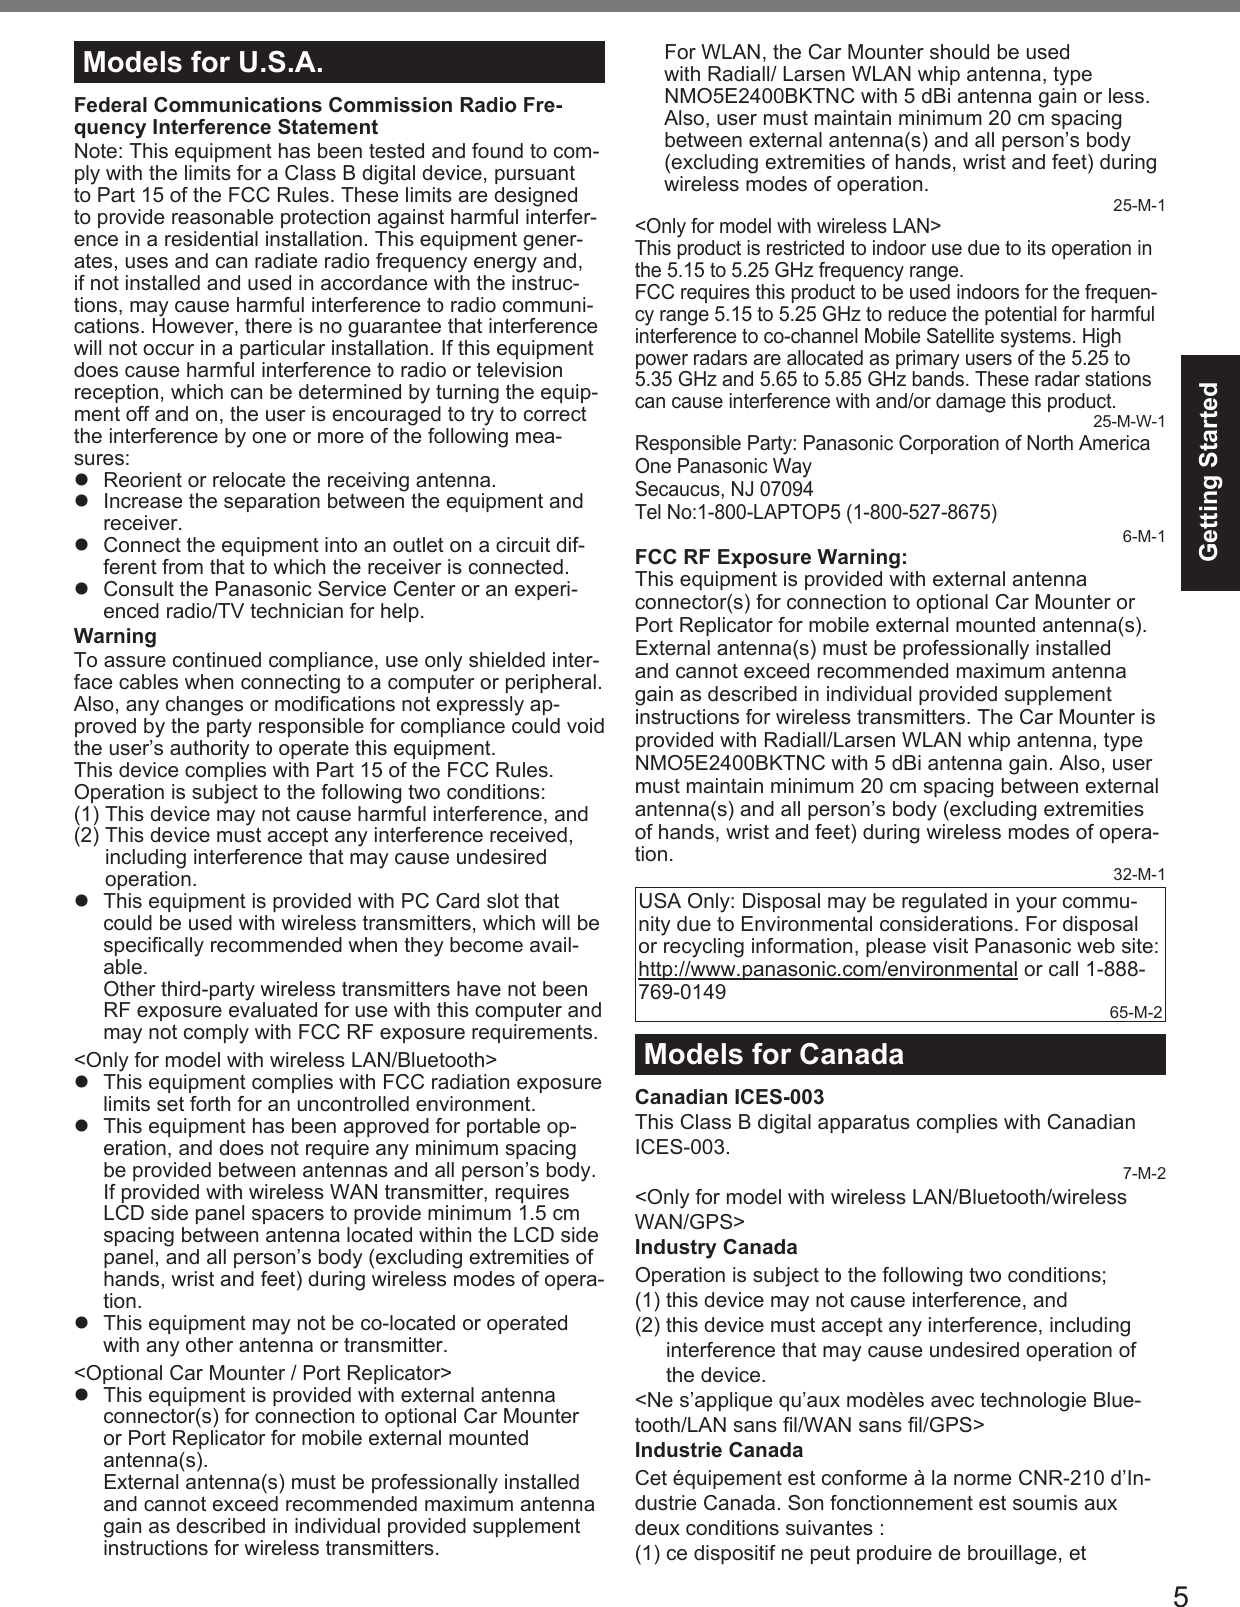
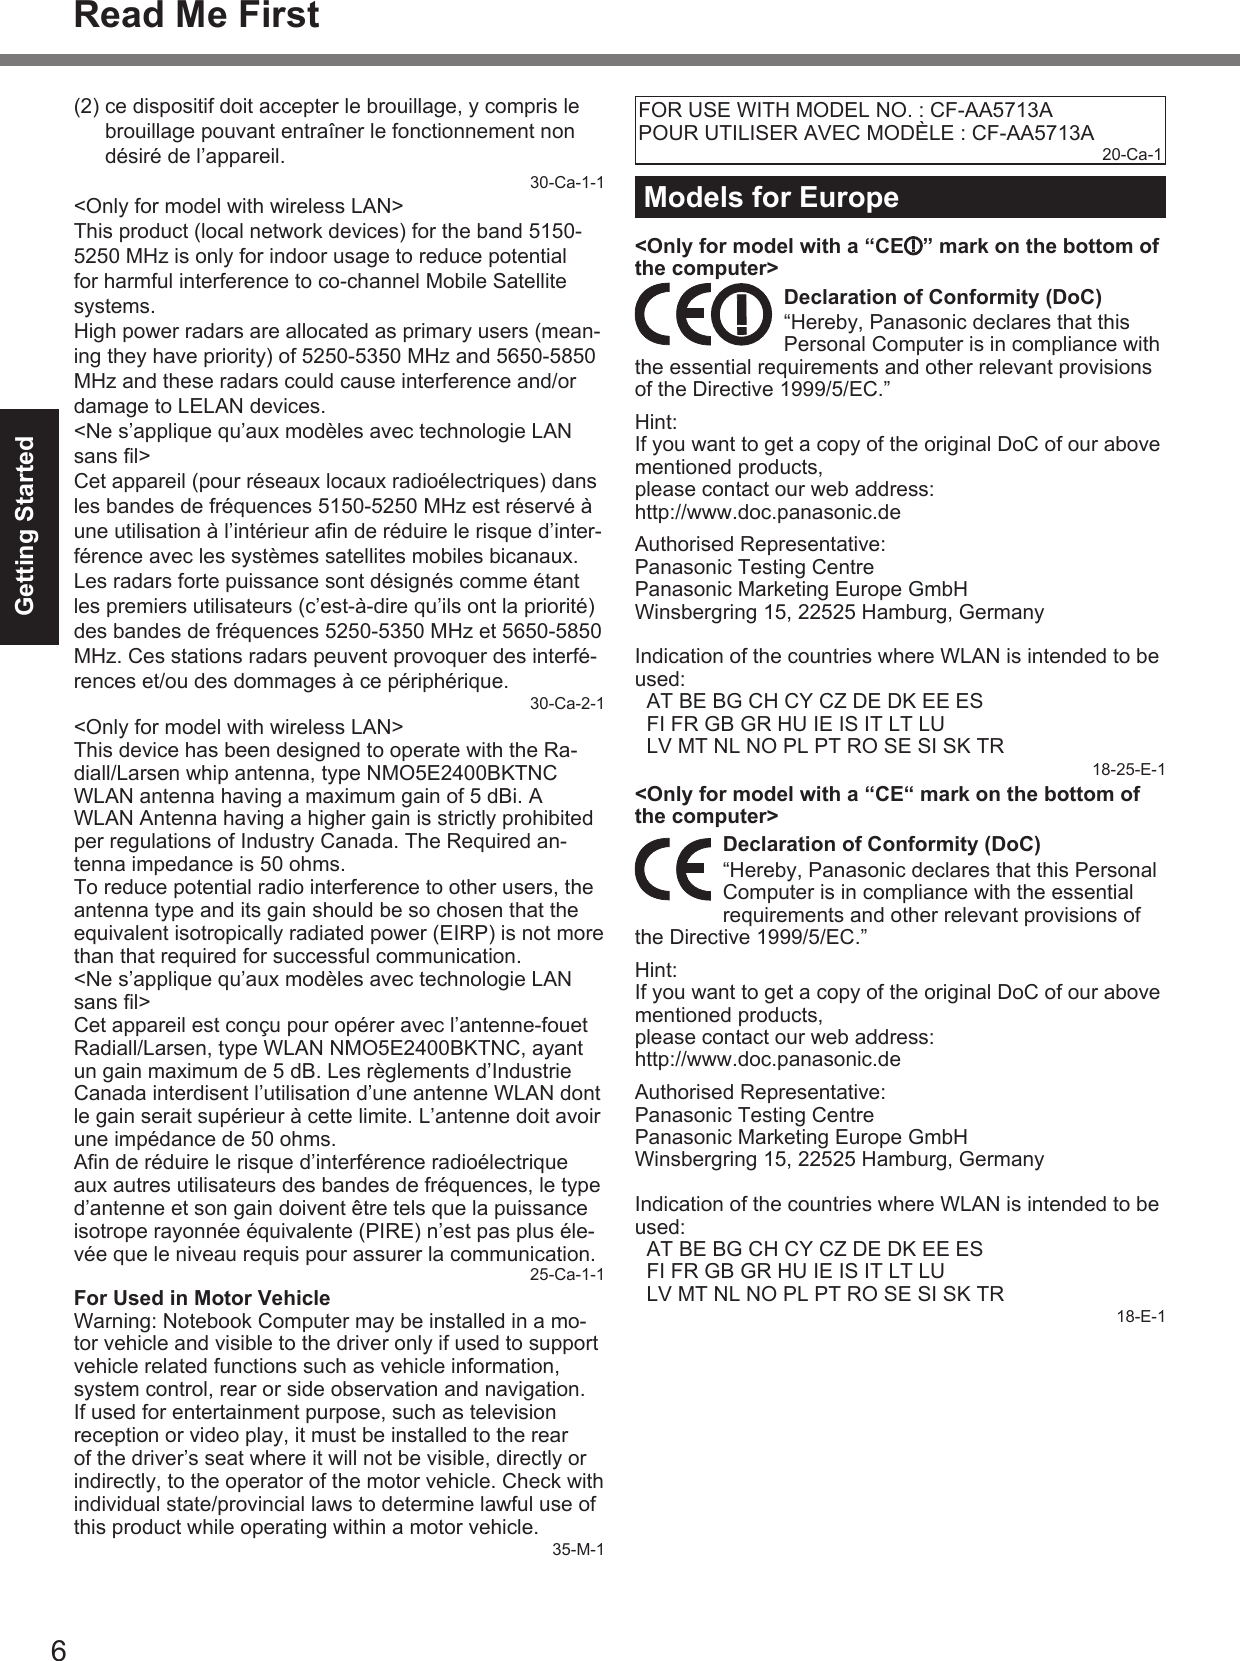
![3Getting StartedRead Me FirstInformation to the User<Only for model with wireless LAN>This product and your HealthThis product, like other radio devices, emits radio fre-quency electromagnetic energy. The level of energy emitted by this product however is far much less than the electromagnetic energy emitted by wireless devices like for example mobile phones.Because this product operates within the guidelines found in radio frequency safety standards and recom-mendations, we believe this product is safe for use by consumers. These standards and recommendations re-fl ect the consensus of the scientifi c community and result from deliberations of panels and committees of scientists who continually review and interpret the extensive re-search literature.In some situations or environments, the use of this prod-uct may be restricted by the proprietor of the building or responsible representatives of the organization. These situations may for example include: Using this product on board of airplanes, or In any other environment where the risk of interference to other devices or services is perceived or identifi ed as harmful.If you are uncertain of the policy that applies on the use of wireless devices in a specifi c organization or environ-ment (e.g. airports), you are encouraged to ask for autho-rization to use this product prior to turning on the product.Regulatory InformationWe are not responsible for any radio or television interfer-ence caused by unauthorized modifi cation of this product. The correction of interference caused by such unauthor-ized modifi cation will be the responsibility of the user. We and its authorized resellers or distributors are not liable for damage or violation of government regulations that may arise from failing to comply with these guidelines.26-M-1Lithium Battery / Pile au lithiumLithium Battery!This computer contains a lithium battery to enable the date, time, and other data to be stored. The battery should only be exchanged by authorized service person-nel.Warning! A risk of explosion from incorrect installation or misapplication may possibly occur.15-E-1Pile au lithium!Le micro-ordinateur renferme une pile au lithium qui permet de sauvegarder certaines données, notamment la date et l’heure. La pile ne doit être remplacée que par un technicien qualifi é.Danger ! Risque d’explosion en cas de non respect de cette mise en garde!15-F-1Information for Users on Collection and Disposal of Old Equipment and used BatteriesThese symbols on the products, packaging, and/or accompanying documents mean that used electrical and electronic products and batteries should not be mixed with general household waste.For proper treatment, recovery and recycling of old prod-ucts and used batteries, please take them to applicable collection points, in accordance with your national legisla-tion and the Directives 2002/96/EC and 2006/66/EC.By disposing of these products and batteries correctly, you will help to save valuable resources and prevent any potential negative effects on human health and the envi-ronment which could otherwise arise from inappropriate waste handling.For more information about collection and recycling of old products and batteries, please contact your local munici-pality, your waste disposal service or the point of sale where you purchased the items.Penalties may be applicable for incorrect disposal of this waste, in accordance with national legislation.For business users in the European UnionIf you wish to discard electrical and electronic equipment, please contact your dealer or supplier for further informa-tion.[Information on Disposal in other Countries outside the European Union]These symbols are only valid in the European Union. If you wish to discard this product, please contact your local authorities or dealer and ask for the correct method of disposal.Note for the battery symbol (bottom two symbol examples):This symbol might be used in combination with a chemical symbol. In this case it complies with the requirement set by the Directive for the chemical involved. 53-E-1 Safety Precautions<Only for model with wireless WAN>The following safety precautions must be observed dur-ing all phases of the operation, usage, service or repair of any Personal Computer or Handheld Computer in-corporating wireless WAN modem. Manufacturers of the cellular terminal are advised to convey the following safety information to users and operating personnel and to incorporate these guidelines into all manuals supplied with the product. Failure to comply with these precautions violates safety standards of design, manufacture and in-tended use of the product. Panasonic assumes no liability for customer failure to comply with these precautions.](https://usermanual.wiki/Panasonic-of-North-America/9TGBT11B.OPERATING-INSTRUCTIONS/User-Guide-1505387-Page-3.png)
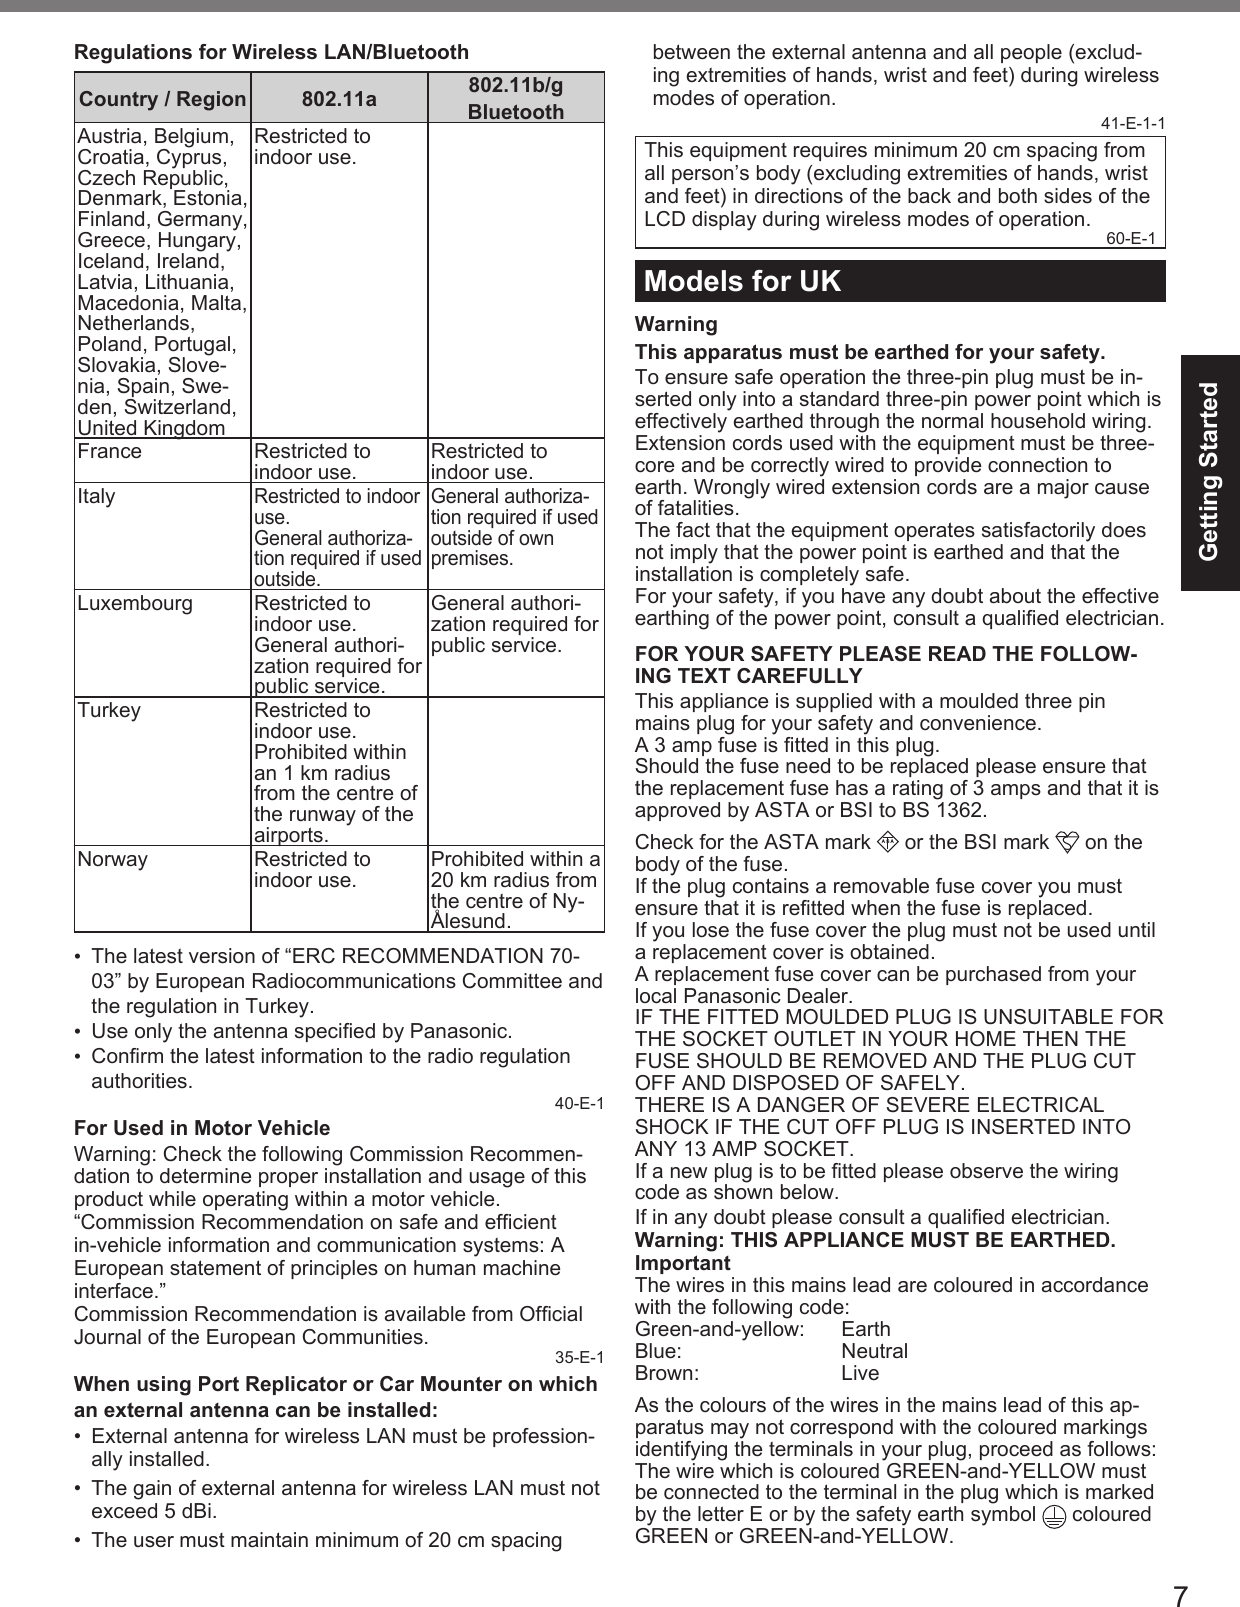
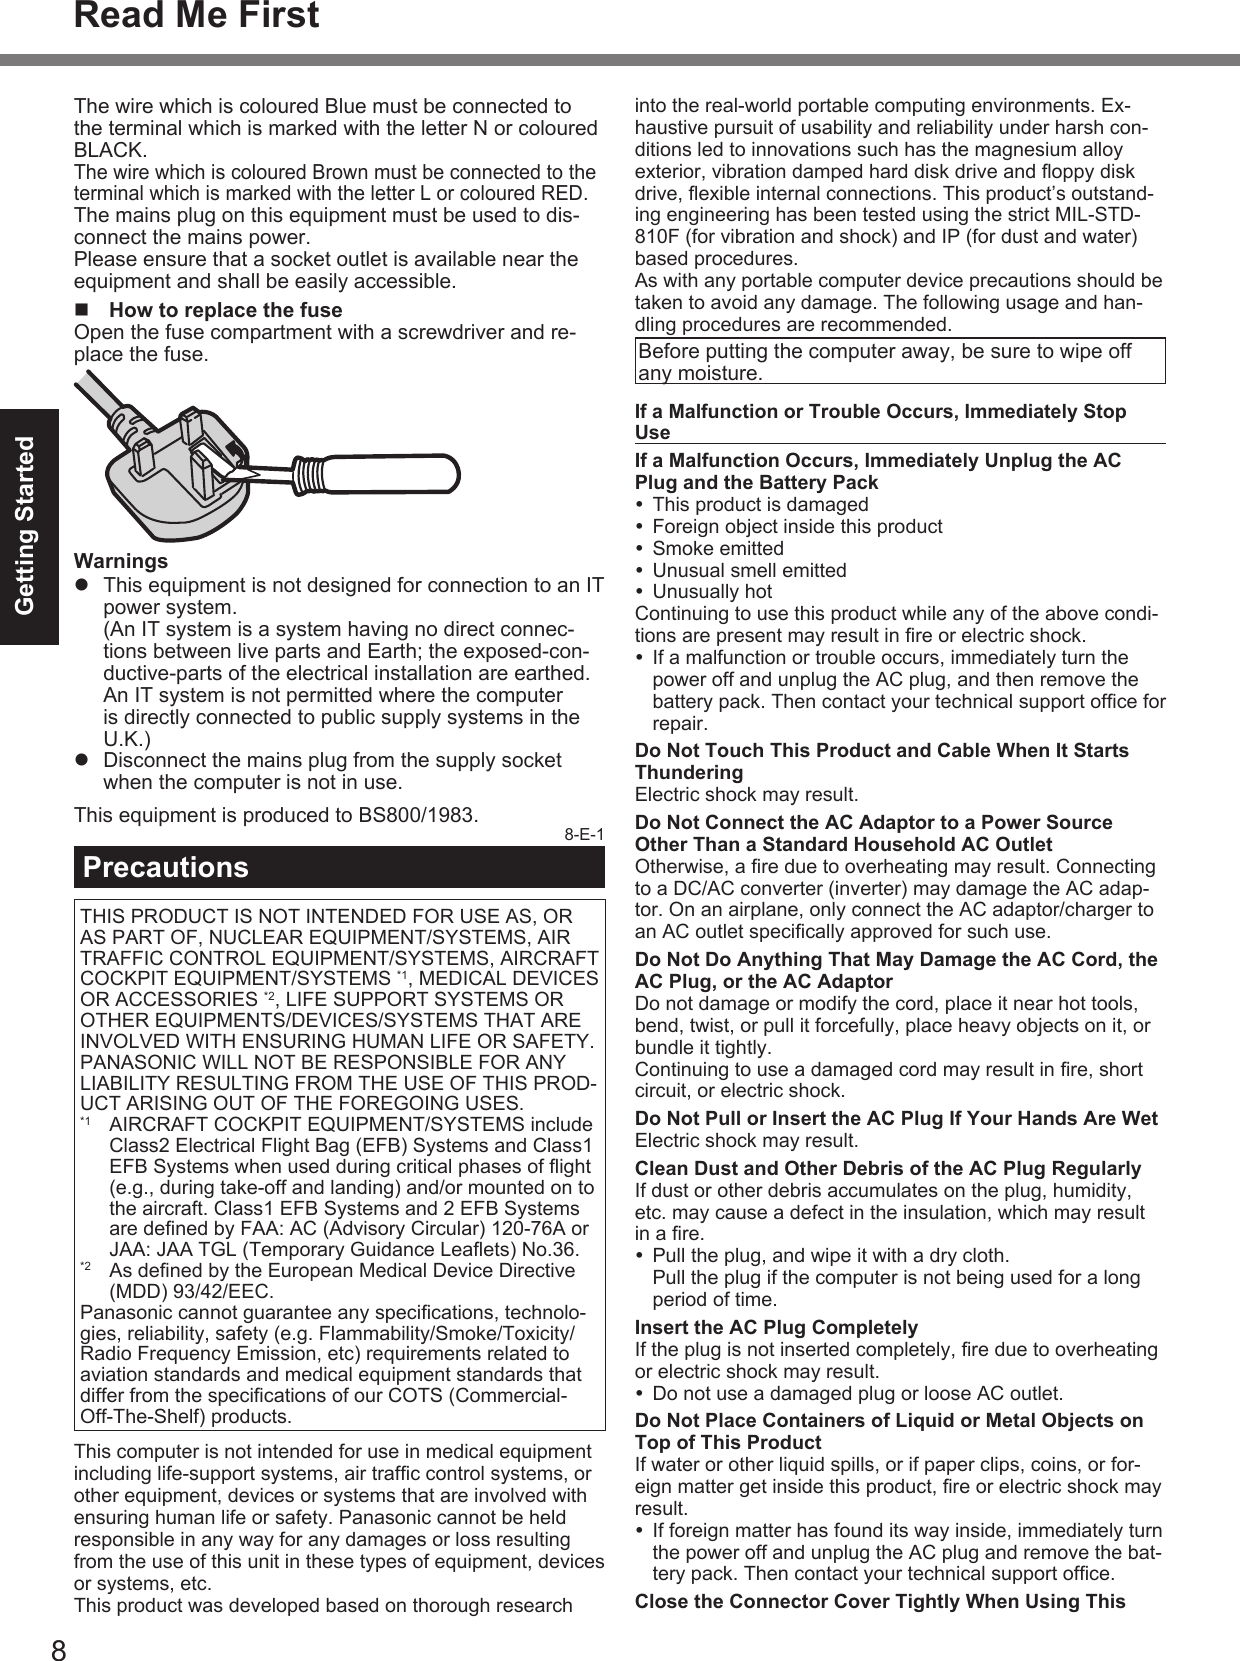
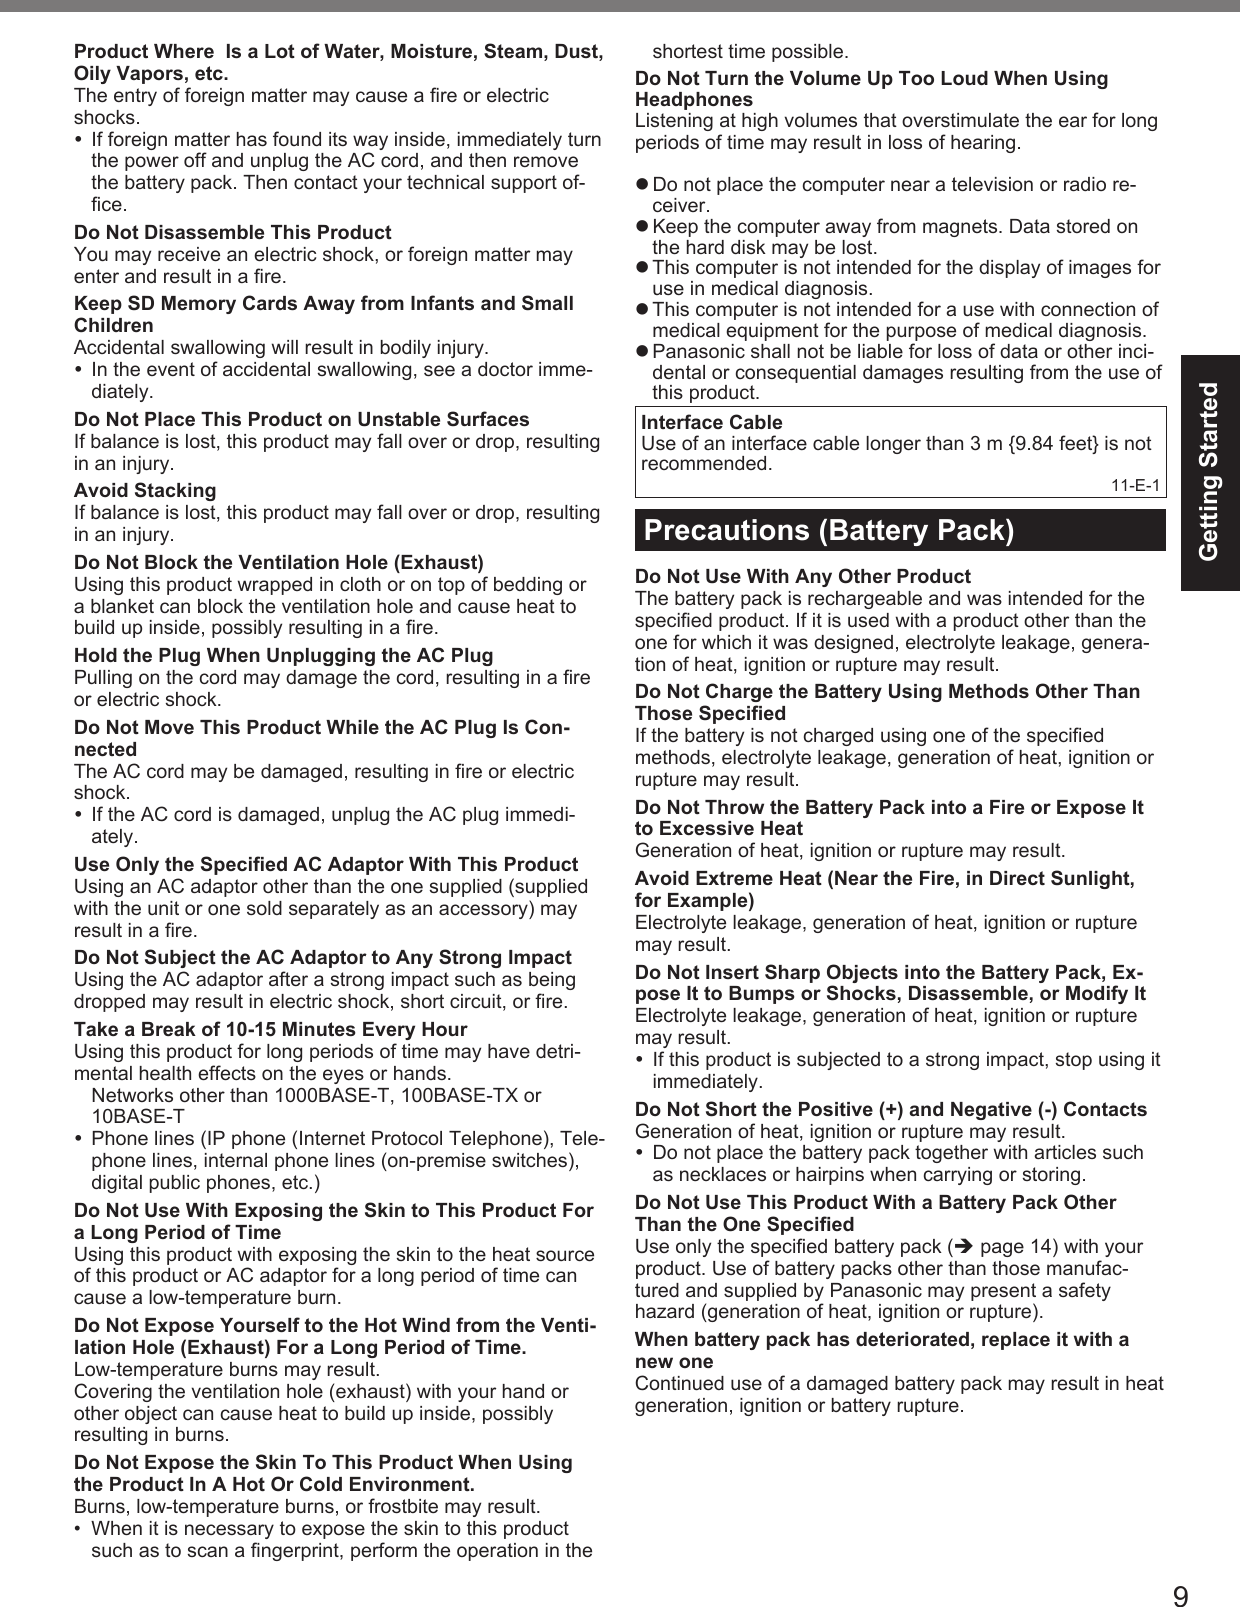

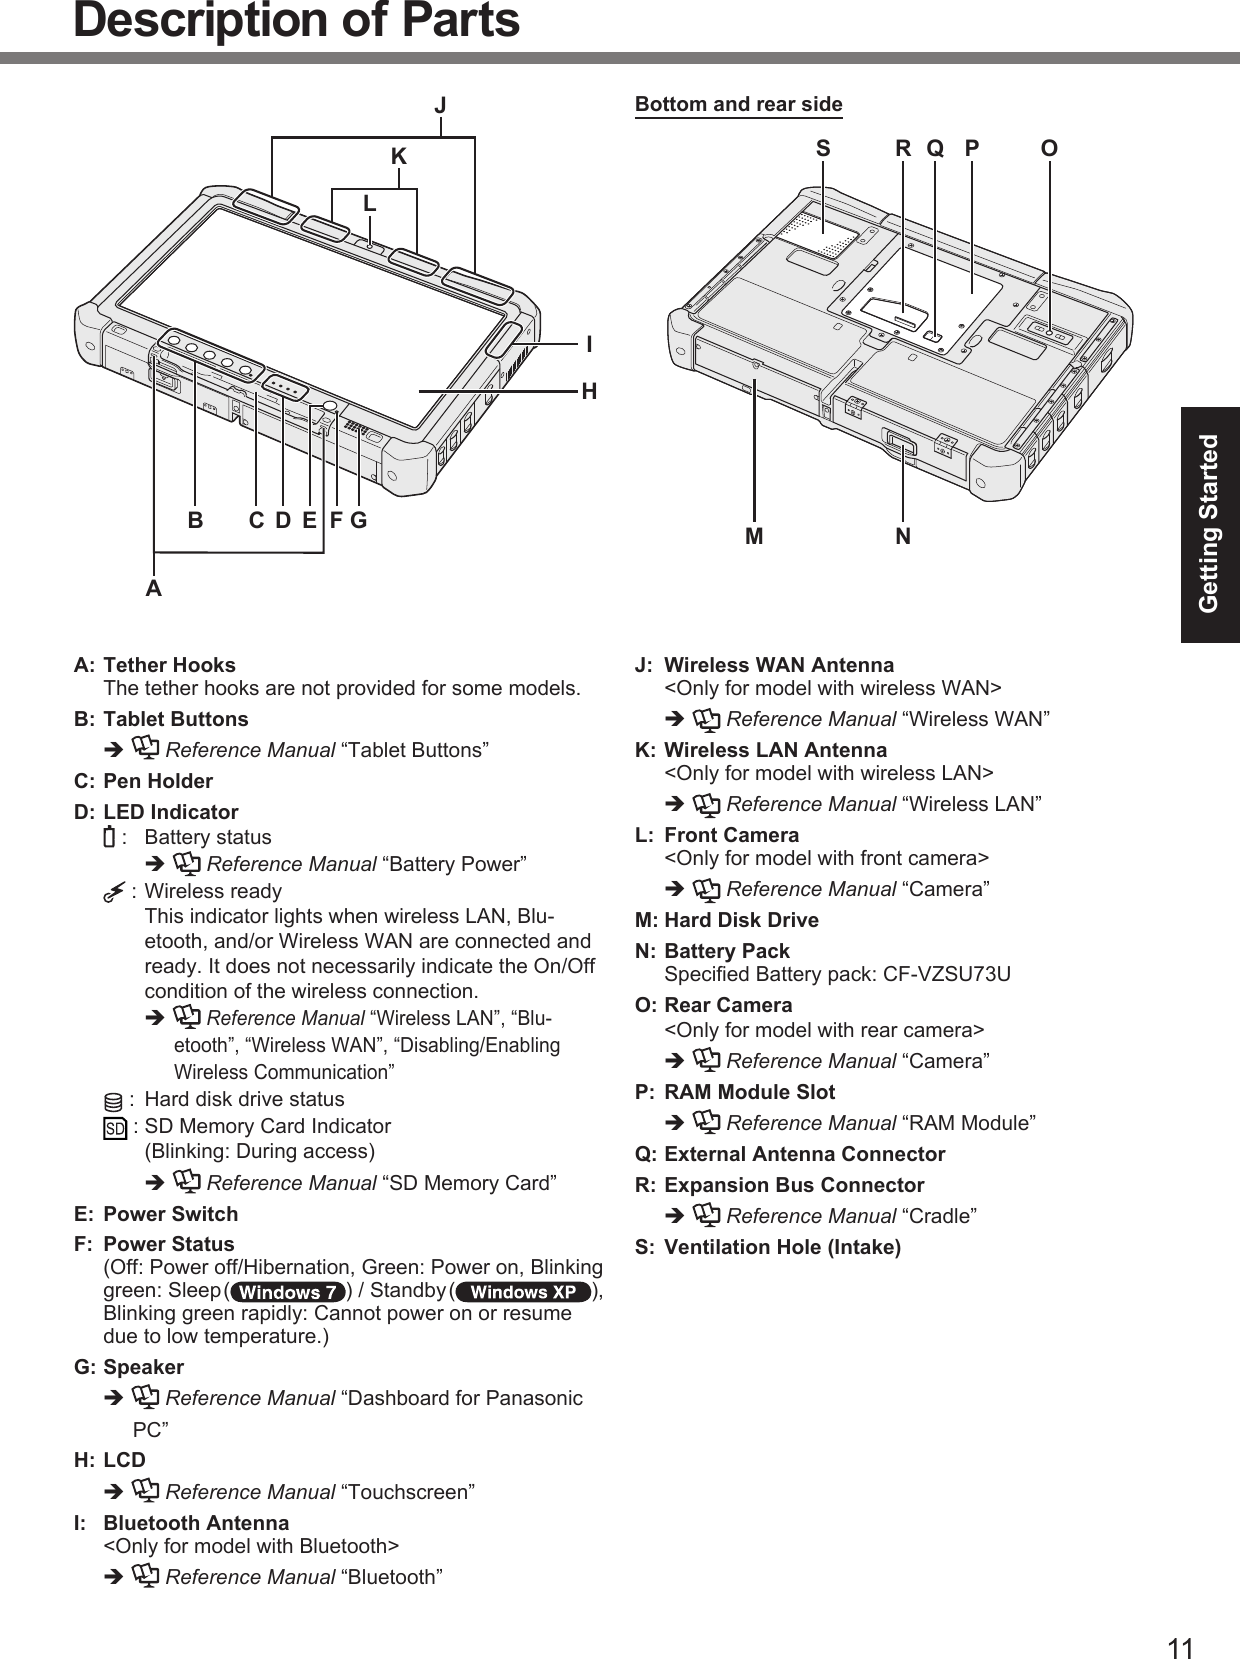

![17Getting Started4 <For MUI OS model> Select language and OS (32 bit or 64 bit). NOTE You can operate with the Tablet Buttons. Follow the instructions displayed on the screen.A Select language and OS (32bit or 64bit) on “Select OS” screen and click [OK].The language setting will start by clicking [OK] on the confi rmation screen.You can return to the “Select OS” screen by clicking [Cancel].The language and OS setting will be completed in about 15 minutes.B When termination screen is displayed, click [OK] to turn off the computer.C Turn on the computer. CAUTION Carefully choose your language because you cannot change it later. If you set a wrong language, you need to reinstall Windows.5 Setup Windows. Follow the on-screen instructions. The computer restarts several times. Do not touch the touchscreen, external keyboard or external mouse, and wait until the hard disk drive indicator has turned off. After the computer is turned on, the screen remains black or unchanged for a while. This is not a malfunction. Wait for a moment until the Windows setup screen appears. During setup of Windows, use the touchscreen, external mouse, external keyboard and clicking to move the cursor and to click an item. Setup of Windows will take approximately 20 minutes. Go to the next step, confi rming each message on the display. “Join a wireless network” screen may not appear. You can set the Wireless Network after the setup of Windows is complete.<For MUI OS model> Setup of Windows will take approximately 20 minutes. Go to the next step, confi rming each message on the display. For some languages, the characters on the key and inputted character may not match. Set the keyboard properly after the setup is complete. Then set the password. Do not change the settings on the screen where you select a country or re-gion. You can set a country, region or keyboard layout in [Clock, Language, and Region] of [Control Panel] after the Windows setup is complete. CAUTION Wait until the hard disk drive indicator has turned off. You can change the user name, password, image and Wireless Networks ( ) / security setting ( ) after setup of Windows. Use standard characters as a computer name: numbers 0 through 9, uppercase and lowercase letters from A to Z, and the hyphen (-) character. If the error message “The computer name is not valid” appears, check if characters other than the above are not entered. If the error message still remains on the dis-play, set the key entry mode to English (“EN”) and enter characters.](https://usermanual.wiki/Panasonic-of-North-America/9TGBT11B.OPERATING-INSTRUCTIONS/User-Guide-1505387-Page-17.png)
![18Getting Started Do not use the following words for user name: CON, PRN, AUX, CLOCK$, NUL, COM1 to COM9, LPT1 to LPT9, @. In particular, if you create a user name (account name) that includes the “@” mark, a password will be requested at the log-on screen, even if no password has been set. If you try to log on without entering a password, “The user name or password is incorrect.” may be displayed and you will not be able to log on to Windows ( page 30). The wallpaper for the fi rst logon user has already been set on “5 Setup Win-dows.”.When using this computer under the Sun, the screen becomes easily viewable by changing the wallpaper to the white wallpaper.A Right-click on the desktop, and click [Personalize] - [Desktop Background].B Select [Solid Colors] at [Picture Location].C Select the white wallpaper and click [Save changes].<For MUI OS model> When setting up the keyboard, choose the appropriate one to your computer. Otherwise, input by the keyboard may become unavailable. You cannot choose the following words for user name and password: CON, PRN, AUX, CLOCK$, NUL, COM1 to COM9, LPT1 to LPT9. When you set date/time/time zone and click [Next], the screen may not go to the next step for a few minutes. Do not touch the keyboard or touch pad, and wait until the screen changes. If “An unexpected error has occurred ...” (or a similar message) is displayed, click [OK]. This is not a malfunction. Wait until the hard disk drive indicator has turned off.<For MUI OS model> The keyboard will operate as the US keyboard until the keyboard setting is changed. Because of this, some alphabets shown on display may differ from inputted ones.To avoid the accidental selections, during setting up Windows, Use the external mouse to make some selections. To match the languages, change the language settings after setting up Win-dows ( page 17). Do not change the settings in [To change system or these settings, click Customize] of [Regional and Language Options] during setting up Windows.First-time Operation](https://usermanual.wiki/Panasonic-of-North-America/9TGBT11B.OPERATING-INSTRUCTIONS/User-Guide-1505387-Page-18.png)
![19Getting Started6 <For MUI OS model> Change the language settings.<Languages installed in this computer>• English • Arabic • Bulgarian • Chinese (Simplifi ed)• Chinese (Traditional) • Croatian • Czech• Danish • Dutch • Estonian • Finnish• French • German • Greek • Hebrew• Hungarian • Italian • Japanese • Korean• Latvian • Lithuanian • Norwegian • Polish• Portuguese • Portuguese (Brazilian) • Romanian• Russian • Slovak • Slovenian • Spanish• Swedish • Thai • TurkishChange the language settings in the following menu.[start] - [Control Panel] - [Date, Time, Language, and Regional Options] - [Regionaland Language Options] [Regional Options] - [Standards and Formats] [Languages] - [Language used in menus and dialogs] [Languages] - [Details] - [Default input language] [Advanced] - [Language for non-unicode Programs] NOTE When you use MUI OS and localized OS versions together on the same net-work, use English computer names on localized versions of Windows. Some UI (User Interface) strings remain in English even if the user’s UI is set to another language. For more information, refer to “c:\windows\mui\relnotes.txt”.If you change the language in [Languages] - [Language used in menus and dia-logs], the desktop color will be changed when logging on to Windows next time.The desktop color can be changed by following the procedure below.Click [start] - [Control Panel] - [Appearance and Themes] - [Display] - [Desktop] and select color from [Color], then click [OK].7 Perform the touchscreen calibration. To calibrate the touchscreen, use the stylus. Before performing the calibration, close Tablet PC Input Panel. NOTE At fi rst, log on to Windows as an administrator and perform this calibration.A Open the Dashboard for Panasonic PC, and click [Change Settings] in [Touch Calibration].Alternatively, proceed with the following operation. Click (Start) - [Control Panel] - [Hardware and Sound] - [Tablet PC Set-ting].B Click [Calibrate].C Using the stylus, touch each of the “+” target marks one by one, and then click [Yes].D Click [OK]. NOTE After completing the calibration as an administrator, perform the calibration for each user by the above steps.Perform the calibration for the orientation to be used.](https://usermanual.wiki/Panasonic-of-North-America/9TGBT11B.OPERATING-INSTRUCTIONS/User-Guide-1505387-Page-19.png)
![20Getting StartedA Open the Dashboard for Panasonic PC, and click [Change Settings] in [Touch Calibration].Alternatively, proceed with the following operation. Click [start] - [All Programs] - [Fujitsu Touch Panel (USB)] - [Touch Screen Calibration Utility].B Using the stylus, touch each of the “+” target marks one by one until it blinks.8 Create a new account. Click [start] - [Control Panel] - [User Accounts] - [Create a new account]. Follow the on-screen instructions to create an account. CAUTION Remember your password. If you forget the password, you cannot use the Win-dows operating system. Creating a password reset disk beforehand is recom-mended. NOTE PC Information Viewer This computer periodically records the management information of the hard disk, etc. The maximum data volume for each record is 1024 bytes. This information is only used for estimating the cause in the case when the hard disk goes down by any possibility. They are never sent to outside via network nor used for any other purpose except for the pur-pose described the above. To disable the function, add the check mark for [Disable the automatic save function for management information history] in [Hard Disk Status] of PC Information Viewer, and click [OK]. ( Reference Manual “Checking the Computer’s Usage Status”) When Starting Up/Shutting Down Do not do the following Connecting or disconnecting the AC adaptor Pressing the power switch Touching the touchscreen, external mouse or external keyboard Turn on/off the wireless switch NOTE To conserve power, the following power saving methods are set at the time of purchase. The screen automatically turns off after 10*1 minutes of inactivity. The computer automatically enters sleep*2 ( )/standby*2 ( ) after 20 minutes of inactivity.*1 Windows XP :15 minutes*2 Refer to Reference Manual “Sleep and Hibernation Functions” about resuming from sleep.First-time Operation](https://usermanual.wiki/Panasonic-of-North-America/9TGBT11B.OPERATING-INSTRUCTIONS/User-Guide-1505387-Page-20.png)
![21Getting Started When Logging on to WindowsDo not log on to Windows by the Guest account. To change the partition structureYou can shrink a part of an existing partition to create unallocated disk space, from which you can create a new parti-tion. This computer has a single partition as default setting.A Click (Start) and right-click [Computer], then click [Manage]. A standard user needs to enter an administrator password.B Click [Disk Management].C Right-click the partition for Windows (“c” drive in the default setting), and click [Shrink Volume]. The partition size depends on the computer specifi cations.D Input the size in [Enter the amount of space to shrink in MB] and click [Shrink]. You cannot input a larger number than the displayed size. To select [Reinstall to the fi rst 2 partitions.] in reinstalling Windows 7 ( page 25), 30000 MB*3 or more is necessary for [Total size after shrink in MB].E Right-click [Unallocated] (the shrunk space in the step D) and click [New Simple Volume].F Follow the on-screen instructions to make the settings, and click [Finish].Wait until formatting is completed.*3 For MUI OS model, 60000 MB or more is necessary. NOTE You can create an additional partition using remaining unallocated space or newly creating unallocated space. To delete a partition, right-click the partition and click [Delete Volume] in step C.](https://usermanual.wiki/Panasonic-of-North-America/9TGBT11B.OPERATING-INSTRUCTIONS/User-Guide-1505387-Page-21.png)
![22Useful InformationOn-screen ManualYou can access the following manuals on the computer screen. Reference Manual The Reference Manual contains the practical information to help you fully enjoy the computer’s performance.To access the Reference Manual: Double-click on the desktop. Alternatively click (Start) - [All Programs] - [Panasonic] - [On-Line Manuals] - [Reference Manual]. Click [start] - [Reference Manual]. Alternatively click [start] - [All Programs] - [Panasonic] - [On-Line Manuals] - [Reference Manual].To display “Battery Power” of the Reference Manual, proceed as follows. Double-click on the desktop. Alternatively click (Start) - [All Programs] - [Panasonic] - [On-Line Manuals] - [Important Tips]. Double-click on the desktop. Alternatively click [start] - [All Programs] - [Panasonic] - [On-Line Manuals] - [Important Tips]. NOTE When you access the document of PDF format for the fi rst time, the License Agreement of the Adobe Reader may be displayed. Read it carefully and select [Accept] to proceed. When Adobe Reader update notice is displayed, we recommend you follow the on-screen procedure and update.See http://www.adobe.com/ for the latest version of Adobe Reader.](https://usermanual.wiki/Panasonic-of-North-America/9TGBT11B.OPERATING-INSTRUCTIONS/User-Guide-1505387-Page-22.png)
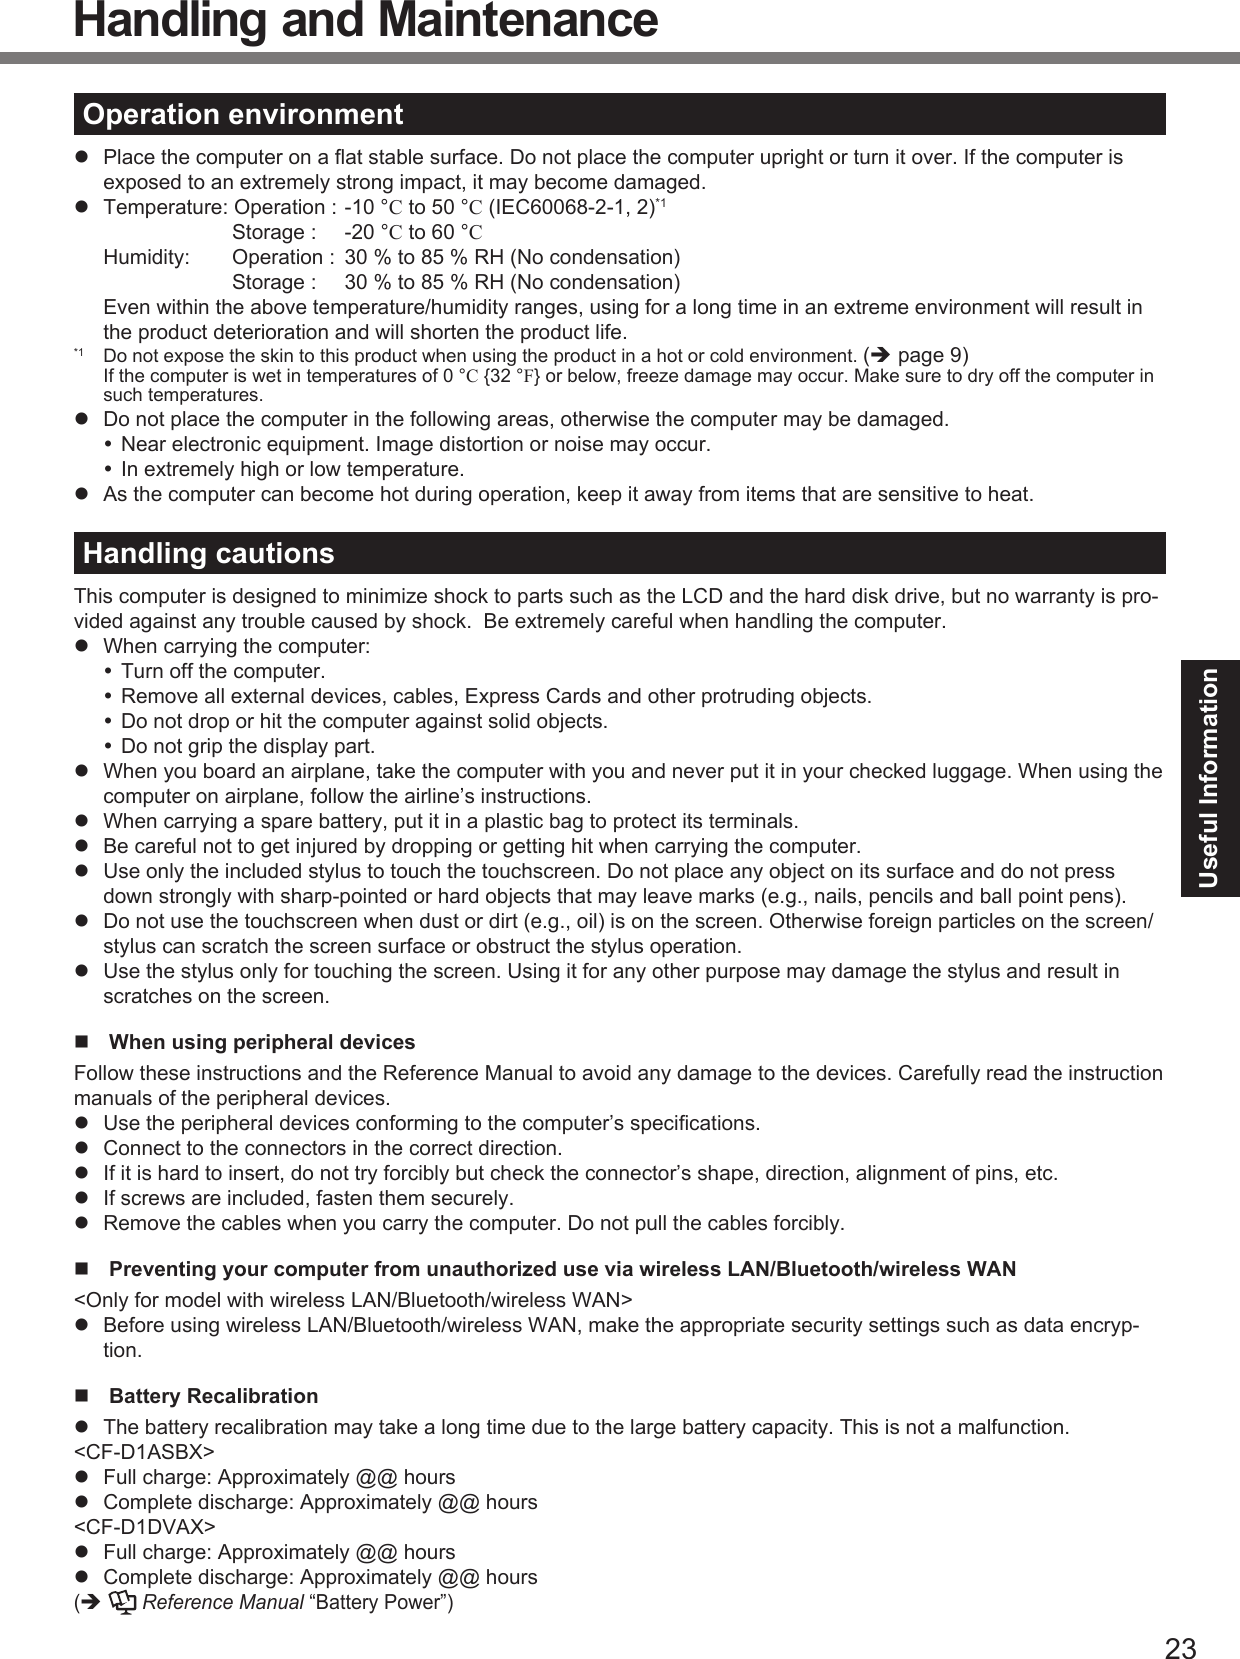
![25Useful InformationReinstalling SoftwareReinstalling software will return the computer to the default condition. When you reinstall the software, the hard disk data will be erased.Back up important data to other media or an external hard disk before reinstallation. Hard Disk Recovery CAUTION Area usable by WindowsHard diskHDD Recovery partitionRecovery partition You can install Windows 7 only. Do not delete the recovery partition on the hard disk.The disk space in the partition is not available to store data. NOTE You can operate with the Tablet Buttons. Follow the instructions displayed on the screen.You can also use the external keyboard and external mouse.Preparation Remove all peripherals. Connect the AC adaptor and do not remove it until reinstallation is complete.1 Turn off the computer and connect the external keyboard and mouse to the USB ports.2 Turn on the computer, and press while [Panasonic] boot screen is displayed.The Setup Utility starts up.If the [Panasonic] boot screen is not displayed, as soon as the computer starts up, press several times until the Setup Utility screen appears. If the password is requested, enter the Supervisor Password.3 Write down all of the contents of the Setup Utility and click F9.At the confi rmation message, select [Yes] and click Enter.4 Click F10.At the confi rmation message, select [Yes] and click Enter.Computer will restart.5 Press F2 or Del while [Panasonic] boot screen is displayed.The Setup Utility starts up.If the [Panasonic] boot screen is not displayed, as soon as the computer starts up, press several times until the Setup Utility screen appears. If the password is requested, enter the Supervisor Password.6 Select the [Exit] menu, then select [Repair Your Computer] and click Enter.7 Click [Reinstall Windows] and click [Next].The License Agreement screen appears.8 Click [Yes, I agree to the provisions above and wish to continue!] and click [Next].9 Select the settings and click [Next]. [Reinstall Windows to the whole Hard Disk to factory default.]Select this option when you want to reinstall Windows to the factory default. After reinstallation, you can cre-ate a new partition. For how to create a new partition, refer to “To change the partition structure” ( page 21). [Reinstall to the System and OS partitions.]*1Select this option when the hard disk has already been divided into several partitions. For how to create a new partition, refer to “To change the partition structure” ( page 21).You can keep the partition structure.*1 This does not appear if Windows cannot be reinstalled to the partition containing boot fi les and the area usable by Windows.10 At the confi rmation message, click [YES].11 <For model with localized OS> Select OS (32bit or 64bit) and click [OK]. <For model with MUI OS> Select language and OS (32bit or 64bit), then click [OK].](https://usermanual.wiki/Panasonic-of-North-America/9TGBT11B.OPERATING-INSTRUCTIONS/User-Guide-1505387-Page-25.png)
![26Useful Information12 At the confi rmation message, click [OK].Reinstallation starts according to the instructions on the screen. Do not interrupt reinstallation, for example by turning off the computer. Otherwise reinstallation may become unavailable as Windows may not start up or the data may be corrupted.13 When termination screen is displayed, click [OK] to turn off the computer.14 Turn on the computer. If the password is requested, enter the Supervisor Password.15 Perform the “First-time Operation” ( page 17).16 Start the Setup Utility and change the settings as necessary.17 Perform Windows Update. Using Product Recovery DVD-ROM <Only for model with Product Recovery DVD-ROM>Use the Product Recovery DVD-ROM for reinstallation in the following conditions. You have forgotten the administrator password. Reinstallation is not complete. The recovery partition may be broken. NOTE When you reinstall OS using the Product Recovery DVD-ROM, OS which was installed as the factory default will be installed. To change OS from 32-bit to 64-bit, or vice versa, reinstall OS using the recovery partition in the hard disk. You can operate with the Tablet Buttons. Follow the instructions displayed on the screen.You can also use the external keyboard and external mouse.Preparation Prepare the Product Recovery DVD-ROM Prepare the following items: USB DVD drive (refer to recent catalogs and other sources for information about the products available) Remove all peripherals (excluding USB DVD drive) Connect the AC adaptor and do not remove it until reinstallation is complete.1 Turn off the computer and connect the external keyboard, external mouse and DVD drive to the USB ports.2 Turn on the computer, and press while [Panasonic] boot screen is displayed.The Setup Utility starts up.If the [Panasonic] boot screen is not displayed, as soon as the computer starts up, press several times until the Setup Utility screen appears. If the password is requested, enter the Supervisor Password.3 Write down all of the contents of the Setup Utility and click F9.At the confi rmation message, select [Yes] and click Enter.4 Click F10.At the confi rmation message, select [Yes] and click Enter.Computer will restart.5 Press while [Panasonic] boot screen is displayed.The Setup Utility starts up.If the [Panasonic] boot screen is not displayed, as soon as the computer starts up, press several times until the Setup Utility screen appears. If the password is requested, enter the Supervisor Password.6 Set the Product Recovery DVD-ROM into the DVD drive.7 Select the [Exit] menu, then select your DVD drive in [Boot Override].8 Click Enter.The computer will restart.9 Click [Reinstall Windows] and click [Next].The License Agreement screen appears.10 Click [Yes, I agree to the provisions above and wish to continue!] and click [Next].Reinstalling Software](https://usermanual.wiki/Panasonic-of-North-America/9TGBT11B.OPERATING-INSTRUCTIONS/User-Guide-1505387-Page-26.png)
![27Useful Information11 Select the settings and click [Next]. [Reinstall Windows to the whole Hard Disk to factory default.]Select this option when you want to reinstall Windows to the factory default. After reinstallation, you can cre-ate a new partition. For how to create a new partition, refer to “To change the partition structure” ( page 21). [Reinstall to the fi rst 3 partitions.]*2Select this option when the hard disk has already been divided into several partitions. For how to create a new partition, refer to “To change the partition structure” ( page 21).You can keep the partition structure.*2 This does not appear if Windows cannot be reinstalled to the partition containing boot fi les and the area usable by Windows.12 At the confi rmation message, click [YES].Reinstallation starts. (It will take approximately @@ minutes.)According to the screen, replace the Product Recovery DVD-ROM. Do not interrupt reinstallation, for example by turning off the computer. Otherwise reinstallation may become unavailable as Windows may not start up or the data may be corrupted.13 When termination screen is displayed, remove the Product Recovery DVD-ROM, and then click [OK] to turn off the computer.14 Remove the DVD drive.15 Turn on the computer. If the password is requested, enter the Supervisor Password.16 Perform the “First-time Operation” ( page 17).17 Start the Setup Utility and change the settings as necessary.18 Perform Windows Update.](https://usermanual.wiki/Panasonic-of-North-America/9TGBT11B.OPERATING-INSTRUCTIONS/User-Guide-1505387-Page-27.png)
![28TroubleshootingTroubleshooting (Basic)Follow the instructions below when a problem has occurred. There is also an advanced troubleshooting guide in the“Reference Manual”. For a software problem, refer to the software’s instruction manual. If the problem persists, contactPanasonic Technical Support. You can also check the computer’s status in the PC Information Viewer ( Refer-ence Manual “Checking the Computer’s Usage Status”). Starting UpCannot start up.The power indicator or bat-tery indicator is not lit. Connect the AC adaptor. Insert a fully charged battery. Remove the battery pack and the AC adaptor, then connect them again. Even if the AC adaptor and battery pack are correctly connected, if the battery indicator is not lit, the AC adaptor protection function may be operating. Disconnect the AC cord, wait three minutes or more, and reconnect the AC cord. If a device is connected to the USB port, disconnect the device, or set [USB Port] or [Legacy USB Support] to [Disabled] in the [Advanced] menu of the Setup Utility. If a device is connected to the ExpressCard slot, disconnect the device, or set [Express-Card Slot] to [Disabled] in the [Advanced] menu of the Setup Utility.The power is turned on but “Warming up the system (up to 30 minutes)” appears. The computer is warming up before start up. Wait for the computer to start up (takes up to 30 minutes). If, “Cannot warm up the system” is displayed, the computer failed to warm up and does not start. In this case, turn off the computer, leave it in an environ-ment of 5 °C or higher temperature for about an hour, and then turn on the power once more.Cannot turn on the comput-er. The computer does not resume from sleep( )/standby ( ).(The power indicator blinksquickly in green.) Leave it in an environment of 5 °C or higher temperature for about an hour, then turn on the power once more.After adding or changing the RAM module, the power is turned on but nothing is displayed on the screen. Turn off the computer and remove the RAM module, then confi rm whether the RAM module has conformed to specifi cation. When the RAM module has conformed to speci-fi cation, install it again.The computer does not enter sleep mode while the screen saver is running (The screen stays black). Press and hold the power switch for four seconds or longer to shut down the computer forcibly. (Data not saved will be lost.) Then disable the screen saver.It takes time for the power indicator to light up. If the power switch is pressed immediately after the battery pack has been mounted on the computer, and while the AC adaptor is not connected, it may take about fi ve sec-onds before the power indicator lights up and the computer turns on. This is because the computer is checking the remaining battery charge; it is not a malfunction.You have forgotten the password. Supervisor Password or User Password: Contact Panasonic Technical Support. Administrator password: If you have a password reset disk, you can reset the administrator password. Set the disk and enter any wrong password, then follow the on-screen instructions and set a new password. If you do not have a password reset disk, reinstall ( page 25) and set up Windows, and then set a new password.“Remove disks or other media. Press any key to restart” or a similar message appears. A fl oppy disk in the drive or USB memory is connected, and it does not contain system startup information. Remove the fl oppy disk and USB memory, connect an external keyboard and then press any key. If a device is connected to the USB port, disconnect the device, or set [USB Port] or [Legacy USB Support] to [Disabled] in the [Advanced] menu of the Setup Utility. If a device is connected to the ExpressCard slot, disconnect the device, or set [Express Card Slot] to [Disabled] in the [Advanced] menu of the Setup Utility. <Only for model with ExpressCard slot>If the problem persists after removing the disk, it may be a hard disk failure. Contact Panasonic Technical Support.](https://usermanual.wiki/Panasonic-of-North-America/9TGBT11B.OPERATING-INSTRUCTIONS/User-Guide-1505387-Page-28.png)
![29Troubleshooting Starting UpWindows startup and opera-tion is slow. Click F9 in the Setup Utility ( Reference Manual “Setup Utility”) to return the Setup Utility settings (excluding the passwords) to the default values. Start the Setup Utility and make the settings again. (Note that the processing speed depends on the ap-plication software, so this procedure may not make Windows faster.) If you installed a resident software after purchase, turn off the residence. Disable Indexing Service in the following menu.Click [start] - [Search] - [Change preferences] - [With Indexing Service (for faster local searches)].The date and time are incor-rect Make the correct settings. Click (Start) - [Control Panel] - [Clock, Language, and Region] - [Date and Time]. Click [start] - [Control Panel] - [Date, Time, Language, and Regional Options] - [Date and Time]. If the problem persists, the internal clock battery may need to be replaced. Contact Panasonic Technical Support. When the computer is connected to LAN, check the date and time of the server. The 2100 A.D. or later year will not be correctly recognized on this computer.[Executing Battery Recali-bration] screen appears. The Battery Recalibration was canceled before Windows was shut down last time.To start up Windows, turn off the computer by the power switch, and then turn on.[Enter Password] does not appear when resuming from sleep ( )/standby ( )/hibernation. Select [Enabled] in [Password On Resume] in the [Security] menu of the Setup Utility ( Reference Manual “Setup Utility”). The Windows password can be used instead of the password set in the Setup Utility.A Click (Start) - [Control Panel] - [User Accounts and Family Safety] - [Add or remove user accounts] and select the account, and set the password.B Click (Start) - [Control Panel] - [System and Security] - [Power Options] - [Re-quire a password on wakeup] and add a check mark for [Require a password].A Click [start] - [Control Panel] - [User Accounts] and select the account, and set the password.B Click [start] - [Control Panel] - [Performance and Maintenance] - [Power Options] - [Advanced] and add a check mark for [Prompt for password when computer re-sumes from standby].Cannot resume. An error may occur when the computer automatically enters the sleep / standby or hibernation mode while the screen saver is active. In this case, turn off the screen saver or change the pattern of the screen saver.Other startup problems. Click F9 in the Setup Utility ( Reference Manual “Setup Utility”) to return the Setup Utility settings (excluding the passwords) to the default values. Start the Setup Utility and make the settings again. Remove all peripheral devices. Check to see if there was a disk error.A Remove all peripheral devices including an external display.B Click (Start) - [Computer] and right-click [Local Disk (C:)], and click [Proper-ties].C Click [Tools] - [Check Now...]. A standard user needs to enter an administrator password.D Select the option in [Check disk options] and click [Start].E Click [Schedule disk check] and restart the computer.A Click [start] - [My Computer] and right-click [Local Disk(C:)], and click [Properties].B Click [Tools] - [Check Now].C Select the option in [Check disk options] and click [Start]. Connect the external keyboard to the computer, and start it in Safe Mode and check the error details. When the [Panasonic] boot screen disappears*1 at startup, press and hold F8 until the Windows Advanced Options Menu is displayed. Select the Safe Mode and press Enter.*1 When [Password on boot] is set to [Enabled] in the [Security] menu of the Setup Utility, [Enter Password] appears after the [Panasonic] boot screen disappears. As soon as you enter the password and press Enter, press and hold F8.](https://usermanual.wiki/Panasonic-of-North-America/9TGBT11B.OPERATING-INSTRUCTIONS/User-Guide-1505387-Page-29.png)
![30Troubleshooting Entering PasswordCannot log on to Windows. (“The user name or pass-word is incorrect.” is dis-played.) The user name (account name) includes an “@” mark. - If another user account exists:Log on to Windows using another user account, and delete the account that includes “@”. Then create a new account. - If no other account exists:You need to reinstall Windows ( page 25). Shutting downWindows does not shut down. Remove the USB device and the ExpressCard. Wait one or two minutes. It is not a malfunction. DisplayNo display. <Only for model with VGA port> The external display is selected. Change the display output destination. <Only for model with VGA port> When using an external display, Check the cable connection. Turn on the display. Check the settings of external display. The display is turned off by the power-saving function. To resume, touch the screen. The computer entered sleep ( ) / standby ( ) or hibernation by the power-saving function. To resume, press the power switch.The screen is dark. The screen might be darker when the AC adaptor is not connected. Adjust the bright-ness by using Dashboard for Panasonic PC. As you increase the brightness, battery consumption increases. You can separately set the brightness for when the AC adaptor is connected and when not connected.The screen is disordered. Changing the number of display colors and resolution may affect the screen. Restart the computer. Connecting/disconnecting an external display may affect the screen. Restart the com-puter. Resuming from sleep ( ) /standby ( ) or hibernation may af-fect the screen of the external display. Restart the computer.<Only for model with VGA port>During Simultaneous dis-play, one of the screens becomes disordered. When using the Extended Desktop, use the same display colors for the external display as those used by the LCD. If you continue to experience problems, try changing the display.A Right-click on the desktop, and click [Graphics Properties].B Select [Basic mode] and click [OK].C Click [Display].A Click [start] - [Control Panel] - [Other Control Panel Options] - [Intel(R) Graphics and Media].B Select [Basic mode] and click [OK].C Click [Display]. Simultaneous display cannot be used until Windows startup is complete (during Setup Utility, etc.). When the [Command Prompt] is set to “Full Screen” by pressing Alt+Enter, the picture is displayed on one of the screens only. When the window display is restored by pressing Alt+Enter on the external keyboard, the picture is displayed on both screens.<Only for model with VGA port>The external display does not work normally. If the external display does not support the power saving function, it may not work nor-mally when the computer enters the power saving mode. Turn off the external display.Troubleshooting (Basic)](https://usermanual.wiki/Panasonic-of-North-America/9TGBT11B.OPERATING-INSTRUCTIONS/User-Guide-1505387-Page-30.png)
![31Troubleshooting Display<Only for model with GPS>The cursor cannot be con-trolled properly. Operate the following steps.A Set [GPS] to [Disabled] in the [Advanced - Serial Port Setting] of the Setup Utility.B Click F10 and select [Yes] at the confi rmation message, and click Enter (Enter).The computer will restart.C Log on to Windows as an administrator.D Click (Start) and input “c:\util\drivers\gps\GPS.reg” in [Search programs and fi les], and click Enter.E Click [Yes], click [Yes] and click [OK].Then restart the computer.F Click [Click for Enter Setup] that appears at the upper left corner on the screen while [Panasonic] boot screen is displayed.G Set [GPS] to [Enabled] in the [Advanced - Serial Port Setting].H Click F10 and select [Yes] at the confi rmation message, and click Enter. TouchscreenThe cursor does not work. When using the external mouse, connect it correctly. Restart the computer using the external keyboard. Press and press two times, and press to select [Restart] and press Enter. Press , U, and R to select [Restart]. If the computer does not respond to the external keyboard commands, read “No re-sponse” ( page 32).Cannot input using the touchscreen. Set [Touchscreen Mode] to [Auto] or [Tablet Mode] in the [Main] menu of the Setup Util-ity. Set [Touchscreen Mode] to [Auto] or [Touchscreen Mode] in the [Main] menu of the Setup Utility.Cannot point the correct position using the included stylus. Perform the touchscreen calibration ( page 19). On-screen DocumentThe document of PDF for-mat is not displayed. Install Adobe Reader. According to the language you have selected, the following version of Adobe Reader is installed. English: English version French: French version German: German version Other languages: English version If you need Adobe Reader in a language other than above described languages, down-load from Adobe web site and install it.A Click [start] - [Run], input the following, then click [OK].[c:\util\reader\**\Setup.exe] “**” depends on the language.English : mFrench : fGerman : gIf you need Adobe Reader in a language other than above described languages, download from Adobe web site and install it.](https://usermanual.wiki/Panasonic-of-North-America/9TGBT11B.OPERATING-INSTRUCTIONS/User-Guide-1505387-Page-31.png)
![32Troubleshooting OthersNo response. Press button to open Task Manager and close the software application that is not responding. Connect the external keyboard and press Ctrl + Shift + ESC to open Task Man-ager and close the software application that is not responding. An input screen (e.g., password input screen at startup) may be hidden behind another window. Click Alt+Tab to check. Press the power switch for 4 seconds or longer to shut down the computer, and then press the power switch to turn it on. If the application program does not work normally, uninstall and reinstall the program. To uninstall, click (Start) - [Control Panel] - [Programs] - [Uninstall a program]. click [start] - [Control Panel] - [Add or Remove Programs].Troubleshooting (Basic)](https://usermanual.wiki/Panasonic-of-North-America/9TGBT11B.OPERATING-INSTRUCTIONS/User-Guide-1505387-Page-32.png)

![34AppendixSpecifi cationsThis page provides the specifi cations for the basic model. The model number is different according to the unit confi gu-ration. To check the model number:Check the bottom of the computer or the box the computer came in at the time of purchase. To check CPU speed, memory size and the hard disk drive (HDD) size:Run the Setup Utility ( Reference Manual “Setup Utility”) and select [Information] menu.[Processor Speed]: CPU speed, [Memory Size]: Memory size, [Hard Disk]: Hard disk drive size Main Specifi cationsModel No. CF-D1A Series CF-D1D SeriesCPU Intel® Core™ i5-2520M(2.5 GHz, Intel® Smart Cache 3 MB*1)Intel® Celeron® Processor 857(1.2 GHz, Intel® Smart Cache 2 MB*1)Chip Set Intel® 6 Series Express Chipsets QM67 Intel® 6 Series Express Chipsets HM65Video controller Built-in Chip SetMain Memory*2 2 GB*1, DDR3 SDRAM (8 GB*1 Max.)Video MemoryUMA (<32-bit> 773 MB*1 Max., <64-bit> 776 MB*1 Max.)*3UMA (1024 MB*1 Max.)*3Hard Disk Drive 250 GB*4 (Serial ATA)Approx. @@ GB*4 is used as a partition with recovery tools. (Users cannot use this parti-tion.)160 GB*4 (Serial ATA)Approx. @@ GB*4 is used as a partition with recovery tools. (Users cannot use this parti-tion.)Display Method 13.3 type with Touchscreen (TFT) (1366 × 768 dots) (16:9)Internal LCD 65,536/16,777,216 colors(800 × 600 dots / 1024 × 768 dots / 1280 × 600 dots / 1280 × 720 dots / 1280 × 768 dots /1360 × 768 dots / 1366 × 768 dots)*5External Display*6 65,536 / 16,777,216 colors (800 × 600 dots / 1024 × 768 dots / 1280 × 768 dots / 1366 × 768 dots / 1600 × 1200 dots / 1920 × 1080 dots / 1920 × 1200 dots)Touchscreen ResistiveCircular PolarizerResistiveWireless LAN Intel® Centrino® Advanced - N 6205 ( page 35)Bluetooth*7 page 35Wireless WAN*8 Ericsson F5521gw ( page 35)LAN IEEE 802.3 10Base-T / IEEE 802.3u 100BASE-TX / IEEE 802.3ab 1000BASE-T(2nd LAN*9: IEEE 802.3 10BASE-T, IEEE 802.3u 100BASE-TX)Sound WAVE and MIDI playback, Intel® High Defi nition Audio subsystem supportSecurity Chip TPM (TCG V1.2 compliant)*10Card Slots PC Card Slot*11 × 1, Type I or Type II, Allowable current 3.3 V: 400 mA, 5 V: 400 mAExpressCard Slot × 1, ExpressCard/34 or ExpressCard/54SD Memory Card Slot*12 × 1Contact Smart Card Slot*13 × 1SIM Card Slot*8 × 1RAM Module Slot × 2, DDR3 SDRAM, 204-pin, 1.5 V, SO-DIMM, PC3-10600 CompliantInterface USB2.0 Ports × 3 or × 4*14 / Serial Port (Dsub 9-pin male)*15 / LAN Port (RJ-45) × 1 or × 2*9 / VGA Port (Mini DSub 15-pin female)*16 / Microphone Jack (Miniature jack, 3.5 DIA) / Head-phone Jack (Miniature jack, 3.5 DIA, Impedance 32 Ω, Output Power 4 mW × 2, Stereo) / Expansion Bus Connector (Dedicated 100-pin female) / Rugged USB2.0 Port *17Pointing Device TouchscreenButton Security, Application × 3, FunctionFingerprint Reader*18 Array Size : 192 × 4 pixels, Image Size : 192 × 512 pixels, Image Resolution : 508 DPIFront Camera*19 Specifi cations differ depending on the model.Rear Camera*20 Specifi cations differ depending on the model.](https://usermanual.wiki/Panasonic-of-North-America/9TGBT11B.OPERATING-INSTRUCTIONS/User-Guide-1505387-Page-34.png)
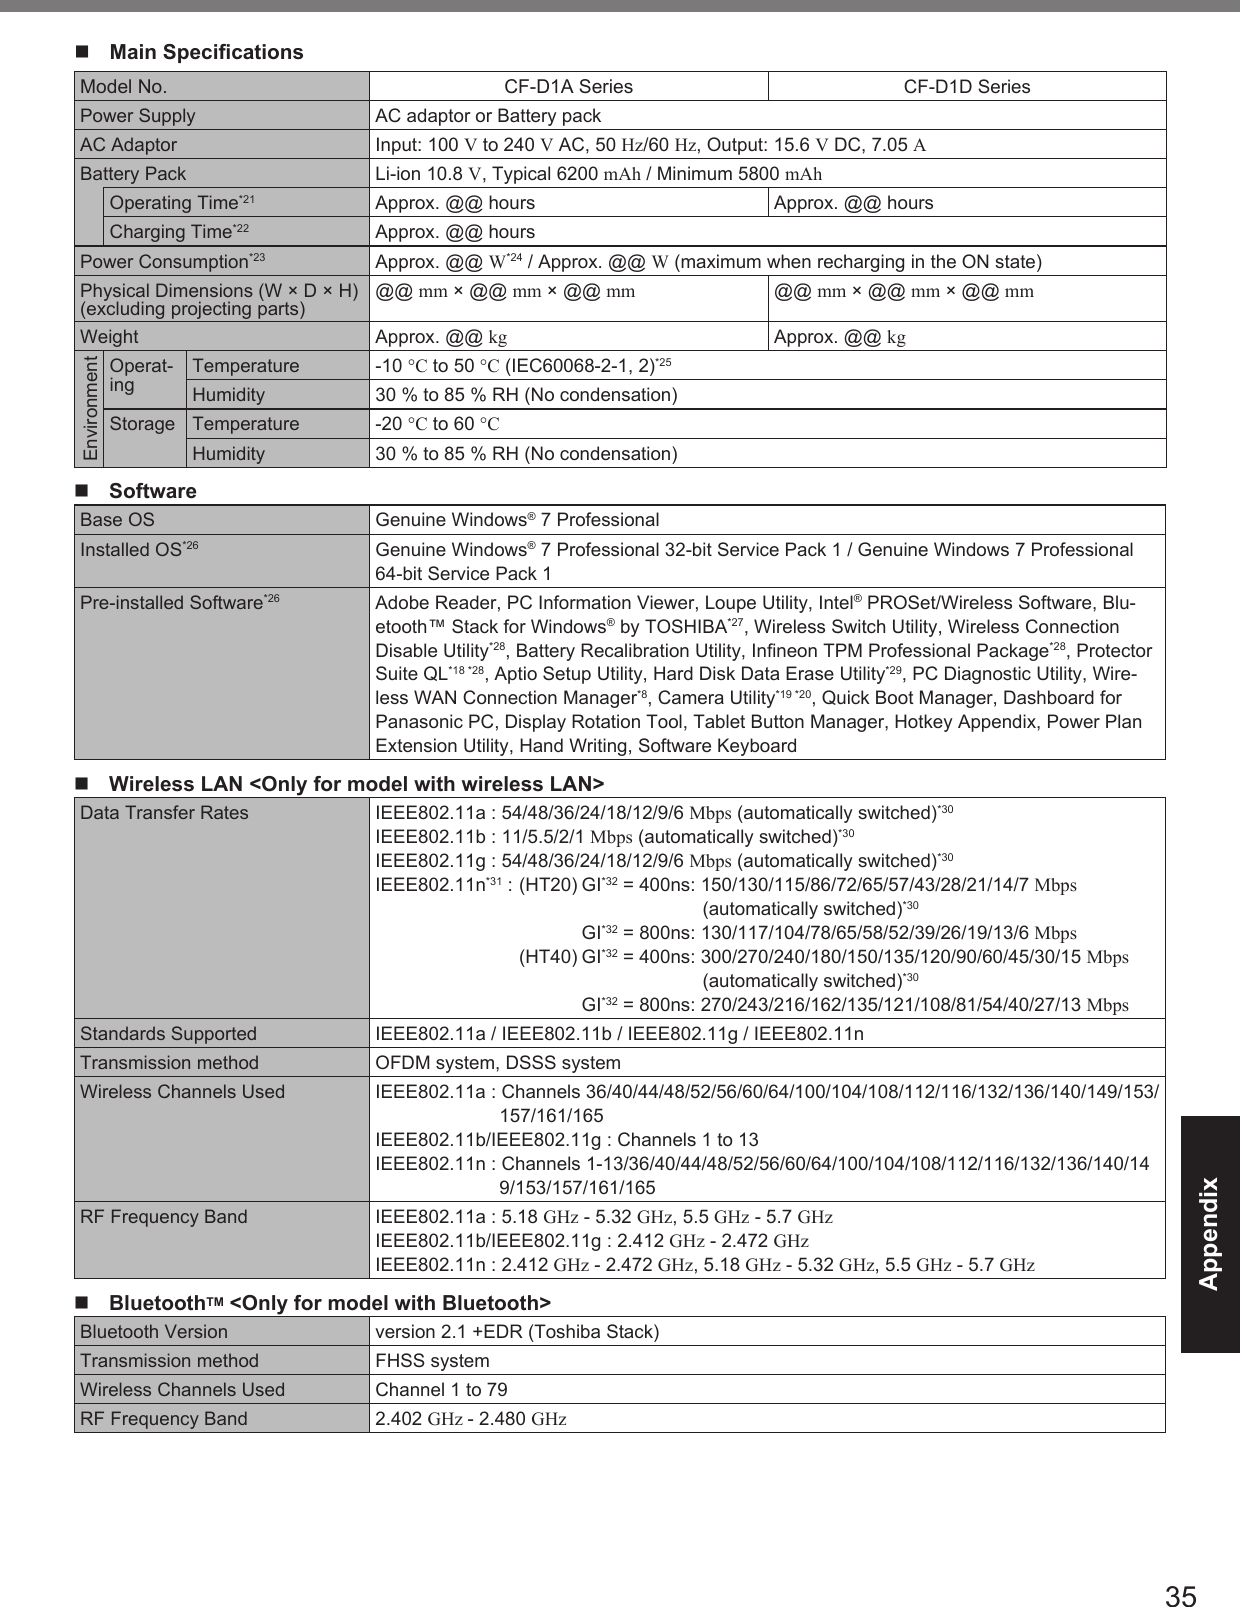
![36Appendix Wireless WAN <Only for model with wireless WAN>Data Communication HSUPA Category 6, 5.7 MbpsHSDPA (HSPA+) Category 14, 21 MbpsUMTS 3GPP Release 7EDGEGPRS MultiSlot Class 10Circuit Switched DataOther Features SMS Mobile Originated SMS (MO-SMS) / Mobile Terminated SMS (MT-SMS)FAX No SupportVoice No SupportSIM 1.8/3 V SIM Support*1 1 MB = 1,048,576 bytes /1 GB = 1,073,741,824 bytes*2 Memory size of the factory default depends on the model. You can physically expand the memory up to 8 GB, but the total amount of usable memory available will be less depending on the actual system confi guration.*3 A segment of the main memory is allotted automatically depending on the computer’s operating status. The size of the Video Memory cannot be set by the user. The size of Video memory is allotted depending on the operating system.*4 1 GB = 1,000,000,000 bytes. Your operating system or some application software will report as fewer GB.*5 A 16,777,216 color display is achieved by using the dithering function.*6 Display may be impossible using some connected external displays.*7 Only for model with Bluetooth.*8 Only for model with wireless WAN.*9 Only for model with 2nd LAN.*10 Only for model with TPM. For information on TPM, refer to the Installation Manual of “TrustedPlatform Module (TPM)” by the following procedure. Click (Start) and input “c:\util\drivers\tpm\index.hta” in [Search programs and fi les] and press Enter. Click [start] - [Run] and input “c:\util\drivers\tpm\index.hta” and click [OK].*11 Only for model with PC Card slot.*12 This slot is compatible with High-Speed Mode. Operation has been tested and confi rmed using Panasonic SD/SDHC/SDXC Memory Cards with a capacity of up to 64 GB. Operation on other SD equipment is not guaranteed.*13 Only for model with Smart Card slot.*14 Only for model with 4th USB2.0 port.*15 Only for model with serial port.*16 Only for model with VGA port.*17 Only for model with rugged USB2.0 port.*18 Only for model with Fingerprint reader.*19 Only for model with front camera.*20 Only for model with rear camera.*21 Measured with LCD brightness : 60 cd/m2 Varies depending on the usage conditions, or when an optional device is attached.*22 Varies depending on the usage conditions, CPU speed, etc.*23 Approx. 0.5 W when the battery pack is fully charged (or not being charged) and the computer is off. <When using with 115 V AC> Even when the AC adaptor is not connected to the computer, power is consumed (Max. 0.2 W) simply by having the AC adaptor plugged into an AC outlet. <When using with 240 V AC> Even when the AC adaptor is not connected to the computer, power is consumed (Max. 0.3 W) simply by having the AC adaptor plugged into an AC outlet.*24 Rated power consumption. 23-E-1*25 Do not expose the skin to this product when using the product in a hot or cold environment. ( page 9)When using in hot or cold environment, some peripherals may fail to work properly. Check the operation environment of the peripherals. Using this product continuously in a hot environment will shorten the product life. Avoid use in these types of environments. When using in low temperature environment, startup may become slow or battery operation time may become short. The computer consumes power when the hard disk is warming up during startup. Therefore, if you are using battery power and the remaining power is low, the computer may not start up.*26 When reinstalling Windows using the data of the recovery area on the hard disk, you can select the OS to be installed (either Windows 7 (32-bit) or Windows 7 (64-bit)). An OS that has been installed at the time of purchase or an OS that has been in-stalled using the hard disk recovery function or the Product Recovery DVD-ROM can be supported.*27 May not be installed depending on the model.*28 Must be installed before use.*29 Perform on the recovery partition. (If this software can not be performed on the recovery partition, perform from the Product Recovery DVD-ROM)*30 These are speeds specifi ed in IEEE802.11a+b+g+n standards. Actual speeds may differ.*31 Available when set to “WPA-PSK”, “WPA2-PSK” or “none”.*32 Only available when HT40 enabled by the computer and access point which associated supports HT40.Specifi cations](https://usermanual.wiki/Panasonic-of-North-America/9TGBT11B.OPERATING-INSTRUCTIONS/User-Guide-1505387-Page-36.png)


