Panasonic of North America 9TGCF-502 Panasonic ToughBook w/ Intel WLAN User Manual Operating Instructions
Panasonic Corporation of North America Panasonic ToughBook w/ Intel WLAN Operating Instructions
Contents
- 1. Users Manual 1
- 2. Users Manual 2
- 3. Users Manual 3
Users Manual 3
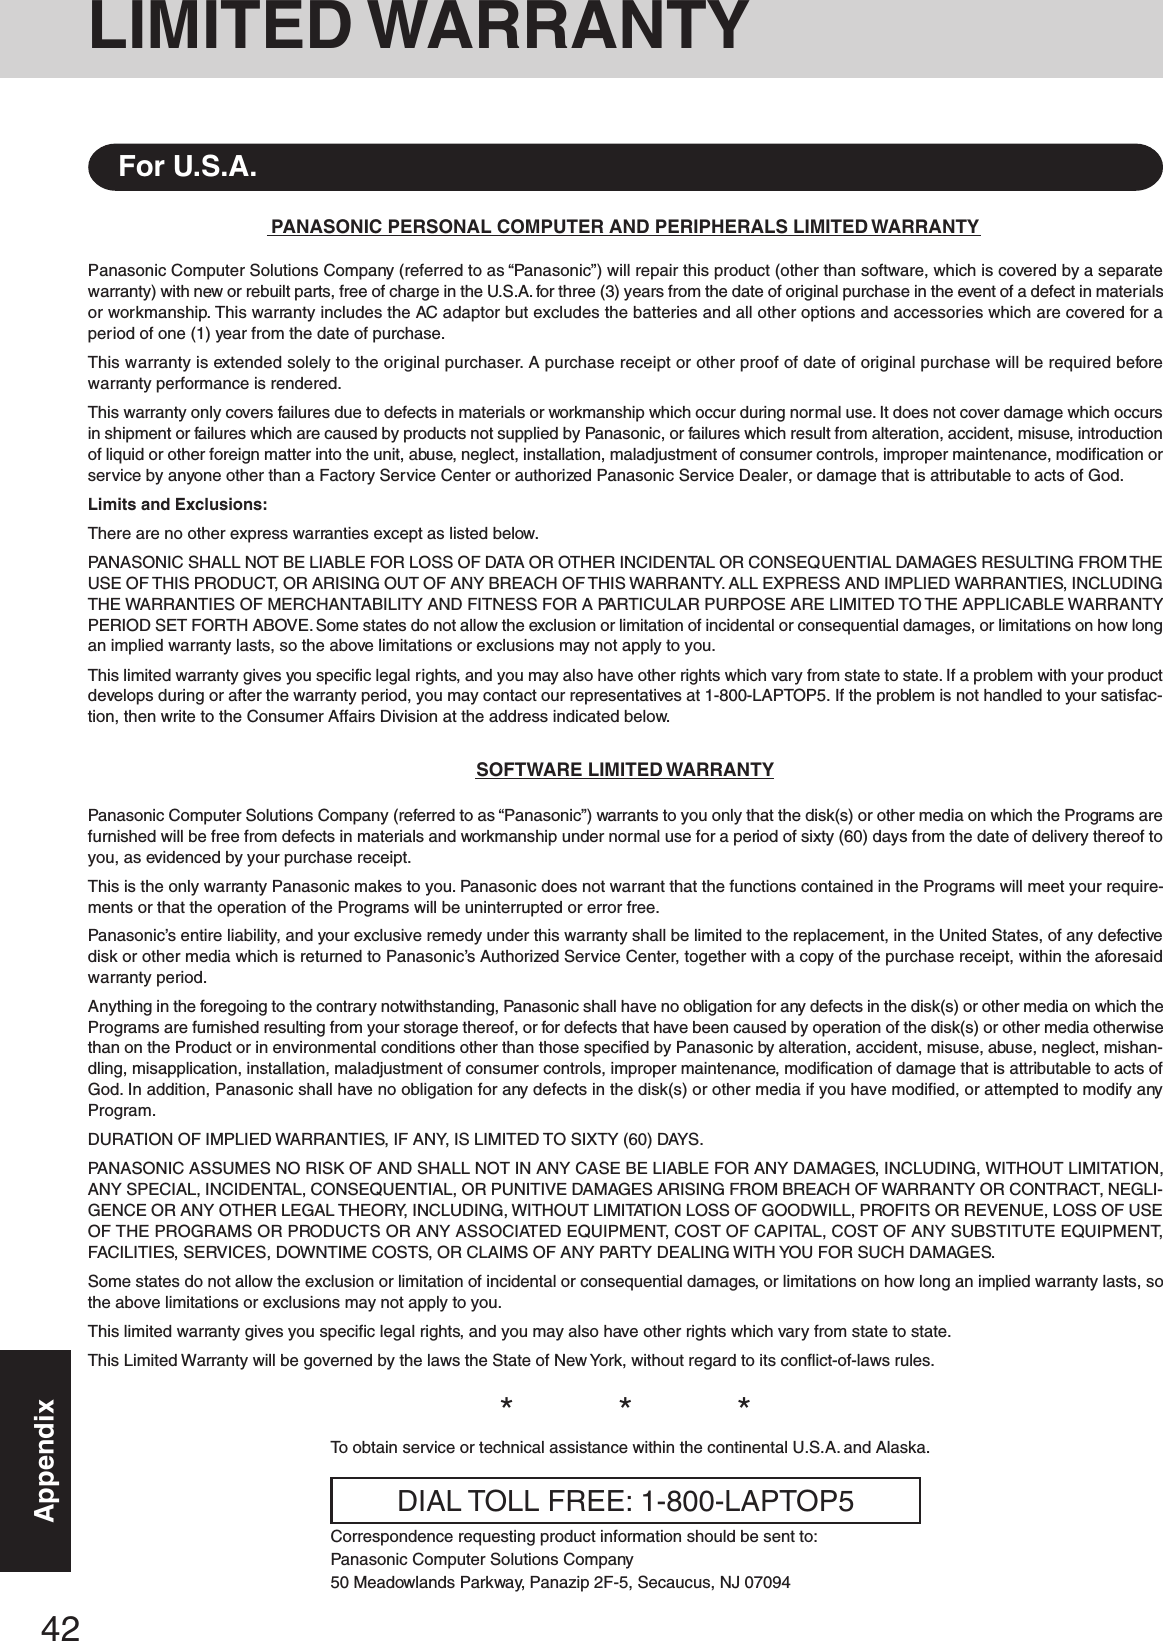
![20OperationReference ManualThe Reference Manual and the Important Tips can be accessed on your computer. When a printer is connected, the ReferenceManual can also be printed.The Reference Manual explains functions for you to make greater use of the computer, such as how to add peripheral devices,how the Setup Utility works, and other useful information. (Refer to the cover of this manual for a list of the main contentsincluded.)Important Tips provides information on how to maximize use of the battery pack, which is necessary for computing away fromyour home or office.Illustrations may be difficult to view depending on the magnification. If the illustration is too small, magnify the display.When the taskbar is hidden at the bottom portion of Acrobat Reader, set the maximum display window size.If a printer is connected, we recommend printing pages. The illustrations and display samples may not print with a highquality.Windows XPWhen switching to a different user with the Fast User Switching function, PDF files may not be printed properly. In this case,log off all users, and try the operation once more. If the problem persists, restart the computer.NOTEOpening the Reference Manual or Important TipsReference ManualWindows 2000Select [Reference Manual] in [Start] - [Programs] - [Panasonic] - [On-Line Manuals]Windows XPSelect [Reference Manual] in [start]Important TipsSelect on the desktopImportant Tips can also be accessed from the following menu.Windows 2000Select [Important Tips] in [Start] - [Programs] - [Panasonic] - [On-Line Manuals].Windows XPSelect [Important Tips] in [start] - [All Programs] - [Panasonic] - [On-Line Manuals].When the Reference Manual or Important Tips is started up for the first time, the License Agreement of the Acrobat Reader may bedisplayed. If it is displayed, after reading the agreement, select [Accept] to access the Reference Manual or Important Tips.](https://usermanual.wiki/Panasonic-of-North-America/9TGCF-502.Users-Manual-3/User-Guide-338207-Page-1.png)
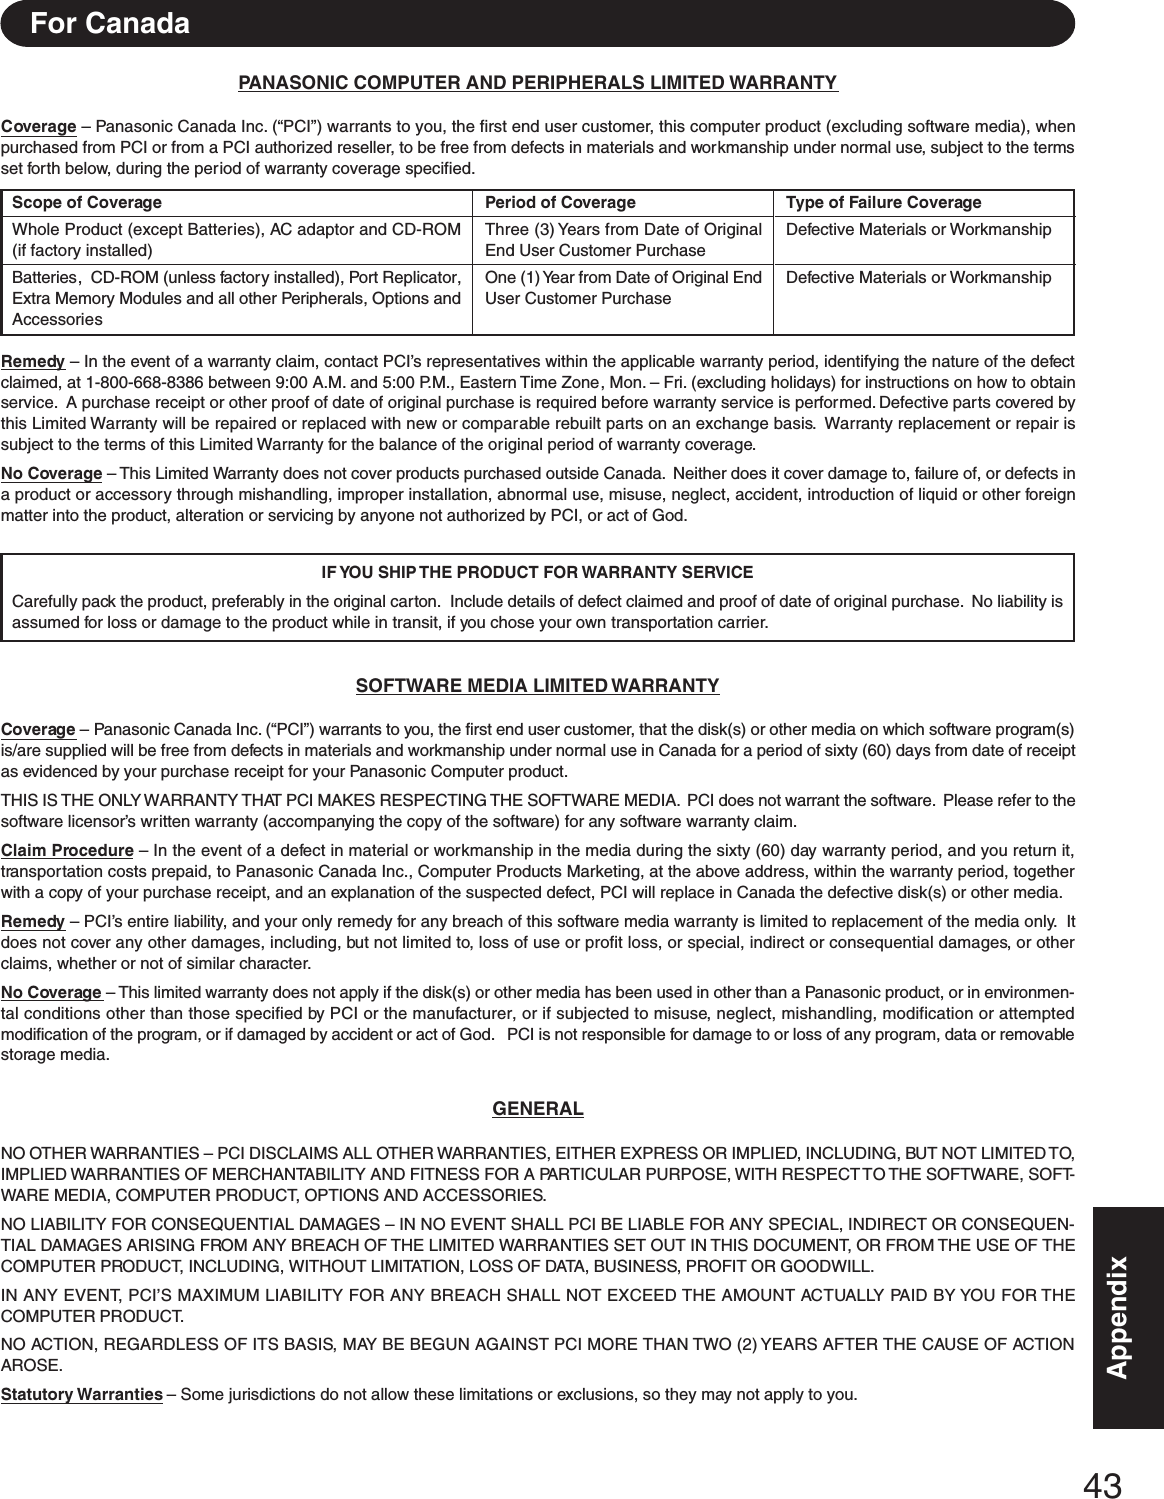
![23TroubleshootingThe power indicator or bat-tery indicator is not lit[Enter Password] is displayedPOST Startup Error(s) isdisplayedWindows startup, or an op-eration is extremely slowThe date and time are incor-rectWhen resuming from thestandby or hibernationmode, [Enter Password]does not appear even if apassword has been set in theSetup UtilityWhen “Invalid system disk.Replace the disk, and thenpress any key.” (or a simi-lar message) is displayedWhen the administratorpassword is forgottenCheck the cable connection for the AC adaptor.Check to see if a fully charged battery is properly installed.Remove the battery pack and disconnect the AC adaptor, then connect them again.Input your Supervisor Password or User Password. If you have forgotten it, contactPanasonic Technical Support ( page 42). page 21Press F9 in the Setup Utility ( “Setup Utility”). This will restore the SetupUtility’s settings to their default values (except the password settings). Then, the SetupUtility must be run once again for you to input the appropriate operating environment set-tings. (The processing speed depends on the application software used, so this operationmay not cause the processing speed to increase.)You can set the date and time using the following procedure.Windows 2000 : [Start] - [Settings] - [Control Panel] - [Date/Time]Windows XP : [start] - [Control Panel] - [Date, Time, Language, and Regional Op-tions] - [Date and Time] When the computer is connected to a LAN, confirm the date and time of the server.If you continue to experience problems, the internal battery maintaining the clock mayneed to be replaced. Contact Panasonic Technical Support ( page 42). This computer will not correctly recognize the date and time starting from the year 2100 A.D.Even when a password has been set in the Setup Utility, [Enter Password] does not appearwhen the computer resumes from the standby or hibernation mode.If you want to use the security function when using the standby or hibernation mode, use theWindows password as follows:Windows 2000Set the password in [Control Panel] - [Users and Passwords], then add the check mark for[Prompt for password when computer goes off standby] in [Control Panel] - [Power Op-tions] - [Advanced].Windows XPSelect the account to change in [Control Panel] - [User Accounts] and set the password, thenadd the check mark for [Prompt for password when computer resumes from standby] in[Control Panel] - [Performance and Maintenance] - [Power Options] - [Advanced].This means a floppy disk that does not contain system startup information has been left inthe floppy disk drive. Remove the floppy disk, and press any key.If the message still appears even after trying the above measure, this may be an indicationthat some type of hard disk failure has occurred. Contact Panasonic Technical Support( page 42).Windows 2000After reinstalling, setup Windows and then set the password again.Windows XPIf you have created a password reset disk ( page 15), a message is displayed when youfail to correctly enter the password. Follow the message’s instructions and set the passwordagain by using the password reset disk.If you have not created a password reset disk, after reinstalling, setup Windows and then setthe password again.When a problem occurs, refer to this page. The “Reference Manual” also contains detailed information. If a problem appears to berelated to a software application, read the software related manual. If you still cannot troubleshoot the problem, contact PanasonicTechnical Support ( page 42).<Only for CF-50E******/CF-50G******>You can use the PC Information Viewer to check the computer's usage status. ( “Dealing with Problems (Advanced)”)Dealing with Problems (Summary) Starting Up](https://usermanual.wiki/Panasonic-of-North-America/9TGCF-502.Users-Manual-3/User-Guide-338207-Page-4.png)
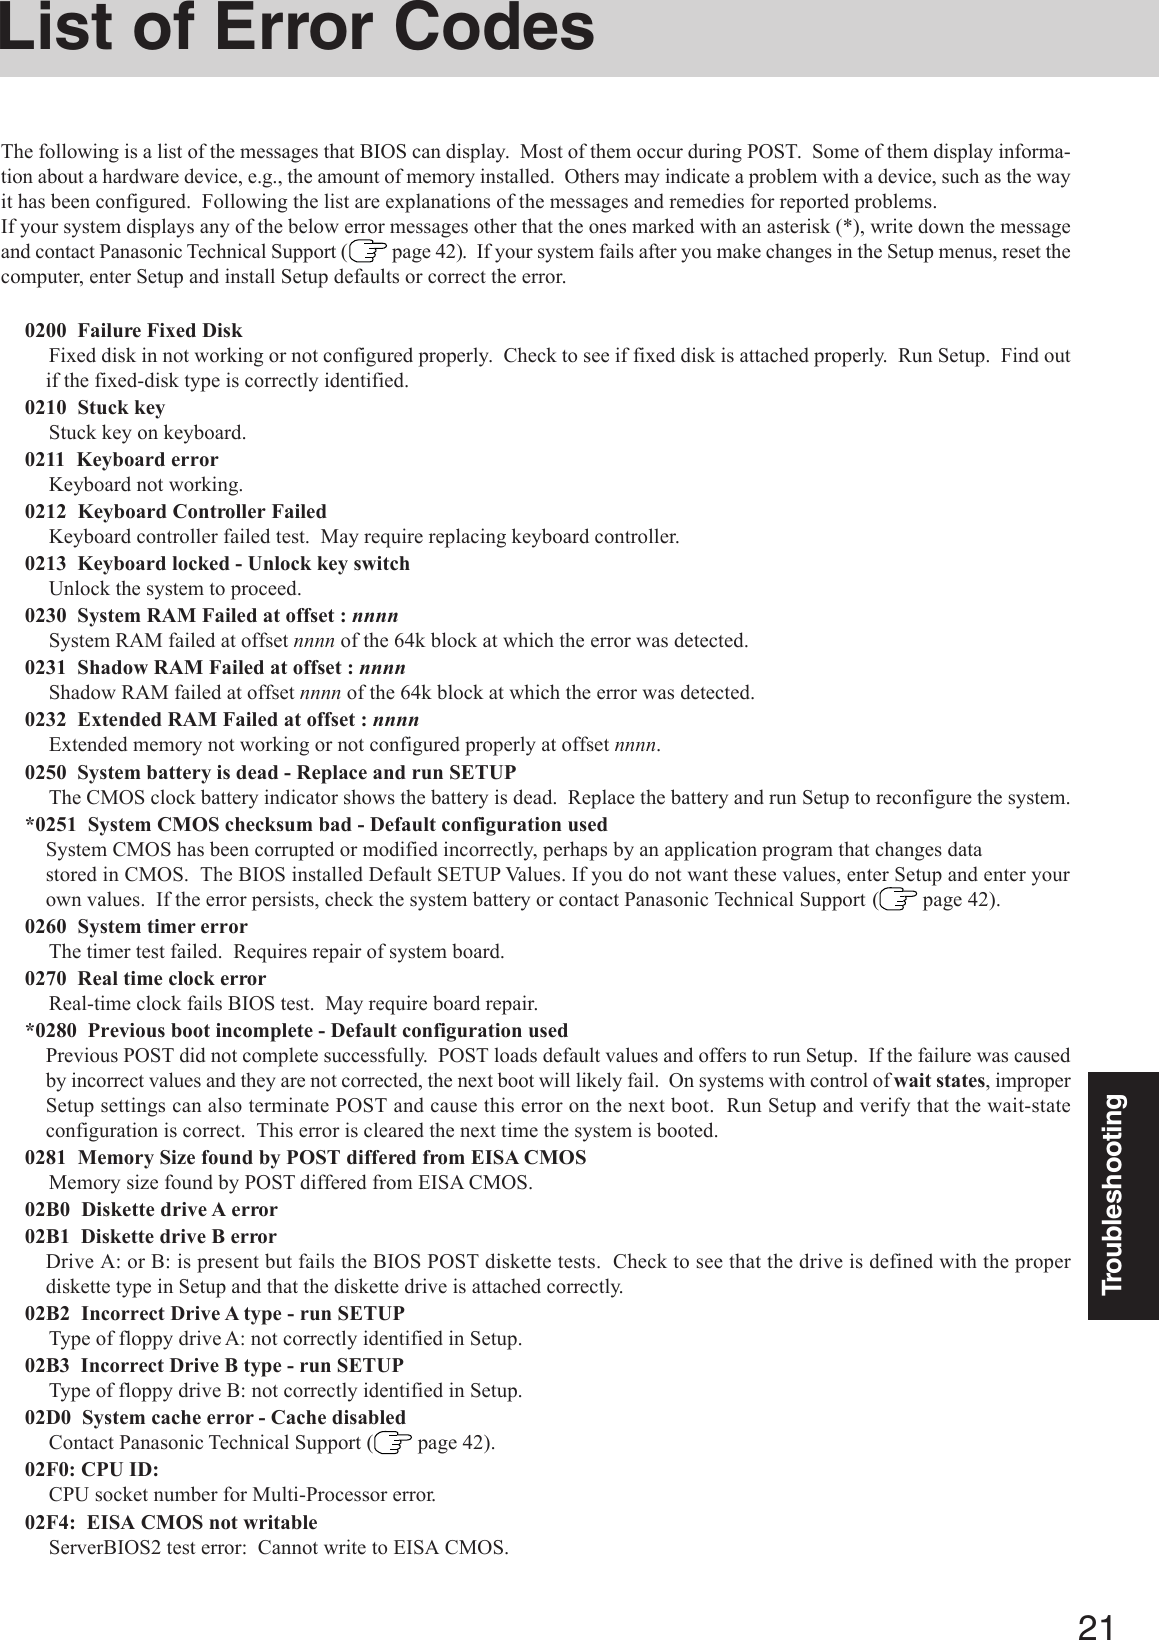
![24TroubleshootingDealing with Problems (Summary)No display after powering onThe power has not beenturned off, but after a cer-tain period of time, there isno displayWhen the battery pack isused, the screen is darkerthan when the AC adaptoris connectedThe cursor cannot be con-trolled properlyAn afterimage appears (e.g.,green, red, and blue dotsremain on the display) orthere are dots not display-ing the correct colorsThe screen becomes disor-deredWhen there is no display to an external display,• Check your cable connection to the external display.• Confirm your display is powered on.• Check the settings for your external display.Try changing the display by pressing Fn + F3 .If you want to switch the display destination repeatedly by pressing Fn + F3 ,make sure that the display destination has switched completely each time beforepressing Fn + F3 again.When displaying only through an external display, if the computer is shut down byusing the standby or hibernation function, there will be no display on the LCD unlessthe external display is connected when operations are resumed. In this case, connect theexternal display or press Fn + F3 .Has the computer been set to the power-saving mode?To resume operation of your computer from the condition the power of the display is off(for energy conservation purposes), press any key unrelated to the direct triggering of aselection, like Ctrl .To save power, your computer may have automatically entered the standby or hiberna-tion mode. ( “Computing on the Road”) Press the power switch.Press Fn + F2 and adjust the brightness. Note, however, that when the brightness isincreased, the battery running time will become shorter.Brightness can be set to separate levels for when the AC adaptor is connected and when it isdisconnected.If you are using an external mouse, ensure that the external mouse has been connectedcorrectly.Restart the computer by using the keyboard (Press , U , and select [Restart] with , then press Enter ).If the computer does not respond to keyboard commands, read “No response” (page 26).If an image is displayed for a prolonged period of time, an afterimage may appear. Thisis not a malfunction. The afterimage will disappear when a different screen is displayed.High-precision and advanced technologies are necessary in the production of color liq-uid crystal displays (color LCDs). Therefore, if 0.002% or less of the picture elementseither fail to light or remain constantly lit (that is, more than 99.998% of elements arefunctioning properly), no defect is considered to exist.Changing the number of colors of the display may affect the screen. Restart the computer.Stop playing the MPEG file before switching the display destination.Windows XPWhen using Dualview, use the same display colors for the external display as those usedby the LCD.When using Dualview, do not press Fn + F3 . DisplayWhen the previous item isnot the causePress F9 in the Setup Utility ( “Setup Utility”). This will restore the SetupUtility’s settings to their default values (except the password settings).Try removing all peripheral devices.Check a disk error using the following procedure.1Display [Local Disk (C:) Properties].Windows 2000Select [Local Disk(C:)] with the right button in [My Computer], and select [Properties].Windows XPSelect [Local Disk(C:)] with the right button in [start] - [My Computer], and select [Properties].2Select [Tools] - [Check Now].3Select [Start] after selecting required items in [Check disk options].At start-up, press F8 to operate the computer in the Safe Mode.At startup, hold down F8 when [Panasonic] boot screen disappears, and release yourfinger when the Windows Advanced Option Menu is displayed. Start the computer inSafe Mode, and confirm the details of the error. Starting Up (continued)](https://usermanual.wiki/Panasonic-of-North-America/9TGCF-502.Users-Manual-3/User-Guide-338207-Page-5.png)
![25TroubleshootingThe red indicator lightsThe red indicator blinksThe orange indicator blinksThe battery level is very low (the charge is less than approx. 9% capacity).Connect the AC adaptor. You can use the computer when the indicator light is orange. If youdo not have an AC adaptor, save your data and power off your computer. After replacing thebattery pack with a fully charged one, turn your computer on.Quickly save your data and power off your computer. Remove the battery pack and discon-nect the AC adaptor, then connect them again.If the problem persists, contact Panasonic Technical Support. The battery pack or recharg-ing function may be defective.Battery cannot be recharged temporarily because the internal temperature of the batterypack is outside of the acceptable temperature range for recharging. Once the allowablerange requirement is satisfied, charging begins automatically. Your computer can be usednormally. Battery IndicatorSome applications do notwork properlyWhen switching to a different user with the Fast User Switching function, the followingproblems may occur. In this case, log off all users, and try the operation once more. If theproblem persists, restart the computer.• Some applications may not work properly (for example, PDF files may not be printedproperly).• It may not be possible to set the settings of the display.• A serial mouse may not work.•Fn + F3 may not work.• The wireless LAN cannot be used.• The B’s CLiP icon will no longer be shown on the taskbar and a CD-RW disc cannot bewritten on. Fast User Switching function Windows XPThe external display nolonger displays properlyWhen you want to displaythe fonts or icons at a largersizeWindows XPAn error occurs or the computerfreezes while using DualviewWhen an external display not compatible with the power saving mode is used with thecomputer, the external display may no longer display properly when the computer entersthe condition the power of the display is OFF (for energy conservation purposes). In suchcases, turn off the power to the external display.Change the settings as follows (for more details, refer to the Windows Help).Windows 20001Select [Start] - [Settings] - [Control Panel] - [Display] - [Appearance].2Select the scheme labeled “large” or “extra large” in [Scheme] to change the font size,and select [Icon] in [Item] to change the icon size.3Select [OK].You can change the size of the icons, etc. using “Icon Enlarger” ( page 13).Windows XP1Select [start] - [Control Panel] - [Appearance and Themes] - [Display] - [Appearance].2Select the font size in [Font size], and select [Effects] and then add the check mark for[Use large icons] to increase the icon size.3Select [OK], then select [OK].You can change the size of the icons, etc. using “Icon Enlarger” ( page 14).If you use a 3D screen saver while in Dualview mode at a high resolution, an error mayoccur or the computer may freeze. Under these conditions, do not use a 3D screen saver.](https://usermanual.wiki/Panasonic-of-North-America/9TGCF-502.Users-Manual-3/User-Guide-338207-Page-6.png)
![26TroubleshootingDealing with Problems (Summary)Windows cannot be shutdown or restarted Shutting downIf a USB device is connected, try removing it. OthersPress Ctrl + Shift + Esc to open Task Manager and close the software applicationwhich is not responding.After shutting down by pressing the power switch for more than four seconds, press thepower switch to power on and open the application again.If the program no longer works normally, delete the program using the following proce-dure. Then reinstall the program.Windows 2000 : [Start] - [Settings] - [Control Panel] - [Add/Remove Programs]Windows XP : [start] - [Control Panel] - [Add or Remove Programs]No responseIs Acrobat Reader installed?If Acrobat Reader is not installed, run the following*1 in [Start]*2 - [Run] to reinstall theprogram. When installing the program, do not change the installation destination folder. Ifthe destination folder is changed, the Reference Manual cannot be opened from [Start]*2menu.*1<CF-50A******/CF-50B******>: [c:\util\reader\ar505enu.exe]<CF-50E******/CF-50G******>: [c:\util\reader\m\acroreader51_enu_full.exe]*2Windows XP : [start] Reference ManualThe Reference Manual isnot displayedIf the CD drive vibrates ex-cessively or is noisy Disk OperationsIs the disc bent or labeled?Check to see if the disc is inserted correctly, and check that the disc is in good condition.If the disc is good and inserted correctly, set [CD Drive Speed] to [Low] in the SetupUtility. ( “Setup Utility”)](https://usermanual.wiki/Panasonic-of-North-America/9TGCF-502.Users-Manual-3/User-Guide-338207-Page-7.png)
![27TroubleshootingReinstalling SoftwareBefore Reinstallation PreparingThe Product Recovery CD-ROM<Only for CF-50A******/CF-50B******>The Backup Disk (e.g., FIRSTAID FD) you made earlier ( page 15)Reinstalling ImportantBefore the reinstallation procedure, remove all peripherals.Be sure the AC adaptor is connected until the reinstallation procedure is completed.Even if reinstallation is executed to return this unit to its condition at the time of purchase, the region code will not bereturned to its original condition. ( “CD Drive”)CAUTION2Write down all of the contents of the Setup Utility andthen press F9 .At the confirmation message, select [Yes] and press Enter .3Select [Boot] menu, then select [CD Drive] and press F6until [CD Drive] is at the top of [Boot] menu.4Place the disc number one of the recovery CDs into theCD drive.5Press F10 .At the confirmation message, select [Yes] and press Enter .The computer will restart, and this screen should appear.<CF-50A******/CF-50B******><CF-50E******/CF-50G******>---------------------------------------------------------------------Select a number---------------------------------------------------------------------1. Start restoring the operating system.2. Erase the whole data on HDD for security.3. End---------------------------------------------------------------------For users intending to change the partitioning of thehard disk:Do not use the FDISK program that comes as a stan-dard with Windows 95, Windows 98, and Windows98 Second Edition, as this has been shown to resultin an error in the partitioning settings.The following FDISK programs will enable the cor-rect settings:- FDISK program that comes as a standard withWindows Me- Windows 98 and Windows 98 Second EditionFDISK programs for hard disks that is larger than64 GB in size**A patch for correcting the bug in the standardFDISK program has been made available as afree download. For details, refer to theMicrosoft Web Site.When selecting [2] in step 8, the partition can alsobe divided in two. ( page 28)When reinstall procedure is performed, the contents of the hard disk will be erased. Be sure to back up any critical data that ison your hard disk before running the reinstall procedure.The reinstall procedure will return the computer to its original condition.• If you have created partitions for data, the data may be erased or become corrupt as a result of the reinstall procedure.1Turn the computer on, and press F2 while [Panasonic]boot screen is displayed.The Setup Utility will start up.If the password has been set, enter the Supervisor Pass-word.<Only for CF-50A******/CF-50B******>If you have not created the FIRSTAID FD, you can create by using the following procedure.Windows 2000 : [Create Backup Disk] in [Start] - [Programs] - [Panasonic].Windows XP : [Create Backup Disk] in [start] - [All Programs] - [Panasonic].If you can not create this disk, contact Panasonic Technical Support ( page 42).NOTE---------------------------------------------------------------------Select a number---------------------------------------------------------------------1. [ Recovery ] Reinstall Windows.2. [ Erase HDD ] Erase the whole data on HDD for security.0. [ Cancel ] Cancel.---------------------------------------------------------------------](https://usermanual.wiki/Panasonic-of-North-America/9TGCF-502.Users-Manual-3/User-Guide-338207-Page-8.png)
![28Troubleshooting8Make a selection from the menu.When selecting [2], enter the basic partition size forthe operating system installation and press Enter .(The data partition size is the remainder after subtract-ing the basic partition size.)To select [3], the initial partition size must be 6 GB ormore of the hard disk size. Reinstallation cannot beperformed with a small partition size.9At the confirmation message, press Y .The operation of reinstallation for the hard disk starts au-tomatically. (The operations take about 15 minutes.)Do not cancel the reinstallation procedure beforeit is completed.When a message appears instructing you to insertthe next CD, insert the recovery CD showing thenext number in the sequence, and then select [OK].If the message “The media does not contain the cor-rect file” appears, select [OK]. A message will ap-pear instructing you to insert the next CD.Confirm that the proper recovery CD has been in-serted by opening the tray of the CD drive and thenclose the tray, then select [OK].CAUTIONWindows 2000Windows XP6Select the following.<CF-50A******/CF-50B******>[1. Start restoring the operating system.]<CF-50E******/CF-50G******>[1.[Recovery]]The License Agreement screen should appear.7Select [1. Yes, I agree to the provisions above and wish tocontinue!].This screen should appear.<CF-50A******/CF-50B******>Reinstalling Software---------------------------------------------------------------------Select a number---------------------------------------------------------------------Reinstalling : Windows(R) 2000 Professional1. Reinstall Windows to the whole HDD to factory default.2. Make two partitions, for the operating system and data. And reinstallWindows to the operating system partition.(All existing partitions on HDD will be lost.)3. Reinstall Windows to the first partition.0. Cancel---------------------------------------------------------------------<CF-50E******/CF-50G******>Windows 2000Windows XP---------------------------------------------------------------------Select a number---------------------------------------------------------------------Reinstalling : Windows(R) XP Professional1. Reinstall Windows to the whole HDD to factory default.2. Make two partitions, for the operating system and data. And reinstallWindows to the operating system partition.(All existing partitions on HDD will be lost.)3. Reinstall Windows to the first partition.0. Cancel---------------------------------------------------------------------10After the reinstallation procedure completes, the follow-ing message will appear on the display.<CF-50A******/CF-50B******>Windows 2000Windows(R) 2000 Professional install wizard will start after reboot.Remove the Product Recovery CD-ROM, then restart the computer by pressingCtrl + Alt + Del (Delete).Windows(R) XP Professional install wizard will start after reboot.Remove the Product Recovery CD-ROM, then restart the computer by pressingCtrl + Alt + Del (Delete).Windows XP<CF-50E******/CF-50G******>Windows 2000WindowsXP----------------------------------------------------------------------[Recovery] is complete.Windows(R) 2000 Professional install wizard will start after reboot.Please Remove the Product Recovery CD-ROM, and pressCtrl + Alt + Del(Delete) to reboot.--------------------------------------------------------------------------------------------------------------------------------------------[Recovery] is complete.Windows(R) XP Professional install wizard will start after reboot.Please Remove the Product Recovery CD-ROM, and pressCtrl + Alt + Del(Delete) to reboot.-------------------------------------------------------------------------------------------------------------------------------------------Select a number---------------------------------------------------------------------1. Restore Windows(R) 2000 Professional to the whole HDD.2. Make two partitions, for the operating system and data. And restoreWindows(R) 2000 Professional to the operating system partition.(All existing partitions on HDD will be lost.)3. Restore Windows(R) 2000 Professional to the first partition.4. End------------------------------------------------------------------------------------------------------------------------------------------Select a number---------------------------------------------------------------------1. Restore Windows(R) XP Professional to the whole HDD.2. Make two partitions, for the operating system and data. And restoreWindows(R) XP Professional to the operating system partition.(All existing partitions on HDD will be lost.)3. Restore Windows(R) XP Professional to the first partition.4. End---------------------------------------------------------------------11Remove the Product Recovery CD-ROM, then restart thecomputer by pressing Ctrl + Alt + Del .12Turn the computer on, and press F2 while [Panasonic]boot screen is displayed.The Setup Utility will start up.If the password has been set, enter the Supervisor Pass-word.13Press F9 .At the confirmation message, select [Yes] and press Enter . (The Setup Utility settings will return to theirdefault values. Even the security settings with the excep-tion of the password(s) will return to their default values.)](https://usermanual.wiki/Panasonic-of-North-America/9TGCF-502.Users-Manual-3/User-Guide-338207-Page-9.png)
![29Troubleshooting14Press F10 .At the confirmation message, select [Yes] and press Enter .15Perform the setup procedure for Windows by followingthe instructions on the screen. ( page 13)16Run the Setup Utility and change the settings where nec-essary.<Changing the drive letter>You can change the drive letter for the CD drive or hard diskdrive by the following steps.Drive letters can only be changed when two or more parti-tions have been created on the hard disk drive. The nameof the C: drive cannot be changed.We recommend that you make these changes before in-stalling applications.Windows 20001Select [Start] - [Settings] - [Control Panel] - [Administra-tive Tools] - [Computer Management].2Select [Disk Management] from [Storage].3Right click on the partition of the hard disk or the name ofthe CD drive and select [Change Drive Letter and Path].4Select [Edit].5Select [Assign a drive letter] and the new drive letter, andthen select [OK].6At the confirmation message, select [Yes].Windows XP1Select [start] - [Control Panel] - [Performance and Main-tenance] - [Administrative Tools] - [Computer Manage-ment].2Select [Disk Management] from [Storage].3Right click on the partition of the hard disk or the name ofthe CD drive and select [Change Drive Letter and Paths].4Select [Change].5Select [Assign the following drive letter] and the new driveletter, and then select [OK].6At the confirmation message, select [Yes].](https://usermanual.wiki/Panasonic-of-North-America/9TGCF-502.Users-Manual-3/User-Guide-338207-Page-10.png)
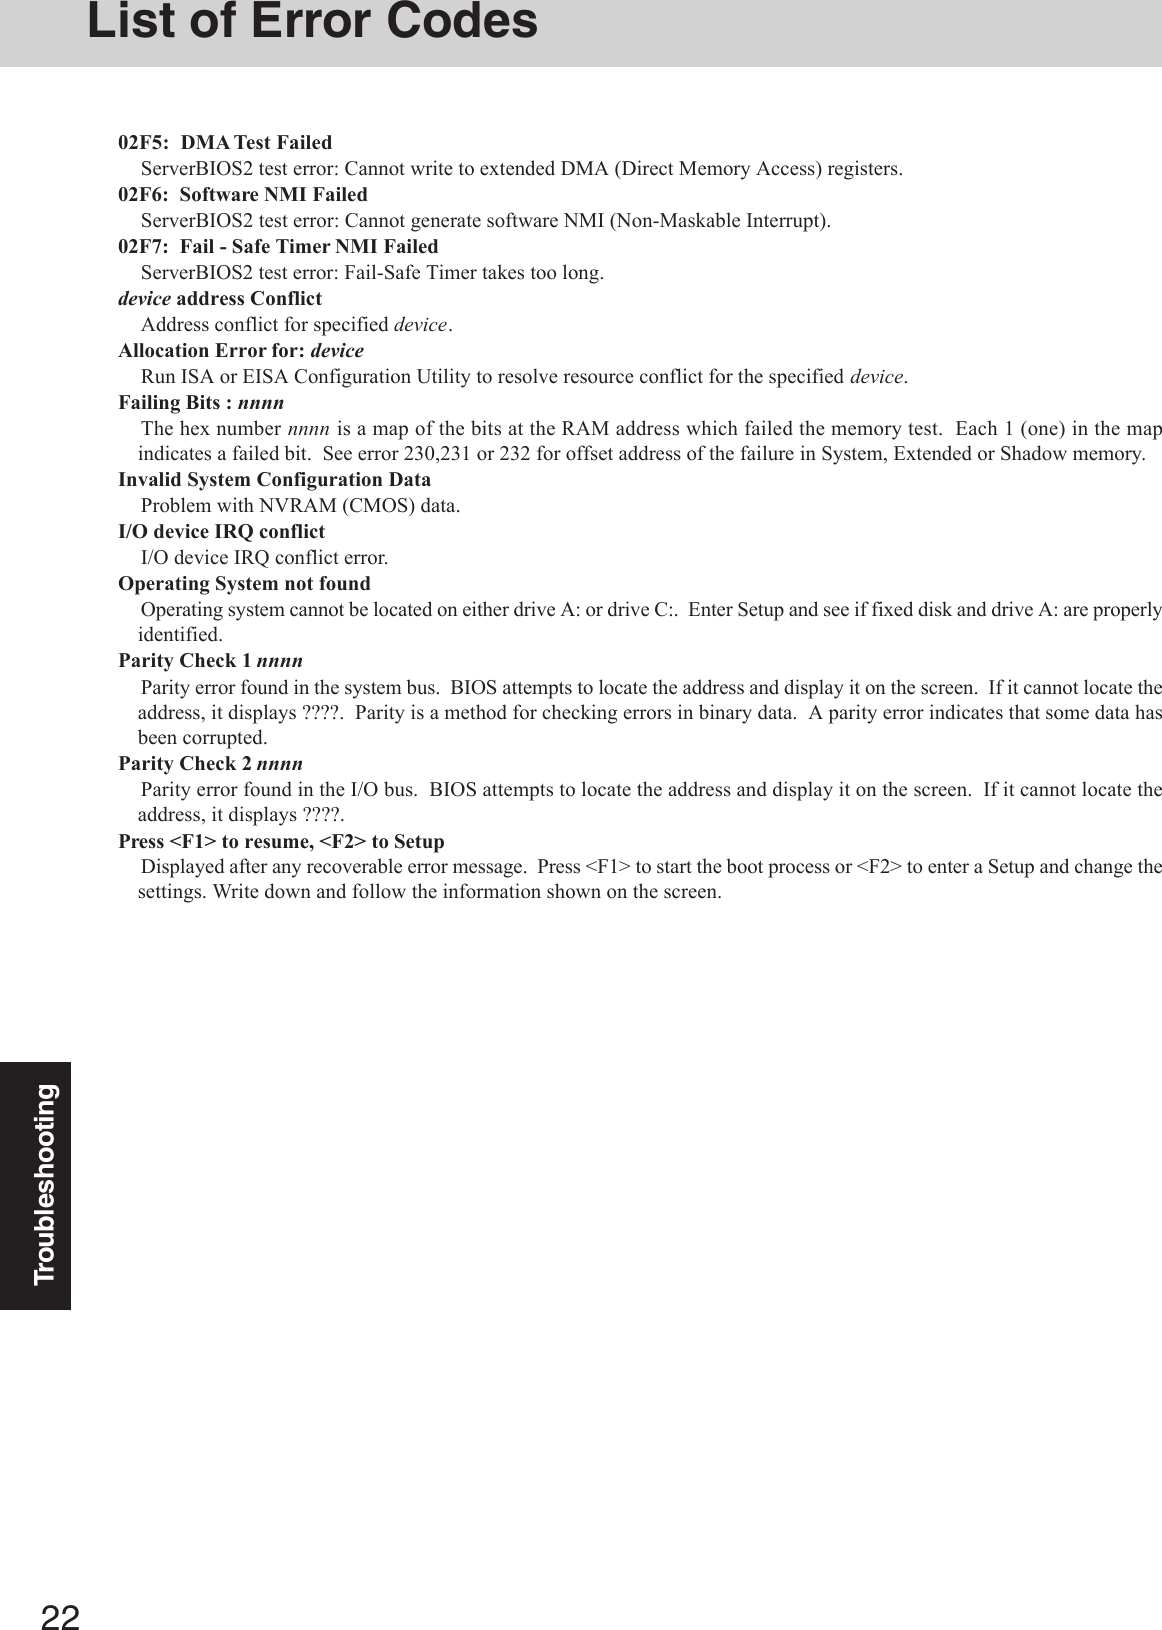
![32Appendix1Turn the computer on, and press F2 while [Panasonic] boot screen is displayed. The Setup Utility will start up.If the password has been set, enter the Supervisor Password.2Select [Boot] menu, then select [CD Drive] and press F6 until [CD Drive] is at the top of [Boot] menu.3Place the disc number one of the recovery CDs into the CD drive.4Press F10 .At the confirmation message, select [Yes] and press Enter .The computer will restart, and this screen should appear.<CF-50A******/CF-50B******> <CF-50E******/CF-50G******>5Select the following.<CF-50A******/CF-50B******> [2. Erase the whole data on HDD for security.]<CF-50E******/CF-50G******> [2. [Erase HDD]]6At the confirmation message, press Y .7At the start menu, press Enter .8The time required for erasing data will be displayed.Press Space .9At the confirmation message, press Enter .The operation of erasing the hard disk starts.10After the operation is complete:Under normal conditions, the message [Hard disk data has been deleted.] will be displayed.If a problem occurred during the operation, an error message will be displayed.11Remove the Product Recovery CD-ROM, then turn off the computer by using the power switch.This computer is equipped with a utility for completely erasing hard disk data.When disposing of or transferring ownership of this device, erase all data on the hard disk in order to prevent the theft of hard diskdata following the steps below.The hard disk data erase utility erases data using an “overwriting” method, but there is a possibility that due to malfunctions orother operational errors, data may not be completely erased. There are also specialized devices that may be able to read datathat has been erased using this method. If you need to erase highly confidential data, we recommend that you contact acompany that specializes in this process. Matsushita Electric Industrial Co., Ltd. will bear no responsibility for losses ordamages suffered as a result of the use of this utility.PreparingYou will need the Product Recovery CD-ROM.---------------------------------------------------------------------Select a number---------------------------------------------------------------------1. Start restoring the operating system.2. Erase the whole data on HDD for security.3. End---------------------------------------------------------------------NOTEBe sure the AC adaptor is connected until the procedure is completed.This utility can only be used for internal hard disk. It cannot be used to erase data from external hard disks.This utility cannot erase data from damaged disk.This utility cannot erase data for specific partitions.After executing this utility, the computer cannot be booted from the hard disk.Hard Disk Data Erase UtilityProcedure---------------------------------------------------------------------Select a number---------------------------------------------------------------------1. [ Recovery ] Reinstall Windows.2. [ Erase HDD ] Erase the whole data on HDD for security.0. [ Cancel ] Cancel.---------------------------------------------------------------------](https://usermanual.wiki/Panasonic-of-North-America/9TGCF-502.Users-Manual-3/User-Guide-338207-Page-13.png)
![33Appendix<Model with a DVD-ROM & CD-R/RW drive / Model with a DVD MULTI drive >“B’s Recorder GOLD5” (hereafter, B’s Recorder) and “B’s CLiP” are CD and DVD recording software applications developed byB.H.A Corporation.Here, explanations are given on general information about B’s Recorder and B’s CLiP, the installation procedure, and how toaccess the online manual. Refer to the online manual concerning the detailed use of the software application ( page 34).Applicable MediaCD-R* (one-time recordable CD media)CD-RW (rewritable CD media)* Applicable only for B's Recorder. It cannot be used for B's CLiP.Windows 2000Uninstall Adaptec CD-Burning Plug-in.1Select [Start] - [Settings] - [Control Panel] - [Add/Remove Programs].2Select [Windows Media Player 7] - [Change/Remove].3Select [Remove Windows Media components] and select [Next].4Select [Adaptec CD-Burning Plug-in] from the components list, and select [Next].5If the [Windows Media setup is now ready to uninstall] message appears, select [Next].6Select [Finish] and restart the computer.Windows XPSelect [(X:)]* in [start] - [My Computer] with the right button, select [Properties] - [Recording], then delete the check mark for [EnableCD recording on this drive].(Delete the check mark for [Enable CD recording on this drive] every time a new user is added.)* “X” is the drive letter. You can change the letter to suit your preference.Before Installing the SoftwareInstalling the Software1Set “B’s Recorder GOLD/B’s CLiP” disc in the drive.[B.H.A setup launcher] screen will appear (allow some time for disc recognition). When the setup program will not run auto-matically, input [X:\Setuputil.exe]*1 in [Start]*2 - [Run] and select [OK].Windows 2000At the message, select [OK].2Select [B’s Recorder GOLD5] and follow the on-screen instructions.During the course of the installation process, you will be asked to input a serial number. Input the serial number marked on thesticker and the disc.3Upon completion of the installation, select [Yes, I want to restart my computer now], then select [Finish]. The computer willrestart.4Input [X:\Setuputil.exe]*1 in [Start]*2 - [Run] and select [OK].[B.H.A setup launcher] screen will appear.Windows 2000At the message, select [OK].5Select [B’s CLiP] and follow the on-screen instructions.During the course of the installation process, you will be asked to input a serial number. Input the serial number marked on thesticker and the disc.6Upon completion of the installation, select [Yes, I want to restart my computer now], then select [Finish]. The computer willrestart.*1 “X” is the drive letter. You can change the letter to suit your preference.*2Windows XP : [start]Close all other software application before running the Setup program for B’s Recorder and B’s CLiP for added safety.Log on with the administrator authority.Take care not to lose the serial number.CAUTIONB’s Recorder/B’s CLiP](https://usermanual.wiki/Panasonic-of-North-America/9TGCF-502.Users-Manual-3/User-Guide-338207-Page-14.png)
![34AppendixHow to access the Online ManualB’s RecorderWindows 2000 : Select [Start] - [Programs] - [B.H.A] - [B’s Recorder GOLD5] - [User’s Manual].Windows XP : Select [start] - [All Programs] - [B.H.A] - [B’s Recorder GOLD5] - [User’s Manual].B’s CLiPWindows 2000 : Select [Start] - [Programs] - [B.H.A] - [B’s CLiP] - [User’s Manual].Windows XP : Select [start] - [All Programs] - [B.H.A] - [B’s CLiP] - [User’s Manual].CAUTIONYou cannot eject the disc by using the eject button on the drive while is displayed on the taskbar. To eject the disc in thiscase, move the cursor to the indicator and right-click it to select [Eject].Do not eject discs in any other way except the one described above.When formatting a disc with B’s CLiP, right-click or to select [Format]. Do not select [My computer].After formatting the disc, eject it then re-insert before using it.When settings are changed using the following method, only a user with administrator authority can make the settings:Select the CD drive icon or the B’s CLiP icon on the Taskbar with the right button, and select [Properties] - [B’s CLiP PageSettings].Windows 2000If CD/DVD media with B’s CLiP format is removed while the content of that media is displayed in Explorer, the contents ofthe media may remain displayed in Explorer even after the media is removed. This will not affect the computer’s operation.When another CD/DVD media is inserted, the Explorer display will be updated.Windows XPDo not use the Fast User Switching function.If this function is used, will no longer be shown on the user taskbar after the switching is complete. (If this happens, logoff of Windows, and return to the original user.)InformationIf B’s Recorder and B’s CLiP do not operate properly, we recommend carefully reading the online help file first for problemswith the operating environment or operations.If you still cannot troubleshoot the problem, contact B.H.A ( described below).About CopiesWhen writing to discs, make sure that you are not infringing any copyrights.It is illegal to copy audio CDs for non-personal use.When backing up software, make sure that you are not infringing any software copyrights for that product.SUPPORT INFOMATIONInquires about B’s Recorder and B’s CLiP should be made to B.H.A.URL: http://www.bhacorp.com/support/http://www.bha.co.jp/support/ (Japanese)areaU.S./Canada/AustraliaEuropeAsialanguageEnglish, French (Canada)English, German, FrenchChinesee-mailwinntsupport@bhacorp.comeurosupport@bhacorp.comasiasupport@bhacorp.comB’s Recorder/B’s CLiP](https://usermanual.wiki/Panasonic-of-North-America/9TGCF-502.Users-Manual-3/User-Guide-338207-Page-15.png)
![35AppendixWinDVD™ (hereafter, WinDVD) is a software application for DVD playback.Here, you will find explanations and general information on the installation procedure and how to access the online manual.WinDVD™Installing WinDVDCAUTIONClose all other software application before running the Setup program for WinDVD for added safety.Log on with the administrator authority.1Set the WinDVD CD-ROM in the drive.The WinDVD setup program will run automatically (allow some time for disc recognition). When the setup program willnot run automatically, input [x:\setup] in [Start]* - [Run] and select [OK]. (“x”is the drive letter. You can change the letter tosuit your preference.)*Windows XP :[start]2Select [Next] at the Welcome Message.3After reading the “License Agreement”*, select [Yes] if you agree to the terms.*Refer to the “LIMITED USE LICENSE AGREEMENT” on the Operating Instructions of the computer.4Follow the on-screen instructions and install WinDVD.<Confirmation of the DVD-ROM drive settings>To run WinDVD, it is necessary to make the following settings.1Windows 2000 Select [Start] - [Settings] - [Control Panel] - [System] - [Hardware] - [Device Manager].Windows XP Select [start] - [Control Panel] - [Performance and Maintenance] - [System] - [Hardware] - [Device Man-ager].2Double-click [Primary IDE Channel] for [IDE ATA/ATAPI controllers].3Select [Advanced Settings], and confirm that [Transfer Mode] is set to [DMA if available] for [Device 0] and [Device 1].4Double-click [Secondary IDE Channel] for [IDE ATA/ATAPI controllers] and perform as the step .Do not enter the standby or hibernation mode while WinDVD is running.Do not start WinDVD while the hard disk drive’s indicator is blinking immediately after the computer was started up.If you maximize the video display window, you can return to the original window size by double-clicking over theimages.During video playback (while the access lamp is on), do not eject the disc.Do not use other applications or the Command Prompt, and do not change the settings of the screen properties.In some cases, when the number of colors for the display is increased, a message appears and the DVD cannot be played.If this happens, reduce the number of display colors.Immediately after resuming from a pause, frame dropping may occur depending on the operating environment or DVDvideo (images or sounds are disrupted).In the Dualview or simultaneous (internal/external) display mode, there are times when images or video are not dis-played correctly.During a prolonged period of rapid advance, the pause mode may be established at some point. If this happens, exitWinDVD, and restart.NOTERunning WinDVDWindows 2000Select [Start] - [Programs] - [InterVideo WinDVD] - [InterVideo WinDVD] or select on the desktop.Windows XPSelect [start] - [All Programs] - [InterVideo WinDVD] - [InterVideo WinDVD] or select on the desktop.<How to access the online manual>Select “?” of the WinDVD control panel.](https://usermanual.wiki/Panasonic-of-North-America/9TGCF-502.Users-Manual-3/User-Guide-338207-Page-16.png)
![36AppendixInformationInquires about WinDVD should be made to InterVideo, Inc.InterVideo, Inc.URL: http://www.intervideo.com/E-mail: support@intervideo.comAbout Regions SettingCAUTIONThe region code can be set a total of five times, including the initial setting. Proceed very carefully, because after thefourth change has been made, the region code set last is fixed and no further changes can be made.The user must take responsibility for any trouble that results from illegally changing or altering the region code.NOTE[Confirm Region] will also be displayed if a DVD-Video with one region code is inserted into a drive for which anotherregion code has already been set.WinDVD™<Only for CF-50A******/CF-50B******>The regions setting can be changed for up to 5 times. After the fifth change is made, it will no longer be possible either to changethe setting or to return to the original setting.<Only for CF-50E******/CF-50G******>The DVD-Video has a region code that is fixed according to the region where it is sold. In order to play a DVD-Video, theregion code of the player software and of the drive must match that of the DVD-Video.<Example>For U.S.A. and Canada: “1”For Europe: “2”The region code is not set prior to the shipment of this drive. Therefore, operations will differ depending on the first DVD-Video played.In the case of a DVD-Video with a specific region code:The drive will automatically be set with the same region code as the DVD-Video.In the case of any other DVD-Video:[Confirm Region] appears. Select region code and select [OK]. Play now begins.([Confirm Region] may not be displayed for some DVD-Videos. To confirm the current region code and the number ofsettings remaining, right-click on the WinDVD screen and select [Setup] - [Region].)](https://usermanual.wiki/Panasonic-of-North-America/9TGCF-502.Users-Manual-3/User-Guide-338207-Page-17.png)
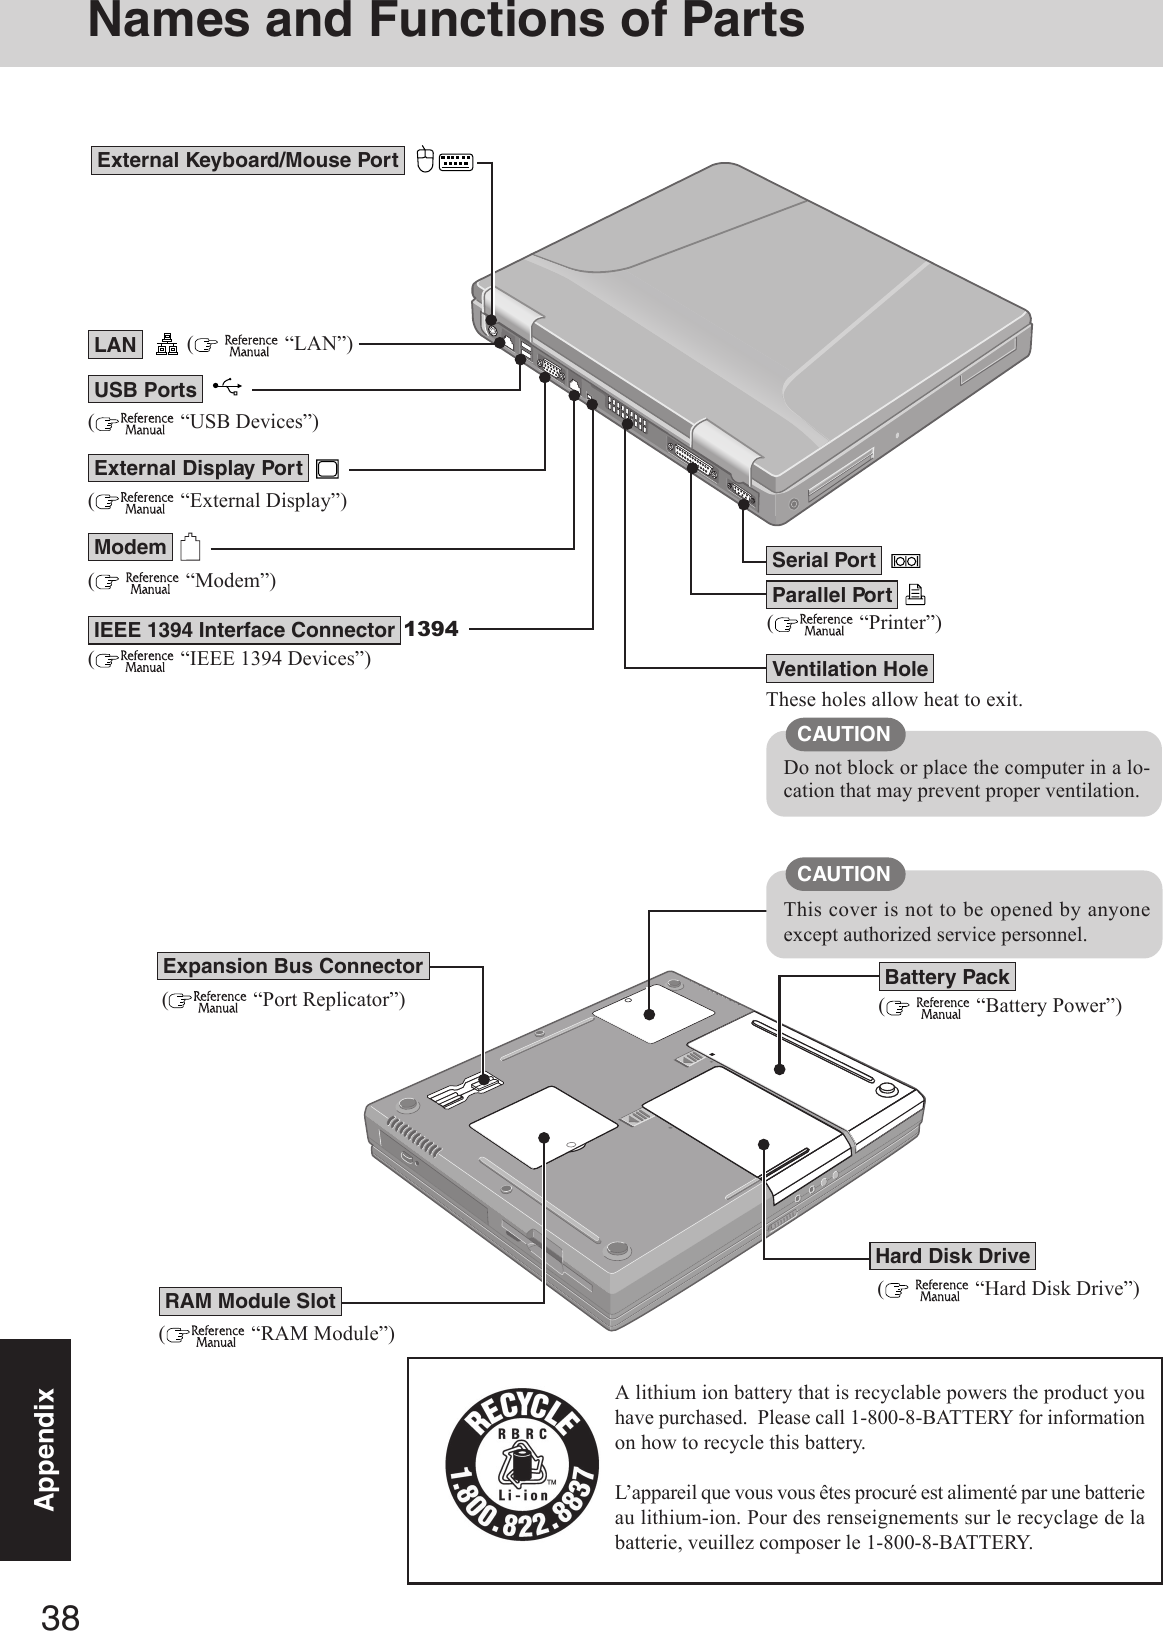
![37AppendixNames and Functions of PartsFor information on the key combi-nations available. ( “Key Combinations”).There are dots near function keysto enable you to locate the key’sposition by touch.( “LED Indicators”)LED IndicatorsTo adjust the volume: Fn + F5 / Fn + F6Speaker on/off: Fn + F4Speakers( page 19)Touch PadLED Indicators( “LED Indicators”)Power statusBattery pack statusUse this connector to connect head-phones or amplifier-equipped speak-ers. Audio output from the internalspeaker is disabled when headphonesor external speakers are connected.Use only a monaural condenser mi-crophone.Using an input source other than amonaural condenser microphonemay not allow audio to be input ormay damage the equipment.The illustrations shown may differ from the actual physicalappearances.( “PC Cards”)PC Card SlotsCaps LockNumeric key (NumLk)Scroll lock (ScrLk)CD drive status*Floppy disk drive statusHard disk drive statusPower statusFunction KeysLCDFloppy Disk DriveMicrophone JackHeadphone Jack( “CD Drive”)Security LockA Kensington cable can be connectedto prevent theft of your computer. Formore information, please read themanual that comes with the cable.LOCKDC-IN JackKeyboardThere is a small bar on F , J ,and to enable you to locate thekey’s position by touch.CD Drive*The access lamp on the CD drivelights at the same time as this indi-cator. (In some cases, only one ofthem may light.)Before using the computer for thefirst time, carefully read [Limited UseLicense Agreement]. If you agree tothe conditions, remove the seal.Power SwitchWireless LAN Antenna ( “Wireless LAN”)<Only for the model with a wireless LAN>Wireless LAN Antenna ( “Wireless LAN”)<Only for the model with a wireless LAN>](https://usermanual.wiki/Panasonic-of-North-America/9TGCF-502.Users-Manual-3/User-Guide-338207-Page-18.png)
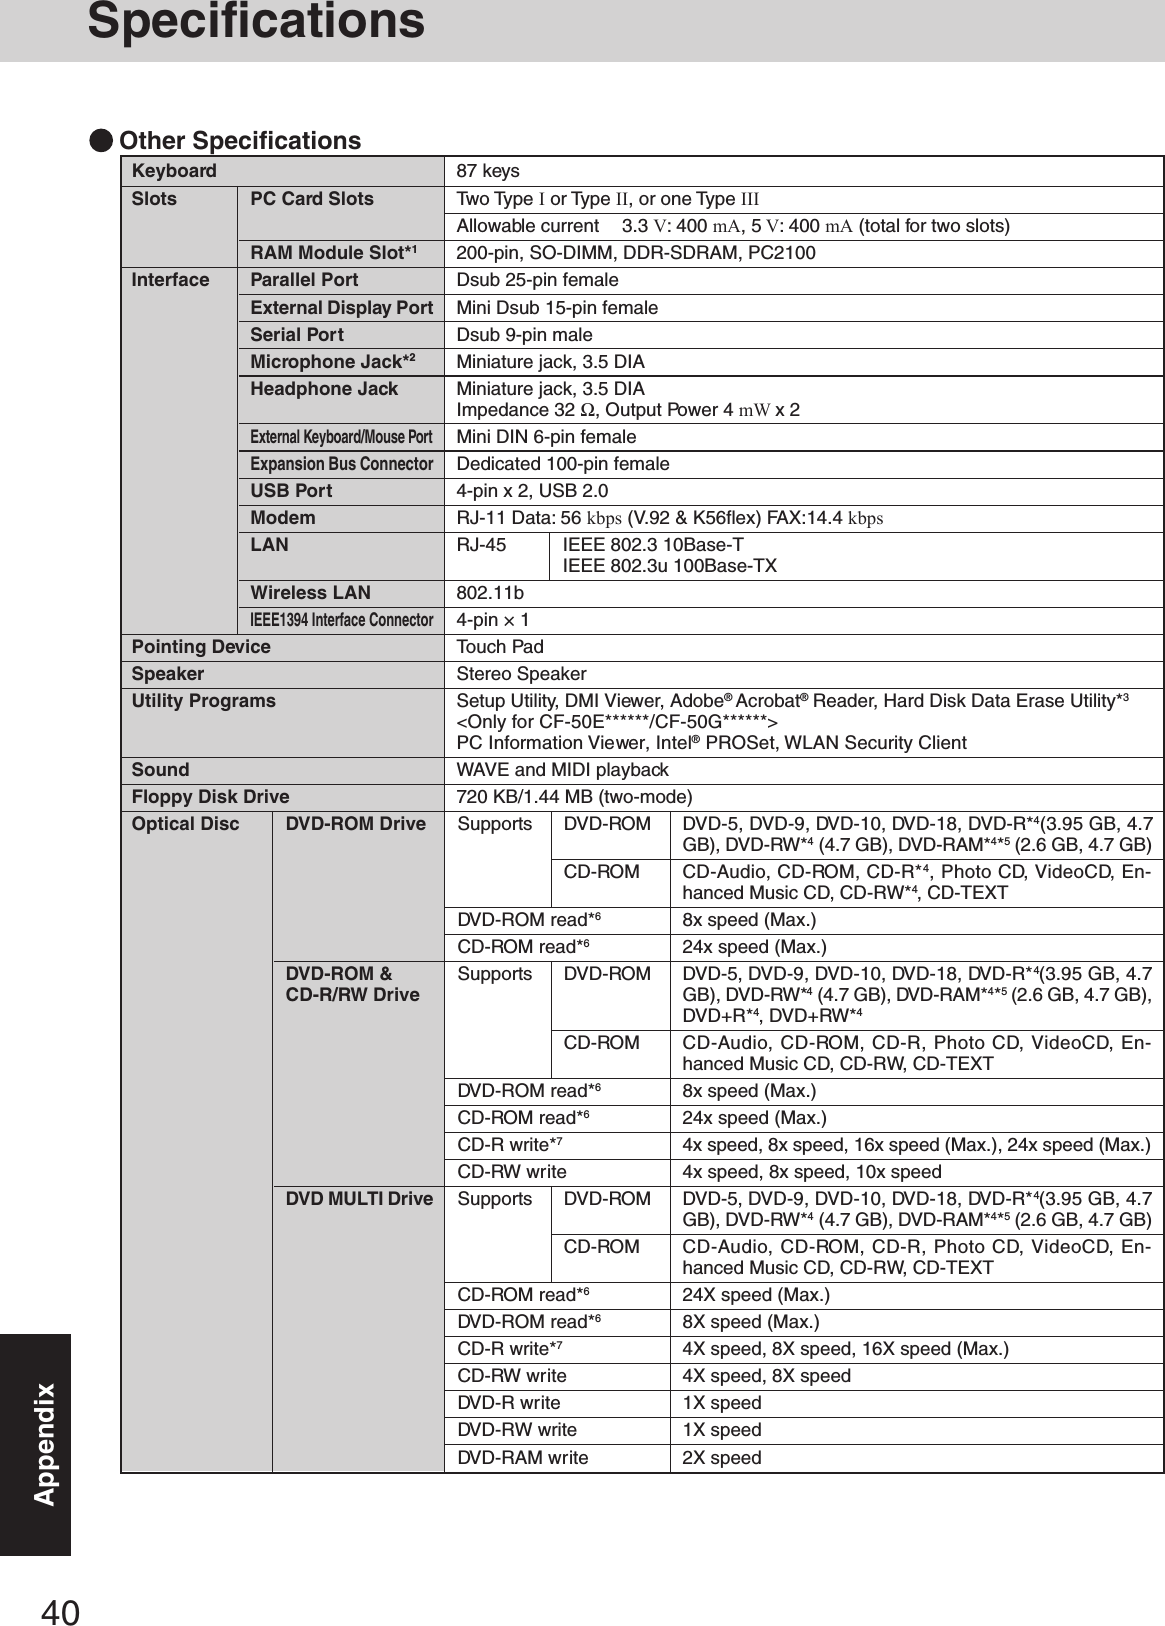
![39AppendixSpecifications*1A 16 M color display is achieved by using the dithering function.Windows XP : 256 color depth and the resolution of 640 × 480 are not supported.Windows 2000 : Setting 256 color depth or the resolution of 640 × 480 is not recommended.*2Maximum resolution depends on the specifications of the external display.Windows XP : 256 color depth and the resolution of 640 × 480 are not supported.Windows 2000 : Setting 256 color depth or the resolution of 640 × 480 is not recommended.*31GB = 109 bytesThis page provides the specifications for the basic model CF-50AAKHUDM/CF-50BB2HUDM/CF-50AAKHUKM/CF-50BB2HUKM/CF-50EAKQUDM/CF-50EAKQUKM/CF-50GB2UUDM/CF-50GB2UUKM. The model number will change de-pending on the configuration of the unit, such as, CPU speed, memory size, HDD size, Operating System, LCD type, and whethera DVD-ROM drive, a DVD-ROM&CD-R/RW drive or a DVD MULTI drive is included or not.To check the model number:Check the bottom of the computer or the box the computer came in at the time of purchase.To check CPU speed, memory size and the hard disk drive (HDD) size:Run the Setup Utility ( “Setup Utility”) and select [Information] menu.Confirm the required information by checking the following items.CPU speed: [CPU Speed]Memory size: [System Memory]Hard disk drive size: [Primary Master] Main Specifications<CF-50A******/CF-50B******>Model No.CPUMemory (Expandable to)Video MemoryLCD TypeDisplayed Colors*1External DisplayHard Disk DriveOperating SystemCF-50AAKHUDM CF-50AAKHUKM CF-50BB2HUDM CF-50BB2HUKMMobile Intel® Pentium® 4 Processor 2.0 GHz-M Mobile Intel® Pentium® 4 Processor 2.2 GHz-ML2 (Second) Cache Memory: 512 KB256 MB (768 MB Max. ) 512 MB (1024 MB Max. )64 MB15.0 XGA type (TFT) 15.0 UXGA type (TFT)256/65536/16M colors (640 × 480 dots/800 × 600 256/65536/16M colors (640 × 480 dots/800 × 600dots/1024 × 768 dots) dots/1024 × 768 dots/1280 × 1024 dots/1600× 1200 dots)256/65536/16M colors (640 × 480 dots/800 × 600 dots/1024 × 768 dots/1280 × 1024dots/1600 × 1200 dots/2048 × 1536 dots)*240 GB*360 GB*3Microsoft® Windows®Microsoft® Windows®Microsoft® Windows®Microsoft® Windows®2000 Professional with XP Professional with 2000 Professional with XP Professional withService Pack 3 Service Pack 1 Service Pack 3 Service Pack 1<CF-50E******/CF-50G******>Model No.CPUMemory (Expandable to)Video MemoryLCD TypeDisplayed Colors*1External DisplayHard Disk DriveOperating SystemCF-50EAKQUDM CF-50EAKQUKM CF-50GB2UUDM CF-50GB2UUKMIntel® Pentium® M Processor 1.4 GHz Intel® Pentium® M Processor 1.6 GHzL2 (Second) Cache Memory: 1 MB256 MB (768 MB Max. ) 512 MB (1024 MB Max. )64 MB15.0 XGA type (TFT) 15.0 UXGA type (TFT)256/65536/16M colors (640 × 480 dots/800 × 600 256/65536/16M colors (640 × 480 dots/800 × 600dots/1024 × 768 dots) dots/1024 × 768 dots/1280 × 1024 dots/1600× 1200 dots)256/65536/16M colors (640 × 480 dots/800 × 600 dots/1024 × 768 dots/1280 × 1024dots/1600 × 1200 dots/2048 × 1536 dots)*240 GB*360 GB*3Microsoft® Windows®Microsoft® Windows®Microsoft® Windows®Microsoft® Windows®2000 Professional with XP Professional with 2000 Professional with XP Professional withService Pack 3 Service Pack 1 Service Pack 3 Service Pack 1](https://usermanual.wiki/Panasonic-of-North-America/9TGCF-502.Users-Manual-3/User-Guide-338207-Page-20.png)
![41Appendix*1Only a RAM card designed for PC2100 can be added.*2Use only a monaural condenser microphone.*3The Product Recovery CD-ROM is required.*4Read only.*5In the case of DVD-RAM, only non-cartridge discs or removable cartridge discs can be used.*6If an unbalanced disc (e.g., a disc with which the balance has been displaced from the center) is inserted, the speed may become slower ifthere are large vibrations while the disc is rotating.*7Depending on the disc, the writing speed may become slower.*8Varies depending on the usage conditions.*9The AC adaptor is compatible with power sources up to 240 V AC adaptor.This computer is supplied with a 125 V AC compatible AC cord.*10 Approx. 0.9 W when the battery pack is fully charged (or not being charged) and the computer is OFF.Approx. 1.5 W when the [Wake up from LAN] has been enabled.*11 Rated power consumption.Battery Battery PackClock BatteryAC adaptor*9Power Consumption*10EnvironmentPhysical Dimensions (W × H × D)WeightLi-ion 11.1 V, 6.3 AhOperating Time*8<CF-50A******/CF-50B******>UXGA type: Approx. 1.4 hours - 3.2 hoursXGA type: Approx. 1.7 hours - 3.7 hours<CF-50E******/CF-50G******>UXGA type: Approx. 2.1 hours - 6.4 hoursXGA type: Approx. 2.5 hours - 7.4 hoursCharging Time*8Power On <CF-50A******/CF-50B******> Approx. 6 hours<CF-50E******/CF-50G******> Approx. 3.5 hoursPower Off Approx. 3.5 hoursCoin type lithium battery 3.0 VInput 100 V - 240 V AC, 50 Hz/60 Hz Output 15.6 V DC, 5.0 AApprox. 70 W*11 / Approx. 90 W (maximum when recharging in the ON state)In use Temperature 5 °C to 35 °C {41 °F to 95 °F}Humidity 30% to 80% RH (No condensation)Not in use Temperature -20 °C to 60 °C {-4 °F to 140 °F}Humidity 30% to 90% RH (No condensation)307 mm × 45 mm × 260 mm {12.1 " × 1.8 " × 10.2 "}Approx. 3.4 kg {Approx. 7.6 lb.}](https://usermanual.wiki/Panasonic-of-North-America/9TGCF-502.Users-Manual-3/User-Guide-338207-Page-22.png)