Panasonic of North America 9TGWLM-1 User Manual p12 pm6
Panasonic Corporation of North America p12 pm6
Manual
18
Getting Started
3Select [AdHoc].
The following screen is displayed.
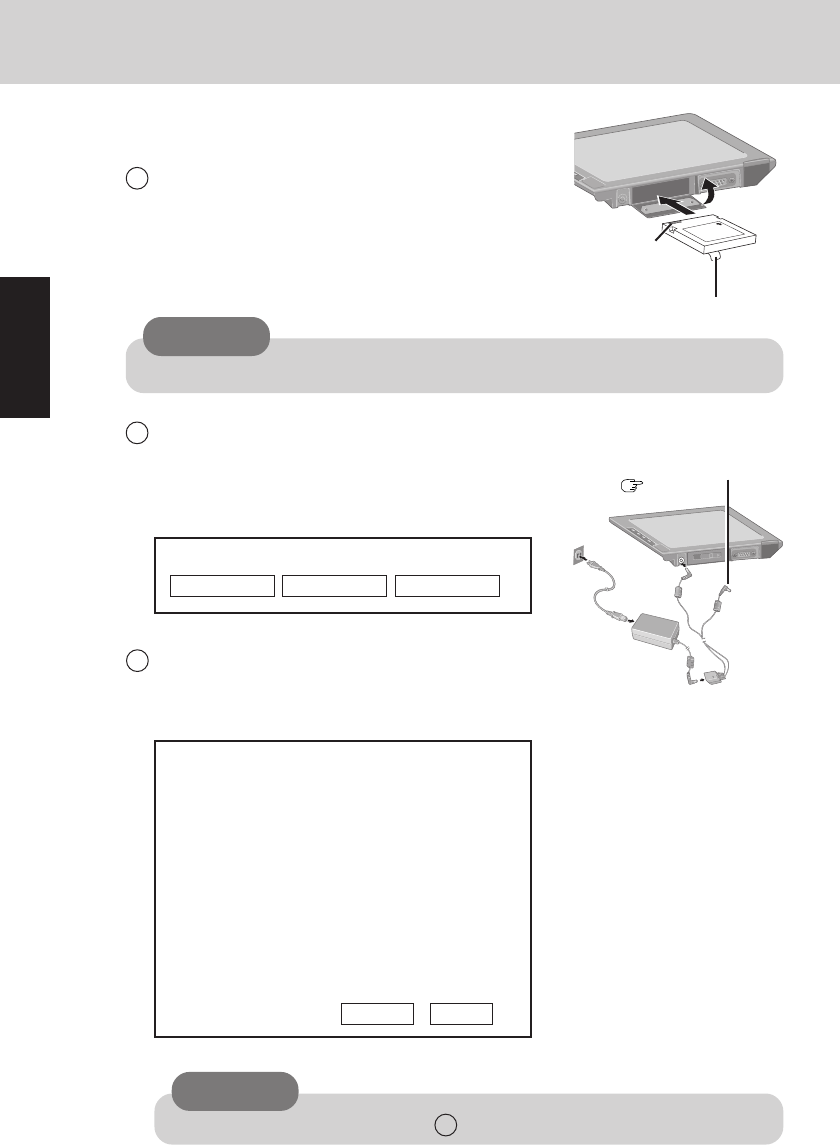
<Wireless display screen>
Change setting on host PC to the following
value, reboot the host PC, then select
"Connect" below.
Wireless LAN card
Network Type : AdHoc
SSID : cfvdw07-43411
Encryption : disable
TCP/IP
IP Address : 10.57.148.205
NetMask : 255.0.0.0
MeiWDS
Password : wdsp
Connect Cancel
First-time Operation
CAUTION
Do not select [Connect] until step 9 is completed.
This screen is a sample.
11 Setup the wireless display
1Set the battery pack in the wireless display.
2Connect the wireless display to a power outlet and
turn the wireless display on.
The following screen is displayed.
<Wireless display screen>
Select network type.
AdHoc Infrastructure Cancel
To the computer
( Page 14)
Be sure to insert the battery pack as illustrated.
CAUTION
Tab
connector
19
Getting Started
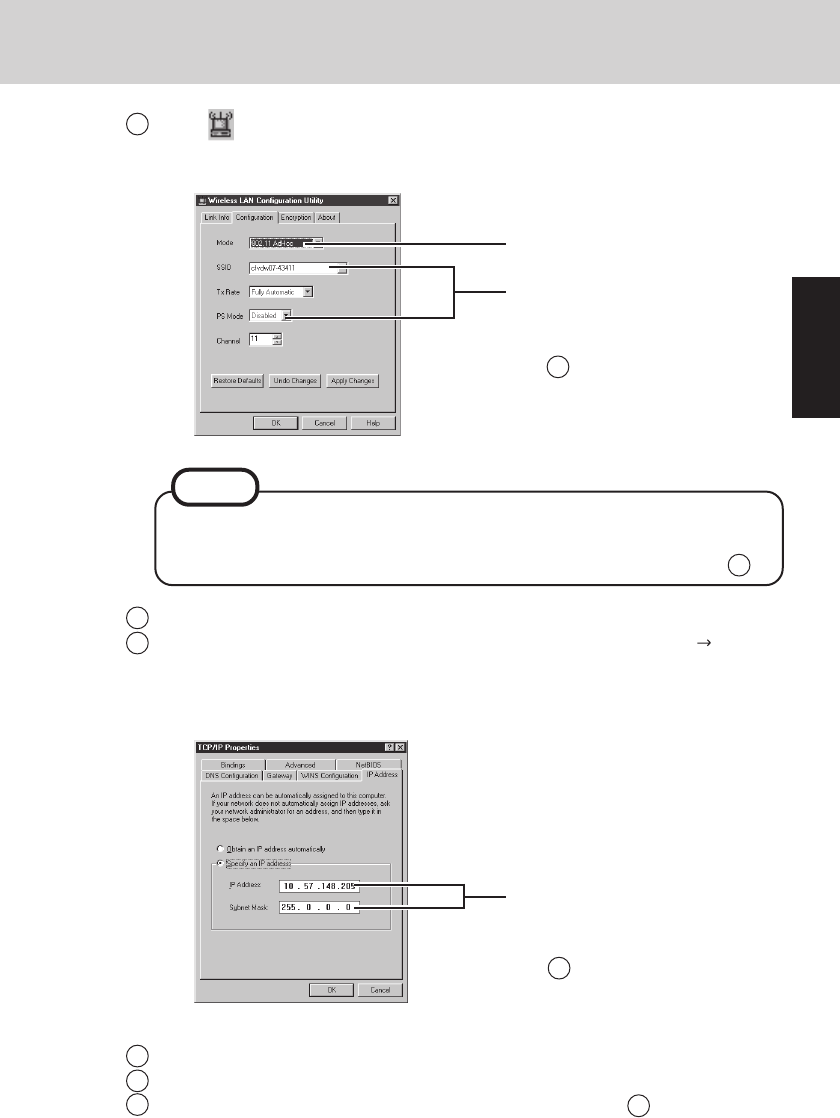
4Select on the taskbar of the external display, then select [Configuration]
The following screen is displayed.
<External display screen>
Match the settings of the computer
with the information displayed on
<Wireless display screen> of the
step 3 .
If there is no input from a key or an external mouse for a certain interval of
time, the power to the wireless display may be turned off automatically. In this
case, turn on the wireless display and then start the procedure from step 3 .
NOTE
5Select [Apply Changes], then select [OK].
6Select [Start] - [Settings] - [Control Panel] - [Network] - [TCP/IP PRISM2
IEEE 802.11 PC CARD Adapter] - [Properties] - [IP Address].
The following screen is displayed.
This screen is a sample.
<External display screen>
Match the settings of the computer
with the information displayed on
<Wireless display screen> of the
step 3 .
7Select [OK], then select [OK].
8Restart the computer.
9Select [Connect] on <Wireless display screen> of the step 3 .
This screen is a sample.
Set to [802.11.AdHoc].
20
Getting Started
14
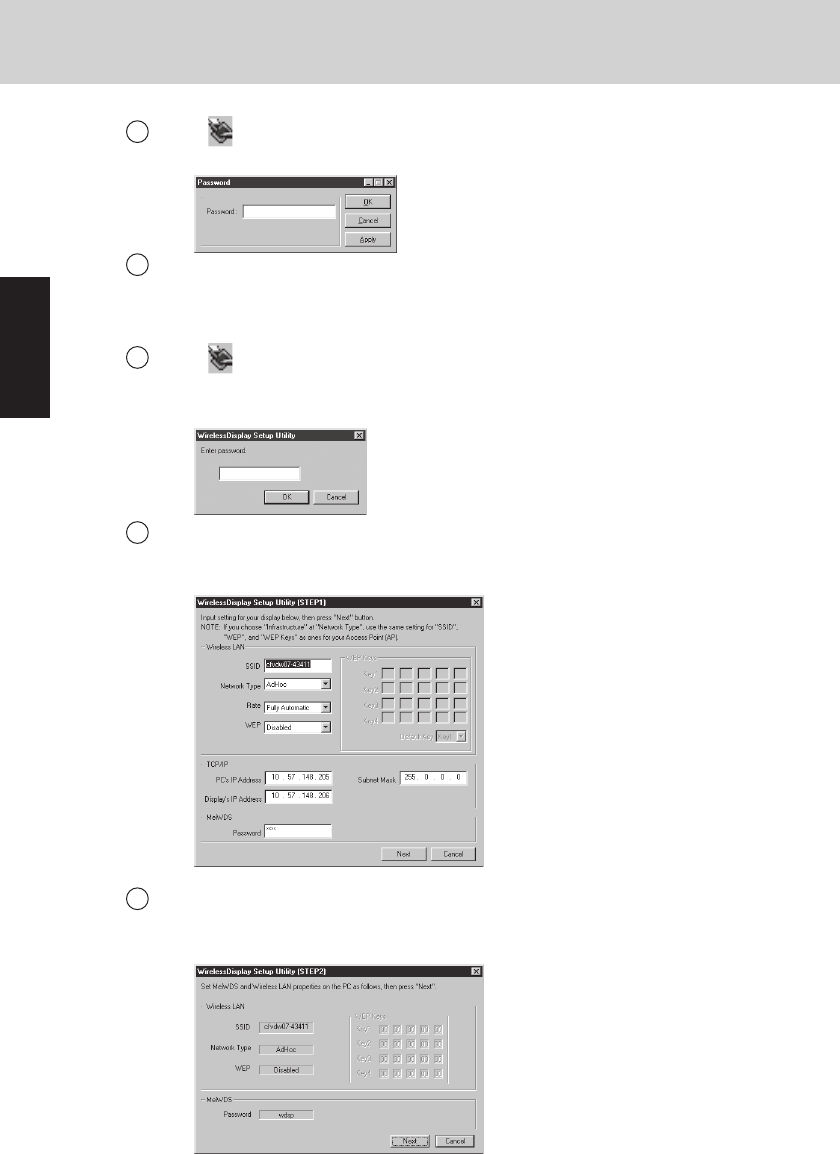
Set the necessary items, select [Next].
The following screen is displayed.
<Step 2>
13
Input [wdsp], then select [OK].
The following screen is displayed.
<Step 1>
First-time Operation
12
Select on the taskbar, select [Run Setup Utility].
The following screen is displayed.
<When using except default settings>
<External display screen>
11
Input [wdsp], then select [OK].
The wireless display can be used.
This screen is a sample.
10
Select on the taskbar, select [Password]:
The following screen is displayed.
This screen is a sample.

21
Getting Started
15
Select on the taskbar, set the parameters in [Wireless LAN].
Ignore although you attempt a reconnection on the wireless display side and are
unsuccessful.
16
Select on the taskbar, select [Password].
Set the password by following <Step 2> screen.
17
Select [Next] at the <Step 2> screen.
The following screen is displayed.
18
Select [Start] - [Settings] - [Control Panel] - [Network] - [TCP/IP PRISM2
IEEE 802.11 PC CARD Adapter], set the parameters by following the above
<Step 3> screen, then select [OK].
Ignore although you attempt a reconnection on the wireless display side and are
unsuccessful.
19
Restart the computer.
<Step 3>
This screen is a sample.