Panasonic of North America 9TGWW11A TD-CDMA PCI Express Mini Module User Manual Host
Panasonic Corporation of North America TD-CDMA PCI Express Mini Module Host
Contents
- 1. User manual - host
- 2. Module Integration guide
- 3. Host User Manual
- 4. Users Manual
Host User Manual
Contents
Getting Started
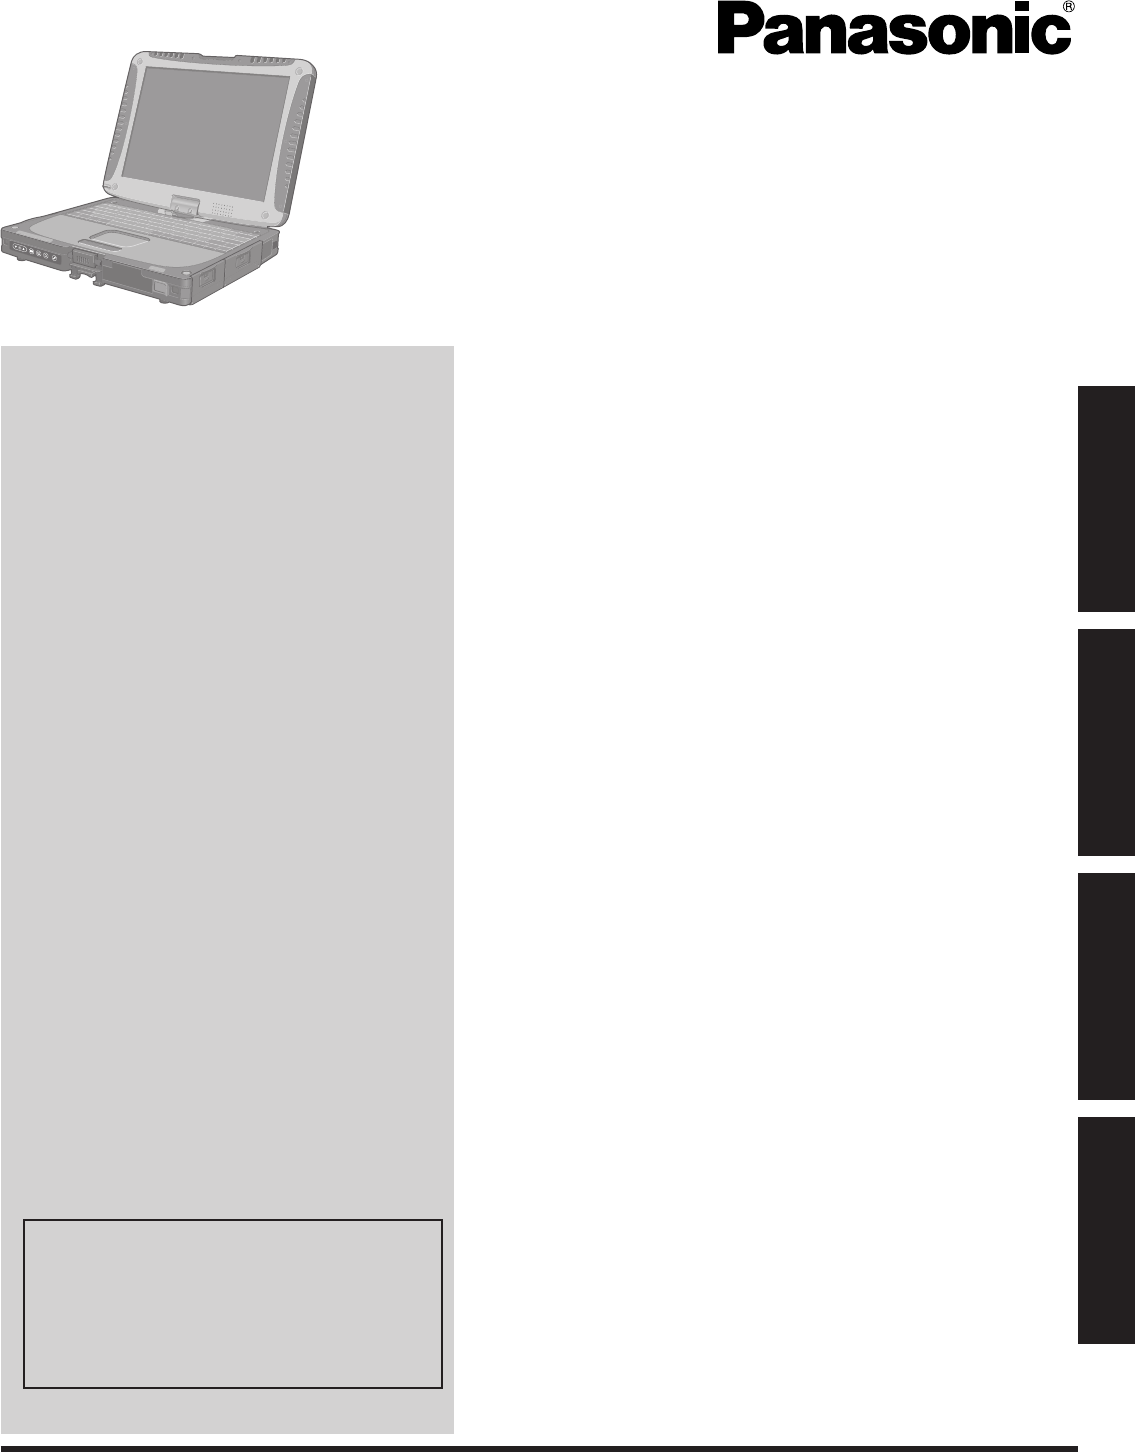
OPERATING INSTRUCTIONS
Personal Computer
Model No. CF-19
Useful Information
Troubleshooting
Appendix
For further information about the com-
puter, you can refer to the on-screen
manual.
To access the on-screen manual
è page 20 “On-screen Manual”
Getting StartedUseful InformationTroubleshootingAppendix
Getting Started
Introduction
n Terms and illustrations in these instructions
CAUTION
NOTE
Enter
Fn
+
F5
è
l
l
l
l
l
l
n Disclaimer
n Trademarks
Getting Started
Read Me First
Models for U.S.A.
Federal Communications Commission Radio Fre-
quency Interference Statement
l
l
l
l
Warning
l
l
l
l
l
l
FCC Regulation Notice for modem
This equipment contains a FCC approved modem.
*Model with Wireless LAN module (model: WL11E) does not
operate in 5GHz frequency band.

Getting Started
Read Me First
This product contains a Coin Cell Lithium Battery which
contains Perchlorate Material - special handling may apply.
See www.dtsc.ca.gov/hazardouswaste/perchlorate/
Models for Canada
Industry Canada (IC) Notice for modem
EQUIPMENT ATTACHEMENT LIMITATIONS
RESTRICTIONS CONCERNANT LE RACCORDEMENT
DE MATÉRIEL

Getting Started
Models for Europe
<Only for model with a “CE” mark on the bottom of the computer>
Declaration of Conformity (DoC)
Canadian ICES-003
Industry Canada
Industrie Canada

Getting Started
Read Me First
Informations destinées aux utilisateurs
Ce produit et votre santé
l
l
Informations concernant la réglementation
Important Safety Instructions / Importantes Mesures De Sécurité
Information to the User
This product and your Health
l
l
Regulatory Information
Getting Started
Safety Precautions
Lithium Battery / Pile au lithium
Lithium Battery!
Pile au lithium!
Getting Started
For Used in Motor Vehicle /Pour L’utilisation Dans Un Véhicule Motorisé
Information on Disposal in other Countries outside the European Union
Camera Light
CAUTION
Camera Light
Specication
Read Me First
External Antenna
FCC RF Exposure Warning:

Getting Started
If a Malfunction or Trouble Occurs, Immediately Stop Use
If a Malfunction Occurs, Immediately Unplug the AC Plug
and the Battery Pack
Do Not Touch This Product and Cable When It Starts
Thundering
Do Not Connect the AC Adaptor to a Power Source
Other Than a Standard Household AC Outlet
Do Not Do Anything That May Damage the AC Cord, the
AC Plug, or the AC Adaptor
Do Not Pull or Insert the AC Plug If Your Hands Are Wet
Clean Dust and Other Debris of the AC Plug Regularly
Insert the AC Plug Completely
Close the Connector Cover Tightly When Using This Product
Where Is a Lot of Water, Moisture, Steam, Dust, Oily Vapors, etc.
Do Not Disassemble This Product
Keep SD Memory Cards Away from Infants and Small Children
Do Not Place This Product on Unstable Surface
Avoid Stacking
Do Not Leave This Product in High Temperature Envi-
ronment for a Long Period of Time
Hold the Plug When Unplugging the AC Plug
Do Not Move This Product While the AC Plug Is Connected
Use Only the Specied AC Adaptor With This Product
Do Not Subject the AC Adaptor to Any Strong Impact
Take a Break of 10-15 Minutes Every Hour
Precautions

Getting Started
Do Not Turn the Volume Up to Loud When Using Headphones
Use the Modem with a Regular Telephone Line
Do Not Connect a Telephone Line, or a Network Cable
Other Than the One Specied, into the LAN Port
Precautions (Battery Pack)
Do Not Use with Any Other Product
Do Not Charge the Battery Using Methods Other Than
Those Specied
Do Not Throw the Battery Pack into a Fire or Expose It
to Excessive Heat
Avoid Extreme Heat (Near the Fire, in Direct Sunlight, for Example)
Do Not Insert Sharp Objects into the Battery Pack, Ex-
pose It to Bumps or Shocks, Disassemble, or Modify It
Do Not Short the Positive (+) and Negative (-) Contacts
Do Not Use This Product with a Battery Pack Other Than
the One Specied
When the battery pack has become degraded, replace it
with a new one
l
l
l
l
l
Do Not Use with Exposing the Skin to This Product for a
Long Period of Time
Do Not Expose the Skin to This Product When Using the
Product In a Hot or Cold Environment.
l
l
l
l
l
l
CAUTION:
ATTENTION:
NOTE
l
l
è
Reference Manual
l
l
è Reference Manual
l
l
l
Read Me First
Getting Started
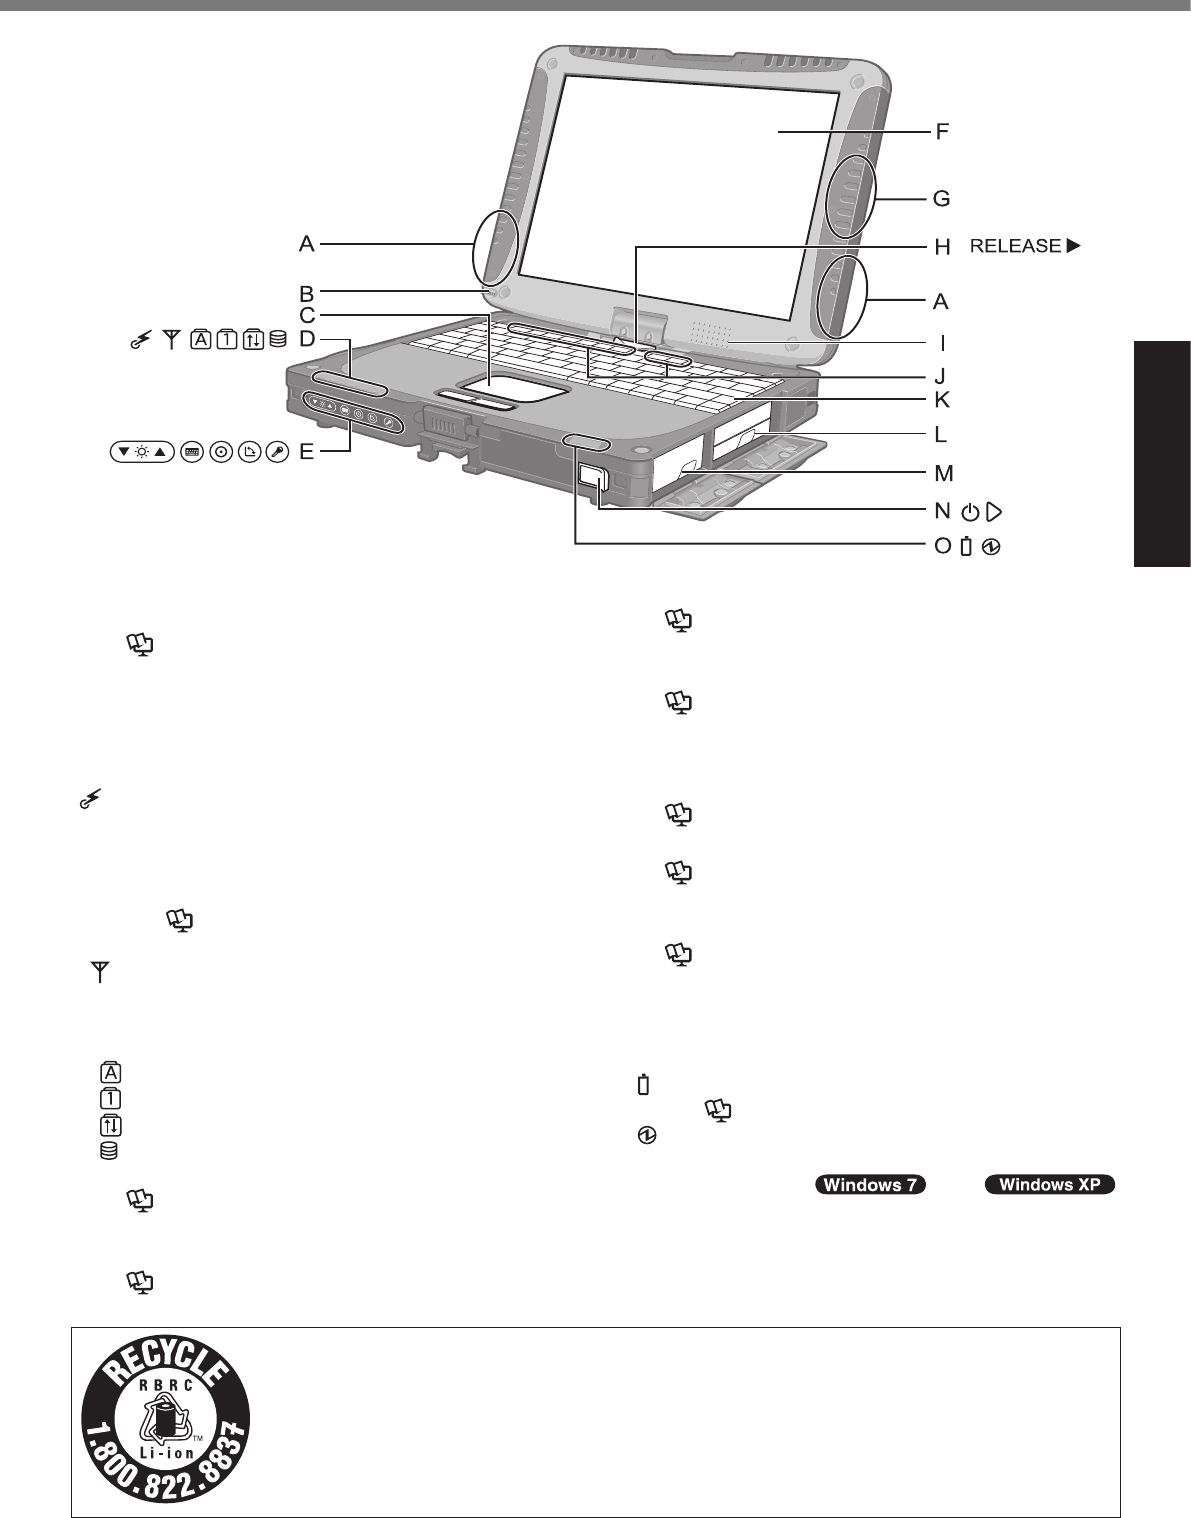
Description of Parts
A: Wireless LAN Antenna
èReference Manual
B: Stylus/Digitizer pen Holder
C: Touch Pad
D: LED Indicator
èReference Manual
è
E: Tablet Buttons
èReference Manual
F: LCD
èReference Manual
è Reference Manual
G: Bluetooth Antenna
èReference Manual
H: Display Release Latch
è
I: Speaker
è Reference Manual
J: Function Key
èReference Manual
K: Keyboard
L: Hard Disk Drive
èReference Manual
M: Battery Pack
N: Power Switch
O: LED Indicator
èReference Manual
Getting Started
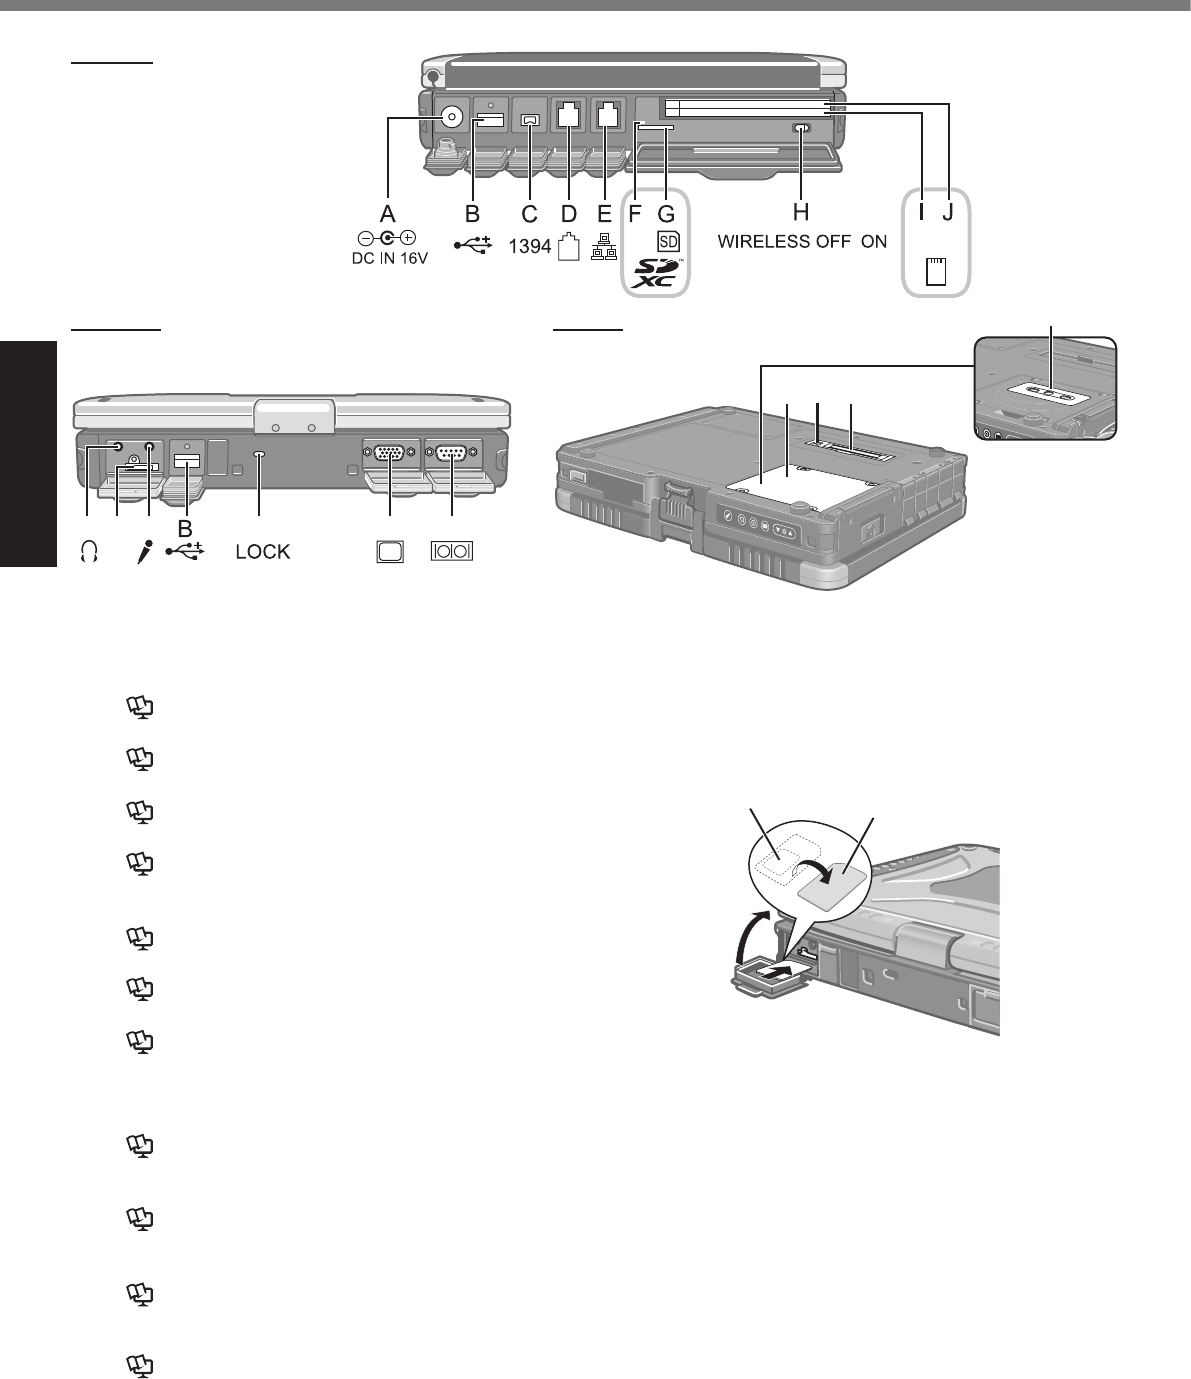
Left side
LK M N O P
T
SRQ
Rear side Bottom
A: DC-IN Jack
B: USB Port
èReference Manual
C: IEEE 1394 Interface Connector
è Reference Manual
D: Modem Port
è Reference Manual
E: LAN Port
è Reference Manual
F: SD Memory Card Indicator
èReference Manual
G: SD Memory Card Slot
èReference Manual
H: Wireless Switch
è Reference Manual
I:
PC Card Slot (PC)
è Reference Manual
Smart Card Slot (SCR)
è Reference Manual
J:
ExpressCard Slot (EX)
èReference Manual
PC Card Slot (PC)
èReference Manual
K: Headphone Jack
L: SIM Card Slot
,QVHUWWKH6,0FDUGLQWRWKH6,0FDUGVORW
ZLWKWKHFRQWDFWVLGHIDFLQJGRZQDQGWKH
FXWFRUQHUIDFLQJIRUZDUG
M: Microphone Jack
Description of Parts
Getting Started
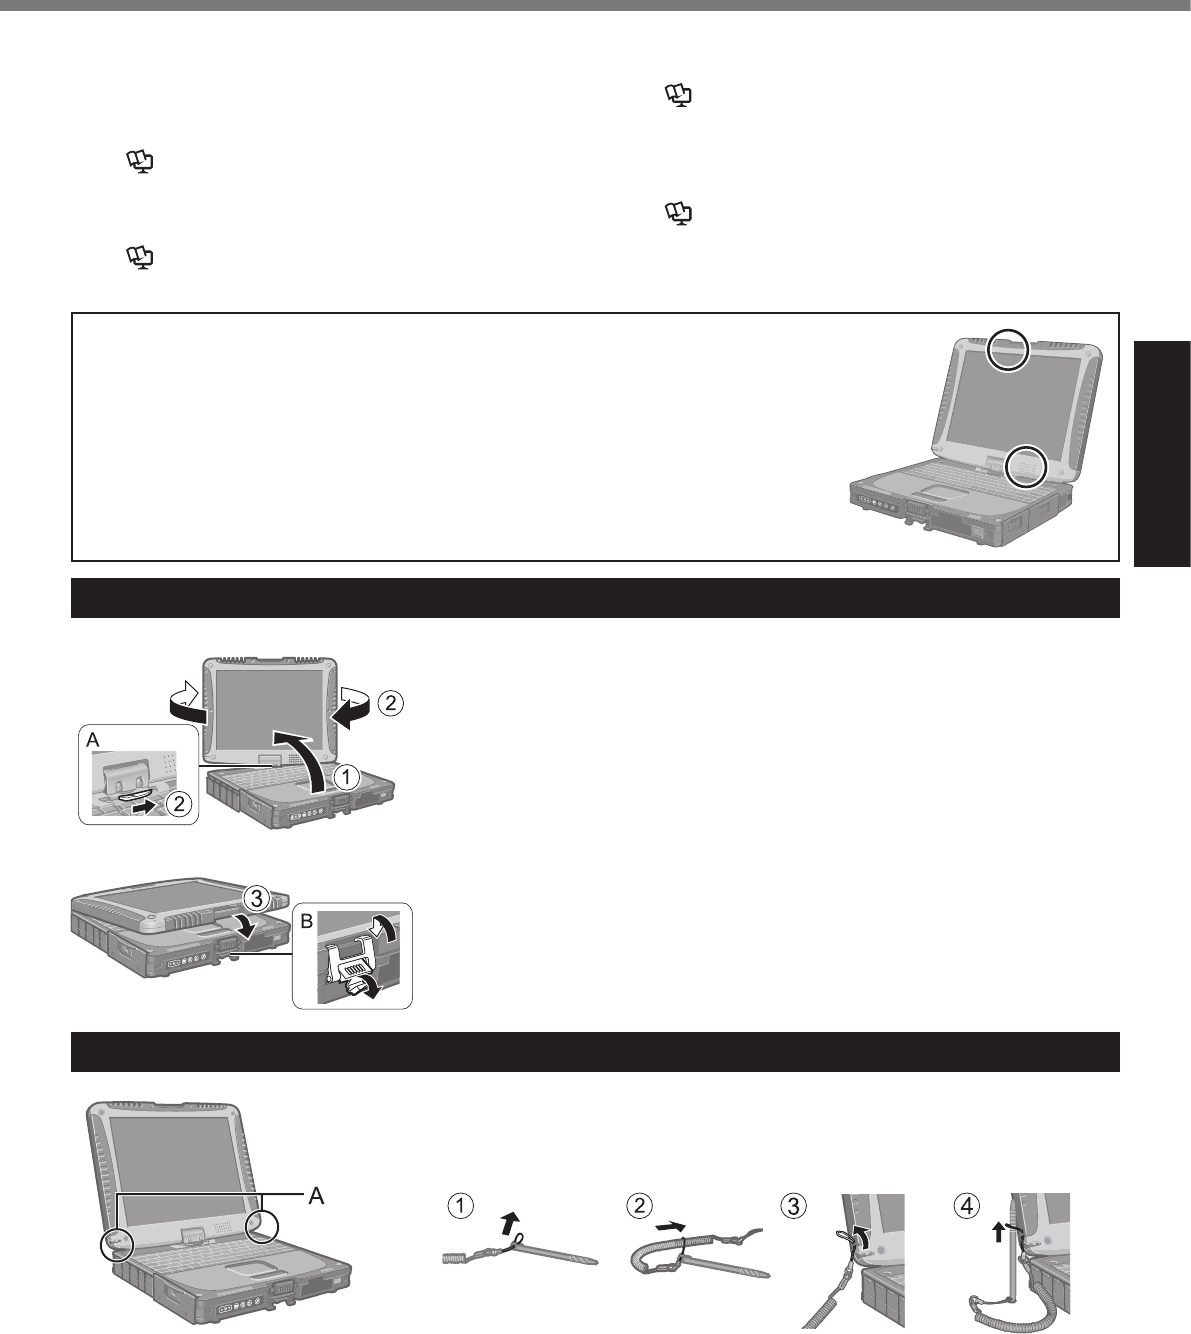
Switching to the Tablet mode
A
B
Attaching the stylus to the computer
C
l
N: Security Lock
O: External Display Port (VGA)
è Reference Manual
P: Serial Port
Q: RAM Module Slot
è Reference Manual
R: External Antenna Connector
S: Expansion Bus Connector
è
Reference Manual
T: Camera
è Reference Manual
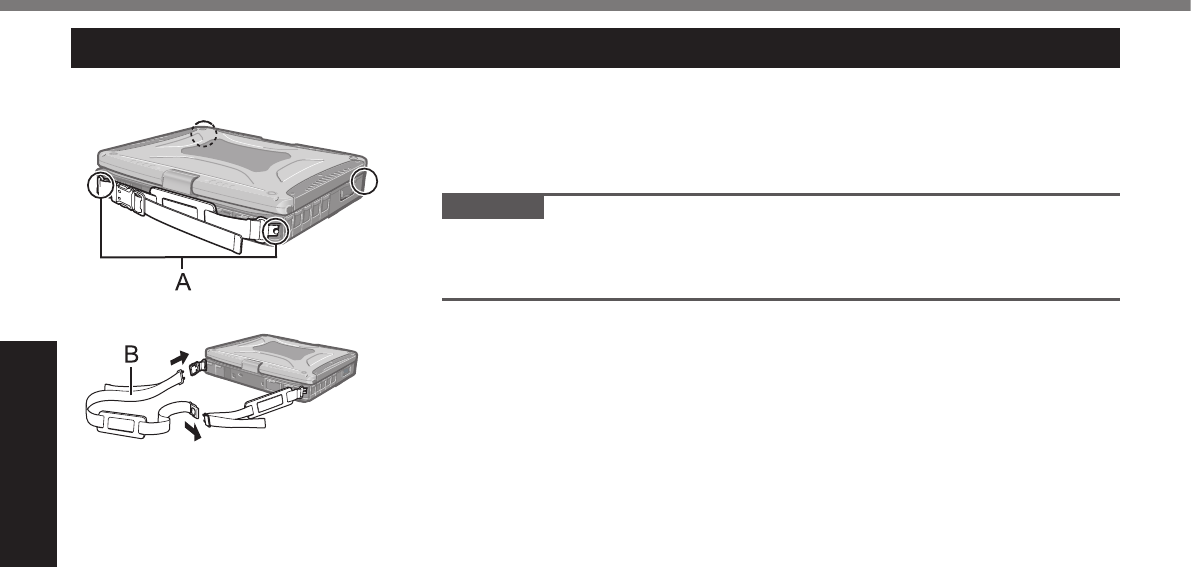
Getting Started
Attaching the hand strap and the shoulder strap (option)
CAUTION
l
l
Description of Parts
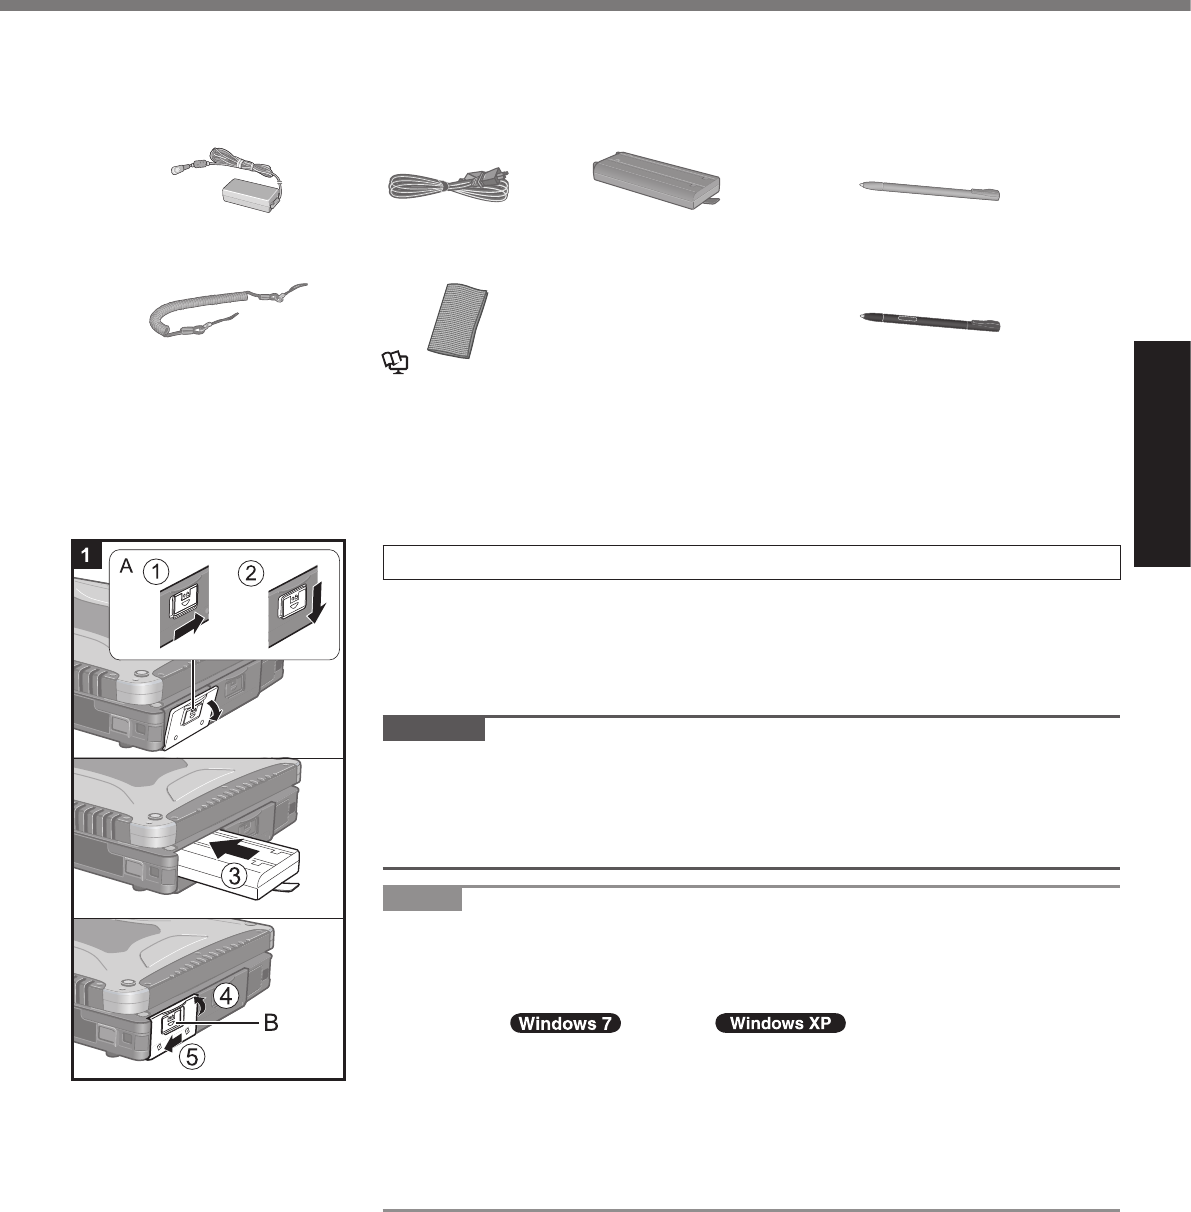
Getting Started
n Preparation
A
è
• AC Adaptor . . . . . 1
• AC Cord . . . . . . . 1 • Battery Pack . . . 1
• Stylus ...................1
• Digitizer pen . . . . . . . . . . . . . . 1
• Tether . . . . . . . . . 1 • Soft Cloth . . . . . . 1
èReference Manual
• Operating Instructions (This book) . . . . . . . . . . . . . . . . . . . . . . . . 1
l
B
è
1 Inserting the Battery Pack
A
B
C
D
E
CAUTION
l
l
NOTE
l
First-time Operation
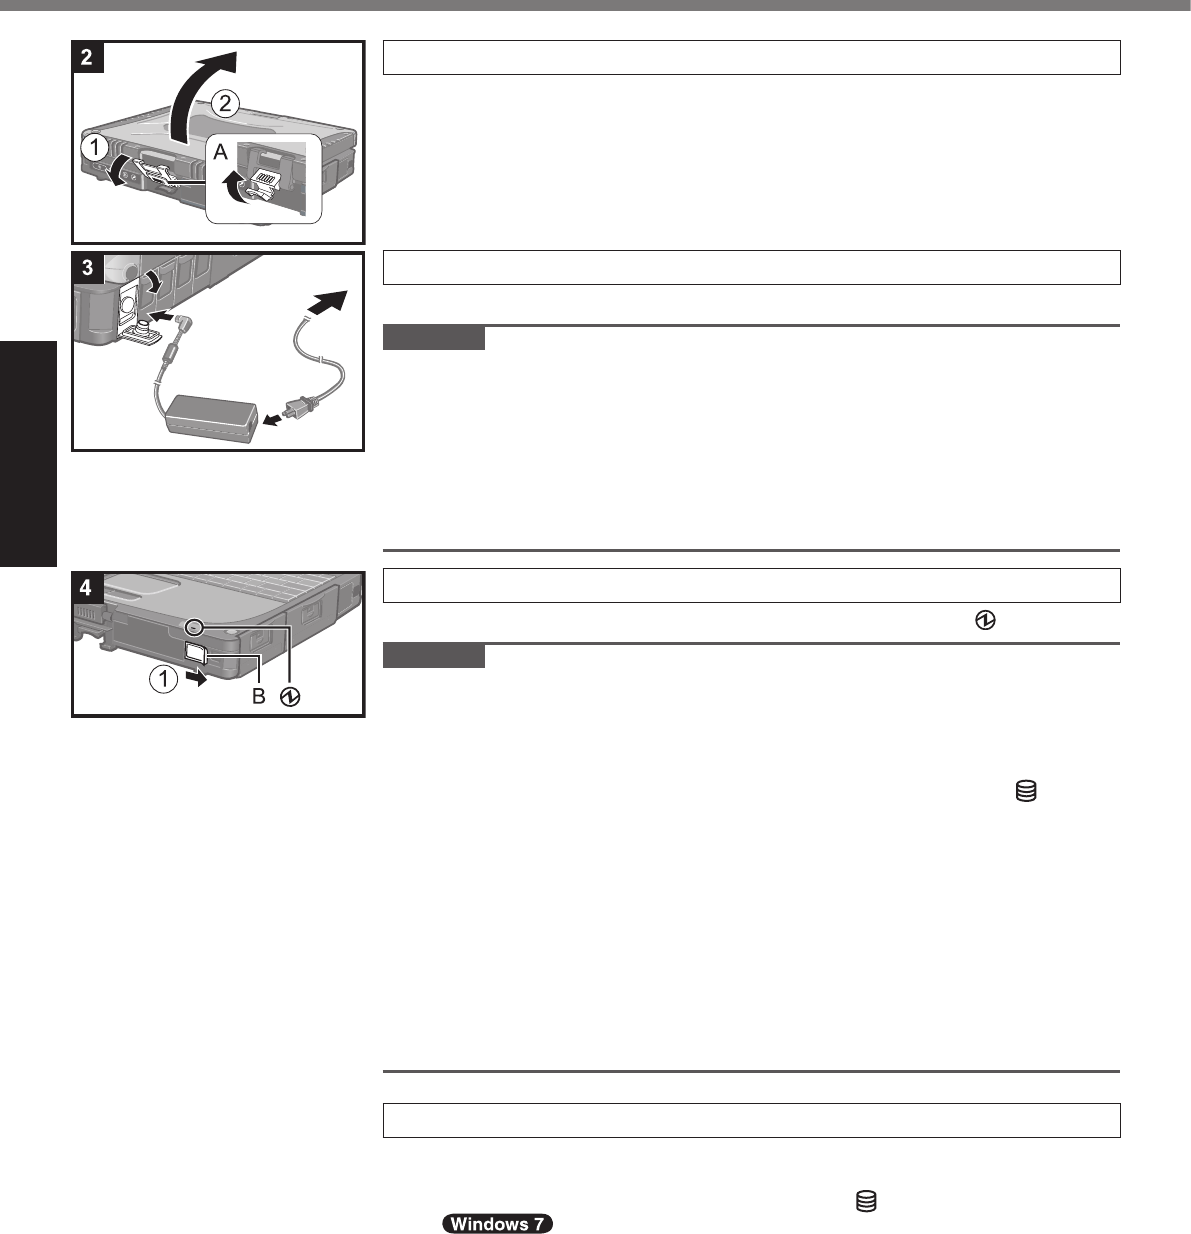
Getting Started
First-time Operation
2 Opening the Display
A
B
3 Connect your computer to a power outlet.
CAUTION
l
l
l Handling the AC adaptor
4 Turn on the computer.
A
CAUTION
l
l
l
l
l
è
l
5 Setup Windows.
l
l
l
l
l
Getting Started
l
CAUTION
l
l
l
l
è
l
l
l
6 Perform the touchscreen calibration.
NOTE
l
l
A
B
C
NOTE
l
A
B
C
l
A
B
Enter
C
Enter
NOTE
l
l
Getting Started
NOTE
l PC Information Viewer
è
Reference Manual
n Precaution against Starting Up/Shutting Down
l
NOTE
l
Reference Manual
A
B
C
D
l
A
B
C
l
7 Restart the computer.
8 Create a new account.
CAUTION
l
First-time Operation

Getting Started
n To change the partition structure
A
l
B
C
l
D
l
l èMB
E D
F
NOTE
l
l C

Useful Information
On-screen Manual
n Reference Manual
To access the Reference Manual:
l
l
n Important Tips
To access the Important Tips:
l
l
NOTE
l
CAUTION
l

Useful Information
Operation environment
l
l
è
l
l
Handling cautions
l
l
l
l
l
l
l
l
l
l
l
l
n When using peripheral devices
l
l
l
l
l
Handling and Maintenance

Useful Information
n Preventing your computer from unauthorized use via wireless LAN/Bluetooth/Wireless WAN
l
Maintenance
To clean the LCD panel
è Reference Manual
To clean areas other than the LCD panel
CAUTION
l
l
Handling and Maintenance
Useful Information
Reinstalling Software
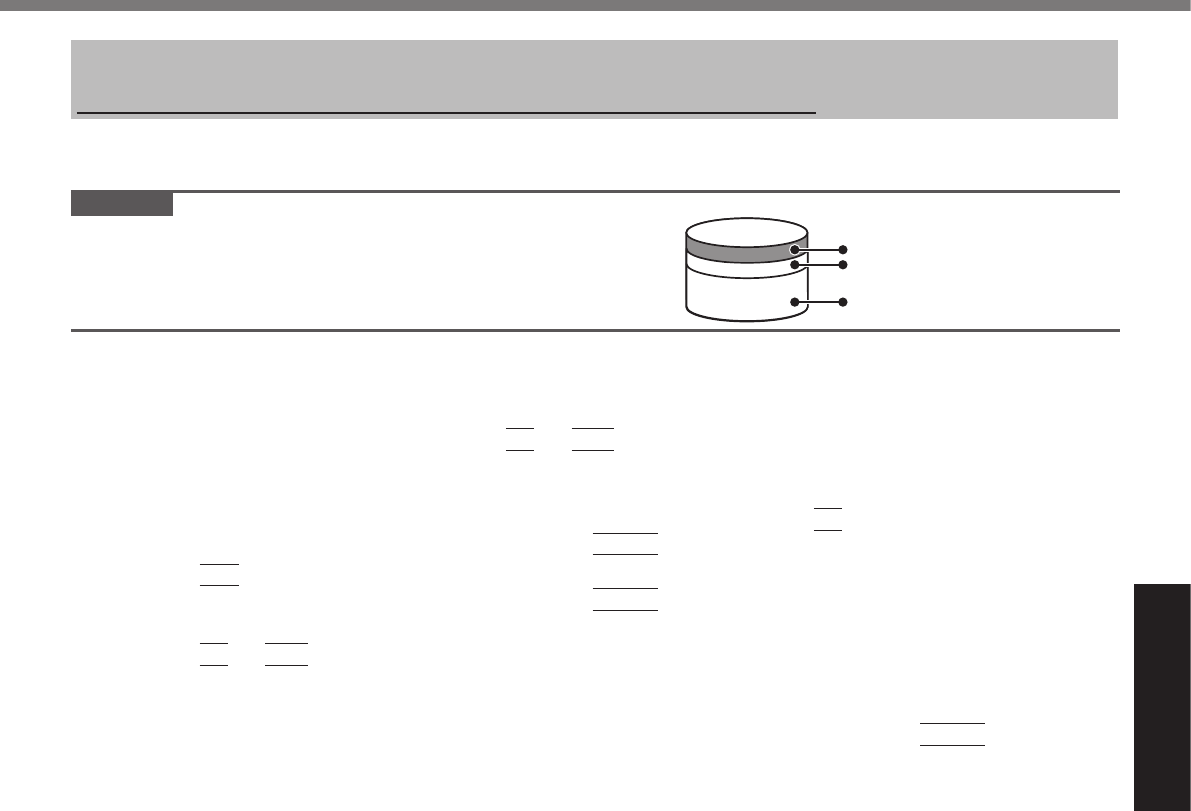
n Hard Disk Recovery
CAUTION
Area usable by Windows
Hard disk HDD Recovery partition 10GB
Recover partition 300MB
Preparation
l
l
1 Turn on the computer, and press
F2
or
Del
while [Panasonic] boot screen is displayed.
l
2 Write down all of the contents of the Setup Utility and press
F9
.
Enter
3 Press
F10
.
Enter
4 Press
F2
or
Del
while [Panasonic] boot screen is displayed.
l
5 Select the [Exit] menu, then select [Repair Your Computer] and press
Enter
.
6 Click [Reinstall Windows] and click [Next].
7 Click [Yes, I agree to the provisions above and wish to continue!] and click [Next].
8 Select the settings and click [Next].
l
è
l
è
9 At the conrmation message, click [OK].
10 Select OS (32bit or 64bit) and click [OK].
11 At the conrmation message, click [OK].
l
12 When ending screen is displayed, click [OK] to turn off the computer.
13 Turn on the computer.
l
14 Perform the “First-time Operation” (è page 15).
15 Start the Setup Utility and change the settings as necessary.
16 Perform Windows Update.
Useful Information
n Using Recovery Disc
NOTE
Preparation
l èReference Manual
l
l
1 Turn off the computer and connect the CD/DVD drive to the USB port (è page 12).
2 Turn on the computer, and press
F2
or
Del
while [Panasonic] boot screen is displayed.
l
3 Write down all of the contents of the Setup Utility and press
F9
.
Enter
4 Press
F10
.
Enter
5 Press
F2
or
Del
while [Panasonic] boot screen is displayed.
l
6 Set the Recovery Disc into the CD/DVD drive.
7 Select the [Exit] menu, then select your CD/DVD drive.
8 Press
Enter
9 Click [Reinstall Windows] and click [Next].
10 Click [Yes, I agree to the provisions above and wish to continue!] and click [Next].
11 Select the settings and click [Next].
l
è
l
è
12 At the conrmation message, click [YES].
l
13 When “Ending process.” is displayed, remove the Recovery Disc, and then click [OK]
to turn off the computer.
14 Turn on the computer.
l
15 Perform the “First-time Operation” (è page 15).
16 Start the Setup Utility and change the settings as necessary.
17 Perform Windows Update.
Reinstalling Software
Troubleshooting
Troubleshooting (Basic)
è
èReference Manual
n Starting Up
l
l
l
l
l
l
Fn
F8
l
l
l
l
è
l
è
l
l
l
l
è
l
F9
è Reference Manual
l
l
Troubleshooting
n Starting Up
l
l
è
l
l
l
l
èReference Manual
l
A
B
A
B
l
l
l
F9
è Reference Manual
l
l
A
B
C
D
E
A
B
C
l
F8
Enter
Enter
F8
Troubleshooting (Basic)
Troubleshooting
n Entering Password
l
NumLk
l
Caps Lock
l
è
n Shutting down
l
l
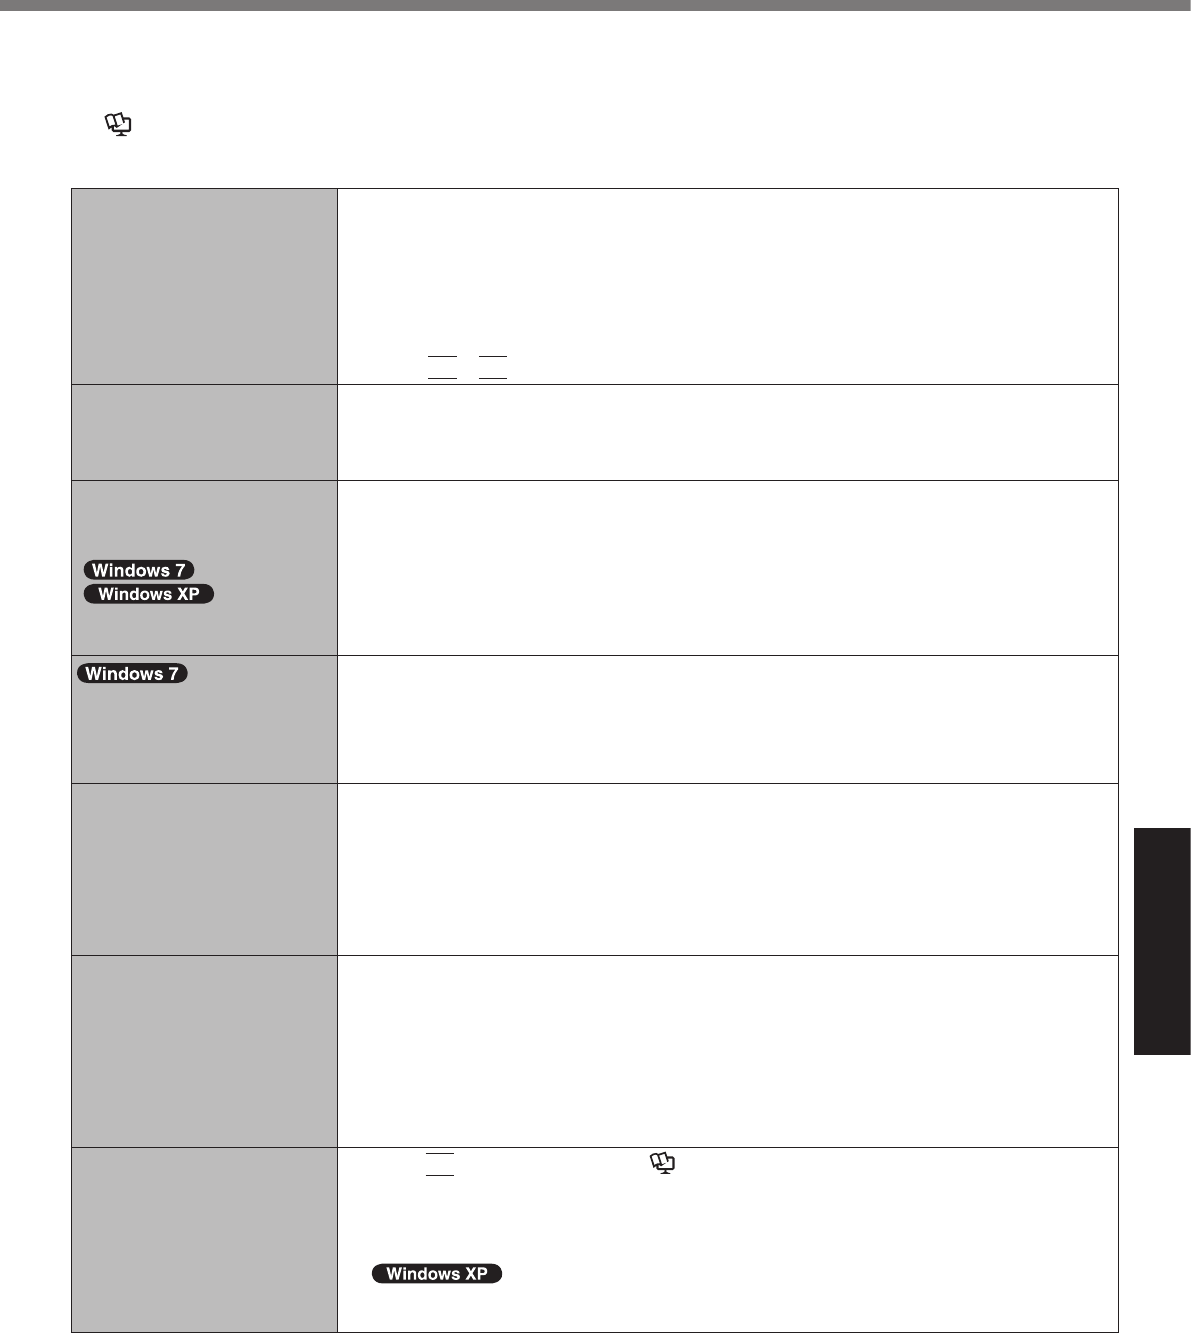
n Display
l
Fn
F3
P
Fn
F3
P
l
l
Ctrl
l
l
Fn
F2
l
Fn
F8
l
l
l
l
&OLFN6WDUW>$//3URJUDPV@>3DQDVRQLF@6HOHFWRU
>$//3URJUDPV@>3DQDVRQLF@>'LVSOD\6HOHFWRU@
l
Alt
Enter
Alt
Enter
l
l
Troubleshooting
n Display
l
A
B
F10
Enter
C
D
Enter
E
F
F2
G
H
F10
Enter
n Touch Pad / Touchscreen (only for model with touchscreen)/Dual Touch (only for model with dual touch)
l
l
è
Enter
U
R
l
è
l
l
l
l
l è
l è
l
l
n Reference Manual
l
A
B
Enter
C
B
C
Troubleshooting (Basic)
Troubleshooting
n Others
l
Ctrl
Shift
Esc
l
Alt
Tab
l

Appendix
LIMITED USE LICENSE AGREEMENT
LICENSE
TERM
GOVERNMENT RESTRICTED RIGHTS.

Appendix
Contrat de licence d’usage limité
Licence
Termes, clauses et conditions
Appendix
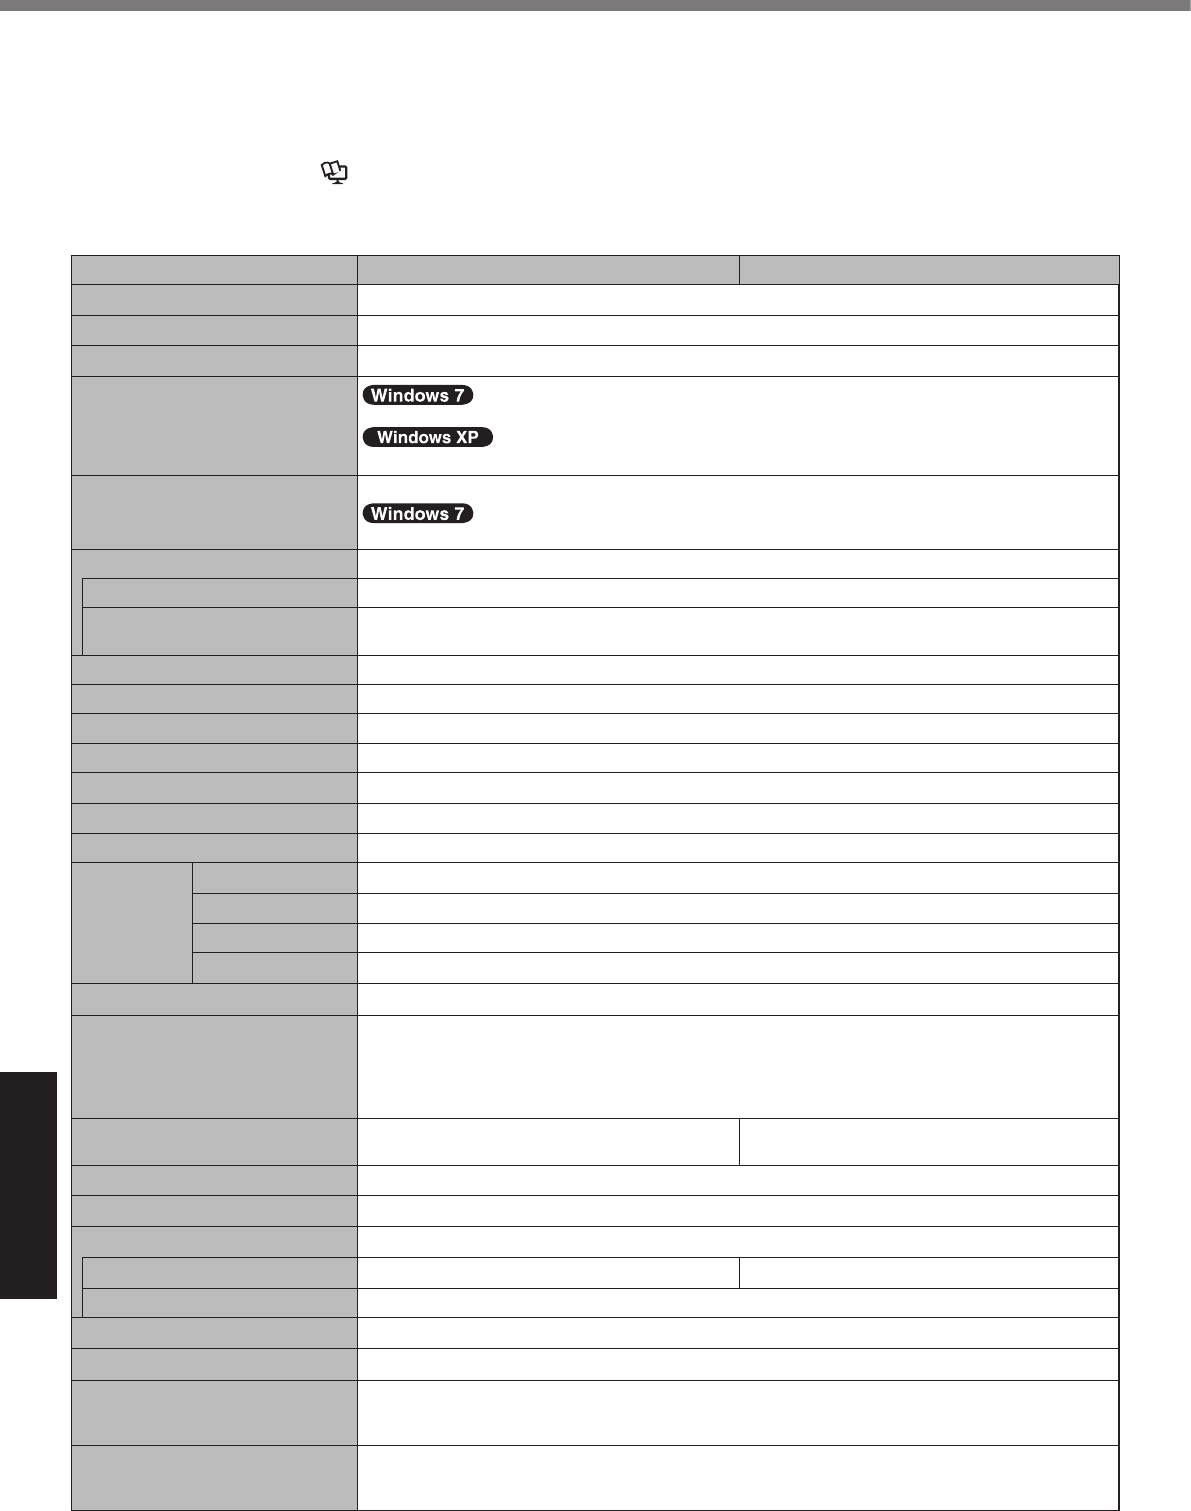
Specications
l
l
èReference Manual
n Main Specications
GHz
GBGB
MBGBMB GB
MB
GB
MB
è
è
kbpskbps
VmAVmA
MB
V
W
WmW
VVHzHzVA
VAhAh
V
WW
mmmmmm
kglb.
Appendix
n Main Specications
°C°C°F°F
%%
°C°C°F°F
%%
n Wireless LAN <Only for model with wireless LAN>
GHzGHzGHzGHzGHzGHzGHz
GHz
GHzGHz
GHzGHzGHzGHzGHzGHzGHz
GHzGHzGHz
n BluetoothTM <Only for model with Bluetooth>
GHz
MBGB
MB
GBGB
*29

Appendix
Enter
GB GB
V
V
W
è
Specications
*29
Wireless LAN module (model: WL11E) does not operate in 5GHz frequency band.

Appendix
For U.S.A.
Section 1: Limited Warranty - Hardware
•
•
•
•
•
•
•
•
•
•
•
•
Battery Warranty
Wireless Module Warranty
Options and Accessories warranties
•
•
•
•
•
•
•
•
•
•
•
•
LIMITED WARRANTY

Appendix
Section 2 - Limited Warranty - Software
Section 3 - Limited Warranty Exclusions
•
•
•
•
•
•
•
•
•
•
•
Other Limits and Exclusions:
LIMITED WARRANTY
Appendix
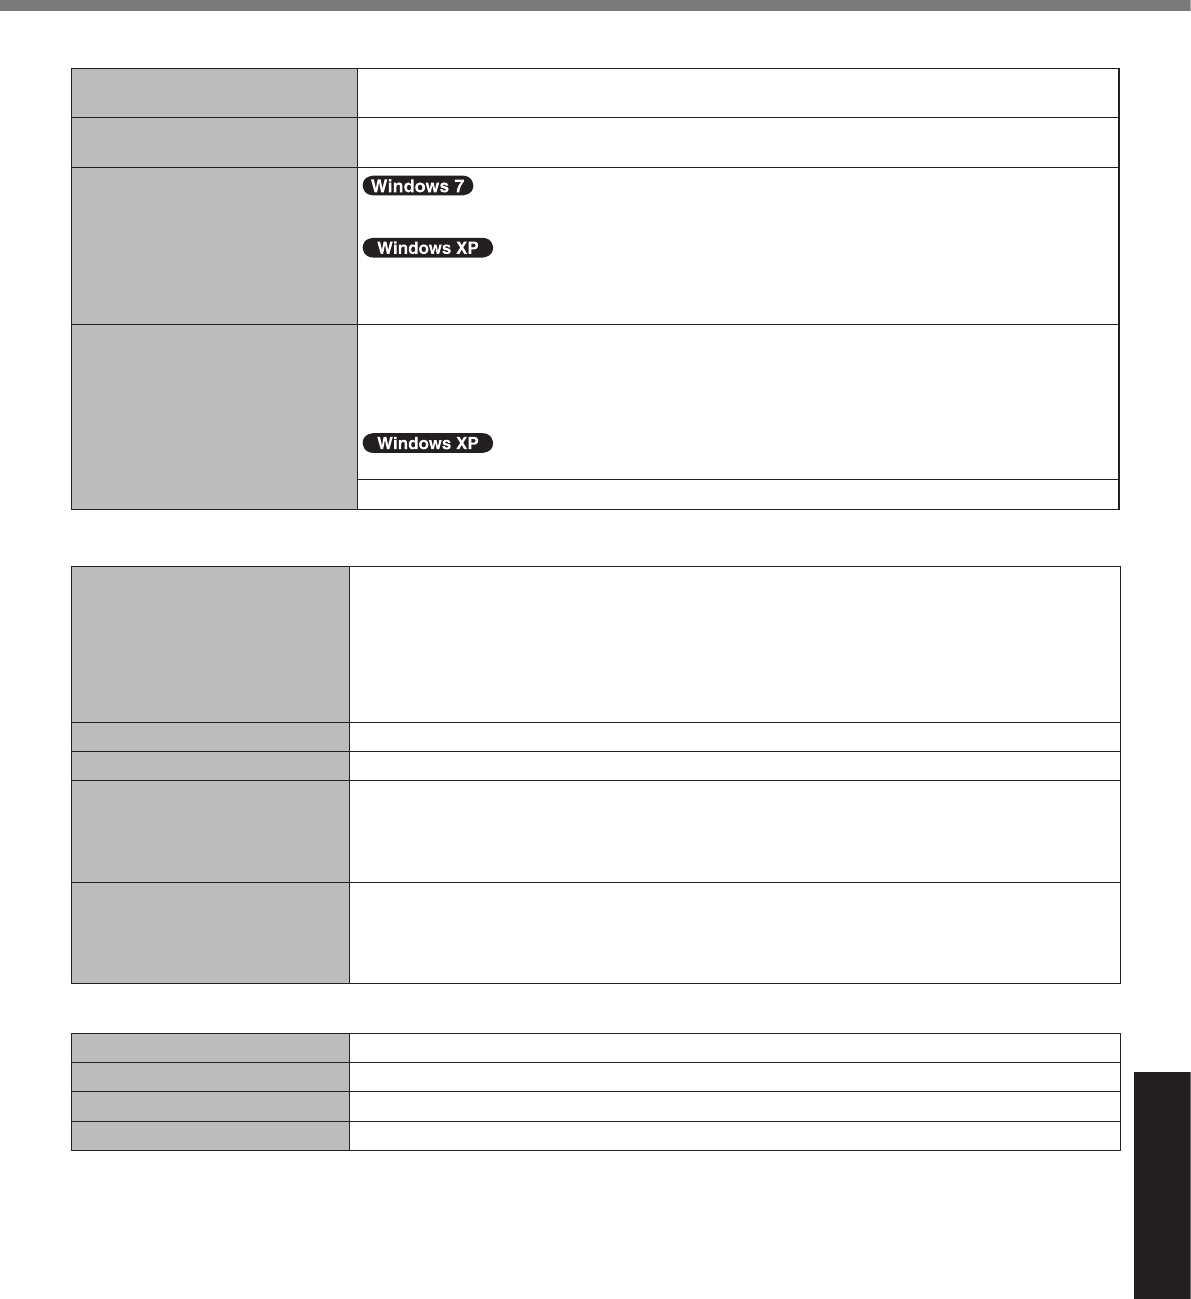
For Canada
PANASONIC COMPUTER AND PERIPHERALS LIMITED WARRANTY
Coverage
Scope of Coverage Period of Coverage Type of Failure Coverage
•
•
•
•
•
•
•
•
•
•
•
•
Remedy
No Coverage
IF YOU SHIP THE PRODUCT FOR WARRANTY SERVICE
SOFTWARE MEDIA LIMITED WARRANTY
Coverage
Claim Procedure
Remedy
No Coverage
GENERAL
Statutory Warranties

Appendix
GARANTIE LIMITÉE
Pour le Canada
GARANTIE LIMITÉE – ORDINATEURS ET PÉRIPHÉRIQUES PANASONIC
Couverture
Éléments couverts Durée de couverture Type de couverture
•
•
•
•
•
•
•
•
•
•
•
•
Recours
Produits non couverts
EXPÉDITION DU PRODUIT POUR SERVICE SOUS GARANTIE
GARANTIE LIMITÉE – SUPPORTS DES LOGICIELS
Couverture
Réclamation – marche à suivre
Recours
Produits non couverts
GÉNÉRALITÉS
Garantie statutaires

MEMO
Outline of the International ENERGY STAR® Ofce Equipment Program
The international ENERGY STAR® Ofce Equipment Program is an international program that promotes energy
saving through the use of computers and other ofce equipment. The program backs the development and dis-
semination of products with functions that effectively reduce energy consumption. It is an open system in which
business proprietors can participate voluntarily. The targeted products are ofce equipment such as computers,
displays, printers, facsimiles, and copiers. Their standards and logos are uniform among participating nations.
For information about ENERGY STAR®, refer to the following web site:
Web Site: www.energystar.gov
Panasonic Solutions Company
Panasonic Canada Inc.
As an ENERGY STAR® Partner, Panasonic Corporation has determined that this
product meets the ENERGY STAR® guidelines for energy efciency. By enabling
available power management settings, Panasonic computers enter a low-power sleep
mode after a period of inactivity, saving the user energy. To learn more about power
management, please visit the web site:
www.energystar.gov/index.cfm?c=power_mgt.pr_power_management